

Page 1
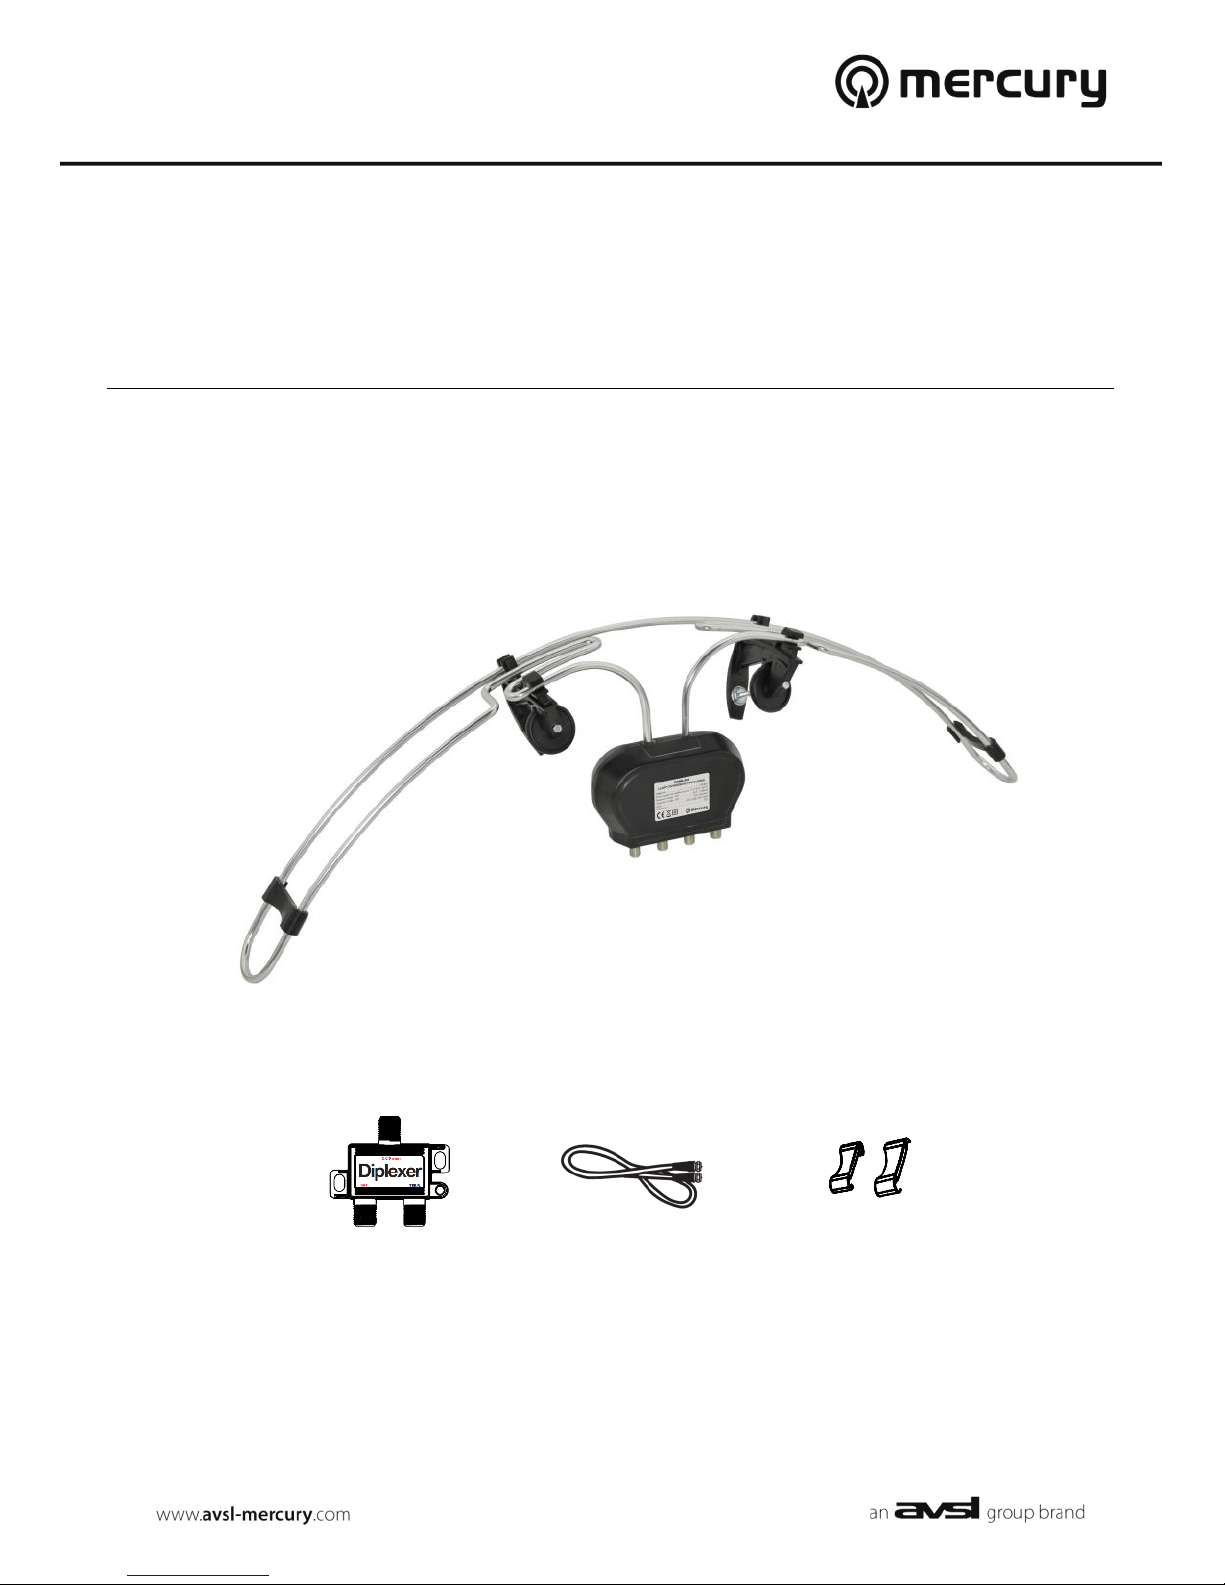
MAWB-A26
CLAMP ON WIDEBAND MIXER
AERIAL
Item ref: 130.021UK
User Manual
Diplexers
F plug coax leads
Mounting clips
Page 2
130.021UK User Manual
INTRODUCTION:
Thank you for choosing this Mercury aerial. This aerial is designed for the reception of FM, DAB and UHF
digital TV signals. It is designed to clamp onto a satellite dish and does not need a mast. With a built-in
low noise signal amplifier and mixer, it boosts the signals and transmits them along the same coax cables
as the satellite signals.
With dual outputs, this aerial is suitable for twin LNB installations.
SPECIFICATION:
Power Supply: Via satellite receiver (13 – 18Vdc 60mA)
Frequency Range: VHF: 87.5 – 230MHz, UHF: 470 – 862MHz
Gain: VHF: 26dB, UHF: 24dB
Impedance: 75Ω
Connector: 2 x SAT input (950 – 2150MHz), 2 x Mix output
Insertion Lost: 3dB
Dimensions & weight 700 x 180 x 110mm, 450g
PRODUCT FEATURES:
- Tool free installation, easily installed onto existing satellite dish.
- Built in high gain low noise amplifier with DC pass to power the amplifier and LNB from
the satellite receiver.
- Built in signal mixer combines the satellite and terrestrial signals and transmits them down
the cables, saving material and labour costs.
- Supplied with diplexers to split satellite and terrestrial signals to feed a set top box and
satellite receiver.
- Wideband frequency response compatible with FM/DAB/DTV(DVB-T, ATSC, ISDB-T, T-
DMB)
INSTALLATION:
Please note, before installation turn the satellite receiver off and unplug from the mains supply. Take care
not to alter the satellite dish position during installation, otherwise realignment may be required.
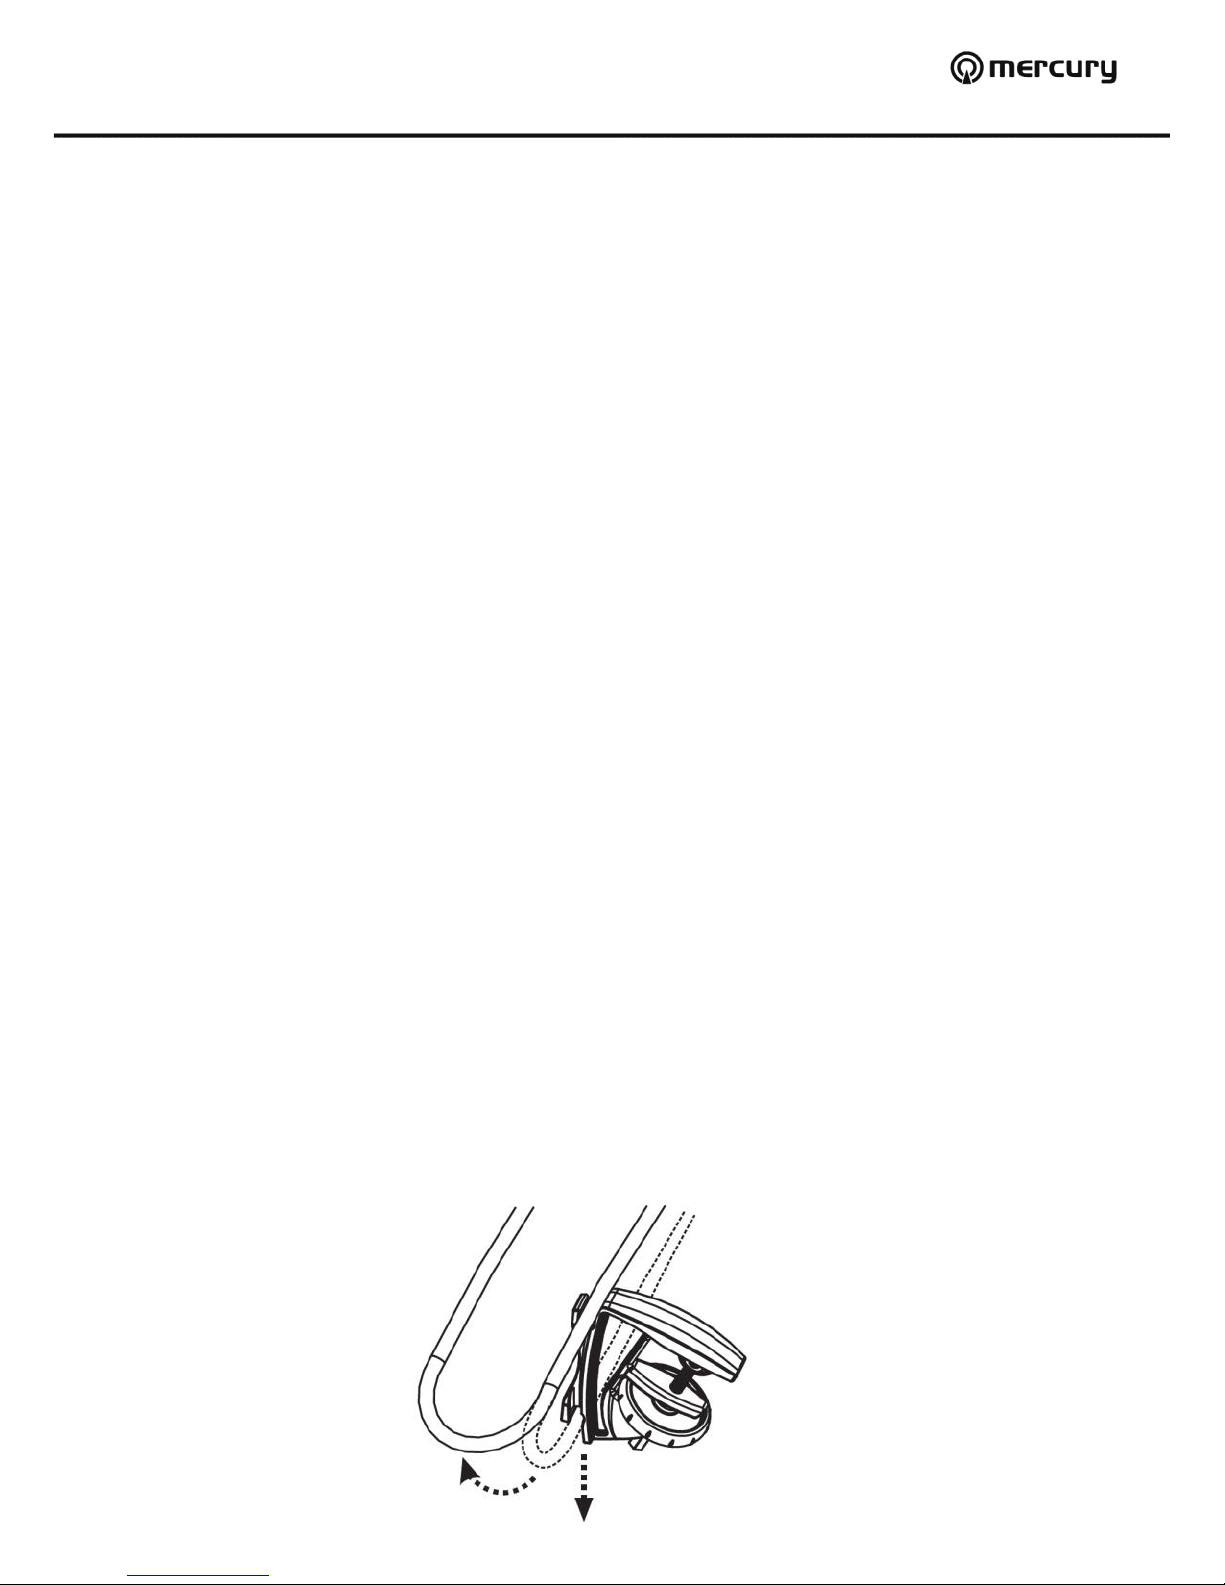
Step 1:
Gently pull the elements apart from each other and detach one side of each of the mounting clamps from
the aerial element.
Page 3

130.021UK User Manual
Step 2:
Position the aerial on top of the dish with dipole box at the back of the satellite dish; ensure the Mercury
logo is facing outward. Put the mounting clamps over the edge of the satellite dish one by one and attach
the loose end back on the aerial. Turn the thumbscrew clockwise to tighten the aerial in position.
Step 3:
Attach the two securing clips to the aerial elements, one on each side and slide the clips towards the
mounting clamp, this prevents the aerial detaching from the mounting clamps.
Step 4:
Undo the screws that hold LNB on the support beam, disconnect the cable from LNB output if it is an
existing installation.
Step 5:
Connect the outputs of the LNB to the inputs of the aerial dipole box using the supplied coax cables, use
the waterproof boots supplied to cover the connections to prevent ingress of water.
Page 4

130.021UK User Manual
Step 6:
On existing installations, connect the cables removed from LNB to the mix outputs on the aerial.
Otherwise run the cables neatly to the satellite receiver.
Step 7:
At the end of the cable connect the diplexer as shown in the diagram below. (To split the satellite and
terrestrial signals). Connect the SAT on the diplexers to the SAT inputs on the satellite receiver and Ter
on the diplexer to TV set top box (or directly from Ter on the diplexer to TV if it is digital TV compatible).
For satellite boxes, such as SKY+, that can view one channel while recording another will require 2
satellite inputs. Below diagram shows an example of how it can be connect with a free Ter connection to
secondary TV if required.
This product is classed as Electrical or Electronic equipment and should not be disposed
with other household or commercial waste at the end of its useful life. The goods must be disposed of
according to your local council guidelines.
Errors and omissions excepted.
Copyright© 2014. AVSL Group Ltd
 Loading...