

Page 1
É1175842704eËÍ
1175842704
CLA
Operator's Manual
Order no. P117 0075 13 Part no. 117 584 2704 Edition A2018
CLA Operator's Manual
Mercedes-Benz
Page 2

Symbols
In this Operator's Manual you will find the following symbols:
WARNING
G
Warning notes make you aware of dangers
which could pose athreat to your health or
life, or to the health and life of others.
Environmental note
H
Environmental notes provide you with information on environmentally aware actions or
disposal.
Notes on material damage alert you to dan-
!
gers that could lead to damage to your vehicle.
Practical tips or further information that
i
could be helpful to you.
X
X
(Y
page)
Dis‐
play
This symbol indicates an instruction
that must be followed.
Several of these symbols in succession
indicate an instruction with several
steps.
This symbol tells you where you can
find more information about atopic.
This text indicates amessage on the
multifunction display/multimedia display.
Publication details
Internet
Further information about Mercedes-Benzvehicles and about Daimler AG can be found on the
following websites:
http://www.mbusa.com (USA only)
http://www.mercedes-benz.ca (Canada only)
Editorial office
Daimler AG: not to be reprinted, translated or
otherwise reproduced, in whole or in part, without written permission from Daimler AG.
Vehicle manufacturer
Daimler AG
Mercedesstrae 137
70327 Stuttgart
Germany
As at 20.10.2016
Page 3
Welcome to the world of Mercedes-Benz
We urge you to read this Operator's Manual
carefully and familiarize yourself with the vehicle before driving. For yourown safety and a
longer vehiclelife,follow the instructions and
warning notices in this Operator's Manual.
Ignoring them couldresult in damage to the
vehicleorpersonal injury to you or others.
Vehicle damage caused by failure to follow
instructions is not covered by the MercedesBenz Limited Warranty.
The equipment or product designation of your
vehiclemay vary depending on:
R
Model
R
Order
R
Country specification
R
Availability
Mercedes-Benz therefore reservesthe right to
introduce changes in the following areas:
R
Design
R
Equipment
R
Technicalfeatures
The equipment in yourvehiclemay therefore
differfrom that showninthe descriptions and
illustrations.
The following are integralcomponents of the
vehicle:
R
Printed Operator's Manual
R
Maintenance Booklet
R
Equipment-dependent supplements
Keep these documents in the vehicleatall
times. If you sell the vehicle, alwayspassall
documents on to the new owner.
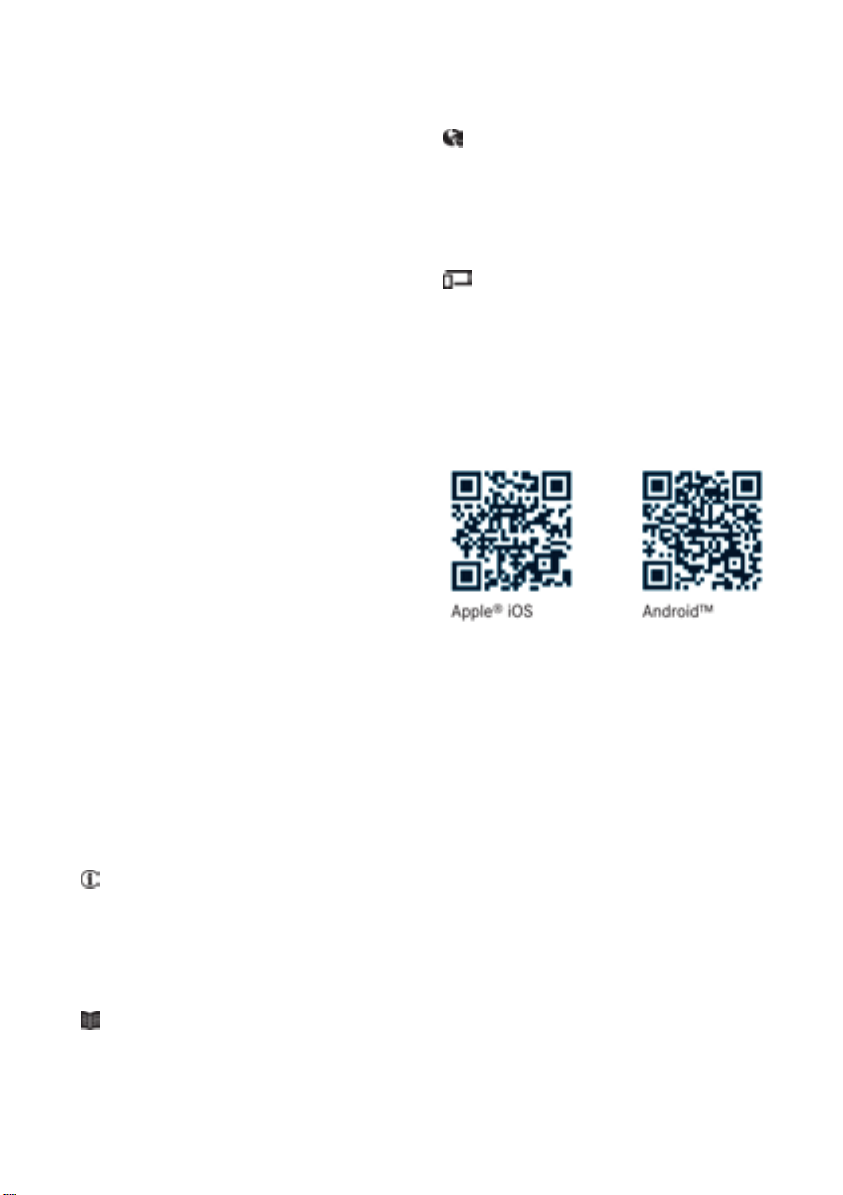
You can alsouse the Mercedes-Benz Guides
App:
Your Operator's Manual:
Digital form inside the vehicle
The DigitalOperator's Manual provides
comprehensive and specifically adapted
information on yourvehicle's equipment
and multimediasystem. It contains informative animations, individuallanguage
settings and an intuitive search function.
Booklet inside the vehicle
In addition to this manualand the aforementioned digital media, you alsohave the
option to obtainacomprehensive printed
versionofthe Supplement for yourmulti-
mediasystem from yourauthorized
Mercedes-Benz Center.
Digital form via the Internet
The Operator's Manual on the Internet provideseasy access to all information
regarding yourvehicleand multimediasystem. It alsoprovides helpful animations,
interesting background information and a
widearrayofsearch options.
Digital form as an App
Using the Mercedes-Benz GuidesApp, you
can view all the information on yourvehicle
and multimediasystem via mobile Internet
or download it independently of network
access. Availablefor smartphones or tablets.
You can alsouse the Mercedes-Benz Guides
App:
Please note that the Mercedes-Benz GuidesApp
may not yet be available in yourcountry.
Mercedes-Benz USA, LLC
Mercedes-Benz Canada,Inc.
ADaimler Company
1175842704
É1175842704eËÍ
Page 4

2
Contents
Index ....................................................... 4
Digital Operator's Manual .................. 23
Introduction........................................... 23
Operation ............................................... 23
Introduction ......................................... 24
Protecting the environment ...................24
Genuine Mercedes-Benzparts............... 24
Operator's Manual ................................. 25
Service and vehicle operation ................25
Operating safety .................................... 27
QR codes for the rescue card ................29
Data stored in the vehicle...................... 29
Informationoncopyright ....................... 31
At aglance ........................................... 32
Cockpit.................................................. 32
Instrument cluster................................. 33
Multifunctionsteering wheel................. 34
Center console...................................... 35
Doorcontrolpanel ................................. 38
Overhead controlpanel .........................39
Safety ................................................... 40
Panic alarm ............................................ 40
Occupant safety .................................... 40
Children in the vehicle ........................... 54
Pets in the vehicle ................................. 60
Driving safety systems ........................... 61
Protection against theft .........................68
Opening and closing ........................... 70
SmartKey ............................................... 70
Doors ..................................................... 76
Trunk ..................................................... 78
Side windows ......................................... 81
Panorama roof with power tilt/sliding
panel ...................................................... 85
Seats, steering wheel and mirrors .... 90
Correct driver's seat position ................90
Seats ..................................................... 90
Steering wheel ....................................... 95
Mirrors................................................... 96
Memory function ................................... 98
Lights and windshield wipers .......... 100
Exterior lighting ................................... 100
Interior lighting .................................... 103
Replacing bulbs................................... 104
Windshield wipers ................................ 107
Climate control ................................. 110
Overview of climate control systems ... 110
Operating the climate control sys-
tems .................................................... 115
Air vents .............................................. 120
Drivingand parking .......................... 121
Notesonbreaking-in anew vehicle..... 121
Driving ................................................. 121
DYNAMIC SELECT button (all vehicles
exceptMercedes-AMGvehicles) ......... 128
DYNAMIC SELECT controller
(Mercedes-AMGvehicles) .................... 129
Automatictransmission....................... 130
Refueling ............................................. 138
Parking ................................................ 141
Driving tips.......................................... 144
Driving systems ................................... 149
On-board computer and displays .... 176
Important safety notes ........................ 176
Displays and operation ........................ 176
Menusand submenus ......................... 179
Displaymessages ................................ 190
Warning and indicator lamps in the
instrument cluster ............................... 218
Multimediasystem ........................... 229
Generalnotes ...................................... 229
Important safety notes ........................ 229
Function restrictions ............................ 229
Operating system ................................ 230
Stowageand features ...................... 237
Loading guidelines............................... 237
Stowageareas ..................................... 237
Page 5

Features.............................................. 242
Maintenanceand care ...................... 257
Engine compartment ........................... 257
ASSYST PLUS ...................................... 261
Care ..................................................... 262
Breakdown assistance ..................... 269
Where will Ifind...? .............................. 269
Flattire ................................................ 271
Battery (vehicle) .................................. 276
Jump-starting ....................................... 278
Towing and tow-starting ...................... 281
Fuses ................................................... 284
Wheels and tires ............................... 287
Important safety notes ........................ 287
Operation ............................................ 287
Winteroperation .................................. 289
Tirepressure ....................................... 290
Loading the vehicle .............................. 298
All aboutwheelsand tires................... 301
Changing awheel ................................ 307
Wheel and tire combinations ............... 312
Contents
3
Technical data ................................... 313
Information regarding technical data ... 313
Vehicleelectronics .............................. 313
Identification plates ............................. 314
Service products and filling capaci-
ties ...................................................... 315
Vehicledata......................................... 320
Page 6

Index
4
1, 2, 3...
4ETS (Electronic Traction System)
see ETS/4ETS (Electronic Traction System)
4MATIC
Display message ............................ 215
4MATIC (permanent four-wheel
drive) .................................................. 160
A
ABS (Anti-lock Braking System)
Display message ............................ 192
Function/notes ................................ 61
Important safety notes .................... 61
Warninglamp .................................220
Accident
Automatic measuresafter an acci-
dent ................................................. 54
Activatingmedia mode
General notes ................................ 235
Activating/deactivating cooling
with air dehumidification ................. 115
Active Brake Assist
Activating or deactivating .............. 185
Display message ............................ 197
Function/notes ................................ 62
ADAPTIVE BRAKE ................................. 68
Adaptive DampingSystem
Function/notes .............................160
Adaptive Highbeam Assist
Display message ............................ 204
Function/notes .............................102
Switching on/off ........................... 103
Additional speedometer ................... 187
Additives (engine oil) ........................ 318
Address book
see also DigitalOperator's Man-
ual..................................................229
Adjustingthe volume
Multimediasystem ........................ 230
Airbags
Deployment ..................................... 52
Display message ............................ 200
Front airbag (driver, front
passenger)....................................... 46
Important safety notes .................... 45
Introduction ..................................... 45
Knee bag .......................................... 46
Occupant Classification System
(OCS) ............................................... 47
PASSENGER AIR BAG indicator
lamps ............................................... 41
Side impact airbag .......................... 47
Windowcurtainair bag .................... 47
Airvents
Important safety notes ..............
ear............................................... 120
R
Setting the center airvents ........... 120
Setting the sideair vents ...............120
Air-conditioningsystem
see Climate control
Alarm
ATA (Anti-Theft Alarm system) ......... 68
Switching off (ATA) .......................... 68
Switching the function on/off
(ATA) ................................................ 68
Alarm system
see ATA (Anti-Theft Alarm system)
AMG
Adaptive sport suspension sys-
tem ................................................ 159
Performance Seat ............................ 94
AMG adaptive sport suspension
system
General Information ....................... 159
AMG menu (on-board computer) ..... 188
AMG Performance exhaustsys-
tem ..................................................... 127
Anti-lockbraking system
see ABS (Anti-lock Braking System)
Anti-skid chains
see Snow chains
Anti-Theft Alarm system
see ATA (Anti-Theft Alarm system)
Ashtray ............................................... 244
Assistancedisplay (on-board com-
puter) ..................................................185
Assistancemenu (on-board com-
puter) ..................................................184
ASSYST PLUS
Displaying aservice message ........261
Driving abroad ............................... 262
Hiding aservice message .............. 261
.... 120
Page 7

Index
5
Information aboutService .............261
Resetting the service intervaldis-
play................................................ 261
Service message ............................ 261
Specialservice requirements ......... 261
ATA (Anti-Theft Alarm system)
Activating/deactivating ................... 68
Function ...........................................68
Switching off the alarm .................... 68
ATTENTIONASSIST
Activating/deactivating ................. 185
Displaymessage ............................ 207
Function/notes............................. 171
Audiomenu(on-board computer) .... 182
Audiosystem
see separate operating instructions
Authorized Mercedes-Benz Center
see Qualifiedspecialist workshop
Authorized workshop
see Qualifiedspecialist workshop
AUTO lights
Displaymessage ............................ 204
see Lights
Automatic car wash(care) ............... 262
Automatic engine start (ECO start/
stopfunction) .................................... 126
Automatic engine switch-off (ECO
start/stopfunction) .......................... 126
Automatic headlamp mode .............. 100
Automatic transmission
Accelerator pedalposition ............. 133
Changing gear............................... 133
DIRECTSELECT lever ..................... 130
Drive program................................ 134
Drive programdisplay .................... 130
Driving tips.................................... 133
DYNAMIC SELECT button (all vehiclesexcept Mercedes-AMGvehi-
cles) ............................................... 128
DYNAMIC SELECT controller
(Mercedes-AMGvehicles) .............. 129
Emergency running mode.............. 138
Engaging drive position .................. 132
Engaging neutral ............................ 131
Engaging park position
(Mercedes-AMGvehicles) .............. 132
Engaging park position automati-
cally ............................................... 131
Engaging reverse gear................... 131
Engaging the park position ............ 130
Holding the ve
uphill gradients .............................. 134
Kickdown....................................... 134
Manualshifting .............................. 136
Oil temperature (on-board com-
puter, Mercedes-AMGvehicles) ..... 188
Overview ........................................ 130
Problem (malfunction) ................... 138
Pulling away ................................... 125
Selector lever ................................ 132
Starting the engine ........................ 124
Steering wheelpaddleshifters ...... 136
Transmission position display ........ 132
Transmission position display
(DIRECT SELECT lever) ................... 130
Transmission positions .................. 133
Automatic transmissionemer-
gencymode ....................................... 138
hiclestationary on
B
Back button ....................................... 230
Backup lamp
Displaymessage ............................ 203
BAS (Brake Assist System) ................. 61
Battery (SmartKey)
Checking .......................................... 73
Important safety notes .................... 73
Replacing ......................................... 73
Battery (vehicle)
Charging ........................................ 278
Displaymessage ............................ 206
Important safety notes .................. 276
Jump starting ................................. 278
Belt
see Seatbelts
Beltwarning ......................................... 44
Blind SpotAssist
Activating/deactivating (on-
board computer) ............................ 186
Displaymessage ............................ 208
Notes/function .............................. 172
Bluetooth
®
Searching for amobilephone ........ 233
Page 8

Index
6
Searching for amobilephone
(device manager)........................... 234
see also Digital Operator's Man-
ual.................................................. 229
Telephony ...................................... 233
Brake Assist
see BAS (Brake Assist System)
Brake fluid
Displaymessage ............................ 197
Notes............................................. 318
Brake forcedistribution
see EBD (electronicbrake force
distribution)
Brake lamp
Replacing bulbs............................. 106
Brake lamps
Displaymessage ............................ 202
Brakes
ABS .................................................. 61
BAS .................................................. 61
Brake fluid (notes) ......................... 318
Braking assistance appropriate to
the situation ..................................... 63
Displaymessage ............................ 192
EBD .................................................. 67
Hillstart assist............................... 125
HOLD function ............................... 157
Important safety notes .................. 146
Maintenance .................................. 147
Parking brake ................................ 142
Riding tips...................................... 146
Warning lamp ................................. 219
Brakingassistanceappropriate to
the situation
Function/notes................................ 63
Breakdown
Where will Ifind...? ........................ 269
see Flattire
see Tow-starting
see Towing away
Buttonsonthe steering wheel ......... 177
C
California
Important notice for retail cus-
tomers and lessees .......................... 25
Calling up amalfunction
see Displaymessages
Car
see Vehicle
Care
Carwash........................................ 262
Carpets .......................................... 268
Display........................................... 266
Exhaustpipe.................................. 266
Exterior lights ................................ 265
Gear or selector lever .................... 267
Interior ........................................... 266
Matte finish ................................... 264
Notes............................................. 262
Paint .............................................. 263
Plastic trim .................................... 266
Power washer................................ 263
Rear viewcamera .......................... 265
Roof lining ...................................... 268
Seatbelt........................................ 267
Seatcover..................................... 267
Sensors ......................................... 265
Steering wheel............................... 267
Trimpieces.................................... 267
Washing by hand ........................... 262
Wheels........................................... 264
Windows........................................ 264
Wiperblades.................................. 265
Woodentrim .................................. 267
Cargocompartmentenlargement ... 240
Cargotie downrings ......................... 241
CD
see also Digital Operator's Man-
ual.................................................. 229
CD player (on-board computer) ........ 183
Centerconsole
Lower section .................................. 36
Upper section .................................. 35
Central locking
Automaticlocking (on-board com-
puter) ............................................. 187
Locking/unlocking (SmartKey)........ 70
Changeofaddress .............................. 26
Changeofownership .......................... 26
Changingawheel
Wheels andtires............................ 308
Page 9

Index
7
Child
Restraintsystem .............................. 56
Child seat
Forward-facing restraint system ...... 59
LATCH-type (ISOFIX) child seat
anchors............................................57
On thefront-passenger seat ............ 58
Rearward-facingrestraint system .... 59
Top Tether .......................................57
Child-proof locks
Important safety notes....................59
Rear doors....................................... 60
Children
Special seat belt retractor............... 55
Children in thevehicle
Important safety notes....................54
Cigarettelighter ................................ 244
Cleaning
Mirror turnsignal ...........................265
Climate control
Air-conditioning system ................. 111
Automatic climate control (dual-
zone) .............................................. 113
Controlling automatically ...............116
Cooling with airdehumidification .. 115
Defrosting the windows ................. 118
Defrosting the windshield .............. 117
General notes ................................ 110
Indicator lamp ................................ 116
Information about using auto-
matic climate control ..................... 114
Maximum cooling .......................... 118
Notes on using the air-condition-
ing system ..................................... 112
Overview of systems ......................110
r window
Problem with
defroster ........................................ 119
Problems with cooling with air
dehumidification ............................ 116
Refrigerant ..................................... 319
Refrigerant filling capacity ............. 320
Setting the airdistribution ............. 116
Setting the airvents ......................120
Setting the airflow ......................... 117
Setting the temperature ................ 116
Switching air-recirculation mode
on/off ............................................ 119
Switching on/off ........................... 115
the rea
Switching residualheaton/off ...... 119
Switching the rear window
defroster on/off ............................ 118
Switching the ZONE function
on/off ............................................ 117
Cockpit
Overview .......................................... 32
COMAND display
Cleaning ......................................... 266
Combination switch .......................... 101
Compass
Calibrating ..................................... 255
Calling up ....................................... 255
Magnetic fieldzone maps.............. 255
Setting ...........................................255
ConnectingaUSB device
see also DigitalOperator's Man-
ual..................................................229
Consumptionstatistics(on-board
computer) .......................................... 180
Controller ...........................................230
Convenience closing feature .............. 83
Convenience opening feature ............ 83
Coolant(engine)
Checking the level......................... 260
Display message ............................ 205
Filling capacity ............................... 319
Important safety notes .................. 318
Temperature (on-board computer,
Mercedes-AMG vehicles) ...............188
Temperature gauge ........................ 177
Warning lamp ................................. 225
Cooling
see Climate control
Copyright ............................................. 31
rneringli
Co
Display message ............................ 202
Cruisecontrol
Activationconditions ..................... 150
Cruise control lever....................... 149
Deactivating ................................... 150
Display message ............................ 210
Driving system ............................... 149
Function/notes .............................149
Important safety notes .................. 149
Setting aspeed.............................. 150
ght function
Page 10

Index
8
Storing and maintaining current
speed ............................................. 150
Cup holder
Center console .............................. 243
Important safety notes .................. 242
Rear compartment ......................... 243
CustomerAssistance Center
(CAC) ..................................................... 28
CustomerRelations Department ....... 28
D
Dashboard
see Instrument cluster
Data
see Technicaldata
Daytime runninglamps
Displaymessage ............................ 204
Function/notes............................. 100
Switching on/off(on-board com-
puter) ............................................. 187
Declarations of conformity ................. 27
Diagnosticsconnection ...................... 28
Digital Operator's Manual
Help................................................. 23
Introduction ..................................... 23
Digital speedometer ......................... 181
DIRECTSELECT lever
Automatictransmission................. 130
Display messages
ASSYST PLUS................................ 261
Calling up (on-board computer) ..... 191
Driving systems ............................. 207
Engine ............................................ 205
Generalnotes ................................ 190
Hiding (on-board computer) ........... 191
Lights ............................................. 202
Safety systems .............................. 192
SmartKey ....................................... 216
Tires ............................................... 211
Vehicle........................................... 213
Distance PilotDISTRONIC
Activating ....................................... 152
Calling up aspeed ......................... 153
Cruise control lever ....................... 152
DisplayMessage ............................ 209
Displays in the instrument cluster .. 155
Driving tips.................................... 156
Function/notes............................. 151
Important safety notes .................. 151
Setting aspeed .............................. 154
Setting the specified minimum
distance ......................................... 154
Stopping ........................................ 154
Storing aspeed .............................. 153
Switching off .................................. 155
Distance recorder ............................. 180
Distance warning(warning lamp) .... 227
Distance warningfunction
Function/notes................................ 62
Warning lamp ................................. 227
Doors
Automaticlocking (on-board com-
puter) ............................................. 187
Automaticlocking (switch) ............... 77
Central locking/unlocking
(SmartKey)....................................... 70
Control panel ................................... 38
Displaymessage ............................ 216
Emergency locking ........................... 77
Emergency unlocking ....................... 77
Important safety notes .................... 76
Opening (frominside
rinking and driving ......................... 144
D
Drive program
Automatictransmission ................. 134
Display........................................... 132
Display(DIRECT SELECT lever) ...... 130
Driver's door
see Doors
Drivingabroad
Mercedes-Benz Service ................. 262
Drivingonfloodedroads .................. 148
Drivingsafety system
Active Brake Assist .......................... 62
Braking assistance appropriate to
the situation ..................................... 63
Drivingsafety systems
ABS (Anti-lock Braking System) ....... 61
ADAPTIVEBRAKE............................. 68
BAS (Brake Assist System) .............. 61
Distance warning function ............... 62
EBD (electronicbrake force distri-
bution) ............................................. 67
)...................... 76
Page 11

Index
9
ESP®(ElectronicStability Pro-
gram) ............................................... 64
Important safety information ........... 61
Overview .......................................... 61
STEER CONTROL ............................. 68
Driving system
Distance PilotDISTRONIC............. 151
DYNAMIC BODY CONTROL ............ 160
Parking assistPARKTRONIC .......... 161
Parking Pilot.................................. 164
RACESTART(Mercedes-AMG
vehicles) ........................................ 158
Start-off assist............................... 158
Drivingsystems
AMG adaptive sport suspension
system ........................................... 159
ATTENTIONASSIST ........................ 171
Blind Spot Assist ............................ 172
Cruise control ................................ 149
Displaymessage ............................ 207
HOLD function ............................... 157
Lane Keeping Assist ...................... 174
Lane Tracking package.................. 172
Rear viewcamera .......................... 167
Drivingtips
Automatictransmission................. 133
Brakes ........................................... 146
Break-in period.............................. 121
Checking brake lining thickness .... 147
Distance PilotDISTRONIC ............. 156
Downhillgradient ........................... 146
Drinking and driving ....................... 144
Driving in winter ............................. 148
Driving on floodedroads ................ 148
Driving on wetroads ...................... 148
Exhaustcheck ............................... 144
Fuel................................................ 144
General.......................................... 144
Hydroplaning ................................. 148
Icy roadsurfaces ........................... 148
Limitedbraking efficiency on sal-
ted roads ....................................... 147
Snow chains .................................. 290
The first 1000 miles (1500km) ..... 121
Wet roadsurface ........................... 146
DVD video
Operating (on-board computer) ..... 183
see also Digital Operator's Man-
ual.................................................. 229
DYNAMICSELECT button
Climate control (3-zone automatic
climate control)............................. 115
Climate control (air-conditioning
system) .......................................... 112
CSE
DYNAMI
cles except Mercedes-AMG vehi-
cles) .................................................... 128
DYNAMICSELECT controller
(Mercedes-AMGvehicles) ................. 129
LECT button(allvehi-
E
EBD (electronicbrake forcedistribution)
Displaymessage ............................ 194
Function/notes................................ 67
ECOdisplay
Function/notes............................. 145
On-board computer....................... 180
ECOstart/stopfunction
Automaticengine start .................. 126
Automaticengine switch-off .......... 126
Deactivating/activating ................. 127
Generalinformation ....................... 126
Important safety notes .................. 126
Introduction ................................... 125
Electronic Stability Program
see ESP
Emergency
Automaticmeasures afteranacci-
dent ................................................. 54
Emergencyrelease
Driver's door.................................... 77
Vehicle............................................. 77
EmergencyTensioningDevices
Activation ......................................... 52
Emissionscontrol
Service and warranty information .... 25
Engine
Check Engine warning lamp ........... 224
Displaymessage ............................ 205
ECO start/stop function ................ 125
Engine number ............................... 315
Irregularrunning ............................ 127
Jump-starting ................................. 278
®
(Electronic Stability Program)
Page 12

10
Index
Starting (important safety notes)... 123
Starting problems .......................... 127
Starting the engine with the
SmartKey ....................................... 124
Starting via smartphone ................ 124
Starting with the Start/Stopbut-
ton ................................................. 124
Switching off .................................. 141
Tow-starting (vehicle)..................... 284
Engine electronics
Problem (malfunction) ................... 127
Engine jump starting
see Jump starting (engine)
Engine oil
Adding ........................................... 259
Additives ........................................ 318
Checking the oillevel ..................... 258
Checking the oillevel using the
dipstick .......................................... 258
Displaymessage ............................ 206
Filling capacity ............................... 318
Notesabout oilgrades................... 317
Notesonoil level/consumption .... 258
Temperature (on-board computer,
Mercedes-AMGvehicles) ............... 188
Entering an address
see also Digital Operator's Man-
ual.................................................. 229
®
(ElectronicStability Pro-
ESP
gram)
Activating/deactivating (on-
board computer) ............................ 219
AMG menu (on-board computer) ... 188
Characteristics ................................. 65
Deactivating/activating (button
in Mercedes-AMGvehicles) ............. 66
Deactivating/activating (except
Mercedes‑AMG vehicles) ................. 65
Deactivating/activating (onboard computer, except
Mercedes-AMGvehicles) ............... 185
Displaymessage ............................ 192
Function/notes................................ 64
Generalnotes .................................. 64
Important safety information ........... 64
Trailer stabilization ........................... 67
Warning lamp ................................. 221
ETS/4ETS (ElectronicTraction Sys-
tem) ...................................................... 64
Exhaust
see Exhaustpipe
Exhaustcheck ................................... 144
Exhaustpipe
Cleaning ......................................... 266
r lighting
terio
Ex
Cleaning ......................................... 265
see Lights
Exterior mirrors
Adjusting ......................................... 96
Dipping (automatic) ......................... 97
Folding in when locking (on-board
computer) ...................................... 188
Folding in/out (automatically)......... 97
Folding in/out (electrically) ............. 97
Outofposition (troubleshooting)..... 97
Setting ............................................. 97
Storing settings (memory func-
tion) ................................................. 99
Storing the parking position ............. 98
Eyeglassescompartment ................. 238
F
Favorites
Overview ........................................ 231
Filler cap
see Refueling
First-aidkit ......................................... 270
Flat tire
MOExtended tires.......................... 271
Preparing the vehicle..................... 271
TIREFIT kit ...................................... 272
Floormats ........................................... 256
Frequencies
Mobilephone ................................. 313
Two-way radio ................................ 313
Fuel
Additives ........................................ 317
Consumption statistics .................. 180
Displaying the current consump-
tion ................................................ 180
Displaying the range...................... 180
Driving tips.................................... 144
E10 ................................................ 316
Fuelgauge ....................................... 33
Page 13

Index
11
Grade (gasoline) ............................ 316
Importantsafety notes..................316
Problem (malfunction) ...................140
Refueling ........................................ 138
Tank content/reserve fuel ............. 316
Fuelfiller flap
Opening ......................................... 139
Fuellevel
Calling up the range (on-board
computer) ...................................... 180
Fueltank
Capacity ........................................ 316
Problem (malfunction) ................... 140
Fuses
Allocation chart .............................285
Before changing .............................284
Fuse box in the engine compart-
ment .............................................. 285
Fuse box in the front-passenger
footwell .......................................... 285
Important safety notes .................. 284
G
Garage door opener
Clearing the memory ..................... 254
General notes ................................ 252
Important safety notes .................. 252
Opening/closing the garage door .. 254
Problems whenprogramming ........254
Programming (button in the rear-
view mirror) ................................... 252
Synchronizing the rolling code ....... 253
Gasoline ............................................. 316
Gear indicator (on-board com-
puter, Mercedes-AMG vehicles) ....... 188
Genuine parts ...................................... 24
Glove box ...........................................238
Google™Local Search
see also DigitalOperator's Man-
ual..................................................229
H
Handbrake
see Parking brake
HANDS-FREEACCESS .......................... 79
Hazard warning lamps
Display message ............................ 216
Switching on/off ........................... 102
Head restraints
Adjusting ......................................... 92
Adjusting (manually)........................ 93
Adjusting (rear) ................................ 93
Headlamps
Fogging up ..................................... 103
see Automatic headlamp mode
Heating
see Climate control
High beam flasher .............................101
High-beam headlamps
Adaptive Highbeam Assist ............. 102
Display message ............................ 203
Replacing bulbs .............................106
Switching on/off ........................... 101
Hill start assist .................................. 125
HOLD function
Activating ....................................... 157
Activationconditions ..................... 157
Deactivating ................................... 157
Display message ............................ 207
Function/notes .............................157
Home address
see also DigitalOperator's Man-
ual..................................................229
Hood
Closing ...........................................258
Display message ............................ 215
Important safety notes .................. 257
Opening ......................................... 257
Horn ...................................................... 32
Hydroplaning ..................................... 148
I
Ignitionlock
see Key positions
Immobilizer .......................................... 68
Indicator lamp
Replacing bulbs (rear) .................... 106
Indicator lamps
see Warning and indicator lamps
Indicators
see Turn signals
Page 14

12
Index
Instrumentcluster
Overview .......................................... 33
Settings......................................... 186
Warningand indicator lamps ........... 33
Instrument cluster lighting .............. 176
Interior lighting
Control ...........................................104
Overview ........................................ 103
Reading lamp ................................. 103
®
iPod
see also DigitalOperator's Man-
ual..................................................229
J
Jack
Storage location ............................ 270
Using ............................................. 309
Jump starting (engine) ......................278
K
Keypositions
Start/Stop button .......................... 122
KEYLESS-GO
Convenience closing feature ............ 83
Deactivation ..................................... 71
Locking ............................................ 71
Unlocking ......................................... 71
Kickdown
Driving tips ....................................134
Manual gearshifting ....................... 138
Kneebag .............................................. 46
L
Lamps
see Warning and indicator lamps
Lane KeepingAssist
Activating/deactivating (on-
board computer) ............................ 186
Display message ............................ 208
Function/information.................... 174
LaneTracking package ..................... 172
Lap time (RACETIMER) ...................... 189
LATCH-type (ISOFIX)child seat
anchors ................................................ 57
License plate lamp (display mes-
sage) ................................................... 203
Light sensor(display message) ....... 204
Lights
Adaptive Highbeam Assist ............. 102
Automaticheadlamp mode............ 100
Fogged up headlamps.................... 103
Hazard warning lamps ................... 102
Highbeamflasher.......................... 101
High-beam headlamps................... 101
Light switch ................................... 100
Low-beamheadlamps.................... 101
Parking lamps ................................ 101
Rear fog lamp ................................ 101
Setting exteriorlighting ................. 100
Standing lamps .............................. 101
Switching the daytime running
lamps on/off(on-board com-
puter) ............................................. 187
Turn signals................................... 101
Loadingguidelines ............................ 237
Locking
see Central locking
Locking (doors)
Automatic........................................ 77
Emergency locking ........................... 77
From inside (central locking but-
ton) .................................................. 76
Locking centrally
see Central locking
Locking verification signal (on-
board computer) ............................... 187
Low-beam headlamps
Displaymessage ............................ 202
Replacing bulbs............................. 105
Switching on/off........................... 101
Lumbar support
Adjusting the 4-waylumbarsup-
port.................................................. 93
M
M+S tires ............................................ 289
Malfunctionmessage
see Displaymessages
Matte finish(cleaning instruc-
tions) .................................................. 264
mbrace
Call priority .................................... 248
Displaymessage ............................ 197
Page 15

Index
13
Downloading destinations
(COMAND) .....................................248
Downloading routes....................... 251
Emergency call .............................. 246
General notes ................................ 245
Geo fencing ................................... 251
Locating astolenvehicle ...............250
MB info call button ........................ 247
Remote fault diagnosis.................. 250
Remote vehiclelocking .................. 250
Roadsideassistance button ........... 247
Search &Send ............................... 249
Self-test ......................................... 245
Speed alert .................................... 251
System .......................................... 245
Triggering the vehiclealarm ........... 252
Vehicleremote unlocking .............. 249
Mechanical key
Function/notes................................ 72
Inserting .......................................... 72
Locking vehicle................................ 77
Removing ......................................... 72
Unlocking the driver'sdoor.............. 77
Memory card (audio) ......................... 183
Memory function ................................. 98
Messagememory (on-board com-
puter) .................................................. 191
Messages
see Displaymessages
Mirrorturn signal
Cleaning ......................................... 265
Mirrors
see Exterior mirrors
see Rear-viewmirror
see Vanity mirror (inthe sunvisor)
Mobilephone
Connecting (Bluetooth
face).............................................. 233
Connecting (device manager)........ 234
Frequencies................................... 313
Installation ..................................... 313
Menu (on-board computer) ............ 183
Transmission output(maximum) .... 313
Modifying the programming
(SmartKey) ........................................... 72
MOExtendedtires .............................. 271
®
inter-
Mounting wheels
Lowering the vehicle...................... 311
Mounting anew wheel................... 310
Preparing the vehicle..................... 308
Raising the vehicle......................... 309
Removing awheel .......................... 310
Securing the vehicleagainstroll-
ing away ........................................ 309
MP3
Operation
e also Digital Operator's Man-
se
ual.................................................. 229
Multifunctiondisplay
Function/notes............................. 179
Permanent display ......................... 187
Multifunctionsteering wheel
Operating the on-board computer..177
Overview .......................................... 34
Multimedia system
Switching on and off ......................230
Music files
see also DigitalOperator's Man-
ual..................................................229
....................................... 183
N
Navigation
Entering adestination .................... 231
Menu (on-board computer) ............ 181
see also DigitalOperator's Man-
ual..................................................229
Notes on breaking-inanew vehi-
cle ....................................................... 121
O
Occupant Classification System
(OCS)
Conditions ....................................... 48
Faults ............................................... 51
Operation ......................................... 48
System self-test ............................... 50
Occupant safety
Air bags...........................................45
Automatic measures after an acci-
dent ................................................. 54
Beltwarning ..................................... 44
Childreninthe vehicle..................... 54
Important safety notes.................... 40
Page 16

14
Index
Introduction to the restraint sys-
tem .................................................. 40
Occupant Classification System
(OCS) ............................................... 47
PASSENGER AIR BAG indicator
lamps............................................... 41
Pets in the vehicle ........................... 60
Restraint system warning lamp ........ 41
Seat belt .......................................... 41
OCS
Conditions ....................................... 48
Faults ............................................... 51
Operation .........................................48
System self-test ............................... 50
Odometer ........................................... 180
On-board computer
AMG menu ..................................... 188
Assistance graphicmenu ............... 185
Assistance menu ........................... 184
Audio menu ................................... 182
Convenience submenu .................. 188
Displaymessages .......................... 190
Displaying aservice message ........ 261
Factory settings ............................. 188
Important safety notes .................. 176
Instrument cluster submenu .......... 186
Lighting submenu .......................... 187
Menu overview .............................. 179
Message memory .......................... 191
Navigation menu ............................ 181
Operation ....................................... 177
RACETIMER ................................... 189
Service menu ................................. 186
Settingsmenu ............................... 186
Standard display ............................ 180
Telephone menu ............................ 183
Tripmenu ...................................... 180
Vehiclesubmenu ........................... 187
Video DVD operation ..................... 183
Opening and closingthe side trim
panels ................................................. 106
Operatingsafety
Declaration of conformity ................ 27
Important safety notes .................... 27
Operatingsystem
see On-board computer
Operation
Digital Operator's Manual................ 23
Operator's Manual
Vehicleequipment ........................... 25
Outside temperature display ........... 176
Overhead controlpanel ...................... 39
Override feature
indows........................... 60
side w
Rear
P
Paint code number ............................ 314
Paintwork (cleaning instructions) ... 263
Panic alarm .......................................... 40
Panorama roofwithpower tilt/
sliding panel
Important safety notes .................... 85
Operating ......................................... 86
Operating the rollersunblindsfor
the sliding sunroof........................... 87
Problem (malfunction) ..................... 89
Reversing feature ............................. 86
Parking
Important safety notes .................. 141
Parking brake ................................ 142
Parking position for the exterior
mirror on the front-passenger
side .................................................. 98
Rear viewcamera .......................... 167
Parking aid
see Exterior mirrors
see Rear viewcamera
Parking Assist PARKTRONIC
Deactivating/activating ................. 163
Driving system ............................... 161
Function/notes............................. 161
Important safety notes .................. 161
Problems (malfunctions)................ 163
Sensorrange................................. 161
Warning display ............................. 162
Parking assistance
see Parking Assist PARKTRONIC
Parking brake
Applying automatically................... 143
Applying or releasing manually ...... 142
Displaymessage ............................ 194
Electric parking brake .................... 142
Emergency braking ........................ 143
Generalnotes ................................ 142
Releasing automatically................. 143
Page 17

Index
15
Warning lamp ................................. 224
Parking lamps
Switching on/off ........................... 101
Parking Pilot
Canceling ....................................... 167
Detecting parking spaces .............. 164
Display Message ............................208
Exiting aparking space .................. 166
Function/notes .............................164
Important safety notes .................. 164
Parking .......................................... 165
PASSENGERAIR BAG
Display message ............................ 200
Indicator lamps ................................ 41
Problem (malfunction) ................... 200
Pets in the vehicle ............................... 60
Phonebook
see also DigitalOperator's Man-
ual..................................................229
Plastic trim (cleaning instruc-
tions) ..................................................266
Power washers .................................. 263
Power windows
see Side windows
Protection against theft
ATA (Anti-Theft Alarm system) ......... 68
Immobilizer...................................... 68
Protection of the environment
General notes .................................. 24
Pulling away
Automatic transmission ................. 125
General notes ................................ 125
Hill start assist ............................... 125
Q
QR code
Mercedes-Benz Guide App ................. 1
Rescue card ..................................... 29
Qualifiedspecialist workshop ........... 28
R
RACESTART
Important safety notes .................. 158
RACESTART (Mercedes-AMG vehi-
cles) .................................................... 158
RACETIMER (on-board computer,
Mercedes-AMG vehicles) .................. 189
Radio
Selecting astation......................... 182
see separate operating instructions
Radio mode
see also DigitalOperator's Man-
ual..................................................229
Radio-wave reception/transmissioninthe vehicle
Declarationofconformity ................ 27
Rain closing feature (panorama
roof with power tilt/sliding panel) .... 87
Readinglamp ..................................... 103
Rear compartment
Setting the airvents ......................120
Rear fog lamp
Display message ............................ 203
Replacing bulbs .............................106
Switching on/off ........................... 101
Rear lamps
see Lights
Rear seats
Folding the backrestforwards/
back ............................................... 240
Rear viewcamera
"Reverse parking" function ............ 169
Cleaning instructions ..................... 265
Display in the multimediasystem .. 168
Function/notes .............................167
General notes ................................ 167
Switching on/off ........................... 168
Rear window defroster
Problem (malfunction) ................... 119
Switching on/off ........................... 119
Rear-viewmirror
Anti-glare (manual).......................... 96
Dipping (automatic) ......................... 97
Reflectivesafety jacket .................... 269
Refrigerant (air-conditioning system)
Important safety notes .................. 319
Refueling
Fuel gauge ....................................... 33
Important safety notes .................. 138
Refueling process.......................... 139
see Fuel
Page 18

16
Index
Remote control
Garagedooropener ....................... 252
Programming (garagedoor
opener) .......................................... 252
Replacing bulbs
Brake lamp .................................... 106
High-beam headlamps................... 106
Important safety notes .................. 104
Installing/removing the cover
(front wheelarch).......................... 105
Low-beamheadlamps.................... 105
Overview of bulb types .................. 104
Rear fog lamp ................................ 106
Turn signals(front) ......................... 106
Turn signals(rear) .......................... 106
Reporting safety defects .................... 28
Rescue card ......................................... 29
Reserve (fuel tank)
see Fuel
Reserve fuel
Displaymessage ............................ 206
Warning lamp ................................. 224
see Fuel
Residual heat(climate control) ........ 119
Restraintsystem
Displaymessage ............................ 198
Introduction ..................................... 40
Warning lamp ................................. 224
Warning lamp (function) ................... 41
Reversegear(selectorlever) ........... 132
Reversingfeature
Roller sunblind ................................. 87
Sidewindows................................... 82
Roadside Assistance (breakdown) .... 26
Rollersunblind
Panorama roofwithpower tilt/
sliding panel ..................................... 87
Roofcarrier ........................................ 241
Roofliningand carpets (cleaning
guidelines) ......................................... 268
Roofload(maximum) ........................ 320
Route guidance
see also Digital Operator's Man-
ual.................................................. 229
S
Safety
Childreninthe vehicle..................... 54
see Occupant safety
Safety system
see Driving safety systems
SD card
Inserting ........................................ 235
Inserting/removing ........................ 235
Removing ....................................... 235
SD memory card
see also Digital Operator's Man-
ual.................................................. 229
Search &Send
see also Digital Operator's Man-
ual.................................................. 229
Seat
Correct driver'sseatposition ........... 90
Seat belts
Adjusting the height ......................... 44
Cleaning ......................................... 267
Correct usage.................................. 43
Fastening ......................................... 44
Important safety guidelines............. 42
Introduction ..................................... 41
Releasing ......................................... 44
Warning lamp ................................. 218
Warning lamp (function) ................... 44
Seats
Adjusting (electrically) ..................... 92
Adjusting (manually) ........................ 91
Adjusting (Performance Seat) .......... 94
Adjusting the 4-waylumbarsup-
port.................................................. 93
Adjusting the headrestraint ............ 92
Cleaning the cover......................... 267
Folding the backrest(rear com-
partment) forwards/back .............. 240
Important safety notes .................... 90
Seatheating problem ...................... 95
Storing settings (memory func-
tion) ................................................. 99
Switching seatheating on/off......... 94
Securing cargo .................................. 241
Selectorlever
Cleaning ......................................... 267
Sensors (cleaning instructions) ....... 265
Page 19

Index
17
Service center
see Qualified specialist workshop
Service Center
see Qualified specialist workshop
Service menu (on-board com-
puter) .................................................. 186
Service message
see ASSYST PLUS
Service products
Brake fluid .....................................318
Coolant (engine) ............................ 318
Engine oil ....................................... 317
Fuel ................................................ 315
Important safety notes .................. 315
Refrigerant (air-conditioning sys-
tem) ............................................... 319
Washer fluid ................................... 319
Settingthe air distribution ...............116
Settingthe airflow ............................ 117
Settingthe date/time format
see also DigitalOperator's Man-
ual..................................................229
Settingthe language
see also DigitalOperator's Man-
ual..................................................229
Settingthe time
see also DigitalOperator's Man-
ual..................................................229
Settings
Factory (on-board computer) ......... 188
On-board computer ....................... 186
SETUP (on-board computer,
Mercedes-AMG vehicles) .................. 188
Side impact air bag .............................47
Side marker lamp (display mes-
sage) ................................................... 204
Side windows
Cleaning ......................................... 264
Convenienceclosing feature ............ 83
Convenienceopening feature ..........83
Important safety information ........... 81
Opening/closing .............................. 82
Problem(malfunction) .....................84
Resetting......................................... 84
Reversingfeature .............................82
SIRIUS
Sliding sunroof
SmartKey
SmartKey positions (ignition lock) .. 122
Smartphone
SMS
Snow chains ...................................... 290
Sound
Special seat belt retractor .................. 55
Specialist workshop ............................28
Speed, controlling
Speedometer
SPORT handling mode
Standing lamps
services
see also Digital Operator's Man-
ual .................................................. 229
see Panorama roof with power
tilt/sliding panel
Changing the battery ....................... 73
Changing the programming .............72
Checkingthe battery .......................73
Convenience closingfeature ............ 83
Convenience opening feature .......... 83
Display message ............................ 216
Door central locking/unlocking .......70
Important safety notes .................... 70
KEYLESS-GO start function .............. 71
Loss .................................................74
Mechanical key ................................ 72
Positions (ignition lock) ................. 122
Problem (malfunction) ..................... 74
Starting the engine ........................ 124
Starting the engine ........................ 124
see also Digital Operator's Man-
ual .................................................. 229
Switching on/off ........................... 230
see Cruise control
Activating/deactivating the addi-
tional speedometer ........................ 187
Digital ............................................ 181
In the Instrument cluster ................. 33
Segments...................................... 176
Selectingthe display unit ......
Deactivating/activat
(Mercedes-AMG vehicles) ................66
Warning lamp ................................. 222
Display message ............................203
Switching on/off ........................... 101
ing
......... 186
Page 20

18
Index
Start-off assist
Activating ....................................... 158
Important safety notes .................. 158
Start/Stop button
Removing ....................................... 123
Starting the engine ........................ 124
Start/stop function
see ECO start/stop function
Starting (engine) ................................ 123
STEER CONTROL ..................................68
Steering
Display message ............................216
Steering assistant STEERCONTROL
see STEER CONTROL
Steering wheel
Adjusting (manually)........................ 95
Buttonoverview ............................... 34
Buttons (on-board computer) ......... 177
Cleaning ......................................... 267
Important safety notes .................... 95
Paddle shifters ............................... 136
Steering wheelpaddle shifters ........ 136
Stopwatch (RACETIMER) ................... 189
Stowagecompartments
Armrest (front) ............................... 238
Armrest (under)............................. 239
Center console .............................. 238
Center console (rear) ..................... 239
Cupholders ................................... 242
Eyeglasses compartment ............... 238
Glove box ....................................... 238
Important safety information ......... 237
Mappockets .................................. 239
Stowagenet ................................... 239
Stowagenet ....................................... 239
Stowagewellbeneath the trunk
floor .................................................... 241
Summertires ..................................... 289
Sun visor ............................................ 243
Suspension setting
AMG adaptive sport suspension
system ........................................... 159
Switchingair-recirculationmode
on/off ................................................. 119
Switchingonmediamode
Via the device list .......................... 235
T
Tachometer ........................................ 176
Tail lamps
Displaymessage ............................ 203
see Lights
Tank
see Fueltank
Tank content
Fuelgauge ....................................... 33
Technical data
Capacities ...................................... 315
Information .................................... 313
Tires/wheels ................................. 312
Vehicledata................................... 320
Telephone
Accepting acall(multifunction
steering wheel) .............................. 184
Authorizing amobilephone (con-
necting) ......................................... 233
Authorizing amobilephone via the
device manager (connecting) ......... 234
Connecting amobilephone
(device manager)........................... 234
Connecting amobilephone (gen-
eralinformation) ............................ 233
Displaymessage ............................ 216
Introduction ................................... 183
Menu (on-board computer) ............ 183
Numberfrom the phone book........ 184
Redialing ........................................ 184
Rejecting/ending acall................. 184
see also Digital Operator's Man-
ual.................................................. 229
Temperature
Coolant .......................................... 177
Coolant (on-board computer,
Mercedes-AMGvehicles) ............... 188
Engine oil(on-board computer,
Mercedes-AMGvehicles) ............... 188
Outsidetemperature ...................... 176
Setting (climate control)................ 116
Transmission oil(on-board com-
puter, Mercedes-AMGvehicles) ..... 188
Through-loadingfeature ................... 239
Timing (RACETIMER) ......................... 189
Tire pressure
Calling up (on-board computer) ..... 294
Page 21

Index
19
Checkingmanually ........................ 293
Display message ............................ 211
Maximum .......................................293
Not reached (TIREFIT) .................... 274
Notes ............................................. 292
Reached (TIREFIT) .......................... 274
Recommended ............................... 290
Tire pressure losswarning system
General notes ................................ 293
Important safety notes .................. 294
Restarting ...................................... 294
Tire pressure monitor
Checking the tire pressure elec-
tronically ........................................ 296
Function/notes .............................294
General notes ................................ 294
Important safety notes .................. 295
Radio type approval for the tire
pressure monitor ........................... 297
Restarting ...................................... 297
Warning lamp ................................. 228
Warning message .......................... 296
TIREFIT kit .......................................... 272
Important safety notes .................. 272
Storage location ............................ 271
Tire pressure not reached .............. 274
Tire pressure reached .................... 274
Tires
Aspect ratio (definition) ................. 307
Averageweight of the vehicle
occupants (definition) .................... 305
Bar (definition) ............................... 305
Changing awheel .......................... 307
Characteristics .............................. 305
Checking ........................................ 287
Curb weight (definition) ................. 306
Definition of terms ......................... 305
Direction of rotation...................... 308
Displaymessage ............................ 211
Distribution of the vehicleoccu-
pants (definition) ............................ 307
DOT (Department of Transporta-
tion) (definition) ............................. 305
DOT, T
ire Identification Number
(TIN) ............................................... 305
GAWR(GrossAxle Weight Rating)
(definition) ..................................... 306
Generalnotes ................................ 312
GVW(GrossVehicleWeight) (def-
inition) ........................................... 306
GVWR (GrossVehicleWeight Rat-
ing)(definition) .............................. 306
Important safety notes .................. 287
Increased vehicleweightdue to
optionalequipment (definition) ...... 306
Information on driving .................... 287
Kilopascal(kPa)(definition) ........... 306
Labeling (overview) ........................ 302
Loadbearing index (definition) ...... 307
Loadindex ..................................... 304
Loadindex (definition) ................... 306
M+S tires....................................... 289
Maximumloadonatire (defini-
tion) ............................................... 306
Maximumloaded vehicleweight
(definition) ..................................... 306
Maximumpermissibletire pres-
sure (definition) ............................. 306
Maximumtire load ......................... 304
Maximumtire load (definition) ....... 306
MOExtended tires.......................... 289
Optionalequipment weight (defi-
nition) ............................................ 307
PSI (pounds persquare inch)(def-
inition) ........................................... 307
Replacing ....................................... 307
Service life ..................................... 288
Sidewall(definition) ....................... 307
Speed rating (definition) ................ 306
Storing ........................................... 308
Structure and characteristics
(definition) ..................................... 305
Summer tires................................. 289
Temperature .................................. 302
TIN (Tire Identification Number)
(definition) ..................................... 307
Tire bead (definition) ...................... 307
Tire pressure (definition) ................ 307
Tire pressures (recommended)...... 306
Tire size (data)............................... 312
Tire size designation, load-beari
ca
pacity, speed rating .................... 302
Tire tread....................................... 288
Tire tread(definition) ..................... 307
Totalloadlimit (definition) ............. 307
Traction......................................... 301
ng
Page 22

20
Index
Traction (definition)....................... 307
Tread wear .....................................301
Uniform Tire Quality Grading
Standards...................................... 301
Uniform Tire Quality Grading
Standards(definition) .................... 306
Wearindicator (definition) ............. 307
Wheelrim (definition) .................... 306
see Flat tire
Top Tether ............................................ 57
Tow-starting
Emergency engine starting ............ 284
Important safety notes .................. 281
Installing the towing eye................ 282
Removing the towing eye...............282
Towing atrailer
®
(ElectronicStability Pro-
ESP
gram) ............................................... 67
Towing away
Important safety guidelines ........... 281
Installing the towing eye................ 282
Notes for 4MATIC vehicles ............ 284
Removing the towing eye...............282
Transporting the vehicle ................ 283
With both axlesonthe ground ....... 283
With front axle raised ..................... 282
Towing eye ......................................... 270
Traffic reports
see also DigitalOperator's Man-
ual..................................................229
Transmission
see Automatic transmission
Transmission position display
(DIRECT SELECTlever) ......................130
Transporting the vehicle .................. 283
Trim pieces (cleaning instruc-
tions) ..................................................267
Trip computer (on-board com-
puter) ..................................................180
Trip odometer
Calling up ....................................... 180
Resetting (on-board computer) ...... 181
Trunk
Emergency release .......................... 81
Emergency release button ...............81
Important safety notes .................... 78
Opening (automaticallyfrom out-
side) .................................................79
Opening (from outside the vehicle, HANDS-F
Opening automaticallyfrom
inside ............................................... 80
Opening/closing (manually from
outside) ............................................ 78
Trunk lid
Display message ............................215
Opening dimensions ......................320
Trunk load (maximum) ......................320
Turn signals
Display message ............................ 202
Replacing bulbs (front) ................... 106
Switching on/off ........................... 101
Two-way radio
Frequencies ................................... 313
Installation..................................... 313
Transmissionoutput (maximum).... 313
Type identification plate
see Vehicle identification plate
REE ACCESS) ...
........... 79
U
Unlocking
Emergency unlocking ....................... 77
From insidethe vehicle (central
unlocking button) .............................76
Upshiftindicator (on-boardcom-
puter, Mercedes-AMG vehicles) .......188
USB devices
Connecting to the MediaInter-
face ............................................... 236
V
Vanity mirror (in the sun visor) ........244
Vehicle
Correct use ...................................... 28
Data acquisition ............................... 29
Display message ............................ 213
Equipment ....................................... 25
Individualsettings .......................... 186
Limited Warranty .............................29
Loading .......................................... 298
Locking (in an emergency) ............... 77
Locking (SmartKey) .......................... 70
Page 23

Index
21
Lowering ........................................ 311
Maintenance .................................... 26
Parking for along period................ 143
Pulling away................................... 125
Raising ........................................... 309
Reporting problems ......................... 28
Securing from rolling away ............ 309
Transporting .................................. 283
Unlocking (inanemergency) ........... 77
Unlocking (SmartKey)...................... 70
Vehicledata................................... 320
Vehicledata
Roof load (maximum) ..................... 320
Trunk load (maximum) ................... 320
Vehicledimensions ........................... 320
Vehicleemergencylocking ................ 77
Vehicleidentificationnumber
see VIN
Vehicleidentificationplate .............. 314
Vehicletoolkit .................................. 270
Ventilation
Setting the vents ........................... 120
Video
Operating the DVD ......................... 183
see also Digital Operator's Man-
ual.................................................. 229
VIN
Seat............................................... 315
Type plate ...................................... 314
W
Warning and indicator lamps
ABS ................................................ 220
Active Brake Assist ........................ 227
Brakes ........................................... 219
Check Engine ................................. 224
Coolant .......................................... 225
Distance warning ........................... 227
®
.............................................. 221
ESP
®
ESP
OFF ....................................... 222
Fueltank ........................................ 224
Overview .......................................... 33
PASSENGER AIR BAG ...................... 41
Reserve fuel................................... 224
Restraint system ............................ 224
Seatbelt........................................ 218
SPORThandling mode................... 222
Tire pressure monitor .................... 228
Warning triangle ................................ 270
Warranty .............................................. 25
Washer fluid
Displaymessage ............................ 216
Weather display (COMAND)
see also Digital Operator's Man-
ual.................................................. 229
Wheel and tire combinations
Tires ............................................... 312
Wheel bolt tighteningtorque ........... 311
Wheel chock ...................................... 309
Wheels
Changing awheel .......................... 307
Checking ........................................ 287
Cleaning ......................................... 264
Important safety notes .................. 287
Information on driving .................... 287
Interchanging/changing ................ 307
Mounting anew wheel................... 310
Removing awheel .......................... 310
Storing ........................................... 308
Tightening torque ........................... 311
Wheel size/tire size ....................... 312
Wheelsand tires
Changing awheel .......................... 308
Window curtainair bag
Displaymessage ............................ 199
Operation ......................................... 47
Windows
see Sidewindows
Windshield
Defrosting ...................................... 117
Windshieldwasher system
Adding washerfluid ....................... 260
Important safety notes .................. 319
Windshieldwipers
Displaymessage ............................ 216
Problem (malfunction) ................... 109
Replacing the wiperblades............ 108
Switching on/off........................... 107
Winter driving
Slippery roadsurfaces ................... 148
Snow chains .................................. 290
Winter operation
Generalnotes
Wi
nter tires
................................ 289
M+S tires....................................... 289
Page 24

Index
22
Wiper blades
Cleaning ......................................... 265
Important safety notes .................. 108
Woodentrim (cleaning instruc-
tions) .................................................. 267
Workshop
see Qualified specialist workshop
Z
ZONE function
Switching on/off ........................... 117
Page 25
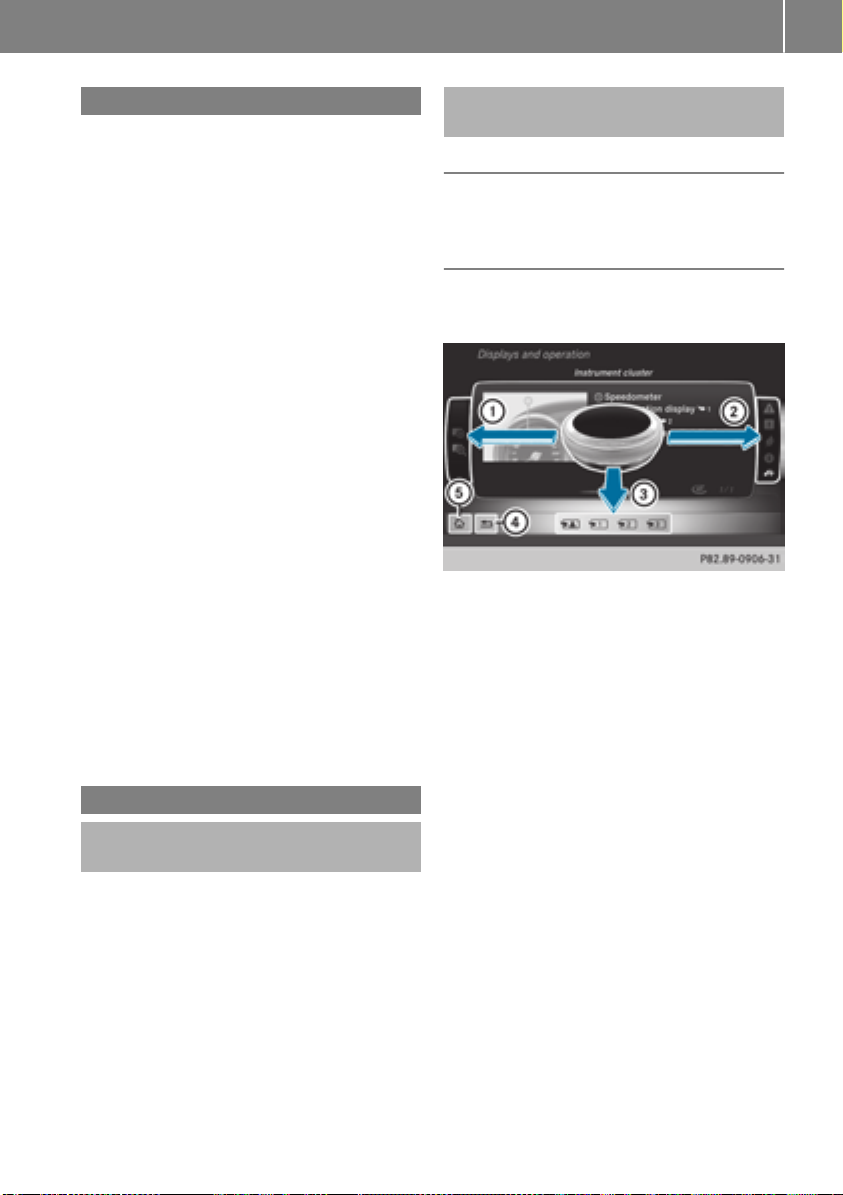
Digital Operator's Manual
23
Introduction
The printedOperator's Manual providesinformation about thesafeoperation of your vehicle.
The Digital Operator's Manual providescomprehensiveand specifically adapted information on
your vehicle's equipmentand multimedia system. You can call up theDigital Operator's Manual via themultimedia system.
You will notincur any costswhen calling up
i
theDigital Operator's Manual. The Digital
Operator's Manual works without connecting
to theInternet.
Thereare three ways to access thetopicsofthe
Digital Operator's Manual:
R
Visualsearch
The visual search allows you to exploreyour
vehicle"virtually". Starting from either the
vehicleexteriorvieworinteriorview, you can
access manyofthe differenttopicscovered
by theDigital Operator's Manual. To access
thevehicleinteriorsection,select the"Vehicle interior" view.
R
Keywordsearch
The keyword search allows you to search for a
keyword by enteringcharacters.
R
Contents
You can select individual sectionsinthe contents.
The Digital Operator's Manual is deactiva-
i
tedfor safetyreasonswhile driving.
Operation
Calling up theDigital Operator's Manual
X
Press the Ø buttoninthe center console.
The overview relating to thevehicleappears.
X
Selectthe "Operator's Manual" menuitemby
turning 3 or pressing 7 thecontroller.
X
Confirm 7 themessage about thewarning
and safetynotes.
The basic menufor theDigital Operator's
Manual appears.
Operating theDigital Operator's Manual
General notes
Pleaseobservethe information about theoperation of thecontroller (
Y page 230).
Content pages
The contentpages can be accessed by meansof
avisual search,akeyword search or usingthe
contents.
X
To scroll forwards/backwards: turn 3
thecontroller.
X
To displayinfull-screen or animation:slide
8 thecontroller to theleft :.
To select information texts or savebook-
X
marks: slide 9 thecontroller to the
right ;.
X
To select alink: slide 6 thecontroller
downwards =.
X
To exit acontent page: select % sym-
bol ?.
To call up thebasic menuofthe Digital
X
Operator's Manual: select Þ symbol A.
To switch functions to themultimedia
X
system using thebuttonsonthe center
console: press the $, %, Õ or Ø
button.
The selected menuappears. The Digital Operator's Manual remainsopen in thebackground.
Page 26

Genuine Mercedes-Benz parts
24
Protecting the environment
General notes
Environmental note
H
Daimler's declared policy is one of comprehensive environmental protection.
The objectives are for the natural resources
that form the basis of our existence on this
Introduction
planet to be used sparingly and in amanner
that takes the requirements of both nature
and humanity into account.
You too can help to protect the environment
by operating your vehicle in an environmentally responsible manner.
Fuel consumption and the rate of engine,
transmission, brake and tire wear are affected
by these factors:
R
operating conditionsofyour vehicle
R
your personal driving style
You can influence both factors. You should
bear the following in mind:
Operating conditions:
R
avoid short trips as these increase fuel consumption.
R
always make sure that the tire pressures
are correct.
R
do not carry any unnecessary weight.
R
remove roof racks once you no longer need
them.
R
aregularly serviced vehicle will contribute
to environmental protection. You should
therefore adhere to the service intervals.
R
always have service work carried out at a
qualified specialist workshop.
Personal driving style:
R
do not depress the accelerator pedal when
startingthe engine.
R
do not warm up the engine when the vehicle
is stationary.
R
drive carefully and maintain asafe distance
from the vehicle in front.
R
avoid frequent, sudden acceleration and
braking.
R
change gear in good time and use each gear
only up to Ô of its maximum engine speed.
R
switch off the engine in stationary traffic.
R
keep an eye on the vehicle's fuel consumption.
Environmental concerns and recommendations
Wherever the Operator's Manual requires you to
dispose of materials, first try to regenerate or reuse them. Observe the relevant environmental
rules and regulations when disposing of materials. In this way you will help to protect the environment.
Genuine Mercedes-Benz parts
Environmental note
H
Daimler AG also suppliesreconditioned major
assemblies and parts which are of the same
quality as new parts. They are covered by the
same Limited Warranty entitlements as new
parts.
Air bags and Emergency Tensioning Devi-
!
ces, as well as control units and sensors for
these restraint systems, may be installed in
the following areas of your vehicle:
R
doors
R
door pillars
R
door sills
R
seats
R
cockpit
R
instrumentcluster
R
center console
Do not install accessories such as audio systems in these areas. Do not carry out repairs
or welding. You could impair the operating
efficiency of the restraint systems.
Have aftermarket accessories installed at a
qualified specialist workshop.
You could jeopardize the operating safety of
your vehicle if you use parts, tires and wheels as
well as accessories relevant to safety which
have not been approved by Mercedes-Benz. This
could lead to malfunctionsinsafety-relevant
Page 27

Service and vehicle operation
25
systems, e.g. the brake system. Use only genuine Mercedes-Benz parts or parts of equalquality. Only use tires, wheels and accessories that
have been specifically approved for your vehicle.
Genuine Mercedes-Benz parts are subject to
strict quality control. Every part has been specifically developed,manufactured or selected
for and adapted to Mercedes-Benz vehicles.
Therefore, only genuine Mercedes-Benz parts
should be used.
More than 300,000 different genuine
Mercedes-Benz parts are available for
Mercedes-Benz models.
All authorized Mercedes-Benz Centers maintain
asupply of genuine Mercedes-Benz parts for
necessary service and repair work. In addition,
strategically located parts delivery centers provide quick and reliable parts service.
Always specify the vehicle identification number
(VIN) when ordering genuine Mercedes-Benz
Y page 314).
parts (
Operator's Manual
Vehicle equipment
This Operator's Manual describes allmodels
i
and all standard and optional equipment of
your vehicle available at the time of this Operator's Manual going to print. Country-specific
differences are possible.Bear in mind that
your vehicle may not feature all functions
described here. This also applies to safetyrelevant systems and functions. The equipment in your vehicle may therefore differ from
that shown in the descriptions and illustrations.
The original purchase agreement lists all systems installed in your vehicle.
Should you have any questions concerning
equipment and operation, please consult an
authorized Mercedes-Benz Center.
The Operator's Manual and Maintenance Booklet are important documents and should be kept
in the vehicle.
Service and vehicleoperation
Warranty
The Limited Warranty for your vehicle applies in
accordance with the warranty terms and conditions in the Service and Warranty Information
booklet.
Your authorized Mercedes-Benz Center will
replace and repair all factory-installedparts in
accordance with the following warranty terms
and conditions:
R
New Vehicle Limited Warranty
R
Emission System Warranty
R
Emission Performance Warranty
R
California, Connecticut,Maine, Massachusetts, New York, Pennsylvania, Rhode Island
and Vermont Emission Control System Warranty
R
State warranty enforcementlaws (lemon
laws)
Replacement parts and accessories are covered
by the Mercedes-Benz Parts and Accessories
warranties. These are available at any authorized Mercedes-Benz Center.
Should you lose your Service and Warranty
i
Information booklet, have an authorized
Mercedes-Benz Center arrange for areplacement. The new Service and Warranty Information booklet will be posted to you.
Information for customers in California
Under California law you may be entitled to a
replacement of your vehicle or arefund of the
purchase price or lease price, if after areasonable number of repair attempts Mercedes-Benz
USA, LLC and/or its authorized repair or service
facilities fail to fix one or more substantial
defects or malfunctions in the vehicle that are
covered by its express warranty.
During the period of 18 months from original
delivery of the vehicle or the accumulation of
18,000 miles (approximately 29,000 km) on the
odometer of the vehicle, whichever occurs first,
areasonable number of repair attempts is presumed for aretail buyerorlessee if one or more
of the following occurs:
(1) the same substantial defect or malfunction
results in acondition that is likely to cause
Introduction
Z
Page 28

Service and vehicle operation
26
death or serious bodily injury if the vehicle is
driven,that defect or malfunction has been
subjecttorepair two or more times, and you
have directly notified Mercedes-Benz USA,
LLC in writingofthe need for its repair.
(2) the same substantial defect or malfunction
of aless serious naturethan category (1)
has been subjecttorepair four or more
times and you have directly notified
Mercedes-Benz in writingofthe need for its
Introduction
repair.
(3) the vehicle is out of servicebyreason of
repair of the same or differentsubstantial
defectsormalfunctionsfor acumulative
total of more than 30 calendar days.
Please send your written notice to:
Customer Assistance Center
Mercedes-Benz USA,LLC
3Mercedes Drive
Montvale, NJ 07645-0350
Maintenance
Always bring the Maintenance Booklet with you
when takingthe vehicle to an authorized
Mercedes-Benz Center.Your customer service
advisor will enter every serviceintoyour Maintenance Booklet on your behalf.
Roadside Assistance
The Mercedes-Benz Roadside Assistance Program offerstechnical help in the event of a
breakdown.Calls to the toll-free Roadside AssistanceHotline are answered by our agents24
hours aday, 365 days ayear.
1-800-FOR-MERCedes (1-800-367-6372)
(USA)
1-800-387-0100 (Canada)
For additional information,refer to the
Mercedes-Benz Roadside Assistance Program
brochure(USA)orthe "Roadside Assistance"
section in the Service and WarrantyBooklet
(Canada). You will find both in the vehicle document wallet.
Change of address or change of ownership
In the event of achangeofaddress, please send
us the "Notification of AddressChange" in the
Service and WarrantyBooklet or simply call the
Mercedes-Benz Customer Assistance Center
(USA)atthe hotlinenumber
1-800-FOR-MERCedes (1-800-367-6372) or
Customer Service Center (Canada) at
1-800-387-0100.This will assist us in contacting you in atimely manner should the need arise.
If you sell your Mercedes,please leave all literature in the vehicle so that it is available to the
nextowner.
If you have purchased aused car, please send us
the "Notification of Used Car Purchase" in the
Service and WarrantyBooklet or simply call the
Mercedes-Benz Customer Assistance Center
(USA)atthe hotlinenumber
1-800-FOR-MERCedes (1-800-367-6372) or
Customer Service (Canada) at 1-800-387-0100.
Vehicle operation outsidethe USA
and Canada
When you are abroad with your vehicle, observe
the following points:
R
Service facilities or replacementparts may
not be readily available.
R
Lead-free fuel for vehicles with acatalytic
converter may not be available. Leaded fuel
can cause damage to the catalytic converter.
R
The fuel may have aconsiderably lower
octane number. Unsuitable fuel can cause
enginedamage.
Some Mercedes-Benz models are available for
delivery in Europe through our European Delivery Program. For details, consult an authorized
Mercedes-Benz Center or write to one of the
following addresses.
In the USA
Mercedes-Benz USA,LLC
European DeliveryDepartment
One Mercedes Drive
Montvale, NJ 07645-0350
In Canada
Mercedes-Benz Canada, Inc.
European DeliveryDepartment
98 Vanderhoof Avenue
Toronto, Ontario M4G 4C9
Page 29

Operating safety
Important safetynotes
WARNING
G
If you do not have the prescribed service/
maintenancework or any required repairs
carried out, this can result in malfunctions or
system failures. There is arisk of an accident.
Always have the prescribed service/maintenancework as well as any required repairs
carried out at aqualified specialist workshop.
WARNING
G
Flammable material such as leaves, grass or
twigs may ignite if they come into contact with
hot parts of the exhaust system. There is arisk
of fire.
When driving off road or on unpaved roads,
checkthe vehicle's underside regularly. In
particular, remove parts of plants or other
flammable materials which have become
trapped. In the case of damage, contact a
qualified specialist workshop.
WARNING
G
Modifications to electronic components, their
software as well as wiring can impair their
function and/or the function of other networked components. In particular, systems
relevant to safety could also be affected. As a
result, these may no longer function as intended and/or jeopardizethe operatingsafety of
the vehicle. There is an increased risk of an
accidentand injury.
Never tamper with the wiring as well as electronic componentsortheir software. You
should have all work to electrical and electronic equipment carried out at aqualified
specialist workshop.
Operating safety
There is arisk of damage to the vehicle if:
!
R
the vehicle becomes stuck,e.g. on ahigh
curb or an unpaved road
R
you drive too fast over an obstacle, e.g. a
curb, aspeed bump or apothole in the road
R
aheavy objectstrikes the underbody or
parts of the chassis
In situationslike this, the body, the underbody, chassis parts, wheels or tires could be
damaged without the damage being visible.
Components damaged in this way can unexpectedly fail or, in the case of an accident, no
longer withstand the loads they are designed
to.
If the underbody paneling is damaged, combustible materials such as leaves, grass or
twigs can gather between the underbody and
the underbody paneling. If these materials
come in contact with hot parts of the exhaust
system, they can catchfire.
In such situations, have the vehicle checked
and repaired immediately at aqualified specialist workshop. If on continuingyour journey you notice that driving safety is impaired,
pull over and stop the vehicle immediately,
paying attention to road and traffic conditions. In such cases, consult aqualified specialist workshop.
Declarations of conformity
USA: "The wireless devices of this vehicle com-
ply with Part 15 of the FCC Rules. Operation is
subject to the two following two conditions:1)
These devices may not cause harmful interference, and 2) These devices must accept any
interference received, including interference
that may cause undesired operation.Changes
or modifications not expressly approved by the
party responsible for compliancecould void the
user’s authoritytooperate the equipment."
Canada: "The wireless devices of this vehicle
comply with Industry Canada license-exempt
RSS standard(s). Operation is subject to the following two conditions:(1) These devices may
not cause interference, and (2) These devices
must accept any interference, including interference that may cause undesired operation of
the device."
27
Introduction
Z
Page 30

Operating safety
28
Diagnostics connection
The diagnosticsconnectionisonlyintendedfor
theconnectionofdiagnostic equipmentata
qualified specialistworkshop.
WARNING
G
If you connectequipmenttoadiagnostics
connection in thevehicle, it may affectthe
operation of vehicle systems.Asaresult,the
Introduction
operatingsafetyofthe vehicle could be affected. There is ariskofanaccident.
Only connectequipmenttoadiagnosticsconnection in thevehicle, whichisapproved for
your vehicle by Mercedes-Benz.
WARNING
G
Objects in thedriver's footwell can restrictthe
pedaltravelorobstruct adepressed pedal.
The operatingand road safetyofthe vehicle is
jeopardized. There is ariskofanaccident.
Makesurethatall objects in thevehicle are
stowed correctly, and that they cannotenter
thedriver's footwell. Install thefloormats
securely and as specifiedinorder to ensure
sufficientclearancefor thepedals. Do notuse
loose floormatsand do notplacefloormatson
topofone another.
If theengineisswitched offand equipment
!
on thediagnosticsconnectionisused,the
starter battery may discharge.
Connectingequipmenttothe diagnosticsconnection can lead to emissionsmonitoringinformation beingreset,for example. Thismay lead
to thevehicle failingtomeetthe requirements of
thenextemissionstestduringthe main inspection.
Qualified specialist workshop
An authorized Mercedes-BenzCenterisaqualifiedspecialistworkshop.Ithas thenecessary
specialistknowledge,tools and qualificationsto
correctlycarry out theworkrequiredonyour
vehicle. Thisisespecially thecasefor workrelevant to safety.
Observethe notesinthe Maintenance Booklet.
Always havethe followingworkcarriedout at an
authorized Mercedes-BenzCenter:
R
workrelevant to safety
R
serviceand maintenance work
R
repair work
R
alterations, installation workand modifications
R
workonelectronic components
Correct use
If you removeany warningstickers, you or others could fail to recognizecertaindangers.
Leave warningstickersinposition.
Observethe followinginformation when driving
your vehicle:
R
thesafetynotes in this manual
R
technical datafor thevehicle
R
traffic rulesand regulations
R
laws and safetystandardspertainingtomotor
vehicles
Problemswithyourvehicle
If you should experience aproblem withyour
vehicle, particularly onethatyou believe may
affectits safeoperation,weurgeyou to contact
an authorized Mercedes-BenzCenterimmediately to havethe problem diagnosed and rectified. If theproblem is notresolved to your satisfaction,please discussthe problem again with
an authorized Mercedes-BenzCenteror, if necessary, contact us at oneofthe following
addresses.
In theUSA
Customer AssistanceCenter
Mercedes-BenzUSA,LLC
3Mercedes Drive
Montvale, NJ 07645-0350
In Canada
Customer RelationsDepartment
Mercedes-BenzCanada, Inc.
98 VanderhoofAvenue
Toronto,Ontario M4G4C9
Reporting safetydefects
USAonly:
Page 31

Data stored in the vehicle
29
The following text is reproduced as required of
all manufacturers under Title 49, Code of U.S.
Federal Regulations, Part 575 pursuant to the
National Traffic and Motor Vehicle Safety Act of
1966.
If you believe that your vehicle has adefect
which could cause acrash or could cause injury
or death, you should immediately inform the
National Highway Traffic Safety Administration
(NHTSA)inaddition to notifying Mercedes-Benz
USA,LLC.
If NHTSA receives similar complaints,itmay
open an investigation, and if it finds that asafety
defect exists in agroup of vehicles, it may order
arecall and remedy campaign. However, NHTSA
cannot become involved in individual problems
between you, your dealer, or Mercedes-Benz
USA,LLC.
To contact NHTSA,you may call the Vehicle
Safety Hotlinetoll-free at 1-888-327-4236
(TTY: 1-800-424-9153); go to http://
www.safercar.gov;orwrite to: Administrator,
NHTSA,400 SeventhStreet, SW., Washington,
DC 20590.
You can also obtain other information about
motor vehicle safety from
http://www.safercar.gov
Limited Warranty
Follow the instructions in this manual about
!
the proper operation of your vehicle as well as
about possible vehicle damage. Damage to
your vehicle that arises from culpable contraventions against these instructions is not covered either by the Mercedes-Benz Limited
Warranty or by the New or Used-Vehicle Warranty.
QR codes for the rescue card
The QR codes are secured in the fuel filler flap
and on the opposite side on the B-pillar. In the
event of an accident,rescue services can use
the QR code to quickly find the appropriate rescue card for your vehicle. The current rescue
card contains the most important information
about your vehicle in acompact form, e.g. the
routing of the electric cables.
You can find more information under
www.mercedes-benz.de/qr-code.
Data stored in the vehicle
Data storage
Awide range of electronic components in your
vehicle contain data memories.
These data memories temporarily or permanently store technical information about:
R
the vehicle's operating state
R
incidents
R
malfunctions
In general, this technical information documentsthe state of acomponent, amodule, a
system or the surroundings.
These include, for example:
R
operating conditions of system components,
e.g. fluid levels
R
the vehicle's status messages and those of its
individual components, e.g. number of wheel
revolutions/speed, deceleration in movement,lateral acceleration, accelerator pedal
position
R
malfunctionsand defects in important system
components, e.g. lights, brakes
R
vehicle reactionsand operating conditions in
special driving situations, e.g. air bag deployment,intervention of stability control systems
R
ambient conditions, e.g. outside temperature
This data is of an exclusively technical nature
and can be used to:
R
assist in recognizing and rectifying malfunctions and defects
R
analyze vehicle functions, e.g. after an accident
R
optimize vehicle functions
The data cannot be used to trace the vehicle's
movements.
When your vehicle is serviced, technical information can be read from the event data memory
and malfunction data memory.
Services include, for example:
R
repair services
R
service processes
R
warranties
R
quality assurance
The vehicle is read out by employees of the service network (including the manufacturer) using
special diagnostic testers. More detailed information is obtained from it, if required.
Introduction
Z
Page 32

Data stored in the vehicle
30
After amalfunctionhas been rectified, the informationisdeletedfrom the malfunctionmemory
or is continuallyoverwritten.
Whenoperating the vehicle, situations areconceivableinwhich thistechnicaldata, in connectionwithotherinformation(if necessary,under
consultationwithanauthorizedexpert),could
be traced to aperson.
Examples include:
Introduction
R
accident reports
R
damage to the vehicle
R
witness statements
Further additional functions thathavebeencontractuallyagreeduponwiththe customerallow
certain vehicledatatobeconveyedbythe vehicle as well.The additional functions include, for
example, vehiclelocation in caseofanemergency.
COMAND/mbrace
If the vehicleisequippedwithCOMAND or
mbrace,additional data aboutthe vehicle's
operation, the useofthe vehicleincertain situations, and the location of the vehiclemay be
compiled throughCOMAND or the mbrace system.
For additional informationpleaserefer to the
COMAND UserManualorthe DigitalOperator's
Manualand/or the mbrace Terms and Conditions.
Eventdata recorders
Thisvehicleisequippedwithanevent data
recorder(EDR). Thisvehicleisequippedwithan
event data recorder(EDR). The main purpose of
an EDR is to record, in certain crash or near
crash-like situations, such as an airbag deployment or hitting aroadobstacle,datathatwill
assist in understanding how avehicle's systems
performed.The EDR is designedtorecord data
relatedtovehicledynamics and safety systems
for ashort periodoftime,typically30seconds
or less.
The EDR in thisvehicleisdesignedtorecord
such data as:
R
How various systemsinyourvehiclewere
operating
R
Whether or not the driver and passenger
safety belts were buckled/fastened
R
How far (ifatall)the driver wasdepressing the
accelerator and/or brake pedaland
R
How fastthe vehiclewas traveling.
These data can helpprovideabetter understanding of the circumstances in which crashes
and injuriesoccur. NOTE: EDR data arerecorded
by your vehicleonlyifanon-trivialcrash situationoccurs; no data arerecordedbythe EDR
under normal driving conditions and no personal
data (e.g. name, gender, ageand crash location)
es, such as
arerecorded. However, otherp
arti
lawenforcement could combine the EDR data
with the typeofpersonally identifying data routinely acquired during acrash investigation.
Accesstothe vehicleand/or the EDR is needed
to readdatathatisrecordedbyanEDR, and
specialequipment is required.Inadditiontothe
vehiclemanufacturer,otherpartiesthathave
the specialequipment,suchaslaw enforcement, can readthe informationbyaccessing the
vehicleorthe EDR.
EDR data maybeusedinciviland criminalmatters as atool in accident reconstruction, accident claims and vehiclesafety.Since the Crash
Data RetrievalCDR tool thatisusedtoextract
data from the EDR is commercially available,
Mercedes-Benz USA, LLC ("MBUSA")expressly
disclaims any and allliability arising from the
extractionofthisinformationbyunauthorized
Mercedes-Benz personnel.
MBUSA will not share EDR data with others
withoutthe consent of the vehicleowners or, if
the vehicleisleased, withoutthe consent of the
lessee. Exceptions to thisrepresentation
includeresponses to subpoenas by lawenforcement; by federal, state or local government; in
connectionwithorarisingout of litigation involving MBUSA or its subsidiariesand affilia
tes; o
as required by law.
Warning:The EDR is acomponent of the
Restraint System Module. Tampering with,altering,modifying or removing the EDR component
mayresultinamalfunctionofthe Restraint System Moduleand othersystems.
State laws or regulations regarding EDRs that
conflict with federalregulation arepre-empted.
Thismeans thatinthe event of such conflict, the
federalregulation governs.AsofFebruary2013,
13 states have enacted laws relating to EDRs.
r,
Page 33

Information on copyright
General information
Information on license for free and open-source
software used in your vehicleand itselectronic
componentsisavailable on thefollowingwebsite:
http://www.mercedes-benz.com/opensource
Registeredtrademarks
R
Bluetooth®is aregisteredtrademark of BluetoothSIG Inc.
R
DTS™ is aregisteredtrademark of DTS, Inc.
R
Dolby®and MLP™are registeredtrademarks
of DOLBYLaboratories.
R
BabySmart™, ESP®and PRE-SAFE®are registeredtrademarksofDaimler AG.
R
HomeLink®is aregisteredtrademark of Johnson Controls.
R
iPod®and iTunes®are registeredtrademarks
of Apple Inc.
R
Logic7®is aregisteredtrademark of Harman
International Industries.
R
Microsoft®and Windows media®are registered trademarksofMicrosoft Corporation.
R
SIRIUS®is aregisteredtrademark of Sirius
XM Radio Inc.
R
HD Radio™ is aregisteredtrademark of iBiquityDigital Corporation.
R
Gracenote®is aregisteredtrademark of
Gracenote, Inc.
R
ZAGATSurvey®and relatedbrands are registered trademarksofZagat Survey, LLC.
Information on copyright
31
Introduction
Z
Page 34

32
Cockpit
Cockpit
At aglance
Function Page
:
Steering wheel paddle shifters
;
Combination switch 101
=
Instrumentcluster 33
?
Horn
A
DIRECT SELECT lever 130
B
Parking Assist PARKTRONIC
warning display
C
Overhead control panel 39
136
162
Function Page
D
Climatecontrol systems 110
E
Ignition lock 122
F
Adjusts thesteering wheel 95
G
Cruisecontrol lever 149
H
Electric parking brake 142
I
Lightswitch 100
J
Diagnostics connection 28
K
Opensthe hood 257
Page 35

Instrumentcluster
Instrument cluster
33
At aglance
Function Page
:
Speedometer withsegments 176
Warning and indicator lamps:
L Low-beam headlamps
T Parking lamps
K High-beam headlamps
÷ ESP
Electric parking brake
applied(red)
F (USAonly)
! (Canada only)
! Electric parking brake
(yellow)
· Distancewarning
å ESP®OFF
! ABSmalfunctioning
Brakes 219
$ (USAonly)
J (Canada only)
®
101
101
101
221
224
224
227
221
220
Function Page
;
#! Turn signals
=
Multifunction display 179
?
Tachometer 176
6 Restraintsystem
ü Seat belt notfastened
M SPORT handlingmode
(Mercedes-AMGvehicles)
R Rear fog lamp
; CheckEngine
h Tirepressuremonitor
A
Coolanttemperature gauge 177
Warning and indicator lamps:
? Coolanttoo hot/cold
B
Fuellevel indicator
Warning and indicator lamps:
æ Reserve fuel
101
41
218
222
101
224
228
225
224
Page 36

Multifunctionsteering wheel
34
Multifunction steering wheel
At aglance
Function Page
:
Multifunction display 179
;
Multimediasystem display
=
~ Rejects or ends acall
6 Makes or accepts acall
Further telephone functions 183
WXAdjusts volume
8 Mute
? Switchesonvoice-
operated controlfor navigationorthe Voice Control System
i In vehicleswith multimediasystem Audio 20
youcan find further information:
R
on the multimediasystem in the Digital
Operator's Manual
R
on voice-controlled navigation in the manufacturer's operating instructions
Function Page
?
ò Opens the menu list
9:Selects amenu
a Confirmsthe selection
% Back
Operatesthe on-board com-
puter
? Switches off voice-
operatedcontrol for navigation or the Voice Control System
i In vehicles with multimediasystem
COMAND youcan find further information:
R
on the multimediasystem in the Digital
Operator's Manual
R
on the DVD changer or single DVD drive in
the Digital Operator's Manual
R
on the Voice Control System in the separate operating instructions
177
Page 37

Center console
Center console, upper section
Center console
35
At aglance
Function Page
:
Multimedia system (see the
separate operatinginstructions)
;
c Seat heating
Mercedes-AMGvehicles:
AMGadaptive sportsuspension system (leftside)
Mercedes-AMGvehicles:
adjuststhe exhaust flap of
theAMG performance
exhaust system (right side)
=
c Parking Assist
PARKTRONIC
94
159
127
163
Function Page
?
è ECO start/stopfunction
A
£ Hazard warning lamps
B
PASSENGER AIRBAGindicatorlamps
C
DYNAMIC SELECT button 128
å Mercedes-AMGvehi-
cles: ESP
®
125
102
41
66
Page 38

Center console
36
Center console, lower section
At aglance
Function Page
:
Ashtray 244
Cigarettelighter 244
Socket
Stowage compartment 237
;
Cup holder 242
=
Cup holder 242
Function Page
?
Stowage compartmentwith
Media Interface
A
Multimedia system controller (see theseparate operating instructions)
237
Page 39

Mercedes-AMG vehicles
i
Function Page
:
Ashtray 244
Cigarette lighter 244
Socket
Stowage compartment 237
;
Selector lever 132
=
Manual gearshifting (permanent setting)
136
Center console
Function Page
?
DYNAMIC SELECT controller 129
A
Cup holder 242
B
Stowage compartmentwith
Media Interface
C
Multimedia system controller (see the separate operating instructions)
37
At aglance
237
Page 40

Door control panel
38
Door controlpanel
At aglance
Function Page
:
Opens thedoor 76
;
%&Unlocks/locks
the vehicle
=
r45= Saves
the seat and exterior mirror
settings
?
Adjusts the seats electrically 92
A
7 Z ö \
Adjusts and folds the exterior
mirrors in/out electrically
76
98
96
Function Page
B
W Opens/closes the side
windows
C
n Activates/deactivates
the override feature for the
side windows in the rear
compartment
D
q Opens the trunk
82
60
80
Page 41

Overheadcontrol panel
Overheadcontrol panel
39
At aglance
Function Page
:
u Switches the rear compartmentinterior lighting
on/off
;
p Switches the righthand reading lamp on/off
=
| Switches the frontinterior lighting/automatic interior lighting control off
?
ï MB Infocall button
(mbrace system)
A
Rear-view mirror 97
B
Setsthe compass 255
C
Buttons for the garage door
opener
103
103
103
247
252
Function Page
D
F Breakdown assistance
call button (mbrace system)
E
G SOS button (mbrace
system)
F
Eyeglasses compartment 238
G
3 Opens/closes the panorama roof with power tilt/
sliding panel with roller sunblinds
H
c Switches the frontinterior lighting on
I
p Switches the left-hand
reading lamp on/off
247
246
86
103
103
Page 42

Occupant safety
40
Panic alarm
Safety
X
To activate: press and hold the
! button : for approx. one second.
Avisual and audible alarm is triggered if the
alarm system is armed.
X
To deactivate: press ! button : again.
or
X
Insert the SmartKey into the ignition lock.
or, in vehicles with KEYLESS-GO start-function
or KEYLESS‑GO
X
Press the Start/Stop button.
The SmartKey must be in the vehicle.
Occupant safety
Introduction to the restraint system
The restraint system can reduce the risk of vehicle occupants coming into contact with parts of
the vehicle's interior in the event of an accident.
The restraint system can also reduce the forces
to which vehicle occupants are subjected during
an accident.
The restraint system comprises:
R
Seat belt system
R
Air bags
R
Child restraint system
R
Child seat securing systems
The components of the restraint system work in
conjunction with each other. They can only
deploy theirprotective function if, at all times, all
vehicle occupants:
R
have fastened their seat belts correctly
Y page 43)
(
R
have the seat and head restraint adjusted
properly (
Y page 90)
As the driver, you also have to make sure that
the steering wheel is adjusted correctly.
Observe the information relating to the correct
driver's seat position (
Y page 90).
You also have to make sure that an air bag can
inflate properly if deployed(
Y page 45).
An air bag supplements acorrectly worn seat
belt. As an additional safety device, the air bag
increases the level of protection for vehicle
occupants in the event of an accident. For example, if, in the event of an accident, the protection
offered by the seat belt is sufficient, the air bags
are not deployed. When an accident occurs, only
the air bags that increase protection in that particular accident situation are deployed. However, seat belts and air bags generally do not
protect against objectspenetrating the vehicle
from the outside.
Information on restraint system operation can
be found under "Triggering of the Emergency
Tensioning Devices and air bags" (
Y page 52).
See "Children in the vehicle" for information on
children traveling with you in the vehicle as well
as on child restraint systems (
Y page 54).
Important safety notes
WARNING
G
Modifications to the restraint system may
cause it to no longer work as intended. The
restraint system may then not perform its
intended protectivefunction and may fail in an
accident ortrigger unexpectedly, for example.
This poses an increased risk of injury or even
fatal injury.
Never modify parts of the restraint system.
Never tamper with the wiring, the electronic
components or their software.
If it is necessary to modify components of the
restraint system to accommodate aperson with
disabilities, contact an authorized MercedesBenz Center for details. USA only: for further
information contact our Customer Assistance
Center at 1-800-FOR-MERCedes
(1‑800‑367‑6372).
Mercedes-Benz recommends that you only use
driving aids which have been approved specifically for your vehicle by Mercedes-Benz.
Page 43

Occupantsafety
41
Restraint system warninglamp
The functions of the restraint system are
checkedafterthe ignition is switched on and at
regular intervalswhile the engine is running.
Therefore, malfunctions can be detected in
goodtime.
The 6 restraint system warning lamp on the
instrument cluster lights up when the ignition is
switched on. It goesout no later than afew seconds afterthe vehicleisstarted. The components of the restraint system are in operational
readiness.
Amalfunction hasoccurred if the 6 restraint
system warning lamp:
R
doesnot light up afterthe ignition is switched
on
R
doesnot go outafterafew seconds with the
engine running
R
lights up againwhile the engine is running
WARNING
G
If the restraint system is malfunctioning,
restraint system components may be triggered unintentionally or may not deployas
intended during an accident. Thiscan affect
for examplethe Emergency Tensioning
Device or the airbag.Thisposes an increased
riskofinjury or evenfatalinjury.
Have the restraint system checkedand
repaired in aqualified specialist workshopas
soonaspossible.
PASSENGER AIRBAG indicator lamp
The indicator lamps display the statusofthe
front-passenger front airbag.
R
PASSENGER AIR BAG ON lights up for 60 seconds,subsequently both indicator lamps are
off (PASSENGER AIR BAG ON and OFF):the
front-passenger front airbag is able to deploy
in the event of an accident.
R
PASSENGER AIR BAG OFF lights up:the frontpassenger front airbag is deactivated. It will
then not be deployedinthe event of an accident.
If the PASSENGER AIR BAG ON indicator lamp is
off, only the PASSENGER AIR BAG OFF indicator
lamp shows the statusofthe front-passenger
front airbag.The PASSENGER AIR BAG OFF
indicator lamp may be litcontinuously or be off.
Depending on the person in the front-passenger
seat, the front-passenger front airbag must
either be deactivated or enabled; see the following points. Youmustmake sure of this both
before and during ajourney.
R
Childreninachild restraintsystem:
whetherthe front-passenger front airbag is
enabled or deactivated depends on the installedchild restraint system, and the ageand
size of the child.Therefore, be sure to observe
the notes on the "Occupant Classification
System (OCS)" (
dreninthe vehicle" (
l also find instructions on rearward and
wil
Y page 47)and on "Chil-
Y page 54). There you
forward-facing child restraint systems on the
front-passenger seat.
R
Allotherpersons: depending on the classification of the person in the front-passenger
seat, the front-passenger front airbag is enabled or deactivated (
Y page 47). Be sure to
observe the notes on "Seat
Y page 41)and "Airbags"
belts“ (
Y page 45). There youcan also find infor-
(
mation on the correct seatposition.
Safety
PASSENGER AIR BAG ON indicator lamp : and
PASSENGER AIR BAG OFF indicator lamp ; are
part of the Occupant Classification System
(OCS).
Seat belts
Introduction
Seatbelts are the most effective means of
restricting the movement of vehicleoccupants
in the event of an accident or the vehiclerolling
over. Thisreducesthe riskofvehicleoccupants
coming into contact with parts of the vehicle
interiororbeing ejectedfrom the vehicle. Furthermore,the seatbelthelps to keep the vehicle
Z
Page 44

Occupant safety
42
occupant in the best position in relation to the
air bag.
The seat belt system comprises:
R
Seat belts
R
Emergency TensioningDevices for the front
seat belts and the outer seat belts in the rear
R
Seat belt force limiters for the front seat belts
and the outer seat belts in the rear
If the seat belt is pulled out of the belt outlet
quickly or with ajerkymovement,the belt
retractor locks. The belt strap cannot be extrac-
Safety
ted any further.
The Emergency TensioningDevice tightensthe
seat belt in an accident,pulling the belt close
against the body. However it does not pull the
vehicle occupant back in the direction of the
backrest.
The Emergency TensioningDevice does not correct an incorrect seat position or the routing of
an incorrectly fastened seat belt.
When triggered, aseat belt force limiter helps to
reduce the force exerted by the seat belt on the
vehicle occupant.
The seatbelt force limiters for the front seats are
synchronized with the front air bags, which
absorb part of the deceleration force. This can
reduce the force exerted on the vehicle occupants during an accident.
If the front-passenger seat is not occupied,
!
do not engage the seat belt tongue in the
buckle on the front-passenger seat. Otherwise, the Emergency TensioningDevice and
side impact air bag could be triggered in the
event of an accident and would need to be
replaced.
Important safety notes
The use of seat belts and child restraint systems
is required by law in:
R
all 50 states
R
the U.S. territories
R
the District of Columbia
R
all Canadian provinces
Even where this is not required by law, all vehicle
occupantsshould correctly fasten their seat
belts before starting the journey.
WARNING
G
If the seat belt is not worn correctly, it cannot
perform its intended protective function. An
incorrectly fastened seat belt can also cause
injuries, for example, in the event of an accident or when braking or changing direction
abruptly. This poses an increased risk of injury
or even fatal injury.
Always ensure that all vehicle occupantshave
their seat belts fastened correctly and are sitting properly.
The components of the restraint system work in
conjunction with each other. They can only
deploy theirprotective function if, at all times, all
vehicle occupants:
R
have fastened their seat belts correctly
Y page 43)
(
R
have the seat and head restraint adjusted
properly (
G
Y page 90)
WARNING
The seat belt does not offer the intended level
of protection if you have not moved the backrest to an almost vertical position. When braking or in the event of an accident,you could
slide underneath the seat belt and sustain
abdomen or neck injuries, for example. This
poses an increased risk of injury or even fatal
injury.
Adjust the seat properly before beginning
your journey. Always ensure that the backrest
is in an almost vertical position and that the
shoulder section of your seat belt is routed
across the center of your shoulder.
WARNING
G
Persons less than 5ft(1.50 m) tall cannot
wear the seat belt correctly without an additional and suitable restraint system. If the
seat belt is not worn correctly, it cannot perform its intended protective function. An
incorrectly fastened seat belt can also cause
injuries, for example, in the event of an accident or when braking or changing direction
abruptly. This poses an increased risk of injury
or even fatal injury.
For this reason, alwayssecure persons under
5ft(1.50 m) tall in suitableadditional restraint
systems.
Page 45

Occupant safety
43
If achild younger than twelve years old and
under 5ft(1.50m)inheight is travelinginthe
vehicle:
R
always securethe child in achild restraint
system suitable for this Mercedes-Benzvehicle. The child restraint system must be appropriatetothe age, weight and size of the child
R
always observe the instructions and safety
notes on "Children in the vehicle"
Y page 54) in addition to the child restraint
(
system manufacturer'sinstallation and operatinginstructions
R
always observe the instructions and safety
notes on the "Occupant classification system
Y page 47)
(OCS)" (
WARNING
G
The seat belts may not perform their intended
protective function if:
R
theyare damaged, modified, extremely
dirty, bleachedordyed
R
the seat belt buckle is damaged or
extremely dirty
R
the Emergency TensioningDevices, belt
anchoragesorinertia reels have been modified.
Seat belts may be damaged in an accident,
althoughthe damage may not be visible, e.g.
due to splinters of glass. Modifiedordamaged
seat belts may tear or fail, e.g. in an accident.
ModifiedEmergency TensioningDevices
could accidentally trigger or fail to deploy
when necessary. This poses an increased risk
of injury or even fatal injury.
Never modifythe seat belts,Emergency Tensioning Devices, belt anchoragesand inertia
reels. Make sure that the seat belts are
undamaged, not worn out and clean.Following an accident,have the seat belts checked
immediately at aqualified specialist workshop.
Only use seat belts that have been approved for
your vehicle by Mercedes-Benz.
Sports seat or AMG Performance seat: this
seat is designed for the standard three-point
seat belt. If you install another multi-point seat
belt, e.g. sport or racingseat belts,the restraint
system cannot provide the best level of protection.
WARNING
G
If you feed seat belts through the opening in
the seat backrest,the seat backrest may be
damaged or may even break in the eventofan
accident.This poses an increased risk of
injury or even fatal injury.
Only use the standard three-point seat belt.
Never modifythe seat belt system.
Proper use of theseat belts
Observe the safetynotes on the seat belt
Y page 42).
(
All vehicle occupantsmust be wearingthe seat
belt correctly beforebeginningthe journey. Also
make sure that all vehicle occupantsare always
wearing the seat belt correctly while the vehicle
is in motion.
When fasteningthe seat belt, always make sure
that:
R
the seat belt buckle tongue is inserted only
intothe belt buckle belonging to that seat
R
the seat belt is pulled tightacross your body
Avoid wearing bulky clothing,e.g. awinter
coat.
R
the seat belt is not twisted
Only thencan the forces which occur be dis-
tributed over the area of the belt.
R
the shoulder section of the belt is routed
across the center of your shoulder
The shoulder section of the seat belt should
not touchyour neckorberouted under your
arm or behindyour back.Where possible,
adjust the seat belt to the appropriate height.
R
the lap belt is taut and passes across your lap
as low down as possible
The lap belt must always be routed across
your hip joints and not across your abdomen.
This applies particularly to pregnant women.
If necessary, push the lap belt down to your
hip jointand pull it tightusing the shoulder
section of the belt.
R
the seat belt is not routed across sharp, pointed or fragile objects
If you have such itemslocated on or in your
clothing,e.g. pens,keys or eyeglasses,store
these in asuitable place.
R
only one personisusing aseat belt
Z
Safety
Page 46

Occupant safety
44
Infants and childrenmust never travel sitting
on the lap of avehicle occupant. In the event
of an accident, they could be crushed
between the vehicle occupant and seat belt.
R
objects are never secured with aseat belt if
the seat belt is also being used by one of the
vehicle's occupants
Also ensure that there are never objects
between aperson and the seat, e.g. cushions.
Seat belts are only intended to secure and
restrain vehicle occupants. Alwaysobserve the
"Loading guidelines" for securing objects, lug-
Safety
gage or loads(
Y page 237).
Fastening and adjusting the seat belts
Observe the safety notes on the seat belt
Y page 42) and the notes on correct use of seat
(
Y page 43).
belts (
Basic illustration
X
Adjust the seat (Y page 90).
The seat backrest must be in an almost
upright position.
X
Pullthe seat belt smoothly from the belt outlet.
X
Engage seat belt tongue ; in belt buckle :.
X
If necessary,pulluponthe shoulder section
of the seat belt to tighten the belt across your
body.
The shoulder section of the seat belt must
always be routed across the center of the shoulder. Adjust the belt outlet if necessary.
X
To raise: slidethe belt outlet up.
The belt outlet willengage in variouspositions.
X
To lower: hold belt outlet release = and slide
the belt outlet down.
X
Let go of belt outlet release = in the desired
positionand make sure that the belt outlet
engages.
All seat belts except the driver's seat belt are
equipped with aspecialseat belt retractor to
securelyfasten child restraint systems in the
vehicle.Further information can be found under
"Specialseat belt retractor" (
Y page 55).
Releasing seat belts
Make surethat the seat belt is fullyrolledup.
!
Otherwise,the seat belt or belt tongue willbe
trapped in the door or in the seat mechanism.
This could damage the door, the door trim
panel and the seat belt. Damaged seat belts
can no longer fulfill their protective function
and must be replaced. Visit aqualifiedspecialist workshop.
X
Press the release button in the belt buckle,
hold the belt tongue firmly and guide the belt
back.
Belt warning for the driver and front
passenger
The 7 seat belt warning lamp in the instrument cluster is areminder that all vehicle occupants must weartheir seat belts. It may light up
continuously or flash. In addition, there may be
awarning tone.
Regardless of whether the driver's seat belt has
already been fastened, the 7 seat belt warning lamp lights up for six seconds each time the
engine is started. If the front doors are closed
and the driver's or front-passenger seat belt has
not been fastened, the 7 seat belt warning
lamp lights up again after the six seconds. As
soon as the driver's and front-passenger seat
belts are fastened or afront door is opened
again, the 7 seat belt warning lamp goes out.
If the driver's seat belt is not fastened after the
engine is started, an additional warning tone will
sound. The warning tone switches off after six
Page 47

Occupant safety
45
seconds or once the driver's seat belt is fastened.
If the vehicle's speed exceeds 15 mph
(25 km/h) once and the driver's and frontpassenger seat belts are not fastened, awarning
tone sounds. Awarning tone also sounds with
increasing intensityfor 60 seconds or until the
driver or front passenger have fastened their
seat belts.
If the driver or front passenger unfasten their
seat belts during the journey, the seat belt warning is activated again.
Air bags
Introduction
The installation point of an air bag can be recognized by the AIRBAG marking.
An air bag complements the correctly fastened
seat belt. It is no substitute for the seat belt. The
air bag provides additional protection in applicable accident situations.
Not all air bags are deployed in an accident. The
different air bag systems function independently from one another (
Y page 52).
However, no system available today can completely eliminate injuries and fatalities.
It is also not possible to rule out arisk of injury
caused by an air bag due to the high speed at
which the air bag must be deployed.
Important safety notes
WARNING
G
If you do not sit in the correct seat position,
the air bag cannot protect as intended and
could even cause additional injury when
deployed. This poses an increased risk of
injury or even fatal injury.
To avoid hazardous situations, always make
sure that all of the vehicle's occupants:
R
have fastened their seat belts correctly,
including pregnant women
R
are sitting correctly and maintain the greatest possible distance to the air bags
R
follow the following instructions
Always make sure that there are no objects
between the air bag and the vehicle's occupants.
R
Adjust the seats properly before beginning
your journey. Always make sure that the seat
is in an almost upright position. The center of
the head restraint must support the head at
about eye level.
R
Move the driver's and front-passenger seats
as far back as possible.The driver's seat position must allow the vehicle to be driven safely.
R
Only hold the steering wheel on the outside.
This allowsthe air bag to be fully deployed.
R
Always lean against the backrest while driving. Do not lean forward or lean against the
door or side window. You may otherwise be in
the deployment area of the air bags.
R
Always keep your feet in the footwell in front
of the seat. Do not put your feet on the dashboard, for example. Your feet may otherwise
be in the deployment area of the air bag.
R
For this reason, always secure persons less
than 5ft(1.50 m) tall in suitable restraint systems. Up to this height, the seat belt cannot
be worn correctly.
If achild is traveling in your vehicle,also
observe the following notes:
R
Always secure children under twelve years of
age and less than 5ft(1.50 m) tallinsuitable
child restraint systems.
R
Childrestraint systems shouldbeinstalledon
the rearseats.
R
Onlysecureachild in arearward-facing child
restraint systemonthe front-passengerseat
when the front-passengerfront airbag is
deactivated.Ifthe PASSENGER AIR BAG OFF
indicator lamp is permanentlylit,the frontpassengerfront airbag is deactivated
Y page 41).
(
R
Alwaysobserve the instructions and safety
notesonthe "Occupant Classification Syste
Y page 47) and on "Children in the
(OCS)"(
vehicle" (
Y page 54)inadditiontothe child
restraint systemmanufacturer's installation
and operating instructions.
Safety
m
Z
Page 48

Occupant safety
46
Objects in the vehicle interior may prevent
an air bag from functioning correctly. Before
starting your journey and to avoid risks resulting
from the speed of the air bag as it deploys, make
sure that:
R
there are no people, animals or objects
between the vehicle occupantsand an air bag
R
there are no objectsbetween the seat, door
and B-pillar
R
there are no hard objects, e.g. coat hangers,
hanging on the grab handles or coat hooks
Safety
R
no accessories, such as cup holders, are
attached to the vehicle within the deployment
area of an air bag, e.g. to doors, side windows,
rear side trim or side walls
R
no heavy, sharp-edged or fragileobjectsare in
the pocketsofyour clothing. Store such
objectsinasuitable place
WARNING
G
If you modify the air bag cover or affix objects
such as stickers to it, the air bag can no longer
function correctly. There is an increased risk
of injury.
Never modify an air bag cover or affix objects
to it.
WARNING
G
Sensors to control the air bags are located in
the doors. Modificationsorwork not performed correctly to the doors or door paneling, as well as damaged doors, can lead to the
function ofthe sensorsbeing impaired. The air
bags might therefore not function properly
anymore. Consequently, the air bags cannot
protectvehicle occupantsasthey are
designed to do. There is an increased risk of
injury.
Never modify the doors or parts of the doors.
Always have work on the doors or door paneling carried out at aqualified specialist workshop.
the front-passenger side may be triggered
and have to be replaced.
Driver's air bag : deploys in frontofthe steering wheel. Front-passenger frontair bag ;
deploys in frontofand above the glove box.
When deployed, the frontair bags offer additional head and thorax protection for the occupants in the frontseats.
The PASSENGER AIR BAG OFF indicatorlamp
informsyou about the status of the frontpassenger frontair bag (
Y page 41).
The front-passenger frontair bag will only
deploy if:
R
the system, based on the OCS weight sensor
readings, detectsthat the front-passenger
seat is occupied (
Y page 47). The
PASSENGER AIR BAG OFF indicatorlamp is
Y page 48)
not lit (
R
the restraint system control unit predictsa
high accident severity
Knee bags
Front air bags
Do not place heavy objectsonthe front-
!
passenger seat. This could cause the system
to identifythe seat as being occupied. In the
event of an accident,the restraint systems on
Driver's knee bag : deploys under the steering
column and front-passenger knee bag ; under
the glove box. The driver's and front-passenger
knee bags are triggered together with the front
air bags.
Page 49

Occupant safety
47
The driver's and front-passenger knee bags
offer additional thigh, knee and lower leg protection for the occupantsinthe front seats.
Side impact air bags
WARNING
G
Unsuitable seat covers can obstruct or prevent deployment of the air bags integrated
into the seats. Consequently, the air bags
cannot protectvehicle occupantsasthey are
designed to do. In addition, the operation of
the occupant classification system (OCS)
could be adversely affected. This poses an
increased risk of injury or even fatal injury.
You should only use seat covers that have
been approved for the respective seat by
Mercedes-Benz.
Frontside impact air bags : and rear side
impact air bags ; deploy next to the outer bolster of the seat backrest.
When deployed, the side impact air bag offers
additional thorax protection. It also offers additional pelvis protection for occupantsinthe
front seats. However, it does not protectthe:
R
Head
R
Neck
R
Arms
If the restraint system control unit detectsaside
impact, the side impact air bag is deployed on
the side on which the impact occurs.
The side impact air bag on the front-passenger
side deploys under the following conditions:
R
the OCS system detectsthat the frontpassenger seat is occupied or
R
the seat belt buckle tongue is engaged in the
belt buckle of the front-passenger seat
If the belt tongue is engaged in the belt buckle,
the side impact air bag on the front-passenger
side deploys if an appropriate accident situation
occurs. In this case, deployment is independent
of whether the front-passenger seat is occupied
or not.
Window curtain air bags
Window curtain air bags : are integrated into
the side of the roof frame and deployed in the
area from the A-pillar to the C-pillar.
When deployed, the window curtain air bag
enhances the level of protection for the head.
However, it does not protectthe chest or arms.
If the restraint system control unit detectsaside
impact, the window curtain air bag is deployed
on the side on which the impact occurs.
If the system determines that they can offer
additional protection to that provided by the
seat belt, awindow curtain air bag may be
deployed in other accident situations
Y page 52).
(
Occupant Classification System
(OCS)
Introduction
The Occupant Classification System (OCS) categorizes the person in the front-passenger seat.
Dependingonthat result, the front-passenger
front air bag and front-passenger knee bag are
either enabled or deactivated.
The system does not deactivate:
R
the side impact air bag
R
the window curtain air bag
R
the Emergency TensioningDevices
Safety
Z
Page 50

Occupantsafety
48
Requirements
To be classifiedcorrectly,the front passenger
mustsit:
R
with the seatbeltfastened correctly
R
in an almost upright position with theirback
against the seatbackrest
R
with theirfeetresting on the floor, if possible
If the front passenger doesnot observe these
conditions,OCS may produce afalse classification, e.g. because the front passenger:
Safety
R
transfers theirweightbysupporting themselves on avehiclearmrest
R
sits in such away that theirweightisraised
from the seatcushion
If it is absolutely necessary to install achild
restraint system on the front-passenger seat, be
sure to observe the correct positioning of the
child restraint system. Neverplace objects
under or behind the child restraint system, e.g. a
cushion. The entirebaseofthe child restraint
system mustalwaysrestonthe seatcushionof
the front-passenger seat. The backrest of the
forward-facing child restraint system mustlie as
flataspossible against the backrest of the frontpassenger seat.
The child restraint system mustnot touch the
rooforbesubjectedtoaloadbythe head
restraint. Adjust the angle of the seatbackrest
and the headrestraint position accordingly.
Only then can OCSbeguaranteed to function
correctly.Alwaysobserve the child restraint sys-
and o
tem manufacturer'sinstallation
perating
instructions.
OperationofOccupant Classification
System (OCS)
:
PASSENGER AIR BAG ON indicator lamp
;
PASSENGER AIR BAG OFF indicator lamp
The indicator lamps inform youwhetherthe
front-passenger front airbag is deactivated or
enabled.
X
Press the Start/Stopbutton once or twice, or
turn the SmartKey to position 1 or 2 in the
ignition lock.
The system carriesout self-diagnostics.
The PASSENGER AIR BAG OFF and PASSENGER
AIR BAG ON indicator lamps mustlight up simultaneously for approximately six seconds.
The indicator lamps display the statusofthe
front-passenger front airbag.
R
PASSENGER AIR BAG ON lights up for 60 seconds,subsequently both indicator lamps are
off (PASSENGER AIR BAG ON and OFF):the
front-passenger front airbag is able to deploy
in the event of an accident.
R
PASSENGER AIR BAG OFF lights up:the frontpassenger front airbag is deactivated. It will
then not be deployedinthe event of an accident.
If the PASSENGER AIR BAG ON indicator lamp is
off, only the PASSENGER AIR BAG OFF indicator
lamp shows the statusofthe front-passenger
front airbag.The PASSENGER AIR BAG OFF
indicator lamp may be litcontinuously or be off.
If the statusofthe front-passenger front airbag
changes whilethe vehicleisinmotion, an airbag
display message appears in the instrument clus-
Y page 200). Whenthe front-passenger
ter (
seatisoccupied, always payattention to the
tor l
PASSENGER AIR BAG OFF indica
amp. Be
aware of the statusofthe front-passenger front
airbag both before and during the journey.
WARNING
G
If the PASSENGER AIR BAG OFF indicator
lamp is lit, the front-passenger front airbag is
disabled. It will not be deployedinthe event of
an accident and cannotperform its intended
protectivefunction. Aperson in the frontpassenger seatcould then, for example, come
into contact with the vehicle's interior, especiallyifthe person is sitting too close to the
dashboard. Thisposes an increased riskof
injury or evenfatalinjury.
Whenthe front-passenger seatisoccupied,
always ensure that:
R
the classification of the person in the frontpassenger seatiscorrect and the front-
Page 51

Occupant safety
49
passenger frontair bag is enabled or disabled in accordance with the person in the
front-passenger seat
R
the front-passenger seat has been moved
back as far back as possible.
R
the person is seated correctly.
Make sure, both before and during the journey, that the status of the front-passenger
frontair bag is correct.
WARNING
G
If you secure achild in arearward-facing child
restraint system on the front-passenger seat
and the PASSENGER AIR BAGOFF indicator
lamp is off, the front-passenger frontair bag
can deploy in the event of an accident. The
child could be struck by the air bag. This poses
an increased risk of injury or even fatal injury.
Make sure that the front-passenger frontair
bag has been deactivated. The PASSENGER
AIR BAGOFF indicator lamp must be lit.
NEVER use arearward-facing child restraint
on aseat protected by an ACTIVE FRONT AIRBAGinfrontofit; DEATH or SERIOUS INJURY
to the child can occur.
If the PASSENGER AIR BAGOFF indicator lamp
stays off, do not install arearward-facing child
restraint system on the front-passenger seat.
You can find more information on OCS under
"Problems with the Occupant Classification System" (
Y page 51).
WARNING
G
If you secure achild in aforward-facingchild
restraint system on the front-passenger seat
and you position the front-passenger seat too
close to the dashboard, in the event of an
accident, the child could:
R
come intocontact with the vehicle's interior if the PASSENGER AIR BAGOFF indicator lamp is lit, for example
R
be struck by the air bag if the PASSENGER
AIR BAGOFF indicator lamp is off
This poses an increased risk of injury or even
fatal injury.
Always move the front-passenger seat as far
back as possible and fully retract the seat
cushion length. Always make sure that the
shoulder belt strap is correctly routed from
the vehicle belt sash guide to the shoulder
belt guide on the child restraint system. The
shoulder belt strap must be routed forwards
and downwards from the vehicle belt sash
guide. If necessary, adjust the vehicle belt
sash guide and the front-passenger seat
accordingly. Always observe the child
restraint system manufacturer's installation
instructions.
If OCS determines that:
R
The front-passenger seat is unoccupied, the
PASSENGER AIR BAGOFF indicator lamp
lights up after the system self-test and
remains lit. This indicates that the frontpassenger frontair bag is deactivated.
R
The front-passenger seat is occupied by a
child of up to twelve months old, in astandard
child restraint system, the PASSENGER AIR
BAGOFF indicator lamp lights up after the
system self-test and remains lit. This indicates that the front-passenger frontair bag is
deactivated.
But even in the case of atwelve-month-old
child, in astandard child restraint system, the
PASSENGER AIR BAGOFF indicator lamp can
go out after the system self-test. This indicates that the front-passenger frontair bag is
activated. The result of the classification is
dependenton, among other factors, the child
restraint system and the child's stature. It is
recommended that you install the child
restraint system on asuitable rear seat.
R
The front-passenger seat is occupied by a
person of smaller stature (e.g. ateenager or
small adult), the PASSENGER AIR BAGOFF
indicator lamp lights up and remains lit after
the system self-test dependingonthe result
of the classification or, alternatively,goes out.
-
If the PASSENGER AIR BAGOFF indicator
lamp is off, move the front-passenger seat
Safety
Z
Page 52

Occupant safety
50
as far back as possible. Alternatively, aperson of smaller staturecan sit on arear seat.
-
If thePASSENGER AIRBAG OFFindicator
lamp is lit,aperson of smaller stature
shouldnot use thefront-passenger seat.
R
The front-passenger seat is occupied by an
adult or aperson of adult stature, the
PASSENGER AIRBAG OFFindicator lamp
goes out after thesystem self-test.This indicates that thefront-passenger frontair bag is
activated.
If childrenare travelinginthe vehicle,besure to
Safety
observethe noteson"Children in thevehicle"
Y page 54).
(
When theOccupantClassification System
(OCS)ismalfunctioning, thered 6 restraint
system warning lamp on theinstrumentcluster
and thePASSENGER AIRBAG OFFindicator
lamp light up simultaneously. The frontpassenger frontair bag is deactivatedinthis
caseand does notdeployduringanaccident.
Havethe OccupantClassification System (OCS)
checked and repaired immediately at aqualified
specialist workshop.Mercedes-Benzrecommends that you use an authorized MercedesBenzCenter for this purpose.
If thefront-passenger seat,the seat cover or the
seat cushion are damaged, have thenecessary
repairwork carried out at aqualified specialist
workshop.Mercedes-Benzrecommendsthat
you use an authorized Mercedes-Ben
zCen
for this purpose.
For safety reasons, Mercedes-Benzrecom-
mends that you only use seat accessories that
have been approved by Mercedes-Benz.
If thedriver'sair bag deploys, this does not
mean that thefront-passenger frontair bag will
also deploy. The OccupantClassification System(OCS)categorizesthe occupant on the
front-passenger seat.Dependingonthatresult,
thefront-passenger frontair bag is either enabled or deactivated.
System self-test
DANGER
G
If boththe PASSENGER AIRBAG OFFand
PASSENGER AIRBAG ON indicator lamps do
notlight up duringthe system self-test,the
system is malfunctioning. The frontpassenger frontair bag mightbetriggered
unintentionally or mightnot be triggered at all
ter
in theeventofanaccidentwith high deceleration. This posesanincreased risk of injury or
even fatal injury.
In this casethe front-passenger seat may not
be used. Do notinstall achild restraint system
on thefront-passenger seat.Havethe Occupant Classification System (OCS)checked
and repaired immediately at aqualified specialistworkshop.
WARNING
G
If thePASSENGER AIRBAG OFFindicator
lamp remains lit after thesystem self-test,the
front-passenger frontair bag is disabled. It will
notbedeployed in theeventofanaccident. In
this case, thefront-passenger frontair bag
cannotperform its intended protective function, e.g.when aperson is seated in thefrontpassenger seat.
That person could, for example, comeinto
contactwith thevehicle's interior, especially
if theperson is sittingtoo close to thedashboard.This posesanincreased risk of injury or
even fatal injury.
When thefront-passenger seat is occupied,
always ensure that:
R
theclassification of theperson in thefrontpassenger seat is correctand thefrontpassenger frontair bag is enabled or disabled in accordance with theperson in the
front-passenger seat
R
theperson is seated properly with acorrectly fastenedseatbelt
R
thefront-passenger seat has been moved
as far back as possible
If thePASSENGER AIRBAG OFFindicator
lamp remains lit when it shouldnot,the frontpassenger seat may notbeused. Do not
install achild restraint system on thefrontpassenger seat.Havethe OccupantClassification System (OCS)checked and repaired
immediately at aqualified specialist workshop.
Page 53

Occupant safety
51
WARNING
G
Objects between the seat surface and the
child restraint system couldaffect OCS operation. This couldresult in the front-passenger
air bag not functioning as intended during an
accident. This poses an increased risk of
injury or even fatal injury.
Do not place any objects between the seat
surface and the child restraint system. The
entire base of the child restraint system must
alwaysrest on the seat cushion of the frontpassenger seat. The backrest of the forwardfacing child restraint system must, as far as
possible,beresting on the backrest of the
front-passengerseat. Always comply with the
child restraint system manufacturer's installation instructions.
After the system self-test, the PASSENGER AIR
BAG OFF or PASSENGER AIR BAG ON indicator
lamp displaysthe status of the front-passenger
front air bag (
front air bag is enabled, the PASSENGER AIR
BAG ON indicator lamp lights up for 60 seconds
and then goes out.
If the PASSENGER AIR BAG ON indicator lamp is
off, only the PASSENGER AIR BAG OFF indicator
lamp showsthe status of the front-passenger
front air bag.The PASSENGER AIR BAG OFF
indicator lamp may be lit continuously or be off.
For more information about the OCS, see "Problems with the Occupant Classification System"
Y page51).
(
Y page48). If the front-passenger
Problems with the Occupant ClassificationSystem (OCS)
Be sure to observe the notes on "System self-test" (Y page50).
Safety
Z
Page 54

Occupant safety
52
Problem
The PASSENGER AIR
BAG OFF indicator lamp
lights up and remains lit,
even though the frontpassenger seat is occupied by an adult or aperson of astature corresponding to that of an
adult.
The PASSENGER AIR
Safety
BAG OFF indicator lamp
does not light up and/or
does not stay on.
The front-passenger seat
is:
R
unoccupied
R
occupied with the
weight of achild up to
twelve months old in a
child restraint system
Possible causes/consequences and M Solutions
The classification of the person on the front-passenger seat is incorrect.
X
Make sure the conditionsfor acorrect classification of the person
on the front-passenger seat are met (
X
If the PASSENGER AIR BAG OFF indicator lamp remains lit, the front-
Y page 48).
passenger seat may not be used.
X
Have OCS checked as soon as possible at an authorized MercedesBenz Center.
OCS is malfunctioning.
X
Make sure there is nothingbetween the seat cushion and the child
seat.
X
Make sure that the entire base of the child restraint system rests on
the seat cushion of the front-passenger seat. The backrest of the
forward-facing child restraint system must lie as flat as possible
against the backrest of the front-passenger seat. If necessary,
adjust the position of the front-passenger seat.
X
Make sure that the seat cushion length is fully retracted.
X
When installing the child restraint system, make sure that the seat
belt is tight. Do not pull the seat belt tight using the front-passenger
seat adjustment.This could result in the seat belt and the child
restraint system being pulled too tightly.
X
Check for correct installation of the child restraint system.
Make sure that the head restraint does not apply aload to the child
restraint system. If necessary, adjust the head restraint accordingly.
X
Make sure that no objectsare applying additional weight onto the
seat.
X
If the PASSENGER AIR BAG OFF indicator lamp remains off and/or
the PASSENGER AIR BAG ON indicator lamp lights up, do not install
achild restraint system on the front-passenger seat. It is recommended that you install the child restraint system on asuitable rear
seat.
X
Have OCS checked as soon as possible at an authorized MercedesBenz Center.
Deployment of Emergency Tensioning
Devices and air bags
Important safety notes
WARNING
G
The air bag parts are hot after an air bag has
been deployed. There is arisk of injury.
Do not touch the air bag parts. Have a
deployedair bag replaced at aqualified specialist workshop as soon as possible.
WARNING
G
Adeployedair bag no longer offers any protection and cannot provide the intended protection in an accident. There is an increased
risk of injury.
Have the vehicle towed to aqualified specialist workshop in order to have adeployedair
bag replaced.
It is important for your safety and that of your
passenger to have deployedair bags replaced
Page 55

Occupant safety
53
and to have any malfunctioningair bags
repaired. This will help to makesure theair bags
continue to perform their protective function for
thevehicle occupantsinthe eventofacrash.
WARNING
G
EmergencyTensioning Devices that have
deployed pyrotechnically are no longer operational and are unabletoperform their intended protective function.This posesan
increased risk of injury or even fatal injury.
Havepyrotechnically triggered Emergency
Tensioning Devices replaced immediately at a
qualified specialist workshop.
If EmergencyTensioning Devices are triggered
or air bags are deployed, you will hear abang,
and asmall amountofpowder may also be
released. The 6 restraint system warning
lamp lightsup.
Only in rarecases will thebang affect your hearing.The powder that is released generally does
notconstituteahealthhazard, but it may cause
short-term breathingdifficulties in peoplewith
asthma or other respiratory problems.Provided
it is safe to do so, you shouldleave thevehicle
immediately or open thewindow in ordertopreventbreathingdifficulties.
Air bags and pyrotechnic EmergencyTensioning
Devices (ETDs)contain perchlorate material,
whichmay require special handlingand regard
for theenvironment. National guidelines must
be observed duringdisposal. In California, see
www.dtsc.ca.gov/HazardousWaste/
Perchlorate/index.cfm.
Method of operation
During thefirst stage of acollision,the restraint
system control unit evaluates important physical datarelating to vehicle decelerationoracceleration,suchas:
R
duration
R
direction
R
intensity
Based on theevaluation of this data, the
restraint system control unit triggersthe Emergency Tensioning Devices duringafrontal or
rear collision.
An EmergencyTensioning Devicecan only be
triggered, if:
R
theignition is switched on
R
thecomponentsofthe restraint system are
operational. You can findfurther information
under"Restraintsystem warning lamp"
Y page 41)
(
R
theseat belt buckle tongue has engaged in
thebelt buckle of therespectivefront seat
The EmergencyTensioning Devices in therear
compartmentare triggered independently of the
lockstatus of theseat belts.
If therestraint system control unit detectsa
moresevere accident, further componentsof
therestraint system are activated independently of each other in certain frontal collision
situations:
R
Frontair bags as well as driver'sand frontpassenger knee bags
R
Window curtain air bag, if thesystem determines that deploymentcan offer additional
protection to that provided by theseat belt
The front-passenger frontair bag is activated or
deactivateddependingont
he person on t
he
front-passenger seat.The front-passenger front
air bag can only deployinanaccidentifthe
PASSENGER AIRBAG OFFindicator lamp is off.
Observethe informationonthe PASSENGER AIR
BAGindicator lamps (
Y page 41).
Your vehicle has two-stagefront air bags. In the
first deploymentstage, thefront air bag is filled
with propellantgas. The frontair bag is fully
deployed with themaximum amountofpropellant gas if aseconddeploymentthreshold is
reached within afew milliseconds.
The activation threshold of theEmergencyTensioning Devices and theair bags is determined
by evaluating therateofvehicle decelerationor
accelerationwhichoccurs at various points in
thevehicle.This process is pre-emptive in
nature. Deployment shouldtakeplace in good
timeatthe start of thecollision.
The rateofvehicle decelerationoracceleration
and thedirection of theforce are essentially
determinedby:
R
thedistribution of forces duringthe collision
R
thecollision angle
R
thedeformationcharacteristics of thevehicle
R
thecharacteristics of theobject with which
thevehicle has collided
Factors whichcan only be seen and measured
after acollision has occurreddonot play adeci-
Z
Safety
Page 56

Children in the vehicle
54
sive role in the deployment of an air bag. Nor do
they provide an indication of air bag deployment.
The vehicle can be deformed considerably, without an air bag being deployed. This is the case if
only parts which are relatively easilydeformed
are affected and the rate of deceleration is not
high. Conversely, air bags may be deployed even
though the vehicle suffers only minor deformation. This is the case if, for example, very rigid
vehicle parts such as longitudinal body members are hit, and sufficient deceleration occurs
Safety
as aresult.
If the restraint system control unit detects aside
impact or if the vehicle rolls over, the applicable
componentsofthe restraint system are activated independently of each other depending on
the apparent type of accident.
R
Side impact air bags on the side where the
impact takes place, independently of the
EmergencyTensioning Device and the use of
the seat belt on the driver's seat and outer
seats in the second row
The side impact air bag on the frontpassenger side deploysunder the following
conditions:
-
the OCS system detects that the frontpassenger seat is occupied or
-
the seat belt buckle tongue is engaged in
the belt buckle of the front-passenger seat
R
Window curtain air bag on the side of impact,
independently of the use of the seat belt and
independently of whether the frontpassenger seat is occupied
R
EmergencyTensioning Devices, if the system
determines that deployment can offer additional protection in this situation
R
Window curtain air bags on the driver's and
front-passenger side in certain situations
when the vehicle rolls over, if the system
determines that deployment can offer additional protection to that provided by the seat
belt
Not all air bags are deployed in an accident.
i
The different air bag systems work independently of each other.
How the air bag system works is determined
by the severity of the accident detected,
especially the vehicle deceleration or acceleration and the apparent type of accident:
R
Frontal collision
R
Side impact
R
Rollover
Automatic measures after an accident
Immediately after an accident, the following
measures are implemented, depending on the
type and severity of the impact:
R
the hazard warning lamps are activated
R
the emergency lighting is activated
R
the vehicle doors are unlocked
R
the front side windows are lowered
R
the engine is switched off and the fuel supply
is cut off
R
vehicles with mbrace: automatic emergency
call
Children in the vehicle
Important safety notes
Accident statistics show that children secured
in the rear seats are safer than children secured
in the front-passenger seat. For this reason,
Mercedes-Benz strongly advises that you install
achild restraint system on arear seat. Children
are generally better protected there.
If achild younger than twelve years old and
under 5ft(1.50 m) in height is traveling in the
vehicle:
R
always secure the child in achild restraint
system suitable for Mercedes-Benz vehicles.
The child restraint system must be appropriate to the age, weight and size of the child
R
be sure to observe the instructions and safety
notes in this section in addition to the child
restraint system manufacturer's installation
instructions
R
be sure to observe the instructions and safety
notes on the "Occupant classification system
Y page 47)
(OCS)" (
Page 57

Children in the vehicle
55
WARNING
G
If you leave children unsupervised in the vehicle, they couldset it in motion by, for example:
R
release the parking brake.
R
shift the automatic transmission out of the
parking position P.
R
start the engine.
In addition, they may operate vehicleequipment and become trapped. There is arisk of
an accident and injury.
When leaving the vehicle, alwaystake the
SmartKey withyou and lock the vehicle. Never
leave children unsupervised in the vehicle.
WARNING
G
If persons, particularlychildren are subjected
to prolonged exposure to extreme heator
cold, there is arisk of injury,possibly even
fatal.Never leave children unattended in the
vehicle.
WARNING
G
If the child restraint system is subjected to
direct sunlight, parts may get very hot. Children may burn themselves on these parts,
particularlyonthe metal parts of the child
restraint system. There is arisk of injury.
If you leave the vehicle, taking the child with
you,alwaysensure that the child restraint
system is not exposedtodirect sunlight. Protect it with ablanket, for example. If the child
restraint system has been exposedtodirect
sunlight, let it cool downbefore securing the
child in it. Never leave children unattended in
the vehicle.
Always ensure that all vehicleoccupants have
their seatbelts fastened correctly and are sitting
properly.Particular attention must be paidto
children.
Observe the safety notes on the seat belt
(
Y page42) and the notes on correct use of seat
Y page43).
belts (
Abooster seat may be necessary to achieve
properseat beltpositioning for children over
41 lbs (18 kg)until they reach aheight where a
three-point seat beltcan be properly fastened
without abooster seat.
Special seatbelt retractor
WARNING
G
If the seat beltisreleased while driving, the
child restraint system willnolonger be
securedproperly.The special seat beltretractor is disabledand the inertia real drawsina
portion of the seat belt. The seat beltcannot
be immediatelyrefastened. There is an
increased risk of injury,possibly even fatal.
Stop the vehicleimmediately, paying attention to road and traffic conditions. Reactivate
the special seat beltretractor and secure the
child restraint system properly.
All seat belts in the vehicle, except the driver's
seat belt, are equipped with aspecial seat belt
retractor. When activated, the special seat belt
retractor ensuresthat the seat beltcannot
slacken once the child seat is secured.
Installing achild restraint system:
X
Make sure you observe the child restraint
system manufacturer's installation instructions.
X
Pullthe seat beltsmoothly from the beltoutlet.
X
Engage seat belttongue in beltbuckle.
Activating the special seat beltretractor:
X
Pullthe seat beltout fullyand let the inertia
reel retract it again.
Whilethe seat beltisretracting, you should
hear aratcheting sound.The special seat belt
retractor is enabled.
X
Push the child restraint system downsothat
the seat beltistight and does not loosen.
Removing the child restraint system and deactivating the special seat beltretractor:
X
Make sure you observe the child restraint
system manufacturer's installation instructions.
X
Press the release button of the seat belt
buckle and guide the seat belttongue back
towardsthe beltsash guide.
The special seat beltretractor is deactivated.
Safety
Z
Page 58

Children in thevehicle
56
Child restraint system
The use of seat beltsand child restraint systems
is required by law in:
R
all 50 states
R
theU.S.territories
R
theDistrict of Columbia
R
all Canadian provinces
If you install arearward-facing child restraint
system on thecenterrear seat,the rear arm rest
must be folded back as far as possible.
Safety
You can obtain further informationabout the
correctchild restraint system from any authorizedMercedes-BenzCenter.
WARNING
G
If thechild restraint system is installed incorrectly on asuitable seat,itcannotprotect as
intended. The child cannotthenberestrained
in theevent of an accident, heavybraking or
suddenchanges of direction.Thereisan
increased riskofinjury, possibly evenfatal.
Makesure that you observethe child restraint
system manufacturer'sinstallationinstructions and thenotes on use. Pleaseensure,
that thebase of thechild restraint system is
always restingcompletely on theseat cushion.Never placeobjects, e.g.cushions, under
or behindthe child restraint system. Only use
child restraint systems withthe original cover
designedfor them. Only replace damaged
covers withgenuine covers.
WARNING
G
If thechild restraint system is installed incorrectly or is notsecured, it can comeloosein
theevent of an accident, heavybraking or a
suddenchangeindirection.The child
restraint system couldbethrown about,striking vehicle occupants. Thereisanincreased
riskofinjury, possibly evenfatal.
Always install child restraint systems properly, eveniftheyare notbeingused. Make
sure that you observethe child restraint systemmanufacturer'sinstallationinstructions.
WARNING
G
Child restraint systems or their securingsystems whichhave been damaged or subjected
to aload in an accidentcan no longer protect
as intended. The child cannotthenbe
restrainedinthe event of an accident, heavy
braking or suddenchanges of direction.There
is an increased riskofinjury, possibly even
fatal.
Replacechild restraint systems whichhave
been damaged or subjected to aload in an
accidentassoon as possible. Havethe securing systems on thechild restraint system
checked at aqualified specialist workshop,
before you install achild restraint system
again.
The securingsystems of child restraint systems
are:
R
theseat belt system
R
theLATCH-type (ISOFIX) securingrings
R
theTop Tether anchorages
If it is absolutely necessary to carry achild on
thefront-passenger seat,besure to observethe
informationonthe "OccupantClassification
System(OCS)" (
Y page 47).Thereyou will also
findinformationondeactivatingthe frontpassenger frontair bag.
All child restraint systems must meetthe followingstandards:
R
U.S. Federal Motor Vehicle SafetyStandards
213and 225
R
Canadian Motor Vehicle SafetyStandards
213and 210.2
Confirmation that thechild restraint system corresponds to thestandards can be foundonan
truc
tion label on thechild restraint system.
ins
This confirmation can also be foundinthe installation instructionsthatare included withthe
child restraint system.
Observethe warning labels in thevehicle interior and on thechild restraint system.
You will findfurther informationonstowing
objects, luggageorloads under"Loading guidelines" (
Y page 237).
Page 59

Children in thevehicle
57
LATCH-type(ISOFIX) child seat securing system
WARNING
G
LATCH-type (ISOFIX) child restraint systems
do not offer sufficient protection for children
whose weight combinedwith thechild
restraint system is greater than 65 lbs (29 kg)
and who are secured usingthe safety belt
integrated in thechild restraint system. In the
eventofanaccident, achild mightnot be
restrained correctly. This poses an increased
risk of injury or even fatal injury.
If thechild and thechild restraint system
together weigh morethan65lbs (29 kg), only
use LATCH-type (ISOFIX) child restraint systemswith whichthe child is also secured with
thevehicle seat belt.Alsosecure thechild
restraint system with theTop Tether belt,if
available.
Always comply with themanufacturer'sinstallationand operatinginstructionsfor thechild
restraint system used.
Before everytrip, makesure that theLATCHtype (ISOFIX) child restraint system is engaged
correctly in bothLATCH-type (ISOFIX) securing
rings
When installing thechild restraint system,
!
makesure that theseat belt for themiddle
seat does not get trapped. The seat belt could
otherwise be damaged.
rings for two LATCH-type (ISOFIX) child restraint
systems are installedonthe left and rightofthe
rear seats.
Non-LATCH-type (ISOFIX) child seatsmay also
be used and can be installedusingthe vehicle's
seat belt system. Install thechild seat according
to themanufacturer'sinstructions.
Top Tether
Introduction
Top Tether provides an additional connection
between thechild restraint system secured with
aLATCH-type (ISOFIX) system and thevehicle.
This helps reducethe risk of injury even further.
If thechild restraint system is equipped with a
Top Tether belt,thisshould always be used.
Important safety notes
WARNING
G
If therear seat backrests are not locked,they
could fold forwards in theeventofanaccident, heavy braking or sudden changes of
direction. As aresult, child restraint systems
cannot perform their intended protective
function.Rear seat backrests that are not
locked can also cause additional injuries,e.g.
in theeventofanaccident. This poses an
increased risk of injury or even fatal injury.
Always lock rear seat backrests after installing aTop Tether belt.Observe thelockverificationindicator. Adjust therear seat backrestssothattheyare in an uprightposition.
Safety
X
Install theLATCH-type (ISOFIX) child restraint
system on bothLATCH-type (ISOFIX) securing
rings :.
ISOFIXisastandardized securingsystem for
specially designed child restraint systems on
therear seats. LATCH-type (ISOFIX) securing
If therear backrestisnot engaged and locked,
thered lock verificationindicator will be visible
(
Y page 240).
Z
Page 60

Children in the vehicle
58
Top Tether anchorages
Safety
The TopTetheranchorage points areinstalledin
the rearcompartment behind the head
restraints on the parcel shelf.
X
Press down the rearofcover ; in the directionofthe arrow.
Cover ; is raised slightlyatthe front.
X
Foldcover ; up.
Vehicleswithadjustableheadrestraints:
X
Moveheadrestraint : up.
X
Route TopTetherbelt A under head
restraint : between the two head restraint
bars.
Vehicleswithout adjustableheadrestraints:
X
Top Tether belt with onebeltstrap: route
TopTetherbelt A centrallyoverhead
restraint :.
or
X
Top Tether belt with two belt straps: route
one TopTetherbelt A to the left and one to
the right past the side of head restraint :.
Allvehicles:
X
Install the LATCH-type (ISOFIX)child restraint
system with TopTether. Alwayscomply with
the child restraint system manufacturer's
installationinstructions when doing so.
X
HookTop Tetherhook ? of TopTetherbelt
A into TopTetheranchorage =.
Make sure that:
R
TopTetherhook ? is hooked into Top
Tetheranchorage = as shown.
R
TopTetherbelt A is not twisted.
R
TopTetherbelt A is routed between the
rearseatbackrestand th
e cargo compartment coverifthe cargo compartment cover
is installed.
X
Tension TopTetherbelt A.Alwayscomply
with the child restraint system manufacturer'sinstallationinstructions when doing so.
Vehicleswithadjustableheadrestraints:
X
If necessary,moveheadrestraint : back
down againslightly.Makesurethatyou do
not interfere with the correct routing of Top
Tetherbelt A.
Childrestraintsystem on the frontpassengerseat
General notes
Accident statistics showthatchildren secured
in the rearseats aresafer thanchildren secured
in the front-passengerseat. For thisreason,
Mercedes-Benz stronglyadvises thatyou install
the child restraint system on arearseat.
If it is absolutely necessary to installachild
restraint system on the front-passengerseat,
always observe the instructions and safety
notesonthe "Occupant Classification System
Y page 47).
(OCS)"(
Youcan thusavoid the risks thatcould ariseas
aresultof:
R
an incorrectly categorizedpersoninthe frontpassengerseat
R
the unintentionaldeactivationofthe frontpassengerfront airbag
R
the unsuitable positioning of the child
restraint system,e.g.too close to the dashboard
Page 61

Childreninthe vehicle
59
Rearward-facingchild restraint system
If it is absolutely necessary to install arearwardfacing child restraint system on the frontpassenger seat, always make sure that the
front-passenger front airbag is deactivated.
Only if the PASSENGER AIR BAG OFF indicator
lamp is permanently lit(
Y page 41)isthe front-
passenger front airbag deactivated.
Alwaysobserve the child restraint system man-
ufacturer's installation and operating instructions.
Forward-facing child restraint system
If it is absolutely necessary to install aforwardfacing child restraint system on the frontpassenger seat, always move the frontpassenger seatasfar back as possible.Fully
retract the seatcushionlength. The entirebase
of the child restraint system mustalwaysreston
the seatcushionofthe front-passenger seat.
The backrest of the child restraint system must
lieasflataspossible against the backrest of the
front-passenger seat. The child restraint system
mustnot touch the rooforbesubjectedtoaload
by the headrestraint. Adjust the angle of the
seatbackrest and the headrestraint position
accordingly.Alwaysmake sure that the shoulder beltstrapiscorrectly routed from the vehicle beltoutlet to the shoulder beltguide on the
child restraint system. The shoulder beltstrap
mustberouted forward and downfrom the vehicle beltoutlet. If necessary, adjust the vehicle
beltoutlet and the front-passenger seataccordingly.
Alwaysobserve the child restraint system manufacturer's installation and operating instructions.
Child-proof locks
Important safety notes
WARNING
G
If children are traveling in the vehicle, they
could:
R
opendoors, thusendangering otherpeople
or roadusers
R
exitthe vehicleand be caught by oncoming
traffic
R
operate vehicleequipment and become
trapped
There is ariskofanaccident and injury.
Alwaysactivate the child-proof locks and
overridefeature if children are traveling in the
vehicle. Whenleaving the vehicle, always take
the key with youand lock the vehicle. Never
leave children unattendedinthe vehicle.
Overridefeature for:
R
the reardoors (Y page 60)
R
the rearsidewindows(Y page 60)
WARNING
G
If youleave children unsupervised in the vehicle,they could set it in motion by,for example:
R
release the parking brake.
R
shift the automatic transmissionout of the
parking position P.
R
startthe engine.
In addition, they may operate vehicleequipment and become trapped.There is ariskof
an accident and injury.
Whenleaving the vehicle, always take the
SmartKey withyouand lock the vehicle. Never
leave children unsupervised in the vehicle.
Safety
WARNING
G
If persons,particularly children are subjected
to prolonged exposure to extreme heator
cold, there is ariskofinjury, possibly even
fatal. Neverleave children unattendedinthe
vehicle.
Z
Page 62

Pets in the vehicle
60
WARNING
G
If the child restraint system is subjected to
direct sunlight, parts may get very hot. Children may burn themselves on these parts,
particularlyonthe metal parts of the child
restraint system. There is arisk of injury.
If you leave the vehicle, taking the child with
you,alwaysensure that the child restraint
system is not exposedtodirect sunlight. Protect it with ablanket, for example. If the child
Safety
restraint system has been exposedtodirect
sunlight, let it cool downbefore securing the
child in it. Never leave children unattended in
the vehicle.
Child-proof locks for the rear doors
You secure each door individually with the childproof locks on the rear doors. Adoor secured
with achild-proof lock cannot be opened from
insidethe vehicle. When the vehicleisunlocked,
the door can be opened from the outside.
X
To activate: press the child-proof lock lever
up in the direction of arrow :.
X
Make sure that the child-proof locks are working properly.
X
To deactivate: press the child-proof lock
leverdowninthe direction of arrow ;.
Override feature for the rear side windows
X
To activate/deactivate: press button :.
If indicator lamp ; is lit, operation of the rear
side windows is disabled. Operation is only
possible using the switches in the driver's
door. If indicator lamp ; is off, operation is
possible using the switches in the rear compartment.
Pets in the vehicle
WARNING
G
If you leave animals unattended or unsecured
in the vehicle, they couldpress buttons or
switches, for example.
As aresult, they could:
R
activate vehicleequipment and become
trapped, for example
R
activate or deactivate systems,thereby
endangering other road users
Unsecuredanimals couldalsobeflung around
the vehicleinthe event of an accident or sudden steering or braking, thereby injuring vehicle occupants. There is arisk of an accident
and injury.
Never leave animals unattended in the vehicle. Always secure animals properly during
the journey,e.g. use asuitable animaltransport box.
Page 63

Driving safety systems
61
Drivingsafetysystems
Overview of drivingsafetysystems
In this section,you will findinformation about
thefollowingdrivingsafetysystems:
R
ABS(Anti-lock Braking System)
(
Y page 61)
R
BAS(Brake Assist System) (Y page 61)
R
Active BrakeAssist(Y page 62)
R
ESP®(Electronic Stability Program)
(
Y page 64)
R
EBD(Electronic Brakeforce Distribution)
(
Y page 67)
R
ADAPTIVEBRAKE (Y page 68)
R
STEERCONTROL (Y page 68)
Important safetynotes
If you fail to adapt your drivingstyle or if you are
inattentive,the drivingsafetysystems can neither reduce theriskofanaccidentnor override
thelaws of physics. Driving safetysystems are
merely aids designed to assist driving. You are
responsible formaintainingthe distancetothe
vehicle in front, forvehicle speed, forbraking in
goodtime, and forstayinginlane. Always adapt
your drivingstyle to suit theprevailingroadand
weather conditionsand maintain asafedistance
from thevehicle in front. Drive carefully.
The drivingsafetysystems described only work
as effectively as possible when there is adequatecontactbetween thetires and theroad
surface. Please pay special attention to the
notesontires,recommended minimum tire
tread depths, etc. (
In wintrydrivingconditions, always use winter
tires (M+Stires)and if necessary,snow chains.
Onlyinthisway will the driving safety systems
describedinthissection work as effectively as
possible.
Y page 288).
The ! ABS warning lamp in the instrument
cluster lights up when the ignition is switched
on. It goesout when the engine is running.
ABS works from aspeed of about5mph
(8 km/h), regardless of road-surface conditions.
ABS works on slippery surfaces, evenwhenyou
onlybrake gently.
Important safety notes
Observe the "Important safety notes"sec-
i
Y page 61).
tion(
WARNING
G
If ABS is faulty,the wheels could lock when
braking.The steerability and braking characteristicsmay be severely impaired.Additionally,further driving safety systemsare deactivated.There is an increased danger of skidding and accidents.
Driveoncarefully. HaveABS checked immediately at aqualified specialist workshop.
WhenABS is malfunctioning,othersystems,
including driving safety systems, will also
become inoperative. Observe the information
on the ABS warning lamp (
Y page 220)and dis-
play messages which maybeshown in the
instrument cluster (
Y page 192).
Braking
X
If ABS intervenes: continue to depress the
brake pedalvigorously untilthe braking situationisover.
X
To make afullbrake application: depress
the brake pedalwithfullforce.
If ABS interveneswhenbraking,you will feela
pulsing in the brake pedal.
The pulsating brake pedalcan be an indication
of hazardousroadconditions, and functions as a
reminder to take extra carewhile driving.
Safety
ABS (Anti-lock BrakingSystem)
General information
ABS regulatesbrake pressure in such away that
the wheels do not lock when youbrake. This
allows youtocontinue steering the vehiclewhen
braking.
BAS (BrakeAssistSystem)
General information
BAS operates in emergency braking situations.
If youdepress the brake pedalquickly, BAS
automaticallyboosts the braking force,thus
shortening the stopping distance.
Z
Page 64

Driving safety systems
62
Important safety notes
Observethe "Importantsafetynotes"sec-
i
Y page 61).
tion (
WARNING
G
If BASismalfunctioning,the braking distance
in an emergencybraking situation is
increased. Thereisariskofanaccident.
In an emergencybraking situation,depress
thebrakepedal withfull force.ABS prevents
thewheels from locking.
Safety
Braking
X
Keepthe brakepedal firmly depressed until
theemergencybraking situation is over.
ABSprevents thewheels from locking.
The brakes will function as usual once you
release thebrakepedal.BAS is deactivated.
Active BrakeAssist
General information
Observethe "Importantsafetynotes"sec-
i
Y page 61).
tion (
Active Brake Assist consistsofadistancewarning function withanautonomous braking function and situation-dependentbraking assistance
Active Brake Assist can help you to minimizethe
riskofacollision withthe vehicletraveling in
frontorreduce theeffects of suchacollision.
If Active Brake Assist detects that there is arisk
of collision,you will be warned visually and
acoustically. If you do notreacttothe visual and
audible collision warning,autonomous braking
can be initiatedincritical situations. If you apply
thebrakeyourself in acritical situation,Adaptive Brake Assist supportsyou withsituationdependentbraking assistance.
Important safety notes
Detection of hazardous situationscan be particularly impaired if:
R
there is dirt on thesensorsoranythingelse
covering thesensors
R
there is snow or heavyrain
R
there is interferencebyother radar sources
R
there are strongradar reflections, for example in parking garages
R
anarrow vehicleistraveling in front, e.g. a
motorbike
R
avehicleistraveling in frontonadifferentline
R
you are driving anew vehicleorservicing on
theActiveBrake Assist system has justbeen
carriedout
Observethe important safetynotes in the
"Breaking-in notes" section (
Y page 121).
Followingdamagetothe frontend of thevehicle,
havethe configuration and operation of the
radar sensor checkedataqualified specialist
workshop. This also appliestocollisionsatlow
speeds wherenovisible damagetothe frontof
thevehicleisapparent.
Activating/deactivating
Active Brake Assist is active after every ignition
cycle.
You can activateordeactivateActiveBrake
Y page 185) in theon-board computer.
Assist (
When deactivated, thedistancewarning function and theautonomous braking function are
also deactivated.
If Active Brake Assist is deactivated, the æ
symbol appearsinthe assistancegraphic display.
Distance warning function
Generalinformation
The distancewarning function can help you to
minimizethe riskofafront-end collision witha
vehicleahead or reduce theeffects of sucha
collision.Ifthe distancewarning function
detects that there is ariskofacollision,you will
be warned visually and acoustically.
Important safety notes
Observethe "Importantsafetynotes"sec-
i
tion for driving safetysystems (
WARNING
G
Y page 61).
The distancewarning function does notreact:
R
to people or animals
R
to oncomingvehicles
R
to crossing traffic
R
when cornering
Page 65

Driving safety systems
63
The distance warning function may not give
warnings in all critical situations. There is a
risk of an accident.
Always pay careful attention to the traffic situation and be ready to brake.
Always adapt your speed to suit the prevailing
road and traffic conditions.
WARNING
G
The distance warning function cannot always
clearly identify objectsand complex traffic
situations.
In such cases, the distance warning function
may:
R
give an unnecessary warning
R
not give awarning
There is arisk of an accident.
Always pay careful attention to the traffic situation and do not rely solely on the distance
warning function.
Function
Starting at aspeed of approximately 4mph
(7 km/h), the distance warning function warns
you if you rapidly approach avehicle in front.An
intermittent warning tonewill then sound, and
the · distance warning lamp will light up in
the instrument cluster.
X
Brake immediately in order to increase the
distance from the vehicle in front.
or
X
Take evasive action, provided it is safe to do
so.
Due to the nature of the system, particularly
complicated but non-critical driving conditions
may also cause the system to display awarning.
With the help of the radar sensor system, the
distance warning function can detect obstacles
that are in the path of your vehicle for an extended period of time.
Up to aspeed of approximately 44 mph
(70 km/h), the distance warning function can
also react to stationary obstacles, such as stopped or parked vehicles.
Autonomous braking function
If the driver does not react to the distance warning signal in acritical situation, Active Brake
Assist can assist the driver with the autonomous
braking function.
The autonomous braking function:
R
gives the driver more time to react to critical
driving situations
R
can help the driver to avoid an accident or
R
reduces the effectsofanaccident
Vehicles without Distance Pilot DISTRONIC:
the autonomous braking function is available in
the following speed ranges:
R
4-65mph (7 -105 km/h) for moving objects
R
4-31mph (7 -50km/h)for stationary
objects
Vehicles with Distance Pilot DISTRONIC: the
autonomous braking function is available in the
following speedranges:
R
4-124 mph (7 -200 km/h)for moving
objects
R
4-31mph (7 -50km/h)for stationary
objects
Due to the nature of the system,particularly
complicated but non-critical driving conditions
may alsocausethe AutonomousBraking Function to intervene.
Situation-dependent braking assistance
General information
Observethe "Important safety notes" sec-
i
Y page61).
tion (
With the help of the radarsensor system,Adaptive Brake Assist can detect obstacles that are in
the path of yourvehiclefor an extended period
of time.
If Adaptive Brake Assist detects arisk of collision with the vehicleinfront, it calculatesthe
brake pressure necessary to avoidacollision. If
you apply the brakes forcefully,situationdependent braking assistance adapts to the situation and automatically increases the brake
pressure to adegreeappropriate to the traffic
situation.
Situation-dependent braking assistance providesbraking assistance in hazardoussituations
at speeds above 4mph (7 km/h).Itusesradar
Safety
Z
Page 66

Driving safety systems
64
sensor technology to assess the traffic situation.
Situation-dependent braking assistance is capable of reacting to moving objects that have
alreadybeen detected as such at least once
over the period of observation, up to vehicle
speeds of around 155 mph (250 km/h).
Situation-dependent braking assistance can
also detect stationary objects, up to vehicle
speeds of around 44 mph (70 km/h).
X
Keep the brake pedal depressed until the
emergency braking situation is over.
Safety
ABS prevents the wheels from locking.
The brakes will work normally againif:
R
you release the brake pedal.
R
there is no longer any danger of acollision.
R
no obstacle is detected in front of your vehicle.
Situation-dependent braking assistance is then
deactivated.
Important safety notes
Observe the "Important safety notes" sec-
i
tion for driving safety systems (
WARNING
G
Y page 61).
Adaptive Brake Assist does not react:
R
to people or animals
R
to oncoming vehicles
R
to crossing traffic
R
when cornering
As aresult, Adaptive Brake Assist may not
intervene in all critical conditions. There is a
risk of an accident.
Always pay careful attention to the traffic situation and be ready to brake.
WARNING
G
Adaptive Brake Assist cannot always clearly
identify objects and complex traffic situations.
In such cases, Adaptive Brake Assist might:
R
intervene unnecessarily
R
not intervene
There is arisk of an accident.
Always pay careful attention to the traffic situation and be ready to brake. Terminate the
intervention in anon-critical driving situation.
Due to the nature of the system, complex but
non-critical driving conditions may also cause
Active Brake Assist to intervene.
Even if Active Brake Assist is not available due to
amalfunction in the radar sensor system, the
brake system is still available with full brake
boosting effect and BAS.
ESP®(Electronic Stability Program)
General notes
Observe the "Important safety notes" sec-
i
Y page 61).
tion (
®
ESP
monitors driving stability and traction,i.e.
power transmission between the tires and the
road surface.
®
detects that the vehicle is deviating from
If ESP
the direction desired by the driver, one or more
wheels are braked to stabilize the vehicle. The
engine output is also modified to keep the vehicle on the desired course within physical limits.
®
assists the driver when pulling awayon
ESP
wet or slippery roads. ESP
®
can also stabilize
the vehicle during braking.
ETS/4ETS (Electronic Traction System)
Observe the "Important safety notes" sec-
i
Y page 61).
tion (
ETS traction control is part of ESP
with 4MATIC, 4ETS is part of ESP
®
.Onvehicles
®
.
Traction control brakes the drive wheels individually if they spin. This enables you to pull
awayand accelerate on slippery surfaces, for
example if the road surface is slippery on one
side. In addition, more drive torque is transferred to the wheel or wheels with traction.
Traction control remains active, even if you
deactivate ESP
®
.
Important safety notes
Observe the "Important safety notes" sec-
i
Y page 61).
tion (
Page 67

Driving safety systems
65
WARNING
G
®
If ESP
is malfunctioning, ESP®is unable to
stabilize the vehicle. Additionally, further driving safety systems are deactivated. This
increases the risk of skidding and an accident.
Drive on carefully.Have ESP
®
checked at a
qualified specialist workshop.
Vehicles without 4MATIC: when towing your
vehiclewith the front axle raised, it is important
that you observe the notes on ESP
®
(Y page282).
If the å ESP
continuously,ESP
If the ÷ ESP
warning lamp are lit continuously,ESP
®
OFF warning lamp lights up
®
is deactivated.
®
warning lamp and the å
®
is not
available due to amalfunction.
Observe the information on warning lamps
Y page221) and display messages which may
(
be showninthe instrument cluster
Y page192).
(
Only use wheels with the recommendedtire
sizes. Only then willESP
Characteristics of ESP
®
function properly.
®
General information
If the ÷ ESP®warning lamp goes out before
beginning the journey,ESP
®
is automatically
active.
®
intervenes, the ÷ ESP®warning lamp
If ESP
flashes in the instrument cluster.
®
If ESP
intervenes:
X
Do not deactivate ESP®under any circumstances.
X
Only depress the accelerator pedalasfar as
necessary when pulling away.
X
Adapt yourdriving style to suitthe prevailing
road and weather conditions.
ECOstart/stop function
The ECO start/stop function switches the
engine off automatically when the vehiclestops
moving. The engine starts automatically when
the driverwants to pullawayagain. ESP
remains in its previouslyselected status. Exam-
ple: if ESP
was switched off, ESP
®
was deactivated before the engine
®
remains deactivated
®
when the engine is switched on again.
Deactivating/activating ESP®(except
Mercedes‑AMG vehicles)
Important safety notes
Observe the "Important safety notes" sec-
i
Y page61).
tion (
You can select between the following states of
®
:
ESP
R
ESP®is activated.
R
ESP®is deactivated.
WARNING
G
If you deactivate ESP
®
,ESP®no longer stabilizes the vehicle. There is an increased risk
of skidding and an accident.
Only deactivate ESP
®
in the situations descri-
bed in the following.
The spinning of the wheels results in acutting
action for better traction on loosesurfaces.
®
It may be best to deactivate ESP
in the follow-
ing situations:
R
when using snow chains
R
in deep snow
R
on sand or gravel
Activate ESP®as soon as the situations
i
described above no longer apply.ESP
®
will
otherwise not be abletostabilize the vehicleif
the vehiclestarts to skid or awheelstarts to
spin.
Avoid spinning the drivenwheels for an
!
extended period with ESP
®
deactivated. You
couldotherwise damage the drivetrain.
Deactivating/activating ESP
®
You can deactivate or activate ESP®via the onboard computer (
®
deactivated:
ESP
The å ESP
Y page185).
®
OFF warning lamp in the instru-
ment cluster lights up.
®
ESP
activated:
®
The å ESP
OFF warning lamp in the instru-
ment cluster goes out.
Z
Safety
Page 68

Driving safety systems
66
Characteristics when ESP®is deactivated
If ESP®is deactivatedand oneormorewheels
start to spin,the ÷ ESP
instrumentclusterflashes. In suchsituations,
®
ESP
will notstabilizethe vehicle.
If you deactivate ESP
R
ESP®no longer improvesdriving stability.
R
Enginetorque is no longer limited and the
®
warning lamp in the
®
:
drivewheels are able to spin.
R
Tractioncontrol is still activated.
Safety
R
ActiveBrake Assist is no longer available; nor
is it activated if you brakefirmly with assistance from ESP
R
STEER CONTROL is no longer active.
R
ESP®still provides support when you brake
®
.
firmly.
Deactivating/activatingESP
®
(Mercedes‑AMGvehicles)
Important safety notes
Observethe "Important safety notes" sec-
i
Y page 61).
tion(
You can selectbetween thefollowingstatesof
®
:
ESP
R
ESP®is activated.
R
SPORT handlingmode is activated.
R
ESP®is deactivated.
WARNING
G
When SPORT handlingmode is activated,
there is agreaterrisk of skiddingand accidents.
Only activateSPORT handlingmode in thesituations describedinthe following.
WARNING
G
If you deactivate ESP
®
,ESP®no longer stabilizes thevehicle.Thereisanincreased risk
of skiddingand an accident.
Only deactivate ESP
®
in thesituations descri-
bed in thefollowing.
In thefollowingsituations,itmay be betterto
activateSPORT handlingmode or deactivate
®
:
ESP
R
when usingsnowchains
R
indeep snow
R
on sandorgravel
R
on specially designated roads when thevehicle's own oversteering and understeering
characteristics are desired
DrivinginSPORT handlingmode or without
®
requires an extremely qualified and expe-
ESP
rienced driver.
Activate ESP®as soon as thesituations
i
describedabovenolonger apply. ESP
®
will
otherwise notbeable to stabilizethe vehicle if
thevehicle startstoskidorawheel startsto
spin.
Avoid spinningthe driven wheels for an
!
extended period with ESP
®
deactivated. You
couldotherwise damage thedrivetrain.
Deactivating/activatingESP
X
To activate SPORThandling mode: briefly
®
pressbutton :.
The M SPORT handlingmode warning
lamp in theinstrumentclusterlightsup. The
SPORT handling mode
message appearsin
themultifunction display.
To deactivateSPORThandling mode:
X
briefly pressbutton :.
The M SPORT handlingmode warning
lamp in theinstrumentclustergoes out.
Page 69

X
To deactivate ESP®: press button : until
the å ESP
®
OFF warning lamp lights up in
the instrument cluster.
The ÷ OFF
message appears in the multi-
functiondisplay.
X
To activate ESP®: brieflypress button :.
The å ESP
®
OFF warning lamp in the
instrument cluster goesout.The ÷ ESP
ON message appears in the multifunctiondis-
play.
CharacteristicsofactivatedSPORT handling mode
If SPORThandling modeisactivatedand one or
more wheels start to spin, the ÷ ESP
®
warning lamp in the instrument cluster flashes. ESP
onlystabilizes the vehicletoalimiteddegree.
WhenSPORThandling modeisactivated:
R
ESP®onlyimprovesdriving stability to alimited degree.
R
Tractioncontrolisstillactivated.
R
The engine's torque is onlyrestrictedtoa
limiteddegreeand the drive wheels may start
to spin.
The spinning of the wheels results in acutting
action for better tractiononloose surfaces.
R
ESP®stillprovides support when youbrake
firmly.
CharacteristicswhenESP®is deactivated
If ESP®is deactivatedand one or more wheels
start to spin, the ÷ ESP
instrument cluster does not flash. In such situations, ESP
®
will not stabilize the vehicle.
If youdeactivate ESP
R
ESP®no longer improvesdriving stability.
R
Engine torque is no longer limitedand the
®
warning lamp in the
®
:
drive wheels are able to spin.
The spinning of the wheels results in acutting
action for better tractiononloose surfaces.
R
Tractioncontrolisstillactivated.
R
Active Brake Assist is no longer available;nor
is it activatedifyou brake firmly with assistance from ESP
R
ESP®stillprovides support when youbrake
®
.
firmly.
Driving safety systems
ESP®trailer stabilization
General information
If your vehicle/trailer combinationbeginsto
swerve,ESP
slowsthe vehicledownbybraking and limiting
the engine outputuntilthe vehicle/trailer com-
®
bination hasstabilized.
Important safety notes
G
If roadand weather conditions are poor,
trailerstabilization will not be able to prevent
the vehicle/trailer combinationfrom swerving.Trailers with ahighcenterofgravity can
®
tip overbefore ESP
ariskofanaccident.
Alwaysadapt your driving style to the prevailing roadand weather conditions.
If your vehiclewithtrailer(vehicle/trailer combination) begins to lurch, youcan onlystabilize
the vehicle/trailer combinationbydepressing
the brake firmly.
®
ESP
of about65km/h.
®
ESP
is deactivatedordisabledbecause of amalfunction.
EBD (electronicbrake forcedistribution)
General information
EBD monitors and controls the brake pressure
on the rearwheelstoimprove driving stability
whilebraking.
Important safety notes
Observe the "Important safety notes"sec-
i
tion(
G
If EBD is malfunctioning,the rearwheelscan
lock, e.g.under fullbraking.Thisincreases the
riskofskidding and an accident.
®
assists youinthissituation. ESP
WARNING
®
can detect this. There is
trailerstabilization is active above speeds
trailerstabilization does not work if ESP
Y page 61).
WARNING
67
®
Safety
®
Z
Page 70

Protection against theft
68
You should therefore adapt your drivingstyle
to the differenthandlingcharacteristics. Have
the brakesystemchecked at aqualified specialist workshop.
Please observethe information on warningand
indicator lamps (
Y page 220) as well as on display messages
(
Y page 194).
(
Safety
ADAPTIVE BRAKE
Y page 220)
ADAPTIVE BRAKE enhances braking safetyand
offers increased braking comfort.Inaddition to
the braking function,ADAPTIVE BRAKE also has
the HOLDfunction (
Y page 125).
assist (
Y page 157) and hill start
X
To activatewith theSmartKey: remove the
SmartKey from the ignition lock.
To activatewith KEYLESS-GO start-func-
X
tion or KEYLESS-GO: switchthe ignition off
and open the driver's door.
X
To deactivate: switchonthe ignition.
When leaving the vehicle, always takethe
SmartKey with you and lock the vehicle. Anyone
can startthe engineifavalid SmartKey has been
left inside the vehicle.
The immobilizer is always deactivatedwhen
i
you startthe engine.
In the eventthat the enginecannot be started
(yet the vehicle's battery is charged), the system is not operational. Contact an authorized
Mercedes-BenzCenter or call
1-800-FOR-MERCedes (in the USA)or
1-800-387-0100(in Canada).
STEER CONTROL
Generalinformation
STEER CONTROL helps you by transmitting a
noticeable steeringforcetothe steeringwheel
in the direction required for vehicle stabilization.
This steeringassistanceisprovided in particular
if:
R
both right wheels or both left wheels are on a
wet or slippery road surfacewhen you brake
R
the vehicle begins to skid
Important safetynotes
Observe the "Importantsafetynotes" sec-
i
Y page 61).
tion (
No steeringassistanceisprovided from STEER
CONTROL, if:
R
ESP®is malfunctioning
R
the steeringismalfunctioning
®
If ESP
is malfunctioning, you will be assisted
further by the electrical power steering.
Protection against theft
Immobilizer
The immobilizer preventsyour vehicle from
being started without the correctSmartKey.
ATA (anti-theft alarmsystem)
X
To arm: lock the vehicle with the SmartKeyor
KEYLESS-GO.
Indicator lamp : flashes. The alarm system
is armed after approximately 15 seconds.
X
To disarm: unlock the vehicle with the SmartKey or KEYLESS-GO.
or
X
Insert the SmartKeyintothe ignition lock.
Avisual and audible alarm is triggered if the
alarm system is armed and you open:
R
adoor
R
the vehicle with the mechanical key
R
the trunklid
R
the hood
Page 71

To turn the alarm off with the SmartKey:
X
press the % or & button on the SmartKey.
The alarm is stopped.
or
Vehicles with KEYLESS-GO start-function
X
or KEYLESS-GO: remove the Start/Stop button from the ignition lock (
X
Insert the SmartKey into the ignition lock.
Y page 122).
The alarm is stopped.
To stopthe alarm using KEYLESS-GO:
X
grasp the outsidedoorhandle. The SmartKey
must be outsidethe vehicle.
The alarm is stopped.
or
X
Press the Start/Stop button on the dashboard.The SmartKey must be insidethe vehicle.
The alarm is stopped.
The alarm is not switched off, evenifyou close
the open door thattriggered it, for example.
If the alarm continuesfor more than
i
30 seconds,the mbrace emergency callsystem automaticallynotifiesthe Customer
Assistance Center. Thisisdoneeither by text
message or data connection.
The emergency callsystem sendsthe message or data provided that:
R
youhavesubscribed to the mbrace service.
R
the mbrace service hasbeenactivated
properly.
R
the necessary mobilephone network is
available.
Protectionagainsttheft
69
Safety
Z
Page 72

70
SmartKey
SmartKey
Important safety notes
WARNING
G
If children are left unsupervised in the vehicle,
they could:
R
open the doors, thus endangering other
people or road users.
R
get out and disrupt traffic.
R
operate the vehicle's equipment.
Additionally, children could set the vehicle in
motion if, for example, they:
R
release the parking brake.
R
shifting the automatic transmission out of
park position P
R
Start the engine.
There is arisk of an accident and injury.
When leaving the vehicle, always take the
Opening and closing
SmartKey withyou and lock the vehicle. Never
leave children or animals unattended in the
vehicle. Always keep the SmartKey out of
reach of children.
WARNING
G
If you attach heavy or large objectstothe
SmartKey, the SmartKey could be unintentionally turned in the ignition lock. This could
cause the engine to be switched off. There is a
risk of an accident.
Do notattach any heavy or large objectstothe
SmartKey. Remove any bulky key rings before
insertingthe SmartKey into the ignition lock.
Keep the SmartKey away from strongmag-
!
netic fields. Otherwise, the remote control
function could be affected.
Strong magnetic fields can occur in the vicinity of powerful electrical installations.
Do not keep the SmartKey:
R
with electronic devices, e.g. amobile phone
or another SmartKey.
R
with metallic objects, e.g. coins or metal foil.
R
inside metallic objects, e.g. ametal case
Vehicles with KEYLESS-GO startfunction: do
not keep the SmartKey in the trunk.Otherwise,
the SmartKey may not be detected, e.g. when
startingthe engine using the Start/Stop button.
SmartKey functions
:
& To lock the vehicle
;
F To open the trunk lid
=
% To unlock the vehicle
If you do not open the vehicle within approximately 40 seconds of unlocking:
R
the vehicle is locked again.
R
anti-theft protection is reactivated.
X
To lock: press the & button.
The SmartKey centrally locks/unlocks:
R
the doors
R
the trunk lid
R
the fuel filler flap
The turn signals flash once when unlocking and
three times when locking.
When the locator lighting is activated via the
multimedia system, it lights up when it is dark
after the vehicle is unlocked with the remote
control (see the separate operating instructions).
You can also set an audible signal to confirm
that the vehicle has been locked. The audible
signal can be activated and deactivated using
the on-board computer (
X
To open the trunk lid automatically: press
and hold the F button until the trunk lid
opens (
Y page 79).
Y page 187).
Page 73

SmartKey
71
KEYLESS-GO
Generalnotes
Bear in mindthatthe enginecan be started by
any of thevehicleoccupantsifthere is aSmartKey in thevehicle.
Lockingand unlocking
You can start,lockorunlockthe vehicleusing
KEYLESS-GO.Todothis, you only need carry the
SmartKey withyou. You can combine thefunctionsofKEYLESS-GO withthose of aconventional SmartKey. Unlockthe vehiclebyusing
KEYLESS-GO,for instance,and lockitusingthe
& buttononthe SmartKey.
The driver's door and thedoor at whichthe handle is used,mustbothbeclosed. The SmartKey
mustbeoutside thevehicle. Whenlocking or
unlocking withKEYLESS-GO,the distance
between theSmartKey and thecorresponding
door handle mustnot be greaterthanthree feet
(onemeter).
Acheck whichperiodically establishes aradio
connection between thevehicleand theSmartKey determineswhether avalid SmartKey is in
thevehicle. This occurs, for example:
R
when starting theengine
R
while driving
R
when usingHANDS-FREEACCESS
R
when theexternal door handles are touched
R
during convenience closing
Makesurethatyou do nottouch theinner
surfaceofthe door handle.
X
Convenienceclosingfeature: touch
recessed sensor surface ; for an extended
period.
Further information on theconvenience closing feature (
X
To unlock thetrunk lid: pull trunk lid han-
Y page 83).
dle :.
Deactivating and activating
If you do notintendtouse thevehiclefor alonger period of time, you can deactivateKEYLESSGO. The SmartKey will then use verylittlepower,
thereby conserving battery power. Forthe purposes of activation/deactivation,the vehicle
mustnot be nearby.
X
To deactivate: press the & buttononthe
SmartKey twice in rapidsuccession.
The battery checklamp of theSmartKey
flashes twice brieflyand lights up once,then
KEYLESS-GO is deactivated (
X
To activate: press any buttononthe SmartKey.
or
X
Insertthe SmartKey intothe ignition lock.
KEYLESS-GO and all of itsassociated features
are available again.
Y page 73).
Opening and closing
X
To unlock thevehicle: touch theinner sur-
faceofthe door handle.
X
To lock thevehicle: touch sensor surface :
or ;.
KEYLESS-GO startfunction
Generalnotes
Bear in mindthatthe enginecan be started by
any of thevehicleoccupantsifthere is aSmartKey in thevehicle.
Z
Page 74

72
SmartKey
Changing thesettings of thelocking
system
You can changethe settings of thelockingsystem. This meansthatonlythe driver'sdoor and
thefuel fillerflap are unlocked when thevehicle
is unlocked. This is useful if you frequently travel
on your own.
X
To change thesetting: pressand hold the
% and & buttons simultaneouslyfor
approximately six seconds until thebattery
indicator lamp flashes twice (
Y page 73).
If thesettingofthe lockingsystem is changed
within thesignal range of thevehicle,pressing
the & or % button:
R
locks or
R
unlocksthe vehicle
The SmartKey nowfunctionsasfollows:
X
To unlock: pressthe % buttononce.
X
To unlock centrally: pressthe % button
twice.
Opening and closing
X
To lock centrally: pressthe & button.
The KEYLESS-GO function is changed as follows:
X
To unlock thedriver's door: touch theinner
surface of thedoor handle on thedriver's
door.
X
To unlock centrally: touch theinner surface
of thedoor handle on thefront-passenger
door or therear door.
X
To lock centrally: touch theouter sensor
surface on oneofthe door handles.
X
To restorethe factorysettings: pressand
hold the % and & buttons simultaneously for approximately six seconds until the
battery check lamp flashes twice
Y page 73).
(
Mechanicalkey
General notes
If thevehicle can no longer be lockedor
unlocked withthe SmartKey or KEYLESS-GO,
use themechanical key.
If you use themechanical keytounlock and
open thedriver'sdoor or thetrunk lid, theantitheft alarm system will be triggered (
Y page 68).
Thereare several ways to turnoff thealarm:
X
To deactivatethe alarmwith thekey: press
the % or & buttononthe key.
or
X
Insertthe SmartKey intothe ignition lock.
or
To deactivatethe alarm with KEYLESS-GO:
X
pressthe Start/Stopbuttoninthe ignition
lock. The SmartKey must be in thevehicle.
or
X
Lockorunlock thevehicle usingKEYLESSGO. The SmartKey must be outside thevehicle.
If you unlock thevehicle usingthe mechanical
key, thefuel fillerflap will notbeunlocked automatically.
X
To unlock thefuelfillerflap: insert the
SmartKey intothe ignition lock.
Removing themechanicalkey
X
Push release catch : in thedirection of the
arrow and at thesame timeremove mechanical key ; from theSmartKey.
For further informationabout:
R
Unlockingthe driver'sdoor (Y page 77)
R
Unlockingthe trunk (Y page 81)
R
Lockingthe vehicle (Y page 77)
Insertingthe mechanicalkey
X
Push mechanical key ; completely intothe
SmartKey until it engages and release
catch : is back in its basic position.
Page 75

SmartKey
73
SmartKey battery
Important safety notes
WARNING
G
Batteries contain toxic and corrosive substances. If batteries are swallowed, it can result in
severe health problems. There is arisk of fatal
injury.
Keep batteries out of the reach of children. If
abattery is swallowed, seek medical attention
immediately.
The SmartKey batteries contain perchlorate
material, which may require special handling
and regard for the environment. National guidelines must be observed during disposal. In California, see www.dtsc.ca.gov/
HazardousWaste/Perchlorate/index.cfm.
Mercedes-Benz recommends that you have the
battery replaced at aqualified specialist workshop.
Checking the battery
Replacing the battery
You require aCR2025 3Vcell battery.
X
Take the mechanical key out of the SmartKey
Y page 72).
(
X
Press mechanical key ; into the opening in
the SmartKey in the direction of the arrow
until battery tray cover : opens. When doing
so, do not hold cover : shut.
X
Remove battery tray cover :.
Opening and closing
X
Press the & or % button.
The battery is working properly if battery
check lamp : lights up briefly.
The battery is discharged if battery check
lamp : does not light up briefly.
X
Change the battery (Y page 73).
i If the SmartKey battery is checked within
the signal reception range of the vehicle,
pressing the & or % button:
R
locks or
R
unlocks the vehicle
You can get abattery at any qualified spe-
i
cialist workshop.
X
Repeatedly tap the SmartKey against your
palm until battery = falls out.
X
Insert the new battery with the positive terminal facing upwards. Use alint-free cloth to
do so.
X
Make sure that the surface of the battery is
free of lint, grease and other contaminants.
X
Insert the front tabs of battery tray cover :
and then press to close it.
X
Insert mechanical key into the SmartKey
Y page 72).
(
X
Check the function of all SmartKey buttons on
the vehicle.
Z
Page 76

SmartKey
74
Problems with the SmartKey
Problem
You cannot lock or
unlock the vehicle using
the SmartKey.
Opening and closing
You can no longer lock or
unlock the vehicle using
KEYLESS-GO.
Possible causes/consequences and M Solutions
The SmartKey battery is discharged or nearly discharged.
Vehicles without KEYLESS-GO or KEYLESS-GO startfunction:
X
try again to lock/unlock the vehicle using the remote control function of the SmartKey. Point the tip of the SmartKey at the driver's
door handle from close range and press the % or & button.
If this does not work:
X
Check the SmartKey battery (Y page 73) and replace it if necessary
Y page 73).
(
X
Unlock (Y page 77) or lock (Y page 77) the vehicle using the
mechanical key.
There is interference from apowerful source of radio waves.
Vehicles without KEYLESS-GO or KEYLESS-GO startfunction:
X
try again to lock/unlock the vehicle using the remote control function of the SmartKey. Point the tip of the SmartKey at the driver's
door handle from close range and press the % or & button.
If this does not work:
X
Unlock (Y page 77) or lock (Y page 77) the vehicle using the
mechanical key.
The SmartKey is faulty.
X
Unlock (Y page 77) or lock (Y page 77) the vehicle using the
mechanical key.
X
Have the SmartKey checked at aqualified specialist workshop.
The SmartKey battery is discharged or nearly discharged.
X
Check the SmartKey battery (Y page 73) and replace it if necessary
Y page 73).
(
If this does not work:
X
Unlock (Y page 77) or lock (Y page 77) the vehicle using the
mechanical key.
There is interference from apowerful source of radio waves.
X
Unlock (Y page 77) or lock (Y page 77) the vehicle using the
mechanical key.
Page 77

SmartKey
75
Problem
The engine cannot be
started using the SmartKey.
The engine cannot be
started using the Start/
Stop button. The SmartKey is in the vehicle.
Possible causes/consequences and M Solutions
KEYLESS-GO is malfunctioning.
X
Lock/unlock the vehicle using the remote control function of the
SmartKey.
X
Have the vehicle and SmartKey checked at aqualified specialist
workshop.
If the vehicle can also not be locked/unlocked using the remote control function:
X
Unlock (Y page 77) or lock (Y page 77) the vehicle using the
mechanical key.
X
Have the vehicle and SmartKey checked at aqualified specialist
workshop.
The on-board voltage is too low.
X
Switch off non-essential consumers, e.g. seat heating or interior
lighting, and try to start the engine again.
If this does not work:
X
Check the starter battery and charge it if necessary (Y page 278).
or
X
Jump-start the vehicle (Y page 278).
or
X
Consult aqualified specialist workshop.
The vehicle is locked.
X
Unlock the vehicle and try to start the vehicle again.
The SmartKey battery is discharged or nearly discharged.
X
Check the SmartKey battery (Y page 73) and replace it if necessary
Y page 73).
(
If this does not work:
X
Start your vehicle with the SmartKey in the ignition lock.
Opening and closing
You have lost aSmartKey.
You have lost the
mechanical key.
There is interference from apowerful source of radio waves.
X
Start your vehicle with the SmartKey in the ignition lock.
X
Have the SmartKey deactivated at aqualified specialist workshop.
X
Report the loss immediately to the vehicle insurers.
X
If necessary, have the locks changed as well.
X
Report the loss immediately to the vehicle insurers.
X
If necessary, have the locks changed as well.
Z
Page 78

Doors
76
Doors
Important safetynotes
WARNING
G
If children are leftunsupervised in thevehicle,
they could:
R
openthe doors,thusendangeringother
people or road users.
R
get out and disrupttraffic.
R
operatethe vehicle'sequipment.
Additionally, children could set thevehicle in
motion if, forexample, they:
R
release theparking brake.
R
shiftingthe automatic transmissionout of
parkposition P
R
Start theengine.
There is ariskofanaccidentand injury.
Whenleavingthe vehicle, always take the
Opening andclosing
SmartKey withyou and lockthe vehicle. Never
leavechildren or animals unattended in the
vehicle. Always keep theSmartKey out of
reach of children.
You should preferably placeluggage or loadsin
thecargo compartment. Observethe loading
guidelines (
Y page 237).
Unlockingand opening doors from
theinside
The sidewindows will notopen/close if the
!
battery is discharged or if thesidewindows
haveicedup. It will then notbepossible to
close thedoor. Do notattempttoforce the
doorclosed. You could otherwise damage the
doororthe sidewindow.
Whenadoorisopened, thesidewindow on that
sideopens slightly. Whenthe doorisclosed, the
sidewindow closesagain.
X
To unlock andopenafront door: pull door
handle ;.
If thedoorislocked, locking knob : popsup.
The doorisunlockedand opens.
X
To unlock areardoor: pull up locking
knob :.
The doorisunlockedand can be opened.
X
To openareardoor: pull doorhandle ;.
You can openadoorfrominsidethe vehicle
evenifithas beenlocked. You can only openthe
reardoors from insidethe vehicle if they are not
securedbythe child-proof locks (
Y page 60).
If thevehicle has previously beenlockedwith
theSmartKey from theoutside, opening adoor
from theinsidewill trigger theanti-theftalarm
system. Switchoff thealarm(
Y page 68).
Centrally locking andunlocking the
vehicle from theinside
You can centrallylockorunlockthe vehicle from
theinside. Thiscan be useful if you wish to lock
thevehicle beforepulling away, forexample.
X
To unlock: press button :.
X
To lock: press button ;.
If all thedoors and thetrunk lid are closed, the
vehicle locks.
Page 79

Doors
77
Meanwhile, the fuel filler flap will not be locked
or unlocked.
You cannot unlock the vehicle centrally from the
inside if the vehicle has been locked with the
SmartKey or KEYLESS-GO.
You can open adoor from inside the vehicle
even if it has been locked. You can open the rear
doors from inside the vehicle unless they are
secured by the child-proof lock (
Y page 60).
If the vehicle has previously been locked with
the SmartKey from the outside, opening adoor
from the inside will trigger the anti-theft alarm
system. Switch off the alarm (
Y page 68).
If alocked door is opened from the inside, the
previous unlock status of the vehicle will be
taken into consideration if:
R
the vehicle was locked using the locking button for the central locking, or
R
if the vehicle was locked automatically
The vehicle will be fully unlocked if it had previously been fully unlocked. If only the driver's
door had been previously unlocked, only the
door which has been opened from the inside is
unlocked.
Automatic lockingfeature
You could therefore lock yourself out if:
R
the vehicle is being pushed
R
the vehicle is being towed
R
the vehicle is on aroller dynamometer
You can also switch the automatic locking function on and off using the on-board computer
Y page 187).
(
Unlocking the driver's door (mechanical key)
If the vehicle can no longer be locked or
unlocked with the SmartKey or KEYLESS-GO,
use the mechanical key.
If you use the mechanical key to unlock and
open the driver's door, the anti-theft alarm system will be triggered. Switch off the alarm
Y page 68).
(
X
Take the mechanical key out of the SmartKey
Y page 72).
(
X
Insert the mechanical key into the lock of the
driver's door as far as it will go.
Opening and closing
X
To deactivate: press and hold button : for
approximately five seconds until atone
sounds.
X
To activate: press and hold button ; for
approximately five seconds until atone
sounds.
If you press one of the two buttons and do not
hear atone, the relevant settinghas already
been selected.
The vehicle is locked automatically when the
ignition is switched on and the wheels are turning.
X
Turn the mechanical key counter-clockwise
as far as it will go to position 1.
The door is unlocked.
X
Turn the mechanical key back and remove it.
X
Insert mechanical key into the SmartKey
Y page 72).
(
Locking the vehicle (mechanical key)
If the vehicle can no longer be locked with the
SmartKey or KEYLESS-GO, use the mechanical
key.
X
Open the driver's door.
X
Close the front-passenger door, the rear
doors and the trunk lid.
Z
Page 80

Trunk
78
X
Press the lockingbutton on the driver’s door
Y page 76).
(
X
Check whether the lockingknobs on the
front-passenger door and the rear doors are
still visible. Press down the lockingknobs by
hand, if necessary.
X
Close the driver's door.
X
Take the mechanical key out of the SmartKey
Y page 72).
(
X
Insert the mechanical key into the lock of the
driver's door as far as it will go.
Opening and closing
X
Turn the mechanical key clockwise as far as it
will go to position 1.
X
Turn the mechanical key back and remove it.
X
Make sure that the doors and the trunk lid are
locked.
X
Insert mechanical key into the SmartKey
Y page 72).
(
If you lock the vehicle as described above,
i
the fuel filler flap is not locked. The anti-theft
alarm system is not armed.
WARNING
G
If objects, luggage or loads are not secured or
not secured sufficiently, they could slip, tip
over or be flung around and thereby hit vehicle
occupants. There is arisk of injury, particularly in the event of sudden braking or asudden change in direction.
Always store objectssothat they cannot be
flung around. Secure objects, luggage or
loads against slipping or tipping before the
journey.
The trunk lid swings upwards when opened.
!
Therefore, make sure that there is sufficient
clearance above the trunk lid.
The opening dimensions of the trunk lid can be
found in the "Vehicle data" section
Y page 320).
(
You should preferably place luggage or loads in
the trunk.Observe the loading guidelines
Y page 237).
(
Do not leave the SmartKey in the trunk.You
could otherwise lock yourself out.
The trunk lid can be:
R
opened and closed manually from outside
R
opened automatically from outside
R
opened automatically from inside
R
released with the emergencyrelease from the
inside
Opening/closing from outside
Trunk
Important safety notes
WARNING
G
Combustion engines emit poisonous exhaust
gases such as carbon monoxide. Exhaust
gases can enter the vehicle interior if the
trunk lid is open when the engine is running,
especially if the vehicle is in motion.There is a
risk of poisoning.
Always switch off the engine before opening
the trunk lid. Never drive with the trunk lid
open.
Opening
X
Press the % button on the SmartKey.
X
Pull handle :.
X
Raise the trunk lid.
Page 81

Trunk
79
Closing
X
Pull down thetrunk lid usinghandle :.
X
Let thetrunk lid dropintothe lock.
X
If necessary, lockthe vehicle withthe &
buttononthe SmartKey or withKEYLESS-GO.
Opening automatically from outside
Important safety notes
WARNING
G
Combustion engines emit poisonous exhaust
gases suchascarbon monoxide. Exhaust
gases can enterthe vehicle interiorifthe
trunk lid is open when theengineisrunning,
especiallyifthe vehicle is in motion.Thereisa
riskofpoisoning.
Always switch off theenginebefore opening
thetrunk lid. Never drivewiththe trunk lid
open.
The trunk lid swings upwardswhen opened.
!
Therefore, makesure that there is sufficient
clearance abovethe trunk lid.
The opening dimensionsofthe trunk lid can
i
be foundunder"Vehicle data" (
Y page 320).
HANDS-FREE ACCESS
Important safety notes
WARNING
G
The vehicle's exhaust system may be veryhot.
You couldburn yourself by touching the
exhaust system if you use HANDS-FREE
ACCESS.Thereisariskofinjury. Always
ensure that you only makethe kickingmovementwithin thedetection range of sensors.
If theSmartKey is within therear detection
!
range of KEYLESS-GO,the followingsituations,for example,couldlead to theunintentional opening of thetrunk:
R
usingacar wash
R
usingapower washer
Makesure that theSmartKey is at least 10 ft
(3 m) away from thevehicle.
You can also deactivate KEYLESS-GO.Fur-
i
ther informationondeactivatingand activating KEYLESS-GO (
Y page 71).
General notes
WithKEYLESS-GO and HANDS-FREEACCESS,
you can open thetrunk lid without usingyour
hands. This is useful if you have your hands full.
To do this, makeakickingmovement underthe
bumperwithyour foot.
Observethe followingpoints:
R
Carryyour KEYLESS-GO keyabout your person.The KEYLESS-GO keymust be in therear
detection range of thevehicle.
R
When making thekickingmovement,make
sure that you are standing firmly on the
ground and that there is sufficient clearance
to therear of thevehicle.You couldotherwise
lose your balance, for example on ice.
Opening and closing
Opening automatically
You can open thetrunk lid automaticallyusing
theSmartKey or thehandle in thetrunk lid.
X
Press and hold the F buttononthe SmartKey until thetrunk lid opens.
or
X
If thetrunk lid is unlocked, pull thetrunk lid
handle and let it go again immediately.
Z
Page 82

Trunk
80
R
Alwaysensure thatyou onlymakethe kicking
movement withinthe detection range of sensors :.
R
Stand at least12in(30 cm)awayfrom the
rearareawhile doing so.
R
Do not come into contact with the bumper
whilemaking the kicking movement. Otherwise, the sensors maynot functioncorrectly.
R
HANDS-FREE ACCESS does not functionduring engine start.
Opening and closing
R
Dirt caused by roadsaltaround sensors :
mayrestrict functionality.
Using the HANDS-FREE ACCESS with aprostheticleg mayrestrict functionality.
R
If aKEYLESS-GO key is withinthe reardetectionrange of KEYLESS-GO,HANDS-FREE
ACCESS could be triggered.The trunklid
could thusbeopenedunintentionally, for
example, when you:
-
set something down or lift something up
behind the vehicle.
-
polish the rearofthe vehicle.
Do not carry the KEYLESS-GO key aboutyour
personinthesesituations or in situations similar to these. Thiswillprevent the unintentional opening of the trunklid.
Operation
X
To open: kick into sensor detection range :
belowthe bumperwithyourfoot.
If the trunk liddoesnot openafterseveral
X
attempts: wait at leastten secondsthen
move your legunder the bumperonce again.
If youholdyourfootunder the bumperfor too
long, the trunklid does not open. Repeat the leg
movement more quicklyifthisoccurs.
Opening automaticallyfrom inside
Important safety notes
WARNING
G
Combustion enginesemitpoisonousexhaust
gases such as carbonmonoxide. Exhaust
gases can enterthe vehicleinteriorifthe
trunklid is open when the engine is running,
especially if the vehicleisinmotion. There is a
riskofpoisoning.
Alwaysswitch off the engine before opening
the trunklid.Never drive with the trunklid
open.
The trunklid swingsupwards when opened.
!
Therefore,makesurethatthereissufficient
clearance above the trunklid.
The opening dimensions of the trunklid can be
found under "Vehicle data" (
Y page 320).
Opening
Youcan open the trunklid from the driver's seat
when the vehicleisstationaryand unlocked.
Page 83

X
To open: pull remote operating switch : for
the trunk liduntilthe trunk lidopens.
Emergencyreleasefor the trunk
General notes
The trunk lidswingsupwards when opened.
!
Therefore, make sure thatthereissufficient
clearance above the trunk lid.
The opening dimensions of the trunk lidcan be
found in the "Vehicle data" section
Y page 320).
(
If the trunk lidcan no longer be unlocked:
R
using the SmartKey,or
R
using the remote operating switch in the door
controlpanel:
Use the emergency release on the insideofthe
trunk lid.
Youcan reach the emergency release via the
trunk.
Opening
Side windows
X
Foldthe rearseatbackrestforwards
Y page 240).
(
X
Insert asuitabletool ;,e.g.ascrewdriver,
into opening : in the paneling.
The trunk lidisreleased.
X
Openthe trunk lid.
Emergencyreleasebutton
Youcan open the trunk lidfrom insidethe vehicle with the emergency release button.
X
Press emergency release button : briefly.
The trunk lidunlocks and opens.
The trunk lidcan be unlockedand openedwith
the trunk lidemergency release when the vehicle is stationary or whiledriving.
The trunk lidemergency release does not open
the trunk lidifthe battery is disconnected or
discharged.
Trunk lidemergency release light:
R
Emergency release button : flashesfor
30 minutes afterthe trunk lidisopened.
R
Emergency release button : flashesfor
60 minutes afterthe trunk lidisclosed.
81
Opening and closing
Side windows
Important safety notes
WARNING
G
While opening the side windows,bodyparts
could become trappedbetween the side windowand the door frame as the side window
moves. There is ariskofinjury.
Make sure thatnobodytouchesthe side windowduring the opening procedure. If some-
Z
Page 84

Side windows
82
body becomes trapped, release the switch or
pull the switch to close the side window again.
WARNING
G
While closingthe side windows, body parts in
the closingarea could become trapped. There
is arisk of injury.
When closingmake sure that no parts of the
body are in the closingarea. If somebody
becomes trapped, release the switch or press
the switch to open the side window again.
WARNING
G
If children operate the side windows they
could become trapped, particularly if they are
left unsupervised. There is arisk of injury.
Activatethe override feature for the rear side
windows. When leaving the vehicle, always
take the SmartKey with you and lock the vehicle. Never leave children unsupervised in the
Opening and closing
vehicle.
Side window reversing feature
The side windows are equipped with an automatic reversing feature. If asolid objectblocks
or restrictsaside window from traveling
upwards during the automatic closingprocess,
the side window opens again automatically. During the manual closingprocess, the side window
only opens again automatically after the correspondingswitch is released. The automatic
reversing feature is only an aid and is no substitute for your attention when closingaside window.
WARNING
G
The reversing feature does not react:
R
to soft,light and thin objects, e.g. small fingers
R
while resetting
This means that the reversing feature cannot
preventsomeonebeing trapped in these situations. There is arisk of injury.
Make sure that no body parts are in close
proximity during the closingprocedure. If
someonebecomes trapped, press the switch
to open the side window again.
Opening and closing the side windows
The switches for all side windows are located on
the driver'sdoor. There is also aswitch on each
door for the correspondingside window.
The switches on the driver'sdoor take precedence.
:
Frontleft
;
Frontright
=
Rear right
?
Rear left
X
Turn the SmartKey to position 1 or 2 in the
ignition lock (
X
To open manually: press and hold the corresponding switch.
X
To open fully: press the switch beyond the
pressure point and release it.
Automatic operation is started.
X
To close manually: pull the corresponding
switch and hold it.
X
To close fully: pull the switch beyond the
pressure point and release it.
Automatic operation is started.
X
To interrupt automatic operation: press/
pull the correspondingswitch again.
If you press/pull the switch beyond the
i
point of resistance, automatic operation is
started in the correspondingdirection. You
can stop automatic operation by pressing/
pulling the switch again.
You can continue to operate the side win-
i
dows after you switch off the engineor
removethe SmartKey. This function remains
Y page 122).
Page 85

Sidewindows
83
active for fiveminutesoruntil thedriver'sor
front-passenger door is opened.
When theoverride feature for theside win-
i
dows is activated (
Y page 60),the side win-
dows cannotbeoperatedfromthe rear.
Convenience opening
Vehicles with KEYLESS-GO, theKEYLESSGO startfunction, Exclusive package or
AMG Exclusive package: you can ventilate the
vehicle before you start driving.
The SmartKey can also be used to carry out the
followingfunctionssimultaneously:
R
unlock thevehicle
R
open theside windows
R
open thepanoramaroofwith power tilt/sliding paneland theroller sunblind
The convenience opening feature can only be
operatedusingthe SmartKey.
The "convenience opening"feature is also available when thevehicle is unlocked.
Vehicles with Exclusive package or AMG
X
Exclusive package but without KEYLESSGO and theKEYLESS-GO startfunction: for
thefollowingoperations,pointthe tip of the
SmartKey at thedoor handle on thedriver's
door.The SmartKey must be close to thedriver'sdoor handle.
Vehicles with KEYLESS-GO or theKEY-
i
LESS-GO startfunction: theSmartKey must
be in close proximitytothe vehicle.
X
Pressand hold the % button until theside
windows and thepanoramasunroofare in the
desired position.
If theroller sunblindofthe panoramaroof
with power tilt/slidingpanelisclosed, the
roller sunblindisopened first.
X
Pressand hold the % button once more
until thepanoramaroofwith power tilt/sliding panelreaches thedesired position.
X
To interruptconvenience opening: release
the % button.
Convenience closing feature
Important safety notes
WARNING
G
When theconvenience closingfeature is operating, partsofthe body couldbecome trapped
in theclosingarea of theside window and the
slidingsunroof. Thereisarisk of injury.
Observethe completeclosingprocedure
when theconvenience closingfeature is operating. Makesure that no body partsare in
close proximityduringthe closingprocedure.
Vehicles with KEYLESS-GO, theKEYLESSGO startfunction, Exclusive Package or
AMG Exclusive Package: at thesame timeyou
can:
R
lockthe vehicle
R
close theside windows
R
close thepanoramaroofwith power tilt/sliding panel
On vehicleswith apanoramaroofwith power
tilt/slidingpanel, you can then close theroller
sunblind.
i Notes on theautomatic reversing feature
for:
R
theside window (Y page 82)
R
thepanoramaroofwith power tilt/sliding
Y page 86)
panel(
R
theroller sunblind(Y page 87)
Using theSmartKey
Vehicles with Exclusive package or AMG
X
Exclusive package but without KEYLESSGO and theKEYLESS-GO startfunction: for
thefollowingoperations,pointthe tip of the
SmartKey at thedoor handle on thedriver's
door.The SmartKey must be close to thedriver'sdoor handle.
Vehicles with KEYLESS-GO or theKEY-
i
LESS-GO startfunction: theSmartKey must
be in close proximitytothe vehicle.
X
Pressand hold the & button until theside
windows and thepanoramaroofwith power
tilt/slidingpanelare fully closed.
X
Makesure that all theside windows and the
panoramaroofwith power tilt/slidingpanel
are closed.
Z
Opening and closing
Page 86

Side windows
84
On vehicles with apanorama roof with power
tilt/sliding panel:
X
Press and hold the & button againuntil the
roller sunblind of the panorama roof with
power tilt/sliding panel closes.
X
To interruptconvenienceclosing: release
the & button.
Using KEYLESS-GO
The driver's door and the door at which the handle is used, must both be closed. The SmartKey
must be outside the vehicle. The gap between
the SmartKey and the corresponding door handle should not be greater than 3ft(1m).
Opening and closing
X
Touch recessed sensor surface : on the
door handle until the side windows and the
panorama roof with power tilt/sliding panel
are fully closed.
Make sure you only touch recessed sensor
i
surface :.
X
Make sure that all the side windows are
closed.
X
Make sure that all the side windows and the
panorama roof with power tilt/sliding panel
are closed.
On vehicles with apanorama roof with power
tilt/sliding panel:
X
Touch recessed sensor surface : on the
door handle againuntil the roller sunblind of
the panorama roof with power tilt/sliding
panel closes.
X
To interruptconvenienceclosing: release
recessed sensor surface : on the door handle.
Resetting the side windows
If aside window can no longer be closed fully,
you must reset it.
X
Close all the doors.
X
Turn the SmartKey to position 1 or 2 in the
ignition lock (
X
Pull the corresponding switch on the door
control panel until the side window is completely closed (
X
Hold the switch for an additional second.
If the side window opens againslightly:
X
Immediately pull the corresponding switch on
the door control panel until the side window is
completely closed (
X
Hold the switch for an additional second.
X
If the respective side window remains closed
after the button is released,then it has been
set correctly. If this is not the case, repeat the
steps above.
Y page 122).
Y page 82).
Y page 82).
Problems with the side windows
WARNING
G
If you close aside window againimmediately after it has been blocked or reset, the side window
closes with increased or maximum force. The reversing feature is then not active. Parts of the
body could be trapped in the closing area in the process. This poses an increased risk of injury or
even fatal injury.
Make sure that no parts of the body are in the closing area. To stop the closing process, release
the switch or push the switch againtoreopen the side window.
Page 87

Panoramaroof with power tilt/sliding panel
85
Problem
Aside window cannot be
closed because it is
blocked by objects, e.g.
leaves in the window
guide.
Aside window cannot be
closed and you cannot
see the cause.
Possible causes/consequences and M Solutions
X
Remove the objects.
X
Close the side window.
If aside window is obstructed during closing and reopens again
slightly:
X
Immediately after the window blocks, pull the correspondingswitch
again until the side window has closed.
The side window is closed with increased force.
If aside window is obstructed again during closing and reopens again
slightly:
X
Immediately after the window blocks, pull the correspondingswitch
again until the side window has closed.
The side window is closed without the automatic reversing feature.
Panoramaroof with power tilt/sliding
panel
Important safety notes
In the following section, the term "sliding sunroof" refers to the panorama roof with power
tilt/sliding panel.
WARNING
G
While opening and closing the sliding sunroof,
body parts in close proximity could become
trapped. There is arisk of injury.
Make sure that no body parts are in close
proximity during the opening and closing procedures.
If somebody becomes trapped:
R
release the switch immediately, or
R
during automatic operation, push the
switch briefly in any direction
The opening or closing procedure will be stopped.
WARNING
G
If children operate the sliding sunroof they
could become trapped, particularly if they are
left unsupervised. There is arisk of injury.
When leaving the vehicle, always take the
SmartKey withyou and lock the vehicle. Never
leave children unsupervised in the vehicle.
WARNING
G
At high speeds the raised sliding sunroof automatically lowers slightly at the rear. This could
trap you or other persons. There is arisk of
injury. Make sure that nobody reaches into
the sweep of the sliding sunroof whilst the
vehicle is in motion.
If somebody becomes trapped, immediately
pull back the sliding sunroof switch. The sliding sunroof lifts during opening.
Only open the sliding sunroof if it is free of
!
snow and ice. Otherwise, malfunctions may
occur.
Do not allow anything to protrude from the
sliding sunroof. Otherwise, the seals could be
damaged.
The weather can change abruptly. It could
!
start to rain or snow. Make sure that the sliding sunroof is closed when you leave the vehicle. The vehicle electronics can be damaged if
water enters the vehicle interior.
Resonance noises can occur in addition to
i
the usual airflow noises when the sliding sunroof is open. They are caused by minor pres-
Opening and closing
Z
Page 88

Panoramaroof with power tilt/sliding panel
86
sure fluctuations in the vehicle interior.
Change the position of the sliding sunroof or
open aside window slightly to reduce or eliminate these noises.
Sliding sunroof reversing feature
In the following section, the term "sliding sunroof" refers to the panorama roof with power
tilt/sliding panel.
The sliding sunroof is equipped with an automatic reversing feature. If asolid object blocks
or restrictsthe sliding sunroof during the closing
process, the sliding sunroof opens againautomatically.However, the automatic reversing
feature is only an aid and does not relieve you of
the responsibility of paying attention when closing the sliding sunroof.
WARNING
G
The reversing feature does not react:
R
to soft, light and thin objects, e.g. small fin-
Opening and closing
gers
R
over the last 1/6 in (4 mm) of the closing
movement
R
during resetting
R
when closing the sliding sunroof againmanually immediately after automatic reversing
This means that the reversing feature cannot
prevent someone being trapped in these situations. There is arisk of injury.
Make sure that no body parts are in close
proximity during the closing procedure.
If somebody becomes trapped:
R
release the switch immediately,or
R
press the switch in any direction during the
automatic closing process
The closing process is stopped.
Operating the panoramaroof with
power tilt/sliding panel
Opening and closing
:
To raise
;
To open
=
To close/lower
The panorama roof with power tilt/sliding panel
can only be operated when the roller sunblind is
open.
X
Turn the SmartKey to position 1 or 2 in the
ignition lock (
X
Press or pull the 3 switch in the corresponding direction.
If you press/pull the 3 switch beyond the
point of resistance, automatic operation is started in the corresponding direction. You can stop
automatic operation by pressing/pulling the
switch again.
After opening the sliding sunroof, the roller sunblind closes slightly automatically. This reduces
drafts in the vehicle interior.
If the sliding sunroof is raised at the rear, it lowers slightly automatically at higher speeds. The
noise level in the vehicle interior is reduced as a
result.
At low speeds it raises againautomatically.
You can also temporarily deactivate automatic
lowering. To do so, press the 3 switch. The
sliding sunroof raises againautomatically.
You can continue to operate the sliding sunroof
after switching off the engine or removing the
SmartKey from the ignition lock. This function
remains active for five minutes or until you open
afront door.
The sliding sunroof cannot be opened if aroof
carrier is installed. In order to allow ventilation
of the vehicle interior, you can raise the sliding
sunroof.
Y page 122).
Page 89

Panorama roof with powertilt/sliding panel
87
If contact is made with aroof carrier approved
by Mercedes-Benz, the sliding sunroof lowers
slightly but remains raisedatthe rear.
Rain-closing feature
The rain-closing feature is onlyavailable for vehicles with arain sensor.
When the SmartKey is in position g in the ignition lock or is removed, the sliding sunroof
closes automatically:
R
if it starts to rain.
R
at extreme outsidetemperatures.
R
after six hours.
R
if there is amalfunction in the powersupply.
The panorama roof with powertilt/sliding panel
remains raisedatthe rear in order to allow ventilation of the vehicle interior.
If the panorama roof with powertilt/sliding
panel is obstructed whilebeing closed by the
rain-closing feature, it opens again slightly. The
rain-closing feature is then deactivated.
The panorama roof with powertilt/sliding panel
does not close if:
R
it is raisedatthe rear.
R
it is blocked.
R
no rain is falling on the area of the windshield
being monitored by the rain sensor. If the
vehicle,for example,isunder abridge or in a
carport, the field of the sensor may be covered.
Operating the rollersunblind for the
panorama roof with powertilt/sliding
panel
Important safety notes
WARNING
G
Parts of the body could become trapped
betweenthe rollersunblind and frame or sliding sunroof during automatic opening or closing. There is arisk of injury.
When opening or closing, make sure that no
body parts are in the sweep of the rollersunblind.
If somebodybecomes trapped:
R
release the switch immediately,or
R
during automatic operation, push the
switch brieflyinany direction
The opening or closing procedure willbestopped.
The rollersunblind shields the vehicle interior
from sunlight. The rollersunblind can only be
opened and closed when the panorama roof
with powertilt/sliding panel is closed.
Rollersunblind reversingfeature
The rollersunblind is equipped with an automatic reversing feature. If asolid object blocks
or restricts the rollersunblind during the closing
process, the rollersunblind opens again automatically. The automatic reversing feature is
only an aid and is not asubstitute for yourattentiveness when closing the rollersunblind.
WARNING
G
The reversing feature does not react:
R
to soft, lightand thin objects, e.g. small fingers
R
when closing the rollersunblind again manually immediately after automatic reversal
This means that the reversing feature cannot
prevent someone being trapped in these situations. There is arisk of injury.
When closing the rollersunblind, make sure
that no body parts are in the sweep area.
If somebodybecomes trapped:
R
release the switch immediately,or
R
press the switch in any direction during the
automatic closing process
The closing process is stopped.
Opening and closing
Z
Page 90

Panorama roof with power tilt/sliding panel
88
Opening and closing
:
To open
;
To open
=
To close
X
Turn the SmartKey to position 1 or 2 in the
ignition lock (
X
Press or pull the 3 switch in the correspondingdirection.
If you press/pull the 3 switch beyond the
Opening and closing
point of resistance, automatic operation is started in the correspondingdirection. You can stop
automatic operation by pressing/pulling the
switch again.
After opening the panorama roof with power
tilt/sliding panel, the roller sunblind automatically closes slightly. This reduces drafts in the
vehicle interior.
Y page 122).
Reset the panorama roof with power tilt/sliding
panel or the roller sunblind if the panorama roof
with power tilt/sliding panel or the roller sunblind does not move smoothly.
X
Turn the SmartKey to position 1 or 2 in the
ignition lock (
X
Pull the 3 switch repeatedly to the point of
Y page 122).
resistance in the direction of arrow : until
the panorama roof with power tilt/sliding
panel is fully closed.
X
Keep the 3 switch pulled for an additional
second.
X
Pull the 3 switch repeatedly to the point of
resistance in the direction of arrow : until
the roller sunblind is fully closed.
X
Keep the 3 switch pulled for an additional
second.
X
Make sure that the panorama roof with power
tilt/sliding panel and the roller sunblind can
be fully opened and closed again.
X
If this is not the case, repeat the steps above.
Resetting the panorama roof with
power tilt/sliding panel or the roller
sunblind
Page 91

Panoramaroof with power tilt/sliding panel
Problems with the panorama roof with power tilt/sliding panel
WARNING
G
If you do not reset the sliding sunroof after amalfunction or voltage supply interruption, then the
backing up function will malfunction or not work. The sliding sunroof closes with increased or
maximum force. Parts of the body could be trapped in the closing area in the process. This poses
an increased risk of injury or even fatal injury.
In such or similar situations always make sure that no parts of the body are in the closing area.
Always reset the sliding sunroof after amalfunction or voltage supply interruption.
If the sliding sunroof still cannot be opened or closed as aresult of amalfunction,contact a
!
qualified specialist workshop.
89
Problem
The panorama roof with
power tilt/sliding panel
cannot be closed and
you cannot see the
cause.
Possible causes/consequences and M Solutions
If the panorama roof with power tilt/sliding panel is obstructed during
closing and reopens again slightly:
X
Immediately after it blocks, pull the 3 switch down again to the
point of resistance until the panorama roof with power tilt/sliding
panel is closed.
The panorama roof with power tilt/sliding panel is closed with more
force.
If the panorama roof with power tilt/sliding panel is obstructed again
during closing and reopens again slightly:
X
Immediately after it blocks, pull the 3 switch down again to the
point of resistance until the panorama roof with power tilt/sliding
panel is closed.
The panorama roof with power tilt/sliding panel is closed without
the automatic reversing feature.
Opening and closing
Z
Page 92

Seats
90
Correct driver's seat position
WARNING
G
You couldlose control of your vehicle if you do
thefollowingwhile driving:
R
adjust thedriver'sseat,head restraint,
steering wheel or mirrors
R
fasten theseat belt
Thereisariskofanaccident.
Adjust thedriver'sseat,head restraint,steering wheel and mirror and fasten your seat belt
before starting theengine.
Seats, steeringwheel and mirrors
Observethe followingwhen adjusting steering
wheel :,seat belt ; and driver'sseat =:
R
you are as far away from thedriver'sair bag as
possible
R
you are sittinginanormalupright position
R
your thighs are slightly supported by theseat
cushion
R
your legs are notentirely stretched and you
can depress thepedals properly
R
theback of your head is supported at eye level
by thecenterofthe head restraint
R
you can hold thesteering wheel withyour
armsslightly bent
R
you can moveyour legs freely
R
you can see all thedisplays in theinstrument
clusterclearly
R
you should have agood overview of traffic
conditions
R
theseat belt is pulled snugly against thebody
and is routed across thecenterofyour shoulder and across your hips in thepelvic area
Further related subjects:
R
Adjustingthe seatsmanually (Y page 91)
R
Adjustingthe seatselectrically
Y page 92)
(
R
Adjustingthe steering wheel manually
Y page 95)
(
R
Fasteningthe seat belt correctly
Y page 44)
(
R
Adjustingthe rear-view mirror and exterior
mirrors(
R
Vehicles with amemory function: saving
Y page 96)
theseat,steering wheel and exterior mirror
settings usingthe memory function
Y page 99)
(
Seats
Important safety notes
WARNING
G
Children couldbecome trapped if they adjust
theseats, particularly when unattended.
Thereisariskofinjury.
When leaving thevehicle,always takethe
SmartKey withyou and lockthe vehicle.Never
leave childrenunsupervised in thevehicle.
The seatscan still be adjusted when there is no
SmartKey in theignition lock.
WARNING
G
When you adjust aseat,you or other vehicle
occupants couldbecome trapped, e.g.onthe
seat guide rail. Thereisariskofinjury.
Makesure when adjusting aseat that no one
has any body partsinthe sweep of theseat.
Observethe safety noteson"Air bags"
(
Y page 45)and "Children in thevehicle"
Y page 54).
(
WARNING
G
If thedriver'sseat is notengaged,itcould
moveunexpectedly while thevehicle is in
Page 93

motion. This could cause you to lose control of
the vehicle. There is arisk of an accident.
Always make sure that the driver'sseat is
engagedbefore starting the vehicle.
WARNING
G
You could lose control of yourvehicleifyou do
the following while driving:
R
adjust the driver'sseat, head restraint,
steering wheelormirrors
R
fasten the seat belt
There is arisk of an accident.
Adjust the driver'sseat, head restraint, steering wheeland mirror and fasten yourseat belt
before starting the engine.
WARNING
G
If you adjust the seat height carelessly,you or
other vehicleoccupants could be trappedand
thereby injured. Children in particular could
accidentally press the electricalseat adjustment buttons and become trapped. There is a
risk of injury.
Whilemoving the seats, make sure that your
hands orother body parts do not get under the
lever assembly of the seat adjustment system.
To avoiddamage to the seats and the seat
!
heating, observe the following information:
R
keep liquidsfrom spilling on the seats. If
liquid is spilled on the seats, dry them as
soon as possible.
R
if the seat covers are damp or wet, do not
switch on the seat heating. The seat heating should alsonot be used to dry the seats.
R
clean the seat covers as recommended;
see the "Interior care" section.
R
do not transport heavy loads on the seats.
Do not place sharp objects on the seat
cushions, e.g. knives, nailsortools. The
seats should only be occupied by passengers, if possible.
R
when the seat heating is in operation, do
not cover the seats with insulating materials,e.g. blankets, coats, bags,seat covers,
child seats or booster seats.
Seats
Make sure that there are no objects in the
!
footwellunder or behind the seats when moving the seats back. There is arisk that the
seats and/or the objects could be damaged.
i Further related subjects:
R
cargo compartment enlargement (folding
down the rear seats) (
Adjusting the seats manually
Vehicles without the seating comfort
package
Seat fore-and-aft adjustment:
X
Lift handle : and slidethe seat forwards or
backwards.
X
Release lever : again.
Make sure that you hear the seat engage in
position.
Backrest angle:
X
Relieve the pressure on the backrest.
X
Turn handwheel = forwards or backwards.
Seat height:
X
Pullhandle ; upwards or push it down
repeatedly until the seat has reachedthe
desired height.
Y page 240)
91
Seats, steering wheel and mirrors
Z
Page 94

92
Seats
Vehicles with the seatingcomfort package
Seatfore-and-aft adjustment:
X
Lifthandle : and slidethe seatforwardsor
rearwards.
X
Releaselever : again.
Make sure thatyou hearthe seatengage in
position.
Backrest angle:
X
Relieve the pressure on the backrest.
X
Turn handwheel A forwardsorbackwards.
Seatheight:
X
Pull handle ? upwards or push it down
repeatedly untilthe seathas reachedthe
desired height.
Seatcushion angle:
X
Adjust the angle so thatyourthighs are lightly
Seats, steering wheel andmirrors
supported.
X
Turn handwheel = forwardsorbackwards.
Seatcushion length:
X
Lifthandle ; and slidethe front part of the
seatcushion forwardsorbackwards.
X
Releaselever ; again.
The seatcushion engages.
Adjustingthe seats electrically
:
Seatheight
;
Seatcushion angle
=
Seatfore-and-aft adjustment
?
Backrest angle
Youcan storethe seatsettings using the
i
memory function(
Y page 99).
Adjustingthe headrestraints
Important safety notes
WARNING
G
Youcould lose controlofyourvehicleifyou do
the following whiledriving:
R
adjustthe driver'sseat, headrestraint,
steering wheelormirrors
R
fasten the seatbelt
There is ariskofanaccident.
Adjust the driver'sseat, headrestraint, steering wheeland mirror and fasten your seatbelt
before starting the engine.
WARNING
G
If the headrestraints are not installedornot
adjusted correctly, they cannotprovideprotection as intended. There is an increased risk
of injury in the headand neck area, e.g.inthe
event of an accident or when braking.
Alwaysdrive with the headrestraints installed. Before driving off, make sure for every
vehicleoccupant thatthe centerofthe head
restraint supports the back of the headat
abouteye level.
Page 95

Seats
93
Using the fore-and-aft adjustment, adjust the
head restraint so that it is as close as possible to
your head.
General notes
For vehicles with sports seats you cannot adjust
the front head restraints or the outer rear head
restraints.
Adjusting the head restraints manually
Adjusting the head restraint height
X
To raise: pull the head restraint up to the
desired position.
X
To lower: press release catch : in the direc-
tion of the arrow and push the head restraint
down to the desired position.
With this function you can adjust the distance
between the head restraint and the back of the
seat occupant's head.
X
To move forwards: pull the head restraint
forwards in the direction of the arrow until it
engages.
There are several notches.
X
To move backwards: press and hold release
button : and push the head restraint backwards.
X
When the head restraint is in the desired position, release the button and make sure that
the head restraint is engaged in position.
Rear seat head restraints
Adjusting the rear seat head restraint
height
Adjusting the fore/aft position of the
head restraint
X
To raise: pull the head restraint up to the
desired position.
X
To lower: press release catch : and push
the head restraint down until it is in the
desired position.
Adjusting the 4-way lumbar support
You can adjust the contour of the front seat
backrests individually to provide optimum support for your back.
Z
Seats, steering wheeland mirrors
Page 96

Seats
94
:
Raises thebackrest contour
;
Softensthe backrest contour
=
Lowers thebackrest contour
?
Hardensthe backrest contour
AMG Performance seat
Vehicles with electricallyadjustableseats:
to adjust thecontourofthe seat and for
improvedlateral support,you can individually
adjust thefront seats.
Switchingthe seatheating on/off
Switchingon/off
WARNING
G
Repeatedly switching on theseat heating can
causethe seat cushion and backrest pads to
become veryhot.The healthofpersonswith
limitedtemperature sensitivityoralimited
abilitytoreacttohigh temperatures may be
affectedortheymay evensuffer burn-like
injuries. There is ariskofinjury.
Therefore,donot switch theseat heating on
repeatedly.
Seats,steering wheel and mirrors
Adjusting thesidebolsters of theseatcushion
To set thesidebolsters of theseatcush-
X
ion narrower: press button :.
To set thesidebolsters of theseatcush-
X
ion wider: press button ;.
Adjusting thesidebolsters of theseatbackrest
To set thesidebolsters of theseatback-
X
restnarrower: press button =.
To set thesidebolsters of theseatback-
X
restwider: press button ?.
The three red indicator lampsinthe buttonindicatethe heating level you haveselected.
The system automatically switches down from
level 3 to level 2 after approximately eight
minutes.
The system automatically switches down from
level 2 to level 1 after approximately ten
minutes.
The system automatically switches off approximately 20 minutesafter it is set to level 1.
X
Turn theSmartKey to position 1 or 2 in the
ignition lock(
X
To switch on: press button : repeatedly
Y page 122).
until thedesired heating level is set.
X
To switch off: press button : repeatedly
until all theindicator lampsgoout.
If thebattery voltageistoo low, theseat
i
heating may switch off.
Page 97

Problems with the seat heating
Steering wheel
95
Problem
The seat heating has
switched off prematurely
or cannot be switched
on.
Possible causes/consequences and M Solutions
The on-board voltage is too low because too many electrical consumers are switched on.
X
Switch off electrical consumers that you do not need, such as the
rear window defroster or interior lighting.
Once the battery is sufficiently charged, the seat heating will switch
back on automatically.
Steering wheel
Important safety notes
WARNING
G
You could lose control of your vehicle if you do
the following while driving:
R
adjust the driver's seat, head restraint,
steering wheel or mirrors
R
fasten the seat belt
There is arisk of an accident.
Adjust the driver's seat, head restraint,steering wheel and mirror and fasten your seat belt
before startingthe engine.
WARNING
G
Children could injure themselves if they
adjust the steering wheel. There is arisk of
injury.
When leaving the vehicle, always take the
SmartKey withyou and lock the vehicle. Never
leave children unsupervised in the vehicle.
:
Release lever
;
Adjuststhe steering wheel height
=
Adjuststhe steering wheel position (foreand-aft adjustment)
X
Push release lever : down completely.
The steering column is unlocked.
X
Adjust the steering wheel to the desired position.
X
Push release lever : up completely.
The steering column is locked.
X
Check if the steering column is locked. When
doing so, try to push the steering wheel up or
down or try to move it in the fore-and-aft
direction.
Seats, steering wheeland mirrors
Adjusting the steering wheel
WARNING
G
If the steering wheel is unlocked while the
vehicle is in motion, it could change position
unexpectedly. This could cause you to lose
control of the vehicle. There is arisk of an
accident.
Before startingoff, make sure the steering
wheel is locked. Never unlock the steering
wheel while the vehicle is in motion.
Z
Page 98

Mirrors
96
Mirrors
Rear-view mirror
X
Anti-glare mode: flick anti-glare lever : for-
wards or back.
Exterior mirrors
Adjusting the exterior mirrors
WARNING
G
You couldlose control of yourvehicleifyou do
the following while driving:
R
adjust the driver's seat, headrestraint,
steering wheelormirrors
R
fasten the seat belt
There is arisk of an accident.
Adjust the driver's seat, headrestraint, steer-
Seats, steering wheel and mirrors
ing wheeland mirror and fasten yourseat belt
before starting the engine.
WARNING
G
The exterior mirror on the front-passenger
side reduces the size of the image. Visible
objects are actually closer than they appear.
This means that you couldmisjudge the distance from road users traveling behind, e.g.
when changing lane.There is arisk of an accident.
For this reason, alwaysmake sure of the
actualdistance from the road users traveling
behind by glancing over yourshoulder.
X
Turn the SmartKey to position 1 or 2 in the
ignitionlock (
X
Exterior mirror on the front-passenger side:
press button ;.
Exterior mirror on the driver's side:press button :.
The indicator lamp in the corresponding button lights up in red.
The indicator lamp goes out again after some
time. You can adjust the selected exterior
mirror using button = aslong as the indicator
lamp is lit.
X
Press button = up, down, or to the right or
left until you have adjusted the exterior mirror
to the correct position. You should have a
good overview of traffic conditions.
The convex exterior mirrors provide alarger field
of vision.
After the engine has been started, the exterior
mirrors are automatically heated at low outside
temperatures. Heating takes amaximumoften
minutes.
You can alsoheatupthe exterior mirrors
i
manually by switching on the rear window
defroster.
Y page122).
Page 99

Mirrors
97
Folding theexterior mirrors in or out
electrically
X
Turn theSmartKey to position 1 or 2 in the
ignition lock(
X
Briefly press :.
Y page 122).
Both exteriormirrorsfoldinorout.
Makesure that theexteriormirrorsare
i
always folded out fully while driving.They
could otherwise vibrate.
If you are driving fasterthan30mph
i
(47 km/h), you can no longer foldinthe exteriormirrors.
Resetting theexterior mirrors
If thebattery has been disconnected or completely discharged, theexteriormirrorsmust be
reset.The exteriormirrorswill otherwise not
foldinwhen you select the"Fold in mirrorswhen
locking" function in theon-board computer
Y page 188).
(
X
Turn theSmartKey to position 1 in theignition lock(
X
Briefly press :.
Y page 122).
Folding theexterior mirrors in or out
automatically
If the"Fold in mirrorswhen locking" function is
activated in theon-board computer
Y page 188):
(
R
theexteriormirrorsfoldinautomatically as
soonasyou lockthe vehiclefromthe outside.
R
theexteriormirrorsfoldout again automaticallyassoonasyou unlock thevehicleand
then open thedriver'sorfront-passenger
door.
If theexteriormirrorshave been folded in
i
manually, they do notfoldout.
Exterior mirror pushed out of position
If an exteriormirror has been pushed out of
position,proceedasfollows:
Vehicles without electricallyfolding exte-
X
rior mirrors: movethe exteriormirror into
thecorrect position manually.
Vehicles with electricallyfolding exterior
X
mirrors: press and hold mirror-foldingbutton
(
Y page 97)until youhearthe mirror click into
place.
The mirror housing is engaged againand you
can adjustthe exteriormirrors as usual
Y page 96).
(
Automaticanti-glare mirrors
WARNING
G
Electrolyte mayescape if the glassinanautomatic anti-glare mirror breaks.The electrolyte
is harmfuland causes irritation. It must not
come into contact with your skin, eyes, respiratory organs or clothing or be swallowed.
There is ariskofinjury.
If youcome into contact with the electrolyte,
observe the following:
R
Rinse off the electrolyte from your skin
immediatelywithwater.
R
Immediately rinsethe electrolyte outof
your eyes thoroughlywithclean water.
R
If the electrolyte is swallowed, immediately
rinseyourmouth outthoroughly. Do not
induce vomiting.
R
If electrolyte comesinto contact with your
skinorhairorisswallowed, seekmedical
attentionimmediately.
R
Immediately change outofclothing which
hascome into contact with electrolyte.
R
If an allergicreactionoccurs, seekmedical
attentionimmediately.
The "Automatic anti-glare mirrors"functionis
onlyavailable if the vehicleisequippedwiththe
"Mirrors package".
Seats, steering wheel andmirrors
Z
Page 100

Memory function
98
The rear-view mirror and the exterior mirror on
the driver's side automatically go into anti-glare
mode if:
R
the ignition is switched on and
R
incident light from headlamps strikes the sensor in the rear-view mirror
The mirrors do not go into anti-glare mode if
reverse gear is engaged or if the interior lighting
is switched on.
Parking position for the exterior mirror on the front-passenger side
Setting and storing the parking position
You can set the front-passenger side exterior
mirror such that you can see the rear wheel on
that side as soon as you engage reverse gear.
You can store this position.
:
Button for the driver's side exterior mirror
Seats, steering wheel and mirrors
;
Button for the front-passenger side exterior
mirror
=
Button for the exterior mirror setting
?
Memory button M
X
Make sure that the vehicle is stationary.
X
Turn the SmartKey to position 2 in the ignition lock (
X
Press button ;.
X
Engage reverse gear.
The exterior mirror on the front-passenger
side moves to the default parking position.
X
Use button = to adjust the exterior mirror to
aposition that allows you to see the rear
wheel and the curb.
The parking position is stored.
i
tion, the front-passenger side exterior mirror
returnstothe driving position.
Y page 122).
If you shift the transmission to another posi-
Calling up astored parking position setting
X
Turn the SmartKey to position 2 in the ignition lock (
X
Adjust the front-passenger side exterior mir-
Y page 122).
ror using the corresponding button
Y page 96).
(
X
Engage reverse gear.
The exterior mirror on the front-passenger
side moves to the stored parking position.
The exterior mirror on the front-passenger side
moves back to its original position:
R
as soon as you exceed aspeed of 9mph
(15 km/h)
R
about ten seconds after you have disengaged
reverse gear
R
when you use button : to select the exterior
mirror on the driver's side
Memory function
Important safety notes
WARNING
G
If you use the memory function on the driver's
side while driving, you could lose control of
the vehicle as aresult of the adjustments
being made. There is arisk of an accident.
Only use the memory function on the driver's
side when the vehicle is stationary.
WARNING
G
When the memory function adjusts the seat,
you and other vehicle occupants–particularly
children –could become trapped. There is a
risk of injury.
While the memory function is making adjustments, make sure that no one has any body
parts in the sweep of the seat. If somebody
becomes trapped, immediately release the
memory function position button.The adjustment process is stopped.
WARNING
G
Children could become trapped if they activate the memory function, particularly when
unattended. There is arisk of injury.
 Loading...