

Page 1
READ AND SAVE THESE INSTRUCTIONS
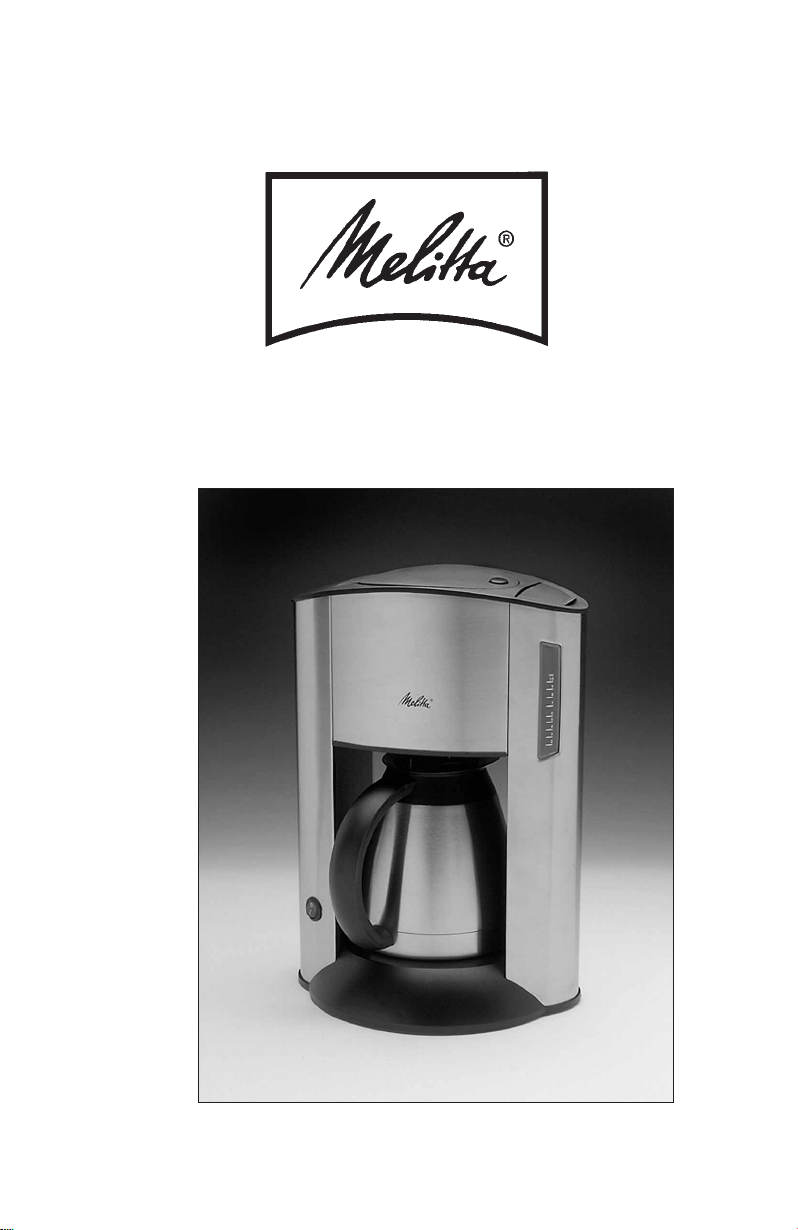
Thermal Coffeemaker
MODEL ME10TS
USE AND CARE GUIDE FOR
Page 2

IMPORTANT SAFEGUARDS
When using electrical appliances, basic safety precautions should
always be followed, including the following:
• Read all instructions.
• Do not touch hot surfaces.Use handles or knobs.
• To protect against electric shock, do not place cord, plugs or
appliance in water or other liquid.
• Close supervision is necessar y when any appliance is used by
or near children.
• Unplug from outlet when not in use and before cleaning. Allow
to cool before putting on or taking off parts, and before cleaning
the appliance.
• Do not operate any appliance with a damaged cord or plug or
after the appliance malfunctions, or has been damaged in any
manner.Contact Consumer Service for examination, repair or
adjustment.
• The use of an accessory not evaluated for use with this appliance may cause injuries.
• Do not use outdoors.
• Do not let cord hang over edge of table or counter, or touch hot
surfaces.
• Do not place on or near a hot gas or electric burner, or in a
heated oven.
• To disconnect, turn any control to “off”, then remove plug from
wall outlet.
• Do not use appliance for other than intended use.
• Be certain Lids are securely in place before operating appliance.
• Scalding may occur if the Lids are removed during the brewing
cycles.
SA VE THESE INSTRUCTIONS
THIS PRODUCT IS FOR HOUSEHOLD USE ONLY.
2
Page 3

ADDITIONAL IMPORTANT
SAFEGUARDS
WARNING: This appliance generates heat and escaping steam
during use. Use proper precautions to prevent the risk of burns,
fires, or other injury to persons or damage to property.
• All users of this appliance must read and understand this Use
and Care Guide before operating or cleaning this appliance.
• The cord to this appliance should be plugged into a 120V AC
electrical outlet only.
• Use
• DO NOT attempt to move an appliance containing hot liquids.
• Keep appliance at least 4 inches aw ay from w alls or other objects
• If this appliance begins to malfunction during use, immediately
• If this appliance falls or accidentally becomes immersed in water
• Do not leave this appliance unattended during use.
• The appliance must be left to cool down sufficiently before
• Always use fresh, cool water in your appliance. Warm water or
• DO NOT put Carafe into a microwave.
• DO NOT lift Hinged Filter Lid until brewing is complete, and all
• The Carafe is designed for use with this appliance. It must
water only in this appliance! Do not put any other liquids or
food products in this appliance.Do not mix or add anything to the
water placed in this appliance, except as instr ucted in the User
Maintenance Instructions to clean the appliance.
Allow appliance to cool completely before moving.
during operation. Do not place any objects on top of appliance
while it is operating. Place the appliance on a surface that is
resistant to heat.
unplug the cord. Do not use or attempt to repair the malfunctioning appliance.
or any other liquid, unplug it immediately.
the water! Do not use this appliance after it has fallen into
or has become immersed in water .
for examination and repair.
adding more water to avoid splattering.
other liquids, except as listed in cleaning section, may cause
damage to the appliance.
parts have cooled.
never be used on a range top.
Contact Consumer Service
Do not reach into
3
Page 4

• Do not use a damaged Carafe or a Carafe having a loose or
weakened handle.
CAUTION:To prevent injury when utilizing Pause and Pour (drip-
•
stop) feature, replace Caraf e within 20 seconds of remo ving during brewing process.
POLARIZED PLUG:This appliance has a polarized plug (one blade
is wider than the other).To reduce the risk of electric shock, this plug
is intended to fit into a polarized outlet only one way.If the plug does
not fit fully in the outlet, reverse the plug.If it still does not fit, contact a qualified electrician. Do not attempt to modify the plug in
any way.
SHORT CORD INSTR UCTIONS:A short power-supply cord is provided to reduce the risk resulting from becoming entangled in or
tripping over a longer cord.The use of extension cords is not
recommended.
ELECTRIC POWER: If the electr ic circuit is overloaded with other
appliances, your appliance ma y not oper ate. It should be operated
on a separate electrical circuit from other appliances.
WARNING: TO REDUCE THE RISK OF FIRE OR ELECTRIC
SHOCK, DO NOT REMOVE THE BOTTOM COVER.NO USERSERVICEABLE PARTS INSIDE. REPAIR SHOULD BE DONE BY
AUTHORIZED SERVICE PERSONNEL ONLY.
4
Page 5

Water Level
Indicator
Carafe Lid
(P/N 30974CL)
Base Plate
Carafe
(P/N 30973)
ON/OFF Switch
Your product may vary slightly from illustration.
Removable Filter Basket
(P/N 30976)
Water Reservoir
Hinged Filter Lid
Filter Lid Release Button
Water Reservoir Cover
(P/N 30977)
Parts Identification
FIGURE 2
FIGURE 1
FIGURE 3
55
Page 6

Before Using Your
Thermal Coffeemaker
WARNING: To reduce risk of fire or electric shock, do not immerse
Cord, Plug or appliance in water or any other liquid.
1. Before preparing coffee in your new coffeemaker, thoroughly
clean the Carafe, Carafe Lid and Removable Filter Basket in
warm, soapy water. Rinse and dry.Replace disassembled
parts.
Note: The Removable Filter Basket must be placed into the
coffeemaker with the arro w pointing toward the bac k of the unit.
2. Clean the inside of the coffeemaker by brewing two full Car afes
of tap water (see Brewing Instructions).Do not place a filter or
coffee in the Removable Filter Basket for this initial cleaning.
Note: At the end of the first brewing cycle, turn the Coffeemak er off
and wait ten minutes for the appliance to cool.Turn unit on and brew
second Carafe of cool water.
Coffee Filters
Cone-shaped paper filters are available locally at grocer y stores
and where coffeemakers are sold.Standard #4 filters should be
used.Permanent gold filters may also be purchased, eliminating the
need for disposable paper filters.
The use of basket-style paper filters is not recommended, since
they do not conform to the shape of the Removable Filter Basket
and may cause coffee to back up and spill over during brewing.
6
Page 7

Brewing Instructions
1. Place the Thermal Coffeemaker on a flat, level surface.Plug
the unit into a 120V, AC electrical outlet.
2. Press the Filter Lid Release Button to open the Hinged Filter Lid.
3. Place a #4 cone-shaped paper filter into the Removable Filter Basket. Measure one level tablespoon of drip or regular
grind coffee for each cup of coffee desired. For stronger or
milder coffee, adjust amount of coffee to suit your taste.
Note: We recommend using coffee ground specifically for
automatic drip coffeemakers.
4. Close the Hinged Filter Lid.
5. Raise the Water Reservoir Cover.Fill the Thermal Carafe with
cold water and pour it into the Water Reservoir to the desired
level.No less than two cups are recommended.
Important: Always use fresh, cool water in your appliance.
Warm water or other liquids, except as listed in the Care and
Cleaning Instructions, may cause damage to the appliance.
Note:The amount of brewed coffee will alwa ys be less than the
amount of water placed into the coffeemak er , since about 10%
is absorbed by the coffee grounds and filter.
6. For optimal thermal retention, preheat the Thermal Carafe by
rinsing it with hot water.PLACE THE CARAFE LID ON THE
CARAFE AND TURN CLOCKWISE UNTIL THE ARROWS
ARE ALIGNED. COFFEE WILL NOT FLOW IN CORRECTLY
IF MISALIGNED. Place the Carafe on the Base Plate.
7. In order to tur n unit on, press the ON/OFF Switch to ON. The
pilot light will glow to show the unit is operating.Hot water will
be dispensed gently and evenly through the coffee grounds.
When all the water has been pumped out of the Water Reservoir the coffeemaker will switch off automatically.
8. To pour a cup of coffee before the brew cycle is complete,
simply remove the Thermal Carafe from the Base Plate and
pour.Brewing will continue but dripping will automatically
pause.Return the Thermal Carafe to the Base Plate within 20
seconds; dripping will resume.
CAUTION: To prevent injury when utilizing Pause and Pour
(drip-stop) feature, replace Caraf e within 20 seconds of removing during brewing process.
7
Page 8

9. Upon completion of the brew cycle, wait until dripping has
stopped before removing the Caraf e.The Carafe Lid should be
kept in place to facilitate safe ser ving and help keep coffee at
proper serving temperature.You may wish to remove the
Thermal Carafe to a more convenient location.If so, seal the
Thermal Carafe by turning the Carafe Lid clockwise until tight.
The Thermal Carafe will maintain the ser ving temperature for
several hours.
10. Switch coffeemaker to OFF since unit is not in use.
11. T o bre w another Caraf e of coffee , turn unit OFF and wait 10 minutes to allow heating element to cool.
allowed to cool before immediate repeated use , water placed in
Water Chamber ma y become ov erheated and a spray of steam
could be released from opening, creating a risk of burns.
12. When not in use unplug the Base Assembly from the wall outlet. Allow the unit to cool completely before cleaning.See
User Maintenance Instructions.
Important: If unit is not
Brewing A Second Pot
Of Coffee
As mentioned above, it is recommended that the Coffeemaker
should be in the Off position for 10 minutes between cycles , in order
to allow unit to cool.While unit is in the Off position, dispose of used
coffee filter , rinse Caraf e and the Remov able Filter Bask et in water .
Place a fresh filter in basket.Repeat brewing procedure.
8
Page 9

Hints for Great Tasting Coffee
• A clean Coffeemaker is essential f or making great tasting coff ee.
Regular cleaning, as specified in User Maintenance Instructions
is highly recommended. Always use fresh, cool water in your
Coffeemaker. Finer grinds, such as drip and ADC coffee, promote fuller extraction and provide rich, full-bodied coff ee .Regular grind will require slightly more coffee per cup to provide the
strength of a finer grind.
• Store coffee in a cool, dry place.Once coffee has been opened,
keep it tightly sealed in the refrigerator to maintain freshness.For
optimum coffee, buy whole beans and grind them just before
brewing.
• Do not re-use coffee grounds since this will greatly impair coff ee
flavor .
• Reheating coffee is not recommended.Coffee is at its peak flavor immediately after brewing.
• Small oil droplets on the surface of brewed, black coffee is due
to the extraction of oil from the coffee grounds. Oiliness may
occur more frequently if heavily roasted coffees are used.Over
extraction may also cause oiliness, indicating a need to clean
your Coffeemaker.
User Maintenance Instructions
This appliance requires little maintenance. It contains no userserviceable parts. Any servicing requir ing disassembly other than
cleaning must be performed by a qualified appliance repair
technician.
WARNING: Unplug from wall outlet before cleaning.
Care And Cleaning Instructions
1. Always make sure Coffeemaker is unplugged and Base Plate
is cool before attempting to clean.
2. After daily use, the Removable Filter Basket, Thermal Carafe
and Carafe Lid should be washed in warm, soapy water.
3. If necessar y, wipe the outside of the Coffeemaker with a soft,
damp cloth and wipe dry .Do not use abrasiv e cleansers, scouring pads or steel wool.
9
Page 10

Special cleaning of your Coffeemaker is recommended at least
once a month, depending on frequency of use and quality of water
used in the unit. If water in your area is especially hard, the following cleaning procedure should be performed every two weeks,
since minerals in water can detract from the flav or of the coff ee and
possibly lengthen brew time.
1. Fill the Carafe with one part white vinegar to three par ts cold
water .P our water and vinegar solution into the W ater Chamber .
2. Open the Hinged Filter Lid, place a paper filter in the Removable Filter Basket then close the Lid.Place Carafe on Base
Plate. Press the Power Select Button to ON.
Note: Dur ing
cleaning, more steam will occur than during normal brewing.
3. KEEP THE COFFEEMAKER ON UNTIL HALF THE WATER
HAS CYCLED THR OUGH THE COFFEEMAKER, AS CAN BE
VIEWED THROUGH THE W ATER LEVEL INDICA T OR.Press
the Power Select Button to OFF.When liquid stops dripping
from the Removable Filter Basket into the Carafe, remove the
Carafe and allow the liquid to cool f or 10 minutes .When cooled,
pour liquid back into the Water Chamber.
4. Return Carafe to Base Plate.
5. Switch control to ON. Repeat procedure, allowing all the cleaning solution to empty into the Carafe. After dr ipping has
stopped, discard contents in Carafe.
6. After allowing the Coffeemaker to cool for 10 minutes, rinse it
out by brewing a Carafe full of cold water.Make sure to insert
a fresh filter into the Removable Filter Basket before brewing.
7. At the end of the brew cycle, press the Po wer Select Button to
OFF. Discard water in the Caraf e.Remov e used filter and wash
the Carafe and Remov able Filter Bask et in warm, soapy w ater .
Rinse and Dry.
8. When Coffeemaker has cooled, wipe exterior with a dry cloth.
10
Page 11

IMPORTANT NOTICE
If any parts are missing or defective,
DO NOT return this product.
Please call our Customer Service Department for assistance.
800-233-9054
LIMITED ONE YEAR WARRANTY
Warranty: This Melitta®product is warranted by Salton, Inc.to be free from
defects in materials or workmanship for a period of (1) year from the original
purchase date.This product warranty covers only the original consumer purchaser of the product.
Warranty Covera ge:This warranty is v oid if the product has been damaged by
accident in shipment, unreasonable use, misuse, neglect, improper service,
commercial use, repairs by unauthorized personnel, normal wear and tear,
improper assembly , installation or maintenance ab use or other causes not arising out of defects in materials or workmanship.This warranty is effective only if
the product is purchased and operated in the USA, and does not extend to
any unit which has been used in violation of written instructions furnished with
the product, or to units which have been altered or modified, or to damage to
products or parts thereof which have had the serial number removed, altered,
defaced or rendered illegible.
Implied Warranties: ANY IMPLIED WARRANTIES WHICH THE PURCHASER MAY H AV E ARE LIMITED IN DURATION T O ONE (1) YEAR FROM
THE DATE OF PURCHASE.Some states do not allow limitations on how long
an implied warranty lasts, so the above limitation may not apply to you.
Warranty P erf ormance: During the above one-year warranty period, a product with a defect will be either repaired or replaced with a reconditioned comparable model (at our option) when the product is returned to the Repair Center,
or the purchase price refunded.The repaired or replacement product will be in
warranty for the balance of the one-y ear warranty period and an additional onemonth period. No charge will be made for such repair or replacement.
Service and Repair: Should the appliance malfunction, you should first call
toll-free 1-800-233-9054 between the hours of 9:00 am and 5:00 pm Central
Standard Time and ask f or CONSUMER SERVICE stating that you are a consumer with a problem.Please refer to model number
In-Warranty Service (USA): For an appliance covered under the warranty
period, no charge is made for service or postage.Call for return authorization
1-800-233-9054.
Monday - Friday 9:00 am - 5:00 pm CST
Thank Y ou
ME10TS
when you call.
11
Page 12

Out-of-Warranty Service:A flat rate charge by model is made f or out-of-w arranty service. Include $8.00 (U.S.) for return shipping and handling.We will
notify you by mail of the amount of the charge for service and require you to
pay in advance for the repair or replacement.
For products purchased in the USA,but used in Canada:You may return
the product insured, packaged with sufficient protection, and postage and
insurance prepaid to the USA address listed below. Please note that all customs duty / brokerage fees , if any, must be paid by y ou and we will require you
to pay the cost of customs duty / brokerage fees to us in advance of our performing any service.
Risk During Shipment: We cannot assume responsibility for loss or damage during incoming shipment. For your protection, carefully package the
product for shipment and insure it with the carrier.Be sure to enclose the following items with your appliance: any accessories related to your problem,
your full return address and daytime phone number, a note describing the
problem you exper ienced, a copy of your sales receipt or other proof of purchase to determine warranty status.C.O.D.shipments cannot be accepted.
To return appliance, ship to: To contact us, please write to , call or email:
Attn: Repair Center Salton, Inc.
Salton, Inc. P.O. Box 6916
708 South Missouri Street Columbia, MO 65205-6916
Macon, MO 63552 1-800-233-9054
Email: Salton@Saltonusa.com
Limitation of Remedies: No representative or person is authorized to
assume for Salton, Inc. any other liability in connection with the sale of our
products.There shall be no claims for defects or failure of performance or
product failure under any theory of tort, contract or commercial law including,
but not limited to negligence, gross negligence, strict liability, breach of warranty and breach of contract.Repair , replacement or refund shall be the sole
remedy of the purchaser under this warranty, and in no event shall Salton, Inc.
be liable for any incidental or consequential damages, losses or expenses.
Some states do not allow the exclusion or limitation of incidental or consequential damages, so the above limitation or e xclusion may not apply to you.
Legal Rights:This warranty gives y ou specific legal rights, and you ma y also
have other rights which vary from state to state.
For more information on Salton products:
Visit our website: www.eSalton.com
© 2003 Salton, Inc. P/N 61322
All Rights Reserved Printed in China
 Loading...