

Page 1
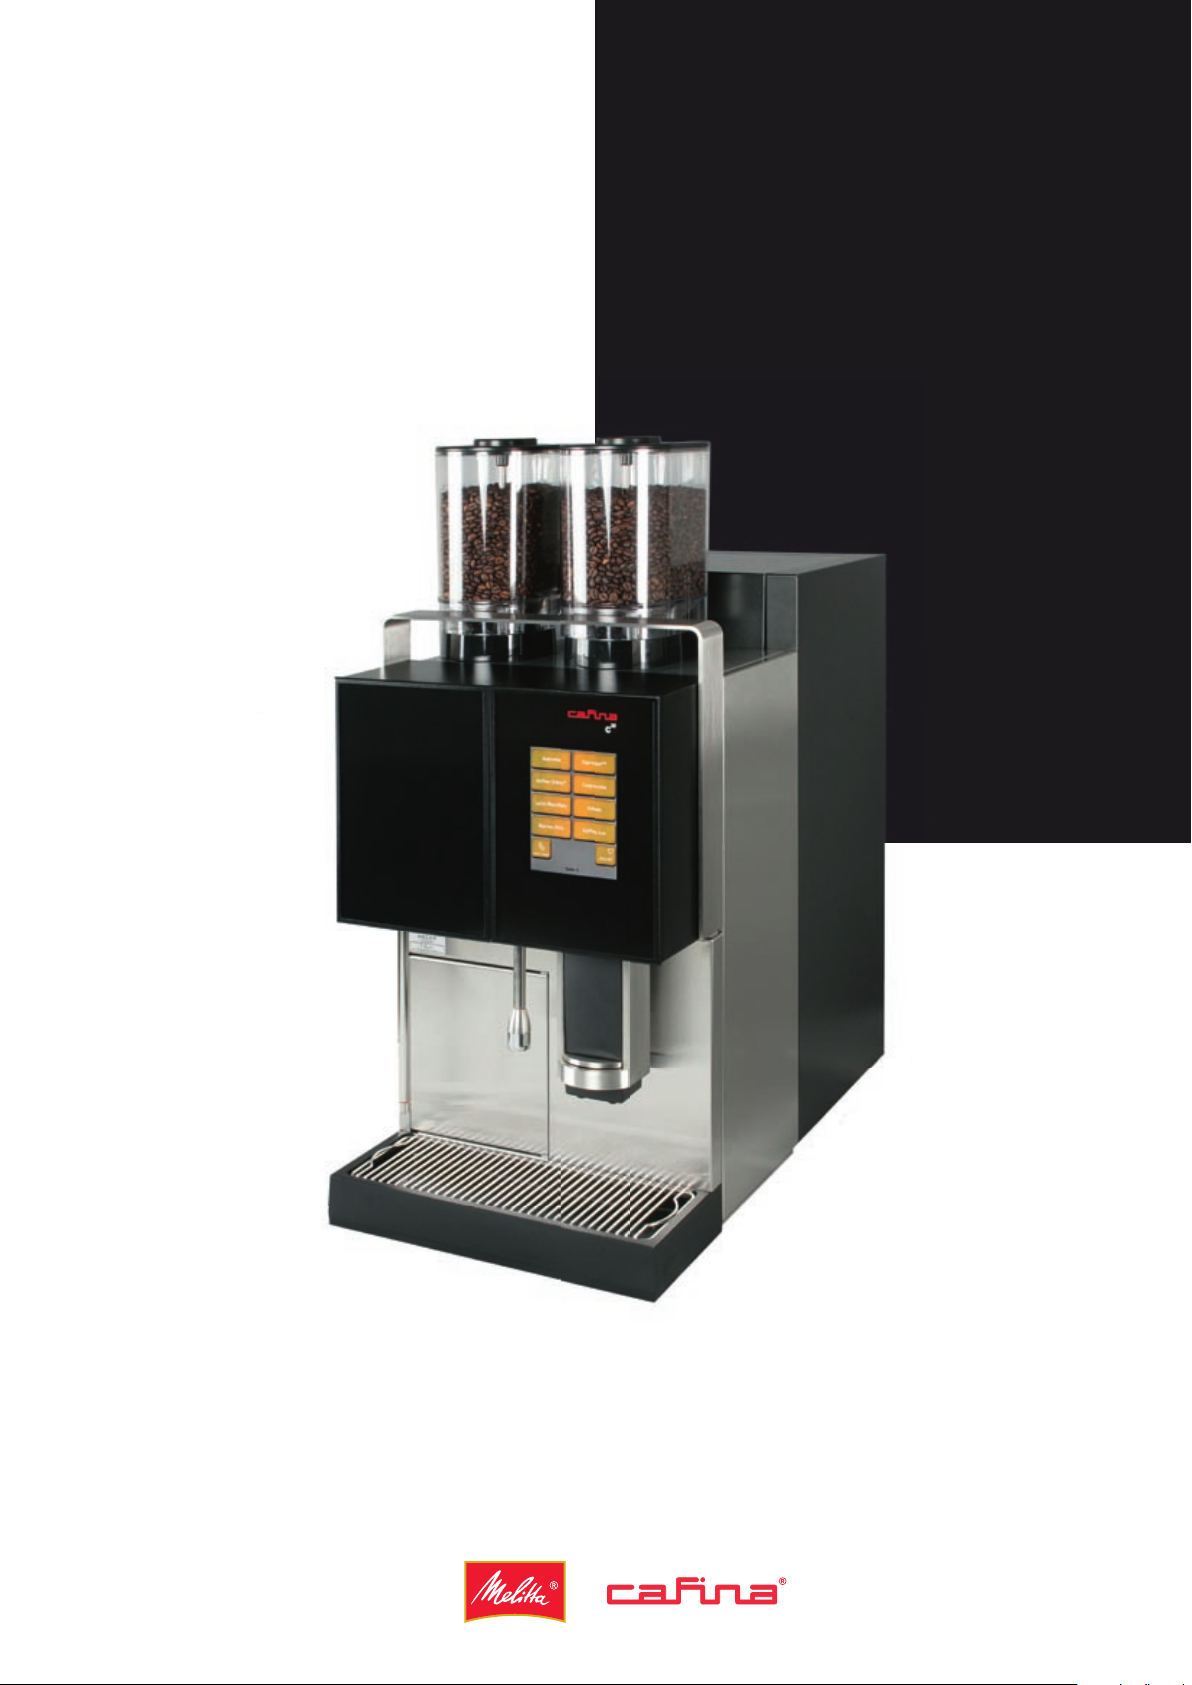
Original operating
instructions
c35
Page 2

2
Manufacturer:
TSM SUCCESS MANUAL® designed and copyright by
CAFINA AG
Römerstraße 2
5502 Hunzenschwil
Tel.: +41 (0)62 889 42 42
Fax: +41 (0)62 889 42 89
info@cafina.ch
www.cafina.ch
Page 3

3
Contents
1 For your safety 4
1.1 Explanation of the safety symbols 4
1.2 Basic safety instructions 4
1.3 User rights c35 5
1.4 Certification of the c35 5
2 Identification 7
2.1 Identification of the appliance type 7
2.2 Brief description of the appliances 8
3 Overview of appliance 9
3.1 Overview 9
3.2 Control panel with the function keys 9
4 Delivery and installation 10
4.1 Delivery 10
4.2 Installation 10
5 Power and water connection 11
5.1 Preparation for Power and
Water Connection 11
6 Starting up the appliance 12
6.1 Starting up the appliance for the first time 12
6.2 Starting up the appliance after a
malfunction or prolonged shutdown 12
7 Turning on and off 13
7.1 c35 and milk part 13
7.2 Milk cooler 13
7.3 Cup warmer 13
8 Dispensing the product 14
8.1 Coffee and milk drinks 14
8.2 Hot water 15
8.3 Manually foaming and heating milk
using the steam nozzle 15
9 Chip cards 16
10 Settings and functions of the
"MANAGER" menu 20
10.1 Product-related "MANAGER" settings 20
10.2 "Products" submenu 20
10.3 "Functions" submenu 21
10.4 "Price/Gratis" submenu 22
10.5 "Counters" submenu 22
10.6 "Time and Date" submenu 23
11 Emptying and Filling 24
11.1 Emptying 24
11.2 Filling 24
12 Cleaning 25
12.1 Equipment 25
12.2 Automatically initiated cleaning
of the coffee machine 25
12.3 Intermediate cleaning of the
coffee machine 25
12.4 Cleaning the exterior of the coffee
machine (cleaning the housing of the c35) 27
12.5 Cleaning the Milk Cooler and
the Cup Warmer 27
13 Shutdown and Storage 27
13.1 Shutting down the appliance for a
limited period or for good 27
13.2 Storage 27
14 Disposal 28
14.1 Disposal of Consumables 28
14.2 Disposing of the Appliance 28
15 Troubleshooting, Error
Messages and Fault Repair 28
15.1 Checklist for Troubleshooting 28
15.2 Error display by means of diagnosis points 29
16 Technical Data and
Installation Diagram 29
9.1 "USER" 16
9.2 "MANAGER" 17
9.3 "MEMORY" 18
9.4 Additional chip cards 19
17 Index 32
18 EC Declaration of Conformity 33
19 Notes 34
Page 4
4
1 For your safety
1.1 Explanation of the safety symbols
DANGER
This symbol warns of the high probability of an electric
shock and the resulting danger to life.
WARNING
This symbol warns of the risk of injury (e.g. scalding).
CAUTION
This symbol warns of possible damage to the c35.
INFORMATION
This symbol indicates important and useful information concerning operation of the c35.
This symbol refers to another location in the operating
instructions.
1.2 Basic safety instructions
1.2.3 General hazards
DANGER
Danger to life from electric shock
– Never turn on an appliance which is damaged or
has a defective power cord.
– If there are signs of damage (e.g. smell of burning),
immediately disconnect the appliance from the
power supply and contact your service technician.
– A damaged power cord on the appliance must be
replaced by a qualified service technician.
– Never let the power cord hang down. The power
cord may become a trip hazard or may be damaged.
– Ensure that the appliance and the power cord are
not near hot surfaces, e.g. ovens, gas or electric
cookers.
– Ensure that the power cord is not trapped or rub-
bing against sharp edges.
– Never open and repair the appliance yourself. Do
not make any changes to the appliance which are
not described in the operating instructions for the
appliance.
– Never remove casing, machine parts or electrical
parts.
– The appliance contains live parts. Danger to life if
the appliance is opened.
– Repairs may be performed only by the service
technician with original spare parts and accessories.
– Use original accessories only. Accessories which
were not explicitly recommended by CAFINA may
damage the appliance and cause fire, electric
shock and injuries.
Please follow ALL safety instructions in these
operating instructions!
1.2.1 Information about these operating
instructions
Please ensure that these operating instructions are
always kept close at hand. Ideally in a folder together
with all other c35 documents.
1.2.2 Designated use
The c35 and its attachments are designed exclusively
for use in the hotel and restaurant industry and in
factories and offices! The c35 is not suitable for use
outdoors.
Page 5
5
WARNING
Risk of injury!
– If objects are placed in the grinding unit, splinters
may be ejected and the machine damaged.
➤ Do not place any objects in the bean hopper
or the outlet to the grinding unit and do not
poke the feed apertures with an implement!
Do not reach into the machine, as hands may
be bruised or grazed by the inner machine elements.
➤ Never open and reach into the machine! The
c35 may be opened by authorised technicians
only!
WARNING
Risk of injury!
– Children and adults with impaired physical sensi-
tive faculties, impaired intellectual powers or who
have little experience must not operate the appliance except under the supervision or instruction
of a person responsible for their safety. Supervise
children to prevent them from playing with the
appliance.
WARNING
Risk of burns!
– The cup warmer trays are hot
➤ Do not touch trays!
– While the machine is being cleaned automatically
or manually, hot water and steam are discharged
continuously.
➤ When cleaning the machine, keep away from
the outlets!
– The product outlet, the hot water outlet and the
steam pipe become very hot!
➤ Do not touch outlets!
– When the products are discharged, there is a risk
of being scalded by the
products themselves.
➤ Caution when handling hot drinks!
– If the user interface is accidentally touched, coffee
can be unintentionally discharged.
➤ Only touch the sensitive user interface deliber-
ately.
WARNING
Hazard posed by spoiled milk and coffee residue!
– If the machine is not cleaned on a regular basis,
milk and coffee residue may stick inside the machine, block the outlets or get into the drinks. The
c35 automatically cleans itself when turned off.
➤ Once a day also clean the machine
yourself!
CAUTION
Operating conditions!
To ensure that the coffee machine is operated correctly, observe the following operating conditions:
– Operating personnel:
➤ The operating personnel must be trained by
authorised technicians.
– Technicians:
➤ Only technicians trained by the manufacturer
or by one of his authorised cooperation partners may maintain or repair the machine.
– Water quality:
➤ Total hardness = 7– 8° dGH
➤ Carbonate hardness = 3– 7° KH
➤ Acidity = 6.8 – 7.2 pH
➤ Conductance < 900 mS
– Milk quality:
➤ Any type of milk can be used provided it is
pasteurised and homogenised and has a
maximum fat content of 0 – 3.5%.
– Coffee bean quality:
➤ Only raw coffee which has been sorted should
be used. Extraneous matter, such as pieces
of wood or metal, stones, leaf remnants, etc.,
have been removed to prevent damage to the
grinding discs in the coffee grinders. However,
raw coffee of medium quality may still contain
a considerable amount of defective beans and
extraneous matter.
➤ Furthermore, coffee beans are preferred which
are roasted using the traditional roasting
method in an externally heated, continuously
moving drum for approx. 6 – 30 min. and
cooled gently with air. Turbo-roasted coffee
beans are to be avoided (roasting method for
3 – 5 min. and coffee beans are usually cooled
with water). In principle, the following applies: The more the coffee beans are burnt, the
lower the required initial quality of the coffee
beans.
Read chapter 12 "Cleaning"!
Page 6
6
1 For your safety (continued)
S
CAUTION
Risk of destruction!
– Do not poke the feed apertures with an imple-
ment!
– If objects are placed in the feed apertures for
coffee powder and cleaning tablets, the machine
may be damaged.
– The c35 is not protected against water jets. Do
not clean the appliance with a water jet or highpressure cleaner.
Follow chapter 12 "Cleaning"!
CAUTION
– Touch display with fingers only. Do not use
pointed objects.
– Do not use a soiled or incorrect chip card. Always
insert slowly and straight. Do not pull out card
until it is indicated on the display.
– Do not empty any extraneous liquids into the
drain.
1.3 User rights c35
The user rights of the c35 are divided into three different user groups:
1| USER (standard user)
2| MANAGER (user with settings rights)
3| ENGINEER (comprehensive service and
maintenance rights)
The different rights are specified by the chip cards.
The corresponding chip card is required to execute all
operating steps, setting steps and functions as well as
to turn the appliance on and off!
Before using the chip cards, read chapter 9 "Chip
cards".
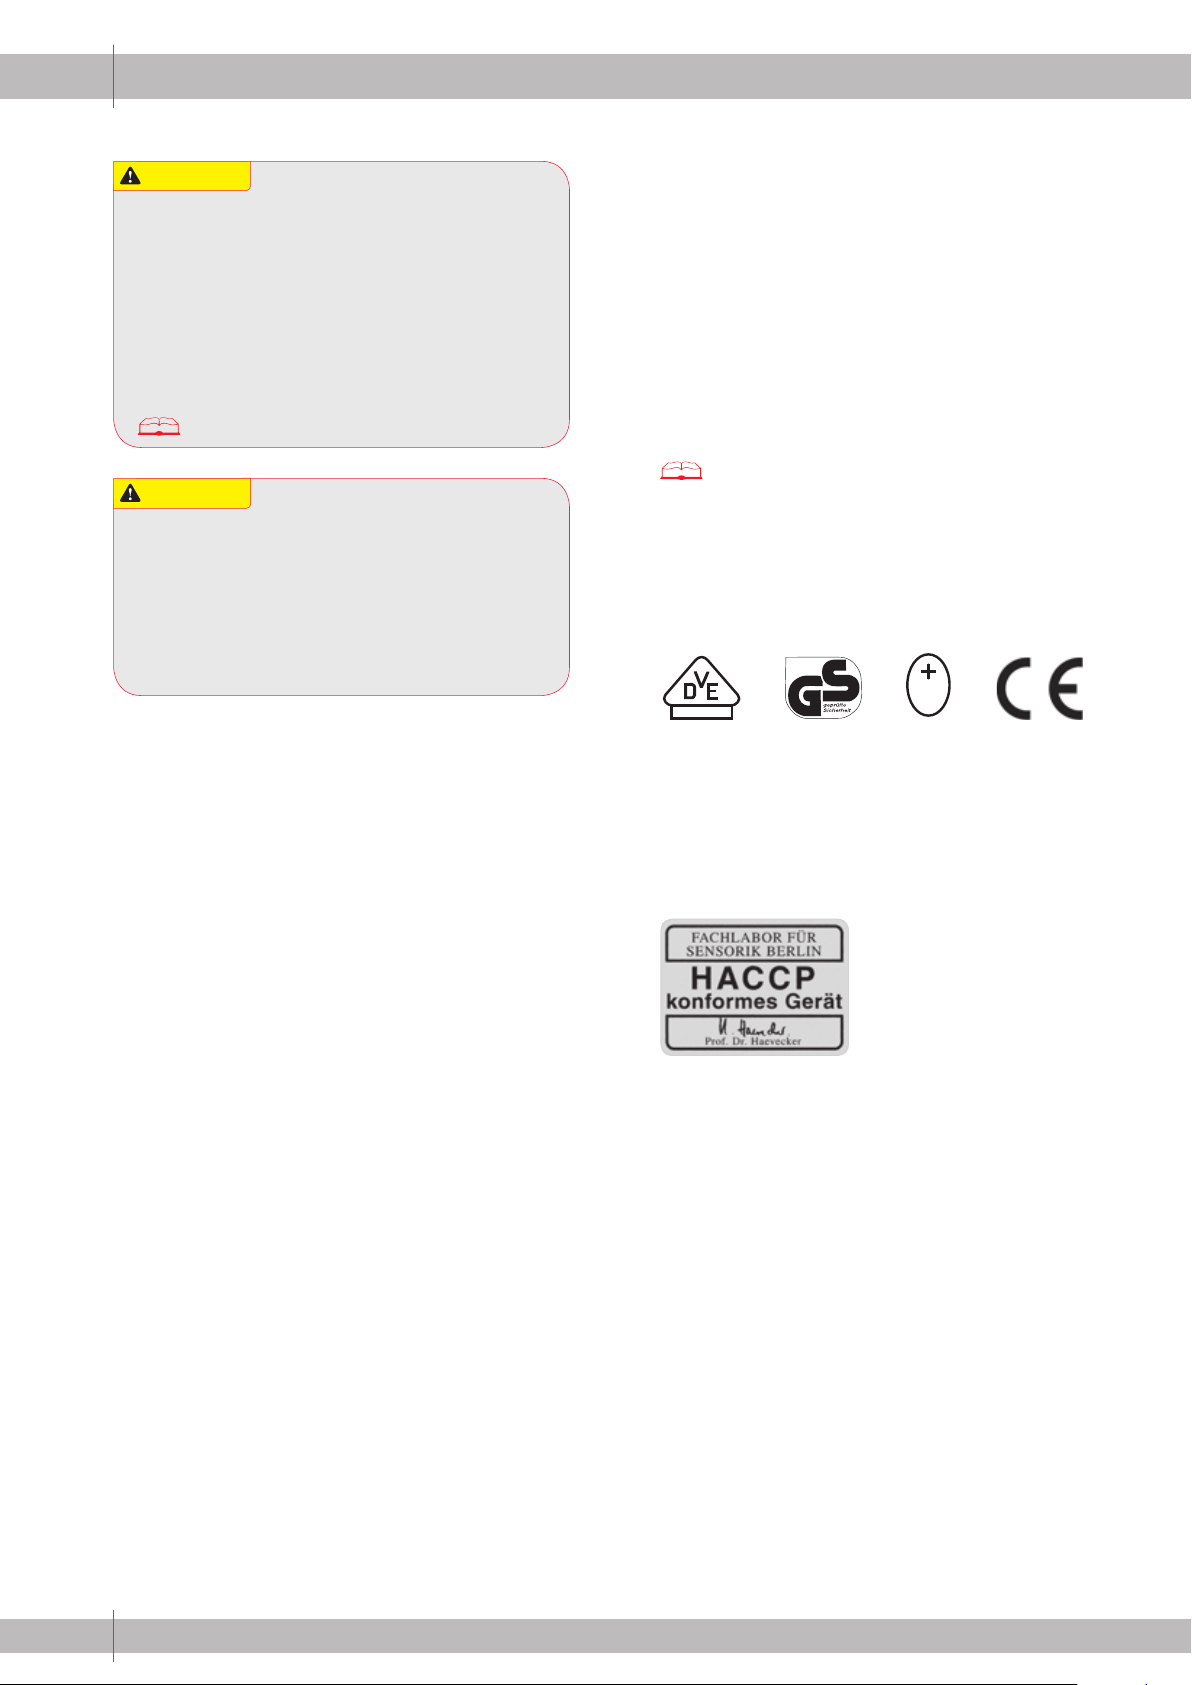
1.4 Certification of the c35
The c35 features the currently required test mark according to the implemented certification:
For the processing of cold and warm milk with
integrated, fully automatic cleaning the c35 satisfies
the hygiene requirements according to Prof.
Dr. Haevecker of the Fachlabor für Sensorik Berlin
(HACCP – Hazard Analysis Critical Control Point).
Page 7
7
2 Identification
2.1 Identification of the appliance type
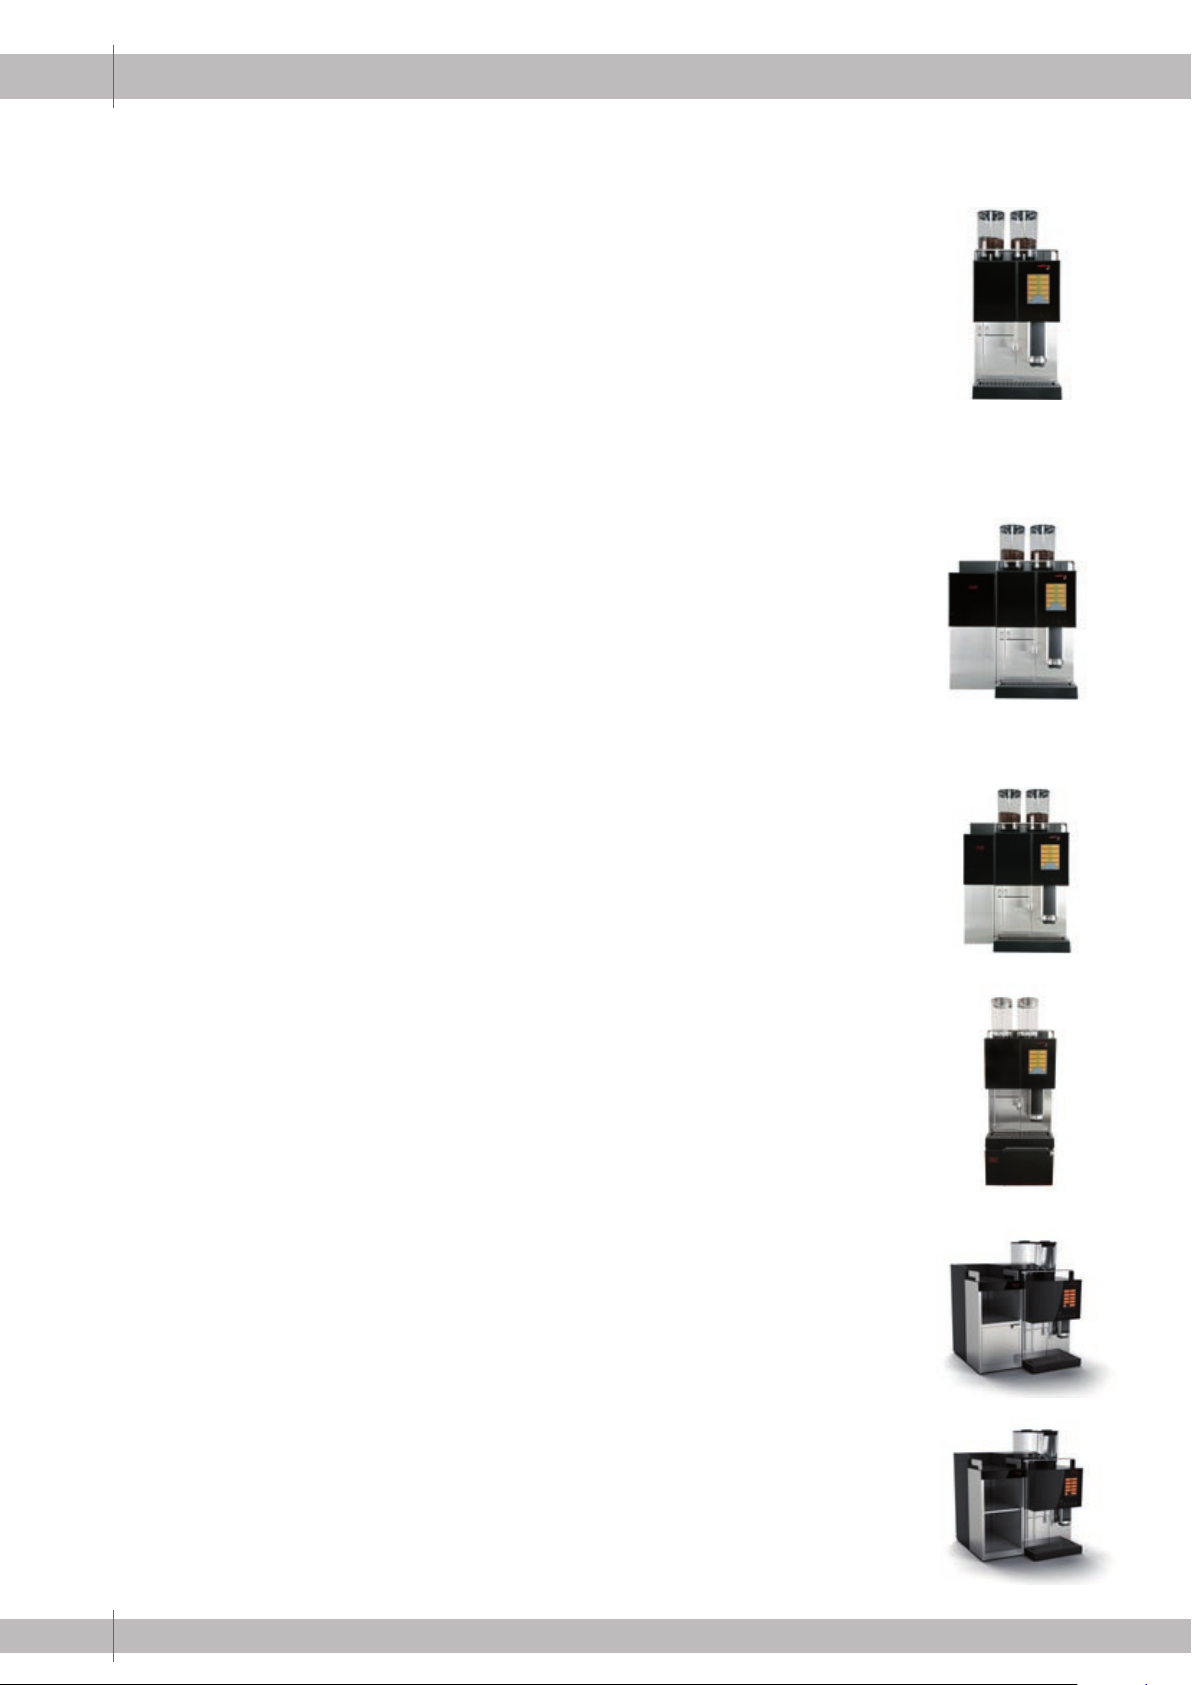
The c35 is available in the following versions:
c35-1W Coffee and hot water
(basic model)
c35-12C Coffee, hot water and steam
(with steam tap for frothing up milk)
c35-12M Coffee, hot water and milk
(with milk jet for integrated output of hot
milk)
c35-12CM Coffee, hot water, steam and milk
(with steam tap and milk jet for integrated dispensing of hot milk and foam)
c35-mc Milk cooler
c35-mcs Milk cooler (narrow)
c35-mcu Base refrigerator
c35-mc/cw Refrigerator / cup warmer
Combination appliance
c35-cw Cup warmer
The appliance type of your c35 has to be established
for some operating steps, as the appliance types may
have different requirements. The appliance type can
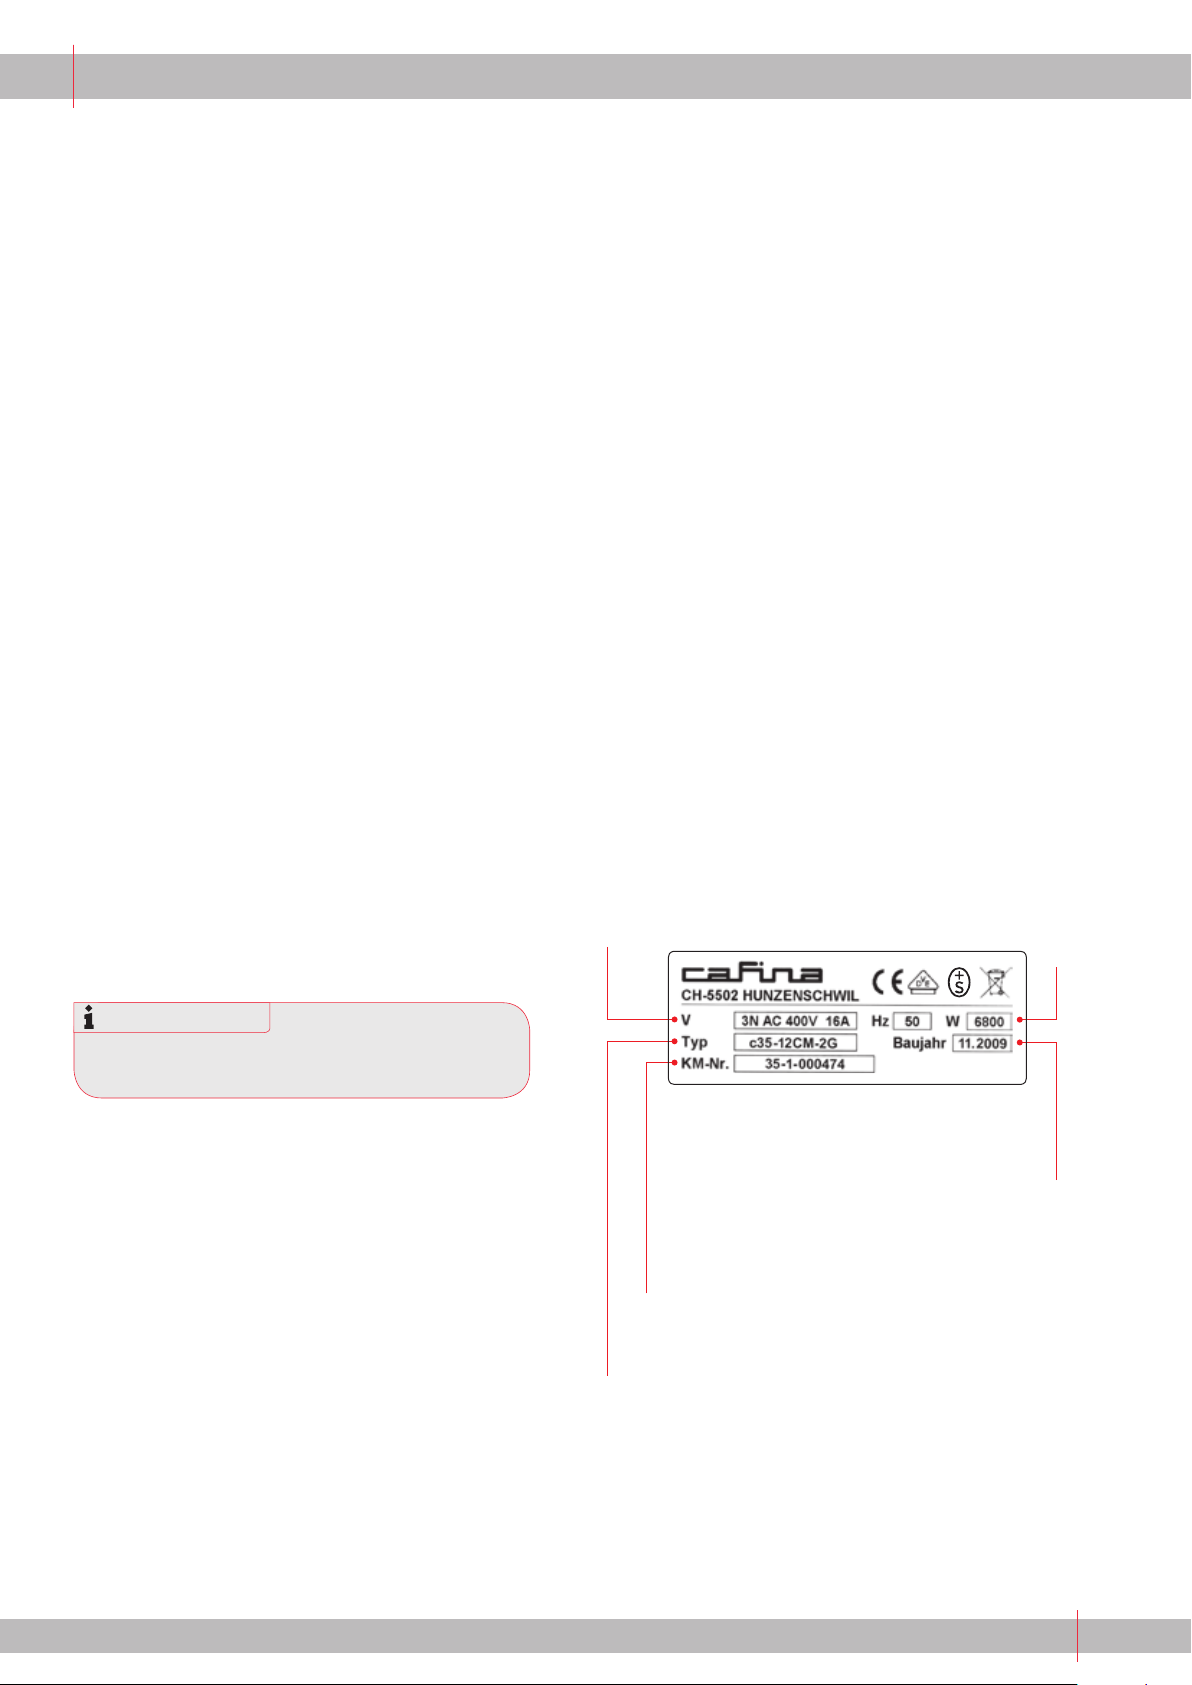
be found on the rating plate affixed to your c35
(e.g. c35-12CM-2G see following diagrams).
INFORMATION
The rating plate of the c35 is situated behind the
grounds drawer.
Power supply
Power
(watts)
Year of
manufacture
(Month. Year)
Coffee machine
number
Type designation
Page 8
8
2 Identification (continued)
2.2 Brief description of the appliances (technical data, see page 29)
2.2.1 c35
The c35 is a fully automatic coffee machine and is used to dispense various coffee products as well as to heat and froth up milk. The bean hoppers are used to fill the appliance
with whole beans. A special insertion chute allows coffee powder to be used.
The c35 basic model can dispense pre-programmed coffee products. The dispense command is issued via direct selection keys which are on the control panel. Drink selection
and additional functions (cleaning, operating status, filling level, etc.) are indicated on the
display.
2.2.2 Milk cooler c35-mc (optional)
The milk cooler is used exclusively to cool milk. The milk container inside the appliance
is available in two versions: either with a nine-litre capacity or with two separate chambers (not yet available) which can hold four litres of milk each. This two-chamber system
allows the storage of two different types of milk (e.g. whole milk and skimmed milk). The
milk is dispensed automatically according to the products.
2.2.3 Milk cooler c35-mcs (optional)
The milk cooler is used exclusively to cool milk. The milk is dispensed automatically according to the drinks.
2.2.4 Milk cooler c35-mcu (optional)
The milk cooler is used exclusively to cool milk. The milk is dispensed automatically according to the drinks.
2.2.5 Milk cooler c35-mc/cw (optional)
The milk cooler / cup heater combination appliance has two levels with heating elements
underneath and a cooling box. Authorised technicians can preselect four temperatures
for the heating elements. The milk cooler is used exclusively to cool milk. The milk is dispensed automatically according to the drinks.
2.2.6 Cup warmer c35-cw (optional)
The freestanding cup warmer has three levels with heating elements underneath. Authorised technicians can preselect four temperatures for the heating elements.
Page 9
9
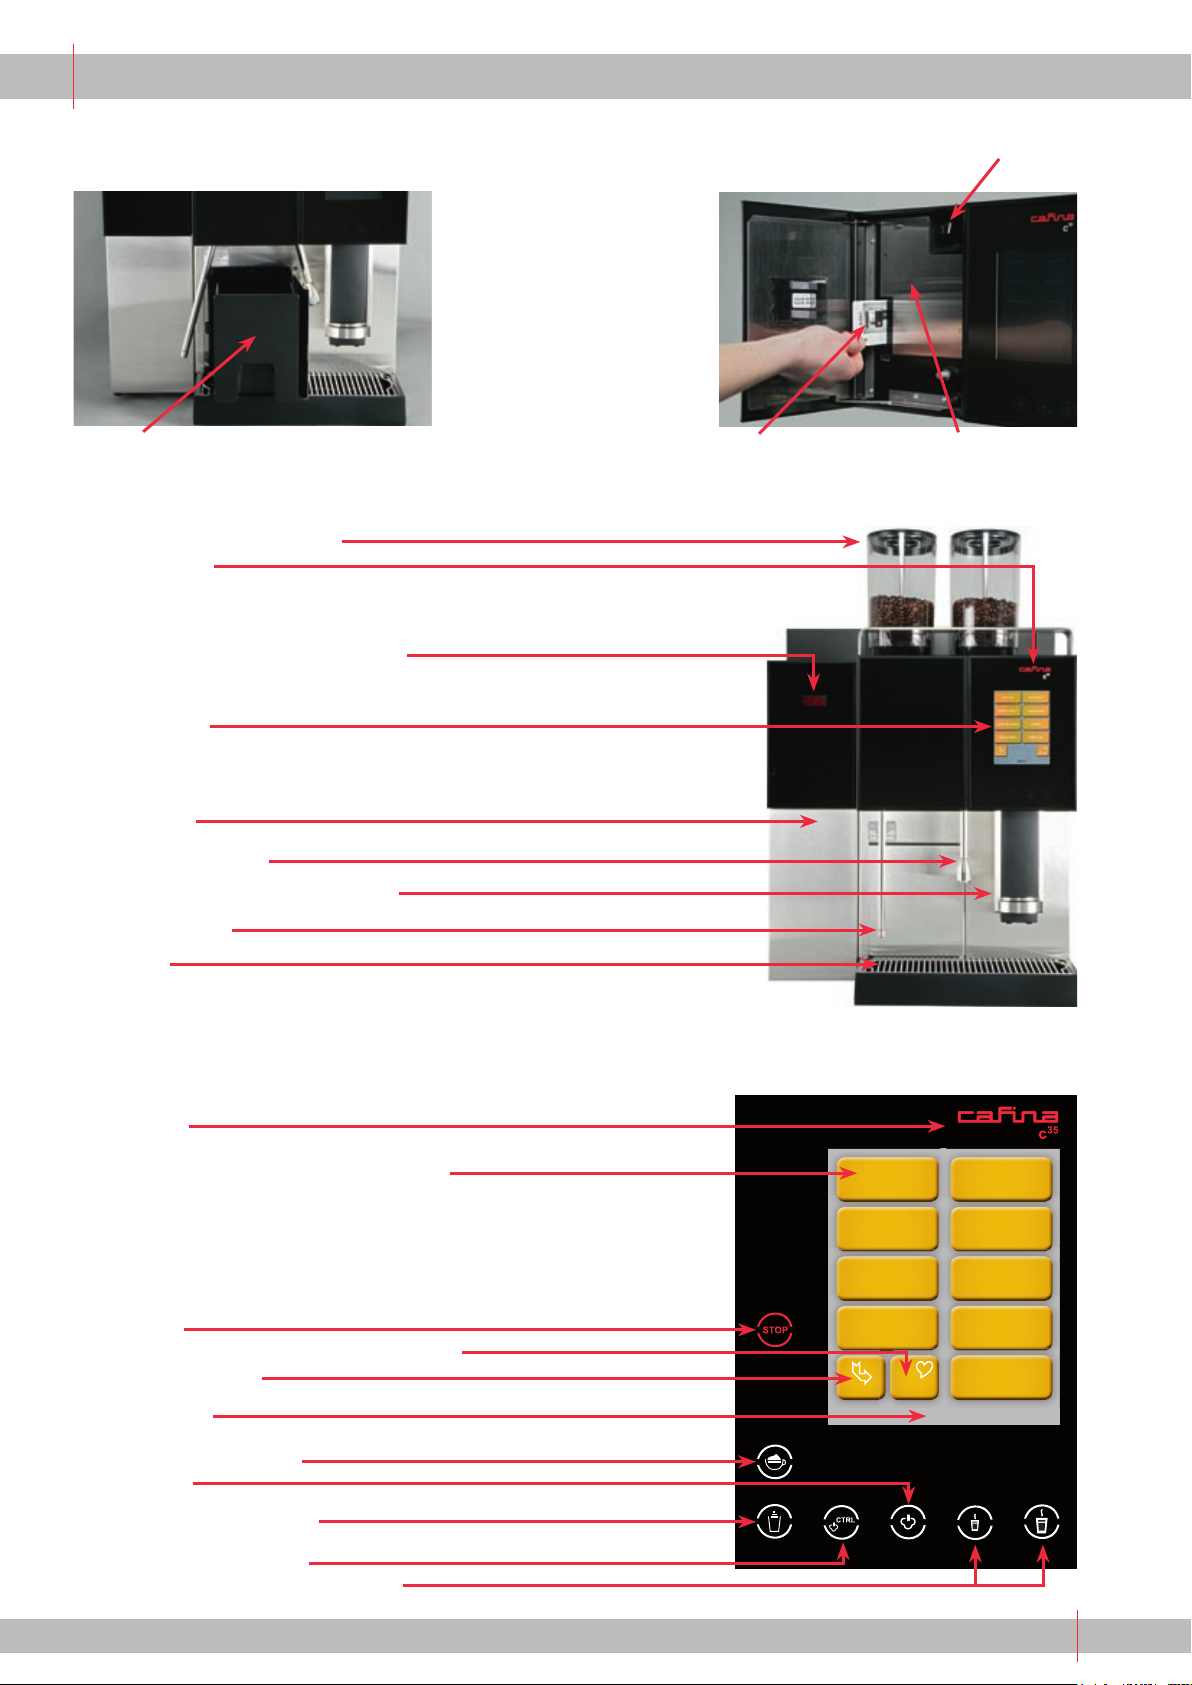
3 Overview of appliance
Coff ee bean hopper with lid
Status light
When the appliance is connected to the power supply,
the company logo is lit red.
Temperature display for milk cooler
Control panel
Milk cooler
Hot water dispenser
Product outlet (height-adjustable)
Steam dispenser
Drip tray
Page 1
Ristretto
Café Crème
*
Espresso
**
Cappuccino
Coffee Latte Macchiato
Coffee White Doppio
next page decaf
Hot milk
Insertion chute with spoon for decaff einated
coff ee powder or cleaning tablets
Chip card slot Milk jet cover
Grounds drawer
3.1 Overview
Status light
Control panel with product selection key
Stop key
Preselection key for coff ee (decaff einated)
Page selection key
Page display
Moussy foam (optional)
Steam key
Solid milk foam (optional)
Steam Control (optional)
Hot water keys (manual/portioned)
3.2 Control panel with the function keys
Page 10
10
4 Delivery and installation
4.1 Delivery
The c35 includes the following accessories:
– 1 cleaning container PP 1 litre
– 1 box of cleaning tablets
– 1 microfibre cloth
– 1 reinforced hose L1500 3/8"
– 2 nylon seals D14.5 x 8 x 2 mm
– 1 chip card carrier bag
– 2 "user" chip cards
– 1 "manager" chip card
– 1 "memory" chip card
– AMC powder (10 bags)
– Document holder
– Original operating instructions
1,600 mm
4.2 Installation
The c35 is installed and serviced by authorised technicians only.
WARNING
To prevent placing third parties in danger, install
the appliance only in locations in which it can be
supervised by trained personnel.
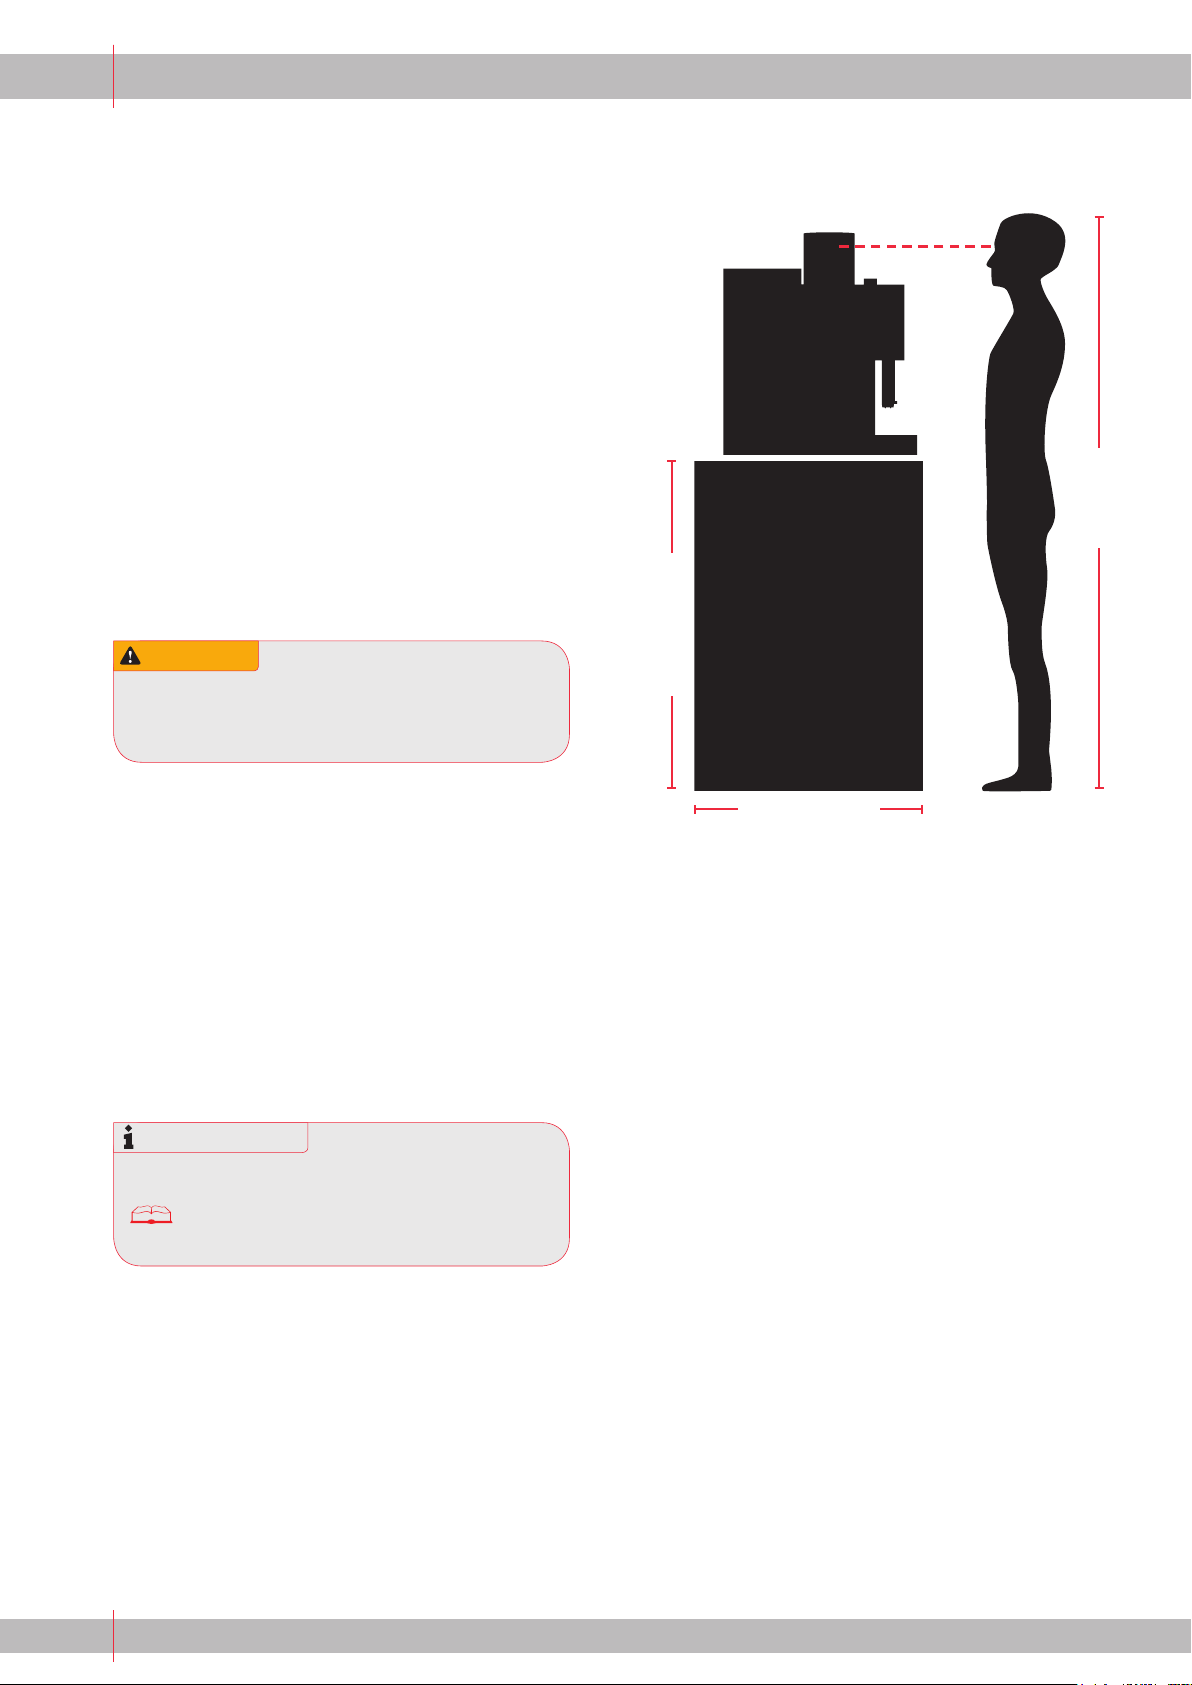
Dimensions of c35
Width: 350 mm
Height: 774 mm
Depth: 650 mm
Weight: approx. 60 kg (without refrigerator c35-mcs)
To ensure that you have an optimum angle of vision,
provide a suitable work surface.
There are four height-adjustable intermediate feet
which can be used to adjust the height between
25.4 and 101.6 mm (1 – 4 inches). The bearing load of
the work surface must be at least 100 kg.
870 – 950 mm
660 – 800 mm
INFORMATION
Further dimensions and information for preliminary measures can be found in:
Chapter 16 "Technical Data and Installation
Diagram".
Page 11
11
5 Power and water connection
5.1 Preparation for Power and
Water Connection
The following is not supplied and must be provided by
you for the installation:
CAUTION
On the installation side an all-pole separator with a
contact opening width of 3 mm must be provided
per pole for a fixed connection.
➤ Maximum system impedance in the building
connection 0.10 ohms (the impedance can be requested from the energy supplier).
➤ Socket and plug for power connection.
➤ External main switch for power connection.
➤ Supply line and main tap for water connection.
– Maximum water line pressure 0.5 MPa (5 bar).
– Maximum inlet temperature of the water 20 °C.
INFORMATION
Remember to have these preparations
made and to have the appliances at hand on the
day of installation.
DANGER
Danger to life from electric shock!
– The use of sockets with the wrong current will
cause an electric shock and the destruction of
the c35.
WARNING
A damaged appliance is not safe and may cause
serious injuries and a fire.
– Protect the appliance from the effects of the
weather, such as rain, frost and direct
sunlight to prevent damage and potential risks
of injury and fire.
– Do not immerse the appliance or appliance
parts, such as cables and connections, in water.
CAUTION
The connection to the water supply must be in
accordance with standard EN 61770. In addition,
the national rules and laws always apply to the
connection to the water supply.
Page 12

12
6 Starting up the appliance
6.1 Starting up the appliance for the first
time
All appliances (c35, cup warmer, milk cooler, etc.) are
started up for the first time following installation by
authorised technicians. Starting up the appliance after a
malfunction is described in the following subchapters.
6.2 Starting up the appliance after a
malfunction or prolonged shutdown
The appliance must be started up again if the c35 and/
or the cup warmer and milk cooler attachments were
shut down and disconnected from the power supply
for a prolonged period.
CAUTION
Risk of destruction!
Have frozen machines started up by authorised
technicians only. The machine may be destroyed.
6.2.1 c35
1| Check water connection and coffee bean level.
2| Insert mains plug of the c35 into a suitable socket.
3| Turn on external main switch.
4| Open front door.
5| Turn on the c35 with the "USER" chip card. Insert
chip card and pull out again when prompted by the
display.
6.2.2 Milk cooler c35
See chapter 4 "Delivery and Installation".
1| Filling the milk container.
2| After a prolonged shutdown:
For cleaning the appliance see:
Chapter 12.1 "Automatically initiated cleaning
of the coffee machine" or after a malfunction:
For troubleshooting see:
Chapter 15.1 "Troubleshooting Checklist".
6.2.3 Cup warmer c35
1| Turn on cup warmer and fill with cups.
INFORMATION
The cup warmer and the milk cooler are not monitored by the software for malfunctions.
Page 13

13
7 Turning on and off
7.1 c35 and milk part
7.1.1 Turning on
DANGER
Risk of scalding!
The appliance is automatically rinsed when turned
on; hot steam is ejected at the same time. Hot water is drained through the coffee dispenser. Avoid
touching the coffee dispenser.
1| Insert mains plug of the c35.
2| Open front door.
3| Insert "USER" chip card.
4| Remove chip card when prompted by the display.
➤ Display indicates heating-up phase status.
7.1.2 Turning off
CAUTION
Risk of blockage due to dried on milk and coffee
residue!
Before the appliance turns off, it is always automatically cleaned!
1| Open front door.
2| Insert "USER" chip card.
3| Remove chip card when prompted by the display.
4| Select "Turn off".
➤ Cleaning process starts.
➤ When the cleaning process ends, the machine turns
off automatically.
7.2 Milk cooler
7.2.1 Turning on
1| If the milk cooler is free-standing, insert plug into a
normal domestic socket.
➤ Temperature lights up on the display.
2| Wait until 2–5 °C are reached.
5| After a brief delay the display indicates instructions
for filling with milk. Press "No" to use the c35 without milk dispenser or to activate the milk part later.
OR fill with milk and press "Yes" to turn on the milk
dispenser.
For subsequent activation of the milk part:
1| Check operation of the milk cooler.
2| Fill the milk container with already cooled
milk (3-5°C).
3| If there is no milk cooler available, an external milk
container must be connected.
4| Open front door.
5| Insert USER chip card.
6| Remove card as soon as the display prompts select
"Milk on".
7| Place milk receptacle in the refrigerator and
acknowledge on the display.
8| Milk is automatically drawn in.
7.2.2 Turning off
1| Perform cleaning.
2| Disconnect milk cooler from the power supply.
INFORMATION
The free-standing milk cooler has similar functions
to a normal domestic refrigerator. The milk can be
kept cool in the milk cooler even when the c35 is
not in use.
➤ Fill with already cooled milk only (3-5°C).
➤ Please follow the cleaning instructions.
7.3 Cup warmer
7.3.1 Turning on
1| Press rocker switch to the right.
2| Fill up with cups.
7.3.2 Turning off
1| Press rocker switch to the left.
Page 14

14
Product key
Stop key
Page selection key
Preselection key (decaff einated coff ee)
Moussy foam (optional)
Steam control (optional)
Solid milk foam (optional)
Steam key
Hot water keys (manual/portioned)
8.1 Coff ee and milk drinks
WARNING
Risk of scalding!
While drinks are being dispensed, there is a
risk of scalding!
Avoid direct contact with the coff ee outlet and the
drinks.
8.1.1 Scrolling through product list and
dispensing product
1| The fi rst page of the product list is indicated on the
standard picture on the display.
2| The subsequent pages of the product list are dis-
played by pressing the "Page selection key".
3| Place cup directly under the outlet.
4| Select the required product by pressing the corre-
sponding product key.
INFORMATION
The products are programmed by authorised
technicians when the appliance is started up. If the
"MANAGER" chip card is added, products which
have already been saved can be changed.
Chapter 9 "Chip cards"
8.1.2 Selecting number of cups
The amount dispensed depends on how frequently the
corresponding product key is pressed. During the dispensing process the requested number of cups is displayed
even if the whole amount has not yet been dispensed:
Dispensing method 1: Dispense one cup.
Dispensing method 2: Dispense two cups simultane-
ously.
Dispensing method 1 Dispensing method 2
8.1.3 Stopping dispensing
Deleting the following product orders:
Press Stop key once.
Stopping the current product order and
deleting the following orders:
Press Stop key twice.
8 Dispensing the product
Cappuccino
1
Cappuccino
2
Page 1
Ristretto
Café Crème
*
Espresso
**
Cappuccino
Coffee Latte Macchiato
Coffee White Doppio
next page decaf
Hot milk
STOP
Page 15

15
8.2 Hot water
WARNING
Risk of burns!
The hot water outlet becomes very hot!
➤ Work carefully and avoid direct contact with the
hot water outlet and the water!
8.2.1 Dispensing the product
1| Place glass or cup under the hot water outlet.
2| Select portion or manual dispensing.
8.2.2 Stopping dispensing
1| Press already pressed dispensing key again.
8.2.3 Selecting dispensing method
Dispensing method 1
Dispensing one cup (portioned):
1| Briefly press product key.
Dispensing method 2
Manual dispensing:
1| Hold down product key.
2| The product is dispensed until the key is released.
INFORMATION
➤ Do not touch receptacle base.
➤ Thin glasses may be damaged by the pressure.
Preparation:
1| Press Steam key.
2| Condensation runs out.
3| To stop, release steam key.
INFORMATION
Authorised technicians can specify the portioned
or manual dispensing method individually.
8.3 Manually foaming and heating milk
using the steam nozzle
WARNING
Risk of burns!
The steam nozzle becomes very hot!
➤ Always immerse the steam nozzle in liquids.
➤ Never switch on the steam nozzle without
a container except to briefly blow out the nozzle
before and after use.
➤ Avoid direct contact with the steam nozzle.
8.3.1 Heating
1| Hold the steam nozzle deep in the liquid.
2| Hold down steam key until required heat is
obtained.
8.3.2 Foaming
1| Hold the steam nozzle deep in the liquid.
2| Press and hold down Steam key.
3| Lower receptacle slowly. Repeat process
until the required amount of foam is obtained.
4| To stop, release steam key.
INFORMATION
At the request of the customer an authorised technician can program a steam dispensing duration
for the heating or foaming of milk.
Page 16

16
CAUTION
Do not use a soiled or incorrect chip card. Always
insert slowly and straight. Do not pull out card
until it is indicated on the display.
The chip cards allow access to the diff erent functions
and settings of the c35.
The chip cards have diff erent user rights and therefore
protect you from access by unauthorised persons. This
chapter explains the diff erent chip cards and their user
rights.
9.1 "USER"
9.1.1 Possible functions of "USER" chip card
This chapter lists all functions and settings which you
can make with the "USER" chip card, according to
menu structure. Depending on the operating mode of
the coff ee machine, not all functions can be selected.
Main function Description
Turning on/off
Dispensing the product
Cleaning and
intermediate cleaning
– Starting the
cleaning process.
– Separate cleaning
of coff ee and
milk part can be selected.
Counters – Product
(indicate product counter)
– Coff ee
– Hot water
– Steam
– Milk
Inlet milk Draws in the milk again.
Activating milk part Turn on the milk part if not
activated beforehand.
9.1.2 Basic operation of "USER" chip card
Turning on:
1| Insert "USER" chip card.
2| Leave the card in until prompted by the display to
remove the card.
➤ "USER" menu is indicated.
3| Press the page selection key to change the display
view and then you can select your required product.
9 Chip cards
Ristretto
Café Crème
*
Espresso
**
Cappuccino
Coffee Latte Macchiato
Coffee White Doppio
next page decaf
Hot milk
Page 1
Turning off :
1| Insert card again.
2| Leave the card in until prompted by the display
to remove the card.
3| Select "Turn off " and follow the cleaning process,
see:
Chapter 12 "Cleaning".
Page 17

17
9.2 "MANAGER"
9.2.1 Navigating
up/down = Select main menu option
right = Open particular submenu options
left = Back to the selection of the
"MANAGER" menu
+ or – = Set the values
+ and – = Acknowledge
PSB key = Preselection key P = Product selection
S = Product size
B = Bean selection
9.2.2 Possible functions of "MANAGER" chip card
with extended menu
This chapter lists all functions and settings which you
can make with the "MANAGER" chip card (extended
menu), according to menu structure. The "MANAGER"
chip card allows you to use several service technician
functions. If the "MANAGER" chip card is inserted
for less than 5 seconds, it has the same functions as
a "USER" chip card.
Main function Description
Products
Water quantity Regulate the water
quantity.
Coff ee quantity Regulate the
coff ee quantity.
1. Pre-inf. fl ow. time Regulate the fl ow period of
the fi rst milk product before
the coff ee.
2. Pre-inf. fl ow. time Regulate the fl ow period
of the second milk product
before the coff ee.
Post-inf. fl ow. time Regulate the fl ow period of
the milk product after the
coff ee.
Functions
Timer On/Off
(only if activated)
Turn on/off coff ee machine
with timer.
Timer External
(only if activated)
Turn on/off external appliance with timer.
Timer Self Turn on/off self-operating
mode of the coff ee
machine with timer.
Buzzer Turn sound on/off .
Sound Set type of sound "beep" or
"click".
Keylock Turning on/off .
Price/Gratis
Price Input required price.
Gratis Select Yes / No.
Price Line Unit (PLU) Select line.
Counters
Clear counters Minus key held down
(>5 sec.).
Product See total counters.
Coff ee See coff ee counter.
Hot water See hot water counter.
Steam See steam counter.
Milk See milk counter.
Time/date
Time Set time.
Date Set date.
Water quantity 40 ml
Coffee quantity 10.0 g
1. Pre-inf. fl ow. time 3.0 sec
2. Pre-inf. fl ow. time 12.0 sec
Post-inf. fl ow. time 0.0 sec
PSB
Page 18

18
Turning on
1| Insert "MANAGER" chip card.
2| Leave card in for approx. 5 seconds;
remove card on second acoustic signal.
➤ "MANAGER" menu is indicated.
3| Navigate through the menu using the arrow keys.
Turning off
1| Insert card again.
2| Leave the card in until prompted by the display
to remove the card.
➤ For setting and changing all functions, see:
Chapter 10 "Settings and Functions of the
‘MANAGER’ menu"
9.2.3 Possible functions of "MANAGER"
chip card with simple menu
This chapter lists all functions and settings which you
can make with the "MANAGER" chip card
(simple menu), according to menu structure. The
"MANAGER" chip card allows you to use several service
technician functions.
Main function Settings
Timer On/Off
(only if activated)
Turn on/off coff ee machine
with timer.
Timer External
(only if activated)
Turn on/off external
appliance with timer.
Timer Self Turn on/off self-operating
mode of the coff ee machine
with timer.
Counters
Clear counters Minus key held down
(>5 sec.).
Product See total counters.
Coff ee See coff ee counter.
Hot water See hot water counter.
Steam See steam counter.
Milk See milk counter.
Time/date
Time Set time.
Date Set date.
Turning on:
1| Insert "MANAGER" chip card.
2| Leave card in for approx. 5 seconds;
remove card on second acoustic signal.
➤ "MANAGER" menu is indicated.
3| Navigate through the menu using the arrow keys.
Turning off :
1| Insert card again.
2| Leave the card in until prompted by the display
to remove the card.
➤ For setting and changing all functions, see:
Chapter 10 "Settings and Functions of the
"MANAGER Menu"
9.3 "MEMORY"
9.3.1 Possible Functions of the "MEMORY" Chip Card
Main function
Reloading the last saved machine and product data.
9 Chip cards (continued)
Product
Functions
Price/Gratis
Counters
Time/date
Page 19

19
9.3.2 Using the "MEMORY" Chip Card
The "MEMORY" chip card is used as an additional
back-up for all the settings of your c35.
This card saves the latest settings which were made by
authorised technicians.
If the system memory of the c35 is deleted during a
malfunction, the data can be copied back from the
"MEMORY" chip card.
Coffee machine reset:
1| Insert "MANAGER" chip card.
2| Turn off machine (cleaning).
3| Insert "MEMORY" chip card and when display
prompts "Read Memory Card", acknowledge with
"Yes" > data is read back.
4| Do not remove card until prompted by display.
5| Turn on machine again with "USER" or "MANAGER"
chip card.
Turning off:
1| Insert card again.
2| Leave the card in until prompted by the display
to remove the card.
9.4.2 "KEYLOCK"
The "KEYLOCK" chip card allows you to lock all operating keys without having to access the programming of
the c35.
Turning on:
1| Insert "KEYLOCK" chip card.
2| Leave the card in until prompted by the display
to remove the card.
Turning off:
1| Insert card again.
2| Leave the card in until prompted by the display
to remove the card.
9.4.3 "SELF"
The "SELF" chip card allows you to directly switch the
self-operating mode of the c35 on and off without
having to access the programming of the machine. In
self-operating mode all drinks can be dispensed only
individually, it is not possible to stop a product which
is being dispensed. The use cannot access the other
functions and programming.
9.4 Additional chip cards
The additional chip cards are function cards. They
actuate functions but do not allow navigation in the
menu. You can order the following additional chip
cards directly from your partner, see:
see "Contact addresses" (cover page).
9.4.1 "FREE VEND"
The "FREE VEND" chip card allows free products to be
dispensed if external modules are used.
Turning on:
1| Insert "FREE VEND" chip card.
2| Leave the card in until prompted by the display
to remove the card.
Turning on:
1| Insert "SELF" chip card.
2| Leave the card in until prompted by the display
to remove the card.
Turning off:
1| Insert card again.
2| Leave the card in until prompted by the display
to remove the card.
9.4.4 "EXTERNAL"
The "EXTERNAL" chip card allows you to directly switch
external modules on and off, such as cashier stations,
coin validators, etc., without having to access the
programming.
Turning on:
1| Insert "EXTERNAL" chip card.
2| Leave the card in until prompted by the display
to remove the card.
Turning off:
1| Insert card again.
2| Leave the card in until prompted by the display
to remove the card.
Page 20

20
10.1 Product-related "MANAGER" settings
up/down = Select main menu option.
left/right = Open particular submenu options
+/– = Set the values. If +/– are pressed
simultaneously, values are deleted or
re-initialised.
Operation:
1| Main menu option: Select products.
➤ The selected product is indicated on the lower
edge of the display.
INFORMATION
It is not necessary to acknowledge the settings.
INFORMATION
The product keys are assigned to the same products as in the product menu. Use the page selection key to scroll
between the product pages or
between the product levels.
10.2 "Products" submenu
10.2.1 Water quantity
The water quantity can be set separately for each
product.
Operation:
1| Select "Water quantity" submenu option.
2| Select a product using the round product keys.
➤ The selected product is indicated on the lower
edge of the display.
3| Press the white plus and minus keys to set the water
quantity.
4| Leave "Water quantity" submenu option by pressing
the left orange arrow key.
10.2.2 Coff ee quantity
The coff ee quantity can be set separately for each
product.
Operation:
1| Select "Coff ee quantity" submenu option.
2| Select a product using the round product keys.
➤ The selected product is indicated on the lower
edge of the display.
3| Press the white plus and minus keys to set the coff ee
quantity. The maximum setting range is +/– 1 g.
4| Leave "Coff ee quantity" submenu option by press-
ing the left orange arrow key.
INFORMATION
The "S" and "B" functions can be programmed by
authorised technicians only.
10.2.3 Pre-infusion product 1 (1. Pre-inf. fl ow. time)
Under this menu option you can set the quantity of
the fi rst product, which is dispensed before the coff ee,
for mixed drinks. Depending on the product, this consists of hot milk, cold milk or milk foam.
10 Settings and functions of the "MANAGER" menu
Water quantity 40 ml
Coffee quantity 10.0 g
1. Pre-inf. fl ow. time 3.0 sec
2. Pre-inf. fl ow. time 12.0 sec
Post-inf. fl ow. time 0.0 sec
Product
Functions
Price/Gratis
Counters
Time/date
PSB
Page 21

21
Operation:
1| Select "1. Pre-inf. flow. time" submenu option.
2| Select a product using the round product keys.
➤ The selected product is indicated on the lower
edge of the display.
3| Press the white plus and minus keys to set the
required time.
4| Leave "1 Pre-inf. flow. time" submenu option by
pressing the left orange arrow key.
10.2.4 Pre-infusion product 2 (2. Pre-inf. flow. time)
Under this menu option you can set the quantity of
the first product, which is dispensed before the coffee,
for mixed drinks. Depending on the product, this consists of hot milk, cold milk or milk foam.
Operation:
1| Select "2. Pre-inf. flow. time" submenu option.
2| Select a product using the round product keys.
➤ The selected product is indicated on the lower
edge of the display.
3| Press the white plus and minus keys to set the
required time.
4| Leave "2. Pre-inf. flow. time" submenu option by
pressing the left orange arrow key.
10.2.5 Post-infusion product (Post-inf. time)
Under this menu option you can set the quantity of
the first product, which is dispensed after the coffee,
for mixed drinks. Depending on the product,
this consists of hot milk, cold milk or milk foam.
INFORMATION
Before the c35 is turned off, it is automatically
cleaned.
Operation:
1| Select "Timer On/Off" submenu option.
2| Press the white plus or minus key to activate the
timer.
3| Leave "Timer On/Off" submenu option by pressing
the left orange arrow key.
4| Make further settings or end "MANAGER" menu by
inserting the "MANAGER" chip card.
10.3.2 Timer External
Under this menu option you can set whether external
registration devices (e.g. waiter lock, cashier station,
coin validator, card systems ...) are switched on or off
on a time-controlled basis, provided the times have
been programmed by authorised technicians.
Operation:
1| Select "Timer External" submenu option.
2| Press the white plus or minus key to activate the
"Timer External". Conclude the input with "Yes"
and "No".
3| Leave "Timer External" submenu option by pressing
the left orange arrow key.
4| Make further settings or end "MANAGER" menu by
inserting the "MANAGER" chip card.
Operation:
1| Select "2. Pre-inf. flow. time" submenu option.
2| Select a product using the round product keys.
➤ The selected product is indicated on the lower
edge of the display.
3| Press the white plus and minus keys to set the
required time.
4| Leave "2. Post-inf. time" submenu option by press-
ing
the left orange arrow key.
10.3 "Functions" submenu
10.3.1 Timer On/Off
Here you can set whether the Cafina c35 is to be
turned on and off automatically, provided the times
have been programmed by authorised technicians.
10.3.3 Timer Self
You use this function to switch the time-controlled
self-operating mode on or off, provided the times have
been programmed by authorised technicians. All
products provided for this mode are dispensed individually, all other functions are disabled. In this way
your guests can help themselves to the Cafina c35
without accidentally changing the settings.
Operation:
1| Select "Timer Self" submenu option.
2| Press the white plus or minus key to activate the
"Timer Self". Conclude the input with "Yes" and "No".
3| Leave "Timer Self" submenu option by pressing the
left orange arrow key.
4| Make further settings or end "MANAGER" menu by
inserting the "MANAGER" chip card.
Page 22

22
10 Settings and functions of the "MANAGER" menu (continued)
10.3.4 Buzzer
Under this menu option you can switch the key sounds
of the c35 on or off.
Operation:
1| Select "Buzzer" submenu option.
2| Press the white plus or minus key to activate the
"Buzzer".
3| Leave "Buzzer" submenu option by pressing the left
orange arrow key.
4| Make further settings or end "MANAGER" menu by
inserting the "MANAGER" chip card.
10.3.5 Sound
Under this menu option you can set the type of key
sounds. A beep and a click are available.
Operation:
1| Select "Sound" submenu option.
2| Press the white plus or minus key to select between
the two possible key sounds "beep" and "click".
3| Leave "Timer Self" submenu option by pressing the
left orange arrow key.
4| Make further settings or end "MANAGER" menu by
inserting the "MANAGER" chip card.
10.3.6 KEYLOCK
You use this function to lock the keyboard of the c35
(e.g. if you want to briefly leave the machine unsupervised ). When the keylock is cancelled, the c35 is
immediately operational again.
10.5 "Counters" submenu
10.5.1 Clear counters
You use this function to clear all counter readings.
Operation:
1| Select "Clear counters" submenu option.
2| Press the white minus key until "Release" is indi-
cated on the display.
➤ "Done" is then indicated on the display.
3| Leave "Clear counters" submenu option by pressing
the left orange arrow key.
4| Make further settings or end "MANAGER" menu by
inserting the "MANAGER" chip card.
10.5.2 Product
You use this function to see the number of the product
which you selected (product type: coffee, milk, hot
water, steam).
Operation:
1| Select "Product" submenu option.
2| Using the yellow double arrow keys, select the
required product whose counter reading you would
like to know.
➤ The selected product is indicated on the lower
edge of the display. The counter reading of this
product is indicated on the display.
3| Leave "Product" submenu option by pressing the
left orange arrow key.
4| Make further settings or end "MANAGER" menu by
inserting the "MANAGER" chip card.
Operation:
1| Select "KEYLOCK" submenu option.
2| Press the white plus or minus key to activate the
keylock. Conclude the input with "Yes" and "No".
3| Leave "KEYLOCK" submenu option by pressing the
left orange arrow key.
4| Make further settings or end "MANAGER" menu by
inserting the "MANAGER" chip card.
10.4 "Price/Gratis" submenu
You use this function to store a price or a "Gratis" for
each product to allow connected, external billing, e.g.
cashier station for self-service.
10.5.3 Coffee
You use this function to see the quantity of the dispensed products which consist of coffee only (no milk
products).
Operation:
1| Select "Coffee" submenu option.
➤ The counter reading of the coffee products is indi-
cated as the number of the dispensed products.
2| Leave "Coffee" submenu option by pressing the left
orange arrow key.
3| Make further settings or end "MANAGER" menu by
inserting the "MANAGER" chip card.
Page 23

23
10.5.4 Hot water
You use this function to see the quantity of the dispensed hot water.
Operation:
1| Select "Hot water" submenu option.
➤ The counter reading of the hot water dispenser
is indicated as the number of the dispensed
products.
2| Leave "Hot water" submenu option by pressing the
left orange arrow key.
3| Make further settings or end "MANAGER" menu by
inserting the "MANAGER" chip card.
10.5.5 Steam
You use this function to see the quantity of the dispensed steam ejections for the steam valve option.
Operation:
1| Select "Steam" submenu option.
➤ The counter reading of the steam ejections is
indicated.
2| Leave "Steam" submenu option by pressing the left
orange arrow key.
3| Make further settings or end "MANAGER" menu by
inserting the "MANAGER" chip card.
10.5.6 Milk
You use this function to see the quantity of the dispensed milk products.
Operation:
1| Select "Milk" submenu option.
➤ The counter reading of the milk products is indi-
cated as the number of the dispensed products.
2| Leave "Milk" submenu option by pressing the left
orange arrow key.
3| Make further settings or end "MANAGER" menu by
inserting the "MANAGER" chip card.
10.6 "Time and Date" submenu
10.6.1 Time
You use this function to set the time (e.g. for switching
between summer/winter time).
Operation:
1| Select "Time" submenu option.
2| Hours: Press right orange arrow key.
➤ Hours are saved in white.
3| Increase or lower the number of hours using the
white plus and minus keys.
4| Minutes: Press orange arrow key again.
➤ Minutes are saved in white.
5| Increase or lower the number of minutes using the
white plus and minus keys.
6| Leave "Time" submenu option by pressing the left
orange arrow key.
7| Make further settings or end "MANAGER" menu by
inserting the "MANAGER"
chip card.
10.6.2 Date
You use this function to set the date.
Operation:
1| Select "Date" submenu option.
2| Day: Press right orange arrow key.
➤ Day is saved in white.
3| Increase or lower the day number using the white
plus and minus keys.
4| Month: Press orange arrow key again.
➤ Month is saved in white.
5| Increase or lower the month number using the
white plus and minus keys.
6| Year: Press orange arrow key again.
➤ Year is saved in white.
7| Increase or lower the year number using the white
plus and minus keys.
8| Leave "Date" submenu option by pressing the left
orange arrow key.
9| Make further settings or end "MANAGER" menu by
inserting the "MANAGER" chip card.
Page 24

24
11 Emptying and Filling
11.1 Emptying
11.1.1 Waste water
If the waste water container is full, the "Waste water
full" message is indicated on the display of the c35.
CAUTION
There is the risk of odour formation, stubborn soiling and mould development in the waste water
canister.
➤ The waste water canister must be emptied at
least once a day.
Operation:
➤ Message: "Waste water full" is indicated on the
display.
1| Empty waste water canister.
2| Re-insert waste water canister.
3| Acknowledge query on the display "Waste water
emptied" with "Yes".
The waste water canister must be emptied at least
once a day.
11.1.2 Coffee grounds
If the grounds drawer is full, the "Drawer" message is
indicated on the display of the c35.
CAUTION
If the grounds drawer is overfull, the c35 will no
longer run. To ensure a smooth operation, please
empty the grounds drawer immediately if the
message is indicated on the display.
Operation:
➤ "Drawer" message is indicated on the display.
1| Take out and empty grounds drawer.
2| Re-insert grounds drawer.
➤ "Drawer emptied?" message is indicated on the
display.
3| Acknowledge with "Yes".
11.2 Filling
11.2.1 Coffee beans and coffee powder
If one of the coffee bean hoppers is empty, the "Bean
hopper 1 empty" or "Bean hopper 2 empty" message is
indicated on the display of the c35.
CAUTION
Place only whole coffee beans in the bean hoppers.
Operation:
➤ Messages "Bean hopper 1 empty" or "Bean hop-
per 2 empty" and "Fill beans 1" or "Fill beans 2" are
indicated alternately on the display.
1| Fill coffee beans.
2| Acknowledge with the Stop key.
3| Acknowledge with "Yes".
11.2.2 Fresh water
If the fresh water container is empty or the fresh water
connection is interrupted, the "Fresh water empty" or
"No water" message is indicated on the display of
the c35.
Operation of canister with level display:
➤ "Fresh water empty" message is indicated on the
display.
1| Fill fresh water canister.
2| Acknowledge query on the display "Fresh water
filled" with "Yes".
Operation of direct fresh water connection:
➤ "No water" message is indicated on the lower edge
of the display.
1| Check whether the shut-off valve of the external
water supply is open and open it if required.
11.2.3 Milk (only if milk level indicator fitted)
If one of the milk containers is empty, the "Fill milk"
message is indicated on the display of the c35.
Operation:
➤ "Fill milk" message is indicated on the display.
1| Fill milk.
➤ "Milk filled?" message is indicated on the display.
➤ Following acknowledgement, the appliance auto-
matically switches to operating mode.
If there is a milk fault, the milk pump is activated with
the "Inlet milk" function and the whole system is filled
with milk.
Operation:
1| Insert "USER" chip card and select "Inlet milk".
➤ The system draws in the milk.
Page 25

25
12 Cleaning
WARNING
Perform cleaning work at the predetermined
times, however at least once a day. Otherwise
hygiene is no longer guaranteed.
WARNING
Machine damage and risk of fire
By using alcohol and solvents.
Therefore, do not use any flammable detergents.
INFORMATION
Bean hoppers, grounds drawer and drip tray are
dishwasher-proof.
12.2 Automatically initiated cleaning of
the coffee machine
Before the appliance is turned off, the cleaning procedure for coffee and milk part (if used) is always automatically initiated.
CAUTION
Risk of destruction!
The c35 and its attachments must always be
cleaned before being turned off.
➤ Never stop the automatically initiated cleaning
process!
➤ Perform an intermediate clean once a day.
➤ Do not hose down the appliance.
➤ Use only the CAFINA-COMBI-Tabs for disinfect-
ing, rinsing, descaling and cleaning.
➤ Do not put COMBI-Tabs and AMC powder in the
bean hoppers.
12.1 Equipment
How to perform the operation:
Perform the instructions on the display of the c35 as
follows.
1| Empty the grounds drawer and acknowledge on the
display.
2| Remove milk and acknowledge on the display.
3| Place the empty CAFINA cleaning container in the
refrigerator and acknowledge on the display.
➤ Prerinsing of the coffee and milk system begins.
CAUTION
Premature wear of the milk part!
Once a week use the CAFINA AMC powder with
the supplied cleaning container instead of the
CAFINA-COMBI-Tabs.
This gives the milk part an acidic clean.
4| Feed the spoon with the cleaning tablet into the
insertion chute and acknowledge on the display.
5| Place a cleaning tablet in the CAFINA cleaning con-
tainer and acknowledge on the display.
➤ Coffee and milk parts are cleaned.
CAFINA-COMBI-Tabs CAFINA AMC cleaner
CAFINA cleaning container CAFINA cleaning cloth
12.3 Intermediate cleaning of the coffee
machine
CAUTION
Perform the intermediate cleaning once a day.
Otherwise, damage may occur!
Page 26

26
How to perform the operation:
1| Insert "USER" chip card.
2| Remove card when prompted by the display.
3| Select "Intermediate clean" on the display.
➤ Selection display is indicated.
4| Select: "Clean coff ee?" or
"Clean milk?" or
"Clean both?"
12.3.1 "Clean coff ee?"
Only the coff ee part of the c35 is cleaned.
How to perform the operation:
Perform the instructions on the display of the c35 as
follows.
1| Empty the grounds drawer and acknowledge on the
display.
➤ Prerinsing of the coff ee part begins.
2| Feed the spoon with the cleaning tablet into the
insertion chute and turn it by 180°. Acknowledge on
the display.
➤ Coff ee part is cleaned.
12.3.2 "Clean milk?"
Only the milk part of the c35 is cleaned.
How to perform the operation:
Perform the instructions according to the information
on the display of the c35.
1| Remove milk and acknowledge on the display.
2| Place the empty CAFINA cleaning container in the
refrigerator and acknowledge on the display.
➤ Prerinsing of the milk part begins.
3| Place a cleaning tablet in the
CAFINA cleaning container and acknowledge on the
display.
➤ Milk part is cleaned.
12.3.3 "Clean both?"
The coff ee and milk parts of the c35 are cleaned.
How to perform the operation:
Perform the instructions according to the information
on the display of the c35.
1| Empty the grounds drawer and acknowledge on the
display.
2| Remove milk and acknowledge on the display.
3| Place the empty CAFINA cleaning container in the
refrigerator and acknowledge on the display.
➤ Prerinsing of the coff ee and milk parts begins.
4| Feed the spoon with the cleaning tablet into the
insertion chute and acknowledge on the display.
5| Place a cleaning tablet in the CAFINA cleaning con-
tainer and acknowledge on the display.
➤ Coff ee and milk parts are cleaned.
12 Cleaning (continued)
Clean coffee?
Clean both?
Turning off
Milk off
Inlet milk
Intermediate cleaning
Clean milk?
Page 27

27
13 Shutdown and Storage
12.4 Cleaning the exterior of the coffee
machine (cleaning the housing
of the c35)
WARNING
Electrical short-circuit!
Cloth must not drip water.
➤ Use a damp cloth only.
CAUTION
Do not use any corrosive or abrasive household
cleaners. Otherwise, display and housing may be
scratched!
➤ Use a damp cloth only. Due to the risk of scald-
ing do not moisten cloth with hot water from
the appliance.
1| Clean the housing and display of the c35 using a
damp cloth.
13.1 Shutting down the appliance for a
limited period or for good
CAUTION
Do not use any corrosive or abrasive household
cleaners. Otherwise display and housing will be
scratched!
How to perform the operation:
1| Perform the cleaning work according to
chapter 12.
2| Correctly disconnect the c35, the cup warmer and
the milk cooler from the power and water supply.
3| Remove all coffee beans from the bean hopper
openings.
13.2 Storage
CAUTION
Non-observance will result in frost damage.
12.4.1 Cleaning the Bean Hopper and the Grounds
Drawer
CAUTION
Remove bean hopper for cleaning.
1| Remove bean hopper and grounds drawer.
2| Clean by hand or in the dishwasher.
3| Re-attach dried parts only.
12.5 Cleaning the Milk Cooler and the Cup
Warmer
DANGER
Perform these cleaning measures daily, otherwise
hygiene is no longer guaranteed.
CAUTION
Do not use any detergents. Residue may affect the
taste of the coffee.
INFORMATION
Storage must be between +5 °C and +30 °C. The air
humidity may be maximum 80%.
Have the c35 correctly drained by authorised
technicians.
1| Clean the milk containers of the milk cooler after the
automatic cleaning process has run and when the
c35 has turned off.
2| Wipe the interior of the milk cooler and the cup
warmer with a cloth.
3| Clean the housing of the milk cooler and the cup
warmer using a damp cloth.
Page 28

28
14 Disposal
14.1 Disposal of Consumables
Observe the applicable
statutory regulations in your region for the disposal of
consumables and waste.
14.2 Disposing of the Appliance
You can dispose of your c35 at your sales outlet. If you
would like to dispose of your c35 yourself, you must
observe the applicable statutory regulations in your
region for the disposal of the appliance.
15 Troubleshooting, Error Messages and Fault Repair
INFORMATION
The most important error messages and diagnosis points can be found at the bottom of the table.
If there are other faults, request the service technician!
If several faults or diagnosis points occur simultaneously, these are indicated alternately
in the status line.
Faults are indicated visually by the flashing dispenser light.
15.1 Checklist for Troubleshooting
LC display clear text error display Causes of fault Troubleshooting measures
"Fill milk" "Fill milk" Milk level is too low. Check milk level.
Fill milk.
"Drawer missing" Grounds drawer is not or incorrectly
inserted.
"No water" Water connection not correct. Open shut-off valve on the external fresh
"Bean hopper 1 empty" or
"Bean hopper 2 empty"
"Fill beans 1" or
"Fill beans 2"
"Filter" Water filter is used up and must be
"Service coffee" Maintenance request for the entire
"Service milk" Maintenance request for the milk
Bean hopper 1 or 2 is empty
or blocked.
replaced.
system.
system.
Insert grounds drawer correctly.
water supply.
Check water connection.
Fill coffee beans.
Contact technical customer service.
Contact technical customer service.
Contact technical customer service.
"Piston error" Brewing unit fault
The coffee grounds cake may not
have been ejected.
Insert "USER" chip card and
follow the instructions.
Disconnect coffee machine from the
power supply and re-insert it after 5 seconds. Insert "USER" chip card and wait for
turn on. If the problem persists, contact
technical customer service.
Page 29

29
15 Troubleshooting, Error Messages and Fault Repair (continued)
15.2 Error display by means of diagnosis points
Diagnosis point Causes of fault Troubleshooting measures
"DP 7" Grounds drawer is full Check grounds drawer
Empty grounds drawer correctly
If the fault persists, contact technical
customer service.
"DP 0" to "DP 6" and
"DP 8" to "DP 31"
System fault Contact technical customer service.
16 Technical Data and Installation Diagram
On request the c35 is also available with a second grinder.
CAFINA c35 1W 12C 12M 12CM c35-mcs c35-mcu c35-cw
Product dispenser Milk cooler
Coffee yes yes yes yes
Hot water yes yes yes yes
Steam no yes no yes
Milk no no yes yes 4-litre
Hourly output in
cups:
Café Crème 200 200 200 200
(narrow)
container
Base
refrigerator
4-litre
container
Cup warmer
Espresso 250 250 250 250
Cappuccino 0 0 200 200
Hot water:
litres/hour
Electrical
specifications:
Rated output 2.8 kW 6.8 kW 6.8 kW 6.8 kW 0.15 kW
Power connection 230/16 400/16 400/16 400/16
Ambient specifications:
Ambient temp. Min. 5 °C
Relative humidity Max. 80% Max. 80% Max. 80% Max. 80% Max. 80% Max. 80% Max. 80%
External dimensions:
Width 350 mm 350 mm 350 mm 350 mm 150 mm 350 mm 280 mm
Height
(including bean
hopper)
Depth 650 mm 650 mm 650 mm 650 mm 547 mm 650 mm 547 mm
30 40 40 40
0.15 kW 0.3 kW
230/10
Min. 5 °C
Max. 30 °C
774 mm 774 mm 774 mm 774 mm 621 mm 218 mm 621 mm
Max. 30 °C
Min. 5 °C
Max. 30 °C
Min. 5 °C
Max. 30°C
Min. 5 °C
Max. 30 °C
Min. 5 °C
Max. 30 °C
Min. 5 °C
Max. 30 °C
Page 30

30
16 Technical Data and Installation Diagram (Continued)
< 70 dB
CAUTION
An all-pole separator with a contact opening width
of at least 3 mm per pole must be provided on the
installation side.
➤ Maximum system impedance in the building con-
nection 0.10 ohms (the impedance can be requested from the energy supplier).
➤ Socket and plug for power connection.
➤ External main switch for power connection.
➤ Supply line and main tap for water connection
(raw water!).
➤ Maximum water line pressure 0.6 MPa (6 bar).
➤ Maximum inlet temperature of the water 20 °C.
INFORMATION
Noise level: < 70dB
CAUTION
Remember to have these preparations made
and to have the appliances at hand on the day of
installation.
CAUTION
Only the water connection hose supplied with
the appliance may be used.
Any other available water connection hoses
must not be used.
547 mm
500 mm
66 mm
Max. 186 mm
7
650 mm
b. a.
2
6
3
750 mm
350 mm150 mm
8
560 - 850 mm
Page 31

31
4
1
5
275 mm
253 mm
774 mm
621 mm
Designation Machine type
1 Ideal fall height above the bean hopper 180 mm All c35 coffee machines
2 Socket and plug 3N 400 volts 16 amps
Socket and plug 1N 230 volts 16 amps
c35-12C, -12M, -12CM
c35-1W
3 Drain pipe for coffee machine outlet All c35 coffee machines
4 120 mm diameter for supply and drainage All c35 coffee machines
5 150 mm diameter for optional container drop For all c35 with optional container drop
542 mm
6 Main tap for raw water All c35 coffee machines
7 Supply line G3/8 inches 0.4 MPa (4 bar) All c35 coffee machines
8 Descaling device (Aqua Quell Purity) All c35 coffee machines
Page 32

32
17 Index
A
Appliance type 07
B
Bean hopper 27
Bearing load 10
Buzzer 25
C
CE / S+ 05
Clean both 26
Cleaning 25, 26, 27, 28
Cleaning milk 26
Coffee quantity 20
Coffee 22
Contact addresses 06
Contact 06
Counters 22
Cup warmer 12
D
Date 17, 18, 21
Delivery 32
Diagnosis point 28, 29
Dimensions 10
Dispenser 07, 14, 15
Dispensing method 14, 15
Display 27
Disposal 28
K
Keylock 19
M
Manager 17
Memory 18, 19
Milk cooler 12, 13
Milk drinks 14
Milk foam 20, 21
Milk part 13, 26
Milk 13, 24, 26
N
Number of cups 14
O
Overview of appliance 08, 09
P
Post-infusion product 21
Power connection 04, 29
Power connection 11
Power 37
Pre-infusion product 20, 21
Price 22
R
Rated output 29
Rating plate 07
E
Emptying 24
Engineer 05
Error 28, 29
External 19
F
Fault/troubleshooting/cause of fault 28, 29
Filling 24
Foaming 15
Free Vend 19
Fresh water 24
G
Gratis 22
GS/VDE 05
H
HACCP 05
Heating 15
Hot water 15
Hourly output 29
Housing 27
I
Identification 06
Installation diagram 29, 30
Installation 10
Intermediate cleaning 25
Intermediate feet 10
S
Safety instructions 04
Safety 04
Self 19
Shutdown 12, 27
Sound 22
Starting up the appliance for the first time 12
Starting up the appliance 12
Stopping dispensing 14, 15
Storage 27
T
Technical data 29, 30
Time 23
Timer 21
Turning off 7
Turning on 13
U
User 16
User rights 05, 16
W
Waste water canister 24
Waste water 24
Water connection 11
Water quantity 20
Page 33

33
18 EC Declaration of Conformity
Page 34

34
19 Notes
Page 35

35
Page 36

Contact addresses
A
Melitta SystemService
International GmbH
Rottfeld 9A
5020 Salzburg
Fon 0043-662 / 882888-0
Fax 0043-662 / 882888-99
AUS
Global Coffee Solutions Pty. Ltd.
P. O. Box 201
Fairy Meadow NSW 2519
Fon 0061-2 / 9571-4444
Fax 0061-2 / 4284-6099
CH
Cana AG
Römerstraße 2
5502 Hunzenschwil
Fon 0041-62 / 8894242
Fax 0041-62 / 8894289
CYP
Vassos Eliades
24 Aristidou Str. 21085
Ay. Dometios Nicosia
Fon 00357-99621328
Fax 00357-22357505
CZ
La Patio International
Saldova 425/12
18600 Praha 8
Fon 00420-2481 / 90 22
Fax 00420-2481 / 90 23
CN P.R.
SIMS Trading Company Ltd.
10/F, DCH Centre
20 Kai Cheung Road
Kowloon Bay, Kowloon, HK
China
Fon 00852-2262-1533
Fax 00852-2687-7199
D
MELITTA SystemSer vice
GmbH & Co. KG
Zechenstraße 60
32429 Minden-Dützen
Fon 0049-571 / 5049-0
Fax 0049-571 / 5049-233
DK
aromateknik a/s
Industrivej 44
4000 Roskilde
Fon 0045-46 / 753366
Fax 0045-46 / 753810
E
Tecnimel Hosteleria, S.L.
Avda. Espar teros, 15
Pol. S. J. de Valderas Sanahuja
28918 Leganés (Madrid)
Fon 0034-91 / 6448130
Fax 0034-91 / 6448131
F
Melitta SystemService
France SA
16 Rue Paul Henri Spaak
77462 Saint Thibault des Vignes
Fon 0033-1 / 64303295
Fax 0031-1 / 64303340
FIN
Metos Oy AB
Ahjonkaarre
04220 Kerava
Fon 00358-204 / 3913
Fax 00358-204 / 394433
GB
M.S.S. (UK) Limited
21 Grove Park
White Waltham
Maidenhead Berkshire
SL6 3LW
Fon 0044-1628 / 829888
Fax 0044-1628 / 825111
GR
Helitta Ltd.
17th km National Rd.
Athens – Lamia
14564 Nea Kifsia (Adames)
Fon 0030-210 / 6203315
Fax 0030-210 / 6203320
IE
Ratio Brand Distribution Ltd.
92 Tully Road
Lisburn
BT 27 5JW
Fon 0044-28 / 90826562
Fax 0044-28 / 90826840
J
Melitta Japan Ltd.
6th . Tachibana Kameido Bldg.
2-26-10, Kameido, Koto-Ku
Tokyo 136-0071 Japan
Fon 0081-3 / 5836-2708
Fax 0081-3 / 5836-2704
NL
Melitta SystemService
Benelux BV
Industriestraat 6
3371 XD Hardinxveld
Giessendam
Fon 0031-184 / 671660
Fax 0031-184 / 610414
PT
Disotel
Rua Padre Francisco 11-E
1350-223 Lisboa
Fon 00351-2 / 13932610
Fax 00351-2 / 13932611
RUS
Melitta Russland
pl. Pobedy, 2
Ofce 246
196143 St. Petersburg
Fon 007-812 / 3737939
Fax 007-812 / 3734785
S
aromateknik a/s
Radiovägen 2
Box 662
13526 Tyresö
Fon 0046-8 / 7987788
Fax 0046-8 / 7989018
UAE
Maromas L.L.C.
Sheik Khalifa Bin Zayed Street
P.O. Box 12 44 01
Dubai
United Arab Emirates
USA
Melitta SystemService USA Inc.
665 Tollgate Road, Suite B
Elgin, IL 60123
Fon 001-847 / 717 89 00
Fax 001-847 / 717 89 24
2957004/EN/01
 Loading...