

Mega 105WR Start Manual
Mega 105WR ADSL 2+ Router - Easy Start

Mega 105WR ADSL2+ Router - Easy Start Guide
Chapter 1 – Introduction
Thank you for purchasing a Mega 105WR Router. This Easy start guide is a complete guide to
configuring your Mega 105WR. It includes setup configurations for most operating systems. If
you are setting your Mega 105WR up with a PC running Microsoft Windows operating system,
it is suggested that you follow the much quicker “Quick Start Guide“ that was supplied in printed
form with your Router. (It is also available in soft copy on your Router CD.)
The Mega 105WR Router can be connected to any computer/notebook with a 10/100 Base-T
Ethernet card, USB port or IEEE 802.11b/g Wireless adapter. The Ethernet ports have the Auto
MDI/MDIX feature which allows both cross and straight UTP cable to be utilized. The Mega
105WR has an in-built IEEE802.11g Wireless LAN Access Point for wireless connectivity.
1.1 Minimum Requirements
• Pentium
• A CD-ROM Drive
®
MMX 233MHz
• At least one of the following, depending on how you wish to connect to the
Router
• For Ethernet connectivity - Ethernet card with TCP/IP Protocol
installed
• For Wireless connectivity - IEEE 802.11b/g Wireless adapter
• For USB connectivity - USB port
- One of the following operating systems
+Windows® 98 Second Edition
+Windows® Me
+Windows® 2000
+Windows® XP
+Windows® XP x64 Edition
• Web Browser - Microsoft Internet Explorer 4.0 (or later versions)
Or
- Netscape® Navigator 3.02 (or later versions)
+Macintosh OS 10.2 & above
1
Mega 105WR ADSL2+ Router - Easy Start Guide
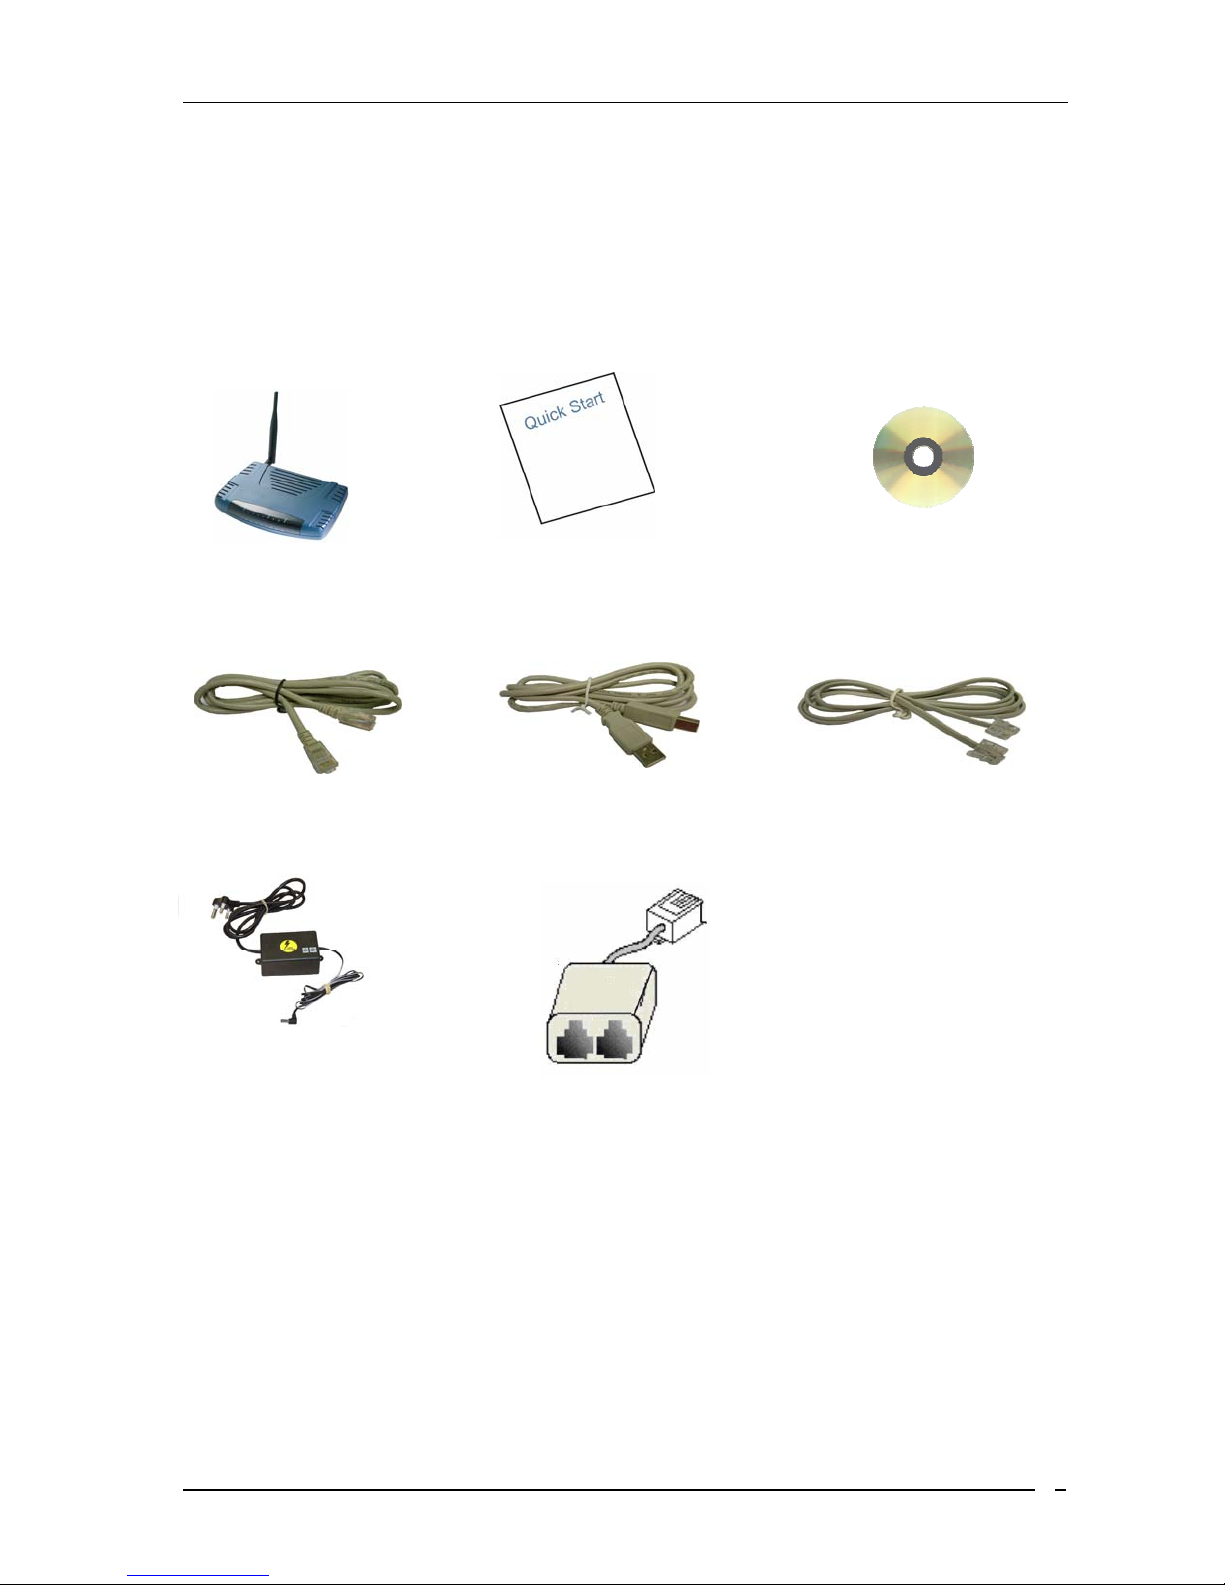
1.2 ADSL Router Package
Your Mega 105WR package should contain the items shown in Figure 1-1. For any missing
items, please contact the sales outlet from which you purchased this router immediately.
Wireless Router Quick Start guide Utility CD
Cat 5 Ethernet Straight Cable USB Cable 2 Telephone Cables
9V Power Adapter 2 micro filters
Figure 1-1 : ADSL Router Package
2

Mega 105WR ADSL2+ Router - Easy Start Guide
1.3 Mega 105WR Overview
1.3.1 Front Indicators
Fig 1-2 shows the front indicators of the Mega 105WR router.
4 6
1 2
3 5
Figure 1-2 : Front Indicators
LED Name Status & Meaning
1. Power
2. Ethernet(E1 - E4)
Lights up when power is supplied to the ADSL Router.
Lights up when the Ethernet cable is properly connected
from your ADSL Router to the Ethernet Card. Flickers
when the ADSL is transmitting/receiving data.
3. Wireless
4. USB
Flickers when the Wireless LAN is operational.
Lights up when the USB cable is properly connected
from your Router to the USB port. Light is Off when the
USB cable is not correctly connected
5. DSL
Light is off when no Telephone jack (RJ-11) is
connected. Flickers w hen the ADSL Router is trying to
establish a connection with the ADSL Service Provider
(Training). Steady Green LED. Lights up when the
ADSL connection is established.
6. Internet
Green LED lights up when the PPP connection is
established. Light is off when there is no PPP
connection.
3

Mega 105WR ADSL2+ Router - Easy Start Guide
1.3.2 Back Panel
Fig 1-3 shows the back panel indicators of the Mega 105WR router.
E1
1 2
3
4
5
7
6
Figure 1-3 : Back Panel Indicators
Label Description
1. DSL
Connect the telephone jack (RJ-11) to your Telephone
Wall Socket (DSL line).
2. USB
Connect the USB jack to your PC’s USB port, if
required.
3. RESET
To reset the ADSL Router, simply press the reset button
for at least 10 seconds (all customised settings that you
have saved will be lost!).
4. ETHERNET(E1-E4)
10/100 Base-T Auto-MDI/MDIX Ethernet jack (RJ-45)
to connect to your PC’s Ethernet (Network) card or
Ethernet Hub / Switch.
5. DC 9V
To connect to the Power Adapter that comes with your
package.
6. POWER SWITCH
Push downwards to switch ON and press upwards to
switch OFF.
7. RF Antenna
2.4Ghz Wireless Antenna.
4
Mega 105WR ADSL2+ Router - Easy Start Guide
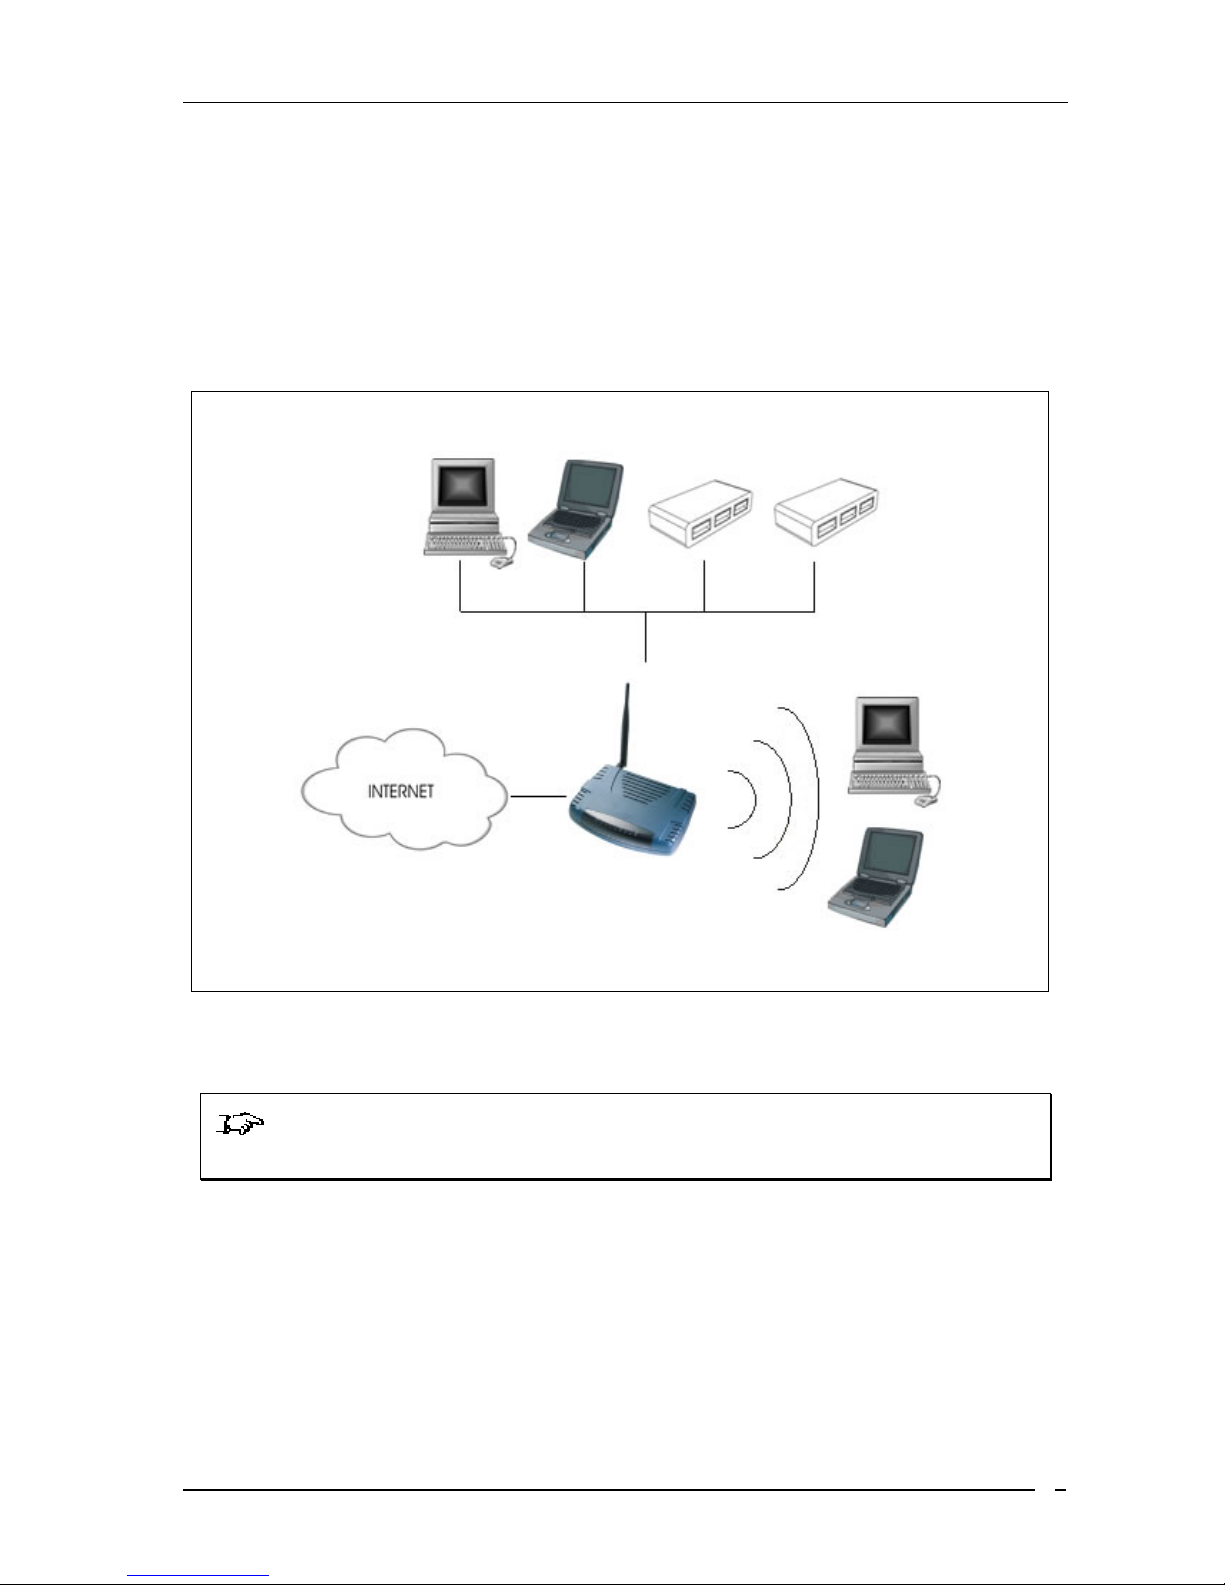
1.4 Typical MEGA 105WR Router Connection
You may connect many computers to the Mega 105WR over Wi-Fi. Only 4 computers may be
directly connected to the router’s Ethernet ports. You may, however, connect any of the Ethernet
ports to an Ethernet hub or switch. Many more computers (and other Ethernet devices) may then
be connected to the router.
Computers or Notebooks with Ethernet Network
Cards, Ethernet Switches or Hubs
Computers or Notebooks with Wireless
Figure 1-4 : Typical device conectivity
PC cards or USB Clients.
NOTE: With the Auto MDI/MDIX feature, both cross and straight UTP cables can
be used.
5

Mega 105WR ADSL2+ Router - Easy Start Guide
Chapter 2 - Setup overview
The following chapters describe how to connect your Mega 105WR. As there are many different
combinations of operating systems and connection types, what follows may seem rather
complicated, so here is a summery of the steps to be taken:
• Telephone line is connected to the Mega 105WR
• Power supply is connected to the Mega 105WR
• Mega 105WR is connected to your computer using USB or Ethernet (Wi-Fi is not
recommended for initial setup )
• Mega 105WR is switched on
• USB drivers are installed ( if necessary)
• Ethernet port is configured ( if necessary)
• Web browser is configured for connection (if necessary)
• Mega 105WR is configured for internet connection
• Your Telkom internet account is verified
The easiest way to configure your Mega 105WR is by using the installation utility on of the
Windows operating systems.
To configure your Mega 105WR using a particular Operating system,
perform the steps in the listed chapters in the correct order.
Operating system Chapters
Microsoft Windows (using installation utility )
Mac OS
Windows XP x64 (if connecting via USB)
Other operating systems and Window without using
installation utility
Chapter 3
Chapter 5
(During chapter 5, you will
be prompted to follow
chapter 4 )
Chapter 3
Chapter 6
Chapter 8
Chapter 3
Chapter 4
Chapter 7
Chapter 5
Chapter 3
Chapter 4
Chapter 9
6
Mega 105WR ADSL2+ Router - Easy Start Guide
p
Chapter 3 - Telephone and power connections
3.1 Connecting the Telephone Line
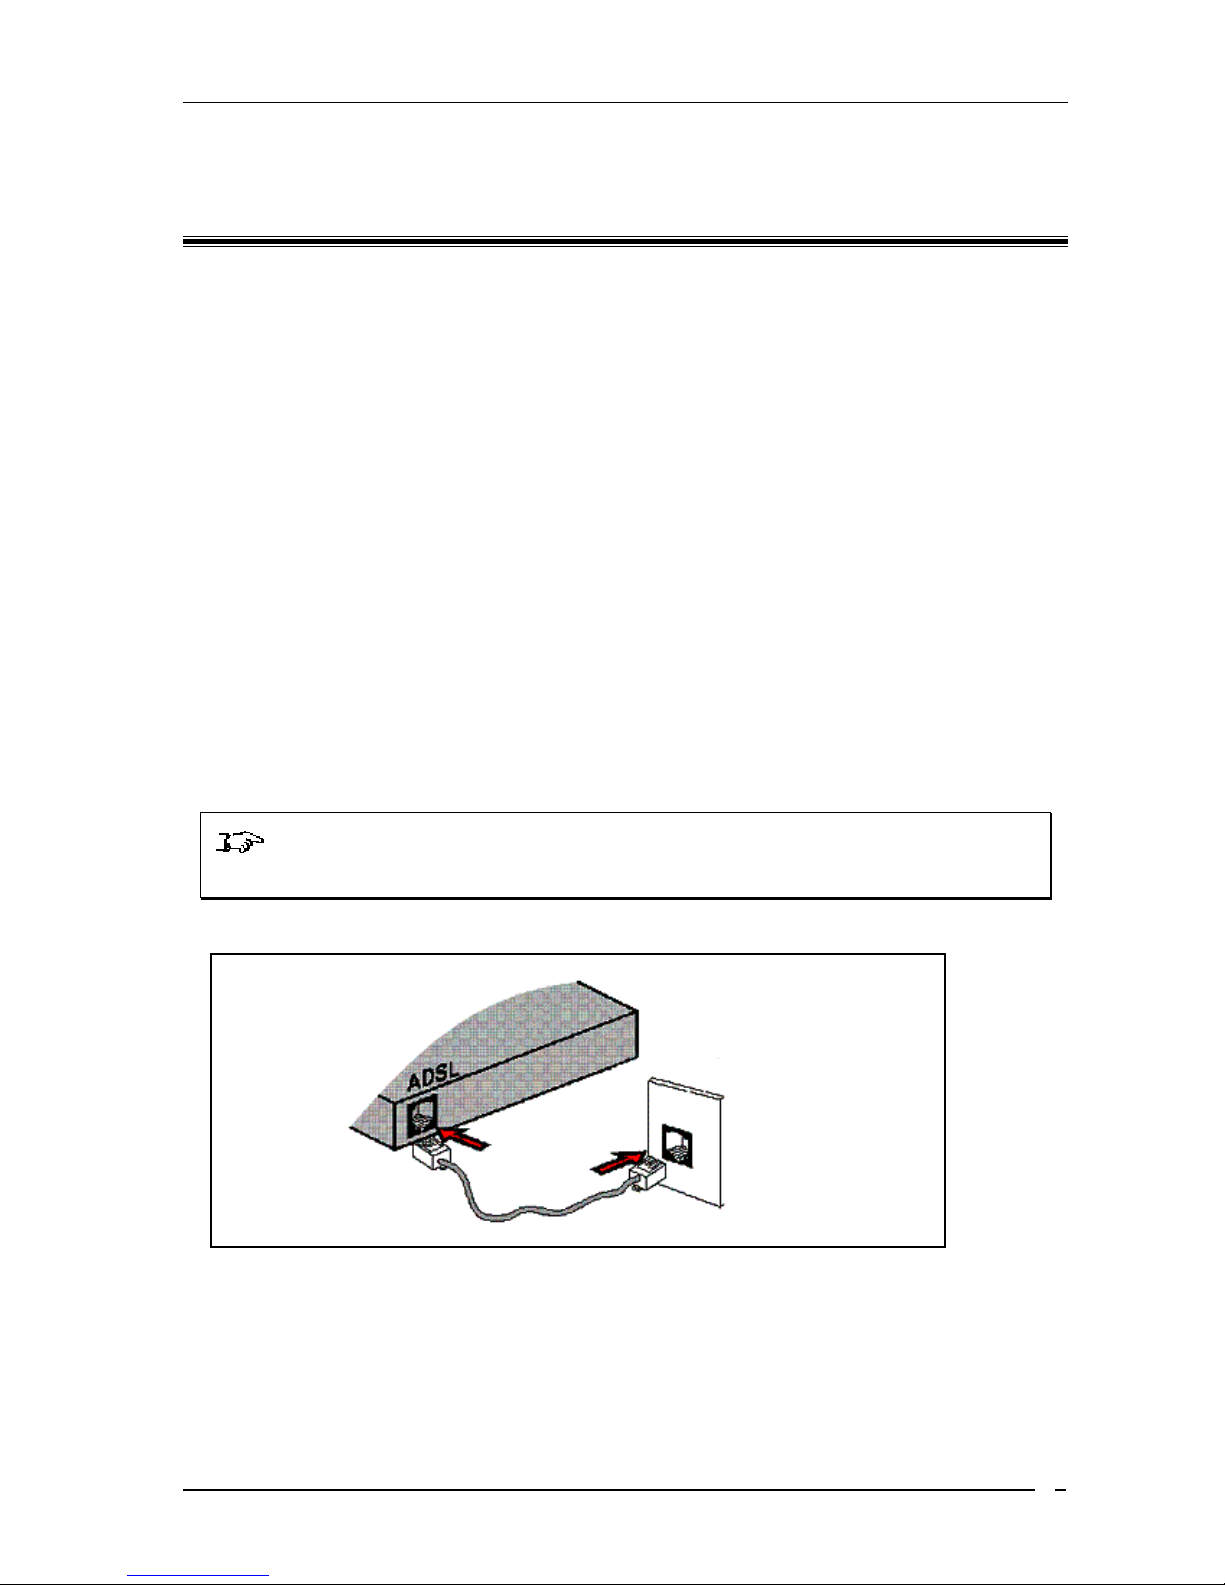
There are various ways to connect your Mega 105WR to your ADSL enabled telephone line.
• Directly (Without a telephone connected to the same outlet)
- To make a direct connection, please connect as per Figure 3-1
- If a telephone is to be connected to another outlet that shares the same telephone
line, please connect it as shown in Figure 3-2
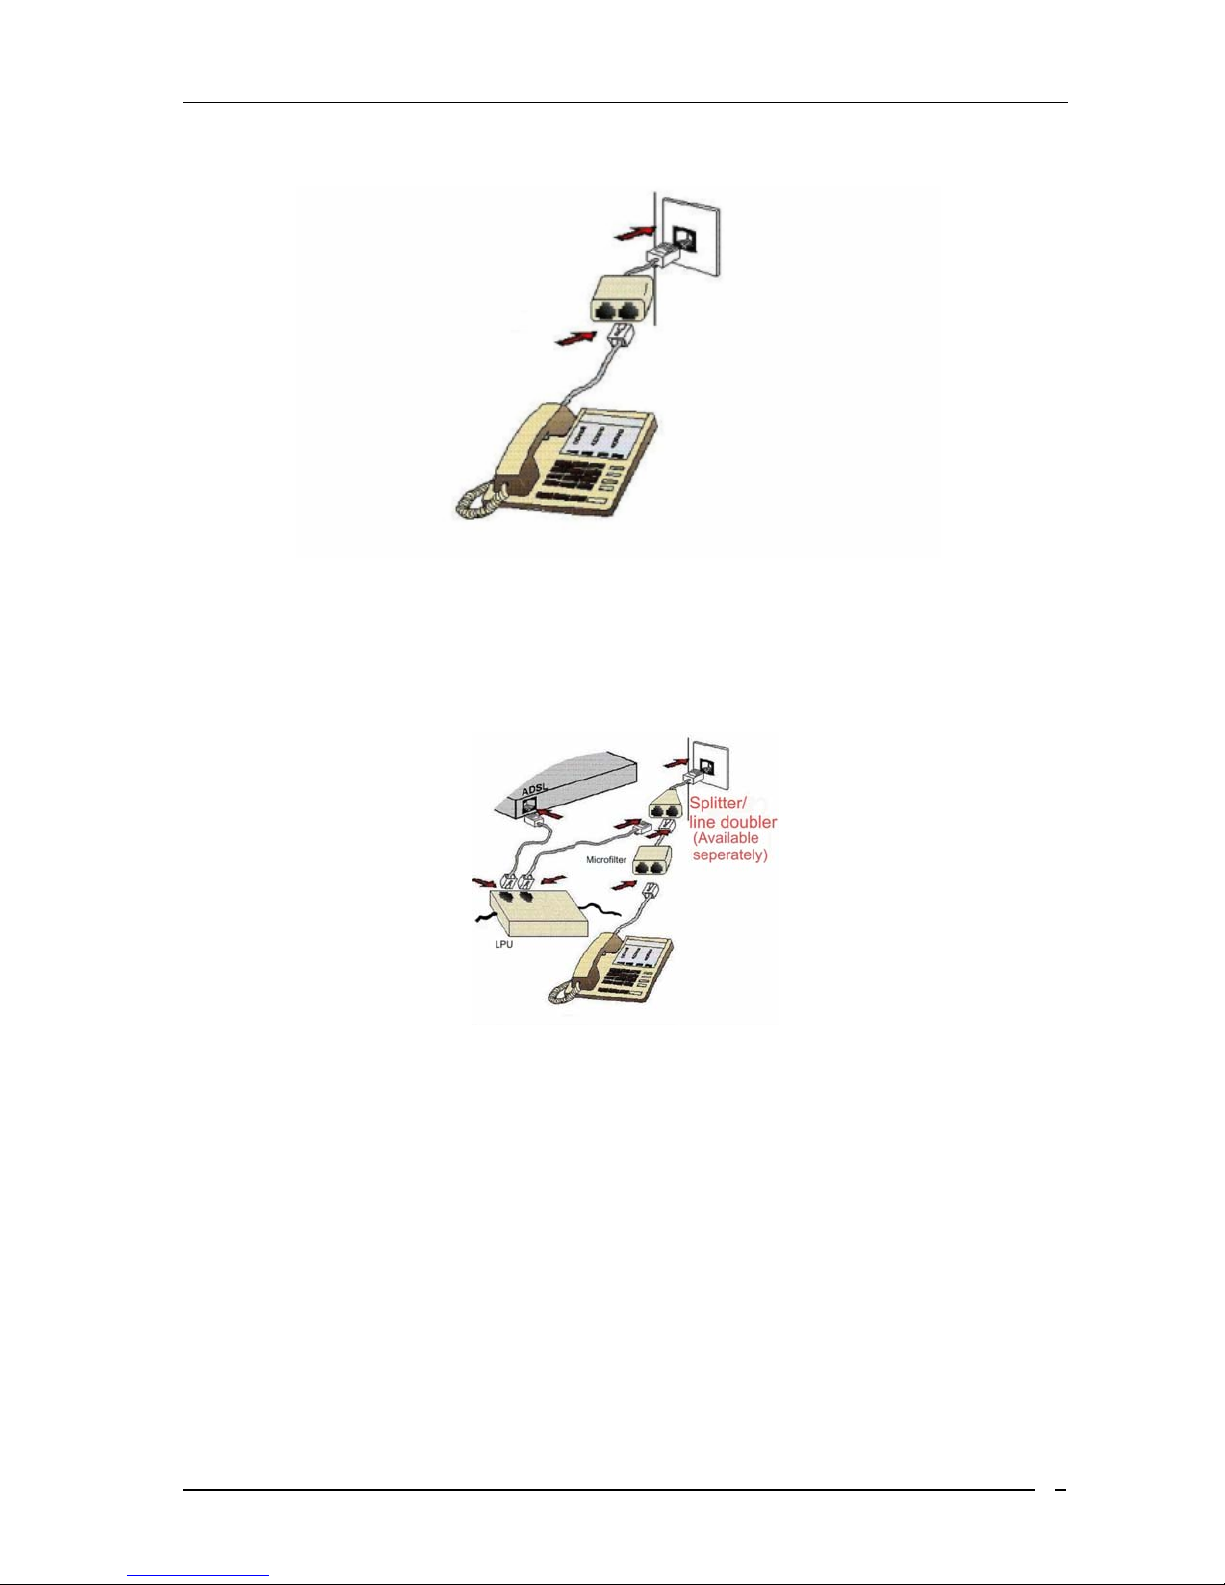
• Together with a telephone
- Please connect as per Figure 3-3 if you have a single telephone outlet or Figure 3-
4 if you have a twin telephone outlet.
- Should you wish to connect another telephone to an additio nal outlet that shares
the same telephone line, please connect this as shown in Figure 3-2
NOTE: When connecting a telephone to an ADSL enabled telephone line, you
MUST ALWAYS make use of a Microfilter
Back View of
ADSL Router
Telephone
Wall Socket
Tele
hone Cable
Figure3- 1 : Connecting directly to telephone outlet
7
Mega 105WR ADSL2+ Router - Easy Start Guide
Figure 3- 2 : Connecting a telephone to the same telephone line
Figure3- 3 : Connecting the router together with a telephone to a single telephone outlet
(using splitter/line doubler – available seperatly)
8

Mega 105WR ADSL2+ Router - Easy Start Guide
Figure 3- 4 : Connecting together with a telephone to a dual telephone outlet
3.2 Connecting to the Power Outlet
The Mega 105WR is powered through a power adaptor. This is connected to the Router as
shown in Figure 3-5. The 3 pin mains plug on the other end of the power adapter is to be plugged
into the mains outlet.
Back View of the
ADSL Router
Figure 3-5 : Connecting the power adapter to the Mega 105WR
Connect the other end of
the Power Adapter to the
Power Outlet.
Use only the supplied power adaptor ! Use of any other adaptor may damage
the router !
CAUTION
9
Mega 105WR ADSL2+ Router - Easy Start Guide
Chapter 4 - Connecting your computer
Your computer can be connected to the Mega 105WR in one of three ways
• Ethernet
• USB
• Wi-Fi
It is recommended that you initially connect to the router using a USB or Ethernet
connection, in order to do the initial setup. Thereafter, you may connect using Wi-Fi if
necessary.
NOTE: Do EITHER section 4.1 OR section 4.2 as needed, not both !
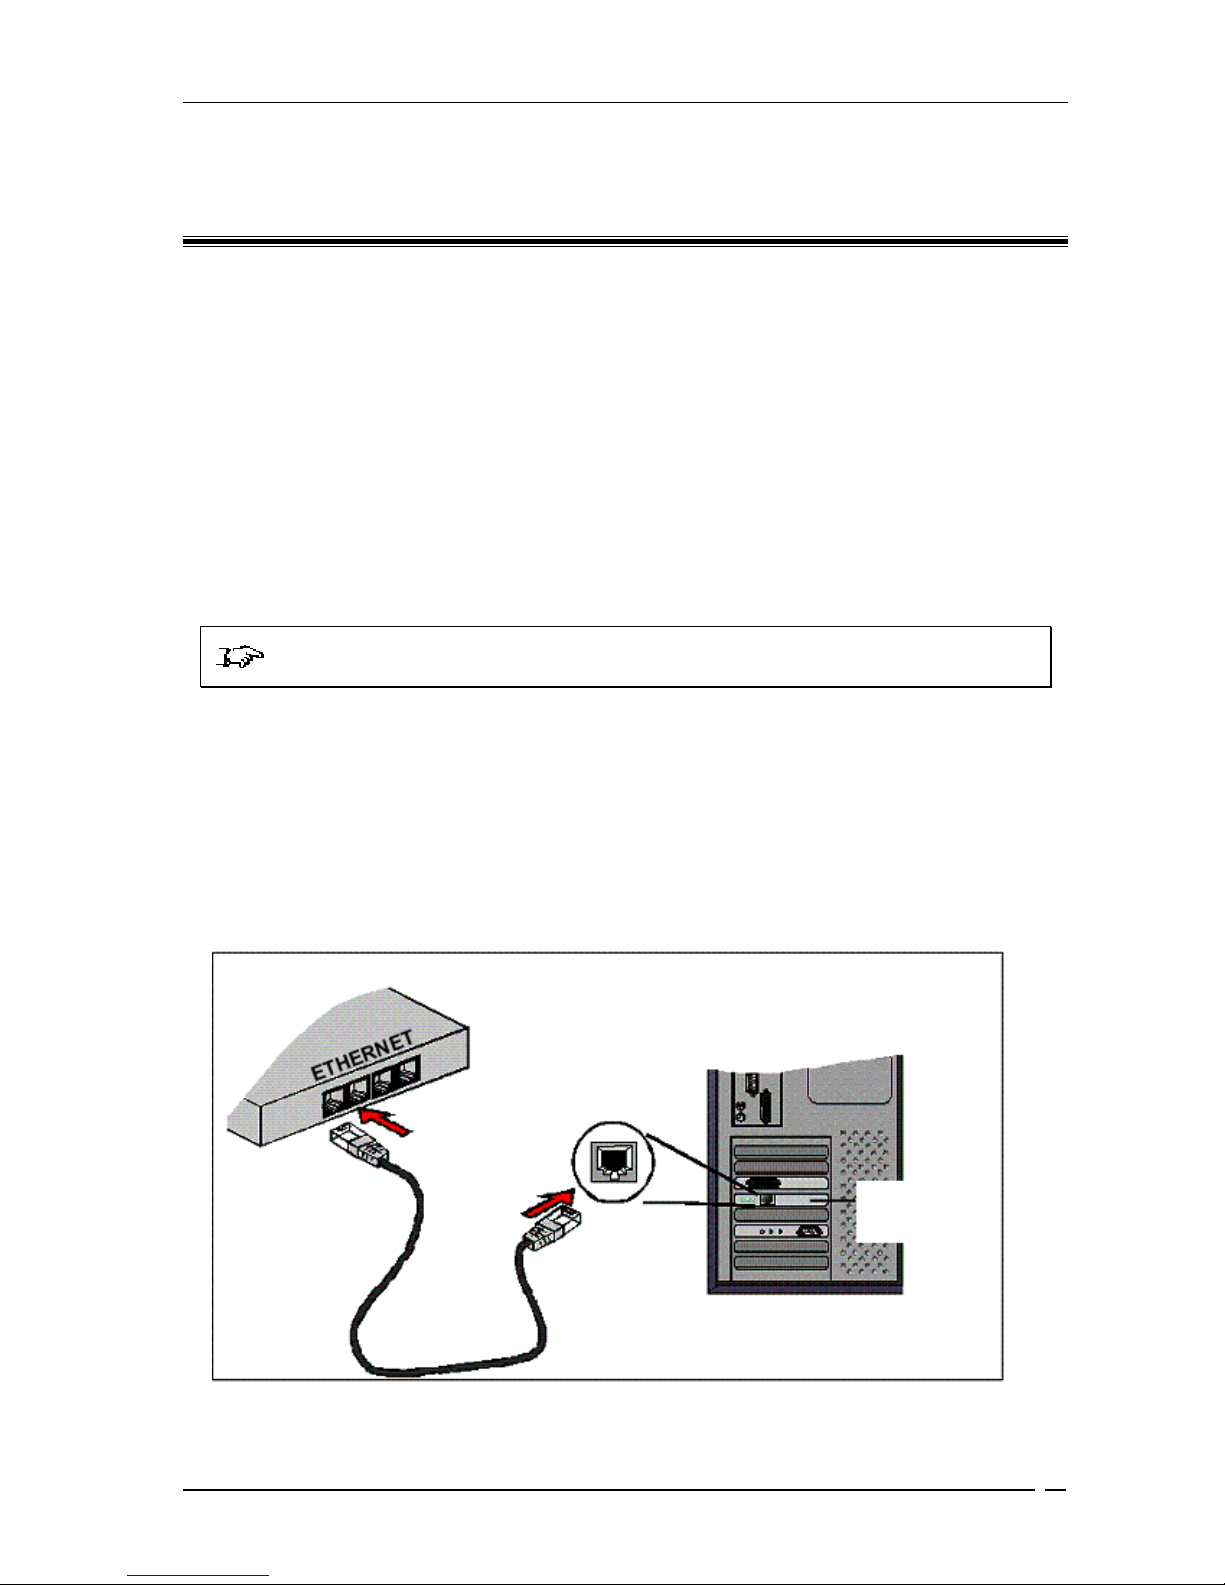
4.1 Connecting the computer using a Ethernet connection
You can connect up to four Ethernet devices to your Mega 105WR. These devices may be
computers, hubs, switches, printers etc. To do the initial configuration, it is recommended that
you start by connecting only one computer. Please connect as shown in Figure 4.1. P roceed to
4.3
Back View of
ADSL Router
Ethernet Port
Back view of a
Computer
Ethernet
Network Card
Ethernet
Network Cable
Figure 4-1 : Connecting via Ethernet
10
 Loading...