

Page 1
T
T
N
N
E
E
T
T
N
N
O
O
C
C
F
F
O
O
E
E
L
L
B
B
A
A
T
T
registered trademarks.
®
are Microsoft
®
2003, all rights reserved.
©
and Windows
®
Inserting batteries in mouse ........................................... 2
Features......................................................................... 2
Setting up ........................................................................ 2
Installation ..................................................................... 2
Inserting batteries in keyboard........................................ 2
Connect the keyboard and mouse.................................... 3
Software installation...................................................... 4
Setting frequency channel or ID ........................................ 3
Display Keyboard Modes ................................................ 4
Multimediatasten der Tastatur......................................... 4
Keyboard battery indicator ............................................. 5
Cleaning the keyboard and the mouse.............................. 6
Working in comfort with your input set ............................... 4
Troubleshooting and tips ................................................ 6
Trademark:
This manual contains information protected by law. All rights are reserved.
Copyright law prohibits duplicating this information in mechanical, electronic, or
MAKING COPIES OF THIS MANUAL
any other form, without the written approval by the manufacturer.
MS-DOS
Copyright
Except the rights for making technical and aesthetical modifica-
All the other trademarks are of the property of their respective owners.
tions and possible typing errors.
Wireless
Keyboard & Mouse
Page 2
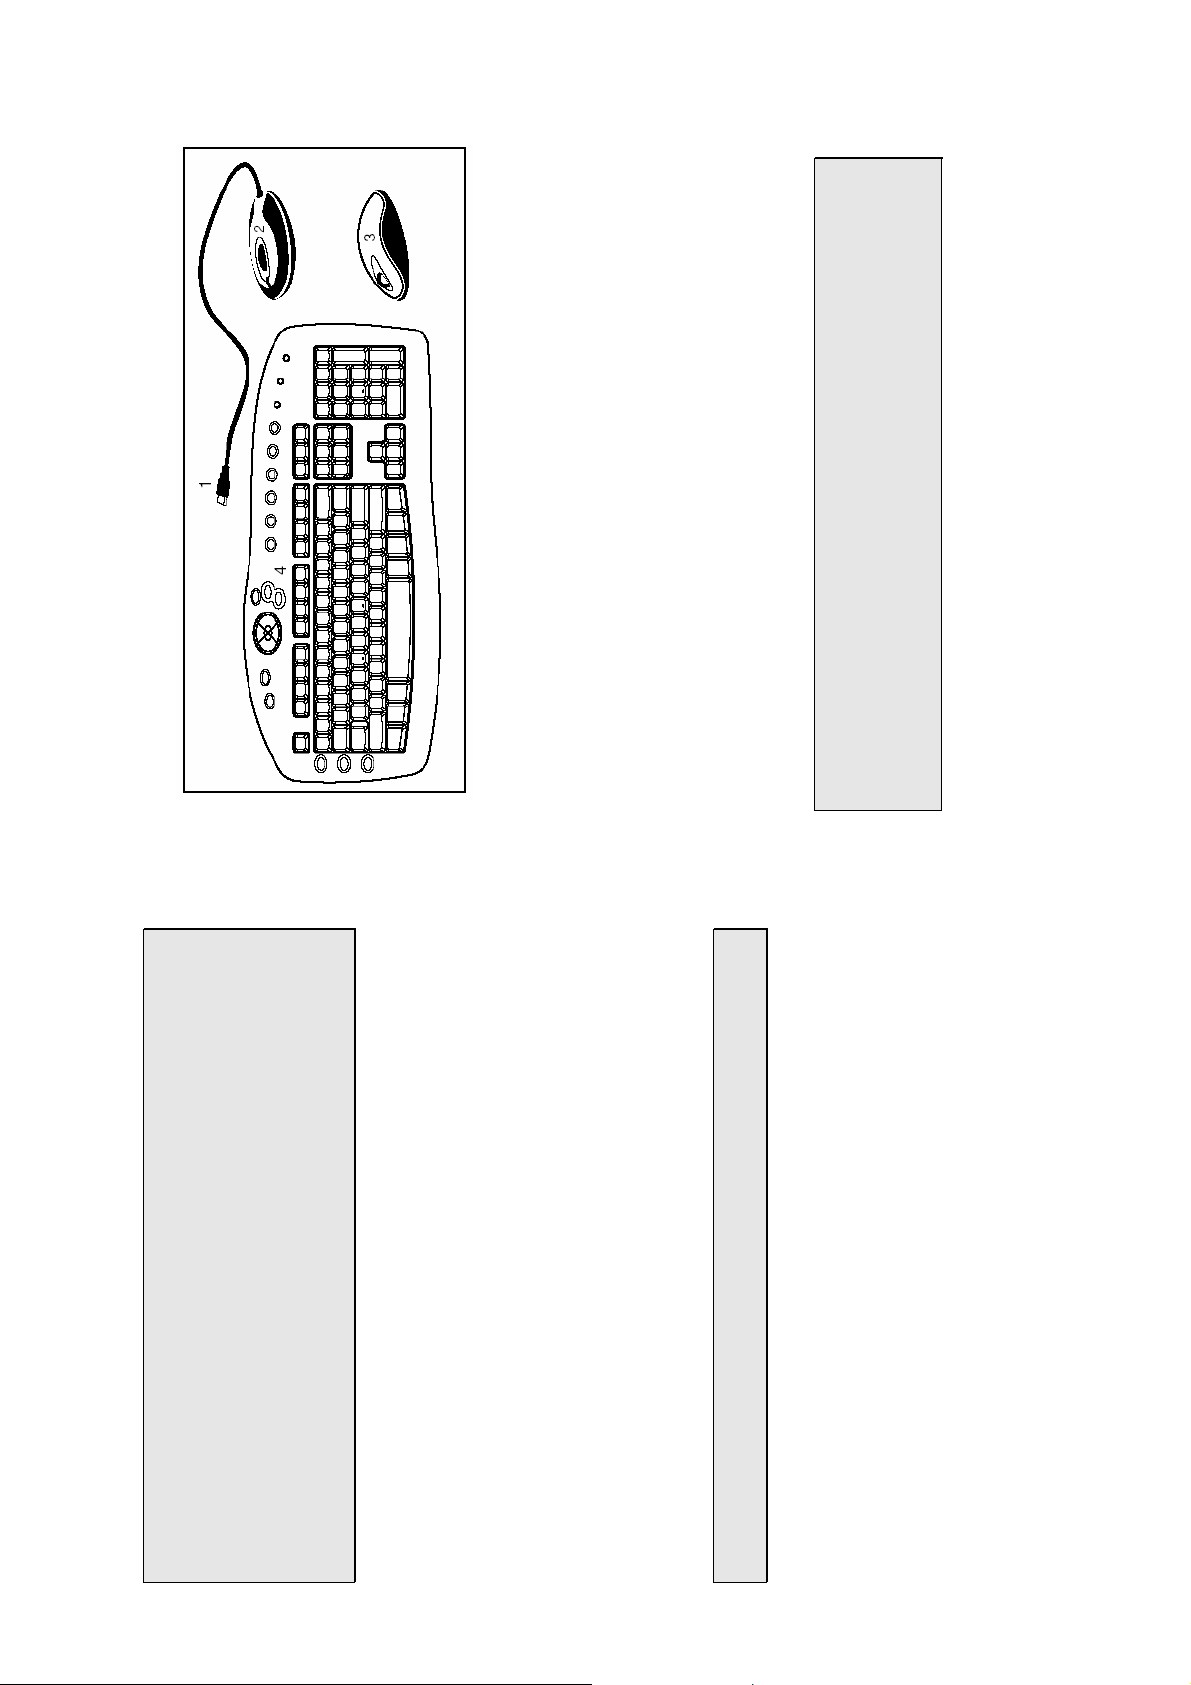
of the keyboard by pushing it in the direction of the arrow.
compartment and fix the battery compartment cover (1)
on the bottom of mouse again.
1. Remove the battery compartment cover (1) on the bottom
2. Insert the two alkaline batteries (AAA) in the battery
at one side of the battery compartment cover. It may
cause the channel or ID change..
 Note: Please do not push the channel setting button (3)
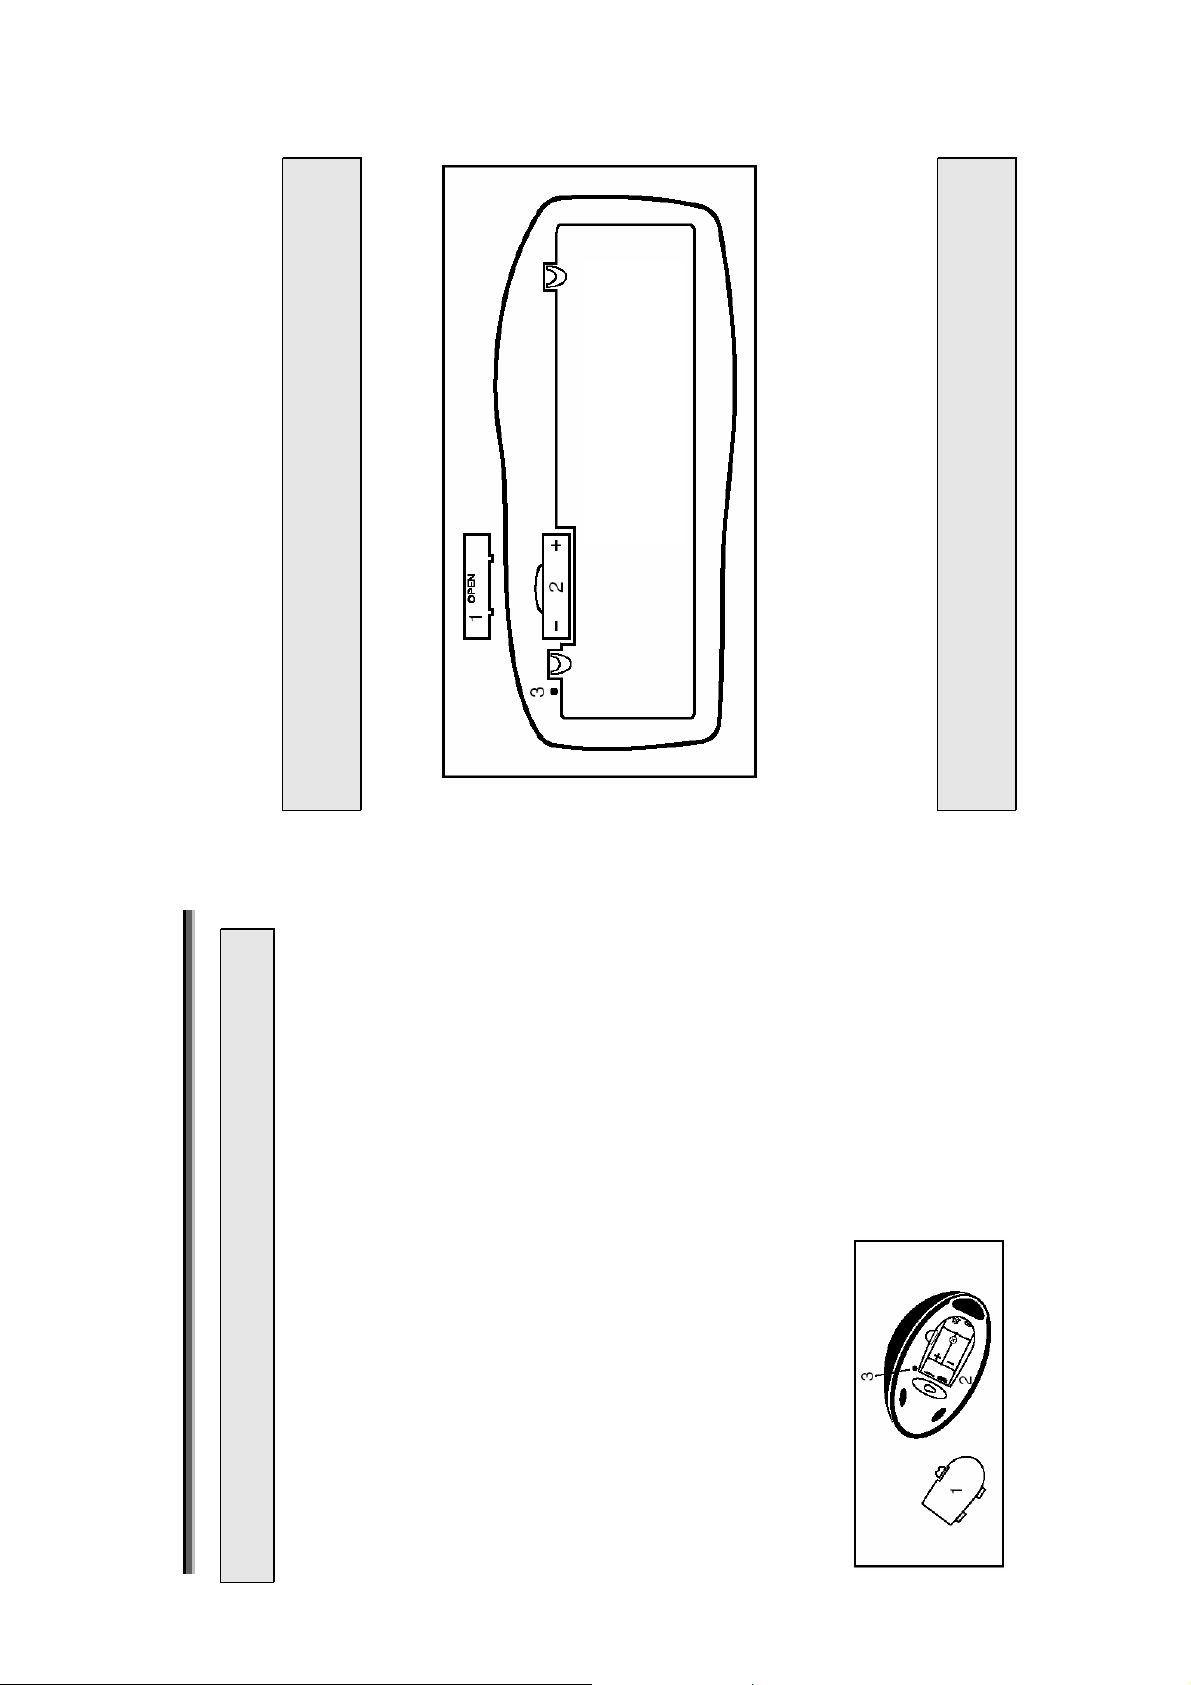
INSERTING BATTERIES IN KEYBOARD
The keyboard requires two alkaline batteries (AA).
1 = Cover
2 = Battery compartment
3 = Channel setting button
of the keyboard by pushing it in the direction of the arrow.
1. Remove the battery compartment cover (1) on the bottom
partment (2) shows how to insert the batteries properly.
2. Insert two AA batteries. The illustration in the battery com-
(2) under the battery compartment.
3. Recover the battery compartment by pushing the locking lug
at one side of the battery compartment cover. It may
cause the channel or ID change.
 Note: Please do not push the channel setting button (3)
P
P
U
U
G
G
N
N
I
I
T
T
T
T
E
E
S
S
your computer’s user manual.
 Beware: Please read and follow the security advices in
Thank you for choosing this Wireless keyboard and Mouse Kits.
It operates with digital radio technology to ensure no hinder
communication between the keyboard, the mouse and your
computer without connecting cable.
The transmission and receiving of keyboard and mouse are free
liament and Commission.
for radio and telecommunications Equipment.
• Complies with Directive 1995/5/EC of the European Par-
• Complies with the mutual recognition of conformity 1999
• Manufactured with environmental friendly recycled materials.
from angle restriction. There are two frequency channels each
for keyboard and mouse to prevent malfunctions when you op-
erate several radio transmission devices simultaneously.
FEATURES
INSTALLATION
1 = Cover
2 = Battery compartment
Before working with your new keyboard and mouse, take a few
one-time preparations.
INSERTING BATTERIES IN MOUSE
The mouse requires two alkaline batteries (Type: AAA).
ENGLISH 2
3 = Channel setting button
Page 3
98 Operating System
®
Windows
®
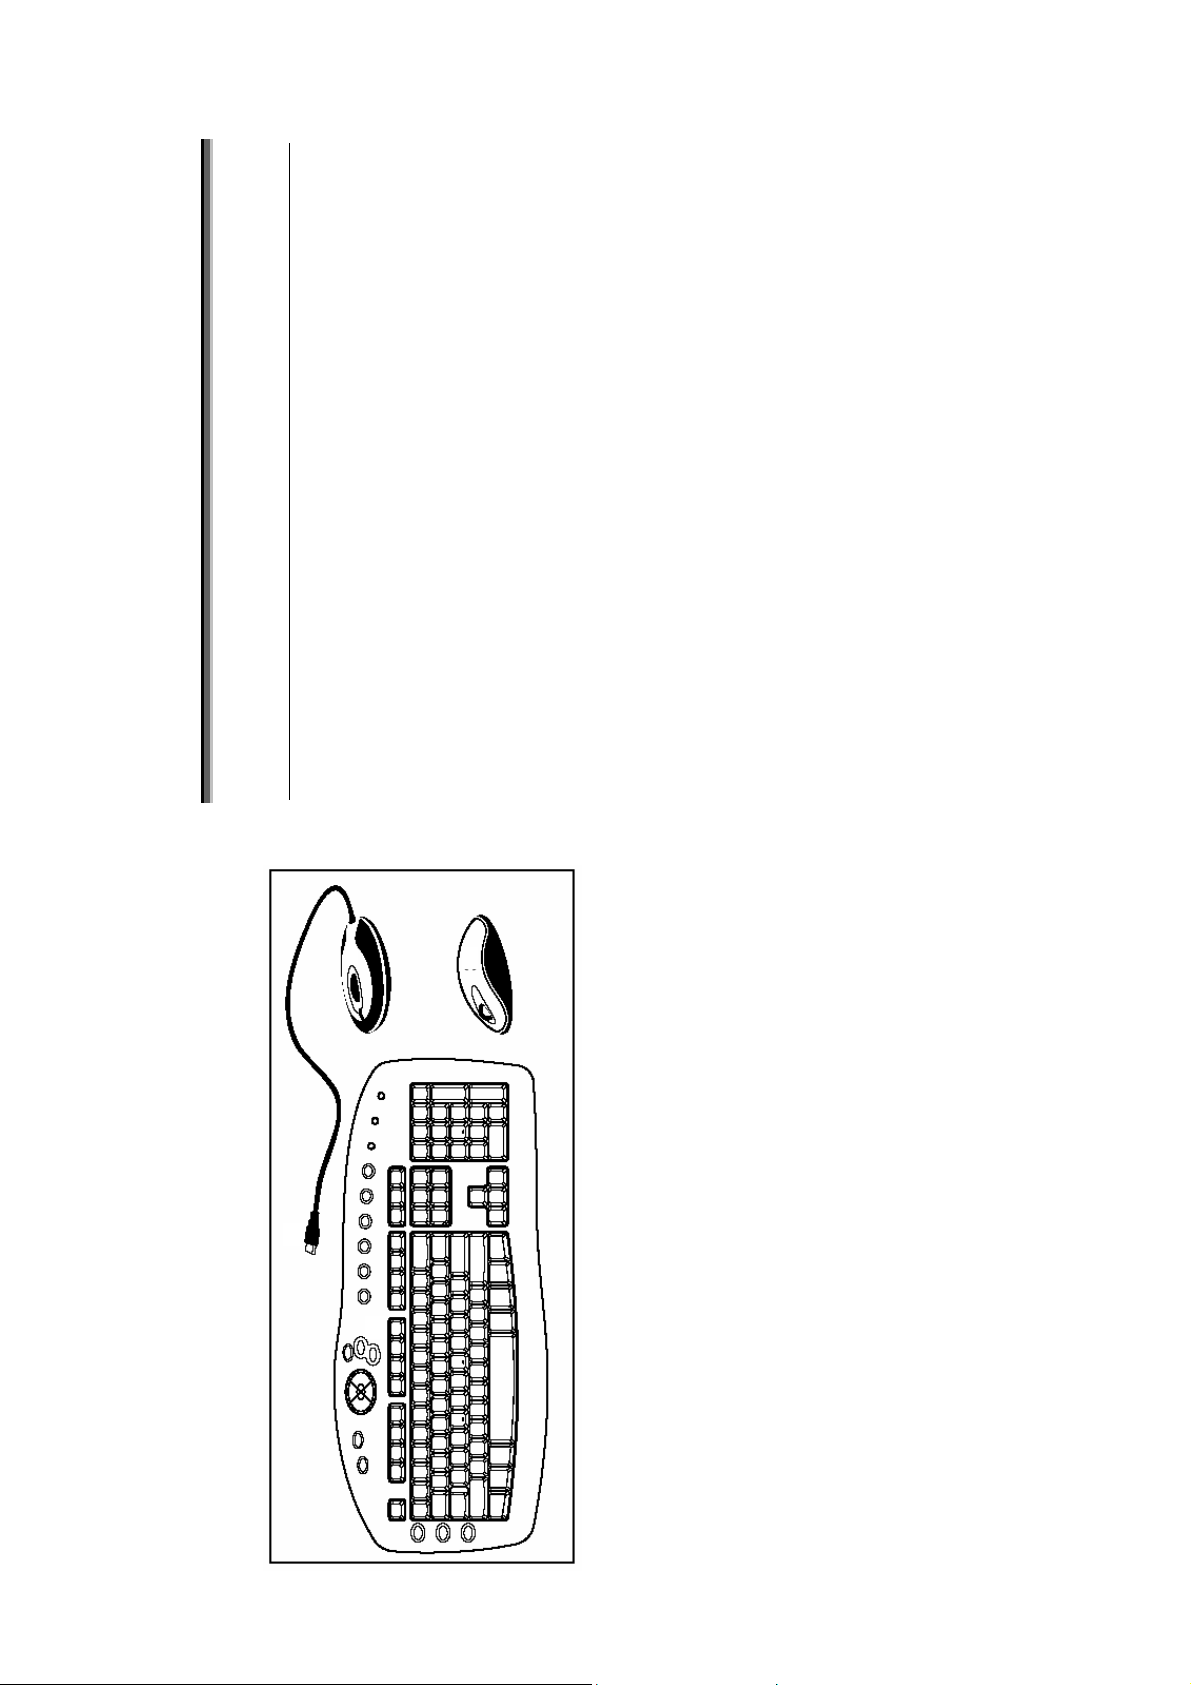
2 = Receiver
3 = Mouse
1 = USB Receiver plug (black)
CONNECT THE KEYBOARD AND MOUSE
4 = Keyboard
1. Plug the plug (1, black) of receiver int o an USB port of your
computer. The computer will activate your mouse and key-
board after 10 seconds.
vices (e.g. monitor) to achieve optimum performance. The distance
between the keyboard, mouse and receiver should not exceed 5 feet.
Do not place the receiver on metal surfaces.
2. Place the receiver at least 20 cm (8 inches) from other electrical de-
does not well support an USB keyboard/ mouse. In order
to complete the setting of USB keyboard and mouse, it is
advisable to use a PS/ 2 keyboard and / or mouse to fol-
 Note: The Microsoft
low the on screen instruction.
ENGLISH 3
for this reason always remove rundown batteries from the
 Caution: some liquid can leak from the rundown batteries,
device. The almost rundown batteries can cause the bad
will be blinking.
functioning of the device.
 Do not throw rundown batteries in the domestic re-
fuses! Respect the environment and throw them in the spe-
cific containers for separate collection. If necessary, turn to
your reseller or to our service assistance. Thank you!
SETTING FREQUENCY CHANNEL OR ID
For the radio connection, set the keyboard to receiver, and
mouse to receiver, with the same frequency channel and ID.
Different ID can keep the keyboard and mouse working well with
the same frequency channel. There are 255 IDs each for key-
board and mouse. Change the frequency channel may prevent
interference between two devices.
Setting frequency channel on keyboard and mouse
1. Push the connect button on the top of receiver. The indicator
channel will be changed after the button released.
2. Push the button on the bottom of keyboard or mouse. The
 Note: Please do not hold the button until 3 seconds.
It will change the ID, instead of channel.
on the top of receiver will be blinking.
1. Push the connect button on the top of receiver. The indicator
Setting ID on keyboard and mouse
until 3 seconds. The ID will be changed after the button re-
2. Hold down the button on the bottom of keyboard and mouse
leased.
Page 4
button: press on the wheel.
rd
Standby Mode
Depending on the settings in the BIOS Setup or operat-
ing system the computer switches to a standby mode.
Internet
With this key you can start the standard browser.
E-Mail
Use this key to start the standard e-mail program.
Favorites
Opens the folder „Favorites“.
Calculater
Activates the Windows default calculator.
Search
Activates the OS default search function.
turn the wheel forward or back.
• For scrolling, e.g. in documents or on Internet pages:
• As a 3
WORKING IN COMFORT WITH YOUR INPUT SET
The following sections contain information on using the keyboard
and the mouse.
Using mouse wheel
In addition to two buttons, the mouse also has a wheel that can
be used as follows:
MULTIMEDIATASTEN DER TASTATUR
You can specify further settings in the mouse software.
The keyboard has several additional function keys.
ENGLISH 4
Mouse & Keyboard battery low indicator
Uppercase mode (Caps Lock)
Virtual numeric keypad (Num Lock)
Stop screen output (Scroll Lock)
possible that some important files are overwritten or
modified. To have access to the original files in case of
problems that arise after installation, it is advisable to
create a back-up of the hard disk contents.
 Caution! During the installation of the software it is
SOFTWARE INSTALLATION
The software provided, only supports Windows 98SE, Windows
ME, Windows 2000 and Windows XP. Install the software to use
1. Start the computer and insert the data carrier in t he corre-
all mouse functions.
sponding drive.
the instructions on the screen.
2. Start the Setup program from the data carrier and follow
You may also use any standard software. However, it is possible
that (depending on the software used) not all functions are
available. Once you have installed the software, the following
symbols will display on Windows taskbar, the multimedia keys
can be activated.
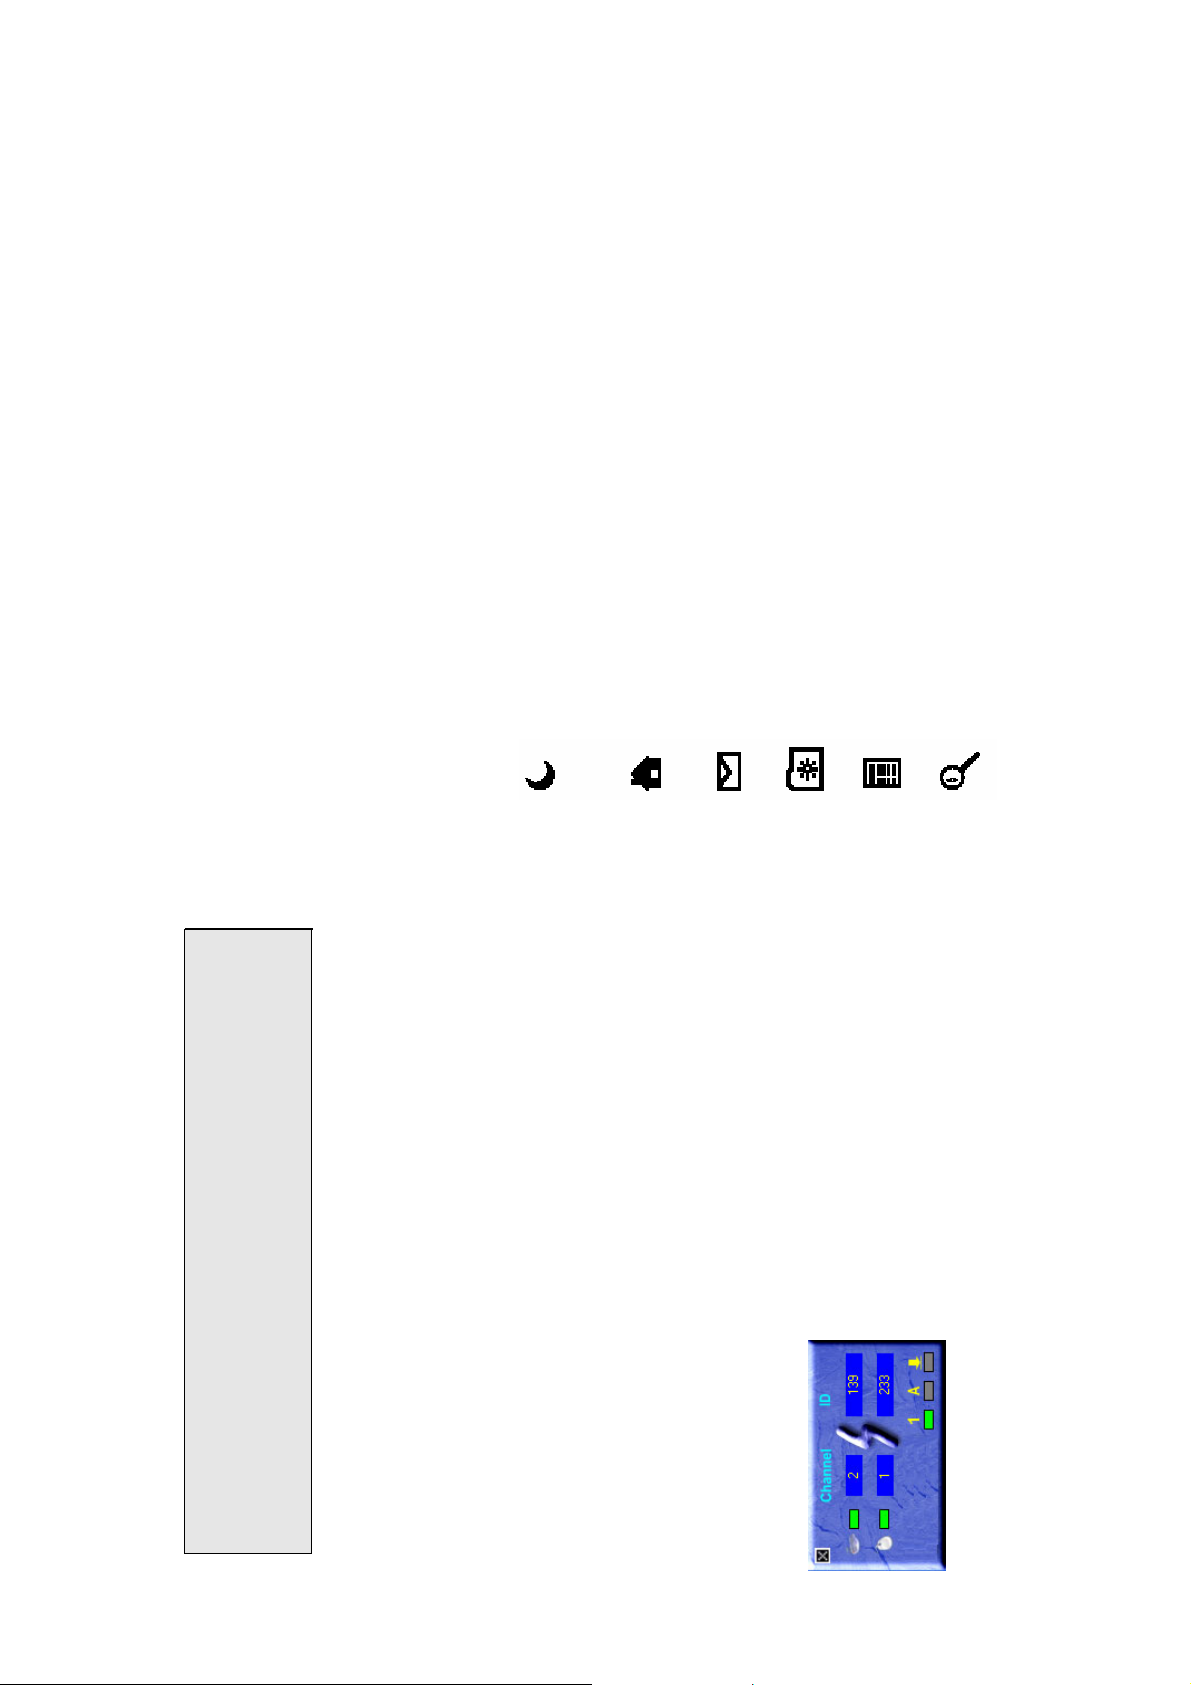
DISPLAY KEYBOARD MODES
The symbols indicate which keyboard mode is active. They
match the displays on ordinary keyboards.
The symbol is green when the respective mode is activated and
light grey when it is deactivated.
Page 5

Special features of multimedia keys
The proper function of the multimedia keys is dependent on your
system and is influenced by the following factors: OS, Mainboard
(Motherboard) and BIOS. The "Standby mode" key only functions
correctly when the system board, BIOS and operating system of
your computer fully supports the ACPI function.
KEYBOARD BATTERY INDICATOR
The battery indicator on the screen shows you the charging sta-
te of the batteries. If the battery indicator lights up when a key
is pressed, the batteries are gradually becoming weaker.
Replace them in the near future.
WRITING USING THE KEYBOARD
The keyboard is ergonomically designed to ensure ease-of-use.
Inconvenient arrangement of the input and output devices,
awkward arm movements or posture, or working with the key-
board or mouse for lengthy periods without a break can lead to
tenseness, fatigue, and damage to the locomotors system
(nerves, muscles, tendons, and joints).
dations for an ergonomic workstation provided in the PC
Operating Manual.
able strain. The keyboard should be level with the upper part of
you body. This prevents any tension in the shoulders and arms.
desk should be 5 to 10 cm (2-4 inches).
• Arrange your workplace in accordance with the recommen-
You can considerably reduce the risk of this happening if you
follow the advice given below.
• Position the keyboard so that you can use it without any notice-
• The distance between the keyboard and the edge of the
• When typing, hold your hands and forearms so that they
form as natural a line as possible. Do not turn your hands
too far to the left or right.
• Keep your wrists straight while typing. Do not angle your
hands upwards or downwards.
ENGLISH 5
Back
Switches to the previous web page/folder.
Forward
Switch to the next web page.
Previuos Track
Use this key to skip to the forward title in the active
player.
Stop
Use this key to end the playback of a title.
Play/Pause
Use this key to start or pause for a short time the play-
back of a title just as you would with a normal CD
player.
Next Track
Use this key to skip to the next title in the active player.
Decrease the volume
This key decreases the volume of the soundcard.
Mute
Use this key to switch on/off the soundcard.
Increase the volume
This key increases the volume of the soundcard.
Cut
Cuts the content you selected.
Copy
Copies the content you selected.
Paste
Pastes the content you have been copied or cut.
Page 6

according to the polarity and the receiver is well connected.
TROUBLESHOOTING AND TIPS
• Make sure that the batteries have been inserted correctly
The keyboard or mouse does not operate following installation or
is not recognized.
the receiver and the keyboard or mouse.
and mouse. Press a mouse button and then the connection
button on the receiver.
• Check that your USB port is configured properly.
• Check whether the respective channels and ID are set on
• Make the connection between the receiver and the keyboard
ton on the device several times to prevent any unexpected
failure after batteries being put in.
• Make sure the batteries are not too weak.
• Remove the batteries from the device. Please press any but-
causes the problem test the keyboard and mouse on a sec-
ond computer if possible; or test another keyboard and
• Change the location of the receiver to have a best sensitivity.
• To determine whether the keyboard, mouse or computer
mouse on your current computer.
If you are still unable to solve the problem, please contact your
customer service.
ENGLISH 6
typing, and do not strike the keys too hard.
• Do not rest your hands on the balls of your thumbs while
During these breaks you should rest your hands on the balls of
your thumbs or place your arms on the armrests of your chair.
• Relax your hands by occasionally taking a break from typing.
CLEANING THE KEYBOARD AND THE MOUSE
of your keyboard and mouse.
• Use disinfectant wipes to clean the keyboard and the mouse.
• Do not use any dissolvent, which may damage the surface
 Loading...