

Page 1

N
N
C
C
O
O
O
O
T
E
T
E
M
M
B
P
P
B
U
U
O
O
T
T
O
O
E
E
K
K
R
R
MANUAL
Page 2

MAKING COPIES OF THIS MANUAL
This manual contains information protected by law. All rights are reserved. Copyright law prohibits duplicating this information in mechanical, electronic, or any
other form, without the written approval by the manufacturer.
©
2003 . All rights reserved. Microsoft®, MS-DOS®, and Windows® are registered
trademarks of Microsoft Corporation in the U.S. and other countries and must be
acknowledged when used. Pentium
The names of actual companies and products mentioned herein are the trademarks of their respective owners.
Information in this document is subject to change without notice.
®
is a registered trademark of Intel Corporation.
ii
Page 3

Table of Contents:
INTRODUCTION........................................................... 1
Notes on This manual ............................................... 1
Audience .............................................................. 1
Document Your Notebook ....................................... 1
Quality................................................................. 2
Service ................................................................ 2
Finding More Information .......................................... 2
Getting to Know Windows XP .................................. 2
Software Help ....................................................... 3
Device Drivers ...................................................... 3
SAFETY........................................................................ 5
Safety Instructions ................................................... 5
Data Security........................................................ 5
Operational Safety................................................. 5
General Safety Information..................................... 6
Ambient Temperature ............................................ 6
CD-ROM/CD-RW/DVD/DVD-RW Drive Safety ............. 7
TFT Display Safety................................................. 7
Power Adapter ...................................................... 8
Battery Operation.................................................. 9
Modem .............................................................. 10
Touch Pad .......................................................... 10
Cabling .............................................................. 10
Set-Up Location .................................................. 10
Important Additional Safety Instructions................. 11
Upgrades and Repairs .......................................... 11
Notes for Service Engineers ..................................... 12
MAINTENANCE ..........................................................13
Maintenance Instructions......................................... 13
Cleaning and Care ............................................... 13
Care of the TFT Display ........................................ 13
Transporting the Notebook.................................... 14
Securing your Notebook ....................................... 15
iii
Page 4

VIEWS OF THE NOTEBOOK ........................................17
Open Notebook ...................................................... 17
Front View............................................................. 18
Left Side ............................................................... 18
Right Side ............................................................. 19
Rear Side .............................................................. 19
Indicators ............................................................. 20
Easy Start Buttons ................................................. 21
Power Saving Button .............................................. 22
GETTING STARTED .................................................... 23
Step 1 ............................................................... 23
Step 2 ............................................................... 23
Step 3 ............................................................... 24
THE WINDOWS XP DESKTOP ..................................... 25
POWER SUPPLY ......................................................... 27
On/Off Button ........................................................ 27
Power Adapter ....................................................... 27
Battery Operation................................................... 28
Inserting the Battery............................................ 28
Removing the battery .......................................... 28
Charging the Battery............................................ 29
Battery Power ..................................................... 29
Power Management ................................................ 31
Standby Mode..................................................... 31
Suspend (hibernate) Mode.................................... 31
DISPLAY.................................................................... 33
Opening and Closing the Display............................... 33
Screen Resolution................................................... 33
Connecting an External Monitor ................................ 34
Connecting A TV / AV Device.................................... 34
DATA ENTRY.............................................................. 35
The Keyboard ........................................................ 35
Notebook-specific key combinations ....................... 35
Touch pad ............................................................. 36
iv
Page 5

MAIN COMPONENTS .................................................. 37
The Hard Drive ...................................................... 37
Important Directories........................................... 38
The Optical Drive ................................................... 39
CD-ROM Drive..................................................... 39
DVD-ROM Drive .................................................. 39
CD-RW/DVD-ROM Combo Drive............................. 39
DVD-RW/CD-RW Super Combo Drive...................... 39
Handling Discs .................................................... 40
Loading a Disc .................................................... 40
Removing a Disc ................................................. 41
Playing Music CDs................................................ 41
Playing DVD Movies ............................................. 41
Writing CDs ........................................................... 42
Writing DVDs (optional) .......................................... 44
The Sound Card ..................................................... 45
External Audio Ports ............................................ 45
Modem ................................................................. 46
Modem port........................................................ 46
The Network.......................................................... 47
What is a network?.............................................. 47
Fast Ethernet-Network ......................................... 47
The PC card Slot .................................................... 50
32-bit CardBus Port ............................................. 50
Use of PC Cards .................................................. 50
Connection Options ................................................ 52
PS/2 Interface..................................................... 52
Parallel Interface ................................................. 52
Universal Serial Bus (USB) Port ............................. 52
SOFTWARE ................................................................ 53
Digital Signatures................................................... 54
Windows Activation.............................................. 55
THE BIOS SET-UP-PROGRAM ..................................... 56
Running the BIOS Set-up ........................................ 56
Navigating the BIOS Utility ................................... 56
v
Page 6

CUSTOMER SERVICE.................................................. 57
Data and System Security ....................................... 57
Data Security...................................................... 57
Maintenance Programs ......................................... 57
SYSTEM RECOVERY ................................................... 59
Restoring Microsoft Windows XP ............................... 59
FAQ – Questions Frequently Asked............................ 60
Troubleshooting ..................................................... 62
Localize the Cause............................................... 62
Additional Support.................................................. 64
Driver Support ....................................................... 64
Standards ............................................................. 65
Electromagnetic Compatibility ............................... 65
Electrical Safety .................................................. 66
Ergonomics ........................................................ 66
Supplementary Information .................................. 66
INDEX ....................................................................... 67
vi
Page 7

I
NNTTRROODDUUCCTTIIOONN
I
NOTES ON THIS MANUAL
This manual is divided into sections to help you find the information you require. Along with the Table of Contents, an Index has
been provided to help you locate information. Please read the
chapters “Operational Safety” (page 5 and following) and “Get-
ting started” (page 23 and following).
In addition, many application programs include extensive help
functions. As a general rule, you can access help functions by
pressing F1 on the keyboard. These help functions are available to
you when you use the Microsoft Windows
the various application programs.
AUDIENCE
These instructions are intended for both the novice and advanced
user. Regardless of the possible professional utilization, this Notebook is designed for day-to-day household use. The functions
and applications for use with this Notebook have been designed
with the entire family in mind.
DOCUMENT YOUR NOTEBOOK
It is important to document the details of your Notebook purchase
in the event you need warranty service. The serial number can be
found on the back of the Notebook:
Serial Number ......................................
®
operating system or
Date of Purchase ......................................
Place of Purchase ......................................
I
NNTTRROODDUUCCTTIIOON
I
N
1
Page 8

QUALITY
We have selected the components in this computer for their high
level of functionality, ease of use, safety and reliability.
Through balanced hardware and software design we are able to provide you with an innovative personal computer useful for applications
relating to both work and leisure.
We are pleased to welcome you as our newest customer. Thank
you for choosing our company.
SERVICE
We are pleased to provide individualized customer service
throughout the life of your Notebook. Please feel free to contact a
customer service representative with any questions relating to
this Notebook. A separate section on Customer Service is included in this manual, starting on page 57.
FINDING MORE INFORMATION
There are many kinds of help and information for using your PC.
This section tells you where to get help with the Microsoft
®
dows
media PC.
XP operating system, software programs, and the Multi-
®
Win-
GETTING TO KNOW WINDOWS XP
WINDOWS XP MANUAL
This printed manual provides general information about the operating system. We recommend that all beginning users or users of
previous versions of Windows read this information. It can be
found with the CDs in the accessory box that came with your PC.
WINDOWS XP TOUR
Windows XP includes a tour that you can take to familiarize yourself
with the operating system. This tour can usually be found by clicking
on the Start menu. You can also find the tour by selecting All Pro-
grams, then Accessories.
WINDOWS XP HELP AND SUPPORT
An answer to almost every question can be found in this program.
You’ll find it in the Start menu.
2
I
NNTTRROODDUUCCTTIIOON
I
N
Page 9

SOFTWARE HELP
Many software programs incorporate extensive help functions. As
a general rule, you can access help functions by pressing F1 on
the keyboard. Many software programs include Help as an option
on the menu at the top of the screen or window. They may also
provide an icon (or icons) with a question mark on them that you
can click to access more information.
DEVICE DRIVERS
If you install external devices, such as printers or digital cameras,
you may also need to install device drivers. The drivers will be included with your peripheral devices. These are occasionally updated
by the manufacturer. Check with the manufacturer of your peripheral device to find out if you have the most recent version of your
device drivers.
I
NNTTRROODDUUCCTTIIOON
I
N
3
Page 10

4
S
Y
AAFFEETTY
S
Page 11

S
AAFFEETTY
S
Y
SAFETY INSTRUCTIONS
This manual contains important information on the safe and
proper setup, use and care of your Notebook computer. Please
read this manual carefully and follow all instructions. These instructions should be kept with your computer at all times. Proper
set up, use and care can help extend the life of your Notebook. In
the event that you transfer ownership, please provide these
instructions to the new owner.
Please follow the instructions in this section for the safe operation
of your Notebook:
DATA SECURITY
How important is the information you will be storing on your
Notebook? You need to guard against the loss of your data by
making backup copies. You can backup your data onto CD, floppy
disk, or other media such as Zip drives. It depends upon how
much data you have. In this way, if something happens to the
hard drive in your Notebook, you have another copy of your data.
The supplier does not assume liability for data
loss or damage to data storage units, and no
claims can be accepted for damages resulting
from the loss of data or consequential losses.
OPERATIONAL SAFETY
It is important to follow all of the safety instructions in this manual to ensure the safety of you and your Notebook.
• DO NOT open the case of the Notebook, the
battery or the power adaptor. When the case is
open there is a danger of severe electric
shock.
S
Y
AAFFEETTY
S
5
Page 12
• DO NOT insert objects through the slots and
openings of the Notebook. This may lead to
electric shock, electrical short-circuit or fire that
will damage your Notebook.
• DO NOT allow small children to play unattended with electrical equipment.
• DO NOT cover the slots and openings of the
Notebook. These openings are for ventilation
purposes. Covering these vents may lead to
overheating.
• This Notebook is NOT designed for use
within industrial environments.
GENERAL SAFETY INFORMATION
If you find that:
• the power cord/power adapter is worn or damaged.
• liquid is spilled on the unit.
• the Notebook fails to work properly.
• the Notebook is dropped or the housing is damaged.
You should:
• shut-down your Notebook immediately.
• remove the power cord from the socket.
• contact Customer Service.
• do not restart unless you have contacted Customer Service.
AMBIENT TEMPERATURE
• The Notebook is most reliably operated at an ambient tempera-
ture between +41° and +104° F and at a relative humidity between 30% and 70% (without condensation).
• When powered off, the Notebook can be stored at tempera-
tures between 32° and 140° F.
6
S
AAFFEETTY
S
Y
Page 13
CD-ROM/CD-RW/DVD/DVD-RW DRIVE SAFETY
• CD-ROM-/CDRW-/DVD-drives are Laser
Class 1 devices. These lasers must remain in
their sealed casing.
• Danger — Invisible laser radiation when
open. Avoid direct exposure to beam. This
product is certified by the manufacturer to
comply with DHHS rules 21CFR, Chapter 1,
Subchapter J, applicable at date of manufacturer. Refer to optical drive labels for additional details.
• DO NOT remove the drive covers, as exposure to the lasers may be harmful.
• DO NOT look directly into the laser, even
when wearing eye protection.
TFT DISPLAY SAFETY
• To avoid damage to the TFT Display, never
open it a full 180º. Do not forcibly open it.
• In order to avoid damage to the display, do
not touch it with your fingers or sharp objects.
• Never lift the Notebook by the TFT Display;
doing so could break the hinges.
• There is a risk of injury if the TFT display
breaks. Use protective gloves to pack up
the broken pieces and contact customer service to arrange for proper disposal.
It is important to thoroughly wash your hands
after handling a broken TFT display. There is
a chance that chemicals may have been released.
S
Y
AAFFEETTY
S
7
Page 14

• Never place objects on top of the
Notebook that would exert any
pressure on the display. There is a
danger that even slight pressure
may break the TFT display.
POWER ADAPTER
• Do not open the power adapter housing. When the housing is
open there is a danger of severe electric shock. It contains no
user-serviceable parts.
• The electric outlet must be in the vicinity of the Notebook and
within reach of the power adapter cables. DO NOT stretch the
power cables tightly to reach an electric outlet.
• To disconnect your Notebook from the power source, or set the
Notebook to battery operation, remove the power cord from
the Notebook’s power socket.
• Only use the Notebook with a power adaptor (
1ADE21/FSP120-AAC
) operating at AC 115V~/60 Hz. In
FSP120-
European countries use the Notebook at AC 220-240V~/50
Hz.
For details on power consumption, please refer to the rating
plate on the rear of your Notebook. If you are unsure of the
type of power supply available at the point of use, ask your local power company.
• Use only the supplied power cord and power adapter.
• If using an extension cord, make certain that it meets your lo-
cal safety requirements. If in doubt, consult an electrician.
• To provide additional protection against electric shock, power
surges, lightning strikes, or other electrical damage to your
Notebook, we recommend the use of a surge protector.
8
S
AAFFEETTY
S
Y
Page 15

BATTERY OPERATION
To extend the life and power of your battery and guarantee secure operation, the instructions below should be followed:
• Never expose the battery to direct sunlight
or heat for long periods.
• Do not dispose of the battery by fire as they
may explode. Check with local codes for possible special disposal instructions.
• Do not open the battery housing; it contains
no user-serviceable parts.
• Disregarding these instructions will lead to
damage and under some circumstances may
even cause the battery to explode.
• Keep the battery away from electrically conductive materials,
chemical substances and cleaning agents.
• Only use the originally supplied power adapter to charge the
battery (
FSP120-1ADE21/FSP120-AAC).
• Fully discharge the battery before recharging it.
• Replace the battery only with the same type or an equivalent
type recommended by the manufacturer.
• Charge the battery only until the battery charging light goes
out. Also, refer to the instructions under "Charging the Battery" on page 29 for instructions on checking the battery level.
• Only change the battery when the unit is switched off.
• Batteries are classified as special waste and should always
be disposed of properly. Contact Customer Service for more
details.
• Keep batteries away from children at all times.
• Use only the batteries and power adapter/cord indicated in this
manual.
S
Y
AAFFEETTY
S
9
Page 16
MODEM
• If your system has a modem, please make sure you connect it
to an analog telephone line only. Connecting to a digital PBX,
a digital line designed for broadband services or ISDN, a
shared service line or a payphone will damage the modem or
the devices to which it is connected.
TOUCH PAD
• Light pressure with the tip of your finger is all that is required
to operate the touch pad. Because the touch pad is electrostatic sensitive, objects cannot be used in place of your fingers. Using a pen or other object can damage the touch pad or
cause the Notebook to malfunction.
CABLING
• Arrange cables so no one can walk on or trip over them.
• DO NOT place objects on any of the cables.
Caution – To reduce the risk of fire, use only
No. 26 AWG or larger telecommunication cords
(applies to American Standards).
SET-UP LOCATION
• Keep your Notebook and all connected peripherals away from
moisture, dust, heat and direct sunlight. Failure to do so can
lead to Notebook malfunction or damage.
• It is highly recommended you do not use the Notebook out-
doors.
• Operate the Notebook and all peripherals on a stable, balanced
and vibration-free surface.
• Do not leave the base of your Notebook on your lap or any
part of your body for a long period of time while the Notebook
is turned ON or is charging. The Notebook can become very
warm while it is turned on or charging and can cause discomfort or injury from heat exposure.
10
S
Y
AAFFEETTY
S
Page 17
IMPORTANT ADDITIONAL SAFETY INSTRUCTIONS
When using any electronic equipment, basic safety precautions
should always be taken. Following the guidelines below can reduce the risk of fire, electric shock and personal injury:
• Do not use this product near water (e.g., near a bathtub,
lavatory or kitchen sink, in a wet basement or near a
swimming pool).
• Avoid using a telephone/modem (other than a cordless
type) during an electrical storm. There is a remote risk of
electric shock from lightning.
• Do not use the telephone/modem to report a gas leak in
the vicinity of the leak.
Lithium batteries cannot handle intense pressure, high temperatures or fire. Danger of
explosion if replaced incorrectly. Replace batteries with a compatible type as recommended by the manufacturer. Lithium batteries are hazardous waste and require proper
disposal. Contact the Service Center for additional information on battery disposal.
UPGRADES AND REPAIRS
• Only a qualified Service Engineer should perform upgrades and
repairs to your Notebook.
• If you do not have the necessary qualifications, go to an ap-
propriate Service Engineer. Please contact the Service Cen-
ter if you are experiencing technical problems with your Notebook.
S
Y
AAFFEETTY
S
11
Page 18

NOTES FOR SERVICE ENGINEERS
• Before opening the housing, disconnect the Notebook from all
power sources and remove any connecting cables. If the
Notebook has not been disconnected from the power outlet
before being opened, there is a danger of severe electric
shock. There is also a risk of damage to the components.
• Internal components of the Notebook may be damaged by
electrostatic discharge (ESD). Perform system upgrades
and changes in an ESD-protected work area. If no such
work area is available, wear an antistatic wrist strap or touch
a highly conductive metal object. Your service center can repair
damage sustained by inappropriate handling for a fee.
• Use only original spare parts.
CAUTION: The CMOS lithium batteries cannot tolerate intense
pressure, high temperatures or fire. Keep away from children!
Danger of explosion if replaced incorrectly. Only replace with a
compatible type (CR2032) as recommended by the manufacturer. Lithium-Batteries are hazardous waste and need to be
disposed of properly. If necessary, we will take back your used
CMOS lithium battery.
Notes on Laser Radiation :
Laser devices of Laser Class 1 to Laser Class 3b may be used in
the Notebook. Where the Notebook housing remains closed, the
device meets the requirements of Laser Class 1. By opening
the Notebook housing you will gain access to laser devices of
up to Laser Class 3b.
• The CD-ROM/CD-RW/DVD/DVD-RW drive contains no user-
serviceable parts. Only the manufacturer should perform
repairs to the CD-ROM/CD-RW/DVD/DVD-RW drives.
When removing and/or opening laser devices, the following
guidelines must be observed:
• DO NOT look into the laser beam, even while wearing opti-
cal protection.
• DO NOT allow yourself to be exposed to the laser beam.
Avoid exposure of the eyes or skin to direct or stray
radiation.
12
S
Y
AAFFEETTY
S
Page 19

M
AAIINNTTEENNAANNCCEE
M
MAINTENANCE INSTRUCTIONS
This section provides information on the proper maintenance and
care of your Notebook. Following these measures can extend its
lifetime.
CLEANING AND CARE
• Before cleaning, always remove the power adapter plug and all
connecting cables.
• Warning! There are no user-serviceable or
user-cleanable parts inside the Notebook
housing. Never open the Notebook housing.
• DO NOT use any solvents, corrosive or gaseous cleaning agents.
• DO NOT use CD-ROM cleaning disks or similar products that clean the lens of the laser to
clean your CD-ROM/CD-RW/DVD/DVD-RW
drive.
• Only use a damp, lint-free cloth to clean the Notebook.
CARE OF THE TFT DISPLAY
• Always close the Notebook when not in use. Avoid touching or
scratching the surface of the screen as it is easily damaged.
• Make sure that no water drops are allowed to remain on the
screen. Water can cause permanent discoloration.
• Clean the screen with a dry, soft, lint-free cloth.
• Do not expose the screen to bright sunlight or ultraviolet radia-
tion.
M
AAIINNTTEENNAANNCCE
M
E
13
Page 20

TRANSPORTING THE NOTEBOOK
Please use the following guidelines when transporting the Notebook:
• Switch off the Notebook. This will prevent damage to the hard
disk. When the Notebook is turned off, the hard disk heads
are moved into a safe area.
• Remove any CDs and floppy disks. This will prevent damage to
the disks or to the drive heads.
• Close the Notebook and ensure that the cover locks shut.
• Always use the Notebook carrying case. This helps to protect
the Notebook from dirt, moisture, jolts and scratches.
• Fully charge your battery and any spare batteries immediately
before a long journey.
• Should you need to ship your Notebook, always use the origi-
nal packaging and make certain the shipper knows the contents contain fragile electronic equipment.
• Wait until the Notebook has reached ambient (room) tempera-
ture before turning it on or connecting it to the power adapter.
Drastic variations in temperature and humidity can create condensation within the Notebook and may cause it to shortcircuit.
14
M
AAIINNTTEENNAANNCCE
M
E
Page 21
SECURING YOUR NOTEBOOK
SETTING A USER PASSWORD
You can prevent unauthorized access to your Notebook by setting
a User Password. If a User Password is set, you will be prompted
for the password each time the Notebook is started. The User
Password is set in the BIOS (page 56).
Attention: It is important to record your password in a safe place. If you forget your password,
you will not be able to cancel it or access the
software on your Notebook. If this happens, you
will need to contact your service center.
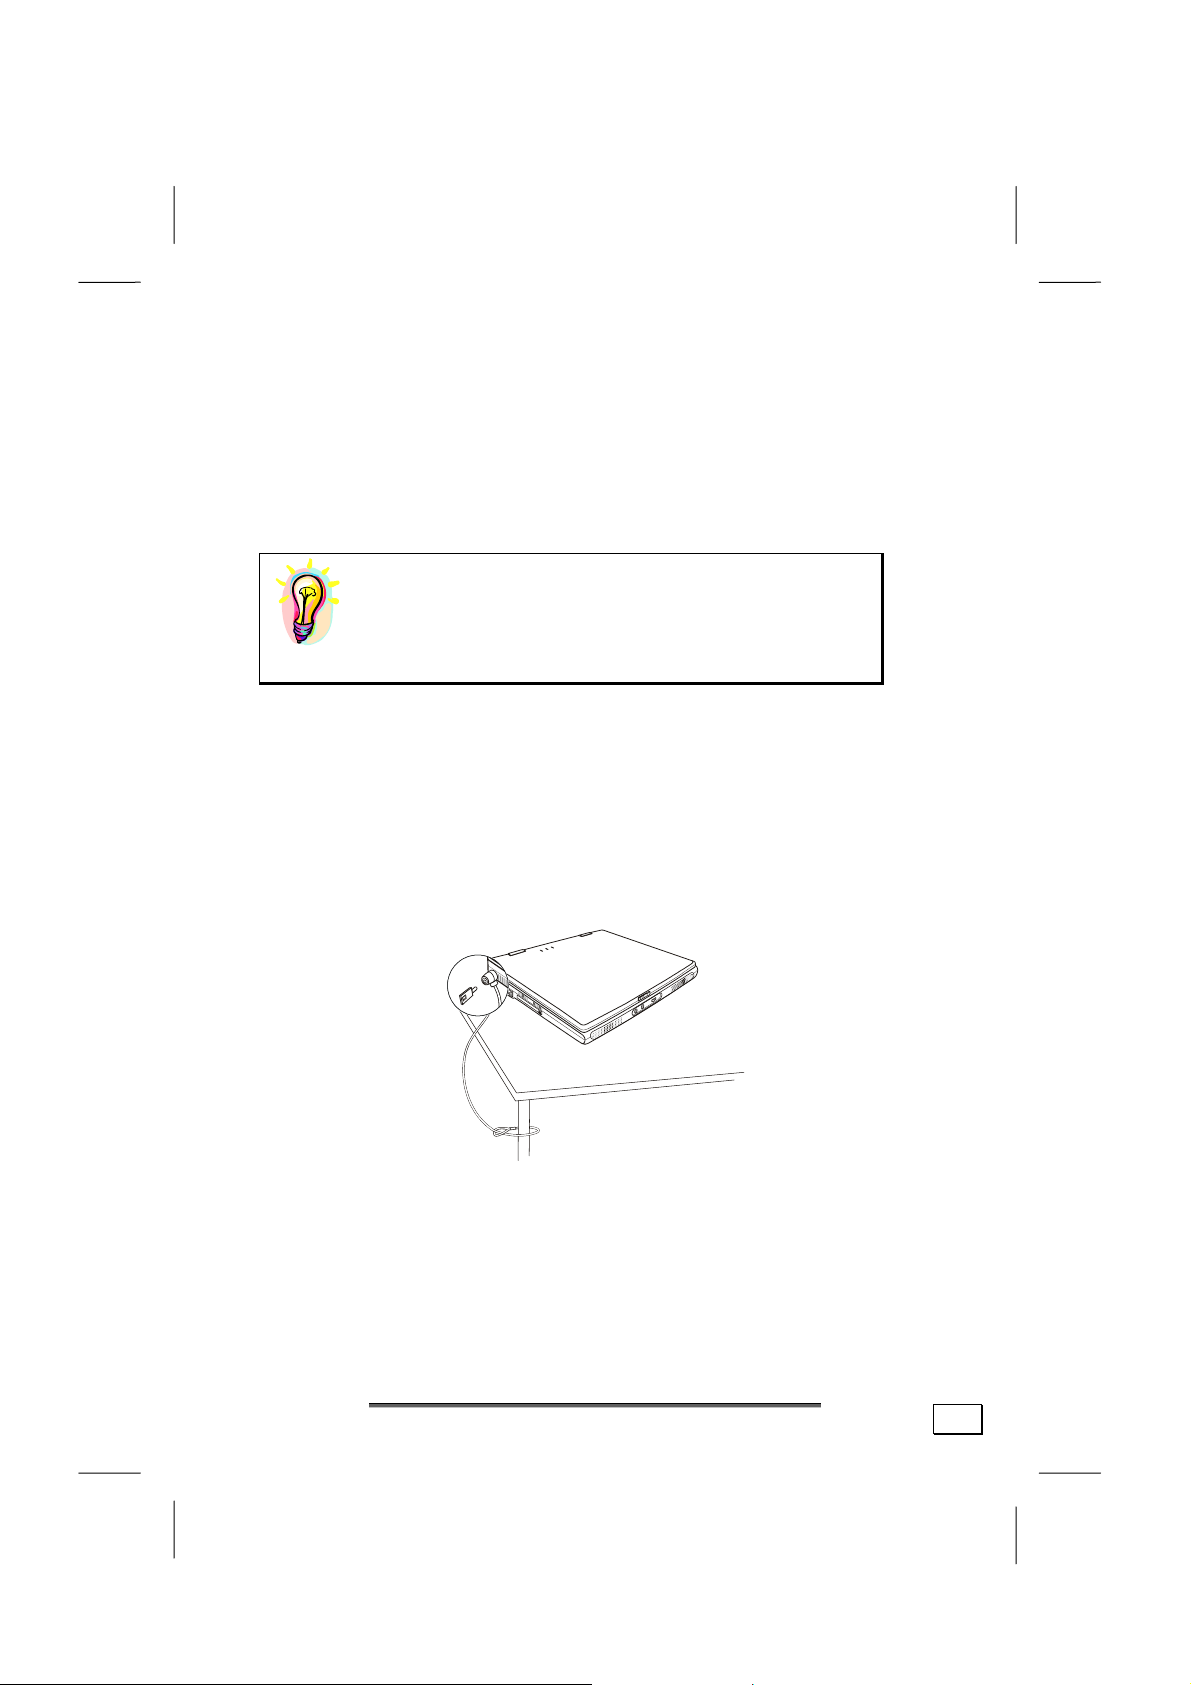
USING A SAFETY LOCK
You can prevent theft by using a special type of lock called a
Kensington Lock, which can be bought at your local retailer.
A Kensington lock has a cable that wraps around a stationary object and a “T” shaped end that inserts into the Kensington lock
port on your Notebook. Either a key or combination dial is used to
secure the lock in place.
M
AAIINNTTEENNAANNCCE
M
E
15
Page 22

16
V
IIEEWWSS OOFF TTHHEE
V
N
OOTTEEBBOOOOK
N
K
Page 23

V
IIEEWWSS OOFF TTHHEE
V
N
N
OPEN NOTEBOOK
TFT display (Ö p. 33)
n
Fan slot*
o
Keyboard (Ö p. 35)
p
Touch pad (Ö p. 36)
q
Microphone
r
Power ON/OFF (Ö p. 27)
s
Operating system states indicators (Ö p. 20)
t
Easy Start Buttons
u
Power Saving Button (optional)
v
Battery charge indicator (Ö p. 20)
w
Battery power indicator (Ö p. 20)
11
12
AC Power indicator (Ö p. 20)
OOTTEEBBOOOOK
K
V
IIEEWWSS OOFF TTHHEE
V
N
OOTTEEBBOOOOK
N
K
17
Page 24

FRONT VIEW
Speakers
n
Line out (Ö p. 45)
o
Microphone in / Line in (Ö p. 45)
p
Display catch (Ö p. 33)
q
Volume control
r
LEFT SIDE
18
Kensington lock (Ö p. 15)
n
Fan slot*
o
Modem port (RJ-11) (Ö p. 46)
p
PC card slot PCMCIA, (Ö p. 50)
q
V
IIEEWWSS OOFF TTHHEE
V
N
OOTTEEBBOOOOK
N
K
Page 25

RIGHT SIDE
Optical Drive (Ö p. 39)
n
Battery Pack
o
PS/2 port (Ö p. 52)
p
REAR SIDE
Power socket (Ö p. 27)
n
LAN port (RJ-45) (Ö p. 47)
o
USB ports (Ö p. 52)
p
TV/Video out
q
External monitor (VGA) (Ö p. 34)
r
Parallel port (Ö p. 52)
s
Fan slot*
t
*Caution! Do not cover when in use!
V
IIEEWWSS OOFF TTHHEE
V
N
N
OOTTEEBBOOOOK
K
19
Page 26

INDICATORS
n o p q r s t u
LED's indicate the power and operating system states of the
Notebook. The meaning of each LED is:
Lights green when battery is fully charged.
Lights amber, when the battery is charging.
Blinks red when the battery is almost completely dis-
n
charged.
Blinks orange when the battery is in an abnormal state.
Lights green when the notebook is using battery power.
o
Blinks green in Standby mode when using battery power.
Lights green when the notebook is using AC power.
p
Blinks green in Standby mode when using AC power.
This LED lights when the Notebook is accessing the optical
q
drive.
This LED lights when the Notebook is accessing the hard
r
disk.
This LED lights when NUM Lock has been activated. It sets
the keyboard so that numbers are assigned to certain char-
s
acters, simplifying numerical data input.
This LED lights when CAPS Lock has been activated. This
t
sets the keyboard to capital letters.
This LED indicates that the Scroll Lock key on the keyboard is
activated. The Scroll Lock key has different functions depend-
u
ing on the software you are using.
20
V
IIEEWWSS OOFF TTHHEE
V
N
OOTTEEBBOOOOK
N
K
Page 27

EASY START BUTTONS
The Easy Start buttons are four user-definable buttons located
above the keyboard.
H2
H1
Easy Start Buttons
H3
H4
The four buttons allow you to launch your frequently used software programs with one single press of a button.
To start the easy start button utility, double-click the Easy Start
Button icon
tion window appears.
To assign a program to a button, you can drag and drop the program icon or shortcut icon from the Windows desktop to the cor-
responding box. Or you can click the Open
to pop up the Open dialog box as shown next and select the de-
sired program. Then, click Open to complete the process.
To launch the program, you can simply press the corresponding
Easy Start button
on the taskbar. The Easy Start Button Defini-
icon under the box
V
IIEEWWSS OOFF TTHHEE
V
N
OOTTEEBBOOOOK
N
K
21
Page 28

POWER SAVING BUTTON
The Power Saving button provides an easy and convenient way to
reduce the CPU’s power consumption for energy saving. The indicator turns blue when the computer is switched to the power saving mode.
Please note that this function is only supported for the Mobile Intel Pentium
4 Processors series.
Power Saving Button/
Indicator
22
V
IIEEWWSS OOFF TTHHEE
V
N
OOTTEEBBOOOOK
N
K
Page 29

G
EETTTTIINNGG
G
Before you get started using your notebook, first take a few moments to read the important section on Safety.
This Notebook comes with software fully pre-installed. You do
not have to install any of the CDs supplied. However, with many
programs (e.g., telephone CDs or encyclopedias) it is necessary to
insert the corresponding CD to access the data that is stored on
it. The software will prompt you to do this when necessary.
S
TTAARRTTEED
S
D
STEP 1
Before starting the Notebook please insert the battery. For further
information read the section titled “Power Supply” starting on page
27. Open the display (see page 33) and switch on the Notebook using the On/Off switch (see page 17.)
If the battery level is insufficient, connect the
power adapter.
Note: Make sure there is no bootable CD (e.g.,
the Recovery CD) in the CD-ROM drive. Such
disks will prevent the operating system from
loading off the hard drive.
Your operating system is finished loading when a welcome screen is
shown on your display.
STEP 2
The greeting procedure will guide you through a series of dialogue
boxes. The information in each dialogue box will explain the steps
that need to be taken.
Should you have any questions just click on
G
G
EETTTTIINNGG
S
TTAARRTTEED
S
D
.
23
Page 30

ENTER PERSONAL DETAILS
In one of the initial start-up dialog boxes a request will appear on
the screen for you to enter your personal details. Please enter the
requested information in the white input fields. You can select the
fields by clicking on them with the mouse. When you press Enter,
or click on the Continue button you progress to the next window.
MOUSE FAMILIARIZATION PROGRAM
The greeting procedure will also take you through a mouse familiarization program. Use this program if you need to learn how to operate the mouse. When ready, quit the program by pressing the ESC
(escape) key on the top left of the keyboard.
LICENSE AGREEMENT
The greeting procedure also displays the license agreement. Please
read this carefully. It contains important legal information on the
use of your software. In order to see the full text, use the mouse
and the scroll bar on the right side of the screen to move downwards until you have reached the end of the document. You accept the agreement by clicking on the I accept the agreement
option field. Only by doing so will you be entitled to use the product under lawful terms and conditions and be entitled to open the
sealed Windows
®
manual.
STEP 3
After the login procedure the Windows® desktop appears on your
screen. This can be adjusted so that the screen of your computer
looks different.
24
G
EETTTTIINNGG
G
S
TTAARRTTEED
S
D
Page 31

T
T
After the login procedure the Windows XP desktop appears on
your screen. (Your desktop might not look exactly like the one
shown here.)
3
1
1. Start Button
HHEE
W
IINNDDOOWWSS
W
6
7
2
XXP
8
4
P
9
D
EESSKKTTOOP
D
P
5
Clicking the Start button brings up a menu where you can access help, software programs, files, and settings. For more information, click Windows XP Tour on the Start menu.
2. Program Bar
The most commonly used software programs are listed here.
3. All Programs
All of the software programs installed on your Notebook are
ordinarily listed here. Click All Programs to reveal an extensive menu.
T
W
HHEE
T
IINNDDOOWWSS
W
XXP
P
D
EESSKKTTOOP
D
P
25
Page 32

4. Turn Off Computer
Click this button to shut down Windows XP and the Notebook.
5. Task Bar
Here you receive information and status reports about Windows XP and which programs are running.
6. Desktop Icons
Desktop icons link to their respective programs. To start a
program, double-click its desktop icon.
7. Logged in User
This tells you which user is logged in to your Notebook.
8. Control Panel
You can use the icons in Control Panel to change the appearance and functionality of Windows XP. These icons represent
options for configuring your Notebook.
9. Windows XP Help
Here you can find information on using your Notebook, networking, backup, and many other tasks.
26
T
T
HHEE
W
IINNDDOOWWSS
W
XXP
P
D
EESSKKTTOOP
D
P
Page 33

P
OOWWEERR
P
S
S
UUPPPPLLY
Y
ON/OFF BUTTON
The On/Off button (page 17) is used to power up/down the Notebook. Pressing the button briefly will turn off your computer using
the operating system. This is the same as clicking Start then Turn
Off Computer. If the button is held down for longer than 4 seconds,
it will force the notebook to power down without going through the
operating system shut down process. This may be useful if your
computer has crashed or stalled.
WARNING! Do not switch off your Notebook
while the hard disk or the optical drive is running and the corresponding media activity
LEDs are lit. Otherwise data may be lost. To
protect the hard disk you should always wait
for 20 seconds after powering down the Notebook before powering it up again.
POWER ADAPTER
Your Notebook is supplied with a universal AC power adapter,
which automatically adjusts to the available power source. The
following levels are supported: AC 100-240V~/ 50-60 Hz.
Please follow the power supply safety instructions found on
page 8.
The power adapter is connected via a power cord to an AC outlet.
The DC power lead from the power adapter is connected to the rear
side of the Notebook (see page 19).
The adapter provides the Notebook with power and also charges the
battery. The power supply indicators of the Notebook (see page 20)
provide details on the operating state. The battery is also being
charged when you are working on your Notebook with the power
adapter.
The power adapter is still live if the Notebook is not connected
with it. You should therefore unplug the power adapter from the
outlet if it is not connected to the Notebook.
P
P
OOWWEERR
S
S
UUPPPPLLY
Y
27
Page 34

WARNING! Use only the power adapter and
power cord supplied with your Notebook.
BATTERY OPERATION
In order to extend the life and power of your battery, and to guarantee reliable operation, it is essential that the safety instructions
on page 9 are followed.
INSERTING THE BATTERY
Slide the battery, contacts first, into the battery compartment.
REMOVING THE BATTERY
WARNING! Do not remove the battery while
the Notebook is running on battery power.
You increase the possibility of losing data.
28
P
OOWWEERR
P
S
S
UUPPPPLLY
Y
Page 35

CHARGING THE BATTERY
The battery is charged via the power adapter. If the power
adapter is connected, it charges the battery automatically,
whether the Notebook is turned on or not.
When the Notebook is switched off, full charging takes a few
hours. If the Notebook is switched on, the charging process takes
a significantly shorter time. However, it is recommended that
from time to time you discharge the battery completely and recharge it afterwards with the Notebook switched off. You can discharge the battery without losing data, if you turn your notebook
on without using any application and no power adapter. As soon
as the battery is empty your notebook will enter the hibernate
mode. We recommend doing this procedure every time you think
the battery power is losing efficiency.
BATTERY POWER
A fully charged Li-Ion battery will provide power for around 2
hours of operation. However, the battery life will vary according to
how the power saving functions are set, the way you work, the
size of the main memory and the display type.
When working in Windows an audible warning signal will be given
off as soon as the battery level drops below a set minimum value.
When this happens, the processing power is reduced in order to
save power.
NOTE: Battery warning signals and "LowBattery" mode will be heard immediately when
the power pack is first connected.
P
P
OOWWEERR
S
S
UUPPPPLLY
Y
29
Page 36

CHECKING THE BATTERY LEVEL
In order to check the current level of the battery, move the cursor
over the power symbol in the taskbar.
When in battery mode, a battery symbol is displayed and when
the power adapter is in use a power connector is displayed. If the
battery is being charged the power connector has a lightning
symbol superimposed over it. Further information on power settings can be obtained by double clicking on the symbol.
NOTE: If you ignore the warning signal when the
battery level is low, your Notebook goes into suspend mode. (Depending on the BIOS/OS setting
this will be Save-to-Disk or Save-to-RAM).
WARNING! If the battery is empty, your data
will not be retained for long in Standby/Save-toRAM mode.
WARNING! Never remove the battery while the
Notebook is switched on or if the Notebook has
not yet gone into suspend mode, as this may
lead to loss of data.
30
P
P
OOWWEERR
S
S
UUPPPPLLY
Y
Page 37

POWER MANAGEMENT
Your Notebook offers automatic and modifiable power saving
functions that you can use to maximize battery life and reduce
overall operating costs. The power saving modes are known as
standby mode and suspend (hibernate) mode.
STANDBY MODE
When in standby mode, the contents of the RAM of your Notebook
are preserved while practically all other components of your Notebook are shut down, reducing your power consumption to a minimum. By pressing any key on the keypad, you can bring your
Notebook back to the fully operational state. You will restart at
precisely the line in which you were working prior to the interruption. The computer takes less time to go into and come out of
standby mode, but uses more power than suspend (hibernate)
mode.
SUSPEND (HIBERNATE) MODE
The hibernate mode is an alternative to a complete shutdown of
the Notebook. In this mode all data from RAM (system and
graphic data) are copied to the hard disk as a file. As soon as the
data has been safely saved, the Notebook powers down. When
the Notebook is switched on again, this file is written back to RAM
by the BIOS. In a few moments the Notebook is in the exact state
as when it was last used. If while working on a document the
Notebook is closed (assuming the correct ACPI setting), the Notebook saves the data in RAM for you automatically. You will restart
at precisely the line in which you were working prior to the interruption. The computer uses no power while it is in suspend (hibernate) mode, but it takes a little longer for the computer to go
into and come out of hibernation compared to standby.
P
P
OOWWEERR
S
S
UUPPPPLLY
Y
31
Page 38

32
D
D
IISSPPLLAAY
Y
Page 39

D
IISSPPLLAAY
D
Unlike a normal monitor, the TFT display does not produce either
radiation or flicker.
Y
OPENING AND CLOSING THE DISPLAY
A display catch keeps the display closed when the Notebook is not
in use. To open, use your thumbs to slide the bar left then lift the
display with your thumbs and index finger and position it as desired.
The opening and closing of the display can be assigned various
functions via the Power management feature. For example, the
Notebook can be programmed to power down when the display is
closed.
WARNING! The display should not be opened
fully to 180°. Do not try to forcibly open it.
SCREEN RESOLUTION
The integral screen has a native resolution of 1024 x 768 pixels.
Using a higher resolution can lead to distortion of the display, especially with text. Using a lower resolution may cause the display
to use only a portion of the screen area.
D
D
IISSPPLLAAY
Y
33
Page 40

CONNECTING AN EXTERNAL MONITOR
The Notebook has a VGA port for connecting an external monitor.
To connect and configure an external monitor:
1. Shut down your notebook.
2. Connect the video signal cable of the external monitor to
the VGA port of the Notebook (see page 19).
3. Connect the external monitor to the electrical socket,
power it up and start your notebook.
CONNECTING A TV / AV DEVICE
Your notebook computer is fitted with a 7 pin TV-OUT port, allowing you to output your display to a wide range of television and
video equipment.
For best results, you will need to connect a 7 pin S-Video cable
from the TV-OUT socket on your notebook, to the relevant SVideo / SCART socket on your television or other AV devices.
Alternatively, you may use a 4 pin S-Video to Composite cable to
connect your notebook to your television. Please note that with a
4 pin cable you may witness degraded picture quality.
These cables and connectors are not supplied with your notebook.
34
D
D
IISSPPLLAAY
Y
Page 41

D
AATTAA EENNTTRRY
D
Y
THE KEYBOARD
By dual assignment of certain keys you have the same range of
functions available to you as with a normal Windows keyboard.
Some functions are input using the FN key, which is normal on
notebook computers.
NOTEBOOK-SPECIFIC KEY COMBINATIONS
Toggles the external monitor output on and off.
Decreases brightness. This is used if the display
is too bright.
Increases brightness. This is used if the display
is too dark.
Toggles the battery beep on and off.
Switches the backlight of the display on and off.
Power saving functions. This key combination is
set to power down by default. To adjust this
key to your own needs go to display properties
in power saving.
D
AATTAA EENNTTRRY
D
Y
35
Page 42

TOUCH PAD
The touch pad’s primary function is to move the cursor around or
select items displayed on the screen with the use of your fingertip
instead of a mouse. It is positioned in front of the keyboard (see
page 17). The pointer follows the direction which is specified by
moving your finger or thumb over the touch pad.
DO NOT use a ball-point pen or other object on the touch pad, as
this could damage or cause a malfunction of your touch pad.
Below the touch pad are the left and right mouse buttons which
can be used as on a normal mouse. You can also perform a direct
click or double click using the touch pad by tapping the surface
briefly once or twice.
In the Windows Control Panel you will find a number of useful
settings that will make using the touch pad easier. If the Control
Panel is in category view, click Printers and Other Hardware
and then Mouse. In classic view, double-click Mouse.
36
D
AATTAA EENNTTRRY
D
Y
Page 43

M
M
AAIINN
C
OOMMPPOONNEENNTTS
C
S
THE HARD DRIVE
The hard drive is the main storage medium combining large storage capacity and rapid data access.
The Windows operating system cannot use the full capacity of the
hard drive, which means that there will be a difference between
the capacity that the BIOS displays and what the operating system displays.
The hard drive contains the operating system of the computer, other
application programs and backup files. These programs and files are
pre-installed on your Notebook, so you may note that some of the
space on your hard drive is already taken.
Whenever the computer is accessing the hard disk, the corresponding LED illuminates (see page 17.)
If you are looking for a file on the hard drive and you know the
name, go to Search on the Start menu to find the file. Following is
some general information on where you might find some common
files.
Usually your hard drive is divided into several partitions, as shown
below. The partitions of your hard drive may vary from what is
shown here.
Local Disk C: Windows XP
WARNING! Never switch off the computer
while the busy indicator is lit since this may
result in loss of data.
Software programs
Your documents
M
C
AAIINN
M
OOMMPPOONNEENNTTS
C
S
37
Page 44

IMPORTANT DIRECTORIES
The most important directories preinstalled on your Notebook are
shown below. These directories may vary from what is shown
here.
Caution: Don't delete files unless you know what they are. Windows XP might require these files for your computer to operate
correctly. Also, do not alter or resize the partitions – this will
make it difficult to restore your Notebook to the factory settings.
C:\ This is the main hard disk drive partition for your Notebook.
It is where your program files, settings, and documents are
stored, as well as files necessary for running Windows XP.
C:\Program Files Includes files belonging to software pro-
grams.
C:\Windows The main directory for Windows XP.
C:\Documents and Settings Includes the settings and docu-
ments for all users.
C:\Applications\Driver Drivers for internal Notebook compo-
nents.
C:\Applications\Tools Includes installation files for software
that came with your Notebook.
38
M
M
AAIINN
C
OOMMPPOONNEENNTTS
C
S
Page 45
THE OPTICAL DRIVE
Depending on the model, your Notebook will be fitted with a CDROM, a DVD-drive, a CD-Rewriter, a Combo drive or a Super
Combo drive.
CD-ROM DRIVE
This drive can play music CDs or read data CDs. It can also run
software programs from CDs.
DVD-ROM DRIVE
This drive can play both movie DVDs and music CDs. It can read
data DVDs and CDs. It can also run software programs from both
CDs and DVDs.
CD-RW/DVD-ROM COMBO DRIVE
This drive can play everything that the DVD-ROM drive can play.
It can also run software programs from CDs. In addition, this
drive can write data and music CDs and copy CDs. It writes to
CD-R or CD-RW.
DVD-RW/CD-RW SUPER COMBO DRIVE
This drive can do everything that a CD-RW/DVD-ROM Combo Drive
can do, and can also write to certain DVD formats.
WARNING! In order to write to a DVD, you
must select a disc that matches the type of
drive on your Notebook. DVD-RW drives use
DVD-RW or DVD-R discs. DVD+RW drives use
DVD+RW or DVD+R discs.
M
C
AAIINN
M
OOMMPPOONNEENNTTS
C
S
39
Page 46

HANDLING DISCS
To maintain the life of CD and DVD discs, observe these guidelines.
• Avoid radiation by direct sunlight (UVA/UVB).
• Avoid scratches and damage to the disc surface.
• Avoid extreme temperatures.
• Do not attach labels or paper to DVD discs.
• Do not use record-cleaning or anti-static agents to clean your
discs.
We also recommend that you avoid specially shaped discs such as
hearts or polygons, or discs that are not standard size. Do not use
warped or cracked discs as they may cause damage to your drive.
LOADING A DISC
1. Press the eject button on the front of the drive to open the
tray.
2. Place the disc on the tray so that it lays flat with the label
facing upward.
3. Gently push the tray in to close it.
Many discs automatically start when they are loaded and launch a
playback software program. In some cases you might need to
start a program (for example, a DVD player program).
40
M
M
AAIINN
C
OOMMPPOONNEENNTTS
C
S
Page 47

REMOVING A DISC
Press the eject button on the front of the drive to open the tray.
WARNING! While the Notebook is accessing
the CD-ROM drive the media activity indicator
is lit. Do not try to remove the CD from the
drive while this LED is lit.
PLAYING MUSIC CDS
Windows Media Player can be used to play music CDs. Please refer to the documentation for this program to decide which program you would like to use.
PLAYING DVD MOVIES
To play DVD movies on your Notebook, you need a DVD playback
software program, such as CyberLink’s award-winning PowerDVD.
To play DVD movies using this software, insert a movie DVD into
the DVD-ROM or DVD-RW drive, then click Start, then All Pro-
grams and select PowerDVD.
In spite of the high storage capability of the DVD, the data must
be extremely compressed in order for a complete feature film to
be stored. This extreme compression combined with exceptional
picture quality is provided by the MPEG2 image coding method on
the DVD. This places high demands on the Notebook’s processor,
so when playing a DVD please close all other applications. To increase Notebook performance, you may also wish to purchase a
plug-in MPEG2 decoder card, which has its own decompression
processor and will thus free the Notebook’s processor.
NOTE: The decoding software included with your
Notebook may be changed for regional DVD decoding
up to five times, after which the drive will only play
DVD movies for the region setting last entered.
M
C
AAIINN
M
OOMMPPOONNEENNTTS
C
S
41
Page 48

WRITING CDS
If included with your Notebook, you can use your CD-RW,
DVD-RW, or DVD+RW drive to write ("burn") data and music CDs.
A data CD is a compact disc (CD) used to store PC data (for example, files and folders you have on your hard disk).
A music, or audio, CD is a compact disc (CD) used to record music
that you can play on your home or car stereo CD player. Using a
CD-R instead of a CD-RW for music CDs will help ensure a greater
level of compatibility with conventional CD-players.
There are several different options for burning CDs. The first step
for using any of these options is to insert a blank recordable CD
into your CD-RW, DVD-RW, or DVD+RW drive.
Nero Burning ROM can create different types of audio, video, and
data CDs quickly and easily. Click Start, then All Programs, then
Ahead Nero to access Nero Burning ROM. Follow the step-bystep instructions given by the software wizard to create a CD.
Windows XP includes functionality for quickly and easily creating
data CDs:
1. Select the files or folders you would like to write to your CD.
To select more than one file, hold down the CTRL key while
you click the files you want.
2. In the File and Folder Tasks menu on the left (Picture Tasks if
the files are located in My Pictures), click Copy this file, Copy
this folder, or Copy the selected items. If you do not see
the File and Folder Tasks menu, select Tools on the main
menu, then Folder Options. Under Tasks on the General tab,
select Show common tasks in folders.
3. In the Copy Items dialog box, click the CD-RW, and then click
Copy.
4. Double-click My Computer, then the CD-RW. Windows displays a temporary area where the files are held before they
are copied to the CD. Verify that the files and folders that you
intend to copy to the CD appear under Files Ready to be Written to the CD.
42
M
M
AAIINN
C
OOMMPPOONNEENNTTS
C
S
Page 49

5. Under CD Writing Tasks, click Write these files to CD. Windows displays the CD Writing Wizard. Follow the instructions in
the wizard.
Media player programs (such as Windows Media Player) often offer alternatives for burning audio CDs. Refer to the help within the
program for more information.
You can also purchase third-party CD burning software for writing
files to a CD-R or CD-RW disc.
More information about copying CDs reliably can be found in the
“Technical Reference” section of this manual under “CD Facts.”
WARNING! Unless you own the copyright or
the permission of the owner of the copyright,
unapproved copying of copyrighted CDs or DVDs
violates national and/or international laws and
can result in serious punishment.
M
C
AAIINN
M
OOMMPPOONNEENNTTS
C
S
43
Page 50

WRITING DVDS (OPTIONAL)
A DVD-RW drive can not record to a DVD+RW disc, and vice
versa. The media (discs) that you can use with your PC depend
on the drive that it uses. Please double-check the carton box to
determine the type and speed of drive that comes with your
Notebook.
A DVD-RW drive can record to DVD-RW discs. It can also record
to DVD-R General discs, but not to DVD-R Authoring discs.
A DVD+RW drive can record to DVD+R or DVD+RW discs.
Both DVD-RW and DVD+RW drives can record to
CD-R or CD-RW.
Not all DVD formats are compatible with all DVD players.
Do not use media that exceeds the speed of your drive. For example, do not use 4x DVD-R discs in a 2x DVD-RW drive. Please note
that the speed at which your drive records depends on both the
speed of the drive and the speed of the media. For example, a 4x
DVD-R drive will record at 2x speed if a 2x DVD-R is used in the
drive.
If included with your PC, you can use your DVD-RW drive to write
to DVDs. Nero Burning ROM allows you to burn data to DVDs. The
process is very similar to burning CDs.
Video editing and/or DVD authoring programs often include options
for burning your movies to DVD. Please refer to the documentation
for your software programs for more information.
44
M
M
AAIINN
C
OOMMPPOONNEENNTTS
C
S
Page 51

THE SOUND CARD
Your Notebook has an integrated stereo sound card (on-board)
with 16-bit and 3D spatial sound effects (3D). The sound card is
compatible with the industry standard Sound Blaster and Micro-
soft Sound System Version 2.0. This guarantees optimal support for all popular programs and games.
If you wish to alter the base volume, click on the loudspeaker
symbol in the task bar. A double click opens the sound mixer.
EXTERNAL AUDIO PORTS
For recording via an external audio source
Audio in / Mi-
crophone in
Stereo out /
SPDIF
(optional)
or an external microphone. (It is set
through the audio properties)
(Ö p. 18)
For sound reproduction via external stereo
equipment such as loudspeakers or headphones. Connection to a sound system
(analog/digital*) is also via this output. The
notebook automatically recognizes if an
analog (3.5mm stereo plug) or a digital (optical) link has been created. The internal
loudspeakers are switched off when this
port is used. (Ö p. 18)
Your Notebook has a loudspeaker, so you can always playback
sounds without additional equipment. The connection of a Hi-Fi
system increases the sound quality significantly.
M
C
AAIINN
M
OOMMPPOONNEENNTTS
C
S
45
Page 52

MODEM
The modem is fitted with an RJ-11 interface, into which a standard telephone lead can be plugged.
WARNING! Use only with an analog telephone
line. The modem cannot withstand the voltage
levels of digital telephone systems such PBX or
lines such as ISDN or Broadband services.
MODEM PORT
Insert one end of the RJ11-connection (telephone plug connector)
into the modem/network interface and the other into an analog
telephone socket that is easily accessible.
NOTE: Do not place the Notebook in Suspend
(or Sleep) mode if you are connected to your
Internet provider, since this will cause the modem connection to be lost.
46
M
M
AAIINN
C
OOMMPPOONNEENNTTS
C
S
Page 53

THE NETWORK
WHAT IS A NETWORK?
A network means connecting your Notebook to one or several
other computers. Users can transfer data between computers and
share resources such as printers, modems and hard disk drives.
Here are some practical examples:
• You can exchange E-mail and manage appointments in an office.
• Users can share a printer in a network and save their data on
a central server.
• Users can share one modem or one ISDN card among computers for Internet access.
• Two or more computers can be connected to play network
games or share data.
FAST ETHERNET-NETWORK
Your PC has a Fast Ethernet Network connection. You can use this
to connect to a network.
The Windows XP Help and Support Center offers extensive information about networking your PC. You can access this information
by clicking on Start, then Help
M
C
AAIINN
M
OOMMPPOONNEENNTTS
C
S
47
Page 54

WHAT DO YOU NEED FOR NETWORKING?
Some requirements have to be fulfilled to successfully network
computers:
1. The Notebook must have a network card that supports the
same network technology as the other computers on the network. Unless otherwise quoted, your Notebook will support
the current Fast Ethernet (10/100 Mbit) standard.
2. The network cards must be connected. You need a Shielded
Twisted Pair-cable (CAT5) that has an RJ-45-connector.
- If you want to directly connect two PCs you need a Cross-
Link cable.
- If more PCs must be connected you need a supplementary
distributor (Hub or Switch) and a Patch cable.
3. All connected PCs need a network operating system. Windows
®
can act as a network operating system.
4. All networked PCs must speak the same “language” to understand one another. They use protocols for this purpose. The
setting of protocols, therefore, must be the same for all networked PCs.
48
M
M
AAIINN
C
OOMMPPOONNEENNTTS
C
S
Page 55

TROUBLESHOOTING WITHIN THE NETWORK
Why does an error message appear when I click on the
network environment?
The computer name must be unique on the network and may not be the same as the task group.
It appears that the network boards are unable to communicate. What might be the problem?
Maybe one of the used network boards works with a
different speed (e. g. 10 instead 100 Mbit) and
your network computer is unable to recognize this.
If necessary, set the network driver to the compatible speed.
If two PCs should be linked you require a cross-
link cable, otherwise use a patch cable.
In addition, check the protocols and the configu-
ration.
The data transmission is incorrect or very slow. What
might be the problem?
Maybe you have the wrong cable (UTP / CAT3 or
lower) or the problem is the proximity of a power
cord or another source of interference.
For further hints on troubleshooting search for “network errors” in
Windows Help and Support.
M
C
AAIINN
M
OOMMPPOONNEENNTTS
C
S
49
Page 56

THE PC CARD SLOT
The PC card slot on the left side (see page 18) of the Notebook
can be used to operate credit card-sized PC cards. Most PC cards
are communications or interface devices such as ISDN-, Faxmodem-, Network- or SCSI-adapters.
Some PC cards contain memory chips or hard disks for data storage. If you use such cards with your Notebook, the system assigns the card a drive name, so that you may access the resources. The PC card drive in your Notebook supports PCMCIA 2.1
- (Type II), and CardBus (Type I) cards. Cards of Type I are 3.3
mm, and Type II 5 mm thick.
32-BIT CARDBUS PORT
CardBus cards have a 32-bit architecture with which high data
transfer speeds of up to 132 MB can be achieved, similar to PCI.
In this way your Notebook can also support data intensive devices
such as 100Mbps Fast Ethernet, Fast SCSI peripherals and video
conferencing devices.
The CardBus port is backward compatible with 16-bit PC cards
with a 5V power supply, though the CardBus only requires a
power-saving 3.3V.
USE OF PC CARDS
In order to run a PC card, special software is needed (drivers,
etc.). The card manufacturer usually supplies this software. Support for the card port is a component of Windows
represents the optimum in operational smoothness. You should
consider this point when choosing between alternative operating
systems.
50
M
M
AAIINN
C
OOMMPPOONNEENNTTS
C
S
®
and at present
Page 57

INSTALLING A PC CARD
Follow the PC card installation instructions that are given for use
under Windows
Once you have started Windows
slot provided.
®
and have the necessary driver software ready.
®
, slip the card carefully into the
Eject button
When the card is fully inserted two audible signals will be heard,
provided it has been correctly recognized and successfully configured.
In your taskbar will appear the icon
.
If only one signal is heard, this signifies a problem with the card
recognition. In this case, follow the instructions that accompany
your new PC card.
REMOVING A PC CARD
To remove your PC card:
1. Press the corresponding eject button next to the slot.
M
C
AAIINN
M
OOMMPPOONNEENNTTS
C
S
51
Page 58

CONNECTION OPTIONS
The Notebook has a number of input and output interfaces for
connection of peripheral devices such as a printer, scanner, keyboard, and so on. This section presents the individual ports. For
further information, refer to page 19, where the positions of the
respective ports are described.
PS/2 INTERFACE
This port is used to connect devices that use the PS/2-Standard, such
as keyboards and pointing devices.
PARALLEL INTERFACE
You can connect a printer or a device such as a scanner or ZIP
drive to this 25-pin parallel interface. The parallel interface supports Standard/EPP/ECP. You can set the desired mode in the
computer’s BIOS, though this parameter will already be correctly
preset.
UNIVERSAL SERIAL BUS (USB) PORT
USB ports provide an easy way to connect many peripheral devices to
your PC. You can use any USB device with any USB port. USB ports
are located on both the front and back panels of the PC for your convenience. Some USB devices require that you reinstall software drivers when you connect the device to a different USB port than the one
originally used. This can be avoided by always using the device with
the same USB port. Devices connected directly to the USB bus should
not draw more than 500 mA. Should the devices need more power
than this, it will be necessary to provide a hub (distributor / booster).
The data transfer speed is 1.5 Mbit or 12 Mbit, depending on the device connected.
52
M
M
AAIINN
C
OOMMPPOONNEENNTTS
C
S
Page 59

S
OOFFTTWWAARRE
S
The software included with the Notebook was pre-installed at the
factory.
During software installations, important files can be changed or even
deleted. We recommend that you set a Windows XP recovery point
before installing software (p. 64).
For specific installation information, refer to the documentation
that came with the software program. Here is a typical installation
procedure.
1. Load the software program installation disc in an optical drive
(CD-ROM, CD-RW, DVD-ROM, DVD-RW, etc.). If your installation disc is a DVD, make sure that the drive that you use can
read DVDs.
2. Most installer programs start automatically after a few
moments.
If the installer program does not start automatically, you can
manually start it by double-clicking My Computer, and then double-clicking the drive letter where you loaded the software program installation disc.
3. Follow the instructions given by the program.
E
S
OOFFTTWWAARRE
S
E
53
Page 60
DIGITAL SIGNATURES
When installing software or drivers, you may receive the message
“The software you are installing has not passed Windows Logo
testing to verify its compatibility with Windows XP.” Although the
software lacks the digital signature, it may work properly. Click on
“Tell me why this testing is important” to get detailed information.
Click on “Continue Anyway” to continue to install your software.
To set file signature verification options for Windows XP:
1. Click Start, then Control Panel. Double-click System.
2. On the Hardware tab, select Driver Signing.
3. Under File Signature Verification, select one of the
following:
Ignore allows all device drivers and software to be installed
on this PC regardless of whether they have a digital signature.
Warn displays a warning message when you attempt to install
a software program or device driver without a digital signature.
Block prevents installation programs from installing device
drivers without a digital signature.
If you are logged on to your PC as an administrator, you can click
Apply setting as system default to apply the selected setting
as the default for all users of your PC.
WARNING! During software installation important files can be changed or deleted. To
avoid problems in using older files after installation, make sure to safeguard your hard disk.
54
S
OOFFTTWWAARRE
S
E
Page 61

WINDOWS ACTIVATION
Microsoft is committed to the protection of intellectual property
rights and the reduction of software piracy. Windows XP contains
software-based product activation technology. Your copy of Windows XP has already been activated for your Notebook. However,
product activation is needed if some components of your Notebook have been replaced or you use non-authorized BIOS. If necessary, you can activate Windows XP as often as needed.
You will probably need to activate Windows XP by telephone even
if Internet Activation is available. This is due to the pre-activated
SLP version that runs with a special Product-ID. However, activation needs your unique Product ID that can be found on the Cer-
tificate of Authenticity sticker on your Notebook housing. When
you call, please inform the agent that you are running an OEM
(SLP) version of the software.
S
OOFFTTWWAARRE
S
E
55
Page 62

T
HHEE
T
In BIOS setup (Basic Configuration) there are a number of configurable parameter settings available for your Notebook. For example, you can change the operating mode of the interfaces, security
features or power management.
BBIIOOS
T
S
S
EET
S
WARNING! The Notebook is factory pre-set to
guarantee optimum operation. Only modify the
parameters if necessary and if you are familiar
with the configuration options.
P
-
-
UUP
P
RROOGGRRAAM
--P
M
RUNNING THE BIOS SET-UP
You can only run the BIOS configuration program at system startup. If the Notebook has already started, power it down and then
up again. Press the F2 function key in order to start the BIOSSET-UP.
NAVIGATING THE BIOS UTILITY
There are six menu options: System Information, Basic System
Settings, Start up Configuration, Onboard Devices Configuration,
System Security and Load Default Settings.
To enter a menu, highlight the item using the cursor up/down
keys; then press Enter.
While in a menu, follow these instructions:
- Press the cursor up/down keys to move between parameters.
- Press the cursor left/right keys to change the value of a parame-
ter.
- Press Esc while you are in any of the menus to return to the main
menu.
56
Note: If you are unsure if your parameter settings
are correct, you should load the "Set-up-
Defaults".
T
T
BBIIOOS
S
HHEE
T
P
S
-
EET
P
UUP
-
--P
S
RROOGGRRAAM
M
Page 63

C
UUSSTTOOMMEERR
C
S
EERRVVIICCE
S
E
DATA AND SYSTEM SECURITY
The programs described below are part of your Windows operating system. You will find additional information on these programs
in the Windows Help file.
DATA SECURITY
Back up data regularly on external media such as a CD-R or CDRW. Windows offers both a Backup program and a Files and
Settings Transfer Wizard.
Both programs are found in Accessories/System Tools within
the Start menu. You should make a backup disk with all your
passwords and the operating system’s original configuration.
MAINTENANCE PROGRAMS
You can avoid some hardware and software errors with disk maintenance programs such as Disk Defragmenter and Disk
Cleanup. The program System Information can also be helpful
since it gives you detailed information about your system configuration. You will find these programs in Accessories/System
Tools.
C
UUSSTTOOMMEERR
C
S
EERRVVIICCE
S
E
57
Page 64

58
S
S
YYSSTTEEMM
R
EECCOOVVEERRY
R
Y
Page 65

S
YYSSTTEEMM
S
Before performing a recovery, you should review the
“Troubleshooting” section in this manual to see if you can resolve
the problem. If not, it is possible that a software file required by
Windows XP to operate the computer was damaged or deleted.
R
EECCOOVVEERRY
R
Y
RESTORING MICROSOFT WINDOWS XP
Windows XP System Restore allows you to set "recovery points." This
feature enables you to take a snapshot of the current system configuration, which you can return to should an application, device, or
driver cause instability in the system.
While Windows XP automatically creates recovery points, you can
also set them manually. In addition, you can configure the maximum
amount of memory used for this.
To use System Restore to set recovery points or restore your system,
click the Start menu, then choose All Programs, then choose Ac-
cessories, then choose System Tools, then choose System Restore. Select the task that you would like to perform and follow the
on screen instructions. For detailed information refer to Windows XP
Help and Support.
System Restore includes various functions to help ensure that your
Notebook and installed applications and devices work correctly. These
functions assist you in solving the problems which might occur by adding, deleting or replacing files required for proper functioning of Windows XP, and your software and devices. The restore function you use
depends on the type of problem or error.
In general, it is a good idea to set a recovery point before installing a
new software program or driver. If the system becomes unstable
during or after the installation, you can usually return to a workable
configuration without deleting newly created documents.
S
S
YYSSTTEEMM
R
EECCOOVVEERRY
R
Y
59
Page 66

FAQ – QUESTIONS FREQUENTLY ASKED
When do I have to activate Windows?
Your software has been preactivated in the factory.
An activation will only be required, if ...
... several components are replaced by others.
... your installed a new motherboard.
... a different BIOS version has been installed.
... you install the software to another computer.
What is the Windows activation?
Your operating instructions include a chapter about
this subject.
How do I perform a data backup?
Use the program Backup for this.
It is important that you follow the operating instructions of these programs.
60
Make a backup and another backup of selected data
to an external medium (CD-R, CD-RW, DVD-R, DVDRW, SD card, etc.), to familiarize yourself with the
technique.
A backup is unsuitable if you are not able to recover
the data, the medium (floppy disk, CD-R, etc.) is
defective or no longer available.
S
S
YYSSTTEEMM
R
EECCOOVVEERRY
R
Y
Page 67

Do I still have to install the enclosed CDs/DVDs?
No. Basically all programs are already preinstalled.
The disks are only intended as backup copies.
When is the recovery of the factory setting recommended?
This method should be chosen as the last resort.
Read chapter “System recovery” on page 59 concerning the alternatives possible.
Why is the boot partition missing when booting from
the support/ application CD?
The first partition is formatted with the file system
NTFS. Compared to FAT32 this file system offers
more security and a more efficient access. However,
NTFS partitions can only be read from operating systems supporting this. This is not the case in the
aforementioned CD.
S
S
YYSSTTEEMM
R
EECCOOVVEERRY
R
Y
61
Page 68

TROUBLESHOOTING
LOCALIZE THE CAUSE
Errors can have simple causes, but sometimes they are caused by
faulty equipment. We would like to give you some tips to help
solve common problems. Should these instructions not lead to
success, please feel free to call us.
CHECK CABLES AND CONNECTIONS
Visibly check all cables and connections. Should all lights be off,
check whether all equipment is supplied with power.
¾ In battery mode, connect the Notebook to the power adapter
and ensure that the battery is charged up.
¾ If you are operating the Notebook with the power adapter,
check the electrical socket, power cord and all switches in the
circuit of the electrical socket.
¾ Switch off the Notebook and check all cable connections.
Check the connections to peripherals. Do not exchange cables, even though they may look similar. The polarity in the
cables may be different. When it is confirmed that the Notebook has power and all connections are correct, turn the
Notebook on again.
THE POWER ON SELF TEST (POST)
The Power On Self Test (POST) is executed during each boot
process to test the memory, motherboard, display, keyboard and
other components. If the Notebook does not pass the POST but
beeps several times, or if the screen remains blank, call your
Notebook support technician.
62
S
YYSSTTEEMM
S
R
EECCOOVVEERRY
R
Y
Page 69

ERRORS AND POSSIBLE CAUSES
The display is blank:
- Confirm that the system is not in stand-by mode. Press any
key on the keyboard to test this.
Wrong Date and Time:
- Double-click the clock on the taskbar and correct the date and
time.
An error message appears during boot-up:
- You may have a floppy disk in the disk drive so the system is
looking for an operating system on that floppy. Remove the
disk and press any key.
No data can be accessed from the optical Drive:
- Check whether the CD is inserted correctly.
- Is the CD-ROM displayed in Windows Explorer? If so, test an-
other CD.
The Printer does not work:
- Check the printer cable.
- Do a Printer Self Test.
- Should several pieces of equipment be operating from the
same port, check all peripherals and reinstall the drivers.
- If you have access to the Internet, download and install the
latest drivers from the manufacturer’s Web site.
The mouse does not work.
- Check the cable connection.
- Check to see if the mouse works in another application pro-
gram and if there is a problem of compatibility between the
mouse (e.g. Microsoft Intellimouse) and the touch pad.
S
S
YYSSTTEEMM
R
EECCOOVVEERRY
R
Y
63
Page 70

ADDITIONAL SUPPORT
If the suggestions in the above section have not solved your problem, please contact the customer service hotline and we will attempt
to help you solve the problem. Before you call, however, please have
the following information available:
- How is your computer configured?
- What additional peripherals do you use?
- What messages, if any, appear on your screen?
- What software were you using when the error occurred?
- What steps have you already undertaken to solve the prob-
lem?
- Have you upgraded or removed drivers or hardware?
- Can you manually repeat the problem?
- If you have been given a customer number previously, please
have this available.
DRIVER SUPPORT
This Notebook has been extensively tested in our laboratories with a
large number of compatible devices. It fulfils all required standards
and complies with the standard “Designed for Windows”, which certifies utmost compatibility. However, the software drivers for individual components are updated from time to time. This is a regular
process provided by the manufacturer to mend possible compatibility
problems that may occur with components (e.g., programs or hardware) that were not tested at the time of your Notebook’s manufacture. Driver updates and the latest information on your product are
available on the Internet.
64
S
S
YYSSTTEEMM
R
EECCOOVVEERRY
R
Y
Page 71

STANDARDS
This Notebook meets the requirements of the following standards:
ELECTROMAGNETIC COMPATIBILITY
This Notebook meets the following requirements for standards of
electromagnetic compatibility and electrical safety:
EN 55022
EN 55024
EN 61000-3-2
EN 61000-3-3
Information technology equipment - Radio disturbance characteristics - Limits and methods of measurement.
Information technology equipment - Immunity characteristics - Limits and methods of measurement.
Limits - Limits for harmonic current emissions
(equipment input current up to and including 16 A
per phase).
Limits - Limitation of voltage fluctuations and flicker
in low-voltage supply systems for equipment with a
rated current up to 16 A.
• Keep the Notebook at least one meter (approximately
three feet) away from high frequency and magnetic in-
terference sources (e.g., televisions, loudspeaker cabinets, mobile telephones, etc.) in order to avoid malfunctions and/or loss of data.
• Please note that only shielded cables shorter than
3 meters (9.84 ft) should be used for the LPT, COM,
USB, IEEE 1394, audio, video and network interfaces
with this Notebook.
• When connecting additional components, please observe
the Guidelines on Electromagnetic Compatibility (EMC).
S
S
YYSSTTEEMM
R
EECCOOVVEERRY
R
Y
65
Page 72

ELECTRICAL SAFETY
EN 60950
Safety of information technology equipment.
• The connection of devices is limited to equipment that com-
plies with EN60950 “Safety of information technology
equipment” or EN60065 “Audio, video and similar electronic apparatus. Safety requirements”
• For U.S. / Canadian purposes: The Notebook should
only be connected to equipment which complies with
UL 60950 / CAN CSA 22.2 No 60950
ERGONOMICS
EN 29241-3
EN ISO 9241-8
Ergonomic requirements for office work with
visual display terminals (VDTs). Visual display
requirements.
Ergonomic requirements for office work with
visual display terminals (VDTs). Requirements for
displayed colors.
SUPPLEMENTARY INFORMATION
This product complies with the requirements of the R&TTE Directive 1999/5/EC and carries the CE-marking accordingly.
66
S
S
YYSSTTEEMM
R
EECCOOVVEERRY
R
Y
Page 73

I
I
A
All Programs.......................26
Ambient Temperature ........... 6
Audience............................. 1
B
Battery Operation............9, 28
Battery Power.....................29
BIOS Setup-Program ...........56
BIOS Utility
Burning CDs .... See writing CDs
Burning DVDs See writing DVDS
C
Cabling..............................10
CardBus.............................50
Care of Displays..................13
CD-ROM ............................39
CD-ROM Drive ....................39
CD-RW Drive ......................39
CDs
Charging the Battery ...........29
Checking the Battery Level ...30
Cleaning Agents..................13
Cleaning and Care...............13
Connection
X
NNDDEEX
Battery Power .................29
Charging ........................29
Inserting ........................28
Removing .......................28
Navigating ......................56
Data ..............................42
Music .............................42
Writing ...........................42
AV Device .......................34
External Monitor ..............34
Lan ................................19
Line In ...........................18
Line Out .........................18
Modem...........................18
Monitor.......................... 19
Parallel ..................... 19, 52
Power Socket.................. 19
PS/2......................... 19, 52
TV................................. 34
TV/Video........................ 19
USB .........................19, 52
Connection Options............. 52
Control Panel ..................... 26
Customer Service ............... 57
D
Data and System Security ... 57
Data entry......................... 35
Data Security..................5, 57
Deleting Files ..................... 38
Desktop ............................ 25
Digital Signatures ............... 54
Directories......................... 38
Disc-Drive ......................... 39
Discs
Handling ........................ 40
Loading ......................... 40
Removing....................... 41
Display ............................. 33
Drivers...........................3, 38
DVD Movies ....................... 41
DVD+RW disc .................... 44
DVD+RW drive................... 44
DVD+RW Drive .................. 39
DVD-Drive......................... 39
DVD-R Authoring................ 44
DVD-R General................... 44
DVD-ROM Drive.................. 39
DVD-RW Disc..................... 44
DVD-RW drive.................... 44
DVD-RW Drive ................... 39
DVDs
Writing .......................... 44
I
X
NNDDEEX
I
67
Page 74

E
Electrical Safety ..................66
Electromagnetic
Compatibility...................65
EMC ..................................65
Ergonomics ........................66
Ethernet ............................47
External Audio Ports ............45
External Monitor ........... 19, 34
F
FAQ ..................................60
Files
Deleting .........................38
Finding Files .......................37
H
Mains Operation ................. 27
Maintenance ...................... 13
Cleaning and Care ........... 13
TFT Display .................... 13
Transport ....................... 14
Maintenance Programs ........ 57
Modem ........................10, 46
Port............................... 46
Mouse............................... 36
MPEG2.............................. 41
MusicMatch Jukebox ........... 41
N
Network ............................ 47
Troubleshooting .............. 49
What do you need for
Networking? ................ 48
What is a Network? ......... 47
NIC .................... See ethernet
Hard Drive .........................37
Partitions ........................37
HD.................. See Hard Drive
Help................................... 2
Help with Software ............... 3
Hotline ..............................64
I
Icons.................................26
Indicators ..........................20
Installing a PC Card.............51
Introduction ........................ 1
K
Kensington Lock..................15
Keyboard ...........................35
L
Laser Radiation...................12
M
Main Components................37
O
On/Off Switch .................... 27
Operational Safety................ 5
P
Parallel Port .................. 19, 52
Partitions .......................... 37
PC Card Slot ...................... 50
PCMCIA............................. 50
Peripheral Devices ................ 3
POST ................................ 62
Power
Turning off your
Computer ................... 26
Power Management ............ 31
Power On Self Test ............. 62
Power Saving button
Indicator........................ 22
Power Socket..................... 19
Power Supply..................... 27
Battery Operation............ 28
Hibernate Mode............... 31
Mains Operation.............. 27
Power Management ......... 31
68
I
X
NNDDEEX
I
Page 75

Standby Mode .................31
Suspend Mode.................31
PowerDVD..........................41
Program Bar.......................25
Programs
Installing ........................59
Location .........................38
PS/2 port ..................... 19, 52
Q
Quality ............................... 2
Questions Frequently Asked ..60
R
Recovery ...........................59
Windows
Recovery Points ..................59
Removing a PC Card ............51
Repairs..............................11
Running the Bios Setup........56
S
Safety ................................ 5
Additional Instructions ......11
Ambient Temperature........ 6
Battery Operation ............. 9
Cabling...........................10
Data ..............................38
Data Security ................... 5
General Information .......... 6
Instruction ....................... 5
Modem...........................10
Operation ........................ 5
Optical Drive .................... 7
Power Adapter.................. 8
Set-Up Location ...............10
TFT Display ...................... 7
Touch Pad.......................10
Upgrades and Repairs.......11
Safety Instructions ............... 5
Screen Resolution ...............33
Search...............................37
Securing your Notebook .......15
Serial Number ..................... 1
xp
......................59
Service Engineers............... 12
Setting a User Password ...... 15
Set-Up Location ................. 10
Software
For Playing CDs............... 41
Starting Programs ........... 25
Software Help ...................... 3
Sound Card ....................... 45
Standards
Electrical Safety .............. 66
Electromagnetic
Compatibility ............... 65
Ergonomics .................... 66
Standby Mode.................... 31
Start Button ...................... 25
Start-up............................ 23
Suspend to Disk ................. 31
T
Task Bar ........................... 26
Touch Pad .................... 10, 36
Tour ................................... 2
Transport .......................... 14
Troubleshooting ................. 62
Turn Off Computer.............. 26
TV/Video out...................... 19
U
Universal Serial Bus ............ 52
Upgrades and Repairs ......... 11
Use of PC Cards ................. 50
Using a Safety Lock ............ 15
V
Views ............................... 17
Battery Pack................... 19
Display Catch ................. 18
Easy Start Buttons .....17, 21
Fan Slot .............. 17, 18, 19
Front View...................... 18
Indicator........................ 17
Indicators .................17, 20
Kensington Lock.............. 18
Keyboard ....................... 17
I
X
NNDDEEX
I
69
Page 76

LAN Port.........................19
Left Side.........................18
Line In ...........................18
Line Out .........................18
Microphone .....................17
Modem Port ....................18
Open Notebook................17
Optical Drive ...................19
Parallel Port ....................19
PCMCIA Card Slot ............18
Power ON/OFF.................17
Power Saving Button .. 17, 22
Power Socket ..................19
PS/2 Port........................19
Rear Side........................19
Right Side.......................19
RJ-11 .............................18
RJ-45 .............................19
Speakers ........................18
TFT Display .....................17
Touch Pad.......................17
TV/Video Out.................. 19
USB Port ........................ 19
USB Ports ...................... 19
Volume Control ............... 18
W
Windows Logo Testing......... 54
Windows Media Player......... 41
Windows XP
Control Panel.................. 26
Desktop ......................... 25
Help ...........................2, 26
Help and Support .............. 3
Manual ............................ 2
Recovery........................ 59
Recovery Point................. 53
Tour ................................ 2
Writing CDs ....................... 42
Writing DVDs ..................... 44
70
I
X
NNDDEEX
I
 Loading...