

Medela Vario 8 c/i, Vario 18 c/i, Vario 18, Vario 8 Service Manual
Vario
Vario 8 (AC/DC)
SERVICE MANUAL
SERVICEANLEITUNG
INSTRUCTIONS DE SERVICE
EN
DE
FR
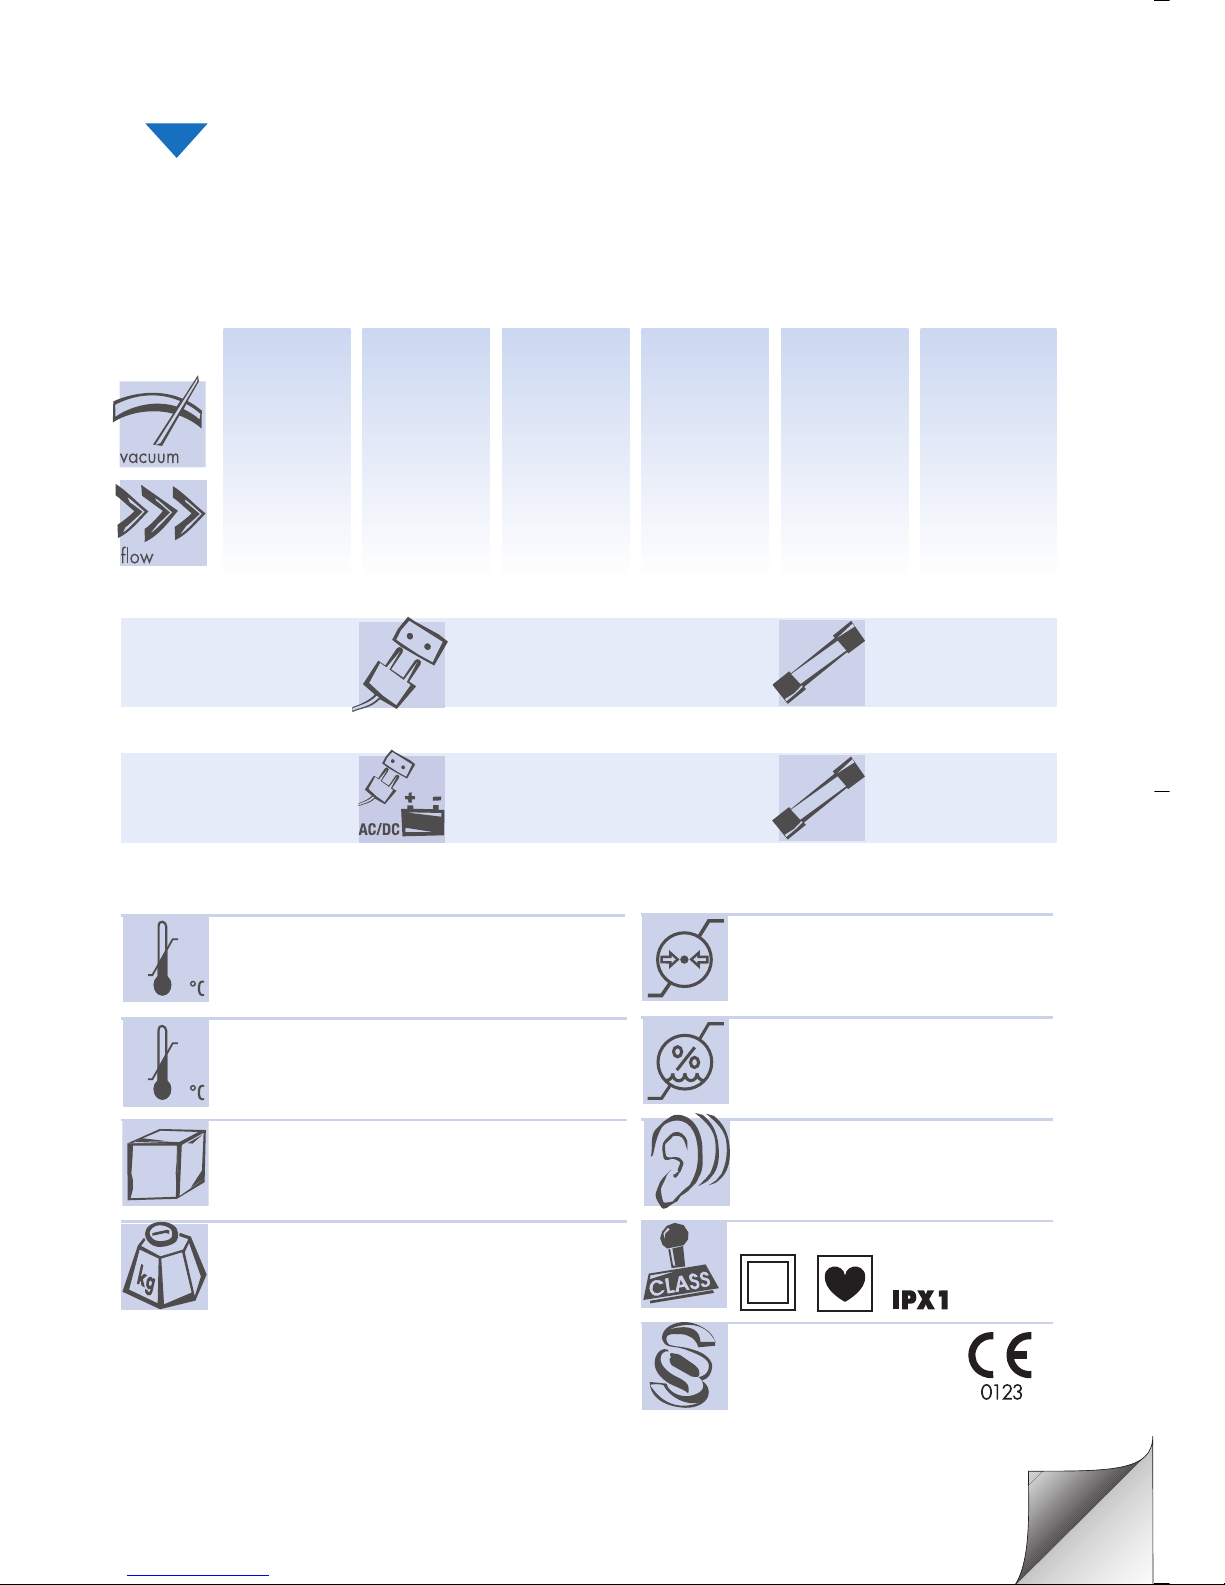
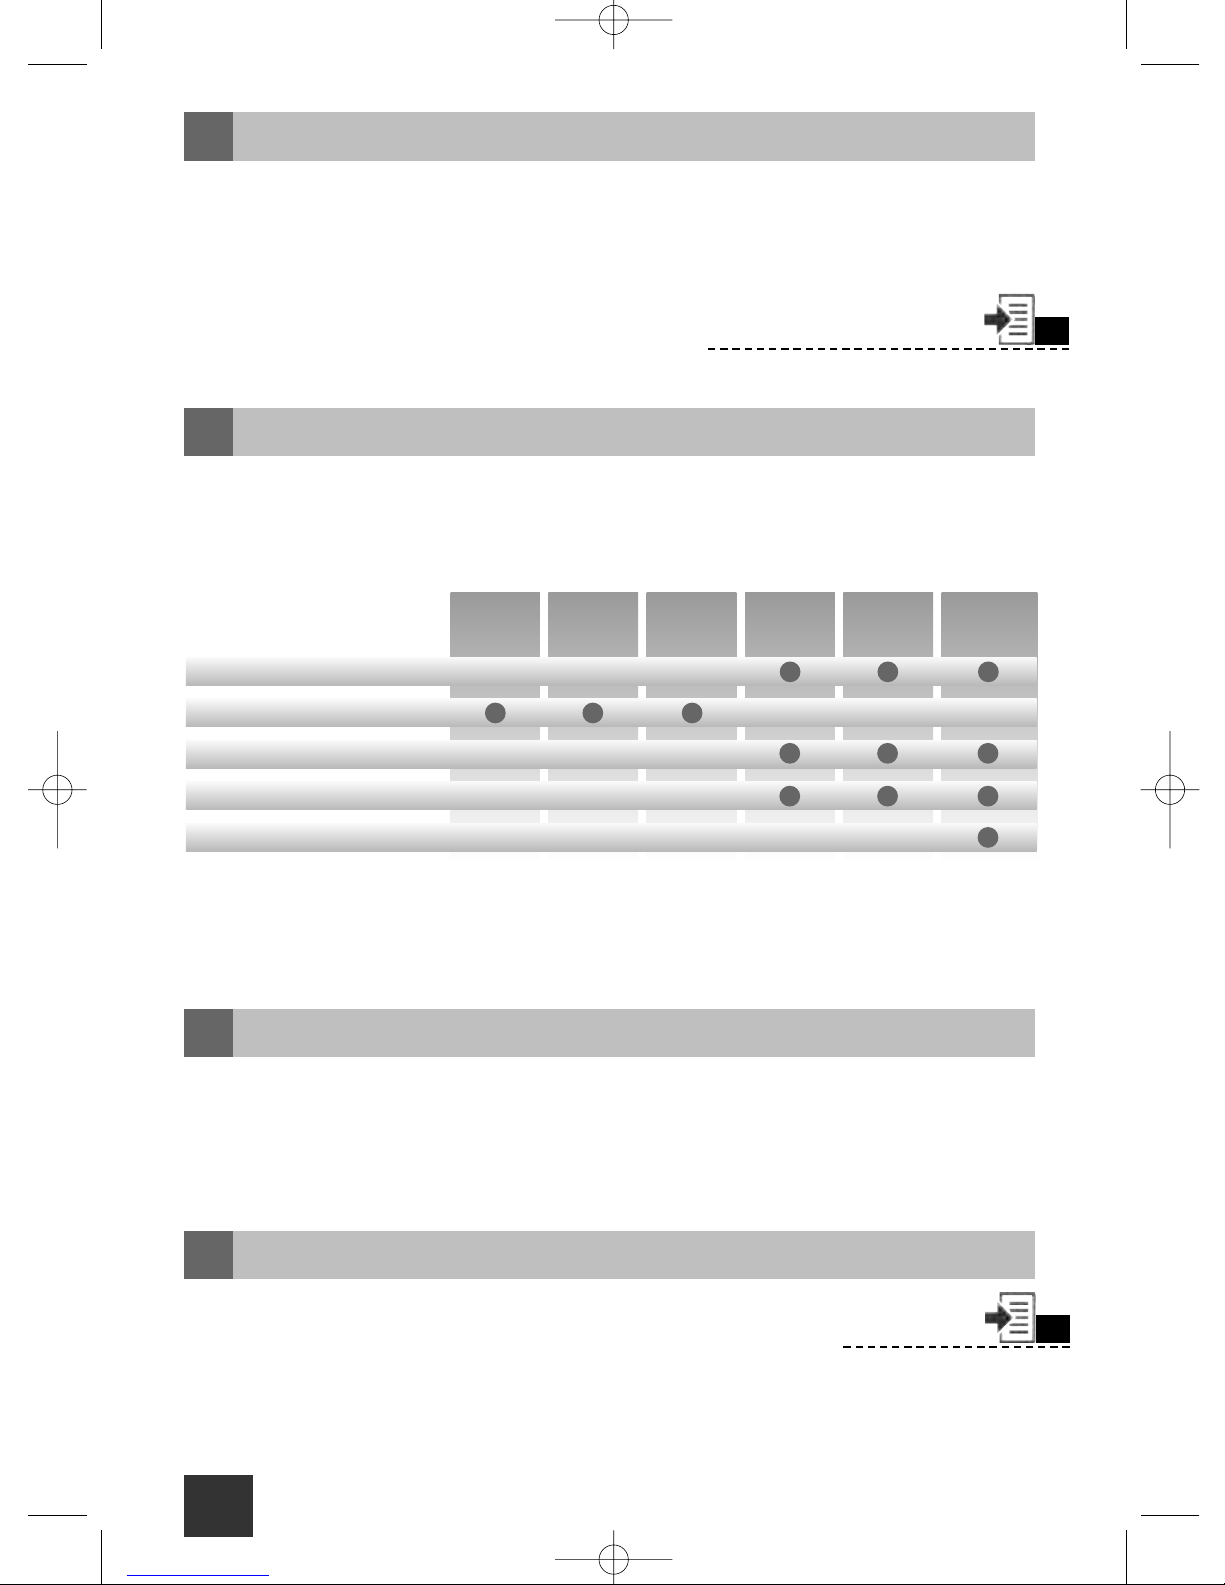
Technical specifications • Technische Daten • Données techniques
380 x 170 x 285 mm
T 1,0 AØ5 x 20 mm
100 – 240 V 50/60 Hz 80 VA
230 – 240 V 50 Hz 90 W
230 – 240 V 60 Hz 90 W
120 V 60 Hz 70 W
18 l/min.
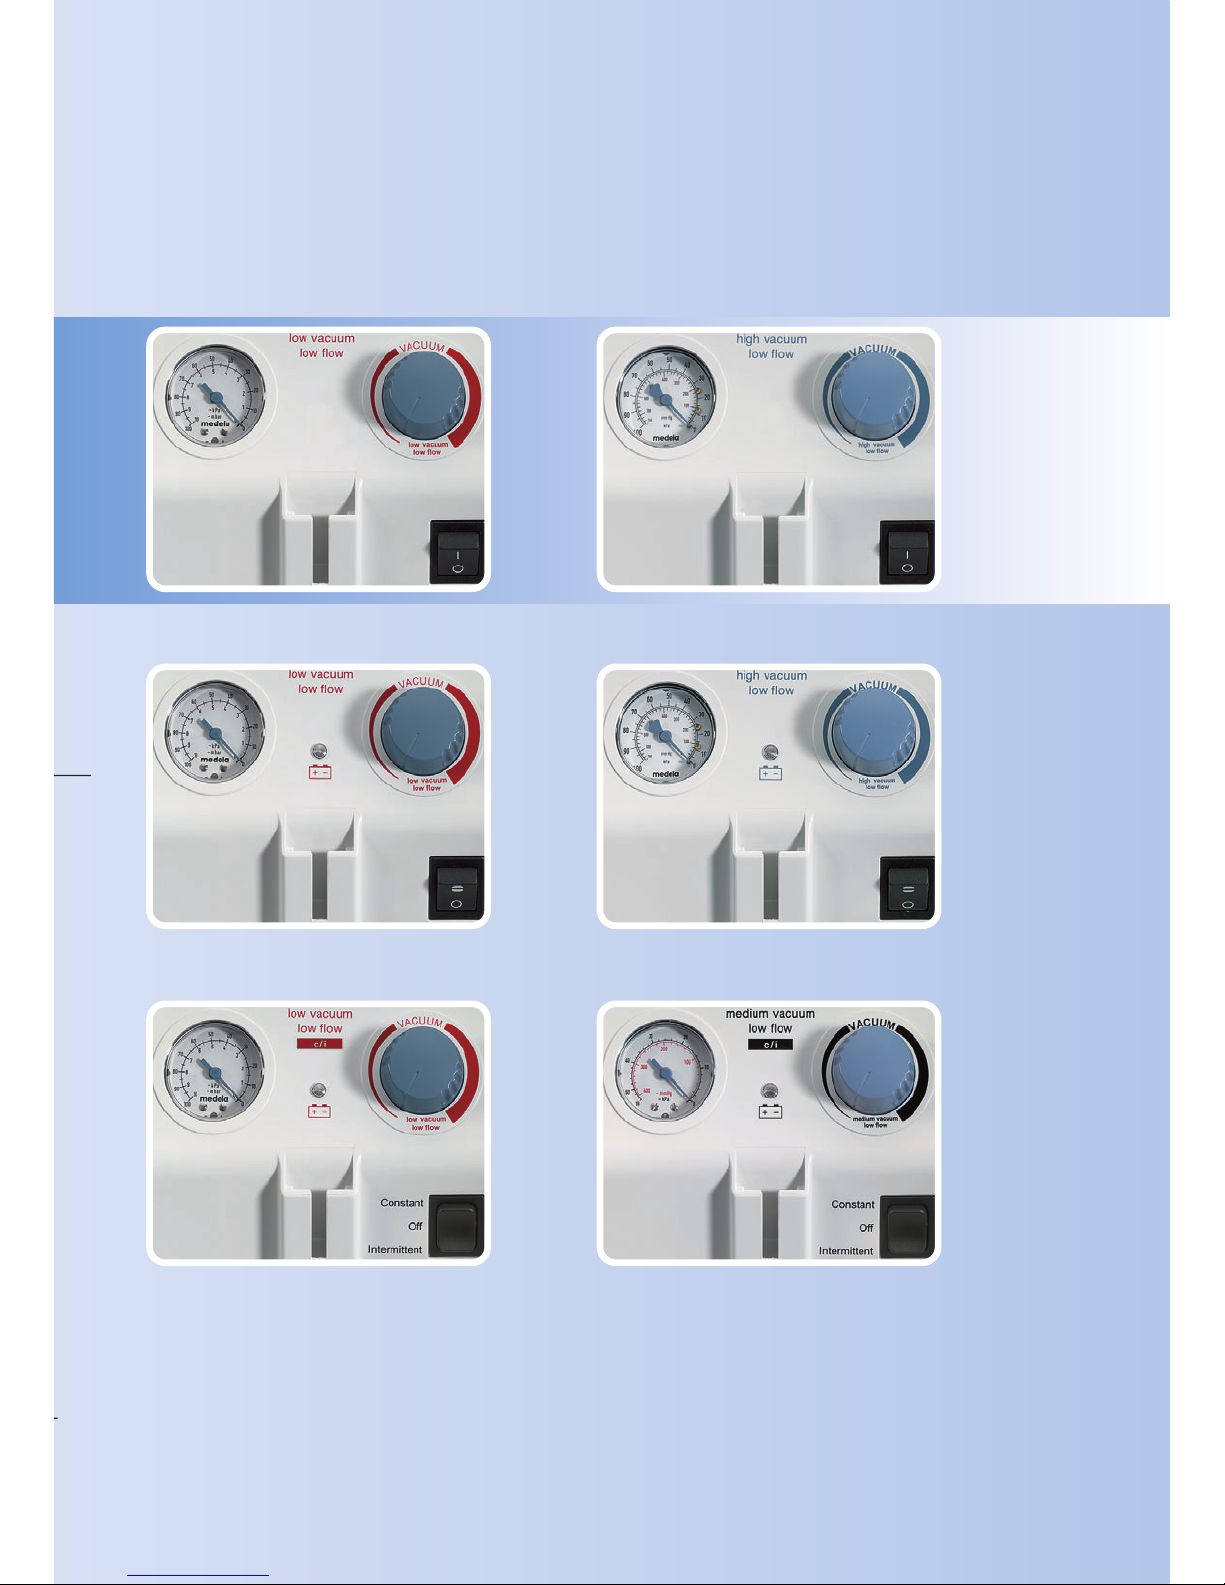
Vario 8 Vario 8
AC/DC
Vario 8 c/i
AC/DC
Vario 18 Vario 18
AC/DC
Vario 18 c/i
AC/DC
8 l/min. 8 l/min. 8 l/min. 18 l/min. 18 l/min.
low flow low flow low flow low flow low flow low flow
low vacuum low vacuum low vacuum high vacuum high vacuum
medium vacuum
- 90 mbar
- 9 kPa
- 68 mmHg
- 90 mbar
- 9 kPa
- 68 mmHg
- 90 mbar
- 9 kPa
- 68 mmHg
- 75 kPa
- 563 mmHg
- 75 kPa
- 563 mmHg
- 55 kPa
- 413 mmHg
T 0,8 A Ø 5 x 20 mm
T 0,8 A Ø 5 x 20 mm
T 1,25 A Ø 6,3 x 32 mm
AC-Version
Vario 8 / Vario 18
Vario 8 / Vario 18
Vario 8 / Vario 18
Vario 8 / Vario 18
Vario 8 c/i / Vario 18 c/i
AC/DC-Version
Transport/Storage
Transport/Lagerung
Transport/Stockage
Operation
Betrieb
Fonctionnement
Transport/Storage
Transport/Lagerung
Transport/Stockage
Operation
Betrieb
Fonctionnement
Vario 8: 49 dB(A) / Vario 18: 52 dB(A)
+40
+5
AC 3.5 kg
AC/DC 4.2 kg
ISO 9001
ISO 13485
CE (93/42/EEC), IIa
106
70
+50
-20
95
20
Max. noise level
Max. Lautstärke
Niveau de bruit maximum

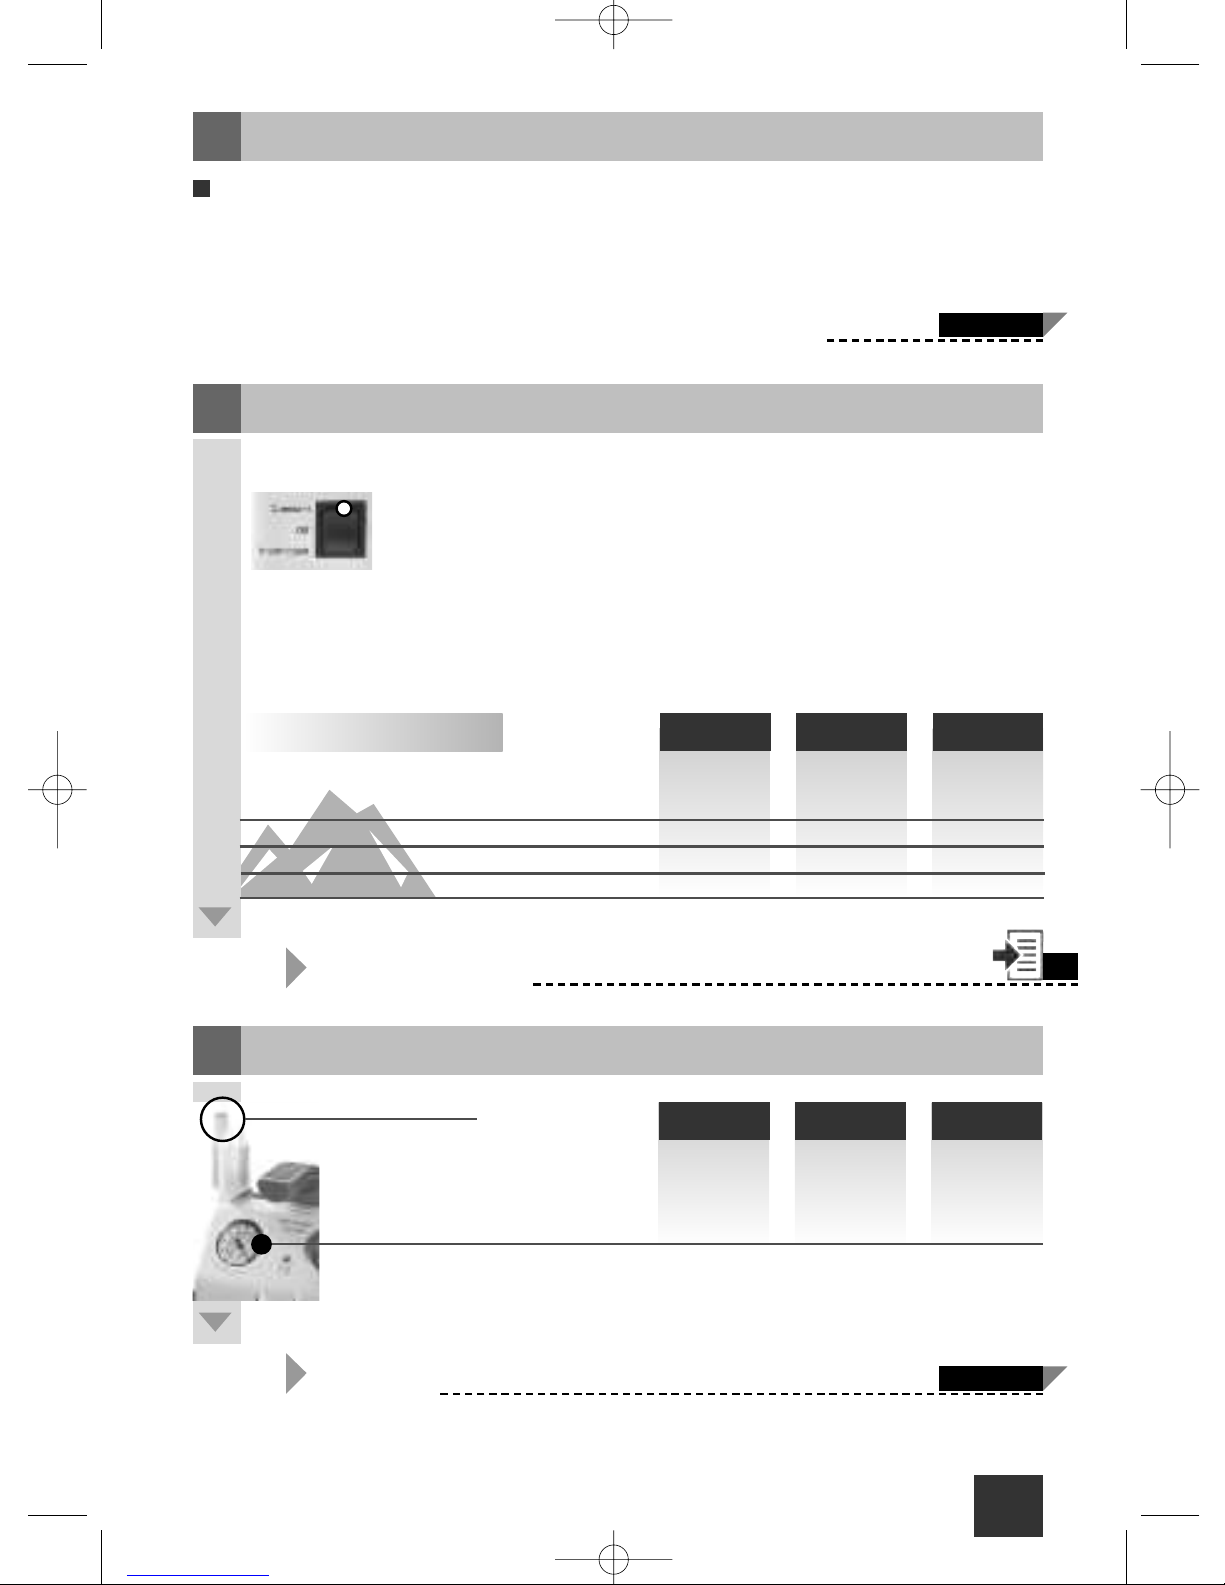
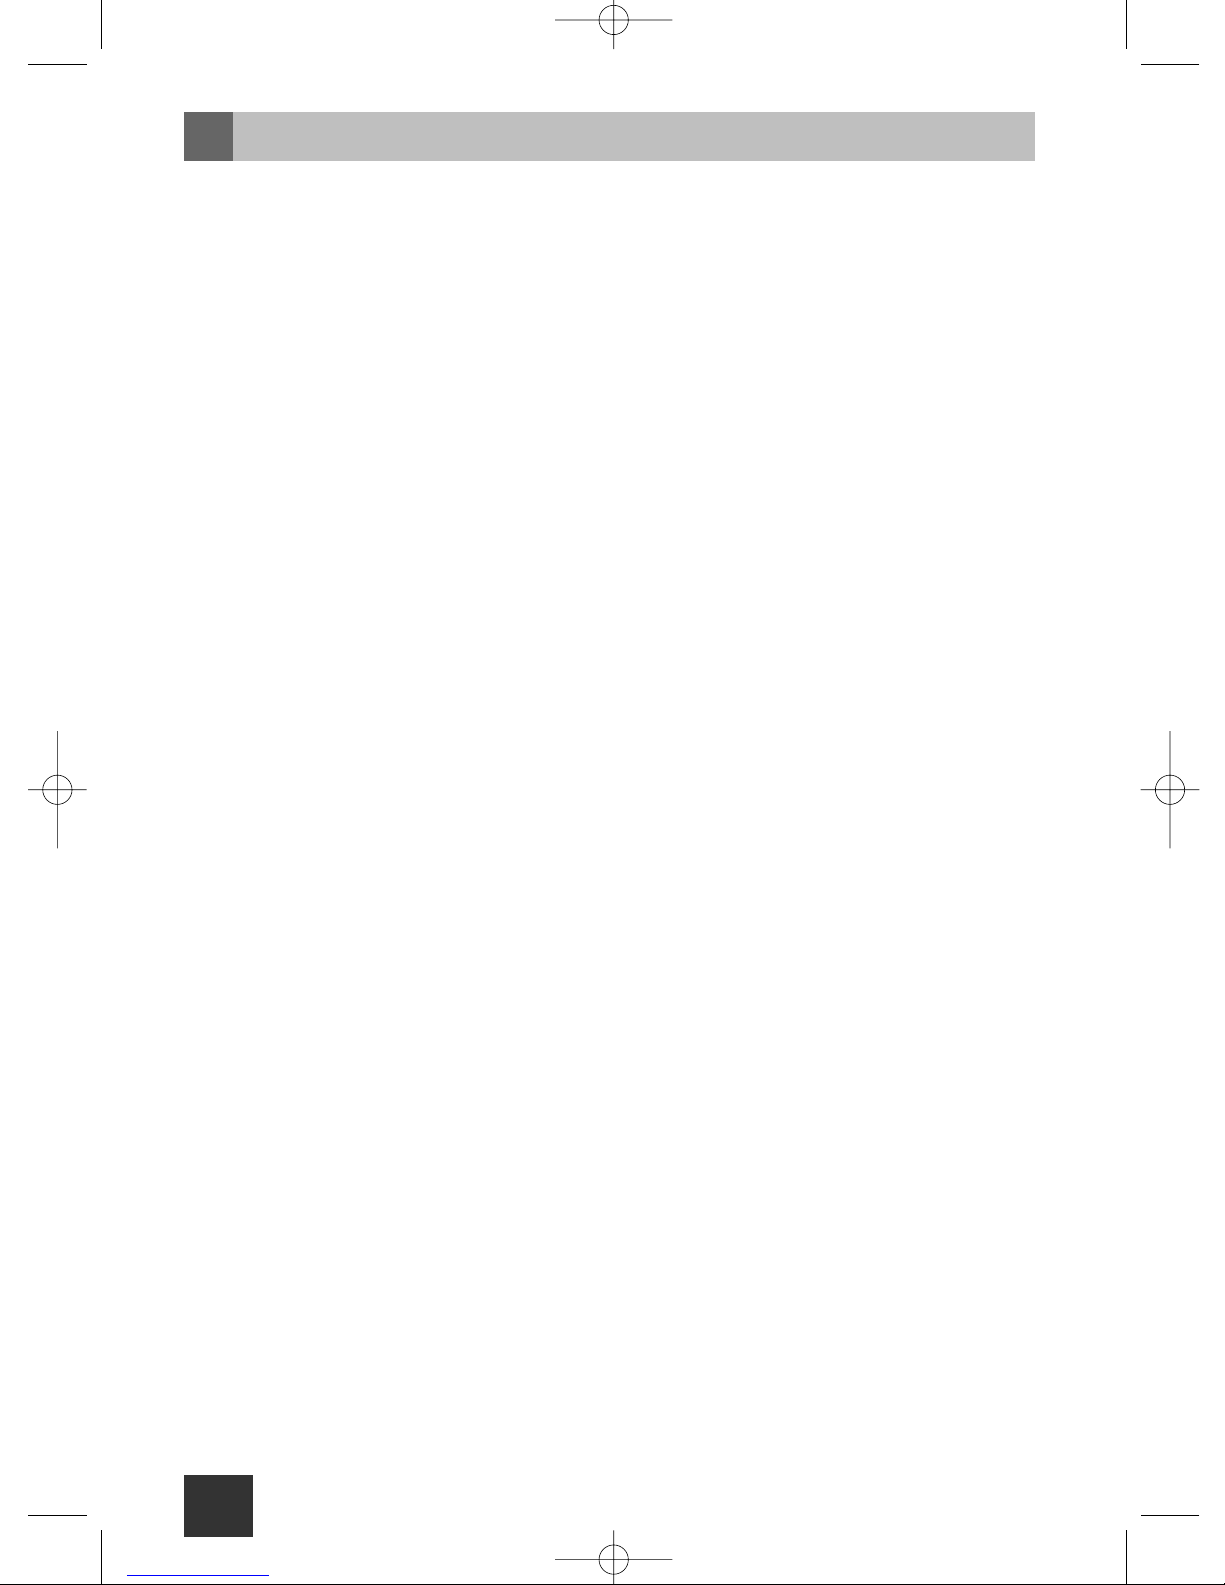
Vacuum gauge
Manometer
Manomètre
ON/OFF swich
Ein-/Ausschalter
Commutateur
marche/arrêt
12 V DC connect
socket
12 VDC Anschlu
s
Fiche pour
alimentation 12
V
Fuse
Sicherung
Fusible
Regulator
Regler
Régulateur
Vario 8 AC/DC
Vario 8
Vario 18
Vario 8 (AC/DC)
Vario 18 (AC/DC)
Vario 8 c/i (AC/DC)
Vario 18 c/i (AC/DC)
or
s
CC
1
Service manual
Wiring diagrams
Spare parts list
2
A1
A2
Anschlusspläne
Ersatzteilliste
A1
A2
Schéma de branchement
Liste des piéces de rechange
A1
A2
Occupational Safety and Health
A3
Berufliche Sicherheit und Gesundheit
A3
Sécurité et santé professionnelles
A3
Serviceanleitung
Instructins de service
12
22
EN -
DE -
FR -
Servicecenter • Servicestelle • Point S.A.V.
Subject to change • Technische Änderungen vorbehalten • Sous réserve de modifications techniques
Valid as of serial number • Gültig ab Serien-Nr. • Valable
à partir du numéro de série
1106353
Electronic • Elektronik • Electronique
Upgrade of devices to new PCB (electronic) not possible • Umbau von
Geräten auf neuen Print (Elektronik) nicht möglich • Mise à jour de
l’appareil impossible avec nouvelle carte électronique
Sm_177.2610_Booklet_endefr 30.05.2006 14:11 Uhr Seite 1
2
EN
Important notes
l
In the application area of medical suction devices, the vacuum is normally quoted as the
difference (in absolute figures) between the absolute pressure and the atmospheric pressure or as negative values in kilopascals (kPa). The indication, e.g. of -10 kPa, in this
document therefore always refers to a pressure level in kPa below the ambient atmospheric pressure.
Rechargeable battery: charge the battery before use.
Use in accordance with the instructions
ll
The device is highly suitable for the aspiration of surgical fluids, secretions, tissue (including bone) and infectious particles. In the emergency room, the doctor’s practice, the
ward or in the home care area.
Guarantee
lll
2 years guarantee on the device from delivery date – 6 months on rechargeable battery
and Quatroflex™ suction unit. The manufacturer is not liable for any damage or consequential damage caused by incorrect operation, inappropriate usage as well as use by
unauthorized persons.
Service work
lV
• Service work is to be performed only by Medela authorized personnel
• Medela recommendation: perform a routine check once every year
VIll
An extensive range of accessories makes the Vario the ideal device for a broad range of
medical applications. Contact us – we will be pleased to advise you.
General suction purposes
Thoracic drainage
Wound drainage
Vario 8
Vario 8
AC/DC
Vario 8 c/i*
AC/DC
Vario 18 Vario 18
AC/DC
Vario18 c/i*
AC/DC
ENT indications
Gastric suction
*c = constant suction / i = intermittent suction
IX
Sm_177.2610_Booklet_endefr 30.05.2006 14:11 Uhr Seite 2
EN 3
Cleaning
V
• Comply with in-house directives on hygiene
• Clean the device with a damp cloth and with non-aggressive cleaning material
• Suction jars, lids, suction bags and other accessories are to be handled in accordance
with the instruction-sheets provided
• The Medela cleaning recommendations must also be respected
Before cleaning the device, remove the mains plug from the socket!
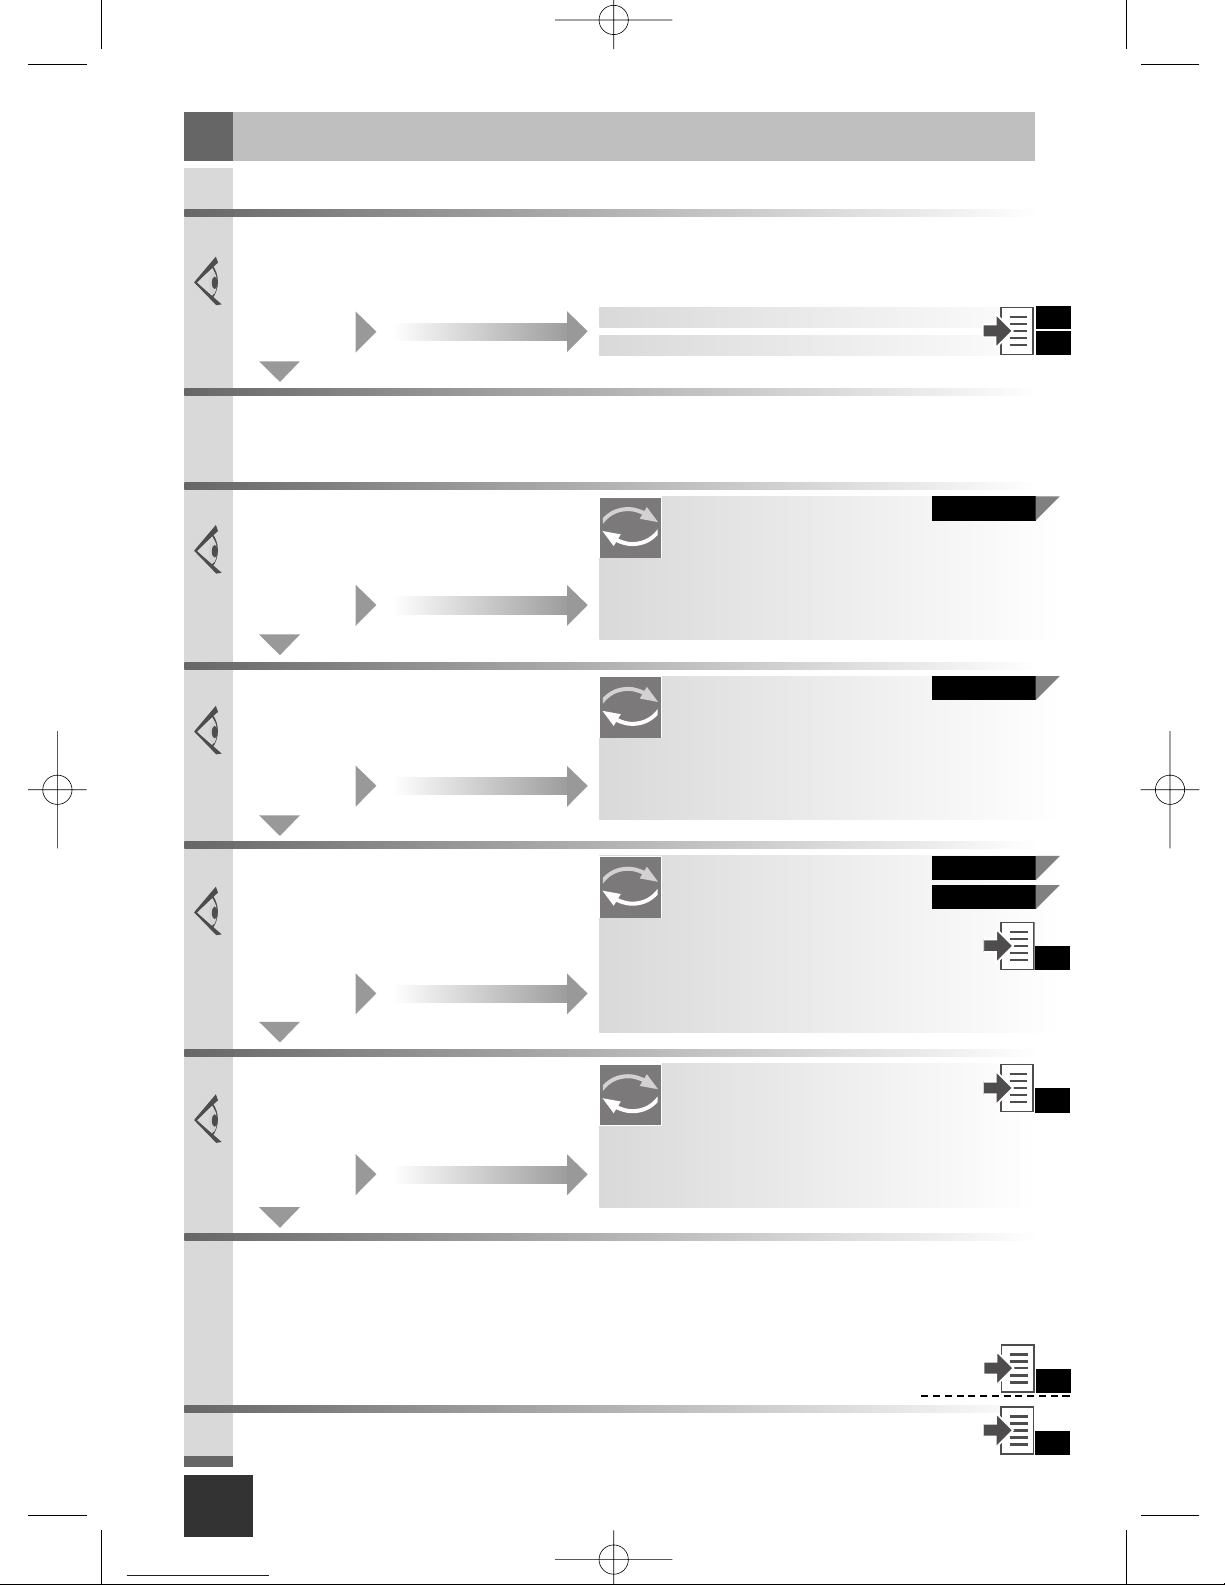
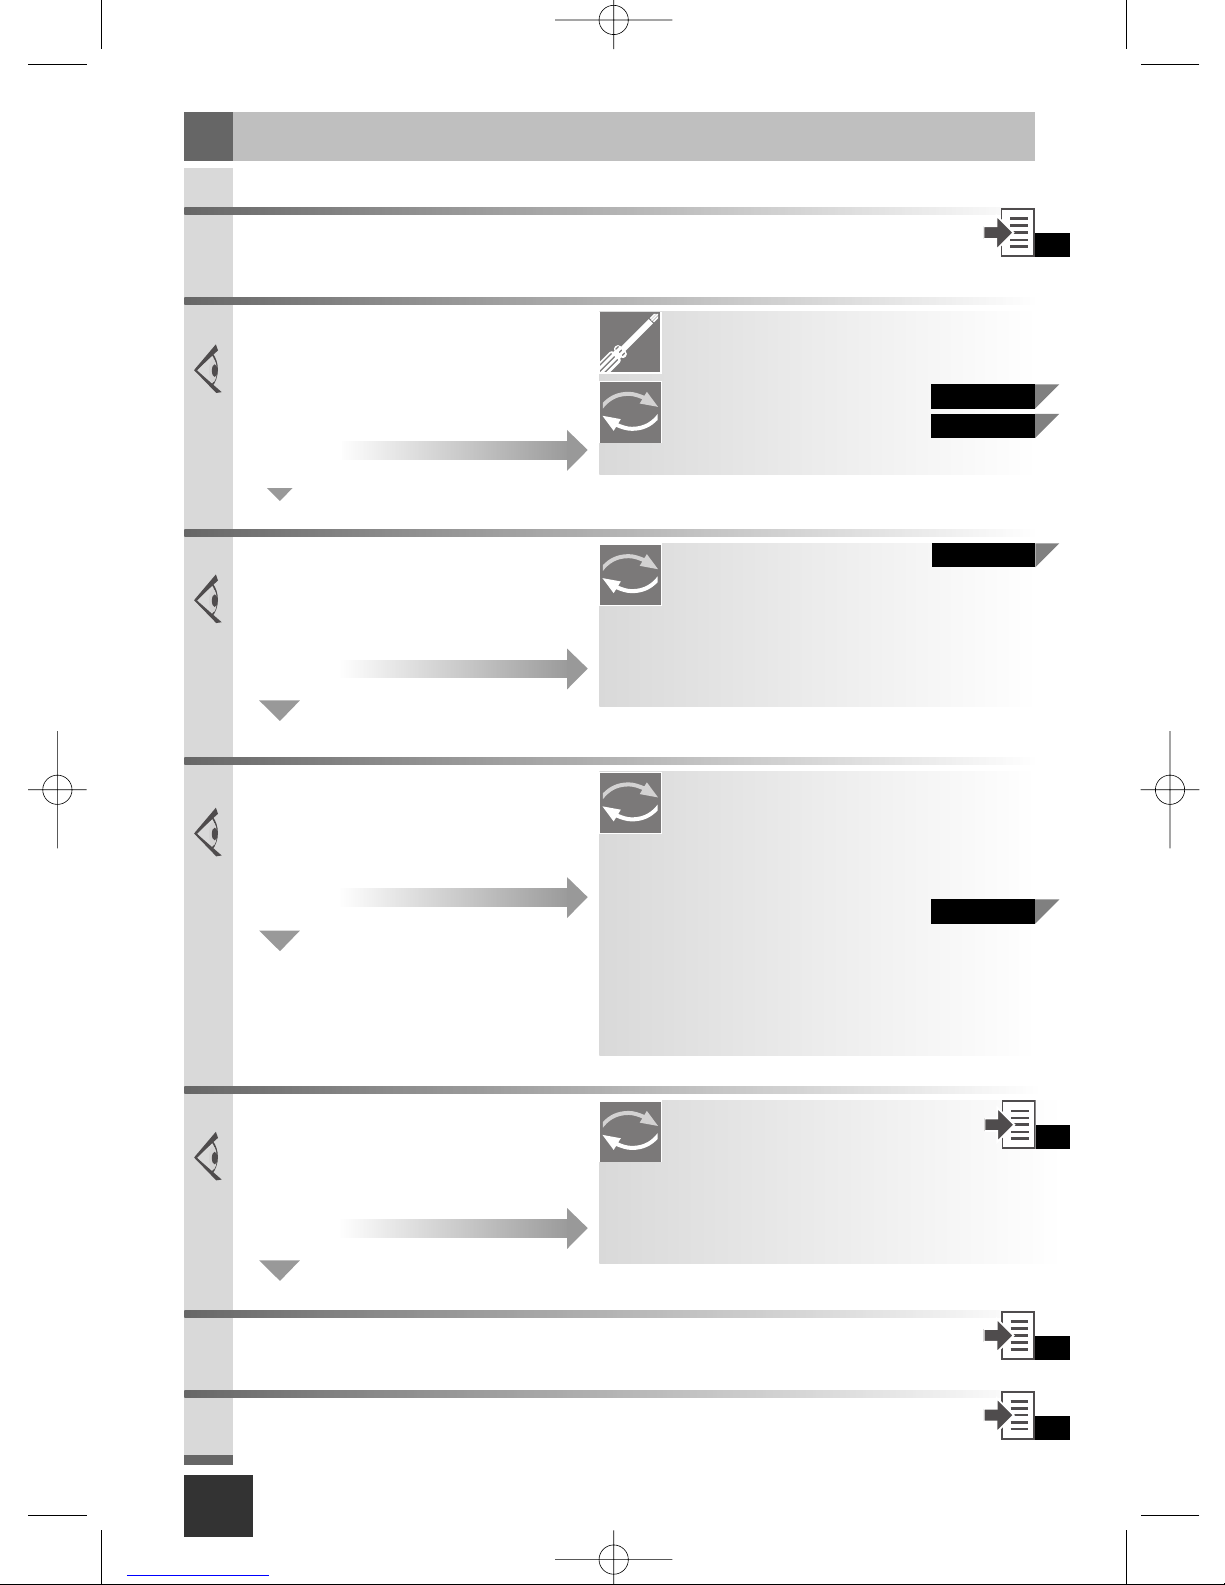
a. Plug device in and switch on
Functional test
Vl
c. Close vacuum port
d. Compare vacuum
0 m
1013 hPa
955 hPa
899 hPa
795 hPa
MINIMUM VALUES
+ 500 m
+1000 m
+ 2000 m
low
vacuum
medium
vacuum
high
vacuum
– 7,0 kPa
– 7,9 kPa
– 8,5 kPa
– 9,0 kPa
– 43 kPa
– 48 kPa
– 51 kPa
– 55 kPa
– 59 kPa
– 66 kPa
– 70 kPa
– 75 kPa
b. Set maximum vacuum
Press knob to turn
With c/i versions,
select continuous vacuum
ok?
ok?
Vacuum values exceed limits,
replace filter
Test filter
Vll
low
vacuum
medium
vacuum
high
vacuum
-10 kPa
Filter open!
-10 kPa-3 kPa
1. Set maximum vacuum
2. Switch on the Vario
3. Compare vacuum
Minimum vacuum
values not reached
X
LIMITS
077.0571
077.0225
Overflow protection / bacteria filter
Sm_177.2610_Booklet_endefr 30.05.2006 14:11 Uhr Seite 3
4
EN
Replace power cord
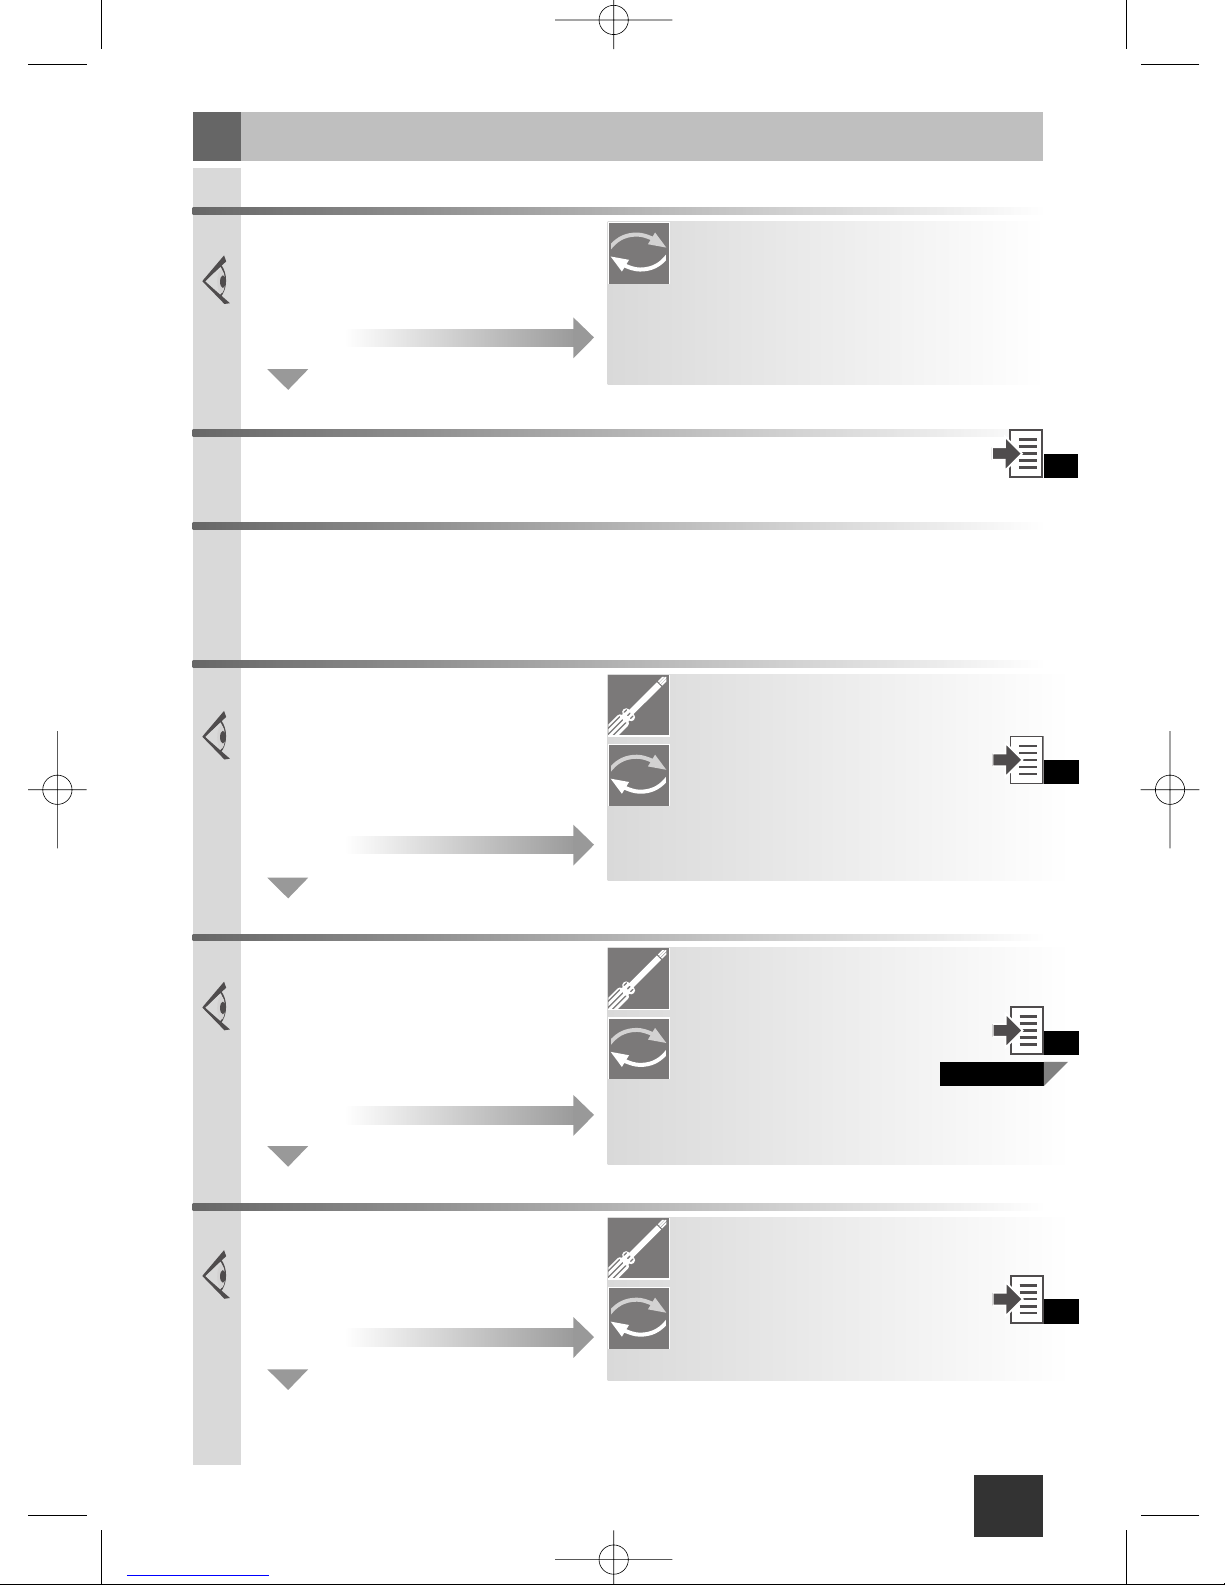
Routine check
Vlll
6. Check power cord
2. Open device
8. Functional test
7. Close device
(time required approx. 30 minutes)
- Damage, kinks
- Check for tight seal
a. Disconnect the pump from the mains supply
b. Release four screws
c. Remove rear panel
a. Clean interior of device
b. Attach rear panel
c. Tighten four screws
d. Plug in the mains cord
e. Only for AC/DC versions:
Testing of rechargeable battery
Motor not running
Vacuum insufficient
ok?
X
Xl
A1
lX,2
Vl
not OK
Replace sound absorber
4. Check sound absorber
- Dirt, discolouration
- Brittle material
ok?
not OK
Replace sound absorber
Replace QuatroFlex™
5. Check tubings
- Check seal of all connections
- Dirt, discolouration
- Brittle material
ok?
not OK
077.1702
077.1702
Replace QuatroFlex™
3. Check QuatroFlex
TM
- Film hinge torn
- open valve cover
ok?
not OK
077.1700
1. Functional test
a. Is motor running?
b. Is vacuum sufficient?
ok?
not OK
077.1700
A1
Sm_177.2610_Booklet_endefr 30.05.2006 14:11 Uhr Seite 4
5
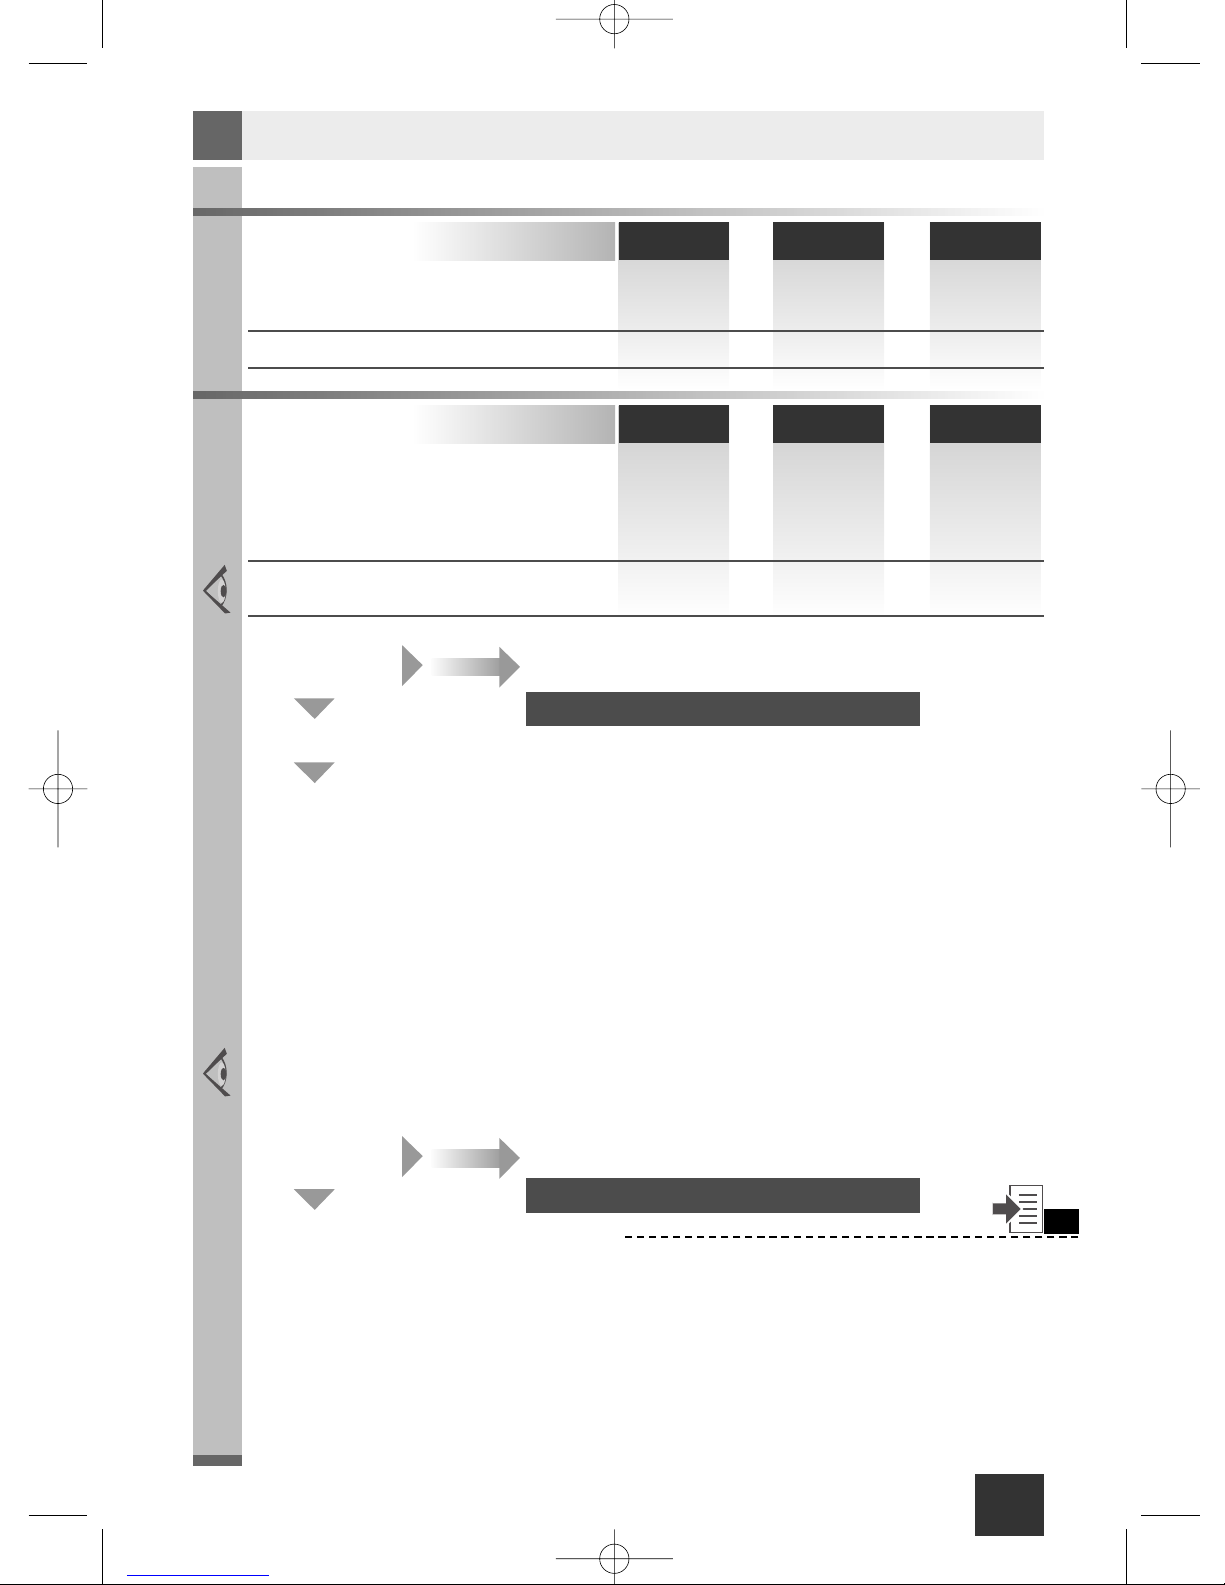
Battery management
lX
(only for AC/DC versions)
low
vacuum
medium
vacuum
high
vacuum
Duration of pumping
low
vacuum
medium
vacuum
high
vacuum
~120 min.
~ 5 hrs.
~ 30 min.
~ 5 hrs.
~30 min.
~ 5 hrs.
Charging time
(charged up to 100%)
A Completely discharge the rechargeable battery
• Disconnect the mains cord
• Switch on the Vario
• Let the Vario run to a standstill
Conditioning the rechargeable battery
B Charge battery
• Plug in the mains cord
• the rechargeable battery is being charged
• Wait until the charging indicator goes out
C Test rechargeable battery
Storage of rechargeable batteries
> 30 min.
1. Disconnect the mains cord
2. Switch on the Vario
3. Plug the suction port
4. Set required vacuum
5. Measure the running time
6. Compare the running time
> 30 min.
ok?
OK if above values are reached
OK If above values are reached
not OK
> 120 min.
1. Performance of
rechargeable battery
ok?
not OK, change rechargeable battery
-55 kPa
-413 mmHg
-55 kPa
-413 mmHg
-90 mbar
- 9 kPa
-68 mmHg
In order to keep the self-discharge at a minimum, store the Vario and the replacement
rechargeable batteries at temperatures below 25°C (77°F).
Repeat Steps A and B every 60-90 days.
A1
Do not forget to charge battery before use
Do not forget to charge battery before use
2. Testing of rechargeable battery
Sm_177.2610_Booklet_endefr 30.05.2006 14:11 Uhr Seite 5
EN
6
EN
not OK
not OK
not OK
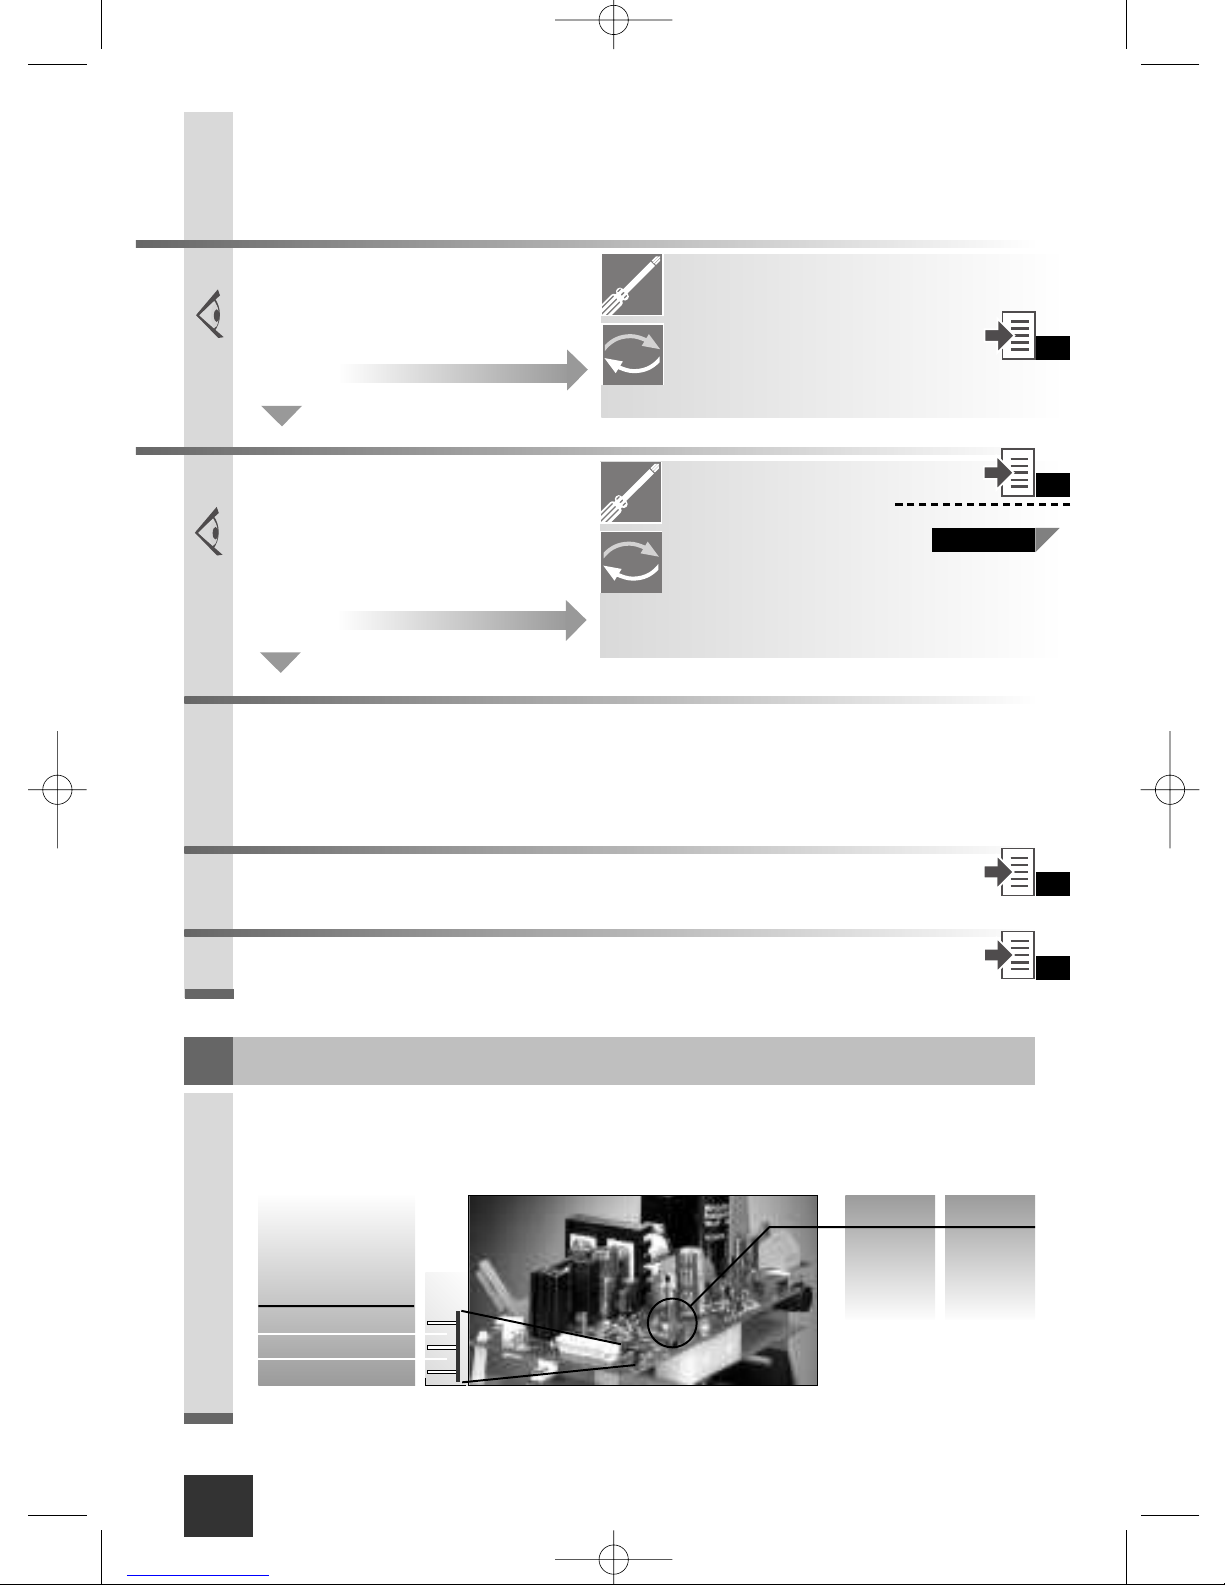
Insufficient vacuum
X
1. Open device
6. Close device
7. Functional test
not OK
2. Check tubings
Attach tubings
Replace sound absorbers
Replacing QuatroFlex™
ok?
3. Check vacuum port
- Brittle material
- Vacuum port broken
Replace vacuum port
ok?
4. Check QuatroFlex
TM
- Film hinge torn
- Open valve cover
ok?
5. Check vacuum gauge/regulator
- Mechanical damage
- Oxidation/rust
Replace vacuum gauge
Replace regulator
ok?
- Tubing connections
- Dirt, discolouration
- Brittle material
A1
Vlll,7
Vl
077.1700
077.1711
077.1702
077.1700
a. Disconnect 3 tubings
b. Turn QuatroFlex TM 45˚
counter-clockwise and remove
c. General inspection and cleaning
d. New QuatroFlex
TM
- Position on drive shaft
- Press down against holder
- Turn 45° clockwise as far as
limit/re-attach all the tubings
Vlll,2
Sm_177.2610_Booklet_endefr 30.05.2006 14:11 Uhr Seite 6
EN 7
4. Check mains cord
Motor not running
Xl
2. Open device
Tighten electrical connections
Replace mains cord
not OK
not OK
not OK
not OK
ok?
1. Check fuse
- Fuse fitted
- Fuse defective
Fit correct fuse as per technical
specifications. See technical data
(envelope)
ok?
5. Check motor/drive belt
ok?
6. On/Off switch
- Correctly connected
- Defective
Mount switch
ok?
Replace switch
- Mains voltage correct
- Correctly connected
- Broken cable
- Electrical connections
Continued on next page
- Motor correctly connected
- Motor defective
- Drive belt positioned correctly
- Drive belt torn
Plug in motor
Position drive belt
Replace motor
Replace drive belt
A1
Vlll,2
A1
A1
077.1703
3. Dismantle drive unit
a. Dismantle QuatroFlex™
b. Dismantle sound absorber
c. AC/DC version: disconnect battery
d. Dismantle drive unit with 4 screws
Sm_177.2610_Booklet_endefr 30.05.2006 14:11 Uhr Seite 7
8
EN
Motor not running (continued)
10. Close device
11. Functional test
not OK
8. Check electronic module
- Correctly connected
- Defective
- Check the jumper setting
Connect cable properly
Set jumper correctly
ok?
Replace defective
electronic module
AC/DC version
only
• Check the jumper setting. Also see the jumper settings (foldout)
• Check correct position of the On/Off switch
Jumper settings
Xll
not OK
7. Check capacitor
- Correctly connected?
Connect cord
ok?
Replace capacitor
A1
Xll
Vlll,7
Vl
9. Mount drive unit
a. secure drive unit with 4 screws
b. AC/DC version: mount battery
b. mount QuatroFlex™
b. Mount sound absorber
AC version
only
077.1765
8 sec.
16 sec.
32 sec.
4 sec.
8 sec.
16 sec.
Vario 8 Vario 18
with without
*
*
On Off
* Factory setting
c/i-versions
Sm_177.2610_Booklet_endefr 30.05.2006 14:12 Uhr Seite 8

EN 9
The following service work must be performed immediately to prevent
a possible infection. Comply with Medela hygiene instructions
Overflow
Xlll
1. Open device
3. General cleaning
2. Remove and replace
following components:
4. Close device
5. Functional test
- QuatroFlex
TM
- Regulator
- Vacuum gauge
- Sound absorber
- Vacuum port
Disposal
XlV
Before disposal, the device is to be rendered unusable and it must be disposed of in
accordance with the local regulations. Must not be disposed of together with household refuse. Hand the discarded device to a local collection and recycling centre for
old electrical and electronic appliances. Incorrect disposal can have harmful effects on
the environment and public health.
Clean device on inside and
outside
Vl
Vlll,7
lV
Vlll,2
A3
Sm_177.2610_Booklet_endefr 30.05.2006 14:12 Uhr Seite 9
10
EN
Safety-related checks
XV
For the safety-related checks, it is assumed that the device is maintained and repaired
throughout its service life strictly and exclusively in compliance with these service instructions by authorized service centres
For the Vario as a device in protection class II (EN IEC 60601-1, A1, A2:1995), the safety-related checks are confined to visual inspection of the housing and mains power cord
for damage. This check must be performed prior to each use.
Devices of protection class II do not have a protective earth conductor; there is therefore
no need to check the earth leakage current!
The Vario enclosure is made entirely of insulating material. Tests of the
enclosure leakage
current
using common measuring instruments will therefore not reveal measurable values.
The applied parts of the Vario (type B or CF) are connected to the Vario via non-conductive
vacuum hoses, collection jars and intermediate tubings.
Even when suctioning a conductive fluid until the overflow protection device activates
(9 g/l NaCl; EN ISO 10079-1;1999), measurements of the
patient leakage current using
common measuring instruments will not reveal measurable values.
The Vario pumps do not have patient circuits, signal input and output parts and functional
earth connections.
Sm_177.2610_Booklet_endefr 30.05.2006 14:12 Uhr Seite 10
EN 11
Notes
Sm_177.2610_Booklet_endefr 30.05.2006 14:12 Uhr Seite 11
 Loading...