

Page 1
Vario
SUCTION PUMP
EN
Instructions for use
Gebrauchsanweisung
DE
FR
Mode d’emploi
IT
Istruzioni per l’uso
NL
Gebruiksaanwijzing
Bruksanvisning
SV
Käyttöohjeet
FI
Bruksanvisning
NO
Instrucciones de uso
ES
Instruções de utilização
PT
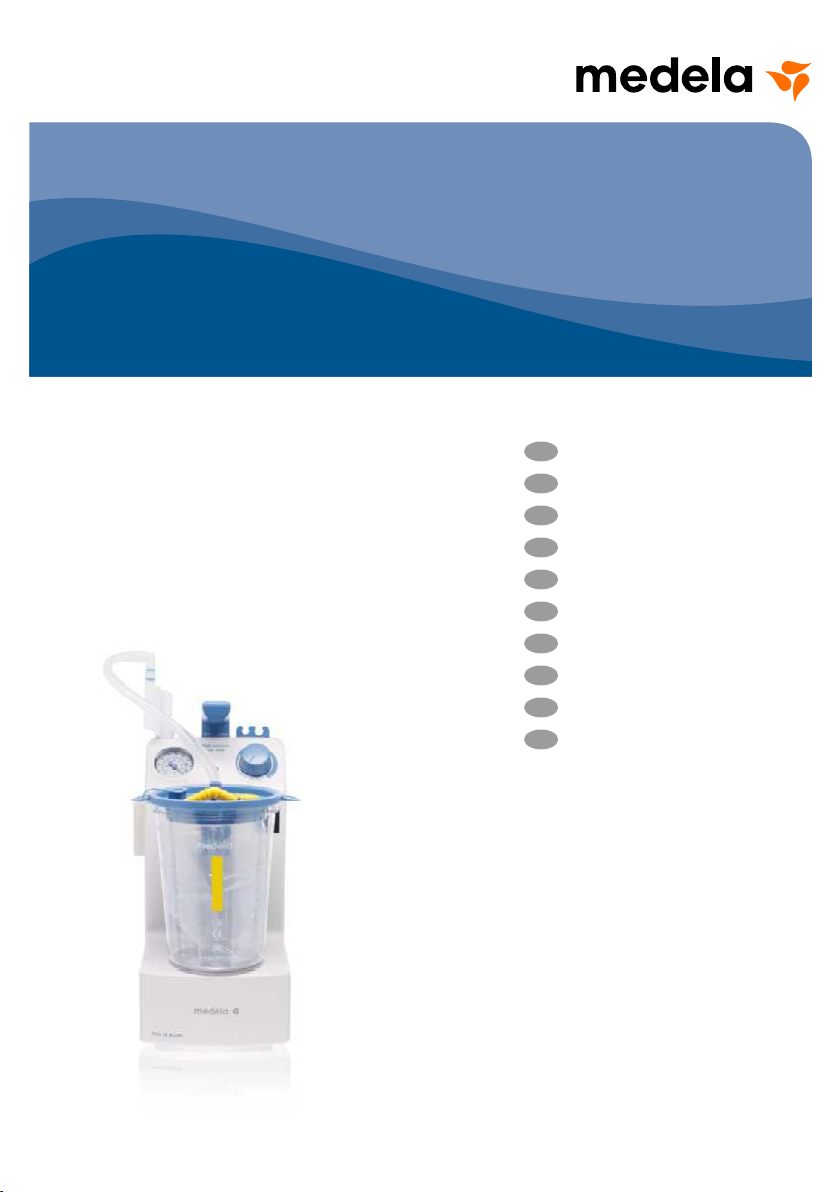
Vario 18 AC / DC
Page 2

Table of contents
Congratulations ........................................................................................................................... 4
1 Warnings and safety instructions ...................................................................................... 5
Safety instructions .................................................................................................................. 7
2 Power supply and battery operation .................................................................................. 8
Battery low (only AC / DC versions) ......................................................................................... 8
Battery empty (only AC / DC versions) .................................................................................... 8
3 Description ............................................................................................................................ 8
Introduction ............................................................................................................................8
Intended use ........................................................................................................................... 8
Indications .............................................................................................................................. 9
Contraindications ....................................................................................................................9
Intended user.......................................................................................................................... 9
Intended Patient Population ................................................................................................... 9
Important note ........................................................................................................................ 9
4 Overview ............................................................................................................................. 10
Definition of vacuum ............................................................................................................. 10
Versions of the pump ........................................................................................................... 10
Front of the pump ................................................................................................................. 10
Bottom of device ...................................................................................................................11
Operating elements and battery status ................................................................................. 11
Acoustic indicator ..................................................................................................................11
On/off switch not c/i versions ................................................................................................11
On/off switch c/i versions ......................................................................................................11
5 Installation ........................................................................................................................... 12
Check initial delivery ..............................................................................................................12
6 Preparation for use ............................................................................................................ 13
Checks before use ................................................................................................................13
Assembly of the basic configuration ......................................................................................13
Assembly of the REUSABLE collection system .....................................................................14
Assembly of the DISPOSABLE collection system .................................................................15
7 Operating instructions ....................................................................................................... 16
Connect Vario to mains power ............................................................................................. 16
Check maximal vacuum for functional check ....................................................................... 16
Changing vacuum level..........................................................................................................17
Placing out of operation after use..........................................................................................17
8 Changing reusable jar ........................................................................................................ 18
9 Changing disposable liner ................................................................................................. 19
2 | Table of contents
Page 3

10 Troubleshooting.................................................................................................................. 20
Motor not running ................................................................................................................. 20
Insufficient vacuum............................................................................................................... 20
No LED lit (AC / DC version only)........................................................................................... 20
LED lit up (AC / DC version only) ........................................................................................... 20
LED blinks slowly (AC / DC version only) ............................................................................... 20
LED blinks rapidly (AC / DC version only) .............................................................................. 20
11 Replacing defective fuse ................................................................................................... 21
12 Setting interval times ......................................................................................................... 22
13 Replacing the QuatroFlex .................................................................................................. 23
14 Replacing the rechargeable battery................................................................................. 24
15 Battery data and test ......................................................................................................... 25
Duration of pumping ..............................................................................................................25
Charging time (charged up to 100 %) ....................................................................................25
Testing the rechargeable battery ...........................................................................................25
16 Battery calibration ............................................................................................................. 26
Calibrating NiMH rechargeable battery .................................................................................26
Storage of the rechargeable battery ......................................................................................26
17 Filter test ............................................................................................................................. 27
18 Cleaning guidelines ............................................................................................................ 28
General notes ........................................................................................................................28
Medela recommended surface cleaning agents for pump housing ......................................28
Water .....................................................................................................................................28
Cleaning / disinfection machines ...........................................................................................28
Disposable products .............................................................................................................28
19 Accessories overview ........................................................................................................ 30
20 Accessories legend............................................................................................................ 31
21 Technical specifications .................................................................................................... 33
22 Signs and symbols ............................................................................................................. 34
23 Warranty and servicing ..................................................................................................... 36
Warranty ............................................................................................................................... 36
Servicing / routine check ....................................................................................................... 36
24 Disposal ............................................................................................................................. 36
25 Technical documentation .................................................................................................. 37
Technical documentation / EMC ...................................................................................... 366
EN
Table of contents | 3
Page 4

Congratulations
By choosing the Vario, you have acquired a high-quality suction pump which is adaptable to your
needs. The QuatroFlex suction aggregate is the innovative continuation of the proven Medela
piston / cylinder system. As all Medela suction pumps, this pump provides reliable and simple
suction. Its simple handling and cleaning as well as the safety features are additional advantages
you receive. A comprehensive range of accessories makes the Vario ideally suited to a wide
range of medical applications and can be used for continuous operation. Contact us – we will be
pleased to advise you.
4 | Congratulations
Page 5

1 Warnings and safety instructions
WARNINGS
Indicates a potentially hazardous situation which, if not avoided, could result in death or
serious injury.
CAUTIONS
Indicates a potentially hazardous situation which, if not avoided, could result in minor or
moderate injury.
Safety related tip
Indicating useful information about the safe use of the device.
The Vario is approved exclusively for the use as described in these instructions for use. Medela
can only guarantee the safe functioning of the system when the Vario is used in combination with
the original Medela accessories (collection system, tubings, filters etc. – see chapters 19 / 20).
Please read and observe these warning and safety instructions before operation. These
instructions for use must be kept with the device for later reference.
Please note that these instructions for use are a general guide for the use of the product.
Medical matters must be addressed by a physician.
Medela considers herself only responsible for the effect on BASIC SAFETY, reliability and
performance of the Vario if it is used in accordance with the instructions for use.
EN
CAUTION: U.S. Federal law restricts this device to sale by or on the order of a physician.
Subject to change.
Warnings and safety instructions | 5
Page 6

WARNINGS
– For use only by medically trained persons who have been adequately trained in suction
procedures and in the use of aspirators.
– For patients for whom a breakdown of the device can lead to a critical situation (e.g.
patients with acute dyspnoea or severe catarrhal congestion), a replacement device
must always be available.
– Gastric suction: When the device is used for gastric suction, the patient’s condition and
correct functioning of the pump (on the basis of acoustic and visual signs) must be
checked at least once every four hours.
–
The device must not be used for suctioning explosive, easily flammable or corrosive liquids
– The connecting tubing supplied with the device must never come into direct contact
with the suction area. A sterile suction catheter must always be used (risk of infection).
– Before cleaning the device, pull the plug out of the fixed mains socket.
– No modification of this equipment is allowed.
– Do not connect this device to a passive drainage tube.
– Consult the indications for use and consider risk factors and contraindications before
using the Vario. Failure to read and follow all instructions in this manual prior to use
may result in serious or fatal injury of the patient.
– The Vario pump may shortly shut down with electrostatic discharge (ESD) events at the
DC port of 15kV.
CAUTIONS
– Incorrect use can cause pain and injury to the patient.
– Do not use sterile accessories when the sterile packaging is damaged.
– Wireless communications equipment such as wireless home network devices, mobile
phones, cordless telephones and their base stations, walki-talkie can affect the Vario
and should be kept at least a distance 1ft (30 cm) away from the equipment.
– Portable and mobile RF communications equipment can affect medical devices.
– The patient should be monitored regularly according to the physicians instructions and
facility guidelines. Objective indications or signs of a possible infection or complication
must be met immediately (e.g. fever, pain, redness, increased warmth, swelling or
purulent discharge). Non-observance can lead to con si de rable danger of the patient.
Monitor the Vario frequently for opera ting status.
Safety related tip
– The Vario suction pump is Magnetic Resonance (MR) unsafe. Do not take the pump
into the MR environment.
–
For safety tests, it is assumed that the device is serviced and repaired throughout its
service life in accordance with the service manual. Because the Vario is a device of safe-
ty class lI (EN IEC 60601-1, A1, A2:1995), the safety tests are confined to visual inspec-
tion of the housing and power cord. This test must be carried out before each use.
– Testing the patient leakage current: Please see service manual for details.
– The protection of the Vario against the effects of the discharge of a cardiac defibrillator
is dependent upon the use of appropriate cables.
6 | Warnings and safety instructions
Page 7

– Separation from the mains is only assured through the disconnection of the mains plug and
the fixed mains socket.
– Before you plug in the device, please check that your local power supply is the same as the
voltage given on the specification plate.
Safety instructions
– The Medela Vario is a medical device that requires special safety measures in regard to EMC.
It must be installed and put into operation in accordance with the attached EMC information.
– In the case of overflow, inform the internal technical service immediately and perform the tasks
in the service manual.
– In each of the following cases, the device must not be used and it must be repaired by
Customer Services:
– if the power cord or the plug are damaged
– if the device is not functioning perfectly
– if the device is damaged
– if the device shows clear safety defects.
– Keep the power supply cord away from hot surfaces.
– The mains plug and the on / off switch must not come into contact with moisture.
– Never pull the mains plug out of the fixed mains socket by pulling on the power supply cord!
– Never leave the device unattended when it is switched on.
– The pump must stand upright during use.
– Never place the power supply cord around your neck.
– Never use the device at high room temperatures, while bathing or showering, if you are very
tired or in an environment where there is a risk of explosion.
– Never place the device in water or other liquids.
– When using single use, sterile products, please note that they are not intended to be
reprocessed. Reprocessing could cause loss of mechanical, chemical and / or biological
characteristics. Reuse could cause cross contamination.
– Contact your local Medela customer service representative for assistance with product
operations.
– Do not place a 2 l suction jar in the lateral adaptor.
– The overflow protection / bacteria filter protects the pump against overflow. Caution: Suctioning
is interrupted when the filter is wet / moist or clogged. Test the filter before each use and
during use periodically (see chapter 17).
EN
These instructions for use must be kept for later reference.
Warnings and safety instructions | 7
Page 8

2 Power supply and battery operation
The Vario is a mains-powered suction pump. Before you plug in the device, please check that
your local power supply is the same as the voltage given on the specification plate. If the
Vario AC / DC versions are running continuously, a maximum of 30 minutes of battery time is
expected before it is necessare to recharge. If the Vario AC / DC version is not in use, the
battery must be calibrated every 60–90 days.
Battery low (o nly AC / DC ver sions)
During battery operation a slow blinking of the LED indicator and an acoustic signal (beep - beep
- beep) indicates, that the rechargeable battery is soon discharged. The function of the Vario is
maintained for 10 minutes (20 minutes Vario low vacuum versions), but the battery must be
recharged as soon as possible.
Battery empty (only AC / DC versions)
As soon as the rechargeable battery is empty, the pump comes to a stop. The proper function of
the pump is no longer maintained. The rechargeable battery must be recharged.
3 Description
Introduction
The Vario is a high-quality suction pump. It is powered by the well-proven QuatroFlex system
and guarantees maximum suction performance for many suctioning needs. It ideally combines easy handling and cleaning with safety features to ensure optimal operation. You can
choose from a comprehensive range of accessories from Medela to configure the pump to
many medical applications. The device should not be used adjacent to or stacked with other
equipment. If adjacent or stacked use is necessary, the device should be observed to verify
normal operation in the configuration in which it will be used.
Intended use
The Vario 8 / 18 / ci suction pumps are indicated for aspiration and removal of surgical fluids,
tissue (including bone), gases, bodily fluids (including vomit) or infectious materials from a
patient’s airway or respiratory support system, either during surgery or at the patient’s
bedside. Generally the Vario 8 / 18 / ci is intended to be used for a variety of suctioning
procedures including nasopharyngeal, tracheal, surgical, gastrointestinal suctioning either in
«constant» or «intermittent» mode. Please make sure you have a correct Vario version for the
required application.
8 | Power supply and battery operation | Description
Page 9

Contraindications
None known.
Intended user
The Vario should only be operated by properly trained staff. These persons must not be hard
of hearing or deaf and must have adequate visual faculty. The training has to be refreshed at
least once a year.
Intended Patient Population
The Vario is intended to be used on patients only exhibiting conditions as described in the
indications for use.
Important note
Compliance with proper surgical procedures and techniques is the responsibility of the
physician. Each physician must evaluate the appropriateness of the treatment based on his
own knowledge and experience.
EN
Description | 9
Page 10
4 Overview
Definition of vacuum
By the application of medical aspiration devices, vacuum is normally given as the difference
(in absolute figures) between absolute pressure and atmospheric pressure or as negative
values in Kilopascal (kPa). In this document, the indication of -10 kPa for example always
refers to a pressure range in kPa below atmospheric ambient pressure (according to
EN ISO 10079:1999).
Versions of the pump
Vario 8 AC Vario 8 AC / DC Vario 8 c/i AC / DC
Vario 18 AC Vario 18 AC / DC Vario 18 c/i AC / DC
Front of the pump
10 | Overview
Suction port
Jar adaptors
Handle
Tubing holder
12 V DC
connector socket
(AC / DC ve rsions on ly)
Exhaust
Page 11
EN
Bottom of device
Operating elements and
battery status
Specification plate
Fuse
Vacuum gauge
Vacuum regulator
Rechargeable battery indicator
(only AC / DC ver sions)
not lit Battery is fully charged
lit up – Battery is being charged
– Pump is connected to the
mains
blinks slowly Battery is soon empty
blinks rapidly Battery is defective
Acoustic indicator
On/off switch not c/i
versions
On/off switch c/i versions
During battery operation an acoustic signal (beep - beep beep) indicates that the rechargeable battery is soon
discharged.
On: pump is running
Off: pump is switched off
Constant:
pump is running in constant mode
Off: pump is switched off
Intermittent:
pump is running in intermittent mode
Overview | 11
Page 12
5 Installation
Check initial delivery
Check the delivery package of the Vario for completeness
and general condition.
Vario portable version
Vario 8 AC 026.XXXX
Vario 8 AC / DC 026.XX XX
Vario 8 c/i AC / DC 026.XXXX
Vario 18 AC 026.XXXX
Vario 18 AC / DC 026.XX XX
Vario 18 c/i AC / DC 026.XXXX
Silicone Tubing ø 7 x 12 mm, 25 cm with 2 coupling pieces
077. 0 931
5 x Disposable overflow protection / bacteria filter with Medela
connections
077. 0 571
12 | Installation
Instructions for use
17 7. 26 04
Page 13

6 Preparation for use
WARNINGS
For use only by medically trained persons who have been adequately trained in suction
procedures and in the use of aspirators.
CAUTIONS
– The Vario must remain in an upright position during use.
– Sterile accessories must be checked on the integrity of the packaging before use.
– Non sterile and reusable accessories must be cleaned, disinfected and / or sterilized
according to the Medela cleaning guide (product code 200.2391).
Checks before use
6.1
– Check the Vario system before use for damage of the power cord or plug,
obvious device damage or safety defects and proper functioning of the device.
– Check for completeness and general condition of the Vario delivery package.
– Only for AC / DC versions: make sure that the rechargeable battery is calibrated
according to chapter 16.
– Check all accessories prior to use:
– suction jars, lids and liners for cracks, brittle and flawed spots. Replace if
necessary.
– Tubing for cracks, brittle areas and that connectors are firmly attached.
Replace if necessary.
– As an additional safety test, evacuate the system (including jars) to maximum
vacuum several times before actual use.
EN
Assembly of the
6.2
basic configuration
1. 1.1 Attach the overflow
Attach all necessary accessories according to your needs.
2.
See the system overview for more details.
protection bacteria filter to
the Vario with the arrow
pointing in the flow
direction.
Preparation for use | 13
Page 14

Assembly of
6.3
the REUSABLE
collection system
positions for jars:
1. If you use a DISPOSABLE collection system proceed
with step 6.4.
2. 2.1 Attach mechanical
2.1
2.2
overflow protection to lid.
2.2 Pull gently downwards
to make sure it is
open / de activated.
3. 3.1 Attach the lid to the jar.
3.2 3.2
4. 4.1 Attach the jar to the Vario.
4.2
4.3
5. 5.1 Connect patient tubing to
4.1
3.1
3.2 Lock with the two lid
clamps.
4.2 Connect tubing to the
filter.
4.3 Connect tubing to the lid
of the jar (marked with
«vacuum»).
the lid of the jar (marked
with «patient»).
14 | Preparation for use
Page 15

EN
Assembly of
6.4
the DISPOSABLE
collection system
positions for jars:
1. If you use a REUSABLE collection system proceed with
step 6.3.
2. 2.1 Attach the Vario jar
3. 3.1 Choose the 1.5 l size
4. 4.1 Attach the jar to the Vario.
4.2
4.3
adapter to the Vario.
(yellow code) for the Vario.
3.2 Prepare and insert corresponding liner size (yellow)
according to instructions
delivered with liners. The
disposable liner has an
integrated overflow
protection filter. No action
is necessary to activate it.
4.2 Connect tubing to the
filter.
4.3 Connect tubing to the jar.
The tubing connector is
on top of the jar.
4.1
5. 5.1 Connect patient tubing to
the lid of the liner using
either the coloured angle
piece or the patient port
directly (depending on
tubing size).
Preparation for use | 15
Page 16

7 Operating instructions
CAUTIONS
The Vario is to be set up in such a way, that a separation from the mains supply can be
easily managed.
Connect Vario to
7.1
mains power
Check maximal
7.2
vacuum for
functional check
Check the pump before use following the instruction in
1.
cha pter 6 .1.
2. All versions: if the pump
is connected to a fixed
mains socket:
or
AC / DC versions: if the
pump is operated with a
12 V DC power s ource:
or
AC / DC versions: if the
pump is operated with the
rechargeable battery:
1. 1.1 Switch on the Vario. The
2. 2.1 Press and turn the
or
Plug in the mains plug of the
power cord to a fixed mains
socket.
Connect the optional 12 V DC
connection cable to the
socket on the side of the
pump and connect it to the
12 V DC power so urce.
No connection to a power
source is needed. Make
sure that the battery was
charged for five hours.
pump will start running.
Caution: c / i vers ions
must be switched on in
«constant» mode.
vacuum regulator to the
right to set maximum
vacuum.
16 | Operating instructions
3. 3.1 Seal the end of the patient
tubing with your thumb.
3.2 Compare the maximum
vacuum according to the
specification. See chapter
10 if the maximum
vacuum is not reached.
Page 17

Specifications:
Altitude
above
sea level:
+ 2000 m – 7.0 kPa – 43 kPa – 5 9 kPa
+ 1000 m – 7.9 kPa – 4 8 kPa – 66 kPa
+ 500 m – 8.5 kPa – 51 kPa – 70 kPa
0 m – 9.0 k Pa – 55 kPa – 75 kPa
(Tolerance +/- 10 %)
Vario 8 / Vario 8 c/i
Max. Vacuum:
low vacuum
Vario 18 c/i
Max. Vacuum:
medium vacuum
Vari o 18
Max. Vacuum:
high vacuum
EN
Changing vacuum
7.3
level
Placing out of
7.4
operation after use
1. 1.1 Clamp patient tubing
1.2 Push and turn vacuum
regulator to select the correct vacuum according to
the particular application.
1.3 Check vacuum gauge for
setting.
1. 1.1 Switch the on / off switch
2. If the pump is connected
to a fixed mains socket:
or
If the pump is connected
to a 12 V DC power source:
3. Clean and desinfect the Vario. See chapter 18.
or
of the Vario to position
«0» (c/i - ve rsions: «Of f»).
Disconnect the mains plug
from the fixed mains socket.
Disco nnect the 12 V DC
plug from the 12 V DC
power source.
Operating instructions | 17
Page 18

8 Changing reusable jar
1. 1.1 Switch the on / off switch
2. 2.1 Remove full jar from the
3. 3.1 Prepare new jar and
4. Empty jar and dispose of patient tubing in accordance with
local guidelines and inhouse guidelines.
5. Switch on the Vario. The pump will start running.
or
of the Vario to position «0»
(c/i - versi ons: «O ff»).
1.2 Remove patient and
vacuum tubings from the
lid.
Vario.
unpack it.
3.2 Secure new jar to the
Vario
3.3 Reconnect vacuum tubing
and new patient tubing
firmly.
18 | Changing reusable jar
6. Set vacuum according to the particular application.
See chapter 7.3.
Page 19

9 Changing disposable liner
WARNINGS
Disposable liners are not intended to be reprocessed. Reprocessing could cause loss
of mechanical, chemical and / or biological characteristics.
EN
1.5 l
1. 1.1 Remove patient tubing
2. 2.1 Switch the on / off switch
3. 3.1 Remove full liner from the
4. Dispose of the liner and patient tubing in accordance with
local guidelines and inhouse guidelines.
5. Prepare new liner, unpack it and insert it in the jar. Press
down lid.
or
with colored angle piece
from lid.
1.2 Plug patient port.
of the Vario to position «0»
(c/i - versi ons: «O ff»).
Reduce vacuum to
minimum by pressing
and turning vacuum
regulator to the left.
ja r.
6. 6.1 Connect new patient
7. Switch on the Vario. The pump will start running.
8. Set vacuum according to the particular application.
See chapter 7.3.
tubing firmly.
Changing disposable liner | 19
Page 20

10 Troubleshooting
Motor not running
Check if:
– the Vario is switched on.
– the mains voltage is correct and if the mains plug is inserted correctly into the fixed mains
socket.
– the internal battery is charged (only AC / DC version under battery operation)
– the fuse on the bottom of the Vario is not defective. For replacing the defective fuse see
cha p ter 11.
Insufficient vacuum
Check if:
– the vacuum regulator is set correctly.
– the tubings are not defective or broken. If necessary, replace.
– all plug-in connections are tight.
– the overflow protection is deactivated / open. If the overflow protection is activated, deactivate
as shown under 6.3a/2.2.
– the suction jar / lid have no cracks, brittle areas, discolouration. Replace if necessary.
– the disposable system has no cracks, brittle areas, discolouration. Replace if necessary.
– filter is not clogged. To test if the filter is clogged see chapter 17.
– the QuatroFlex is defective. To replace the QuatroFlex see chapter 13.
No LED lit (AC / DC vers ion on ly)
The rechargeable battery is fully charged.
LED lit up ( AC / DC versi on onl y)
– The rechargeable battery is being charged.
– The pump is connected to the mains.
LED blinks slowly ( AC / DC versi on onl y)
The rechargeable battery is soon empty.
LED blinks rapidly (AC / DC versi on onl y)
The rechargeable battery is defective. For replacing the defective battery see chapter 14.
20 | Troubleshooting
Page 21

11 Replacing defective fuse
WARNINGS
Before replacing the fuse, pull the mains plug from Vario out of the fixed mains socket.
Disconnect the Vario from the mains.1.
EN
2. 2.1 Open (turn left) the fuse
3. Replace the defective fuse(s). Make sure that the technical
specification are corresponding.
AC-versions: T 0.8 A L, 5 x 20 , 230 –240 V
T 1.25 AL , 6.3 x 2 0, 120 V
AC / DC-versi ons: T 1.0 AL , 5 x 20, 100 –240 V
4. 4.1 Close (push back and turn
Reconnect the Vario to the mains again.5.
Switch on the Vario again.6.
holder on the bottom of
the Vario.
right) the fuse holder.
Replacing defective fuse | 21
Page 22

12 Setting interval times
(c / i ver sions o nly)
WARNINGS
Before setting the interval times, switch off the Vario and pull the mains plug from Vario
out of the fixed mains socket.
1. 1.1 Unscrew the 4 screws on
2. 2.1 Determine the location of
3.
Reattach the back cover to the Vario and tighten the 4 screws.
Plug the Vario to a fixed mains socket and test the correct
4.
functioning of the Vario (see chapter 7).
the back of the Vario.
1.2 Open the Vario by
removing the back cover.
the red jumper.
2.2 Place the red jumper
according to the desired
interval:
On-time Off-time
8 sec. 4 sec.
16 sec. 8 sec.
32 sec. 16 sec.
22 | Setting interval times
Page 23

13 Replacing the QuatroFlex
WARNINGS
Before replacing the QuatroFlex, switch off the Vario and pull the mains plug from Vario
out of the fixed mains socket.
EN
1. 1.1 Unscrew the 4 screws on
2. 2.1 Remove the 3 marked
3. 3.1 Turn the QuatroFlex 45 °
Clean inside of the Vario.4.
5. 5.1 Insert new QuatroFlex.
the back of the Vario.
1.2 Open the Vario by
removing the back cover.
tubings from the
QuatroFlex.
to the left.
3.2 Pull out the QuatroFlex
and remove it from the
Vario.
5.2 Turn it 45 ° to the right.
5.3 Reattach the 3 tubings to
the QuatroFlex.
Reattach the back cover to the Vario and tighten the 4 screws.
6.
Plug the Vario to a fixed mains socket and test the correct
7.
functioning of the Vario (see chapter 7).
Replacing the QuatroFlex | 23
Page 24

14 Replacing the rechargeable battery
(AC / DC ve rsions on ly)
WARNINGS
Before replacing the rechargeable battery, switch off the Vario and pull the mains plug
from Vario out of the fixed mains socket.
1. 1.1 Unscrew the 4 screws on
2. 2.1 Detach the battery cable
3. 3.1 Remove the old
3.1
3.2
4. 4.1 Reattach the battery cable.
the back of the Vario.
1.2 Open the Vario by
removing the back cover.
by pulling the plug.
rechargeable battery.
3.2 Insert the new
rechargeable battery.
5.
6.
24 | Replacing the rechargeable battery
Reattach the back cover to the Vario and tighten the 4 screws.
Plug the Vario to a fixed mains socket and calibrate the
rechargeable battery (see chapter 16).
Page 25

15 Battery data and test
(AC / DC ve rsions on ly)
CAUTIONS
Only charge the rechargeable battery when the acoustic signal sounds and the charging
indicator blinks slowly. The rechargeable battery is charged during mains operation.
Duration of pumping
If the battery is fully charged, the operating time is about:
– low vacuum versions: approx. 120 minutes
– high and medium vacuum versions: approx. 30 minutes.
Charging time (charged up to 100 %)
– low vacuum versions: approx. 5 hours
– high and medium vacuum versions: approx. 5 hours.
EN
Testing the rechargeable
battery
Make sure that the rechargeable battery is fully charged.1.
Pull out the mains plug from the fixed mains socket.2.
3. 3.1 Press vacuum regulator
4. 4.1 Switch on the Vario. The
5. Measure the time until the pump comes to a stop. The
battery is ok, when the following values are reached:
– low vacuum versions: > 120 min.
– high and medium vacuum versions: > 30 min.
If the values are not reached, repeat test or calibrate
the battery (see next page).
or
and turn it to the right to
select maximum vacuum.
pump will start running.
Caution: c / i vers ions
must be switched on in
«constant» mode.
Battery data and test | 25
Page 26

16 Battery calibration
(AC / DC ve rsions on ly)
CAUTIONS
Calibrate rechargeable batteries before the first use, or after a storage period > 2 months.
Replace the battery if the calibration process fails.
Calibrating NiMH
rechargeable battery
Storage of the rechargeable
battery
Make sure that the battery is fully charged.1.
Pull out the mains plug from the fixed mains socket.2.
3. 3.1 Switch on the Vario. The
Let the pump run until the rechargeable battery is empty
4.
and the pump comes to a stop.
Plug the mains cable into a fixed socket. The rechargeable
5.
battery is beeing charged.
Wait until the charging indicator goes out.6.
Repeat step 1 to 6. The Vario AC / DC is then ready to use.7.
In order to keep the self-discharge at a minimum, store
the Vario and the replacement rechargeable batteries at
temperatures below 25 °C (77 °F). Repeat the calibrating
process every 60–90 days.
or
pump will start running.
Caution: c / i vers ions
must be switched on in
«constant» mode.
26 | Battery calibration
Page 27

17 Filter test
EN
1. 1.1 Remove tubing from filter.
2. 2.1 Select maximum vacuum.
3. 3.1 Switch on the Vario. The
4. 4.1 Read the vacuum.
or
pump will start running.
Caution: c / i vers ions
must be switched on in
«constant» mode.
4.2 Replace the filter if
the vacuum exceeds
the values given in
the following table:
Vario 8 / Vario 8 c/i – 3 kPa
low vacuum
Vario 18 – 10 kPa
high vacuum
Vario 18 c / i – 10 kPa
medium vacuum
Filter test | 27
Page 28

18 Cleaning guidelines
WARNINGS
After each use, the parts that had been in contact with the aspirated secretions are to be
cleaned, disinfected, sterilised or disposed of according to the table on the next page.
Before cleaning the device, pull the mains plug out of the fixed mains
socket.
General notes
– These are general recommendations only that may be adjusted individually, based on the
hospital’s specific directives and cleaning practices and policies.
– Detailed information according to Medela cleaning instructions (product code 200.2391).
– Wear protective gloves for cleaning / disinfection.
– Dispose of fluids such as blood and secretions and the parts contaminated with them in
accordance with internal hospital guidelines.
Medela recommended surface cleaning agents for pump housing
– CaviWipes, Metrex Research, www.metrex.com
– Mikrozid AF Wipes, Schülke & Mayr, www.schuelkemayr.com
Water
Use only the purest quality of water for cleaning. Water hardness is a serious consideration since
deposits left on medical products may not be properly decontaminated. Use deionised water in
order to reduce this problem. The final rinse water is bacterial free and contains no endotoxins.
Cleaning / disinfection machines
Can be used to desinfect parts from the table on the next page. A hot water rinse (maximum
temperature 100 °C) may provide a medium-to high level of disinfection. Every section of the
constituent parts must be accessible in order to ensure efficient cleaning. We recommend using
a cleaning / disinfecting machine that has been approved by the Robert Koch- Institute and
complies with ISO 15883. Recommended temperature for noncritical medical devices (i.e. those
that only come into contact with uninjured skin) is 90 °C for 1 minute. The time is increased to
5 minutes for all medical devices that are considered to be critical.
Disposable products
These are single use products not intended to be reprocessed. Reprocessing could
cause loss of mechanical, chemical and / or biological characteristics. Reuse could cause
cross contamination.
28 | Cleaning guidelines
Page 29

PSU* jars, lids
PC** jars
Silicone
tubing
Pump housing
Mains cable
x x x x x
x x x
x x
x x x x
x x
x x x x
Legend:
* Polysulfone
** Polycarbonate
Plastic
accessories
1. Disassembly
Separate all individual parts before cleaning, disinfecting and
sterilising.
2. Cleaning
Clean components in hot water (60–70 °C) containing a
detergent with a pH range between 6.0 and 8.0 only, in order
to avoid damaging the instruments and containment devices.
Enzymatic detergents help with the removal of organic matter,
such as blood. Detergents should be used according to their
manufacturer’s recommended concentration levels. Some
alkaline detergents have been formulated to be safe for
reprocessing medical devices. The manufacturers of these
detergents should provide information about specific materials
that may be damaged by their detergents.
Soak all parts thoroughly with warm, soapy water or in
enzymatic detergent for 1–5 minutes.
1. Remove visible dirt with a cleaning tool – general purpose
cleaning brushes, such as pipe cleaners or non-abrasive lint
cloths. Brushes and pipe cleaners should fit snugly but still be
able to be moved around easily within the area to be cleaned.
Rinse thoroughly in clear water. Allow to dry
2. Check the instruments for visible dirt and repeat these steps
if necessary.
3. Cleaning
Wipe with detergent mentioned above. Use clean cloth to dry.
4. Disinfect
Soak at room temperature for 30 minutes in a disinfection /
cleaning solution (A). After the reaction time, use water to rinse
the solution residue from the individual parts and rinse the tubing. Rinse for at least 2 minutes with the cleaning solution (B).
(A) fluid aldehyde-free disinfection solution with cleaning
effect for use as a soaking bath, bactericide, fungicide, limited
virucide, with good material compatibility for stainless steel,
non-ferrous material and plastics including silicone, slightly
alkalic. e.g. 2 % neodisher® Septo MEDsolution
(B) Fluid, pH-neutral, enzymatic cleaning solution for the
treatment of instruments by machine or manually with very
good material compatibility for stainless steel, non-ferrous
material and plastics including silicone.
or use cleaning / desinfecting machine.
or use your dishwasher at home.
5. Sterilise
Remove any chemical disinfectant residue before autoclaving.
Do not stack during autoclaving. In the autoclave at 134 °C
for 10 minutes. The sterilisation device must comply to ISO
17665:2003. The following procedures are acceptable: In
the autoclave with saturated steam at 132 °C, with triple
pre-evacuation, sterilisation time of 6 minutes, or at 135–137 °C
in an porous load vacuum autoclave for 3–3.5 minutes
6. Storing components
After disinfection / sterilising, store the components in sterile foil
until required for use.
EN
Cleaning guidelines | 29
Page 30

19 Accessories overview
WARNINGS
Vario was verified in combination with the accessories listed below. For a correct and
safe operation use Vario with these accessories only. Further information is supplied on
the instruction sheet of the individual accessory.
Patient tubings / tubing connectors
with funnel connectors:
07 7.1020
07 7.1017
*
077.0952 180 cm
077.0191 300 cm
without coup ling pieces, 7 x 12 mm
Liners Reusable lids
077.0083/84 07 7.04 4 0 077.0420/30
PC jars
07 7.0 0 8 2
07 7.01 0 5
Reusable jars
077.012 5: 0.25 l
077.0155: 0.5 l
077.0110: 1 l
Connectors and Tubings (max. length 60 cm)
07 7.101 9 07 7.1 018 07 7.101 5 /16
Filters
07 7.0 0 9 2 077.057707 7.0 571
with 1 coupling piece, 7 x 12 mm
077.0900: 25 m
077.0901: 1 m
077.0902: 2 m
077.0905: 5 m
Fingertip tubing
07 7.0 9 51
with 2 coupling pieces, 7 x 12 mm
Reusable sets
with 2 coupling pieces, 7 x 12 mm
077.0921: 0.3 m
077.0922: 0.6 m
077.0931: 0.25 m, 1 coupling piece 90 °
077.0912: 0.6 m
077.0913: 1 m
077.0921: 0.3 m
077.0922: 0.6 m
077.0931: 0.25 m
077.0715: 1 l
* *
Drainage valve
07 7.1022
Additional accessories
07 7.0 8 23 077.0821 07 7.0 8 31 077.083207 7.0 8 25
30 | Accessories overview
Specimen cups
07 7.0 5 6 2 / 6 4 07 7.0 0 9 4
Foot control
077.0731
Vario 8 AC 026.X XX X
Vario 8 AC / DC 026.XX XX
Vario 8 c/i AC / DC 026.XXXX
Vario 18 AC 026. XX XX
Vario 18 AC / DC 026.X XX X
Vario 18 c/i AC / DC 026.X XX X
Page 31

Safety related tip
If the pump is used together with non-Medela applied parts, they must:
– have CE mark and (if necessary) local registration
– be able to be attached to Medela accessories safely without impacting the
performance of the pump.
Note: when combining Medela parts and non-Medela parts, you take over the
responsibility of the entire system.
20 Accessories legend
026.XXXX Vario 8 AC
026.XXXX Vario 8 AC / DC
026.XXXX Vario 8 c/i AC / DC
026.XXXX Vario 18 AC
026.XXXX Vario 18 AC / DC
026.XXXX Vario 18 c/i AC / DC
EN
Filters
Reusable jars
Drainage valve
Liners
Reusable sets
PC jars
07 7. 0 0 9 2 Disposab le overf low protec tion / bacteria / o dour filter
with Medela connections
07 7. 0 5 71 Disposable overflow protection/bacteria filter with
Medela connections
077.0577 Disposable overflow protection/bacteria filter with
Medela and conical connections
07 7. 011 0 Suction jar, polysulfone, 1 l
07 7. 01 2 5 Suction jar, polysulfone, 0.25 l
07 7. 01 5 5 Suction jar, polysulfone, 0.5 l
07 7.10 2 2 Drainage valve (for vacuum ports of reusable jars)
07 7. 0 0 8 3 Disposable suction liner 1.5 l
07 7. 0 0 8 4 Disposable suction liner 1.5 l with solidifier
077.0715 Reusable 1 l set with PSU suction jar
07 7. 0 0 8 2 Suction jar PC, 1.5 l
07 7. 01 0 5 Vario jar adapter
Accessories overview | Accessories legend | 31
Page 32

Specimen cups
07 7. 0 0 9 4 Specimen cup for disposable system. Can be
attached to lid of liner (patient port) of Disposable
Collection System
07 7. 0 5 6 2 Disposable specimen cup, Ø 6–10 mm
07 7. 0 5 6 4 Disposable specimen cup, Ø 10–14 mm. Attach to lid
of Reusable Collection System (patient port)
Reusable lids
Patient tubings / tubing
connectors
07 7. 0 4 4 0 Small lid with conical patient connection, Ø 6–10 mm
and overflow protection device
07 7. 0 4 2 0 Large lid with conical patient connection Ø 6–10 mm
and overflow protection device
077.0430 Large lid with conical patient connection Ø 10–14 mm
and overflow protection device
07 7. 0 9 0 2 Silicone tubing Ø 7 x 12 mm, w/o coupling pieces, 2 m
07 7. 0 912 Silicone tubing Ø 7 x 12 mm with 1 coupling piece, 60 cm
07 7. 0 9 0 0 Silicone tubing Ø 7 x 12 mm, w/o coupling pieces, 25 m
07 7. 0 9 0 1 Silicone tubing Ø 7 x 12 mm, w/o coupling pieces 1 m
07 7. 0 9 0 5 Silicone tubing Ø 7 x 12 mm, w/o coupling pieces, 5 m
07 7. 0 913 Silicone tubing Ø 7 x 12 mm with 1 coupling piece, 100 cm
07 7. 0 9 51 Disposable (PVC) tubing, 180 cm, with fingertip, sterile
(applied part)
077.0952 Disposable tubing with funnel connector
(non-sterile), 180 cm
077.0191 Disposable tubing with funnel connector
(non-sterile), 300 cm
07 7.10 17 Double conical coupling piece. For connecting
2 tubings to each other
07 7.10 2 0 Y-Piece. For connecting 3 tubings to each other
07 7. 0 9 2 1 Silicone tubing Ø 7 x 12 mm with 2 coupling pieces, 30 cm
07 7. 0 9 2 2 Silicone tubing Ø 7 x 12 mm with 2 coupling pieces, 60 cm
077.0931 Silicone tubing Ø 7 x 12 mm, 25 cm, with 1 coupling piece
and 1 coupling piece 90 °
07 7.10 15 Angle piece Ø 6–10 mm
07 7.10 16 Angle piece Ø 10–14 mm. Attaches to lid of Reusable
Collection System (patient port)
07 7.10 18 Coupling piece. Used to connect tubing to vacuum port
of pump
07 7.10 1 9 Coupling piece 90 °. Used to connect tubing to vacuum
port of pump
Additional accessories
Foot control
32 | Accessories legend
07 7. 0 8 2 1 Rail holder
07 7. 0 8 2 3 Universal holder
07 7. 0 8 2 5 Rail holder
077.0831 Carrying bag
07 7. 0 8 3 2 Car connection cable for 12 V DC
077.0731 Foot vacuum regulator
Page 33

21 Technicalspecications
CLASS
Vario 8 / Vario 8 c/i:
low va cuum, - 9 kPa / - 6 8 mmHg ( Tolerance: +/- 10 %)
Vario 18 c/i:
mediu m vacuum , - 55 kPa / - 413 mmHg (Toler ance: +/- 10 %)
Vario 18:
high vacu um, - 75 kPa / - 563 mmH g (Tolera nce: - 10 %)
Measured at 0 m, atmospheric pressure: 1013.25 hPa Please
note: vacuum levels may vary depending on location (meters
above sea level, atmospheric pressure and temperature).
Vario 8: 8 l/mi n. (+/- 10 %)
Vario 18: 18 l/min. (+/- 10 %)
AC 3.5 kg
AC / DC 4.2 kg
Without jar
kg
EN
230–240 V, 50 Hz, 90 VA
230–240 V, 60 Hz, 90 VA
120 V, 60 Hz, 70 VA
ISO 9001
ISO 13485
CE (93/42/EEC), IIa
h x w x d
380 x 170 x 285 mm
+50
93
15
0
°C
15
-25
°C
+25
Transport / Storage
Rechargeable battery
93
+5
°C
70
+40
70
Transport / Storage Conditions
106
kPa
Operating Conditions
106
kPa
100 –24 0 V
50 / 60 Hz
80 VA
IP21
Technical specifications | 33
Page 34

22 Signs and symbols
CLASS
This symbol
indicates the
compliance with
the essential
requirements
of the Council
Directive 93/42/
EEC of 14 June
1993 concerning
medical devices.
This symbol indicates
the compliance
with additional USA
and Canada safety
requirements for
medical electrical
equipment.
This symbol indicates
the legal specifications of the pump.
This symbol indicates
to follow instructions
for use.
This symbol indicates
to consult instructions
for use.
This symbol indicates
a CAUTION or
WARNING associated
with the device.
This symbol indicates
safety related tip.
This symbol indicates
the class of the pump.
This symbol indicates
a class Il device.
This Symbol indicates
the protection against
ingress of solid foreign
objects and against
harmful effects due to
the ingress of water.
This symbol indicates
a type CF applied
part.
This symbol indicates
MR
MR UNSAFE.
This symbol indicates
that interferences may
occur in the vicinity
of equipment marked
with this symbol.
This symbol indicates
the manufacturer.
This symbol indicates
the date of manufacture (four digits for the
year and two digits
for the month).
This symbol indicates
that the device should
not be used after the
end of the year and
month shown.
This symbol indicates
a single use device.
Do not reuse the
device.
This symbol indicates
manufacturer’s
catalogue number.
This symbol indicates
manufacturer’s serial
number.
This symbol indicates
manufacturer’s batch
code.
This symbol
indicates the
device is
sterilized using
ethylene oxide.
This symbol indicates
the temperature limitation for operation,
transport and storage.
This symbol indicates
the humidity limitation
for operation,
transport and storage.
34 | Signs and symbols
Page 35

EN
This symbol indicates
the atmospheric
pressure limitation for
operation, transport
and storage.
This symbol indicates
do not use the
device if package
is damaged.
This symbol indicates
the number of items
n that the content is
sufficient for.
This symbol indicates
do not dispose the
device together with
unsorted municipal
waste (for EU only).
This symbol indicates
that the material is
part of a recovery/
recycling process.
This symbol indicates
a carton package.
This symbol indicates
to keep the device
dry.
This symbol indicates
the maximum vacuum
level of the pump.
This symbol indicates
the flow levels of the
pump.
AC
This symbol indicates
the electrical specifications of the pump.
This symbol indicates
alternating current.
This symbol indicates
direct current.
This symbol indicates
the weight of the
kg
pump.
This Symbol indicates
a Prescription Device.
CAUTION: U.S. Federal
law restricts this device
to sale by or on the
order of a physician.
(for US only).
This symbol indicates
pcs
number of items.
This symbol indicates
the fuse
This symbol indicates
to keep the device
away from sunlight.
This symbol indicates
to handle the fragile
device with care.
This symbol indicates
the dimensions
(h x w x d) of the pump.
Signs and symbols | 35
Page 36

23 Warranty and servicing
Warranty
Medela AG warrants the device will be free from defects in materials and workmanship for a
period of 2 years (6 month for the rechargeable battery and the QuatroFlex) from the date of
delivery. Faulty material will be replaced free of charge during this period if not resulting from
abuse or misapplication. This will not apply to parts subject to wear and tear in use. To
ensure compliance with this warranty as well as optimum service from Medela products,
we recommend the exclusive use of Medela accessories with our appliances.
In no event shall Medela AG be liable for claims which exceed the scope of warranty described
including liability for consequential damages, etc. The right to the replacement of faulty parts will
not be recognized by Medela if any work has been carried out on the pump by unauthorized
persons. This warranty is subject to the appliance being returned to a Medela service centre.
Servicing / routine check
Routine checks and service work are only to be carried out by positions authorised by Medela.
The routine check is to be carried out 1 x per year (see service manual). The Medela service
manual is available upon request.
24 Disposal
The Vario comprises metals and plastics and should be disposed of in accordance with the
European directives 2011 / 65 / EU and 2012 / 19 / EU. Additional, local guidelines must also be
observed. With the AC / DC versions, the electronic components and the rechargeable battery
must be disposed of separately, in accordance with the local regulations.
Please take care that you dispose the Vario and its accessories in accordance with your local
disposal guidelines.
User information for the disposal of electrical and electronic equipment
This symbol means that the electrical and electronic equipment must not be disposed
as normal household refuse. A correct disposal of this device protects and prevents
possible damage to the environment or human health. For more information about the
disposal contact the manufacturer, your local caregiver or healthcare provider. This symbol is
only valid in the European Union. Please respect the relevant state laws and rules in your country
for the disposal of electrical and electronic equipment.
36 | Warranty and servicing | Disposal
Page 37

25 Technical documentation
WARNINGS
Do not use other accessories than those specified or sold by the manufacturer as
replacement parts for internal components as it may result in increased emissions or
decreased immunity of the Vario pump.
HF (high-frequency) surgical equipment, radio networks or the like can influence the
operation of the device and may not be operated in combination with the system.
EMC
Vario is EMC-tested in conformity with the requirements of IEC 60601-1-2:2007 and IEC
60601-1-2:2014 4th Edition according to clause 7 and 8.9. Vario is suitable for use in home
and clinical environments. Vario is a medical device that requires special safety precautions
and must be installed and placed in operation in accordance with the attached EMC information.
EN
Technical documentation | 37
 Loading...