

Medela Pump In Style User Manual [en, es, fr]
Pump In Style®
Advanced
EN Instructions for use | ES Instrucciones de uso | FR Mode d’emploi
On-the-go Tote
Backpack
The Metro Bag
™
Important Safeguards
When using electrical products, especially when children are present, basic safety precautions
should always be followed.
READ ALL INSTRUCTIONS BEFORE USING THIS PRODUCT.
DANGER: To reduce the risk of electrocution:
• Always unplug electrical product immediately after use.
• Do not use while bathing.
• Do not place or store product where it can fall or be pulled into a tub or sink.
• Do not place or drop into water or other liquid.
• Do not reach for a product if it has fallen into water. Immediately unplug from electrical outlet.
WARNING: To avoid fi re, electrocution, or serious burns:
• Do not leave product unattended when plugged into an electrical outlet.
• Close supervision is necessary when this product is used near children or persons with
disabilities.
• Use the product only for its intended use as described in this manual. Do not use
attachments not recommended by the manufacturer.
• Never operate this product if it has a damaged cord or plug, if it is not working properly, if it
has been dropped or damaged, or dropped into water.
• Keep cord away from heated surface.
• Never use while sleeping or when drowsy.
• Never drop or insert any object into any opening or tubing.
• Do not use outdoors, or operate where aerosol (spray) products are being used or where
oxygen is being administered.
• Aways inspect power adaptor and battery pack wires prior to use for damage or exposed
wire. If damage is found, immediately discontinue use of power adaptor or battery pack and
call Medela Customer Service at 1-800-435-8316.
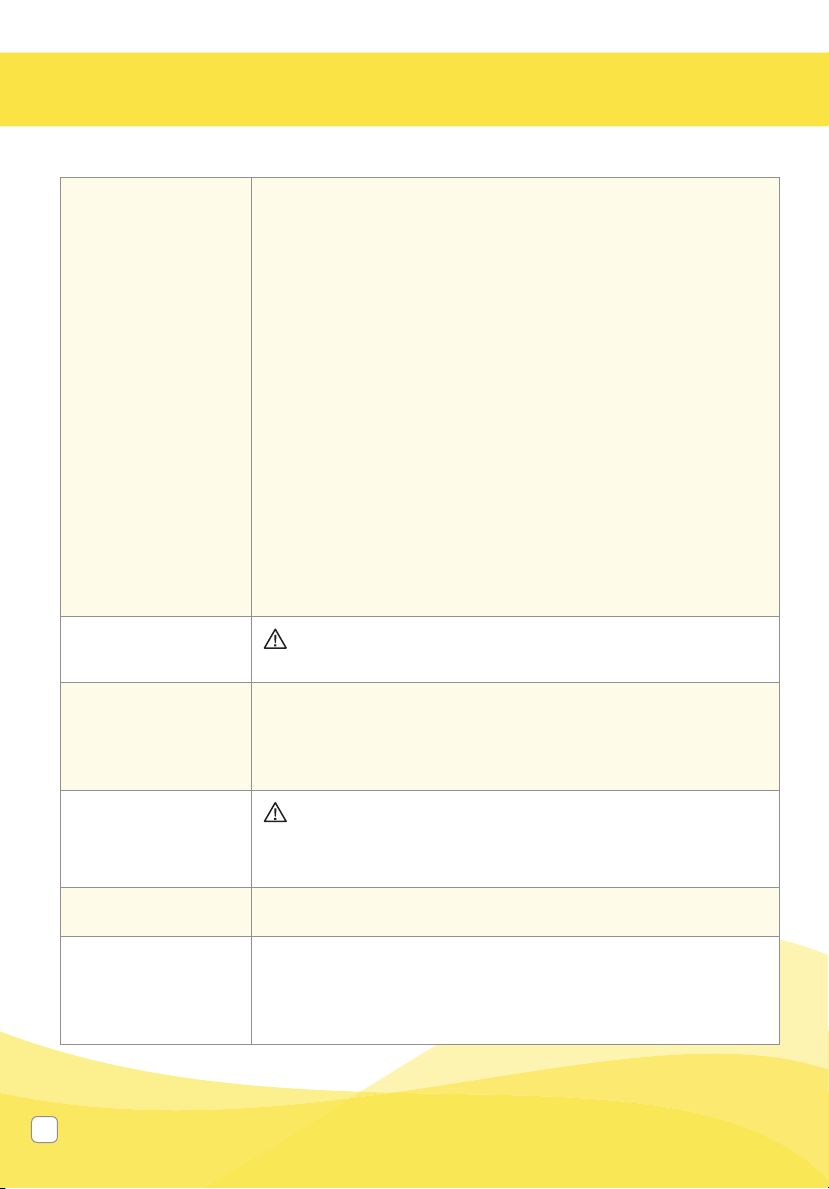
The warning symbol identifi es all instructions that are important to safety. Failure to
observe these instructions can lead to injury or damage to the breastpump. When
used in conjunction with the following words, the warning symbols stand for:
WARNING Can lead to serious injury or death.
CAUTION Can lead to minor injury.
NOTE Can lead to material damage.
INFO Useful or important information that is not related to safety.
2
WARNING: To avoid health risk and reduce the risk of injury:
• This product is intended for use by a single user only and should not be shared between
users.
• Do not drive while pumping.
• Never use while pregnant, as pumping can induce labor.
• Clean and sanitize all parts that come in contact with your breast and breastmilk prior to fi rst
use.
• Wash all parts that come in contact with your breast and breastmilk after every use.
• Inspect all appropriate pump components before each use.
• Do NOT continue pumping for more than 2 consecutive pumping sessions if no results are
achieved.
• Do not thaw frozen breastmilk in a microwave or in a pan of boiling water.
• If tubing becomes moldy, discontinue use and replace tubing.
• If breastmilk backup occurs you must clean tubing, faceplace and diaphragm before your next
pumping session.
CAUTION: Can lead to minor injury:
• Do NOT wrap cord around adaptor body.
®
• Use only the power adaptor that comes with the Pump In Style
• Use only the Pump In Style Advanced Battery Pack that comes with the Pump In Style
breastpump.
• Pump only with the breastpump in an upright position.
• Do NOT shorten tubing.
• Make sure the voltage of the power adaptor is compatible with the power source.
• Plug the power adaptor into the breastpump fi rst and then into the wall socket.
• Do NOT use antibacterial or abrasive cleaners/detergents when cleaning breastpump or
breastpump parts.
• Never put breastpump motor in water or a sterilizer, as you can cause permanent damage to
the breastpump.
• Do not attempt to remove the breastshield from your breast while pumping. Turn the
breastpump off and break the seal between your breast and breastshield with your fi nger,
then remove breastshield from your breast.
• If pumping is uncomfortable or causing pain, turn the unit off, break the seal between the
breast and the breastshield with your fi nger and remove the breastshield from your breast.
Advanced breastpump.
IMPORTANT
• Plastic bottles and component parts become brittle when frozen and may break when
dropped.
• Bottles and component parts may become damaged if mishandled, e.g. dropped, over-
tightened, or knocked over.
• Take appropriate care in handling bottles and components.
• Do not use the breastmilk if bottles or components become damaged.
SAVE THESE INSTRUCTIONS
Questions? Visit www.medela.com or call us at 1-800-435-8316.
3

Table of Contents
1. Cleaning Instructions ................................................................................................. 8-15
1.1 Before using for the fi rst time ...................................................................................... 8
1.2 After each use..........................................................................................................8-9
1.3 Sanitize daily ........................................................................................................ 10-11
1.4 Tubing, faceplate and diaphragm cleaning ........................................................... 12-14
1.5 Cleaning your breastpump bag ................................................................................. 15
2. Assembly ................................................................................................................... 16-23
2.1 Assembly of pump kit .......................................................................................... 16-19
2.2 Correctly fi tting breastshields .................................................................................... 20
2.3 Powering your pump............................................................................................ 21-23
2.3.1 Power adaptor care ........................................................................................ 21
2.3.2 Battery pack ................................................................................................... 22
2.3.3 Traveling outside of the U.S. ........................................................................... 23
3. Pumping ....................................................................................................................24-27
3.1 Device operation .................................................................................................. 24-27
4. Storing Breastmilk ......................................................................................................... 28
4.1 Storing breastmilk in your Pump In Style
®
Advanced cooler bag ................................ 28
5. Preparing & Feeding Breastmilk .................................................................................. 29
5.1 Preparing breastmilk ................................................................................................. 29
5.2 Feeding breastmilk .................................................................................................... 29
6. Troubleshooting ............................................................................................................. 30
7. Supplemental Information/Disposal ............................................................................ 31
8. Warranty ......................................................................................................................... 32
4
Take a moment to read through this entire instruction manual before using this product for
the fi rst time.
PLEASE SAVE THESE INSTRUCTIONS.
It is best to wait until your breastfeeding routine is established (approximately 4weeks)
before expressing breastmilk, unless otherwise advised by your healthcare professional.
Glossary of Terms
2-Phase Expression® technology – research based technology that mimics a baby’s
natural nursing rhythm.
Expression Phase – slower sucking/pumping rhythm for gentle and effi cient milk removal
as quickly as possible.
Maximum Comfort Vacuum
comfortable during pumping. It is different for every mother.
Stimulation Phase – fast sucking/pumping rhythm to stimulate the milk ejection refl ex and
to start the milk fl owing.
™
– highest vacuum setting where a mother still feels
Intended Use
For lactating women to express and collect milk from their breasts to complement
breastfeeding.
If you have medical reasons or other needs for exclusively pumping, it is recommended that
you use a hospital grade breastpump such as our Symphony
Expression technology. To learn more, visit us at www.medelabreastfeedingus.com.
®
breastpump with 2-Phase
Product Description
Pump In Style® Advanced (PNSA) is a personal use electric breastpump that includes
2-Phase Expression technology and is capable of single and double pumping.
Questions? Visit www.medela.com or call us at 1-800-435-8316.
5
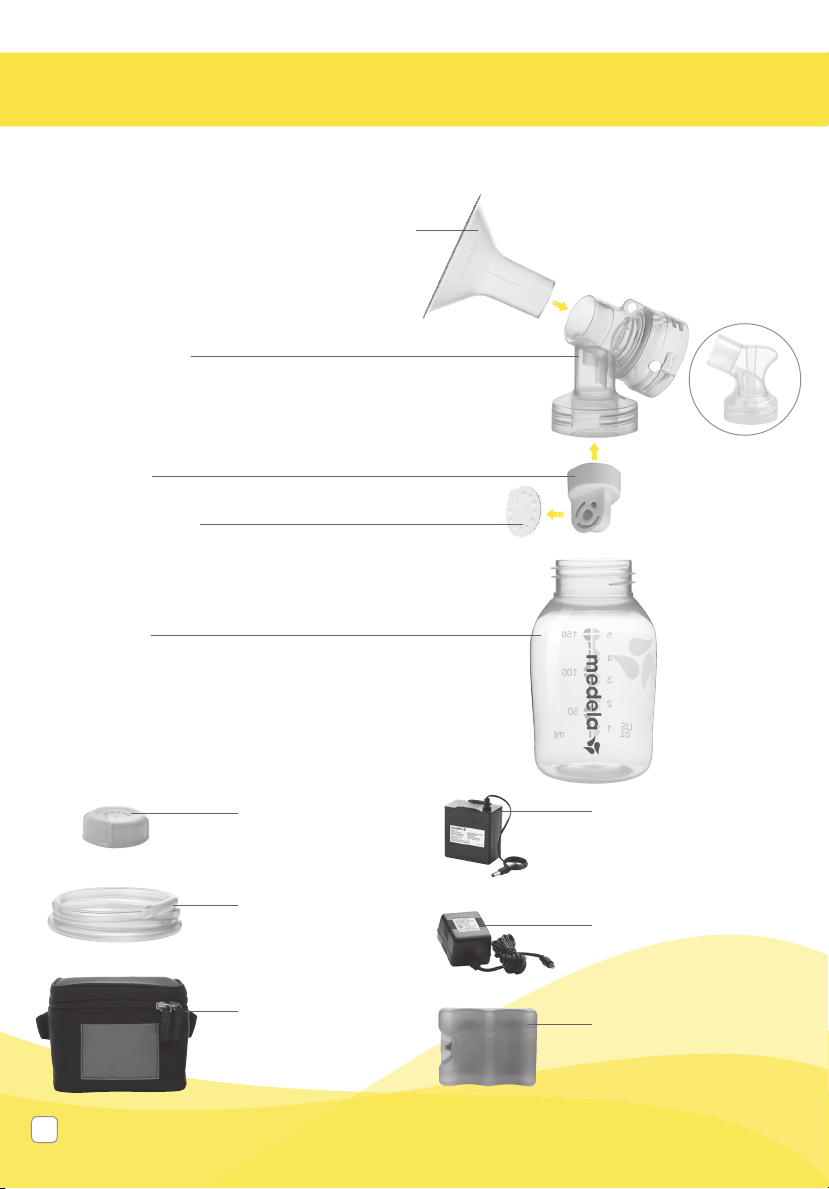
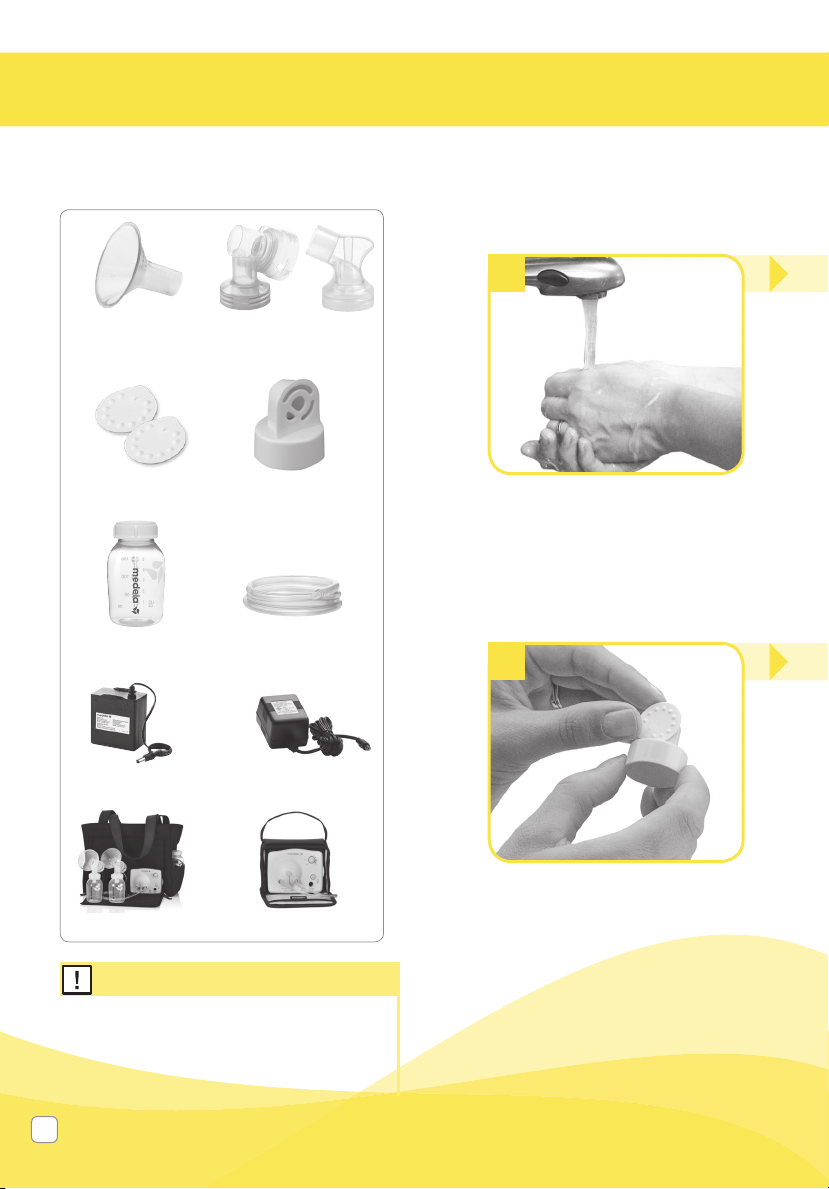
Product Description
Medela reserves the right to substitute any component or accessory with a
replacement of equivalent performance.
2x PersonalFit™ Breastshields M (24 mm)
(for other breastshield sizes
see Section 2.2, page 20)
87073
Item
2x Connectors
87071 or 8107264
Item
2x Valves
87089
Item
2x Membranes
87088
Item
4x Bottles
6100050
Item
4x Lids
8107183
Item
2x Tubing
87212
Item
1x Cooler bag
Replacement 67068
(includes ice pack &
4 bottles with lids)
810726487071
1x Battery pack
Item 90170 02
Replacement 67553
1x Power adaptor
Item 9207010
Replacement 68030
1x Ice pack
Ite m 8117010
Replacement 87092
6

1x Faceplate
Item 6007132
Tubing port Tubing portPort plug
BackpackOn -the -g o Tote
On/Off button
Increase/reduce
vacuum
Let-down
button
Power
adaptor port
Additional parts included with The Metro Bag
™
27 mm PersonalFit™ Breastshields .................. 87274
Metro Bag including:
Flexible, Plastic Workspace ........................ 3007299
2 Mesh Storage Bags
Pump In Style
Advanced
The Metro Bag
®
™
Questions? Visit www.medela.com or call us at 1-800-435-8316.
7
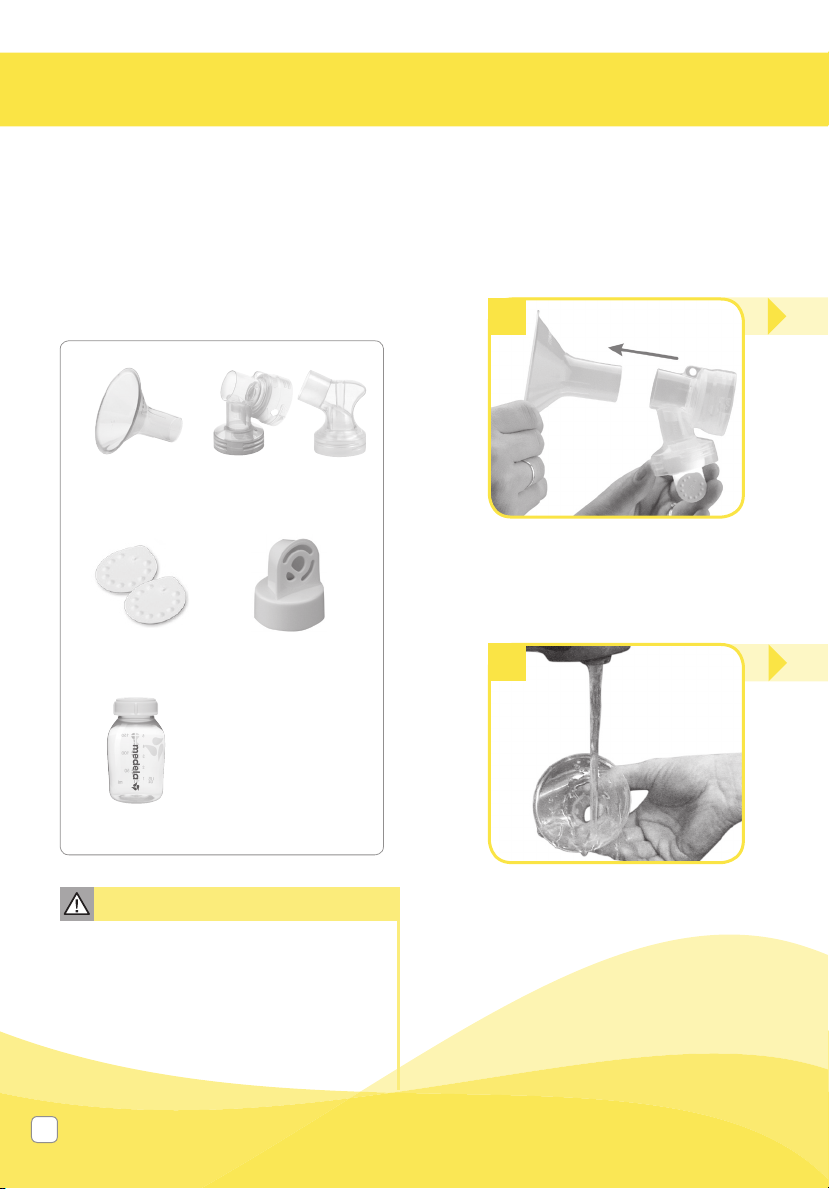
1. Cleaning
1.1 Before using for the fi rst time
Clean and sanitize the parts below before
using your pump for the fi rst time. Follow
the cleaning and sanitizing instructions in
Sections 1.2 (start at step 4) and 1.3
that follow.
• Breastshield
• White membrane • Yellow valve
87071 or 8107264
• Breastshield
connector
1.2 After each use
Clean all parts that come in contact
with your breast and breastmilk.
See image in Section1.1.
1
Separate breastshields from
breastshield connectors.
4
• Breastmilk bottles
and lids
Caution
• Only use drinking-quality tap or bottled
water for cleaning.
• Take apart and wash all parts that
come in contact with the breast and
breastmilk immediately after use to
avoid dry up of milk residues and to
prevent growth of bacteria.
8
Rinse in cool water all separated
parts that came in contact with
breast and breastmilk in order to
remove breastmilk residue.
Supplies Needed: • Mild Dish Soap
• Clean Dish Towel or
Soft Brush
• Clean Sink or Bowl
• Drinking Quality
Water
2
Twist and pull the yellow valves
off the breastshield connectors.
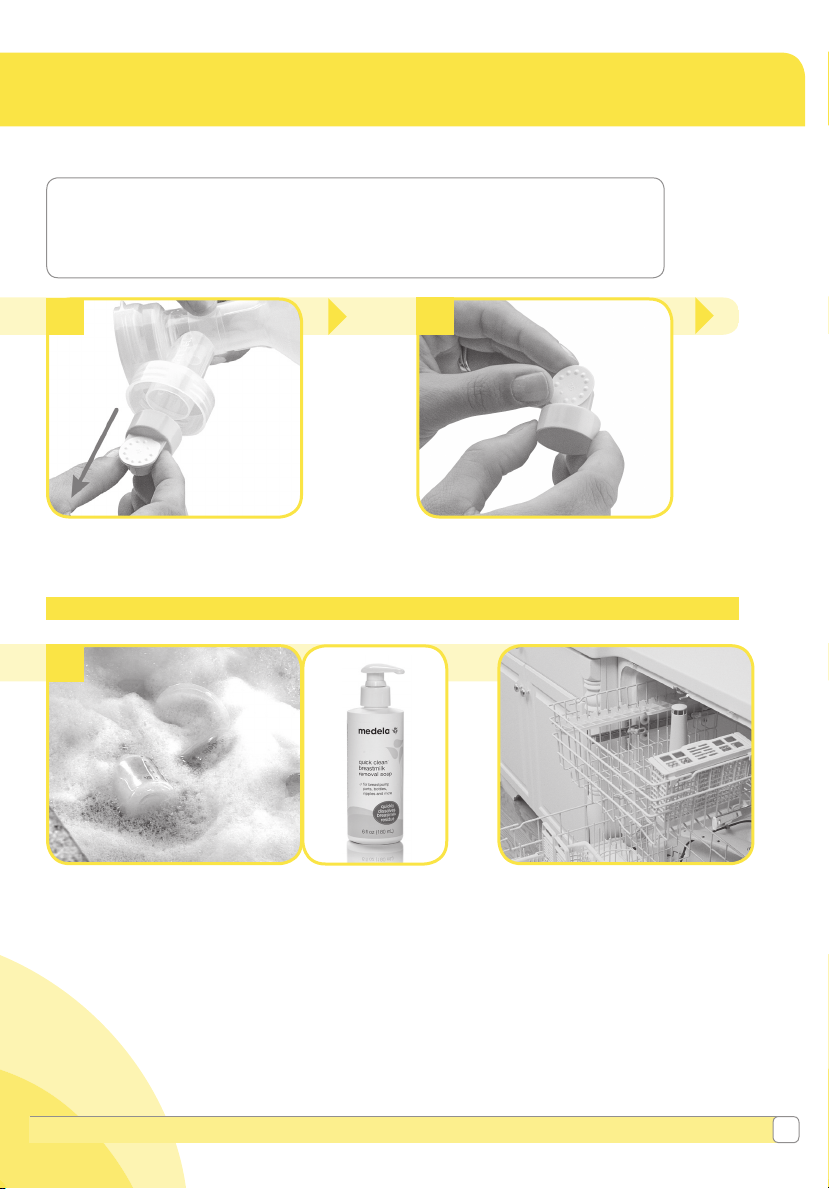
Washing Options:
Washing in sink:
5
• Soak all separated parts in
warm soapy water for
5minutes.
• Clean with a clean dish-cloth
or soft brush.
• Rinse all separated parts
with clear water.
• Allow all parts to air dry in
a clean area.
• Store dry parts when not in use.
Questions? Visit www.medela.com or call us at 1-800-435-8316.
• You may wash
your kit parts
by following the
instructions on
the Quick Clean
Breastmilk Removal
Soap bottle.
3
Remove the white membranes
from the yellow valves.
Washing in dishwasher:
or
• Wash all separated parts on
top rack of dishwasher.
• Allow all breastpump parts to
™
air dry in a clean area.
• Store dry parts when not in
use.
9
1. Cleaning (cont.)
Note
• Wash breastpump kit parts after each use.
• Sanitize breastpump kit parts once daily.
• The pump kit requires no maintenance.
• Take care not to damage parts
of the pump kit during cleaning.
• If the individual components of the pump
kit are cleaned in a dish washer parts may
be discolored by food pigments. This has
no impact on the function.
• Store the dry pump kit in a clean
bag/container until next use.
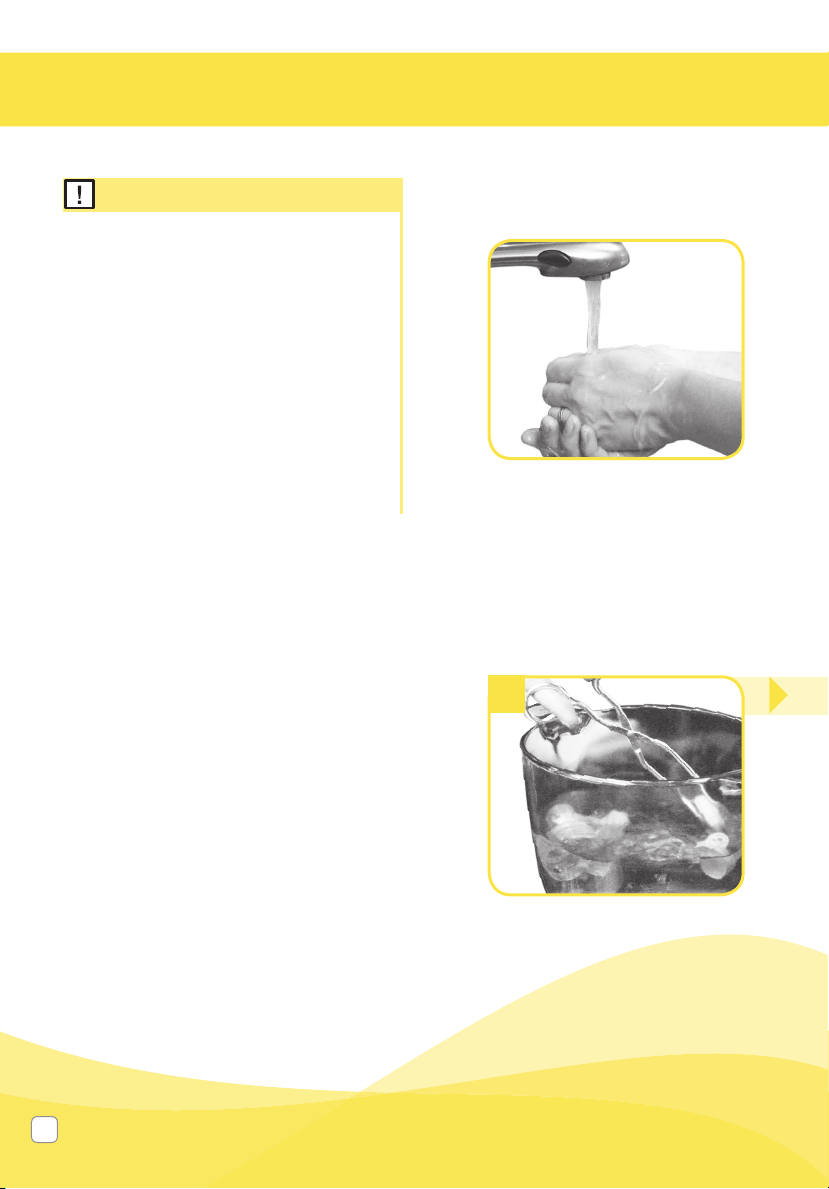
1.3 Sanitize daily
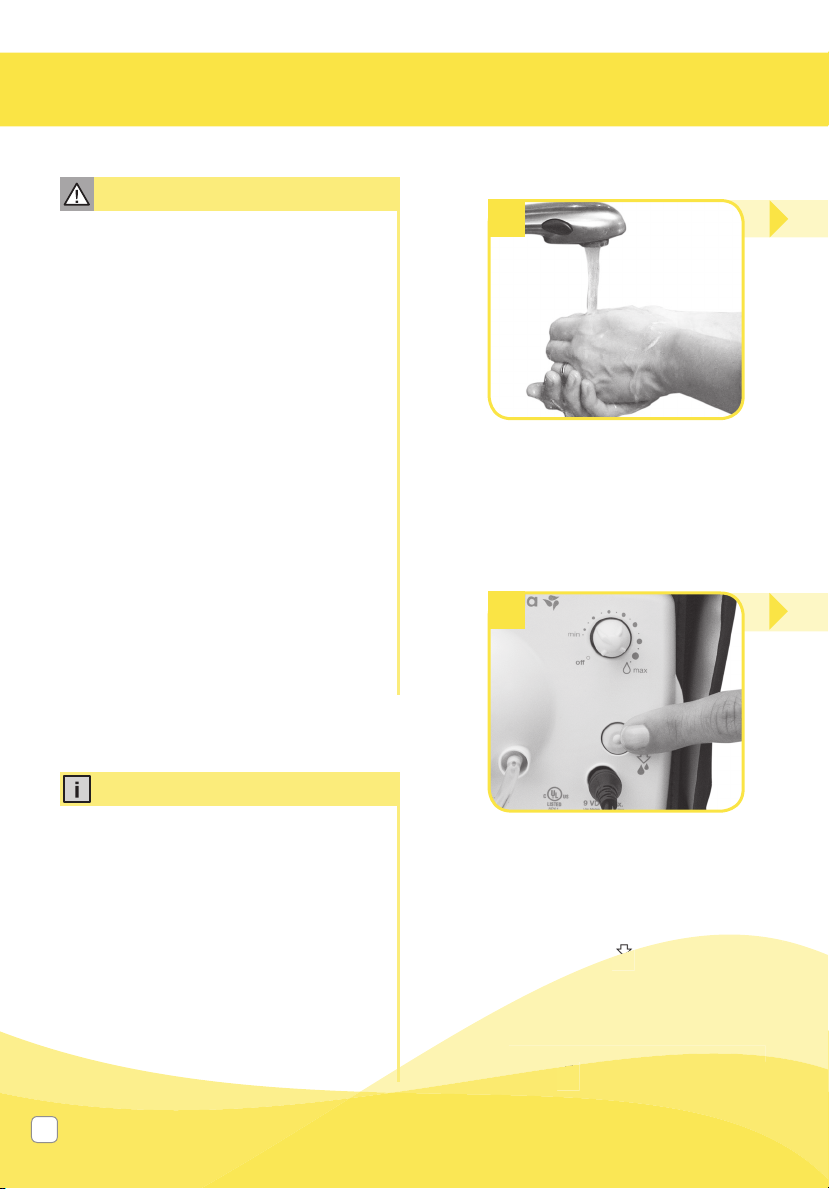
Wash hands thoroughly.
3
Allow water to cool and gently remove
parts from water with tongs.
10
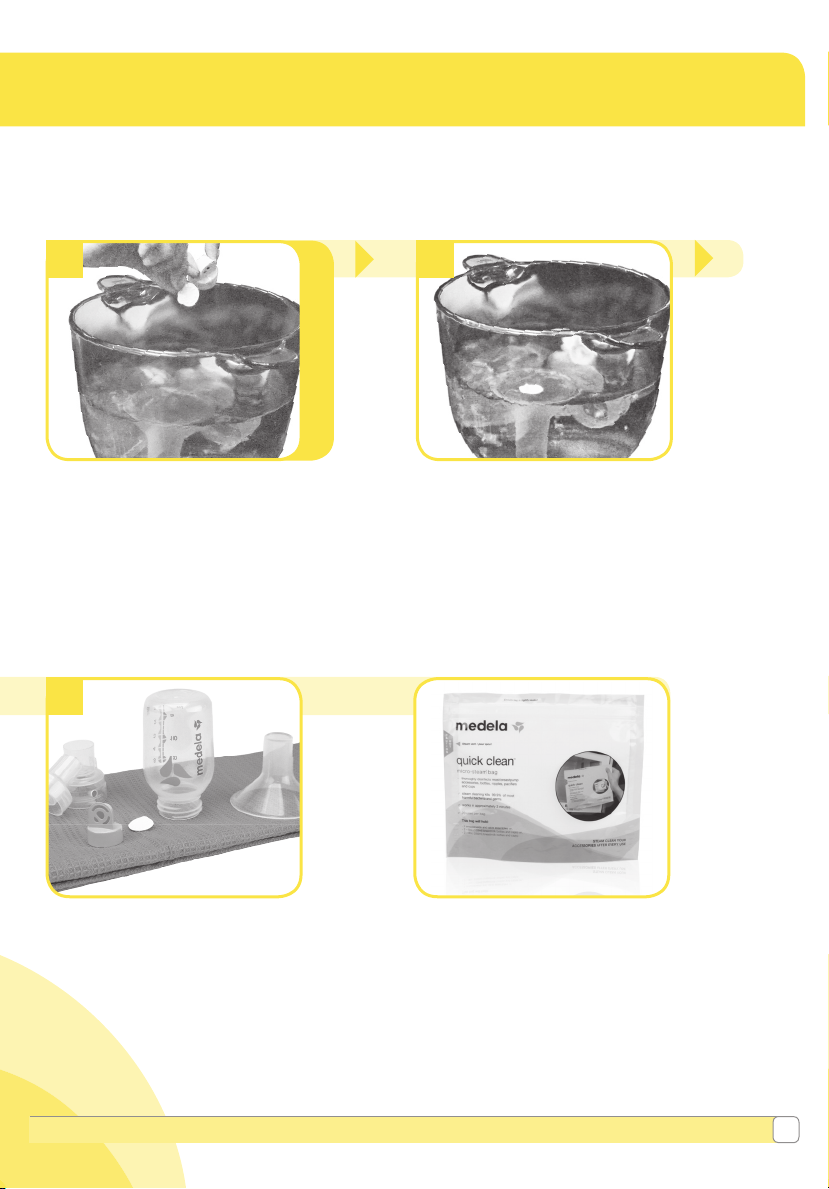
1
Refer to image in Section 1.1
2
Separate all parts that come in
contact with your breast and
breastmilk.
4
• Place parts on a clean surface and/
or towel.
• Allow all parts to air dry.
• Store dry parts when not in use.
Do NOT store wet or damp parts.
or
• Fill a pot with enough water to cover all
parts.
• Bring water to a boil.
• Place parts in boiling water for
10 minutes.
You may sanitize your kit parts by
following the instructions on Medela’s
Quick Clean
™
Micro-Steam™ bag.
Questions? Visit www.medela.com or call us at 1-800-435-8316.
11
1. Cleaning (cont.)
Caution
• Do not store wet or damp parts as
mold may develop.
• If tubing becomes moldy, discontinue
use and replace tubing. Contact
Medela Customer Service at
customer.service@medela.com or
1-800-435-8316.
Note
• Tubing should be washed if dirty or
milk is present. Follow instructions in
Section 1.4.
• Tubing should be washed if
condensation due to breastmilk is
present.
• Cleaning tubing is not necessary if
condensation present is from previous
washings or atmospheric conditions.
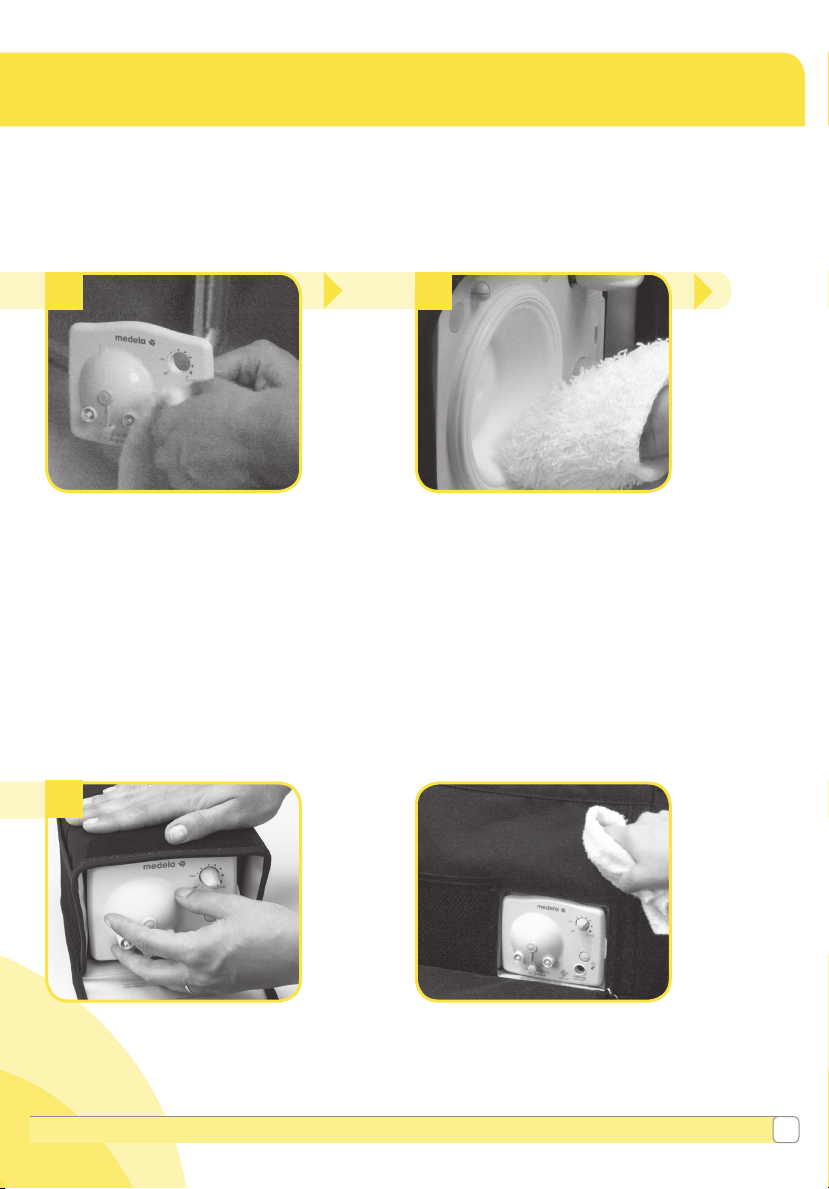
1.4 Tubing, faceplate and
diaphragm cleaning
Clean the faceplate monthly. Also,
inspect tubing after each pumping
session. Clean tubing, faceplate and
diaphragm if dirty or there is any sign
of condensation and/or milk.
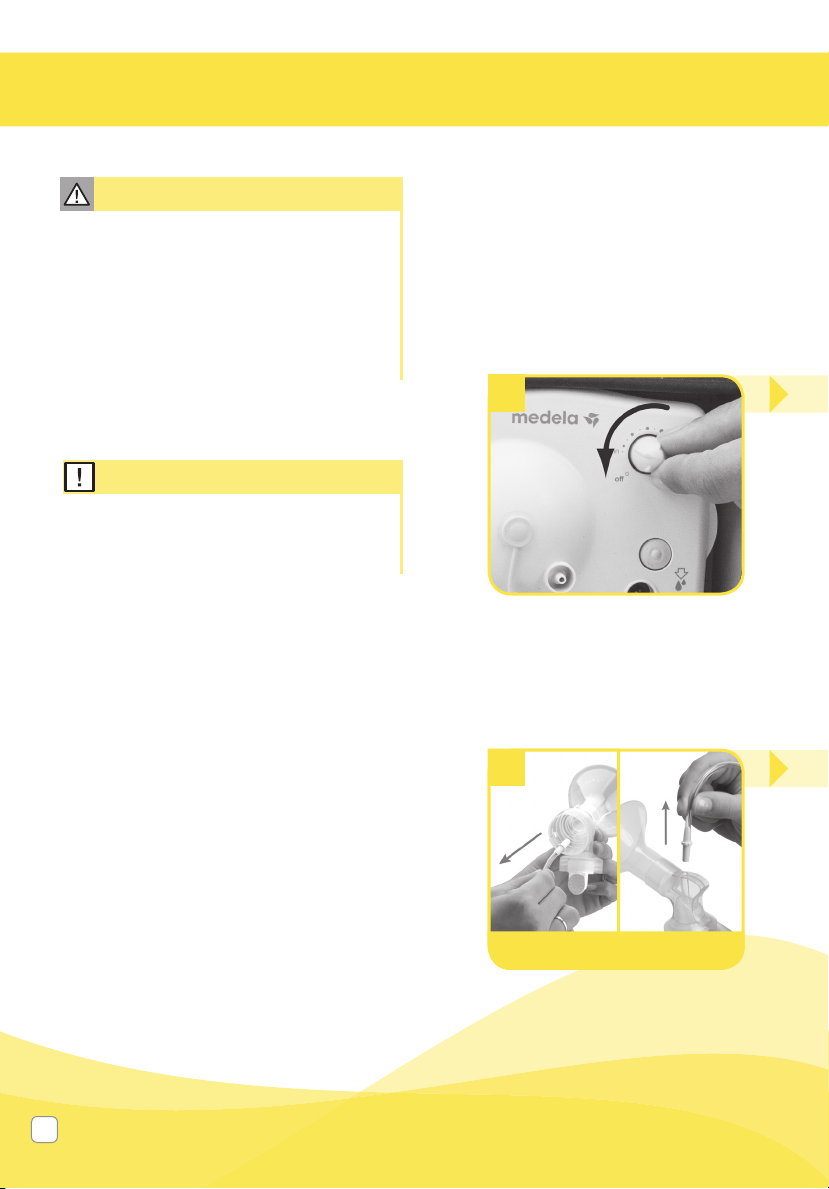
1
Turn off breastpump.
4
810726487071
Remove tubing from breastshield.
12
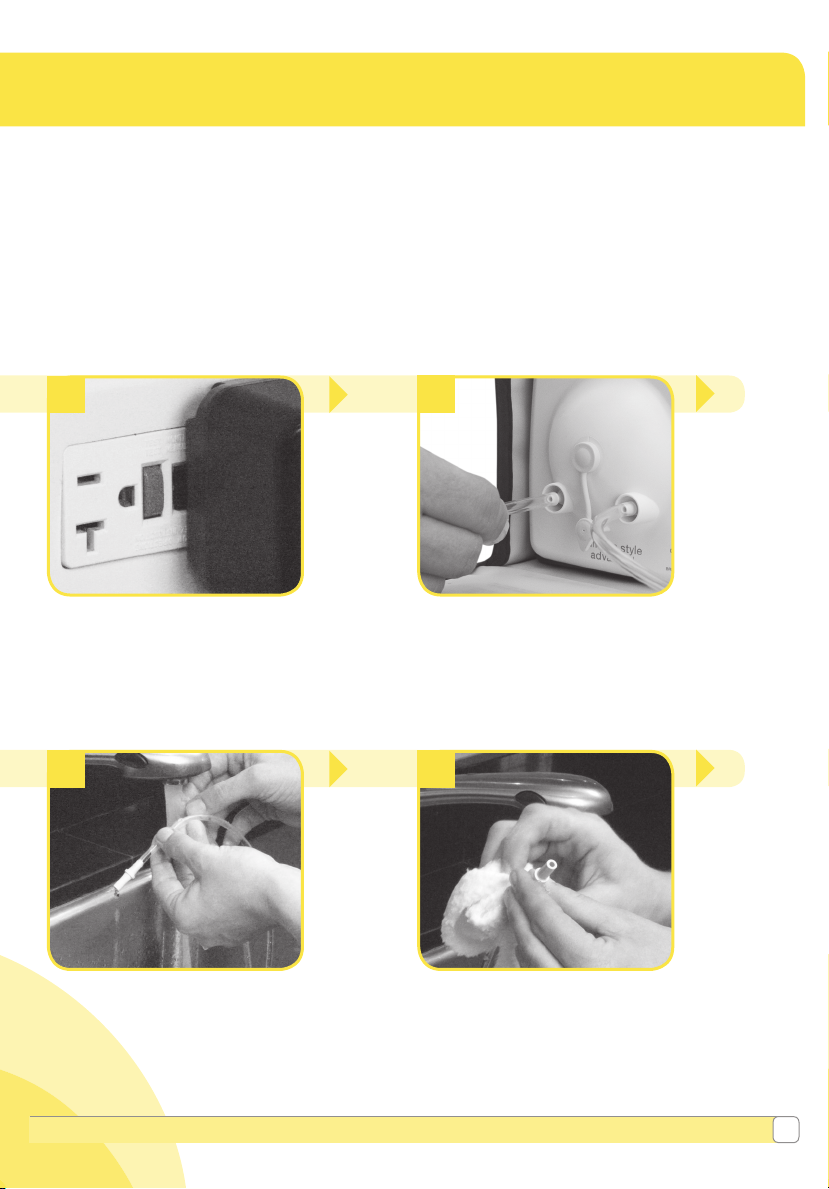
2
3
Unplug breastpump from
power source.
5
Rinse tubing in cool water to
remove breastmilk.
Questions? Visit www.medela.com or call us at 1-800-435-8316.
Remove tubing by pulling
straight out of tubing ports. Do
not wiggle or pull tubing at an
angle.
6
• Wash tubing in warm soapy water.
• Rinse tubing with clear water.
• Hang to air dry.
Continued
next page.
13
1. Cleaning (cont.)
Note
• Make sure faceplate and diaphragm are
completely dry before reseating.
• The faceplate must be seated correctly
and snapped together at all connection
points. This ensures the pump will
have adequate vacuum and optimum
performance.
1.4 Tubing, faceplate and
diaphragm cleaning
(cont.)
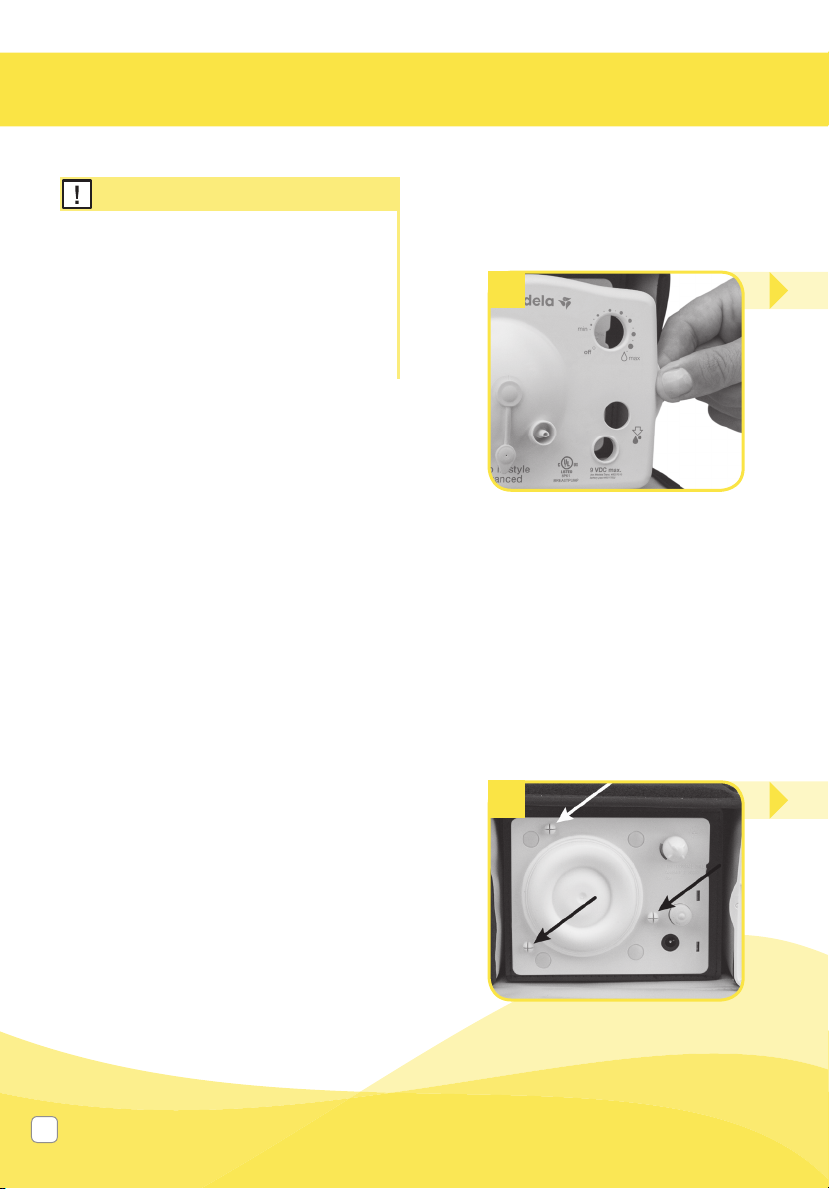
7
Snap off the faceplate using the
thumb tab.
10
Locate the 3 connection points
on the reverse side of the
faceplate and on the pump.
14
8 9
• Soak in warm soapy water for
5 minutes.
• Clean with a clean dish-cloth or
soft brush.
• Rinse parts with clear water.
• Allow to air dry in a clean area.
• Some breastpump models may have a
diaphragm that appears different than
pictured above.
• Carefully wipe the entire surface area of the
diaphragm where particles or liquid may have
accumulated, including the cap in the center,
if present, with a clean (no soap), damp cloth.
• Allow all parts including edges to air dry,
completely, in a clean area before replacing
the faceplate.
1.5 Cleaning your breastpump bag
11
Align connection points and hold
back of pump with one hand
while pushing on the faceplate
until it snaps into place.
Questions? Visit www.medela.com or call us at 1-800-435-8316.
Use a damp (not wet) cloth to
wipe the breastpump bag after
each use.
15
2. Assembly
Parts you will need for this step:
• Breastshield
• White membrane
• Breastmilk bottles
and lids
87071 or 8107264
• Breastshield
connector
• Yellow valve
• Tubing
2.1 Assembly of pump kit
1
Wash hands before touching
breastpump, kit and breasts
and avoid touching the inside of
containers or lids.
4
• Battery pack
• Breastpump • Metro motor
or
or
• 9 volt power
adaptor
Note
• Inspect valves for cracks or chips and
inspect membranes for holes, tears or
warping. If you notice any damage to
these parts, replace them immediately.
16
Snap membranes onto valves
until membranes lie completely
fl at on valve.

Visit Visit
Questions?Questions?
2
3
Place your breastpump on a
clean and dry surface. Ensure
that the surface is solid and
secure so your breastpump will
not tip over or fall.
5
Push assembled yellow valves and
white membranes onto bottom of
breastshield connectors.
Securely attach breastshield to
breastshield connector.
6
Continued
next page.
Screw bottles onto breastshield
connectors.
Questions? Visit www.medela.com or call us at 1-800-435-8316.
17
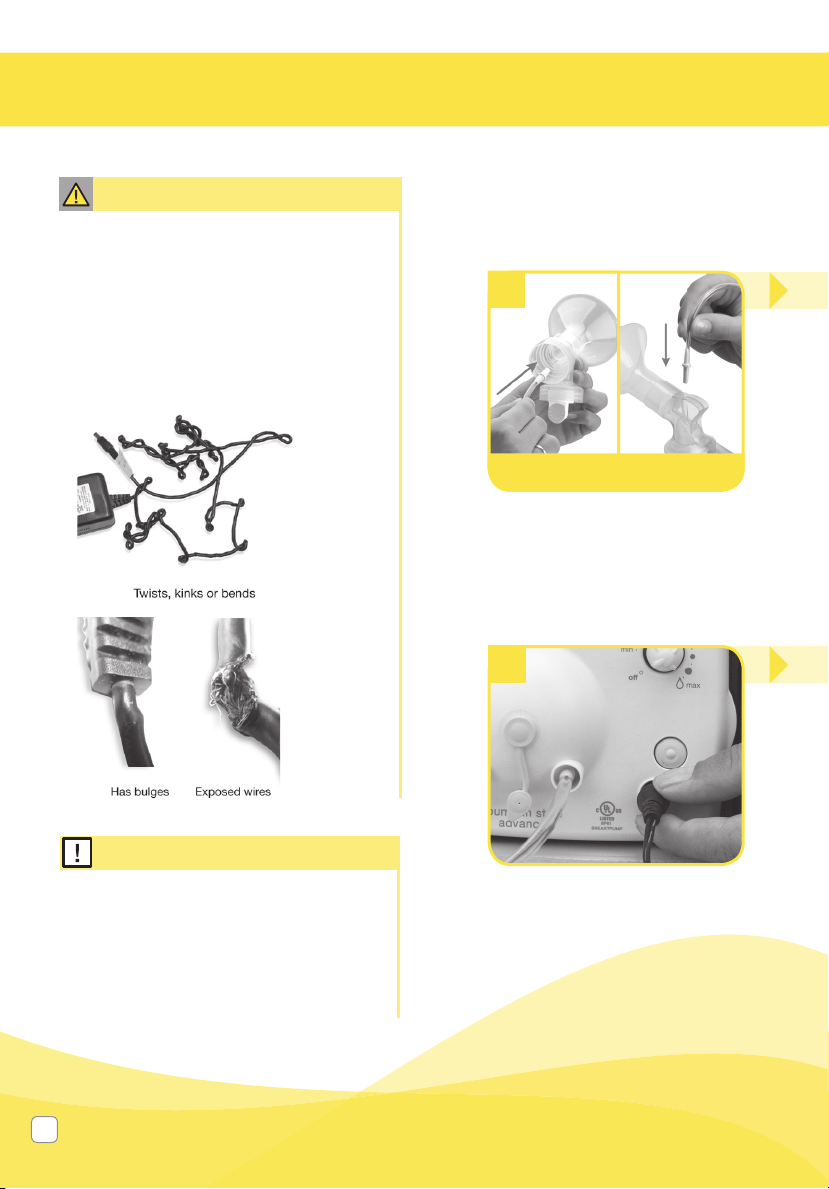
2. Assembly (cont.)
Warning
• Use only the power adaptor supplied with
the Pump In Style
• Always inspect the 9 volt power adaptor
and Battery Pack cords prior to use for
damaged, kinked, twisted, frayed or
exposed wires. If damaged, immediately
discontinue use and call Medela
Customer Service at 1-800-435-8316.
®
Advanced.
2.1 Assembly of pump kit
(cont.)
7
810726487071
Insert hard yellow adapter ends
of tubing into hole on the back
of breastshield connectors.
10
Note
• See Section 2.3.2 Battery Pack
Assembly for instructions on the use of
the Battery Pack.
• See Section 2.3.3 Traveling Outside
the U.S. for information on using your
device internationally.
18
Plug the metal fi tting on end of
9 volt power adaptor or Battery
Pack cord into the power jack on
front of breastpump faceplate.
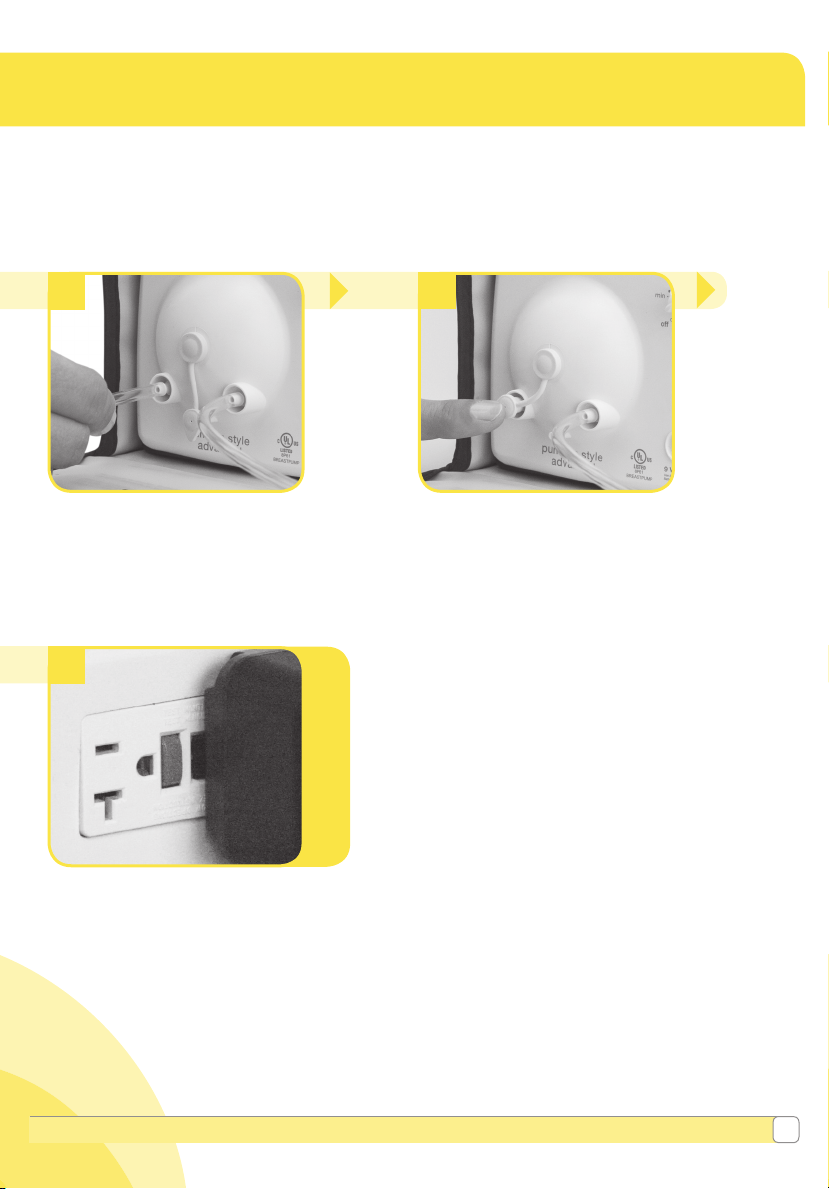
8
9
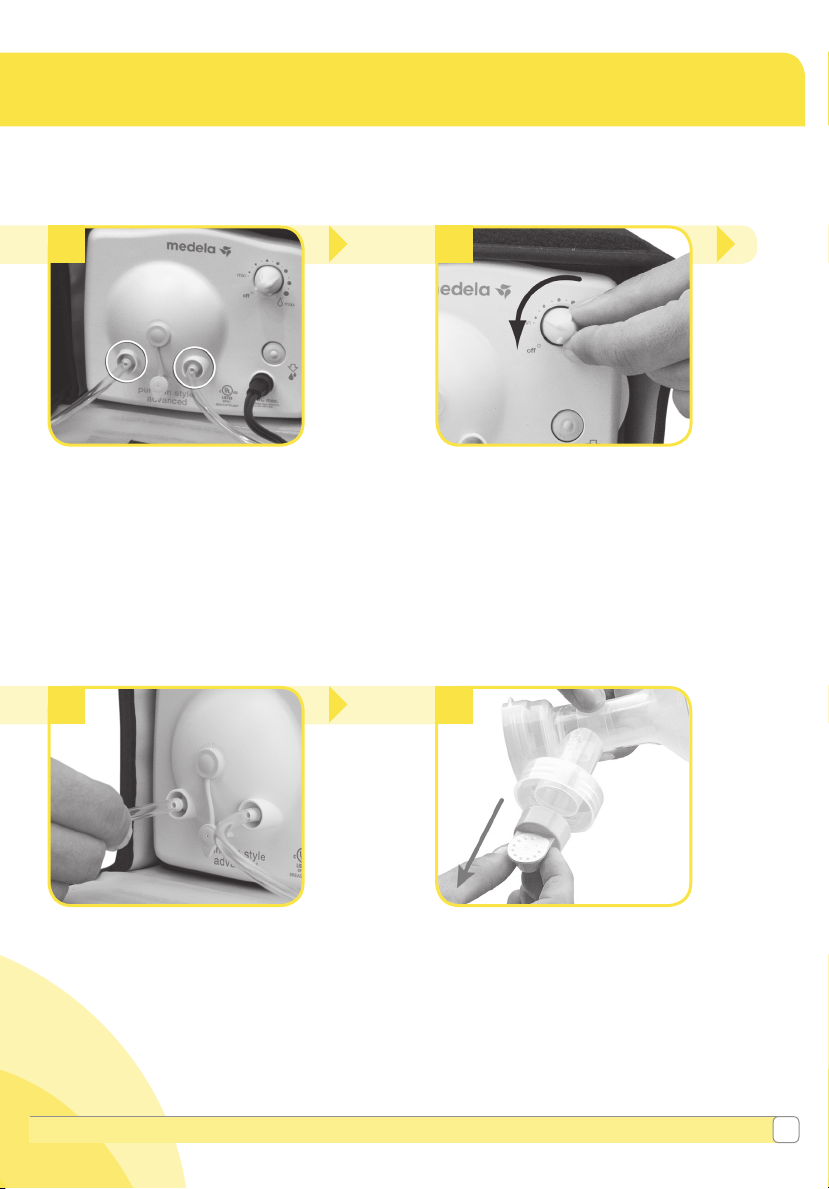
Double pumping: Insert
free ends of tubing onto both
ports on front of breastpump
faceplate.
11
Plug 9 volt power adaptor into
a standard electrical outlet.
Single pumping: Insert free end
of tubing onto one port on front
of breastpump faceplace. Place
port cap over the unused port.
Refer to Power Adaptor Care
in Section 2.3.1
Questions? Visit www.medela.com or call us at 1-800-435-8316.
19
TM
breastshield:
Your breastshield
Your breastshield
24 mm
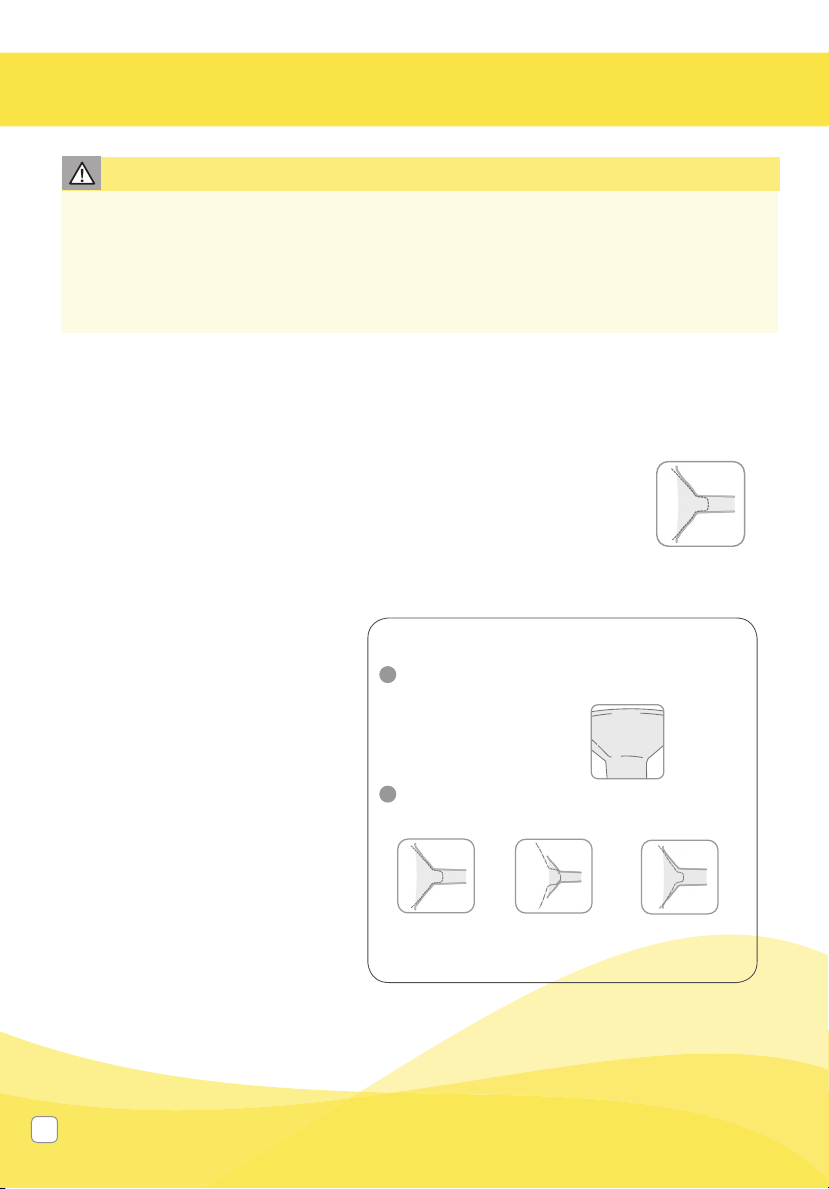
Choosing the right size PersonalFit
TM
breastshield:
1. Determine the size you’re currently using. If you’re
not sure, look for the size embossed on your
breastshield (see picture).
24 mm (M) breastshields
are provided with
Medela breastpumps.
2. While pumping, compare your fit to the images below
as a sizing guideline.
Your breastshield
is too large;
try a smaller size
Correct fit
Your breastshield
is too small;
try a larger size
24 mm
2. Assembly (cont.)
Caution
• While some discomfort may be felt when fi rst using a breastpump, using a breastpump should not
cause pain.
• If you are experiencing discomfort at the base of the nipple due to rubbing of your breast tissue with the
breastshield tunnel, use of a lubricant such as Tender Care
• For assistance with correct breastshield sizing and comfort please visit www.medelabreastshields.com or
see a lactation consultant / breastfeeding specialist.
2.2 Correctly fi tting breastshields
Properly fi tting breastshields will ensure comfort and effi cient milk expression. To
determine if you have the correct size, look at the following diagram:
• The nipple should be centered in the tunnel of the shield.
• The nipple should move freely without rubbing when the
pump is turned on.
• Minimal or no part of your areola should be pulled into the tunnel of the
breastshield.
• You should see a gentle, rhythmic motion in the breast with each cycle
of the pump.
• After pumping, your breast should
feel much less full with no areas of
hardness.
Medela offers smaller and larger
sizes which are available at many
local retailers or visit
www.shopmedela.com.
PersonalFit Breastshields
21 mm (Small)
Item 87072
24 mm (Medium)
Item 87073
27 mm (Large)
Ite m 87274
30 mm (X-Large)
Item 87075
36 mm (XX-Large)
Item 87084
TM
Lanolin may be benefi cial.
Correct fit
20
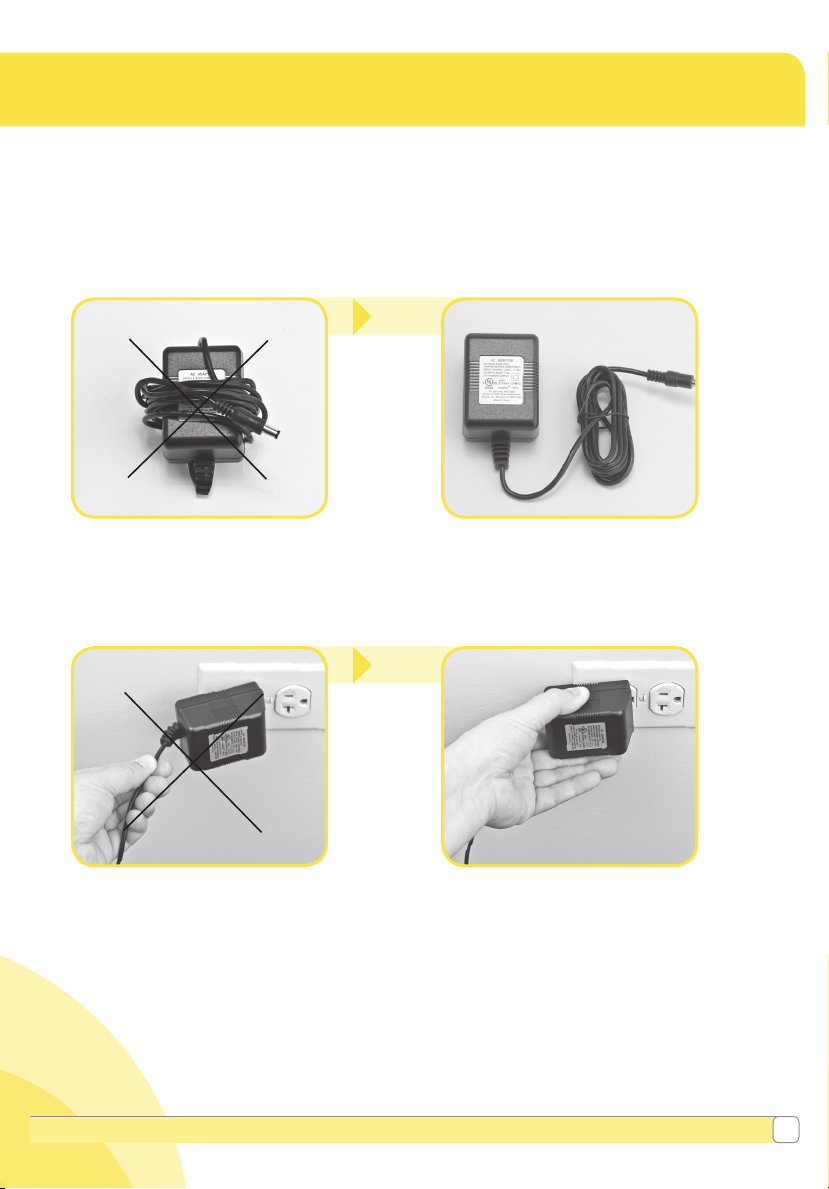
2.3 Powering your pump
2.3.1 Power adaptor care
To care for your adaptor be sure to follow these storage directions.
Do not wrap cord of power
adaptor around the plug body.
Do not unplug power adaptor
by pulling on the cord.
Correct!
Correct!
Questions? Visit www.medela.com or call us at 1-800-435-8316.
21
2. Assembly (cont.)
2.3 Powering your pump (cont.)
Note
• Remove the batteries if the Battery Pack
is not going to be used for an extended
period of time.
• If breastpump does not turn on, make
sure the batteries have been inserted
properly. If this does not solve the
problem refer to the troubleshooting
section of this instruction booklet or
contact Medela Customer Service at
1-800-435-8316.
• Each set of batteries will provide
approximately 2hours of pumping time.
• Do not mix old and new batteries.
• Do not mix alkaline, standard
(carbon-zinc) or rechargeable batteries.
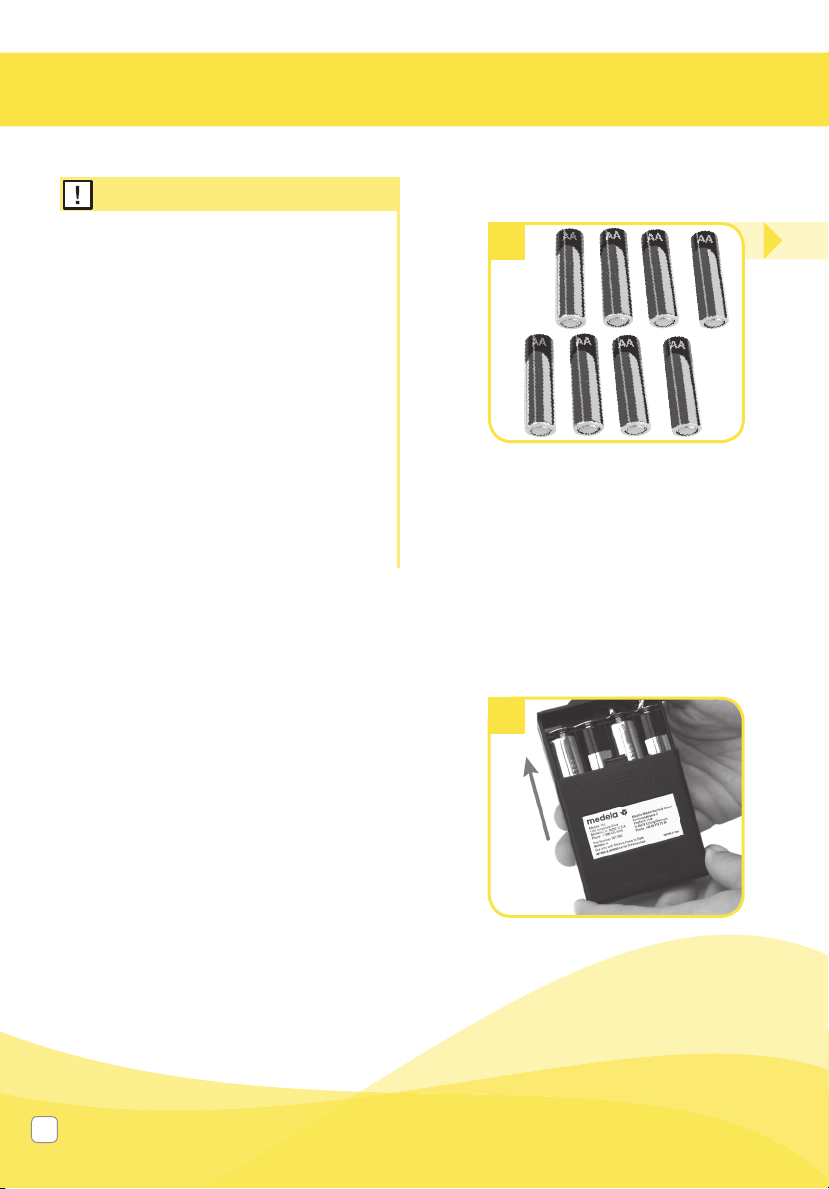
2.3.2 Battery pack
1
Use 8 AA rechargeable batteries
or alkaline batteries.
4
Replace battery cover.
22
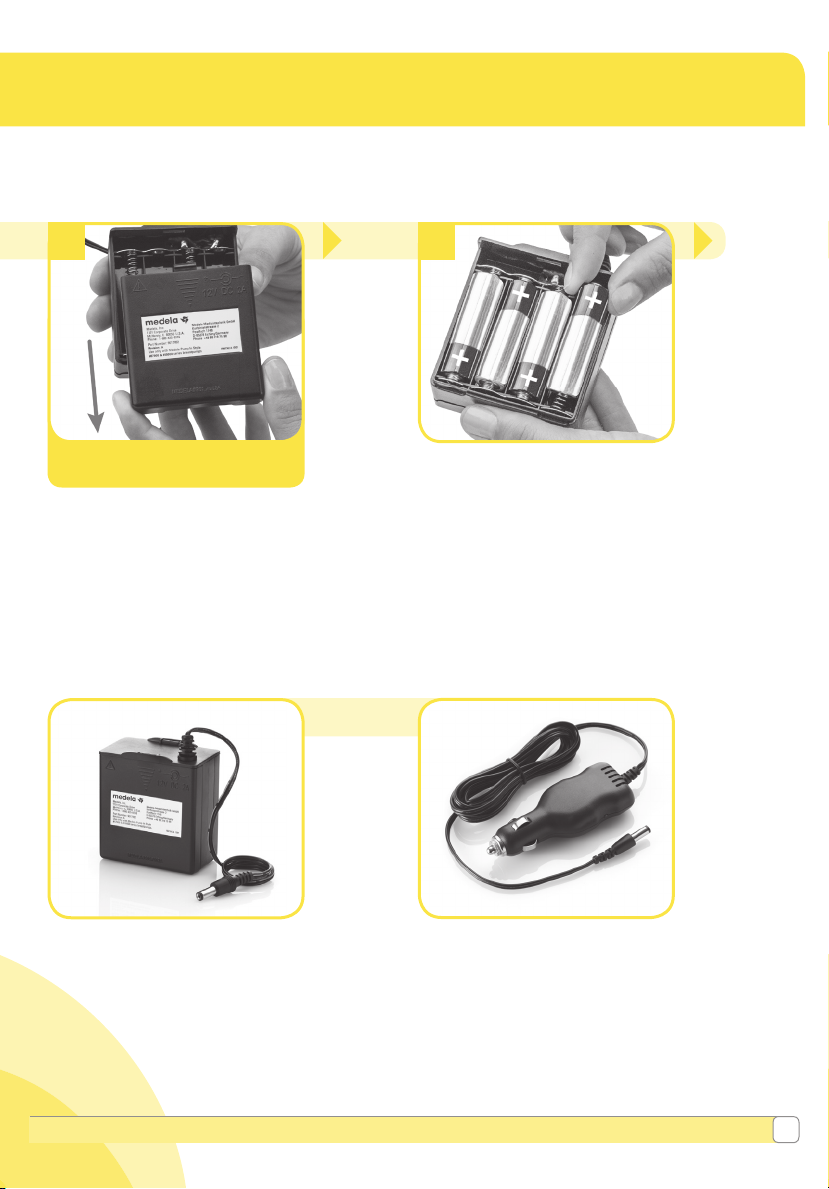
2 3
Replace all batteries at the
same time.
Place the NEGATIVE (-) end of the battery
against the front of the spring by pushing the
Slide off both battery covers.
Four (4) batteries are placed on
each side of battery pack.
battery in and down in one motion until the
battery snaps into place.
The POSITIVE (+) end of the battery should be
near the positive sign on the battery pack.
2.3.3 Traveling outside of the U.S.
When traveling outside of the U.S., there are 2 power options:
or
Use the Battery Pack that was
included with your Pump In Style
Advanced breastpump.
®
Purchase the 9 volt Portable Vechicle Adaptor
(sold separately). Locate a Medela Retailer
at: http://medela.fi ndlocation.com or visit our
online store at www.shopmedela.com.
For information about traveling with your breastpump and expressed breastmilk, visit www.TSA.gov.
Questions? Visit www.medela.com or call us at 1-800-435-8316.
23
3. Pumping
Caution
• Always inspect breastshield,
breastshield connectors, white
membranes, yellow valves, and tubing
prior to use for cleanliness. If dirty, see
Section 1.2.
• If you experience pain or other
symptoms while pumping seek advice
from your healthcare professional or
breastfeeding specialist. See Section 7
for more information.
• Do not try and express with vacuum
that is too high and uncomfortable
(painful). The pain, along with potential
breast and nipple trauma may decrease
milk output.
• Make sure tubing is not kinked or
pinched while pumping.
• Contact your healthcare professional
or breastfeeding specialist if you can
express only minimal or no milk or if
expression is painful.
3.1 Device operation
1
Wash hands before touching
breastpump, kit and breasts
and avoid touching the inside of
containers or lids.
4
Info
• Research has shown that you will
pump more effi ciently – get more
milk in less time – when pumping at
Maximum Comfort Vacuum
Expression Phase.
• You should reassess your Maximum
Comfort Vacuum throughout your
pumping experience because it can
change during the different stages of
lactation.
• Do not tilt or overfi ll containers when
pumping.
24
™
during the
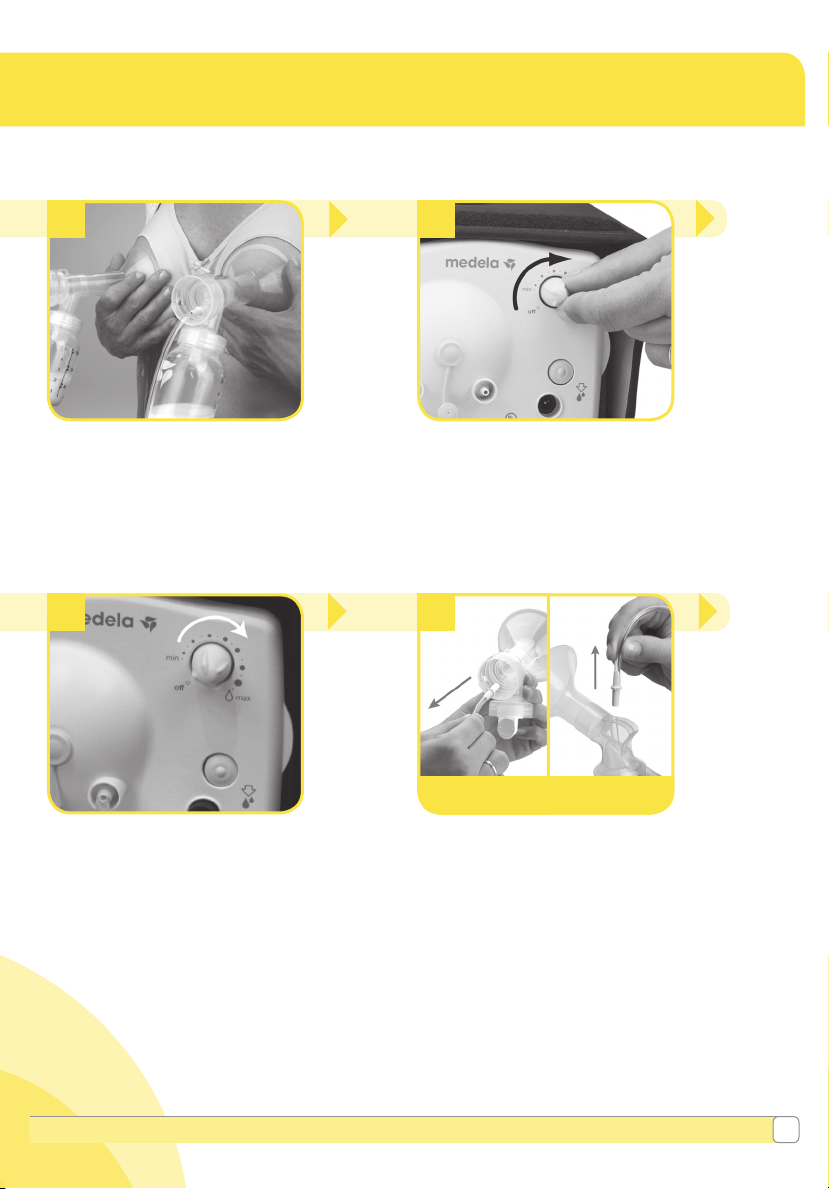
After two minutes, the pump
will automatically change to the
Expression Phase.
a. If you let-down (your milk starts to
fl ow) sooner than 2 minutes, press
the let-down
button.
b. If let-down has not happened
during the Stimulation Phase and
the pump has switched to the
Expression Phase, press the letdown
button once to return to
the Stimulation Phase.
2
3
Center the assembled
breastshields over your nipples.
5 6
To fi nd your Maximum Comfort
Vacuum, increase speed/
vacuum until pumping feels
slightly uncomfortable (not
painful), then decrease slightly.
To begin pumping, turn dial clockwise from
the off position. Your pumping session
will start in the Stimulation Phase. While
pumping, adjust the speed/vacuum by
turning the dial to your comfort level.
Continued
next page.
810726487071
When your pumping session
is over unplug tubing from the
back of the breastshield(s)
before setting down the
bottles.
Questions? Visit www.medela.com or call us at 1-800-435-8316.
25
3. Pumping (cont.)
Note
• Always disconnect Pump In Style® from
the power source after expression.
• Only fi ll the bottle to the 150 mL mark.
Info
• How often should you pump? A
breastpump is a replacement for when
you are separated from your baby. It
is important to pump when the baby
would be breastfeeding, which usually
means a working mother pumps 2-3
times during an 8 hour working day.
• How long should your pumping
session last? Pumping times can vary
from mother to mother sometimes 15
minutes, sometimes up to 30 minutes.
• How should your breasts feel after
pumping? After pumping, your breasts
should feel soft and there should be
no fi rm areas. Before pumping, your
breasts will have a fi rm, heavy feeling.
After pumping make sure your breasts
are not fi rm or have lumpy areas. This
could indicate that the breast is not
draining all over. See Section7 for
more information.
3.1 Device operation (cont.)
7
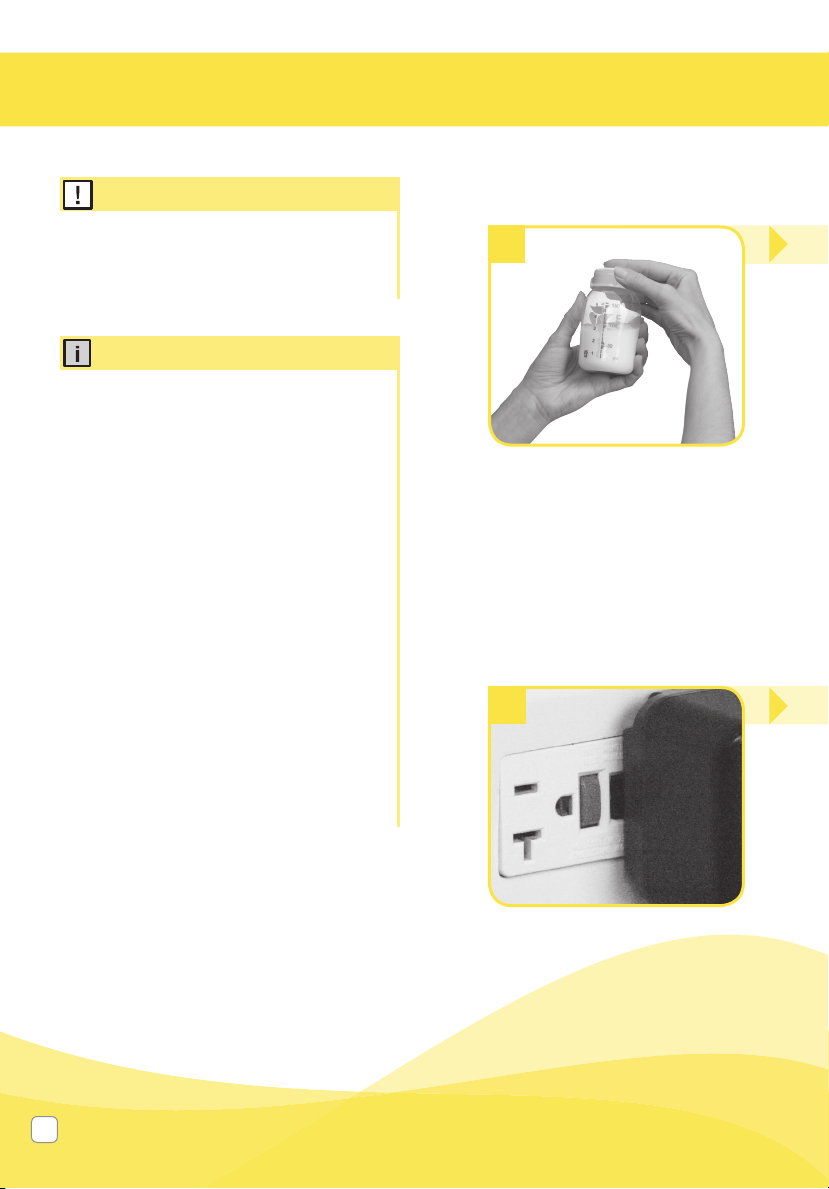
Close the bottle with a lid.
➙ Follow the instructions in
Section 4 “Storing Breastmilk
& Section 5 "Preparing and
and Feeding Breastmilk”.
10
Unplug breastpump from
power source.
26
8
9
Allow the pump to continue to run
while you store your breastmilk.
This will allow any condensation
that has formed from the natural
results of humidity to dry in the
tubing.
11
Prior to storing your pump
remove tubing by pulling straight
out of tubing ports. Do not wiggle
or pull tubing at an angle.
Turn off breastpump.
12
Disassemble and clean per
Cleaning Instructions in
Section1.
Questions? Visit www.medela.com or call us at 1-800-435-8316.
27

4. Storing Breastmilk
Warning
• Do not thaw frozen breastmilk in a
microwave or in a pan of boiling water.
• Do not microwave breastmilk.
Microwaving can cause severe burns
to baby’s mouth from hot spots that
develop in the milk during microwaving.
(Microwaving can also change the
composition of breastmilk.)
Note
• If the ice pack is frozen solid, it will
safely cool your breastmilk for up
to 10 hours in a room temperature
environment.
4.1 Storing breastmilk
in your Pump In Style®
Advanced cooler bag
The Pump In Style Advanced cooler
bag requires one contoured ice
pack (#87092, included) for cooling
up to four 5 oz bottles of breastmilk.
• As soon as you are fi nished
pumping, place the breastmilk
bottle or breastmilk storage bag in
the cooler bag with the ice pack.
• Transfer breastmilk bottles or
breastmilk storage bag to the
refrigerator or freezer once you are
home.
28
5. Preparing and Feeding Breastmilk
Freshly Expressed Breastmilk
(For Healthy Term Babies)
Room
Temperature
4–6 hours
at 66–78 °F
(19–26 °C)
References: www.BreastmilkGuidelines.com
Cooler with
Ice Pack
24 hours
at 59 °F
(15 °C)
Storage Guidelines
Refrigerator Freezer
3–8 days
at 39 °F
or lower
(4 °C)
6–12
months
0–-4 °F
(-18–-20 °C)
5.1 Preparing breastmilk
• Thaw breastmilk overnight in the refrigerator. Thawed breastmilk is safe in the
refrigerator for 24hours. Do not refreeze thawed breastmilk.
• Quickly thaw breastmilk by holding the bottle under warm running water.
• Place the sealed bottle in a bowl of warm water for 20minutes to bring it to body
temperature.
• If you are adding expressed breastmilk to a container of already frozen breastmilk,
make sure to add a lesser amount than the already frozen amount.
5.2 Feeding breastmilk
It is recommended that breastfeeding is well established prior to bottle feeding your
baby.
• Always inspect the bottle, nipple and other components immediately before and after
each use. If nipple appears cracked or torn, discontinue use immediately.
• To prevent possible choking hazard, test strength of nipple by pulling on bulb portion
of the nipple.
• Do not attempt to enlarge the nipple hole.
• Infants must not be bottle fed without adult supervision.
• Nipple should not be used as a pacifi er.
For additional breastmilk collection and storage information, please visit:
www.BreastmilkGuidelines.com
Questions? Visit www.medela.com or call us at 1-800-435-8316.
29
6. Troubleshooting6. Troubleshooting
Low or No Suction Valve and Membrane Check
• Remove and separate valve from membrane
• Inspect the valve for chips or cracks. Inspect the membrane for holes or tears. If
fl awed or damaged replace valve and/or membrane prior to pumping
• Wash valve and membrane per Cleaning section
• Reassemble. Make sure the membrane lays fl at on the valve, and if it does not,
replace the valve and/or membrane prior to pumping
Breastshield and Breastshield Connector Check
• Inspect breastshield and breastshield connector to make sure there are no
cracks and they securely attach to each other
Faceplate Check
• Wash faceplate and backplate per Milk Overfl ow section steps 1.4
on pages 12-15.
• Reassemble faceplate and backplate, and reattach tubing to faceplate port
Connection Point Check
Inspect following connection points to ensure attachment is secure
• Tubing adapter to breastshield connector
• Tubing end to faceplate port
• Faceplate to backplate
• Test vacuum. If suction is not improved, contact Medela Customer Service at
1-800-435-8316.
Audible air coming from
port cap/faceplate
Power source • If pump is not turning on with the power adaptor try the battery pack.
Faceplate port broken/
cracked
Condensation or milk in
tubing
No “let-down” or
breastmilk expression
CAUTION: Do not attempt to plug hole in cap or port with additional material.
• There is a built-in air leak for vacuum control, some audible air is normal.
• If the pump is not turning on with the battery pack, be sure the batteries have
been inserted correctly.
• If pump is still not working with the power adaptor or the battery pack, contact
Medela Customer Service at 1-800-435-8316.
CAUTION: If you are feeling a loss of suction with the broken faceplate, do not
use the pump until the new faceplate arrives.
• Contact Medela Customer Service at 1-800-435-8316 or order online at
www.shopmedela.com.
• Refer to “Tubing and faceplate cleaning” section 1.4.
• Ensure your breastpump is assembled correctly and that there is suction.
• Relax and take a 10-15 minute break if let down is not achieved after 2
consecutive pumping sessions.
• Consult with your healthcare provider or breastfeeding specialist if expression
does not occur.
30
 Loading...