

Page 1
NEGATIVE PRESSURE WOUND THERAPY SYSTEM
Invia® Liberty
™
EN
Patient instructions for use
ES
Instrucciones de uso paciente
FR
Mode d’emploi pour le patient
Page 2

2
Assistance
Read the entire instruction manual before trying to operate
the device.
If you have any questions about your Invia Liberty Negative
Pressure Wound Therapy system, please contact your healthcare
provider / physician at the number below:
Keep this Patient instructions for use (IFU) booklet in an
easily accessible location.
HEALTHCARE PROVIDER/PHYSICIAN
CONTACT INFORMATION:
Page 3

3
EN
General warnings ............................................................................................................................. 4
Purpose of the device
................................................................................................................. 6
Intended use
......................................................................................................................................... 6
When not to use the device (Contraindications)
.............................................. 7
Description of the device
.......................................................................................................... 8
Display
......................................................................................................................................................... 9
Conditions that affect use
....................................................................................................... 9
General safety at home
........................................................................................................... 10
Sleeping
...................................................................................................................................................11
Showering, bathing and washing
...................................................................................11
When you leave the house
.................................................................................................. 12
Set up instructions
....................................................................................................................... 12
Set up carrying case
................................................................................................................. 14
Battery status
.................................................................................................................................... 14
Charge battery
................................................................................................................................. 15
Change canister
............................................................................................................................. 16
Connect / disconnect Quick-connector
....................................................................17
Notifications and troubleshooting
.................................................................................. 19
Alarm table
..........................................................................................................................................20
Cleaning / Disinfection
................................................................................................................ 24
Guarantee
............................................................................................................................................. 24
Maintenance / Safety-related check
............................................................................. 24
Disposal
.................................................................................................................................................. 24
Technical specifications
.......................................................................................................... 25
Signs and symbols
...................................................................................................................... 26
Technical documentation
...................................................................................................... 28
Electromagnetic compatibility (EMC)
......................................................................... 81
Table of contents
EN Instructions for use 2
ES Instrucciones de uso 29
FR Mode d’emploi 56
Page 4
4
General warnings
WARNING
The individual responsible for operating this device on a daily
basis (patient, caregiver) must be able to read, understand and
follow directions provided in this IFU, on the pump display and by
the healthcare professional. The individual must be able to hear
and respond to auditory signals.
Only use the Invia Liberty NPWT system on the person for whom
it was ordered and only for its intended use.
Do not perform the therapy without first consulting with healthcare
personnel and caregivers trained on the instructions for use and
the healthcare professional’s supervision.
No modification of this equipment is allowed.
WARNING
Visually check at the wound dressing and the Invia Liberty system
frequently.
If you see large amounts of blood in the dressing, tubing
or canister:
1 Turn off the pump by pressing
and hold for 3 seconds.
2 Apply pressure to your wound.
3 Seek immediate Emergency Medical assistance.
If you have difficulty breathing, seek immediate Emergency
Medical Assistance.
WARNING
Immediately contact your healthcare professional if you
experience the following symptoms:
– Significant vision or hearing loss
– Pain, soreness or redness around the wound
– Swelling, itching, or rash around the wound
– Fever
– Strong odor from the wound
Page 5
5
EN
– Thick green drainage or any unusual change in color
of drainage
– Nausea or vomiting or diarrhea
– Sore throat with swelling
– Dizziness or confusion
– Allergic reactions like redness, rash or hives, swelling
or severe itching
WARNING
Once the healthcare professional has set the pump pressure
and mode settings do not press any other button than the on / off
button [
], the standby button [ ] or the mute button [ ].
WARNING
The pump must be used 24 hours per day. Do not stop the pump
unless instructed by your healthcare professional or if excessive
bleeding occurs.
If the pump is stopped for more than the time frames shown
below, the dressing must be changed. Contact your healthcare
professional to request a dressing change.
Gauze dressings: Change dressing if the pump is
stopped more than 2 hours.
Foam dressings: Change dressing if the pump is
stopped more than 2 hours.
WARNING
If the pump stops working and cannot be switched on, immediately call your healthcare professional.
CAUTION: U.S. Federal law restricts this device for sale or rental
by or on the order of a physician.
Page 6

6
Purpose of the device
Your healthcare provider has prescribed Negative Pressure
Wound Therapy ( NPW T ) for you.
Negative Pressure Wound Therapy has been shown to help
promote healing in several different kinds of wounds. Negative
pressure (suction) is delivered to a wound through a pump.
The suction, or negative pressure, helps to remove fluid and close
your wound. Your healthcare professional will place a special
dressing on your wound and a tube will go from your wound to
the canister on the pump. The pump is then turned on to the
prescribed pressure to remove the fluid from your wound.
The fluid then goes into the canister. The treatment will be on
24 hours a day.
Intended use
The Medela Invia Liberty Negative Pressure Wound Therapy
system is indicated to help promote wound healing, through
means including drainage and removal of infectious material or
other fluids, under the influence of continuous and/or intermittent
negative pressures, particularly for patients with chronic, acute,
traumatic, subacute and dehisced wounds, partial thickness
burns, ulcers (such as diabetic or pressure), flaps and grafts.
Page 7

7
EN
When not to use the device (Contraindications)
Contraindicated for patients with:
– Malignancy of the wound
– Untreated osteomyelitis
– Unmanaged malnutrition
– Non-enteric fistula
– Unexplored fistula
– Necrotic tissue with eschar present
– Do not place Invia Wound Therapy dressing over
exposed blood vessels or organs
– Do not place directly over anastomoses or sutured vessels
If you have concerns, speak with your healthcare professional.
Page 8
8
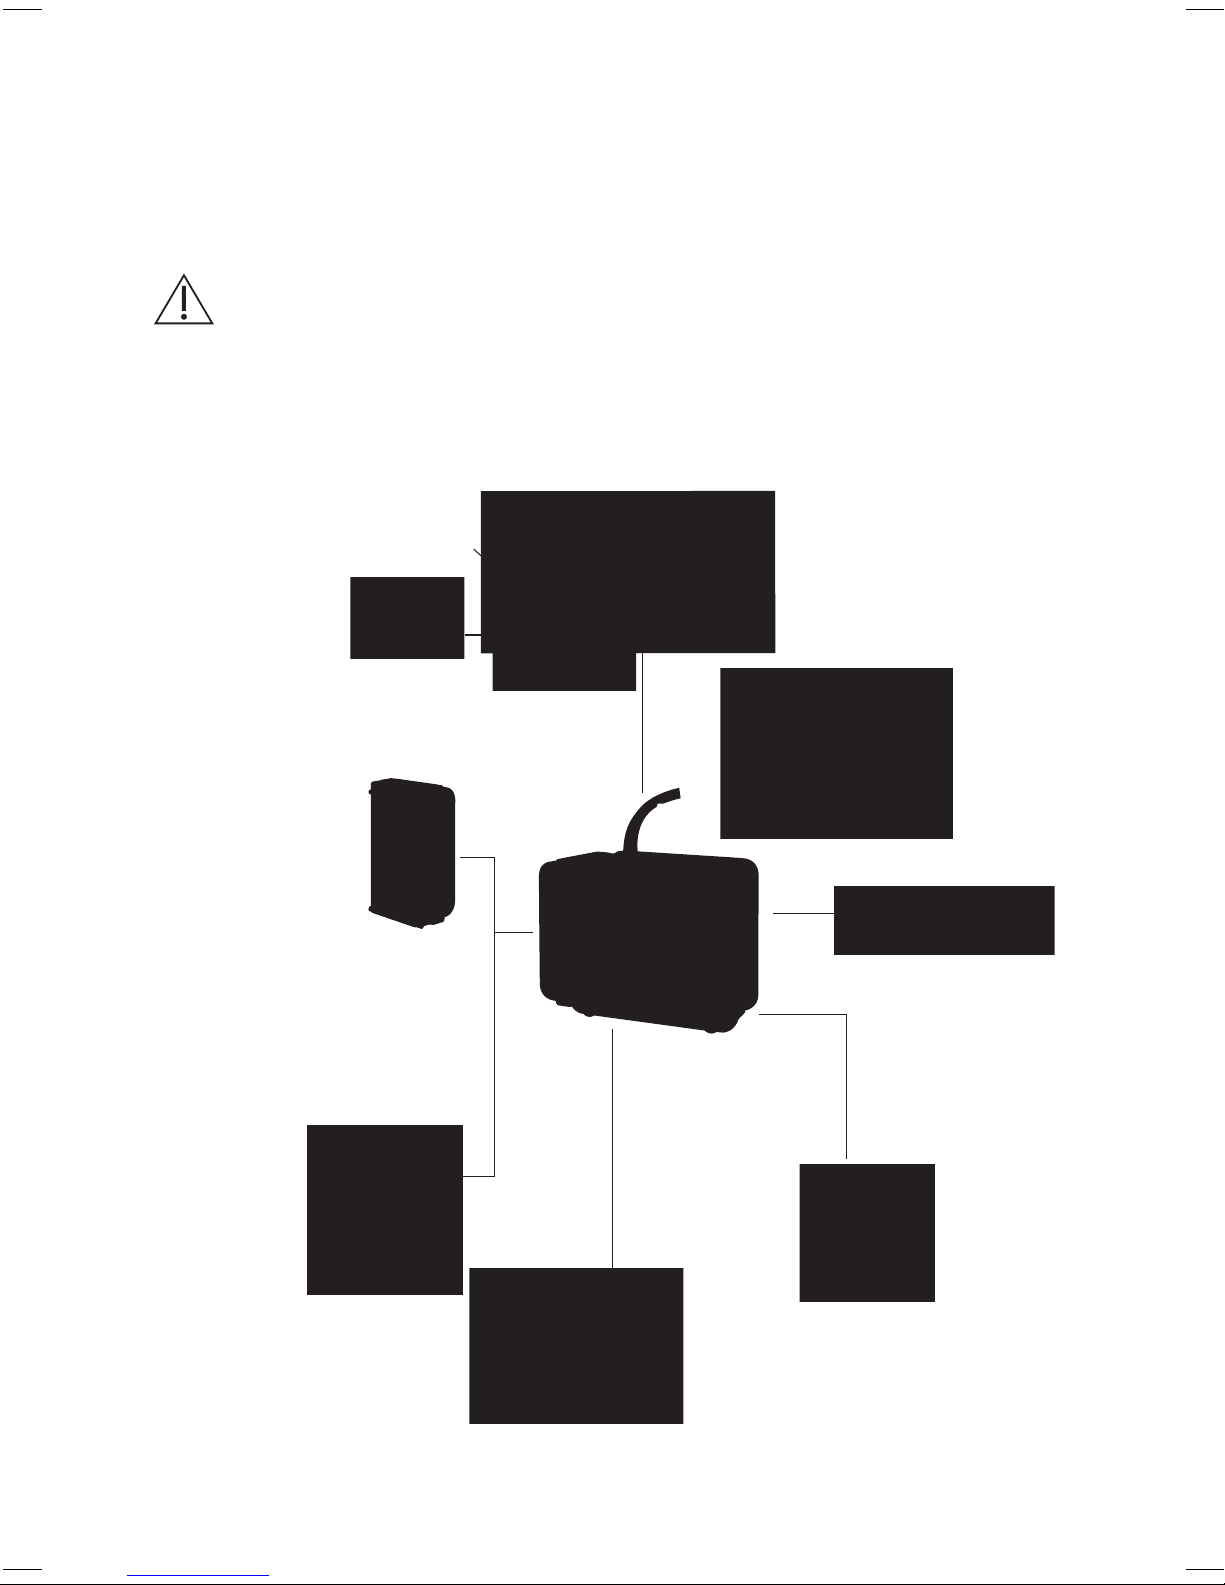
Description of the device
Check the delivery package of the Invia Liberty system
for completeness and general condition.
WARNING
Do not use any other accessories than the ones
described below.
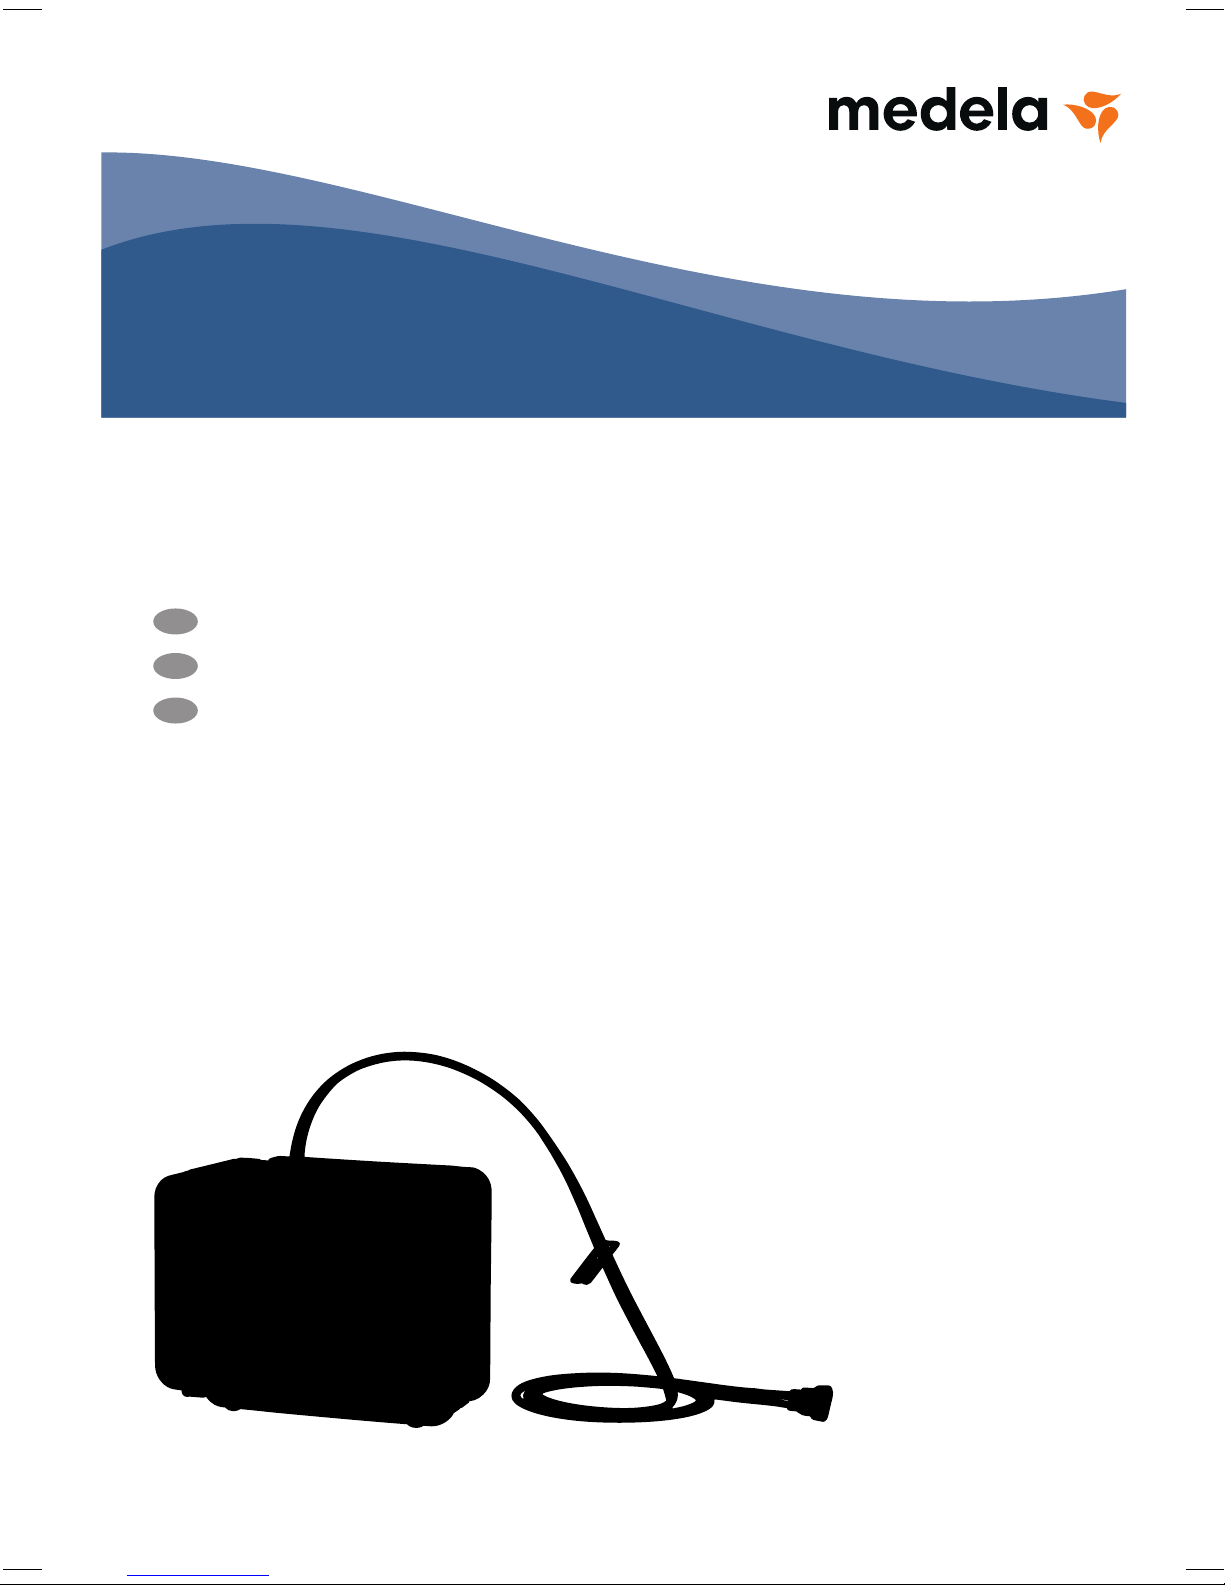
Invia Liberty
pump with
instructions
for use
Invia Liberty canister 0.3 liter with
solidifier
Y- connector
Invia Liberty canister 0.8 liter with
solidifier
Charger
Holder with
standard rail
Carrying
case
Docking station
Invia Liberty tubing
set, single, sterile
Drain adapter
Quick- connector
Page 9
9
EN
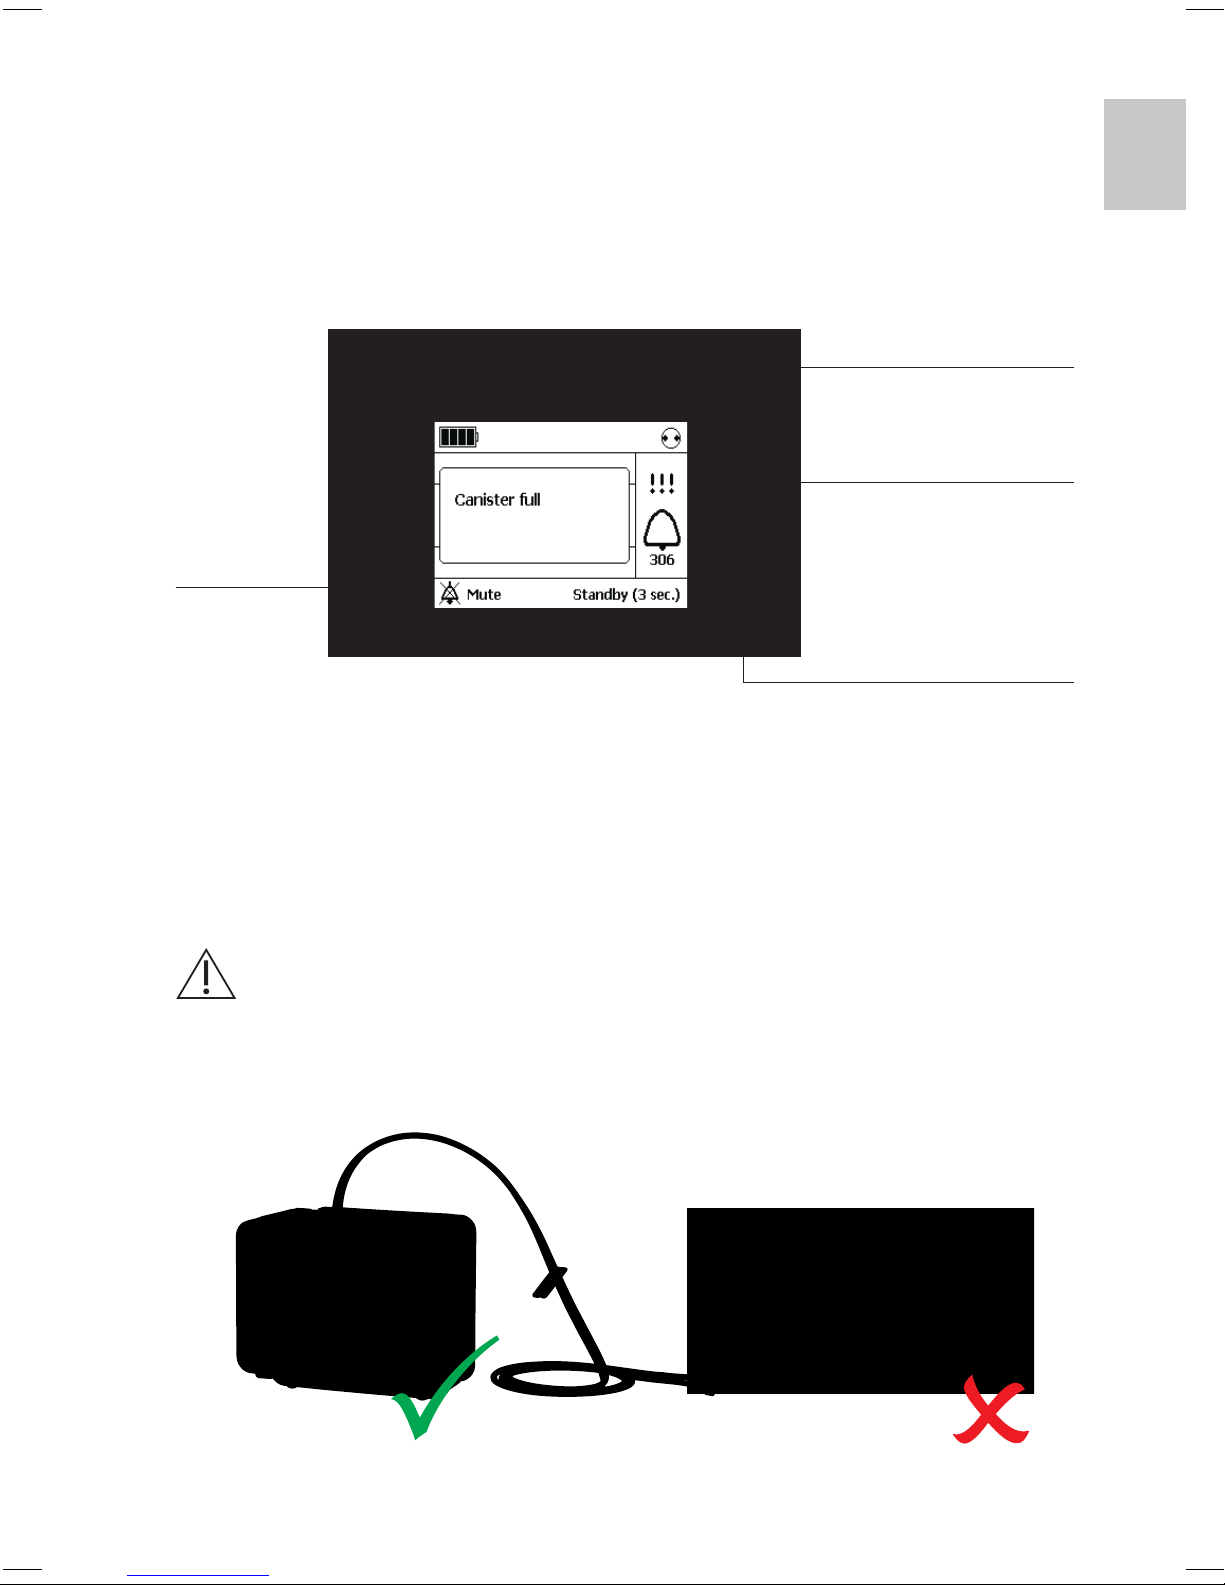
Display
Buttons to operate the Invia Liberty pump
Conditions that affect use
CAUTION
The Invia Liberty pump must remain in an upright
position during use.
ON / OFF
Mute
Do not press (only
for clinician)
Standby / On
Page 10

10
General safety at home
Please read and observe these warnings and safety instructions
before operation. These instructions for use must be kept with the
device. Please note that these instructions for use are a general
guide for the use of the product. Medical situations must be
addressed by a physician.
CAUTIONS / WARNINGS
– Do not use extension cords with the Invia Liberty pump.
– Position the power cord so that it will not cause someone to
trip and fall.
– Never place the power supply cord around your neck.
– Keep the power supply cord away from hot surfaces.
– Do not unplug the power supply cord from the wall outlet by
pulling on the cord.
– Do not try to fix or repair the Invia Liberty pump. Contact your
healthcare professional if the pump is not working.
– Keep the Invia Liberty pump clean and dry.
– Never place the Invia Liberty pump in water or liquids.
– If the Invia Liberty pump gets wet, dry with a towel.
– Do not dry the Invia Liberty pump in a microwave.
– Keep the Invia Liberty pump away from children and pets.
– Supervision is necessary when the Invia Liberty pump is used
in the vicinity of children.
– Keep the Invia Liberty pump protected from direct sunlight.
– Explosion hazard – the Invia Liberty pump is not for use in
potentially explosive environments including oxygen enriched
environments and in areas of flammable anesthetics.
– The use of mobile telephones, local area networks (LAN)
including wireless (WLAN), walkie-talkies ( two-way radios ) and
cordless telephone sets can affect the Invia Liberty pump.
This may cause insufficient battery charging or may lead to an
internal fault. See the chapter Notifications and roubleshooting
for actions to take in the case of an internal fault. Certain
mobile phones may interfere with the Invia Liberty pump when
Page 11

11
EN
receiving and making calls close to the pump. Prior to using
a mobile phone near the Invia Liberty pump, check that it continues to function while making or receiving a call.
If you observe a change in the vacuum level or an error condition,
move the Invia Liberty pump at least 1 meter (3.3 feet) from the
mobile phone when making or receiving calls. Turn the Invia
Liberty pump on and off again to reset it after an error condition.
Whenever possible, a safety distance of minimum 1 meter
(3.3 feet) between the Invia Liberty pump and a mobile phone is
recommended.
Sleeping
– Make sure the Invia Liberty pump tubing will not become kinked.
– Prevent the Invia Liberty pump from falling to the floor during
sleep.
– Always charge the Invia Liberty pump when going to bed.
Showering, bathing and washing
– Do not use the Invia Liberty pump while bathing or showering.
– The Invia Liberty pump can be disconnected from the dres-
sing for a short period of time ( up to 20 minutes ) in order to
change clothes or perform personal hygiene. Discuss bathing
plans with your healthcare professional.
– Prevent the Invia Liberty pump from getting wet.
– Do not put the Invia Liberty pump where it can fall into a
shower, sink or tub.
– Do not touch the Invia Liberty pump when it has fallen into
water. Unplug device immediately from electrical outlet
and disconnect the pump from the dressing.
Page 12

12
Display view when the pump is runing.
Run / Standby indicator is rotating [ ].
Set up instructions
WARNING
Check the Invia Liberty pump and dressing frequently to
make sure it is working. Visually check the wound dressing,
area around the wound and fluid in the canister for signs of
infection or other complications as provided by your healthcare professional.
Turn ON
Switch Invia Liberty pump ON
by pressing [ ].
When you leave the house
– Check the battery status and recharge if necessary before
leaving the house.
– For your convenience, place the Invia Liberty pump into
the carrying case.
– Do not forget to take a spare canister and power supply with you.
WARNING
Do not try to perform therapy without the super vision of
your healthcare professional.
Page 13

13
EN
WARNING
The dressing should be changed and therapy restarted by
the healthcare professional if therapy is discontinued for
more than 2 hours.
WARNING
Invia Liberty pump does not detect blockage along tubing
connected to the drain adapter or connected to the curved
arm of the Y-connector. Check dressing tubing connected
to the drain adapter or the curved arm of the Y-connector
frequently throughout the day to make sure tubing is not
kinked or blocked.
If blockage is identified along tubing connected to the drain adapter or tubing connected to the curved arm of the Y-connector,
contact your healthcare professional.
Turn OFF
Switch Invia Liberty pump OFF by pressing
[ ] for 3 seconds. Press only once.
WARNING
NPWT must run 24 hours a day. Do not stop the therapy
unless instructed by your healthcare professional or if
excessive bleeding occurs.
Page 14

14
Set up carrying case
The Invia Liberty pump is intended to be worn in a carrying case
during operation.
1 Open the carrying case.
2 Slide the Invia Liberty pump into the designated pocket.
3 Close the velcro over the pump.
The shoulder strap can also be used as a belt strap.
To accomplish this, release the strap at the sides of the carrying
case and pull it through the two loops located on the back of the
carrying case.
Battery status
When the battery is fully charged it should last appro ximately
10 hours. If the Invia Liberty pump is running continuously due
to an air leakage, the battery may need to be recharged earlier
(after approximately 4 hours).
Battery status symbols
full half full fully discharged (empty)
Page 15

15
EN
Charge battery
If the battery becomes fully discharged (empty), please follow the
instructions below.
Open the electrical outlet port. Connect the Invia Liberty pump to
the supplied electrical plug from the power supply provided with
the pump. Plug the other end of the power supply into a wall outlet. Moving bars on the battery display will indicate charging is
occurring.
The battery is fully charged after approximately 4 hours. Once
battery is fully charged and continues to be connected to the
power source
will appear constantly on the display. After
charging is completed, unplug the power supply from the wall and
disconnect the Invia Liberty pump from the power supply.
Close the electrical outlet port by pressing the protection cover
down.
CAUTION
NPWT therapy must be continued while charging
the pump’s battery. Do not turn the pump off while charging.
Always charge the battery overnight.
Electrical outlet port
Page 16

16
Change canister
Change canister when it appears full or when the alarm sounds,
in accordance with instructions on the pump display.
1 Wash hands.
2 Clamp the canister tubing.
3 Press the “Standby” button [
> 3 seconds ]
and the pump motor will stop running.
4
Press release button at the top of the
pump and remove canister.
5
Seal used canister with a cap located on
the side of the canister.
6
Unpack new canister, position the feet at
the bottom of the canister into the grooves
at the base of the pump. Push the canister
up and click into the Invia Liberty pump.
CAUTION
Do not use an Invia Liberty canister if
the sterile packaging is damaged.
Page 17

17
EN
7 Switch the Invia Liberty pump on by
pressing [ ] and slide the pump into the
carrying case.
8 Discard the used canister according to instructions provided
by your healthcare professional.
Connect / disconnect Quick-connector
The Quick-connector can be disconnected for a short period
of time (up to 20 minutes) in order to change clothes or perform
personal hygiene.
1 Wash hands.
2 Clamp the canister tubing and dressing tubing.
3 Press the “Standby” button [
> 3 seconds ]
and the pump motor will stop running.
4
➡
➡
➡
➡
Disconnect the Quick connector by pres-
sing under the sides of the connector.
Page 18

18
5
➡
➡
To reconnect the Quick-connector push
together the Quick-connector until you
hear the click.
click
6 Press “On” [ ] to resume therapy.
Page 19

19
EN
Notications and troubleshooting
Do not panic if an acoustic signal sounds.
Follow the instructions below.
1 If the Invia Liberty pump is in the carrying case open the lid of
your carrying case.
2 Press [ ] to mute the acoustic signal for
60 seconds (can be pressed every time the
signal sounds.
Page 20

20
Alarm table
Warning
401
405
406
Alarm
301
302
Page 21

21
EN
Remarks / potential cause of fault
Recharge the battery either by placing the Invia Liberty pump
in the docking station or plug in the charger to the electrical outlet port
on the pump.
Remaining time of battery is approximately 30 minutes.
If the pump is in Standby mode for more than 5 minutes, an alarm will
go off.
To continue therapy press
“On”
[ ]
Cool Invia Liberty pump down as per instructions on the display.
Dressing:
– Check dressing for air leakage. Press firmly around the edges of
the dressing, around the drain tubing or on the Invia FitPad.
– May apply additional film dressing to seal the leaking area.
Connectors:
– Ensure that the tubing connected to the dressing is connected properly
to the canister tubing.
– Ensure that the canister tubing is inserted straight into the pump.
Canister:
– Ensure that the canister is properly inserted, release the canister
and reposition.
– Ensure that the orange O-ring / gasket, placed beside the canister tubing
on the pump is not missing. Additional O-ring is available via Medela
representative.
Call your healthcare professional.
Page 22

22
CAUTION
If you are unable to identify any symbol or do not under-
stand the alarm on the display, contact your healthcare
professional.
305
Alarm
306
311
313
Internal fault
Page 23

23
EN
WARNING
If the pump fails or cannot be switched on call your health-
care professional immediately.
Remarks / potential cause of fault
Recharge the battery either by placing the Invia Liberty pump
in the docking station or plug in the charger to the electrical outlet port
on the pump.
Remaining time of battery is approximately 15 minutes.
Change the canister, see chapter “Change canister”.
Canister: – Release the canister and reposition.
Tubing: – Ensure that the tubing is not twisted, kinked or clamped.
Canister: – Release the canister and reposition.
Tubing: – Ensure that the tubing is not twisted, kinked or clamped.
Change canister, see chapter “Change canister”.
Restart the pump. If internal fault remains, turn off by pressing
[ > 3 seconds ] and contact your healthcare professional.
Page 24

24
Cleaning / Disinfection
The Invia Liberty pump can be wiped with a damp cloth using
a mild household cleaner.
Guarantee
Warranty period is for 2 years after date of delivery. The manufacturer is not liable for any damage or consequential damage
caused by incorrect operation, inappropriate usage as well as use
by unauthorized persons.
Maintenance / Safety-related check
Service work may only be carried out by authorized personnel.
A safety-related check is confined to visual inspection of the
housing and charger for damage and must be performed prior to
each use. If Invia Liberty pump has not been in use, the battery
must be charged approximately once every 6 months to ensure
optimum function.
Disposal
Ask your healthcare professional how to dispose of used
dressings, canisters and tubing.
Page 25

25
EN
Technical specications
Accessories storage conditions
Accessories must remain in the packaging and stored at
a temperature range of – 4° Fahrenheit and + 122° Fahrenheit
( – 20° Celsius and + 50° Celsius ).
Operation environmental conditions
The Invia Liberty pump and accessories must be operated within
a temperature range of + 41° Fahrenheit and + 104° Fahrenheit
( + 5° Celsius and + 40° Celsius ). Do not operate the products
in extreme cold or heat. Avoid high relative humidity ( 15 – 93 %
is pe rmissible ).
CAUTION
Do not operate the Invia Liberty pump above 9,842 feet
above sea level ( 3000 meter above sea level ).
Protection Class IP33
The Invia Liberty pump is protected against ingress of
solids larger than 0.1 inch (2.5 millimeter) and dripping
water.
Page 26

26
Signs and symbols
This symbol indicates a CAUTION
or WARNING associated with the
device (see page 3).
This symbol indicates that this
is a prescription device.
CAUTION: U.S.
Federal law
restricts this device to sale by
or on the order of a physician
(for US only).
This symbol indicates a class II
device.
This symbol indicates a type
BF applied part.
Do not dispose the device together
with unsorted municipal waste
(for EU only).
This symbol indicates
manufacturer’s catalog number.
This symbol indicates the date of
manufacture (four digits for the year
and two digits for the month).
This symbol indicates
manufacturer’s serial number.
This symbol indicates the name and
the address of the manufacturer.
This symbol indicates
manufacturer’s batch code.
This symbol indicates the device is
sterilized using ethy lene oxide.
This symbol indicates the
protection against the ingress
of solid foreign objects and
against harmful effects due to
the ingress of water.
This symbol indicates that the
device should not be used after the
end of the year and month shown.
Page 27

27
EN
This symbol indicates
to follow the Instruction for use.
This symbol indicates the humidity limitation for operation and
storage.
This symbol indicates the compliance with additional USA and
Canada safety requirements for
medical electrical equipment.
This symbol indicates the atmospheric pressure limitation for operation and storage.
This symbol indicates to not use
the device if package is damaged.
This symbol indicates
to keep the device dry.
This symbol indicates the number
of items.
This symbol indicates
to keep the device away from
sunlight.
This symbol indicates the direct
current socket.
This symbol indicates to handle
the fragile device with care.
This symbol indicates a single use
device. Do not reuse the device.
This symbol indicates the compliance with the essential requirements of the Council Directive
93/42/ EEC of 14 June 1993
concerning medical devices.
This symbol indicates the temperature limitation for operation,
transport and storage.
Page 28

28
Technical documentation
WARNING
Do not use other accessories than those specified or sold by
the manufacturer as replacement parts for internal components
as it may result in increased emissions or decreased immunity
of the Invia Liberty pump.
 Loading...