

Page 1
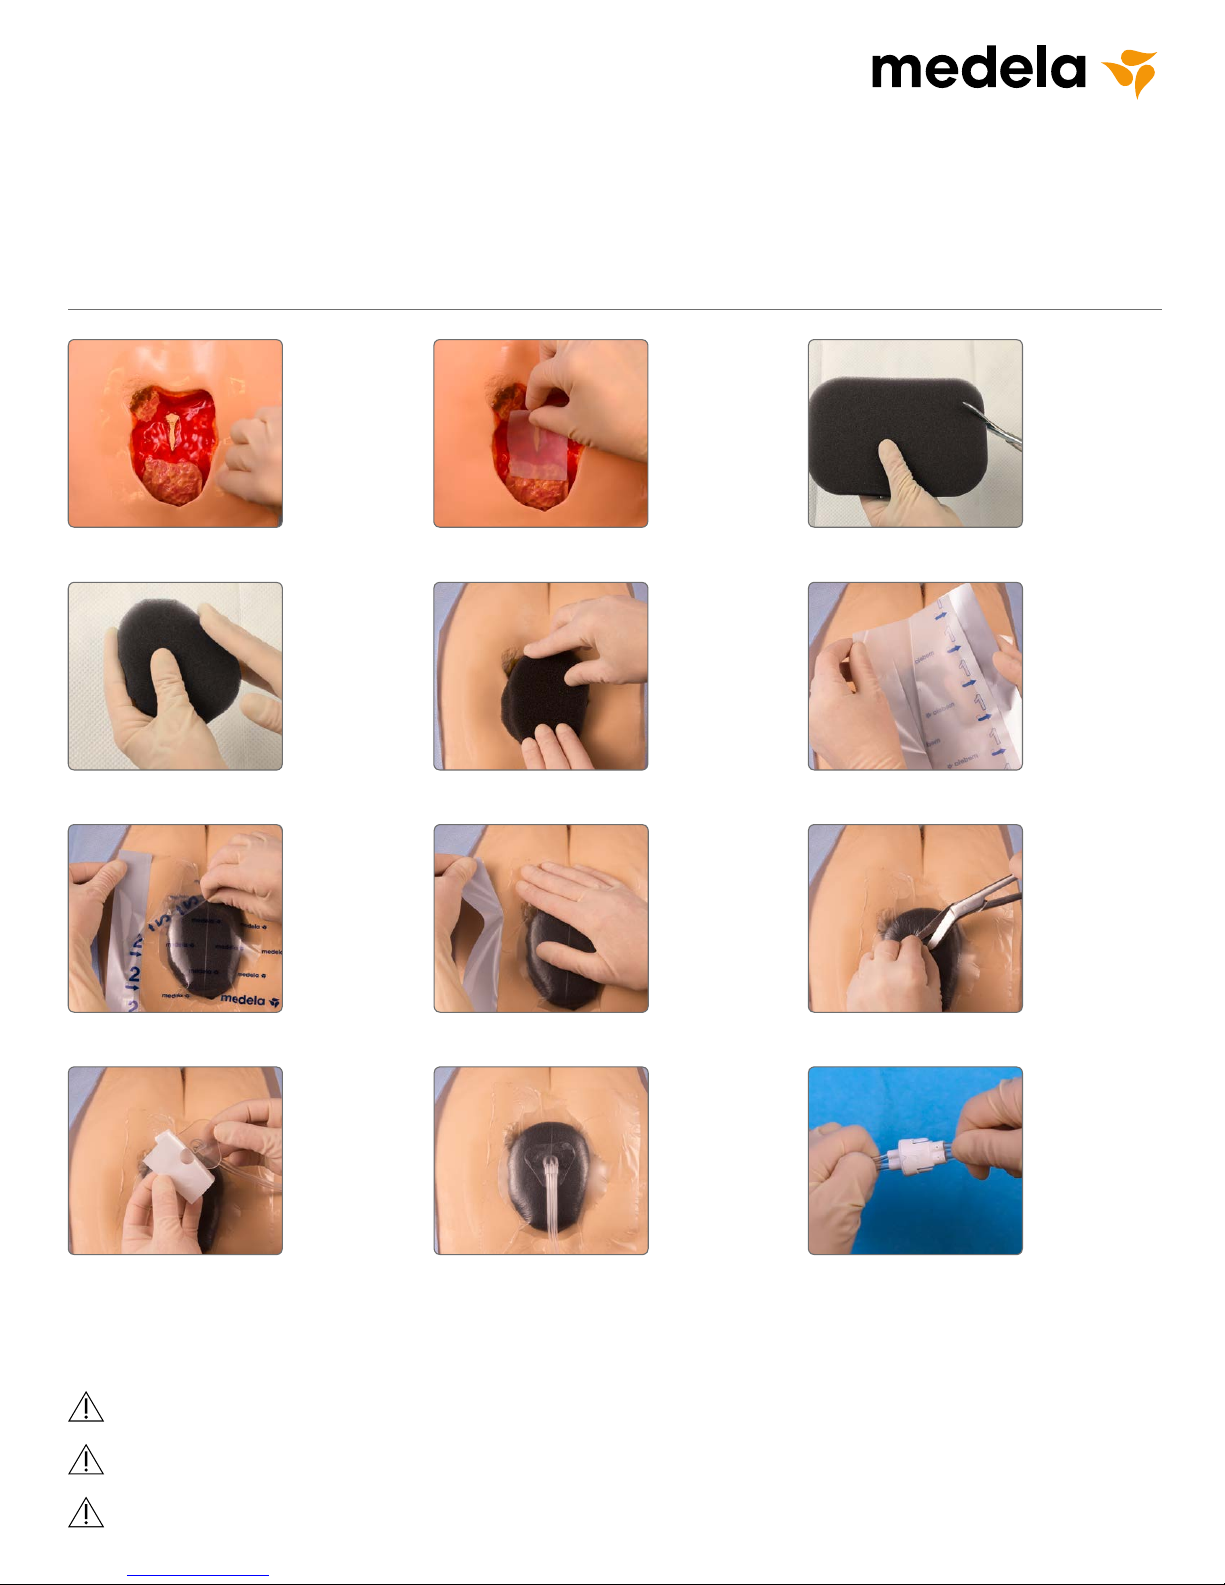
Dressing Application Guide
Invia® Foam Dressing Kit with FitPad
1. Thoroughly
clean and
debride the
wound.
Apply skin prep
to protect the
peri-wound
skin.
4. Rub the edges
of the foam to
remove any
loose
particles.
7. Now remove
the transparent
backing layer
labeled 2.
2. If required,
apply a
non-adherent
contact layer
prior to placing
the foam into
the wound.
5. Place the foam
into the wound
cavity. Do not
tightly pack or
force foam into
areas of the
wound. Do not
allow the foam to
overlap onto
intact skin.
8. Remove the
perforated silver
colored tab on
the side. The
film should
extend 3 –5 cm
beyond the
wound margin
to facilitate
adequate seal.
3. Cut the foam to
fit the size and
shape of the
wound. Do not
cut directly over
the wound.
6. Apply
transparent
film. Partially
peel back one
side of layer 1
and place the
adhesive side
down. Remove
the remaining
side of layer 1.
9. Select
appropriate
location for the
suction pad
(FitPad) to be
applied. Pi nch
the film and cut
a small hole
(appr ox. 1 cm).
10. Peel the
backing
off the FitPad
to expose the
adhesive.
The Invia Foam Dressing Kit with FitPad is intended to be used in conjunction with the Invia Motion and
Invia Libert y Negative Pressure Wound Therapy Systems (NPWT ).
Invia NPWT instructions advise 24 hour therapy without interruption. If therapy is discontinued for more than 2 hours,
the dressing should be replaced and therapy restarted by a healthcare professional.
This Quick Card does not replace the instructions for use REF 200.8923.
11. Place the
FitPad
centered over
the previously
cut hole in the
dressing.
Press firmly
for adherence.
12. Attach the
dressing tubing
to the pump
tubing by
pushing the
Quick-connector together until
you hear a click.
Page 2
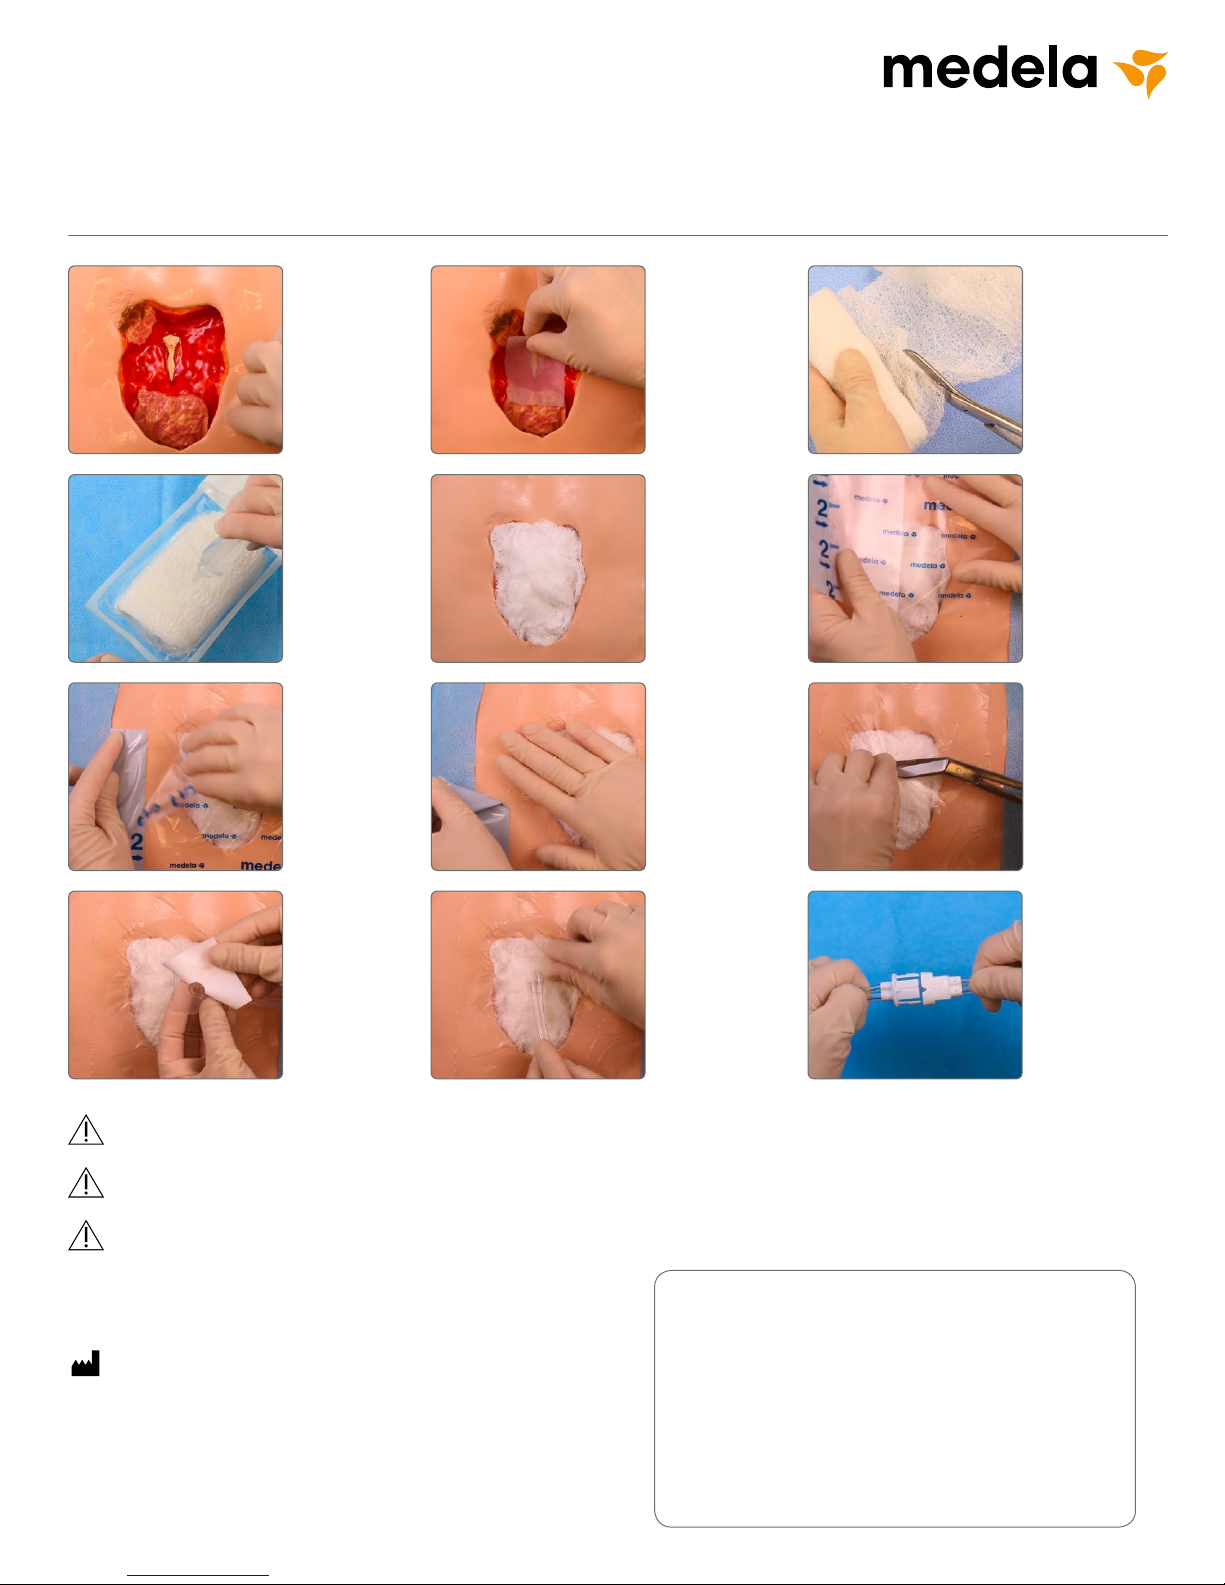
Dressing Application Guide
®
Invia
Gauze Dressing Kit with FitPad
1. Thoroughly
clean and
debride the
wound.
Apply skin prep
to protect the
peri-wound
skin.
4. Saturate the
gauze with
the saline
provided.
7. Now remove
the transparent
backing layer
labeled 2.
10. Peel the
backing off
the FitPad
to expose the
adhesive.
2. If required,
apply a
non-adherent
contact layer
prior to placing
the gauze into
the wound.
5. T he gauze
should fit
loosely into
the wound bed.
Do not tightly
pack or force
gauze into
areas of the
wound.
8. Remove the
perforated silver
colored tab on
the side. The film
should extend
3–5 cm beyond
the wound
margin to
facilitate an
adequate seal.
11. Place the
FitPad
centered over
the previously
cut hole in the
dressing.
Press firmly
for adherence.
3. Cut the gauze
to fit the size
and shape of the
wound. Do not
cut the gauze
directly over the
wound.
6. Apply
transparent
film. Partially
peel back one
side of layer 1
– place the
adhesive side
down. Remove
the remaining
side of layer 1.
9. Select
appropriate
location for the
suction pad
(FitPad) to be
applied. Pi nch
the film and cut
a small hole
(appr ox. 1 cm).
12. At tach the
dressing tubing
to the pump
tubing by
pushing the
Quick-connector together until
you hear a click.
The Invia Gauze Dressing Kit with FitPad is intended to be used in conjunction with the Invia Motion and
Invia Libert y Negative Pressure Wound Therapy Systems (NPWT ).
Invia NPWT instructions advise 24 hour therapy without interruption. If therapy is discontinued for more than 2 hours,
the dressing should be replaced and therapy restarted by a healthcare professional.
This Quick Card does not replace the instructions for use REF 200.9065.
Please contact u s or your local Mede la rep resenta tive fo r details .
Medela AG
Lättichstrasse 4b
6341 Baar, Switzerland
www.medela.com
CAUTION: U.S. Federal law restricts this device to sale by or on the order of a physician.
USA
Medela LLC
1101 Corporate Drive
McHenry
IL 60050, USA
Phone +1 877 735 1626
Fax +1 815 307 8942
info-healthcare@medela.com
www.medela-healthcare.us
Canada
Medel a Canada Inc.
4160 Sladeview Cres., Unit #8
Mississauga, ON
L5L 0A1, Canada
Phone +1 800 435 8 316
Fax +1 800 995 7867
info@medela.ca
www.medela.ca
Local contact:
© Medela AG/201.0869/2016-12/A
Medela US/1908565/A
 Loading...