

MD LUX User Manual
LUX User
Manual

“ I say YES to invitations I would’ve turned down
before. Now I can hear my friends and participate in the conversation.
I have my life back!”
– Mary Lou S.
1

CONGRATULATIONS
With the LUX, you are back in control of the sounds
around you, thanks to premium digital technology,
paired with user-adjustable controls.
Please read this User Manual in its entirety.
Practice and patience are important as your ears
relearn how to hear. Your results, and improved quality
of life, will depend on the type and degree of your
hearing loss, your expectations, and frequency of use.
2

Our hearing instrument specialists are ready
to provide assistance with any questions you
may have. Take advantage of our free
one-on-one phone consultations.
312-366-3899
Mon.—Fri. 8:30am—4:30pm (CST)
support@MDHearingAid.com
24 hours a day, 7 days a week
WE’RE ALWAYS
HERE FOR YOU
3

4

TABLE OF CONTENTS
5

Package Contents .......... 7
LUX Diagram ..............9
Quick Start Guide..........12
1. Insert Battery and......13
Battery Information
2. Place LUX On Ear ......15
3. Adjust Volume .........16
Replacing Tips and Tubing ..17
Replacing ComfortTIP
™
....18
Replacing Thin Tubing ....19
Using High Volume Kit ...20
Care and Cleaning .........21
Program Selection .........24
Using the Telephone .......25
Troubleshooting...........27
Protection Plan and........32
Replacement Parts
Warranty and Repair .......33
Return Policy .............35
Warning to Hearing ........37
Aid Dispensers
Important Notice for .......39
Prospective Users
Notice of Cancellation .....41
Technical Specications ....42
6

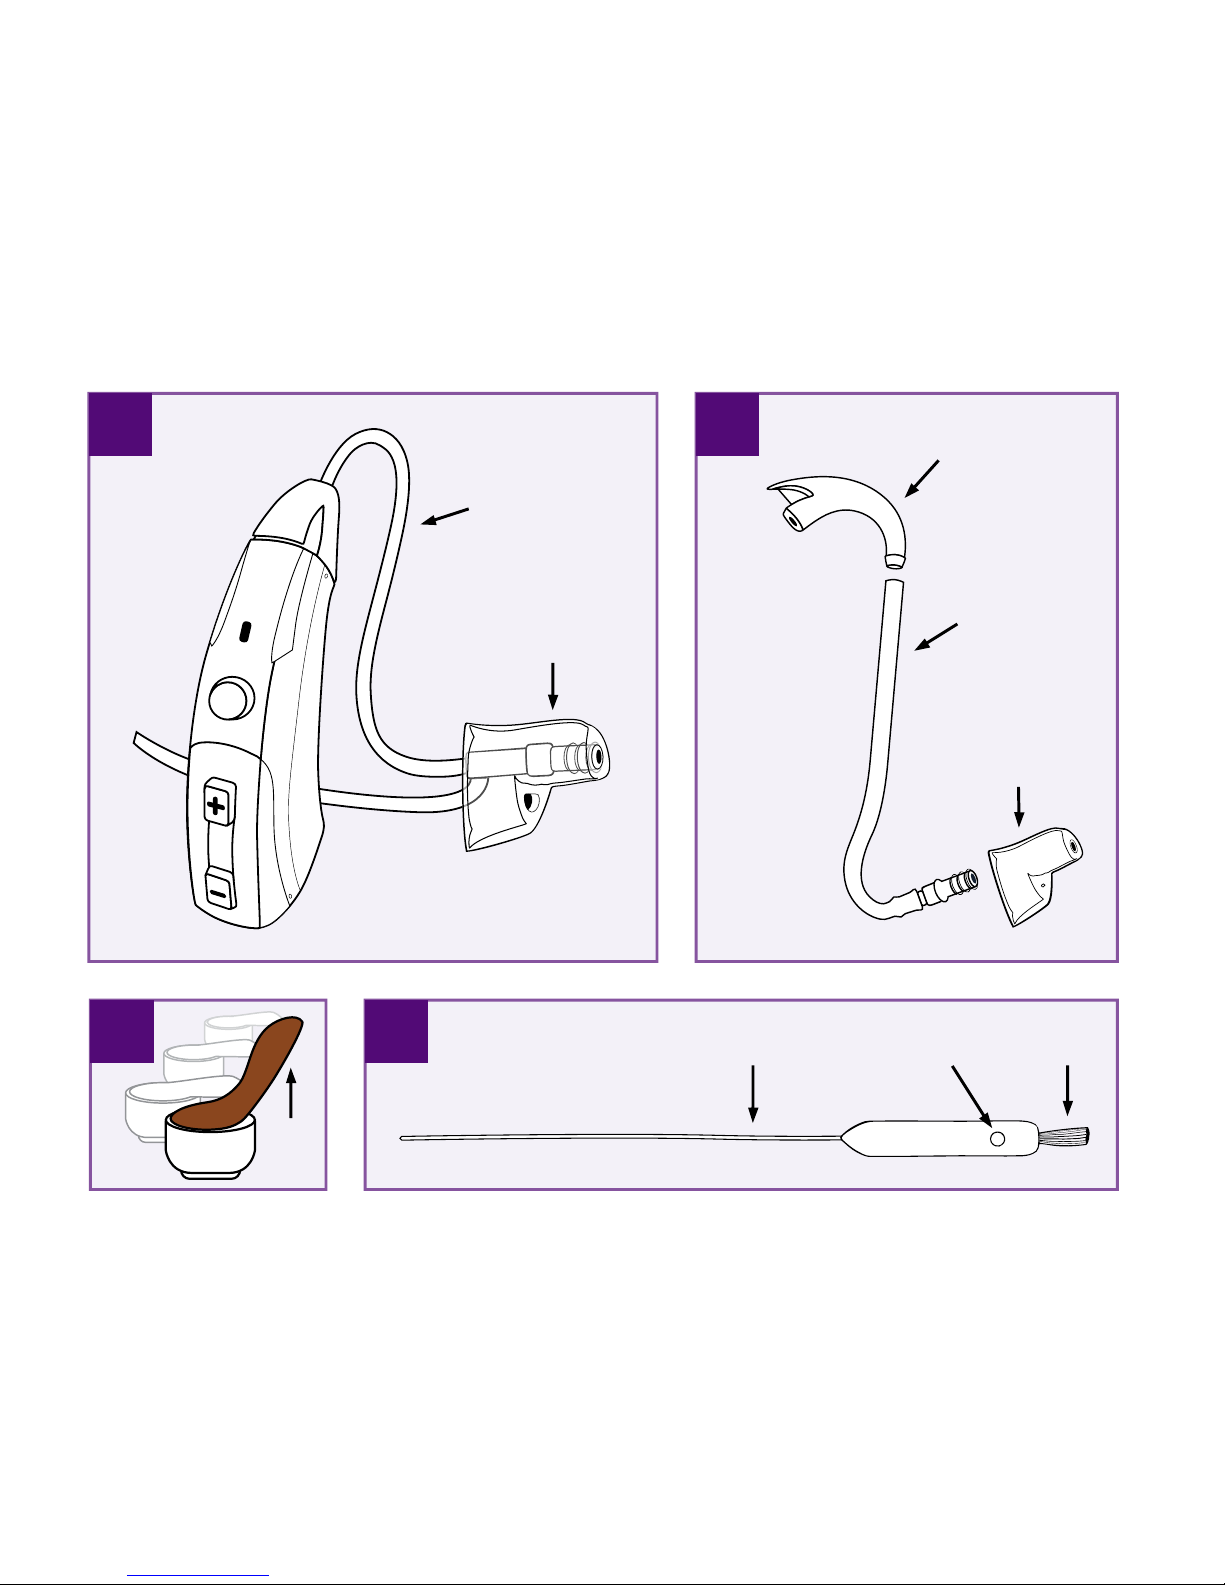
A) MDHearingAid
®
LUX
with Thin Tubing and Open
ComfortTIP
™
, assembled for
your convenience.
B) High Volume Kit
with Earhook, 13PLUS Tubing,
and Closed ComfortTIP.
Requires customization;
see page 20.
C) Size 312 Batteries
Remove brown tab and
wait at least one minute
before use. See page 13
for instructions.
D) Cleaning Tool
with Brush, Magnet,
and Wire. See page 21
for instructions.
PACKAGE CONTENTS
*
7
B
)
A
)
D
)
Open
ComfortTIP
Earhook
Closed
ComfortTIP
13PLUS
Tubing
Thin
Tubing
*Contents will vary depending on product ordered.
C
)
Tab
8
Magnet BrushWire
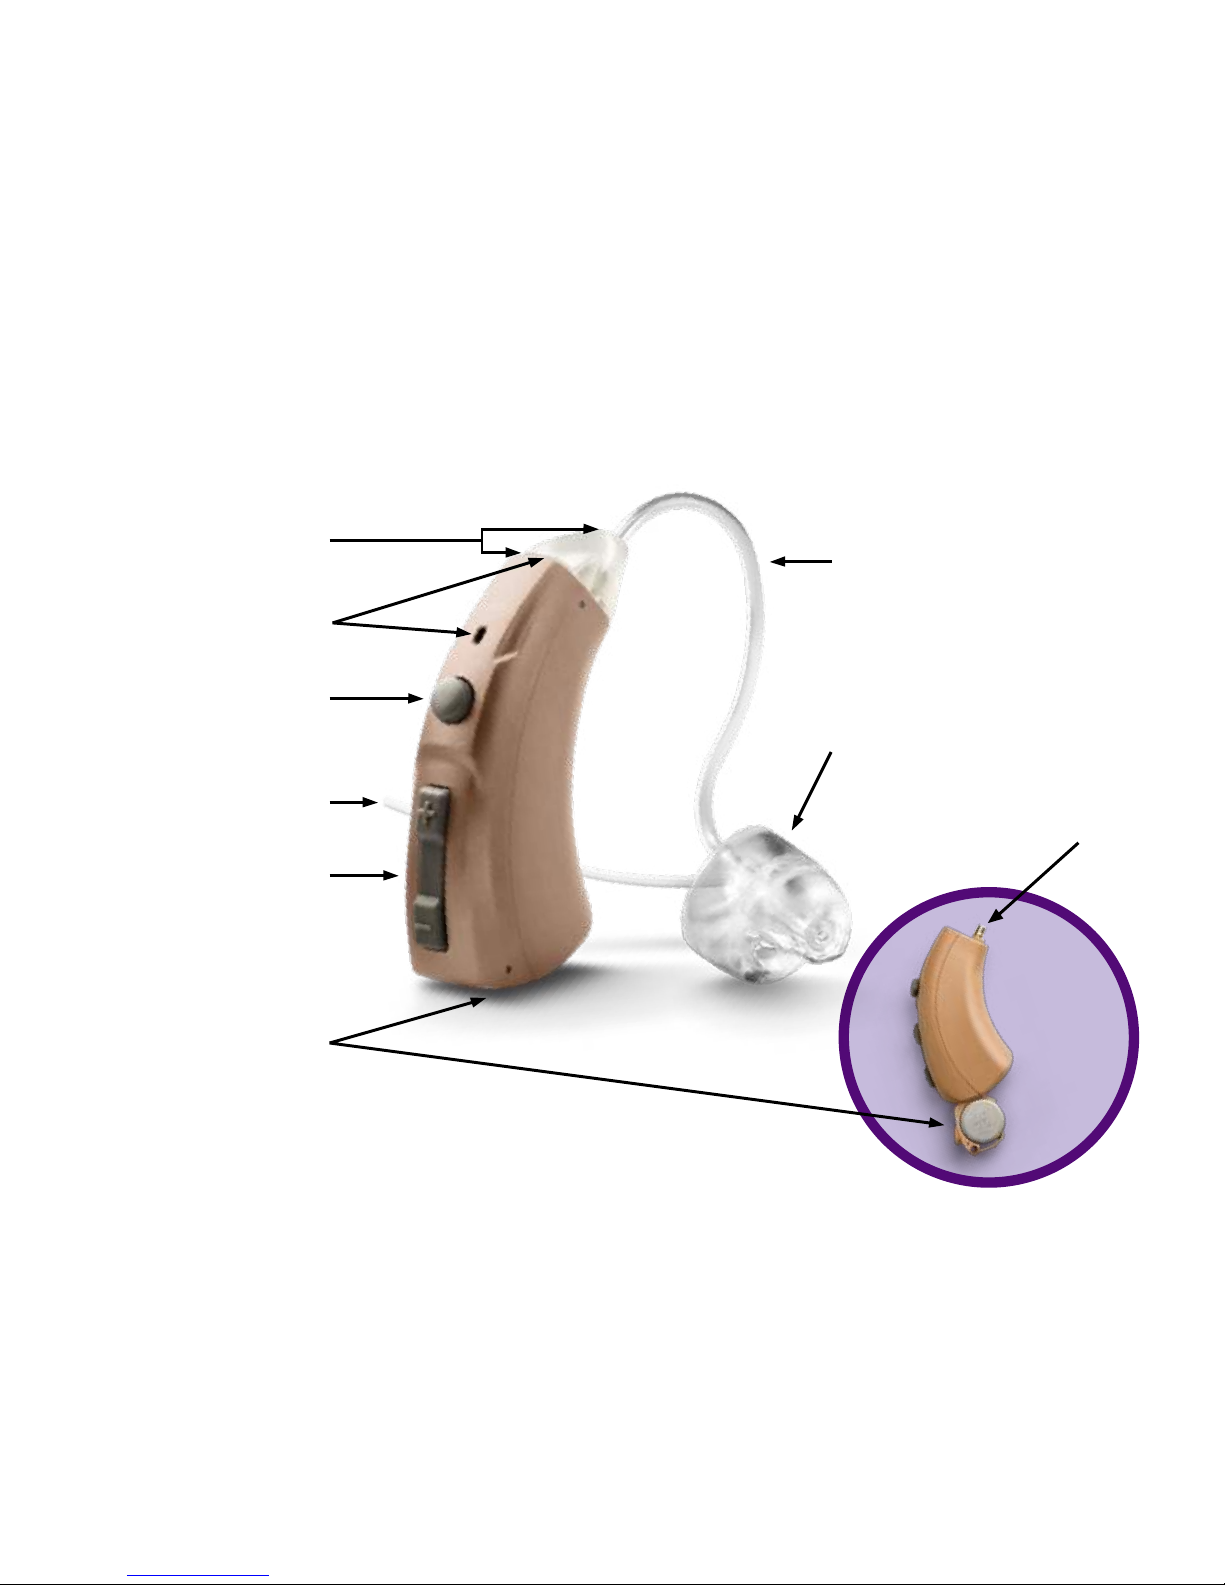
LUX
DIAGRAM
Tubing Base
Program Button
Volume Control
Battery
Compartment
(on/off control)
Thin Tubing
Snap End
LUX
Body
LUX comes assembled for your convenience.
Microphones
ComfortTIP
™
Stabilizer Bar
9

“ I LOVE the ComfortTIPs.
They are so comfortable and clear,
and work better than any tips that
I could nd for my old aids.”
– Justin M.
10

“ I didn’t realize how
much I was missing.
I can hear birds chirping outside
the window. My morning walk is
so enjoyable now!”
– Bill P.
11
STEPS
QUICK START GUIDE
Three Easy Steps for Using Your MDHearingAid
®
LUX
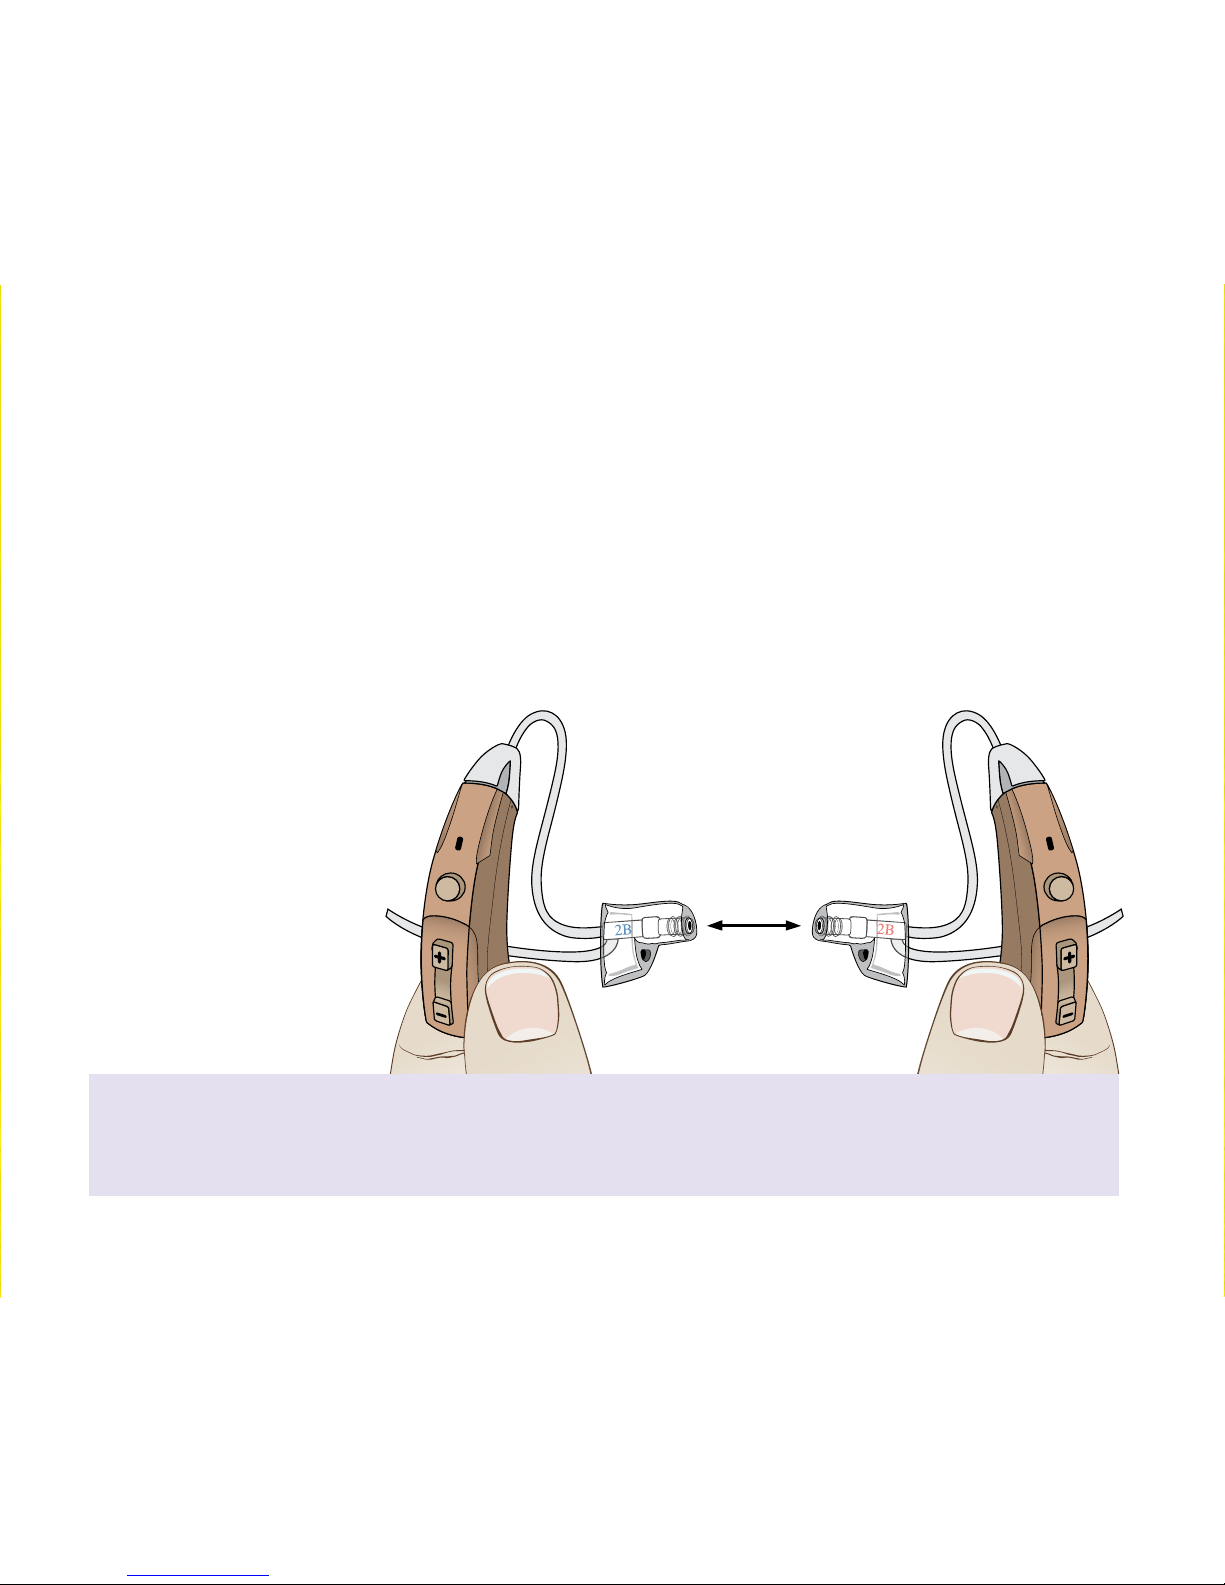
If you have a pair, rst identify the left and right aid.
Step 1: Insert Battery
Step 2: Place
LUX On Ear
Step 3: Adjust Volume
Left LUX in
left hand.
To identify Left/Right LUX: Hold an aid upright in each hand, with controls facing
you. The Tips/Tubing point toward each other when in the correct hand.
Right LUX in
right hand.
12
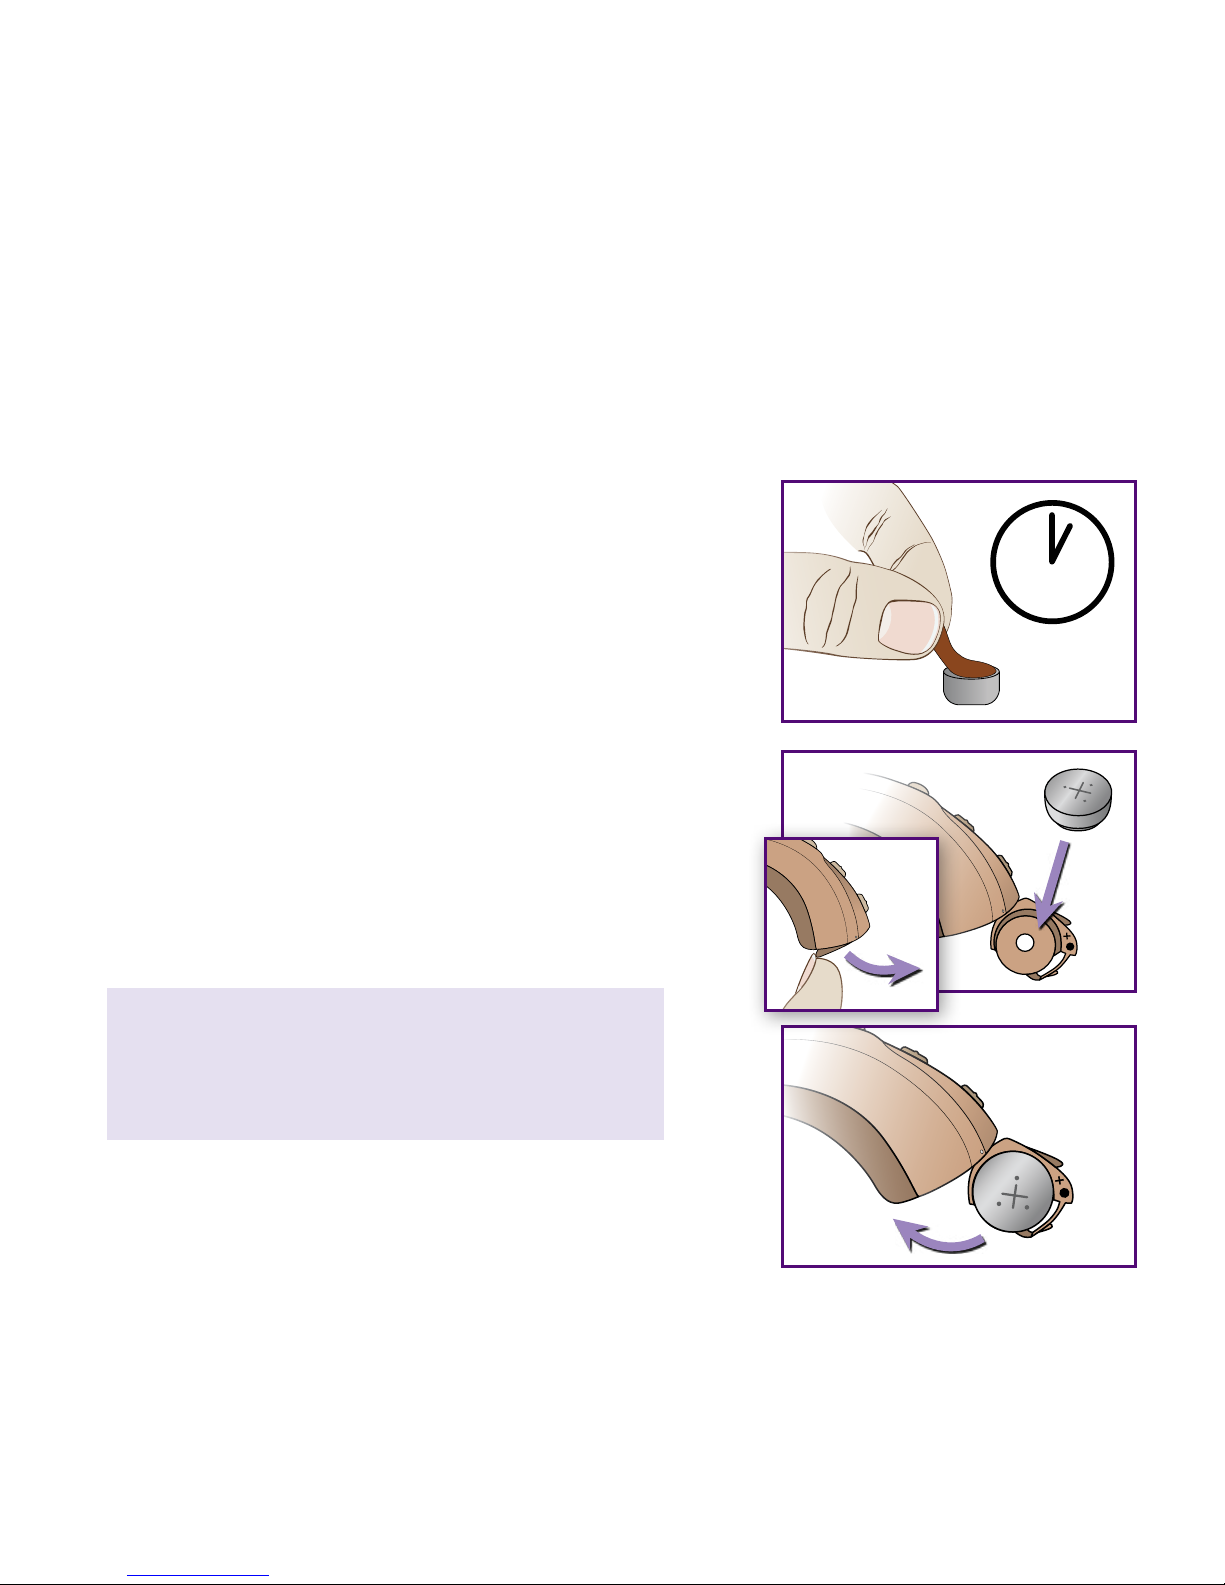
STEP 1
1minute
STEP 1: INSERT BATTERY
Positive (+)
side up
b)
a)
c)
Battery Type: Size 312 zinc-air (brown tab)
a) Remove brown adhesive tab to activate
battery. Wait one (1) FULL minute for battery
to become fully operational.
b) Push Nail Grip downward to open Battery
Compartment. With the “+” side of Battery
Compartment facing up, use Cleaning Tool
Magnet (or your ngers) to insert battery.
c) Close Battery Compartment to turn LUX ON.
(To turn OFF, open Battery Compartment.)
Please note: If Battery Compartment does
not close easily, battery may be inserted
upside down.
13
 Loading...