

MD HearingAir PRO User Manual
A34 A1
Printed in U.S.A.
10.13

1
Congratulations!
As the owner of the MDHearingAid®PRO Hearing Aid, you may once
again enjoy the sounds of your environment and conversations with
your family and friends at a price you can afford. In order to get the
most out of your MDHearingAid
®
PRO, please read this User Manual in
its entirety. Your satisfaction with hearing aids depends on the type and
degree of your hearing loss as well as your expectations. No hearing
aid can restore normal hearing, and not everyone will benet equally.
Please read this User Manual in its entirety before using your
MDHearingAid
®
PRO. Thank You!
The MDHearingAid
®
Story ....2
Hearing Aid Diagram ........4
Quick Start Guide...........5
Fitting & Assembly
1. Select Ear Dome........ 6
2. Cut Tubing.............8
3. Attach Tubing ..........9
4. Insert Battery..........10
5. Place Behind Ear ...... 11
6. Turn Hearing Aid On ....12
Getting the Most from ......13
Your Hearing Aid
Maintenance & Care .......18
In Case of Malfunction ......19
Troubleshooting ...........20
Optional Accessories .......24
Replacement of ...........25
Tubes & Domes
Battery Information.........26
Using the Telephone .......28
Warranty & Repair .........29
Return Policy .............30
Warning to Hearing ........32
Aid Dispensers
Important Notice for ........34
Prospective Users
Notice of Cancellation ......36
Technical Specications.....37
Table of Contents

2 3
Dr. Cherukuri worked with world-class Doctors of Audiology and Audiologists
to create the MDHearingAid®PRO to their exact technical specications, so
that the range of sounds associated with the human voice would be amplied,
without overly amplifying background sounds.
The MDHearingAid®PRO has been rigorously tested by leaders in the
hearing loss eld (ENT Physicians and Audiologists) who have unanimously
agreed that the sound quality and output is incredibly accurate.
The MDHearingAid® Story
The MDHearingAid®PRO was developed by a board-certied Ear,
Nose and Throat physician in Chicago, IL, Dr. Cherukuri. He
encountered patients in his daily practice who would benet from
hearing aids, but many simply couldn’t afford the thousands of
dollars needed to pay for them. As a physician, he knew the
effects of untreated hearing loss: depression, social isolation,
anxiety, and other symptoms consistent with Alzheimer’s disease.
Dr. Cherukuri set out to nd a reasonable solution that could help with
the most common types of hearing loss at a reasonable price. He was
looking for a “one-size-ts-most” hearing aid, similar to reading glasses,
that can easily be purchased at the drug store.
He evaluated numerous hearing aids and sound ampliers, including
those seen on television. He found almost all of these devices only
amplied low frequencies (below 1000 Hz); however, the majority of
hearing loss is in the higher frequencies (1000-4000 Hz), those most
related to the human voice.
4 5
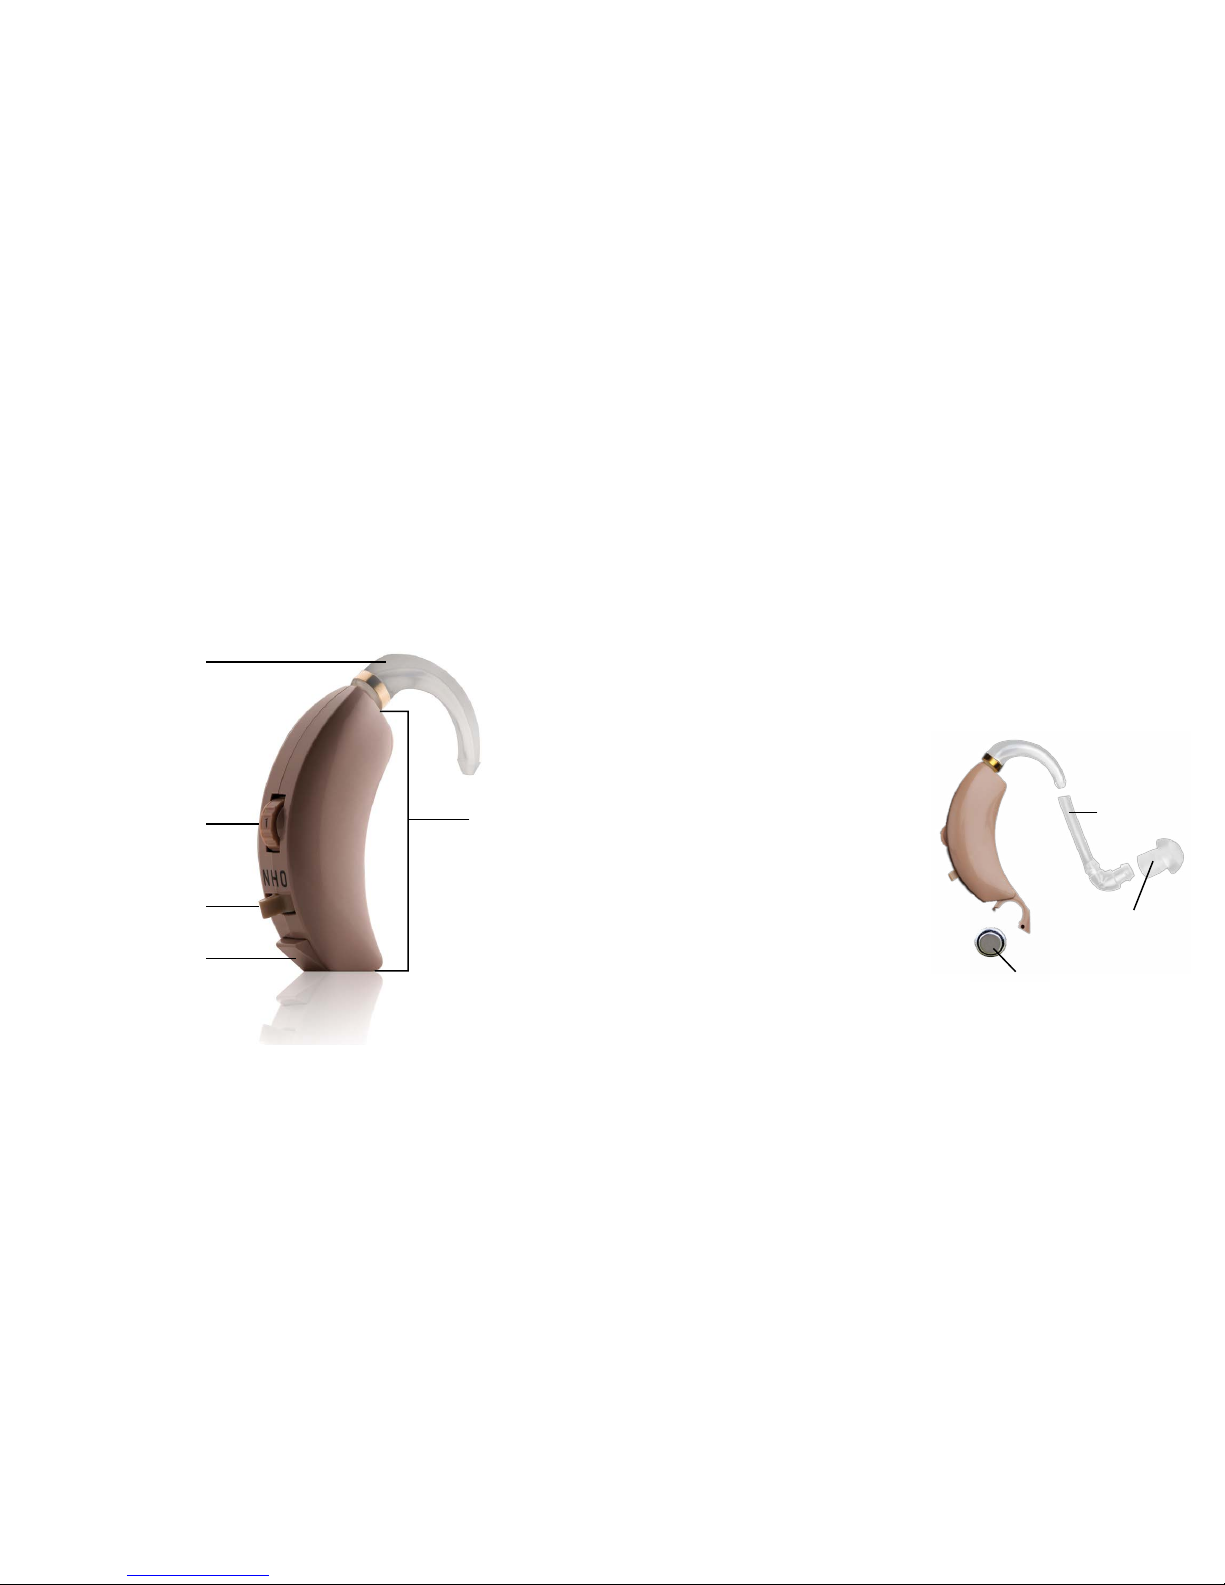
Hearing Aid Diagram
Earhook
Volume Control
Power &
Channel Switch
Battery
Compartment
Steps
Quick Start Guide
Six Easy Steps for Fitting and
Assembling Your MDHearingAid
®
PRO
Step 1: Select the Correct Ear Dome Size
Step 2: Cut Tubing Length
Step 3: Attach Tubing to Earhook
Step 4: Insert Battery
Step 5: Place Hearing Aid Behind Ear
Step 6: Turn the MDHearingAid®PRO On
Body
Tubing
(cut)
Battery
Ear Dome

6 7
Step 1
Fitting and Assembly
Step 1: Select the Correct
Ear Dome Size
Your MDHearingAid®PRO comes with
clear Traditional Tubing and ve different
sized silicone Ear Domes to t most
adult ears. Test the Ear Dome size by
attaching Ear Dome to Tubing before
inserting into ear canal.
Attach Ear Dome to Tubing
a) Hold the Elbow of the Tubing with
one hand and hold the ‘mushroom’
top of the Ear Dome with the other hand.
b) Push the Ear Dome over the ridges
on the end of the Elbow.
c) Pull lightly in the reverse direction
to make sure the Ear Dome is
attached securely.
Insert Ear Dome in Ear Canal
Hold the Elbow of the Tubing (with Ear Dome attached) and insert
Ear Dome into the ear canal. The Ear Dome should nestle in the ear
canal without force (similar to placing a sink stopper into a sink).
The ‘mushroom’ top of the Ear Dome should be in the ear canal
and not protrude into the outer bowl of the ear.
Test Ear Dome for Fit
• Turn head side to side and simulate chewing.
If the Ear Dome pops out, it is too big.
• Nod head towards the ground. If the Ear
Dome slips out easily, it is too small.
When the Ear Dome is too small, there is
space between the Ear Dome and the ear
canal, and you may hear whistling when the
Hearing Aid is on.
Repeat the steps above with different sized
EarDomestondthebesttforyou.
a)
b)
OK
Not Secure
Ear Canal
98
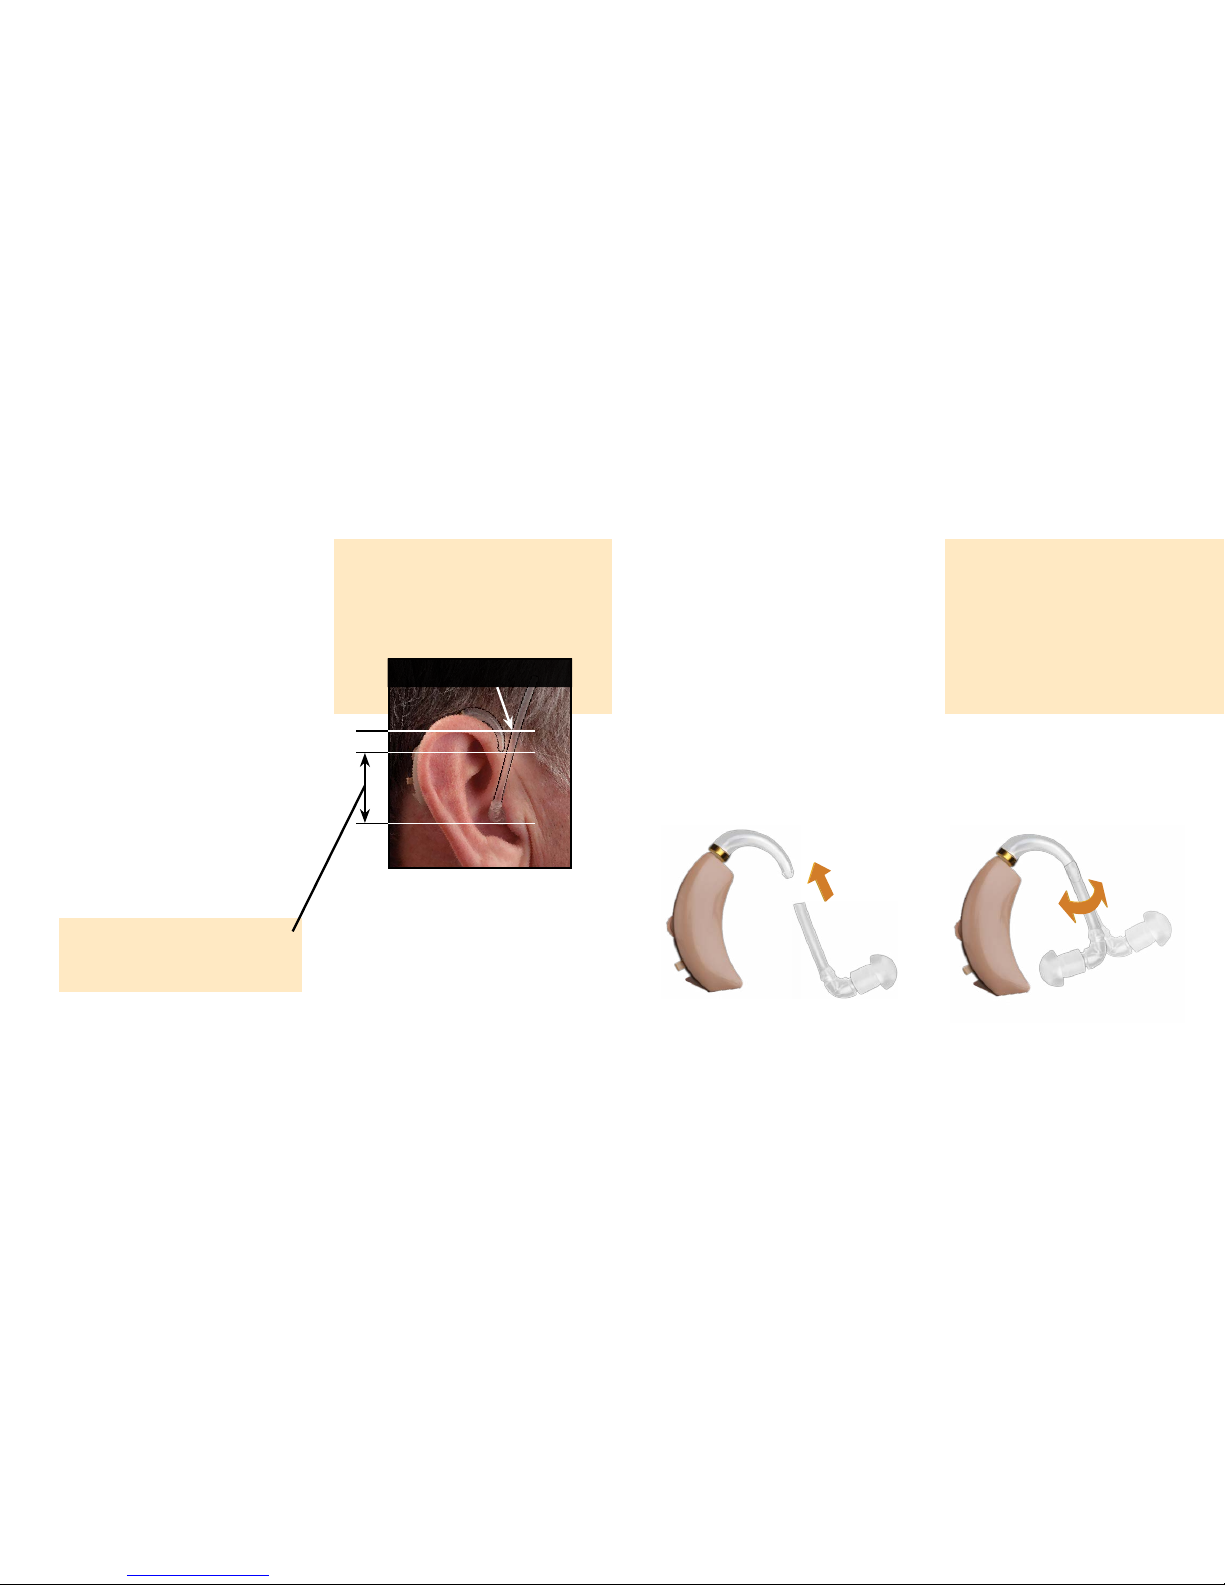
Step 2
Step 2: Cut Tubing Length
a) Place the Hearing Aid Body
behind the ear so the Earhook
rests comfortably on top of the
ear (in front of any eye wear).
b) Insert Ear Dome, with Tubing
attached, into ear canal, and
align Tubing next to Earhook.
c) Use a pen and mark a line
on the Tubing ABOVE the
bottom of the Earhook tip.
Cut Tubing at marked line.
Mark and Cut Here
Overlap
Step 3
Step 3: Attach Tubing
to Earhook
Using your thumb and rst nger, hold
the Tubing up to the Earhook tip, and
twist back and forth until the Tubing
slides OVER the Earhook tip.
Make sure the ‘mushroom’ portion of the
Ear Dome points into the ear canal.
‘Measure twice, cut once!’
Please note: This length will vary.
Tubing must be measured and cut
separately for each of your ears.
 Loading...