

Page 1
Operation Manual
UCHIDA STAPLER-PUNCHER
MODEL SP-22
Read this “Operation Manual” carefully before use.
Keep it at a specific place for handy reference.
17 April 2006
- 0 -
Page 2

1
Page 3
Safety Instructions
Definition of Symbols and Notes
In this manual following names and signs stand for possible dangers.
Danger
This Symbol stands for immediate danger threatening the life and health of persons.
Disregarding these instructions may cause severe damage to health and even serious
injuries.
Caution
This symbol stands for an endangering situation that may occur. Disregarding these
instructions may lead to slight injuries or damage to property.
Note
This symbol stands for notes, operational hints and other useful information. They are
convenient for exploiting the machine’s functional abilities.
Danger
Be sure to connect the ground. If not, electric leakage may result, which can cause fire or an electrical
shock. If you cannot connect the ground, consult your dealer or a maintenance or service company.
Operate the collator with AC current only. Use an exclusive outlet, as overloading may cause fire or an
electrical shock.
Do not place receptacles containing water, such as vases, flowerpots and cups, on the machine. Spilled
water can cause fire or an electrical shock
Do not remove the cover of the machine, as it can cause an electrical shock or injury.
Do not damage, destroy or process the power plug and cord. Placing heavy things on the cord, pulling it, or
bending it forcibly may damage the plug and cord and cause fire or an electrical shock.
Do not remodel the machine. It may cause fire or an electrical shock.
Do not plug or unplug the power cord from an outlet with a wet hand; it can result in an electrical shock.
Continuing operation in spite of irregularities, such as overheating, smoking and unusual odor, may cause
fire or an electrical shock. In such cases, turn off the power switch, remove the plug from the outlet and
contact your dealer.
When foreign substances, such as metal fragm ents, water or other liquid s, fall into the machine, turn off t he
power switch immediately, remove the plug from the outlet and contact your dealer. Continued operation
with such substances in the machine may cause fire or an electrical shock.
Caution
Do not install the machine in an unstable place, such as one that shakes or tilts. The machine may fall,
causing breakage or physical injury.
Do not install the machine in a hum id or dusty place; excessive hum idity and dust can cause fire or physical
injury.
Never unplug the power cord from the outlet by gripping the cord itself. Doing so may damage the cord,
causing fire or injury. Always disconnect the machine by gripping the plug.
Be sure to remove the power plug from the ou tlet w hen moving the m achi ne, o therwise it m ay da m age the
cord, causing fire or an injury.
When the collator will not be used for several days, such during consecutive holidays, etc., be sure to
unplug the power cord from the outlet for safety’s sake.
Do not open the unit cover and main cover during operation, or it may cause an accident.
Do not touch any part of the drive, including the roller, with a hand. It may cause an injury.
2
Page 4

INTRODUCTION
Read this “Operation Manual” carefully before use.
Keep it at a specific place for handy reference.
Since the specifications of this machine are subject to change, be sure not to mistake this manual for one of
a different mode, descriptions of may differ.
CONTENTS
1. Precautions before Installation and Use ..............................................................................5
1.1 Place for installation.....................................................................................................5
1.2 Transport precaution.....................................................................................................5
1.3 Confirmation of contents and attachments...................................................................5
2. Component Name................................................................................................................6
2.1 Overview.......................................................................................................................6
3. Matters for Special Note......................................................................................................7
3.1 Definitions ....................................................................................................................7
3.2 Characteristics and purpose of use ...............................................................................7
3.3 When not in use............................................................................................................7
3.4 Caution while in use .....................................................................................................7
4. Preparations before Use.......................................................................................................8
4.1 Installation ....................................................................................................................8
5. Operation .............................................................................................................................9
5.1 Procedure and method ..................................................................................................9
5.2 Trouble symptoms and corrective action....................................................................11
5.3 Disposing of punch scraps..........................................................................................11
5.4 Stapling and punching position...................................................................................12
5.5 Staple cartridge replacement.......................................................................................12
5.6 Punching.....................................................................................................................14
5.7 Staple jam ...................................................................................................................14
6. Maintenance, Inspection, Expendables..............................................................................15
6.1 Important for maintenance and inspection .................................................................15
6.2 Daily maintenance ......................................................................................................15
3
Page 5

7. Troubleshooting.................................................................................................................16
7.1 Nature of problem and corrective action....................................................................16
7.2. In case of breakdown..................................................................................................17
8. Relocation or Disposal.......................................................................................................17
8.1 Relocation...................................................................................................................17
8.1.1 Removal of the machine from its present location..............................................17
8.1.2 Transport..............................................................................................................17
8.1.3 Installation ...........................................................................................................17
8.2 Disposal ......................................................................................................................17
9. Product Specifications .......................................................................................................18
9.1 Specifications..............................................................................................................18
4
Page 6
1. Precautions before Installation and Use
1.1 Place for installation
This machine is also designed for IT power systems.
(1) Install the machine on a stable and level place.
(2) Use the Stapler-Puncher table designed for this machine.
(3) Avoid installing the machine in the following places for
safety’s sake and to avoid mechanical problems.
- Locations exposed to direct sunlight.
- Humid and/or dusty places
- Places exposed to wind, or near heat sources
1.2 Transport precaution
Handle with care so that the machine will not suffer shock or vibration.
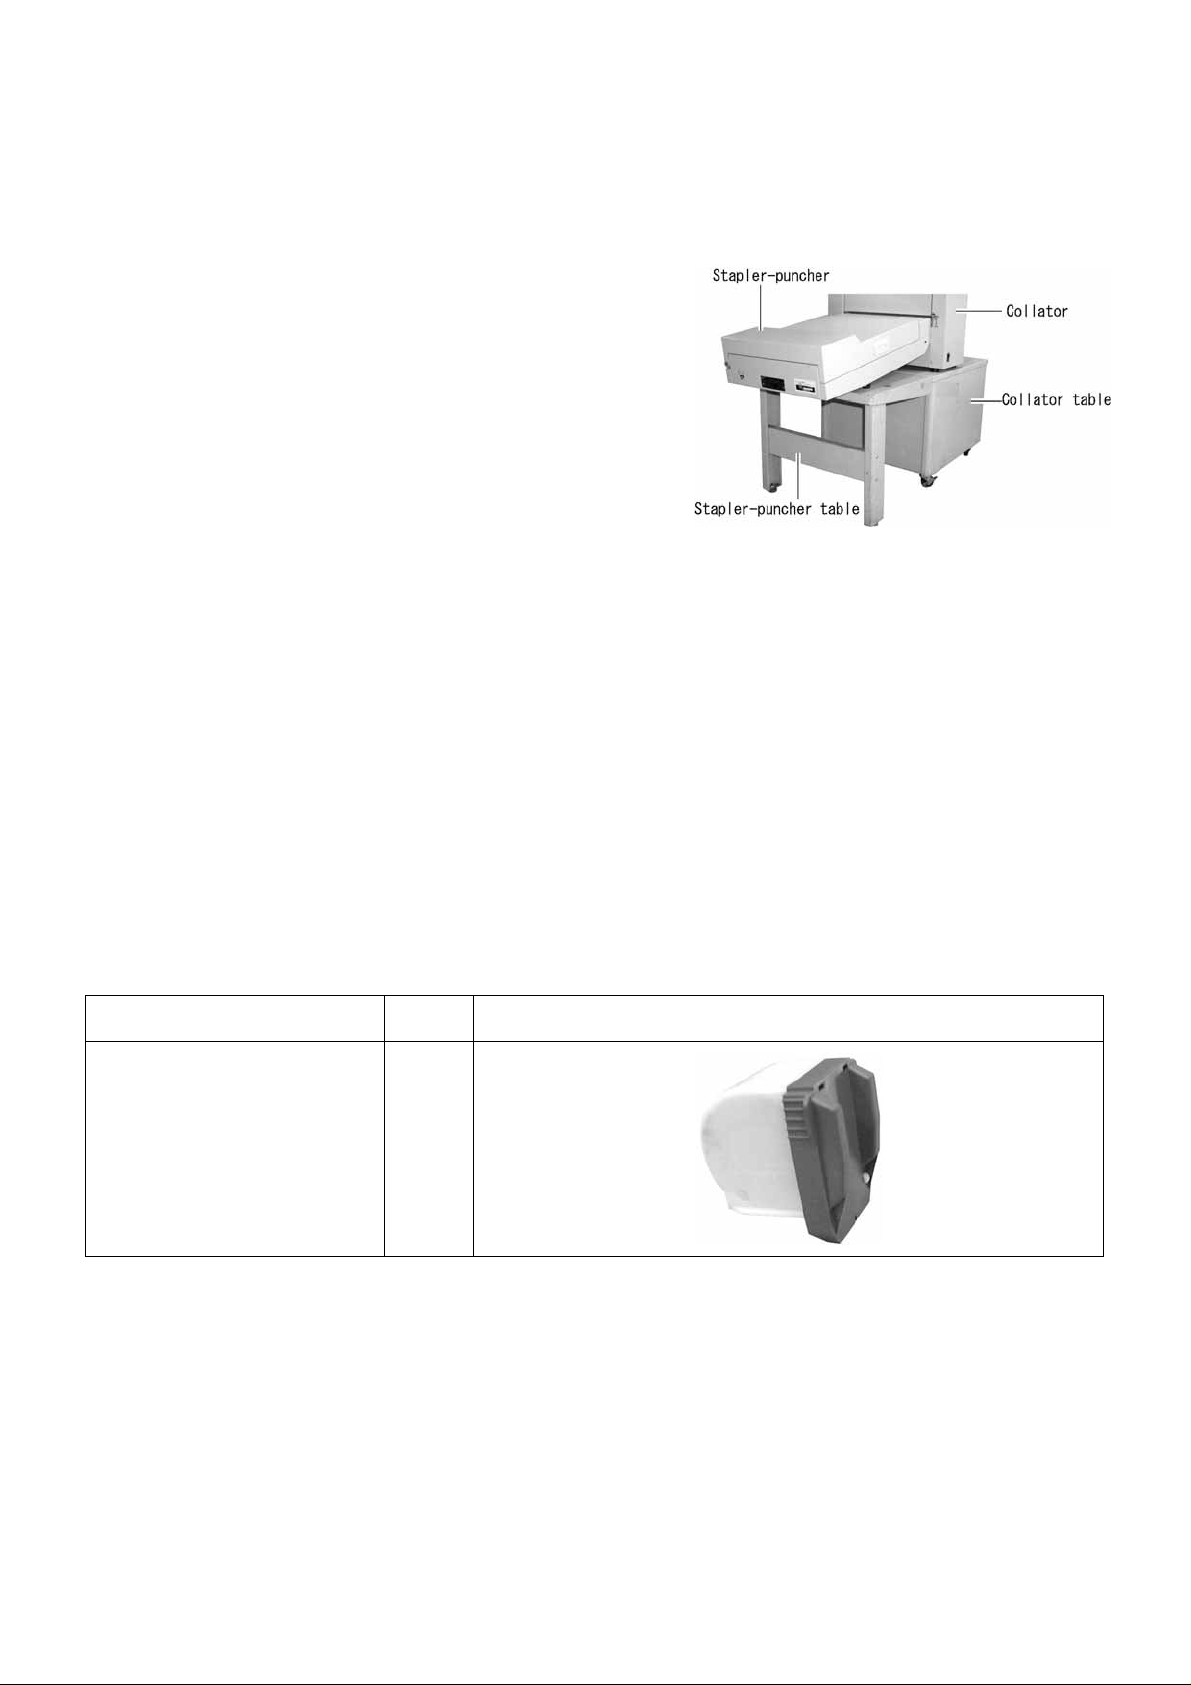
1.3 Confirmation of contents and attachments
After unpacking the collator, check the attachments.
Should any part be missing, contact your dealer immediately.
Attachment Qty Figure
Staple cartridge 1
5
Page 7

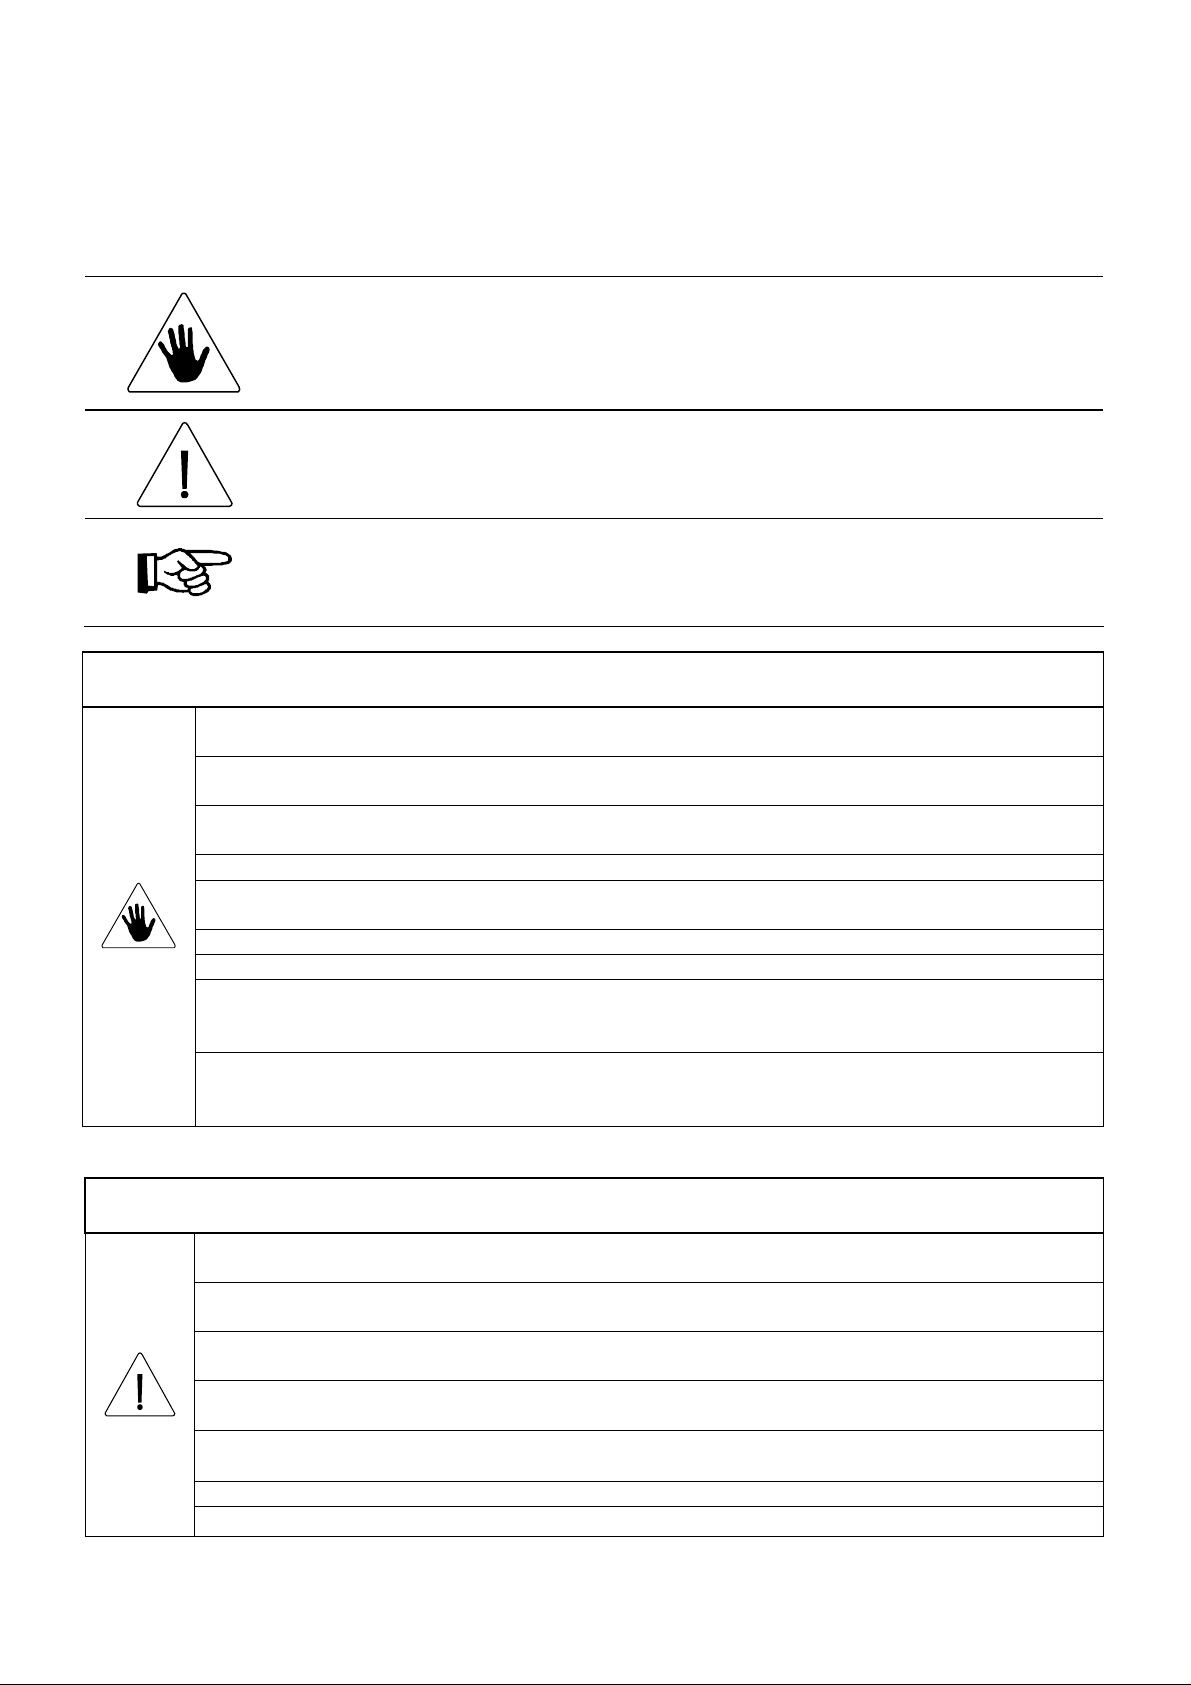
2. Component Name
2.1 Overview
6
Page 8

3. Matters for Special Note
3.1 Definitions
Term Explanation
Paper jam Paper stuck in the machine
Double feed Feeding two or more sheets together
3.2 Characteristics and purpose of use
・Can staple and punch up to A3 size paper.
・Operation with or without punching can be selected.
3.3 When not in use
Remove the power plug from the outlet.
3.4 Caution while in use
・The power plug should be fully inserted into the outlet.
・Take care to prevent foreign matter from falling into the machine.
・Never turn the power switch off while the machine is operating.
・In the event of abnormal noise, bad odor or smoke, turn off the power switch immediately and contact
your dealer.
7
Page 9

4. Preparations before Use
4.1 Installation
(1) Set the shift lever at Connection.
(2) Secure the hooks (one each at right and left
sides) of the stapler-puncher to the collator hook
pins. When removing them, do so while pulling
out the hook lever (one each at right and left
sides) of the stapler-puncher.
Connection
Independent
(3) Insert the connecting plug of the
stapler-puncher into the collator’s connector
and fasten them firmly with two screws.
Caution!
Be sure to insert the connector in the proper
direction.
(4) Insert the stapler-puncher power plug into the
collator optional power outlet.
8
Page 10

5. Operation
5.1 Procedure and method
When using the stapler-puncher, also refer to the collator operation manual.
(1) Turn the power switch on.
(2) If stapling is not required, press the
PROGRAM key on the collator operation panel to
switch to Program mode.
( PROGRAM lamp will light)
(3) Press the STAPLE/1 key on the operation panel.
Stapling mode On: Lamp is lit.
Stapling mode Off: Lamp not lit.
Stapling is designed to be On with nothing
programmed after the collator power switch is on.
(4) Load the paper on the collator stations to be used;
adjust the stacking table guides left and right, slide
poles, and stacking slide guide to fit the paper size.
Caution!
Set the paper neatly and adjust it to fit the paper
feed guides. If the paper is not set properly, its
corners will not be uniform at the time of
stapler-puncher processing.
9
Page 11

(5) Open the main cover and set the paper size shift
knob to paper size.
(6) Set the stapling position shift lever for the paper
size.
(7) If punching is not required, press the
MODE key on the collator operation panel to
switch to Program mode.
( MODE lamp will light)
(8) Press the PUNCH/2 key on the operation panel.
Punching mode On: Lamp is lit.
Punching mode Off: Lamp not lit.
Punching is designed to be On with nothing
programmed after the collator power switch is on.
Caution!
Pay special attention to paper with curled edges, flaws, or folds as they might cause problems.
To process paper soon after being printed, let the ink dry first.
Caution
Do not open the main cover while the machine is in operation, as it may cause an accident.
10
Page 12

5.2 Trouble symptoms and corrective action
・Paper jam:
・Staple cartridge
empty or staple
jam:
・Paper feed
trouble on the
collator side:
The machine stops and the Paper Jam
→
lamp on the collator operation panel
flashes.
Open the main cover, remove aligning to
the left guide and remove paper from the
side of the machine.
The machine stops and the Error
→
(L) lamp on the operation panel
flashes. See the instruction in 5.5
“Staple cartridge replacement.”
Should collator side paper feed
→
trouble occur, the paper is ejected
to the stacker without stapling or
punching.
Should the machine stop owing to
・Machine stops
owing to paper
jam or no feed
・Machine stops
owing to double
feed
→
paper jam or no feed, the last set
will have pages missing. Add
such pages to the stations.
If the machine stops owing to
→
double feed, the last set includes
double pages. Remove duplicate
pages from the last set.
5.3 Disposing of punch scraps
Punch scraps accumulate in the dust case. Remove the
case by pulling it to the front and dispose of the scraps.
Caution!
When collation is performed around 300 times, the
dust case becomes full of punch scraps. Then, be
sure to dispose of punch scraps. If collation is
continued otherwise, it will cause paper jam. Also,
be sure to remove scraps when starting to collate.
11
Page 13

5.4 Stapling and punching position
The machine is designed to punch holes in the center of
each size paper.
Set the stapling position according to paper size using
the stapling position shift lever.
5.5 Staple cartridge replacement
Use prescribed staples only.
(1) Turn the power switch off and unplug the power
plug from the outlet (be sure to do so to avoid an
accident).
(2) Open the main cover of the stapler punch, and pull out the
staple cartridge to the direction indicated with an arrow in
by holding the plastic portion of the staple cartridge.
(3) Insert a new cartridge firmly until it comes to the end of
the stapler.
Caution!
When the cartridge is not inserted at the d eep end , a staple
cannot be applied correctly.
12
Page 14

(4) Conduct empty stapling
Insert a sheet for empty stapling in the clincher
portion of the machine and close the main cover.
(5) Press the MODE key on the collator operation
panel to switch to Program mode.
( MODE lamp will light)
(6) Press the STAPLE/1 key on the collator operation
panel for three seconds.
Stapling mode On: Lamp is lit.
Stapling mode Off: Lamp not lit.
Stapling is designed to be On with nothing
programmed when the collator power switch is on.
(7) Repeat procedures (5) and (6) until the staple hits the sheet for empty stapling.
Caution!
If empty stapling is performed continuously, slide the sheet so that staples hit the same place.
Otherwise, a staple jam will occur.
13
Page 15

5.6 Punching
Each time the MODE key and PUNCH/2 key on the collator operation panel are pressed, punching mode
will switch on and off.
Punching mode On: PUNCH/2 lamp lit.
Punching mode Off: PUNCH/2 lamp not lit.
5.7 Staple jam
(1) Turn off the collator power switch and pull the
power plug from the outlet (be sure to do so to
avoid an accident).
(2) Open the main cover of the stapler punch, and pull out
the staple cartridge to the direction indicated with an
arrow in by holding the plastic portion of the staple
cartridge.
Caution!
If staples or part of a sheet remains in the clincher,
remove it using radio pliers, etc.
(3) Hit Empty Stapling.
(4) Resume the procedure referring to 5.5. “Staple
cartridge replacement (4).”
14
Page 16

6. Maintenance, Inspection, Expendables
6.1 Important for maintenance and inspection
Danger
When conducting inspections and maintenance, be sure to remove the power plug from the outlet. If not,
it may cause injury or electric shock.
6.2 Daily maintenance
・Feed belt
Occasionally clean the feed belt using the prescribed
cleaning kit (sold separately). A dirty belt can cause
improper stapling.
(1) Disconnect the stapler-puncher from the collator .
(2) Dampen the cleaning rod felt with the prescribed
cleaning fluid.
(3) Connect the stapler-puncher power plug and
connector to the collator and turn on the collator
power switch; set the shift lever at Connection.
(4) While pressing the RESET key on the operation
panel, the feed belt will idle.
As it idles, hold the dampened cleaning rod felt
against the exposed part of the feed belt.
Caution!
Take care that fingers, etc. are not caught in the belt,
etc.
(5) Reconnect the stapler-puncher to the collator.
Install it firmly to prevent paper feed trouble
・Cleaning the exterior
Wipe off any stains using a cloth dampened with diluted neutral detergent and wrung tightly.
Caution!
Do not use solvent cleaning liquids as they may cause discoloring.
15
Page 17

7. Troubleshooting
7.1 Nature of problem and corrective action
Status Possible Cause Corrective Action
stapler-puncher
Paper not neatly
delivered
Connectors (two) linking collator and
staple-puncher improperly attached
Stapler-puncher circuit beaker off Push circuit breaker button.
Paper not loaded neatly on each station Place paper in order, then set the guides close to
Paper deformed, curled or damaged
Processing paper soon after being
printed
Copied paper just after leaving copier Allow enough time for static electricity to
Paper of odd specifications used Use specified paper only.
Paper size shift lever improperly set Adjust lever to paper size.
Paper loaded on stations not of uniform
size
Stapler-puncher incorrectly attached to
the collator
Properly attach them. Cannot switch to
the paper.
Correct curling, etc.; do not use deformed or
damaged paper.
Let ink dry for at least a week before
processing.
dissipate before processing.
It is advised that, if the edges of paper to be
collated (four sides) is wiped with wet towel, etc.,
static electricity can be removed.
Use paper of the same size.
Install it firmly so it does not wobble.
Paper jams when
paper enters the
stapler-puncher
from the collator
Paper jams when
returning to the
collator from the
stapler-puncher
Empty Stapling
No stapling
Stapler-puncher incorrectly attached to
the collator
Foreign matter where paper passes Remove foreign matter.
Paper curled or deformed Correct curling; do not use deformed paper.
Paper curled upward or deformed Correct curling; do not use deformed paper.
Stapler-puncher incorrectly attached to
the collator
Foreign matter where paper passes Remove foreign matter.
Staple cartridge improperly set Set cartridge properly.
Staple sheet fails to reach the proper
position
Staples stuck at edge of cartridge Correct it to the normal position.
Staple cartridge improperly set Set it properly.
Stapling mode not programmed Press the MODE and STAPLE/1 keys.
Connectors (two) linking the collator
and stapler-puncher loose or undone
Stapler-puncher circuit breaker off Push the circuit breaker button.
Install it firmly so it does not wobble.
Install it firmly so it will not wobble.
Hit Empty Stapling.
( STAPLE/1 lamp will light)
Connect them firmly.
Foreign matter in the drive portion of
the stapler
16
Remove foreign matter.
Page 18

Status Possible Cause Corrective Action
No punching
ERROR(L) lamp
on the collator
operation panel lit
“Err4” displayed
on collator
operation panel
counter
Paper size shift
knob does not
move.
Punching mode not programmed Press the MODE and PUNCH/2 keys.
Connectors (two) linking the collator
and stapler-puncher loose or undone
Stapler-puncher circuit breaker off Push the circuit breaker button.
Foreign matter in the drive portion of
the stapler
Main cover open Close main cover.
Neither Stapling mode nor Punching
mode programmed
Paper stuck during the paper jogging
procedure and the machine stopped.
7.2. In case of breakdown
( PUNCH/2 lamp will light)
Connect them firmly.
Remove foreign matter.
Program one mode or the other.
Close the main cover, turn off the power switch
and turn on the power again.
Should the collator need repair, contact your dealer.
8. Relocation or Disposal
8.1 Relocation
8.1.1 Removal of the machine from its present location
Be sure to pull out the power plug from the collator.
Remove the stapler-puncher from the collator.
8.1.2 Transport
・Transport the removed parts, attachments and Operation Manual together with the machine.
・Take care not to expose the collator to strong vibration or shock.
8.1.3 Installation
When installing the collator at its new location, observe the same procedure as when first installing it.
8.2 Disposal
When disposing of the collator, ask a contractor specialized in industrial waste disposal to handle it in
accordance to the ordinance of each municipality.
17
Page 19

9. Product Specifications
9.1 Specifications
Paper size A3, B4, A4, B5
Paper quality 53-81g/m
Processing capacity Stapler-puncher: 660 sets/hour (A4 paper)
Stapler : 840 sets/hour (A4 paper)
Punch hole size Diameter: 6mm, 2 holes
Pitch: 80mm
For B5 ad A4 size, holes are punches at the center of the longitudinal side of
the paper.
For B4 ad A3 size, holes are punches at the center of the shorter side of the
paper.
Staples Dedicated Staple cartridge (5000 staples/cartridge)
Processing type Corner staple
Corner staple + two punch holes
2
Power supply voltage
110 – 120 VAC, 220 – 240 VAC
50 and 60Hz
Power consumption 55W
Dimensions 660W × 390D × 185H mm
Weight 20 kg
NOTE: Specifications and appearance are subject to change without notice for improvement.
18 19 19
Page 20

 Loading...