

Page 1

Page 2

Page 3
A Word to Mazda Owners
Thank you for choosing a Mazda. We at Mazda design and build vehicles with complete
customer satisfaction in mind.
To help ensure enjoyable and trouble-free operation of your Mazda, read this manual
carefully and follow its recommendations.
An Authorized Mazda Dealer knows your vehicle best. So when maintenance or service is
necessary, that's the place to go.
Our nationwide network of Mazda professionals is dedicated to providing you with the best
possible service.
We assure you that all of us at Mazda have an ongoing interest in your motoring pleasure
and in your full satisfaction with your Mazda product.
Mazda Motor Corporation
HIROSHIMA, JAPAN
Important Notes About This Manual
Keep this manual in the trunk as a handy reference for the safe and enjoyable use of your Mazda. Should you
resell the vehicle, leave this manual with it for the next owner.
All specications and descriptions are accurate at the time of printing. Because improvement is a constant goal at
Mazda, we reserve the right to make changes in specications at any time without notice and without obligation.
Air-Conditioning and the Environment
Your Mazda's genuine air conditioner is lled with a refrigerant that has been found not to damage the earth's
ozone layer. If the air conditioner does not operate properly, consult an Authorized Mazda Dealer.
Perchlorate
Certain components of this vehicle such as [air bag modules, seat belt pretensioners, lithium batteries,…] may
contain Perchlorate Material-- Special handling may apply for service or vehicle end of life disposal. See
www.dtsc.ca.gov/hazardouswaste/perchlorate.
Please be aware that this manual applies to all models, equipment and options. As a result, you may nd
some explanations for equipment not installed on your vehicle.
©2016 Mazda Motor Corporation
Oct. 2016 (Print1)
Page 4
How to Use This Manual
We want to help you get the most driving
pleasure from your vehicle. Your owner's
manual, when read from cover to cover,
can do that in many ways.
Illustrations complement the words of
the manual to best explain how to enjoy
your Mazda. By reading your manual, you
can nd out about the features, important
safety information, and driving under
various road conditions.
The symbol below in this manual means
"Do not do this" or "Do not let this
happen".
Index: A good place to start is the Index,
an alphabetical listing of all information in
your manual.
NOTE
A NOTE provides information and
sometimes suggests how to make better
use of your vehicle.
The following symbol, located on some
parts of the vehicle, indicates that this
manual contains information related to the
part.
Please refer to the manual for a detailed
explanation.
You'll nd several WARNINGs,
CAUTIONs, and NOTEs in the manual.
WARNING
A WARNING indicates a situation in
which serious injury or death could
result if the warning is ignored.
CAUTION
A CAUTION indicates a situation in
which bodily injury or damage to your
vehicle, or both, could result if the
caution is ignored.
Page 5
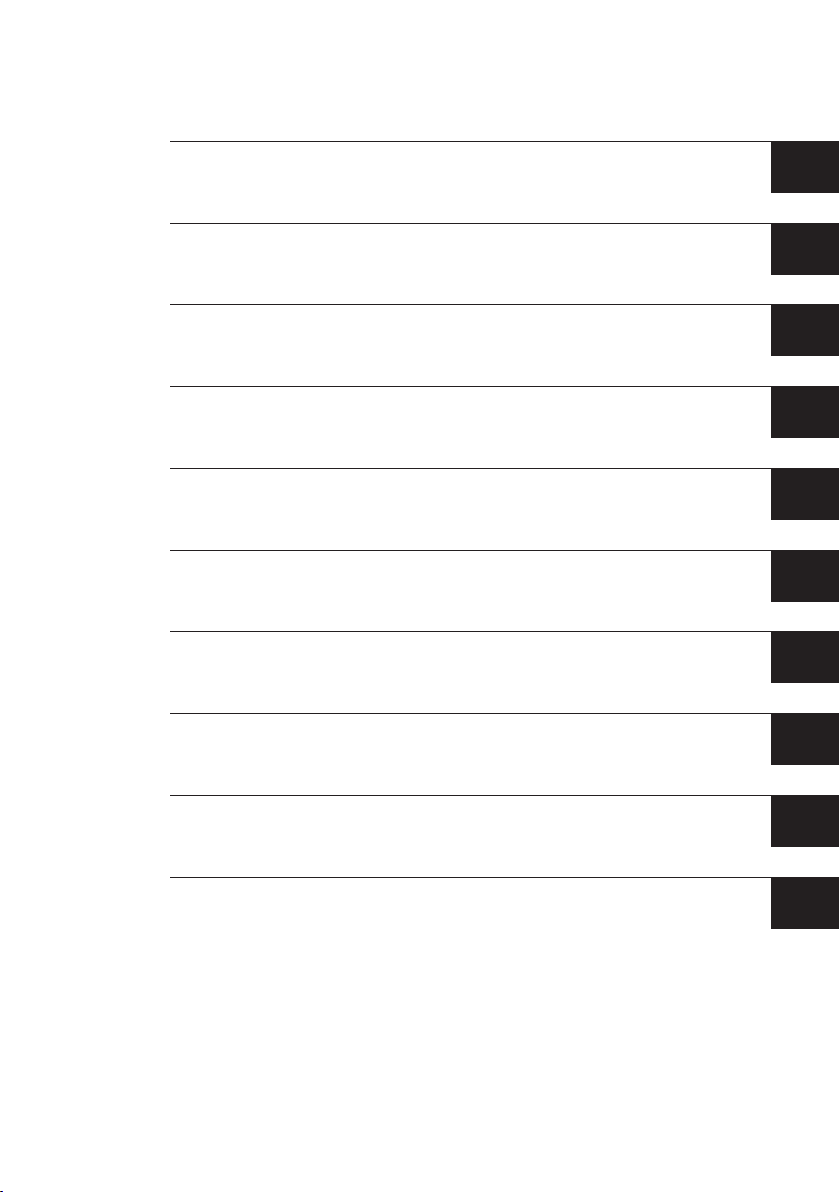
Table of Contents
Pictorial
Index
Essential
Befor
When
Interior
Maintenanc
If
Customer
Specification
Index
Interior, exteriorviewsand part identificationof your Mazda.
1
Safety Equipment
Importantinformationabout safety equipment, including seats, seatbelt
system, child-restraintsystems andSRS airbags.
eDriving
Use of various features, including keys, doors,mirrors andwindows.
Driving
Informationconcerning safe driving and stopping.
Features
Use of various featuresfor ridecomfort,including air-conditioning andaudio
system.
eand Care
Howtokeep your Mazdaintop condition.
Trouble Arises
Helpful informationonwhattodoifaproblem arises with thevehicle.
Information andReporting Safety Defects
Importantconsumer informationincluding warranties andadd-on equipment.
s
Technical informationabout your Mazda.
2
3
4
5
6
7
8
9
10
Page 6

Page 7

1
Pictorial Index
Interior, exterior views and part identication of your Mazda.
Interior Overview ............................................................................... 1-2
Interior Equipment (View A) ........................................................ 1-2
Interior Equipment (View B) ........................................................1-4
Interior Equipment (View C) ........................................................1-5
Exterior Overview .............................................................................. 1-7
Convertible Top (Soft Top) ........................................................... 1-7
Convertible Top (Retractable Fastback)........................................ 1-8
1–1
Page 8
Pictorial Index
Interior Overview
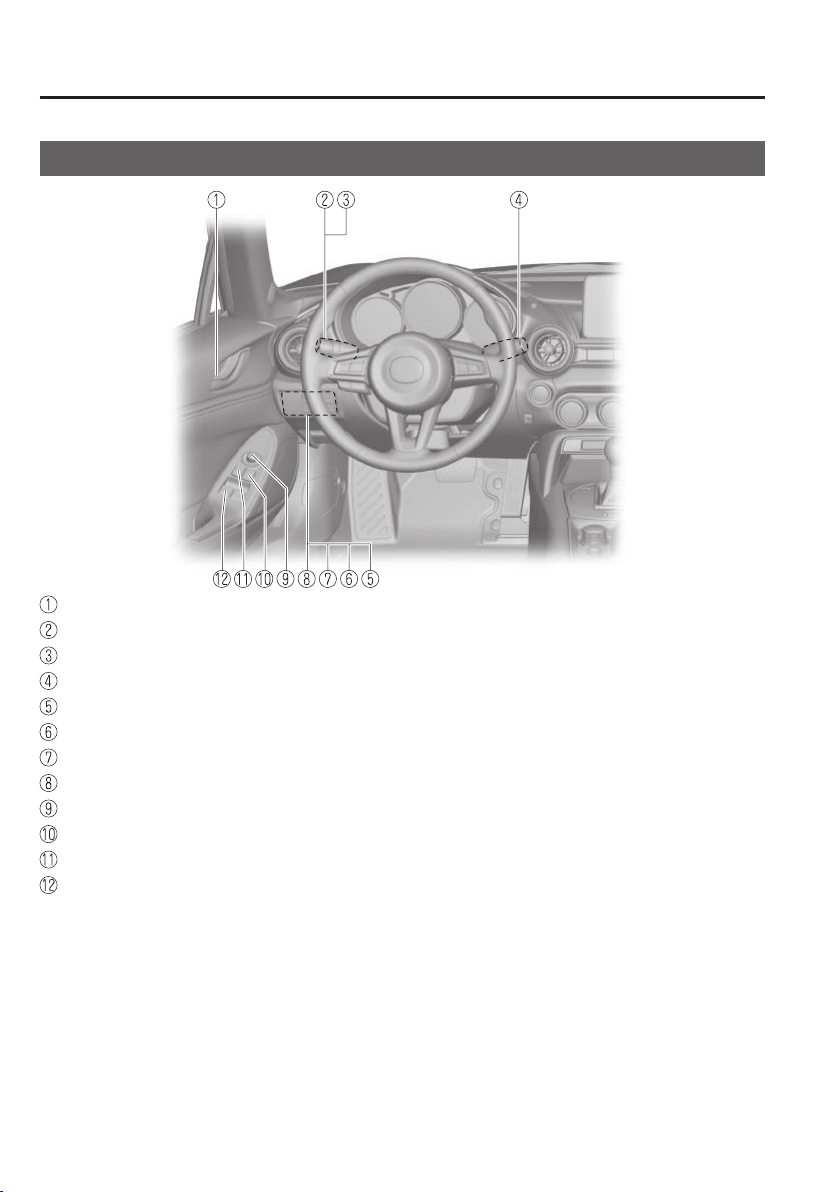
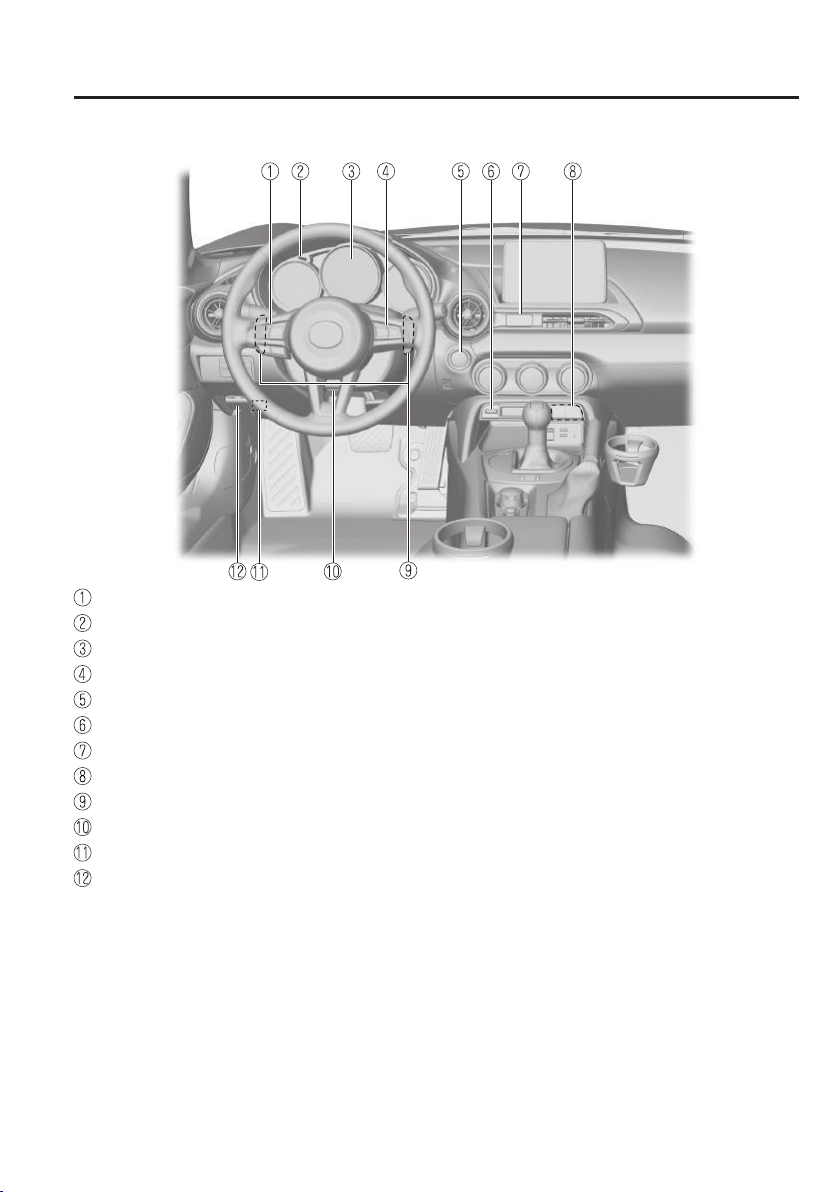
Interior Equipment (View A)
Door-lock knob .....................................................................................................page 3-17
Turn and lane-change signal .................................................................................page 4-50
Lighting control.....................................................................................................page 4-45
Wiper and washer lever ......................................................................................... page 4-51
DSC OFF switch ................................................................................................... page 4-68
Tire pressure monitoring system set switch ........................................................ page 4-108
Blind Spot Monitoring (BSM) switch ...................................................................page 4-90
LDWS switch ........................................................................................................ page 4-82
Outside mirror switch............................................................................................page 3-28
Door-lock switch ................................................................................................... page 3-14
Power window lock switch ................................................................................... page 3-33
Power window switches ........................................................................................ page 3-31
1–2
The equipment and installation position varies by vehicle
Page 9
Pictorial Index
Interior Overview
Audio control switches..........................................................................................page 5-55
Dashboard illumination knob ................................................................................ page 4-15
Instrument cluster .................................................................................................. page 4-11
Cruise control switches ....................................................................................... page 4-100
Push button start ...................................................................................................... page 4-4
Retractable fastback switch ...................................................................................page 3-45
Hazard warning asher switch .............................................................................. page 4-57
Seat warmer switches .............................................................................................. page 2-5
Steering shift switches ..........................................................................................page 4-37
Lock release lever .................................................................................................page 3-27
Trunk release button .............................................................................................. page 3-19
Hood release handle .............................................................................................. page 6-24
The equipment and installation position varies by vehicle
1–3
Page 10
Pictorial Index
Interior Overview
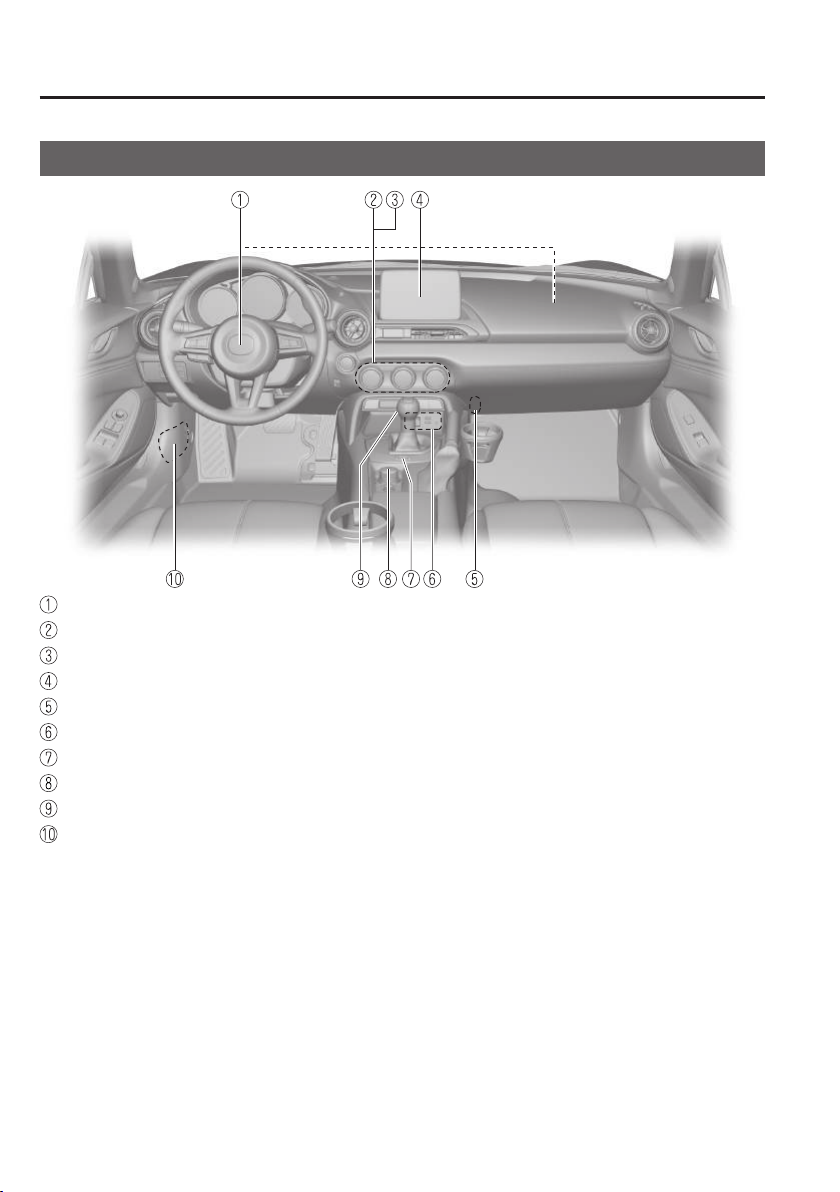
Interior Equipment (View B)
SRS air bags .......................................................................................................... page 2-24
Climate control system............................................................................................page 5-2
Rear window defogger switch...............................................................................page 4-55
Audio system.........................................................................................................page 5-13
Accessory socket ................................................................................................. page 5-134
External input terminal..........................................................................................page 5-57
Drive selection switch ........................................................................................... page 4-72
Commander switch ...............................................................................................page 5-34
Shift lever/Selector lever ..............................................................................page 4-31, 4-34
Fuse block (Left side) ...........................................................................................page 6-54
1–4
The equipment and installation position varies by vehicle
Page 11
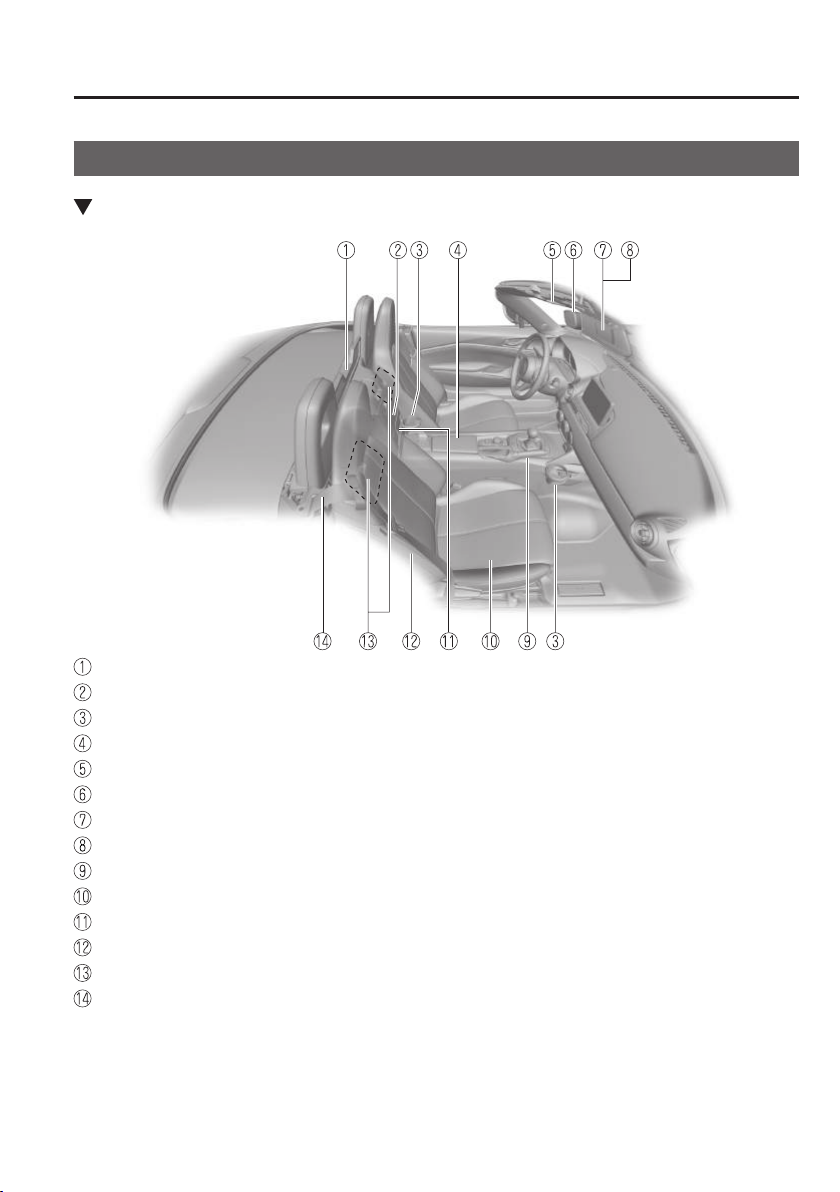
Interior Equipment (View C)
Convertible Top (Soft Top)
Pictorial Index
Interior Overview
Windblocker ........................................................................................................ page 5-140
Seat side box .......................................................................................................page 5-138
Cup holders ......................................................................................................... page 5-135
Console box.........................................................................................................page 5-138
Interior light ........................................................................................................page 5-132
Rearview mirror .................................................................................................... page 3-29
Sunvisor .............................................................................................................. page 5-132
Vanity mirror ....................................................................................................... page 5-132
Parking brake ........................................................................................................page 4-62
Seats ........................................................................................................................ page 2-4
CD player .............................................................................................................. page 5-13
SRS air bag............................................................................................................page 2-24
Back trim storage boxes ...................................................................................... page 5-139
Seat belt ................................................................................................................... page 2-7
The equipment and installation position varies by vehicle
1–5
Page 12
Pictorial Index
Interior Overview
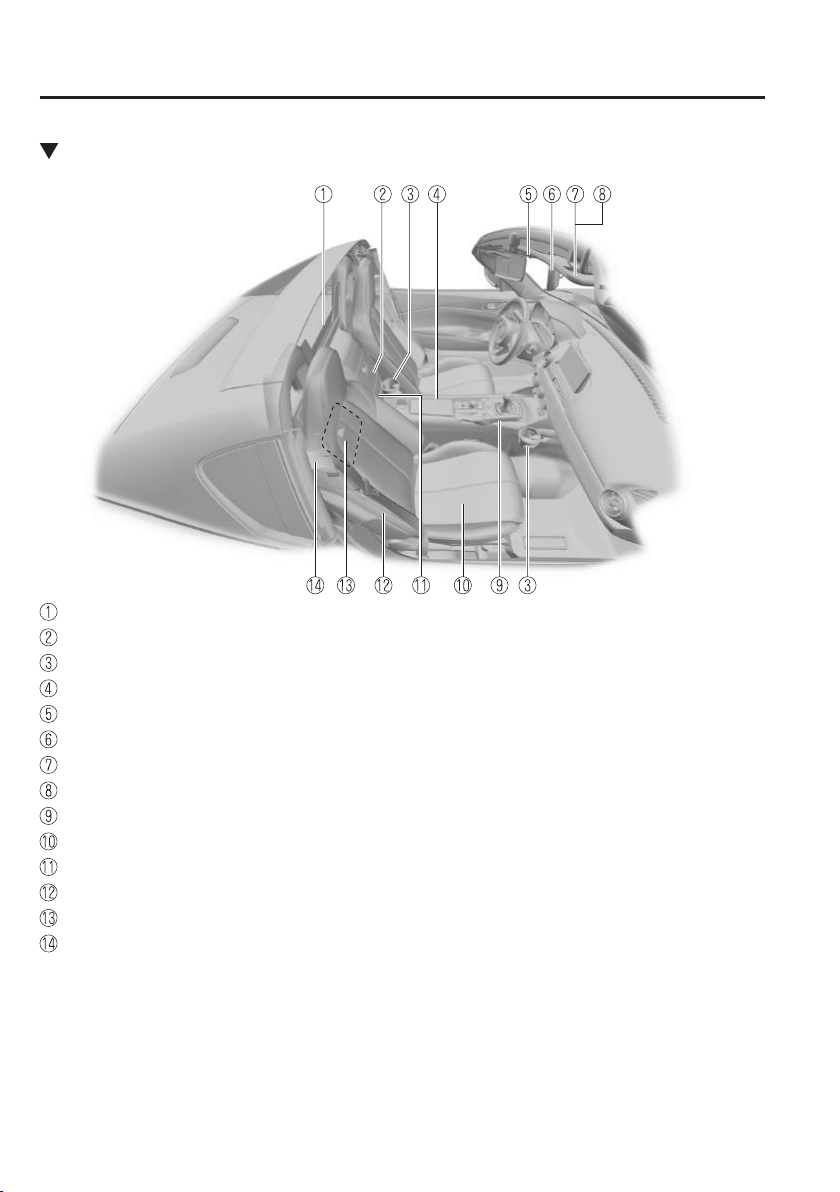
Convertible Top (Retractable Fastback)
Windblocker ........................................................................................................ page 5-140
Seat side box .......................................................................................................page 5-138
Cup holders ......................................................................................................... page 5-135
Console box.........................................................................................................page 5-138
Interior light ........................................................................................................page 5-132
Rearview mirror .................................................................................................... page 3-29
Sunvisor .............................................................................................................. page 5-132
Vanity mirror ....................................................................................................... page 5-132
Parking brake ........................................................................................................page 4-62
Seats ........................................................................................................................ page 2-4
CD player .............................................................................................................. page 5-13
SRS air bag............................................................................................................page 2-24
Back trim storage box ......................................................................................... page 5-139
Seat belt ................................................................................................................... page 2-7
1–6
The equipment and installation position varies by vehicle
Page 13
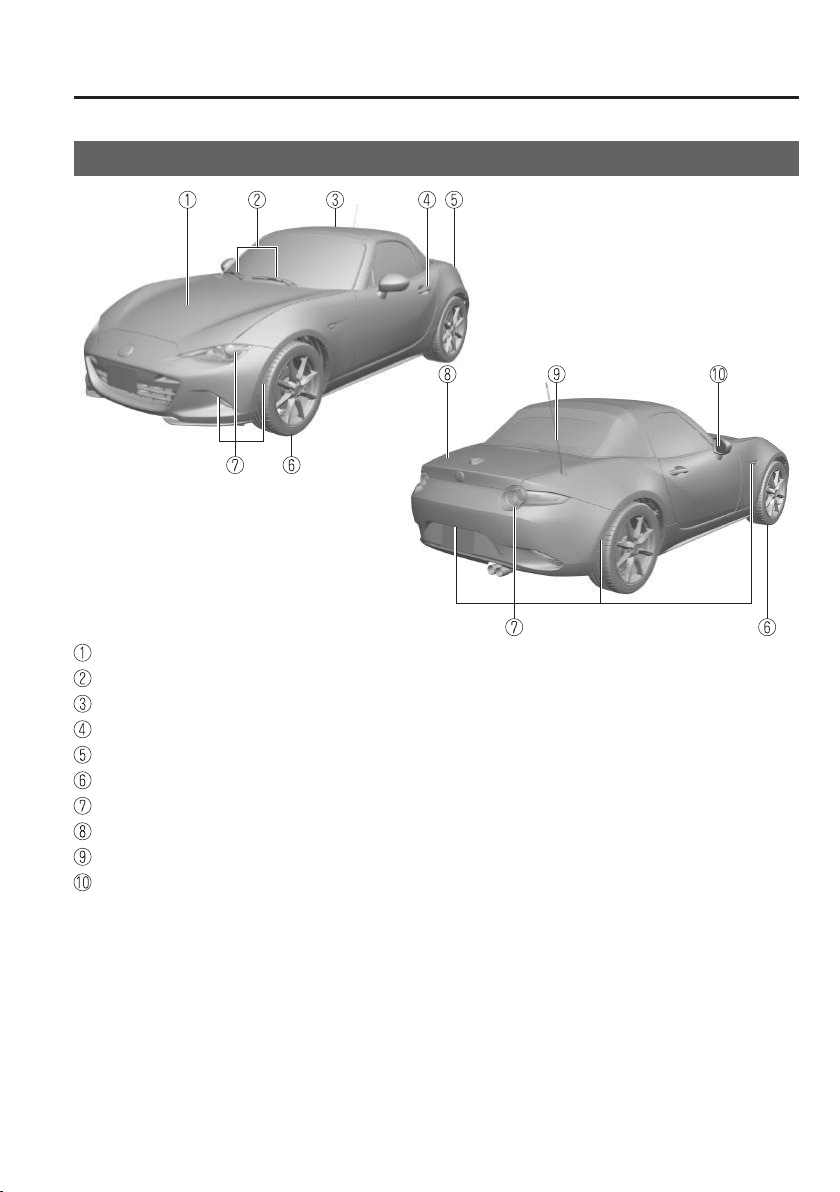
Exterior Overview
Convertible Top (Soft Top)
Pictorial Index
Hood ...................................................................................................................... page 6-24
Windshield wiper blades ....................................................................................... page 6-33
Convertible Top (Soft Top) ...................................................................................page 3-34
Doors and keys ...................................................................................................... page 3-12
Fuel-ller lid .........................................................................................................page 3-25
Wheels and Tires ................................................................................................... page 6-41
Exterior lights ........................................................................................................page 6-45
Trunk Lid ..............................................................................................................page 3-19
Antenna ................................................................................................................. page 5-13
Outside mirror ....................................................................................................... page 3-28
The equipment and installation position varies by vehicle
1–7
Page 14
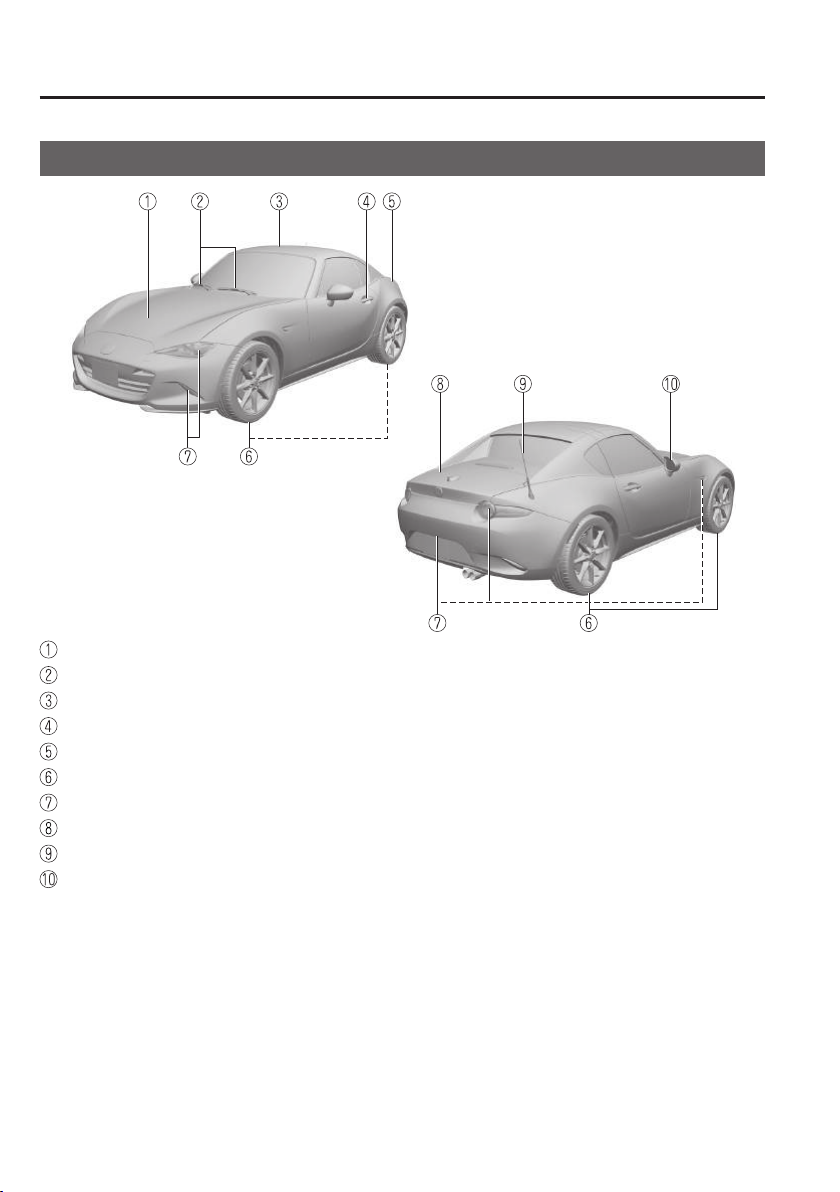
Pictorial Index
Exterior Overview
Convertible Top (Retractable Fastback)
Hood ...................................................................................................................... page 6-24
Windshield wiper blades ....................................................................................... page 6-33
Convertible Top (Retractable Fastback) ................................................................ page 3-39
Doors and keys ...................................................................................................... page 3-12
Fuel-ller lid .........................................................................................................page 3-25
Wheels and Tires ................................................................................................... page 6-41
Exterior lights ........................................................................................................page 6-45
Trunk Lid ..............................................................................................................page 3-19
Antenna ................................................................................................................. page 5-13
Outside mirror ....................................................................................................... page 3-28
1–8
The equipment and installation position varies by vehicle
Page 15

2
Essential Safety Equipment
Important information about safety equipment, including seats, seat belt
system, child-restraint systems and SRS air bags.
Seats ..................................................................................................... 2-2
Seat Precautions ............................................................................ 2-2
Seat ................................................................................................ 2-4
Head Restraints ............................................................................. 2-6
Seat Belt Systems ................................................................................ 2-7
Seat Belt Precautions .................................................................... 2-7
Seat Belt ...................................................................................... 2-10
Seat Belt Warning Systems ......................................................... 2-11
Seat Belt Pretensioner and Load Limiting Systems .................... 2-12
Seat Belt Extender ....................................................................... 2-13
Child Restraint ................................................................................. 2-15
Child-Restraint Precautions ........................................................ 2-15
Child-Restraint System Installation ............................................ 2-20
Installing Child-Restraint Systems ............................................. 2-21
SRS Air Bags .................................................................................... 2-24
Supplemental Restraint System (SRS) Precautions .................... 2-24
Supplemental Restraint System Components ............................. 2-29
How the SRS Air Bags Work ...................................................... 2-31
SRS Air Bag Deployment Criteria .............................................. 2-34
Limitations to SRS Air Bag ........................................................2-35
Passenger Occupant Classication System*................................ 2-37
Constant Monitoring ................................................................... 2-42
*Some models.
2–1
Page 16

Essential Safety Equipment
Seats
Seat Precautions
WARNING
Make sure the adjustable components of a seat are locked in place:
Adjustable seats and seatbacks that are not securely locked are dangerous. In a
sudden stop or collision, the seat or seatback could move, causing injury. Make sure the
adjustable components of the seat are locked in place by attempting to slide the seat
forward and backward and rocking the seatback.
Never allow children to adjust a seat:
Allowing children to adjust a seat is dangerous as it could result in serious injury if a
child's hands or feet become caught in the seat.
Do not drive with the seatback unlocked:
All of the seatbacks play an important role in your protection in a vehicle. Leaving the
seatback unlocked is dangerous as it can allow passengers to be ejected or thrown
around and baggage to strike occupants in a sudden stop or collision, resulting in severe
injury. After adjusting the seatback at any time, even when there are no other passengers,
rock the seatback to make sure it is locked in place.
Adjust the driver's seat only when the vehicle is stopped:
Adjusting the driver's seat while the vehicle is moving is dangerous. The driver could lose
control of the vehicle and have an accident.
Do not modify or replace the seats:
Modifying or replacing the seats such as replacing the upholstery or loosening any
bolts is dangerous. The seats contain air bag components essential to the supplemental
restraint system. Such modications could damage the supplemental restraint system
and result in serious injury. Consult an Authorized Mazda Dealer if there is any need to
remove or reinstall the seats.
Do not drive with damaged seats:
Driving with damaged seats, such as seat cushions torn or damaged down to the
urethane, is dangerous. A collision, even one not strong enough to inate the air bags,
could damage the seats which contain essential air bag components. If there was a
subsequent collision, an air bag may not deploy which could lead to injuries. Always have
an Authorized Mazda Dealer inspect the seats, seat belt pretensioners and air bags after
a collision.
2–2
Page 17
Essential Safety Equipment
Do not drive with either seats reclined:
Sitting in a reclined position while the vehicle is moving is dangerous because you do not
get the full protection from seat belts. During sudden braking or a collision, you can slide
under the lap belt and suer serious internal injuries. For maximum protection, sit well
back and upright.
Do not place an object such as a cushion between the seatback and your back:
Putting an object such as a cushion between the seatback and your back is dangerous
because you will be unable to maintain a safe driving posture and the seat belt cannot
function at its full capacity in a collision, which could result in a serious accident, injury or
death.
Do not place objects under the seat:
The object could get stuck and cause the seat to not be xed securely, and result in an
accident.
Do not stack cargo higher than the seatbacks:
Stacking luggage or other cargo higher than the seatbacks is dangerous. During sudden
braking or a collision, objects can y around and become projectiles that may hit and
injure passengers.
Make sure luggage and cargo is secured before driving:
Not securing cargo while driving is dangerous as it could move or be crushed during
sudden braking or a collision and cause injury.
Seats
Always leave your car locked and keep the car keys safely away from children:
Leaving your car unlocked or the keys in reach of children is dangerous. Children who nd
their way into the trunk through an open trunk can become accidentally locked in the
trunk. This could result in death or brain damage from heat prostration, particularly in
the summer. Always lock the doors and the trunk.
CAUTION
When operating a seat, be careful not to put your hands or ngers near the moving parts of
the seat or on the side trim to prevent injury.
When moving the seats, make sure there is no cargo in the surrounding area. If the cargo
gets caught it could damage the cargo.
When moving the seats forward and rearward or returning a rear-reclined seatback to its
upright position, make sure you hold onto the seatback with your hand while operating. If
the seatback is not held, the seat will move suddenly and could cause injury.
2–3
Page 18
Essential Safety Equipment
Seats
Seat
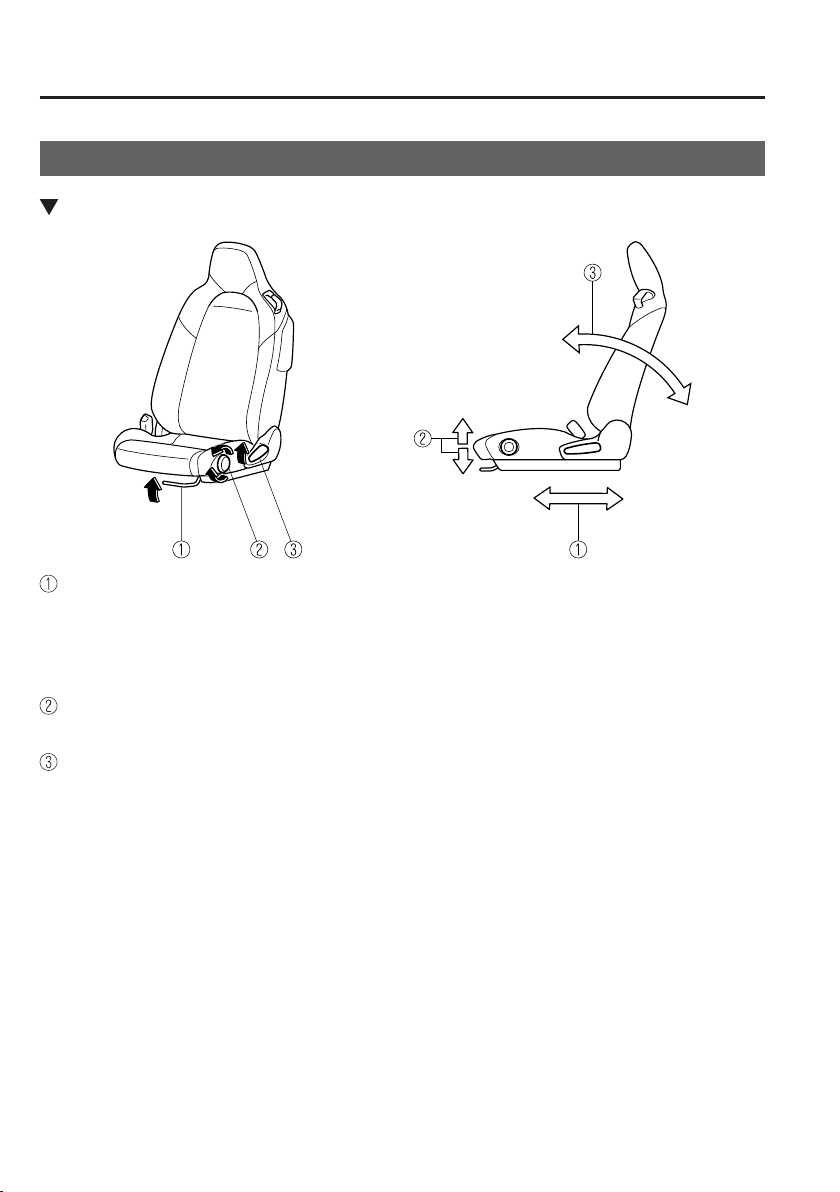
Seat Operation
Seat Slide
To move a seat forward or backward, raise the lever and slide the seat to the desired position
and release the lever.
Make sure the lever returns to its original position and the seat is locked in place by
attempting to push it forward and backward.
Height Adjustment for Front Edge of Seat Bottom (Driver's Seat)
To adjust the height for front edge of the seat bottom, rotate the dial to the desired position.
Seat Recline
To change the seatback angle, lean forward slightly while raising the lever. Then lean back
to the desired position and release the lever.
Make sure the lever returns to its original position and the seatback is locked in place by
attempting to push it forward and backward.
2–4
Page 19
Essential Safety Equipment
Seats
Seat Warmer
*
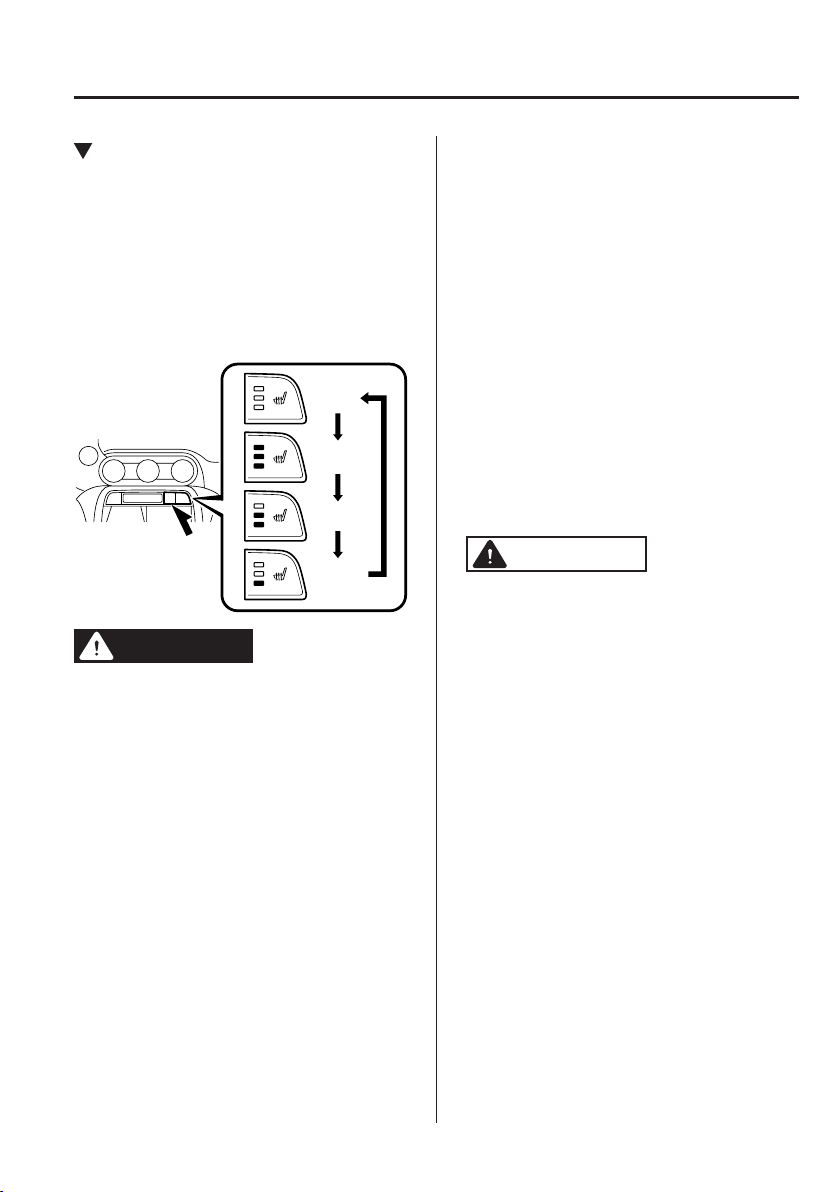
The seats are electrically heated. The
ignition must be switched ON.
Press the seat warmer switch while the
ignition is switched ON to operate the seat
warmer. The indicator lights turn on to
indicate that the seat warmer is operating.
The mode changes as follows each time
the seat warmer switch is pressed.
OFF
High
Mid
Low
WARNING
Be careful when using the seat warmer:
The heat from the seat warmer may be
too hot for some people, as indicated
as follows, and could cause a lowtemperature burn.
Infants, small children, elderly
people, and physically challenged
people
People with delicate skin
People who are excessively fatigued
People who are intoxicated
People who have taken sleep-
inducing medicine such as sleeping
pills or cold medicine
Do not use the seat warmer with
anything having high moistureretention ability such as a blanket or
cushion on the seat:
The seat may be heated excessively
and cause a low-temperature burn.
Do not use the seat warmer even when
taking a short nap in the vehicle:
The seat may be heated excessively
and cause a low-temperature burn.
Do not place heavy objects with sharp
projections on the seat, or insert
needles or pins into it:
This could cause the seat to become
excessively heated and result in injury
from a minor burn.
CAUTION
Do not use organic solvents to clean
the seat. It may damage the seat
surface and the heater.
NOTE
If the ignition is switched off while the
seat warmer is operating (High, Mid or
Low) and then switched ON again, the
seat warmer will automatically operate
at the temperature set before switching
off the ignition.
Use the seat warmer when the engine
is running. Leaving the seat warmer
on for long periods with the engine not
running could cause the battery power
to be depleted.
The temperature of the seat warmer
cannot be adjusted beyond High, Mid
and Low because the seat warmer is
controlled by a thermostat.
*Some models.
2–5
Page 20

Essential Safety Equipment
Seats
Head Restraints
Non-Adjustable Head Restraints
Your vehicle is equipped with non-adjustable head restraints on the driver's and passenger's
seatbacks. The non-adjustable head restraints consist of a trimmed foam covering over the
upper structure of the seatbacks and are intended to help protect you and the passenger from
neck injury. Adjust the seatbacks to their upright, on-road positions so that the head restraint
is positioned as close as possible to the back of your head.
WARNING
Make sure the seatbacks are properly adjusted to their upright, on-road positions
before the vehicle is driven:
Driving with the seatbacks not adjusted properly is dangerous. With no support behind
your head, your neck could be seriously injured in a collision.
2–6
Page 21

Essential Safety Equipment
Seat Belt Systems
Seat Belt Precautions
Seat belts help to decrease the possibility of severe injury during accidents and sudden
stops. Mazda recommends that the driver and passengers always wear seat belts.
(Except Mexico)
All of the seat belt retractors are designed to keep the lap/shoulder belts out of the way when
not in use.
The driver's seat belt has no provisions for child-restraint systems and has only an
emergency locking mode. The driver may wear it comfortably, and it will lock during a
collision.
However, the passenger's seat lap/shoulder belt retractor operates in two modes: emergency
locking mode, and for child-restraint systems, automatic locking mode. If you must use the
passenger seat for a child, slide the passenger seat as far back as possible and make sure any
child-restraint system is secured properly.
(Mexico)
All the seats have lap/shoulder belts. These belts have retractors with inertia locks that keep
them out of the way when not in use. The locks allow the belts to remain comfortable on
users, but they will lock in position during a collision.
WARNING
Always wear your seat belt and make sure all occupants are properly restrained:
Not wearing a seat belt is extremely dangerous. During a collision, occupants not
wearing seat belts could hit someone or things inside the vehicle or even be thrown out of
the vehicle. They could be seriously injured or even killed. In the same collision, occupants
wearing seat belts would be much safer.
Do not wear twisted seat belts:
Twisted seat belts are dangerous. In a collision, the full width of the belt is not available to
absorb the impact. This puts more force on the bones beneath the belt, which could cause
serious injury or death. So, if your seat belt is twisted, you must straighten the seat belt to
remove any twists and to allow the full width of the belt to be used.
Never use one seat belt on more than one person at a time:
Using one seat belt for more than one person at a time is dangerous. A seat belt used
in this way cannot spread the impact forces properly and the two passengers could
be crushed together and seriously injured or even killed. Never use one belt for more
than one person at a time and always operate the vehicle with each occupant properly
restrained.
2–7
Page 22
Essential Safety Equipment
Seat Belt Systems
Do not operate a vehicle with a damaged seat belt:
Using a damaged seat belt is dangerous. An accident could damage the belt webbing
of the seat belt in use. A damaged seat belt cannot provide adequate protection in a
collision. Have an Authorized Mazda Dealer inspect all seat belt systems in use during an
accident before they are used again.
Have your seat belts changed immediately if the pretensioner or load limiter has been
expended:
Always have an Authorized Mazda Dealer immediately inspect the seat belt pretensioners
and air bags after any collision. Like the air bags, the seat belt pretensioners and load
limiters will only function once and must be replaced after any collision that caused them
to deploy. A seat belt with an expended pretensioner or load limiter is still better than
wearing no seat belt at all; however, if the seat belt pretensioners and load limiters are
not replaced, the risk of injury in a collision will increase.
Positioning the Shoulder Portion of the Seat Belt:
Improper positioning of the shoulder portion of the seat belt is dangerous. Always make
sure the shoulder portion of the seat belt is positioned across your shoulder and near your
neck, but never under your arm, on your neck, or on your upper arm.
Positioning the Lap Portion of the Seat Belt:
The lap portion of the seat belt worn too high is dangerous. In a collision, this would
concentrate the impact force directly on the abdominal area, causing serious injury. Wear
the lap portion of the belt snugly and as low as possible.
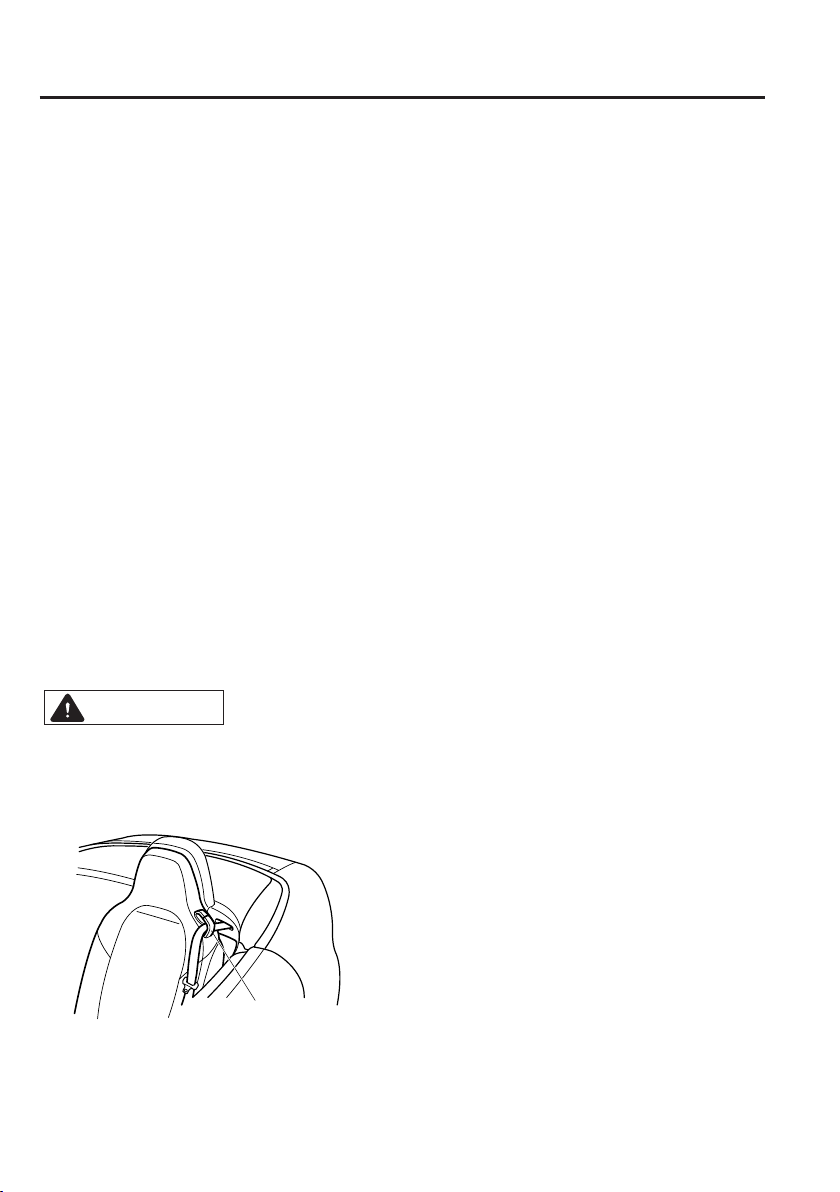
CAUTION
Belt retraction may become dicult if the belts and seat belt guides are soiled, so try
to keep them clean. For more details about cleaning the seat belts, refer to "Seat Belt
Maintenance" (page 6-68).
Seat belt guide
2–8
Page 23
Essential Safety Equipment
Seat Belt Systems
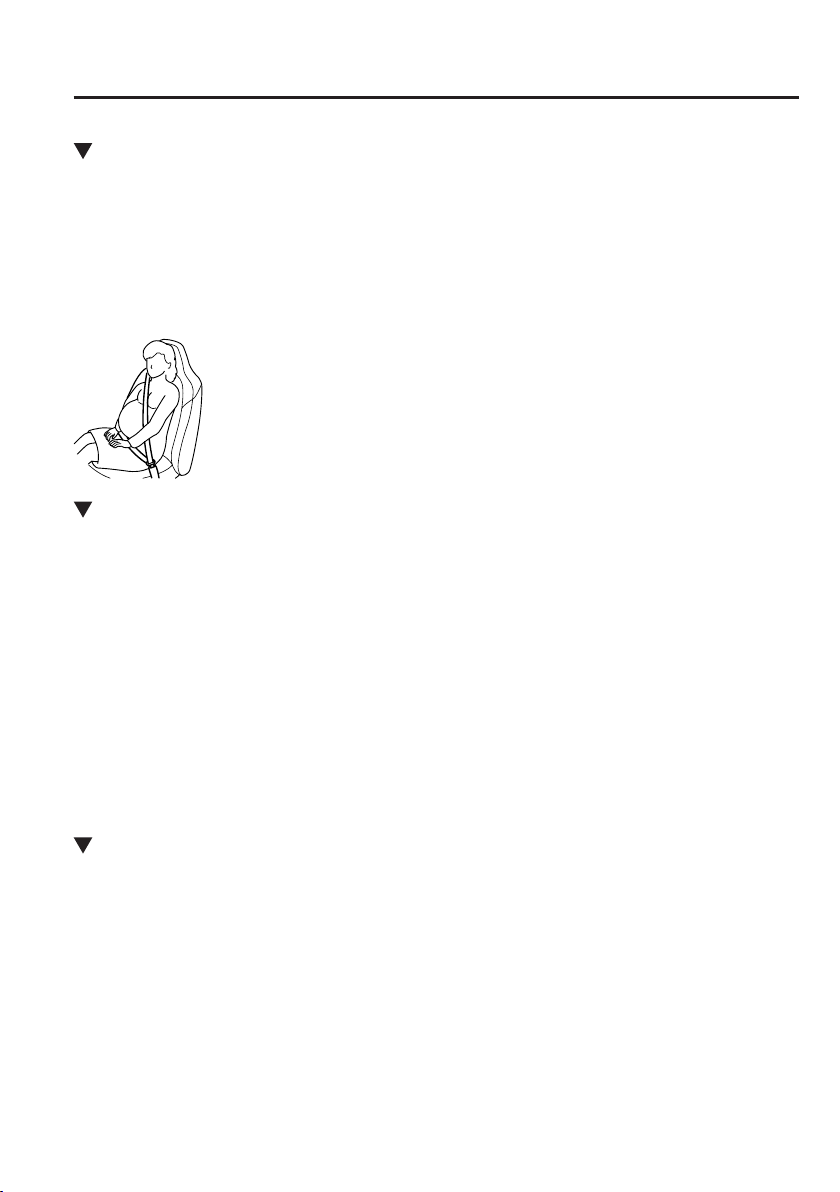
Pregnant Women and Persons with Serious Medical Conditions
Pregnant women should always wear seat belts. Ask your doctor for specic
recommendations.
The lap belt should be worn SNUGLY AND AS LOW AS POSSIBLE OVER THE HIPS.
The shoulder belt should be worn across your shoulder properly, but never across the
stomach area.
Persons with serious medical conditions also should wear seat belts. Check with your doctor
for any special instructions regarding specic medical conditions.
Emergency Locking Mode
When the seat belt is fastened, it will always be in the emergency locking mode.
In the emergency locking mode, the belt remains comfortable on the occupant and the
retractor will lock in position during a collision.
If the belt is locked and cannot be pulled out, retract the belt once, and then try pulling it out
slowly. If this fails, pull the belt strongly one time and loosen, then pull it out again slowly.
(Seat Belt with Automatic Locking Mode)
When the seat belt is fastened, it will always be in the emergency locking mode until it is
switched to automatic locking mode by pulling it all the way out to its full length. If the belt
feels tight and hinders comfortable movement while the vehicle is stopped or in motion, it
may be in the automatic locking mode because the belt has been pulled too far out. To return
the belt to the more comfortable emergency locking mode, wait until the vehicle has stopped
in a safe, level area, retract the belt fully to convert it back to emergency locking mode and
then extend it around you again.
Automatic Locking Mode
Always use the automatic locking mode to keep the child-restraint system from shifting to
an unsafe position in the event of an accident. To enable seat belt automatic locking mode,
pull it all the way out and connect it as instructed on the child-restraint system. It will retract
down to the child-restraint system and stay locked on it. See the section on child restraint
(page 2-15).
*
*Some models.
2–9
Page 24

Essential Safety Equipment
Seat belt guide
Keep low on
hip bone
Seat Belt Systems
Seat Belt
WARNING
Always wear the seat belt with it
correctly routed in its guide:
Wearing a seat belt without the seat
belt routed in its guide is dangerous
because the seat belt would not be
able to provide adequate protection
in an accident, which could result in
serious injury.
Fastening the Seat Belt
Seat belt tongue
Seat belt buckle
Position the lap belt as low as possible,
not on the abdominal area, then adjust the
shoulder belt so that it ts snugly against
your body.
Take up slack
Too high
2–10
Page 25
Essential Safety Equipment
Seat Belt Systems
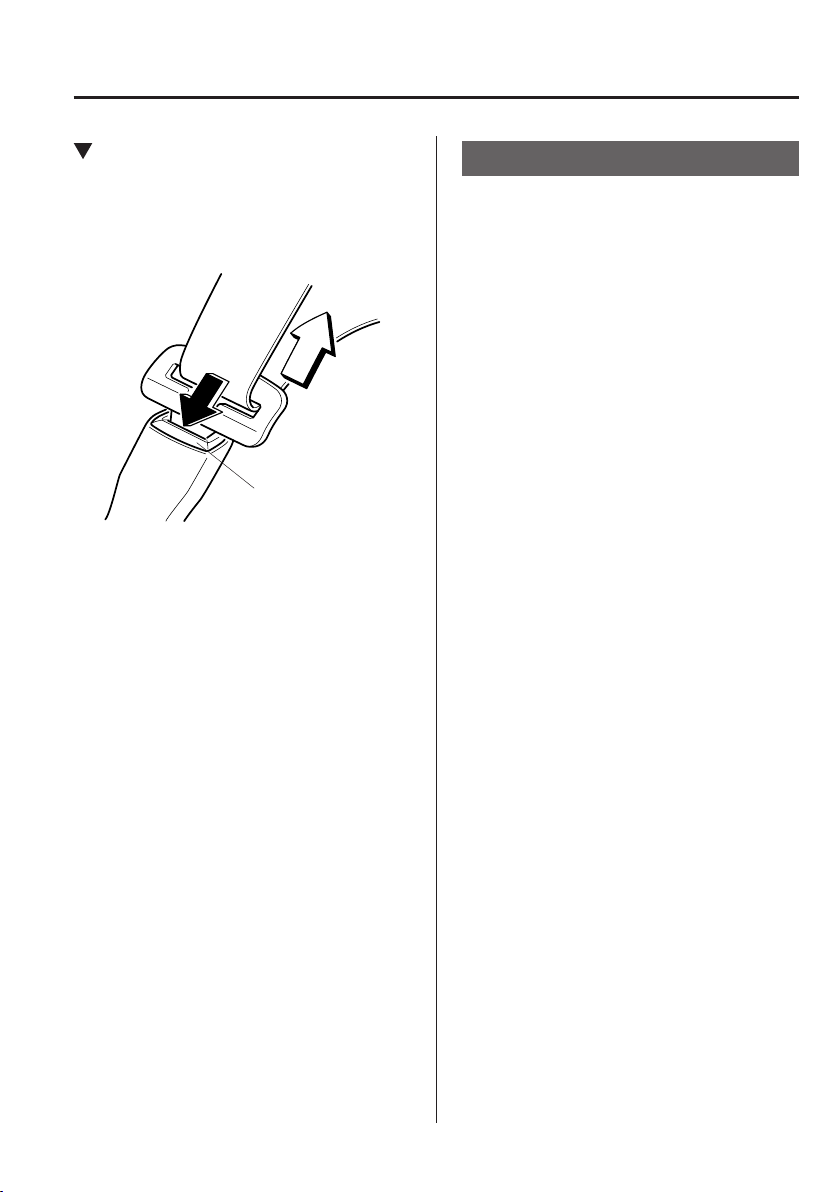
Unfastening the Seat Belt
Depress the button on the seat belt buckle.
If the belt does not fully retract, pull it out
and check for kinks or twists. Then make
sure it remains untwisted as it retracts.
Button
NOTE
If a belt does not fully retract, inspect
it for kinks and twists. If it is still not
retracting properly, have it inspected at an
Authorized Mazda Dealer.
Seat Belt Warning Systems
If it detects that the occupant seat belt
is unfastened, the warning light or beep
alerts the occupant.
Refer to Warning/Indicator Lights on page
4-26.
Refer to Seat Belt Warning Beep on page
7-49.
2–11
Page 26
Essential Safety Equipment
Seat Belt Systems
Seat Belt Pretensioner and Load Limiting Systems
For optimum protection, the driver and
passenger seat belts are equipped with
pretensioner and load limiting systems.
For both these systems to work properly
you must wear the seat belt properly.
Pretensioners:
When a collision is detected, the
pretensioners deploy simultaneously with
the air bags.
For deployment details, refer to the SRS
Air Bag Deployment Criteria (page
2-34).
The seat belt retractors remove slack
quickly as the air bags are expanding.
Any time the air bags and seat belt
pretensioners have red they must be
replaced.
A system malfunction or operation
conditions are indicated by a warning.
Refer to Warning/Indicator Lights on page
4-26.
Refer to Air Bag/Seat Belt Pretensioner
System Warning Beep on page 7-48.
(With Passenger Occupant
Classication System)
In addition, the pretensioner system for
the passenger, like the front and side
passenger air bag, is designed to only
deploy when the passenger occupant
classication sensor detects a passenger
sitting on the passenger's seat.
For details, refer to the passenger occupant
classication sensor (page 2-37).
Load limiter:
The load limiting system releases belt
webbing in a controlled manner to reduce
belt force on the occupant's chest. While
the most severe load on a seat belt occurs
in frontal collisions, the load limiter has
an automatic mechanical function and
can activate in any accident mode with
sufcient occupant movement.
Even if the pretensioners have not red,
the load limiting function must be checked
by an Authorized Mazda Dealer.
WARNING
Wear seat belts only as recommended in
this owner's manual:
Incorrect positioning of the driver and
passenger seat belts is dangerous.
Without proper positioning, the
pretensioner and load limiting systems
cannot provide adequate protection
in an accident and this could result in
serious injury. For more details about
wearing seat belts, refer to "Fastening
the seat belts" (page 2-10).
Have your seat belts changed
immediately if the pretensioner or load
limiter has been expended:
Always have an Authorized Mazda
Dealer immediately inspect the seat
belt pretensioners and air bags after
any collision. Like the air bags, the seat
belt pretensioners and load limiters
will only function once and must be
replaced after any collision that caused
them to deploy. A seat belt with an
expended pretensioner or load limiter
is still better than wearing no seat
belt at all; however, if the seat belt
pretensioners and load limiters are not
replaced, the risk of injury in a collision
will increase.
2–12
Page 27
Essential Safety Equipment
Seat Belt Systems
Do not modify the components or
wiring, or use electronic testing devices
on the pretensioner system:
Modifying the components or wiring
of the pretensioner system, including
the use of electronic testing devices
is dangerous. You could accidentally
activate it or make it inoperable which
would prevent it from activating in an
accident. The occupants or repairers
could be seriously injured.
Properly dispose of the pretensioner
system:
Improper disposal of the pretensioner
system or a vehicle with nondeactivated pretensioners is
dangerous. Unless all safety
procedures are followed, injury
could result. Have an Authorized
Mazda Dealer safely dispose of
the pretensioner system or scrap a
pretensioner system equipped vehicle.
NOTE
The pretensioner system may not
operate depending on the type of the
collision. For details, refer to the SRS
Air Bag Deployment Criteria (page
2-34).
Some smoke (non-toxic gas) will
be released when the air bags and
pretensioners deploy. This does not
indicate a re. This gas normally has
no effect on occupants, however, those
with sensitive skin may experience
light skin irritation. If residue from
the deployment of the air bags or the
pretensioner system gets on the skin
or in the eyes, wash it off as soon as
possible.
Seat Belt Extender
If your seat belt is not long enough, even
when fully extended, a seat belt extender
may be available to you at no charge from
your Authorized Mazda Dealer.
This extender will be only for you and for
the particular vehicle and seat. Even if it
plugs into other seat belts, it may not hold
in the critical moment of a crash.
When ordering an extender, only order
one that provides the necessary additional
length to fasten the seat belt properly.
Please contact your Authorized Mazda
Dealer for more information.
WARNING
Do not use a seat belt extender unless it
is necessary:
Using a seat belt extender when not
necessary is dangerous. The seat belt
will be too long and not t properly.
In an accident, the seat belt will not
provide adequate protection and you
could be seriously injured. Only use the
extender when it is required to fasten
the seat belt properly.
2–13
Page 28

Essential Safety Equipment
Seat Belt Systems
Do not use an improper extender:
Using a seat belt extender that is for
another person or a dierent vehicle
or seat is dangerous. The seat belt will
not provide adequate protection and
the user could be seriously injured in
an accident. Only use the extender
provided for you and for the particular
vehicle and seat. NEVER use the
extender in a dierent vehicle or seat.
If you sell your Mazda, do not leave
your seat belt extender in the vehicle. It
could be used accidentally by the new
owner of the vehicle. After removing
the seat belt extender, discard it. Never
use the seat belt extender in any other
vehicle you may own in the future.
Do not use an extender that is too long:
Using an extender that is too long is
dangerous. The seat belt will not t
properly. In an accident, the seat belt
will not provide adequate protection
and you could be seriously injured.
Do not use the extender or choose
one shorter in length if the distance
between the extender's buckle and the
center of the user's body is less than 15
cm (6 in).
Do not leave a seat belt extender
connected to the buckle:
Leaving a seat belt extender connected
to the buckle without using the seat
belt is dangerous. When the seat belt
extender is connected to the driver's
seat belt buckle (or passenger's
seat belt buckle), the SRS driver's
(or passenger's) air bag system
will determine that the driver (or
passenger) is wearing the seat belt
even if the driver (or passenger) is not
wearing it. This condition could cause
the driver's (or passenger's) air bag
to not activate correctly and result in
death or serious injury in the event of
collision. Always wear the seat belt
with the seat belt extender.
Do not use the seat belt extender when
installing a child-restraint system on the
passenger seat:
Using a seat belt extender to fasten
a child-restraint system on any seat
is dangerous. Always follow the
child-restraint system manufacturer's
installation instructions and never use
a seat belt extender.
NOTE
When not in use, remove the seat belt
extender and store it in the vehicle. If the
seat belt extender is left connected, the
seat belt extender might get damaged
as it will not retract with the rest of the
seat belt and can easily fall out of the
door when not in use and be damaged. In
addition, the seat belt warning light will
not illuminate and function properly.
2–14
Page 29

Essential Safety Equipment
Child Restraint
Child-Restraint Precautions
Mazda strongly urges the use of child-restraint systems for children small enough to use
them.
You are required by law to use a child-restraint system for children in the U.S. and Canada.
Check your local and state or provincial laws for specic requirements regarding the safety
of children riding in your vehicle.
Whatever child-restraint system you consider, please pick the appropriate one for the age
and size of the child, obey the law and follow the instructions that come with the individual
child-restraint system.
A child who has outgrown child-restraint systems should use seat belts, both lap and
shoulder. If the shoulder belt crosses the neck or face, move the child closer to the center of
the vehicle.
A rear-facing child-restraint system should NEVER be used on the passenger seat with the
air bag system activated.
(With Passenger Occupant Classication System)
To reduce the chance of injuries caused by deployment of the passenger air bag, the
passenger occupant classication sensor work as a part of the supplemental restraint system.
This system deactivates the passenger front and side air bags and also the passenger seat belt
pretensioner system when the passenger air bag deactivation indicator light illuminates.
When an infant or small child sits on the passenger seat, the system shuts off the passenger
front and side air bags and seat belt pretensioner system, so make sure the passenger air bag
deactivation indicator light illuminates.
For more details, refer to "Passenger occupant classication sensor" (page 2-37).
2–15
Page 30

Essential Safety Equipment
Child Restraint
WARNING
Use the correct size child-restraint system:
For eective protection in vehicle accidents and sudden stops, a child must be properly
restrained using a seat belt or child-restraint system depending on age and size. If not, the
child could be seriously injured or even killed in an accident.
Follow the manufacturer's instructions and always keep the child-restraint system
buckled down:
An unsecured child-restraint system is dangerous. In a sudden stop or a collision it could
move causing serious injury or death to the child or other occupants. Make sure any
child-restraint system is properly secured in place according to the child-restraint system
manufacturer's instructions. When not in use, remove it from the vehicle or fasten it with
a seat belt.
Always secure a child in a proper child-restraint system:
Holding a child in your arms while the vehicle is moving is extremely dangerous. No
matter how strong the person may be, he or she cannot hold onto a child in a sudden
stop or collision and it could result in serious injury or death to the child or other
occupants. Even in a moderate accident, the child may be exposed to air bag forces that
could result in serious injury or death to the child, or the child may be slammed into an
adult, causing injury to both child and adult.
Always make sure the passenger air bag deactivation indicator light is illuminated
when using a child-restraint system:
Seating a child in a child-restraint system that is installed on the passenger seat with the
passenger air bag deactivation indicator light not illuminated is extremely dangerous. In
an accident, an air bag could inate and cause serious injuries or even death to the child
seated in the child-restraint system. Always make sure the passenger air bag deactivation
indicator light is illuminated.
Refer to Passenger Occupant Classication System on page 2-37.
(Except Mexico)
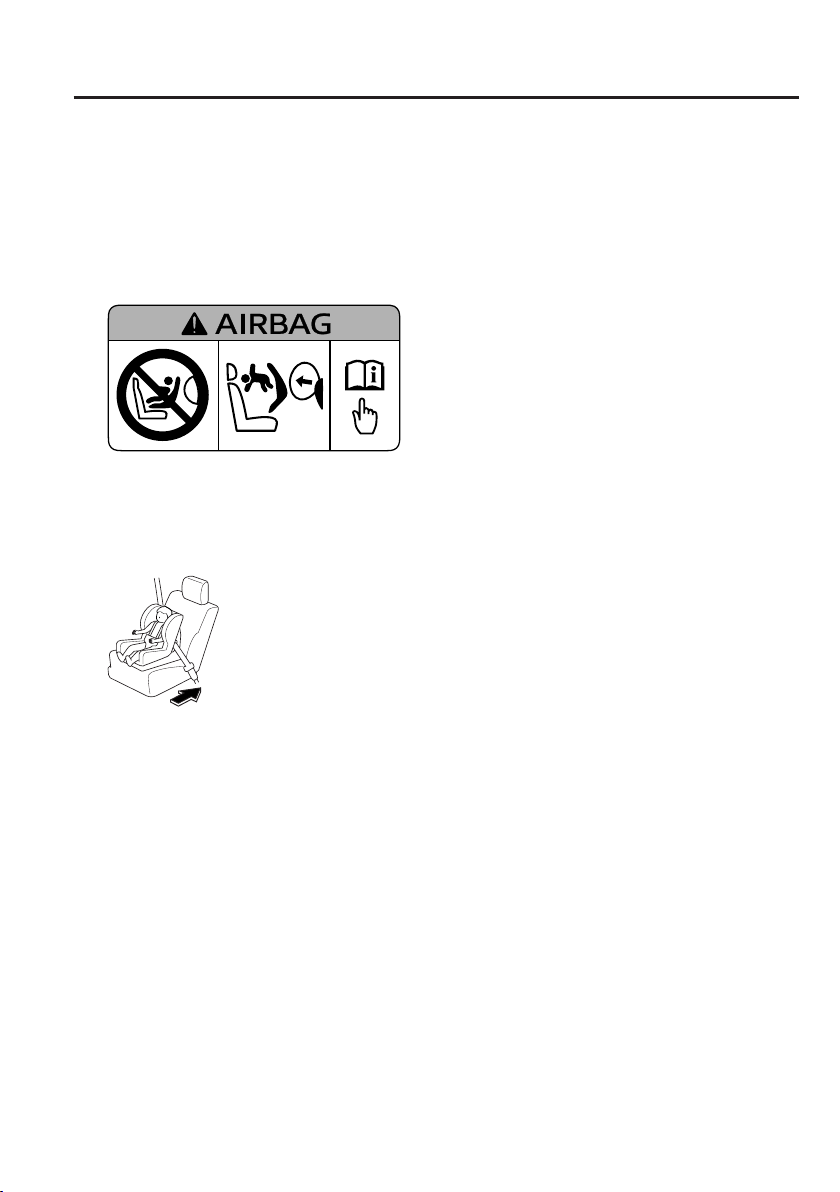
Vehicles with a passenger air bag have the following warning label. The warning label is
displayed in compliance with regulations.
2–16
Page 31
Essential Safety Equipment
Child Restraint
(Mexico)
NEVER use a rearward facing child restraint on a seat protected by an ACTIVE AIRBAG in
front of it, DEATH or SERIOUS INJURY to the CHILD can occur.
Vehicles with a passenger air bag have the following warning label. The warning label
reminds you not to put a rear-facing child-restraint system on the passenger seat at any
time.
Before installing child-restraint system on the passenger seat, move the passenger
seat as far back as possible:
In a collision, the force of a deploying air bag could cause serious injury or death to the
child.
2–17
Page 32

Essential Safety Equipment
Child Restraint
Seating a child in a child-restraint system on the passenger seat is dangerous under
certain conditions (With Passenger Occupant Classication System):
Your vehicle is equipped with passenger occupant classication sensor. Even with the
passenger occupant classication sensor, if you must use the passenger seat to seat a
child, using a child-restraint system on the passenger seat under the following conditions
increases the danger of the passenger air bag deploying and could result in serious injury
or death to the child.
The passenger air bag deactivation indicator light does not illuminate when seating a
child in the child-restraint system.
Luggage or other items are placed on the seat with the child in the child-restraint
system.
The seat is washed.
Liquids are spilled on the seat.
The passenger seat is moved backward, pushing into luggage or other items placed
behind it.
Luggage or other items are placed between the passenger seat and driver seat.
An electric device is put on the passenger's seat.
An additional electrical device, such as a seat warmer is installed to the surface of the
passenger seat.
Do not allow a child or anyone to lean over or against the side window of a vehicle with
side air bags:
It is dangerous to allow anyone to lean over or against the side window, the area of the
passenger seat from which the side air bags deploy, even if a child-restraint system is
used. The impact of ination from a side air bag could cause serious injury or death to an
out of position child. Furthermore, leaning over or against the door could block the side
air bags and eliminate the advantages of supplemental protection. Because the side air
bag deploys from the outboard shoulder of the seat, do not allow the child to lean over or
against the side window, even if the child is seated in a child-restraint system.
Never use one seat belt on more than one person at a time:
Using one seat belt for more than one person at a time is dangerous. A seat belt used
in this way cannot spread the impact forces properly and the two passengers could
be crushed together and seriously injured or even killed. Never use one belt for more
than one person at a time and always operate the vehicle with each occupant properly
restrained.
Always use a child-restraint system designed for use without a tether or the LATCH
lower anchor:
Using a child-restraint system that requires a tether or the LATCH lower anchor is
dangerous. Your Mazda does not have a child-restraint tether or the LATCH lower anchor.
The child-restraint system cannot be properly secured. In a collision, it could move and
injure other occupants as well as result in serious injuries or death to the child.
2–18
Page 33

Essential Safety Equipment
Child Restraint
CAUTION
A seat belt or child-restraint system can become very hot in a closed vehicle during warm
weather. To avoid burning yourself or a child, check them before you or your child touches
them.
2–19
Page 34
Essential Safety Equipment
Child Restraint
Child-Restraint System Installation
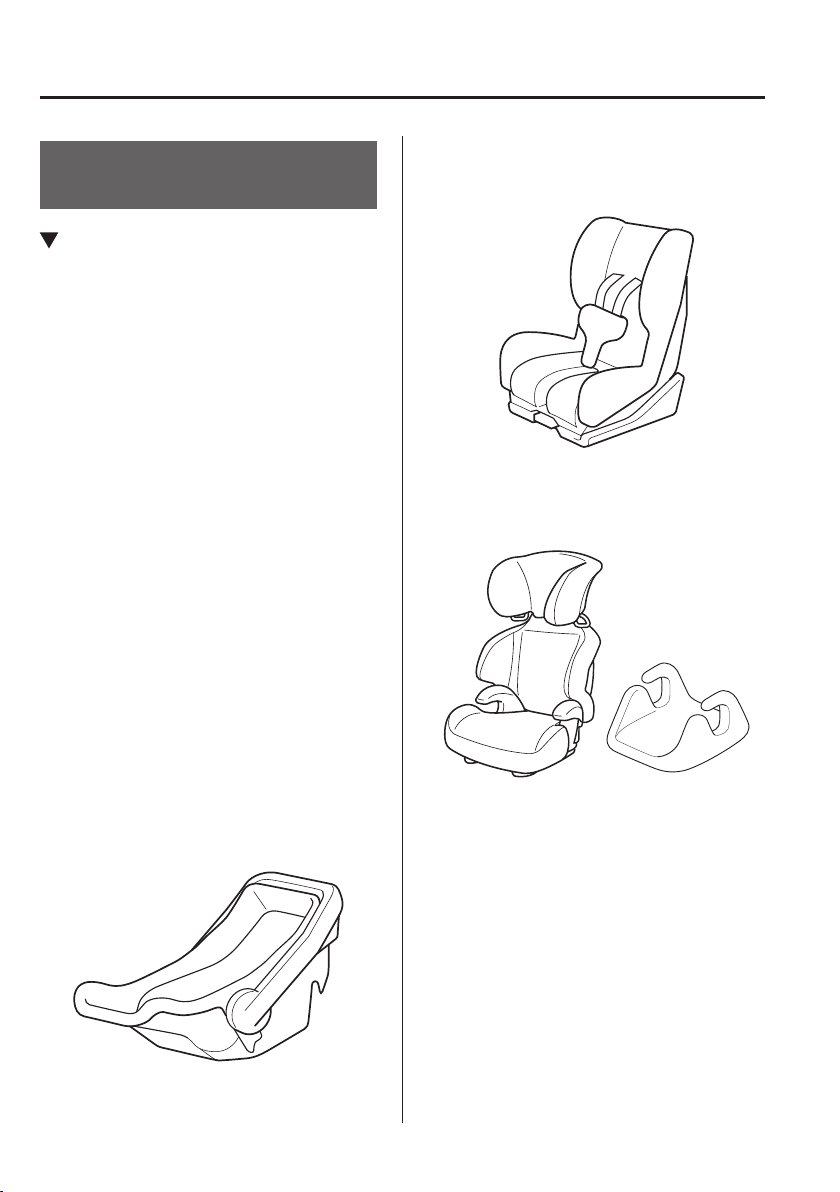
Child-Restraint System Types
In this owner's manual, explanation of
child-restraint systems is provided for the
following three types of popular childrestraint systems: infant seat, child seat,
booster seat.
NOTE
Installation position is determined
by the type of child-restraint system.
Always read the manufacturer's
instructions and this owner's manual
carefully.
Due to variations in the design of child-
restraint systems, vehicle seats and
seat belts, all child-restraint systems
may not t all seating positions. Before
purchasing a child-restraint system, it
should be tested in the specic vehicle
seating position (or positions) where it
is intended to be used. If a previously
purchased child-restraint system does
not t, you may need to purchase a
different one that will.
Infant seat
An infant seat provides restraint by
bracing the infant's head, neck and back
against the seating surface.
Child seat
A child seat restrains a child's body using
the harness.
Booster seat
A booster seat is a child restraint accessory
designed to improve the t of the seat belt
system around the child's body.
2–20
Page 35
Essential Safety Equipment
Child Restraint
Installing Child-Restraint Systems
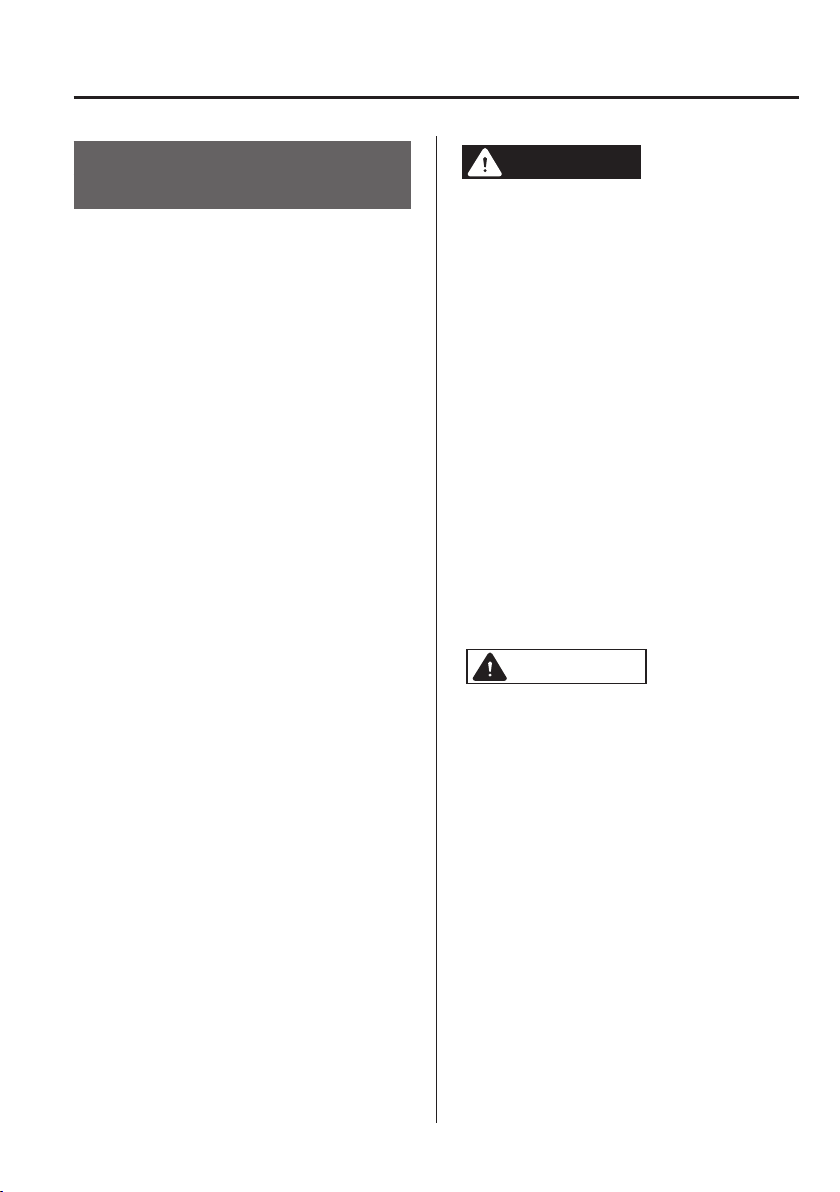
The passenger lap/shoulder belt can easily
be converted into the automatic locking
mode, which must be done to hold the
child-restraint system.
NOTE
To check if your seats have side air
bags:
Mazda vehicles equipped with side
air bag will have an embossed "SRS
AIRBAG" marking on the outboard
shoulder of the seats.
Follow the child-restraint system
manufacturer's instructions carefully.
Depending on the type of child-restraint
system, it may not employ seat belts
which are in automatic locking mode,
however if it uses an upper tether, it
may not be mounted properly in this
vehicle as there is no safe way to anchor
the tether. Conrm whether the child-
restraint system can be used with seat
belts by reading the child-restraint
system manufacturer's instructions.
WARNING
Do not allow a child or anyone to lean
over or against the side window of a
vehicle with side air bags:
It is dangerous to allow anyone to
lean over or against the side window,
the area of the passenger seat from
which the side air bags deploy, even
if a child-restraint system is used. The
impact of ination from a side air bag
could cause serious injury or death to
an out of position child. Furthermore,
leaning over or against the door could
block the side air bags and eliminate
the advantages of supplemental
protection. Because the side air bag
deploys from the outboard shoulder of
the seat, do not allow the child to lean
over or against the side window, even
if the child is seated in a child-restraint
system.
CAUTION
When moving the seats forward and
rearward, make sure you hold onto
the seatback with your hand while
operating. If the seatback is not held,
the seat will move suddenly and could
cause injury.
2–21
Page 36
Essential Safety Equipment
Child Restraint
Passenger's Seat Child-Restraint
System Installation (With Passenger
Occupant Classication System)
1. Make sure the ignition is switched off.
2. Slide the seat as far back as possible.
3. Place the child-restraint system on the
seat without putting your weight on
the seat and secure the child-restraint
system with the lap portion of the lap/
shoulder belt. See the manufacturer's
instructions on the child-restraint
system for belt routing instructions.
4. To get the retractor into the automatic
locking mode, pull the shoulder belt
portion of the seat belt until the entire
length of the belt is out of the retractor.
5. Push the child-restraint system rmly
into the vehicle seat. Be sure the
belt retracts as snugly as possible. A
clicking noise from the retractor will
be heard during retraction if the system
is in automatic locking mode. If the
belt does not lock the seat down tight,
repeat the previous step and also this
one.
NOTE
Inspect this function before each use of
the child-restraint system. You should
not be able to pull the shoulder belt out
of the retractor while the system is in the
automatic locking mode. When you remove
the child-restraint system, be sure the
belt fully retracts to return the system to
emergency locking mode before occupants
use the seat belts.
6. Seat your child safely in the childrestraint system and secure the child
according to the instructions from the
child-restraint system manufacturer.
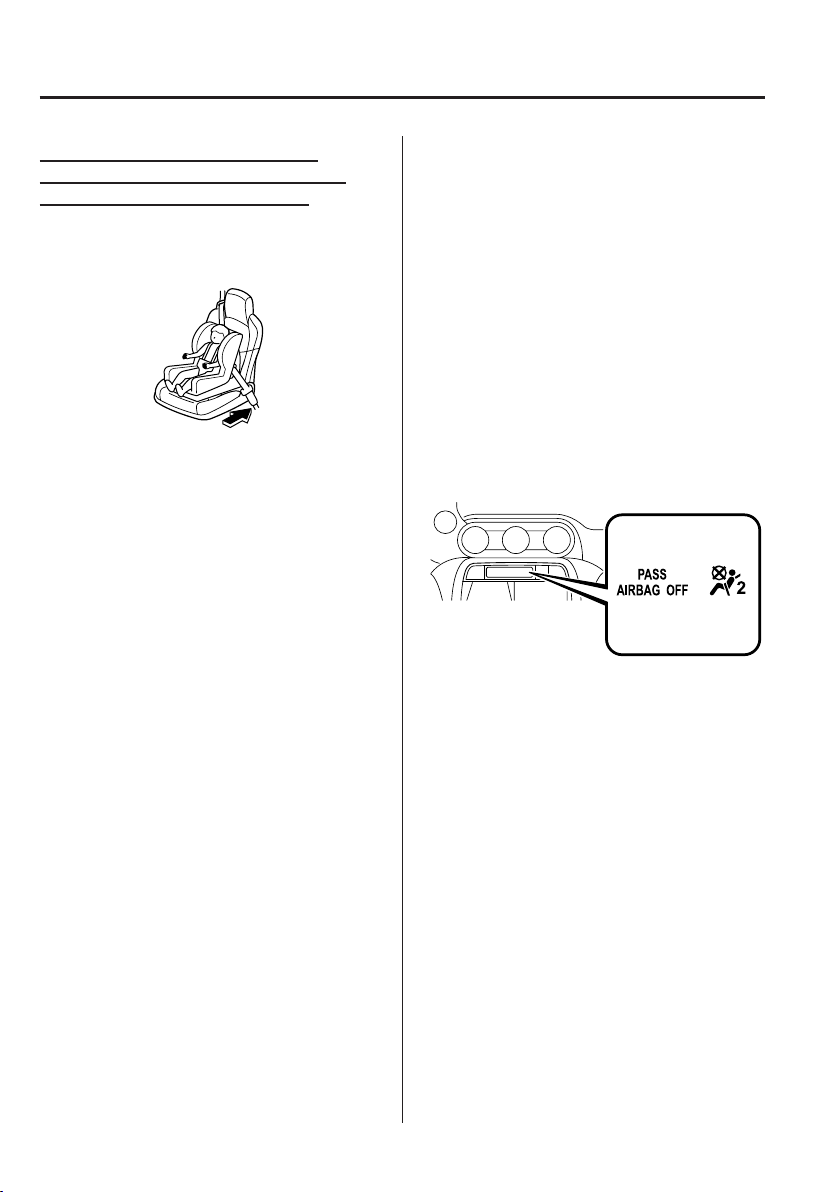
7. Switch the ignition ON and make sure
the passenger air bag deactivation
indicator light illuminates after
installing a child-restraint system on
the passenger seat.
If the passenger air bag deactivation
indicator light does not illuminate,
remove the child-restraint system,
switch the ignition to OFF, and then re-
install the child-restraint system (page
2-37).
2–22
Page 37

WARNING
Do not seat a child in a child-restraint
system on the passenger seat if the
passenger air bag deactivation
indicator light does not illuminate (With
Passenger Occupant Classication
System):
Seating a child in a child-restraint
system installed on the passenger
seat with the passenger air bag
deactivation indicator light not
illuminated is dangerous. If this
indicator light does not illuminate,
this means that the passenger front
and side air bags, and seat belt
pretensioner are ready for deployment.
If an accident were to deploy an air
bag, a child in a child-restraint system
sitting in the passenger seat could
be seriously injured or killed. If the
indicator light does not illuminate
after seating a child in a child-restraint
system on the passenger seat consult
an Authorized Mazda Dealer as soon
as possible.
Essential Safety Equipment
Child Restraint
2–23
Page 38
Essential Safety Equipment
SRS Air Bags
Supplemental Restraint System (SRS) Precautions
The front and side supplemental restraint systems (SRS) include different types of air bags.
Please verify which kinds of air bags are equipped on your vehicle by locating the
“SRS AIRBAG” location indicators. These indicators are visible in the area where the air
bags are installed.
The air bags are installed in the following locations:
The steering wheel hub (driver air bag)
The passenger dashboard (passenger air bag)
The outboard sides of the seatbacks (side air bags)
The air bag supplemental restraint systems are designed to provide supplemental protection
in certain situations so seat belts are always important in the following ways:
Without seat belt usage, the air bags cannot provide adequate protection during an accident.
Seat belt usage is necessary to:
Keep the occupant from being thrown into an inating air bag.
Reduce the possibility of injuries during an accident that is not designed for air bag
ination, such as roll-over or rear impact.
Reduce the possibility of injuries in frontal, near frontal or side collisions that are not
severe enough to activate the air bags.
Reduce the possibility of being thrown from your vehicle.
Reduce the possibility of injuries to lower body and legs during an accident because the
air bags provide no protection to these parts of the body.
Hold the driver in a position which allows better control of the vehicle.
If your vehicle is also equipped with a passenger occupant classication system, refer
to the Passenger Occupant Classication System (page 2-37) for details.
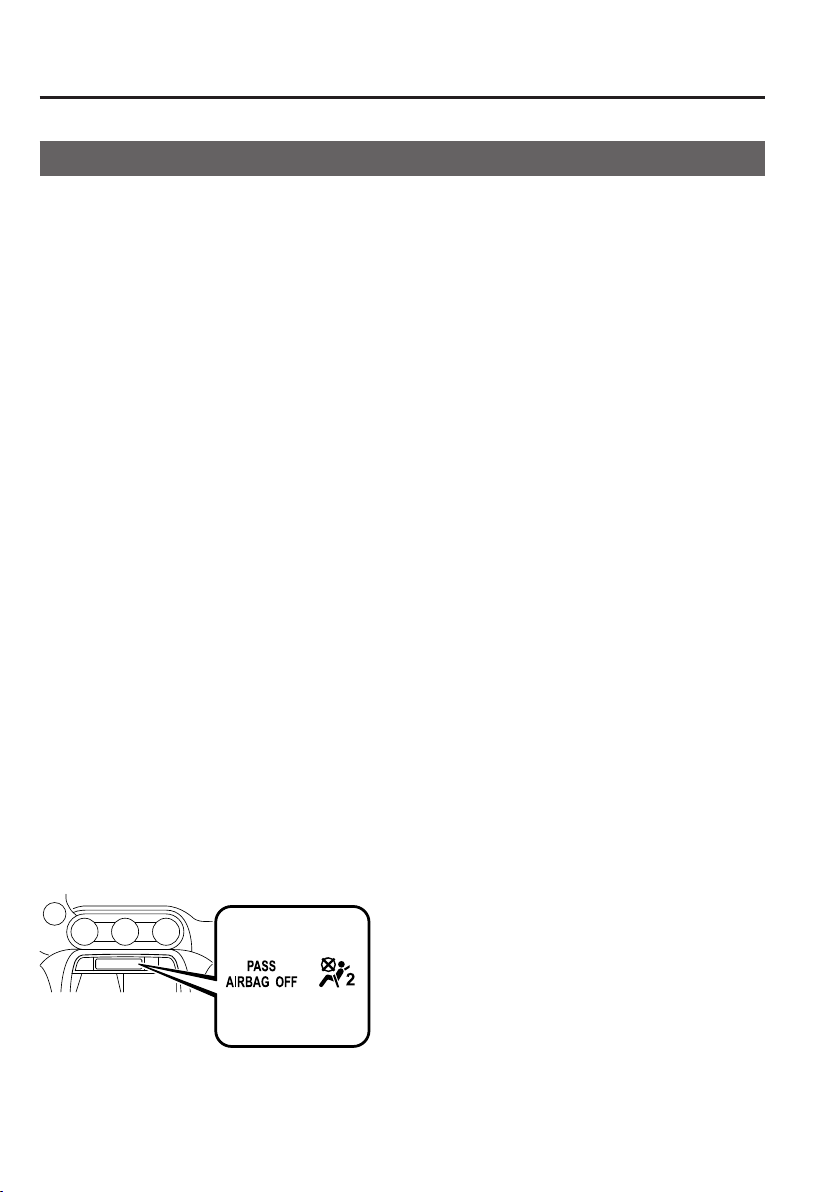
If your vehicle is equipped with a passenger occupant classication system, the passenger
air bag deactivation indicator light illuminates for a specied time after the ignition is
switched ON.
2–24
Page 39

Essential Safety Equipment
SRS Air Bags
Small children must be protected by a child-restraint system as stipulated by law in every
state and province. In certain states and provinces, larger children must use a child-restraint
system (page 2-15).
Carefully consider which child-restraint system is necessary for your child and follow
the installation directions in this Owner's Manual as well as the child-restraint system
manufacturer's instructions.
Do not use a child-restraint system which employs an upper tether because there is no
appropriate means to anchor the tether.
WARNING
Seat belts must be worn in air bag equipped vehicles:
Depending only on the air bags for protection during an accident is dangerous. Alone, air
bags may not prevent serious injuries. The appropriate air bags can be expected to inate
only in the rst accident, such as frontal, near frontal or side collisions that are at least
moderate. Vehicle occupants should always wear seat belts.
Always make sure the passenger air bag deactivation indicator light is illuminated
when using a child-restraint system (With Passenger Occupant Classication System):
Seating a child in a child-restraint system that is installed on the passenger seat with the
passenger air bag deactivation indicator light not illuminated is extremely dangerous. In
an accident, an air bag could inate and cause serious injuries or even death to the child
seated in the child-restraint system. Always make sure the passenger air bag deactivation
indicator light is illuminated.
Refer to Occupant Classication System on page 2-37.
Do not sit too close to the driver and passenger air bags:
Sitting too close to the driver and passenger air bag modules or placing hands or feet on
them is extremely dangerous. The driver and passenger air bags inate with great force
and speed. Serious injuries could occur if someone is too close. The driver should always
hold onto only the rim of the steering wheel. The passenger should keep both feet on
the oor. Seat occupants should adjust their seats as far back as possible and always sit
upright against the seatbacks with seat belts worn properly.
Do not sit too close to a door or lean against doors in vehicles with side air bags:
Sitting too close to the side air bag modules or placing hands on them is extremely
dangerous. A side air bag inates with great force and speed directly out of the outboard
shoulder of the seat and expands along the door on the side the car is hit. Serious injury
could occur if someone is sitting too close to the door or leaning against a window in the
seats. Furthermore, sleeping up against the door or hanging out the driver-side window
while driving could block the side air bag and eliminate the advantages of supplemental
protection. Give the side air bags room to work by sitting in the center of the seat while
the vehicle is moving with seat belts worn properly.
2–25
Page 40

Essential Safety Equipment
SRS Air Bags
Sit in the center of the seat and wear seat belts properly:
Sitting too close to the side air bag modules or placing hands on them, or sleeping up
against the door or hanging out the windows is extremely dangerous. The side air bags
inate with great force and speed directly expanding along the door on the side the car is
hit. Serious injury could occur if someone is sitting too close to the door. Give the side air
bags room to work by sitting in the center of the seat while the vehicle is moving with seat
belts worn properly.
Do not attach objects on or around the area where driver and passenger air bags
deploy:
Attaching an object to the driver and passenger air bag modules or placing something in
front of them is dangerous. In an accident, an object could interfere with air bag ination
and injure the occupants.
Do not attach objects on or around the area where a side air bag deploys:
Attaching objects to the seat in such a way as to cover the outboard side of the seat in any
way is dangerous. In an accident the object could interfere with the side air bag, which
inates from the outboard side of the seats, impeding the added protection of the side air
bag system or redirecting the air bag in a way that is dangerous. Furthermore, the bag
could be cut open releasing the gas.
Do not hang net bags, map pouches or backpacks with side straps on the seats. Never use
seat covers on the seats. Always keep the side air bag modules in your seats free to deploy
in the event of a side collision.
Do not touch the components of the supplemental restraint system after the air bags
have inated:
Touching the components of the supplemental restraint system after the air bags have
inated is dangerous. Immediately after ination, they are very hot. You could get burned.
Never install any front-end equipment to your vehicle:
Installation of front-end equipment, such as frontal protection bar (kangaroo bar, bull
bar, push bar, or other similar devices), snowplow, or winches, is dangerous. The air bag
crash sensor system could be aected. This could cause air bags to inate unexpectedly,
or it could prevent the air bags from inating during an accident. Occupants could be
seriously injured.
Do not modify the suspension:
Modifying the vehicle suspension is dangerous. If the vehicle's height or the suspension is
modied, the vehicle will be unable to accurately detect a collision resulting in incorrect
or unexpected air bag deployment and the possibility of serious injuries.
2–26
Page 41

Essential Safety Equipment
SRS Air Bags
Do not modify a door or leave any damage unrepaired. Always have an Authorized
Mazda Dealer inspect a damaged door:
Modifying a door or leaving any damage unrepaired is dangerous. Each door has a side
crash sensor as a component of the supplemental restraint system. If holes are drilled in
a door, a door speaker is left removed, or a damaged door is left unrepaired, the sensor
could be adversely aected causing it to not detect the pressure of an impact correctly
during a side collision. If a sensor does not detect a side impact correctly, the side air bags
and the seat belt pretensioner may not operate normally which could result in serious
injury to occupants.
Do not modify the supplemental restraint system:
Modifying the components or wiring of the supplemental restraint system is dangerous.
You could accidentally activate it or make it inoperable. Do not make any modications
to the supplemental restraint system. This includes installing trim, badges, or anything
else over the air bag modules. It also includes installing extra electrical equipment on or
near system components or wiring. An Authorized Mazda Dealer can provide the special
care needed in the removal and installation of seats. It is important to protect the air bag
wiring and connections to assure that the bags do not accidentally deploy, and that the
passenger occupant classication system and the seats retain an undamaged air bag
connection.
Do not place luggage or other objects under the seats:
Placing luggage or other objects under the seats is dangerous. The components essential
to the supplemental restraint system could be damaged, and in the event of a side
collision, the appropriate air bags may not deploy, which could result in death or serious
injury. To prevent damage to the components essential to the supplemental restraint
system, do not place luggage or other objects under the seats.
Do not operate a vehicle with damaged air bag/seat belt pretensioner system
components:
Expended or damaged air bag/seat belt pretensioner system components must be
replaced after any collision which caused them to deploy or damage them. Only a trained
Authorized Mazda Dealer can fully evaluate these systems to see that they will work in
any subsequent accident. Driving with an expended or damaged air bag or pretensioner
unit will not aord you the necessary protection in the event of any subsequent accident
which could result in serious injury or death.
Do not remove interior air bag parts:
Removing any components such as the seats, front dashboard, the steering wheel,
containing air bag parts or sensors is dangerous. These parts contain essential air bag
components. The air bag could accidentally activate and cause serious injuries. Always
have an Authorized Mazda Dealer remove these parts.
2–27
Page 42
Essential Safety Equipment
SRS Air Bags
Properly dispose of the air bag system:
Improper disposal of an air bag or a vehicle with live air bags in it can be extremely
dangerous. Unless all safety procedures are followed, injury could result. Have an
Authorized Mazda Dealer safely dispose of the air bag system or scrap an air bag
equipped vehicle.
NOTE
If it becomes necessary to have the components or wiring system for the supplementary
restraint system modied to accommodate a person with certain medical conditions in
accordance with a certied physician, contact an Authorized Mazda Dealer, refer to
“Customer Assistance (U.S.A.)” (page 8-2).
When an air bag deploys, a loud ination noise can be heard and some smoke will be
released. Neither is likely to cause injury, however, the texture of the air bags may cause
light skin injuries on body parts not covered with clothing through friction.
Should you sell your Mazda, we urge you to tell the new owner of its air bag systems
and that familiarization with all instructions about them, from the Owner's Manual, is
important.
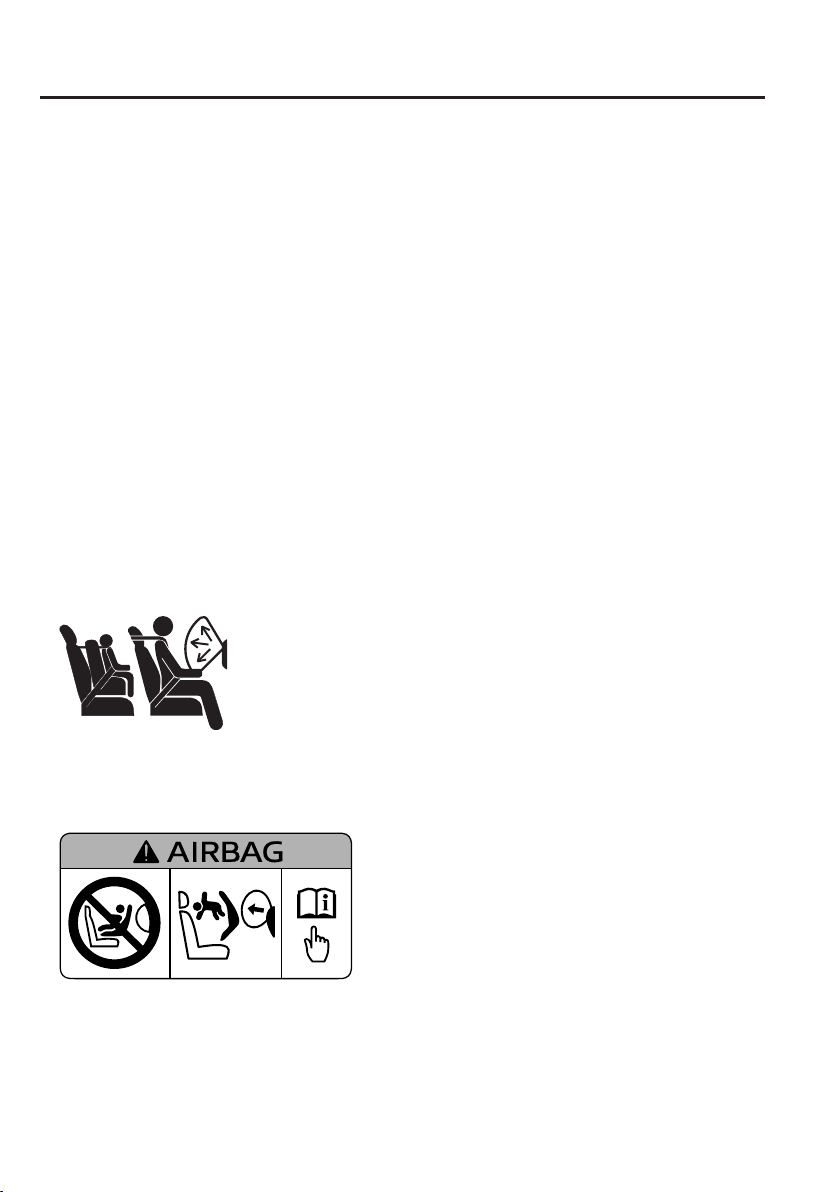
Vehicles with a passenger air bag have a warning label attached as shown in the
following.
(Except Mexico)
This warning label is displayed in compliance with regulations.
(Mexico)
This warning label reminds you not to put a rear-facing child-restraint system on the
passenger seat at any time.
2–28
Page 43
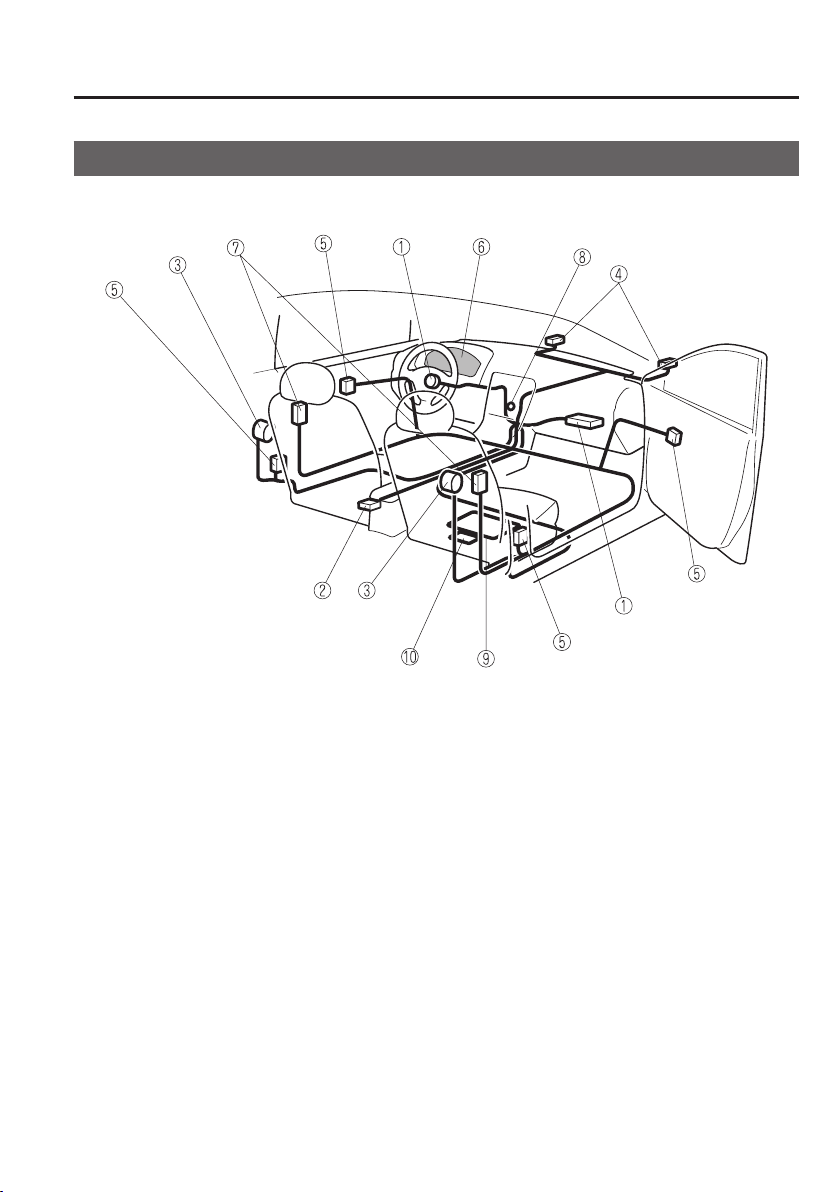
Supplemental Restraint System Components
(With Passenger Occupant Classication System)
Essential Safety Equipment
SRS Air Bags
2–29
Page 44
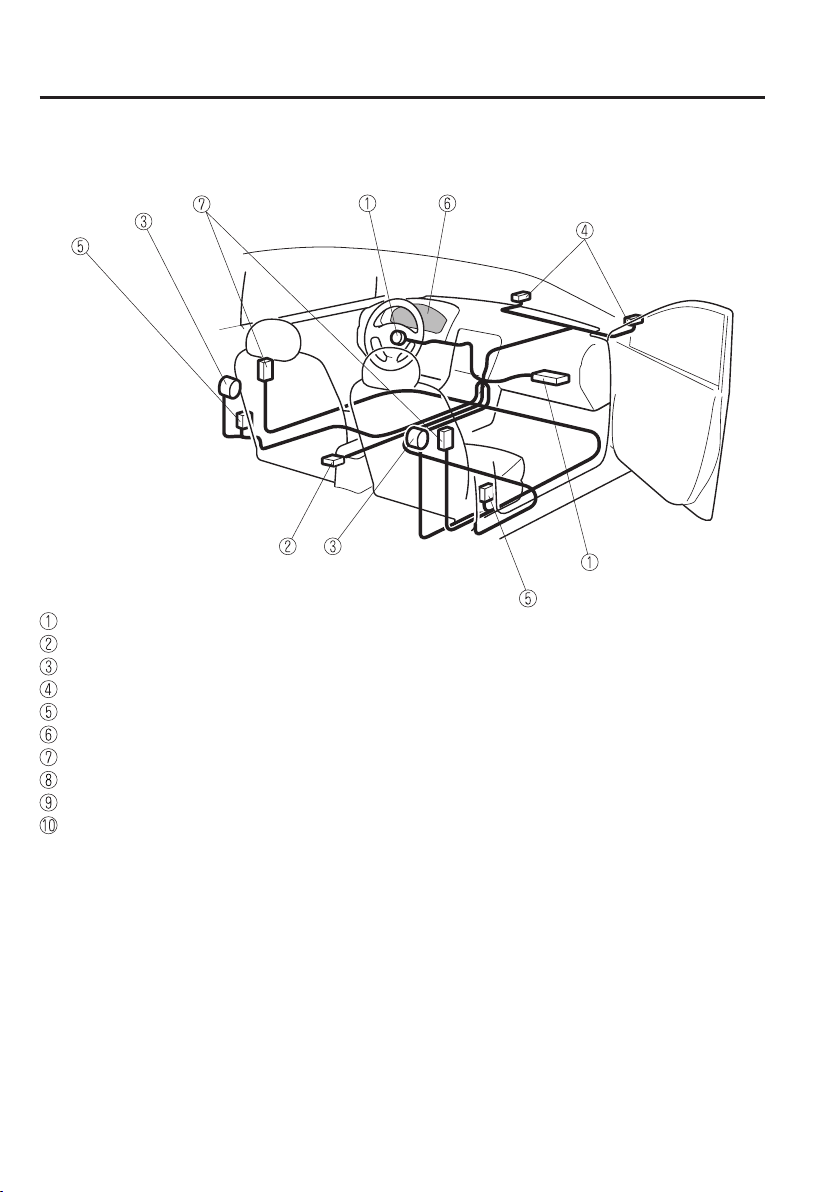
Essential Safety Equipment
SRS Air Bags
(Without Passenger Occupant Classication System)
Driver/Passenger inators and air bags
Crash sensors, and diagnostic module (SAS unit)
Seat belt pretensioners (page 2-12)
Front air bag sensors
Side crash sensors
Air bag/seat belt pretensioner system warning light (page 4-18)
Side inators and air bags
Passenger air bag deactivation indicator light* (page 2-37)
Passenger occupant classication sensor* (page 2-37)
Passenger occupant classication module
*
2–30
*Some models.
Page 45
Essential Safety Equipment
SRS Air Bags
How the SRS Air Bags Work
Your Mazda is equipped with the following types of SRS air bags. SRS air bags are
designed to work together with the seat belts to help to reduce injuries during an accident.
The SRS air bags are designed to provide further protection for passengers in addition to the
seat belt functions. Be sure to wear seat belts properly.
Seat Belt Pretensioners
The seat belt pretensioners are designed to deploy in moderate or severe frontal, near frontal
collisions.
In addition, during a side collision, the pretensioner operates on the side in which the
collision occurs. The pretensioners operate differently depending on what types of air bags
are equipped. For more details about seat belt pretensioner operation, refer to the SRS Air
Bag Deployment Criteria (page 2-34).
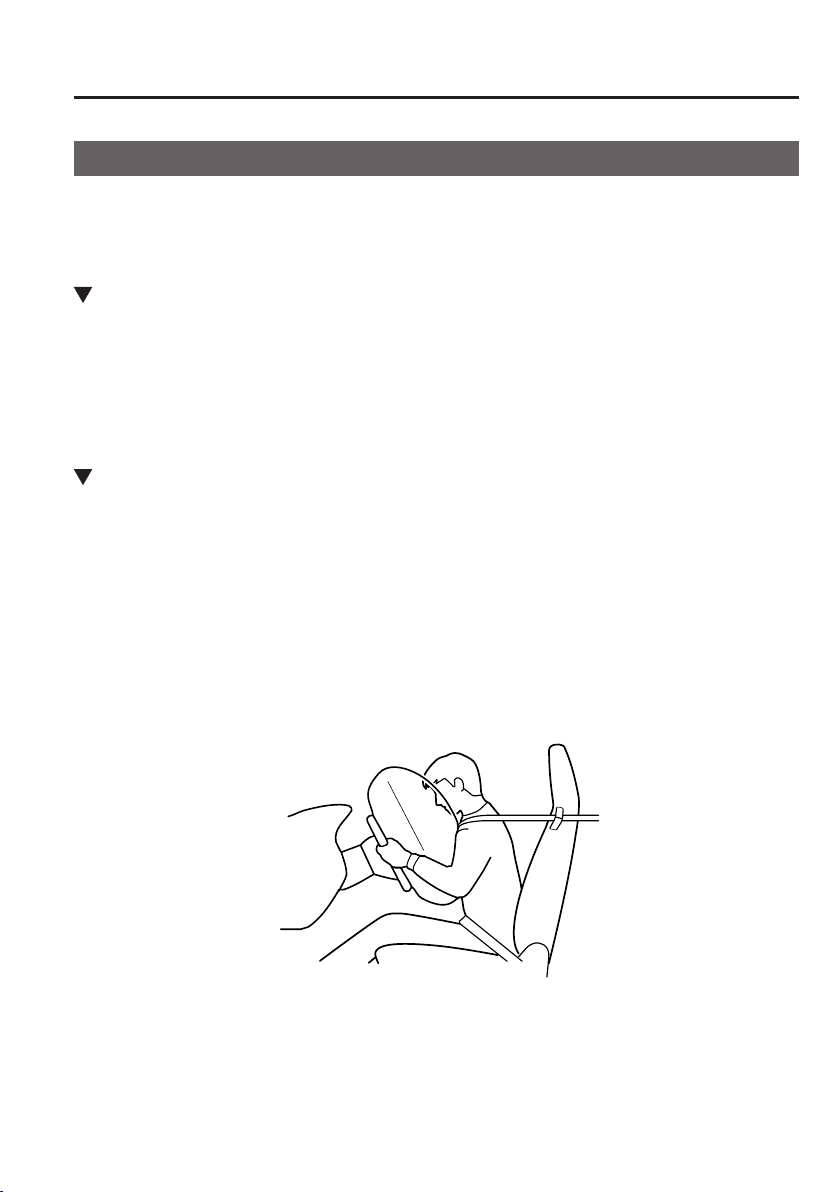
Driver Air Bag
The driver's air bag is mounted in the steering wheel.
When air bag crash sensors detect a frontal impact of greater than moderate force, the
driver's air bag inates quickly helping to reduce injury mainly to the driver's head or chest
caused by directly hitting the steering wheel.
For more details about air bag deployment, refer to "SRS Air Bag Deployment Criteria"
(page 2-34).
(With Passenger Occupant Classication System)
The driver's dual-stage air bag controls air bag ination in two energy stages. During an
impact of moderate severity, the driver's air bag deploys with lesser energy, whereas during
more severe impacts, it deploys with more energy.
2–31
Page 46
Essential Safety Equipment
SRS Air Bags
Passenger Air Bag
The passenger air bag is mounted in the passenger dashboard.
The ination mechanism for the passenger air bag is the same as the driver's air bag.
For more details about air bag deployment, refer to "SRS Air Bag Deployment Criteria"
(page 2-34).
(With Passenger Occupant Classication System)
In addition, the passenger air bag is designed to only deploy when the passenger occupant
classication sensor detects a passenger sitting on the passenger's seat. For details, refer to
the passenger occupant classication system (page 2-37).
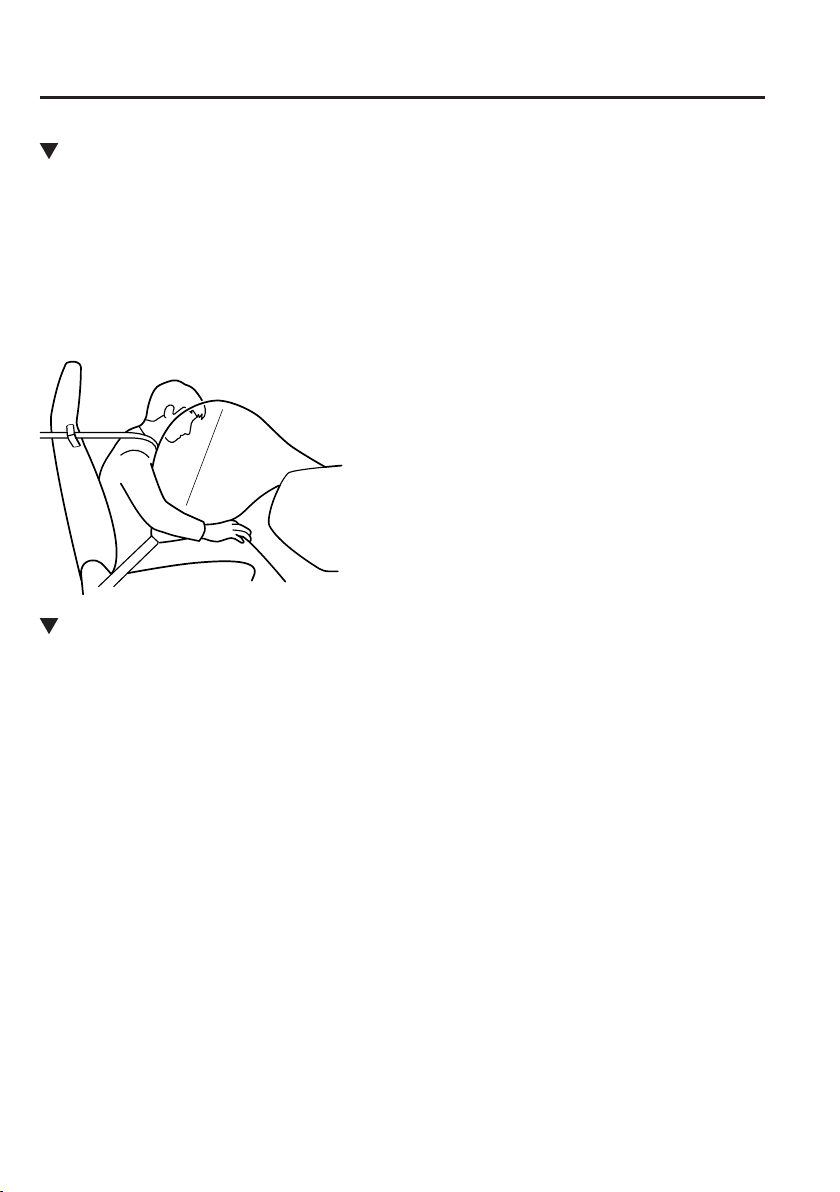
Side Air Bags
The side air bags are mounted in the outboard sides of the seatbacks.
When the air bag crash sensors detect a side impact of greater than moderate force, the
system inates the side air bag only on the side in which the vehicle was hit. The side air
bag inates quickly to reduce injury to the driver or passenger's head and chest caused by
directly hitting interior parts such as a door or window.
For more details about air bag deployment, refer to "SRS Air Bag Deployment Criteria"
(page 2-34).
2–32
Page 47
Essential Safety Equipment
SRS Air Bags
(With Passenger Occupant Classication System)
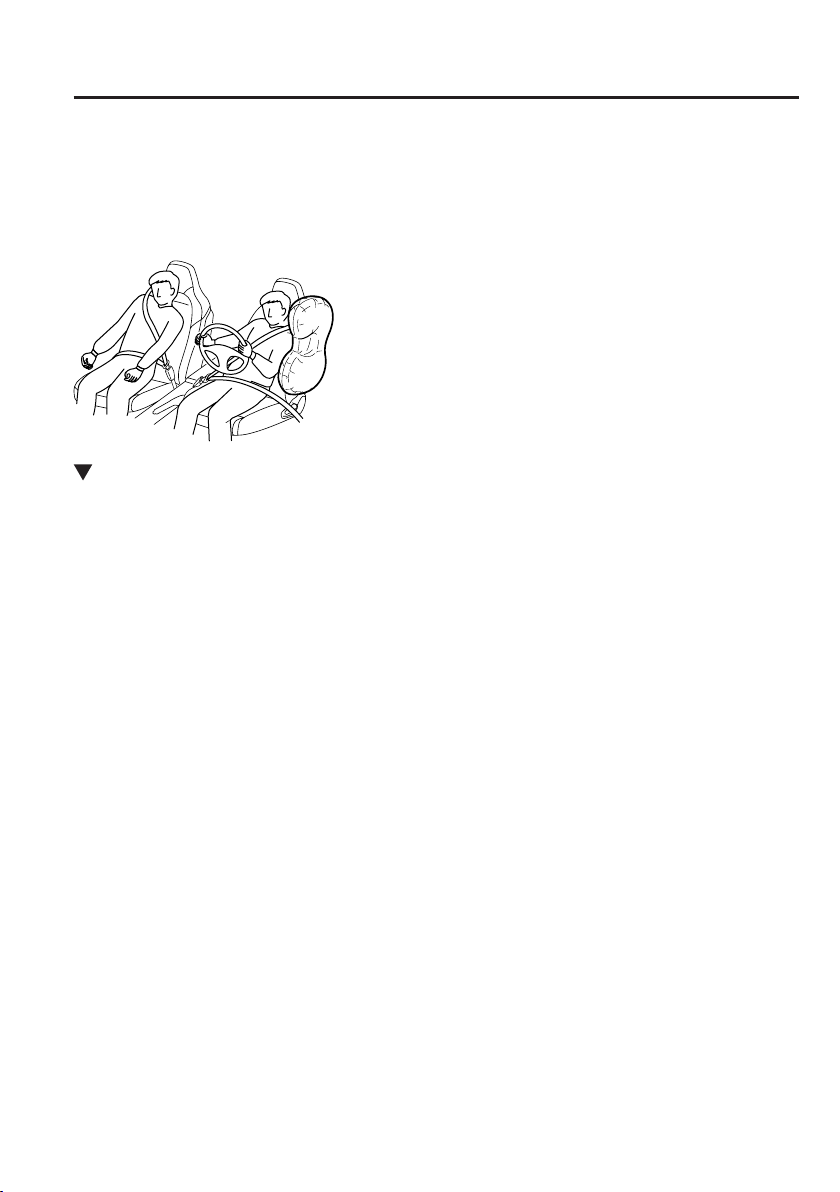
In addition, the passenger side bag is designed to only deploy when the passenger occupant
classication sensor detects a passenger sitting on the passenger's seat. For details, refer to
the passenger occupant classication system (page 2-37).
Warning Light/Beep
A system malfunction or operation conditions are indicated by a warning.
Refer to Warning/Indicator Lights on page 4-26.
Refer to Warning Sound is Activated on page 7-48.
2–33
Page 48
Essential Safety Equipment
SRS Air Bags
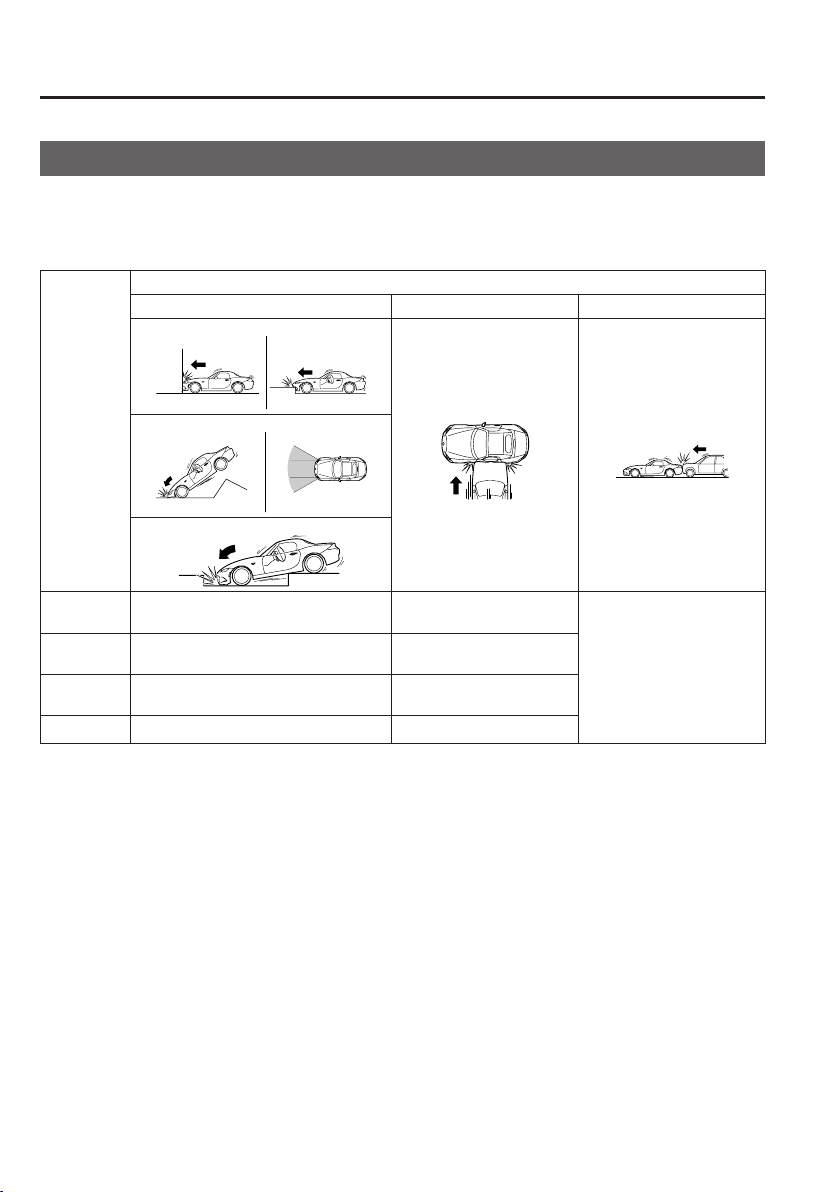
SRS Air Bag Deployment Criteria
This chart indicates the applicable SRS equipment that will deploy depending on the type of
collision.
(The illustrations are the representative cases of collisions.)
Types of collision
A severe frontal/near frontal collision A severe side collision
SRS
equipment
Seat belt
pretensioner
Driver air
bag
Passenger
air bag
Side air bag X*1 (impact side only)
X : The SRS air bag equipment is designed to deploy in a collision.
*1 (Passenger Occupant Classication System)
The passenger front and side air bags and the seat belt pretensioner are designed to deploy when the passenger
occupant classication sensor detects a passenger sitting on the passenger's seat.
*2 In a side collision, the seat belt pretensioners and the side air bags deploy (only on the side in which the
collision occurs).
X*1 (both sides) X*1 (impact side only)
X
*1
X
*2
A rear collision
No air bag and seat belt
pretensioner will be
activated in a rear collision.
NOTE
In a frontal offset collision, the equipped air bags and pretensioners may all deploy
depending on the direction, angle, and rate of impact.
2–34
Page 49
Essential Safety Equipment
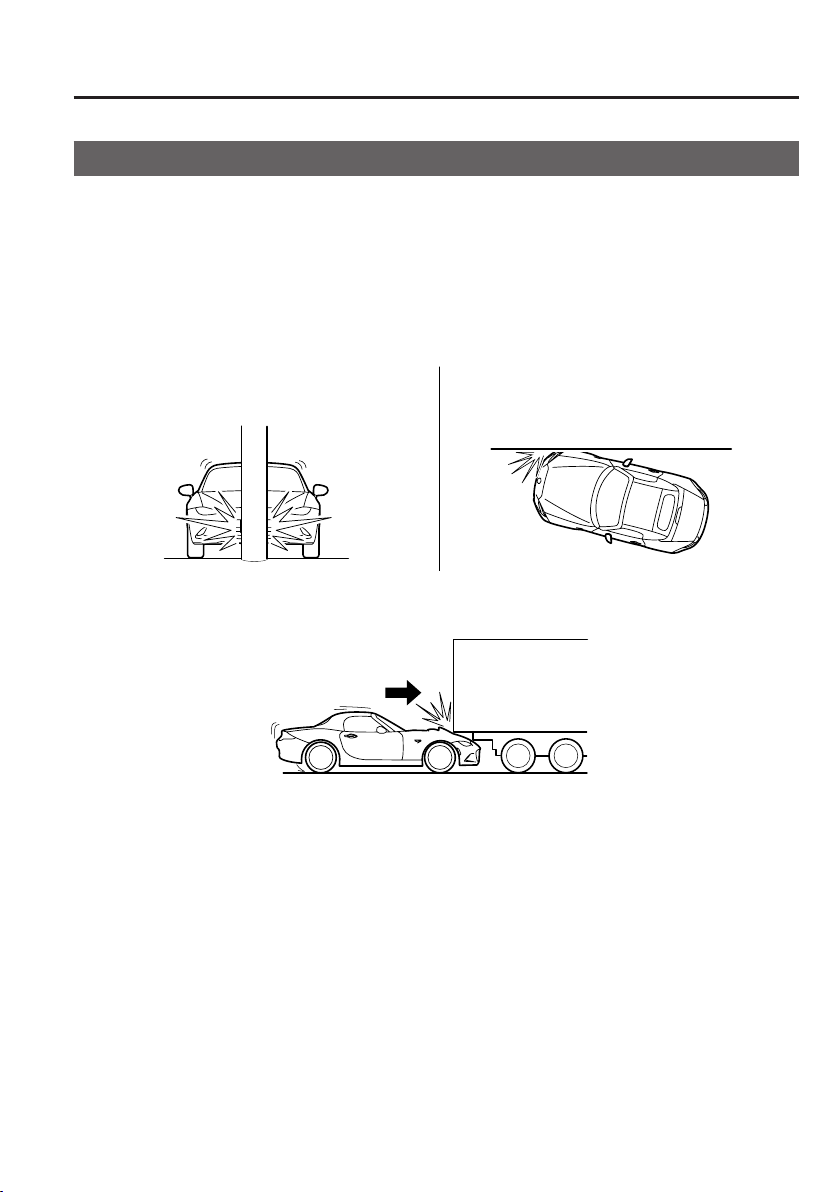
Impacts in
Rear-ending or running under a truck's tail gate
SRS Air Bags
Limitations to SRS Air Bag
In severe collisions such as those described previously in "SRS Air Bag Deployment
Criteria", the applicable SRS air bag equipment will deploy. However, in some accidents,
the equipment may not deploy depending on the type of collision and its severity.
Limitations to front/near front collision detection:
The following illustrations are examples of front/near front collisions that may not be
detected as severe enough to deploy the SRS air bag equipment.
volving trees or poles
Frontal offset impact to the vehicle
2–35
Page 50
Essential Safety Equipment
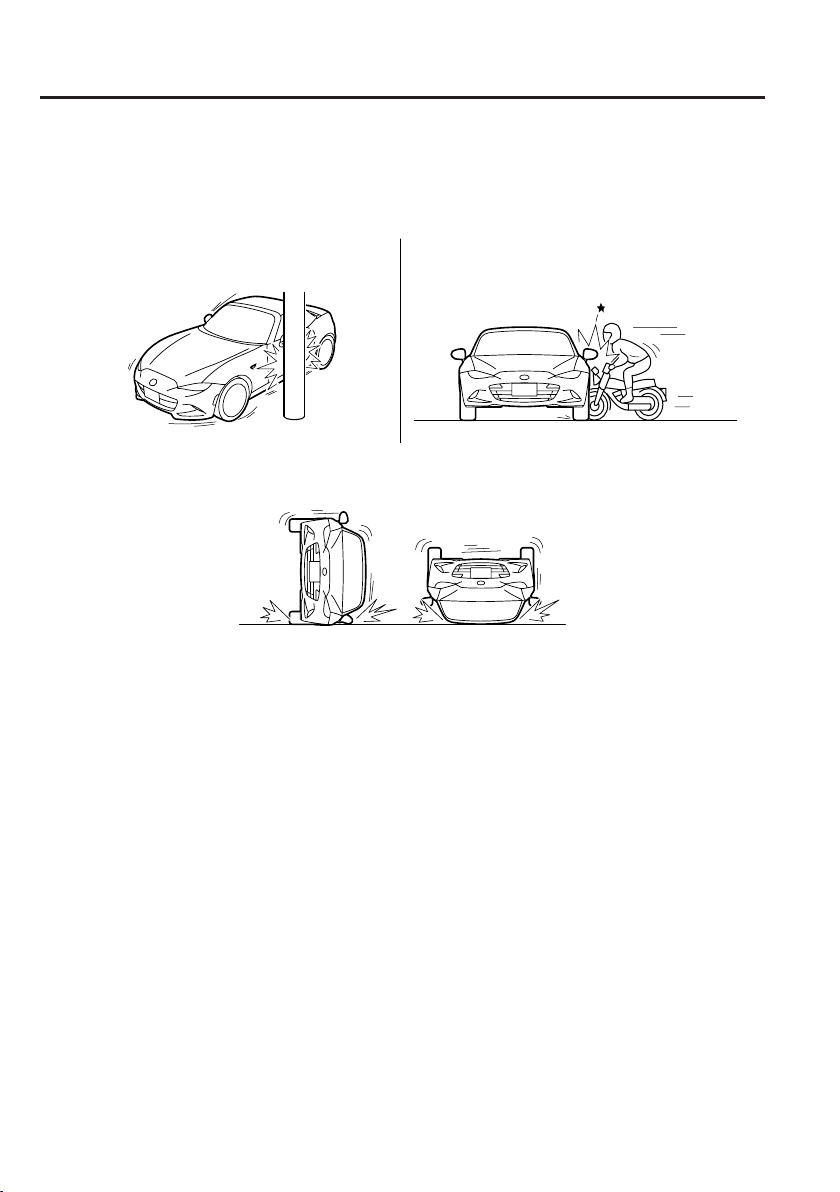
Side impacts in
Roll-over
SRS Air Bags
Limitations to side collision detection:
The following illustrations are examples of side collisions that may not be detected as severe
enough to deploy the SRS air bag equipment.
volving trees or poles
Side impacts with two-wheeled vehicles
2–36
Page 51
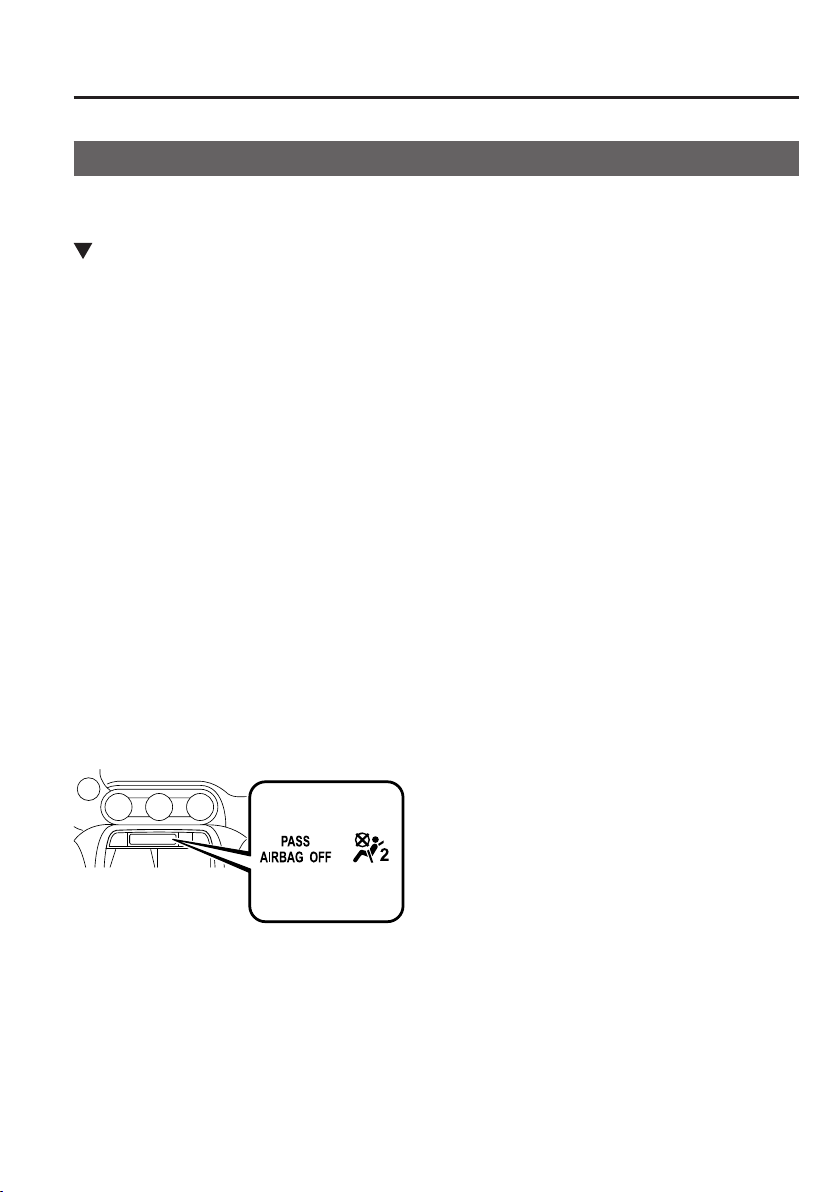
Essential Safety Equipment
SRS Air Bags
Passenger Occupant Classication System
First, please read "Supplemental Restraint System (SRS) Precautions" (page 2-24)
carefully.
*
Passenger Occupant Classication Sensor
Your vehicle is equipped with a passenger occupant classication sensor as a part of the
supplemental restraint system. This sensor is equipped in the passenger's seat cushion. This
sensor measures the electrostatic capacity of the passenger's seat. The SAS unit is designed
to prevent the passenger front and side air bags and seat belt pretensioner system from
deploying if the passenger air bag deactivation indicator light turns on.
To reduce the chance of injuries caused by deployment of the passenger air bag, the system
deactivates the passenger front and side air bags and also the seat belt pretensioner system
when the passenger air bag deactivation indicator light turns on. Refer to the following table
for the passenger air bag deactivation indicator light illumination conditions.
This system shuts off the passenger front and side air bags and seat belt pretensioner system,
so make sure the passenger air bag deactivation indicator light turns on according to the
following table.
The air bag/seat belt pretensioner system warning light ashes and the passenger air bag
deactivation indicator light illuminates if the sensors have a possible malfunction. If this
happens, the passenger front and side air bags and seat belt pretensioner system will not
deploy.
Passenger air bag deactivation indicator light
This indicator light turns on to remind you that the passenger front and side air bags and seat
belt pretensioner will not deploy during a collision.
*Some models.
2–37
Page 52
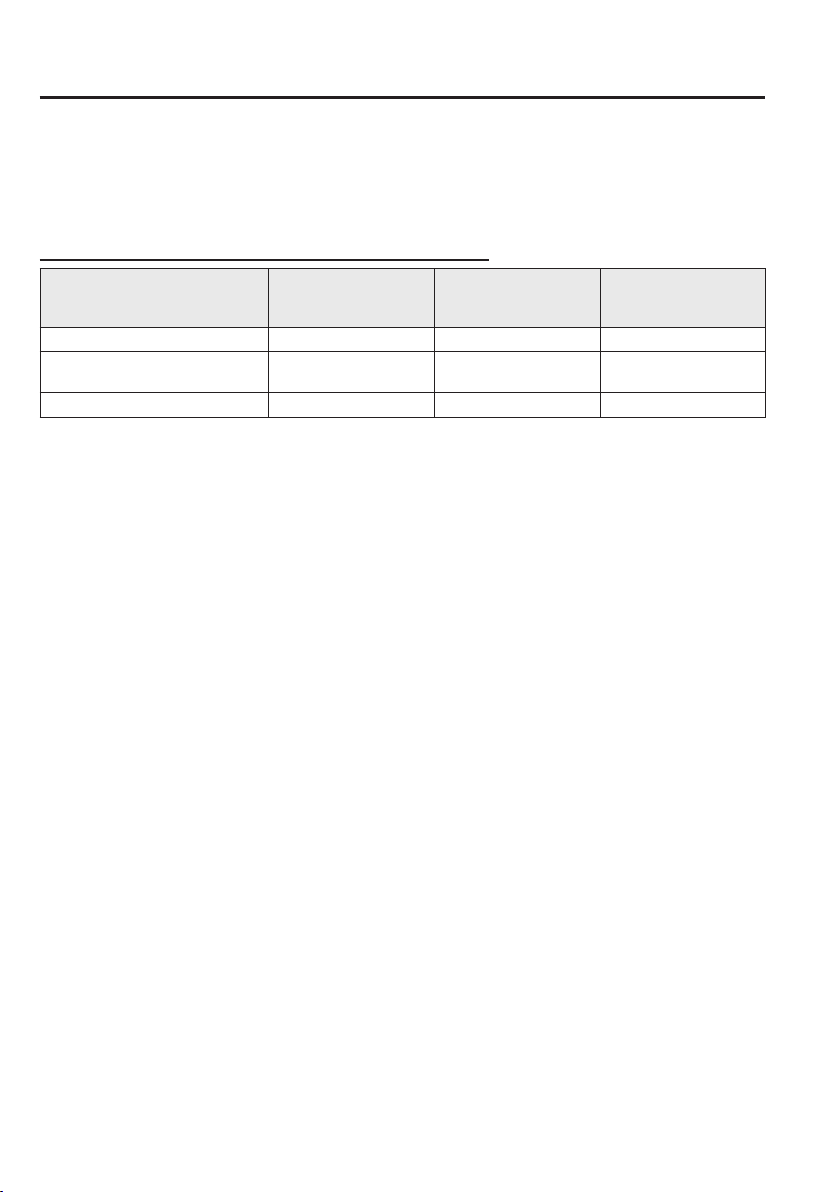
Essential Safety Equipment
SRS Air Bags
If the passenger occupant classication sensor is normal, the indicator light turns on when
the ignition is switched ON. The light turns off after a few seconds. Then, the indicator light
turns on or is off under the following conditions:
Passenger air bag deactivation indicator light on/off condition chart
Condition detected by
the passenger occupant
classication system
Empty (Not occupied) On Deactivated Deactivated
A child is seated in a childrestraint system
*2
Adult
*1 The occupant classication sensor may not detect a child seated on the seat, in a child-restraint system, or a
junior seat depending on the child's physical size and seated posture.
*2 If a smaller adult sits on the passenger seat, the sensors might detect the person as being a child depending on
the person's physique.
*1
If the passenger air bag deactivation indicator light does not turn on when the ignition
is switched ON and does not turn on as indicated in the passenger air bag deactivation
indicator light on/off condition chart, do not allow an occupant to sit in the passenger seat
and consult an Authorized Mazda Dealer as soon as possible. The system may not work
properly in an accident.
Passenger air bag
deactivation indicator
light
On Deactivated Deactivated
Off Ready Ready
Passenger front and
side air bags
Passenger seat belt
pretensioner system
2–38
Page 53

Essential Safety Equipment
SRS Air Bags
WARNING
Do not allow an occupant in the passenger's seat to sit with a posture which makes
it dicult for the passenger occupant classication sensor to detect the occupant
correctly:
Sitting in the passenger's seat with a posture which makes it dicult for the passenger
occupant classication sensor to detect the occupant correctly is dangerous. If the
passenger occupant classication sensor cannot detect the occupant sitting on the
passenger's seat correctly, the passenger front and side air bags and pretensioner system
may not operate (non-deploy) or they may operate (deploy) accidentally. The passenger
will not have the supplementary protection of the air bags or the accidental operation
(deployment) of the air bags could result in serious injury or death.
Under the following conditions, the passenger occupant classication sensor cannot
detect a passenger sitting on the passenger's seat correctly and the deployment/nondeployment of the air bags cannot be controlled as indicated in the passenger air bag
deactivation indicator light on/o condition chart. For example:
A passenger is seated as shown in the following gure:
2–39
Page 54
Essential Safety Equipment
SRS Air Bags
Luggage or other items placed under the passenger seat or between the passenger
seat and driver seat that push up the passenger seat bottom.
An object, such as a seat cushion, is put on the passenger's seat or between the
passenger's back and the seatback.
A seat cover is put on the passenger's seat.
Luggage or other items are placed on the seat with the child in the child-restraint
system.
The seat is washed.
Liquids are spilled on the seat.
The passenger seat is moved backward, pushing into luggage or other items placed
behind it.
Luggage or other items are placed between the passenger seat and driver seat.
An electric device is put on the passenger's seat.
An additional electrical device, such as a seat warmer is installed to the surface of the
passenger seat.
The passenger front and side air bags and seat belt pretensioner systems will deactivate if
the passenger air bag deactivation indicator light turns on.
CAUTION
To assure proper deployment of the front air bag and to prevent damage to the sensor in
the seat cushion:
Do not place sharp objects on the seat cushion or leave heavy luggage on them.
Do not spill any liquids on the seats or under the seats.
To allow the sensors to function properly, always perform the following:
Adjust the seats as far back as possible and always sit upright against the seatbacks
with seat belts worn properly.
If you place your child on the passenger seat, secure the child-restraint system properly
and slide the passenger seat as far back as possible.
2–40
Page 55

Essential Safety Equipment
SRS Air Bags
NOTE
The system requires about 10 seconds to alternate between turning the passenger front
and side air bags and seat belt pretensioner system on or off.
The passenger air bag deactivation indicator light may turn on repeatedly if luggage or
other items are put on the passenger seat, or if the temperature of the vehicle's interior
changes suddenly.
The passenger air bag deactivation indicator light may turn on for 10 seconds if the
electrostatic capacity on the passenger seat changes.
The air bag/seat belt pretensioner system warning light might turn on if the passenger
seat receives a severe impact.
If the passenger air bag deactivation indicator light does not turn on after installing a
child-restraint system on the passenger seat, rst, re-install your child-restraint system
according to the procedure in this owner's manual. Then, if the passenger air bag
deactivation indicator light still does not turn on, and consult an Authorized Mazda
Dealer as soon as possible.
If the passenger air bag deactivation indicator light turns on when an occupant is seated
directly in the passenger seat, have the passenger re-adjust their posture by sitting
with their feet on the oor, and then re-fastening the seat belt. If the passenger air bag
deactivation indicator light remains turned on, slide the passenger seat as far back as
possible. Consult an Authorized Mazda Dealer as soon as possible.
2–41
Page 56

Essential Safety Equipment
SRS Air Bags
Constant Monitoring
The following components of the air bag systems are monitored by a diagnostic system:
Crash sensors, and diagnostic module (SAS unit)
Front air bag sensors
Air bag modules
Side crash sensors
Air bag/Seat belt pretensioner system warning light
Seat belt pretensioners
Related wiring
(With Passenger Occupant Classication System)
Passenger air bag deactivation indicator light
Passenger occupant classication sensor
Passenger occupant classication module
The diagnostic module continuously monitors the system's readiness. This begins when the
ignition is switched ON and continues while the vehicle is being driven.
2–42
Page 57

3
Use of various features, including keys, doors, mirrors and windows.
Before Driving
Keys ...................................................... 3-2
Keys ............................................... 3-2
Keyless Entry System .................... 3-3
Advanced Keyless Entry System ....... 3-8
Advanced Keyless Entry
System* ........................................... 3-8
Operational Range ......................... 3-9
Doors and Locks ................................ 3-10
Door Locks ................................... 3-10
Trunk Lid ..................................... 3-18
Inside Trunk Release Lever* ........ 3-20
Fuel and Emission ............................. 3-22
Fuel and Engine Exhaust
Precautions ................................... 3-22
Fuel-Filler Lid and Cap ................ 3-25
Steering Wheel................................... 3-27
Steering Wheel ............................. 3-27
Mirrors ............................................... 3-28
Mirrors ......................................... 3-28
Windows ............................................. 3-31
Power Windows ........................... 3-31
Convertible Top
(Retractable Fastback) ..................... 3-39
Convertible Top (Retractable
Fastback) ...................................... 3-39
Security System ................................. 3-47
Modication and Add-On
Equipment .................................... 3-47
Immobilizer System ..................... 3-47
Theft-Deterrent System* ............... 3-49
Driving Tips ....................................... 3-51
Break-In Period ............................ 3-51
Saving Fuel and Protection of the
Environment ................................. 3-51
Hazardous Driving ....................... 3-52
Floor Mat ..................................... 3-52
Rocking the Vehicle ..................... 3-53
Winter Driving ............................. 3-53
Driving In Flooded Area .............. 3-55
Overloading .................................. 3-55
Driving on Uneven Road ............. 3-56
Towing ................................................ 3-57
Trailer Towing .............................. 3-57
Recreational Towing .................... 3-57
Convertible Top (Soft Top) ............... 3-34
Convertible Top (Soft Top) .......... 3-34
*Some models.
3–1
Page 58
Before Driving
Keys
Keys
WARNING
Do not leave the key in your vehicle with
children and keep them in a place where
your children will not nd or play with
them:
Leaving children in a vehicle with the
key is dangerous. This could result in
someone being badly injured or even
killed. Children may nd these keys to
be an interesting toy to play with and
could cause the power windows or
other controls to operate, or even make
the vehicle move.
CAUTION
Because the key (transmitter) uses
low-intensity radio waves, it may not
function correctly under the following
conditions:
The key is carried with
communication devices such as
cellular phones.
The key contacts or is covered by a
metal object.
The key is near electronic devices such
as personal computers.
Non-Mazda genuine electronic
equipment is installed in the vehicle.
There is equipment which discharges
radio waves near the vehicle.
The key (transmitter) may consume
battery power excessively if it receives
high-intensity radio waves. Do not place
the key near electronic devices such as
televisions or personal computers.
To avoid damage to the key
(transmitter), DO NOT:
Drop the key.
Get the key wet.
Disassemble the key.
Expose the key to high temperatures
on places such as the dashboard or
hood, under direct sunlight.
Expose the key to any kind of
magnetic eld.
Place heavy objects on the key.
Put the key in an ultrasonic cleaner.
Put any magnetized objects close to
the key.
A code number is stamped on the plate
attached to the key set; detach this plate
and store it in a safe place (not in the
vehicle) for use if you need to make a
replacement key (auxiliary key).
Also write down the code number and
keep it in a separate safe and convenient
place, but not in the vehicle.
If your key (auxiliary key) is lost, consult
your Authorized Mazda Dealer and have
your code number ready.
3–2
Page 59
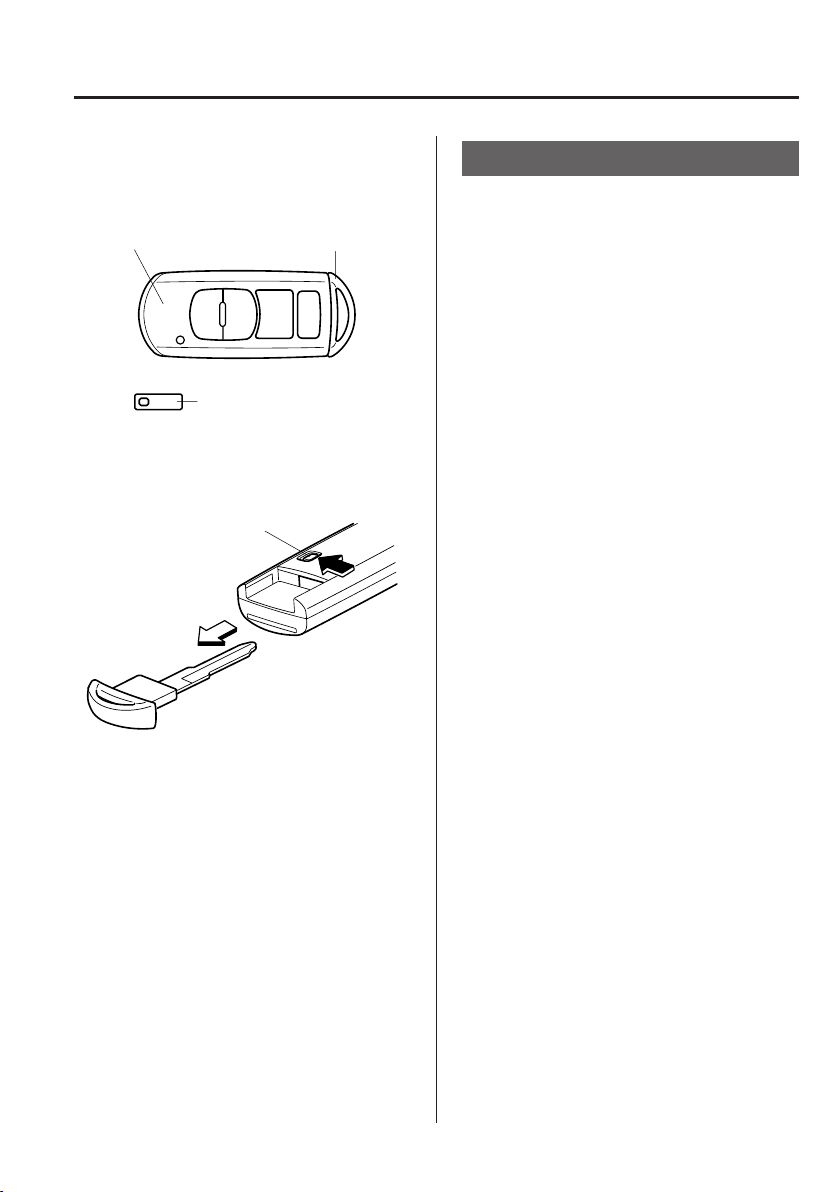
Before Driving
Auxiliary keyTransmitter
Knob
Keys
NOTE
The driver must carry the key to ensure the
system functions properly.
Key code number plate
To use the auxiliary key, pull out the
auxiliary key from the transmitter while
pressing the knob.
Keyless Entry System
This system uses the key buttons to
remotely lock and unlock the doors and
the fuel-ller lid, and opens the trunk lid.
The system can start the engine without
having to take the key out of your purse or
pocket.
It can also help you signal for attention or
help.
Operating the theft-deterrent system is
also possible on theft-deterrent system-
equipped vehicles.
System malfunctions or warnings are
indicated by the following warning lights
or beeps.
For vehicles with the type A instrument
cluster, check the displayed message for
more information and, if necessary, have
the vehicle inspected at an Authorized
Mazda Dealer, according to the indication.
KEY Warning Light (Red)
Refer to Warning/Indicator Lights on
page 4-26.
Ignition Not Switched Off (STOP)
Warning Beep
Refer to Ignition Not Switched Off
(STOP) Warning Beep on page 7-49.
Key Removed from Vehicle Warning
Beep
Refer to Key Removed from Vehicle
Warning Beep on page 7-50.
If you have a problem with the key,
consult an Authorized Mazda Dealer.
If your key is lost or stolen, consult an
Authorized Mazda Dealer as soon as
possible for a replacement and to make the
lost or stolen key inoperative.
3–3
Page 60
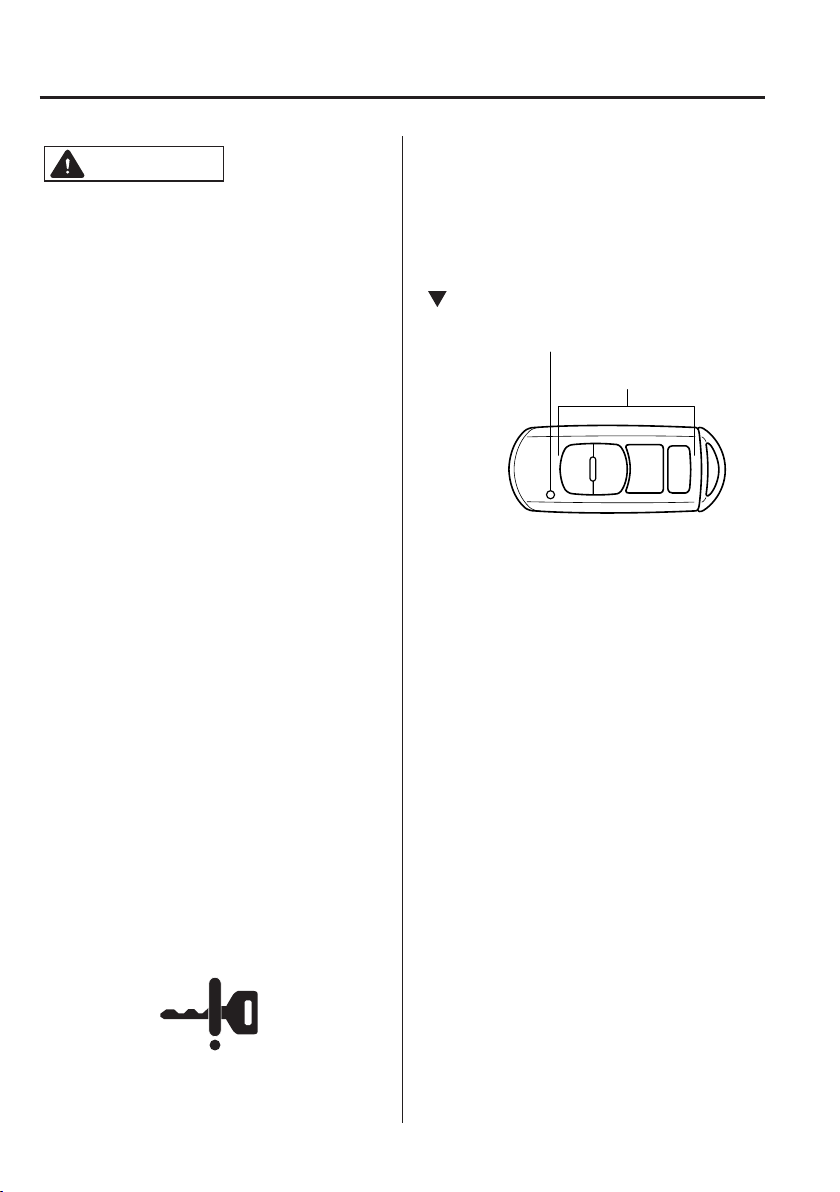
Before Driving
Operation indicator light
Keys
CAUTION
Radio equipment like this is governed
by laws in the United States.
Changes or modications not expressly
approved by the party responsible
for compliance could void the user's
authority to operate the equipment.
NOTE
The keyless entry system operation may
vary due to local conditions.
The keyless entry system is fully
operational (door/fuel-ller lid lock/
unlock) when the ignition is switched
off. The system does not operate if the
ignition is switched to any position
other than off.
If the key does not operate when
pressing a button or the operational
range becomes too small, the battery
may be weak. To install a new battery,
refer to Key Battery Replacement (page
6-38).
Battery life is about one year. Replace
the battery with a new one if the KEY
indicator light (green) ashes in the
instrument cluster (for vehicles with
a type A instrument cluster (page
4-26), messages are displayed in
the instrument cluster). Replacing
the battery about once a year is
recommended because the KEY warning
light/indicator light may not illuminate
or ash depending on the rate of battery
depletion.
Additional keys can be obtained at
an Authorized Mazda Dealer. Up to
6 keys can be used with the keyless
functions per vehicle. Bring all keys
to an Authorized Mazda Dealer when
additional keys are required.
Transmitter
Operation buttons
NOTE
The headlights turn on/off by operating
the transmitter. Refer to Leaving Home
Light on page 4-49.
(With theft-deterrent system)
The hazard warning lights ash when
the theft-deterrent system is armed or
turned off.
Refer to Theft-Deterrent System on page
3-49.
(With the advanced keyless function)
A beep sound can be heard for
conrmation when the doors and the
fuel-ller lid are locked/unlocked using
the key. If you prefer, the beep sound
can be turned off.
The volume of the beep sound can also
be changed.
Refer to Personalization Features on
page 9-9.
Use the following procedure to change
the setting.
1. Switch the ignition off and close
both of the doors and the trunk lid.
2. Open the driver's door.
3–4
Page 61
Before Driving
Keys
3. Within 30 seconds of opening the
driver's door, press and hold the
LOCK button on the key for 5
seconds or longer.
Both of the doors and the fuel-
ller lid lock and the beep sound
activates at the currently set volume.
The setting changes each time the
LOCK button on the key is pressed
and the beep sound activates at the
set volume. (If the beep sound has
been set to not activate, it will not
activate.)
4. The setting change is completed by
doing any one of the following:
Switching the ignition to ACC or
ON.
Closing the driver's door.
Opening the trunk lid.
Not operating the key for 10
seconds.
Pressing any button except the
LOCK button on the key.
Pressing a request switch.
The operation indicator light ashes when
the buttons are pressed.
Lock button
To lock the doors and the fuel-ller lid,
press the lock button and the hazard
warning lights will ash once.
(With the advanced keyless function)
A beep sound will be heard once.
NOTE
The doors and the fuel-ller lid can be
locked by pressing the lock button while
any other door or the trunk lid is open.
The hazard warning lights will not ash.
When the lock button is pressed while
any door is open and then the door is
closed, both the doors and the fuel-ller
lid are locked.
Conrm that both doors and the fuel-
ller lid are locked visually or audibly
by use of the double click.
Make sure both doors and the fuel-ller
lid are locked after pressing the button.
(With theft-deterrent system)
When the doors are locked by pressing
the lock button on the key while the
theft-deterrent system is armed, the
hazard warning lights will ash once to
indicate that the system is armed.
Unlock button
To unlock the driver's door and the fuel-
ller lid, press the unlock button and the
hazard warning lights will ash twice.
(With the advanced keyless function)
A beep sound will be heard twice.
To unlock both doors and the fuel-ller
lid, press the unlock button again within
3 seconds and two more beep sounds will
be heard.
To conrm that both doors and the fuelller lid have been locked, press the lock
button again within 5 seconds. If they are
closed and locked, the horn will sound.
3–5
Page 62

Before Driving
Keys
NOTE
The system can be set to unlock both
doors by performing a single operation.
Refer to Personalization Features on
page 9-9.
Use the following procedure to change
the setting.
1. Switch the ignition off and close
both of the doors and the trunk lid.
2. Open the driver's door.
3. Within 30 seconds of opening the
driver's door, press and hold the
UNLOCK button on the key for 5
seconds or longer (the sound of
the doors locking/unlocking can be
heard).
After this, the system switches the
setting each time the UNLOCK
button is pressed (the sound of the
doors locking/unlocking can be
heard).
4. The setting change is completed by
doing any one of the following:
Switching the ignition to ACC or
ON.
Closing the driver's door.
Opening the trunk lid.
Not operating the key for 10
seconds.
Pressing any button except the
UNLOCK button on the key.
Pressing a request switch.
(Auto re-lock function)
After unlocking with the key, both doors
and the fuel-ller lid will automatically
lock if any of the following operations
are not performed within about 60
seconds. If your vehicle has a theftdeterrent system, the hazard warning
lights will ash for conrmation.
The time required for the doors to lock
automatically can be changed.
Refer to Personalization Features on
page 9-9.
A door or the trunk lid is opened.
The ignition is switched to any
position other than off.
(With theft-deterrent system)
When the doors are unlocked by
pressing the unlock button on the key
while the theft-deterrent system is
turned off, the hazard warning lights
will ash twice to indicate that the
system is turned off.
Trunk button
To open the trunk lid, press and hold the
trunk button until the trunk lid opens.
Panic button
If you witness from a distance someone
attempting to break into or damage your
vehicle, press and hold the panic button
to activate the vehicle's alarm. Call
emergency services if necessary.
3–6
Page 63
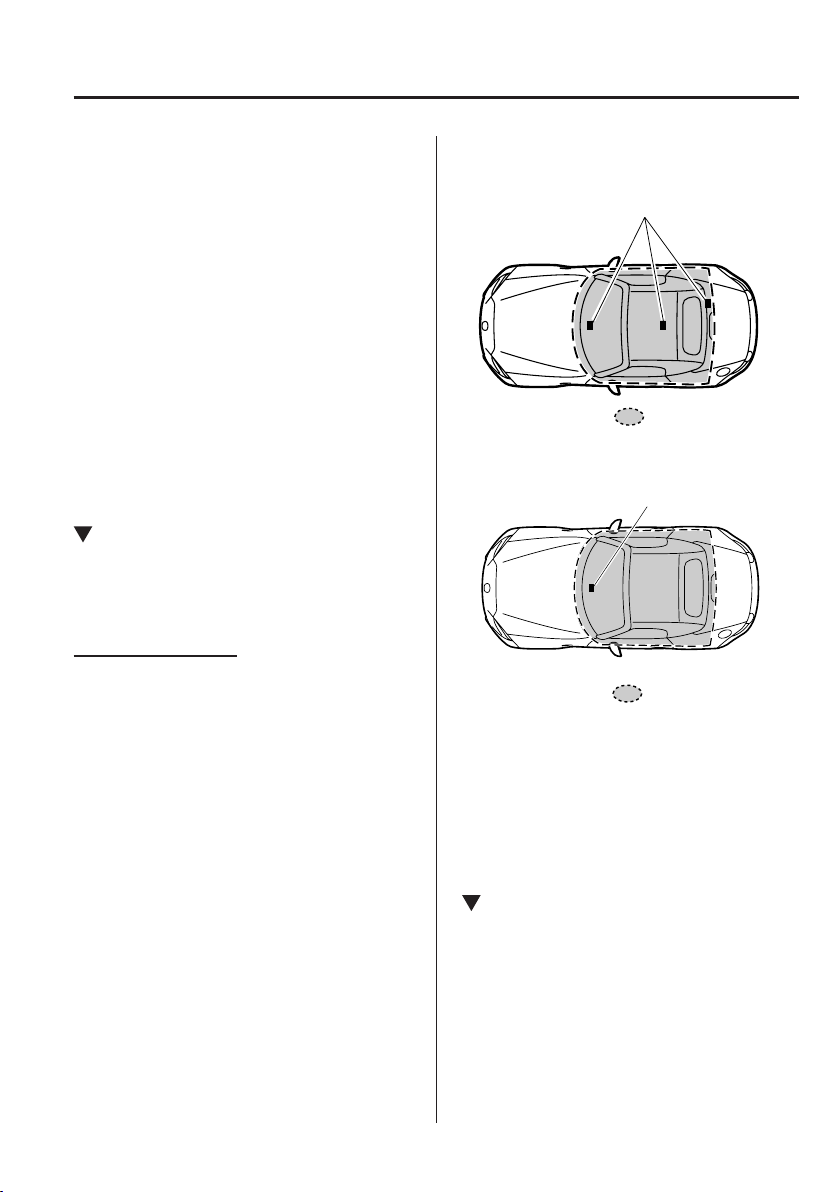
Before Driving
Interior antenna
Operational range
Interior antenna
Keys
NOTE
The panic button will work whether any
door or the trunk lid is open or closed.
(Turning on the alarm)
Pressing the panic button for 1 second or
more will trigger the alarm for about 2
minutes and 30 seconds, and the following
will occur:
The horn sounds intermittently.
The hazard warning lights ash.
(Turning off the alarm)
The alarm stops by pressing any button on
the key.
Operational Range
The system operates only when the driver
is in the vehicle or within operational
range while the key is being carried.
Starting the Engine
NOTE
Starting the engine may be possible
even if the key is outside of the vehicle
and extremely close to a door and
window, however, always start the
engine from the driver's seat.
If the vehicle is started and the key
is not in the vehicle, the vehicle will
not restart after it is shut off and the
ignition is switched to off.
The trunk is out of the assured
operational range, however, if the key
(transmitter) is operable the engine will
start.
With the advanced keyless function
Operational range
Without the advanced keyless function
NOTE
The engine may not start if the key is
placed in the following areas:
Around the dashboard
In the storage compartments or the
center console
Key Suspend Function
If a key is left in the vehicle, the
functions of the key left in the vehicle are
temporarily suspended to prevent theft of
the vehicle.
To restore the functions, press the unlock
button on the functions-suspended key in
the vehicle.
3–7
Page 64

Before Driving
Advanced Keyless Entry System
Advanced Keyless Entry
System
Radio waves from the key may aect
medical devices such as pacemakers:
The advanced keyless function allows you
to lock/unlock the door , or open the trunk
lid while carrying the key.
System malfunctions or warnings are
indicated by the following warning lights
or beeps.
Request switch Inoperable Warning
Beep
Refer to Request Switch Inoperable
Warning Beep (With the advanced
keyless function) on page 7-50.
Key Left-in-Trunk Warning Beep
Refer to Key Left-in-luggage
Compartment Warning Beep (With the
advanced keyless function) on page
7-50.
Key Left-in-vehicle Warning Beep
Refer to Key Left-in-vehicle Warning
Beep (With the advanced keyless
function) on page 7-50.
*
WARNING
Before using the key near people who
use medical devices, ask the medical
device manufacturer or your physician
if radio waves from the key will aect
the device.
NOTE
The advanced keyless entry system
functions can be deactivated to prevent
any possible adverse effect on a user
wearing a pacemaker or other medical
device. If the system is deactivated, you
will be unable to start the engine by
carrying the key. Consult an Authorized
Mazda Dealer for details. If the advanced
keyless entry system has been deactivated,
you can start the engine by following the
procedure indicated when the key battery
goes dead.
Refer to Engine Start Function When Key
Battery is Dead on page 4-8.
3–8
*Some models.
Page 65
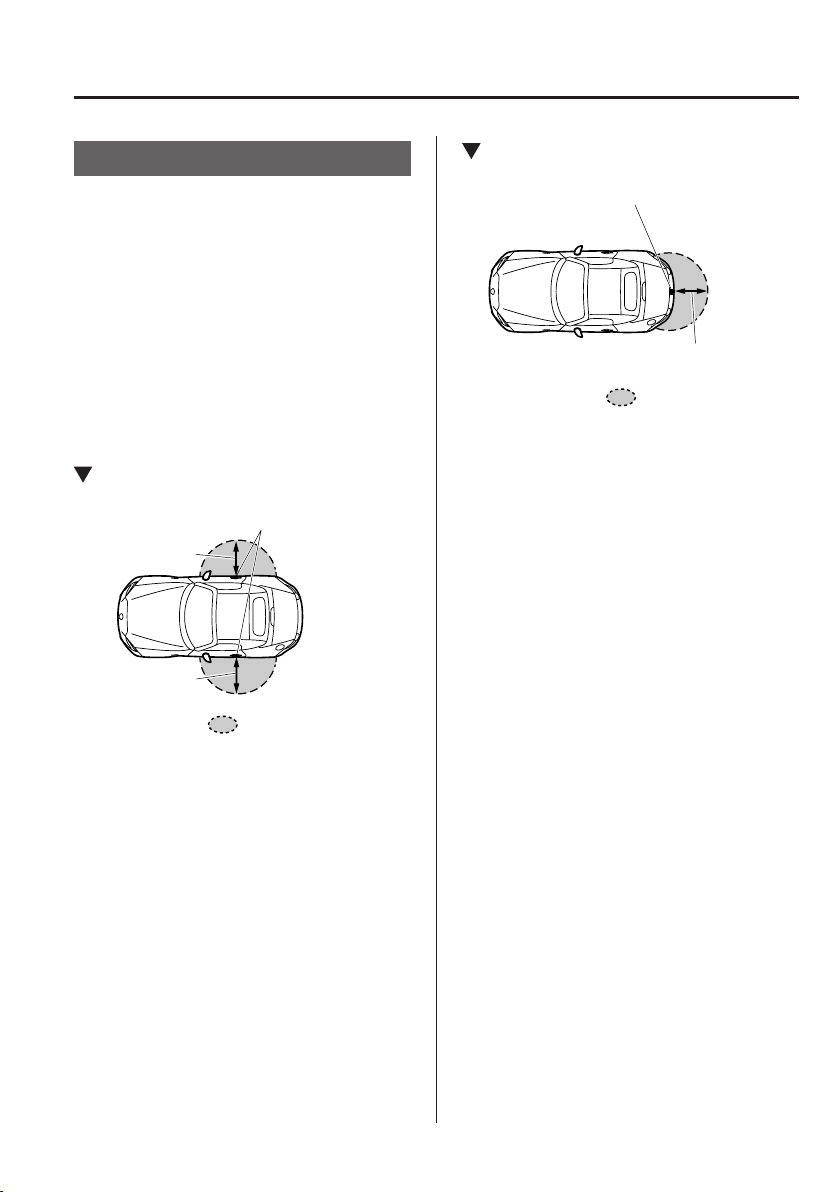
Before Driving
80cm (31in)
80cm (31in)
Exterior antenna
Exterior antenna
Operational range
Advanced Keyless Entry System
Operational Range
The system operates only when the driver
is in the vehicle or within operational
range while the key is being carried.
NOTE
When the battery power is low, or in
places where there are high-intensity radio
waves or noise, the operational range
may become narrower or the system may
not operate. For determining battery
replacement, Refer to Keyless Entry
System on page 3-3.
Locking, Unlocking the Doors
Operational range
Opening the Trunk Lid
80cm (31in)
NOTE
The system may not operate if you
are too close to the windows or door
handles.
If the key is left in the following areas
and you leave the vehicle, the doors
may be locked depending on the radio
wave conditions even if the key is left in
the vehicle.
Around the dashboard
In the storage compartments or the
center console
Next to a communication device such
as a mobile phone
3–9
Page 66
Before Driving
Doors and Locks
Door Locks
WARNING
Always take all children and pets with
you or leave a responsible person with
them:
Leaving a child or a pet unattended in
a parked vehicle is dangerous. In hot
weather, temperatures inside a vehicle
can become high enough to cause
brain damage or even death.
Do not leave the key in your vehicle with
children and keep them in a place where
your children will not nd or play with
them:
Leaving children in a vehicle with the
key is dangerous. This could result in
someone being badly injured or even
killed.
Keep both doors locked when driving:
Unlocked doors in a moving vehicle
are dangerous. Passengers can fall out
if a door is accidentally opened and
can more easily be thrown out in an
accident.
Always close both the windows and
convertible top, lock the doors and take
the key with you when leaving your
vehicle unattended:
Leaving your vehicle unlocked is
dangerous as children could lock
themselves in a hot vehicle, which
could result in death. Also, a vehicle left
unlocked becomes an easy target for
thieves and intruders.
After closing the doors, always verify
that they are securely closed:
Doors not securely closed are
dangerous, if the vehicle is driven with
a door not securely closed, the door
could open unexpectedly resulting in
an accident.
Always conrm the safety around the
vehicle before opening a door:
Suddenly opening a door is dangerous.
A passing vehicle or a pedestrian could
be hit and cause an accident.
CAUTION
Always conrm the conditions around
the vehicle before opening/closing the
doors and use caution during strong
winds or when parked on an incline. Not
being aware of the conditions around
the vehicle is dangerous because ngers
could get caught in the door or a passing
pedestrian could be hit, resulting in an
unexpected accident or injury.
If the power window does not go up or
down automatically because the battery
is dead, slowly open/close the power
window while pressing the glass inward.
Otherwise, the power window may
contact the convertible top and the door
cannot be opened/closed resulting in
damage to the window.
3–10
Page 67

Before Driving
Doors and Locks
NOTE
Always stop the engine and lock the
doors. In addition, to prevent theft of
valuables, do not leave them inside the
cabin.
If the key is left in the following areas
and you leave the vehicle, the doors
may be locked depending on the radio
wave conditions even if the key is left in
the vehicle.
Around the dashboard
In the storage compartments or the
center console
Next to a communication device such
as a mobile phone
When the ignition is switched to ACC
or ON, the vehicle lock-out prevention
feature prevents you from locking
yourself out of the vehicle.
Both doors will automatically unlock if
they are locked using the power door
locks with any door open.
If both the doors are closed even though
the trunk lid is open, both the doors will
lock.
The vehicle lock-out prevention feature
does not operate while the ignition is
switched off.
When any door is opened from the
outside while the key is inside the
vehicle, the closed doors are locked.
Both the doors are automatically
unlocked by closing the open door.
(With the advanced keyless function)
The beep sound is heard for about 10
seconds to notify the driver that the key
has been left in the vehicle.
(Without the advanced keyless
function)
The horn sound is heard twice to notify
the driver that the key has been left in
the vehicle.
(Door unlock (control) system with
collision detection)
*
This system automatically unlocks the
doors in the event the vehicle is involved
in an accident to allow passengers to
get out of the vehicle immediately and
prevent being trapped inside. While the
ignition is switched ON and in the event
the vehicle receives an impact strong
enough to inate the air bags, both the
doors are automatically unlocked after
about 6 seconds have elapsed from the
time of the accident.
The doors may not unlock depending on
how an impact is applied, the force of
the impact, and other conditions of the
accident.
If door-related systems or the battery
is malfunctioning, the doors will not
unlock.
When opening a door, the power
windows open a little automatically.
When closing the door, the power
windows close automatically. This is a
function for improving the sealability,
and it does not mean there is a problem.
If the vehicle battery is disconnected for
vehicle maintenance or other reasons,
the power windows will not open
or close automatically. If the power
windows do not open or close, the
automatic open/close mechanism for the
windows must be reset.
Refer to Operating the Power Windows
on page 3-31.
*Some models.
3–11
Page 68
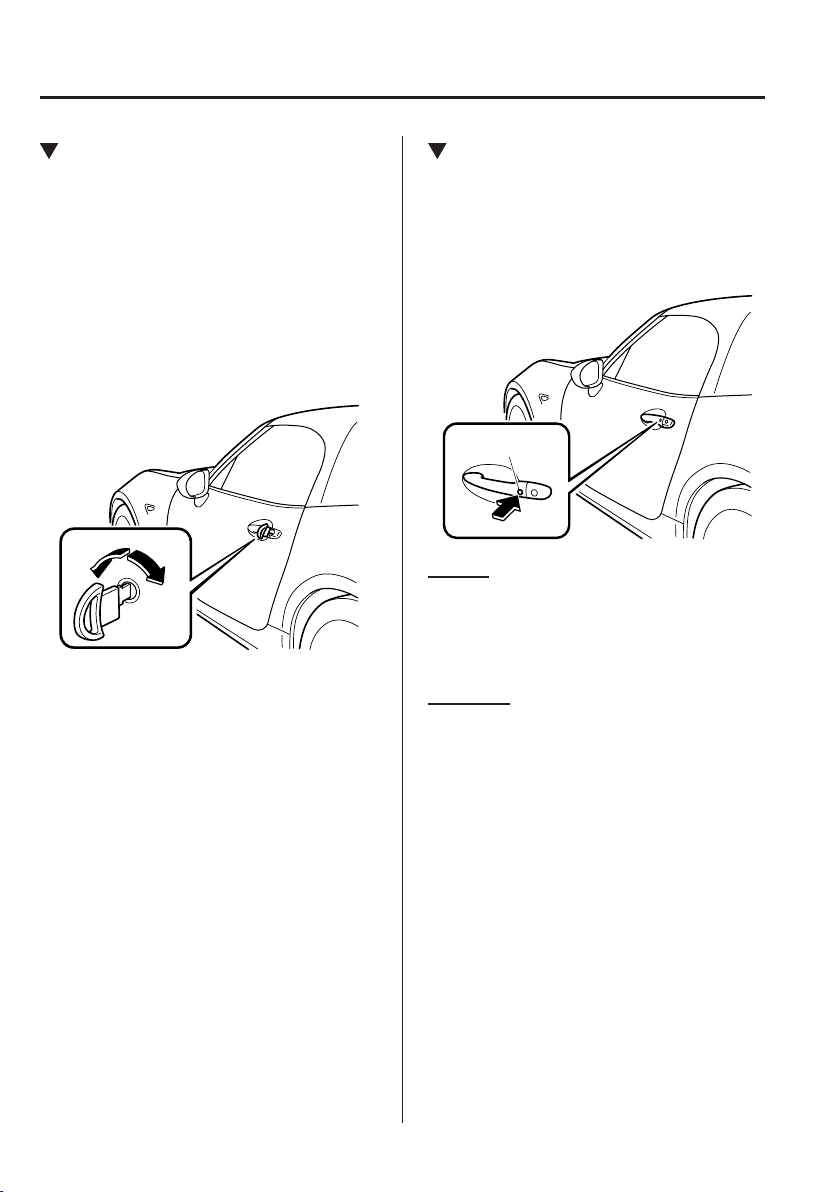
Before Driving
Doors and Locks
Locking, Unlocking with Auxiliary
Key
Both doors and the fuel-ller lid lock
automatically when the driver's door is
locked using the auxiliary key.
Both doors and the fuel-ller lid unlock
when the driver's door is unlocked and the
auxiliary key is held in the unlock position
for one second or longer.
Turn the auxiliary key toward the front to
lock, toward the back to unlock.
Lock
NOTE
Holding the auxiliary key in the unlocked
position in the driver's door lock for about
a second unlocks both doors. To unlock the
driver's door and the fuel-ller lid, insert
the auxiliary key into the driver's door
lock and turn the auxiliary key briey to
the unlock position and then immediately
return it to the center position.
Unlock
Locking, Unlocking with Request
Switch (With the advanced keyless
function)
Both doors and the fuel-ller lid can be
locked/unlocked by pressing the request
switch while the key is being carried.
Request switch
To lock
To lock the doors and the fuel-ller lid,
press the request switch and the hazard
warning lights will ash once.
A beep sound will be heard once.
To unlock
Driver's door request switch
To unlock the driver's door and the fuel-
ller lid, press the request switch. A beep
sound will be heard twice and the hazard
warning lights will ash twice.
To unlock both doors and the fuel-ller
lid, press the request switch again within
3 seconds and two more beep sounds will
be heard.
3–12
Front passenger door request switch
To unlock both doors and the fuel-ller
lid, press the request switch. A beep sound
will be heard twice and the hazard warning
lights will ash twice.
Page 69

Before Driving
Doors and Locks
NOTE
The system can be set to unlock
both doors and the fuel-ller lid by
performing a single operation.
Refer to Personalization Features on
page 9-9.
Use the following procedure to change
the setting.
1. Switch the ignition off and close
both of the doors and the trunk lid.
2. Open the driver's door.
3. Within 30 seconds of opening the
driver's door, press and hold the
UNLOCK button on the key for 5
seconds or longer (the sound of
the doors locking/unlocking can be
heard).
After this, the system switches the
setting of pressing the driver's
request switch once or twice
to unlock both doors each time
the UNLOCK button is pressed
(the sound of the doors locking/
unlocking can be heard).
4. The setting change is completed by
doing any one of the following:
Switching the ignition to ACC or
ON.
Closing the driver's door.
Opening the trunk lid.
Not operating the key for 10
seconds.
Pressing any button except the
UNLOCK button on the key.
Pressing a request switch.
Conrm that both doors and the fuel-
ller lid are securely locked.
Both doors and the fuel-ller lid cannot
be locked when any door is open.
It may require a few seconds for the
doors to unlock after the request switch
is pressed.
A beep sound is heard for conrmation
when the doors and the fuel-ller lid
are locked/unlocked using the request
switch. If you prefer, the beep sound can
be turned off.
The volume of the beep sound can also
be changed. Refer to Personalization
Features on page 9-9.
Use the following procedure to change
the setting.
1. Switch the ignition off and close
both of the doors and the trunk lid.
2. Open the driver's door.
3. Within 30 seconds of opening the
driver's door, press and hold the
LOCK button on the key for 5
seconds or longer.
Both of the doors and the fuel-
ller lid lock and the beep sound
activates at the currently set volume.
The setting changes each time the
LOCK button on the key is pressed
and the beep sound activates at the
set volume. (If the beep sound has
been set to not activate, it will not
activate.)
4. The setting change is completed by
doing any one of the following:
Switching the ignition to ACC or
ON.
Closing the driver's door.
Opening the trunk lid.
Not operating the key for 10
seconds.
Pressing any button except the
LOCK button on the key.
Pressing a request switch.
3–13
Page 70
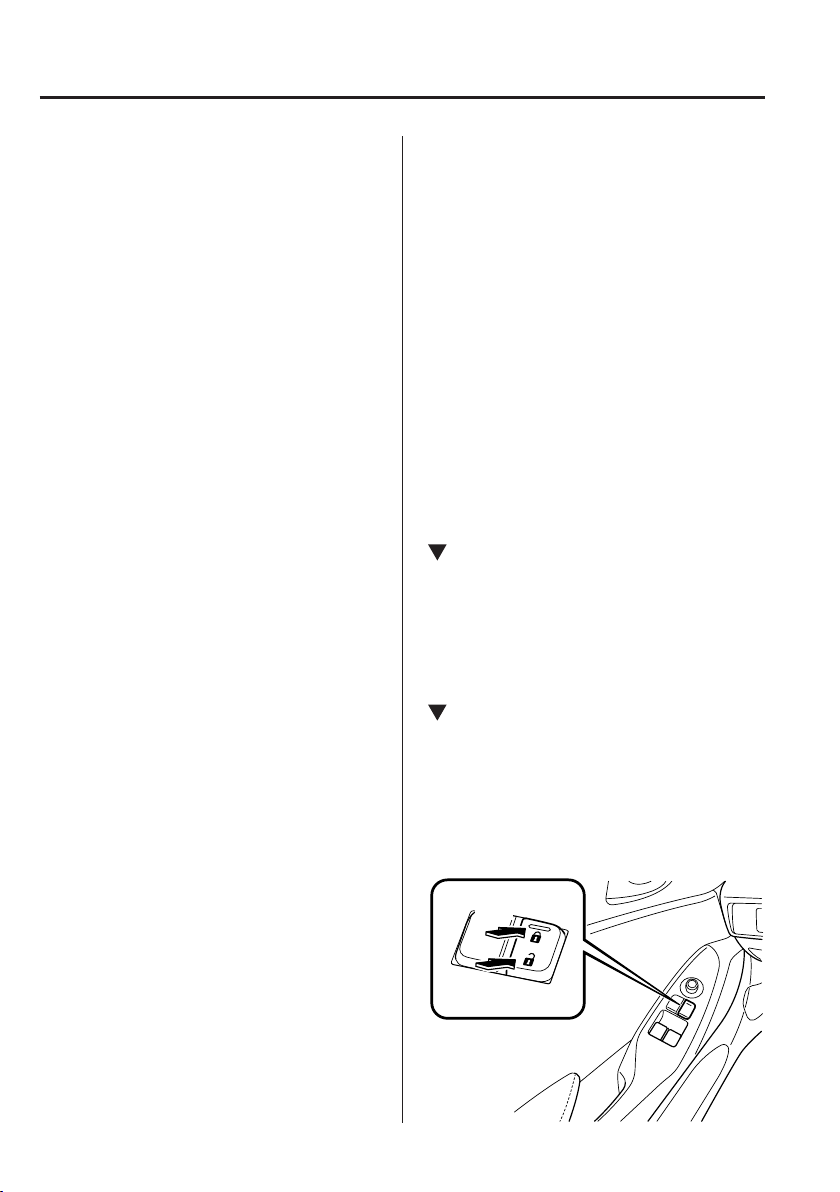
Before Driving
Doors and Locks
(With theft-deterrent system)
The hazard warning lights ash when
the theft-deterrent system is armed or
turned off.
Refer to Theft-Deterrent System on page
3-49.
The setting can be changed so that the
doors and the fuel-ller lid are locked
automatically without pressing the
request switch.
Refer to Personalization Features on
page 9-9.
(Auto-lock function)
A beep sound is heard when both doors
are closed while the advanced key
is being carried. Both doors and the
fuel-ller lid are locked automatically
after about three seconds when the
advanced key is out of the operational
range. Also, the hazard warning lights
ash once. (Even if the driver is in the
operational range, both doors and the
fuel-ller lid are locked automatically
after about 30 seconds.) If you are out
of the operational range before the
doors and the trunk lid are completely
closed or another key is left in the
vehicle, the auto-lock function will not
work. Always make sure that both doors
and the trunk lid are closed and locked
before leaving the vehicle. The auto-
lock function does not close the power
windows.
Auto re-lock function
After unlocking with the request
switch, both doors and the fuel-ller
lid will automatically lock if any of the
following operations are not performed
within about 60 seconds. If your
vehicle has a theft-deterrent system,
the hazard warning lights will ash for
conrmation.
The time required for the doors and the
fuel-ller lid to lock automatically can
be changed.
Refer to Personalization Features on
page 9-9.
Opening a door or the trunk lid.
Switching the ignition to any position
other than off.
Locking, Unlocking with
Transmitter
Both doors and the fuel-ller lid can be
locked/unlocked by operating the keyless
entry system transmitter, refer to Keyless
Entry System (page 3-3).
Locking, Unlocking with Door-
Lock Switch
Both doors and the fuel-ller lid lock
automatically when the lock side is
pressed. They unlock when the unlock side
is pressed.
Driver's door
3–14
Lock
Unlock
Page 71
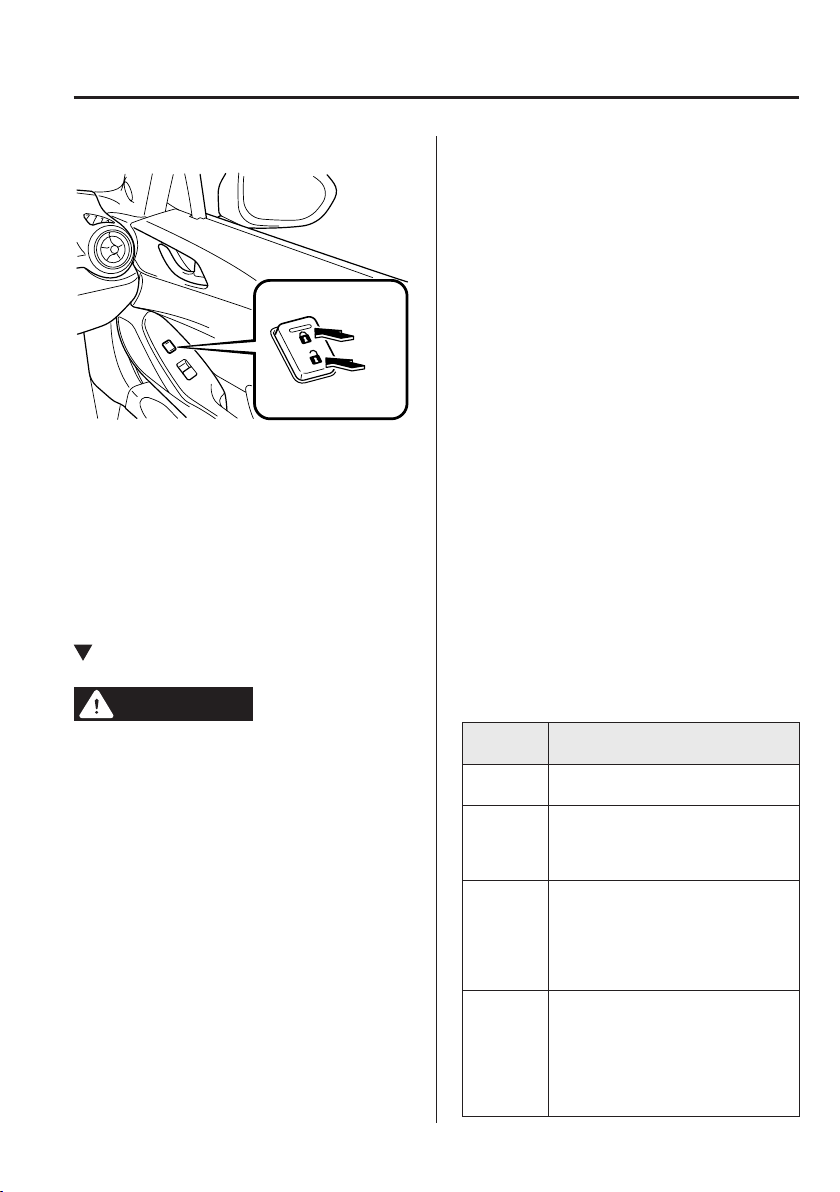
Before Driving
Doors and Locks
Front passenger's door
Lock
Unlock
To lock both the doors and the fuel-ller
lid from an open door, press the lock side
of the door lock switch and then close the
door.
NOTE
When locking the doors this way, be
careful not to leave the key inside the
vehicle.
Auto Lock/Unlock Function
WARNING
Do not pull the inner handle on a door:
Pulling the inner handle on a
door while the vehicle is moving
is dangerous. Passengers can fall
out of the vehicle if the door opens
accidentally , which could result in
death or serious injury.
When the vehicle speed exceeds 20
km/h (12 mph), both doors and the fuel-
ller lid lock automatically.
When the ignition is switched off, both
doors and the fuel-ller lid unlock
automatically.
These functions can also be disabled so
that they do not operate.
Auto lock/unlock function setting
change using door-lock switch
The doors and the fuel-ller lid can be
set to lock or unlock automatically by
selecting any one of the functions from the
following table and using the driver's doorlock switch on the interior door panel.
NOTE
Function number 3 in the following
table is the factory setting for your
vehicle.
There are only a total of six auto lock/
unlock settings available for automatic
transmission vehicles, and three for
manual transmission vehicles. Be sure
to press the unlock side of the driver's
door-lock switch the correct number of
times according to the selected function
number. If the switch is mistakenly
pressed seven times on an automatic
transmission vehicle or four times on a
manual transmission, the procedure will
be cancelled. If this occurs, start the
procedure from the beginning.
Function
number
1
2
3 (Factory
Setting)
4
The auto door-lock function is
disabled.
Both the doors and the fuel-ller lid
lock automatically when the vehicle
speed is about 20 km/h (12 mph) or
more.
Both the doors and the fuel-ller lid
lock automatically when the vehicle
speed is about 20 km/h (12 mph) or
more. Both the doors and the fuelller lid unlock when the ignition is
switched from ON to Off.
(Automatic transmission vehicles
only)
When the ignition is switched ON and
the selector lever is shifted from park
(P) to any other gear position, both
the doors and the fuel-ller lid lock
automatically.
Function
*1
3–15
Page 72
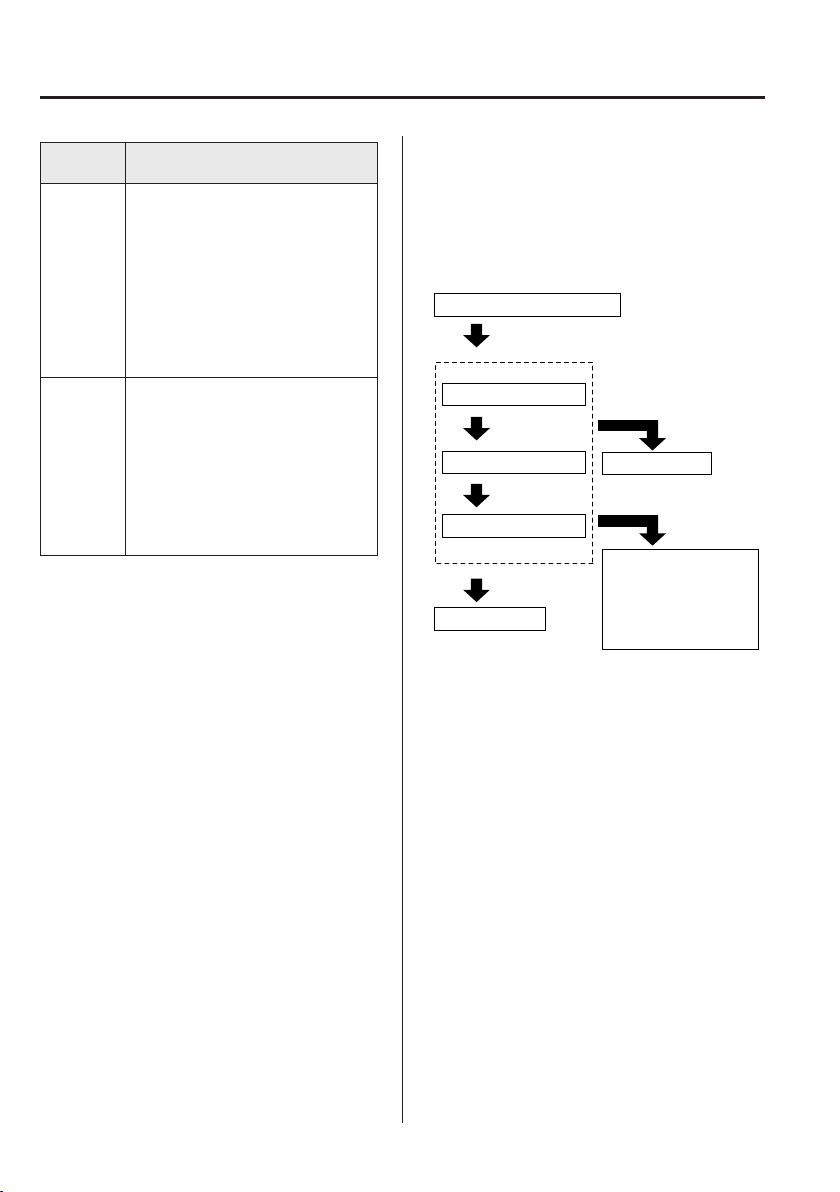
Before Driving
Doors and Locks
Function
number
(Automatic transmission vehicles
only)
When the ignition is switched ON and
the selector lever is shifted from park
(P) to any other gear position, both
the doors and the fuel-ller lid lock
5
automatically.
When the selector lever is shifted to
park (P) while the ignition is switched
ON, both the doors and the fuel-ller
lid unlock automatically.
(Automatic transmission vehicles
only)
Both the doors and the fuel-ller lid
lock automatically when the vehicle
speed is about 20 km/h (12 mph) or
6
more.
When the selector lever is shifted to
park (P) while the ignition is switched
ON, both the doors and the fuel-ller
lid unlock automatically.
*1 Other settings for the auto door lock function are
available at an Authorized Mazda Dealer. For
details consult an Authorized Mazda Dealer. Refer
to Personalization Features on page 9-9.
Function
*1
Settings can be changed using the
following procedure.
1. Safely park the vehicle. Both doors
must remain closed.
2. Switch the ignition ON.
3. Press and hold the lock side of the
driver's door-lock switch within 20
seconds of switching the ignition ON,
and make sure a beep sound is heard
about eight seconds afterwards.
4. Refer to the auto lock/unlock function
setting table, determine the function
number for the desired setting. Press
the unlock side of the driver's door-lock
switch the same number of times as the
selected function number (Ex. If you
select function 2, press the unlock side
of the switch only 2 times).
5. Three seconds after the function setting
has been changed, a beep sound will
beep in the amount of the selected
function number. (Ex. Function number
3 = 3 beep sounds)
(Manual transmission vehicles)
Current Function Number
Press unlock side of
lock switch once
Function Number 1
Press 2 times
Function Number 2
Press 3 times
Function Number 3
Press 4 times
Cancel setting
Press lock side of
lock switch
Cancel setting
Wait for 3 second
Function set (The
number of beeps
heard is the same as
the selected function
number)
3–16
Page 73
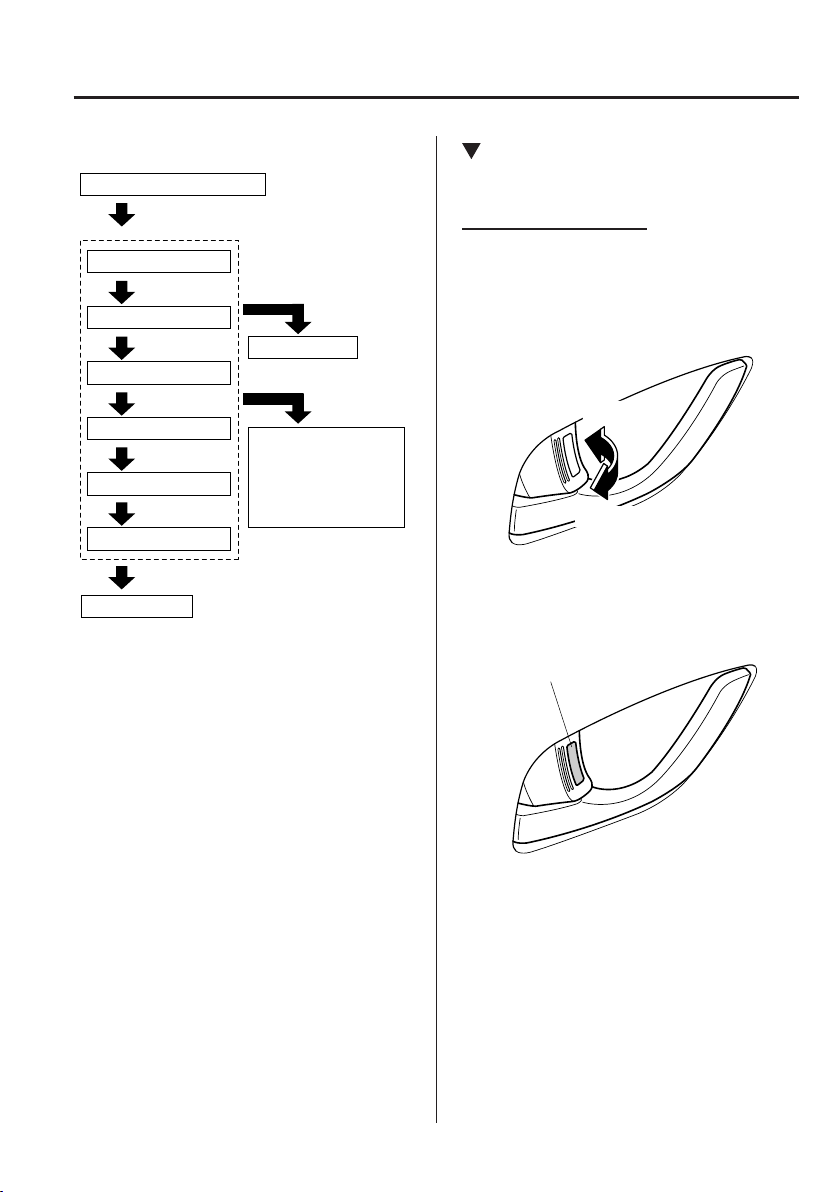
Before Driving
Current Function Number
Red indication
Doors and Locks
(Automatic transmission vehicles)
Press unlock side of
lock switch once
Function Number 1
Press 2 times
Function Number 2
Press 3 times
Function Number 3
Press 4 times
Function Number 4
Press 5 times
Function Number 5
Press 6 times
Function Number 6
Press 7 times
Cancel setting
NOTE
The doors cannot be locked or unlocked
while the setting function is being
performed.
The procedure can be cancelled by
pressing the lock side of the driver's
door-lock switch.
Press lock side of
lock switch
Cancel setting
Wait for 3 second
Function set (The
number of beeps
heard is the same as
the selected function
number)
Locking, Unlocking with Door-
Lock Knob
Operation from inside
To lock any door from the inside, press the
door-lock knob.
To unlock, pull it outward.
This does not operate the other door locks.
Lock
Unlock
NOTE
The red indication can be seen when the
door-lock knob is unlocked.
3–17
Page 74
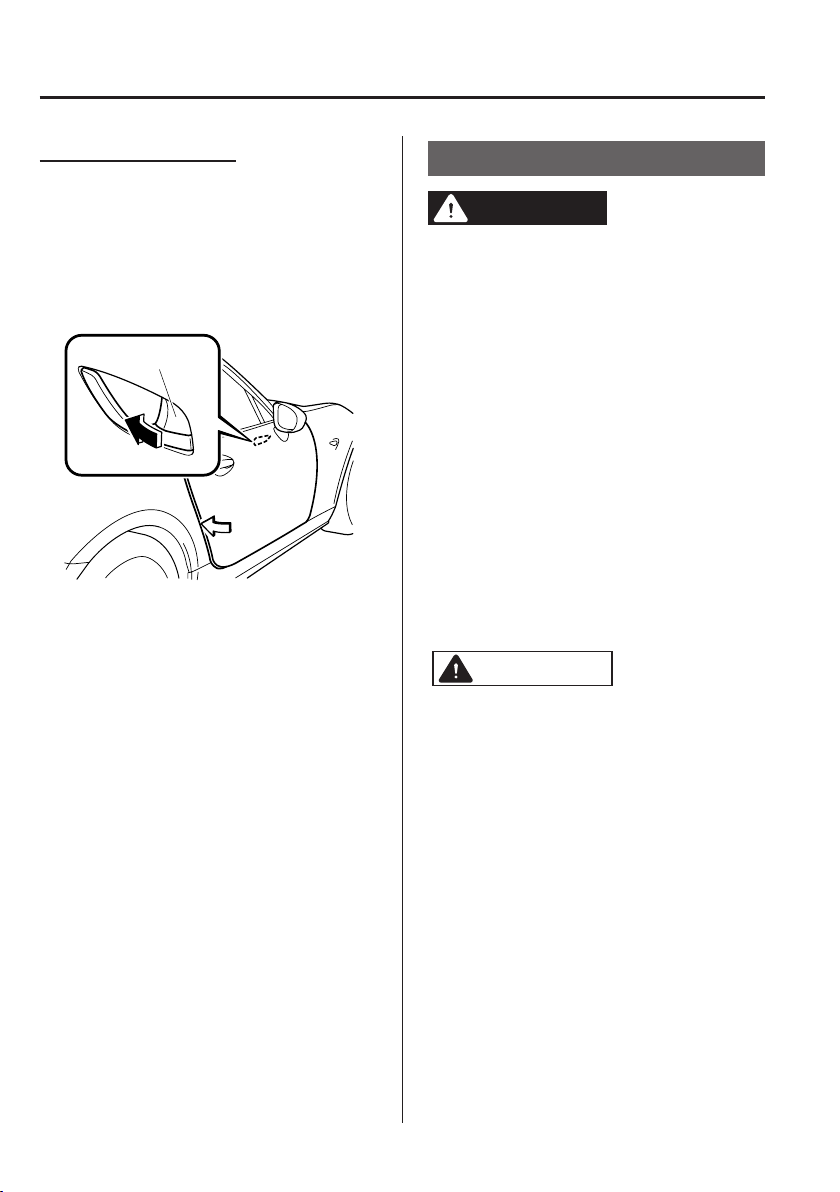
Before Driving
Doors and Locks
Operation from outside
To lock the passenger door with the doorlock knob from the outside, press the
door-lock knob to the lock position and
close the door (holding the door handle in
the open position is not required).
This does not operate the other door locks.
Door-lock knob
NOTE
When locking the door this way:
Be careful not to leave the key inside the
vehicle.
The driver's door lock knob cannot be
used while the driver's door is open.
Trunk Lid
WARNING
Never allow a person to ride in the
trunk:
Allowing a person to ride in the trunk
is dangerous. The person in the trunk
could be seriously injured or killed
during sudden braking or a collision.
Do not drive with the trunk lid open:
Exhaust gas in the cabin of a vehicle
is dangerous. An open trunk lid in a
moving vehicle will cause exhaust
gas to be drawn into the cabin. This
gas contains CO (carbon monoxide),
which is colorless, odorless, and highly
poisonous, and it can cause loss of
consciousness and death. Moreover, an
open trunk lid could cause occupants
to fall out in an accident.
CAUTION
Before opening the trunk lid, remove
any snow and ice accumulation on it.
Otherwise, the trunk lid could close
under the weight of the snow and ice
resulting in injury.
Be careful when opening/closing the
trunk lid during strong winds. If a strong
gust blows against the trunk lid, it could
close suddenly resulting in injury.
Fully open the trunk lid and make sure
that it stays open. If the trunk lid is only
opened partially, it could slam shut
by vibration or wind gusts resulting in
injury.
When loading or unloading luggage in
the trunk, turn o the engine. Otherwise,
you could get burned by the heat of the
exhaust gas.
3–18
Page 75
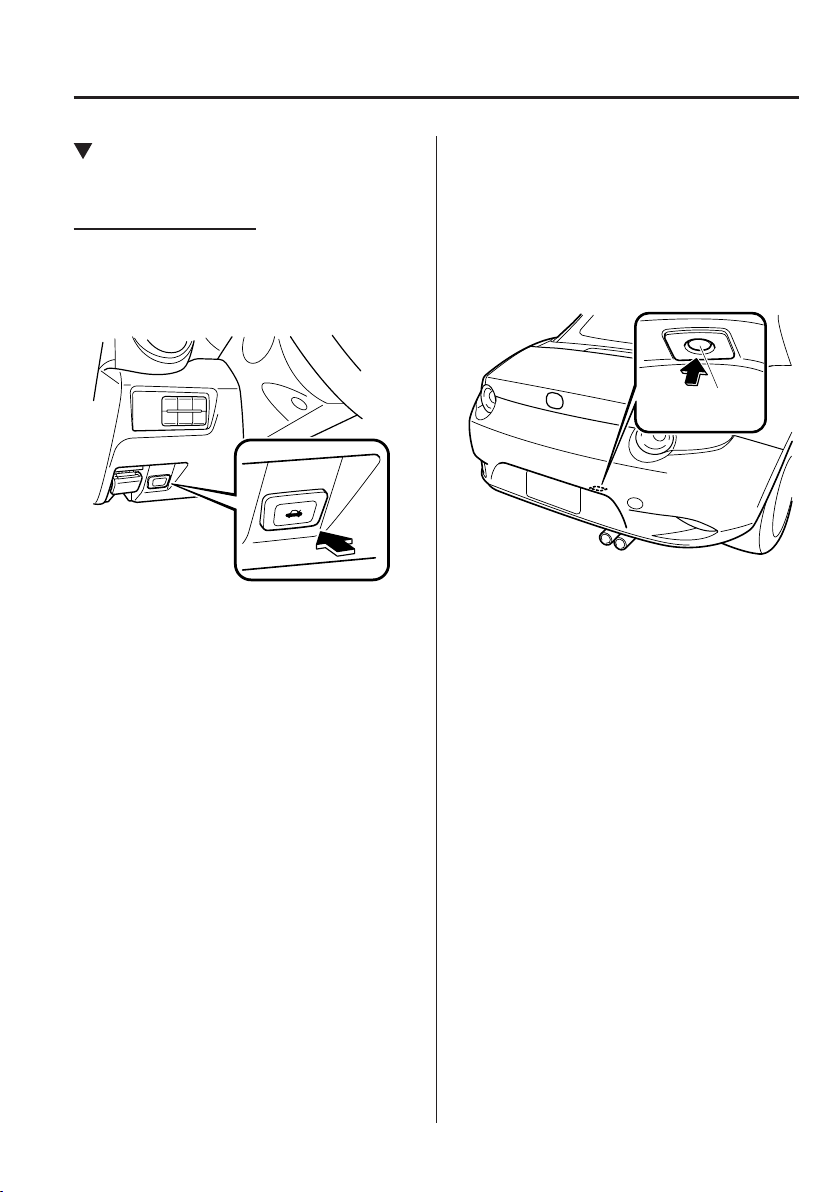
Before Driving
Doors and Locks
Opening and Closing the Trunk
Lid
Opening the trunk lid
Using the remote release button
Push the release button.
The remote release button function can
be disabled by locking the doors using
the transmitter, auxiliary key, or a request
switch to prevent an intruder in the vehicle
from opening the trunk.
To enable the remote release button
operation, unlock the doors by using the
transmitter, auxiliary key, or a request
switch, or switch the ignition ON.
NOTE
The remote release button cannot be
disabled by locking the doors using the
door-lock switch/door-lock knob.
Refer to Locking, Unlocking with DoorLock Switch on page 3-14.
Refer to Locking, Unlocking with DoorLock Knob on page 3-17.
Using the electric trunk lid opener
(With the advanced keyless function)
A trunk lid can also be opened while the
key is being carried.
Press the electric trunk lid opener and raise
the trunk lid when the latch releases.
Electric trunk lid
opener
NOTE
When opening the trunk lid with the
doors locked, it may require a few
seconds for the trunk lid latch to release
after the electric trunk lid opener is
pressed.
The trunk lid can be closed when the
doors are locked with the key left in the
vehicle. However, to prevent locking the
key in the vehicle, the trunk lid can be
opened by pressing the electric trunk lid
opener. If the trunk lid cannot be opened
despite doing this procedure, rst push
the trunk lid completely closed, then
press the electric trunk lid opener to
fully open the trunk lid.
If the vehicle battery is dead or there
is a malfunction in the electrical
system and the trunk lid cannot be
unlocked, the trunk lid can be opened by
performing the emergency procedure.
Refer to When Trunk Lid Cannot be
Opened on page 7-52.
3–19
Page 76
Before Driving
Doors and Locks
Closing the trunk lid
Use both hands to push the trunk lid down
until the lock snaps shut. Do not slam it.
Pull up on the trunk lid to make sure it is
secure.
Inside Trunk Release
Lever
Your vehicle is equipped with an inside
trunk release lever that provides a means
of escape for children and adults in the
event they become locked inside the trunk.
No matter how careful adults might be
with keys and locking their cars, parents
should be aware that children may be
tempted to play around vehicles and use
the trunk as a hiding place.
Adults are advised to familiarize
themselves with the operation and location
of the inside trunk release lever so that
all children can be told about it in an
appropriate way, keeping in mind that
most vehicles do not have such levers.
Close the trunk lid, do not allow children
to play inside the trunk:
*
WARNING
Leaving the trunk lid open or leaving
children in the vehicle with the keys is
dangerous. Children could open the
trunk lid and climb inside resulting
in possible injury or death from heat
exposure.
3–20
Always keep the car from being a
tempting place to play by latching the
doors and the trunk, and keeping the
keys where children can not play with
them:
Leaving children or animals
unattended in a parked vehicle is
dangerous. Babies left sleeping and
children who lock themselves in cars or
trunks can die very quickly from heat
prostration. Do not leave your children
or pets alone in a car at any time. Do
not leave the car, the trunk unlocked.
*Some models.
Page 77
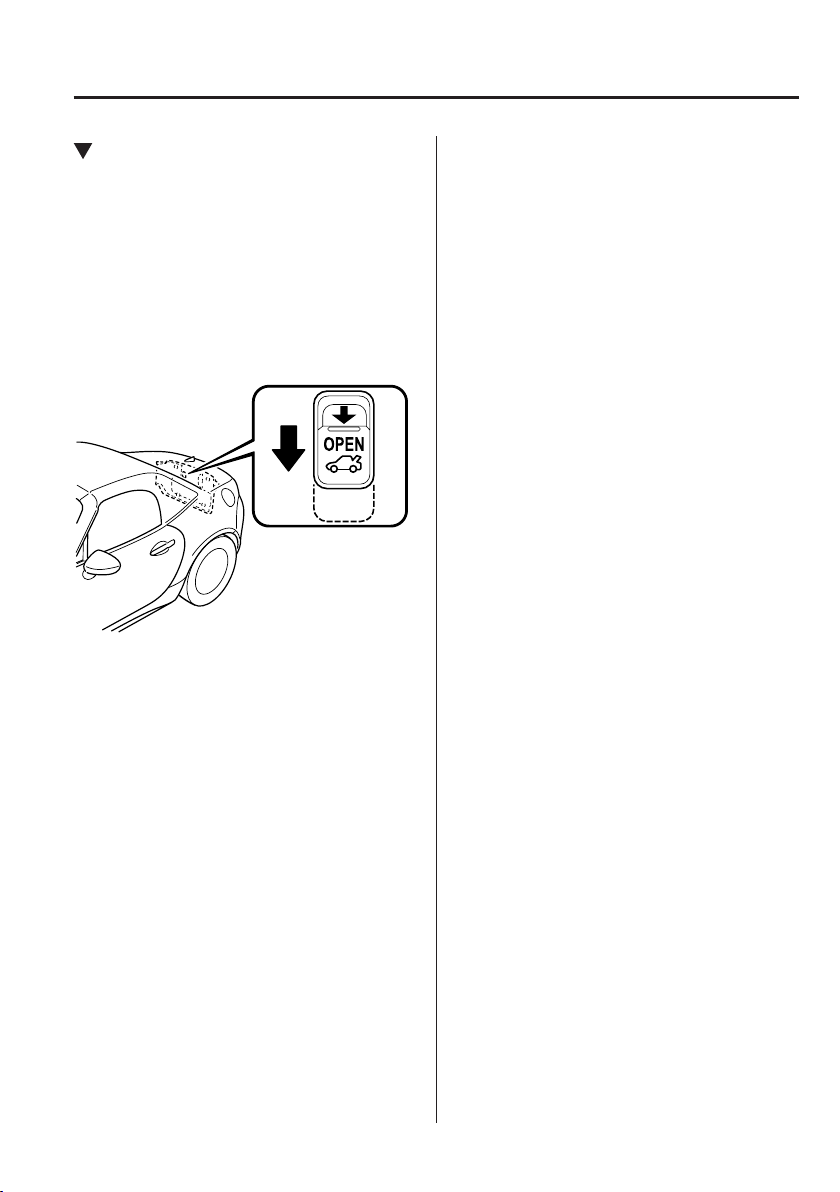
Opening the Trunk Lid from the
Inside
Slide the inside trunk release lever in the
direction of the arrow. The lever is made
of material that will glow for hours in the
darkness of the trunk following a brief
exposure to ambient light.
The inside trunk release lever is located on
the inside of the trunk lid.
Before Driving
Doors and Locks
3–21
Page 78
Before Driving
Fuel and Emission
Fuel and Engine Exhaust Precautions
Fuel Requirements
Vehicles with catalytic converters or oxygen sensors must use ONLY UNLEADED FUEL,
which will reduce exhaust emissions and keep spark plug fouling to a minimum.
This vehicle will perform best with fuel listed in the table.
Fuel Octane Rating* (Anti-knock index)
Premium unleaded fuel
*
U.S. federal law requires that octane ratings be posted on gasoline station pumps.
Regular unleaded fuel with an octane rating from 87 to 90 (91 to 95 RON) can be used, but
this will reduce performance slightly, such as reduced engine output, and engine knocking.
Fuel with a rating lower than 87 octane (91 RON) will negatively affect the emission control
system performance and could also cause engine knocking and serious engine damage.
CAUTION
USE ONLY UNLEADED FUEL.
Leaded fuel is harmful to the catalytic converter and oxygen sensors and will lead to
deterioration of the emission control system and or failures.
This vehicle can only use oxygenated fuels containing no more than 10 % ethanol by
volume. Damage to the vehicle may occur when ethanol exceeds this recommendation, or
if the gasoline contains any methanol. Stop using gasohol of any kind if your vehicle engine
is performing poorly.
Never add fuel system additives, otherwise the emission control system could be damaged.
Consult an Authorized Mazda Dealer for details.
Gasoline blended with oxygenates such as alcohol or ether compounds are generally
referred to as oxygenated fuels. The common gasoline blend that can be used with your
vehicle is ethanol blended at no more than 10 %. Gasoline containing alcohol, such as
ethanol or methanol, may be marketed under the name "Gasohol".
91 [(R M)/2 method] or above (96 RON or above)
Vehicle damage and drivability problems resulting from the use of the following may not be
covered by the warranty.
Gasohol containing more than 10 % ethanol.
Gasoline or gasohol containing methanol.
Leaded fuel or leaded gasohol.
3–22
Page 79
Before Driving
Fuel and Emission
Emission Control System
This vehicle is equipped with an emission control system (the catalytic converter is
part of this system) that enables the vehicle to comply with existing exhaust emissions
requirements.
WARNING
Never park over or near anything ammable:
Parking over or near anything ammable, such as dry grass, is dangerous. Even with the
engine turned o, the exhaust system remains very hot after normal use and could ignite
anything ammable. A resulting re could cause serious injury or death.
CAUTION
Ignoring the following precautions could cause lead to accumulate on the catalyst inside
the converter or cause the converter to get very hot. Either condition will damage the
converter and cause poor performance.
USE ONLY UNLEADED FUEL.
Do not drive your Mazda with any sign of engine malfunction.
Do not coast with the ignition switched o.
Do not descend steep grades in gear with the ignition switched o.
Do not operate the engine at high idle for more than 2 minutes.
Do not tamper with the emission control system. All inspections and adjustments
must be made by a qualied technician.
Do not push-start or pull-start your vehicle.
NOTE
Under U.S. federal law, any modication to the original-equipment emission control
system before the rst sale and registration of a vehicle is subject to penalties. In some
states, such modication made on a used vehicle is also subject to penalties.
While the engine is off, the sound of a valve opening and closing can be heard at the rear
of the vehicle, however this does not indicate an abnormality. The vehicle has a selfchecking device and it operates while the engine is off.
3–23
Page 80

Before Driving
Fuel and Emission
Engine Exhaust (Carbon monoxide)
WARNING
Do not drive your vehicle if you smell exhaust gas inside the vehicle:
Engine exhaust gas is dangerous. This gas contains carbon monoxide (CO), which is
colorless, odorless, and poisonous. When inhaled, it can cause loss of consciousness and
death. If you smell exhaust gas inside the vehicle, keep all windows fully open and contact
an Authorized Mazda Dealer immediately.
Do not run the engine when inside an enclosed area:
Running the engine inside an enclosed area, such as a garage, is dangerous. Exhaust
gas, which contains poisonous carbon monoxide, could easily enter the cabin. Loss of
consciousness or even death could occur.
Open the windows or adjust the heating or cooling system to draw fresh air when
idling the engine:
Exhaust gas is dangerous. When the vehicle is stopped with the windows closed and
the engine running for a long time even in an open area, exhaust gas, which contains
poisonous carbon monoxide, could enter the cabin. Loss of consciousness or even death
could occur.
Clear snow from underneath and around your vehicle, particularly the tail pipe, before
starting the engine:
Running the engine when a vehicle is stopped in deep snow is dangerous. The exhaust
pipe could be blocked by the snow, allowing exhaust gas to enter the cabin. Because
exhaust gas contains poisonous carbon monoxide, it could cause loss of consciousness or
even death to occupants in the cabin.
3–24
Page 81
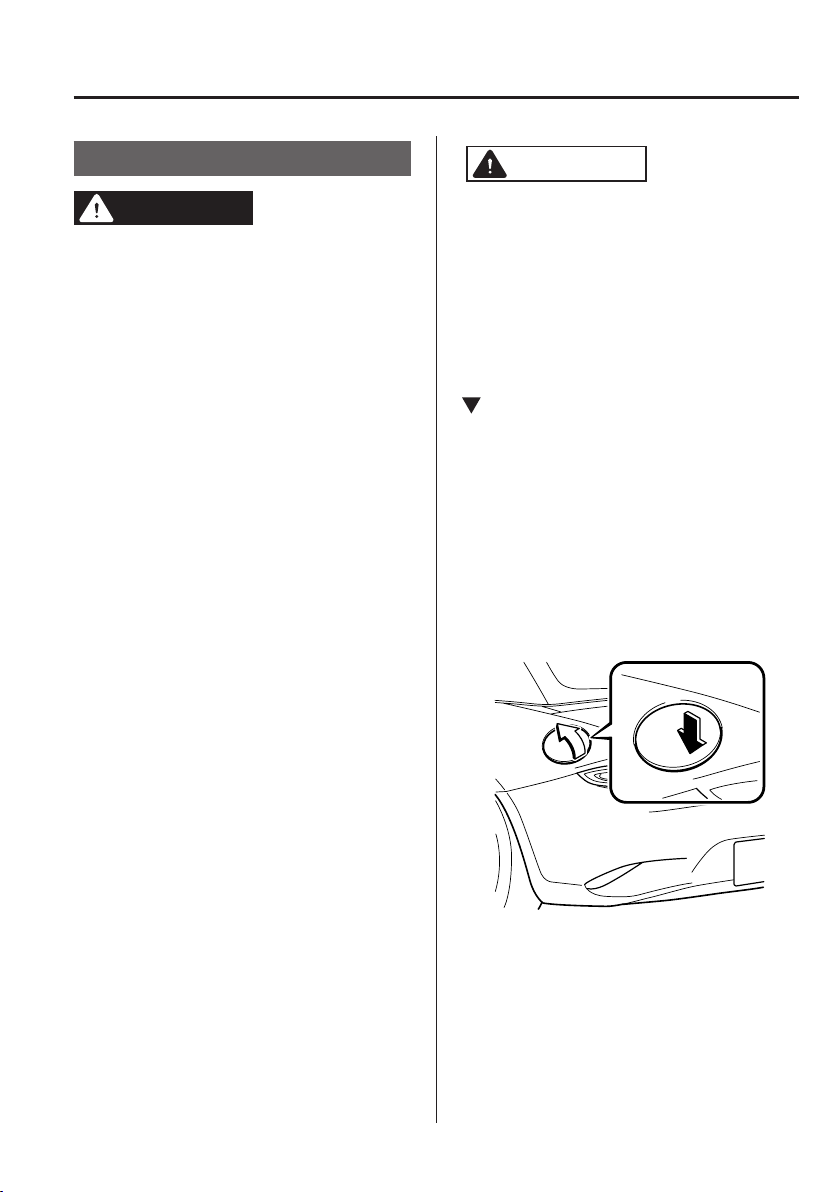
Before Driving
Fuel and Emission
Fuel-Filler Lid and Cap
WARNING
When removing the fuel-ller cap,
loosen the cap slightly and wait for any
hissing to stop, then remove it:
Fuel spray is dangerous. Fuel can
burn skin and eyes and cause illness
if ingested. Fuel spray is released
when there is pressure in the fuel tank
and the fuel-ller cap is removed too
quickly.
Before refueling, stop the engine, and
always keep sparks and ames away
from the ller neck:
Fuel vapor is dangerous. It could be
ignited by sparks or ames causing
serious burns and injuries.
Additionally, use of the incorrect fuelller cap or not using a fuel-ller cap
may result in a fuel leak, which could
result in serious burns or death in an
accident.
Do not continue refueling after the fuel
pump nozzle shuts o automatically:
Continuing to add fuel after the
fuel pump nozzle has shut o
automatically is dangerous because
overlling the fuel tank may cause
fuel overow or leakage. Fuel overow
and leakage could damage the vehicle
and if the fuel ignites it could cause a
re and explosion resulting in serious
injury or death.
CAUTION
Always use only a genuine Mazda fuelller cap or an approved equivalent,
available at an Authorized Mazda
Dealer. The wrong cap can result in
a serious malfunction of the fuel and
emission control systems. It may also
cause the check engine light in the
instrument cluster to illuminate.
Fuel-Filler Lid
When the fuel-ller lid end is pressed with
the doors unlocked, the fuel-ller lid rises.
The fuel-ller lid operates in conjunction
with the door locking/unlocking
mechanism.
Make sure to lock both the doors when
leaving the vehicle.
Refer to Door Locks on page 3-10.
To close, press the fuel-ller lid until a
click sound is heard.
NOTE
Lock the doors after closing the fuel lid.
If the fuel lid is closed after locking the
doors, the fuel lid cannot be locked.
3–25
Page 82

Before Driving
Fuel and Emission
Fuel-Filler Cap
To remove the fuel-ller cap, turn it
counterclockwise.
Attach the removed cap to the inner side
of the fuel lid.
To close the fuel-ller cap, turn it
clockwise until a click is heard.
Open
Close
CAUTION
If the check fuel cap warning light
illuminates, the fuel-ller cap may not
be properly installed. If the warning
light illuminates, park your vehicle
safely o the right-of-way, remove the
fuel-ller cap and reinstall it correctly.
After the cap has been correctly
installed, the fuel cap warning light
may continue to illuminate until a
number of driving cycles have been
completed. A drive cycle consists of
starting the engine (after four or more
hours with the engine o) and driving
the vehicle on city and highway roads.
Continuing to drive with the check
fuel cap warning light illuminated
could cause the check engine light to
illuminate as well.
3–26
Page 83

Steering Wheel
WARNING
Never adjust the steering wheel while
the vehicle is moving:
Adjusting the steering wheel while
the vehicle is moving is dangerous.
Moving it can very easily cause the
driver to abruptly turn to the left or
right. This can lead to loss of control or
an accident.
Steering Wheel Adjustment
To change the angle of the steering wheel:
1. Stop the vehicle, and then pull down
the lock release lever under the steering
column.
Before Driving
Steering Wheel
Lock release lever
2. Tilt the steering wheel to the desired
positions, then push the lever up to lock
the column.
3. Attempt to push the steering wheel
up and down to make sure it's locked
before driving.
3–27
Page 84
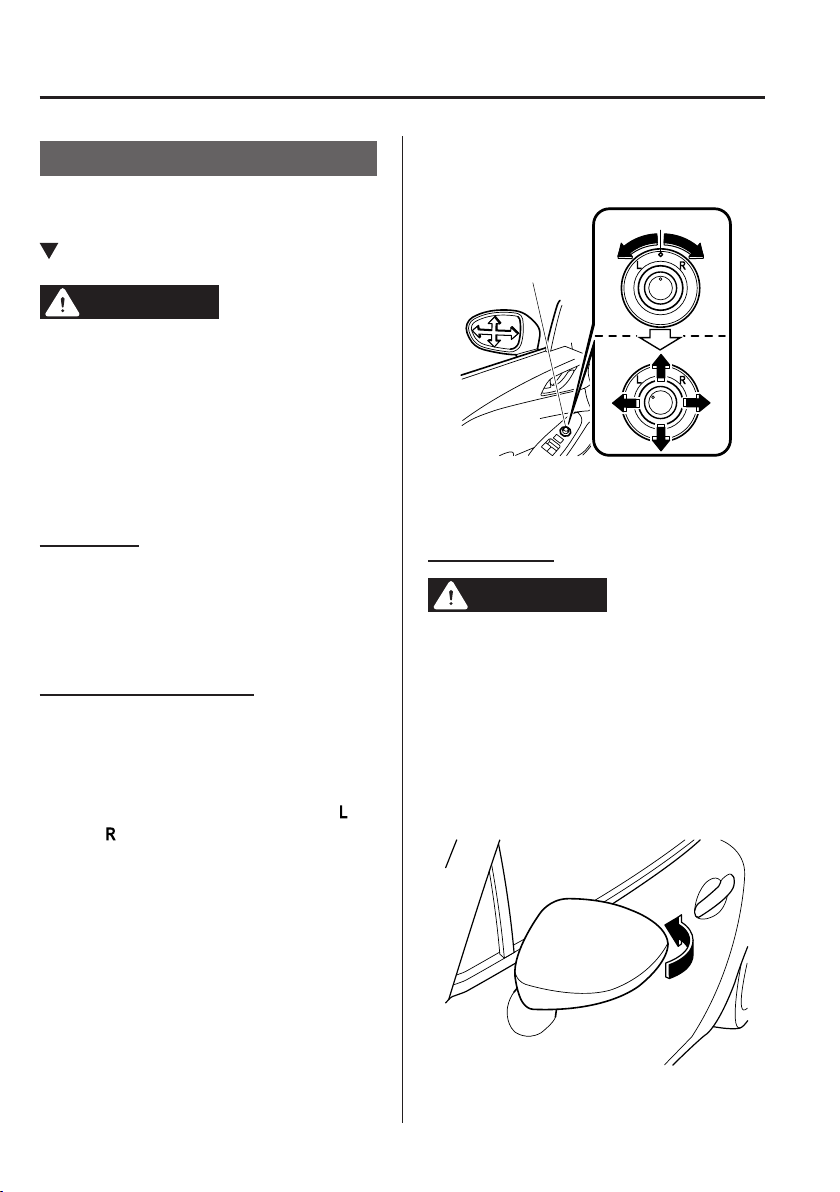
Before Driving
Mirrors
Mirrors
Before driving, adjust the inside and
outside mirrors.
Outside Mirrors
WARNING
Be sure to look over your shoulder
before changing lanes:
Changing lanes without taking
into account the actual distance of
the vehicle in the convex mirror is
dangerous. You could have a serious
accident. What you see in the convex
mirror is closer than it appears.
Mirror type
Flat type (driver's side)
Flat surface mirror.
Convex type (passenger side)
The mirror has single curvature on its
surface.
Power mirror adjustment
The ignition must be switched to ACC or
ON position.
To adjust:
1. Rotate the mirror switch to the left or
right to choose the left or right side
mirror.
2. Press the mirror switch in the
appropriate direction.
Center position
Mirror switch
After adjusting the mirror, lock the
control by rotating the switch in the center
position.
Folding mirror
WARNING
Always return the outside mirrors to
the driving position before you start
driving:
Driving with the outside mirrors folded
in is dangerous. Your rear view will
be restricted, and you could have an
accident.
Manually fold the outside mirror rearward
until it is ush with the vehicle.
3–28
Page 85

Before Driving
ON button
Mirrors
Driver's side auto-dimming door
*
mirror
The movement of the auto-dimming
door mirror is interlocked with the autodimming rearview mirror in the interior
to automatically reduce glare from rear
on-coming vehicles.
Refer to Rearview Mirror on page 3-29.
NOTE
The passenger-side door mirror does not
have the auto-dimming feature.
Rearview Mirror
WARNING
Do not stack cargo or objects higher
than the seatbacks:
Cargo stacked higher than the
seatbacks is dangerous. It can block
your view in the rearview mirror, which
might cause you to hit another car
when changing lanes.
Rearview mirror adjustment
Before driving, adjust the rearview mirror
to center on the scene through the rear
window.
Reducing glare from headlights
Manual day/night mirror
Push the day/night lever forward for day
driving. Pull it back to reduce glare of
headlights from vehicles at the rear.
Day/Night lever
DayNight
Auto-dimming mirror
The auto-dimming mirror automatically
reduces the glare of headlights from
vehicles at the rear when the ignition is
switched ON.
Press the OFF button ( ) to cancel the
auto-dimming function. The indicator light
will turn off.
To reactivate the auto-dimming function,
press the ON button ( ). The indicator
light will illuminate.
NOTE
For the manual day/night mirror, perform
the adjustment with the day/night lever in
the day position.
Indicator light
OFF button
*Some models.
3–29
Page 86
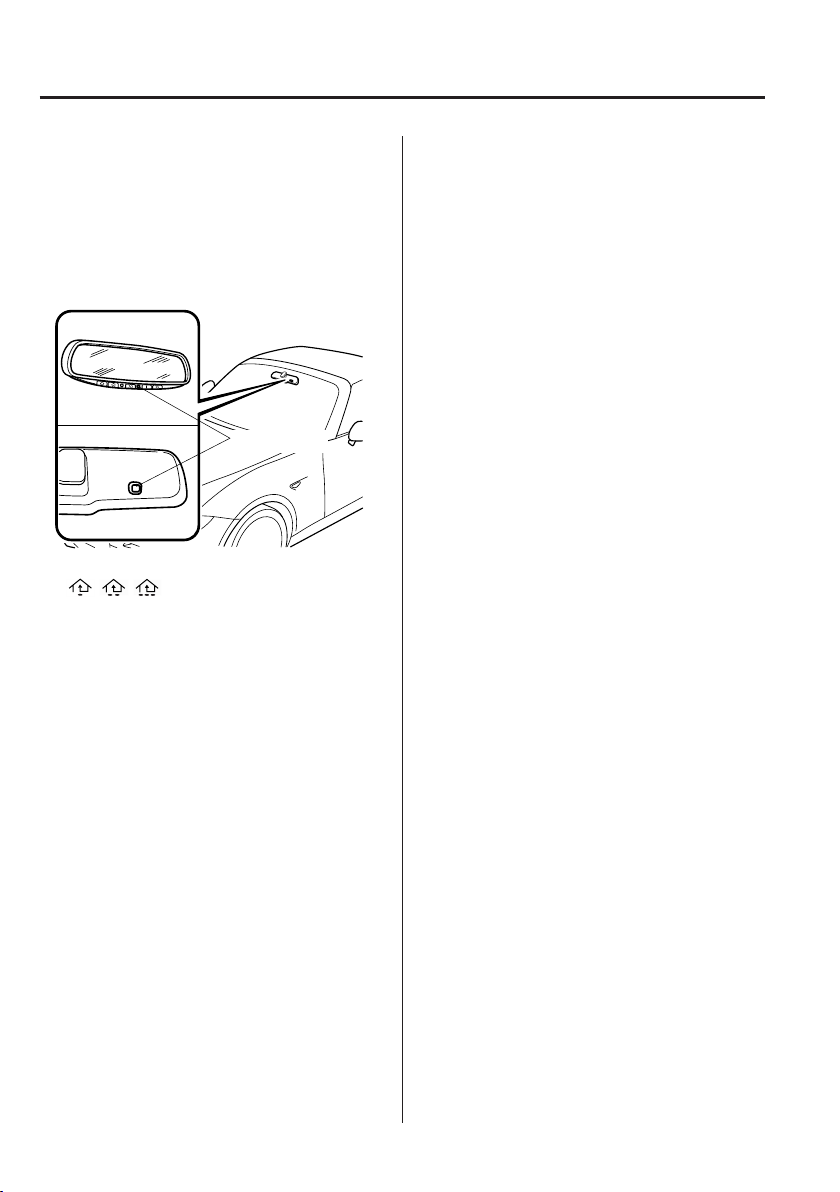
Before Driving
Mirrors
NOTE
Do not use glass cleaner or suspend
objects on or around the light sensor.
Otherwise, light sensor sensitivity
will be affected and may not operate
normally.
Light sensor
For information regarding the 3 buttons
( , , ) on the auto-dimming
mirror.
Refer to HomeLink Wireless Control
System on page 4-57.
The auto-dimming function is canceled
when the ignition is switched ON and
the shift/selector lever is in reverse (R).
3–30
Page 87
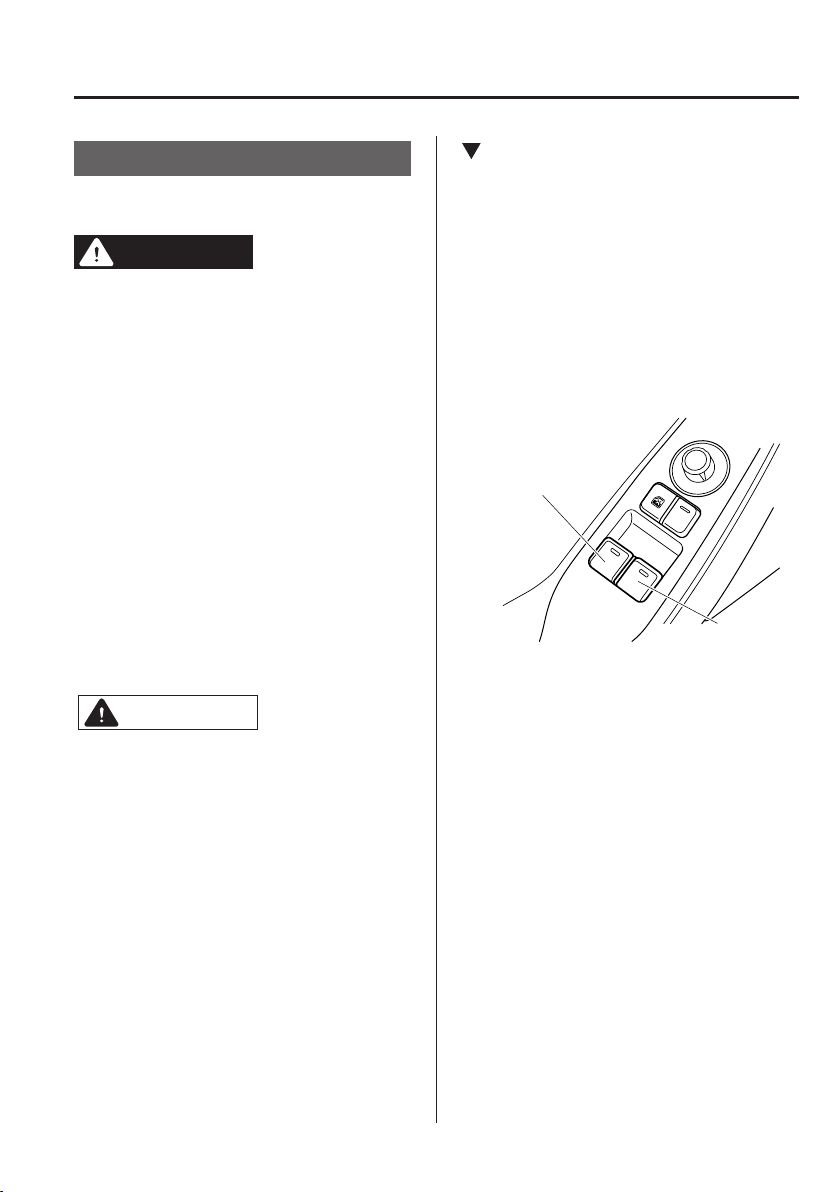
Before Driving
Master control switches
Passenger's window
Windows
Power Windows
The ignition must be switched ON for the
power windows to operate.
WARNING
Make sure the opening is clear before
closing a window:
Closing a power window is dangerous.
A person's hands, head, or even neck
could be caught by the window and
result in serious injury or even death.
This warning applies especially to
children.
Never allow children to play with power
window switches:
Power window switches that are not
locked with the power window lock
switch would allow children to operate
power windows unintentionally, which
could result in serious injury if a child's
hands, head or neck becomes caught
by the window.
CAUTION
Operating the Power Windows
NOTE
The passenger window can be operated
with each door switch when the power
window lock switch on the driver's door
is in the unlocked position (page
3-33).
The passenger window can also be
operated using the master control
switches on the driver's door.
Driver's window
To prevent burning out the fuse and
damaging the power window system,
do not open or close both windows at
once.
NOTE
A power window may no longer open/close
if you continue to press the switch after
opening/closing the power window. If the
power window does not open/close, wait a
moment and then operate the switch again.
3–31
Page 88
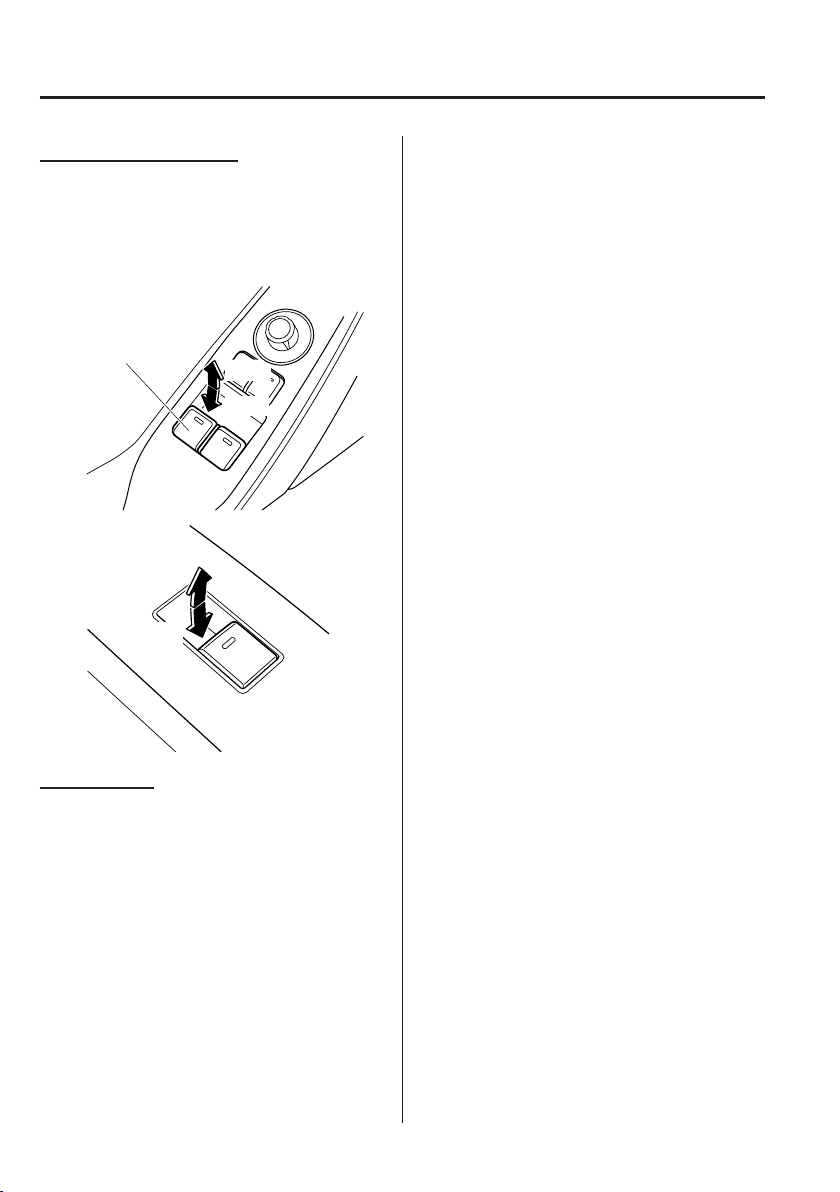
Before Driving
Master control switches
Windows
Normal opening/closing
To open the window to the desired
position, lightly hold down the switch.
To close the window to the desired
position, lightly pull up the switch.
Driver's window
Close
Open
Close
Open
Auto-opening
To fully open the window automatically,
press the switch completely down.
To stop the window partway, pull or press
the switch in the opposite direction and
then release it.
NOTE
The power window cannot be fully closed
while the door is open.
Power window system initialization
procedure
If the battery was disconnected during
vehicle maintenance, or for other reasons
(such as a switch continues to be operated
after the window is open/closed), the
window will not fully open automatically.
Resetting of the automatic function can
be performed using the master control
switches or each passenger door switch.
The power window auto function reset
procedure can be done on both door
switches. The power window auto function
will only resume on the power window
that has been reset.
1. Close the doors and the convertible top.
2. Switch the ignition ON.
3. Make sure that the power window lock
switch located on the driver's door is
not depressed.
4. Press the switch and fully open the
window.
5. Pull up the switch to fully close the
window and continue holding the
switch for about 2 seconds after the
window fully closed.
6. Repeat Steps 4-5 for the passenger
power window while seated in the
passenger seat.
7. Make sure that the power windows
operate correctly using the door
switches.
After the system has been re-initialized,
passenger window can be fully opened
automatically using the master control
switches.
If the automatic power window operation
does not operate normally while the doors
or convertible top are opened/closed, reset
it using the previous procedures.
3–32
Page 89
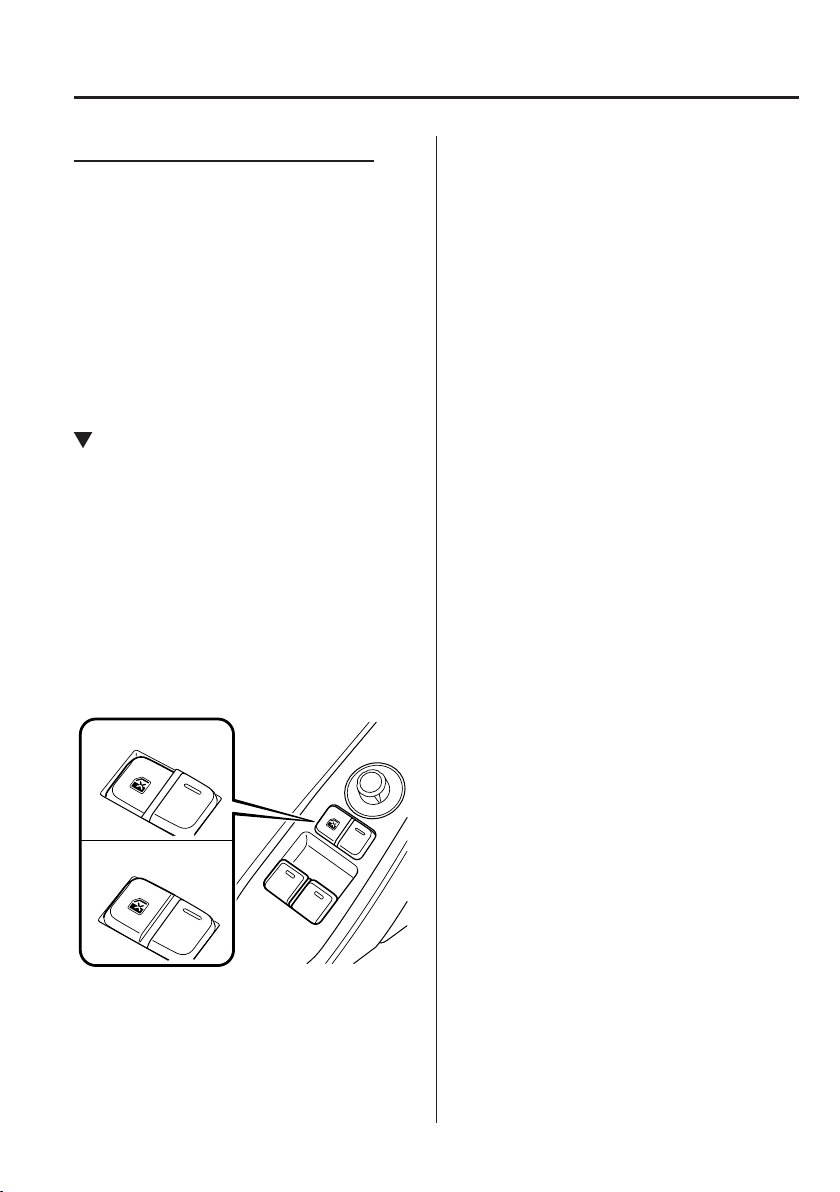
Engine-off power window operation
The power window can be operated for
about 40 seconds after the ignition is
switched from ON to off with both doors
closed. If any door is opened, the power
window will stop operating.
NOTE
For engine-off operation of the power
window, the switch must be held up rmly
throughout window closure because the
auto-closing function will be inoperable.
Power Window Lock Switch
This feature prevents the passenger's
power window from operating. Keep
this switch in the locked position while
children are in the vehicle.
Locked position (button depressed):
Only the driver's power window can be
operated.
Unlocked position (button not
depressed):
Both power windows on each door can be
operated.
Before Driving
Windows
Lock position
Unlock position
NOTE
When the power window lock switch is
in the locked position, the light on the
passenger power window switch turns off.
The light may be difcult to see depending
on the surrounding brightness.
3–33
Page 90

Before Driving
Top latch assembly
Convertible Top (Soft Top)
Convertible Top (Soft Top)
Convertible top
Convertible top's handles
Convertible Top Precautions
WARNING
Sit in the seat with the seat belt correctly fastened when the vehicle is moving:
Standing in the vehicle, or sitting on the convertible top storage area or center console
when the vehicle is moving is a dangerous way to ride. During a sudden maneuver or
collision you could be seriously injured or even killed.
Always keep your hands and ngers away from the fastening mechanisms when
moving the convertible top:
It is dangerous to place your hands or ngers near the fastening mechanisms. Your hands
or ngers could be caught and injured by the mechanism.
3–34
Page 91

Before Driving
Convertible Top (Soft Top)
CAUTION
Remove leaves or other matter that may accumulate on and around the convertible top.
If leaves or other matter block the drain lter, water may enter the vehicle. Clean the drain
lter at least once a year.
Refer to Convertible Top Maintenance on page 6-64.
Before opening the convertible top, make sure the rear window defogger switch is turned
o. Otherwise the heat generated from the defogger could damage the convertible top and
the internal material.
Before lowering or raising the convertible top, stop in a safe place o the right-of-way and
park on a level surface.
Make sure nothing is on the convertible top or near the back window when raising or
lowering the convertible top.
Even small objects may interfere and cause damage.
Do not drive through an automatic car wash; it may damage the convertible top.
Do not raise or lower the convertible top when the temperature is below 5 °C (41 °F) ; this
will damage the convertible top material.
Do not lower the convertible top when it's wet. If the convertible top dries while folded, it
will deteriorate and mold.
Lowering the convertible top while it's wet can also cause water to drip into the passenger
compartment.
Do not raise or lower the convertible top in a strong wind as it could damage the
convertible top or cause an unexpected accident.
NOTE
The power windows go down automatically in conjunction with the convertible top
opening/closing. However, this is a function for improving the operability, and it does not
mean there is a problem. If the vehicle battery is disconnected for vehicle maintenance or
other reasons, the power windows will not go down automatically. If the power windows
do not go down, the automatic open/close mechanism for the windows must be reset.
Refer to Operating the Power Windows on page 3-31.
The windblocker reduces the amount of wind coming into the cabin from behind when
driving with the convertible top opened.
Refer to Windblocker on page 5-140.
When lowering the convertible top, make sure objects inside the vehicle are not blown
away by the wind.
Secure all loose objects inside before driving with the convertible top down.
To help prevent burglary or vandalism and to ensure that the passenger compartment
stays dry, close the convertible top securely and lock both doors when leaving the vehicle.
The soft top is made of high quality material and if it is not maintained correctly, the
material could harden, becomes stained, or have an uneven gloss.
3–35
Page 92
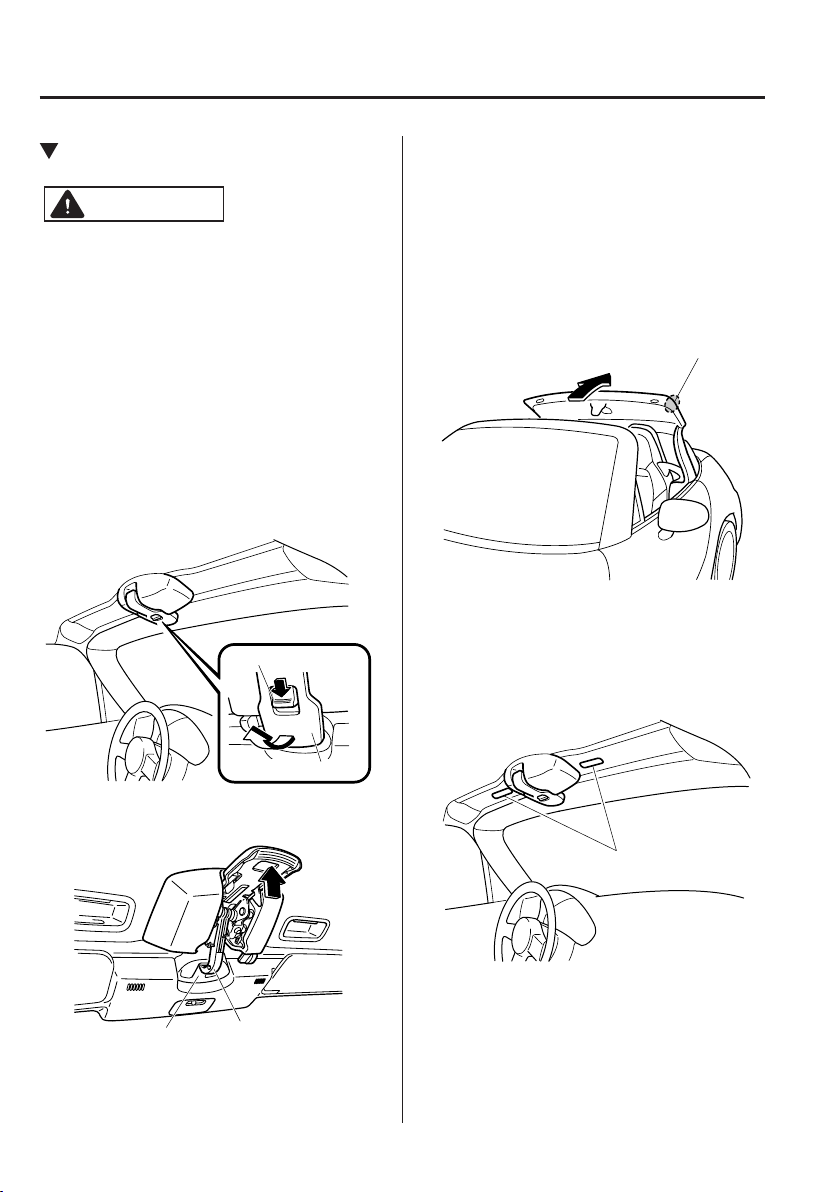
Before Driving
Anchor
Striker
Front edge
Convertible Top (Soft Top)
Lowering the Convertible Top
CAUTION
Do not sit on the folded convertible
top. Otherwise, the convertible top
could be damaged or you may fall o
and be injured.
1. Make sure the parking brake is applied.
2. If the engine is running, turn it off.
3. Make sure there are no objects which
have been placed in the area where the
convertible top is to be retracted.
4. With the lock release button depressed
forward, pull back the top latch lever to
unlock it.
Lock release button
NOTE
If the power windows do not go down
automatically, fully open the windows or
open the doors.
6. Standing outside of the vehicle, hold
the convertible top along the front edge
and pull it toward the vehicle rear.
NOTE
To lower the convertible top from inside
the vehicle, use the convertible top's
handles.
Top latch
5. Remove the striker from the anchor.
3–36
Convertible top's handles
Page 93

Before Driving
Front edge
Convertible Top (Soft Top)
7. Move the convertible top rearward and
fold it while pressing the rear glass
lightly with your hand.
8. With the back end of the convertible
top pressed, press the front end until a
latch sound is heard.
Lightly rock the retracted convertible
top to make sure it is securely locked.
3. Pull up the unlock lever to disengage
the lock.
Unlock Lever
4. Standing outside of the vehicle, hold
the convertible top along the front edge
and pull it towards the vehicle front.
Raising the Convertible Top
1. Make sure the parking brake is applied.
2. If the engine is running, turn it off.
3–37
Page 94
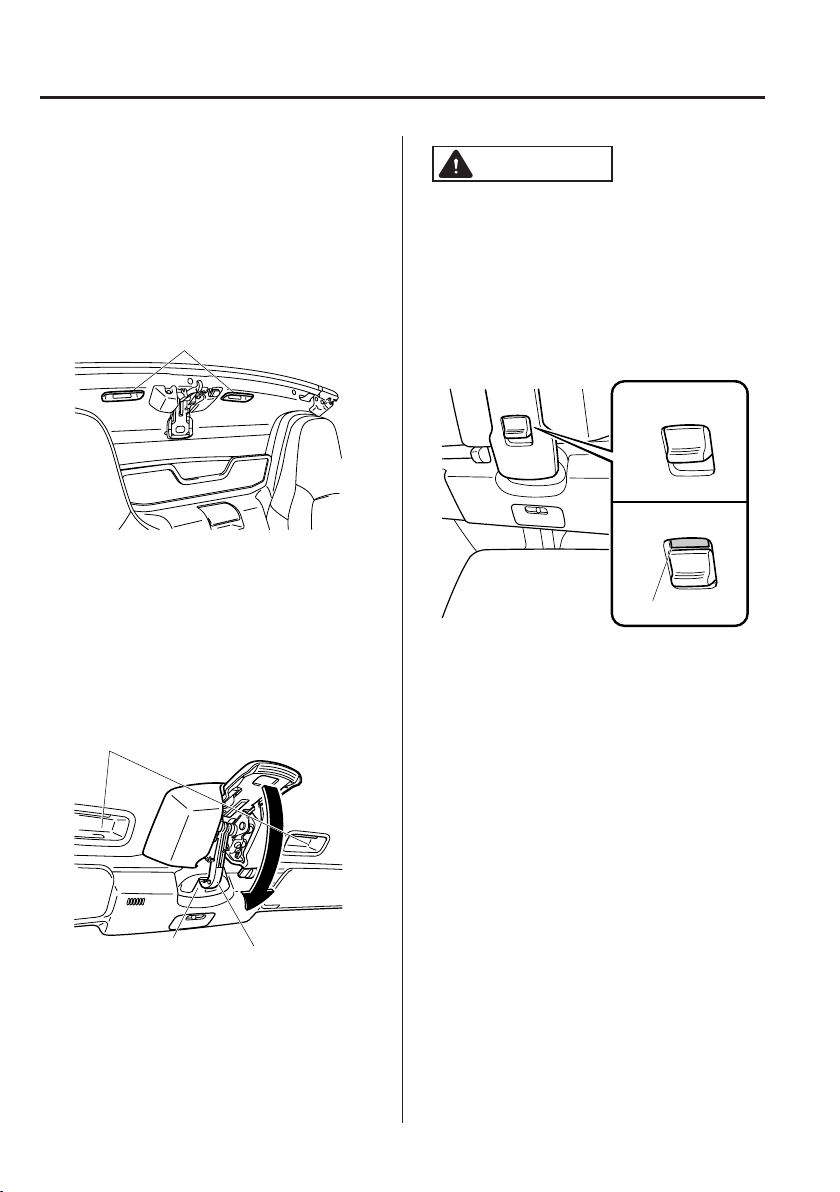
Before Driving
Convertible top's handles
Convertible top's handles
Striker
Convertible Top (Soft Top)
NOTE
If the power windows do not go down
automatically, fully open the windows
or open the doors.
To raise the convertible top from inside
the vehicle, use the convertible top's
handles.
5. Sitting in a seat, grasp the convertible
top's handles, and press the convertible
top against the windshield.
Make sure the striker engages with the
anchor, move the top latch slowly, and
then push the top latch upward until a
latch sound is heard.
CAUTION
Driving with the convertible top not fully
locked could damage the convertible
top.
If the red indicator is visible on the lock
release button, the convertible top is not
locked. After locking the convertible top,
verify that the red indicator is not visible.
Locked position
Unlocked position
Red indicator
Do not spray water directly near the
seam of the window and convertible top
when ushing away dirt on the soft top
with water. Otherwise, water may enter
the vehicle.
Refer to Convertible Top Maintenance on
page 6-64.
Anchor
3–38
NOTE
The convertible top may be constricted
if it is left retracted for a long period.
Therefore, if the top has become
constricted, it may be difcult to hook
the top latch striker to the anchor.
Make sure the convertible top is
securely locked by pushing up on it.
If it still sounds loose (rattles) after
being locked by the top latch, have
it inspected at an Authorized Mazda
Dealer.
Page 95
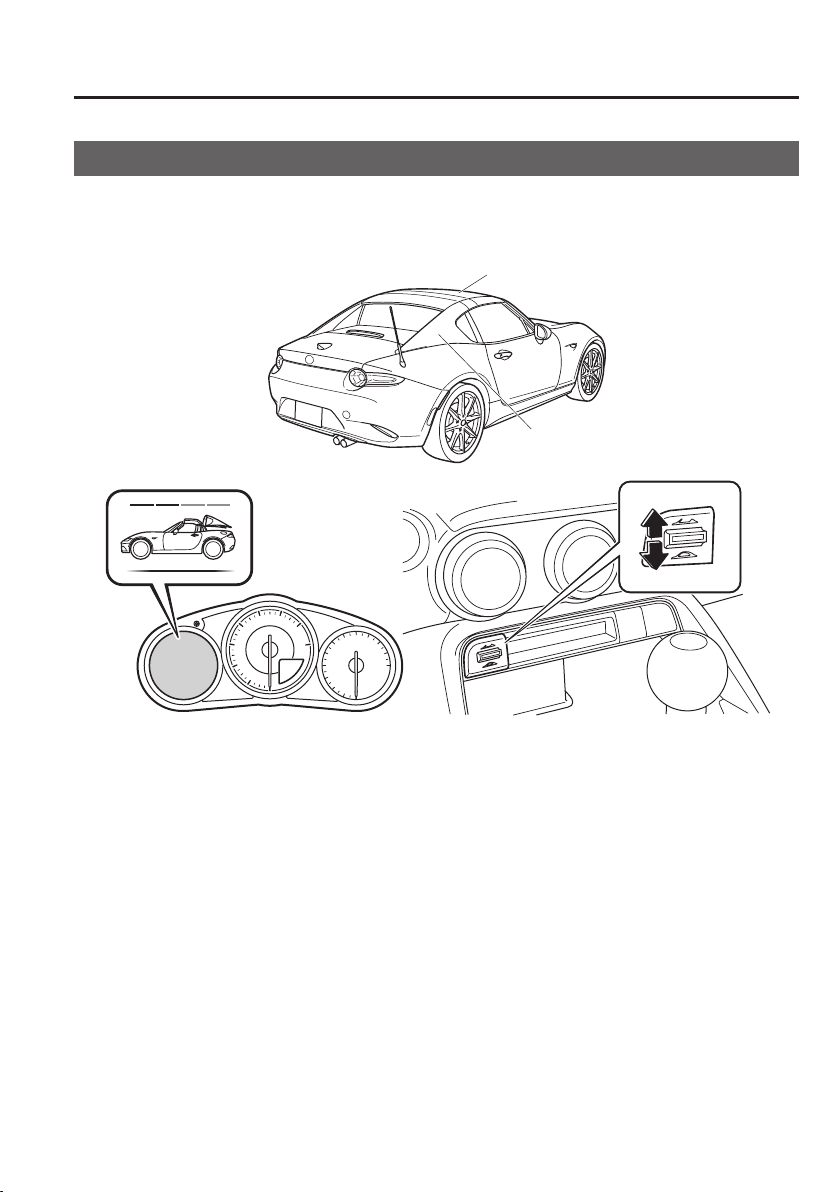
Before Driving
Front roof
Convertible Top (Retractable Fastback)
Convertible Top (Retractable Fastback)
The Retractable fastback opens/closes electrically by operating switches in the vehicle.
When opening/closing the roof and window glass operate together. The front roof is stored
in the storage area under rear roof.
Rear roof
Open
Close
3–39
Page 96

Before Driving
Convertible Top (Retractable Fastback)
Retractable Fastback Precautions
WARNING
Always conrm that there are no people around the vehicle before operating the roof:
If the roof were to operate unexpectedly, it could result in an accident and serious injury
from someone getting caught in the mechanism.
Sit in the seat with the seat belt correctly fastened when the vehicle is moving:
Standing in the vehicle, or sitting on the rear roof or center console when the vehicle is
moving is a dangerous way to ride. During a sudden maneuver or collision you could be
seriously injured or even killed.
Always keep your hands and ngers away from the fastening mechanisms when
moving the roof:
It is dangerous to place your hands or ngers near the fastening mechanisms. Your hands
or ngers could be caught and injured by the mechanism.
3–40
Page 97

Before Driving
Convertible Top (Retractable Fastback)
CAUTION
When getting in or out of the vehicle with the roof open, be careful not to hit your head or
body on the corner of the windshield glass. It may cause an injury.
Do not drive with the roof partially opened; this could damage the roof or cause an
unexpected accident.
Children should not be allowed to play with the retractable fastback switch.
Do not place objects or cargo around the rear roof, rear glass, or the front roof storage area.
Even small objects may interfere and cause damage.
Remove leaves that accumulate on and around the roof. If the leaves are not removed, they
may block the water drainage outlets.
Before opening the roof, make sure the rear window defogger switch (Defroster) is turned
o. Otherwise the heat generated from the defogger could damage the roof and the
internal material.
When opening/closing the roof, verify that there is no obstruction above the roof
(about 1.6 m (5 ft 2 in) from the ground) so as not to damage the roof or the obstruction.
When opening/closing the roof, do not apply any load to the front roof or the rear roof. The
opening/closing mechanism of the roof may be damaged.
Do not spray water directly near the seam of the window and roof when washing o dirt on
the roof with water. Otherwise, water may enter the cabin.
Refer to Retractable Fastback Maintenance on page 6-66.
Open/close the roof with the vehicle parked on a hard, level ground in a safe place where
the vehicle does not obstruct trac. If the roof is opened/closed on a slope or bump, the
opening/closing mechanism of the roof may be damaged.
Do not drive through an automatic car wash as it may damage the roof.
Do not open or close the roof forcefully when the ambient temperature is low and the roof
or the surrounding area is frozen as it could damage the roof.
Opening the roof while it is wet can also cause water to drip into the passenger
compartment.
Do not open or close the roof in a strong wind as it could damage the roof.
3–41
Page 98
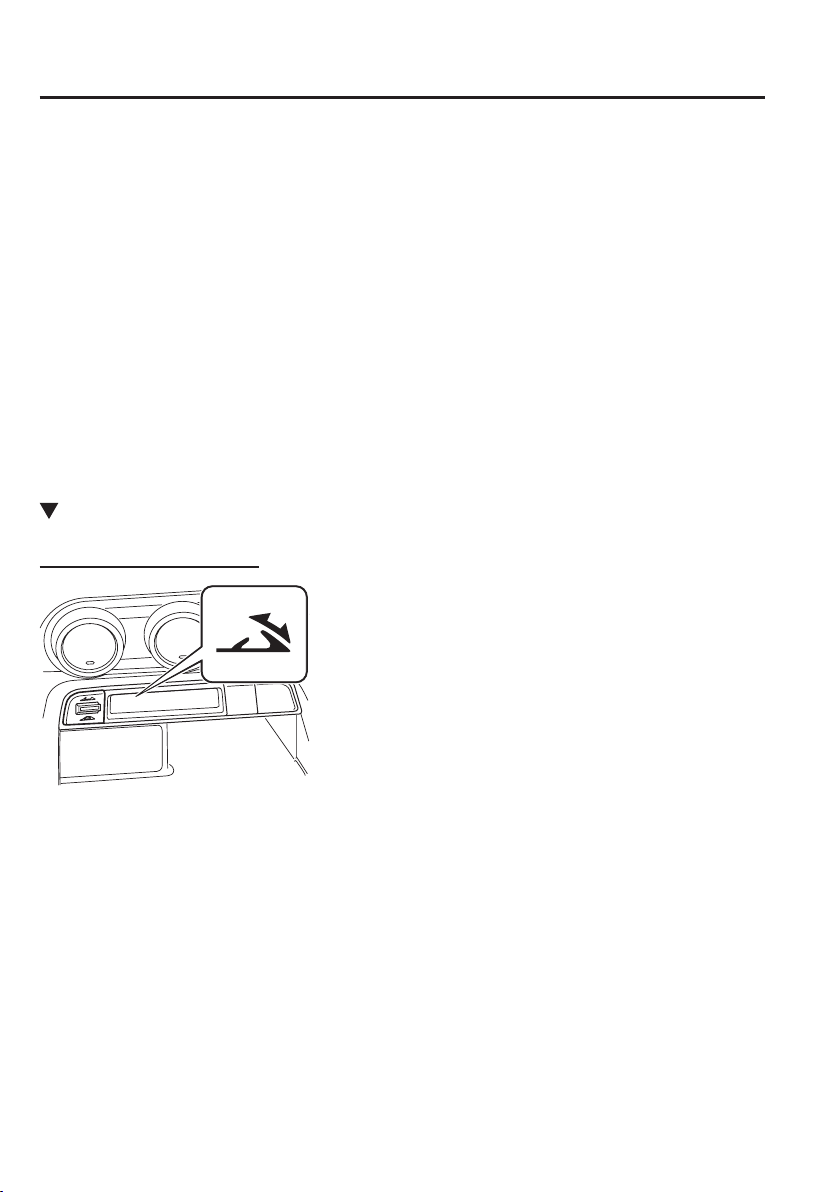
Before Driving
Convertible Top (Retractable Fastback)
NOTE
When opening the roof, make sure objects inside the vehicle are not blown away by the
wind.
Secure all loose objects inside before driving with the roof down.
To help prevent burglary or vandalism and to ensure that the passenger compartment
stays dry, close the roof securely and lock both doors when leaving the vehicle.
The power windows lower automatically in conjunction with the roof opening/closing.
This is a function for improving the operability and it does not indicate a problem.
If the vehicle battery is disconnected for vehicle maintenance or other reasons, the power
windows will not lower automatically. If the power windows do not lower, reset the power
window automatic open/close function.
Refer to Operating the Power Windows on page 3-31.
The windblocker reduces the amount of wind coming into the cabin from behind when
driving with the roof opened.
Refer to Windblocker on page 5-140.
Operation Indication
Operation Indicator Light
When illuminated
This indicates that the roof is only partially open.
When ashing
This indicates that the roof is being open/closed. (During switch operation)
When not illuminated
This indicates that the roof is open/closed fully.
NOTE
If the operation indicator light ashes quickly, there may be a system malfunction. Consult
an Authorized Mazda Dealer.
3–42
Page 99
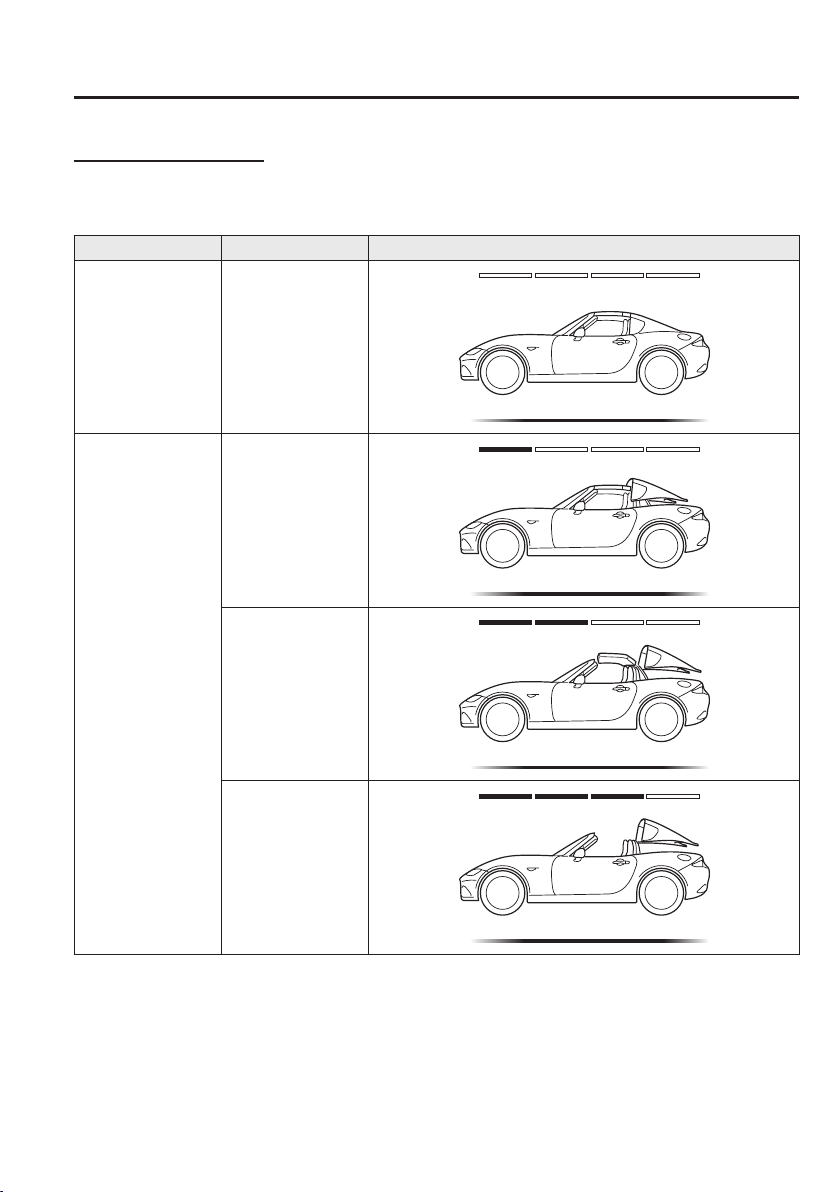
Convertible Top (Retractable Fastback)
Roof operation display
The roof operation status is indicated on the multi-information display.
The following table shows display examples when opening the roof:
Operation Roof status Indication
Before operation Roof closed
Rear roof opened
Before Driving
During operation
Rear roof opened
Front roof opened
Rear roof opened
Front roof stored
3–43
Page 100
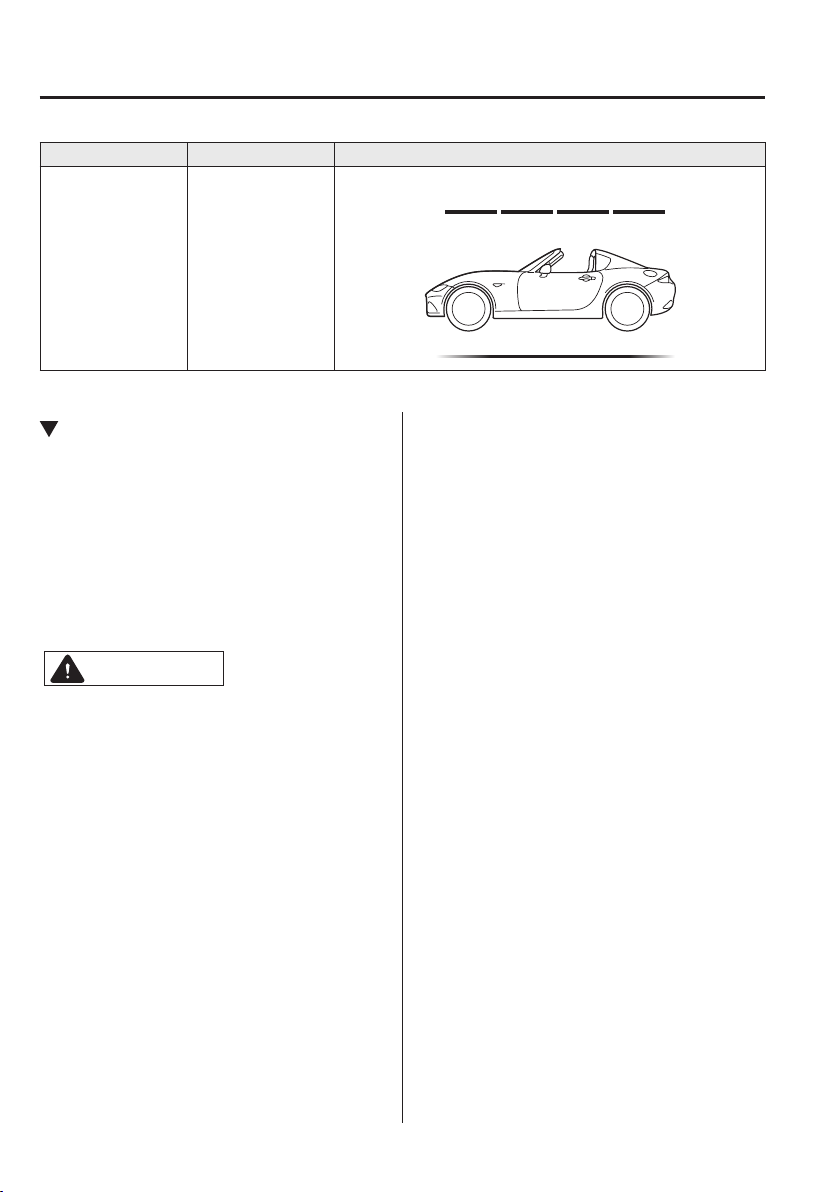
Before Driving
Convertible Top (Retractable Fastback)
Operation Roof status Indication
Operation complete Rear roof closed
Operation Conditions
If the following conditions have been
satised, the roof can be opened/closed.
The ignition is switched ON.
Shift/selector lever is in a position other
than R (reverse).
Vehicle speed is 10 km/h (6.2 mph) or
less.
The trunk lid is closed.
CAUTION
If the vehicle speed exceeds 10 km/h
(6.2 mph) during the opening/closing
operation, the opening/closing
operation of the roof stops midstream.
If the roof stops midstream, visibility at
the rear may be impaired or damage
to the roof may occur which could
lead to an accident. Operate the
switch again with the vehicle stopped,
depending on the road and trac
conditions, to complete opening/
closing operation of the roof.
NOTE
If the roof cannot be closed even after the
operation conditions are all met, have it
checked at an Authorized Mazda Dealer.
The roof can be closed manually as an
emergency measure.
Refer to When the Roof Cannot be Closed
on page 7-57.
3–44
 Loading...