

Maytronics MCC8-UNI Instructions Manual
1
English
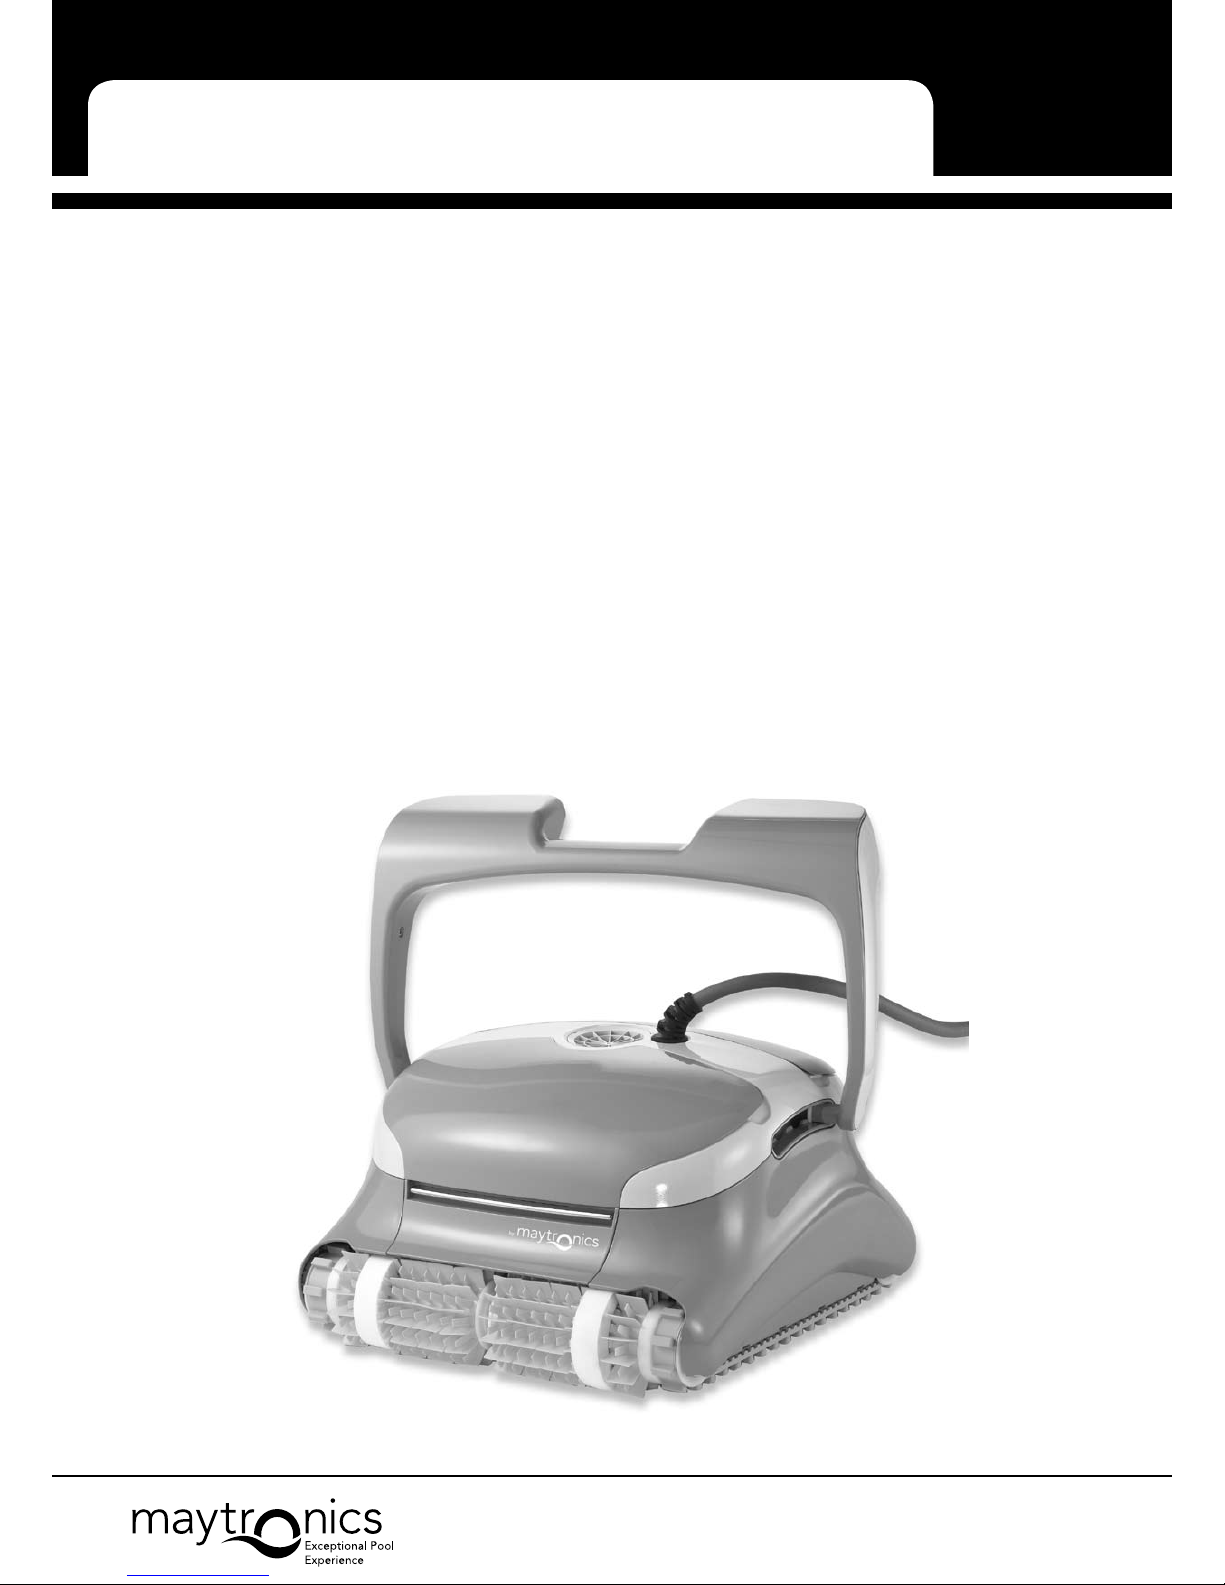
Robot Pool Cleaner by Maytronics
EN
FR
IT
User Instructions
Guide d’utilisation
Istruzioni per l’uso
Instrucciones para el Usuario
Bedienungsanweisungen
SP
DEU
by
MCC8-UNI
8151247, 1/2011

1
English
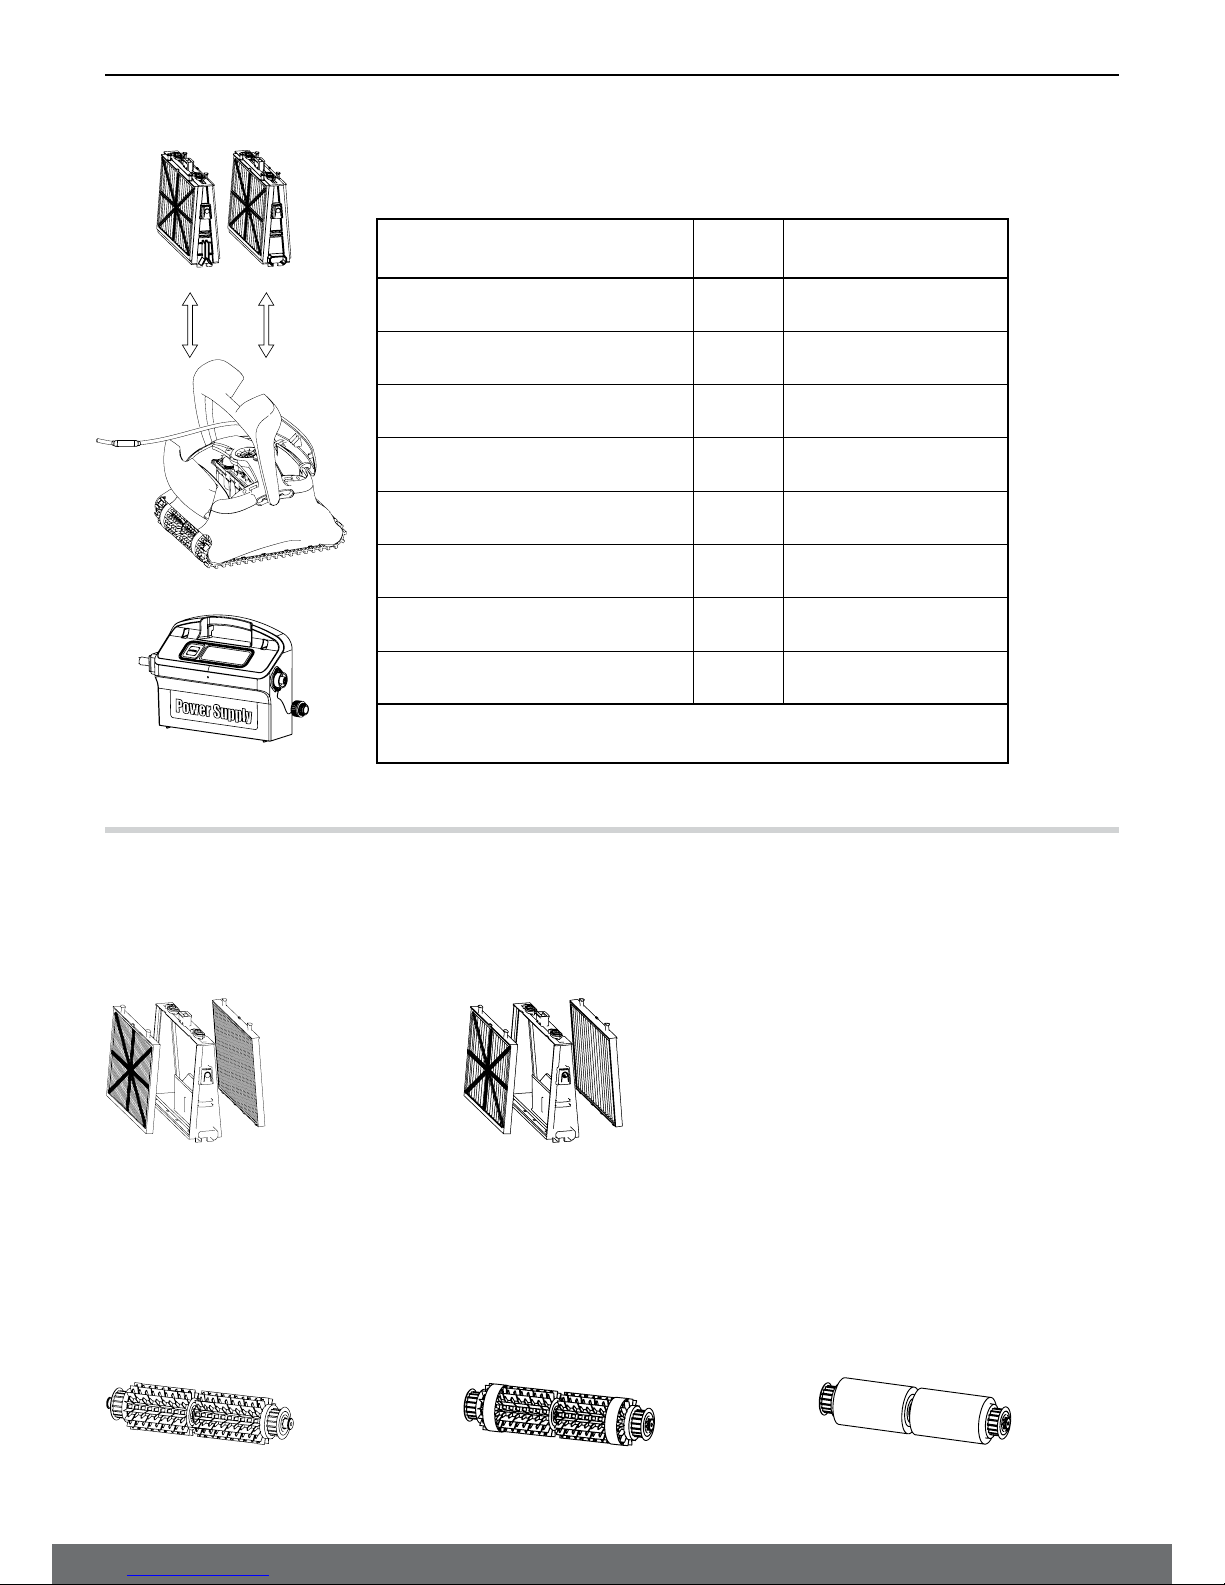
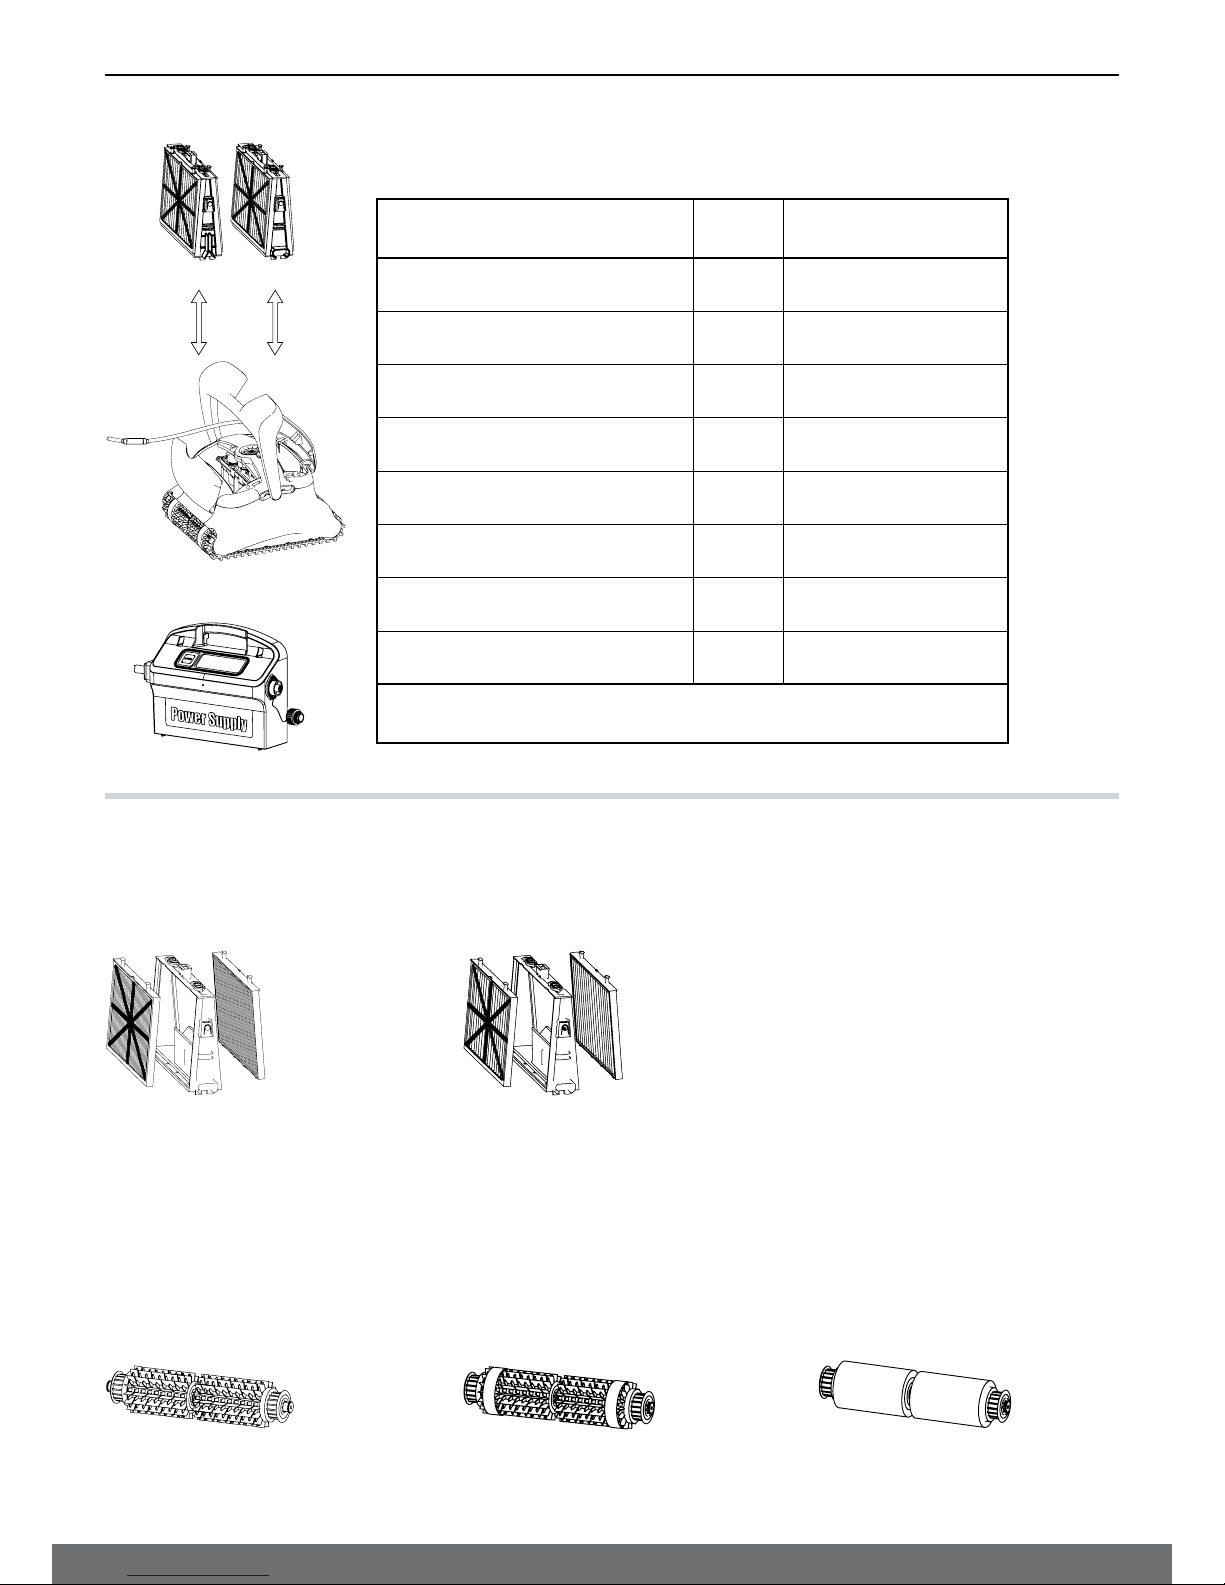
What You’ll Find Inside the Box
Part X Comment
Base frame for filter elements 2
Ultra-fine filter 4 filters
Bag for filters storage 1
Spring filter 4 filters
“S” clip 4
Power supply unit 1
Robot Pool Cleaner 1
Caddy kit 1
Optional components available on request
from your Robot Pool Cleaner distributor
Section 1 - Description of Main Components
1. Filters
Dual-level filtration system:
Spring filter + base frame
For dirty pools with large debris such as
leaves etc. – Useful for beginning of season.
Ultra-fine filter cartridge + base frame
For day-to-day use.
Factory default.
2. Brushes
There are three types of optional brushes, each designed to provide optimal traction on different pool surfaces.
Only one type set is provided with your Robot Pool Cleaner.
PVC Brush
For concrete, PVC, fiberglass and liner.
Combined Brush
For rough ceramic surface and mosaic tiles.
Wonder Brush
For smooth ceramics.
Power supply Unit
Robot Pool Cleaner
Filter and cartridges
2
English
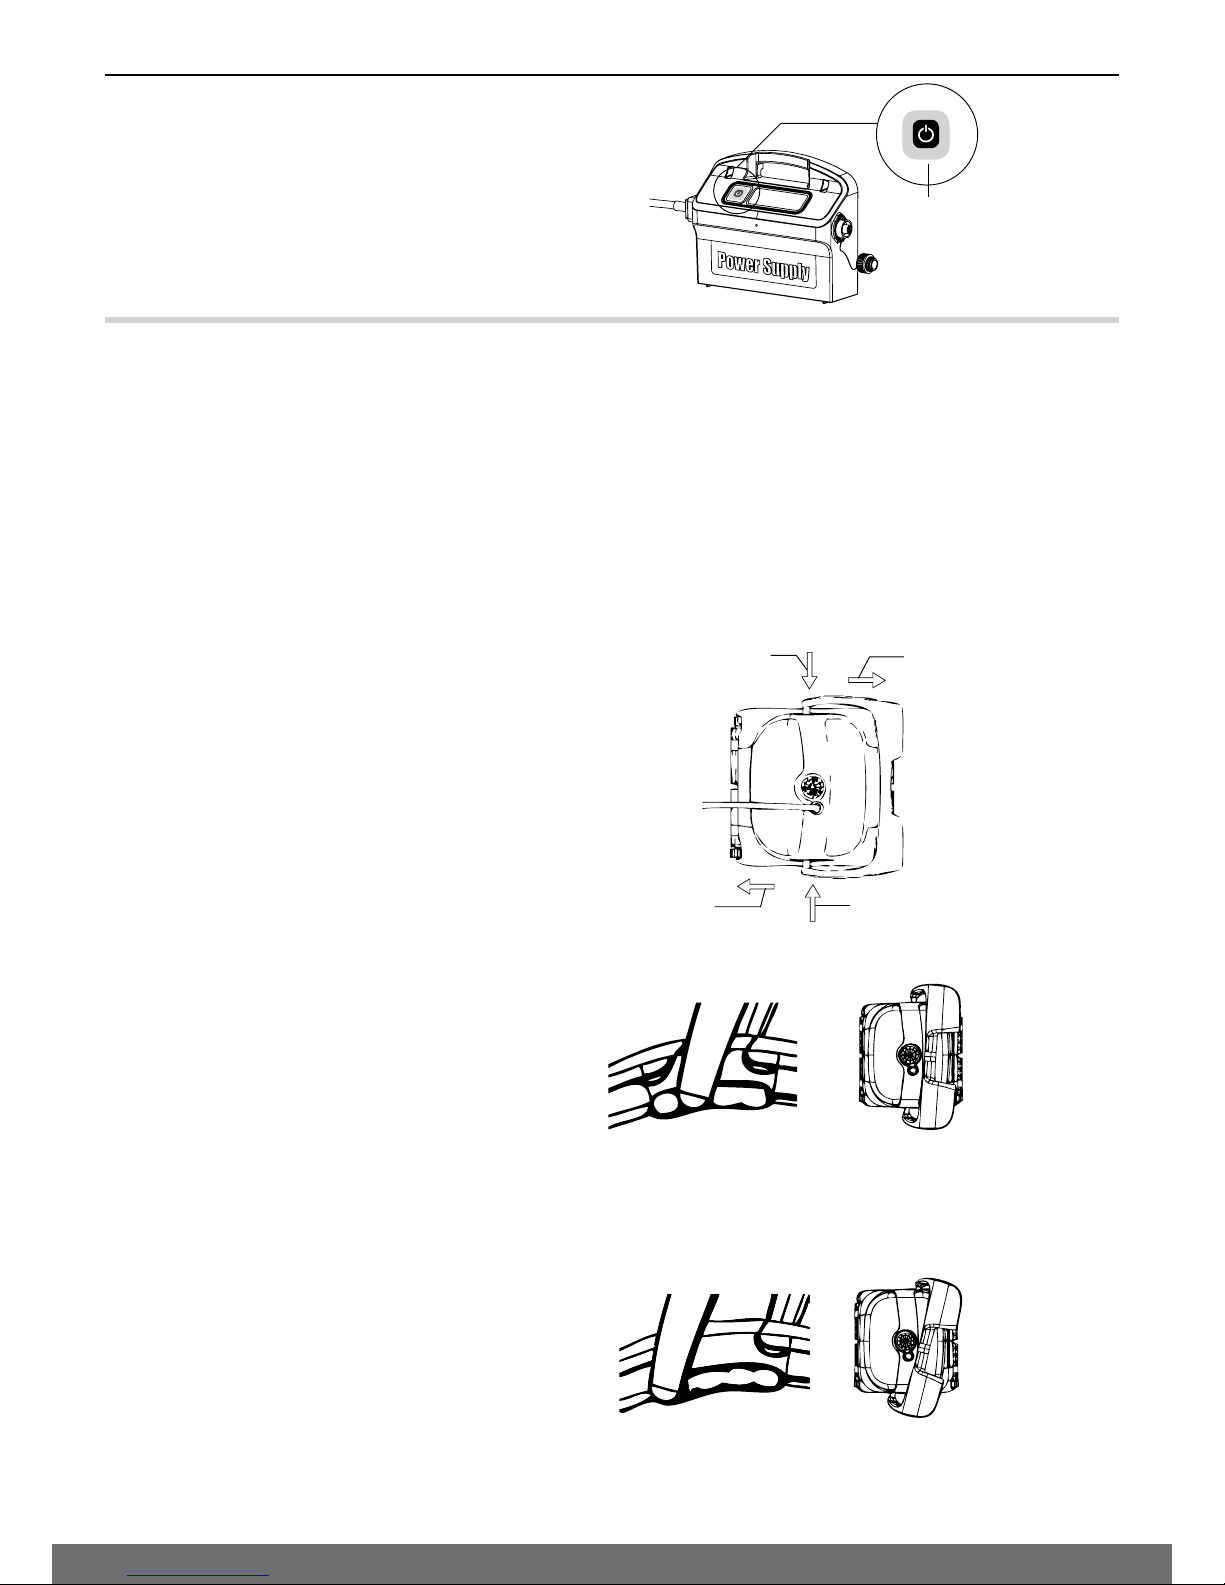
3. Power supply unit
Digital, “Switch-Mode” power supply:
Input - 100-250 AC Volts•
50-60 Hertz•
180 Watt•
Output - 30 VDC•
IP 54•
Section 2 – Robot Pool Cleaner Operation
Part 1 – Preparing the Robot Pool Cleaner for Use
A. Assemble the Caddy kit – you will find the instructions in a separate document
B. Adjusting the handle float angle
The handle angel must be adjusted to determine the speed that the Robot Pool Cleaner advances along the water-line.
1. Lay the handle down at an angle of 180º to the ground.
2. Push the base of the arm into the body of the
Robot Pool Cleaner and slide it towards the rear of the
Robot Pool Cleaner until it clicks into the required position.
Normal advance
More efficient cleaning action on water-line.
Fast advance
Fast speed – For faster but less efficient cleaning
action on water-line.
Push in here Slide here
Push in here
Slide here
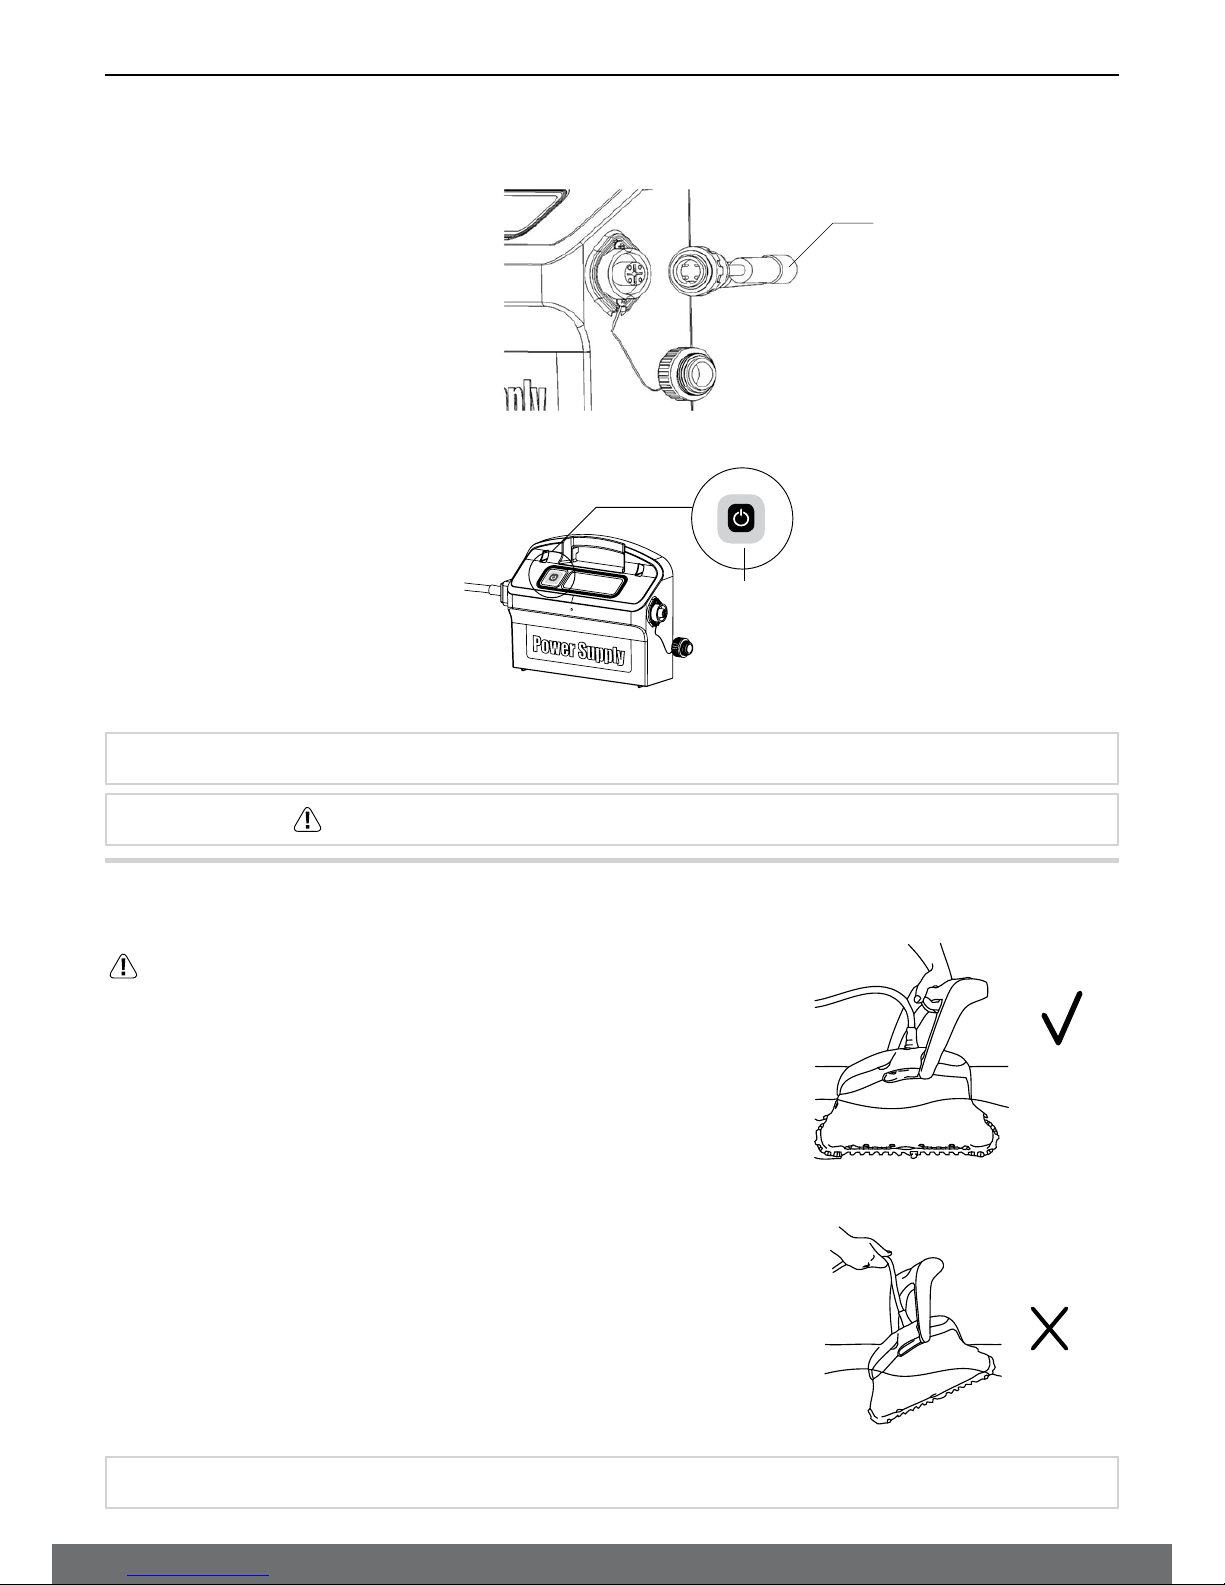
ON
On/Off
switch
3
English
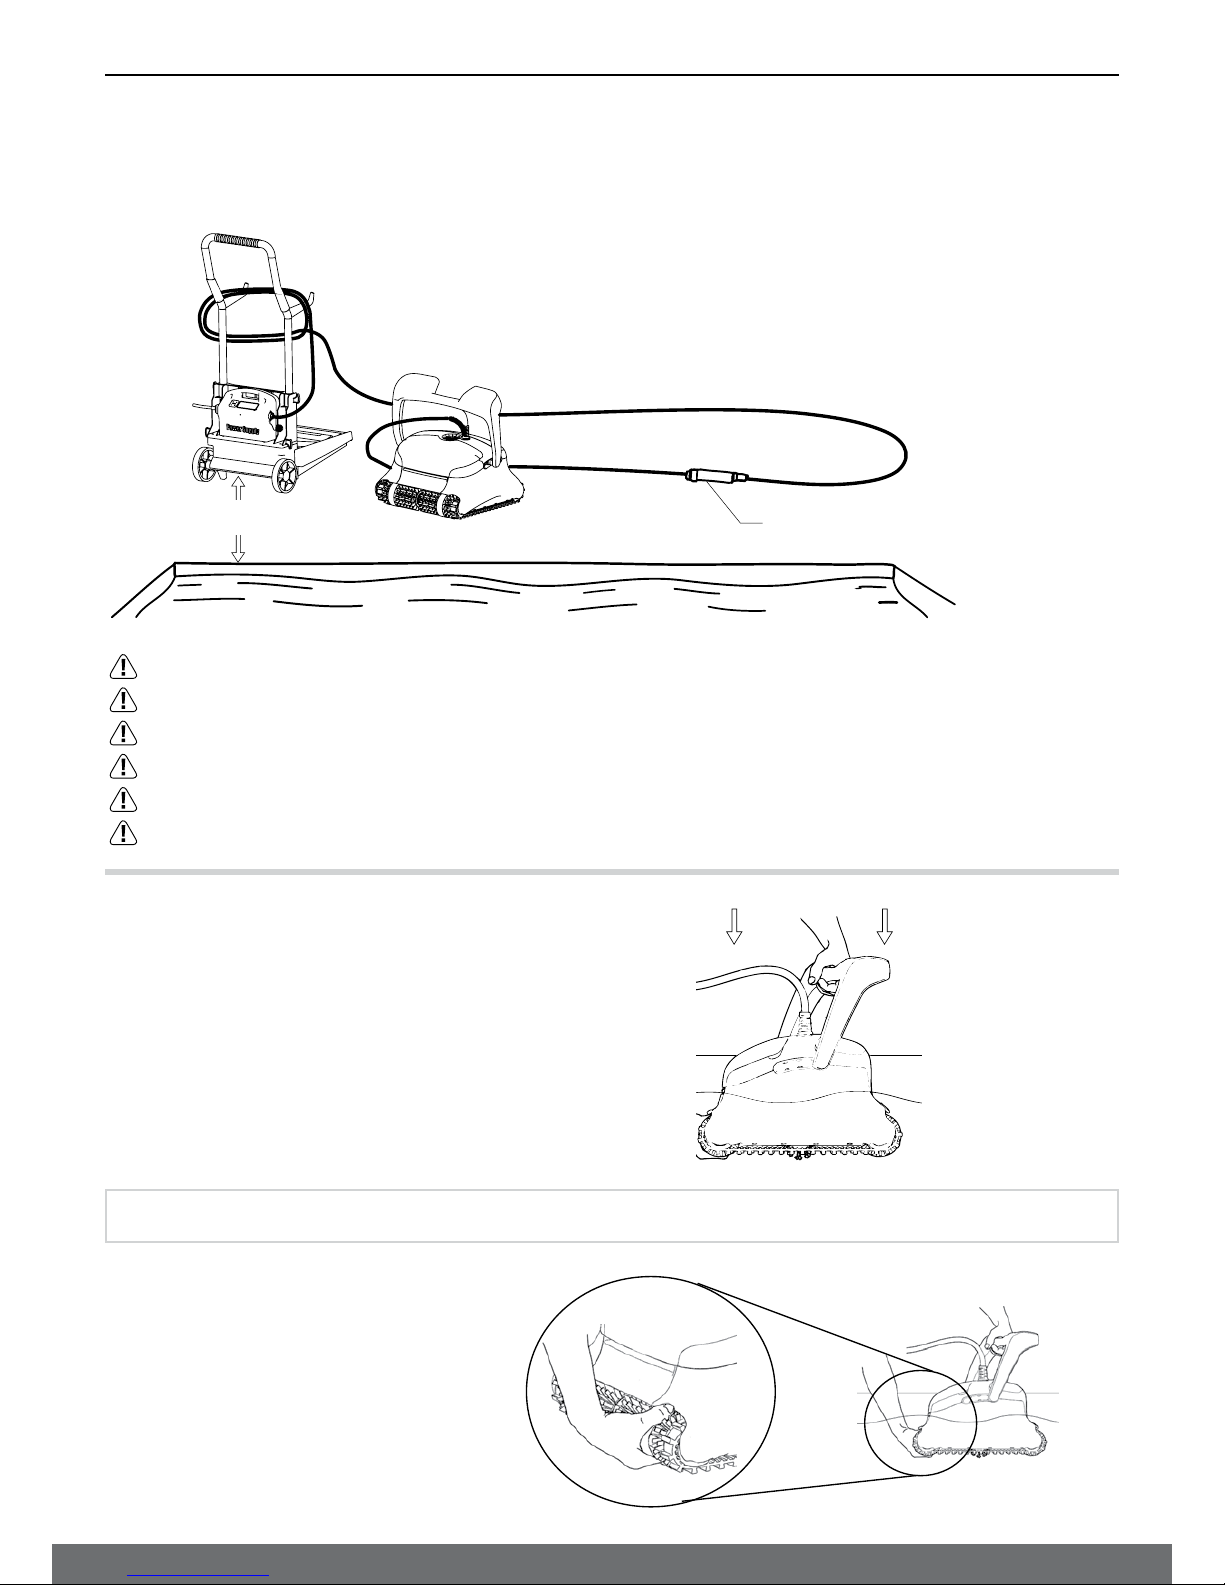
C. Laying out the cable
Unwind minimal required cable to cover the entire pool size, straight the cable along the pool side.
Make sure there are no twists or kinks.
Part 2 - Into the water
Inserting the Robot Pool Cleaner into the pool.
Place the Robot Pool Cleaner into the pool and release the handle.
Note: When using the Combined brushes or Wonder brushes, gently squeeze the Wonder brush material until it is totally wet.
Only use the original supplied power supply unit.
The Power supply unit is splash proof – do not immerse it in water.
Unplug the power supply unit before any servicing activity.
Do not plug the power supply unit in before placing the pool cleaner in the water.
Ensure the mains outlet is protected by a ground fault interrupter (GFI) or an earth leakage interrupter (ELI).
Important : Do not enter the swimming pool while the pool cleaner is working.
3 Meters
10 feet
Swivel
4
English
Turning the Robot Pool Cleaner ON
Part 3 - Taking the Robot Pool Cleaner out of the water
Unplug power supply before any servicing activity.
If the Robot Pool Cleaner has not finished its cycle, 1.
turn off the power supply unit and unplug the mains.
Pull the floating cable gently until the Robot Pool Cleaner 2.
has risen to the surface, then lift by the handle.
Plug the floating cable from 1.
the Robot Pool Cleaner
into the power supply unit.
Plug the electrical cable from the power 2.
supply unit into the mains.
Press the ON/OFF switch 3.
The Robot Pool Cleaner 4.
will now start to work.
Important: Do NOT lift the Robot Pool Cleaner from the water by its cable.
Floating cable
ON
On/Off
switch
Note : If your model includes the remote control unit, please refer to the included instruction leaflet.
Important : Do not enter the swimming pool while the pool cleaner is working.

5
English
Section 3 - Routine Maintenance
Part 1 - Extracting and cleaning the filter elements
Unplug power supply before any servicing activity.
Reassembling the filter elements
Insert the locating tabs at the bottom of the
filter element into their groves on the base frame,
then close the “S” clip.
Locating tab
Locating tab groove
2 3
1

6
English
Reinstall the filters according to the diagram
DO NOT FORCE THE FILTERS INTO PLACE.
Part 2 - Dismantling and cleaning the impeller
Unplug power supply before any servicing activity.
Dismantle the impeller cover and
clean around the impeller housing,
then reassemble.
Grooved end fitting
Octagonal end fitting
Important: Where applicable, you must reset the full filter bag indicator on the power supply unit.
Recommendation: Rinse all brushes with clean water after each cleaning cycle.
Coil the cable and store in dry cool area – preferably on the Caddy if available.
Do NOT store the Robot Pool Cleaner exposed to direct sunlight.
Do NOT store the Robot Pool Cleaner exposed to excessive heat.
Do NOT store the Robot Pool Cleaner exposed to frost.
Section 4 – Storage Advice
2
3
1
7
English
Troubleshooting Guide
Before contacting your Robot Pool Cleaner distributor please read through this guide.
The pool water condition must be within the following parameters:
PH: 7.0 – 7.8 NaCl: Max 5,000 ppm
Temperature: 6˚C(43˚F) to 34˚C(93˚F) Chlorine: Max 4 ppm
Symptom Solution
Cable twisting or cable coils up Check for any obstruction in the pool
Remove excess cable from the pool
Make sure filter cartridge is clean
Straighten cable and lay it in the sun periodically
Robot Pool Cleaner is moving in circles or does not reach all pool
areas
Check for foreign objects in moving parts
Make sure Filter elements are clean and that the filter
doors are closed
Make sure that there is enough cable laid out to cover
the whole pool
Before using the Robot Pool Cleaner at the beginning of the
season you should brush any algae from the floor and walls of the
pool
Robot Pool Cleaner is not traveling sideways on walls Adjust the diagonal angle of the handle
Robot Pool Cleaner does not climb walls Make sure the filter cartridge is clean
If using the Robot Pool Cleaner at the beginning of the season,
use the spring cartridge
If using the Robot Pool Cleaner at the beginning
of the season you should first brush any algae from
the floor and walls of the pool
Check if brushes are suitable for pool coating and replace
them if necessary
Check if brushes are worn and replace them if necessary
Make sure the impeller area is clean
When applicable: Check that the RCU is set for climbing
Robot Pool Cleaner not sinking Make sure the Wonder brushes or the combined brushes
are soaked in water
Robot Pool Cleaner disengaging from wall at water line If Robot Pool Cleaner climbs too high consult your
Robot Pool Cleaner distributor
RCU is not working When applicable: Check if the batteries need replacing
Motor is not working
Check if the impeller is blocked
Check if the drive system is blocked
Electrical problem (power supply), check power source.
If power source is in order, please contact your
Robot Pool Cleaner distributor
Additional troubleshooting is available at our Website:
www.maytronics.com
8
French
Liste des pièces fournies dans l’emballage
Pièces X Remarques
Châssis des composants du filtre 2
Filtre ultrafin 4 filtres
Poche de rangement des sacs filtres 1
Filtre pour nettoyage de printemps 4 filtres
Crochet en “S” 4
Bloc d’alimentation 1
Robot nettoyeur de piscine 1
Kit Caddy 1
Les éléments optionnels sont disponibles sur demande
de la part de votre distributeur de robots nettoyeurs de piscines
Chapitre 1 - Description des principaux composants
1. Filtres
Système à double filtrage:
Filtre Printemps (pour nettoyage de
printemps) + châssis
Pour piscines sales contenant des saletés de
grande taille, par ex. des feuilles – utile en
début de saison.
Cartouche de filtre ultrafin + châssis
A usage quotidien.
Réglage d’usine, défini par défaut.
2. Brosses
Trois types de brosses sont proposés en option, chacune d’elles étant conçue pour fournir une traction optimale sur différentes
surfaces de piscine. Un seul ensemble brosse est fourni avec votre robot nettoyeur de piscine.
Brosse PVC
pour surfaces en béton, PVC, fibre de verre
et à revêtement.
Brosse combinée
pour surface rugueuse en céramique et
pavés en mosaïque.
Brosse Wonder
pour sols en céramique lisse.
Bloc d’alimentation électrique
Robot nettoyeur de piscine
Filtre et cartouches

9
French
3. Bloc d’alimentation électrique
Alimentation numérique avec
« Mode Interrupteur » (Switch mode):
Entrée - 100-250 AC Volts•
50-60 Hertz•
180 Watts•
Sortie - 30 VDC•
IP 54•
Chapitre 2 – Fonctionnement du robot nettoyeur de piscine
1
ère
partie – Préparation du robot nettoyeur de piscine
A. Montez le kit du Caddy – mode d’assemblage indiqué séparément
B. Réglage de l’angle de la poignée du flotteur
Le réglage de l’angle de la poignée permet de déterminer la vitesse de progression du robot nettoyeur de piscine le long
de la ligne de bordure de l’eau.
1. Abaissez la poignée à 180º au sol.
2. Poussez la base du bras à l’intérieur de l’appareil
robot nettoyeur de piscine et faites-la glisser
vers l’arrière du robot jusqu’à entendre un clic
d’enclenchement dans la position voulue.
Progression normale
Pour un nettoyage plus efficace de la bordure de l’eau.
Progression rapide
Vitesse accélérée – pour un nettoyage plus rapide
mais moins appliqué de la bordure de l’eau.
Poussez ici Faites glisser ici
Poussez ici
Faites glisser ici
ON
Marche/ Arrêt

10
French
C. Disposition du câble
Déroulez le minimum nécessaire de câble pour assurer la couverture de toute la piscine. Veillez à le poser bien droit le long de la paroi
et vérifiez qu’il ne présente ni nœuds ni torsades.
2
ère
partie – Insertion du robot nettoyeur de piscine
dans l’eau
Installation du robot nettoyeur de piscine dans la piscine.
Plongez votre robot nettoyeur de piscine dans la piscine,
puis lâchez la poignée.
Remarque: Lors de l’utilisation des brosses combinées ou de brosses Wonder, pressez doucement le matériau
constituant la brosse pour l’humidifier à fond.
Utilisez exclusivement le bloc d’alimentation électrique d’origine.
Le bloc d’alimentation électrique est conçu anti-éclaboussures – Ne pas l’immerger dans l’eau.
Débranchez l’alimentation avant d’entreprendre toute activité d’entretien.
Ne branchez pas l’alimentation avant d’avoir placé le robot nettoyeur dans l’eau.
Assurez-vous que la prise du secteur est protégée par un interrupteur de mise à la terre (GFI) ou de fuite à la terre (ELI).
Important! Ne PAS entrer dans la piscine lorsque le robot nettoyeur de piscine fonctionne.
3 mètres
10 feet
Pivot (Swivel)
 Loading...