

Maytag 913478 User Manual
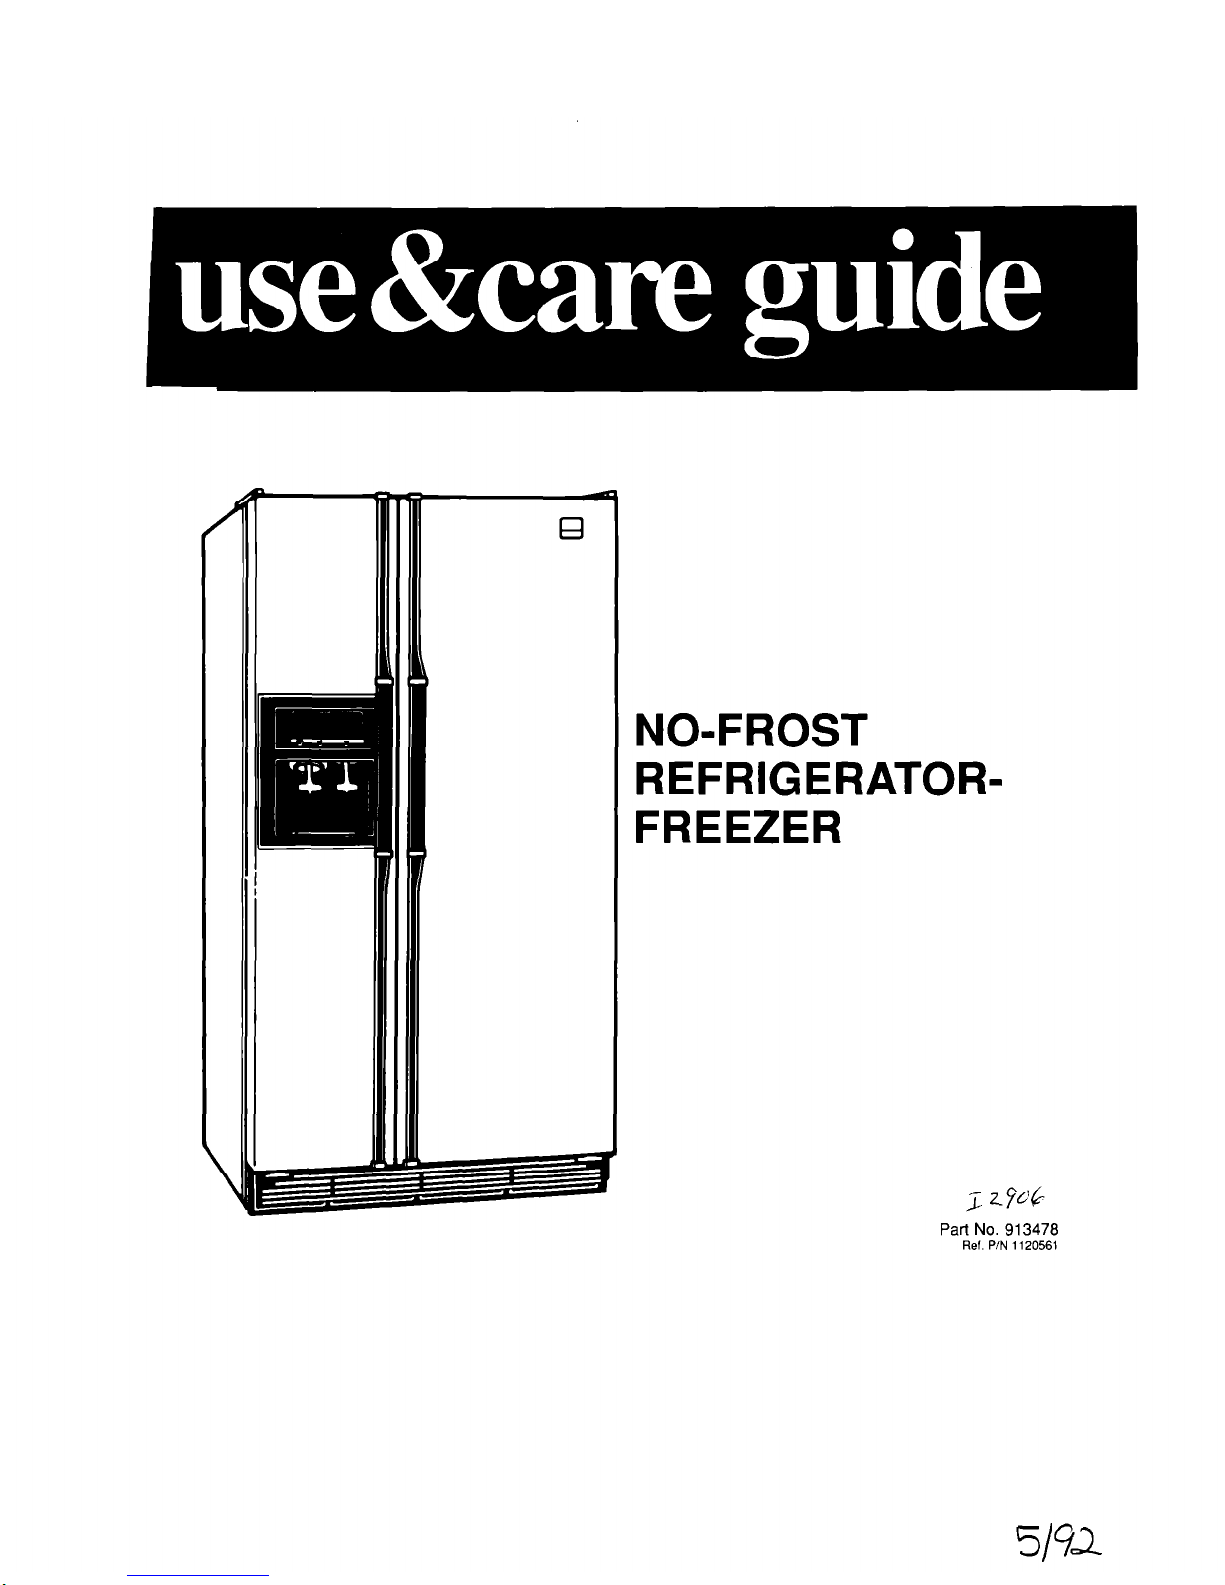
NO-FROST
REFRIGERATORFREEZER
Part No. 913478
Ref. P/N 1120561
Please read this
Use and Care Guide
before you do anything else...
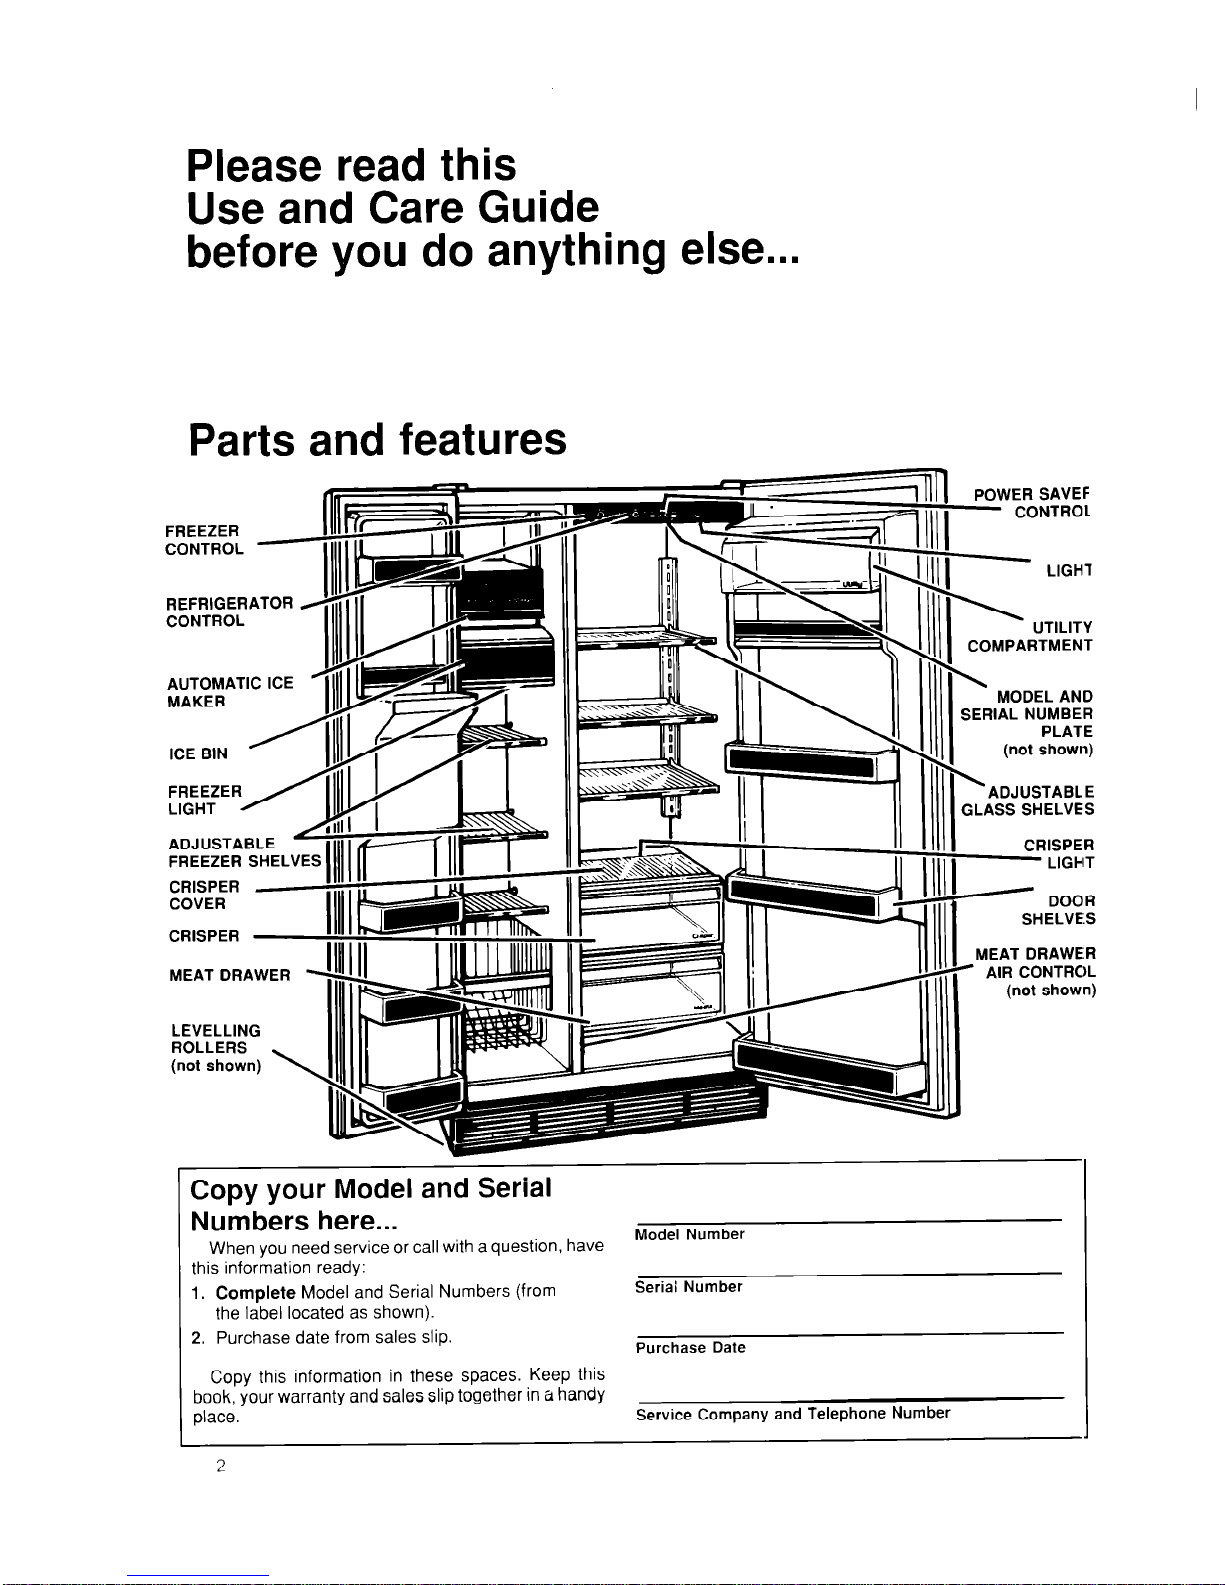
Parts and features
FREEZER
CONTROL
REFRIGERATOR
..-. ..- ~~
CONTROL
COVER
MEAT DRAWER
LEVELLING
POWER SAVEF
- CONTROL
LIGHl
UTILITY
COMPARTMENT
\
MODEL AND
SERIAL NUMBER
PLATE
(not
shown)
\
ADJUSTABLE
SLASS SHELVES
CRISPER
- LIGHT
- DOO’R
SHELVES
MEAT DRAWE:R
- AIR CONTROL
(not shown)
Copy your Model and Serial
Numbers here...
When you need service or call with a question, have
Model Number
this information ready:
1. Complete Model and Serial Numbers (from
the label located as shown).
2. Purchase date from sales slip.
Seriai Number
Purchase Date
Copy this information in these spaces. Keep this
book, your warranty and sales slip together in a handy
place.
Service Company and Telephone Number
2
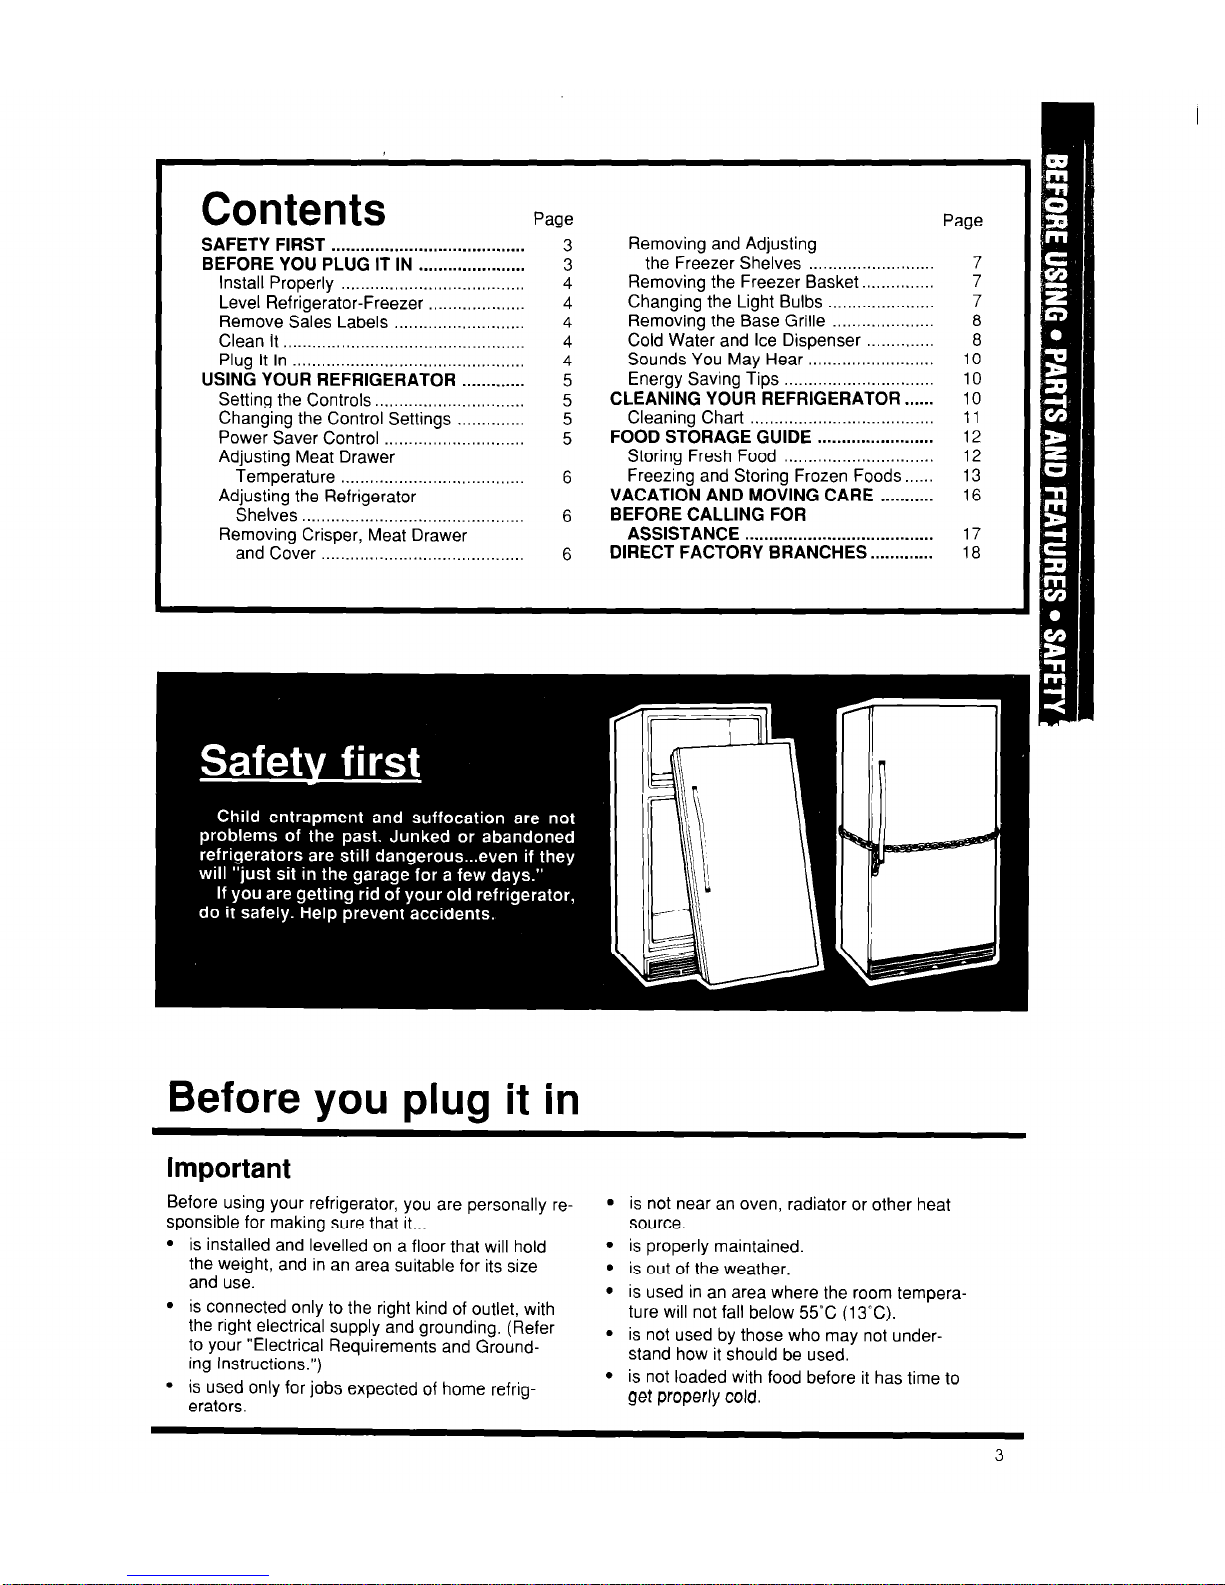
Contents
Page
Page
SAFETY FIRST
........................................
3
Removing and Adjusting
BEFORE YOU PLUG IT IN
......................
3
the Freezer Shelves
.......................... 7
Install Properly
......................................
4
Removing the Freezer Basket..
............. 7
Level Refrigerator-Freezer
....................
4
Changing the Light Bulbs
...................... 7
Remove Sales Labels
...........................
4
Removing the Base Grille
..................... 8
Clean It ..................................................
4
Cold Water and Ice Dispenser
.............. 8
Plug It In ................................................
4
Sounds You May Hear
.......................... 10
USING YOUR REFRIGERATOR
.............
5
Energy Saving Tips
............................... 10
Setting the Controls..
.............................
5
CLEANING YOUR REFRIGERATOR..
.... 10
Changing the Control Settings
..............
5
Cleaning Chart ......................................
11
Power Saver Control
.............................
5
FOOD STORAGE GUIDE
........................ 12
Adjusting Meat Drawer
Storing Fresh Food
............................... 12
Temperature
......................................
6
Freezing and Storing Frozen Foods..
.... 13
Adjusting the Refrigerator
VACATION AND MOVING CARE
........... 16
Shelves
..............................................
6
BEFORE CALLING FOR
Removing Crisper, Meat Drawer
ASSISTANCE .......................................
17
and Cover
..........................................
6
DIRECT FACTORY BRANCHES..
........... 18
Before you plug it in
Important
Before using your refrigerator, you are personally re-
l
is not near an oven, radiator or other heat
sponsible for making sure that it...
source.
l
is installed and levelled on a floor that will hold
l
is properly maintained.
the weight, and in an area suitable for its size
l
is out of the weather.
and use.
l
. is connected only to the right kind of outlet, with
is used in an area where the room tempera-
the right electrical supply and grounding. (Refer
ture will not fall below 55-C (13°C).
*
to your “Electrical Requirements and Ground-
is not used by those who may not under-
ing Instructions.“)
stand how it should be used.
l
l
is used only for jobs expected of home refrig-
is not loaded with food before it has time to
erators.
get properly cold.
3
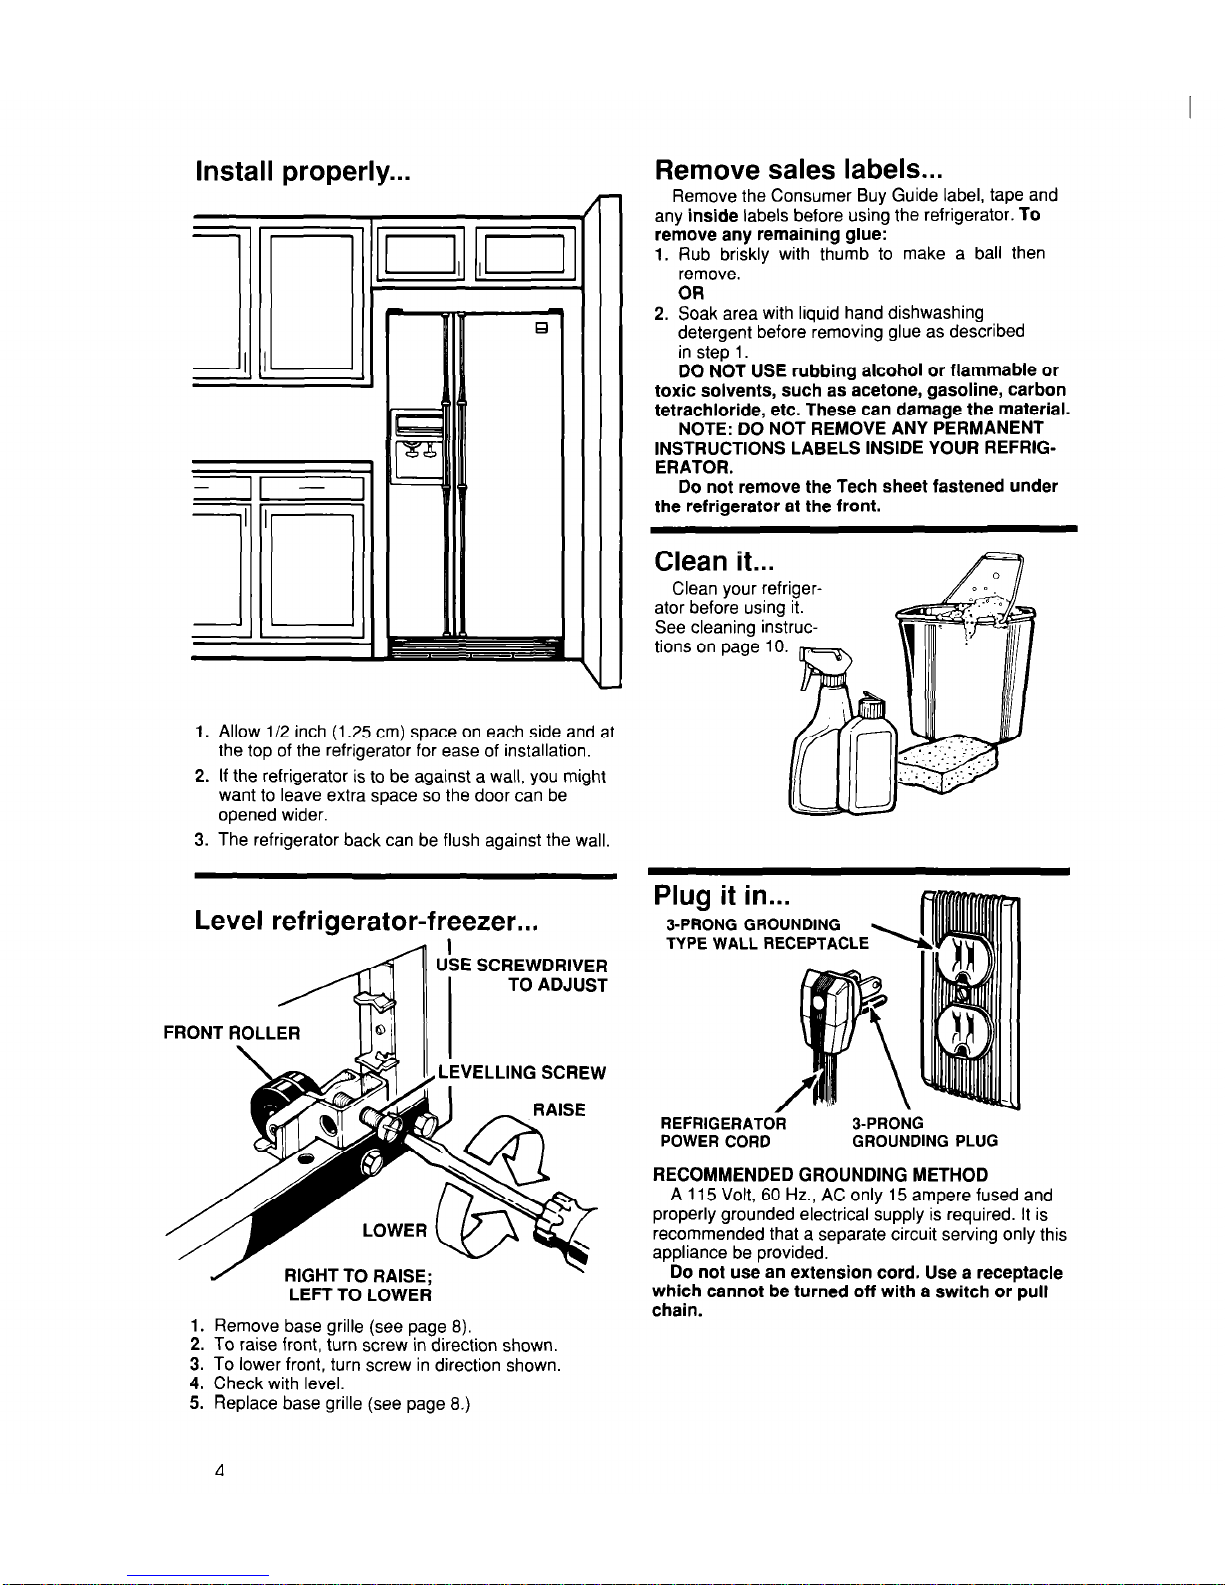
Install properly...
Remove sales labels...
Remove the Consumer Buy Guide label, tape and
any inside labels before using the refrigerator. To
remove any remaining glue:
1. Rub briskly with thumb to make a ball then
remove.
OR
-II
I I
II3
1. Allow l/2 inch (1.25 cm) space on each side and at
the top of the refrigerator for ease of installation.
2. If the refrigerator is to be against a wall, you might
want to leave extra space so the door can be
opened wider.
3. The refrigerator back can be flush against the wall.
2. Soak area with liquid hand dishwashing
detergent before removing glue as described
in step 1.
DO NOT USE rubbing alcohol or flammable or
toxic solvents, such as acetone, gasoline, carbon
tetrachloride, etc. These can damage the material.
NOTE: DO NOT REMOVE ANY PERMANENT
INSTRUCTIONS LABELS INSIDE YOUR REFRIGERATOR.
Do not remove the Tech sheet fastened under
the refrigerator at the front.
Clean it...
Clean your refrigerator before using it.
See cleaning instructions on page 10.
Level refrigerator-freezer...
-
I
USE SCREWDRIVER
I
TO ADJUST
FRONT ROLLER
II I
VELLING SCREW
RIGHT TO RAISE;
LEFT TO LOWER
1. Remove base grille (see page 6).
2. To raise front, turn screw in direction shown.
3. To lower front, turn screw in direction shown.
4. Check with level.
5. Replace base grille (see page 8.)
SPRONG GROUNDING
TYPE WALL RECEPTACLE
REFRIGERATOR
POWER CORD
3-PRONG
GROUNDING PLUG
RECOMMENDED GROUNDING METHOD
A 115 Volt, 60 Hz., AC only 15 ampere fused and
properly grounded electrical supply is required. It is
recommended that a separate circuit serving only this
appliance be provided.
Do not use an extension cord. Use a receptacle
which cannot be turned off with a switch or pull
chain.
4
Using your refrigerator
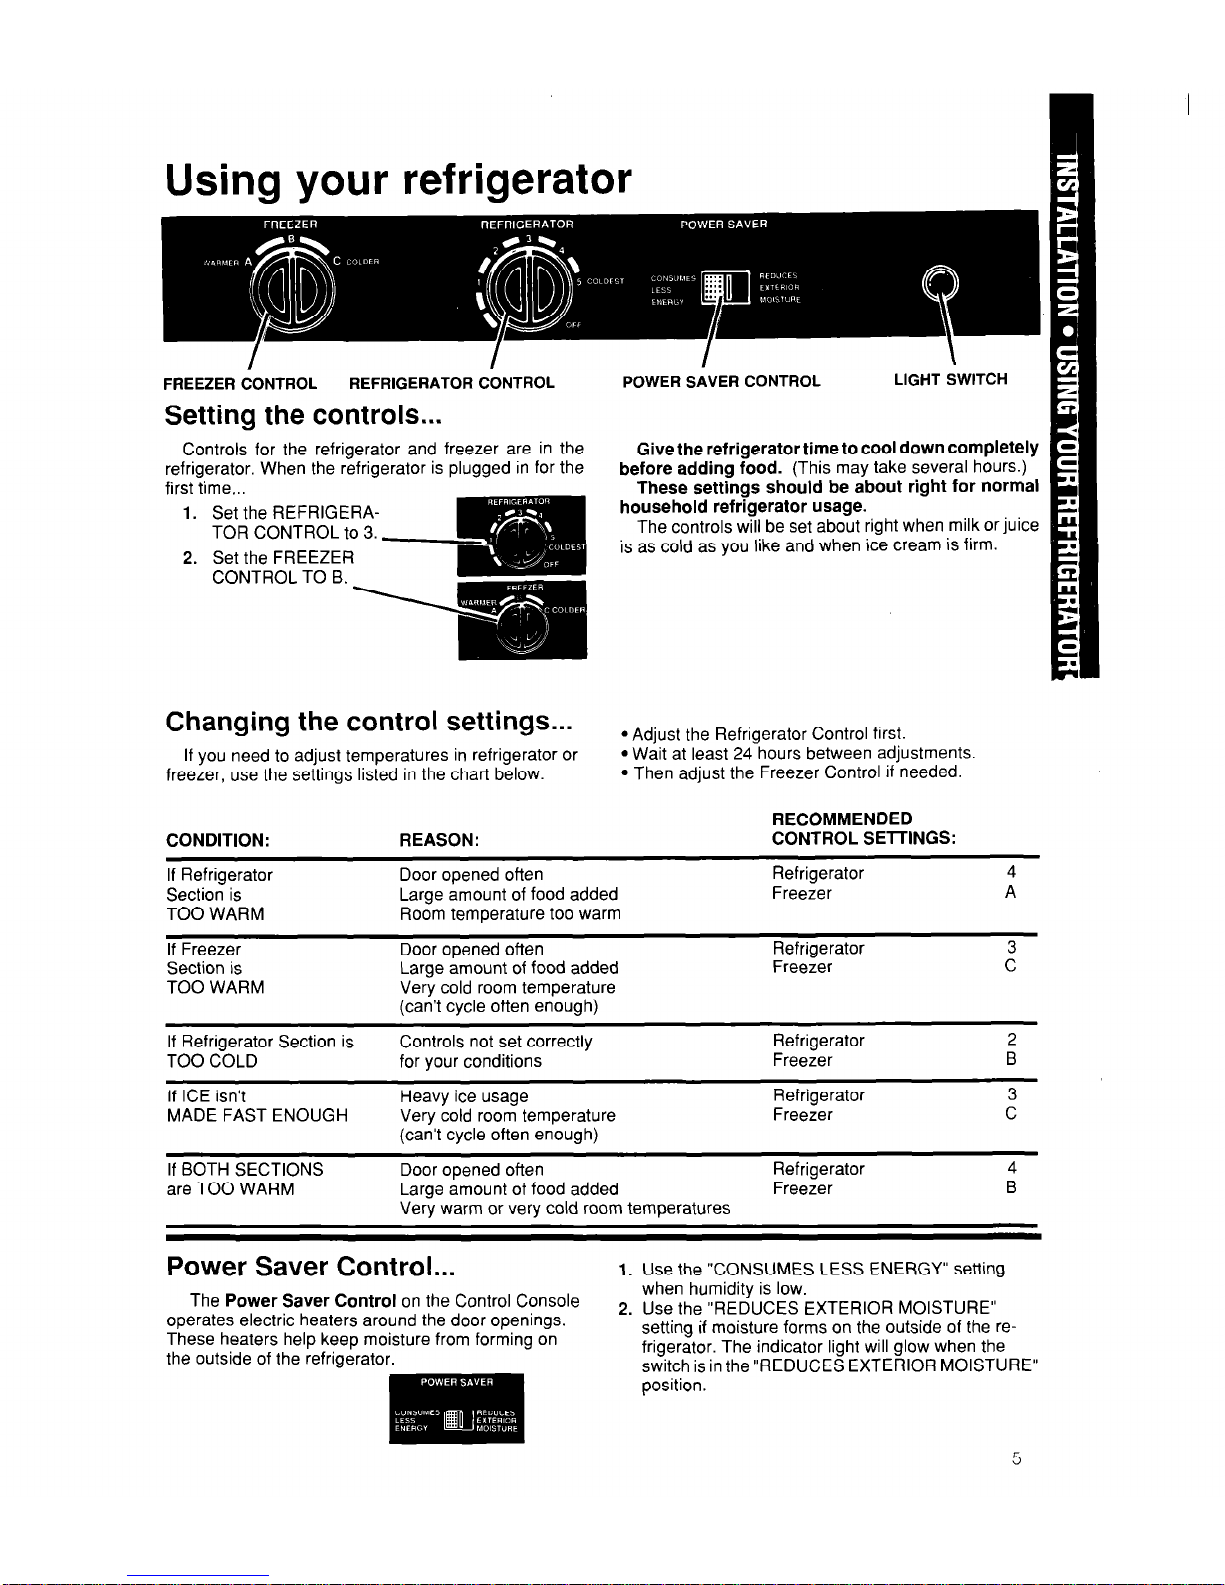
FREEZER CONTROL
REFRIGERATOR CONTROL
Setting the controls...
Controls for the refrigerator and freezer are in the
refrigerator. When the refrigerator is plugged in for the
first time...
1. Set the REFRIGERATOR CONTROL to 3.
I
2. Set the FREEZER
CONTROL TO B. \
I
I
Changing the control settings...
If you need to adjust temperatures in refrigerator or
freezer, use the settings listed in the chart below.
CONDITION: REASON:
Give the refrigerator time to cool down completely
before adding food. (This may take several hours.)
These settings should be about right for normal
household refrigerator usage.
The controls will be set about right when milk or juice
is as cold as you like and when ice cream is firm.
l
Adjust the Refrigerator Control first.
l
Wait at least 24 hours between adjustments.
l
Then adjust the Freezer Control if needed.
Door opened often
Large amount of food added
Room temperature too warm
Door opened often
Large amount of food added
Very cold room temperature
(can’t cycle often enough)
RECOMMENDED
CONTROL SElTINGS:
Refrigerator
Freezer
Refrigerator
Freezer
If Refrigerator
Section is
TOO WARM
If Freezer
Section is
TOO WARM
If Refrigerator Section is Controls not set correctly
Refrigerator
2
TOO COLD for your conditions
Freezer
B
If ICE isn’t
Heavy ice usage
Refrigerator
3
MADE FAST ENOUGH Very cold room temperature
Freezer
C
(can’t cycle often enough)
If BOTH SECTIONS
are TOO WARM
Door opened often
Refrigerator
4
Large amount of food added
Freezer
B
Very warm or very cold room temperatures
Power Saver Control...
1. Use the “CONSUMES LESS ENERGY” setting
The Power Saver Control on the Control Console I he Power saver control on the
operates electric heaters around the ( operates electric heaters around the door openings.
These heaters help keep moisture fro These heaters help keep moisture from forming on
the outside of tt ’
the outside of the refrigerator.
when humidity is low.
2. Use the “REDUCES EXTERIOR MOISTURE”
setting if moisture forms on the outside of the refrigerator. The indicator light will glow when the
switch is in the “REDUCES EXTERIOR MOISTURE”
position.
5
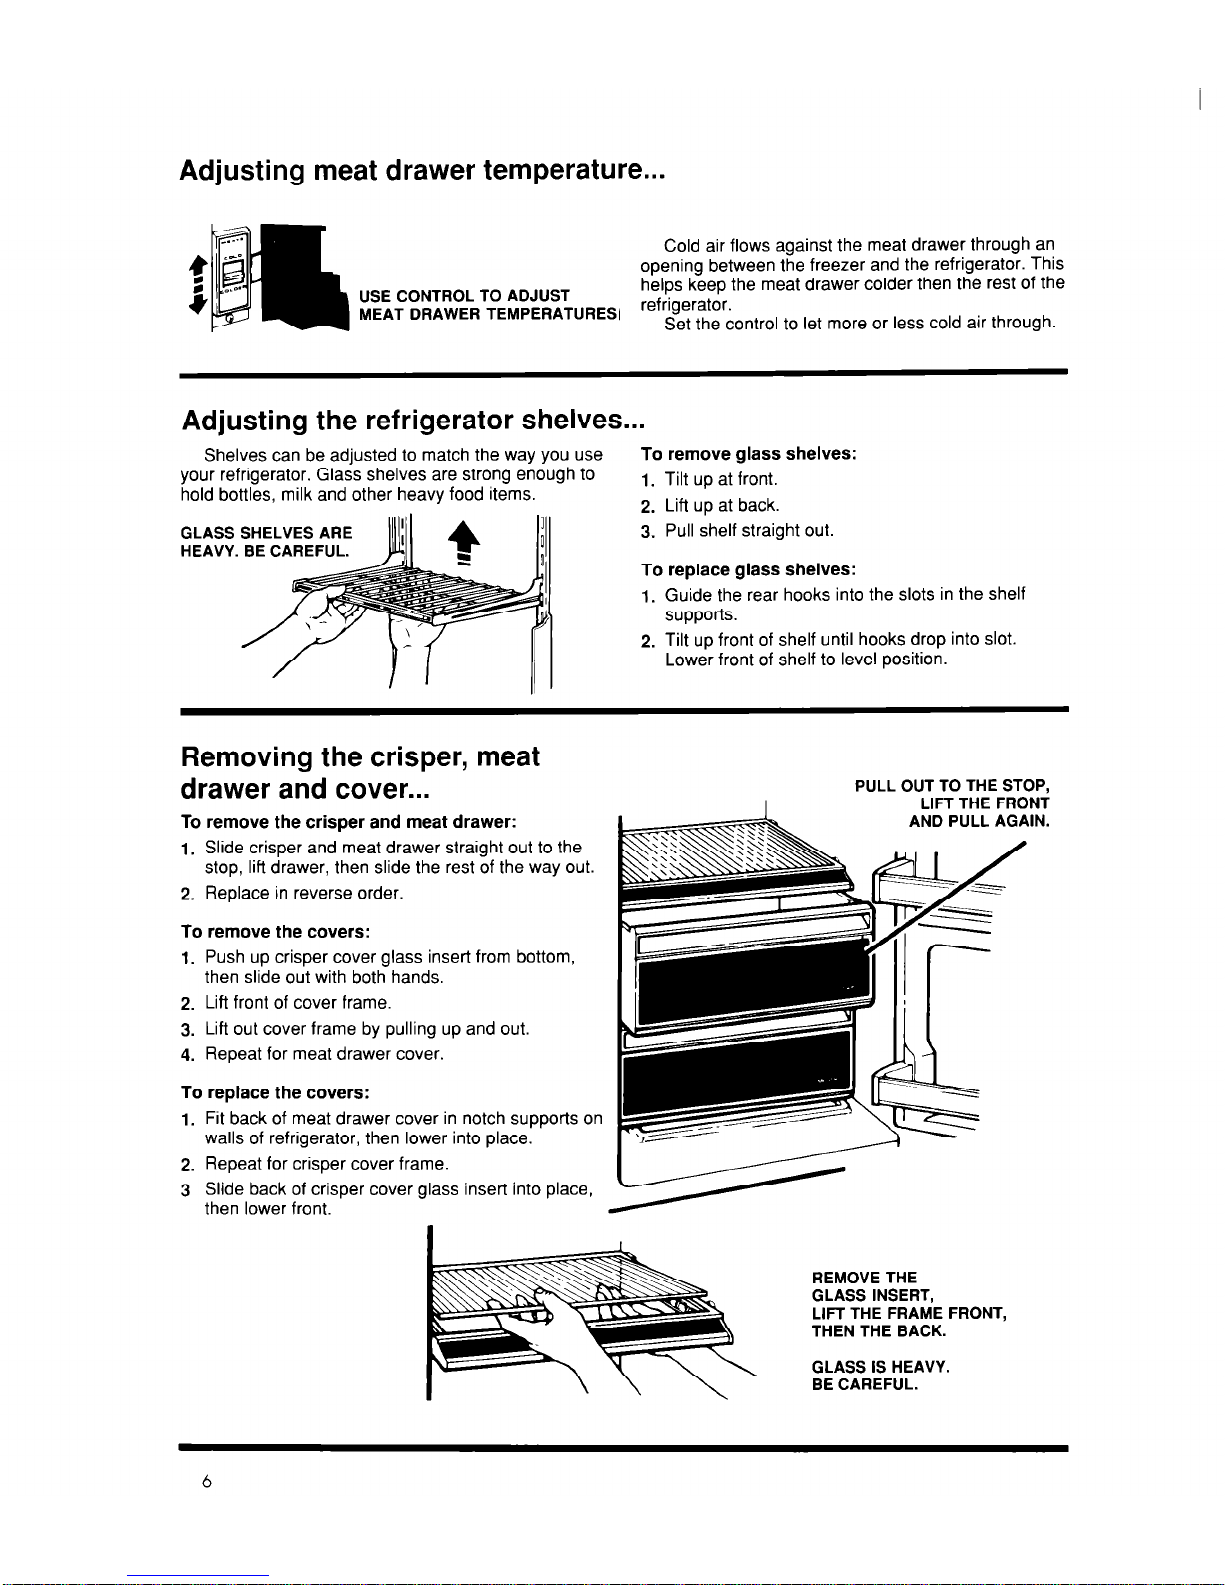
Adjusting meat drawer temperature...
Cold air flows against the meat drawer through an
openino between the freezer and the refrigerator. This
“JE b”I” I ““L
MEAT DRAWER I eMrl
. -.- ERATURES, refrigerator.
Set the control to let more or less cold air through.
helps keep the meat drawer colder then the rest of the
Adjusting the refrigerator shelves...
Shelves can be adjusted to match the way you use
To remove glass shelves:
your refrigerator. Glass shelves are strong enough to
hold bottles, milk and other heavy food items.
1. Tilt up at front.
2. Lift up at back.
GLASSSHELV
3. Pull shelf straight out.
HEAVY. BE CA
To replace glass shelves:
I. Guide the rear hooks into the slots in the shelf
supports.
2. Tilt up front of shelf until hooks drop into slot.
Lower front of shelf to level position.
Removing the crisper, meat
drawer and cover...
To remove the crisper and meat drawer:
1. Slide crisper and meat drawer straight out to the
stop, lift drawer, then slide the rest of the way out.
2. Replace in reverse order.
To remove the covers:
Push up crisper cover glass insert from bottom,
then slide out with both hands.
Lift front of cover frame.
Lift out cover frame by pulling up and out.
Repeat for meat drawer cover.
To replace the covers:
1. Fit back of meat drawer cover in notch supports on
walls of refrigerator, then lower into place.
2. Repeat for crisper cover frame.
3 Slide back of crisper cover glass insert into place,
then lower tront.
PULL OUT TO THE STOP,
LIFT THE FRONT
REMOVE THE
GLASS INSERT,
LIFT THE FRAME FRONT,
THEN THE BACK.
GLASS IS HEAVY.
BE CAREFUL.
6
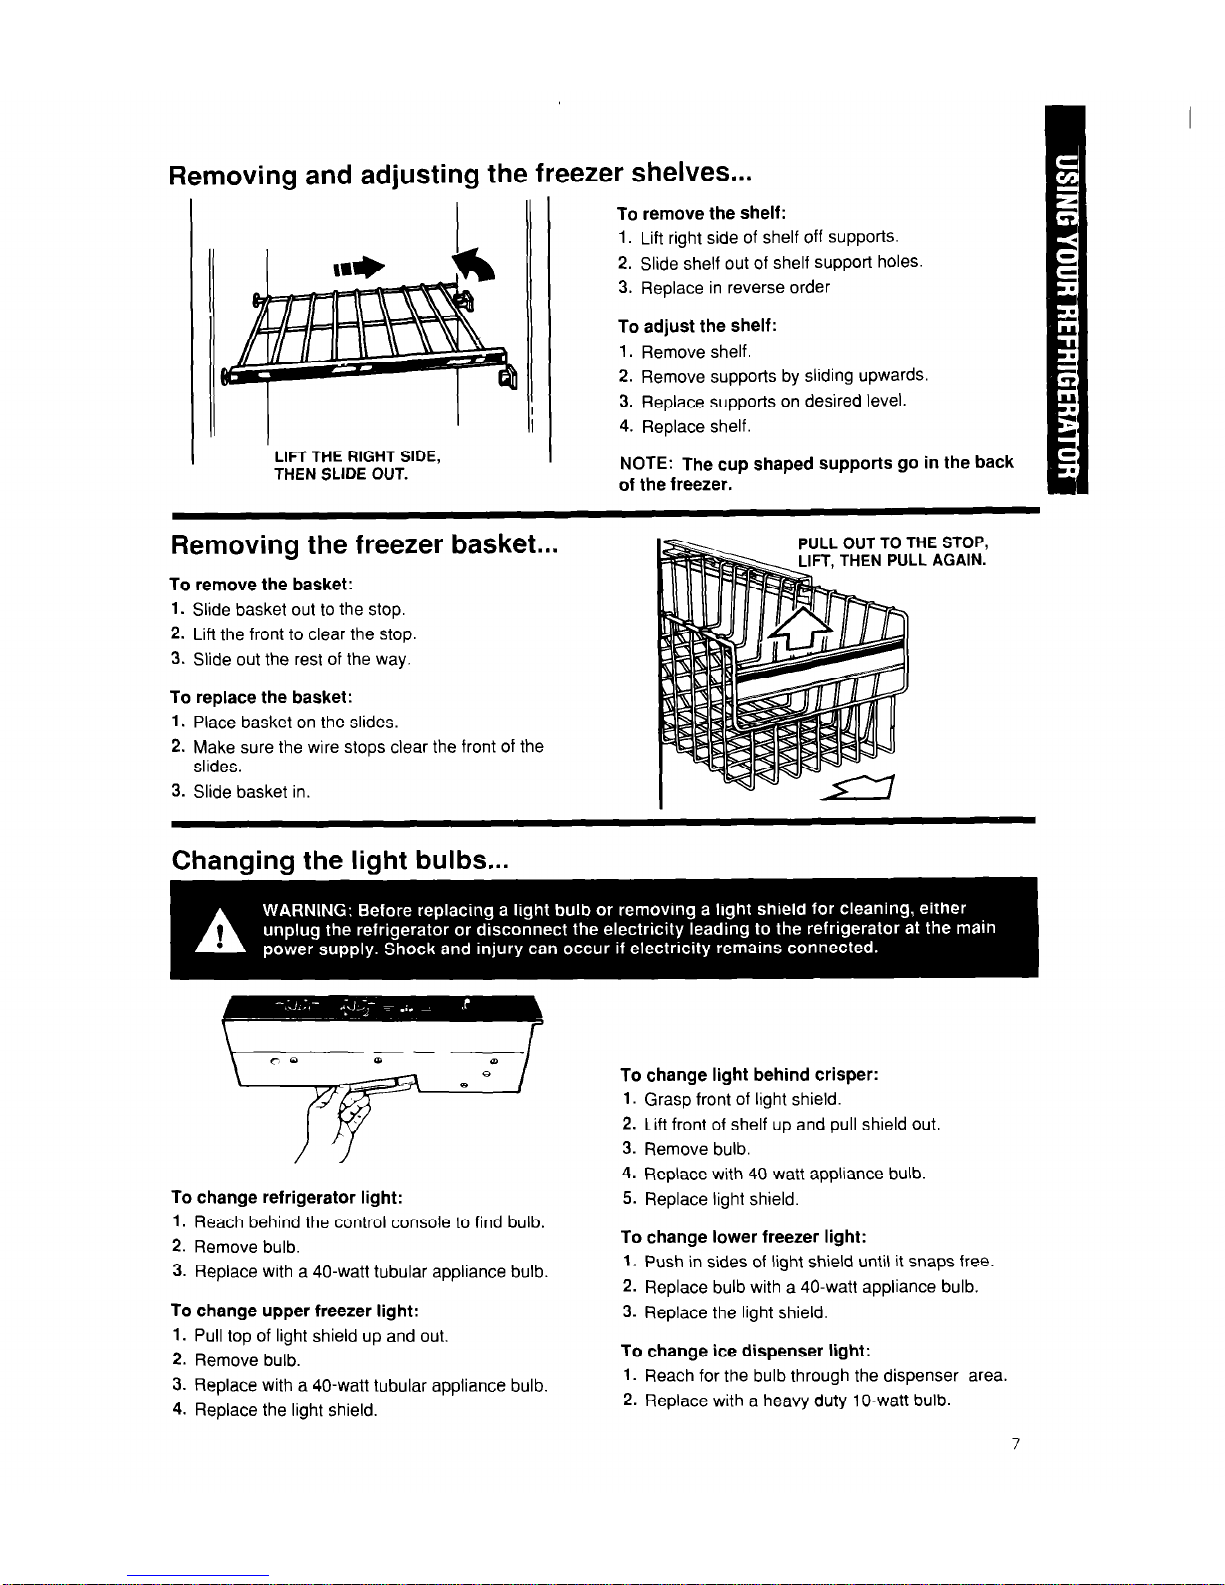
Removing and adjusting the freezer shelves...
LIFT THE RIGHT SIDE,
THEN SLIDE OUT.
To remove the shelf:
1. Lift right side of shelf off support~.
2. Slide shelf out of shelf support holes.
3. Replace in reverse order
To adjust the shelf:
1.
Remove shelf.
2. Remove supports by sliding upwards.
3. Replace supports on desired level.
4. Replace shelf.
NOTE: The cup shaped supports go in the back
of the freezer.
Removing the freezer basket...
To remove the basket:
1. Slide basket out to the stop.
2. Lift the front to clear the stop.
3. Slide out the rest of the way.
To replace the basket:
1. Place basket on the slides.
2. Make sure the wire stops clear the front of the
slides.
3. Slide basket in.
OUT TO THE STOP,
THEN PULL AGAIN.
Changing the light bulbs...
To change refrigerator light:
1. Reach behind the control console to find bulb.
2. Remove bulb.
3. Replace with a 40-watt tubular appliance bulb.
To change upper freezer light:
1.
Pull top of light shield up and out.
2. Remove bulb.
3. Replace with a 40-watt tubular appliance bulb.
4. Replace the light shield.
To change light behind crisper:
1. Grasp front of light shield.
2. Lift front of shelf up and pull shield out.
3. Remove bulb.
4. Replace with 40-watt appliance bulb.
5. Replace light shield.
To change lower freezer light:
1.
Push in sides of light shield until it snaps free.
2. Replace bulb with a 40-watt appliance bulb.
3. Replace the light shield.
To change ice dispenser light:
1.
Reach for the bulb through the dispenser area.
2. Replace with a heavy duty 1 O-watt bulb.
7
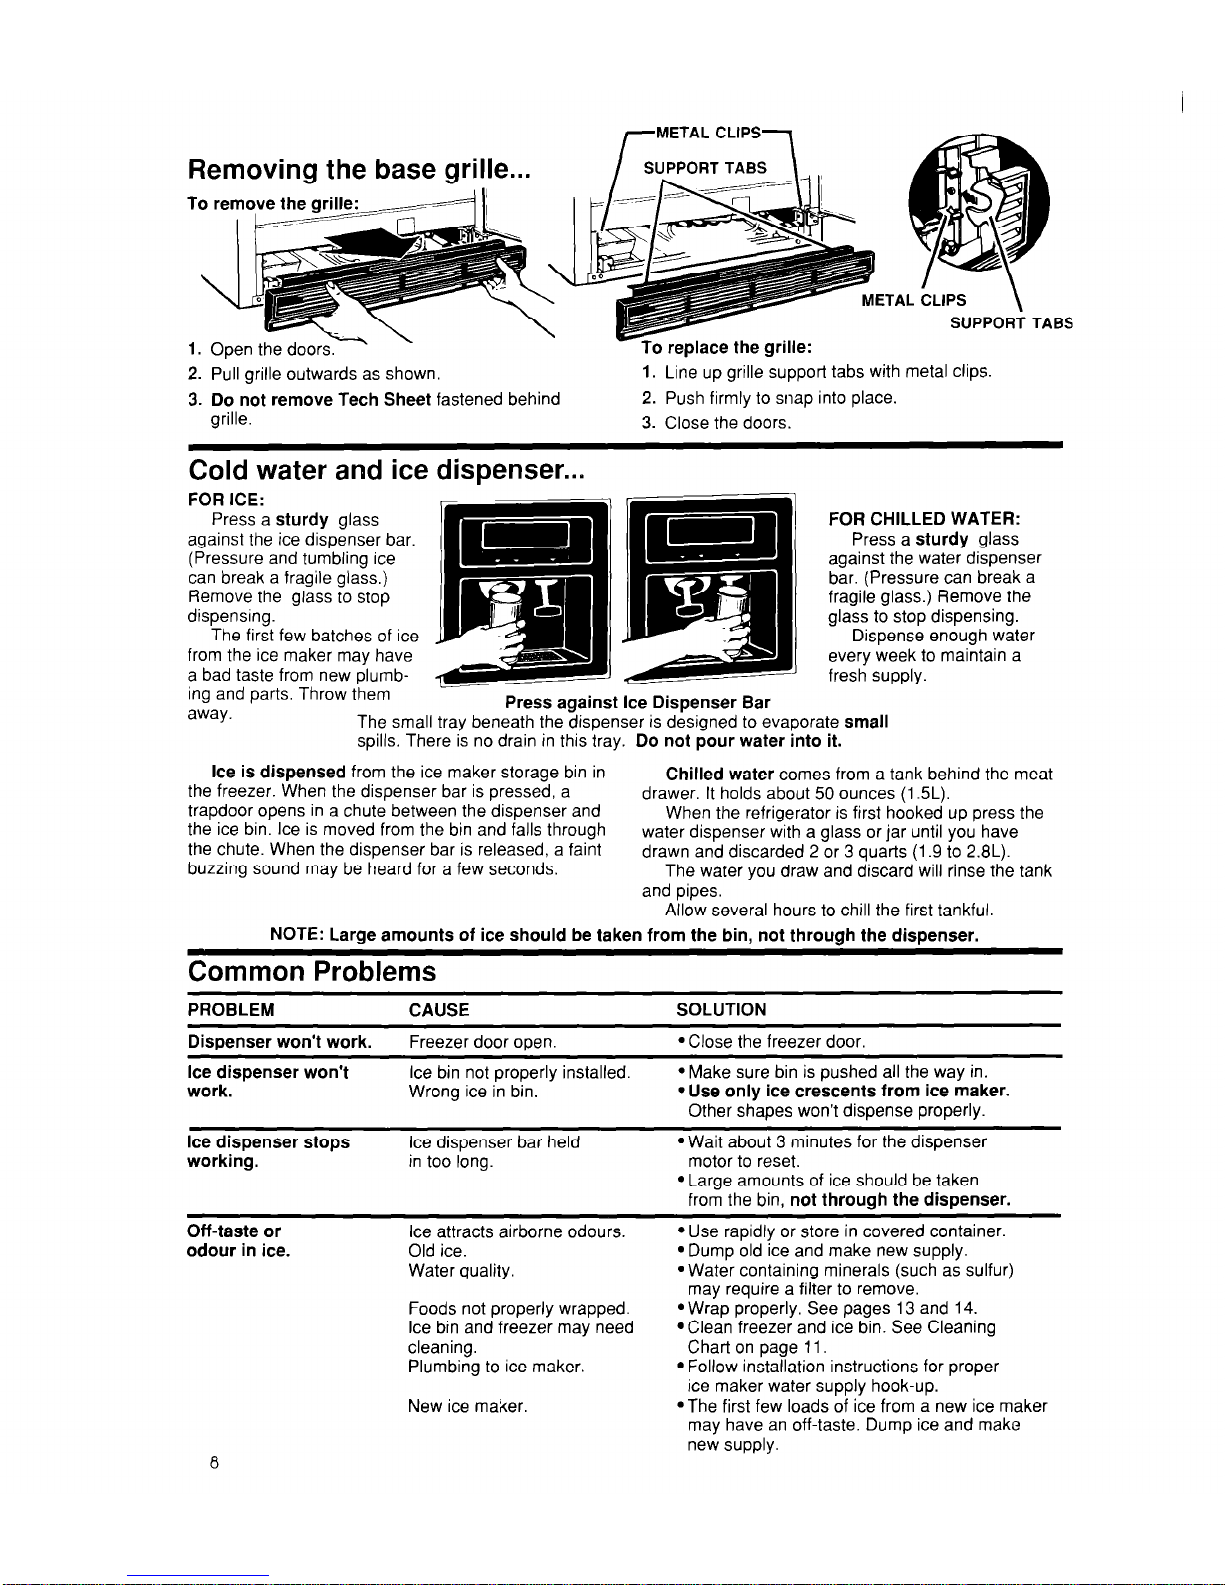
METAL CLIPS
2. Pull grille outwards as shown.
3. Do not remove Tech Sheet fastened behind
grille.
SUPPORT TABS
replace the grille:
1. Line up grille support tabs with metal clips.
2. Push firmly to snap into place.
3. Close the doors.
Cold water and ice dispenser...
FOR CHILLED WATER:
Press a sturdy glass
against the water dispenser
bar. (Pressure can break a
fragile glass.) Remove the
glass to stop dispensing.
Dispense enough water
every week to maintain a
fresh supply.
ing and parts. Throw them
away.
Press against Ice Dispenser Bar
The small tray beneath the dispenser is designed to evapora
spills. There is no drain in this tray. Do not pour water into
.te small
it.
Ice is dispensed from the ice maker storage bin in
Chilled water comes from a tank behind the meat
the freezer. When the dispenser bar is pressed, a
drawer. It holds about 50 ounces (1.5L).
trapdoor opens in a chute between the dispenser and
When the refrigerator is first hooked up press the
the ice bin. Ice is moved from the bin and falls through
the chute. When the dispenser bar is released, a faint
water dispenser with a glass or jar until you have
drawn and discarded 2 or 3 quarts (1.9 to 2.8L).
buzzing sound may be heard for a few seconds.
The water you draw and discard will rinse the tank
and pipes.
Allow several hours to chill the first tankful.
NOTE: Large amounts of ice should be taken from the bin, not through the dispenser.
Common Problems
PROBLEM
CAUSE
SOLUTION
Dispenser won’t work. Freezer door open. *Close the freezer door.
Ice dispenser won’t Ice bin not properly installed.
work.
Wrong ice in bin.
l
Make sure bin is pushed all the way in.
.Use only ice crescents from ice maker.
Other shapes won’t dispense properly.
Ice dispenser stops
working.
Ice dispenser bar held
in too long.
l
Wait about 3 minutes for the dispenser
motor to reset.
l
Large amounts of ice should be taken
from the bin, not through the dispenser.
Off-taste or
odour in ice.
Ice attracts airborne odours.
Old ice.
Water quality.
Foods not properly wrapped.
Ice bin and freezer may need
cleaning.
Plumbing to ice maker.
New ice maker.
8
l
Use rapidly or store in covered container.
l
Dump old ice and make new supply.
l
Water containing minerals (such as sulfur)
may require a filter to remove.
l
Wrap properly. See pages 13 and 14.
l
Clean freezer and ice bin. See Cleaning
Chart on page 11.
l
Follow installation instructions for proper
ice maker water supply hook-up.
.The first few loads of ice from a new ice maker
may have an off-taste. Dump ice and make
new supply.
TIPS
*The dispensers will work only with the freezer
door closed.
aThe ice dispenser will work only if the bin is
pushed all the way in.
muse only ice crescents from the ice maker.
Other shapes won’t dispense properly.
*When you need more ice than a glass or two,
scoop it from the bin or remove the bin. The dis-
penser motor may stop if the dispenser bar is
held in too long. It will be ready to run again in
about 3 minutes.
l
Ice stored too long can go stale...like water.
Throw it away.
l
Ice can shrink. Cold moving air slowly evaporates them. If you use ice often, you may never
notice the change.
. Good water quality is important for good ice
quality. It is not recommended that the ice
maker be connected to a softened water supply.
Water softener chemicals such as salt from a
malfunctioning softener can damage the ice
maker mold ana lead to poor quality ice. If a
softened water supply cannot be avoided, then
it is important that the water softener be well
maintained and operating properly.
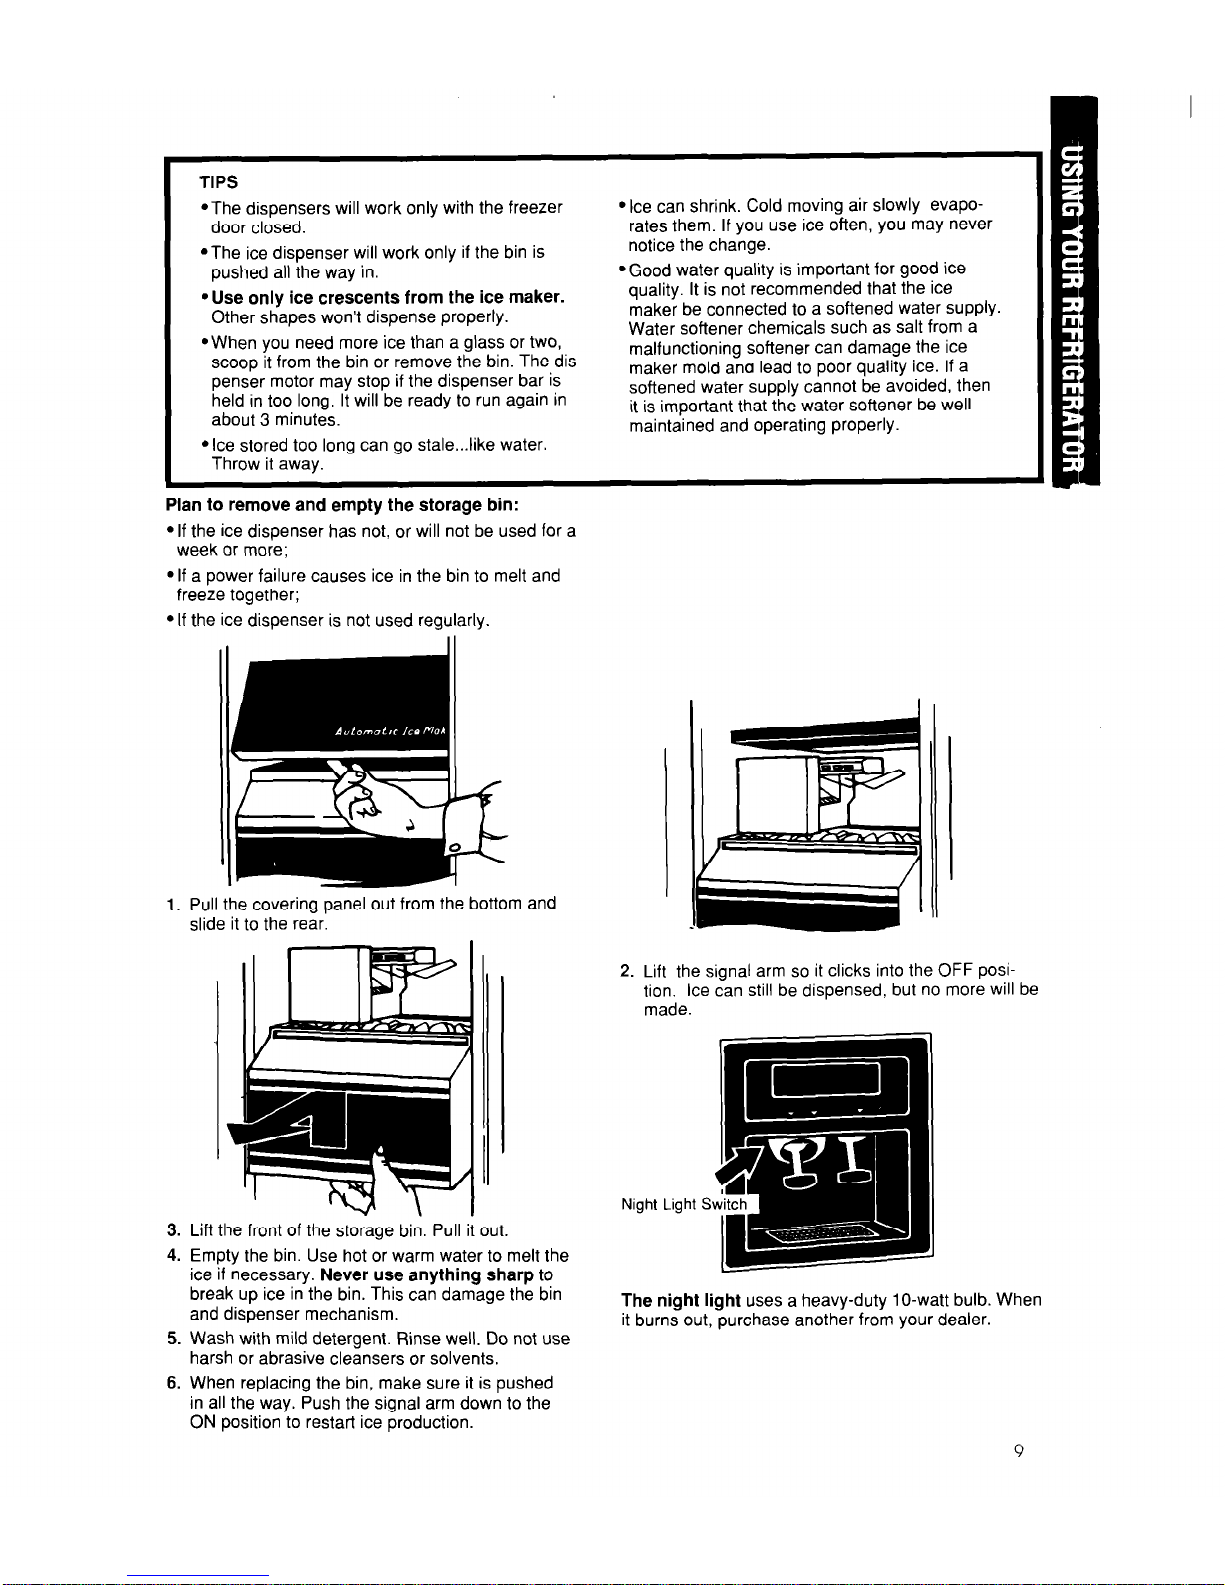
Plan to remove and empty the storage bin:
l
If the ice dispenser has not, or will not be used for a
week or more;
9 If a power failure causes ice in the bin to melt and
freeze together;
l
If the ice dispenser is not used regularly.
1. Pull the coverino oanel out from the bottom and
slide it to the rear:
2. Lift the signal arm so it clicks into the OFF position. Ice can still be dispensed, but no more will be
made.
Night Light S
3. Lift the front of the storage bin. Pull it out.
4. Empty the bin. Use hot or warm water to melt the
ice if necessary. Never use anything sharp to
break up ice in the bin. This can damage the bin
and dispenser mechanism.
5. Wash with mild detergent. Rinse well. Do not use
harsh or abrasive cleansers or solvents.
6. When replacing the bin, make sure it is pushed
in all the way. Push the signal arm down to the
ON position to restart ice production.
The night light uses a heavy-duty 1 O-watt bulb. When
it burns out, purchase another from your dealer.
Sounds you may hear...
Your new refrigerator may make sounds that your old one didn’t. Because
the sounds are new to you, you might be concerned about them. Don’t be. Most
of the new sounds are normal. Hard surfaces like the floor, walls and cabinets
can make the sounds seem louder.
The following chart describes the kinds of sounds that might be new to you,
and what may be making them.
Possible Sounds:
*Slight Hum, Soft Hiss:
*Clicking or Snapping
Sound<: . . -
l
Water Sounds:
Probable Causes:
You may hear the refrigerator’s fan motor and moving air.
The thermostat makes a definite click when the refrigerator stops running.
It also makes a sound when the refrigerator starts. The defrost.timer will click
when the defrost cycle starts and stops.
When the refrigerator stops running, you may hear gurgling in the tubing for a
few minutes after it stops. You may also hear defrost water running into the
alce Maker Sounds:
-trickling water
-thud fclatter of ice1
defrost water pan.
When the ice maker is runnina vou mav hear buzzina (from the water valve),
trickling water and the clatter of ice dumped into the bin.
%~ --I
*Running Sounds:
Your refriqerator has a hioh-efficiency compressor and motor. It will run longer
than older designs. It may even seem to run most of the time
Energy saving tips...
You can help your refrigerator use less electricity.
*Check door gaskets for a tight seal. Level the
cabinet to be sure of a good seal.
*Clean the condenser coil regularly.
*Open the door as few times as possible. Think about
what you need before you open the door. Get
everything out at one time. Keep foods organized so
you won’t have to search for what you want. Close
door as soon as food is removed.
*Go ahead and fill up the refrigerator, but don’t over
crowd it so air movement is blocked.
*It is a waste of electricity to set the refrigera!or and
freezer to temperatures colder than they need to be.
If ice cream is firm in the freezer and drinks are as
cold as your family likes them, that’s cold enough.
*Keep the Power Saving Control on CONSUMES
LESS ENERGY unless moisture forms on refrigerator exterior.
*Make sure your refrigerator is not next to a heat
source such as a range, water heater, furnace,
radiator or in direct sunlight.
Cleaning your
refrigerator
Both the refrigerator and freezer sections defrost
automatically. But both should be cleaned about once
a month to help prevent odours from building up. Of
course, spills should be wiped up right away.
To clean your refrigerator turn the Refrigerator
Control to OFF, unplug it, take out all removable parts
and clean it according to the following directions.
10
Part
Removable parts (shelves,
crisper, meat drawer
freezer basket, etc.)
Outside
What to use
Sponge or cloth; mild
detergent and warm
water.
Sponge, cloth or paper
towel; mild detergent;
appliance wax (or good
auto paste wax).
How to clean
9 Wash removable parts by hand with warm
water and a mild detergent.
l
Rinse and dry.
l
Wash with warm water and a mild detergent.
Do not use abrasive or harsh cleansers.
l
Rinse and dry.
l
Wax painted motal surfaces at least twice a
year with appliance wax or a good auto paste
wax. Apply wax with a clean, soft cloth.
Do not use wax on plastic parts.
Waxing painted metal surfaces provides rust protection.
Inside walls (Freezer
Sponge, soft cloth or
should be allowed to
paper towel, baking
warm up so cloth won’t
soda, warm water, mild
stick.)
detergent.
l
Wash with warm water and
- mild detergent or
- baking soda (2 tablespoons [26 g] to 1
quart [.95 L] warm water).
l
Rinse and dry.
Door liners and gaskets
Sponge, soft cloth or
paper towel; mild
detergent, warm water.
l
Wash with mild detergent and warm water.
9 Rinse and dry.
DO NOT USE Cleaning waxes, concentrated detergents, bleaches
or cleansers containing petroleum on plastic parts.
Dark plastics
(covers and panels)
Mild detergent and
warm water; soft clean
sponge and soft, clean
cloth.
9 Wash with a soft cloth or sponge.
l
Rinse and dry.
DO NOT USE paper towels, window sprays, scouring cleansers, or
flammable or toxic solvents like acetone, gasoline, carbon tetrachloride,
etc. These can scratch or damage the material.
Defrost pan
Sponge or cloth; mild
detergent and warm
water.
Condenser Coil
Floor under
refrigerator
Vacuum cleaner: using
the extended narrow
attachment.
Usual floor cleaners.
l
Remove base grille. (See page 8.)
l
To remove defrost pan, lift pan over wire
brace (remove tape; if any).
l
Wash defrost pan with warm water and
mild detergent.
l
Rinse and dry.
l
Replace with notched corner to the rear.
Push it all the way in.
l
Make sure defrost drain tube is pointing
into pan.
l
Replace base grille.
l
Remove base grille.
l
Clean dust and lint from condenser at least
everv other month.
l
Repface base grille.
l
Roll refrigerator out only as far as water
supply line allows.
l
Clean the floor.
9 Roll refrigerator back.
l
Check to see if the refrigerator is level.
11
 Loading...