

Maxon MX-6880 User Manual
■ Weight 81g (with Slim battery)
■ Dimensions 80 x 42x 22 mm
■ Full Graphic Dual LCD Display
with EL back-lighting
■ WAP 1.1
■ Support Phase 2 + Features
■ SIM Application Tool Kit
■ Personal organizer
■ T9 Text input
■ Multi Party
■ CLIP/CLIR
■ Cell Broadcast
■ 20 Numbers Redial
■ Power off timer
■ Calculator
■ World time
■ Games
■ Currency converter
■ Integrated Data / Fax modem
■ 200 Extended Phonebook Memory
Yes
10
1
9
11
2
7
8
3
5
4
6
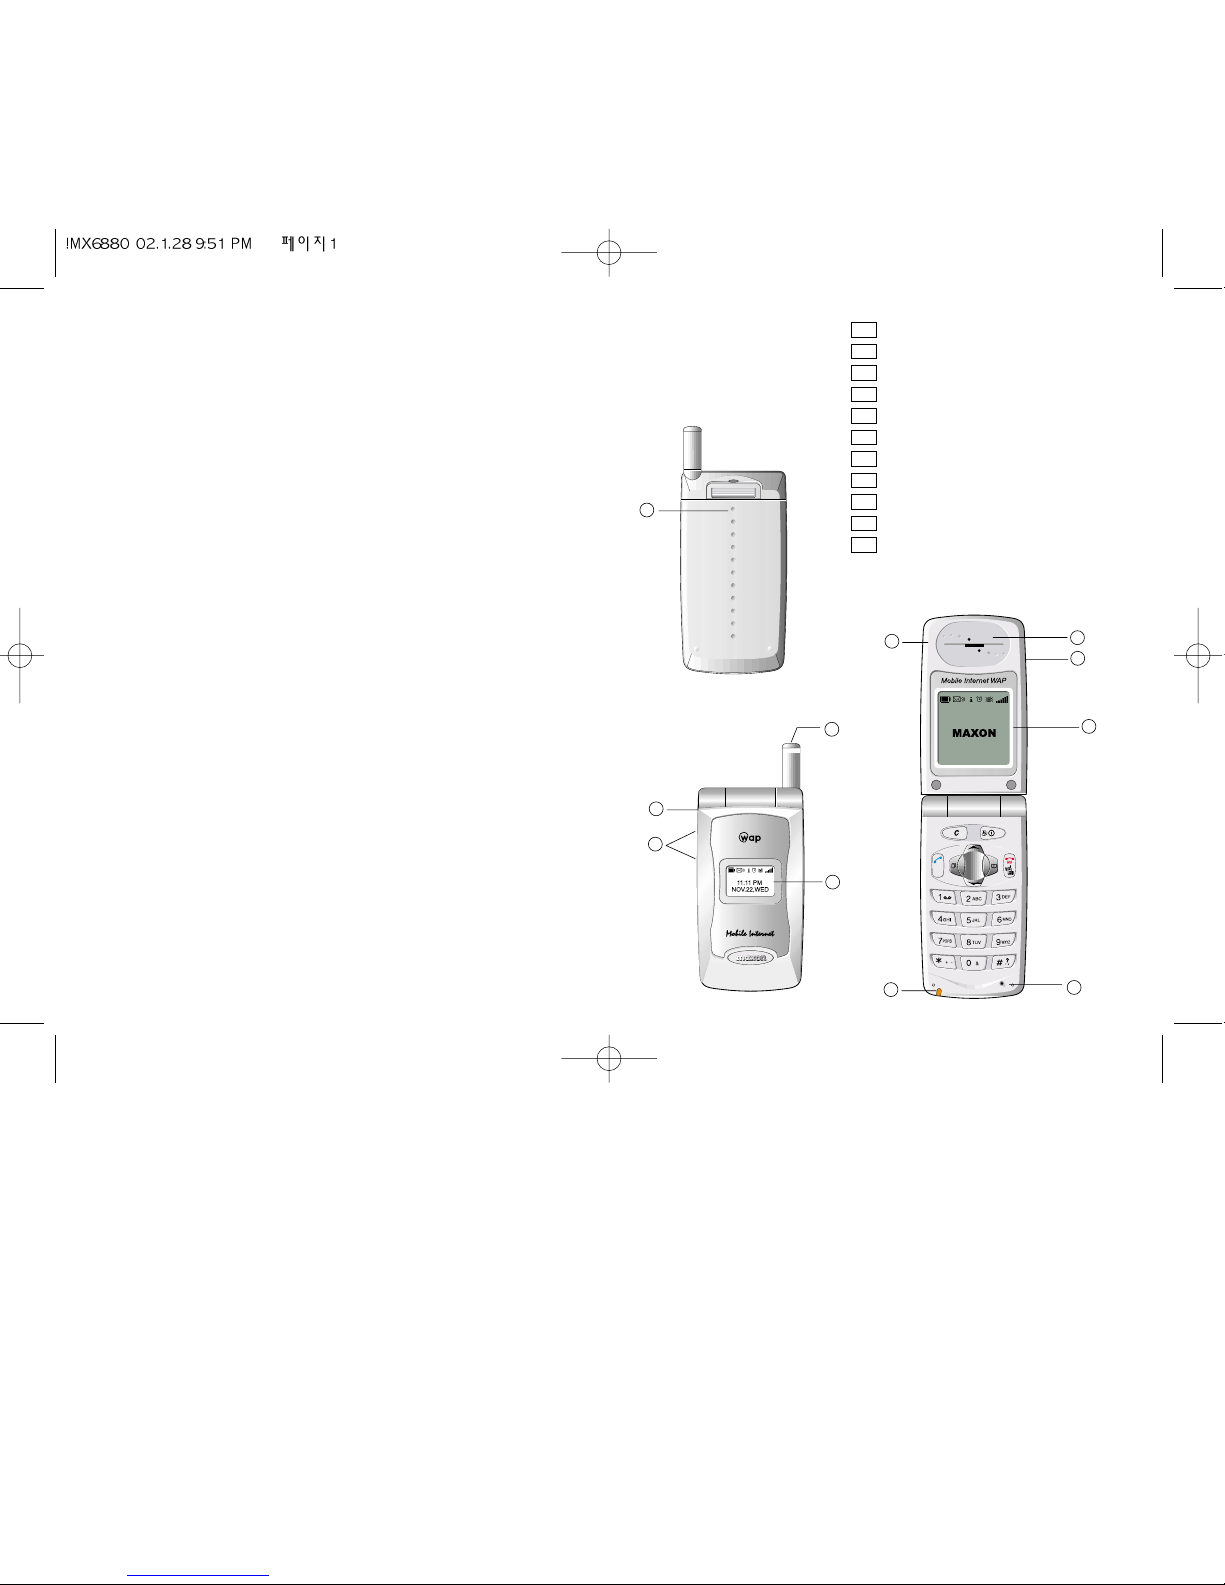
Earpiece
Microphone
antenna
Volume adjustment
Earphone jack
Ringing buzzer
Indicator
Outer display
Inner display
Battery lock/unlock knob
Folder (MX-6880)
Open to answer calls
close to end calls
1
2
3
4
5
6
7
8
9
10
11
ENGLISH
Contents
Introduction
Security
Safety
Getting Started
Calls
Basics
The Phone Book
Network Features
Mobile Internet (WAP)
T9 T ext Input
Miscellaneous
Organizer
Troubleshooting
Accessories
Index
The phone is normally set up to automatically show
display text in the language of the SIM. If this is not the
case, please refer to section 3 for language change
instructions.
ENGLISH
12
11
10
9
8
7
6
5
4
3
2
1
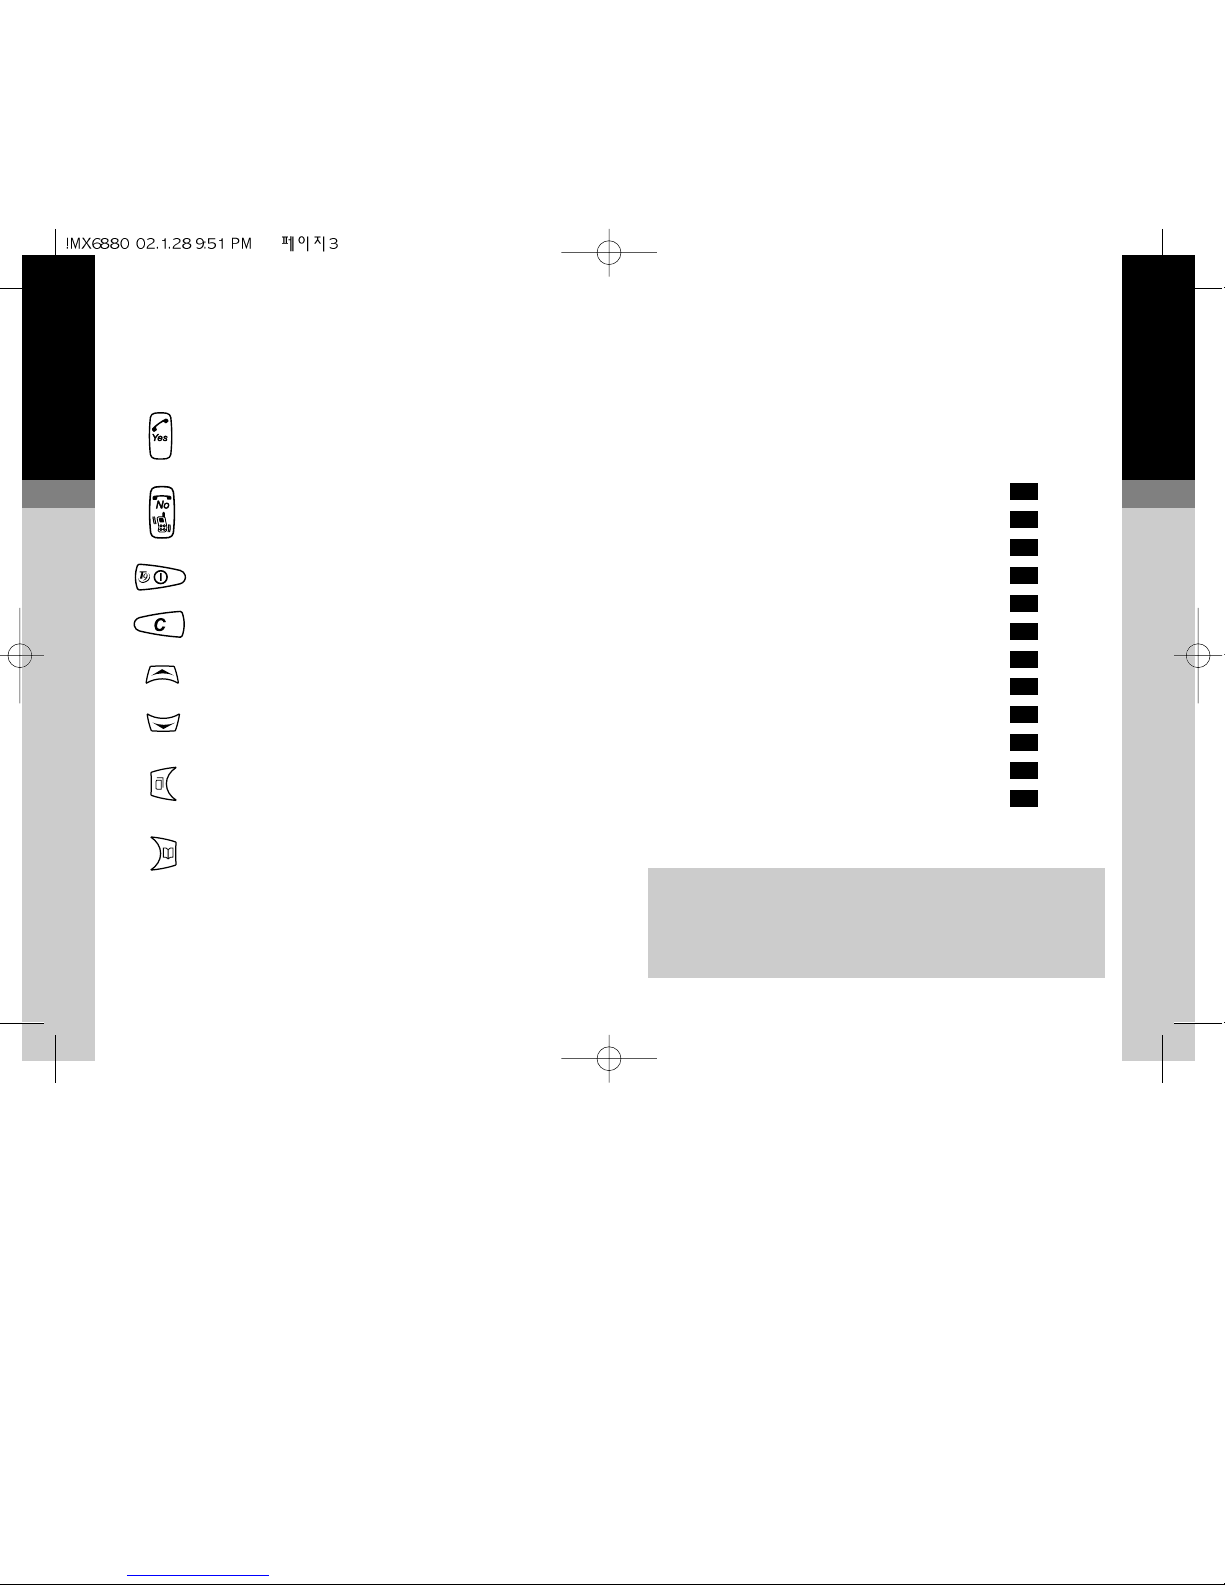
Dial a displayed number, answer an
incoming call and store an entry
End a call, exit a feature and set
vibrator alert
Switch the phone ON and OFF
Clear a number
Upward search
Downward search
Enter the menu or go back one step
in the menu
Enter the phone book or select a
menu feature
ENGLISH
Security
● if your phone is lost or stolen, you must report it to your
network operator or service provider so that they can bar
the phone and SIM from use. This is important as you
may be liable for the cost of unauthorized calls until the
equipment is barred
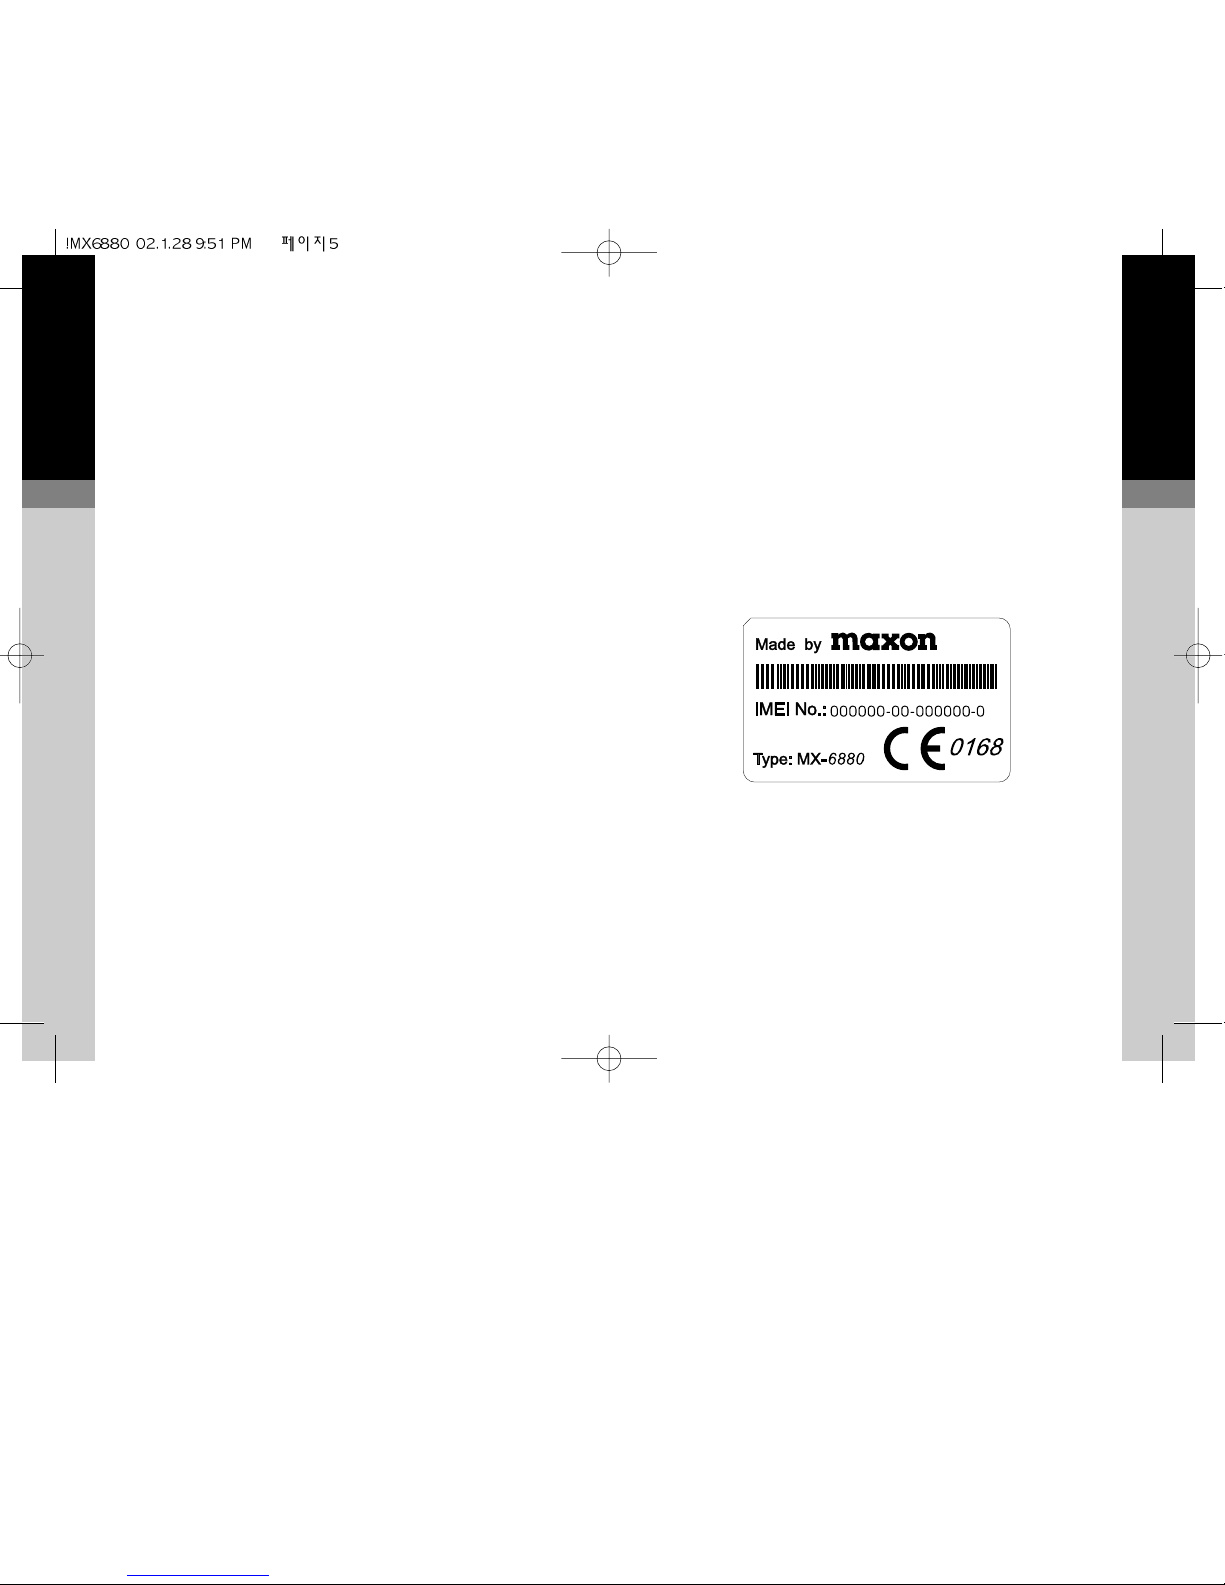
● when you ring the network operator or service provider
they will need the IMEI number of the phone. This is
printed on the label attached to the back of the phone
under the battery. Copy the number onto the label below
for future reference
● you can help prevent mobile phone crime by taking the
following precautions:
- always have the SIM PIN enabled and change it if
you think someone else knows the number
- Do not leave your phone visible in a vehicle when you
leave it. Take the phone with you or lock it in the boot
or glove compartment
- set call bars to limit fraudulent use
ENGLISH
Introduction
Congratulations on choosing the MAXON MX-6880 GSM
Dual Band mobile phone. This user guide describes the
features of MX-6880.
The MX-6880 has been designed to operate on any digital
GSM network, GSM900, GSM1800 and GSM900/1800,
subject to individual network roaming agreements. GSM
has become a worldwide standard communications system,
giving you the freedom to stay in touch wherever you are.
Your mobile phone is intended for use with the supplied
rechargeable battery, charger and any of the approved
accessories shown in section 11 of this user guide. Other
usage will invalidate any approval and warranties given to
this equipment and may be dangerous.
The MX-6880 conforms to the GSM type approval for class
4 for GSM900 (2W) and class 1 for DCS1800 (1W) mobile
phones.
Maxon Telecom Co.,LTD reserves the right to make
changes and improvements to any of the products
described in this guide without prior notice.
© Maxon Telecom Co.,LTD.2002

ENGLISH
Battery
● do not short circuit the battery terminals. This will damage
the battery, produce heat and may cause a fire
● never dispose of batteries in a fire as this can cause them
to explode. Return dead batteries to your supplier or an
approved recycling centre. DO NOT put in with the
household waste
WARNING: If the battery case breaks, avoid contact
with the contents. Wash contaminated skin with lots of
water and seek medical attention if necessary.
On the Road
● before making or receiving calls acquaint yourself
thoroughly with the applicable local laws and guidelines
regarding the use of mobile radio telephones and
observe them at all times
● air safety bags, anti-lock brakes, speed control and fuel
injection systems are normally immune to radio
transmissions, but if you experience problems, consult
your vehicle dealer
● switch off your mobile phone when refuelling or where
there are signs restricting the use of 2-way radio
equipment. Do not store or carry flammable or explosive
materials in the same compartment as your mobile
phone, internal sparks could cause ignition
Inside Aircraft
● switch off your mobile phone when in an aircraft. The use
of mobile phones in an aircraft may be dangerous to the
operation of the aircraft, disrupt the cellular network and
is illegal
ENGLISH
Safety
Personal
● operation of any radio equipment including mobile
phones may interfere with the function of inadequately
shielded medical devices such as hearing aids and
pacemakers. You must consult the manufacturer of the
device or your physician before use
● observe restrictions on the use of radio equipment in fuel
depots, chemical plants, in areas where explosive gases
are present or where blasting operations are in progress.
Your mobile phone will continue to transmit call
responses if left in standby mode. You must switch off
when requested to do so
● do not move the antenna close to, or touching any
exposed part of the body when making a call, a damaged
antenna may cause a minor burn
Mobile Phone
● your mobile phone produces magnetic fields, do not
place next to magnetic storage media such as computer
diskettes
● operating your mobile phone close to other electrical
equipment such as televisions, phones, radios and
personal computers, may cause interference
● do not expose your mobile phone to strong sunlight,
direct heat or liquids
(such as water)
ENGLISH
1
Getting Started
Read this section before attempting to use your phone. It
tells you how to attach, charge and care for the phone’s
battery. We have also included general information
about the digital GSM network and given instructions of
how to insert and unlock the SIM. Your phone has an
indicator to visually show its status when you cannot see
the display. Details about the indicator are also shown in
this section.
The Battery 1.1
Removing and Attaching
the Battery 1.1
Charging the Battery 1.1
Battery Performance 1.4
Battery Power Level 1.4
Network Connection 1.5
The SIM 1.5
Inserting the SIM 1.6
Set Time 1.7
Unlocking the SIM 1.7
Connecting to the Network 1.8
The Display 1.9
The Indicator LED 1.11
ENGLISH
ENGLISH
1
1.2
WARNING: Charge the battery in a well-ventilated area
between +5 and +40 using the supplied charger. The
use of non-approved chargers could result in a fire or
injury through an electrical shock and will invalidate all
warranties given on this product.
ENGLISH
1
1.1
The Battery
Your phone is supplied with a rechargeable battery and
quick charger. Before you use the phone for the first time, it
is important that you fully charge the battery.
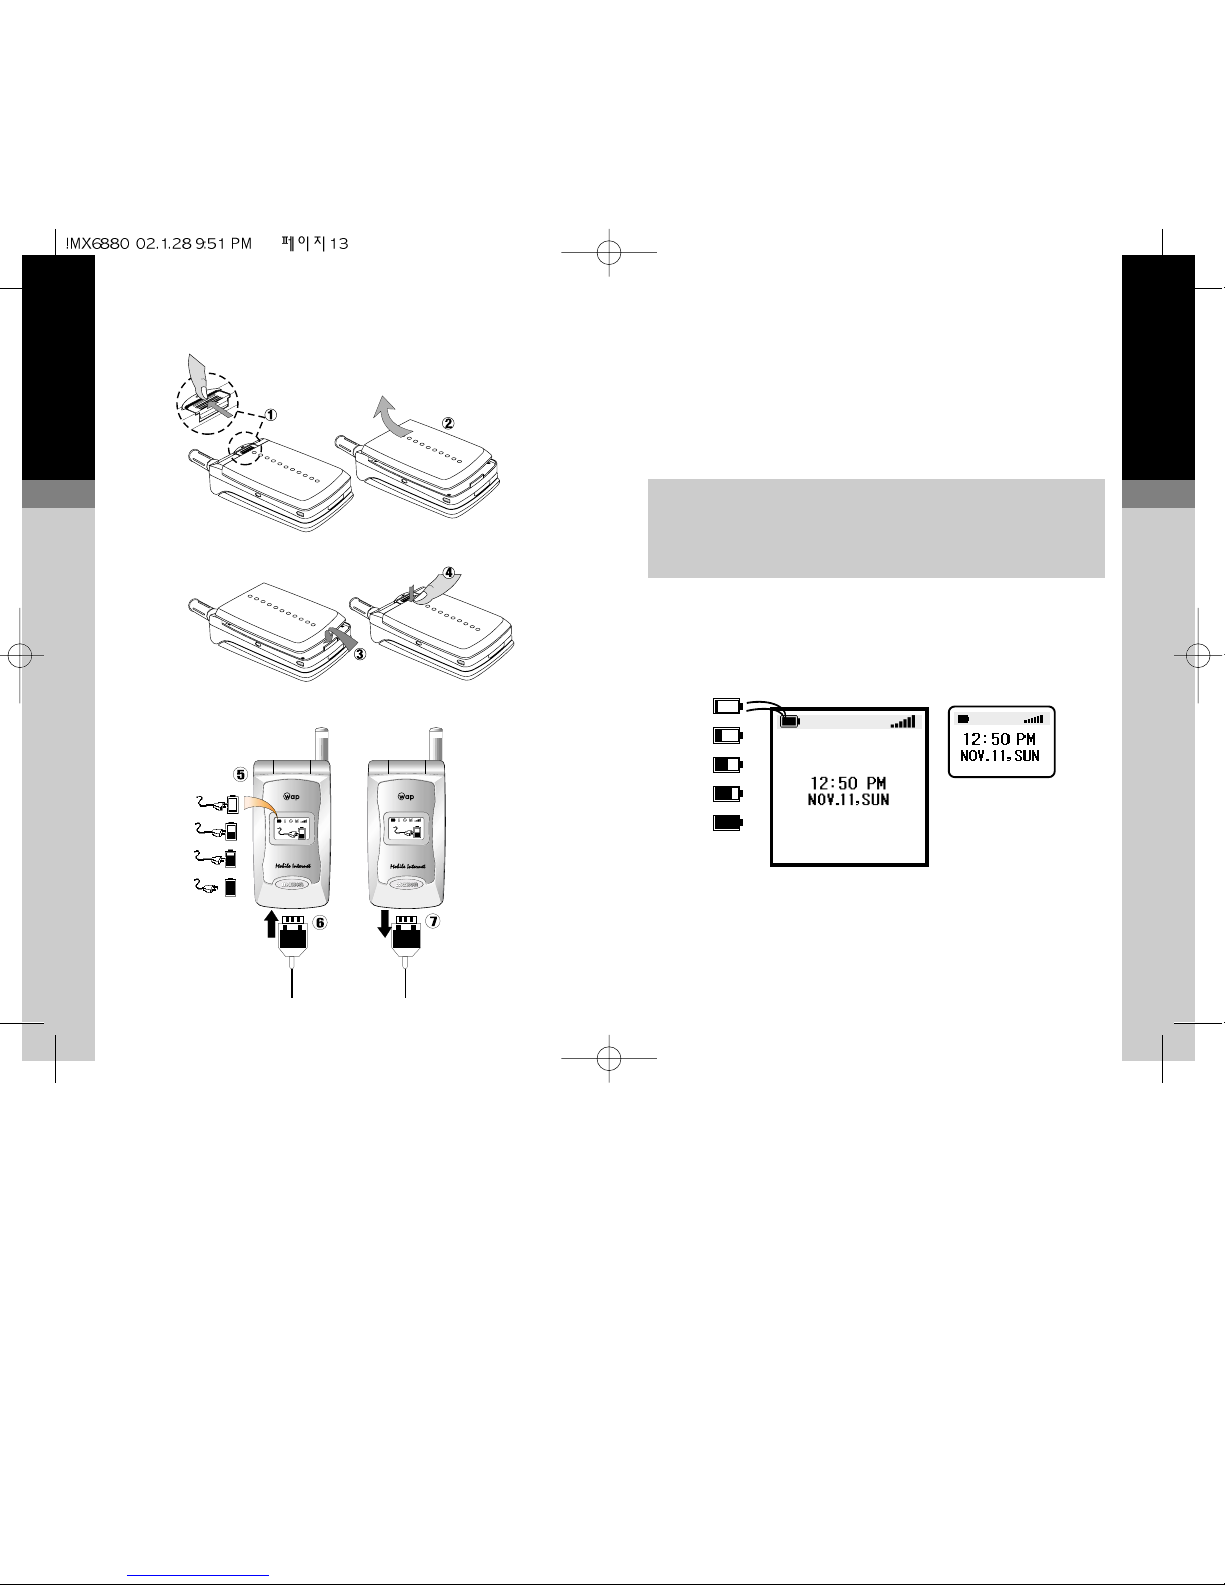
Removing and Attaching the Battery
● to remove, slide in the direction of the arrow then
remove the battery from the phone
● to attach, place the battery on the phone and slide to the
bottom of the phone and lock the battery in position
Charging the Battery
● insert the charger connector into the base of the phone
● plug the charger into the power supply. A filling battery
symbol and charging Animation in the display indicates
charging
● the battery is recharged when the symbol remains all
black This takes approximately 3 hours depending on
the size of the battery. It is normal for the battery, phone
and charger to become warm during charging
● after charging, switch OFF the power supply, then
disconnect the charger from the phone and the power
supply
123
5
6
7
4
ENGLISH
1
1.4
Battery Performance
To maintain battery performance you should operate the
phone until you will see the low power warning message
LOW BATTERY or preferable, the phone switches itself
OFF. If the battery is only partly used before recharging, it
can self-adjust to holding a reduced charge with the
resultant progressive reduction in operating time.
The standby and talk times quoted are estimates based
on ideal operating conditions. Battery life achieved in
use will vary between networks and with different
conditions and applications.
Battery Power Level
The battery power level is shown in the top left corner of the
display when you switch the phone ON. Five levels are
displayed from full (all black) to empty.
The phone will automatically switch OFF shortly after the
empty battery symbol starts flashing and ‘LOW BATTERY’
appears on display. You can clear the message temporarily
by pressing any key.
ENGLISH
1
1.3
Removing
ENGLISH
1
1.6
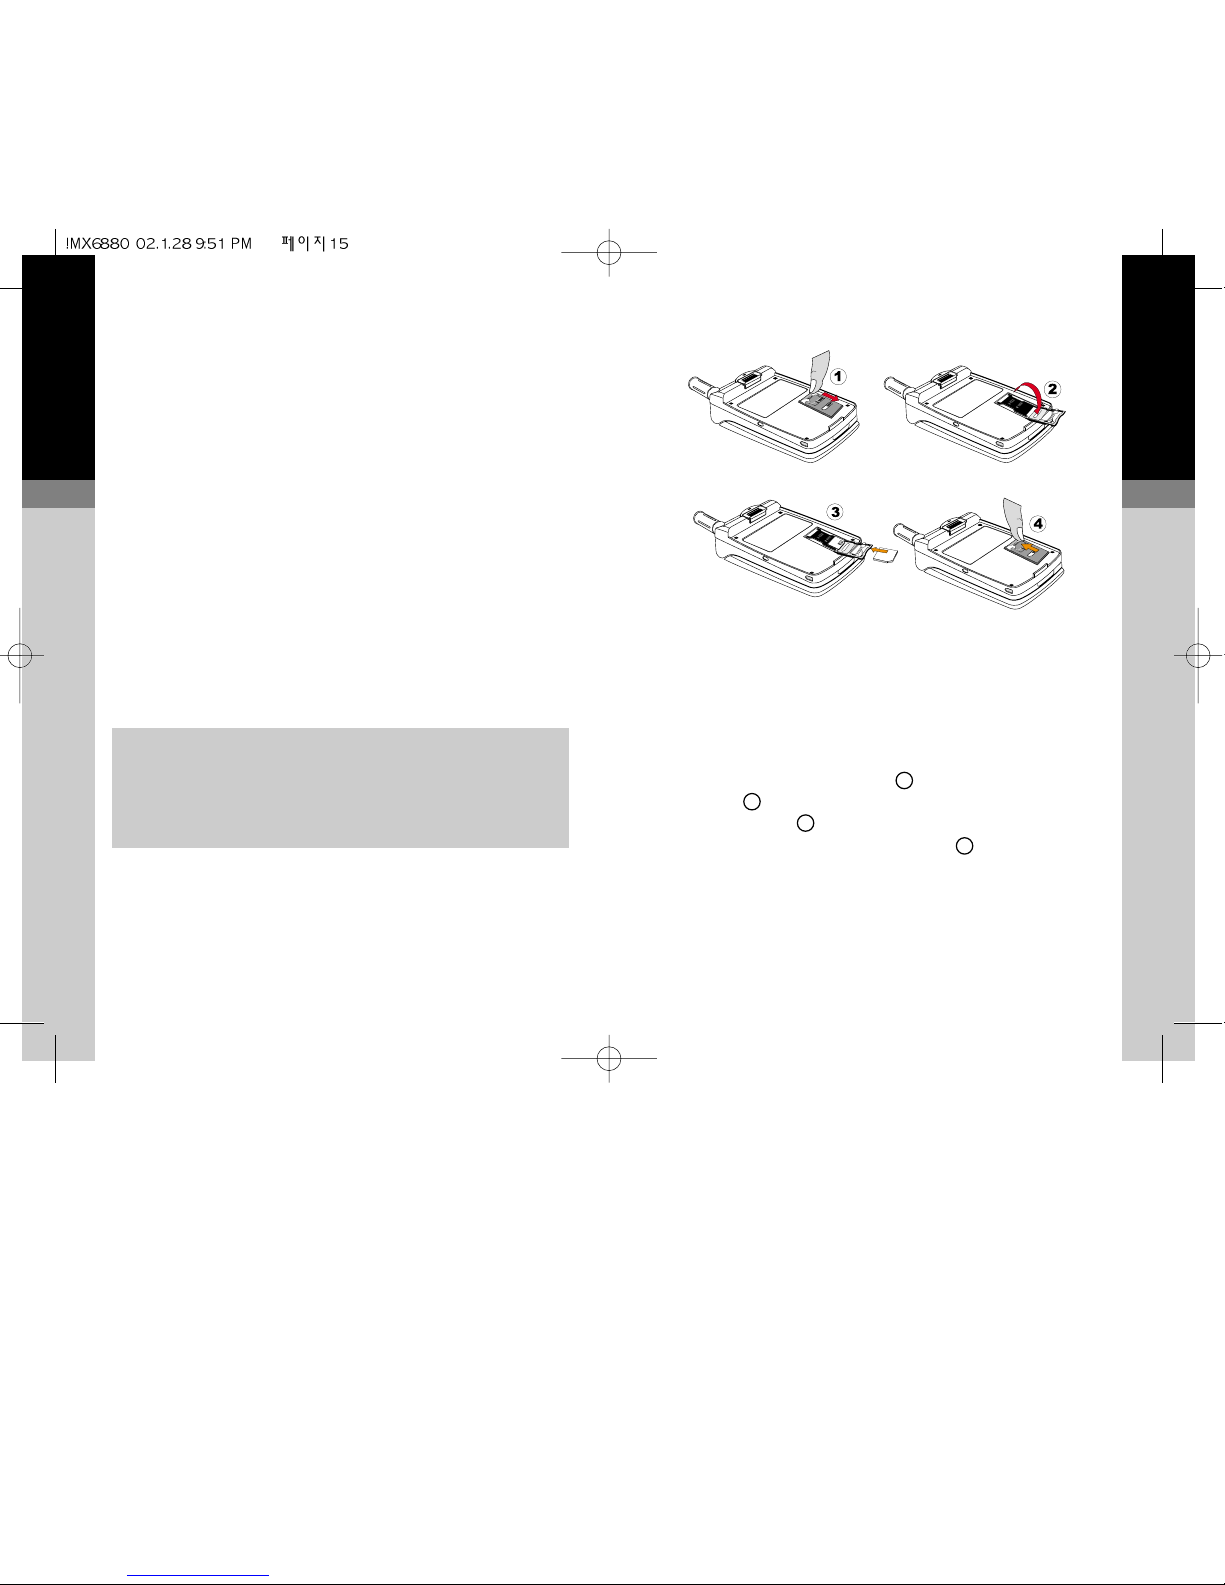
Inserting the SIM
The SIM will probably be supplied in a card holder and you
will need to carefully press it free before fitting.
● switch OFF the phone, remove the battery and any
external power supply
● slide the SIM card holder to the direction of the
position.
● insert SIM card and then slide SIM card holder to the
direction of the arrow in order to lock
● if you need to remove the SIM, remove the battery,
disengage the lock then carefully lift and slide the SIM
from the phone
ENGLISH
1
1.5
Network Connection
The SIM
Your network provider will supply you with a plug-in SIM for
use with your phone. The SIM (Subscriber Identity Module)
is your personal key to the digital GSM network.
All the information needed to connect you to the network
and to initiate billing for your calls is stored in the goldplated area along with names, numbers and messages
which you have entered into the phone book or received.
The SIM can be removed and inserted into any GSM
phone using the same size reader (the new phone
automatically takes the identity of the SIM).
To prevent losing or corrupting information, avoid touching
the gold area and do not place the SIM near electrical or
magnetic fields. A damaged SIM will not allow you to
access the GSM network.
WARNING: Always switch the phone OFF before
removing the battery or SIM. Never insert or remove the
SIM when an external power supply (e.g. the quick
charger) is connected, otherwise the SIM may be
damaged .
1
2
3
4
ENGLISH
1
1.8
If you enter the wrong PIN1 three times in succession,
your SIM will be barred from the network and the phone
will ask for the PUK 1. Refer to section 10 for help.
IMPORTANT: The supplied PIN1 (4 to 8 digits) may be
a standard number used for all SIM’s issued by your
network operator, you should therefore change it to any
personal number of your choice as soon as possible.
Please refer to section 3 for instructions.
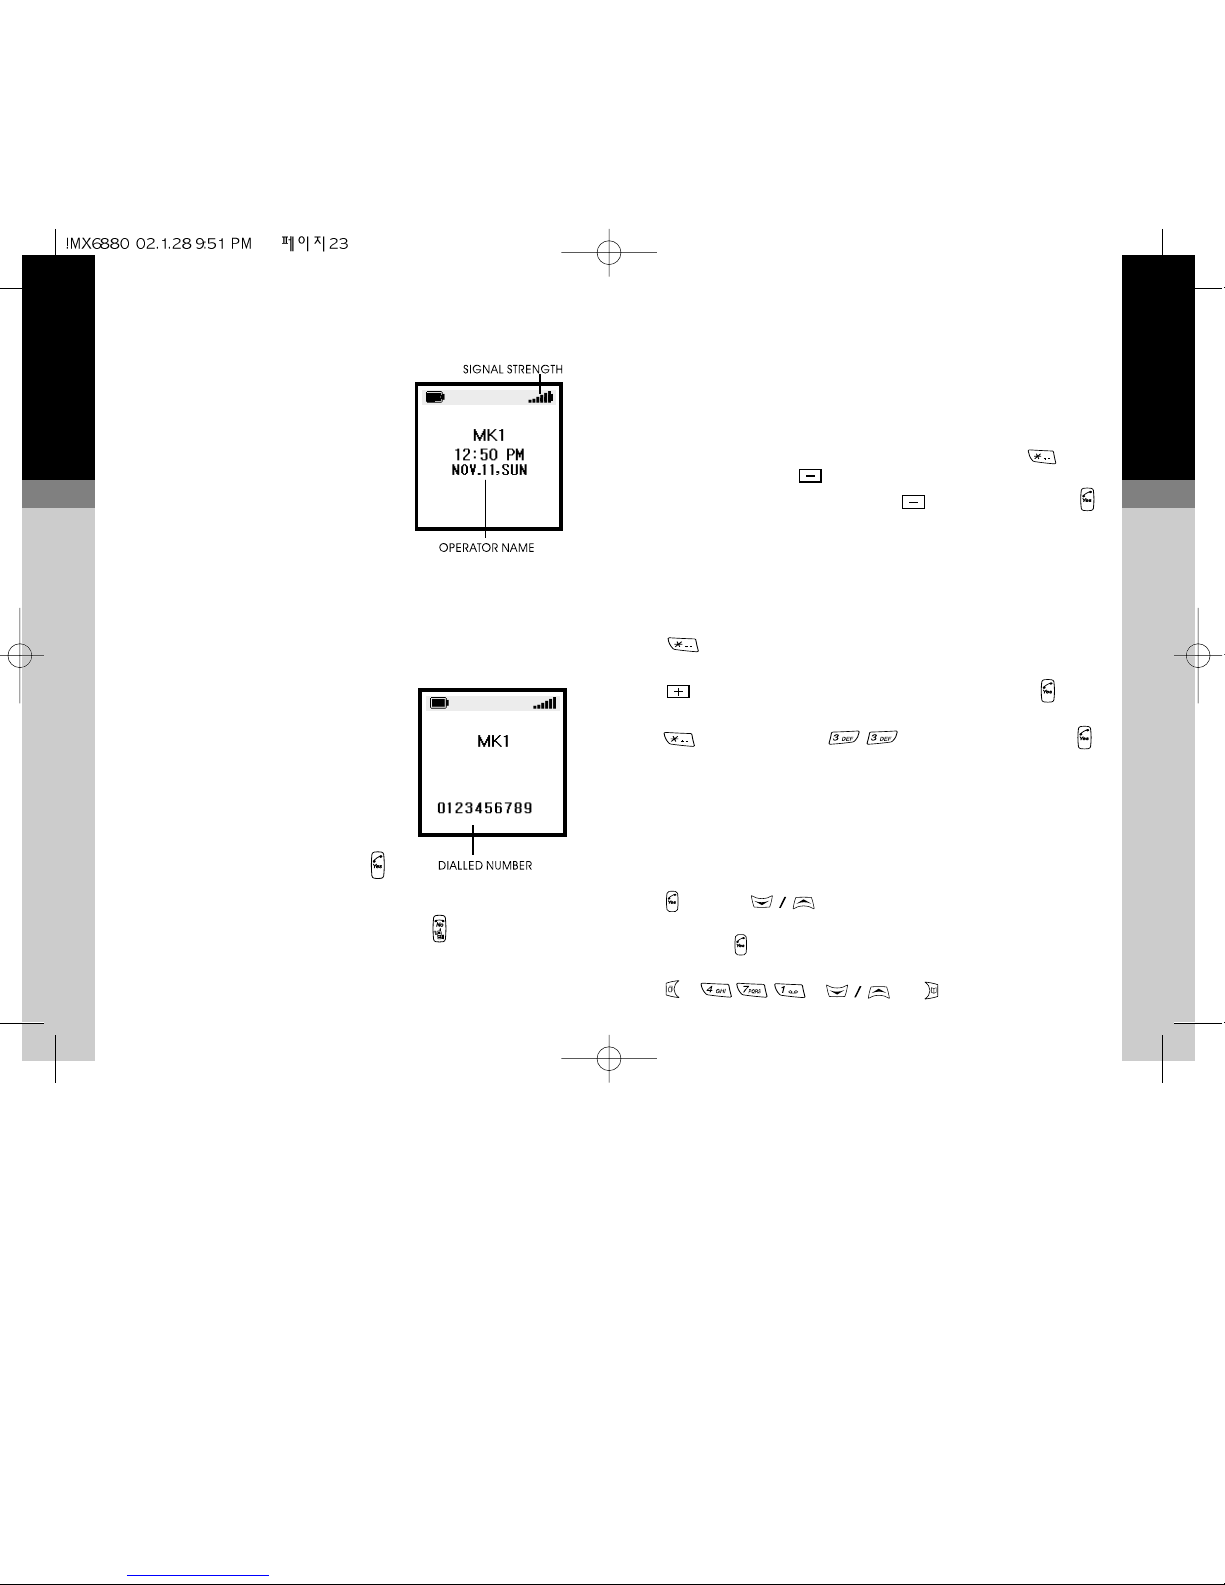
Connecting to the Network
After unlocking the SIM, the phone will make an automatic
search for your home network or another suitable operator
in your location (SEARCHING Displayed). When
connected, the name of the operator appears in the center
of the display.
Your mobile phone is now in standby mode, ready to make
and receive calls.
EMERGENCY CALLS ONLY means that you are
outside co-operating network coverage but you can still
make emergency calls subject to signal strength.
ENGLISH
1
1.7
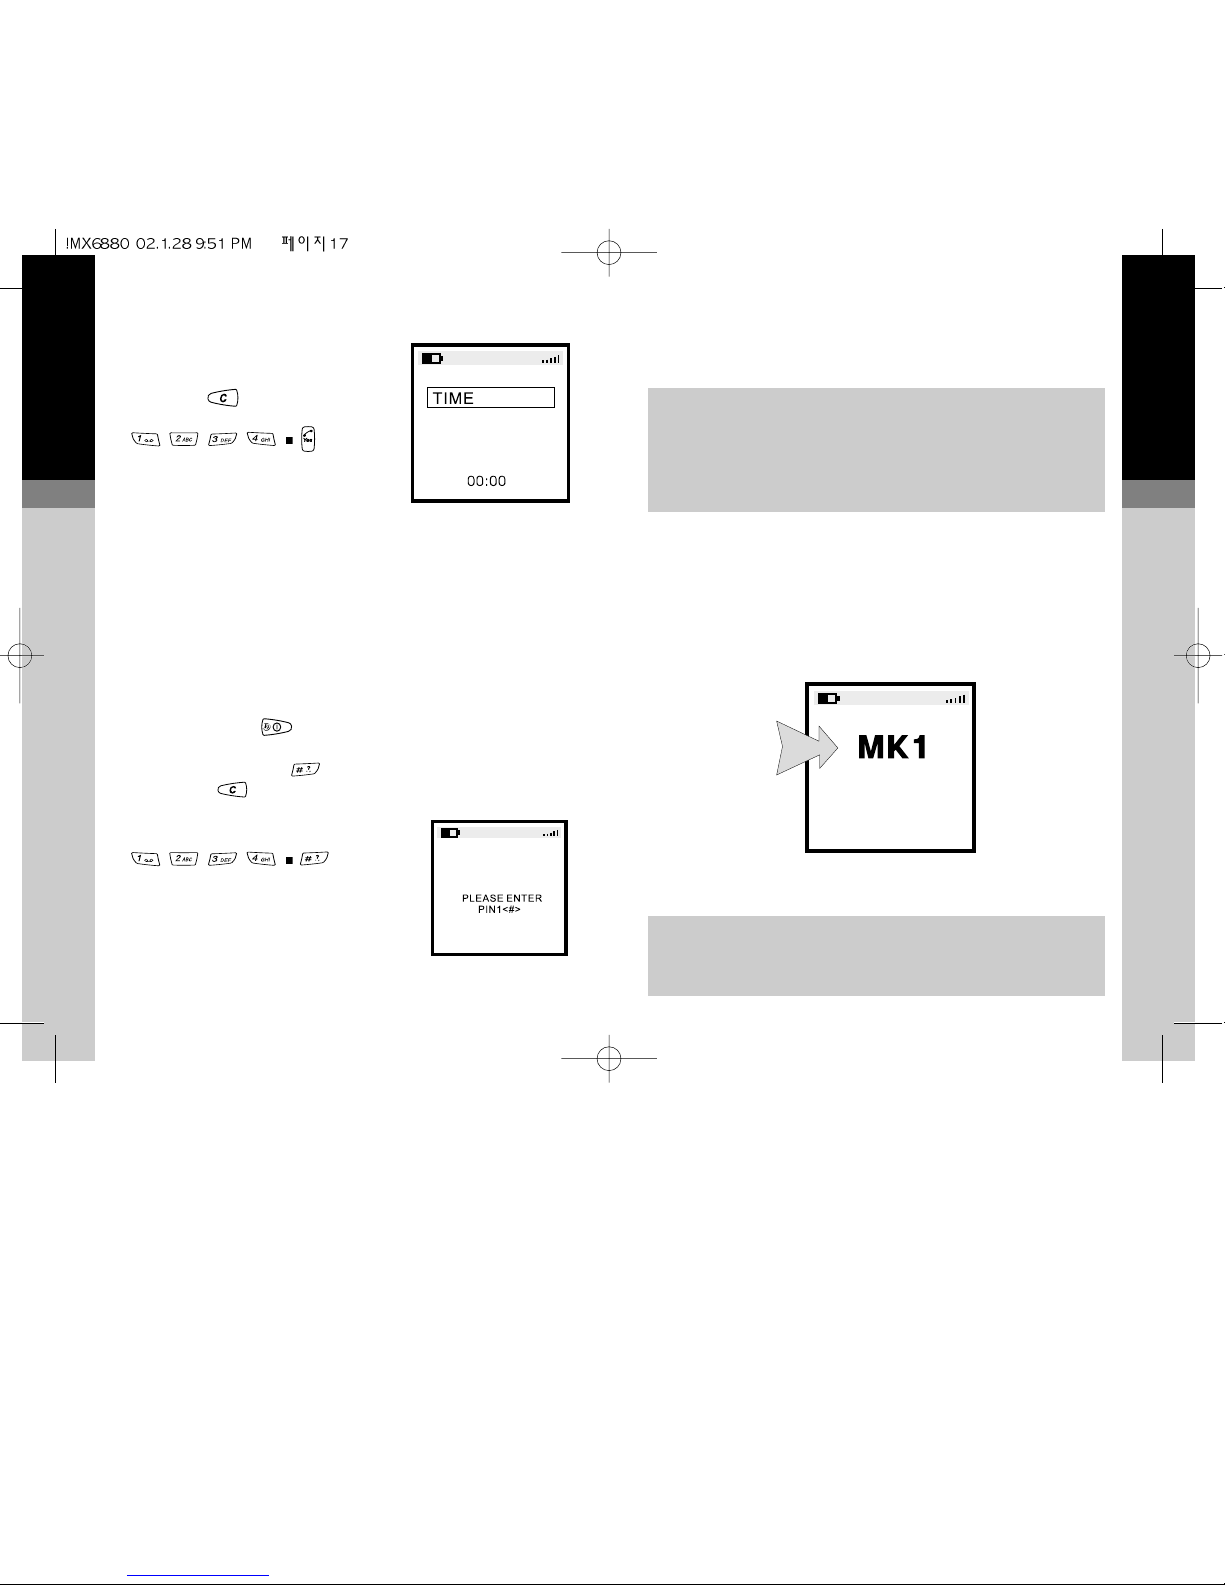
Set Time
● enter the current time. For
example if the time is 12:34
(Use the key
to clear an error)
Unlocking the SIM
To prevent unauthorized use, the SIM is protected by a
PIN1 (Personal Identity Number) code. When enabled, you
must enter the PIN1 each time you switch your phone ON.
This will unlock the SIM and allow you to make and receive
calls. You can choose to disable the PIN1 (refer to section
3) in which case your SIM will not be protected against
unauthorised use.
● press and hold to switch
the phone ON
● enter the PIN1 then
(use the key to clear
an error). For example if
the PIN is set to 1234
ENGLISH
1
1.10
Actual time can be set in either 24 hrs. or AM/PM
format.
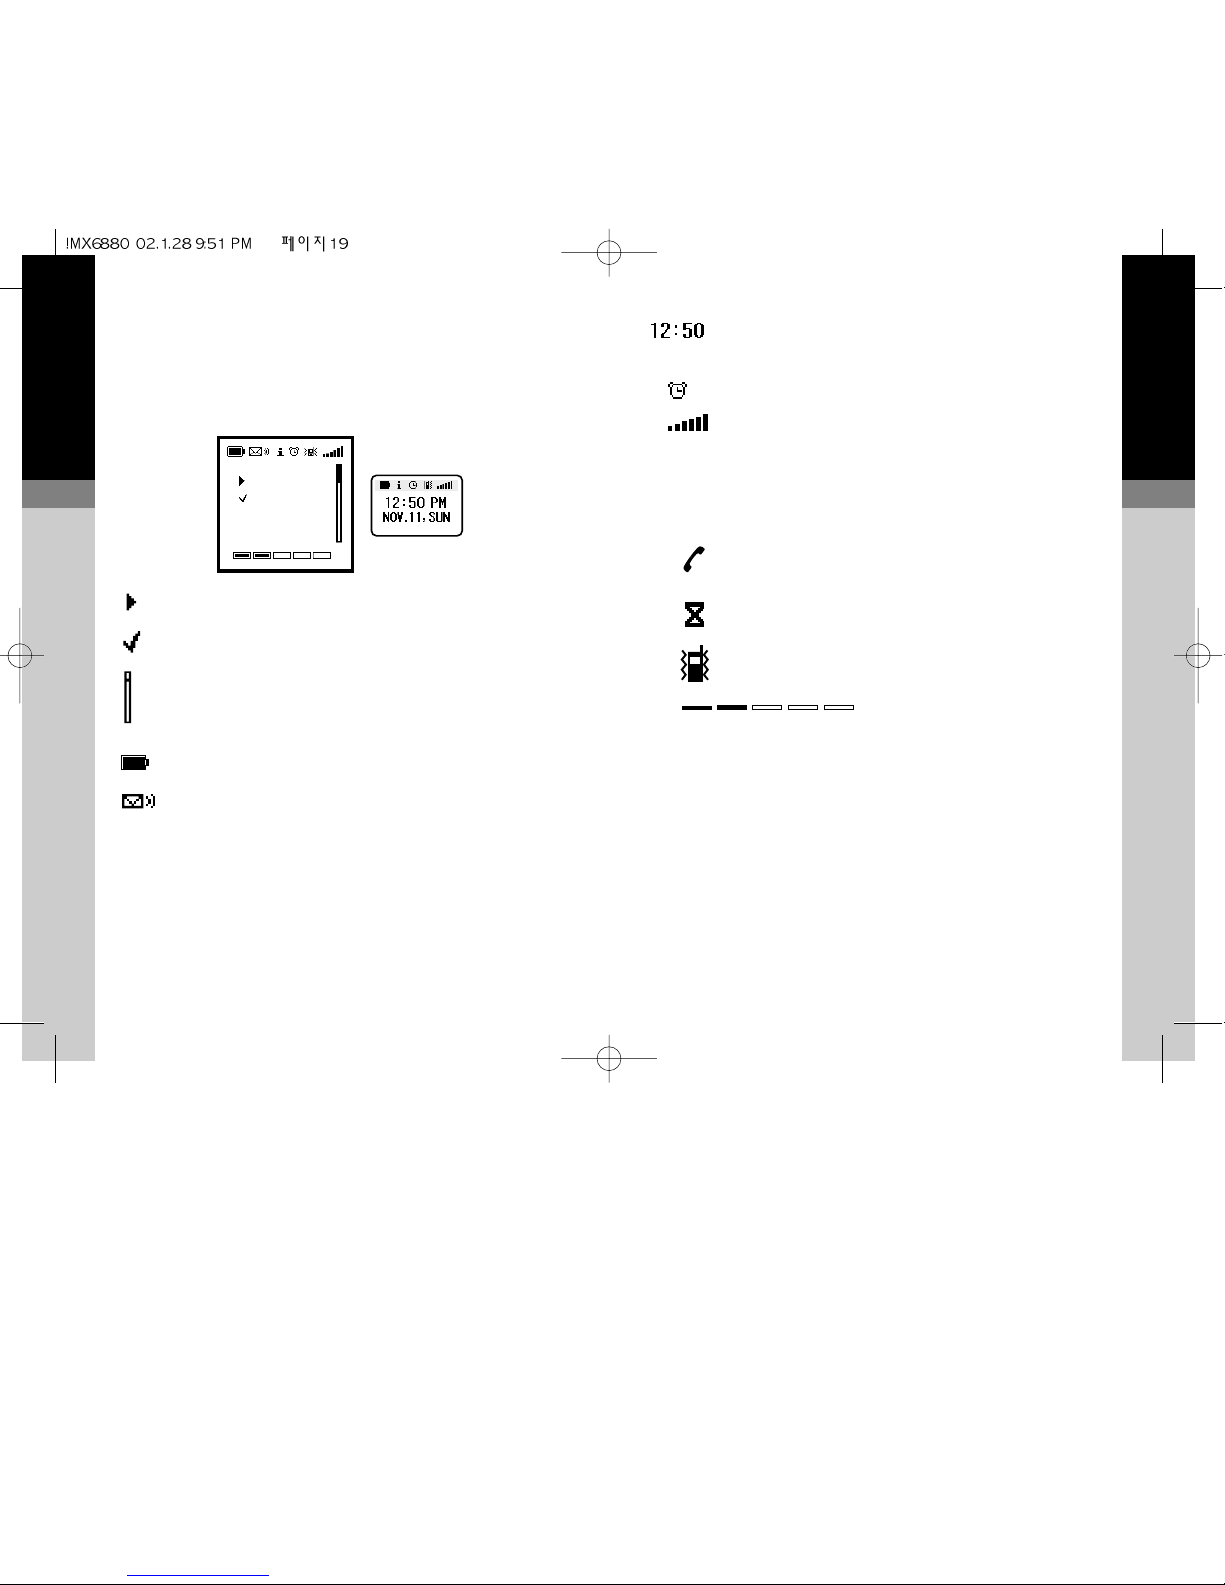
Indicates that the alarm is set.
Signal strength is indicated by the bars in the top
right of the display (6 bars for optimum signal
strength).
Indicates that the Broadcast is set. If a Barring or
Forwarding is set this icon will not be shown.
Indicates that the phone is on line via the mobile
internet.
Indicates that the phone is sending or receiving
data.
Indicates that the phone is in silent mode.
Indicates your current level
ENGLISH
1
1.9
The Display
The display will give you a lot of information via its
indicators and symbols.
Indicates your current position in the display.
Indicates your current selection.
The scrollbar appears when the menu contains
more than 6 or 8 options, and it indicates if you
can scroll up or down.
Indicates the battery power level.
The envelope indicates that you have received a
message. A text message is shown as an
envelope, and a voice message is an envelope
with >>. The voice message has higher priority
than the other in case you receive both types of
messages. After listening to the recorded message
the >> will disappear and the envelope will inform
you that you also have a text message.
i
ENGLISH
2
ENGLISH
1
1.11
The Indicator LED
In Service
The phone has a built-in indicator which can show Green
and flashes at different speeds according to the status of
the phone and battery.
Out of Service
The phone has a built-in indicator which can show Red and
flashes at different speeds according to the status of the
phone and battery.
Indicator Flash Speed
The indicator has the following flash speeds:
Normal
Information
Alert
Indicator Operator
Normal : In Service,Calling
Information : SMS message,Missed call
Alert : Incoming call
Solid : Battery charging complete
Calls
After setting up the phone, you will want to make and
receive calls. This section gives you all the basic
information you will need.
Making Calls 2.1
National Calls 2.1
Calls to a Fixed Phone Extension 2.2
International Calls 2.2
Call List 2.2
Emergency Calls 2.3
Answering Calls 2.4
Missed Calls 2.4
Calls to a Fixed Phone Extension
● some fixed extension phones cannot be called directly,
you need to connect to the exchange before dialling the
extension number. The phone will do all the dialling for
you with one key press provided that you enter a pause
(-) between the telephone (exchange) number and the
extension number. To enter a pause, press three
times (shown as below)
AREA CODE NUMBER EXTENSION
(if used)
International Calls
● unlike most fixed phones, you don’t need to enter a
separate exit code to get an international line out of the
country you are calling from, simply enter ‘+’ (by pressing
until + is displayed), the code of the country you are
calling and the full telephone number
COUNTRY CODE FULL NUMBER
● for example, to make a call to France:
(+ displayed) FULL NUMBER
Call List
● called and received numbers are stored as a list in the
phone with the last number at the top of the list. Each
number is identified as outgoing, incoming, SMS or
missed. Old numbers are automatically deleted when the
call list is full. To see the list
(latest) (search)
● any displayed number on the list can be dialled by
pressing
● the call list can be reset (cleared)
ENGLISH
2
2.2
ENGLISH
2
2.1
Making Calls
The network operator name must
appear in the center of the display
before you can make or receive calls.
Signal strength is indicated by the
bars in the top right of the display (six
bars for optimum signal strength).
Call quality can be affected by physical obstructions, so
moving only a few metres may significantly improve signal
strength.
National Calls
● if the country you are operating
in uses area codes, they must
be included even when making
local calls.
‘CALLING’ appears during
dialling and changes to
‘ACTIVE’ when connected
AREA CODE NUMBER
(if used)
● to hang up at the end of the call press or close the flip
(even if the other person hangs up first)
ENGLISH
2
2.4
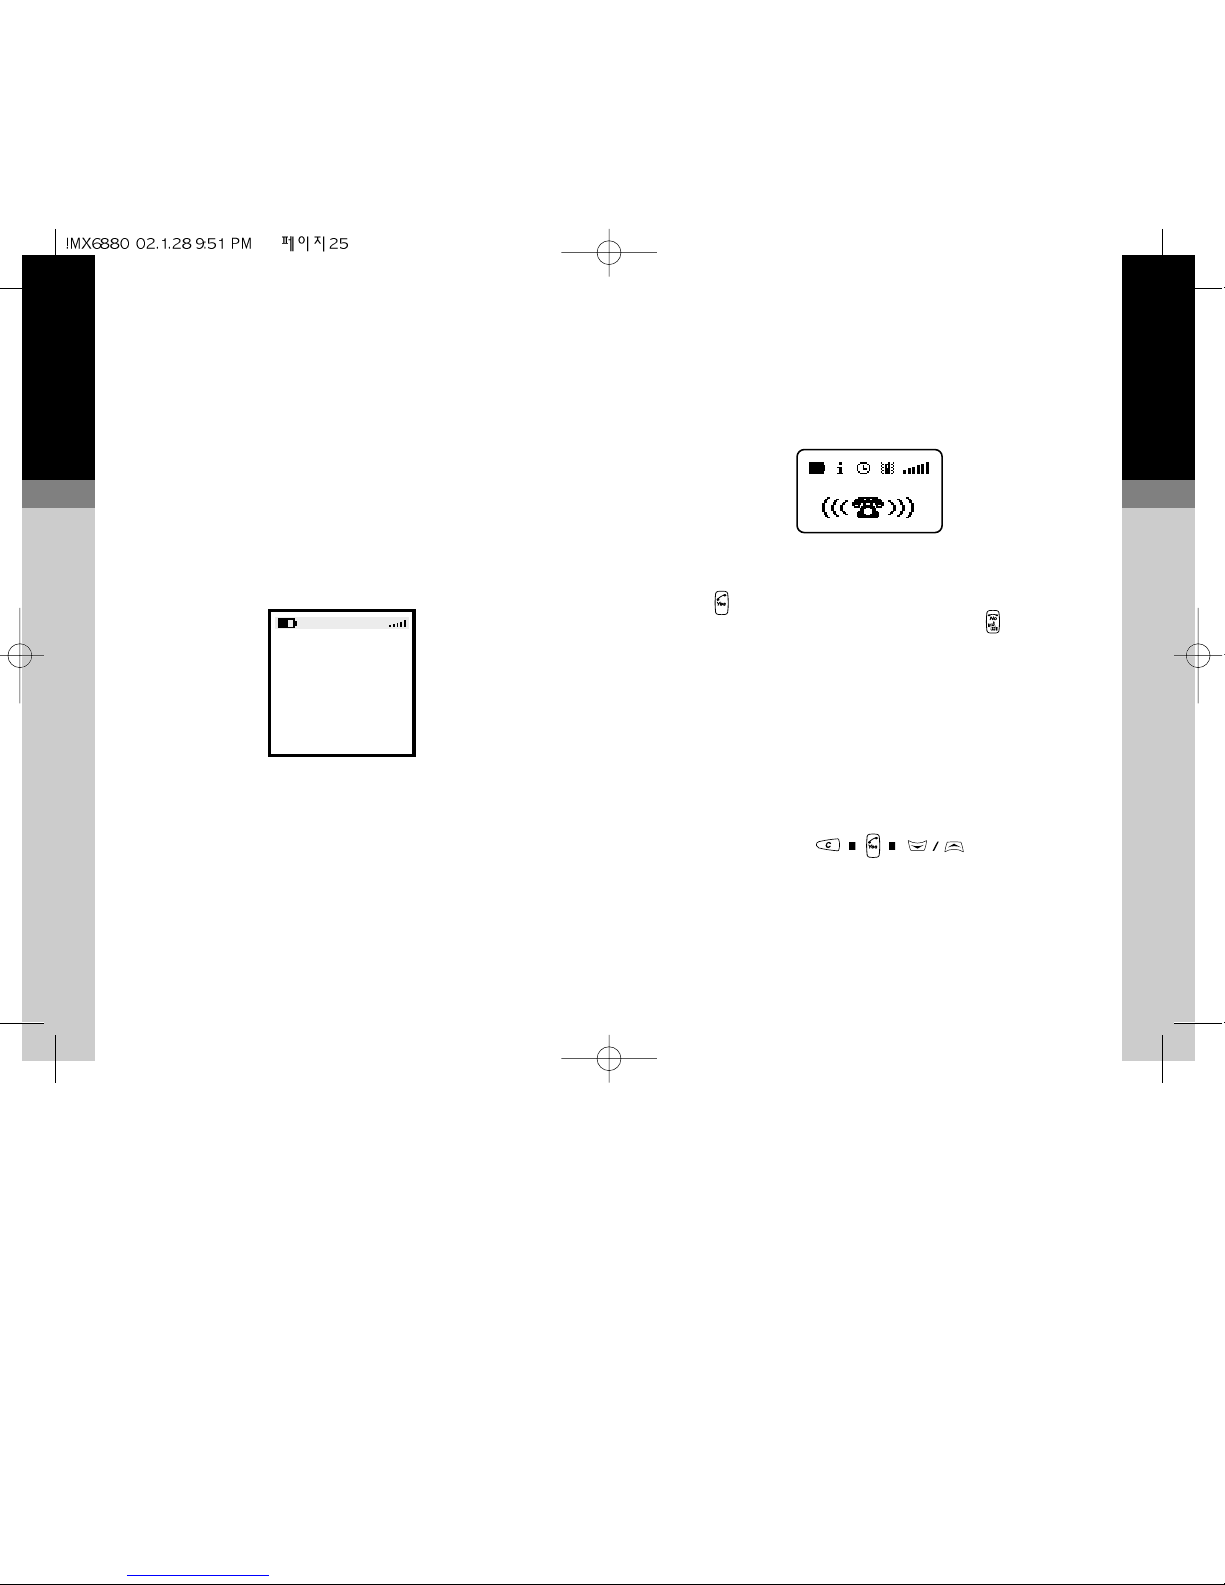
Answering Calls
● When the Folder is closed, to answer an incoming call,
open the Folder.
● When the Folder is opened,to answer an incoming call,
press
● to hang up at the end of the call press or close the
Folder (even if the other person hangs up first)
● When the folder is closed, pressing a long volume key
(increase key or decrease key) rejects the incoming call.
Missed Calls
● If you do not answer an incoming call the phone will store
the calling number in the ‘all List’ and display the number
of missed calls
● clear the message then search through the ‘all List’ for
the calling number
Emergency Calls
● it should be possible to call the emergency services in
any country which uses the digital GSM network provided
you are within network coverage (check for signal
strength bars). If your network operator does not have a
roaming agreement in the area (no displayed name)
‘EMERGENCY CALLS ONLY’ will appear to let you know
that this type of call is available.
It is possible to make the call even if the SIM has been
removed provided that you are within network coverage
● 112 is the standard GSM emergency number which can
be used on any GSM network worldwide
● a local alternative to 112 can be stored in a reserved slot
in the phone, please refer to section 4 for details
ENGLISH
2
2.3
EMERGENCY
CALLS ONLY

ENGLISH
3
Basic Features 3.9
Voice Mail 3.9
Billing (Advice of Charge) 3.10
DTMF Tones 3.11
Earpiece Volume 3.11
Scratch Pad 3.11
Any Key Answer 3.12
Call Timer 3.12
Alarm 3.12
Off Timer 3.13
Time 3.13
Data 3.13
Reset 3.13
ENGLISH
3
Basics
This section will help you to get to know the phone’s
features, phone book and call menus, provides details
about customising the phone for your own use and
shows you how to use the basic operating features.
The Feature Menu 3.1
Selecting a Feature by Search 3.2
Selecting a Feature by Number 3.3
Feature Menu Structure 3.3
Call Menu Structure 3.3
Phone Book Menu Structure 3.4
Customising 3.4
Display Text 3.4
Greeting Animation and Message 3.4
SIM PIN 1 Change 3.4
SIM PIN 2 Change 3.5
Keypad Lock 3.5
Redialling 3.5
Ring Tones and Melodies 3.6
Vibrating 3.6
Keypad Sound 3.7
Information Tones 3.7
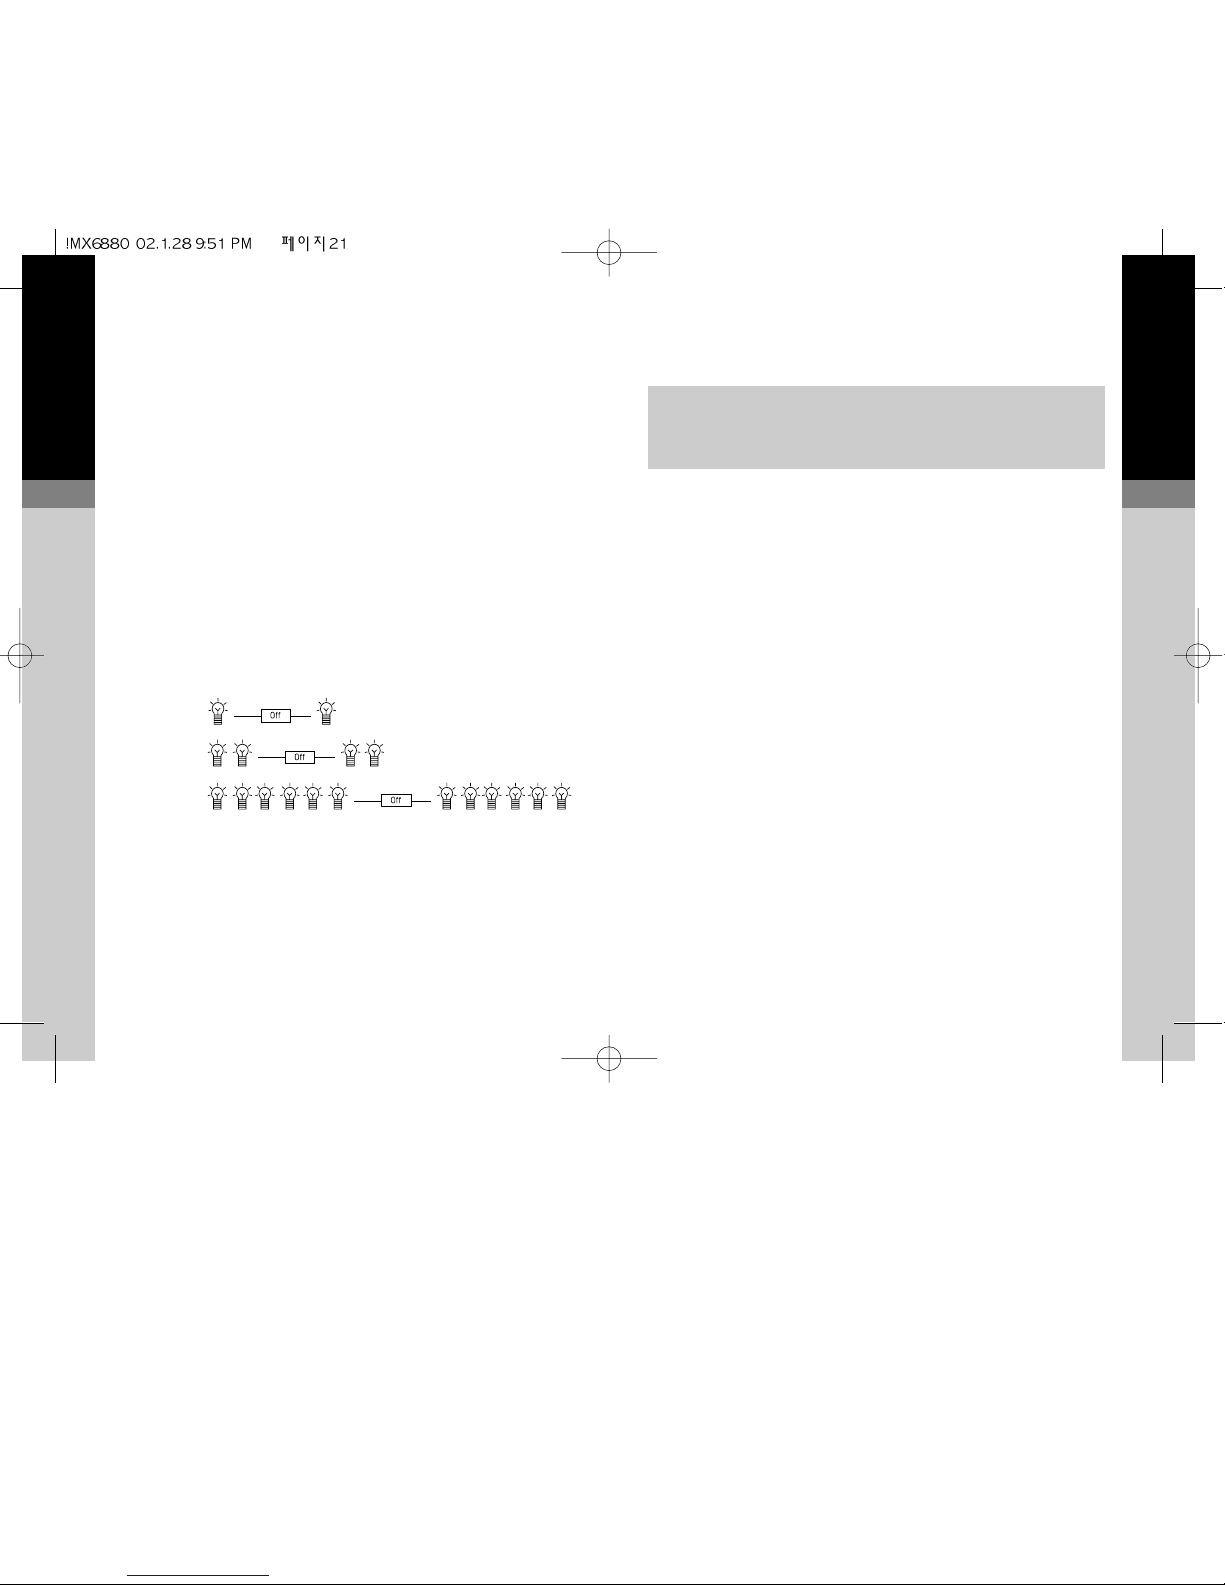
Backlight 3.7
Contrast 3.8
Layout 3.8
ENGLISH
3
3.2
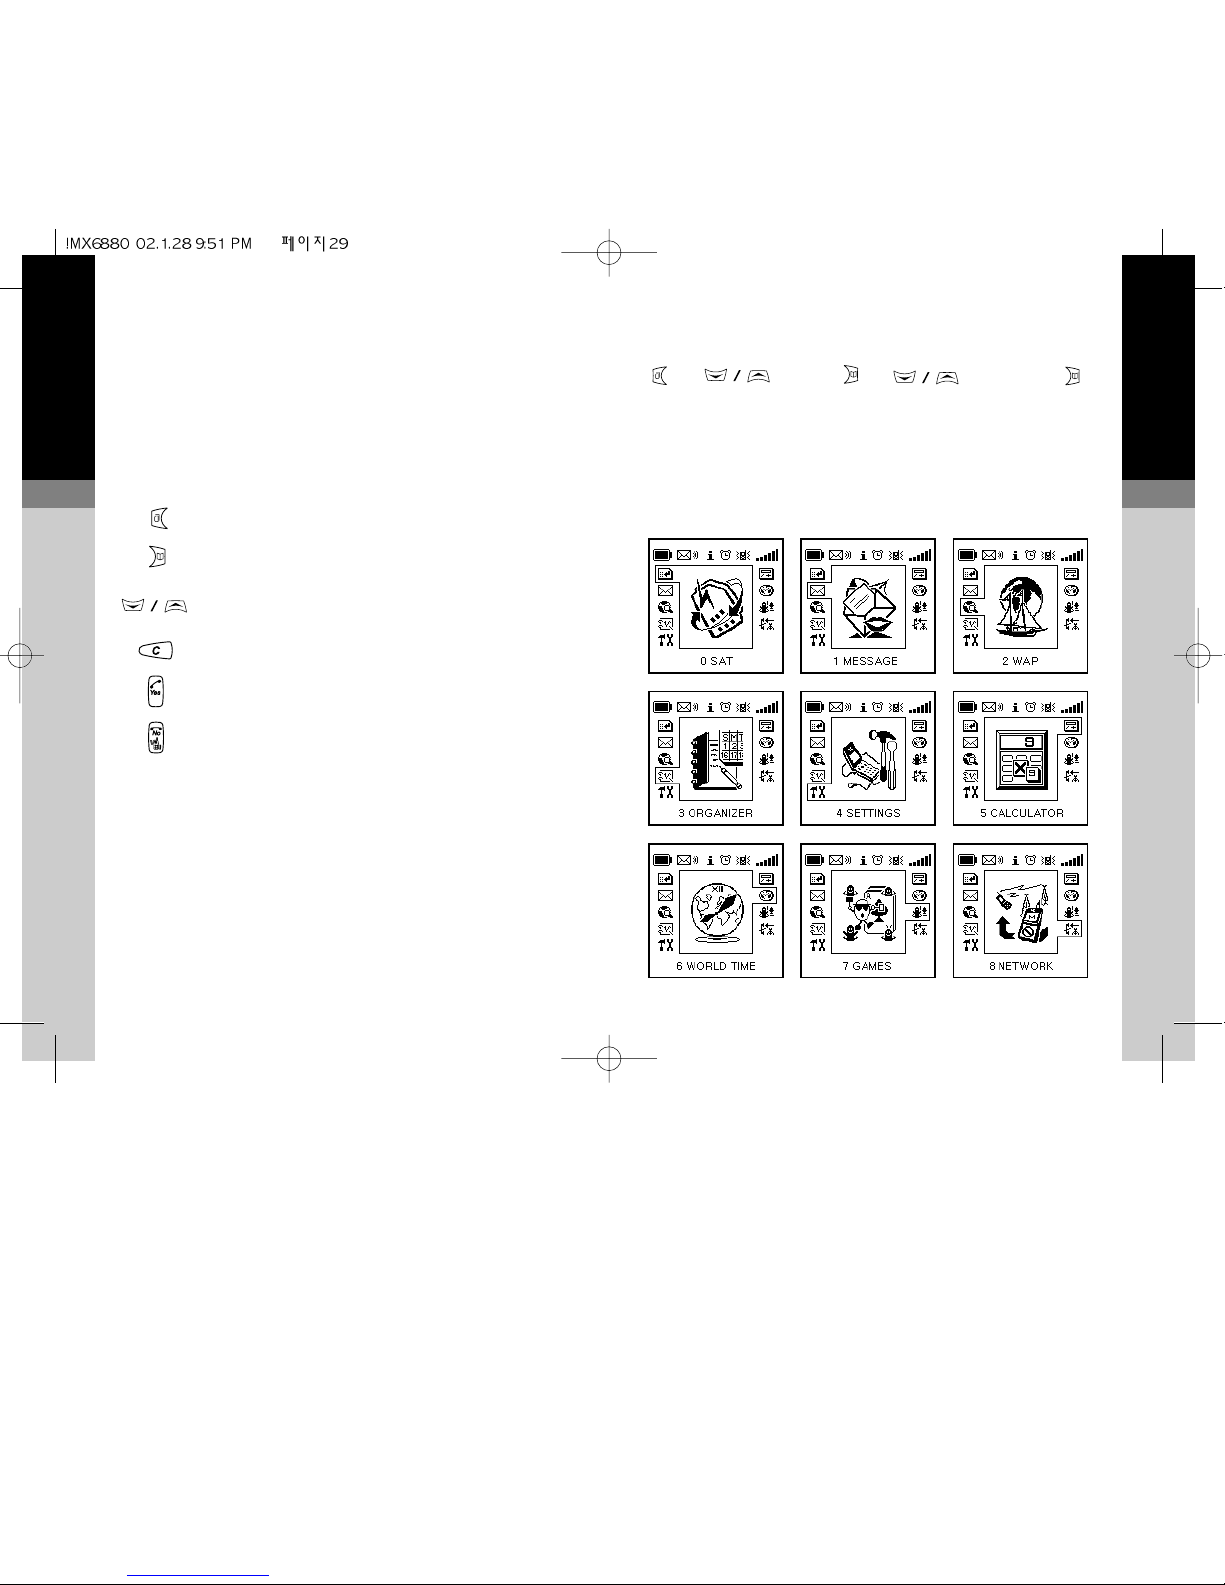
Selecting a Feature by Search
(group) (feature)
As long as you press up/down key, you can see the feature
menu with icon as below.
If network support the SIM Application Toolkit, “SAT”menu
will appear as number “0”menu.
ENGLISH
3
3.1
The Feature Menu
All the operating features of the phone are stored in the
easy to use menu. A feature can be selected directly via its
feature number (see list on next page) or by searching and
selecting using the keys (to move the cursor) at the top of
the keypad as follows:
- enter the feature menu or go back one step.
- select a menu group or feature
- search through the groups and features
- hold to exit the menu
- store an entry
- exit a feature
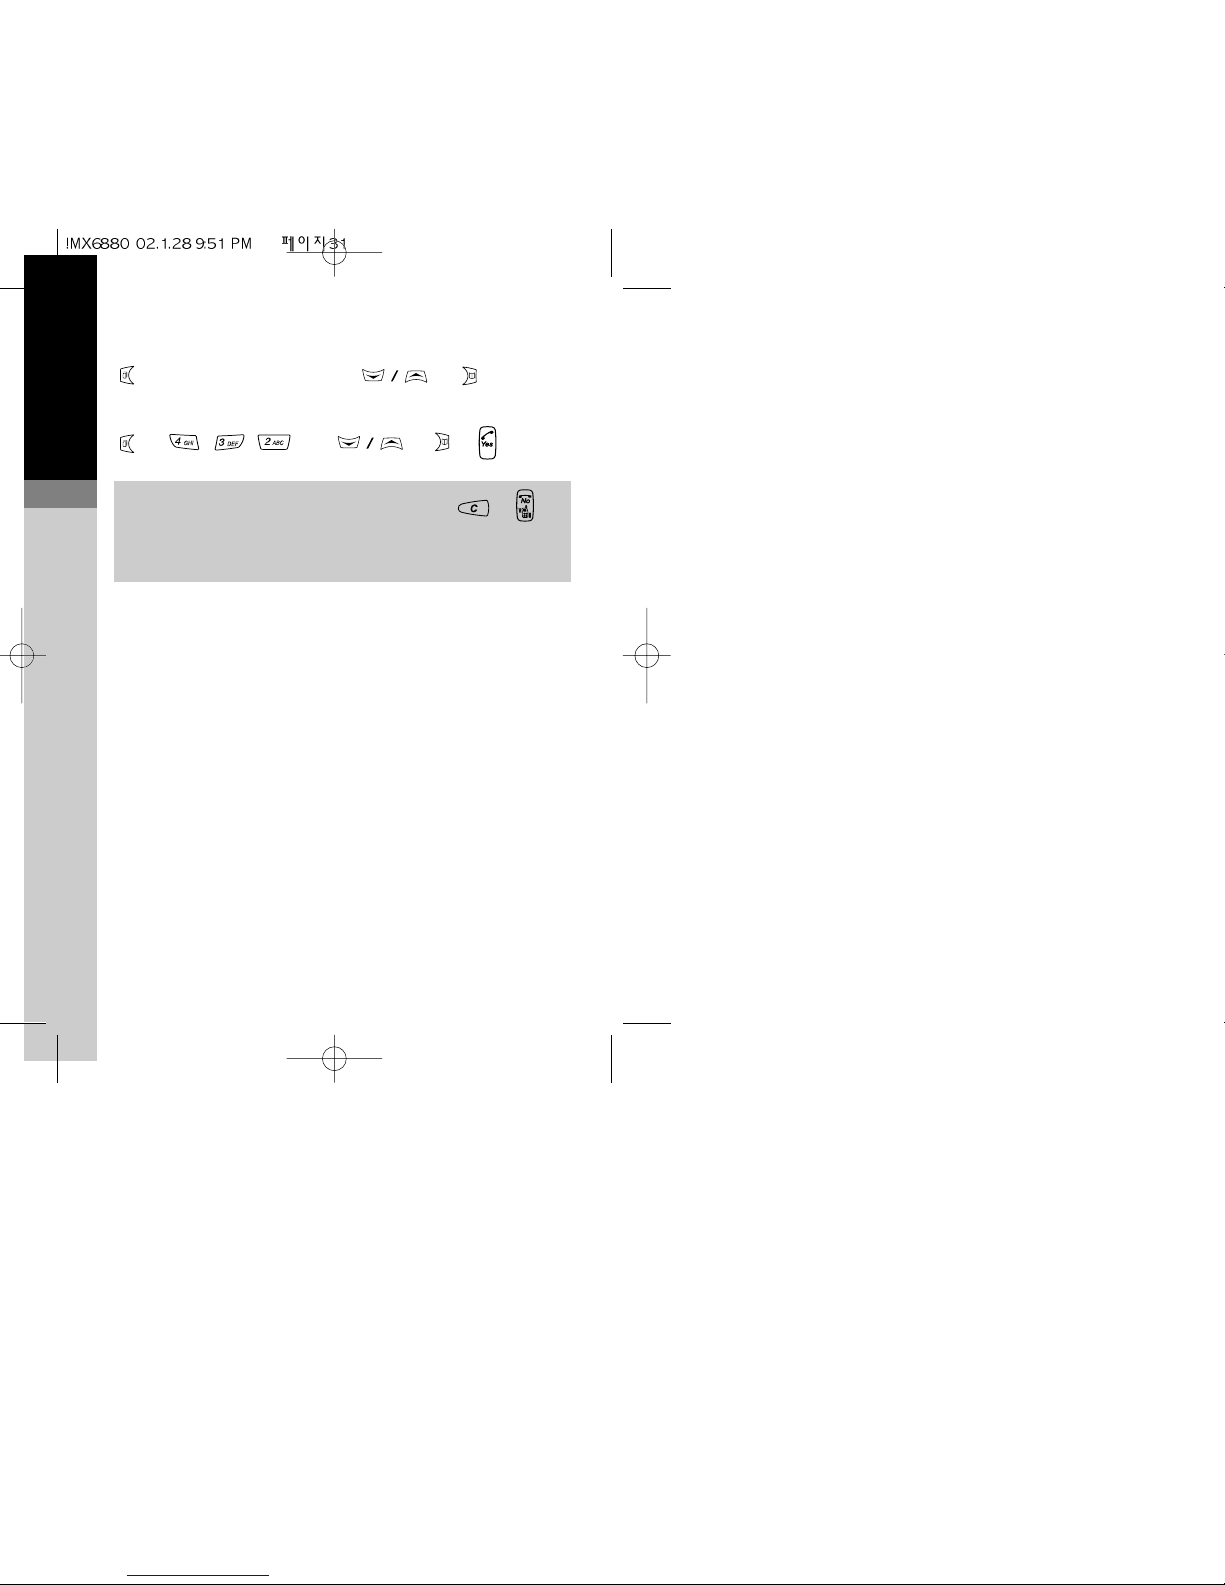
Selecting a Feature by Number
FEATURE NUMBER
● for example, to change the ring type:
(hold)
Please note that you can press and hold , to
exit a menu feature (the phone will exit on its own after a
long delay)
ENGLISH
3
3.3
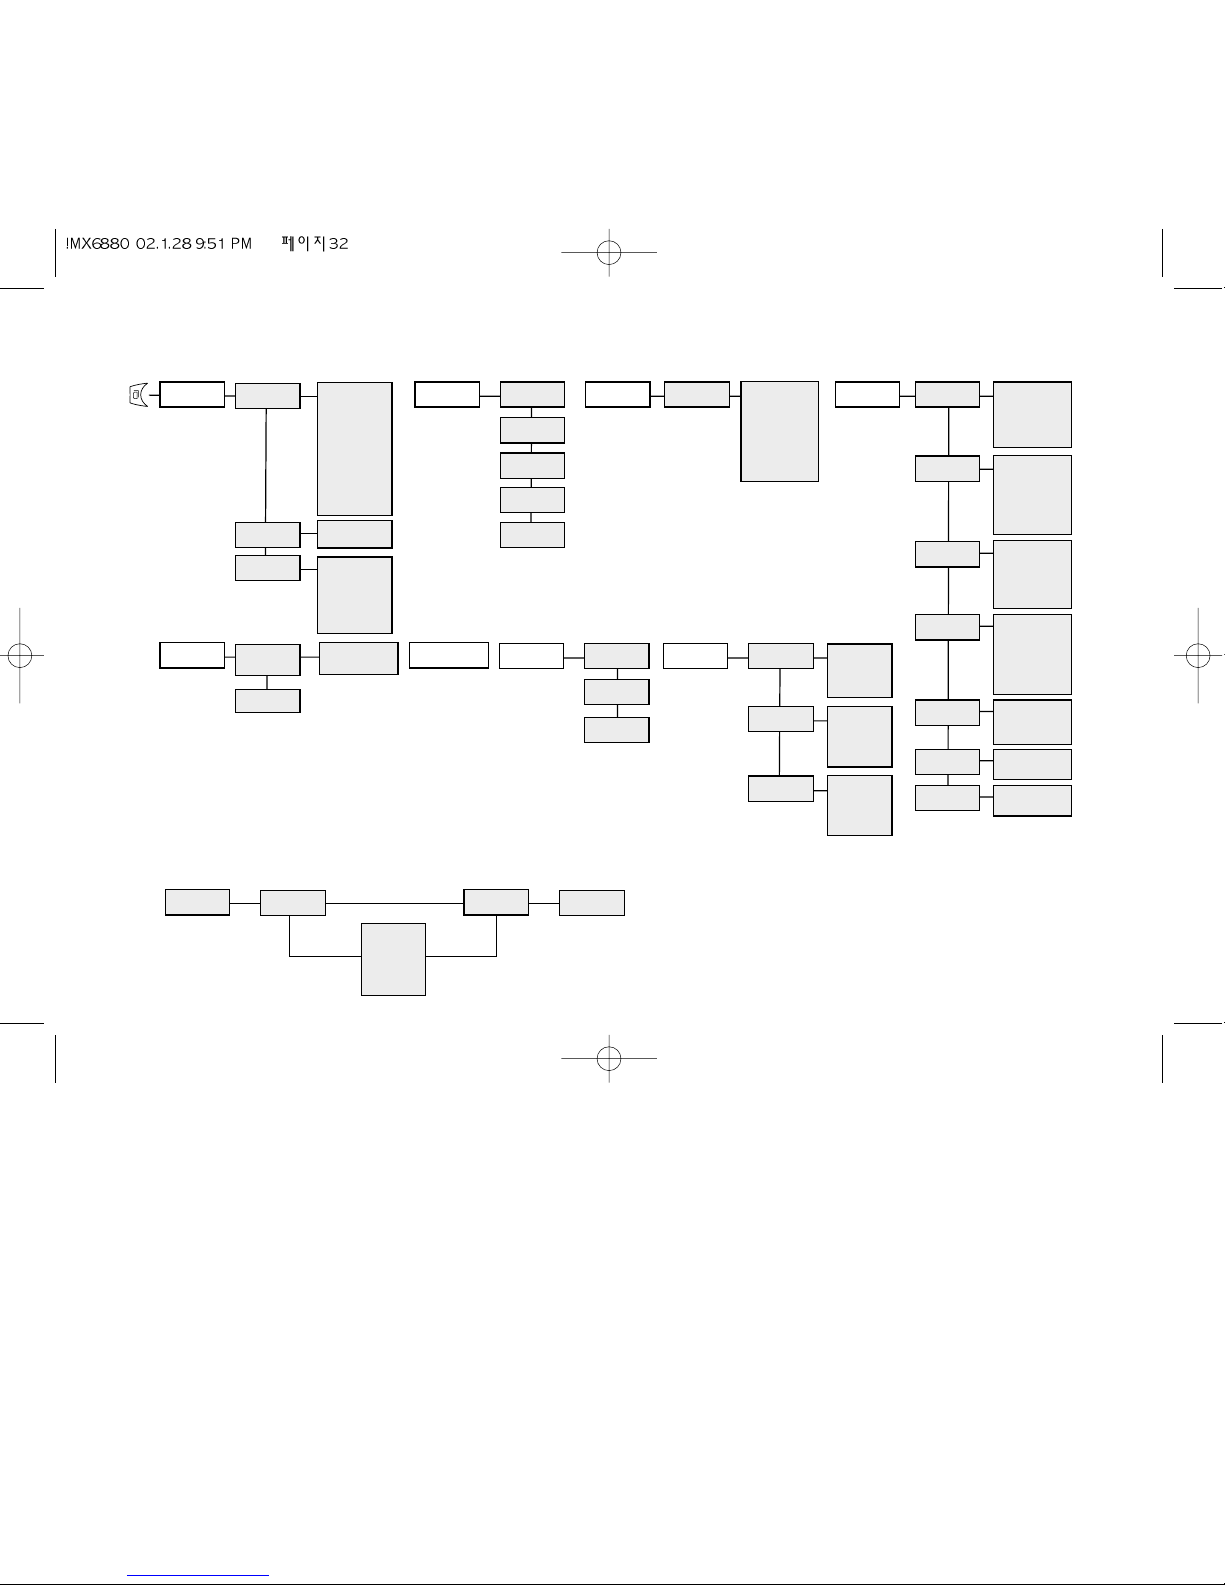
Feature Menu Structure
1. MESSAGE 2. WAP
11. SMS
12. VOICE MAIL
5. CALCULATOR
21. HOME
3. ORGANIZER
31. DAILY
4. SETTINGS
41. PHONE
42. CALL
43. AUDIO
44. CLOCK
45. DATA
46. DISPLAY
47. RESET
22. BOOKMARKS
23. PROFILES
24. EMPTY CACHE
25. T9 LANGUAGE
71. MEMORY
72. CASINO
73. ADVENTURE
51. CURRENCY
CONVERSION
52. CALCULATE
13.BROADCAST
111.
112.
113.
114.
115.
116.
117.
118.
119.
1110.
1111.
READ
SEND/EDIT
SEND ONLY
REPLY
DELETE
TEMPLATE
FORMAT
S.C.NUMBER
VALIDITY
ALERT TONE
T9 LANGUAGE
311.
312.
313.
314.
315.
316.
317.
318.
VIEW ENTRIES
NEW ENTRY
GO TO DAY
GO TO WEEK
VIEW WEEKLY
VIEW MONTHLY
VIEW TO DO’S
SETTINGS
411.
412.
413.
414.
415.
LANGUAGE
GREETING
PIN 1 CODE
PIN 2 CODE
INDICATOR
421.
422.
423.
424.
425.
426.
BILLING
REDIALLING
CALL WAITING
SEND DTMF
ANSWER KEY
CALL TIMER
441.
442.
443.
444.
445.
446.
ALARM 1
ALARM 2
OFF TIMER
TIME
FORMAT
DATE
451.
452.
453.
BIT RATE
FORMAT
RESET
461.
462.
BACKLIGHT
CONTRAST
471.
472.
CALL LIST
SETTINGS
431.
432.
433.
434.
435.
RING VOLUME
RING TYPE
VIBRATE
KEY SOUND
INFO. TONES
121.
122.
LISTEN
NUMBER
131.
132.
133.
134.
135.
136.
READ
ON
OFF
CHANNELS
LANGUAGE
ALERT TONE
511.
512.
IN FOREIGN
IN DOMESTIC
6. WORLD TIME
7. GAMES
81. FORWARDING
811. NO REPLAY
812. WHEN BUSY
813. NOT REACH
814. ALL
815. CANCEL
821. OUTGOING
822. INCOMING
823. CANCEL
824. NEW
PASSWORD
831. MODE
832. SEARCH
833. PREFERRED
834. RESELECT
835.
NEW NETWORK
8.2 BARRING
8.3 NETWORK SET
8. NETWORK
CALL MENU CALL 1
RETRIEVE
END
HOLD
JOIN
SPLIT
CALL 2 MENU
Call Menu Structure (see section 5 for details)
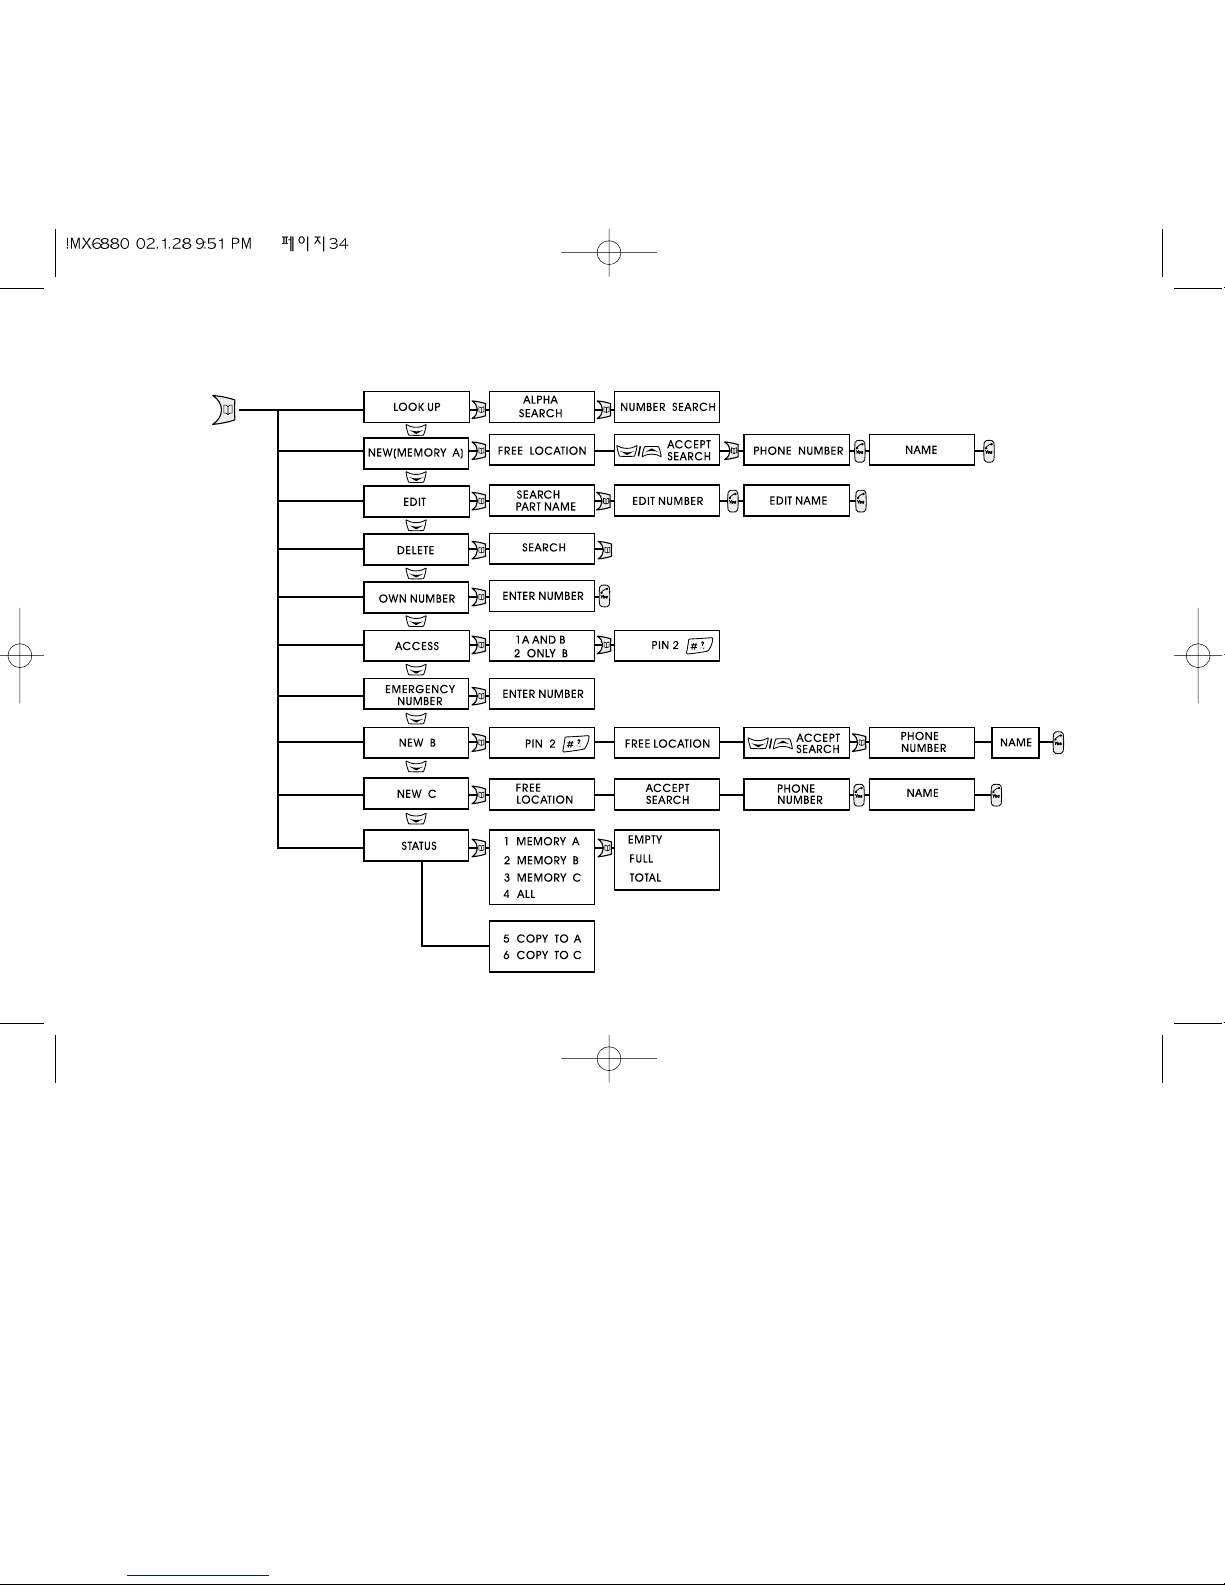
Phone Book Menu Structure (see section 4 for details)
 Loading...