

Page 1
Portable Solar Power Generator
(PPS)
User Manual
Thank you for using our product!
Please strictly follow all warnings and instructions on this manual and the
unit. Make sure to take good care of this manual.
Do not operate until you have read all the safety and operation instructions.
Page 2

Contents
Product Overview.......................................................1
LCD DISPLAY............................................................1
LCD battery symbol and failure code..........................2
Safety Instructions....................................................2
Operation Guidance...................................................3
FAQ(Frequently Asked Questions).............................6
Unpacking..................................................................6
Technical specication...............................................7
Trouble Shooting........................................................9
Contact us................................................................10
Page 3
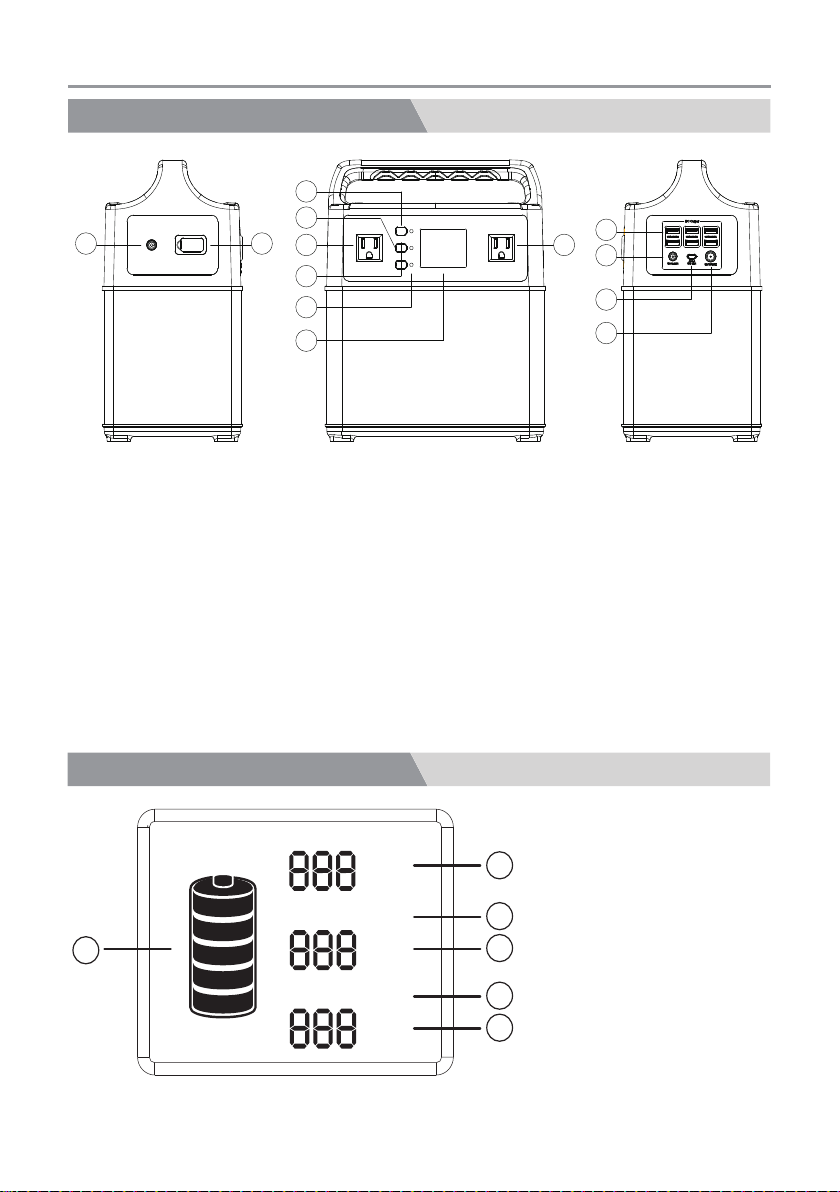
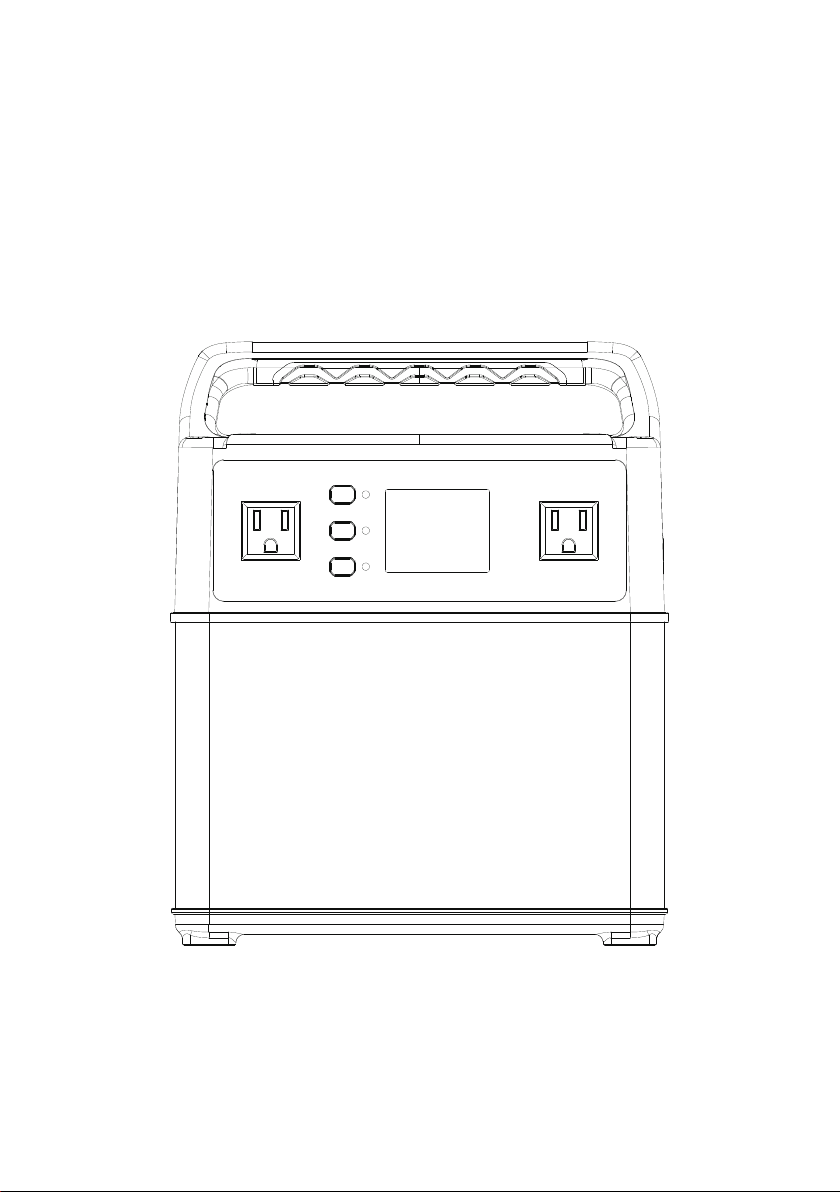
Product Overview
1
2
5 9
10
11
6
8
3
7
12
13
4
INPUT
DC ON/OFF
AC ON/OFF
W
W
W
2
3
4
5
6
1
1. PV/Adapter Charging port
2. CAR Jump Starter Port
3. Main power On/Off Button
4. DC Power On/Off Button
5. AC Outputs
6. AC Power On/Off Button
7. Power On/Off Indicator Lights
LCD DISPLAY
8. LCD Display
9. AC Outputs
10. USB 5V Output ports(6mm)
11. 12V/5A Output port
12. Type-C QC3.0 Output port
13. 12V/10A Output port(8mm)
1
1. Battery Level
2. Input Charging Power
3. DC ON/OFF
4. DC Output Power
5. AC ON/OFF
6. AC Output Power
Page 4

LCD battery symbol and failure code
The LCD Battery Display indicates the Battery level. There are 5 segments
of the battery, approximately 20%-40%-60%-80%-100% capacity. During using,
segments will disappear from the display. When charging your PPS, you will
notice a battery segment blink at 1 second interval, which indicates the current
charge status and the number under INPUT shows the real-time charging
power. Once it is fully charged, all battery segments will be lit and remain solid.
When the product breaks down, the fault code is displayed at the input or
output power display, such as "E01"
Note: Charge your PPS when there is only one battery segment!
Safety Instructions
Safety Caution
1. Before using this product, please read the "safety instructions" carefully
to ensure correct and safe use. And please keep the instructions carefully, if the
equipment is damaged due to failure to operate as described in this manual,
the company has the right not to guarantee the quality.
2. Operate as required.
3. Avoid using the product in direct sunlight, rain or wet environment.
4. This product can not be used near the heat source area, or there are
electric heating furnace, heat furnace and other similar equipments.
5. When placing this product, keep a safe distance around it to ensure
ventilation
6. When cleaning, please use dry articles for wiping
7. In the re, please use dry powder re extinguisher correctly. There is a
danger of electric shock if you use a liquid re extinguisher
8. When using, please do not touch other parts inside the cabinet except the
terminal.
9. If this product needs maintenance, please contact us.
10. Operating temperature r: 0°C-40°C; Operating humidity: 5% - 90%.
2
Page 5

11. Charging plug must be connected to charging socket. Don't connect
charging plug to discharging socket.
Use in low temperature environment
Cold weather can inuence battery capacity. In sub-zero temperature
(<0°C), you may be able to discharge the product, but you should not charge
it. Otherwise, the battery of the product would be greatly damaged and the
capacity may not even be recovered.
1. Low temperature charging protection
When the product is charged at a temperature below 0°C, it will shut off and
stop charging itself automatically. The product will reboot and start charging
itself when the temperature rise to above 5°C .
2. Low temperature discharging protection
If the product is discharged at a temperature of -20°C, it will turn off output in
15 seconds. The product will reboot and turn on output when the temperature
rise to above -15°C.
Storage and maintenance
1.Please fully charge the product before storage and charge it at least once
every 3 months.
2.Store this product in a cool, dry and well-ventilated area. Storage
temperature:0°C-40°C.
3.Failure to use, store and maintain the product according to the instruction
would void the warranty.
Note:
1. The using environment must meet our requirements;
2. Ensure the product is placed in a well-ventilated environment
Operation Guidance
How to use this product
1. Press the main power button for 2 seconds to turn on the product, then
3
Page 6

the power indicator and LCD screen will be lit up. When the main power switch
key is turned on, the product can be charged and the AC/DC key can be turned on.
2. After the main power button is turned on, you must turn on the AC/DC
key when using this product to power your device. Press the AC/DC button
for 2 seconds to open the corresponding AC/DC output. Then you will nd the
corresponding LED green indicator next to AC/DC button will be lit up. After 15
seconds of use, the backlight of the display screen is closed and any key is
pressed to activate the display screen.
3. If the main power button is turned on, and the AC and DC switch button is
not turned on, then the product will be automatically shut down after 10 minutes
without charging.
4. To save battery power, turn off the product when you are not going to
use it for a long time. Press the AC/DC button for 2 seconds to close the
corresponding AC/DC output. Long press the main power button for 2 seconds
to shut down, then AC and DC have no output, and the display screen and
indicator lights are off. The product cannot be charged when it is off.
Note:
1. Please turn off the product when you don’t use it;
2.Please fully charge the product if you are going to leave it idle for a long
period.
How to charge this product ?
Note: Please charge the product before use; Turn on the product before
charging.
There are 3 ways to charge the product, using AC adapter, solar charging
cable or car charger. First, you need to determine the input source and select a
charger accordingly. Then, connect the charger to the input port of the product
and it will be charged. When the product is being charged, the LCD battery
would ash on the LCD screen. When the product is fully charged, the LCD
battery would stop ashing.
A. Charge with Solar Charging Cable
Place your solar panel somewhere that it can receive direct sunlight and
4
Page 7

abundant sunshine.
The solar panel open-circuit voltage should be 14-40v.The maximum
charging power of this product is 125W.
Connect the solar panel and the product using solar charging cable. Make
sure that the solar charging cable is correctly connected and forming a solid
contact with the input port of the product.
This product is built-in advanced system control circuit module. When the
battery is full charged, it will stop charging automatically.
B. Charge with AC Adapter
Please use the AC charger equipped with this product to charge. You can
know the charging status of this product through the LCD screen. This product
is built-in advanced system control circuit module. When the battery is full
charged, the product will stop charging automatically.
C. Charge with Car Charger
Please use the original car charger. Insert one end of the car charger to the
car cigarette lighter and insert the other end to the input port of the product. The
LCD battery will blink to indicate that the product is being charged normally.
Note: A car with 12V starting battery can't charge this PPS fully, but a car
with 24V battery can charge it fully. You'd better start the car when you charge
this PPS.
How to Jump-Start a Car
Precautions before jump-starting a car:
1.Make sure the engine displacement of the vehicle (or other motor vessels,
here take a car for example) is no more than 4L.
2. Make sure the PPS power is over 60% (four battery segments on).
3. Make sure the clamps on jump-start cable is not broken.
Steps:
1. Clamp the red clip to car battery positive pole and the black clip to the
battery negative pole.
2. Plug the other end of jump-start cable into your PPS.
3. Turn the key to start your car as normal.
4. After starting, remove the cable from this product rst, then remove red
and black clip.
5
Page 8

FAQ(Frequently Asked Questions)
Q1.How do I know if my PPS is charged?
To check the charging state of your portable power supply, refer to the LCD
Battery Display. When lit up, you will see a battery outline with ve segments,
indicating the current charge level. You can turn on the Battery Display by
pressing the Master Power Button. It is OK to use your PS5B even when it’s not
fully charged.
Q2. How do I know if my device will work with the PPS?
First, you’ll need to determine the amount of power your device requires.
This may require some research in your side, a good Google search or
examining the user guide of your device should be enough.
Second, you will need to check the capacity for the individual output ports.
For example, the AC port is monitored by an inverter that allows Max.300W of
continuous output power. This means if your device needs to work over 300W
power for a long time, the PPS’s inverter will shut off automatically.
Q3.What’s Depth of Discharge(DOD)
To extend the service life and storage time, the DOD is set around 90%, which
is 90% of 400wh, to keep the battery from damage due to over discharge. Then
the product real working time is calculated as : Working time =400wh*0.9÷P (P:
Power of connected electrical devices)
Unpacking
Before opening the package, please check if the packaging is damaged.
After unpacking, please check if product appearance is damaged or any part is
missing. If so, please contact us.
PPS accessories are as follows.
No. Item Quantity
A Portable Power Supply 1
B AC wall charger 1
6
Page 9

C Car charging cable 1
D Solar charging cable 1
E 12V/10A output to car charging cable 1
F Type-C to type-C cable 1
G Car jump-starting cable 1
H User Manual 1
I Warranty card 1
Technical specication
Model EB40(JP&UL) EB40(EU)
Battery Material Lithium-ion Rechargeable Cell
Battery model Samsung INR18650-29E
Battery rated voltage 11.1V(3S14P)
Battery capacity 400Wh(36Ah*11.1V)
Battery
Output
AC output
12V/10A
output
port(8mm)
Continuous Output Power (Max.) 300W 300W
Peak output 600W 600W
Rated output voltage 110Vac 230Vac
Rated frequency 50/60Hz 50/60Hz
Power factor 1 1
Overload
Self-consumption (No load) <5W <10W
Max efciency (>70% load) 88% 88%
Output voltage 12.6 12.6
Rated output current 10A 10A
Overload protection power >140W >140W
100-150%@2min;
>150%@10S
100-150%@2min;
>150%@10S
7
Page 10

12V/5A output
port(7909)
Type-C output
port
USB output
ports(6pcs)
Max. PV charge power 126W 126W
PV input voltage range 12.6~40Vdc 12.6~40Vdc
Output voltage range 10~12.6V 10~12.6V
Rated output power 60W 60W
Overload protection power >65W >65W
Communication protocol type QC3.0 QC3.0
Output voltage range
Rated output current
Overload protection current >3A >3A
Output voltage 5V 5V
Max output current 3.5A 3.5A
PV charge
voltage range 15-40Vdc 15-40Vdc
Max. input voltage 40Vdc 40Vdc
Max. input current 10A 10A
MPPT efciency 99.50% 99.50%
Max. efciency >96% >96%
3.6~12V(
5V/2.5A, 9V/2A,
default
5V)
12V/1.5A
3.6~12V(
5V/2.5A, 9V/2A,
default
5V)
12V/1.5A
Solar power charge type MPPT MPPT
Main Unit
relative humidity: 10%-90% (without
Working environment
Relative temperature: 0-40
Relative temperature: 0-40
condensation)
8
°C
°C
Page 11

Trouble Shooting
This product has been fully tested prior to shipping. If you meet any difculty
during operation of the generator, read this manual carefully.
If any failure occurs, please refer to this trouble shooting form. If still can’t
solve, please contact our customer service. During a call, please provide
us with the following information: Serial NO.,describe details what error is
happening, input and output information.
Error
code
E01 Over Temperature Protection
E02 Battery Over Voltage Protection Disconnect the charger and restart it;
E03 Battery Damage Protection Please contact customer service.
E04 1st Battery String Over-Voltage Disconnect the charger and restart it
E05 2nd Battery String Over-Voltage Disconnect the charger and restart it
E06 3rd Battery String Over-Voltage Disconnect the charger and restart it;
E07 1st Battery String Low Voltage
E08 2nd Battery String Low Voltage
E09 3rd Battery String Low Voltage
Cause Solution
1, Check the ambient temperature if higher
than 40
generator cools down.
Charge the unit in time, restart it after fully
charged
Charge the unit in time, restart it after fully
charged
Charge the unit in time, restart it after fully
charged
. Output will start again if the
°C
Discharge low temperature
E10
protection
E11 Battery Low Voltage Protection
Check the ambient temperature whether it’s
lower than -20
Charge the unit in time, restart it after fully
charged;
°C
9
Page 12

E12 Inverter Over Current Protection Check if the AC output overload or short circuit
E13 Inverter Over Load Protection Check if the AC output overload
E14 Inverter Short-Circuit Protection Check if the AC output overload or short circuit
E16 Charging Over Voltage protection
12V6A Output Over Current
E19
Protection
E20 12V6A over load protection Check the if the 12V6A is over load
12V10A Output Over Current
E21
Protection
E22 12V10A overload protection Check if the 12V10A output overload
E23 5V1 Over Current Protection Check if the output overload or short circuit
E24 5V2 Over Current Protection Check if the output overload or short circuit
Battery over temperature
E25
protection
Check if the input voltage excess the max
input voltage
Check if the 12V/6A output overload or short
circuit
Check if the 12V10A output overload or short
circuit
Check if the environment temperature is higher
than 40℃. Generator will recover to normal
work after it cools down.
Contact us
Should you have any technical questions, please contact your distributor.
With following information:
Purchase date
Model
Error code
Details refer to the warranty card.
Please tell the distributor or us the details of the failure and process
Thank you for your support
10
Page 13

 Loading...