

Page 1
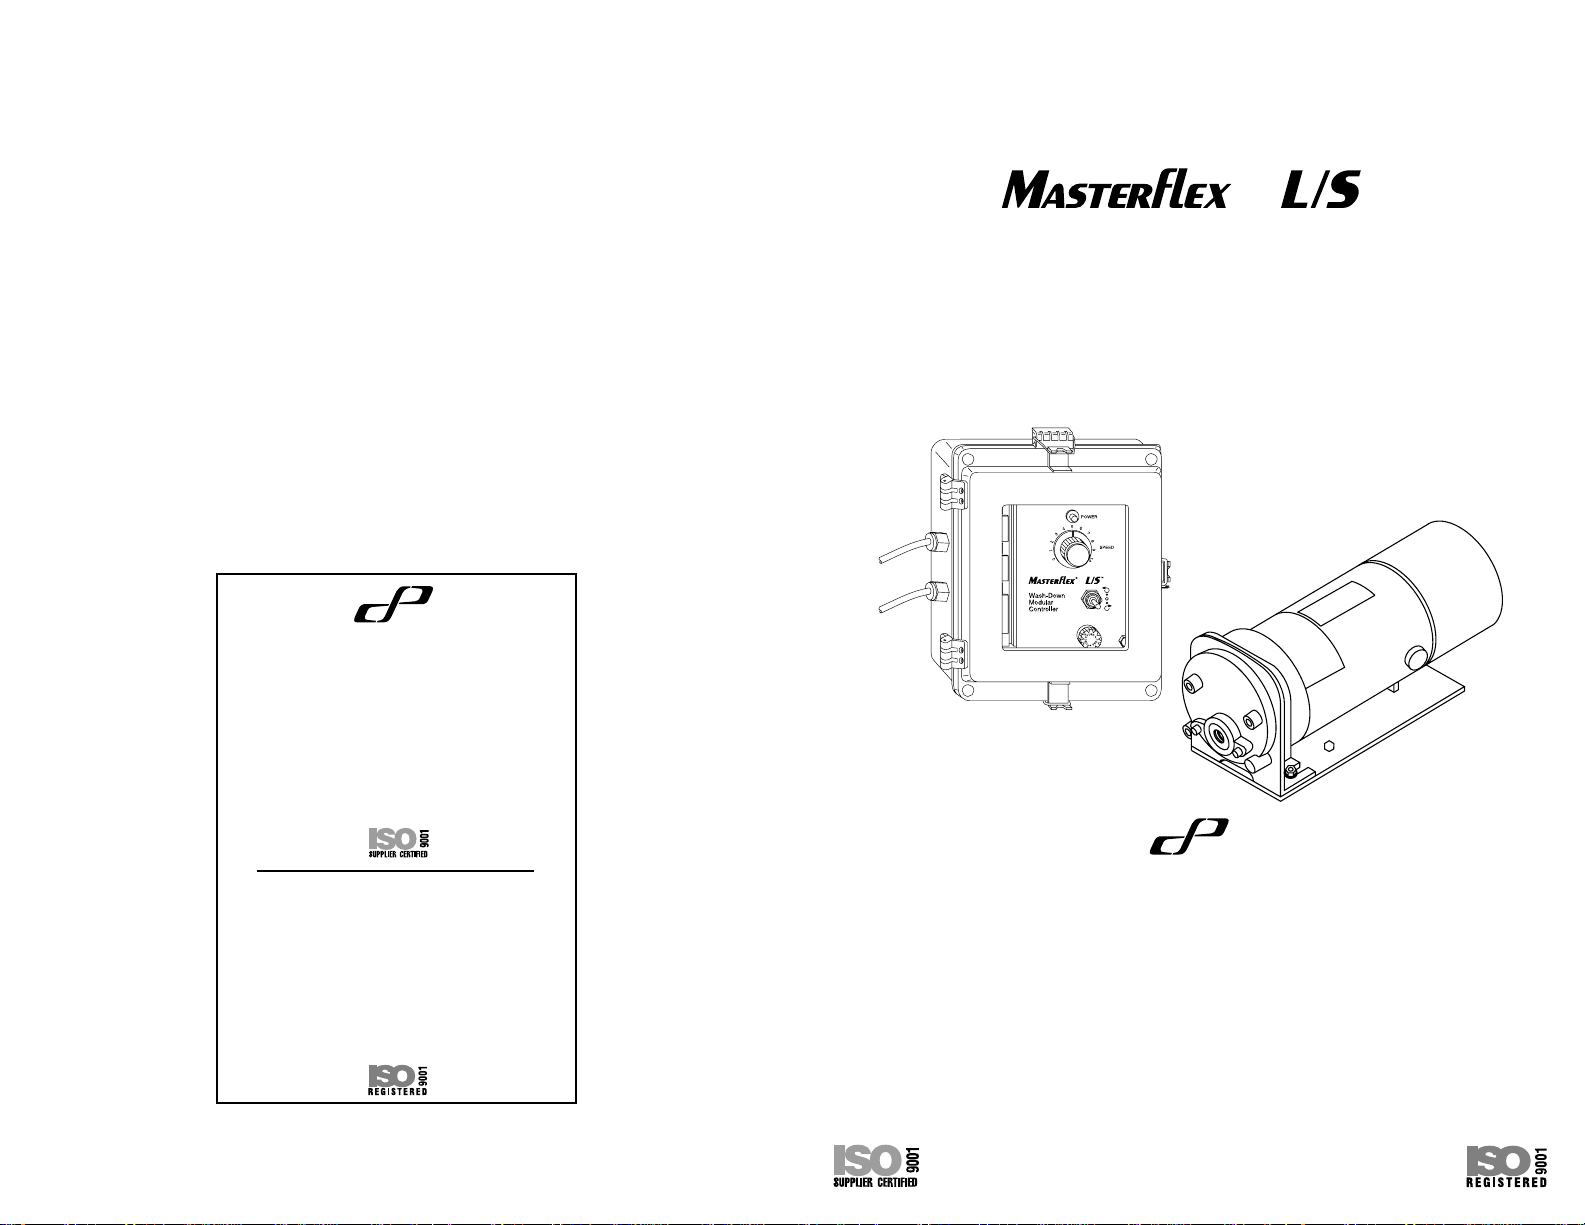
WASH-DOWN MODULAR
PUMP DRIVES
Model Nos.
7552-70
7552-75
WARRANTY
Use only MASTERFLEX precision tubing with MASTERFLEX pumps to
ensure optimum performance. Use of other tubing may void applicable
warranties.
The Manufacturer warrants this product to be free from significant deviations from
published specifications. If repair or adjustment is necessary within the warranty
period, the problem will be corrected at no charge if it is not due to misuse or
abuse on your part, as determined by the Manufacturer. Repair costs outside the
warranty period, or those resulting from product misuse or abuse, may be invoiced
to you.
The warranty period for this product is noted on the Warranty Card.
PRODUCT RETURN
To limit charges and delays, contact the seller or Manufacturer for authorization and
shipping instructions before returning the product, either within or outside of the
warranty period. When returning the product, please state the reason for the return.
For your protection, pack the product carefully and insure it against possible damage
or loss. Any damages resulting from improper packaging are your responsibility.
TECHNICAL ASSISTANCE
If you have any questions about the use of this product, contact the Manufacturer
or authorized seller.
8
Printed in U.S.A.
040901
OPERATING MANUAL
Cole-Parmer Instrument Co.
625 East Bunker Court
Vernon Hills, Illinois U.S.A. 60061-1844
1-800-MASTERFLEX (627-8373) (U.S. and Canada only)
11 (847) 549-7600 (outside U.S.)
(847) 549-7600 (Local)
FAX (847) 247-2929 (U.S. and Canada only)
11 (847) 549-1700 (Fax outside U.S.)
www.masterflex.com
e-mail: techinfo@coleparmer.com
Barnant Company
28W092 Commercial Ave.
Barrington, Illinois U.S.A. 60010-2392
1-800-637-3739 (U.S. and Canada only)
11 (847) 381-7050 (outside U.S.)
(847) 381-7050 (Local)
11 (847) 381-7053 (Fax outside U.S.)
(847) 381-7053 (Local Fax)
www.barnant.com
e-mail: barnant@barnant.com
Cole
Parmer
®
Cole-Parmer Instrument Co.
1-800-MASTERFLEX (627-8373) (U.S. and Canada only)
11 (847) 549-7600 (outside U.S.)
(847) 549-7600 (Local)
www.masterflex.com
Barnant Company
1-800-637-3739 (U.S. and Canada only)
11 (847) 381-7050 (outside U.S.)
(847) 381-7050 (Local)
www.barnant.com
A-1299-0614
Edition 04
Cole
Parmer
®
®
®
Page 2
SAFETY PRECAUTIONS
DANGER: High voltages exist in the Drive/Controller.
WARNING: Disconnect the AC power input line cord before connecting
the drive motor cable.
WARNING: No user serviceable parts are inside of this controller. Refer
servicing to your dealer.
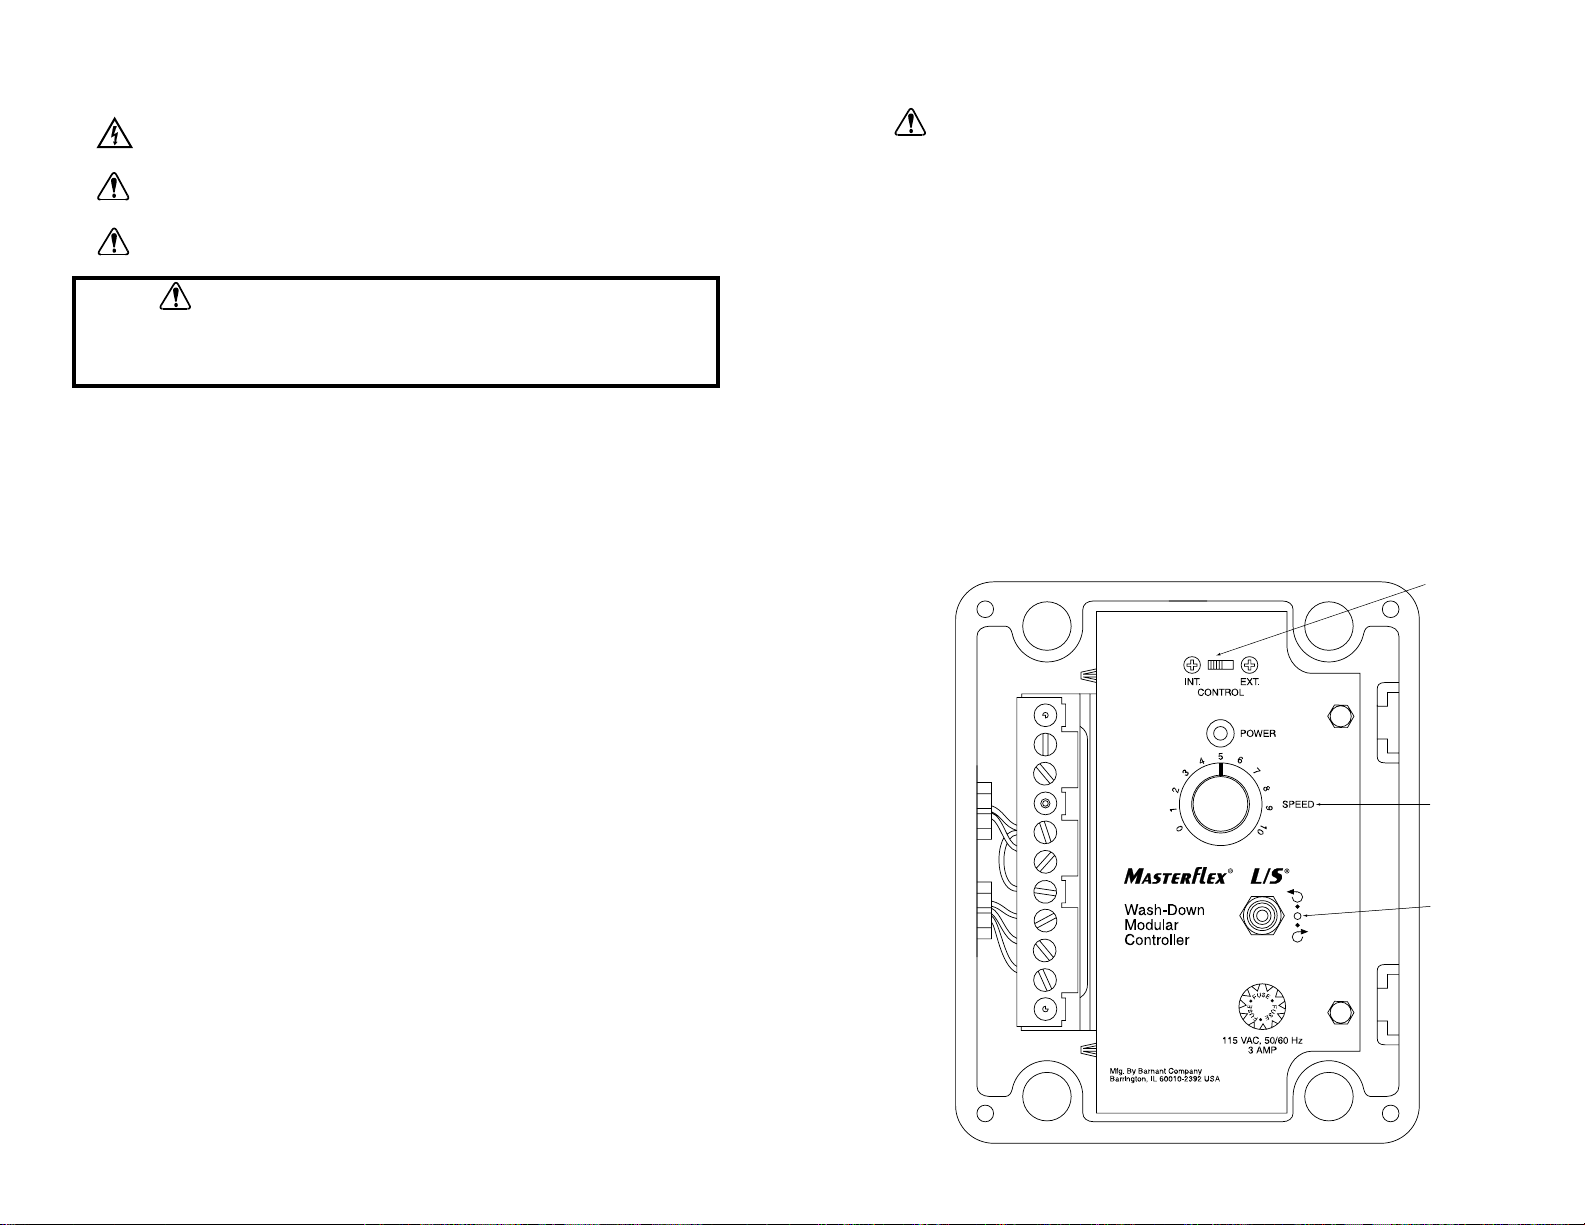
SETUP AND DRIVE OPERATION
INTRODUCTION AND GENERAL DESCRIPTION
This controller and drive system when coupled with a MASTERFLEX®L/S®compatible pump head provide variable-flow fluid transfer. The motor and controller can be
mounted in separate locations for better protection or control. The NEMA rated
motor and controller withstand wet or hostile environments. Operate the pump
drive manually or remotely via a 4-20 mA input signal.
VARIETY OF PUMP HEADS ACCEPTED
Mount up to 2 MASTERFLEX®L/S®pump heads and all MASTERFLEX®L/S®–compatible pump heads. See individual pump heads for flow rates.
SETUP AND DRIVE OPERATION
1. Unpack the drive, save packing material until proper product operation has
been verified.
2. Mount pump head and load tubing (see pump head manual).
3. Connect the drive motor cable to the cable from the controller.
4. Connect the AC power input line cord to the AC receptacle.
5. Selecting motor direction turns pump on. The LED indicator turns RED.
6. Adjust flow rate with speed control potentiometer.
WARNING: PRODUCT USE LIMITATION
This product is not designed for, nor intended for use in patient
connected applications; including, but not limited to, medical and dental use,
and accordingly, has not been submitted for FDA approval.
2
REMOTE OPERATING PROCEDURE
WARNING:
Turn off AC power before connecting the external remote
control cable.
1. Connect the remote speed control to the terminal strip on the side of the
controller.
2. Set the front panel CONTROL switch to the EXTERNAL position.
NOTE: When the CONTROL switch is in the EXTERNAL position, motor speed
can only be controlled from the external source. The front panel speed
control is inoperative.
3. Set the front panel DIRECTIONAL switch for the desired direction of rotation.
4. Set the speed control on the remote control to a setting that will provide the
desired flow rate and lock the control.
5.4-20 mA loop control:
<4 mA (stop pump)
4 mA (minimum speed)
20 mA (maximum speed)
± 3% linearity control
1.8 VDC (nom.) input voltage drop
> 250 V isolation potential
NOTE: The speed control can be adjusted at any time, either before starting the
drive or while the drive is running.
Trademarks bearing the ® symbol in this publication
are registered in the U.S. and in other countries.
3
4-20 mA
Mode
Select
Switch
+ – GRN WHT BLK GRN WHT BLK
4-20 mA LINE MOTOR
Speed
Control
Power/
Directional
Switch
Page 3

Fig. 2 Gear/Brush Replacement
MAINTENANCE
CLEANING
Keep the drive enclosure clean with mild detergents. Never immerse nor use
excessive fluid.
GEAR REPLACEMENT
A plastic intermediate gear protects the drive system from torque overloads. To
replace gear (see Figure 2):
1. Place the FWD-OFF-REV switch in the OFF position.
2. Disconnect the AC line cord from the AC receptacle.
3. Disconnect the motor cable from the controller.
4. Remove housing.
5. Remove front mounting plate.
6. Replace gear/shaft assembly or gear only. See REPLACEMENT PARTS.
7. Reassemble in reverse order.
B. 1-100 rpm
gear set
(included
in service kit
07553-08)
Cap
Motor brush
Gasket
Gear case
cover assembly
A. 6-600 rpm gear
assembly (included
in service kit
07553-06)
MOTOR BRUSH CHECK/REPLACEMENT
NOTE: Brushes should be checked every 6 months or 2000 operating hours.
1. Place the FWD-OFF-REV switch in the OFF position.
2. Disconnect the AC line cord from the AC receptacle.
3. Disconnect the motor cable from the controller.
4. Remove the 2 rubber caps (see Figure 2), then carefully unscrew each brush
holder on opposite sides of the motor. Withdraw the brush, and examine it for
wear.
NOTE: Replace both brushes, if either brush is less than 0.300 in long from base
to point.
5. Screw brushes into brush holder on each side of motor and replace rubber caps.
6. Connect motor to controller.
7. Connect AC line cord to AC receptacle.
FUSE REPLACEMENT
1. Place the FWD-OFF-REV switch in the OFF position.
2. Disconnect the AC line cord from the rear of the unit.
3. Remove and check the fuse located on the front panel and replace if defective.
4. Reconnect AC line cord.
Model no.
Description 7552-70 7552-75
Brushes (2/set) 07520-04 07520-04
Brush Cap
07520-03 07520-03
holder
Fuses 77500-06 77500-12
High speed
07553-09 07553-09
gear
Gear Service kit 07553-06 07553-06
Motor only 07552-02 07552-04
Controller only 07552-71 07552-76
Rubber Caps &
07553-03 07553-03
Brushes Kit
54
REPLACEMENT PARTS
DANGER: High voltages exist in the Drive/Controller.
WARNING:
No user serviceable parts are inside of this controller. Refer
servicing to your dealer.
Page 4

TROUBLESHOOTING
Troubleshooting
SYMPTOM CAUSE REMEDY
Defective line 1. Check that unit is plugged into a
cord or fuse. live line.
2. Check line cord for continuity and
replace if defective.
3. Check fuse and replace if defective.
Defective 1. Place the FWD-OFF-REV switch
Motor or in the OFF position.
Controller.
2. Test motor and controller.
a). Check the drive motor cable
connection to the controller.
b).Replace motor, with similar
unit. Reconnect the drive
motor to the controller. Retest.
c). Replace controller with similar
unit. Reconnect the drive
motor to the controller. Retest.
Motor does not
rotate, when
switched to FWD or
REV. POWER indicator does not glow.
Motor does not
rotate, when
switched to FWD or
REV. Power indicator glows. Speed
control setting is
greater than 0.
SPECIFICATIONS
Operating Temperature: 0˚ to 40˚C
Storage Temperature: -45˚ to 65˚C
Chemical Resistance: Exposed material is
paint, plastic, aluminum,
and vinyl
Line Voltage Limits:
7552-70 100–130 V, 50-60 Hz
7552-75 190–260 V, 50-60 Hz
Speed Range: 6 to 600 rpm
Typical Power:
Motor: 0.075 kW (0.1 hp)
Controller: 6 watts, max. dissipation
Fuses:
115V Units: 3 A
230V Units: 1.5 A
Torque: 13 kg-cm (180 oz-in)
Speed Regulation: ±5% Line Regulation
±10% Load Regulation
±10% Warm-Up Drift
Controller Enclosure Rating: IP56
Motor Enclosure Rating: IP56
Humidity: (non-condensing) 0% to 90%
Display: RED Indicator
Dimensions: (L x W x H)
Motor: 280mm x 102mm x 127mm
(11 in x 4 in x 5 in)
Controller: 229mm x 203mm x 152mm
(9 in x 8 in x 6 in)
Weight:
Motor: 4.1 kg (9 pounds)
Controller: 2.3 kg (5 pounds)
6 7
 Loading...