

Page 1
Installation & Operations Manual for
5/16 Rev. A 57-02499
MSC-A & MSF-A Model
Display Freezers
Page 2
PLEASE READ HANDBOOK BEFORE USING EQUIPMENT
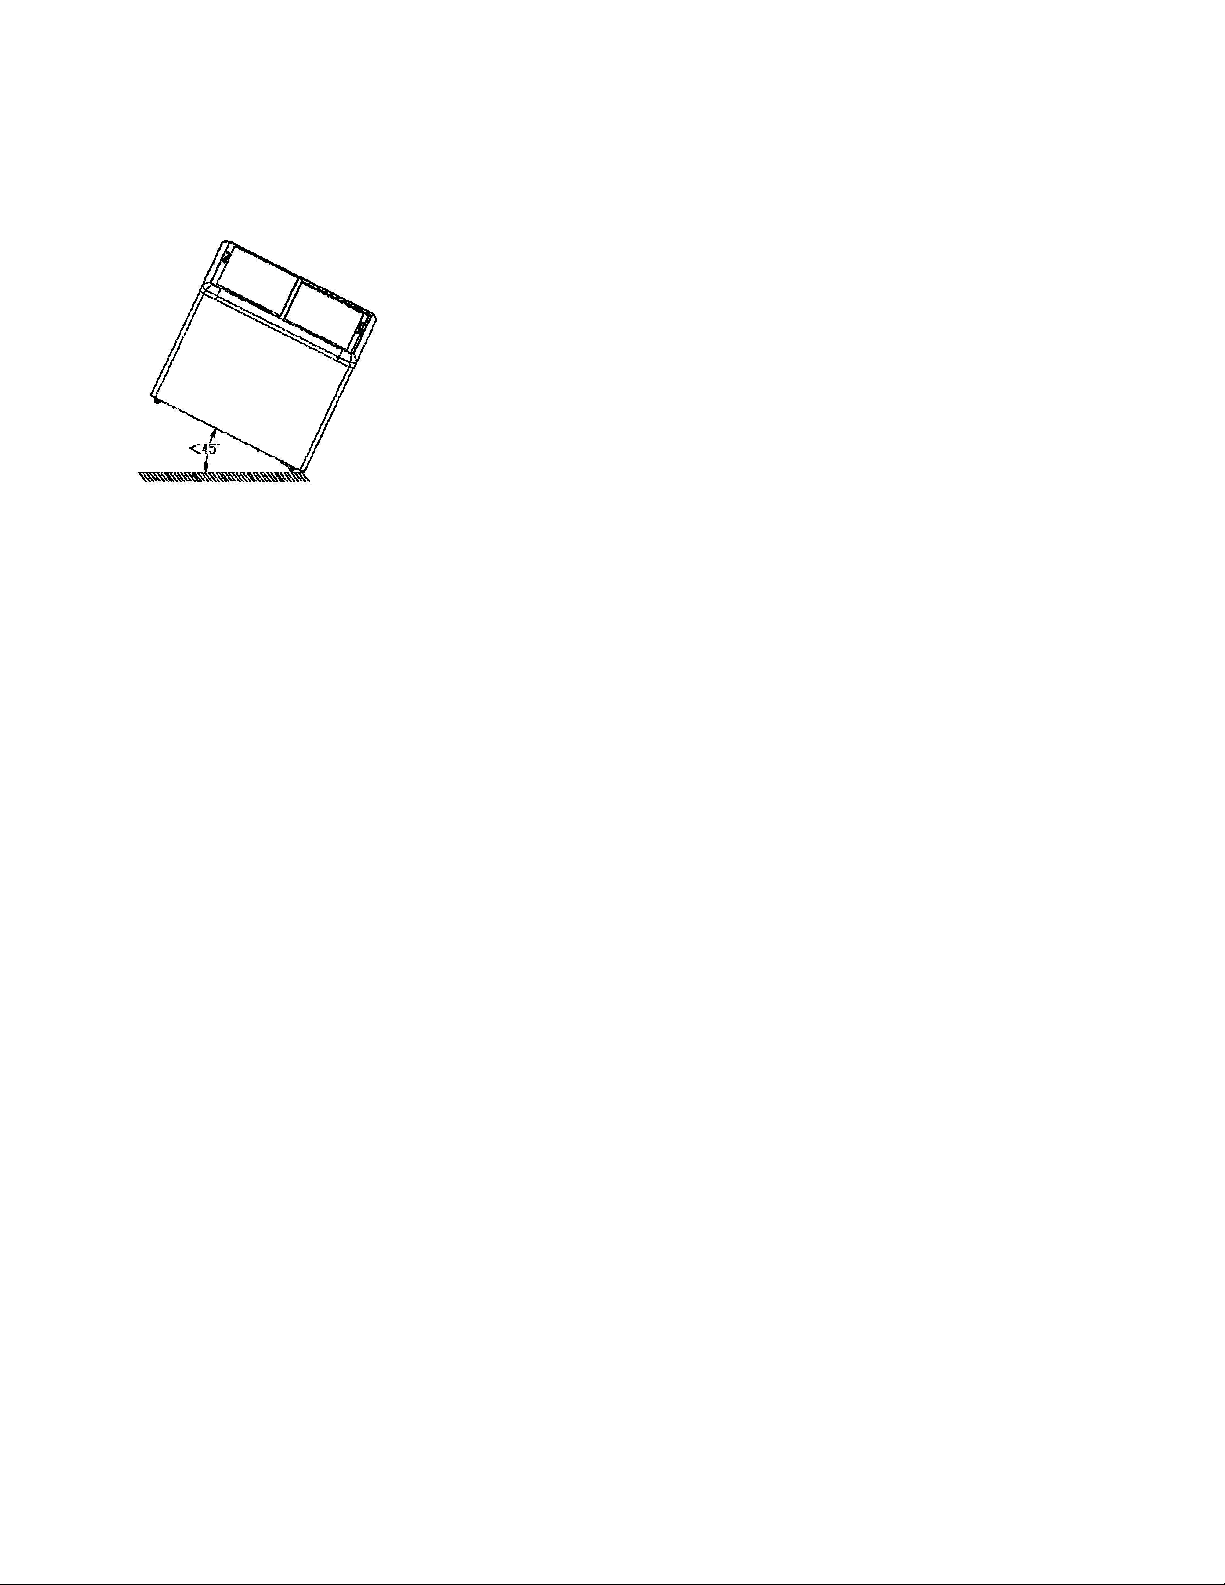
TRANSPORTATION AND INSTALLATION
1.
When transporting the freezer the angle between the compartment body and
the ground should be no more than 45° and you should never place the
freezer upside down.
2.
Do not use any of the external parts as loading points, for example, the
condenser on the back, the lids or the hinge.
3.
When the freezer is installed or used, all the packaging (including carton and
plastic wrap) should be removed.
4.
Keep the freezer stable to avoid vibration and noise.
5.
The freezer should be installed in a place with good ventilation and a space of at least 4” should be allowed
between the surrounding walls and the cabinet wall for air circulation.
6.
Unit should be placed far from any heating source and not in direct sunshine to avoid decrease of the
efficiency of refrigeration.
7.
Install the freezer in a dry place to prevent rust from forming on the compartment body, which may affect the
electrical insulation.
CAUTION
1.
The freezer must be grounded correctly, never with a heating pipe and coal gas pipe.
2.
In case of damage on the electrical cord and plug, please contact after-sale service and never do it yourself.
When pulling the plug out, please grasp by the plug, not the cord.
3.
If the voltage is unstable, please select a suitable automatic voltage regulator.
4.
Connect to the power to check the freezer before using, the freezer can be used until the
temperature decreases obviously after 30 minutes.
5.
You should adjust the temperature control according to the desired temperature, quantity of stored product
and the ambient temperature.
6.
Before loading product into the freezer please adjust the temperature control to the lowest point and allow unit
to run until the temperature decreases to -18°. Then load product and after 12 hours adjust the
temperature control to the normal point.
7.
Never put hot food into the freezer directly, only after it has been cooled to room temperature.
8.
Product should be loaded into the freezer in small quantities. Do not overfill the freezer or crowd it with product.
Large packages of meat should be divided into several smaller packages. There should be reasonable space
between the packages of product for better freezing.
9.
If the power cuts off, you should wait for at least 5 minutes before turning on the unit again to avoid damage to
the compressor.
10.
Never store any flammable, explosive or corrosive liquid or gas in the freezer and keep the unit away from
them.
11.
Beer, beverage, fresh flowers, medications or injections must never be put into the freezer.
12.
Please turn the temperature control to the lowest point if you want to store ice cream or similar frozen product.
5/16 Rev. A 57-02499
Page 3
STORAGE
The appliance is suitable for storing ice cream and ready-frozen foods.
It must not be filled higher than the stacking mark on the inside of the freezer.
LED Light
DEFROSTING
1.
Defrost when the frost thickness on the cabinet wall reaches ¼” to optimize the freezing capacity.
2.
Turn the temperature control to the lowest point for 5-6 hours before defrosting.
3.
Cut off the power and remove product, use the defrost removal tool that comes with the freezer, never use
LOAD LINE
sharp tools.
4.
After defrosting, clean the wall with dry cloth, and then power back on.
THE FOLLOWING CONDITIONS ARE NORMAL
1.
There is a sound of flowing water when the refrigerant is running.
2.
Frozen food will not melt even the power is off for a few hours.
3.
When the ambient humidity is high, moisture can condense on the surface of the freezer.
4.
When the unit is running the condenser and compressor will be hot.
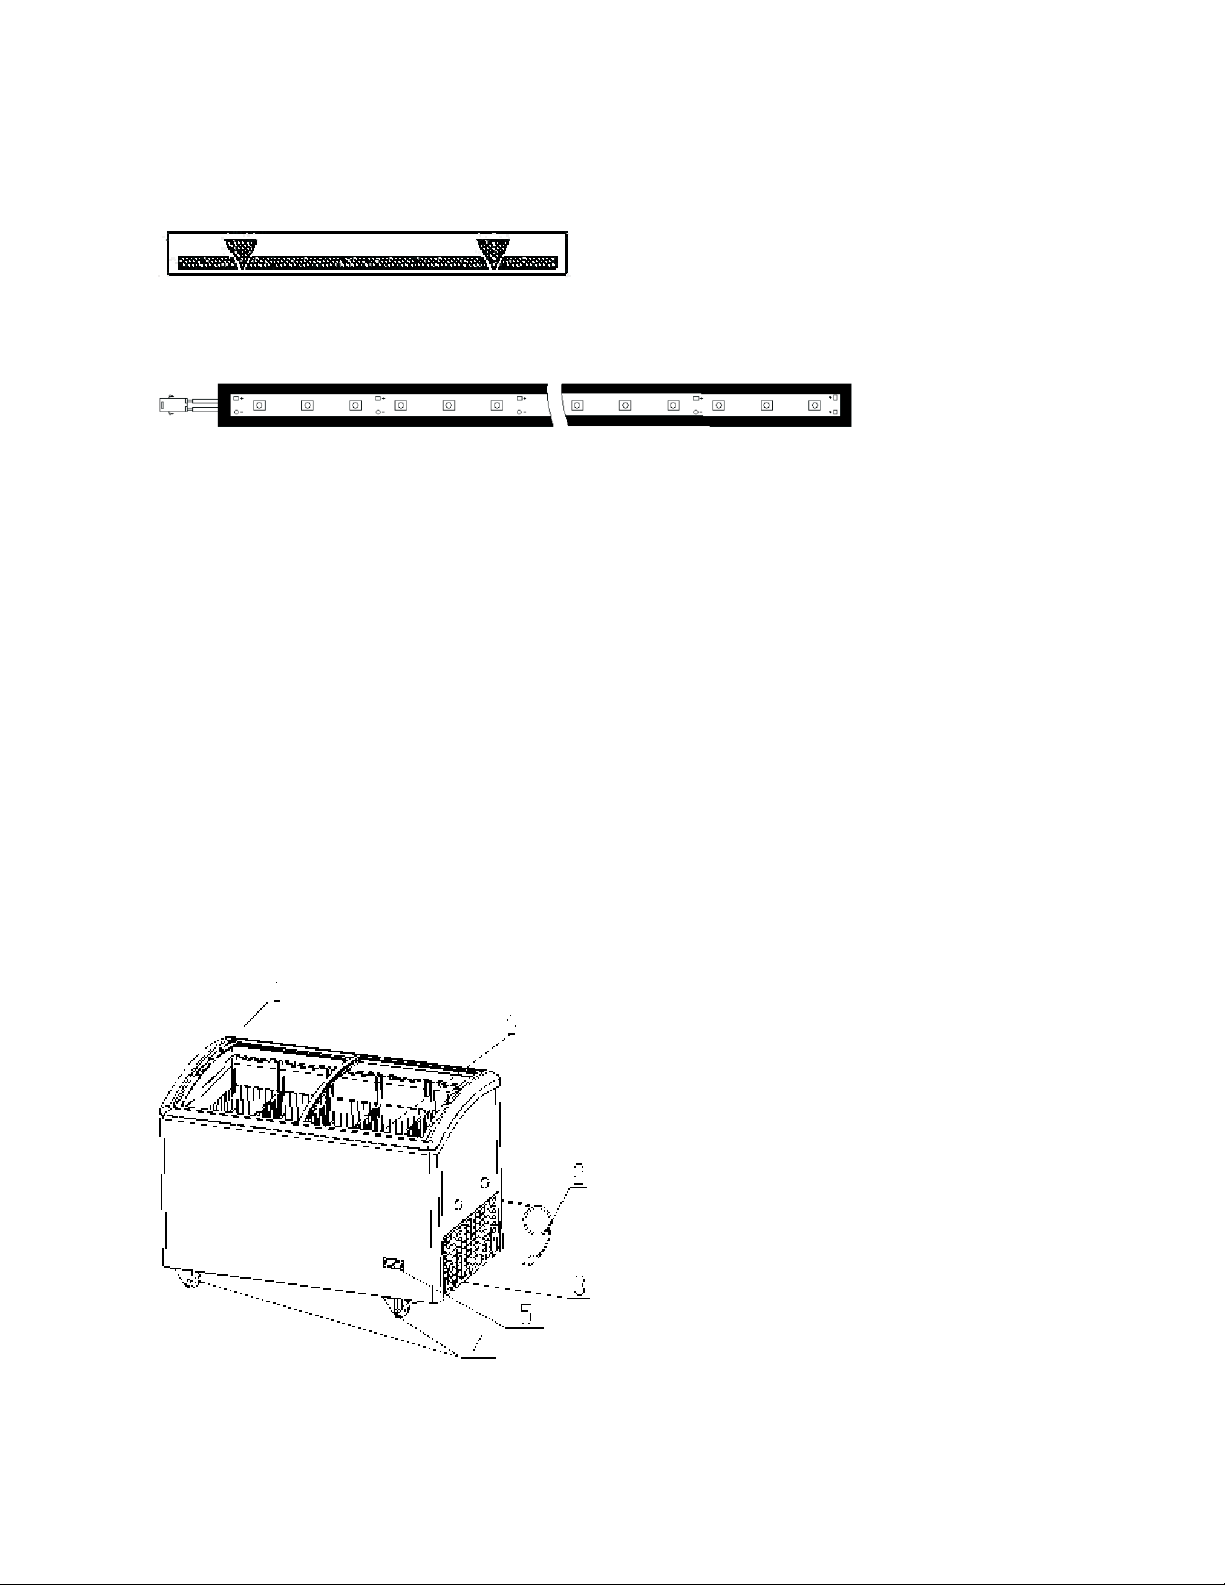
COMPONENTS - MODELS MSC-31A/MSC-41A/MSC-49A/MSC-66A
1.
Sliding Upper Lid
2.
Electrical Cord
3.
Control Panel
4.
Castors
5.
Thermometer
6.
LED Light
5/16 Rev. A 57-02499
Page 4

COMPONENTS - MODELS MSF-31A/MSF-43A/MSF-52A/MSF-71A
1.
Upper Lid
2.
Lock and keys
3.
Lower Lid
4.
Cabinet Exterior
5.
Compressor Grill
6.
Power Indicator Light
7.
Thermostat
8.
Cord
9.
Castors
10.
LED Light
CONTROL PANEL FUNCTIONS
The numbers 1-7 on the temperature control only mean the temperature levels from high to low. They do not mean
a specific temperature. Turn the knob clockwise, the temperature will get colder and turn the knob counter-
clockwise, the temperature will get warmer.
1.
The green light is the power indicator and when it is on it means the freezer is working.
2.
When you turn the knob counter-clockwise to “Off” or “0”, the freezer will not be supplied power.
3.
When the switch play to “1”, it means the LED-Light is on.
Do not turn the knob from “7” to “Off”!
Do not turn the knob from” 7” to” 0”!
TROUBLE SHOOTING
TROUBLE
Thawing
Compressor
won’t stop
working
Loud noise
REASON
Temperature control is on the highest point
Plug and outlet not connected well
Fuse broken off
Temperature control is on the lowest point
Too much product stored at a time
Thick frost
Lids opening too often
Too near the wall
Near heat source or sun
Ground is not flat
Refrigerating tubes connected
NOTE
service, do not handle it yourself.
If you can not solve the trouble according to the above mentioned ways, please contact after sale
5/16 Rev. A 57-02499
SOLUTION
Adjust the temperature
Make the two connect well
Change the fuse
Adjust temperature control
Reduce the quantity being stored
Defrost
Reduce the times the lids are opened
Push away from the wall
Change the location
Change the location
Separate them
Page 5

MAINTENANCE AND CLEANING
1.
Do not open the door frequently and too long to save energy.
2.
Never leave heavy or hot product on top of freezer to avoid warping.
3.
Cut off the power before cleaning.
4.
To clean the freezer please use soft cloth dampened in some moderate detergent and hot water.
5.
Use warm water to clean oil or fruit juice stain on the magnetic gasket in order to keep its elasticity. Apply
some talcum powder to it to prolong its service life.
6.
The freezer should not be left unused for a long period of time. To discontinue freezer use, disconnect the
main power first, then clean the inside and leave the door open for 2-3 days to dry completely.
ATTENTION
The unit is not intended for use by children or the infirm without supervision.
Young children should be supervised to ensure that they don’t play with the freezer.
∆ We have a policy of continuous improvement on our products and reserve the right to change materials and
specifications without notice. To confirm the specific parameters, please refer to the rated label on the product.
GLASS LID LOCKING INSTRUCTIONS FOR MODELS MSC-31A/MSC-41A/MSD-49A/MSC-66A
& MSF-31A/MSF-43A/MSF-52A/MSF-71A
GLASS DOOR KEY CYLINDER KEY LOCKHOLE GLASS DOOR
1.
Unlocking the freezer: Insert key into the lockhole of the key cylinder. Then rotate the key 90°clockwise and
remove the key and key cylinder. Sliding doors are unlocked.
2.
Locking the freezer: Insert key and key cylinder into lockhole and rotate 90°counter-clockwise. Then remove
the key while leaving the key cylinder in the lockhole. This prevents the sliding doors from moving and the
lids are locked into place.
5/16 Rev. A 57-02499
Page 6

DIRECTIONS FOR WATER COLLECTION TRAY
1.
Before using the unit, open the plastic accessory bag inside the freezer and remove the white plastic water
collection tray.
2.
Hold the tray by its handle and insert it into the guide rails on the outer bottom of the freezer from the front
surface of the freezer.
3.
Slide out to empty the accumulated water and re-insert by repeating the above two steps.
5/16 Rev. A 57-02499
Page 7

Customer Service/Warranty Parts
Phone: 800-684-8988
Fax: 866-882-7629
Email: service@master-bilt.com
5/16 Rev. A 57-02499
 Loading...