

Page 1
OWNER’S MANUAL
MODEL HST13 – AUTOTOAST™ VERTICAL TOASTER
Supplier Name: MARSHALL AIR SYSTEMS, INC.
Address: 419 Peachtree Drive South
Charlotte, NC 28217
Serial#: ___________________________
Date Received: ___________________________
Date Installed: ___________________________
Telephone #: 704-525-6230
Fax #: 704-525-6229
Service Referral# 800-722-3474
Local Service Name: ___________________________
Local Service #: ___________________________
Conveyor Speed
Setting: ___________________________
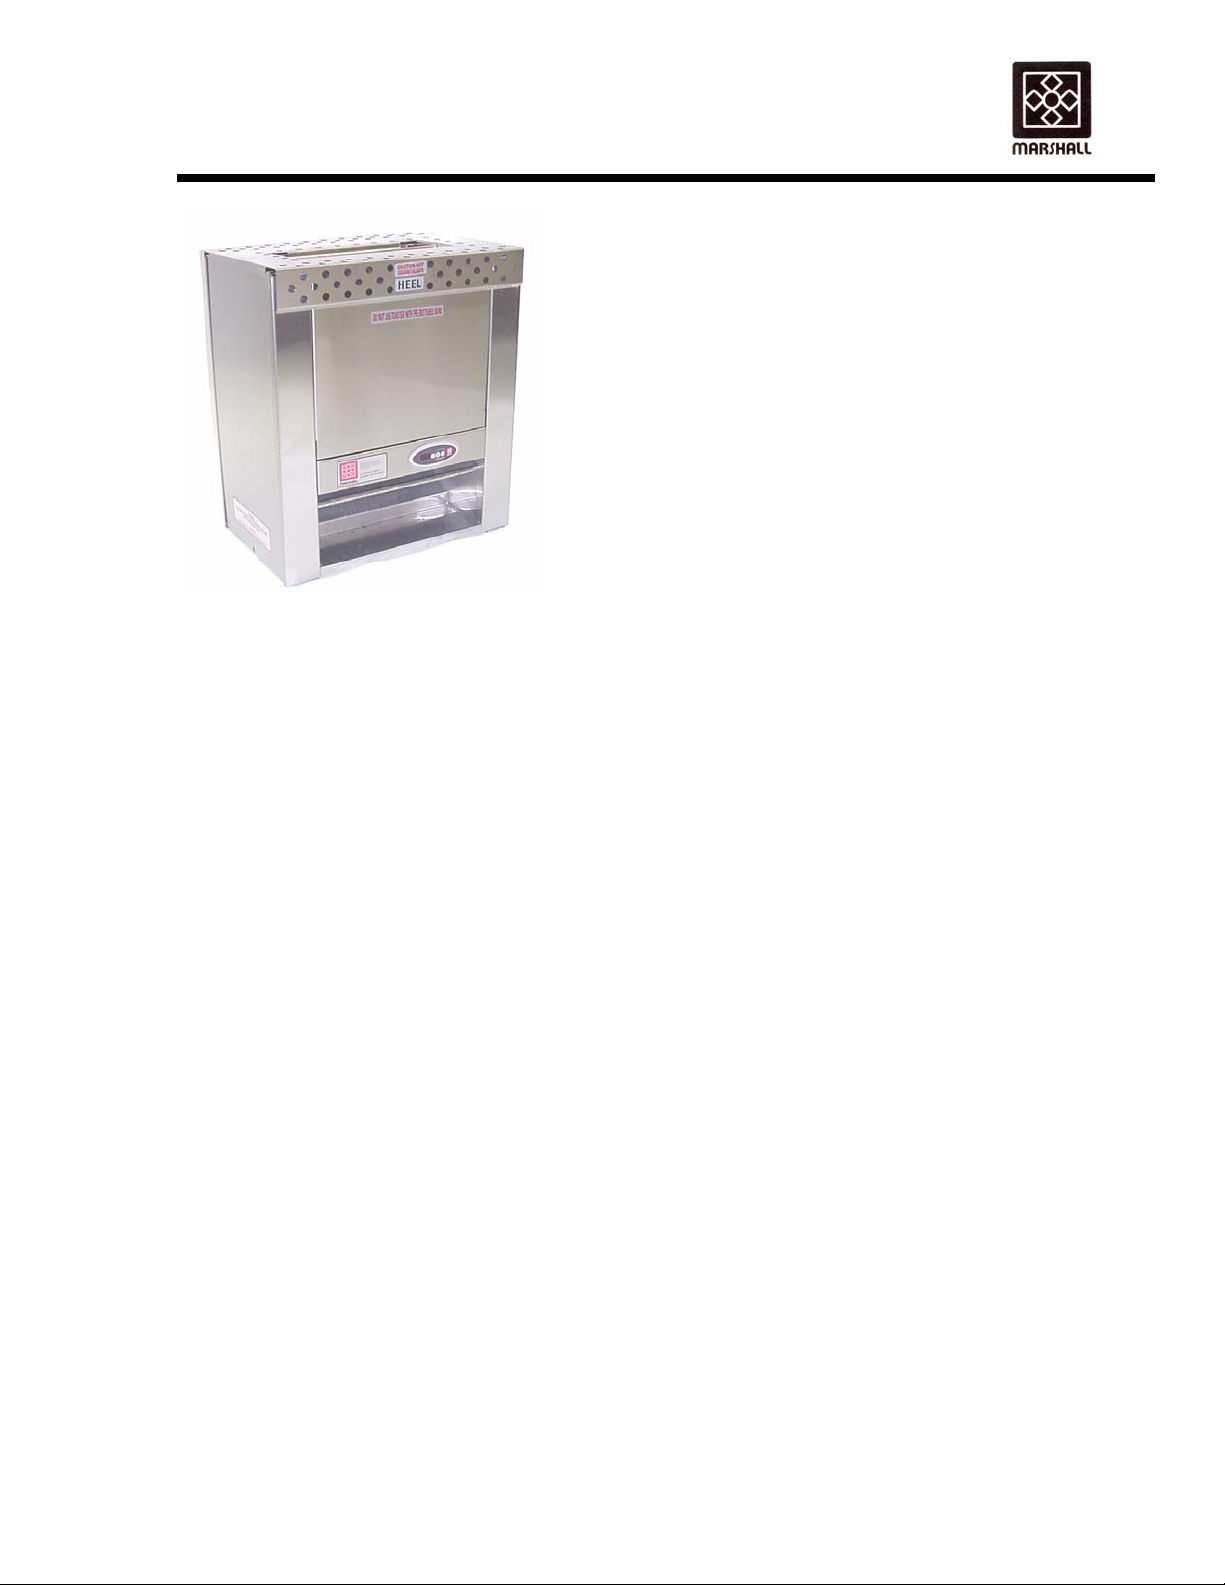
PRODUCT DESCRIPTION
The Marshall High Speed Vertical Toaster produces
a grilled effect on the cut side of the sandwich buns.
GENERAL SPECIFICATIONS
The buns are inserted at the top of the unit and are
pressed against a heated platen surface, which is
Height: 23.250"
covered by a replaceable toaster platen sheet. The
Width: 19.875"
spacing between the heated grill and the conveyor is
Depth: Model CH7B-12”, CH7-15.250”
adjustable to accommodate different thickness of
Model CH7C-12”, CH7D-12”, CH7F-12”,
buns. The buns are discharged onto a product slide
CH7G-12”, CH7H-12”
at the bottom of the unit. Toaster Models CH7,
Electrical: 208V Single Phase 18.5 Amps
CH7B, have variable speed motor controls. Models
240V Single Phase 21.0 Amps
CH7C, CH7D have single speed motors. Toast time
Power Cord: 6 ft. 3 wire including ground, with NEMA
on the CH7C toaster is 8 seconds heel, and 11
L6-20Pplug (208V) (CH7C Models L6-
seconds crown. The CH7D toaster has a toast time
30p 30P)(CH7H Models NEMA 6-20P)
of 23 seconds on both the crown and heel. The
(Plug furnished by others on
CH7F toaster has a toast time of 9 seconds on both
internationsl International units) (CH7CINTLCE
the crown and heel. The CH7F-15 toaster has a
NEMA NEMA L6-30P)
toast time of 15 seconds on both the crown and heel.
Weight: 116 lbs.
The CH7G toaster has a toast time of 3.5 minutes.
Listing: ETL and NSF
The CH7H has a 60 second toast time. Additionally,
the heat settings are preset in factory, which
eliminates unauthorized tampering. The flexibility of
this toaster is unmatched allowing operations to
produce the hottest buns in the shortest time.
FOR YOUR SAFETY
DO NOT STORE OR USE GASOLINE OR OTHER FLAMMABLE VAPORS OR LIQUIDS IN THE VICINITY OF
THIS OR ANY OTHER APPLIANCE.
WARNING: IMPROPER INSTALLATION, ADJUSTMENT, ALTERATION, OR MAINTENANCE
CAN CAUSE PROPERTY DAMAGE, INJURY OR DEATH. READ THE INSTALLATION, OPERATION AND
MAINTENANCE INSTRUCTIONS THOROUGHLY BEFORE INSTALLING OR SERVICING THIS EQUIPMENT.
KEEP THIS MANUAL IN A SAFE PLACE AND RETAIN FOR FUTURE USE.
135168CH7 RV042910
Copyright © 2010 Marshall Air Systems, Inc.
All Rights Reserved.
Page 2

OWNER’S MANUAL
MODEL HST13 – AUTOTOAST™ VERTICAL TOASTER
135168CH7 RV031308
Copyright © 2008 Marshall Air Systems, Inc.
All Rights Reserved.
Page 3

OWNER’S MANUAL
MODEL HST13 – AUTOTOAST™ VERTICAL TOASTER
TABLE OF CONTENTS
PRE INSTALLATION.....................................................................................................................................1
INSTALLATION......................................................................................................................................... 1-2
OPERATION (UNITS WITH LED CONTROL)...............................................................................................2
OPERATION (UNITS WITH HEAT SWITCH AND CONVEYOR SWITCH)..................................................3
PREVENTIVE MAINTENANCE................................................................................................................. 3-4
TROUBLESHOOTING GUIDE.................................................................................................................. 4-8
REPLACEMENT PARTS........................................................................................................................... 8-9
ILLUSTRATIONS
OVERALL DIMENSIONS ...........................................................................................................FIGURE 1, 2
HANG-ON PARTS S/N 0598 AND BEFORE .................................................................................FIGURE 3
HANG-ON PARTS S/N 0599 AND AFTER ....................................................................................FIGURE 4
SWITCHES AND TOASTER PLATEN SHEET.............................................................................. FIGURE 5
BELT TENSION PARTS AND ADJUSTMENT MECHANISM........................................................FIGURE 6
INTERNAL PARTS AND DRIVE COMPONENTS ......................................................................... FIGURE 7
ADJUSTMENT LEVER OPERATION.............................................................................................FIGURE 8
BELT REMOVAL INSTRUCTIONS................................................................................................FIGURE 9
NON-GUIDED BELT INSTALLATION INSTRUCTIONS..............................................................FIGURE 10
NON-GUIDED BELT INSTALLATION INSTRUCTIONS..............................................................FIGURE 11
GUIDED BELT REMOVAL AND INSTALLATION INSTRUCTIONS............................................FIGURE 12
CONTROL CABINET ACCESS INSTRUCTIONS........................................................................FIGURE 13
WEEKLY BELT CLEANING INSTRUCTIONS (150986)..............................................................FIGURE 14
SCHEMATICS FOR UNITS S/N 0929 AND AFTER (UNITS W/LED CONTROL)
WIRING SCHEMATIC (208V, 60HZ, 1PH) VARIABLE SPEED..............................................DWG #143851
WIRING SCHEMATIC (208V, 60HZ, 1PH) SINGLE SPEED..................................................DWG #143856
135168CH7 RV031308
Copyright © 2008 Marshall Air Systems, Inc.
All Rights Reserved.
Page 4

OWNER’S MANUAL
MODEL HST13 – AUTOTOAST™ VERTICAL TOASTER
ILLUSTRATIONS (CONTINUED)
WIRING SCHEMATIC (240V, 60HZ, 1PH) DOMESTIC VARIABLE SPEED..........................DWG #143857
WIRING SCHEMATIC (240V, 50/60Hz, 1 PH) SINGLE SPEED………………………………..DWG #142426
WIRING SCHEMATIC (220V, 50/60Hz, 1PH) SINGLE SPEED(ECM CONTROL) ................DWG #144562
WIRING SCHEMATIC (220V, 50/60Hz, 1PH) SINGLE SPEED (LED CONTROL) ................DWG #144577
WIRING SCHEMATIC (220-240V, 50/60Hz, 1PH) VARIABLE SPEED (LED CONTROL).....DWG #145737
SCHEMATICS FOR UNITS S/N 0928 AND BEFORE
WIRING SCHEMATIC (208V, 50/60Hz, 1PH).........................................................................DWG #135169
WIRING SCHEMATIC (240V, 50/60Hz, 1PH) CE...................................................................DWG #135817
WIRING SCHEMATIC (240V, 50/60Hz, 1PH) DOMESTIC.....................................................DWG #143180
WIRING SCHEMATIC (240V, 50/60Hz, 1PH).........................................................................DWG #138828
WIRING SCHEMATIC (208V, 50/60Hz, 1PH)SINGLE SPEED….…………………………..….DWG #141334
WIRING SCHEMATIC (208V, 50/60Hz, 1PH)VARIABLE SPEED………………………… ….DWG #145294
135168CH7 RV031308
Copyright © 2008 Marshall Air Systems, Inc.
All Rights Reserved.
Page 5

OWNER’S MANUAL
MODEL HST13 – AUTOTOAST™ VERTICAL TOASTER
PRE-INSTALLATION
1. The toaster is packaged to minimize the risk of shipping damage. Immediately upon receipt,
make certain to inspect the unit for damage. FILE ALL CLAIMS WITH THE FREIGHT CARRIER.
2. Unpack unit and remove all protective paper or plastic from metal parts.
FILE ANY CONCEALED DAMAGE CLAIMS WITH THE FREIGHT CARRIER.
3. This toaster is shipped wired and ready to plug into a grounded NEMA L6-20R amp receptacle.
(208 Volt Single Phase, 3 wire including the ground circuit). Check receptacle for proper voltage
and phase. Units which are 240V single phase international are shipped with no electrical plug.
INSTALLATION
1. It is necessary to seal bottom of toaster to the countertop using NSF listed silicone sealant.
2. Check that the two lift off side covers are in place on the toaster AND THE LEFT COVER IS
SECURED WITH A SCREW AT THE BOTTOM.
3. Check that the toaster platen sheet is installed over the contact platen. The toaster platen sheet is
installed from the top of the unit by lightly creasing it at the center, and directly hanging it on the
center platen. USE ONLY MARSHALL APPROVED PLATEN SHEETS OR TOASTER
WARRENTY IS VOID.
4. Install the bun guide assembly on the toaster. (Figure 4)
5. Connect the toaster to the power supply.
6. Turn on the power switch and check for free movement of the two conveyor belts. If unit is
equipped with LED control, display will read “Lo.”
7. Unit is ready to used in approximately 15 minutes. LED control will display “Rdy.”
8. After warm up, drop buns into the toaster at the top of the unit. For proper operation, insert heels
on the side of the toaster marked "Heel", and crown on the opposite side. THE CUT SIDES OF
THE HEEL AND CROWN MUST FACE EACH OTHER. DO NOT USE PRE-BUTTERED BUNS
WITH THIS TOASTER.
9. The toasted heel and crown will drop down onto the product slide together. Check the
appearance of the toasted buns.
10. Adjust the gap settings using the two levers inside the right panel. (See Figure 8). The levers are
labeled “HEEL” gap and “CROWN” gap. To adjust the gap, loosen the black adjustment knob
(Figure 8), several turns to disengage the threaded rod from the locator holes. Turn the lever to
the desired position and retighten the black knob so that the threaded rod engages in one of the
locator holes.
11. The speed control is located behind the left side cover of the CH7, CH7B toasters only.
DISCONNECT (UNPLUG) THE POWER BEFORE OPENING THE SIDE COVER. The speed
control can be adjusted to control the conveyor belt speed to lighten and darken the toasted
product. The toaster is shipped with the speed control set for a twelve-second toast. Models
135168CH7 RV111109 1
Copyright © 2009 Marshall Air Systems, Inc.
All Rights Reserved.
Page 6

OWNER’S MANUAL
MODEL HST13 – AUTOTOAST™ VERTICAL TOASTER
CH7C and CH7D have a single speed motor. CH7C models have a toast time of a 8 seconds
heel and 11 seconds crown. CH7D models have a speed of 23 seconds both crown and heel.
CH7F has a 9 second toast time both crown and heel. The CH7F-15 has a 15 second toast time.
CH7G models have a 3.5 minute toast time both crown and heel.
12. Test at least 3 buns before putting the toaster into service. Uniform surface toasting and bun
temperature are achieved when the gap described in step 10 is set correctly.
OPERATION (UNITS WITH LED CONTROL)
1. The toaster is operated by pressing and releasing the “I/O” Button of the control. “Lo” will be
displayed.
2. The display of the control will show “Rdy” once the toaster is up to temperature. (Approximately
15 minutes.)
3. For proper operation, insert heels on the side of the toaster marked "HEEL", and crowns on the
opposite side.
4. To turn off, press and
to remove any parts. Once the toaster has cooled (approximately 30 minutes), the display will
show “Off.”
5. The LED Control will indicate important information:
A. Press and release either the Crown or the Booster Button, the pre-programmed
temperature settings will flash. This will display for 5 seconds or until another button is
pressed.
B. Press and hold either the Crown or the Booster Button for 3 seconds, the actual platen
temperatures will be displayed. This will display until another button is pressed.
6. Definitions of various displays:
“Off” Unit is off and not operating.
“Lo” Heater platens have not reached programmed set temperature.
“Rdy” Unit has reached programmed set temperature and is ready to toast.
“Hi” Unit is off and too hot to touch most removeable parts.
“AL1” This is an alarm message that indicates the Center Platen Probe is disconnected
“AL2” This is an alarm message that indicates the Booster Platen Probe is disconnected
“AL3” This is an alarm message that indicates the Center Platen is too hot. Normally
“AL4” This is an alarm message that indicates the Booster Platen is too hot. Normally
hold the “I/O” Button. “Hi” will be displayed which means unit is still too hot
or defective.
or defective.
this means the relay has failed. Unit shuts off.
this means the relay has failed. Unit shuts off.
135168CH7 RV111109 2
Copyright © 2009 Marshall Air Systems, Inc.
All Rights Reserved.
Page 7

OWNER’S MANUAL
MODEL HST13 – AUTOTOAST™ VERTICAL TOASTER
OPERATION (UNITS WITH HEAT SWITCH AND CONVEYOR SWITCH)
1. The toaster is operated by turning on the power switch and then the heat switch.
2. Allow the toaster to warm up for approximately 15 minutes before toasting buns.
3. For proper operation, insert heels on the side of the toaster marked "HEEL", and crowns on the
opposite side.
4. Turn unit off at the end of the day.
5. Toaster Platen Sheet General Information:
A. The toaster is not designed for use with buttered buns.
B. The life of the Toaster Platen Sheet depends on usage and cleaning.
C. If the sheet is turning white, the black pigment is fading out of the sheet and does not
mandate sheet replacement.
D. When buns no longer feed through the machine but instead are damaged or torn, the
toaster platen sheet should be replaced. Replace ONLY with Marshall toaster platen
sheet.
E. To obtain maximum life, rotate the sheet daily so the “HEEL” side is opposite from the day
before.
F. USE ONLY MARSHALL APPROVED PLATEN SHEETS OR TOASTER WARRANTY IS
VOID.
CAUTION: DO NOT REMOVE THE CONTROL PANEL COVER WITHOUT FIRST TURNING OFF
THE TOASTER AND UNPLUGGING THE TOASTER.
PREVENTIVE MAINTENANCE
DAILY:
1. Carefully remove the toaster platen sheet (Figure 5), lay it on a flat surface, and wipe with a soft
cloth or towel and clean with soap and water. Use ONLY enough water to make the cloth damp.
DO NOT USE ABRAVISES ON THE TOASTER PLATEN SHEET.
2. Rotate toaster platen sheet so the “HEEL” side is on the “CROWN” side, opposite than the day
before.
3. Re-install all parts after drying.
WEEKLY:
1. Turn toaster off and unplug power cord from wall receptacle.
2. Perform daily maintenance.
135168CH7 RV111109 3
Copyright © 2009 Marshall Air Systems, Inc.
All Rights Reserved.
Page 8

OWNER’S MANUAL
MODEL HST13 – AUTOTOAST™ VERTICAL TOASTER
3. Remove the front and back covers (Figure 3,4), by lifting these covers off the toaster. Clean these
covers with soap and water. Wipe the exposed metal parts with a damp soft cloth or towel.
4. Reconnect the power cord.
5. Clean belts according to the Belt Cleaning Procedures below. Do not scrub belts with abrasive
material.
6. Install the front and rear covers.
WEEKLY BELT CLEANING INSTRUCTIONS
TEMPERATURE.
Supplies Needed: Cleaning Agent: Scotch-Brite™ Quick Clean Griddle Liquid #700-40.
Cleaning Pad: Scotch-Brite™ All Purpose Scouring Pad #9488R.
Contact a Marshall parts distributor or your restaurant
supplies dealer to get these products
NOTE: TOASTER BELTS MUST BE CLEANED WHILE TOASTER IS AT OPERATING
Contact a Marshall parts distributor or your restaurant
supplies dealer to get these products.
SEE FIGURE #14 FOR BELT CLEANING INSTRUCTIONS.
MONTHLY:
1. Perform Daily and Weekly Maintenance.
2. Replace any worn out toaster platen sheets or conveyor belts with Marshall parts. USE ONLY
MARSHALL APPROVED PLATEN SHEETS OR TOASTER WARRANTY IS VOID.
QUARTERLY:
1. Inspect motor brushes on variable speed models. If ¼” in length or less, replace with new.
2. Lubricate the drive chain with drops of any grade motor or machine oil.
TROUBLE SHOOTING GUIDE
NOTE: SERVICE MUST BE PERFORMED BY A QUALIFIED SERVICE COMPANY. THE
TERM "QUALIFIED SERVICE COMPANY" MEANS ANY INDIVIDUAL, FIRM,
CORPORATION OR COMPANY WHICH IS EITHER ENGAGED IN AND IS
RESPONSIBLE FOR THE INSTALLATION OR REPLACEMENT OF ELECTRICAL
COMPONENTS, OR THE CONNECTION, INSTALLATION OR REPAIR OF
ELECTRICAL APPLIANCES, WHO IS EXPERIENCED IN SUCH WORK, FAMILIAR
WITH ALL PRECAUTIONS REQUIRED, AND HAS COMPLIED WITH ALL THE
REQUIREMENTS OF THE AUTHORITY HAVING JURISDICTION.
135168CH7 RV042910 4
Copyright © 2010 Marshall Air Systems, Inc.
All Rights Reserved.
Page 9

OWNER’S MANUAL
MODEL HST13 – AUTOTOAST™ VERTICAL TOASTER
WARNING: INSPECTION, TESTING, AND REPAIR OF ELECTRICAL EQUIPMENT SHOULD BE
PERFORMED BY QUALIFIED SERVICE PERSONNEL. THE UNIT SHOULD BE
UNPLUGGED WHEN SERVICING, EXCEPT WHEN ELECTRICAL TESTS ARE
REQUIRED.
DANGER: USE EXTREME CARE DURING ELECTRICAL CIRCUIT TESTS. LIVE CIRCUITS
WILL BE EXPOSED. WHERE TESTING INDICATES "WITH POWER OFF", BE
SURE THAT THE CONVEYOR AND HEAT SWITCHES ARE OFF AND TOASTER IS
UNPLUGGED.
PROBLEM:
1. No heat and conveyor belts do not move.
SOLUTION:
A. Check that toaster is plugged in. Check condition of power cord and plug.
B. Check that conveyor power switch is on.
C. Check circuit breaker in main breaker panel. Reset if necessary.
D. Check that there is power at receptacle. Verify voltage is correct based upon the voltage listed on
the toaster nameplate.
E. Verify voltage is flowing through conveyor switch.
F. WITH UNIT UNPLUGGED,
check wiring. Any wires or terminals with burns or discoloration from arcing should be replaced.
All wiring, if replaced, should be same or higher rated wire.
G. If equipped with LED control, check for error message. “AL1” message is a defective center
platen probe. “AL2” is a defective booster platen probe. “AL3” is high temperature error of the
center platen. “AL4” is high temperature error of the booster platens. “AL3” and “AL4” typically
means the solid state relay is defective.
PROBLEM:
2. Conveyor belts move but no heat.
SOLUTION:
A. Check that the unit is on.
B. Verify voltage is flowing through heat switch.
C. TURN OFF SWITCHES AND UNPLUG TOASTER. Remove left and right side covers. Remove
one screw and loosen one screw as shown in Figure 13. Lay unit on the left side (drive chain
side). Swivel the bottom of control cabinet open.
D. Check for loose connections at terminal strip and temperature terminals (see schematic).
E. Verify that the heater and sensor wires are connected to the proper controller.
F. Replace all connections or components that have damaged terminals. Replace any damaged
wiring with same or higher rated wire.
G. Check the resistance of the sensor(s) (#503630). If sensor is open, replace. If LED, 1.09k ohms
at room temperature. If switch, 108k ohms at room temperature.
H. If equipped with LED control, check voltage into solid state relays. The voltage input from module
should be approximately 5Vdc. Voltage to heater should be 208Vac.
I. Check the resistance of the heater platens:
Center Platen (#139476): 20 ohms at room temperature
Boost Platens (#503645): 54 ohms at room temperature each
check connections inside of plug. Remove switch side, side panel and
135168CH7 RV042910 5
Copyright © 2010 Marshall Air Systems, Inc.
All Rights Reserved.
Page 10

OWNER’S MANUAL
MODEL HST13 – AUTOTOAST™ VERTICAL TOASTER
PROBLEM:
3. Heater platens are hot; conveyor belts do not move.
SOLUTION:
A. Check that conveyor switch is on and good.
B. Make sure there are no loose connections at the switch.
C. Check the fuse in the adjustment side panel. Replace with type AGC 1.5 amp fuse if necessary.
D. Check motor to make sure it is connected properly.
E. Check conveyor speed control setting(CH7, CH7B models). Adjust as needed.
F. Check for voltage to speed control board (CH7, CH7B models). Check for voltage to the motor
(CH7C, CH7D models).
G. CH7, CH7B models, check for red light on the speed board. If red light is lit, the motor is working
too hard or in a stalled state.
H. Some speed boards have a green light (CH7, CH7B models). If green light is lit then power is
going to the board.
I. Make sure the input voltage switch(es) of the speed board is set at 230V.
J. CH7C, CH7D check capacitor for proper motor connections.
K. CH7, CH7B check for DC voltage out of board to motor.
L. Check all wiring to motor for loose connectors.
M. Check drive system for loose chain or sprockets. Tighten set screws as needed.
N. Check belts are not slipping on rollers. Check belts for tears and that the spring tension is
applying pressure to the upper roller.
PROBLEM:
4. Variable Speed Motor (#500940 90 VDC motor) Not Operating (CH7, CH7B Models)
SOLUTION:
A. Verify correct voltage to unit and motor.
B. Make sure conveyor switch (#501864) has power flowing through it.
C. Check 1.5-amp fuses (#500061).
D. Check for DC voltage to motor out of board (90VDC Motor).
E. If red light on board is on, disconnect load from motor by removing chain. If it goes out, look for
conveyor binding. If it stays lit, replace motor –there is probably a gearbox problem.
F. Check DC amp draw to motor by putting meter in series with motor. (Pull wire from A1 on board,
put one lead to A1, other to wire pulled from A1.) When red LED on board is on, DC amp reading
should be .23 amp approximately.
G. If green LED is on and red is not, make sure that there is varying DC voltage out of board to motor
(terminals A1 & A2 on board) as speed control knob is increased or decreased.
H. Check ohm reading at motor cord plug (Range between 50-80 Ohms).
I. Check for oil leaks on motor signifying bad seal or overheating that has taken place. In either
case, motor should be replaced.
PROBLEM:
5. Circuit Board (#140158) not working properly. (CH7, CH7B Models)
DO NOT ADJUST POTS ON BOARD WITHOUT CONTACTING FACTORY!
SOLUTION:
135168CH7 RV042910 6
Copyright © 2010 Marshall Air Systems, Inc.
All Rights Reserved.
Page 11

OWNER’S MANUAL
MODEL HST13 – AUTOTOAST™ VERTICAL TOASTER
A. Verify AC voltage to board and DC voltage to motor from board. If there is AC voltage in, but no
DC voltage out, replace board.
B. Check all connections on board and terminal strip.
C. Verify that board is wired correctly. (See schematic in Owner’s Manual.)
D. Make sure that switch on board is in 230v position.
E. Check motor plug connection for grease or contamination.
F. Check speed control pot with meter.
a. Two outside terminals should give a full value reading.
b. Each outside terminal separately with center terminal
should give a reading that varies from 0 to full value as
speed control knob is turned or full value to 0 according
to which outside terminal meter is connected.
PROBLEM:
6. Product is over or under toasted.
SOLUTION:
A. Check toasting speed. Good toasting will occur in 10 to 23 seconds depending on product and
preference.
B. Check the gap settings. There must be compression of the bun as it feeds into the toaster.
Decreasing the gap will increase bun temperature and darken surface color.
C. Check conditions of toaster platen sheet and belts. Clean both as noted in this manual.
D. Make sure conveyor belts are not binding.
E. Check drive system for loose sprockets or chain.
F. Check that heaters are cycling. Do this by using an amp clamp on either of the wires from the
controller to the platen. You are looking for cycling. Also verify that the temperature controllers
have power.
G. Check position of temperature control. This is located behind a small panel on bottom of toaster
on some units. After changing temperature setting, allow unit 20 minutes to stabilize.
PROBLEM:
7. Buns do not feed properly into toaster.
SOLUTION:
A. Check condition of the toaster platen sheet to be sure buns are not sticking. Clean sheet as
described in daily maintenance. Replace if needed. Life of sheet is 1 – 2 months. Sheet should
be rotated daily.
B. Belts need cleaning as described under the Weekly Maintenance. DO NOT USE ABRASIVES
TO CLEAN.
C. Check toaster platen sheet installation. Sheet should be creased in middle so that platen is
covered totally on both sides.
D. Toaster gap set too close or too far. See instructions on Page 1, Number 10.
PROBLEM:
8. Outside Bun Toasted, Internal Bun not toasted. (No heat on Center Platen) serial no’s
0601TS0670 Through 928.
135168CH7 RV042910 7
Copyright © 2010 Marshall Air Systems, Inc.
All Rights Reserved.
Page 12

OWNER’S MANUAL
A
MODEL HST13 – AUTOTOAST™ VERTICAL TOASTER
SOLUTION:
A. High limit switch tripped. Reset switch by depressing “RESET.”
B. If limit switch trips again, loosen fasteners holding it and move up.
C. Replace center platen thermostat if any further trips.
REPLACEMENT PARTS
WARNING: USE OF NON-MARSHALL APPROVED PARTS WILL VOID WARRANTY.
PART NUMBER DESCRIPTION FIGURE
502887 Bearing, Gold 6
134739 Bearing, Teflon 6
132728 Bracket, Bearing 6
135165 Bracket, Bearing Retainer 6
503287 Brush, Motor Schematic
140001 Bun Guide Asby (S/N 0400TS0419 and After) 3, 4, 5
135120 Bun Guide Asby (S/N 1298TS0048 thru 0400TS0419) 3,5
503910 Capacitor (Single Speed CH7C, CH7D, CH7F) Schematic
500035 Chain, Roller #35 (2.25 ft long) 7
140158 Circuit Board, 230V Schematic
143852 Control, 3 Digit (S/N 929 and After) Schematic
143855 Control, ECM3 Module 208V (S/N 929 and After) CH7B Schematic
144563 Control, ECM3 Module 240V International Schematic
143858 Control, ECM3 Module 240V (S/N 929 and After) Schematic
148644 Control, ECM3 Module 208V CH7H only Schematic
148201 Control, Temperature (S/N 0603TS0928 and Before) Schematic
503702 Control, Temperature (S/N 0798TS008 Through 928) Schematic
Cord, 12/3 208-240V w/L6-30P Plug (CH7C,
504145
504011
135202 Cover, Back (CH7 only) (S/N 0598 and Before) 3
139717 Cover, Back (S/N 0598 and Before) 3
139717 Cover, Back (S/N 0599 and After) 4
132729 Cover, Front (CH7 Only) (S/N 0598 and Before) 3
139715 Cover, Front (S/N 0598 and Before) 3
139715 Cover, Front (S/N 0599 and After) 4
132739 Cover, Side (CH7 Only) (S/N 0598 and Before) 3
139716 Cover, Side (S/N 0598 and Before) 3
141248 Cover, Side (S/N 0599 and After) 4
503575 Filter, Electrical Noise Schematic
500061 Fuse, 1.5 Amp 8, Schematic
500068 Fuseholder 8, Schematic
137605 Guard, Heat Front (S/N 1298TS0048 thru 0400TS0419) 3
140841 Kit, Belt Conversion (2 Belts) 3
140840 Kit, Belt Conversion (CH7 Only) (2 Belts) 3
138599 Kit, Belt Replacement (Belt Tensioner) (1 Belt) 3
CH7CINTLCE) Schematic
Cord, 12/3 208-240V w/6-20P Plug (CH7H S/N 5572 and
fter) Schematic
135168CH7 RV042910 8
Copyright © 2010 Marshall Air Systems, Inc.
All Rights Reserved.
Page 13

OWNER’S MANUAL
MODEL HST13 – AUTOTOAST™ VERTICAL TOASTER
140808 Kit, Belt Replacement (Spring Tensioner) (1 Belt) 3
139476 Kit, Center Platen Replacement (Template, Drill Bit) Schematic
151365 Kit, HST13 Belt Cleaning 14
137454 Kit, Temperature Control (S/N 0798008 and Before) Schematic
135162 Knob Asby, Adjustment 6
500088 Knob, Small (CH7, CH7B Only) 7, Schematic
500092 Link, Master 7
503909 Motor, Drive AC (Single Speed CH7C, CH7D, CH7F) Schematic
500940 Motor, Drive DC (Variable Speed) Schematic
503645 Platen, (Outside) Schematic
502860 Plug, NEMA L6-20P Schematic
Plug, NEMA L6-30P CH7C, CHUCINTLCE (S/N 4468 and
502321
502892 Potentiometer, Rotary (CH7, CH7B Only) 7, Schematic
504023 Relay, Solid State 25A (S/N 929 and After) Schematic
138021 Roller Asby, 2' DIA (CH7 Only) 7
141406 Roller Asby, 2" DIA 7
134734 Roller Asby, 2" DIA (CH7 Only) 7
134733 Roller Asby, 3" DIA (CH7 Only) 7
140630 Roller Chain Tension Asby (Arm Only) 7
140629 Roller Chain Tension Asby (CH7 Only) (Arm Only) 7
135403 Roller Chain Tension Asby Complete (CH7 Only) 7
139896 Roller Chain Tension Asby Complete 7
503590 Sensor, RTD(S/N 929 and After) Schematic
503630 Sensor, Thermistor (S/N 928 and Before) 7, Schematic
503665 Sheet, Platen (Package of 5) 5
137629 Spacer, .5"OD X .25"ID 6
134728 Spring 7
502531 Spring 6
500040 Sprocket, 3510 X .500" (CH7G Motor) 7
124643
129209 Sprocket, 3515 X .755" (CH7, CH7B, CH7H) 7
126451 Sprocket, 3518 X .755" (CH7C Crown, CH7D) 7
500042
145299 Sprocket, 3520 X .755" (CH7G Heel) 7
129210 Sprocket, 3524 X .755" (CH7G Crown) 7
501650 Sprocket, 3512 X .500” (CH7D CH7H CH7F-15 Motor) 7
501864 Switch, Rocker (S/N 928 and Before) 5, Schematic
503902 Thermostat, Hi-Limit Center Platen (S/N 0670 Thru 928) Schematic
503974 Thermostat, Hi-Limit Booster Platens (S/N 0649 thru 928) Schematic
503770 Washer, Teflon 6
after) Schematic
Sprocket, 3512 X .755" (CH7C Heel)(CH7F, CH7F-15
Heel,Crown) 7
Sprocket, 3520 X .500" (CH7, CH7B, CH7C, CH7F
Motor) 7
135168CH7 RV042910 9
Copyright © 2010 Marshall Air Systems, Inc.
All Rights Reserved.
Page 14

Page 15

Page 16

Page 17

Page 18

Page 19

Page 20

Page 21

Page 22

Page 23

Page 24

Page 25

Page 26

WEEKLY BELT CLEANING INSTRUCTIONS
g
AUTOTOAST™ MODEL HST13, HST13S
1. Supplies
2. Turn Unit OFF
3. Bun Guide and Covers
USE GLOVES
Scotch-Brite™ Quick Clean Griddle Liquid
#700-40
Scotch-Brite™ All Purpose Scouring Pad
#9488R
Heat Resistant Gloves (Restaurant provided)
Clean Towel (Restaurant provided)
3. Apply Cleaner to Pad
Apply Scotch-Brite™ Quick Clean Griddle
Liquid to the Scotch-Brite™ All Purpose
Scouring Pad
DO NOT POUR CLEANER ONTO BELT.
USE GLOVES
Turn power OFF (display should read “Hi”).
PUT ON HEAT RESISTANT GLOVES.
Belts are to be cleaned “in place” while
toaster is still at operating temperature.
4. Clean Belt
Lightly rub width of the exposed belt in
circular motion.
USE GLOVES
Remove Bun Guide, Front and Rear Covers.
5. Rotate Belt
Pressing the ON/OFF button to start and
stop the belt, rotate the belt and clean the
next section. Repeat for both belts.
“Lo” will move belt.
“Hi” will stop belt.
USE GLOVES
6. Rinse Belt
Rinse belt by wiping with a clean, damp,
sanitized towel. Frequently rinse towel to
remove accumulated soil and cleaner
residue.
USE GLOVES
150986 RV032708
Copyright ©2008 Marshall Air Systems, Inc.
All Rights Reserved.
7. Platen Sheet
Remove Platen Sheet. Clean using current
procedures as described in the owner’s
manual. Reinstall when clean. If sheet has
cuts, holes or cannot be cleaned, replace with
a new sheet.
To reorder weekly belt cleaning supplies, contact a Marshall Parts Distributor.
USE GLOVES
8. Bun Guide and Covers
After cleaning, reinstall Front and Rear Covers
and Bun Guide. Clean and save the All
Purpose Scouring Pad for the next belt
.
cleanin
FIGURE 14
USE GLOVES
Page 27

INSTRUCCIONES DE LIMPIEZA SEMANAL
AUTOTOAST™ MODEL HST13, HST13S
1. Suplementos
2. Apagar la unidad
3. Guia de panes y covertores
USE GUANTES
Scotch-Brite™ liquido para limpieza rapida de
planchas de cocina #700-40
Scotch-Brite™ estropajo para todo proposito
#9488R
Guantes de resistencia caliente(restaurante
provee)
Toalla de limpieza (restaurante provee)
3.Aplicar el limpiador al estropajo
USE GUANT
Aplique Scotch-Brite™ liquido de limpieza
rapida de planchas de cocina al,
Scotch-Brite™ estropajo para todo proposito
No echar el liquido de limpieza
en la banda
.
Apagar la unidad (en la pantalla se lee
“Hi”alto).
resistencia caliente
su limpieza tienen que estar “en su lugar”
Mientras la tostadora suigue en su
4. Limpiar Bandas
Pongase los guantes de
. Las bandas para
USE GUANTES
Estregar despacio la anchura de la
banda sin que quede descubierta
haciendo movimiento circular.
Remover la guia de panes,los covertores de la
parte trasera y delantera.
5. Rotar Las Bandas
Presionando el boton de ON/OFF de
empezar y parar bandas, rote las bandas y
limpie la proxima seccion. Repitiendo el
mismo paso a las mismas bandas.
“LO” va a mover bandas.
“HI” va a parar bandas.
USE GUANTES
6. Enjuagar Bandas
Enjuage bandas pasando un trapo
limpio,humedo, tolla sanitada. Enjuage la
toalla Frecuentemente para remover la
suciedad acomulada y residuo de limpieza.
USE GUANTES
7. Hoja De Cristal
Remover la hoja de cristal. Usando los
procedimientos descrito en el manual del
comprador, re-instale cuando este limpia ,si la
hoja de cristal tiene algun corte,hueco o no se
puede limpiar, remplace con una hoja de cristal
nueva.
USE GUANTES
contactar a su distribuidor de partes Marshall.
150986 RV032708
Copyright ©2008 Marshall Air Systems, Inc.
All Rights Reserved.
Para ordenar suplementos semanal de limpieza para bandas
8.Guia de panes y covertores
Despues de la limpieza, re-instale los
covertores de la parte trasera y delantera y la
guia de panes. Limpie y guarde todo los
suplementos para la proxima limpieza..
USE GUANTES
Page 28

 Loading...