

Marmitek FLAT TV LINK 4 Owner's Manual
20070 / 250804 • FLAT TV LINK 4.tmALL RIGHTS RESERVED 2004
OWNER’S MANUAL 3
BETRIEBSANLEITUNG 9
GUIDE UTILISATEUR 15
GEBRUIKSAANWIJZING 21
FLAT TV LINK 4
nieuw NL3 02-09-2004 16:41 Pagina 1

3FLAT TV LINK 4.
tm
2 MARMITEK
Thank you for buying the Marmitek Flat TV Link 4.
Introduction
Thank you for buying this Marmitek Flat TV Link 4. Marmitek products are made with care
and are of a high quality. Please read this user manual carefully and follow all the instructions.
Safety warnings
• To prevent short circuits, this product should only be used inside and only in dry areas. Do
not expose the components to rain or humidity. Do not use the product close to a bath,
swimming pool etc.
• Only connect the adapters to the mains after you have checked whether the mains
voltage corresponds with the value on the specification tags. Never connect an adapter or
cable when it is damaged. If this happens, contact your supplier.
• Batteries: keep batteries out of the reach of children. Dispose of batteries as chemical
waste. Never use old and new batteries or different types of batteries together. Remove
the batteries when you are not using the system for a long period of time. Check the
polarity (+/-) of the batteries when inserting them in the product. Wrong positioning can
cause an explosion.
• Do not expose the components of your systems to extremely high temperatures or bright
light sources.
• Do not open the product. The device contains live components. The product should only
be repaired or serviced by a qualified repairman.
In the case of improper usage or if you have opened, altered and repaired the product
yourself, all guarantees will expire. Marmitek does not accept responsibility in cases of
improper usage of the product or when the product is used for other purposes than specified.
nieuw NL3 02-09-2004 16:41 Pagina 2
5FLAT TV LINK 4.
tm
4 MARMITEK
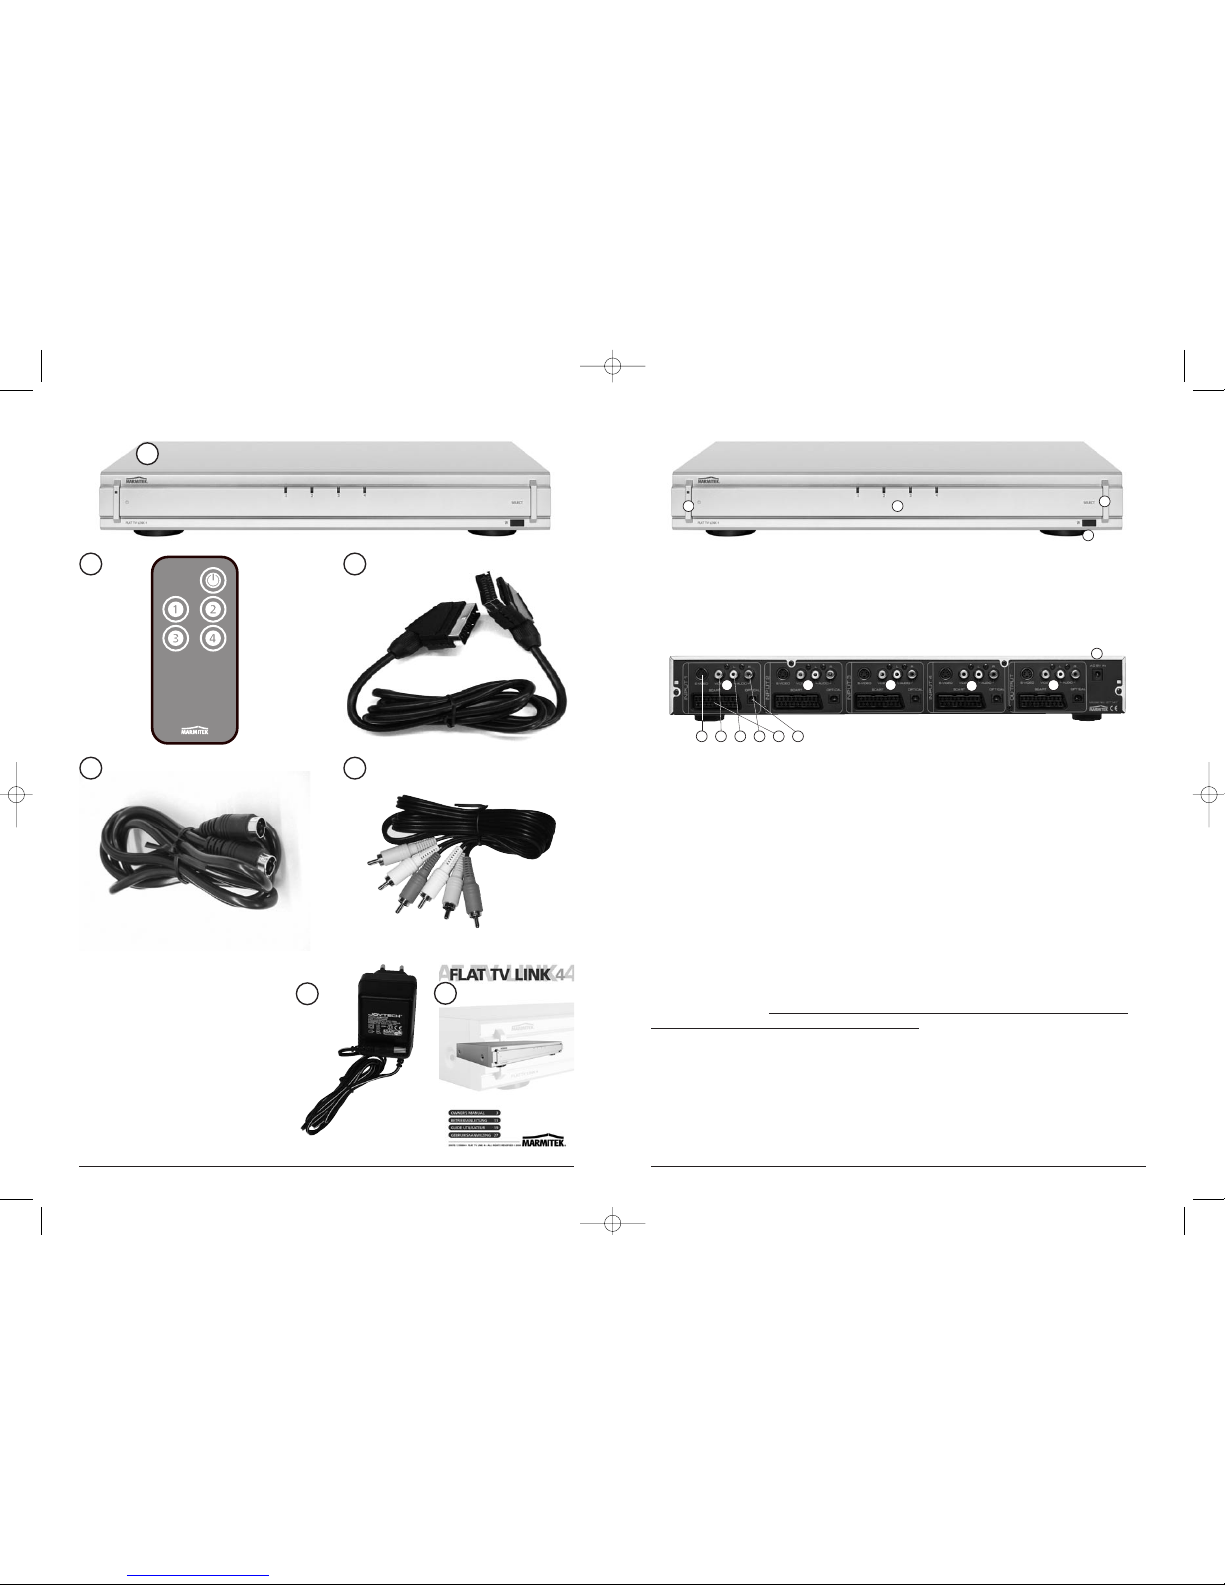
Front:
1. On/Off/Standby buttons
2. IN channel indicator 1-4
3. IN channel option button
4. Infrared receiver
Back:
1. In 1
2. In 2
3. In 3
4. In 4
5. Out
6. Connection power adapter 9-12 Volt
7. S-Video (S-VHS)
8. Composite video (yellow)
9. Audio left (white)
10. Audio right (red)
11. Scart
12. Optical audio (digital)
The Marmitek Flat TV Link has 4 In connections. Every connection has different types of
connectors. Every In channel only corresponds with the Out channel of the same plug type.
Example: A signal that is received at In 1 via a Scart cable, is transmitted identically on the
Out Scart connection. In this case the signal cannot be transmitted via the connections for
S-video, composite video or the audio connections.
1
1 2
3
4
5
6
7 8 9 10 11 12
2
3
4
Components:
1. Flat TV Link
2. Remote control
3. Scart-Scart cable
4. S-VIDEO – S-VIDEO cable
5. 3x RCA cable
6. Power adapter
7. User manual
1
2 3
4 5
6
7
nieuw NL3 02-09-2004 16:41 Pagina 4
7FLAT TV LINK 4.
tm
6 MARMITEK
Troubleshooting
1. I cannot turn on the Flat TV Link with the remote control or the On/Off button:
- Check whether the power adapter has been connected properly and the wall socket is
working.
- If you see a red light on the On/Off/Standby button, the Flat TV Link is in standby mode.
Press the On/Off button on the front of the device or the remote control again.
2. The Flat TV Link is switched on, but there is no image:
- Make sure the Flat TV Link is connected properly and the TV is set to the A/V or
external channel. Try connecting one of the devices directly to the same connection.
- Check the connections on the back of the Flat TV Link.
3. The sound is not working:
- Check the connecting cables.
- Check the volume setting of the TV.
- Check whether the audio signal is transmitted by the cable used (S-VIDEO cables or
partially pinned Scart cables do not transmit audio).
4. The image is very grainy/there is background interference:
- Switch off equipment which is not being used. Sometimes equipment gives off a very
strong signal, which can cause interference.
- Check the quality of the cables used.
5. Replacing the battery of the remote control:
Follow the instructions on the back of the remote control and replace the battery with a
battery type CR2025 (3V). Check the polarity (+/-) when positioning the battery.
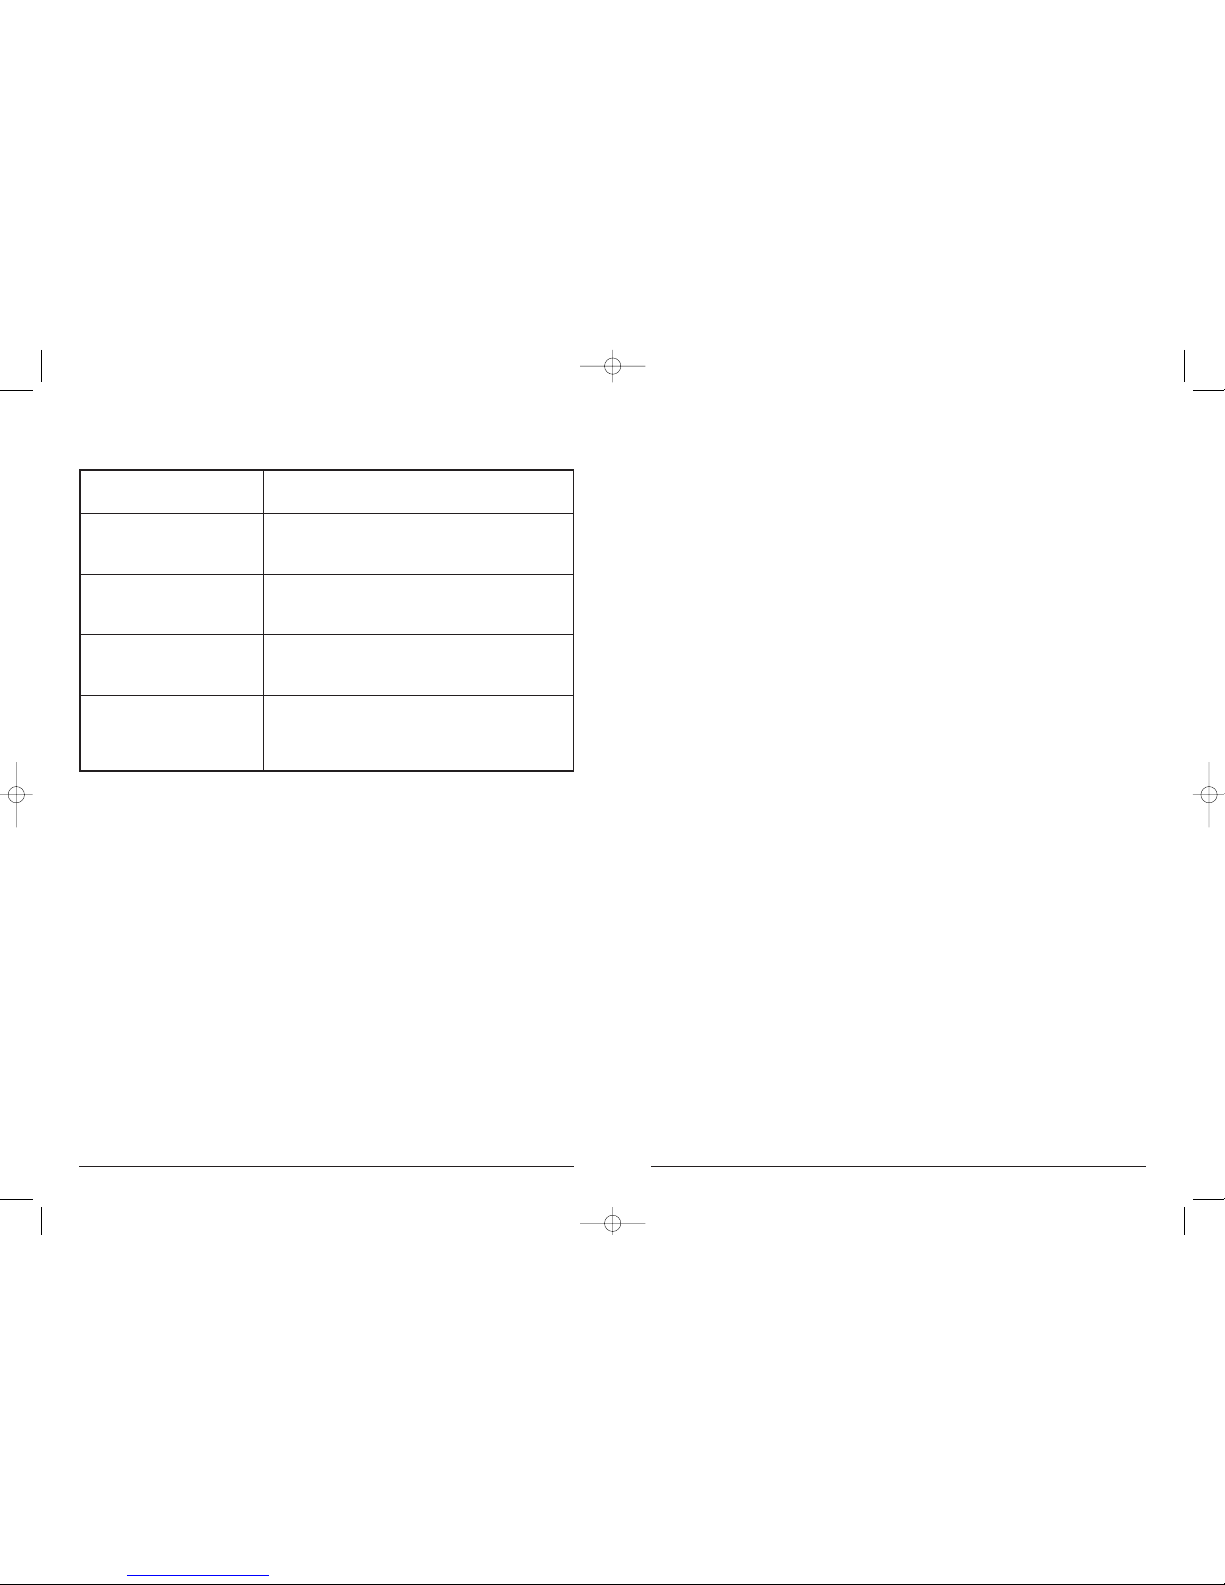
Use the table below to choose which connection cables/plugs you need to use
Using the device
1. Connect the power adapter (included) to connection (6).
2. Plug the adapter into a 230V wall socket. You will now see a red light on the Flat TV Link 4.
3. Connect your (flat screen) TV to the Out connection on the Flat TV Link (5) to correspond
with the In connector used (Scart, S-video or RCA).
Note: if you are using an S-video cable, you need to connect the audio signal to the TV
via an RCA cable, because S-video does not transmit audio signals.
4. Connect all your equipment to the In connection
(corresponding with the chosen Out connection).
5. Turn on your TV and select the A/V or external channel
(check the user manual of your TV).
6. Switch on the Flat TV Link using the On/Off/Standby button on the front (1).
You will now see a green light.
7. Use the remote control or the option buttons on the front (3) to select the In channel.
You can step through the 4 In channels by repeatedly pressing the button.
Composite video and
mono audio (e.g. a VCR)
Composite video
and stereo audio
(e.g. DVD player, camcorder)
S-video (S-VHS) and
stereo audio
Scart
Scart and digital
optical audio
Connect the video connector to the yellow Video In
(8) and the audio signal to the white Audio In (9).
Connect the video connector to the yellow Video In
(8), the left audio signal to the white Audio In (9)
and the right audio signal to the red Audio In (10).
Connect the S-video connector to the 4-pin Mini DIN
In (7), the left audio signal to the white Audio In (9)
and the right audio signal to the red Audio In (10).
Connect your Scart cable to the Scart In (11). With
stereo audio you need to use full 21-pin Scart cables
(1 included).
Connect your Scart cable to the Scart In (11) and the
optical cable to the Optical Connection (12). First
remove the dust cover. Replace the dust cover when
not using the optical connection.
nieuw NL3 02-09-2004 16:41 Pagina 6
9FLAT TV LINK 4.
tm
8 MARMITEK
Danke für Ihren Erwerb des Marmitek Flat TV Link 4.
Einleitung
Herzlichen Dank für den Erwerb dieses Marmitek Flat TV Link 4. Marmitek-Produkte werden
mit größter Sorgfalt hergestellt und sind hoher Qualität. Lesen Sie diese Gebrauchsanweisung
aufmerksam durch und befolgen Sie die Anweisungen genau.
Sicherheitswarnungen
• Um Kurzschluss zu vermeiden, ist dieses Produkt ausschließlich im Hause zu benutzen,
und nur in trockenen Räumen. Setzen Sie die Komponenten nicht Regen oder Flüssigkeit
aus. Nicht neben oder in direkter Nähe eines Bads, Schwimmbads, usw. benutzen.
• Schließen Sie den Netzadapter erst an das Stromnetz an, nachdem Sie sichergestellt
haben, ob die Netzspannung mit dem Wert der auf dem Typenschild angegeben ist,
übereinstimmt. Schließen Sie einen Netzadapter oder ein Netzkabel niemals an, wenn
er/es beschädigt ist. Wenden Sie sich in dem Fall an Ihre Verkaufsstelle.
• Batterien: Halten Sie die Batterien von Kindern fern. Entsorgen Sie Batterien nach den
gesetzlichen Entsorgungsvorschriften. Benutzen Sie niemals alte und neue Batterien oder
Batterien unterschiedlichen Typs durcheinander. Entfernen Sie die Batterien, wenn Sie das
System längere Zeit nicht benutzen. Achten Sie beim Einlegen der Batterien auf die
Polarität (+ / -): Falsches Einlegen kann zu Explosionsgefahr führen.
• Setzen Sie die Komponenten Ihres Systems nicht extrem hohen Temperaturen oder starke
Lichtquellen aus.
• Das Produkt niemals öffnen: Das Geräte enthält Bestandteile, die unter lebensgefährlicher
Spannung stehen. Lassen Sie Reparaturen oder Wartung nur von Fachkräften
durchführen.
Bei unsachgemäßem Gebrauch, selber angebrachten Modifikationen oder Reparaturen wird
jeglicher Garantieanspruch hinfällig. Marmitek haftet nicht bei unsachgemäßem oder nicht
bestimmungsgemäßem Gebrauch des Produkts.
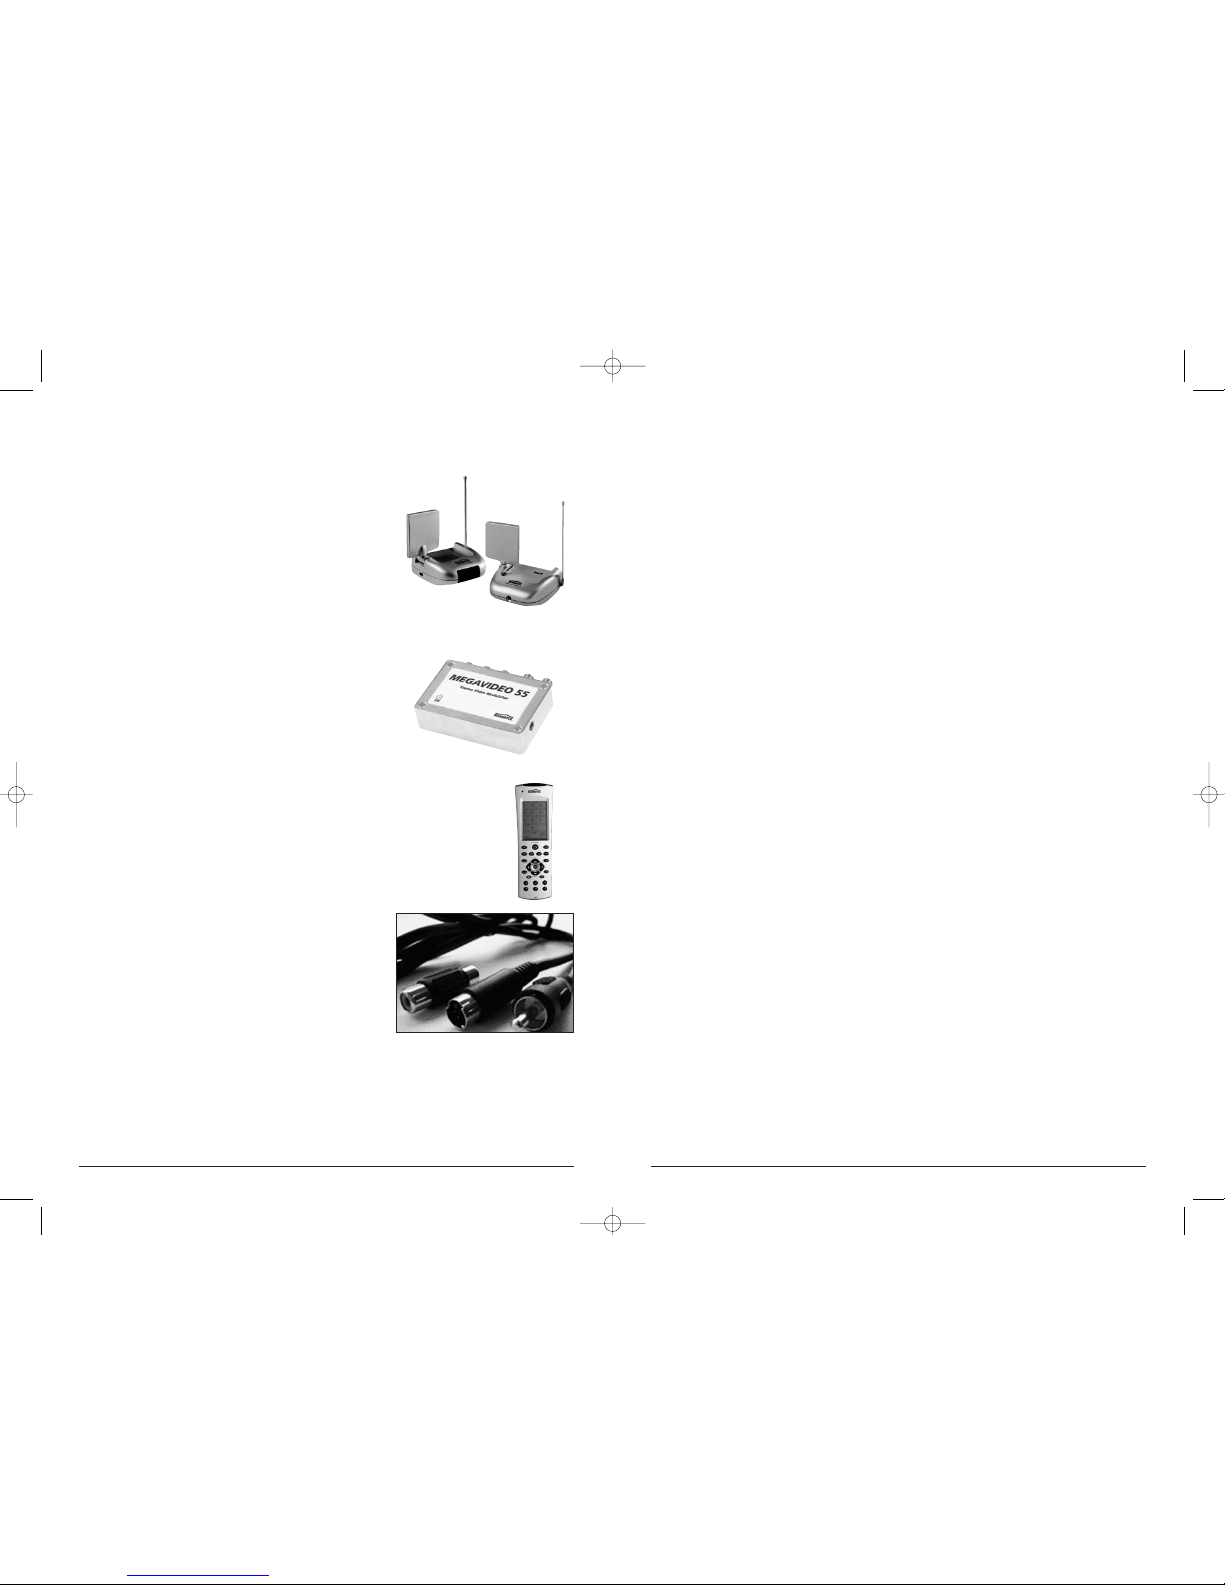
Extra options
1. Wireless audio and video
You can connect a Marmitek GigaVideo to the Out
connection of the Flat TV Link to transmit the audio and
video signal wirelessly throughout the entire house. This
means you can also transmit the signal to a TV in
another room and watch the signals from every device
connected to the Flat TV Link.
The built-in infrared return channel also means you can
control the equipment and the Flat TV Link remotely,
even through walls and ceilings!
2. Audio and video via the aerial
The Marmitek MegaVideo 55 gives you the possibility to
add the Out signal of your Flat TV Link as an extra
channel to your aerial. You can watch the signal of every
device connected everywhere in the house where there is
an aerial connection. The built-in infrared return channel
also means you can control the equipment and the Flat
TV Link remotely, even through walls and ceilings!
3. No extra remote control
You can use the Marmitek Multimedia remote control or the Marmitek
EasyTouch 35 to learn the commands of your Flat TV Link remote control.
These remote controls replace all the controls you now use.
4. S-video to composite video adapter
If the Out connections of devices connected (e.g. a
laptop) do not correspond with the In connections of
your (flat screen) TV, in many cases the Marmitek S-video
to Composite Video Adapter can be used.
More information can be found on our web site: www.marmitek.com
nieuw NL3 02-09-2004 16:41 Pagina 8
 Loading...