

Marathon MBWC24, MBWC24-2D, MWC24-DBLS, MWC24-D1 User Manual

PREMIUM WINE COOLER
Owners
use and care guide
MBWC24 | MBWC24-2D | MWC24-D1 | MWC24-DBLS
Congratulations on the purchase of your new Premium Wine cooler!
To activate your Warranty, please register your appliance at www.stirlingmarathon.com
or by completing and mailing the enclosed Warranty Registration Card. We are confident you will have years of hassle free enjoyment and ask that you please retain the Use
& Care Guide for future reference and your safety.
Before installing please, read your Use & Care guide carefully and pay special attention
to the Safety & Warning information outlined in the following pages
For immediate assistance: 1-844-309-9777
www.stirlingmarathon.com

Table of Contents
Important Safety information ..........................................................................................................
Parts description.....................................................................................................................................
Installation location................................................................................................................................
Installation requirements (MBWC24-2D)....................................................................................
Installation requirements (MBWC24, MWC24-D1 & MWC24-DBLS).............................
Ventilation Grill Assembly..................................................................................................................
Reversing door instruction ...............................................................................................................
Switching the appliances ‘‘On’’........................................................................................................
Loading your wine and beverage cooler.....................................................................................
Control description (MBWC24-2D) ..............................................................................................
Control description (MBWC24).......................................................................................................
Control description (MWC24-D1 & MWC24-DBLS)...............................................................
Temperature chart ................................................................................................................................
Adjusting shelves....................................................................................................................................
Troubleshooting......................................................................................................................................
Warranty.....................................................................................................................................................
3
4
5
6
7
8
9
10
10
12
13
14
15
16
17
18

Important Safety Information
SUFFOCATION HAZARD AND RISK OF CHILD ENTRAPMENT
Before installing please read your Use & Care guide carefully and
pay special attention to the Safety and Warning Information outlined in the following pages. To avoid the possibility of child entrapment, please take the following precautions before throwing out the
refrigerator.
Remove all doors from the unit. Leave the shelves in place so that
children may not easily climb inside Never allow children to operate,
play with, or crawl inside the refrigerator.
3
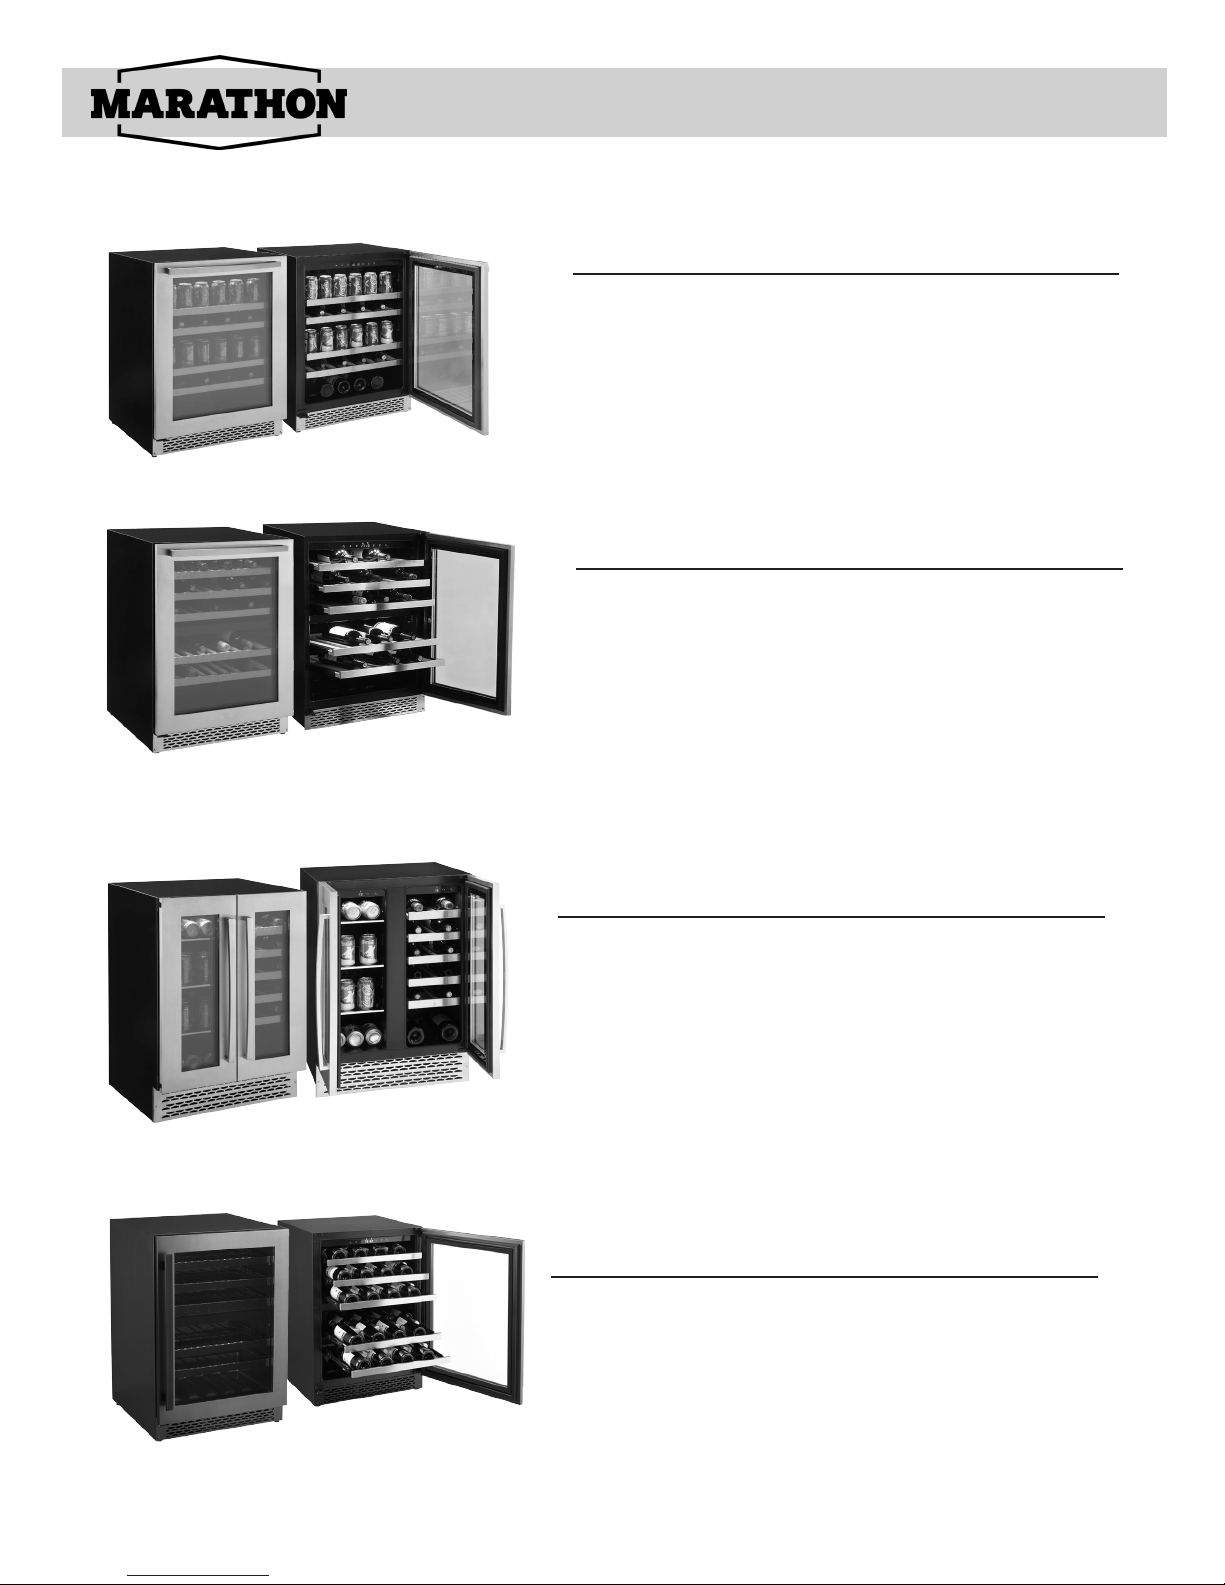
MBWC24
Removable shelves (4)1.
Stainless steel handle2.
Ventilation grill3.
Removable tempered glass insert4.
MWC24-D1
Pull-out shelves (5)1.
Stainless steel handle2.
Ventilation grill3.
Parts Description
MBWC24-2D
Adjustable glass shelves (3)1.
Stainless steel handles2.
Ventilation grills (3.25’’ & 5’’)3.
Adjustable wooden shelves (5) 4.
MBWC24-DBLS
Pull-out shelves (5)1.
Black steel handle2.
Ventilation grill3.
4

Installation location
Installing your Marathon Wine and/or Beverage Cooler
Before using your new Wine and/or Beverage Cooler, we recommend leaving Cooler
door open and unplugged for 24 hours prior to installation or use. This will allow time to
clear any residual odors from the interior liner and hardwood shelves.
Your Premium Marathon Wine and/or Beverage cooler is engineered for built-in or free
standing installation. The front bottom vent is the ventilation grill and must not be covered.
Your Marathon Wine and/or beverage cooler is also equipped with 4 adjustable feet to
facilitate easy leveling. We recommend that you tighten the back feet first and then adjust the front feet to level the wine cooler.
Installation location
Choosing the right location for your Marathon Wine and/or Beverage Cooler is important.
We highly recommend the following location criteria:
• The appliance must be positioned such that the plug and power outlet are
accessible. Release the power cord and move the appliance to its final location.
The appliance should be installed in a suitable place where the compressor will not
be subject to physical contact, unencumbered and well ventilated
• Dry area, not too damp or humid – ideally at maximum 65% relative humidity for
peak performance and reduced sweating on the interior door when opening. If the
temperature is above or below this range, it may affect the performance of
the Wine and/or beverage cooler. Placing in cold, hot or humid temperature condi tions may cause temperature fluctuations and increased running operation costs.
• Flat, level oor
• Approved electrical outlet (preferably with surge protector) within 3 feet of the
Wine and/or beverage cooler.
• Minimum 1 meter from any microwave oven. Certain microwave ovens do not have
a wave interference shield. When placed too close to the wine or beverage cooler ,
the performance may be affected.
• Marathon Wine and/or Beverage Coolers are NOT CERTIFIED for outdoor use.
Outdoor use will void your warranty and possibly cause a safety hazard and
result in fire or personal injury.
CAUTION! Your Marathon wine and/or Beverage Cooler is equipped with a three
prong power cord which has a ground wire. The plug should never be altered or used
with an extension cord or power bar. Improper use of the grounding plug can result in
the risk of electric shock. Consult a qualified electrician or service person if the
grounding instructions are not completely understood. If the supply cord is damaged,
it must be replaced by a qualified person in order to avoid electrical hazard.
5
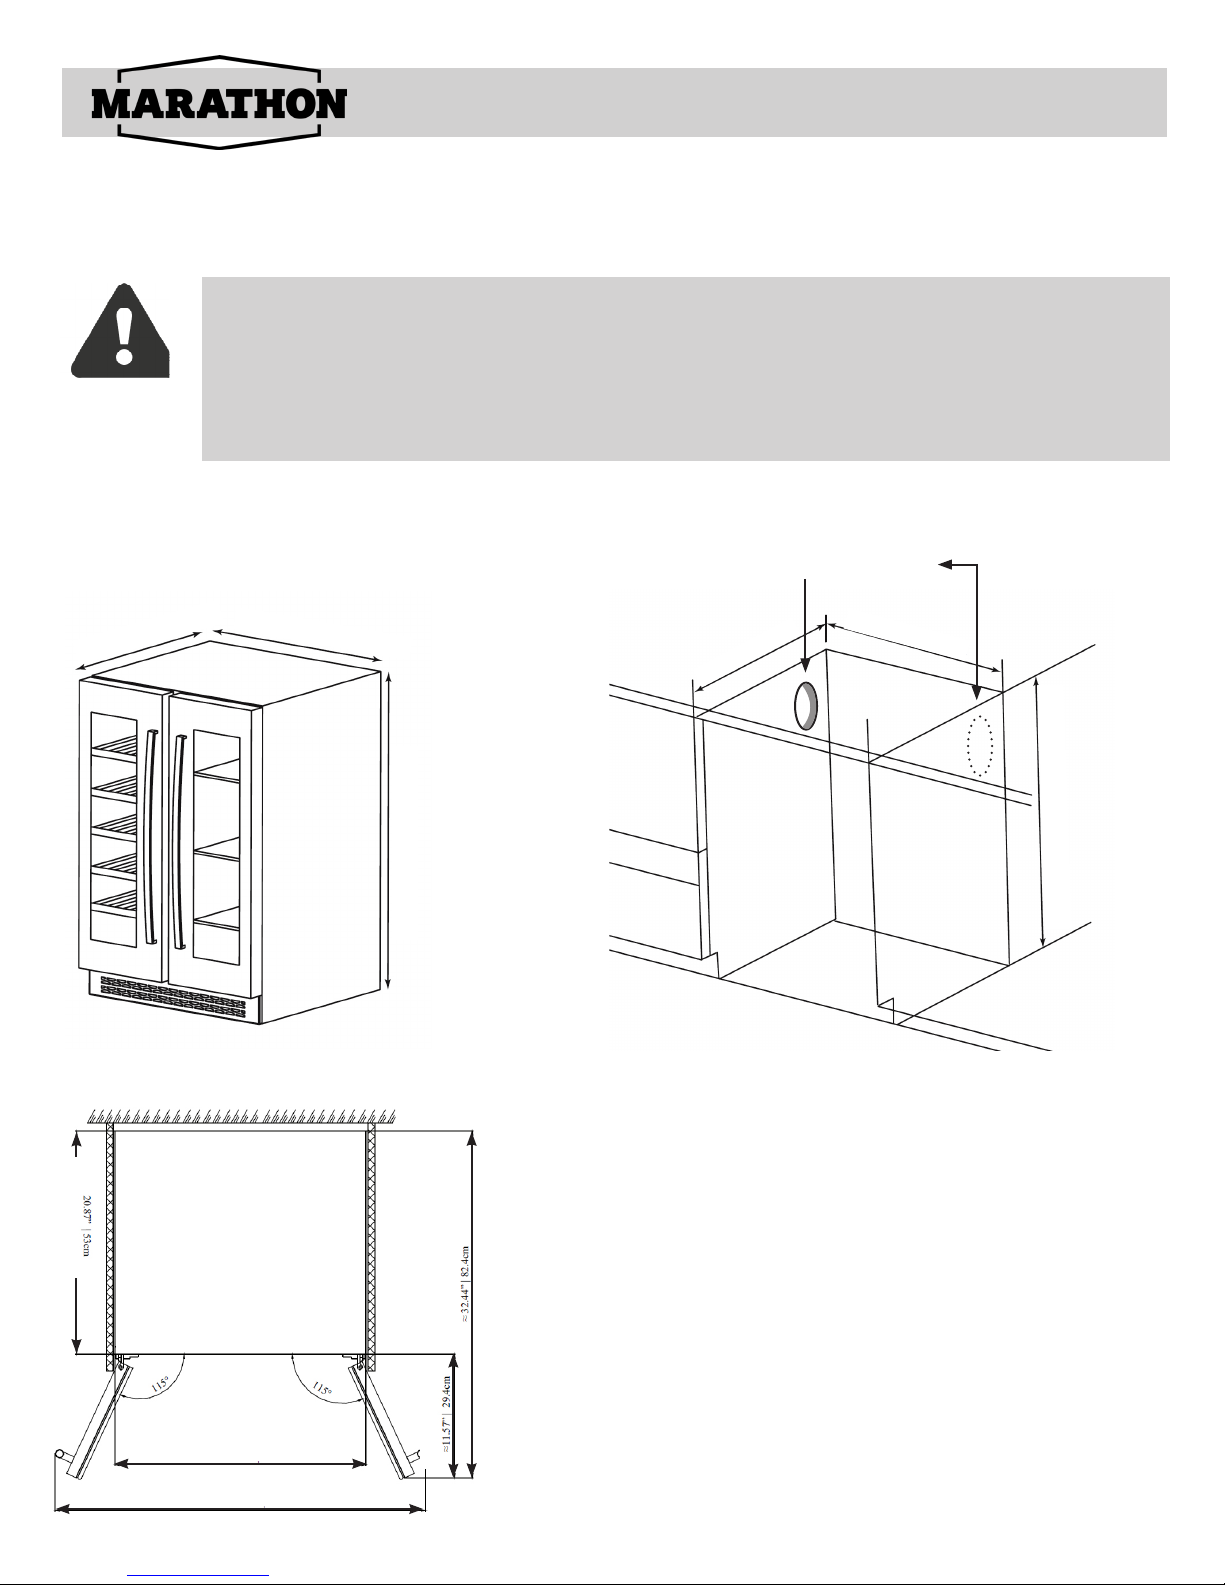
MBWC24-2D
Cutout & Dimensions
In “Hot and Humid locations”, an air vent with a minimum ventilation size of 200mm x 40mm
MUST be cut out at the rear top OR 2 circular shapes with a diameter of 65mm at the top of
either side of the partitioning, allowing cool air to flow into the rear of the cabinet.
This air vent must not be opened on the same side as other appliances, such as ovens, or an area
that is sealed and without access to fresh cool air. Failing to comply with the above specifica-
tions could result in WARRANTY becoming void.
DIMENSIONS
Installation Requirements
Make up air
(recommended)
Ø Min. 2.½ ’’
23
22
7/16
’’ | 57 cm
DOOR CLEARANCE
20 ⅞’’ | 53 cm
23 ½’’ | 59.6 cm
34 ⅝’’ | 88 cm
½
’’ | 59.6cm
32 ¼’’-35’’ | 82-89 cm
32 7/16’’ | 82.4 cm
11 9/16’’ | 29.4 cm
23
CUTOUT
¼
22
’’ | 59 cm
⅞
’’ | 60.5 cm
32 11/16’’ - 35
¼
’’ | 82-89 cm
1. Please follow the installation diagram when installing built-in wine
cellars. Use no less than the minimum installation dimension, or it
will affect the venting of cellar .
2. Built-in wine cellars draw air from right of ventilation frame and
expel through left of ventilation frame under the front door.
3. Built in wine cellars have a power switch located on the control
panel so power point location is not critical.
4.The wine cellar requires a standard 120 volt/15 amp dedicated
power supply.
5. The power cord is approx. 6 ft./2M in length and is xed on the
right side at the back when looking from front of cabinet.
6. As with most appliances of today, your Marathon appliance has
sensitive electronic components which are susceptible to damage
through lightning and electricity supply surges. It is therefore advised to use a surge protected power outlet to avoid power interruptions or damage to the appliance.
6
 Loading...