

Marathon MFF101W User Manual

10 cu.ft. Frost Free Refrigerator
OWNERS’S USE & CARE MANUAL
MFF101W
MFF101W
Congratulations
Congratulations on the purchase of your new Marathon Appliance!
To activate your Warranty, please register your appliance at www.stirlingmarathon.com or by completing
and mailing the enclosed Warranty Registration Card. We are condent you will have years of hassle free
enjoyment and ask that you please retain the Use & Care Guide for future reference and your safety.
Important Safety Instructions
WARNING
To reduce the risk of re, electrical shock, or injury follow these basic precautions when using your appliance.
1) WARNING----Keep ventilation openings, in the appliance enclosure or in the built-in structure, clear of obstruction.
2) WARNING----Do not use mechanical devices or other means to accelerate the defrosting process, other than those recommended by the manufacturer.
3) WARNING----Do not use electrical appliances inside the appliance
4) WARNING----DANGER: Never allow children to play with, operate, or crawl inside the appliance. Risk of child entrapment. Before you discard or recycle
your old refrigerator or freezer
• Completely remove the doors or lids
• Leaves the shelves in place so that children not may easily climb inside
5) Always unplug before any maintenance or service on the appliance.
6) If the component part is damaged, it must be re placed by the manufacturer, its service agent or similar qualied persons in order to avoid a hazard.
7) Follow local regulations regarding disposal of the appliance due to flammable refrigerant and blowing gas. All refrigeration products contain refrigerants,
which under the guidelines of federal law must be removed before disposal. It is the consumer’s responsibility to comply with federal and local regulations
when disposing of this product.
8) This appliance is intended to be used in household and similar environment such as:
• sta kitchen, work shop, oce and other working environments;
• farm houses and by clients in hotels, motels and other residential type environments;
• bed and breakfast type environments;
• catering and similar non retail applications.
9) Do not store or use gasoline or any inflammable liquors and liquids inside or in the vicinity of refrigerator.
10) Do not use an extension cord with t his appliance. If the power cord is too short, have a qualied electrician install an outlet near the appliance. Use of an
extension can negatively aect the appliance’s performance.
2
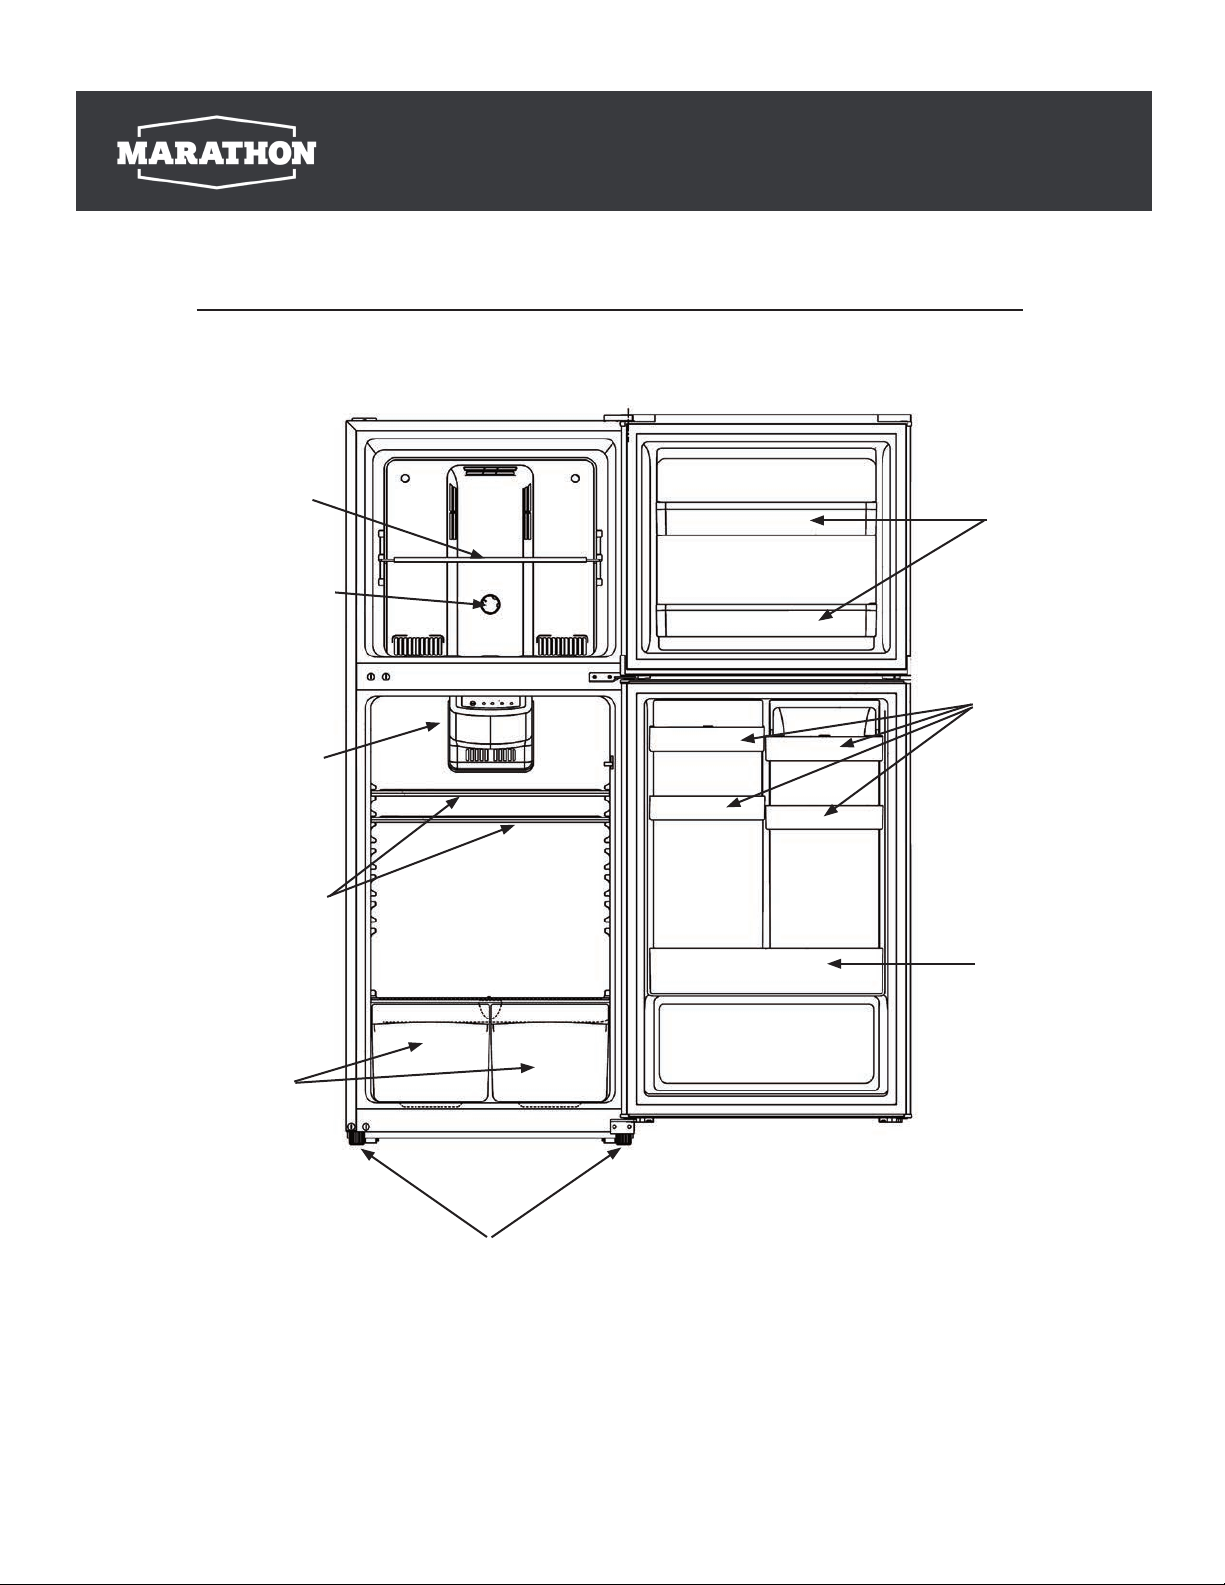
OVERVIEW
MFF101W
Freezer Shelf
Freezer
Temperature Control
Refrigerator
Temperature Control
Adjustable Tempered
Glass Shelves
Twin Crisper
Freezer
Door Shelf
Refrigerator
Adjustable
Door Bin
Large Bottle
Storage
Adjustable Feet
Note: Above picture is for reference only. The actual appliance maybe slightly dierent.
3
INSTALLATION
Space Requirement
Select a location without direct exposure to sunlight;•
Select a location with enough space for the refrigerator doors to open easily;•
Select a location with level (or nearly level) flooring;•
Allow sucient space to install the refrigerator on a flat surface;•
Allow clearance to the right, left,back andtop when installing. This will help reduce •
power consumption and keep your energy bills lower.
MFF101W
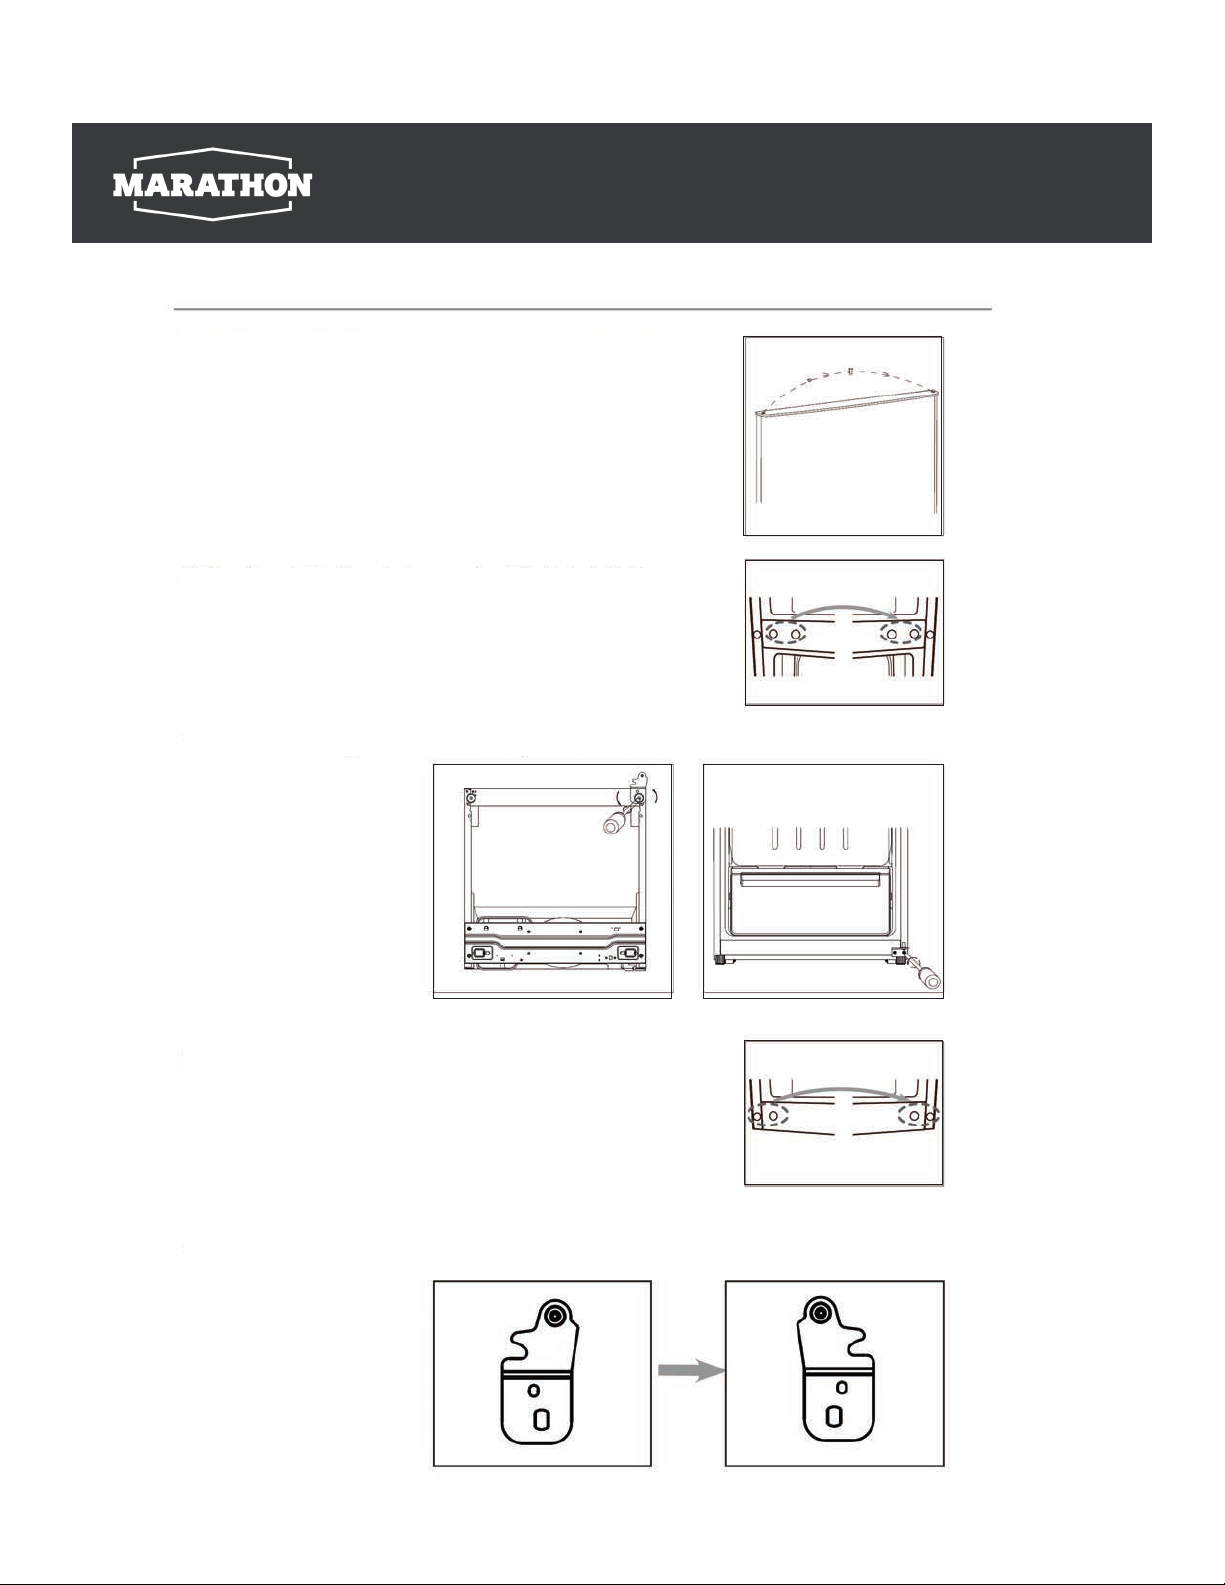
Levelling the refrigerator
To do this adjust the two levelling feet at front of the unit.
If the unit is not level, the doors and magnetic seal alignments
will not be covered properly
Location
The appliances should be installed well away from sources of heat such as radiators, boilers, direct sunlight
etc. Ensure that air can circulate freely around the back of the cabinet. To ensure best performance, if the appliance is positionned below an overhanging wall unit, the minimum distance between the top of the cabinet
and the wall unit must be at least 100 mm. Ideally, the appliances should not be positionned below overhanging wall units. Accurate leveling is ensured by one or more adjustable feet at the base of the cabinet.
WARNING! It must be possible to disconnect the appliances from the mains power supply; the plug must therefore
be easily accessible after installation.
4
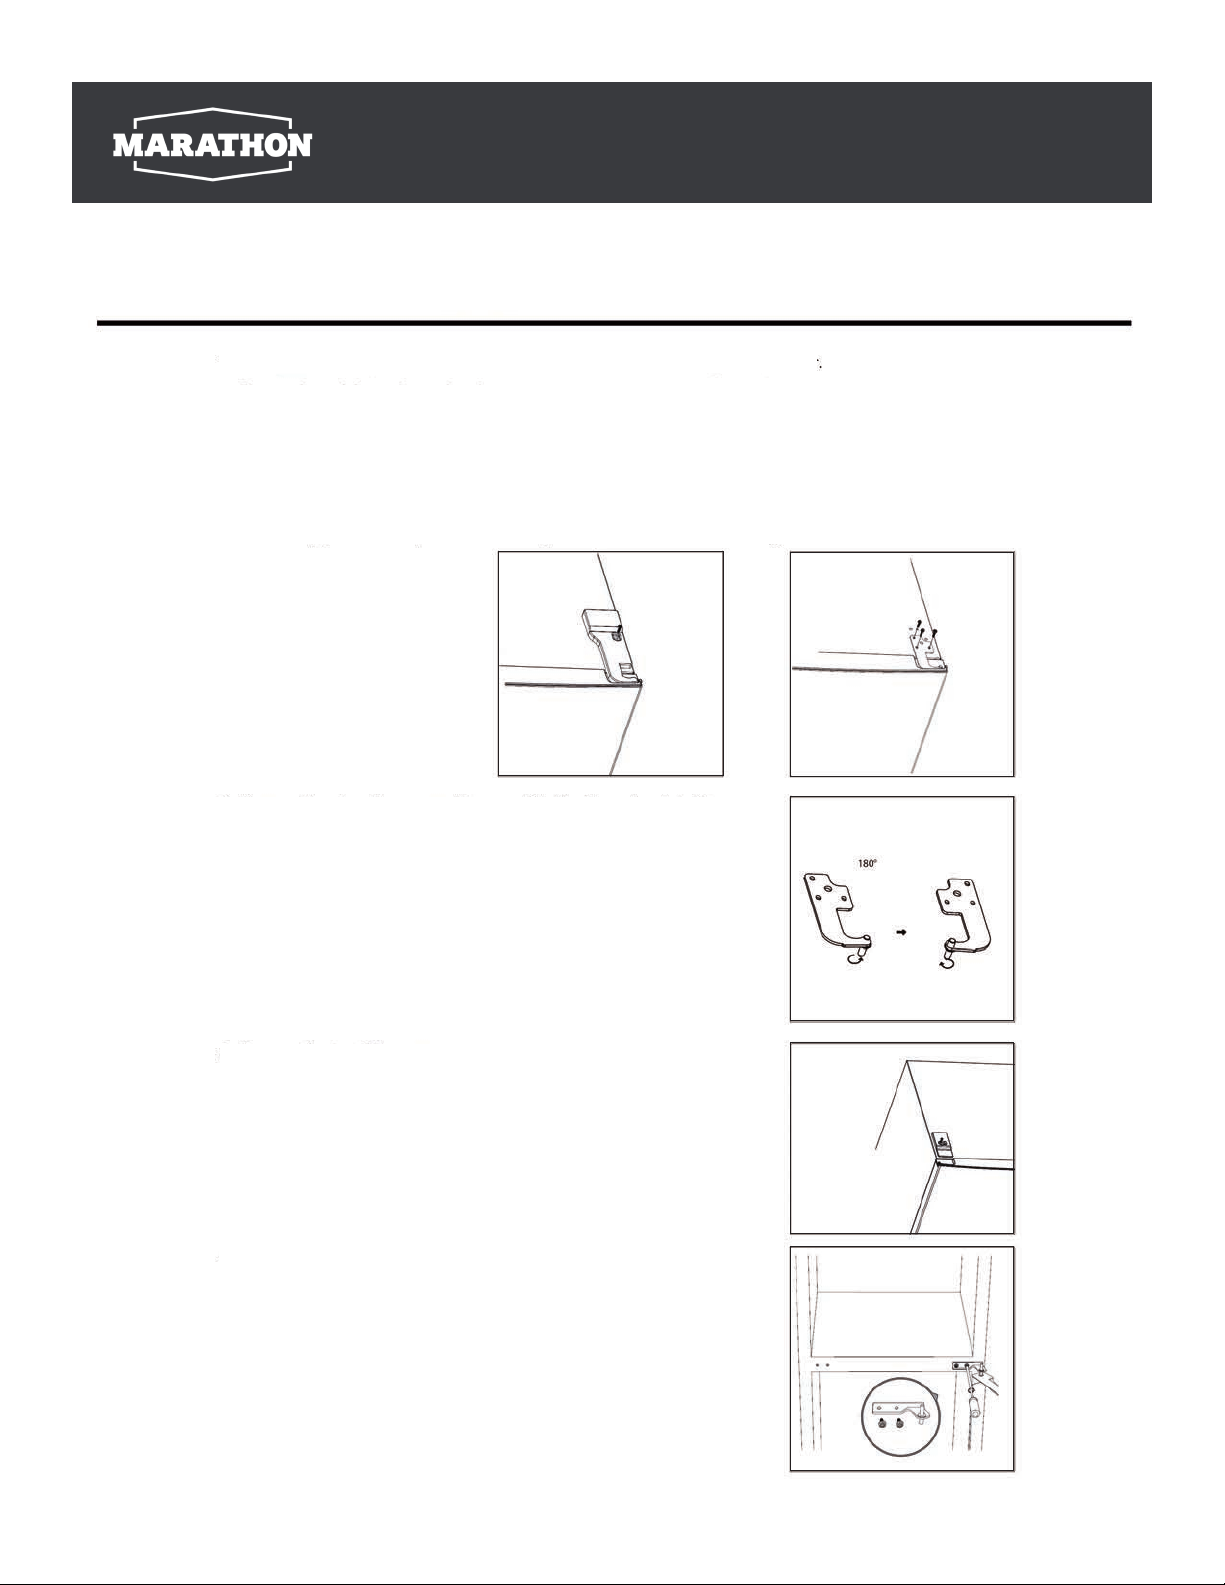
MFF101W
Changing the Reversible Door
Tool required: Philips screwdriver, Flat bladed screwdriver,
• Ensure the unit is unplugged and empty.
• To take the door off, it is necessary to tilt the unit backwards. You should rest the unit on
something solid so that it will not slip during the door reversing process.
• All parts removed must be saved to do reinstallation of the door.
• Do not lay the unit flat as this may damage the coolant system.
• It’s better taht 2 people handle the unit during assembly.
1. Unscrew top hinge cover and
then unsrew the top hinge. then
lift upper door and place it on
a soft pas to avoid scratch and
damage.
2. Remove the pin with a scredriver and flip the hinge bracket.
Then ret the pin to hinge bracket
3. Remove the top left srew cover.
4. Unscrew middle hinge.
5
Reverse Door
5. Move shaft sleeve and pin hole plug from left side to right side.
6. Move the middle hinge hole covers from left side to right side.
7. Unscrew bottom hinge. Then remove the adjustable feet from both.
MFF101W
8. Move the bottom hinge hole covers from left side to right side.
9. Disassemble right hinge, nd out right bottom hinge from spare parts bags and x it.
6
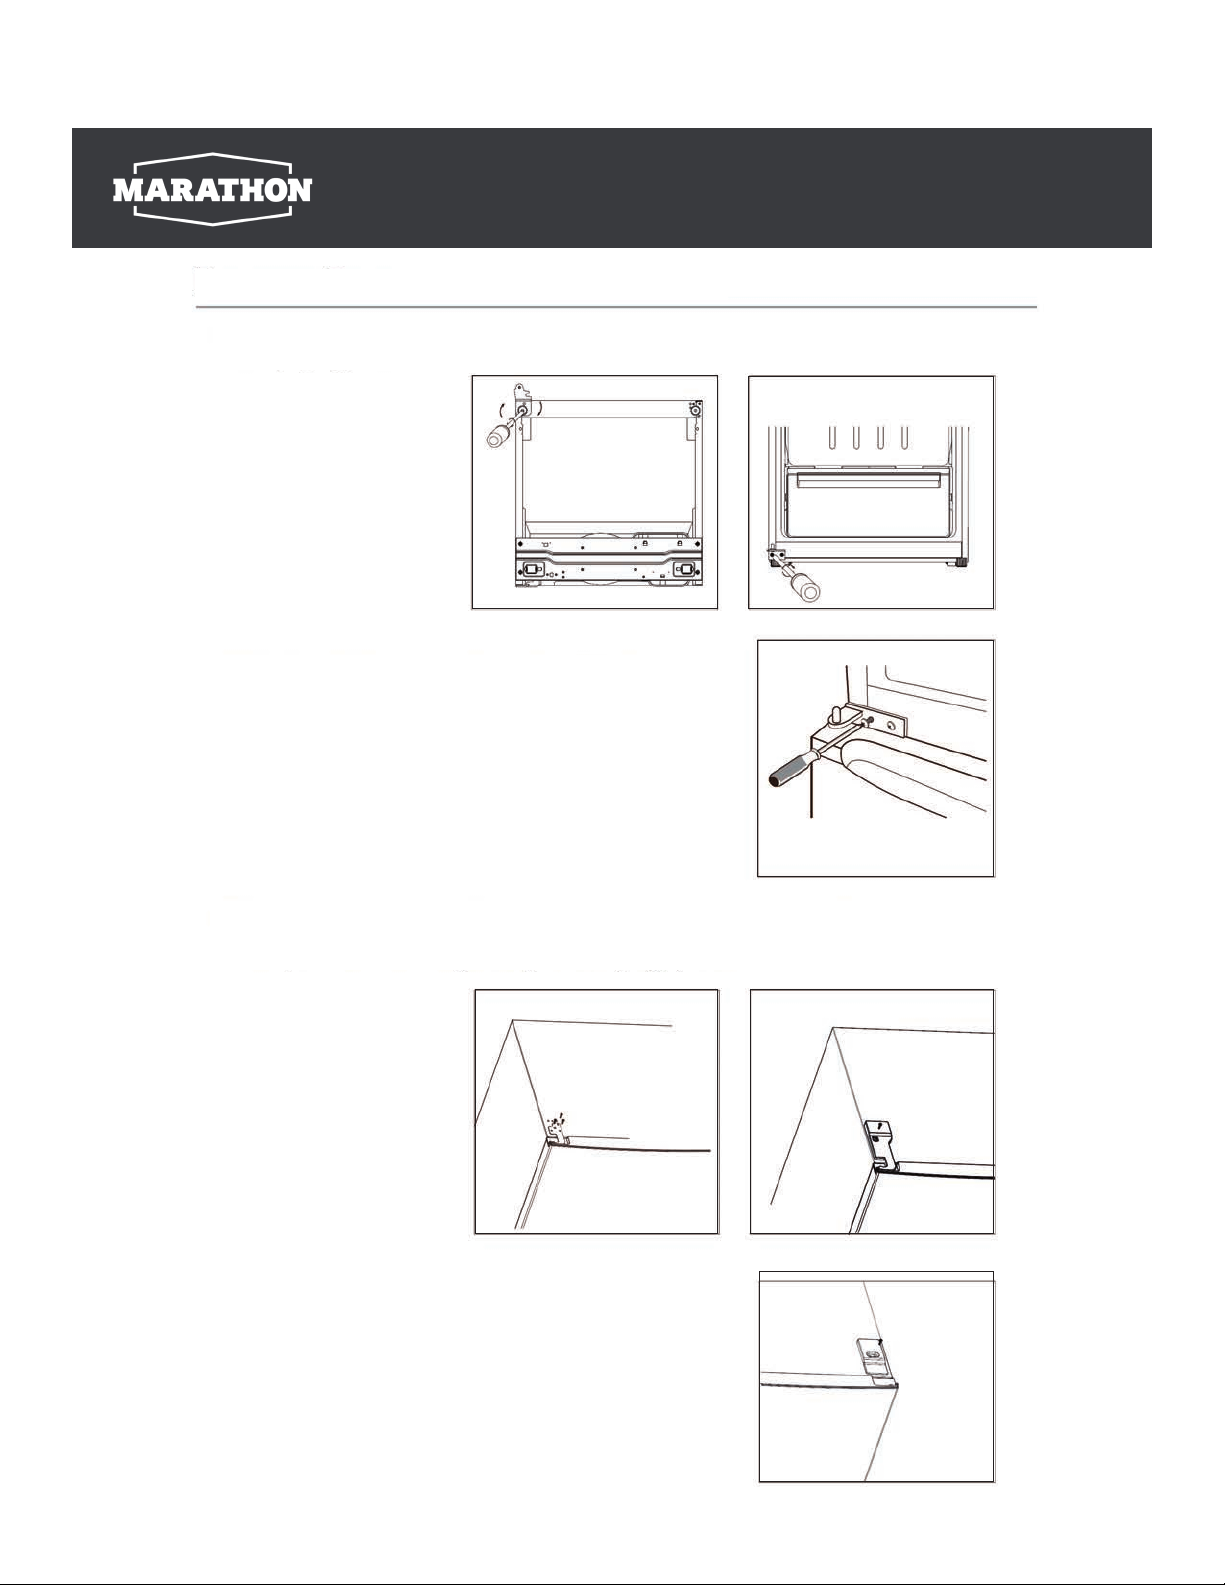
Reverse Door
10. Ret the bracket tting the bottom hinge pin. Replace both adjustable feet. Transfer the lower
door to the property position.
11. Make the middle hinge reverse the direction 180º, then
transfer it to the left property position. Make the middle
hinge pin in the upper hole of the lower door, then tight the
bolts.
MFF101W
12. Place the upper door back on. Ensure the door is aligned horizontally and vertically so that
the seal transfer it to the left property position. Make the middle hinge pin in the upper hole of
the lower door, then tight the bolts.
13. Place the top left cover to right side and x it by screw.
7
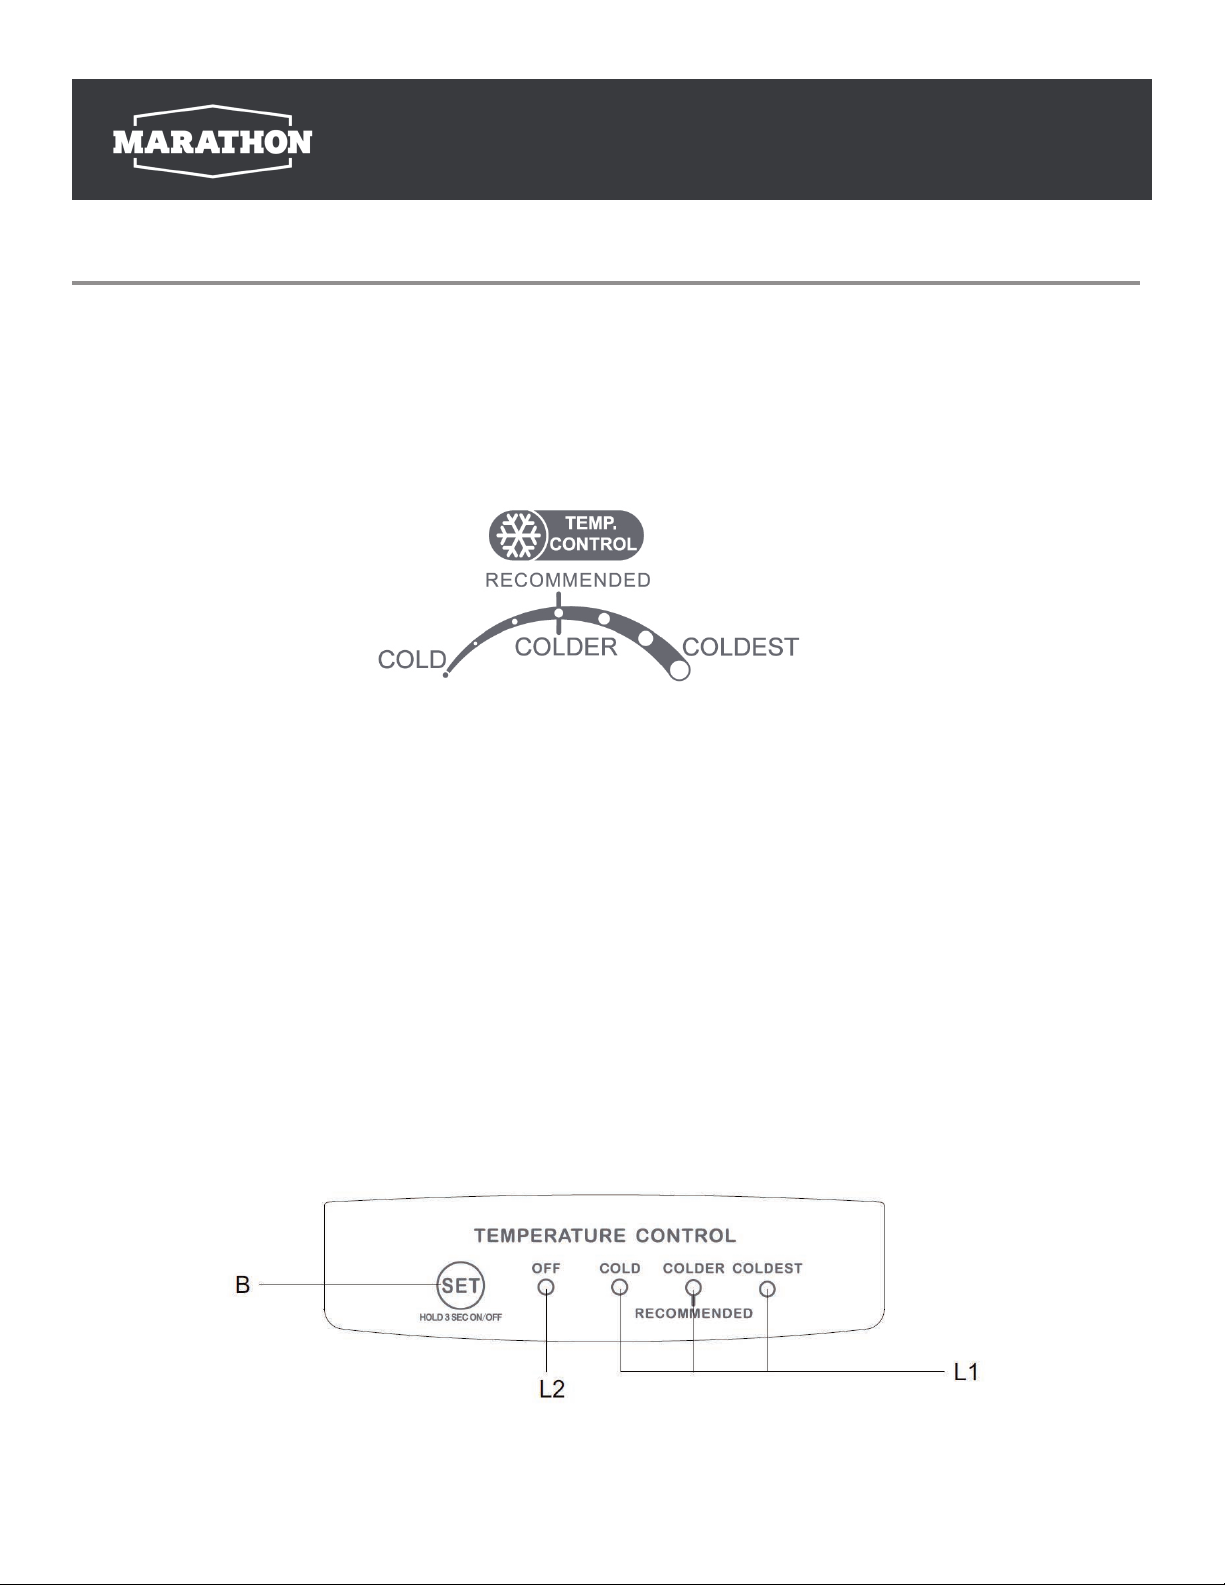
Using the Control Panel
Freezer compartment Temperature Setting
• Plug on your appliance. The internal temperature is controlled by a sensor. There are 3 settings COLD,
RECOMMENDED and COLDEST. COLD is warmest setting and COLDEST is coldest setting.
• The appliance may not operate at the correct temperature if it is in a particularly hot or if you open the
door often.
MFF101W
Freezer Temperature Control
Refrigerator Compartment Temperature Setting
1.0 Control panel
1.1 Key operation
B --- temperature setting key.
1.2 Led indication light
L1 --- show the setting of fridge compartment.
L2 --- Power O.
2.0 Operation
2.1 The temperature setting is cycle change between “cold”.”colder” and ”coldest”,
when you push the “SET”key. After each operation is nished for 5 seconds, the setting
temperature is conrmed.
2.2 Power o and power on
Refrigerator Temperature Control
8
 Loading...