

Page 1

Model VS3002 User Guide
Video Selector
Page 2
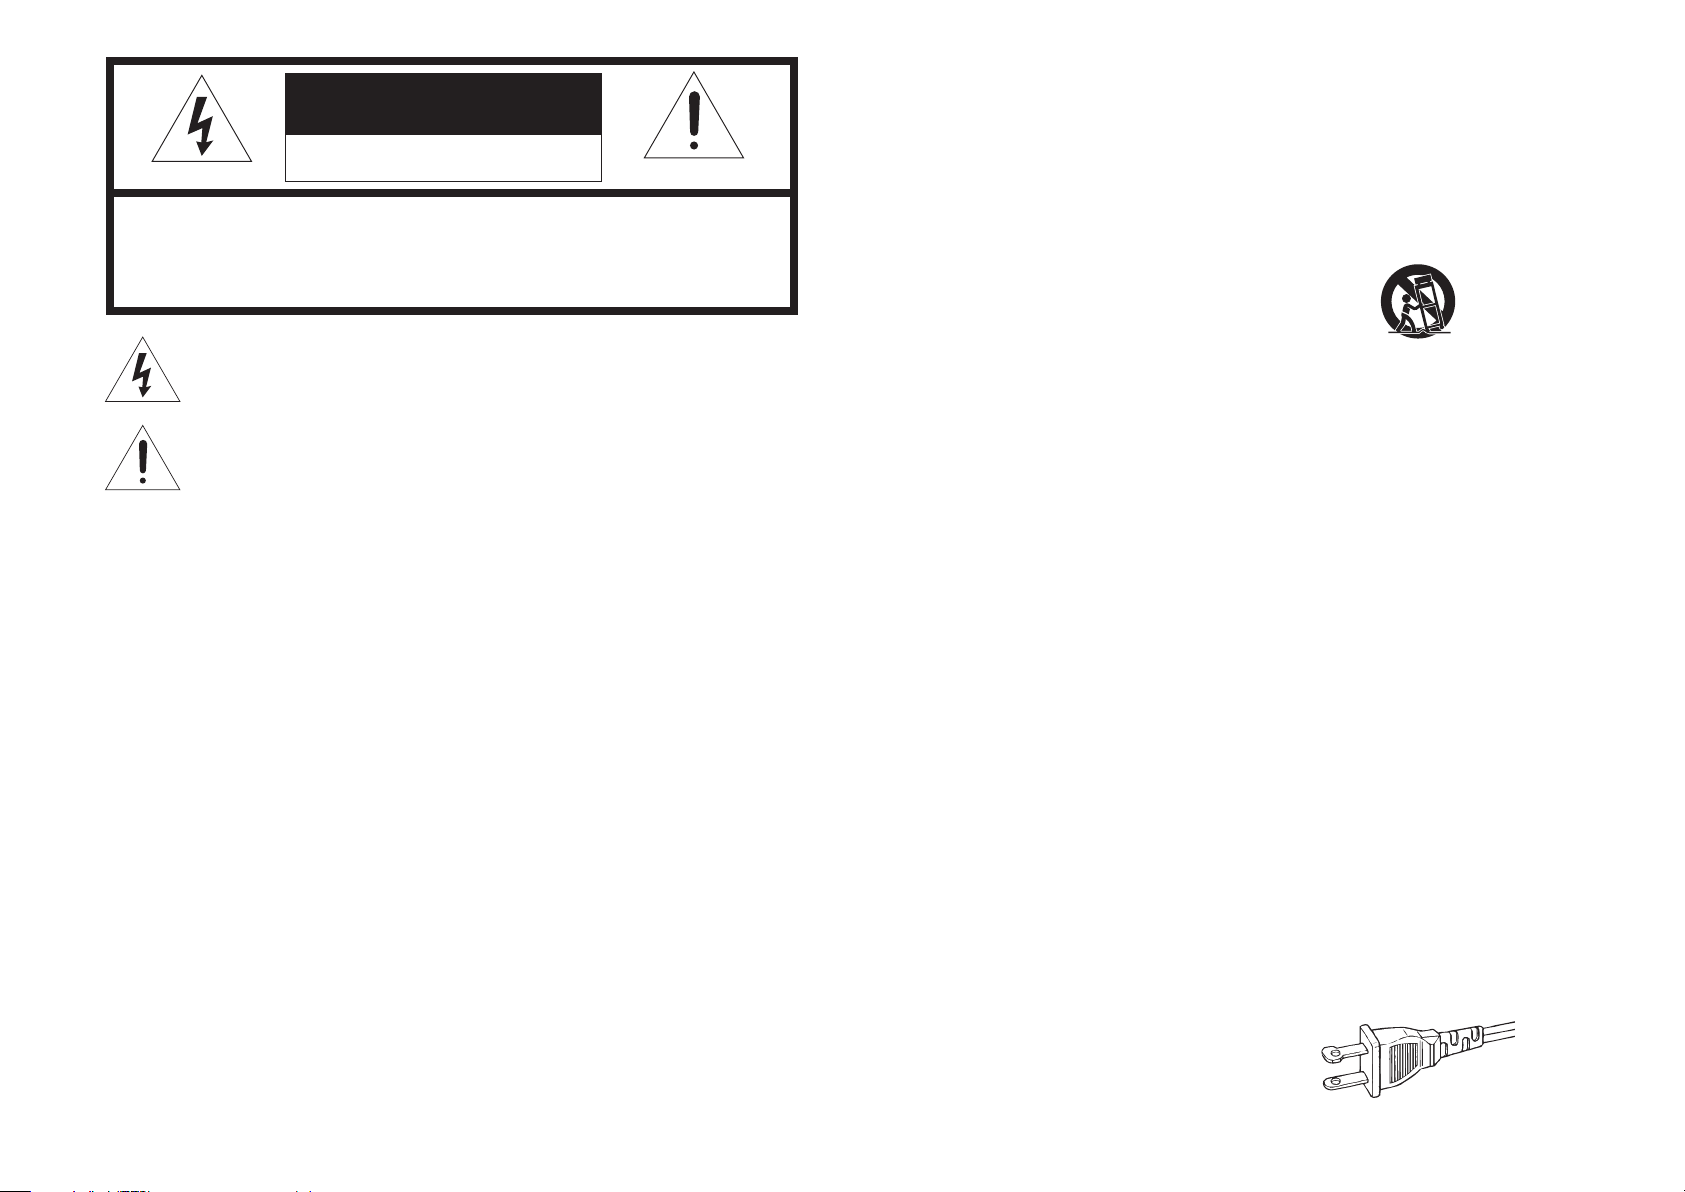
CAUTION
RISK OF ELECTRIC SHOCK
DO NOT OPEN
CAUTION: TO REDUCE THE RISK OF ELECTRIC SHOCK,
DO NOT REMOVE COVER (OR BACK)
NO USER-SERVICEABLE PARTS INSIDE
REFER SERVICING TO QUALIFIED SERVICE PERSONNEL
The lightning flash with arrowhead symbol within an equilateral triangle is
intended to alert the user to the presence of uninsulated “dangerous voltage”
within the product’s enclosure that may be of suffi cient magnitude to constitute
a risk of electric shock to persons.
The exclamation point within an equilateral triangle is intended to alert the
user to the presence of important operating and maintenance (servicing)
instructions in the literature accompanying the product.
WARNING
TO REDUCE THE RISK OF FIRE OR ELECTRIC SHOCK,
DO NOT EXPOSE THIS APPLIANCE TO RAIN OR MOISTURE.
CAUTION: TO PREVENT ELECTRIC SHOCK, MATCH WIDE BLADE OF PLUG
TO WIDE SLOT, FULLY INSERT.
ATTENTION: POUR EVITER LES CHOCS ELECTRIQUES, INTRODUIRE LA
LAME LA PLUS LARGE DE LA FICHE DANS LA BORNE CORRESPONDANTE
DE LA PRISE ET POUSSER JUSQU’AU FOND.
NOTE:
This equipment has been tested and found to
comply with the limits for a Class B digital device,
pursuant to Part 15 of the FCC Rules. These limits
are designed to provide reasonable protection
against harmful interference in a residential
installation. This equipment generates, uses
and can radiate radio frequency energy and, if
not installed and used in accordance with the
instructions, may cause harmful interference
to radio communications. However, there is no
guarantee that interference will not occur in a
particular installation. If this equipment does cause
harmful interference to radio or television reception,
which can be determined by tuning the equipment
off and on, the user is encouraged to try to correct
the interference by one or more of the following
measures:
- Reorient or relocate the receiving antenna.
- Increase the separation between the equipment
and receiver.
- Connect the equipment into an outlet on a
circuit different from that to which the receiver is
connected.
- Consult the dealer or an experienced radio/TV
technician for help.
NOTE:
Changes or modifi cations not expressly approved
by the party responsible for compliance could void
the user’s authority to operate the equipment.
IMPORTANT SAFETY
INSTRUCTIONS
READ BEFORE OPERATING EQUIPMENT
This product was designed and manufactured to
meet strict quality and safety standards.
There are, however, some installation and operation
precautions which you should be particularly aware
of.
1. Read Instructions
All the safety and operating instructions should
be read before the product is operated.
2. Retain Instructions
The safety and operating instructions should
be retained for future reference.
3. Heed Warnings
All warnings on the product and in the
operating instructions should be adhered to.
4. Follow Instructions
All operating and use instructions should be
followed.
5. Cleaning
Unplug this product from the wall outlet before
cleaning. Do not use liquid cleaners or aerosol
cleaners. Use a damp cloth for cleaning.
6. Attachments
Do not use attachments not recommended by
the product manufacturer as they may cause
hazards.
7. Water and Moisture
Do not use this product near water-for
example, near a bath tub, wash bowl, kitchen
sink, or laundry tub, in a wet basement, or near
a swimming pool, and the like.
8. Accessories
Do not place this product on an unstable cart,
stand, tripod, bracket, or table.
The product may fall, causing serious injury
to a child or adult, and serious damage to
the product. Use only with a cart, stand,
tripod, bracket, or table recommended by the
manufacturer, or sold with the product. Any
mounting of the product should follow the
manufacturer’s instructions, and should use
a mounting accessory recommended by the
manufacturer.
9. A product and cart combination should be
moved with care. Quick stops, excessive force,
and uneven surfaces may cause the product
and cart combination to overturn.
10. Ventilation
Slots and openings in the cabinet are provided
for ventilation and to ensure reliable operation
of the product and to protect it from overheating,
and these openings must not be blocked or
covered. The openings should never be blocked
by placing the product on a bed, sofa, rug, or
other similar surface. This product should not
be placed in a built-in installation such as a
bookcase or rack unless proper ventilation is
provided or the manufacturer’s instructions have
been adhered to.
11. Power Sources
This product should be operated only from
the type of power source indicated on the
marking label. If you are not sure of the type
of power supply to your home, consult your
product dealer or local power company. For
products intended to operate from battery
power, or other sources, refer to the operating
instructions.
12. Grounding or Polarization
This product may be equipped with a polarized
alternating current line plug (a plug having one
blade wider than the other). This plug will fit
into the power outlet only one way. This is a
safety feature. If you are unable to insert the
plug fully into the outlet, try reversing the plug.
If the plug should still fail to fit, contact your
electrician to replace your obsolete outlet. Do
not defeat the safety purpose of the polarized
plug.
AC POLARIZED PLUG
Page 3
13. Power-Cord Protection
Power-supply cords should be routed so
that they are not likely to be walked on or
pinched by items placed upon or against them,
paying particular attention to cords at plugs,
convenience receptacles, and the point where
they exit from the product.
14. Protective Attachment Plug
The product is equipped with an attachment
plug having overload protection. This is a safety
feature.
See Instruction Manual for replacement or
resetting of protective device. If replacement
of the plug is required, be sure the service
technician has used a replacement plug
specified by the manufacturer that has the
same overload protection as the original plug.
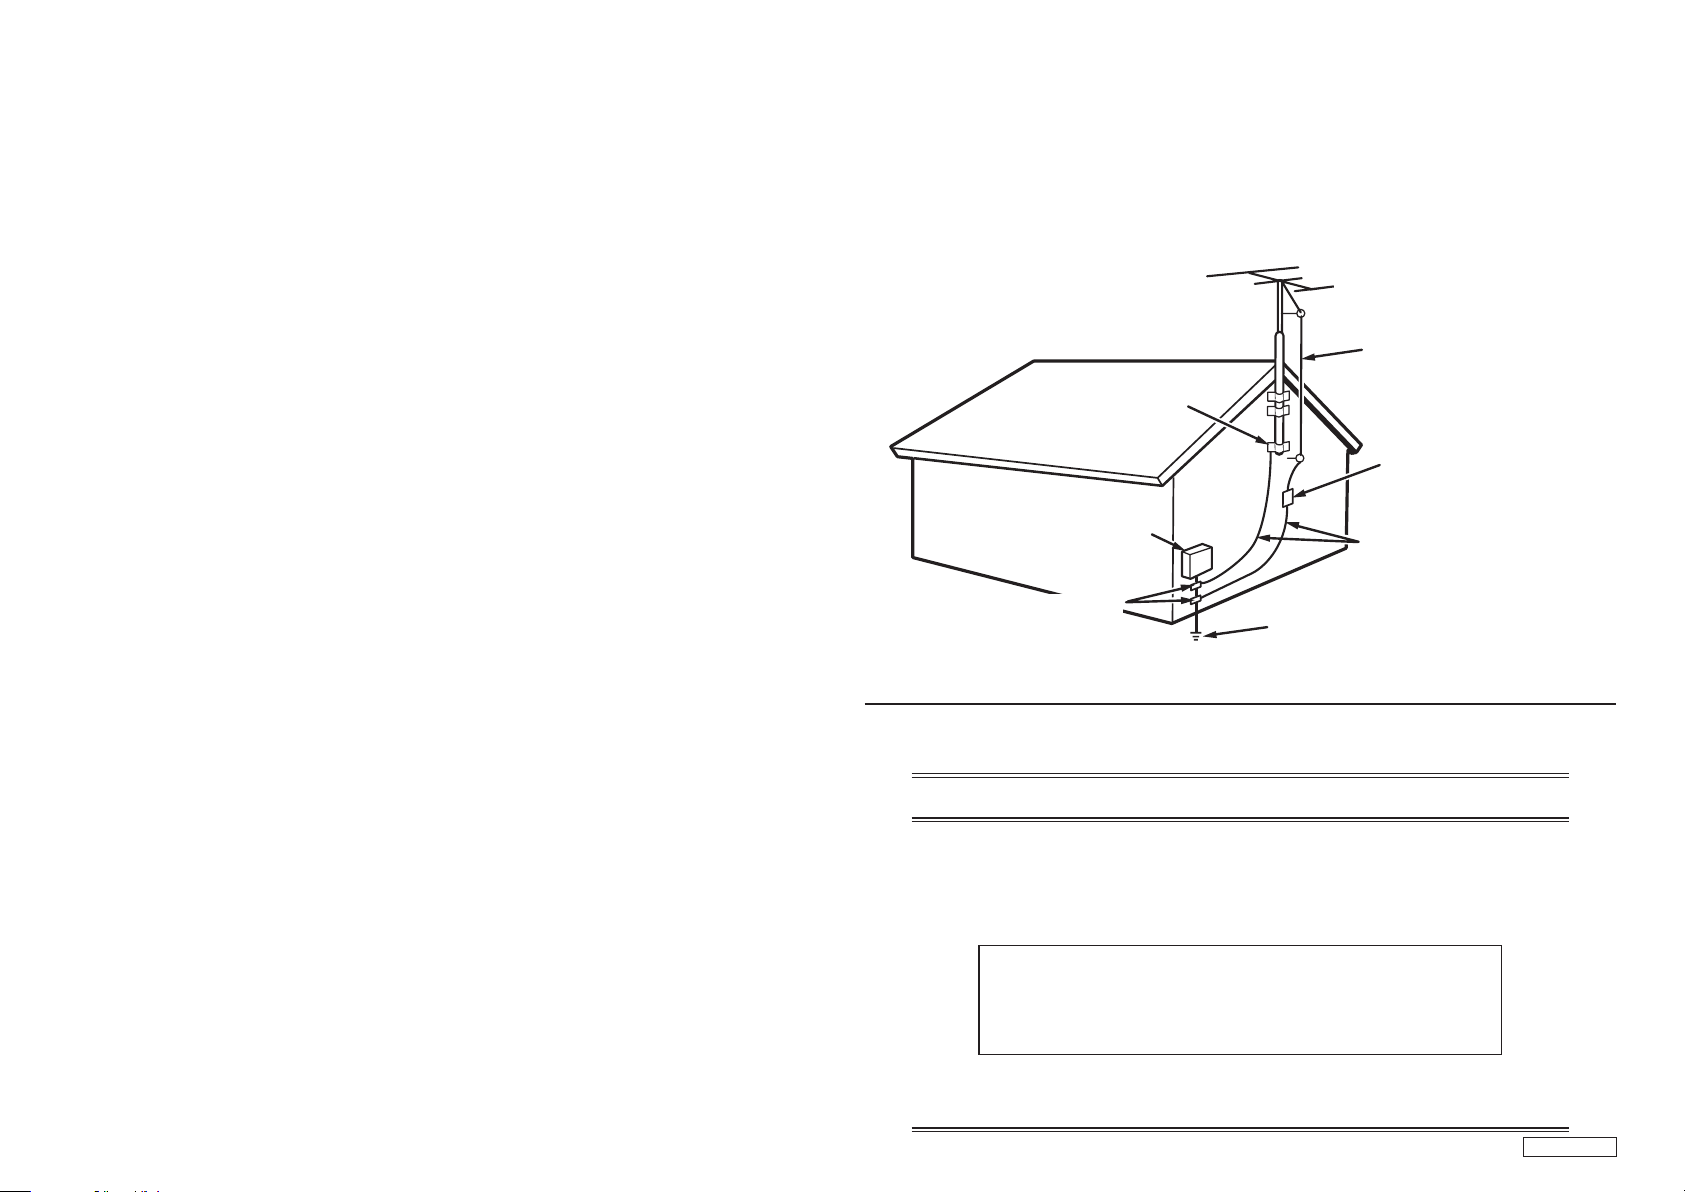
15. Outdoor Antenna Grounding
If an outside antenna or cable system is
connected to the product, be sure the antenna
or cable system is grounded so as to provide
some protection against voltage surges and
built-up static charges. Article 810 of the National
Electrical Code, ANSI/NFPA 70, provides
information with regard to proper grounding of
the mast and supporting structure, grounding
of the lead-in wire to an antenna-discharge
unit, size of grounding conductors, location of
antenna discharge unit, connection to grounding
electrodes, and requirements for the grounding
electrode. See Figure 1.
16. Lightning
For added protection for this product during a
lightning storm, or when it is left unattended
and unused for long.
This will prevent damage to the product due to
lightning and power-line surges.
17. Power Lines
An outside antenna system should not be
located in the vicinity of overhead power
lines or other electric light or power circuits,
or where it can fall into such power lines or
circuits. When installing an outside antenna
system, extreme care should be taken to keep
from touching such power lines or circuits as
contact with them might be fatal.
18. Overloading
Do not overload wall outlets, extension cords,
or integral convenience receptacles as this can
result in a risk of fi re or electric shock.
19. Object and Liquid Entry
Never push objects of any kind into this
product through openings as they may touch
dangerous voltage points or short-out parts
that could result in a fire or electric shock.
Never spill liquid of any kind on the product.
20. Servicing
Do not attempt to service this product yourself
as opening or removing covers may expose
you to dangerous voltage or other hazards.
Refer all servicing to qualified service
personnel.
21. Damage Requiring Service
Unplug this product from the wall outlet and
refer servicing to qualified service personnel
under the following conditions:
a. When the power-supply cord or plug is
damaged.
b. If liquid has been spilled, or objects have
fallen into the product.
c. If the product has been exposed to rain or
water.
d. If the product does not operate normally by
following the operating instructions. Adjust
only those controls that are covered by
the operating instructions as an improper
adjustment of other controls may result in
damage and will often require extensive
work by a qualifi ed technician to restore the
product to its normal operation.
If the product has been dropped or damaged
e.
in any way, and
f. When the product exhibits a distinct change
in performance this indicates a need for
service.
22. Replacement Parts
When replacement parts are required, be sure
the service technician has used replacement
parts specifi ed by the manufacturer or have the
same characteristics as the original part.
Unauthorized substitutions may result in fire,
electric shock, or other hazards.
23. Safety Check
Upon completion of any service or repairs
to this product, ask the service technician to
perform safety checks to determine that the
product is in proper operating condition.
24. Wall or Ceiling Mounting
The product should be mounted to a wall
or ceiling only as recommended by the
manufacturer.
EXAMPLE OF ANTENNA GROUNDING AS PER
NATIONAL ELECTRICAL CODE, ANSI/NFPA 70
GROUND
CLAMP
ELECTRIC
SERVICE
EQUIPMENT
GROUND CLAMPS
NEC - NATIONAL ELECTRICAL CODE
This Class B digital apparatus complies with Canadian
ICES-003.
25. Heat
The product should be situated away from
heat sources such as radiators, heat registers,
stoves, or other products (including amplifi ers)
that produce heat.
FIGURE 1
ANTENNA
LEAD IN WIRE
ANTENNA
DISCHARGE UNIT
(NEC SECTION 810-20)
GROUNDING CONDUCTORS
(NEC SECTION 810-21)
POWER SERVICE GROUNDING
ELECTRODE SYSTEM
(NEC ART 250, PART H)
Cet appareil numerique de la Classe B est conforme a
la norme NMB-003 du Canada.
DECLARATION OF CONFORMITY
This device complies with Part 15 of the FCC rules. Operation is subject to the
following conditions: (1) This device may not cause harmful interference, and (2) this
device must accept any interference received, including interference that may cause
undesired operation.
U.S. Responsible Party: Marantz America, Inc.
100 Corporate Drive,
Mahwah, NJ, 07430, U.S.A.
TEL: 630-741-0300
Type of Product:
Model:
Video Selector
VS3002
VS_070912U1
Page 4

ENGLISH
ESPAÑOL
ITALIANO
WARRANTY
For warranty information, contact your local Marantz
distributor.
RETAIN YOUR PURCHASE RECEIPT
Your purchase receipt is your permanent record of a
valuable purchase. It should be kept in a safe place
to be referred to as necessary for insurance purposes
or when corresponding with Marantz.
IMPORTANT
When seeking warranty service, it is the responsibility of
the consumer to establish proof and date of purchase.
Your purchase receipt or invoice is adequate for such
proof.
FOR U.K. ONLY
This undertaking is in addition to a consumer's
statutory rights and does not affect those rights in
any way.
FRANÇAIS
GARANTIE
Pour des informations sur la garantie, contacter le
distributeur local Marantz.
CONSERVER L'ATTESTATION D'ACHAT
L'attestation d'achat est la preuve permanente
d'un achat de valeur. La conserver en lieu sur pour
s'y reporter aux fi ns d'obtention d'une couverture
d'assurance ou dans le cadre de correspondances
avec Marantz.
IMPORTANT
Pour l'obtention d'un service couvert par la garantie, il
incombe au client d'établir la preuve de l'achat et d'en
corroborer la date. Le reçu ou la facture constituent
des preuves suffi santes.
GARANTIA
Para obtener información acerca de la garantia
póngase en contacto con su distribuidor Marantz.
GUARDE SU RECIBO DE COMPRA
Su recibo de compra es su prueba permanente de
haber adquirido un aparato de valor, Este recibo
deberá guardarlo en un lugar seguro y utilizarlo
como referencia cuando tenga que hacer uso del
seguro o se ponga en contacto con Marantz.
IMPORTANTE
Cuando solicite el servicio otorgado por la garantia
el usuario tiene la responsabilidad de demonstrar
cuándo efectuó la compra. En este caso, su recibo
de compra será la prueba apropiada.
DEUTSCH
GARANTIE
Bei Garantiefragen wenden Sie sich bitte an Ihren
Marantz-Händler.
HEBEN SIE IHRE QUITTING GUT AUF
Die Quittung dient Ihnen als bleibende Unterlage
für Ihren wertvollen Einkauf Das Aufbewahren der
Quittung ist wichtig, da die darin enthaltenen Angaben
für Versicherungswecke oder bei Korrespondenz mit
Marantz angeführt werden müssen.
WICHTIG!
Bei Garantiefragen muß der Kunde eine Kaufunterlage
mit Kaufdatum vorlegen. Ihren Quittung oder
Rechnung ist als Unterlage ausreichend.
GARANZIA
L’apparecchio è coperto da una garanzia di buon
funzionamento della durata di un anno, o del periodo
previsto dalla legge, a partire dalla data di acquisto
comprovata da un documento attestante il nominativo
del Rivenditore e la data di vendita. La garanzia sarà
prestata con la sostituzione o la riparazione gratuita
delle parti difettose.
Non sono coperti da garanzia difetti derivanti da
uso improprio, errata installazione, manutenzione
effettuata da personale non autorizzato o, comunque,
da circostanze che non possano riferirsi a difetti di
funzionamento dell’apparecchio. Sono inoltre esclusi
dalla garanzia gli interventi inerenti l’installazione e
l’allacciamento agli impianti di alimentazione.
Gli apparecchi verranno riparati presso i nostri Centri
di Assistenza Autorizzati. Le spese ed i rischi di
trasporto sono a carico del cliente.
La casa costruttrice declina ogni responsabilità per
danni diretti o indiretti provocati dalla inosservanza
delle prescrizioni di installazione, uso e manutenzione
dettagliate nel presente manuale o per guasti dovuti ad
uso continuato a fi ni professionali.
Page 5

CE MARKING
English
The VS3002 is in conformity with the EMC
directive and low-voltage directive.
Français
Le
VS3002
et à la directive sur les basses tensions.
Español
El
VS3002
EMC y las relacionadas con baja tensión.
Deutsch
Das Modell VS3002 entspricht den EMC-
Richtlinien und den Richtlinien für Niederspannungsgeräte.
Italiano
Il VS3002 è conforme alle direttive CEE ed
a quelle per i bassi voltaggi.
est conforme à la directive EMC
está de acuerdo con las normas
English
WARNINGS
- Do not expose the equipment to rain, moisture,
dripping or splashing.
- Do not remove the cover from the equipment.
- Do not insert anything into the equipment through the
ventilation holes.
- Do not handle the mains cord with wet hands.
- Do not cover the ventilation with any items such as
tablecloths, newspapers, curtains, etc.
- No naked fl ame sources, such as lighted candles,
should be placed on the equipment.
- When disposing of used batteries, please comply
with governmental regulations or environmental
public instruction’s rules that apply in your country or
area.
- No objects fi lled with liquids, such as vases, shall be
placed on the equipment.
- When the switch is in the OFF position, the equipment
is not completely switched off from MAINS.
- The equipment shall be installed near the power
supply so that the power supply is easily accessible.
- Do not expose the unit to excessive heat such as
direct sunlight, fi re or the like.
Français
AVERTISSEMENTS
- Ne pas exposer l’appareil à la pluie, à l’humidité, à
l’égouttement ou aux éclaboussures.
- Ne pas essayer de retirer le boîtier de l’appareil.
- Ne rien insérer dans l’appareil par les orifi ces de
ventilation.
- Ne pas manipuler le cordon d’alimentation avec
les mains mouillées.
- Ne pas recouvrir les ouïes de ventilation avec un
objet quelconque comme une nappe, un journal,
un rideau, etc.
- Ne placer aucune source de fl amme nue, comme
une bougie allumée, sur l’appareil.
- Pour mettre au rebut les piles usées, respecter
les lois gouvernementales ou les règlements offi
ciels concernant l’environnement qui s’appliquent
à votre pays ou région.
- Aucun objet rempli de liquide, un vase par exemple,
ne doit être placé sur l’appareil.
- Lorsque l’interrupteur est sur la position OFF,
l’appareil n’est pas complètement déconnecté du
SECTEUR (MAINS).
- L’appareil sera installé près de la source
d’alimentation, de sorte que cette dernière soit
facilement accessible.
- Ne pas exposer l’appareil à une chaleur excessive,
comme celle des rayons directs du soleil, d’un feu,
etc.
Español
ADVERTENCIAS
- No exponga el equipo a la lluvia, la humedad,
goteos o salpicaduras.
- No extraiga la tapa del equipo.
- No introduzca nada en el interior del equipo a
través de los orifi cios de ventilación.
- No maneje el cable de alimentación con las
manos mojadas.
- No cubra la ventilación con objetos como manteles,
periódicos, cortinas, etc.
- No deben colocarse sobre el equipo elementos
con fuego, por ejemplo velas encendidas.
- Cuando se eliminen baterías usadas, deben
cumplirse las reglamentaciones oficiales o las
normas de protección medioambiental aplicables
en su país o en su zona.
No se deben colocar sobre el aparato recipientes que
contengan líquidos, como por ejemplo jarrones.
- Cuando el interruptor está en la posición OFF, el
equipo no está completamente desconectado de
la alimentación MAINS.
- El equipo se instalará cerca de la fuente de
alimentación de manera que resulte fácil acceder
a ella.
- No exponga la unidad a un calor excesivo, como
el derivado de la luz directa del sol, el fuego, o
similar.
Deutsch
WARNHINWEISE
- Das Gerät nicht Regen, Feuchtigkeit, Tropf- oder
Spritzwasser aussetzen.
- Die Abdeckung nicht vom Gerät abnehmen.
- Keine Gegenstände durch die Belüftungsschlitze
stecken.
- Das Netzkabel nicht mit feuchten oder nassen
Händen anfassen.
- Decken Sie die Lüftungsöffnungen nicht mit einem
Tischtuch, einer Zeitung, einem Vorhang usw. ab.
- Es dürfen keine Gegenstände mit offener Flamme,
wie etwa brennende Kerzen, auf dem Gerät
aufgestellt werden.
- Beachten Sie bei der Entsorgung der verbrauchten
Batterien alle geltenden lokalen und überregionalen
Regelungen.
- Auf das Gerät dürfen keine mit Flüssigkeiten
gefüllte Behälter, wie etwa eine Vase, gestellt
werden.
- Wenn der Schalter ausgeschaltet ist (OFFPosition), ist das Gerät nicht vollständig vom
Stromnetz (MAINS) abgetrennt.
- Das Gerät sollte in der Nähe einer Netzsteckdose
aufgestellt werden, damit es leicht an das
Stromnetz angeschlossen werden kann.
- Setzen Sie das Gerät keiner übermäßigen
Wärme aus, z.B. durch Aufstellung in direkter
Sonneneinstrahlung, in der Nähe eines offenen
Feuers usw.
Italiano
AVVERTENZE
- Non esporre l’apparecchio alla pioggia, all’umidità,
al gocciolamento o agli spruzzi.
- Non rimuovere il coperchio dell’apparecchio.
- Non introdurre oggetti all’interno dell’apparecchio
attraverso i fori di ventilazione.
- Non toccare il cavo di alimentazione con le mani
bagnate.
- Non coprire le fessure di ventilazione con tovaglie,
giornali, tende od oggetti analoghi.
- Non posare sull’apparecchio sorgenti di fi amme
scoperte quali candele accese.
- Smaltire le pile usate in conformità alle norme
governative o disposizioni ambientali vigenti nel
proprio paese o zona.
- Non mettere sull’apparecchiatura alcun contenitore
di liquido, come ad esempio dei vasi.
- Quando l’interruttore è nella posizione OFF,
l’apparecchiatura non è completamente scollegata
da MAINS.
- L’apparecchio va installato in prossimità della fonte
di alimentazione, in modo che quest’ultima sia
facilmente accessibile.
- Non esporre l’unità ad eccessivo calore come la
luce diretta del sole, il fuoco o simili.
VS_070912N1
Page 6
Thank you very much for purchasing this Marantz Video Selector.
Before using this unit, please read the User Guide carefully to ensure
proper operation of the unit, and retain it together with the supplied
warranty.
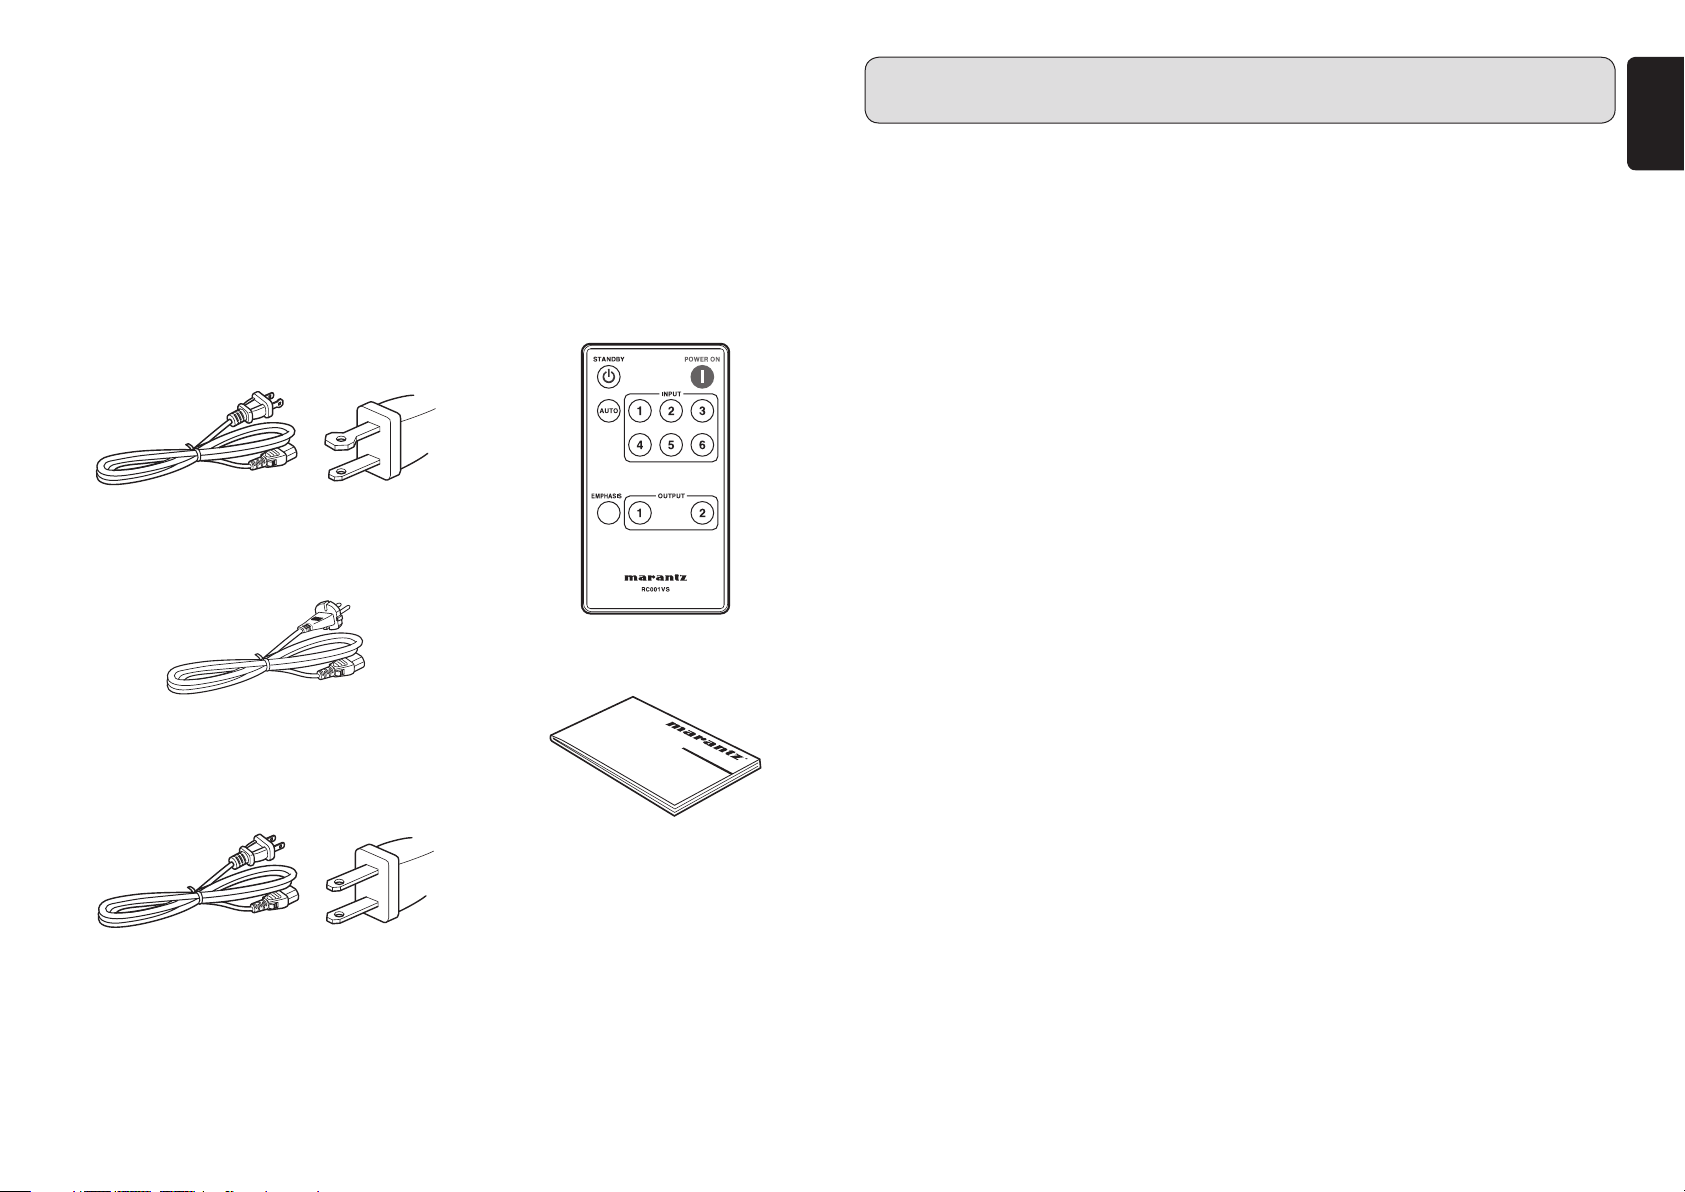
7 Accessories Check
Before use, check the below accessories were included in the package.
• AC power cord (U.S.A.) x 1
This plug has polarity. One pin is thicker
than the other.
• AC power cord (Europe) x 1
This plug has round pins.
• Remote controller (battery included) × 1
• User Guide (This manual) × 1
CONTENTS
FEATURES ........................................................................................2
BEFORE USING ................................................................................2
EQUIPMENT MAINS WORKING SETTING ........................................................ 2
COPYRIGHT ........................................................................................................ 2
NAMES AND FUNCTIONS ...............................................................4
FRONT PANEL .................................................................................................... 4
REAR PANEL ...................................................................................................... 5
REMOTE CONTROLLER .................................................................................... 6
CONNECTIONS ................................................................................7
CONNECTING TO DEVICES WITH HDMI JACKS ............................................. 7
REMOTE CONTROL CONNECTION .................................................................. 8
CONNECTING THE POWER CORD ..................................................................8
BASIC OPERATIONS .......................................................................9
1. TURNING ON THE POWER ...........................................................................9
2. SELECTING THE INPUT SIGNAL ..................................................................9
3. SELECTING THE OUTPUT SIGNAL ..............................................................9
4. TURNING OFF THE POWER ..........................................................................9
ENGLISH
• AC power cord (Japan) x 1
The pins on both sides are the same
shape.
• Warranty Card (U.S.A.)
U.S.A. x 1
Canada x 1
• Warranty (for Japan) × 1
OTHER FUNCTIONS ......................................................................10
AUTO INPUT FUNCTION (AUTO) .................................................................... 10
EMPHASIS FUNCTION ..................................................................................... 10
REMOTE LINK FUNCTION ............................................................................... 11
TROUBLESHOOTING ....................................................................13
SPECIFICATIONS AND DIMENSIONS ..........................................14
OTHERS ..........................................................................................15
1
Page 7
ENGLISH
FEATURES
¶ Supports HDMI version 1.3b
Supports up to 1080p / 60 Hz Deep Color
36-bit (12-bit × 3).
Equipped with six HDMI input
jacks
Equipped with six input jacks, so that
up to six different input devices can be
connected.
¶ Equipped with two HDMI
output jacks
Equipped with two output jacks. This
enables the display to be switched
between two different devices, such as
a TV and projector, using a switch and
without having to replace the cables.
Enables stable signal switching
Reduces noise in video and
audio output signals (emphasis
function)
Any generated noise is canceled out by
switching the emphasis function on and
off.
Automatic input mode switching
function (auto input function)
Detects cable connections and
disconnections and the power being
turned on and off to the connected
devices, enabling automatic switching
between input devices.
¶ Equipped with an RS-232
control jack that supports
custom installation
¶ Equipped with a control jack
that supports remote control
systems (compatible with
Marantz products)
¶ Equipped with a FLASHER
IN jack
BEFORE USING
This section must be read before any
connection is made to the mains supply.
EQUIPMENT MAINS
WORKING SETTING
Your Marantz product has been prepared to
comply with the household power and safety
requirements that exist in your area.
— Power requirements (U.S.A.)
................................ AC 120V 60Hz
— Power requirements (Europe)
........................... AC 230V 50/60Hz
— Power requirements (Japan)
........................... AC 100V 50/60Hz
COPYRIGHT
Recording and playback of any material may
require consent. For further information refer
to the following:
— Copyright Act 1956
— Dramatic and Musical Performers Act
1958
— Performers Protection Acts 1963 and 1972
— Any subsequent statutory enactments and
orders
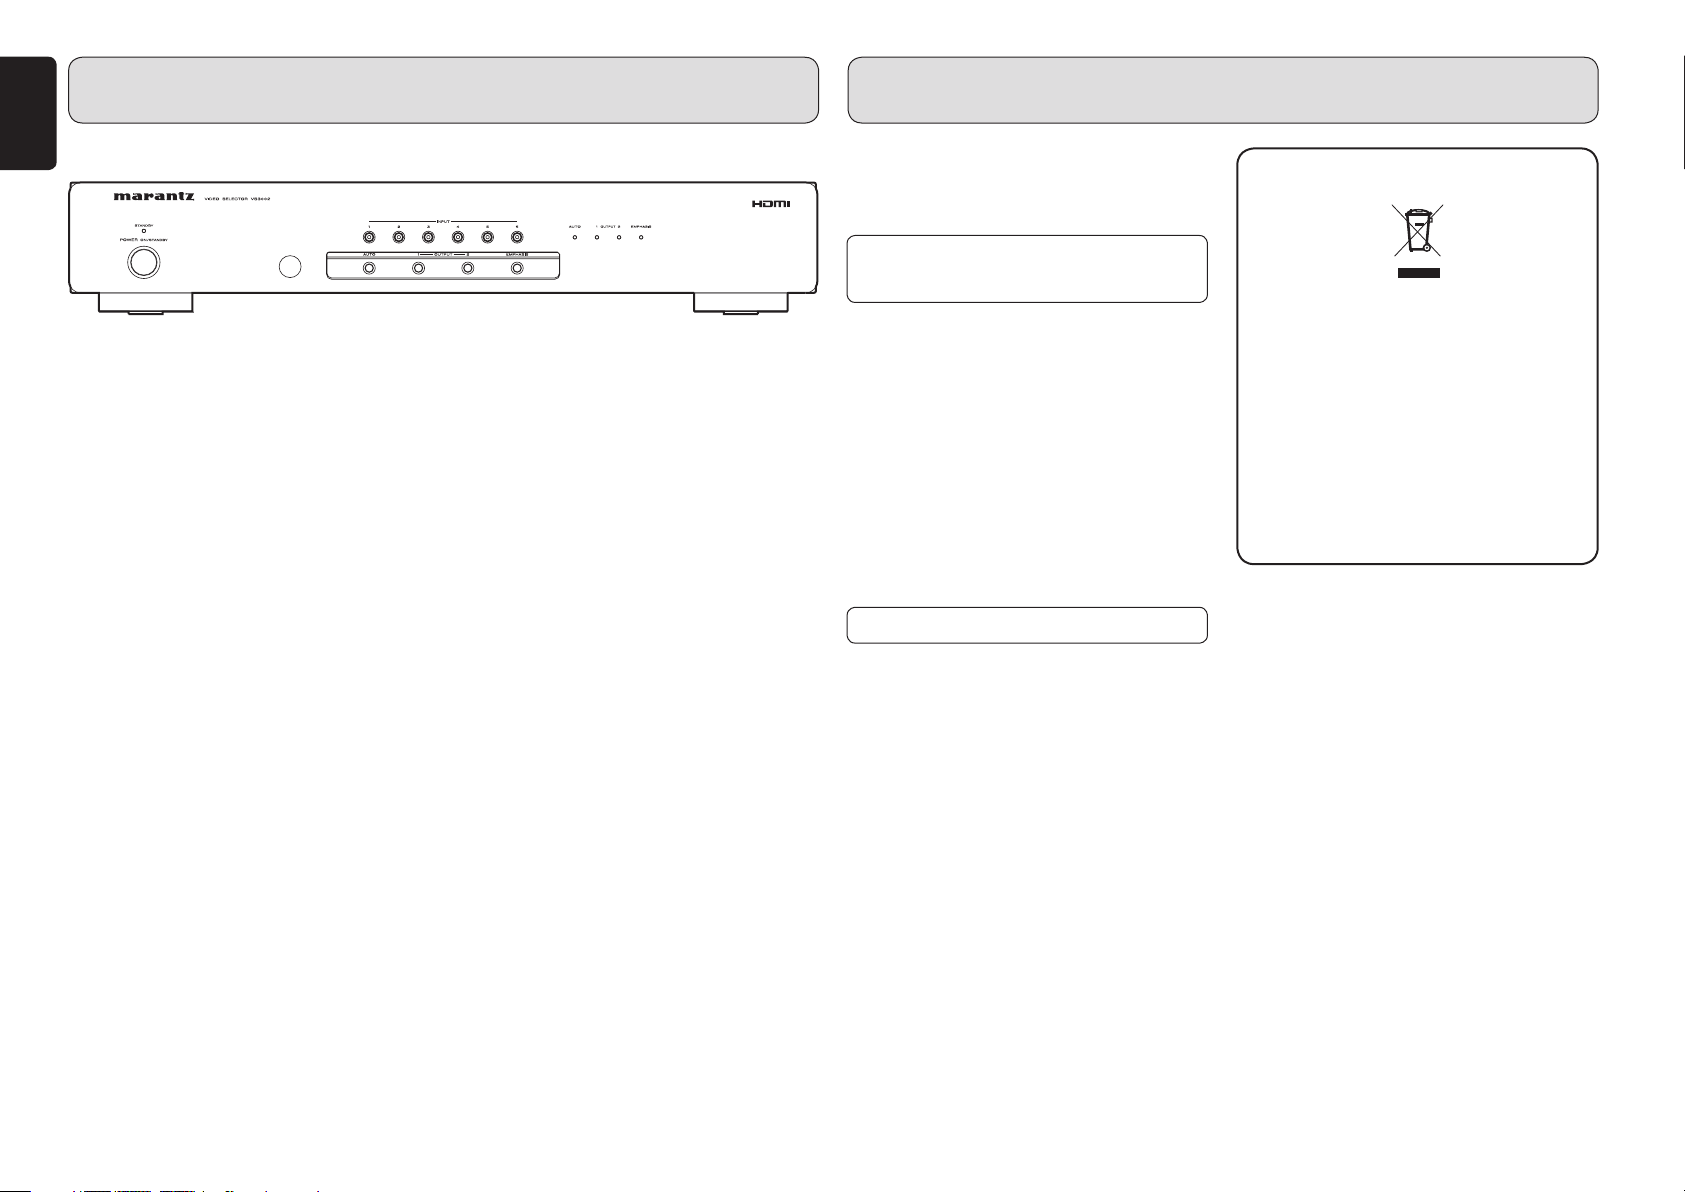
A NOTE ABOUT RECYCLING
This product’s packaging materials are
recyclable and can be reused. This product
and the accessories packed together are
the applicable product to the WEEE directive
except batteries.
Please dispose of any materials in accordance
with your local recycling regulations.
When discarding the unit, comply with your
local rules or regulations.
Batteries should never be thrown away or
incinerated but disposed of in accordance with
your local regulations concerning chemical
wastes.
2
Page 8

BEFORE USING
7
Operation of remote controller
Please make sure the below instructions
are followed when operating your remote
controller.
• Do not spill water or any other liquid on
your remote controller.
• Do not drop, apply excessive impact on
your remote controller.
• Do not leave your remote controller in a
place such as;
- At high humidity/temperature
(near heater, bathroom)
- At extremely low temperature
- Dusty
¶ Before using your remote
controller
Note that your remote controller is provided
with lithium battery and can be operative after
removing insulation sheet.
insulation sheet
¶ Handling battery
Improper handling of lithium battery may
cause heat generation, ignition or bursting, so
be sure to follow the below instructions when
handling the lithium battery.
• The supplied battery is provided to check
the functionality of your remote controller.
• Use only battery type CR2025.
• Do not recharge your battery.
• Do not handle roughly or disassemble your
battery.
• When you replace your battery, be sure
to insert the battery with polarity (+)(-)
correctly.
• Do not place your battery in any place
where it will be subjected to direct sunlight
or high temperature.
• Keep your battery out of the reach of
children. In case of accidental ingestion,
immediately consult a doctor.
• Leaky battery should be disposed
immediately. If the liquid is spilt on your skin
or cloth, you can get a skin burn, so be sure
to handle leaky battery carefully. When the
solution adheres to the skin and/or clothes,
wash it with water and consult a doctor.
• At disposal of used batteries, insulate
terminal parts by winding with tape. Dispose
the battery away from fire in accordance
with applicable local regulations.
¶ Battery replacement
If you find that the remote control must be used
closer to the main unit than usual, the battery
is weak. Replace the battery new one.
1. Move the part shown by the arrow to the
right using a sharp edge such as your
fingernail.
2. Pull out the battery case.
Lithium battery
Battery holder
3. Replace the battery from the battery
holder, and then place new one in the
holder, positive side upward.
4. Slide the holder into the remote control.
¶ Remote-controllable range
Operate the unit with the remote controller
within the range of the illustration below.
Approx. 5m
Remote controller
Precautions:
• Do not allow direct sunlight, an inverter
fluorescent light or other strong source
of light to shine onto the player’s infrared
signal reception window (remote sensor).
Otherwise, the operation of the remote
control unit may be disabled.
• Bear in mind that operating the remote
control unit may cause other devices
operated by infrared rays to be operated by
mistake.
• The remote control unit cannot be operated
if the space between the controller and the
player’s remote sensor is obstructed.
• Do not place any objects on top of the
remote control unit. Doing so may cause
one or more buttons to be held down which
will cause the batteries to run down.
ENGLISH
3
Page 9

ENGLISH
NAMES AND FUNCTIONS
FRONT PANEL
qw e
!0 ouytri
q POWER ON/STANDBY button
Switches between power on and off
(standby). Press the button to turn on the
power. Press it again to enter STANDBY
mode.
w STANDBY indicator
Lights up in red when the unit is in
STANDBY mode.
e INPUT buttons 1 to 6 with
indicators
Press to select INPUT 1 to 6. When you
press the button, the corresponding
indicator on each button lights up in red.
r EMPHASIS indicator
Lights up in yellow when the emphasis
function of the unit is on.
t OUTPUT indicators 1 and 2
When you press OUTPUT button 1 or 2,
the corresponding indicator lights up in
red.
y AUTO indicator
Lights up in blue when the auto input
function of the unit is on.
u EMPHASIS button
Press to switch on or off the emphasis
function of the unit.
i OUTPUT buttons 1 and 2
Press to select OUTPUT 1 or 2.
o AUTO button
Press to turn on the auto input function of
the unit.
!0 Infrared receiver
Receives the infrared control signal from
the remote controller.
4
Page 10

NAMES AND FUNCTIONS
AC IN
OFFVPVP
SR
OUTPUT
REMOTE
LINK
REMOTE
CONTROL
EXTERNAL
INTERNAL
OUT
IN
FLASHER
IN
RS-232C
654321
INPUT
21
REAR PANEL
OUTPUT
q w e rt iy u
q HDMI OUTPUT jacks 1 and 2
HDMI output jacks. There are two jacks,
which can be connected to the HDMI input
jacks of devices such as TVs, projectors
and amps.
w HDMI INPUT jacks 1 to 6
HDMI input jacks. There are six jacks,
which can be connected to the HDMI
output jacks of devices such as videos and
computers.
e FLASHER IN jack
This jack is for the external operation of
the unit. It is not used when using the unit
by itself.
r RS-232C jack
A control jack for custom installers.
INPUT
FLASHER
IN
RS-232C
t REMOTE CONTROL IN/OUT
jack
Connects to Marantz products that are
equipped with a REMOTE CONTROL
(RC-5) jack. Use when you want to perform
system control of the unit with the remote
controller.
y INTERNAL/EXTERNAL switch
A switch that selects the reception method
for the remote controller signal. When
using the REMOTE CONTROL jack and
FLASHER IN jack to control the unit
from an external device, set the switch
to “EXTERNAL.” When using the unit
by itself, set the switch to “INTERNAL.”
When the switch is set to “EXTERNAL,”
signals from the remote controller cannot
be received.
REMOTE
CONTROL
EXTERNAL
INTERNAL
IN
OUT
OFF
REMOTE
LINK
SR
u REMOTE LINK switch
A switch that selects the device to which to
apply the remote link function.
When you press INPUT button 1 to 6
after setting this switch, the set device is
switched automatically to HDMI input from
other input modes.
i Power cord jack
Connect the supplied power cord to the
unit and then connect the cord to a power
outlet.
Note:
To prevent accidents, install in a position
where the power cord can be removed
from the unit. Three power cord types are
supplied. Use the type that is appropriate
for your region. (See page 1)
ENGLISH
AC IN
5
Page 11

ENGLISH
NAMES AND FUNCTIONS
REMOTE CONTROLLER
n
b
z STANDBY button
While the power to the unit is on, press to
switch the unit to STANDBY mode.
z
x POWER ON button
Press to turn on the power to the unit.
x
c INPUT buttons 1 to 6
Press to select INPUT 1 to 6.
c
v OUTPUT buttons 1 and 2
Press to select OUTPUT 1 or 2.
b EMPHASIS button
Press to switch on or off the emphasis
function of the unit.
n AUTO button
v
Press to turn on the auto input function of
the unit.
6
Page 12

CONNECTIONS
AC IN
OFFVPVP
SR
OUTPUT
REMOTE
LINK
REMOTE
CONTROL
EXTERNAL
INTERNAL
OUT
IN
FLASHER
IN
RS-232C
654321
INPUT
21
SURROUND
Notes:
• Before connecting, be sure to switch off the unit and the other devices to be connected.
• Use cables that are appropriate for the devices to be connected.
• When connecting, fully insert the plugs into the jacks. Plugs that are not fully inserted could
cause a malfunction.
• Be sure to hold the plug when pulling out a cable. If you hold the cable itself when pulling it
out, it could damage the cable and cause a connection defect.
• Read carefully the instructions of the device to be connected before performing the
connections.
CONNECTING TO DEVICES WITH HDMI JACKS
7 Connecting to devices with HDMI output jacks
The unit is equipped with six HDMI input jacks. Connect to devices that are equipped with HDMI
output jacks (for example, DVD players, Blu-ray players, HD-DVD players, satellite tuners, cable
tuners, amps).
1. Connect one end of the HDMI cable to one of the INPUT 1 to 6 jacks on the rear panel of the
unit.
2. Connect the other end of the HDMI cable to the HDMI output jack of the output device.
7 Connecting to devices with HDMI input jacks
The unit is equipped with two HDMI output jacks. Connect to devices that are equipped with
HDMI input jacks (for example, video projectors, plasma TVs, LCD TVs, amps).
1. Connect one end of the HDMI cable to OUTPUT jack 1 or 2 on the rear panel of the unit.
2. Connect the other end of the HDMI cable to the HDMI input jack of the input device.
DVD player
PAUSEPLAY
STOP
STANDBY
POWER
FL OFF
ON/OFF
HDMI/DVI
RESOLUTION
HDMI
OUTPUT
OPEN/CLOSE
PHONES
LEVEL
+
-
Blu-ray player HD-DVD player
STANDBY
POWERON/OFF
HDMI
OUTPUT
HDMI
OUTPUT
ENGLISH
INPUT1 〜 3
REMOTE
CONTROL
EXTERNAL
INTERNAL
IN
REMOTE
LINK
OUT
OFF
SR
AC IN
OUTPUT
OUTPUT1、2
FLASHER
INPUT
RS-232C
IN
INPUT4 〜 6
Amp
VOLUME
UP
DOWN
MEMORY CLEAR
T-MODE
DISPLAY
SPEAKERS
A/B
M-DAX
EXIT
AUX 1 INPUT
DIGITAL
RLVIDEO
S-VIDEO
MIC
AUDIO
HDMI
INPUT
HDMI
OUTPUT
PURE DIRECT
M-DAX
SURROUND
MULTI
MODE AUTO
BAND
SPEAKER
MULTI
7.1CH INPUT
PURE DIRECT THX
STANDBY
POWER ON/OFF
ENTER
MENU
PHONES
HDMI
Projector
TV
HDMI
OUTPUT
HDMI
OUTPUT
Cable tuner
Satellite tuner
7
Page 13

ENGLISH
AC IN
OFFVPVP
SR
OUTPUT
REMOTE
LINK
REMOTE
CONTROL
EXTERNAL
INTERNAL
OUT
IN
FLASHER
IN
RS-232C
654321
INPUT
21
AC IN
OFF
VP
SR
REMOTE
LINK
CONNECTIONS
REMOTE CONTROL CONNECTION
If you connect the remote control jack of the unit to the remote control jack of another Marantz
product, you can perform remote control of the connected devices as though they were a single
system.
• When using the unit by itself, set the INTERNAL/EXTERNAL switch of the unit to
“INTERNAL.”
¶ When controlling a connected device from the unit
• Connect the REMOTE CONTROL OUT jack of the unit to the REMOTE CONTROL IN jack of
the connected device.
• At this time, set the INTERNAL/EXTERNAL switch of the unit to “INTERNAL.”
¶ When controlling the unit from a connected device
• Connect the REMOTE CONTROL IN jack of the unit to the REMOTE CONTROL OUT jack of
the connected device.
• At this time, set the INTERNAL/EXTERNAL switch of the unit to “EXTERNAL.” The remote
controller infrared receiver of the unit is disabled and you can operate the unit through the
remote controller infrared receiver of the connected device.
REMOTE
CONTROL
+
PAUSEPLAY
EXTERNAL
INTERNAL
IN
REMOTE
LINK
OUT
OFF
SR
AC IN
OUTIN
REMOTE CONTROL
DVD player
OUTPUT
STANDBY
POWER
ON/OFF
INPUT
FL OFF
HDMI/DVI
RESOLUTION
FLASHER
RS-232C
IN
OPEN/CLOSE
PHONES
STOP
LEVEL
-
When controlling a connected device from the unit (set to INTERNAL)
CONNECTING THE POWER CORD
1. Insert the supplied power cord into the power cord jack on the rear panel of the unit.
REMOTE
LINK
OFF
SR
VP
2. Turn on the power switch of the connected device.
3. Insert the power cord plug into an outlet.
The STANDBY indicator on the front panel lights up in red and the unit enters standby.
Notes:
• Make sure that the AC power cord is fully inserted into the power cord jack.
• Three AC power cord types are supplied.
Use the cord type that is appropriate for your country. (See page 1)
[When Using in Japan]
Use the power cord with the flat pins that are the same shape on both sides.
[When Using in the U.S. or Canada]
Use the power cord whose plug has polarity and where one pin is thicker than the other.
[When Using in Europe]
Use the power cord with the round pins.
• Do not touch the power cord with wet hands.
• When disconnecting the power cord, always make sure that you take hold of the plug.
Yanking out or bending the cord can damage it and/or cause electric shocks or a fire.
AC IN
When controlling the unit from a connected device (set to EXTERNAL)
8
Page 14

BASIC OPERATIONS
1. TURNING ON THE POWER
POWER ON/STANDBY button
Press the POWER ON/STANDBY button on the unit or the POWER ON button on the remote
controller. The power to the unit is turned on and the STANDBY indicator on the front panel
goes off.
POWER ON
button
2. SELECTING THE INPUT SIGNAL
Select an input device that is connected to the unit.
INPUT buttons 1 to 6
INPUT
buttons 1
to 6
3. SELECTING THE OUTPUT SIGNAL
Select an output device that is connected to the unit.
OUTPUT buttons 1 and 2
Press OUTPUT button 1 or 2 on the unit or the remote controller.
The output device corresponding to the number of the pressed button is selected and the
indicator on the front panel lights up in red.
OUTPUT
buttons 1
and 2
Note:
When OUTPUT 1 (OUTPUT 2) is selected, video and audio are not output from OUTPUT 2
(OUTPUT 1).
4. TURNING OFF THE POWER
STANDBY
button
POWER ON/STANDBY button
ENGLISH
Press one of the INPUT buttons from 1 to 6 on the unit or the remote controller.
The input device corresponding to the number of the pressed button is selected and the indicator
on the button lights up in red.
Press the POWER ON/STANDBY button on the unit or the STANDBY button on the remote
controller.
The unit enters standby and the STANDBY indicator on the front panel lights up in red.
Notes:
• Do not pull out the power cord while the power to the unit is on. Doing so could cause a
malfunction.
• The power to the unit is not completely turned off while in standby. If you will not use the unit
for a long time, pull out the power cord from the outlet.
9
Page 15

ENGLISH
OTHER FUNCTIONS
AUTO INPUT FUNCTION (AUTO)
AUTO
button
AUTO button
Press the AUTO button on the unit or the remote controller to turn on the auto input function. The
AUTO indicator on the front panel lights up in blue.
When the auto input function is on, the unit monitors the input signals of the connected
devices. When the unit detects a new input signal, the input is automatically switched to the
corresponding device.
This function enables the unit’s input device to be automatically switched simply by connecting
or disconnecting cables or by turning on the power to a connected device.
The auto input function is on when the unit is shipped.
AUTO indicator
¶ Turning off the auto input function
Press one of the INPUT buttons from 1 to 6 on the unit or the remote controller. The auto input
function is turned off and the AUTO indicator on the front panel goes off.
Notes:
• The auto input function may not operate correctly with some connected devices.
• When the auto input function is on, you cannot turn it off by pressing the AUTO button
again.
EMPHASIS FUNCTION
EMPHASIS button
Press the EMPHASIS button on the unit or the remote controller to turn on the emphasis
function. The EMPHASIS indicator on the unit lights up in yellow. Press the EMPHASIS button
again to turn off the function.
When the emphasis function is on, if a signal that was input to the unit is then output again,
the signal is corrected before being output. This is useful when noise is generated in the output
video or audio. The effectiveness of this function depends on the connected devices and the
length and type of cables that are used. In particular, we recommend trying this function when
the output cable from the unit is 5 meters or longer. The effectiveness of this function may also
depend on your system. Test out your system when the function is on and the function is off, and
compare the results.
The emphasis function is on when the unit is shipped.
EMPHASIS
indicator
Notes:
• Sometimes, turning the emphasis function on or off makes no difference. (For example, when
the accuracy of the input signal is good.)
• If using this function has no significant effect, replace the cable with a shorter one.
EMPHASIS
button
10
Page 16

OTHER FUNCTIONS
AC IN
OFFVPVP
SR
OUTPUT
REMOTE
LINK
REMOTE
CONTROL
EXTERNAL
INTERNAL
OUT
IN
FLASHER
IN
RS-232C
654321
INPUT
21
SURROUND
REMOTE LINK FUNCTION
When you perform the remote control connections for a Marantz amp or projector and set the
REMOTE LINK switch, the set device is switched automatically to HDMI input from other input
modes.
If you do not need to automatically switch the HDMI input, set the REMOTE LINK switch to
“OFF”.
The switch is set to “OFF” when the unit is shipped.
¶ The models (made by Marantz) that support the remote link function are as
follows. (As of September 2007)
• Amps SR4002, SR5002, SR7002, SR8002
• Projectors VP-10S1*, VP-11S1, VP-11S1H, VP-11S2, VP-12S2*, VP-12S3*,
VP-12S4, VP-13S1, VP-15S1
(* Devices that require an HDMI-DVI conversion connector)
7 When you want to control an amp:
Set the REMOTE LINK switch to “SR”
1. Connect the unit and the amp. Connect the HDMI INPUT 1 jack of the amp to the OUTPUT
1 jack of the unit.
Note:
This function only works when the HDMI INPUT 1 jack of an amp made by Marantz is
connected to the OUTPUT 1 jack of the unit. It will not function correctly when other jacks
are connected.
STANDBY
POWER
ON/OFF
OUTPUT1
OUTPUT
DVD player
FL OFF
HDMI/DVI
RESOLUTION
HDMI
OUTPUT
PAUSEPLAY
STOP
OPEN/CLOSE
PHONES
LEVEL
+
-
FLASHER
INPUT
RS-232C
IN
To a video device equipped with
HDMI
EXTERNAL
INTERNAL
REMOTE
CONTROL
ENGLISH
HDMI
connection
Remote
connection
Set to SR
IN
REMOTE
LINK
OUT
OFF
SR
AC IN
2. Perform the remote control connections for the unit and the amp.
3. Set the REMOTE LINK switch on the rear panel of the unit to “SR.”
4. When you press INPUT button 1 to 6 on the unit or remote controller, the amp is switched
automatically to HDMI input from other input modes (the S-Video jack in the connection
diagram).
INPUT1
HDMI
INPUT1
STANDBY
POWER ON/OFF
PHONES
HDMI
OUTPUT1
PURE DIRECT
M-DAX
SURROUND
MODE AUTO
MULTI
PURE DIRECT THX
SPEAKER
7.1CH INPUT
MENU
MULTI
ENTER
Amp
S-VIDEO
MEMORY CLEAR
BAND
T-MODE
DISPLAY
M-DAX
EXIT
MIC
IN
IN
REMOTE
CONTROL
OUT
VOLUME
UP
DOWN
SPEAKERS
A/B
AUX 1 INPUT
DIGITAL
RLVIDEO
S-VIDEO
AUDIO
S-VIDEO
Video deck
11
Page 17

ENGLISH
AC IN
OFFVPVP
SR
OUTPUT
REMOTE
LINK
REMOTE
CONTROL
EXTERNAL
INTERNAL
OUT
IN
FLASHER
IN
RS-232C
654321
INPUT
21
OTHER FUNCTIONS
7 When you want to control a projector:
Set the REMOTE LINK switch to “VP”
1. Connect the unit and the projector. Connect the HDMI1 of the projector and OUTPUT 1 jack
of the unit.
Note:
This function only works when the HDMI1 jack of a projector made by Marantz is
connected to the OUTPUT 1 jack of the unit. It will not function correctly when other jacks
are connected.
2. Perform the remote control connections for the unit and the projector.
3. Set the REMOTE LINK switch on the rear panel of the unit to “VP.”
4. When you press INPUT button 1 to 6 on the unit or remote controller, the projector is
switched automatically to HDMI input from other input modes (the S-Video jack in the
connection diagram).
DVD player
PAUSEPLAY
STOP
STANDBY
POWER
ON/OFF
FL OFF
HDMI/DVI
RESOLUTION
OPEN/CLOSE
PHONES
LEVEL
+
-
HDMI
connection
Remote
connection
HDMI
OUTPUT
Set to VP
REMOTE
CONTROL
EXTERNAL
INTERNAL
IN
REMOTE
LINK
OUT
OFF
SR
AC IN
OUTPUT
OUTPUT1
FLASHER
INPUT
RS-232C
IN
12
HDMI1
HDMI1
IN
S-VIDEO REMOTE
CONTROL
Projector
IN
OUT
S-VIDEO
Video deck
Page 18

TROUBLESHOOTING
Try the following troubleshooting before calling for service.
1. Are the connections made properly ?
2. Are you operating the unit properly, following the instructions ?
If the unit does not operate properly, check the items shown in the following table.
If any trouble cannot be solved by the instructions below, malfunction of the internal circuitry is suspected; immediately unplug the AC power cord and contact Marantz dealer or service center.
Symptom Cause Solution
The power does not turn on.
The power is on but there is no
video or audio output.
The video or audio is distorted.
The remote controller does not
work.
Is the power cord disconnected? Properly insert the power cord.
Is the signal cable properly connected to the input jack? Properly connect the signal cable to the input jack.
Is the input of the connected device selected?
Is the output of the connected device selected?
Is the signal cable properly connected? Properly connect the signal cable.
Is the battery worn out? Replace with a new battery.
Are the unit and remote controller too far apart? Operate the remote controller closer to the unit.
Is there an obstruction between the unit and remote controller? Remove the obstruction.
Is the INTERNAL/EXTERNAL switch on the rear panel of the unit
set to “EXTERNAL”?
Press one of the buttons from INPUT 1 to 6 on the unit or the remote
controller to select the input of the connected device.
Press OUTPUT button 1 or 2 on the unit or the remote controller to select the
output of the connected device.
Set the INTERNAL/EXTERNAL switch to “INTERNAL.”
ENGLISH
The auto input function does not
work.
The emphasis function does not
work.
The remote link function does not
work.
Is the auto input function turned off?
Is the emphasis function turned off?
Is the connection cable too long? (10 m or more) Replace the cable with a shorter one.
Does the connected device support the remote link function? See the description of the remote link function on page 11.
Is the remote control cable disconnected? Properly connect the remote control cable to the input and output jacks.
Is the HDMI output cable connected to a jack other than INPUT 1 of
the amp or HDMI1 of the projector?
Press the AUTO button on the unit or the remote controller to turn on the auto
input function.
Press the EMPHASIS button on the unit or the remote controller to turn on the
emphasis function.
Connect the HDMI output cable to INPUT 1 of the amp or HDMI1 of the
projector.
13
Page 19

ENGLISH
SPECIFICATIONS AND DIMENSIONS
¶ Electrical System
Input and output signals
HDMI INPUT .................................................................... 6 jacks (Ver. 1.3b, single link only)
HDMI OUTPUT ................................................................ 2 jacks (Ver. 1.3b, single link only)
REMOTE CONTROL IN ....................................................................................1 jack (RCA)
REMOTE CONTROL OUT ................................................................................1 jack (RCA)
FLASHER IN ...................................................................................... 1 jack (3.5 φ mini jack)
Power requirement (U.S.A.) ................................................................................ AC 120V 60Hz
(Europe) .......................................................................... AC 230V 50/60Hz
(Japan) ............................................................................ AC 100V 50/60Hz
Power consumption ........................................................................5 W / 0.8 W (during standby)
¶ Others
Operating temperature and humidity .............5 to 35°C / 30 to 85% (no condensation allowed)
Storage temperature and humidity .............–20 to 60°C / 30 to 85% (no condensation allowed)
¶ Maximum External Dimensions (Unit)
Width .............................................................................................................440mm (XX inch)
Height ...............................................................................................................78mm (XX inch)
Depth ............................................................................................................. 340mm (XX inch)
Mass (unit) ............................................................................................................ 3.2kg (XX lbs)
¶ Supplied Items
• AC power cord
For the U.S. ........................................................................................................................1
For Europe .........................................................................................................................1
For Japan ...........................................................................................................................1
• Remote controller (battery included) ......................................................................................1
• Instruction manual ..................................................................................................................1
• Warranty card (for the U.S.)
U.S.A. .................................................................................................................................1
Canada ..............................................................................................................................1
• Warranty (for Japan) ..............................................................................................................1
¶ Dimensions (Unit: mm (inch))
440 ( )
Design and specifications are subject to change without notice.
6 ( )
340 ( )
333 ( )
2 ( )
65 ( )
13 ( )
78 ( )
14
Page 20

OTHERS
The section describes the care and
maintenance tasks that must be performed
to optimize the operation of your Marantz
equipment.
7 Cleaning of equipment external
surfaces
The exterior finish of your unit will last
indefinitely with proper care and cleaning,
Never use scouring pads, steel wool, scourging
powders or harsh chemical agents (e.g., lye
solution), alcohol, thinner, benzine, insecticide
or other volatile substances as these wil mar
the finish of the equipment. Likewise, never
use cloths containing chemical substances.
If the equipment get dirty, wipe the external
surfaces with a soft, lint-free cloth.
If the equipment becomes heavily soiled:
• dilute some washing up liquid in water, in
a ratio of one part detergent to six parts
water.
• dip a soft, lint free in the solution and wring
the it is damp.
• wipe the equipment with the damp cloth.
• dry the equipment by wiping it with a dry
cloth.
7 Repairs
Only the most competent and qualified
service technicians should be allowed to
service the factory-trained warranty station
personnel have the knowledge and special
facilities needed for repair and calibration of
this precision equipment. After the warranty
period has expired, repairs will be performed
for a charge if the equipment can be returned
to normal operation.
In the event of difficulty, refer to your dealer or
write directly to the nearest location to you that
is listed on the Marantz Authorized Service
Station list. If writing, please include the model
and serial number of the equipment together
with a full description of what you think is
abnormal about the equipment’s behaviour.
ENGLISH
15
Page 21

www.marantz.com
You can find your nearest authorized distributor or dealer on our website.
is a registered trademark.
11/2007 00M30AV851010 mzh-dPrinted in China
 Loading...