

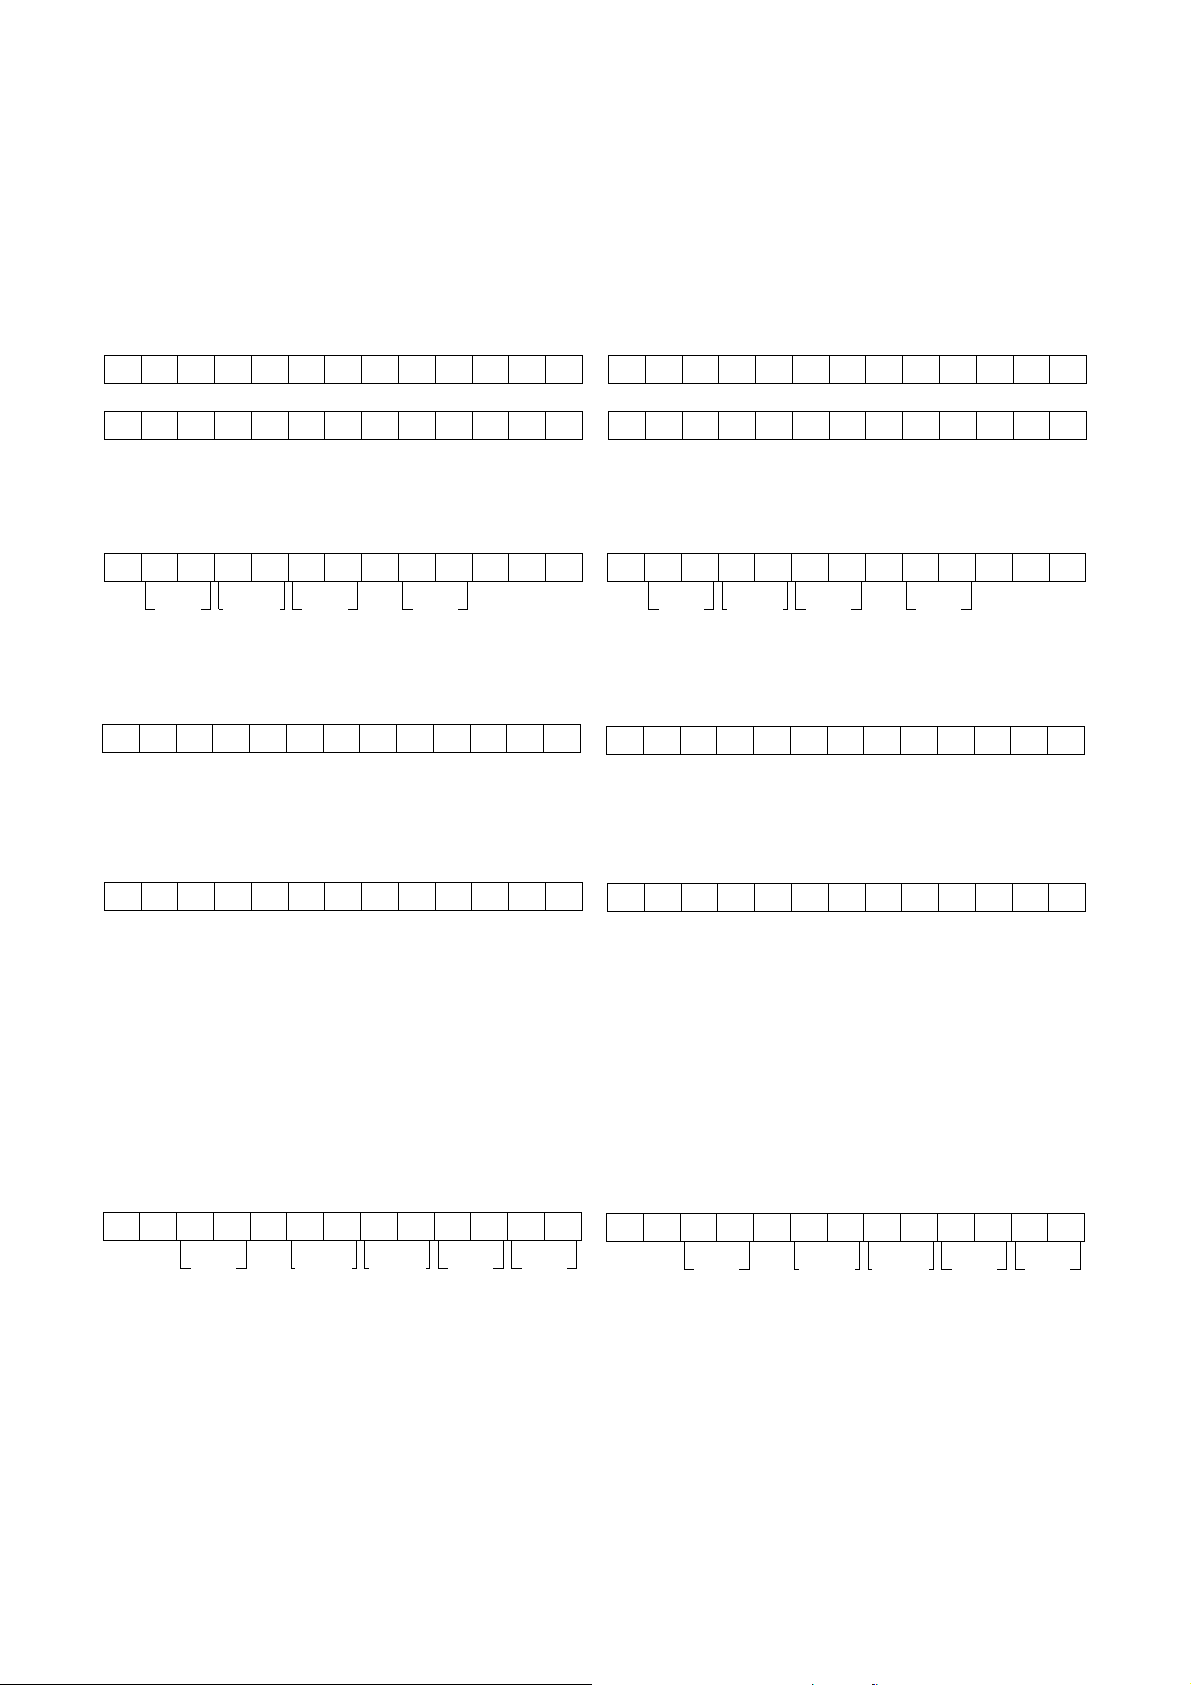
CD01 01020101
SIGDev. TYP Ver.No.
No. : DISP CODE ID Dev. : Device ID SIG. : CODE SIG ID
TYP. : CODE TYPE ID Ver. : Version
4. SERVICE MODE
4. SERVICEMODE
Microprocessor (IC28), DSP(IC20 )Version and FLD Segment
Check Mode.
1. While the power is on, MULTI, EXIT and 7.1CH INPUT
buttons simultaneously more than 3 seconds.
The FL display shows “SERVICE MODE” for 2 seconds
then shows the model name.
SERV I CE MODE
SR5500
2. Press MULTI button, The software version of the
microprocessor (IC28) is displayed in the format below.
V040624 IU
Year
3. Press MULTI button again, The software Type Number is
displayed.
Month Date Dest.
(Dest. : Destination)
Microprocessor(IC28),DSP(IC20)の Version表示及びFL
点燈を確認するモードです。
1. セットの電源を入れます。MULTI、 EXIT、7.1CHINPUT
のボタンを同時に約 3 秒以上押します。
SERVICEMODEと表示が出ます。更に約 2 秒後に機
種名が表示されます。
SERV I CE MODE
SR5500
2. MULTI ボタンを押します。マイコン(IC28)のバージョ
ンが次のように表示されます。
V040624 IU
Year
3. MULTIボタンを押します。マイコン(IC28)の Software
Type が表示されます。
Month Date Dest.
(Dest. : 仕向け)
SOF T TYPE XX
(XX is displayed in Hex)
4. Press MULTI button again, The Code Group Type Number
is displayed.
CODE TYP EXXXX
(XXXX is displayed in Hex)
5. Press MULTI button again, The left half, right half and
center of the label area in the FLD light on and off each
other.
6. Press MULTI button again, The segments of the character
area in the FLD flick in checker pattern.
7. Press MULTI button again, All the FL segments turns off.
8. Press MULTI button again. Every time MULTI button is
pressed, DSP code is indicated in turn from NO.1 to NO.10.
CD01 01020101
SIGDev. TYP Ver.No.
No. : DISP CODE ID Dev. : Device ID SIG. : CODE SIG ID
TYP. : CODE TYPE ID Ver. : Version
SOF T TYPE XX
(XX: Hex数字表示)
4. MULTI ボタンを押します。CodeGroupType が表示さ
れます。
CODE TYP EXXXX
(XXXX: Hex数字表示)
5. MULTI ボタンを押します。FL 表示の右、左、中央部分が
交互に点燈を繰り返します。
6. MULTI ボタンを押します。FL の Character 部分が点滅
します。
7. MULTI ボタンを押します。FL が全消灯します。
8. MULTIボタンを押します。MULTIボタンを押す度にDSP
CodeID が NO.1 から NO.10 まで順に表示されます。
9. Press MULTI button again to quit this mode. 9. MULTIボタンを押します。サービスモードは解除されま
す。
6

Note: Step4, 5 is to check if CPU software is capable of DSP
Personal notes:
Product Reset
To reset the back up memory of the unit into the default status,
follow the procedure below.
1. Turn of the unit and press 7.1CH INPUT and MULTI button
simultaneously more than 1.5 seconds.
2. After “DEFAULT” is displayed on FLD, power is turned off
once and turned of again, EEPROM is cleared to the
default status, µ-com is reset and the unit returns to the
normal status. (Software Serial Number will not be
cleared.)
Note: When the unit is shipped from the factory, the procedure
code. “Software Type No” is to show what “DSP Code
Group” CPU is capable of. And vice versa.
Step 8 is to manage the 16 codes for DSP.
• When the unit is once turned into Service Mode, the
unit keeps this mode until the main power is turned
off. (Turning into stand-by mode does not make it quit
from Service Mode.) When the unit quits from Service
Mode, Information in the memory is also cleared and
the unit returns to the status when it is out from the
factory.
above must be done to set the unit to initial status after
the tests.
7
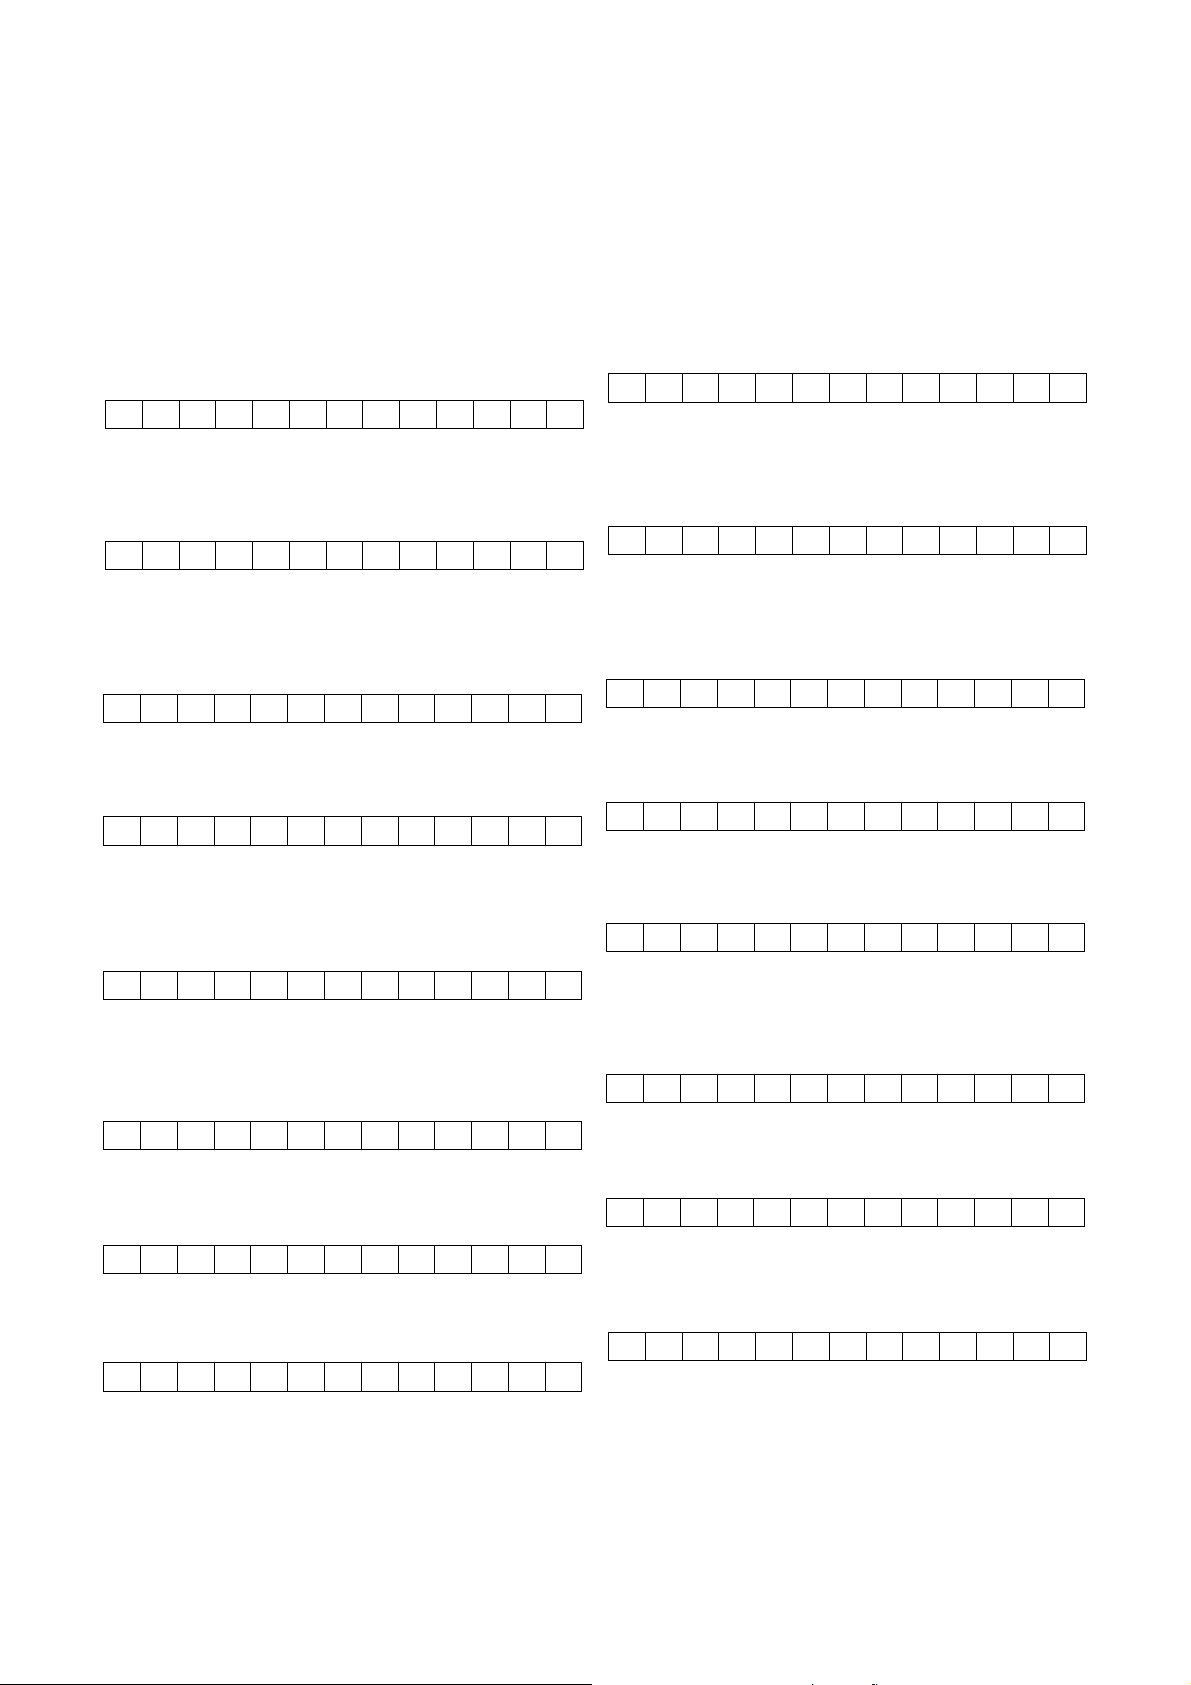
5. SYSTEM ERROR
5.SYSTEMERROR
When the microcomputer detects a trouble, the following
information is displayed on the FLD.
• After the error contents indication, Surround Mode is
initialized and returned Factory mode.
• The contents of the ERROR indication are the followings.
1. Trouble in DSP
If communication with DSP is troubled more than 2
seconds.
CHECK DSP
Indication is keep and sound is mute.
2. Trouble in DSP Code
The trouble of DSP Code was found.
CHECK DSP ROM
3. Trouble in ADC
When ADC input was chosen and CAL signal continued
High about 2 seconds after the ADC Calibration start.
CHECK ADC
4. Trouble in EEP-ROM
If data from EEPROM does not match.
CHECK E2P
製品内部での異常発生時に処理、表示を行います。主に各
Device との通信異常を検出します。
・ ERROR 表示後、SurroundMode は初期化され工場出荷
の状態に戻ります。
・ ERROR 表示の内容は下記です。
1. DSP 異常検出表示。
DSP との通信上の不具合を約 2 秒検出した時。
CHECK DSP
表示状態はそのままで音声は Mute 状態
2. DSPCode異常検出表示。
DSPCode の異常を検出した時。
CHECK DSP ROM
3. ADC 異常検出表示。
ADC 入力を選択した場合に ADCCalibration 開始後、
CAL 信号が約 2 秒以上 High を持続した時。
CHECK ADC
4. EEP-ROM 異常検出表示。
EEP-ROMData の不整合を検出した時。
CHECK E2P
5. Trouble in EEP-ROM IF
If communication with EEPROM is troubled more than 2
seconds.
CHECK E2P I F
6. Trouble in RS-232C
If communication of Panja with RS232C is troubled more
than 2 seconds.
CHECK 2 3 2C
7. Trouble in 5V Supply
If 5V supply to DATA DIR is troubled.
CHECK POW5
8. Trouble in Protection
CPU turns off the speaker output.
PROTECT
5. EEP-ROMIF 異常検出表示。
EEP-ROM との通信不具合が約 2 秒以上生じた時。
CHECK E2P I F
6. RS-232C 異常検出表示。
Panja通信時にRS-232Cとの通信不具合を約2秒以上検
出した時。
CHECK 2 3 2C
7. 5V 異常検出表示。
DATADIR. の異常を検出した時。
CHECK POW5
8. Protection 信号異常検出表示。
Speaker からを出力を止めます。
PROTECT
8
 Loading...