

Page 1
РУССКИЙ
ENGLISHFRANÇAISDEUTSCHNEDERLANDSESPAÑOLITALIANOSVENSKA
CD Player
CD6003
Page 2

ENGLISH
DEUTSCH
ESPAÑOL
SVENSKA
WARRANTY
For warranty information, contact your local Marantz
distributor.
RETAIN YOUR PURCHASE RECEIPT
Your purchase receipt is your permanent record of a
valuable purchase. It should be kept in a safe place
to be referred to as necessary for insurance purposes
or when corresponding with Marantz.
IMPORTANT
When seeking warranty service, it is the responsibility of
the consumer to establish proof and date of purchase.
Your purchase receipt or invoice is adequate for such
proof.
FOR U.K. ONLY
This undertaking is in addition to a consumer's
statutory rights and does not affect those rights in
any way.
FRANÇAIS
GARANTIE
Pour des informations sur la garantie, contacter le
distributeur local Marantz.
CONSERVER L'ATTESTATION D'ACHAT
L'attestation d'achat est la preuve permanente
d'un achat de valeur. La conserver en lieu sur pour
s'y reporter aux fi ns d'obtention d'une couverture
d'assurance ou dans le cadre de correspondances
avec Marantz.
IMPORTANT
Pour l'obtention d'un service couvert par la garantie, il
incombe au client d'établir la preuve de l'achat et d'en
corroborer la date. Le reçu ou la facture constituent
des preuves suffi santes.
GARANTIE
Bei Garantiefragen wenden Sie sich bitte an Ihren
Marantz-Händler.
HEBEN SIE IHRE QUITTING GUT AUF
Die Quittung dient Ihnen als bleibende Unterlage
für Ihren wertvollen Einkauf Das Aufbewahren der
Quittung ist wichtig, da die darin enthaltenen Angaben
für Versicherungswecke oder bei Korrespondenz mit
Marantz angeführt werden müssen.
WICHTIG!
Bei Garantiefragen muß der Kunde eine Kaufunterlage
mit Kaufdatum vorlegen. Ihren Quittung oder
Rechnung ist als Unterlage ausreichend.
NEDERLANDS
GARANTIE
Voor inlichtingen omtrent garantie dient u zich tot uw
plaatselijke Marantz dealer te wenden.
UW KWITANTIE, KASSABON E.D. BEWAREN
Uw kwitantie, kassabon e.d. vormen uw bewijs van
aankoop van een waardevol artikel en dienen op een
veilige plaats bewaard te worden voor evt, verwijzing
bijv. in verbend met verzekering of bij correspondentie
met Marantz.
BELANGRIJK
Bij een evt, beroep op de garantie is het de
verantwoordelijkheid van de consument een
gedateerd bewijs van aankoop te tonen. Uw kassabon
of factuurzijn voldoende bewijs.
GARANTIA
Para obtener información acerca de la garantia
póngase en contacto con su distribuidor Marantz.
GUARDE SU RECIBO DE COMPRA
Su recibo de compra es su prueba permanente de
haber adquirido un aparato de valor, Este recibo
deberá guardarlo en un lugar seguro y utilizarlo
como referencia cuando tenga que hacer uso del
seguro o se ponga en contacto con Marantz.
IMPORTANTE
Cuando solicite el servicio otorgado por la garantia
el usuario tiene la responsabilidad de demonstrar
cuándo efectuó la compra. En este caso, su recibo
de compra será la prueba apropiada.
ITALIANO
GARANZIA
L’apparecchio è coperto da una garanzia di buon
funzionamento della durata di un anno, o del periodo
previsto dalla legge, a partire dalla data di acquisto
comprovata da un documento attestante il nominativo
del Rivenditore e la data di vendita. La garanzia sarà
prestata con la sostituzione o la riparazione gratuita
delle parti difettose.
Non sono coperti da garanzia difetti derivanti da
uso improprio, errata installazione, manutenzione
effettuata da personale non autorizzato o, comunque,
da circostanze che non possano riferirsi a difetti di
funzionamento dell’apparecchio. Sono inoltre esclusi
dalla garanzia gli interventi inerenti l’installazione e
l’allacciamento agli impianti di alimentazione.
Gli apparecchi verranno riparati presso i nostri Centri
di Assistenza Autorizzati. Le spese ed i rischi di
trasporto sono a carico del cliente.
La casa costruttrice declina ogni responsabilità per
danni diretti o indiretti provocati dalla inosservanza
delle prescrizioni di installazione, uso e manutenzione
dettagliate nel presente manuale o per guasti dovuti ad
uso continuato a fi ni professionali.
GARANTI
För information om garantin, kontakta Marantz
lokalagent.
SPAR KVITTOT
Kvittot är ett inköpsbevis på en värdefull vara. Det skall
förvaras säkert och hänvisas till vid försäkringsfall
eller vidkorrespondens mod Marantz.
VIKTIGT
Fö att garantin skall gälla är det kundens sak att
framställa bevis och datum om köpet. Kvitto eller
faktura är tillräokligt bevis fö detta.
РУССКИЙ
ГАРАНТИЯ
Относительно информации о гарантии
обращайтесь к Вашему местному дистрибьютору
Marantz.
СОХРАНИТЕ ВАШУ КВИТАНЦИЮ О ПОКУПКЕ
Ваша квитанция о покупке является документом,
свидетельствующим о дорогостоящей покупке.
Ее необходимо хранить в безопасном месте и
в случае необходимости использовать в целях
страхования или при обращении в компанию
Marantz.
ВАЖНО
При обращении за гарантийным обслуживанием
обязанностью потребителя является
подтверждение факта и даты покупки. Для
такого доказательства достаточно предъявить
квитанцию о покупке или счет.
ТОЛЬКО ДЛЯ СОЕДИНЕННОГО КОРОЛЕВСТВА
Это используется в дополнение к законным
правам потребителя и ни в коей мере не
ущемляет эти права.
Page 3

CE MARKING
English
The CD6003 is in conformity with the EMC
directive and low-voltage directive.
Français
Le
CD6003
est conforme à la directive EMC
et à la directive sur les basses tensions.
Deutsch
Das Modell CD6003 entspricht den EMC-
Richtlinien und den Richtlinien für Niederspannungsgeräte.
Nederlands
De CD6003 voldoet aan de EMC eisen en
de vereisten voor laag-voltage.
Español
El
CD6003
está de acuerdo con las normas EMC y las relacionadas con baja tensión.
Italiano
Il CD6003 è conforme alle direttive CEE ed
a quelle per i bassi voltaggi.
Svenska
CD6003
är tillverkad i enlighet med EMC di-
rektiven och direktiven för lågvoltsutrusning.
English
- Do not expose the equipment to rain, moisture,
dripping or splashing.
- Do not remove the cover from the equipment.
- Do not insert anything into the equipment through
the ventilation holes.
- Do not handle the mains cord with wet hands.
- Do not cover the ventilation with any items such as
tablecloths, newspapers, curtains, etc.
- No naked fl ame sources, such as lighted candles,
should be placed on the equipment.
- No objects fi lled with liquids, such as vases, shall
be placed on the equipment.
- When the switch is in the OFF position, the
equipment is not completely switched off from
MAINS.
- The equipment shall be installed near the
power supply so that the power supply is easily
accessible.
- Do not expose the unit to excessive heat such as
direct sunlight, fi re or the like.
Français
-
Ne pas exposer l’appareil à la pluie, à l’humidité, à
l’égouttement ou aux éclaboussures.
- Ne pas essayer de retirer le boîtier de l’appareil.
- Ne rien insérer dans l’appareil par les orifi ces de
ventilation.
- Ne pas manipuler le cordon d’alimentation avec les
mains mouillées.
- Ne pas recouvrir les ouïes de ventilation avec un
objet quelconque comme une nappe, un journal, un
rideau, etc.
- Ne placer aucune source de fl amme nue, comme
une bougie allumée, sur l'appareil.
- Aucun objet rempli de liquide, un vase par exemple,
ne doit être placé sur l'appareil.
- Lorsque l'interrupteur est sur la position OFF,
l'appareil n'est pas complètement déconnecté du
SECTEUR (MAINS).
- L'appareil sera installé près de la source
d'alimentation, de sorte que cette dernière soit
facilement accessible.
- Ne pas exposer l’appareil à une chaleur excessive,
comme celle des rayons directs du soleil, d’un feu,
etc.
WARNINGS
AVERTISSEMENTS
Deutsch
-
Das Gerät nicht Regen, Feuchtigkeit, Tropf- oder
Spritzwasser aussetzen.
- Die Abdeckung nicht vom Gerät abnehmen.
- Keine Gegenstände durch die Belüftungsschlitze
stecken.
- Das Netzkabel nicht mit feuchten oder nassen
Händen anfassen.
- Decken Sie die Lüftungsöffnungen nicht mit einem
Tischtuch, einer Zeitung, einem Vorhang usw. ab.
- Es dürfen keine Gegenstände mit offener Flamme, wie
etwa brennende Kerzen, auf dem Gerät aufgestellt
werden.
- Auf das Gerät dürfen keine mit Flüssigkeiten gefüllte
Behälter, wie etwa eine Vase, gestellt werden.
- Wenn der Schalter ausgeschaltet ist (OFF-Position),
ist das Gerät nicht vollständig vom Stromnetz (MAINS)
abgetrennt.
- Das Gerät sollte in der Nähe einer Netzsteckdose
aufgestellt werden, damit es leicht an das Stromnetz
angeschlossen werden kann.
- Setzen Sie das Gerät keiner übermäßigen Wärme aus,
z.B. durch Aufstellung in direkter Sonneneinstrahlung,
in der Nähe eines offenen Feuers usw.
Nederlands
- Stel het apparaat niet bloot aan regen, vocht,
druppels of spetters.
- Verwijder de afdekplaat van het apparaat niet.
- Duw niets door de ventilatieopeningen in het
apparaat.
- Raak het netsnoer niet met natte handen aan.
- Bedek de ventilatieopeningen niet met enige
voorwerpen, zoals tafelkleden, kranten, gordijnen,
enz.
- Plaats geen brandende voorwerpen, zoals kaarsen,
op het apparaat.
- Plaats geen voorwerpen met een vloeistof erin, zoals
een bloemenvaas, op het apparaat.
- Als de schakelaar op OFF staat, is het apparaat niet
volledig losgekoppeld van de netspanning (MAINS).
- De apparatuur wordt in de buurt van het stopcontact
geïnstalleerd, zodat dit altijd gemakkelijk toegankelijk
is.
- Stel het apparaat niet bloot aan grote warmte, zoals
direct zonlicht, vuur en dergelijke.
WARNHINWEISE
WAARSCHUWINGEN
Español
ADVERTENCIAS
- No exponga el equipo a la lluvia, la humedad, goteos
o salpicaduras.
- No extraiga la tapa del equipo.
- No introduzca nada en el interior del equipo a través
de los orifi cios de ventilación.
- No maneje el cable de alimentación con las manos
mojadas.
- No cubra la ventilación con objetos como manteles,
periódicos, cortinas, etc.
- No deben colocarse sobre el equipo elementos con
fuego, por ejemplo velas encendidas.
- No se deben colocar sobre el aparato recipientes
que contengan líquidos, como por ejemplo jarrones.
- Cuando el interruptor está en la posición OFF, el
equipo no está completamente desconectado de la
alimentación MAINS.
- El equipo se instalará cerca de la fuente de
alimentación de manera que resulte fácil acceder a
ella.
- No exponga la unidad a un calor excesivo, como el
derivado de la luz directa del sol, el fuego, o similar.
Italiano
AVVERTENZE
- Non esporre l’apparecchio alla pioggia, all’umidità, al
gocciolamento o agli spruzzi.
- Non rimuovere il coperchio dell’apparecchio.
- Non introdurre oggetti all’interno dell’apparecchio
attraverso i fori di ventilazione.
- Non toccare il cavo di alimentazione con le mani
bagnate.
- Non coprire le fessure di ventilazione con tovaglie,
giornali, tende od oggetti analoghi.
- Non posare sull'apparecchio sorgenti di fiamme
scoperte quali candele accese.
- Non mettere sull'apparecchiatura alcun contenitore
di liquido, come ad esempio dei vasi.
- Quando l'interruttore è nella posizione OFF,
l'apparecchiatura non è completamente scollegata
da MAINS.
- L’apparecchio va installato in prossimità della fonte
di alimentazione, in modo che quest’ultima sia
facilmente accessibile.
- Non esporre l’unità ad eccessivo calore come la luce
diretta del sole, il fuoco o simili.
Page 4

Svenska
VARNINGAR
- Utsätt inte utrustningen för regn, fukt, droppande
vatten eller vattenstänk.
- Ta inte bort utrustningens hölje.
- För inte in föremål i utrustningen genom
ventilationshålen.
- Hantera inte nätsladden med våta händer.
- Täck inte för ventilationsöppningarna med några
föremål som till exempel bordsdukar, dagstidningar,
gardiner e.d.
- Inga föremål med öppen låga, som till exempel tända
stearinljus, bör placeras på utrustningen.
- Inga objekt som är fyllda med någon vätska, till
exempel blomstervaser, bör placeras på apparaten.
- Även om strömbrytaren står i det avstängda läget
OFF, så är utrustningen inte helt bortkopplad från det
elektriska nätet (MAINS).
- Utrustningen ska vara installerad nära strömuttaget
så att strömförsörjningen är lätt att tillgå.
- Utsätt inte enheten för kraftig värme, såsom direkt
solljus, eld eller liknande.
Русский
ПРЕДУПРЕЖДЕНИЯ
- Не подвергайте это оборудование воздействию
дождя, влаги, капающей жидкости или брызг.
- Не удаляйте крышку с оборудования.
- Не вставляйте посторонние предметы
в оборудование через вентиляционные
отверстия.
- Не прикасайтесь влажными руками к сетевому
шнуру.
- Не закрывайте вентиляционные отверстия
такими предметами, как скатерти, газеты,
занавески и т.д.
- Не помещайте на оборудование источники
открытого огня, например, горящие свечи.
- Не помещайте на оборудование никакие
предметы, наполненные жидкостью, например,
вазы.
- Когда переключатель находится в положении
OFF, оборудование не полностью отключено от
сети переменного тока.
- Оборудование должно быть установлено около
источника питания, так чтобы источник питания
был легкодоступен.
- Не подвергайте этот аппарат сильному
нагреванию, например, из-за воздействия
прямого солнечного света, пламени и т.п.
OPTRC_090130N1
Page 5

CD-плеер
Marantz CD6003
(РУКОВОДСТВО ПО ЭКСПЛУАТАЦИИ)
Вы приобрели устройство усилительное/преобразовательное производства компании "D&M Холдингс Инк", Япония ("D & M Holdings Inc.", Japan). Модель CD6003
является CD-плеер и предназначена для усиления аудиосигналов в домашних аудиосистемах. Это изделие широко известно в кругах истинных ценителей
высококлассного звука. Качество и безопасность подтверждены множеством тестов, проведенных как зарубежными, так и российскими испытательными
лабораториями.
Изготовитель в течение 3 лет (срок службы) после выпуска данного изделия обеспечивает наличие комплектующих в целях возможности проведения ремонта
и технического обслуживания, по истечении которого эксплуатация и техническое обслуживание продолжается в соответствии с действующими нормативными
документами. Изделие остается безопасным для жизни, здоровья человека и окружающей среды в течение всего срока эксплуатации. Гарантийный срок - 1 год.
Информация о Российской сертификации
No сертификата
соответствия
РОСС JP.АЯ46.B78127 РОСТЕСТ-МОСКВА ГОСТ Р МЭК 60065-2005
См. в конце инструкции
Орган по
сертификации
Нормативные
документы
ГОСТ 22505-97
ГОСТ Р 51515-99
ГОСТ Р 51317.3.2.-2006
(Рaзд. 6, 7)
ГОСТ Р 51317.3.3-99
Основные технические характеристики
Наименование сертифицированной продукции
Проигрыватели CD-дисков До 11.06.2011
46
Срок действия
сертификата
ВНИМАНИЕ: Если Вы приобрели аудиоаппаратуру надлежащего качества, то, по Российским законам, она не подлежит возврату или обмену на аналогичный товар других
размера, формы и т.д.
D&M Холдингс Инк
Здание D&M, 2-1 Ниссин-тё
Кавасаки-ку, Кавасаки-си, Канагава
2108569, Япония
D&M Holdings Inc.
D&M Building, 2-1 Nisshin-Cho
Kawasaki-Ku, Kawasaki-Shi, Kanagawa
2108569, Japan
Page 6
A NOTE ABOUT RECYCLING
This product’s packaging materials are recyclable and can be reused. This product and the accessories
packed together are the applicable product to the WEEE directive except batteries.
Please dispose of any materials in accordance with your local recycling regulations.
When discarding the unit, comply with your local rules or regulations.
ENGLISH
Batteries should never be thrown away or incinerated but disposed of in accordance with your local
regulations concerning chemical wastes.
REMARQUE CONCERNANT LE RECYCLAGE
Le matériel d’emballage de cet appareil est recyclable et peut être réutilisé. Cet appareil et les accessoires
qui sont emballés avec celui-ci sont conformes, à l’exception des piles, à la directive DEEE (relative aux
déchets d’équipements électriques et électroniques).
Jetez ce matériel conformément aux réglementations de recyclage locales.
Pour mettre l’appareil au rebut, respectez les règles ou réglementations locales.
FRANÇAIS
Les piles ne doivent jamais être jetées ou incinérées, mais être mises au rebut conformément aux
réglementations locales concernant les déchets chimiques.
RECYCLING-HINWEIS
Das Verpackungsmaterial dieses Produkts ist für Recycling geeignet und kann wiederverwendet werden.
Dieses Produkt und das in seinem Verpackungskarton enthaltene Zubehör mit Ausnahme der Batterien
entsprechen der WEEE-Direktive.
Bitte beachten Sie bei der Entsorgung irgendwelcher Materialien die örtlichen Recycling-Bestimmungen.
Bei der Entsorgung des Gerätes sind die einschlägigen Umweltschutzaufl agen sorgfältig zu befolgen.
DEUTSCH
Batterien dürfen nicht weggeworfen oder verbrannt werden, sondern müssen gemäß den örtlichen
Vorschriften zur Entsorgung von chemischem Abfall entsorgt werden.
RECYCLING VAN APPARATUUR EN VERPAKKINGSMATERIAAL
De verpakking van dit product is geschikt voor recycling. Dit product en de accessoires, als geheel verpakt,
zijn het relevante product volgens de WEEE-richtlijn, behalve de batterijen.
Gooi materialen bij het afval volgens de gemeentelijke voorschriften voor recycling.
Gooi dit apparaat bij het afval volgens de gemeentelijke wetten of voorschriften.
Batterijen mogen nooit bij het normale afval en mogen nooit worden verbrand, maar moeten worden
NEDERLANDS
weggegooid volgens de gemeentelijke voorschriften voor chemisch afval.
NOTA SOBRE EL RECICLADO
Los materiales de embalaje de este producto son reciclables y pueden ser reutilizados. En este producto
y sus accesorios incluidos es aplicable la directiva europea sobre residuos de aparatos eléctricos y
electrónicos (RAEE), excepto en lo referente a las pilas.
Se ruega eliminar cualquiera de esos materiales de acuerdo con las normas locales de reciclado.
Cuando deseche esta unidad, cumpla con las normas o reglamentaciones locales.
ESPAÑOL
Las pilas no deben tirarse ni incinerarse, sino que deben eliminarse de acuerdo con las normas locales
sobre residuos químicos.
NOTA SUL RICICLAGGIO
I materiali di imballaggio di questo prodotto sono riciclabili e possono essere riutilizzati. Questo prodotto e gli
accessori in dotazione con esso, eccettuate le batterie, rappresentano il prodotto applicabile per la direttiva
RAEE (rifi uti di apparecchiature elettriche ed elettroniche).
Smaltirli seguendo le proprie normative locali sul riciclaggio.
Quando si desidera eliminare l’apparecchio, attenersi alle indicazioni e alle normative locali.
ITALIANO
Non gettare via le batterie e non bruciarle, ma smaltirle in conformità alle normative locali relative ai rifi uti
chimici.
OM ÅTERVINNING
Den här produktens förpackningsmaterial är återvinningsbart och kan återanvändas. Den här produkten och
de med produkten levererade tillbehören, förutom batterierna, överensstämmer med WEEE-direktivet.
Kassera allt material i enlighet med lokala miljöföreskrifter.
När enheten ska kasseras ska du följa lokala miljöföreskrifter.
SVENSKA
Batterier får aldrig slängas i hushållsavfall eller brännas. Dom ska hanteras i enlighet med lokala
miljöföreskrifter för kemiskt avfall.
INFORMATION FOR USERS ON COLLECTION AND DISPOSAL OF OLD EQUIPMENT AND
USED BATTERIES
When discarding the unit, comply with local rules or regulations.
Batteries should never be thrown away or incinerated but disposed of in accordance with the local
ENGLISH
regulations concerning battery disposal.
INFORMATION CONCERNANT LA COLLECTE ET LE TRAITEMENT DES PILES USAGÉES ET DES
DÉCHETS D’ÉQUIPEMENTS ÉLECTRIQUES ET ÉLECTRONIQUES
Lorsque vous mettez cet appareil au rebut, respectez les lois ou réglementations en vigueur.
Les piles ne doivent jamais être jetées ou incinérées, mais mises au rebut conformément aux lois en vigueur
FRANÇAIS
sur la mise au rebut des piles.
VERBRAUCHERINFORMATION ZUR SAMMLUNG UND ENTSORGUNG ALTER ELEKTROGERÄTE UND
BENUTZTER BATTERIEN
Beachten Sie bei der Entsorgung des Gerätes die örtlichen Vorschriften und Bestimmungen.
Die Batterien dürfen nicht in den Hausmüll geworfen oder verbrannt werden; bitte entsorgen Sie die
DEUTSCH
Batterien gemäß der örtlichen Vorschriften.
INFORMATIE VOOR GEBRUIKERS VAN INZAMELING EN VERWIJDERING VAN OUDE APPARATEN EN
GEBRUIKTE BATTERIJEN
Volg voor het wegdoen van de speler de voorschriften voor de verwijdering van wit- en bruingoed op.
Batterijen mogen nooit worden weggegooid of verbrand, maar moeten volgens de plaatselijke voorschriften
betreffende chemisch afval worden verwijderd.
NEDERLANDS
INFORMACIÓN PARA USUARIOS SOBRE RECOLECCIÓN Y DISPOSICIÓN DE EQUIPAMIENTO VIEJO Y
BATERÍAS USADAS
Cuando se deshaga de la unidad, cumpla con las reglas o reglamentos locales.
Las pilas nunca deberán tirarse ni incinerarse. Deberá disponer de ellas siguiendo los reglamentos de su
ESPAÑOL
localidad relacionados con los desperdicios químicos.
INFORMAZIONI PER GLI UTENTI SULLA RACCOLTA E LO SMALTIMENTO DI VECCHIA ATTREZZATURA
E BATTERIE USATE
Per lo smaltimento dell’unità, osservare le normative o le leggi locali in vigore.
Non gettare le batterie, né incenerirle, ma smaltirle conformemente alla normativa locale sui rifiuti chimici.
ITALIANO
ANVÄNDARINFORMATION, BETRÄFFANDE INSAMLING OCH DUMPNING AV GAMMAL
UTRUSTNING OCH ANVÄNDA BATTERIER
När du kasserar enheten ska du göra det i överensstämmelse med lokala regler och bestämmelser.
Batterier får absolut inte kastas i soporna eller brännas. Kassera dem enligt lokala bestämmelser för kemiskt
SVENSKA
avfall.
Page 7
Thank you for choosing the Marantz product.
Please read this User Guide thoroughly to ensure proper operation and installation before using this
product.
After reading this User Guide, be sure to keep this for your future reference.
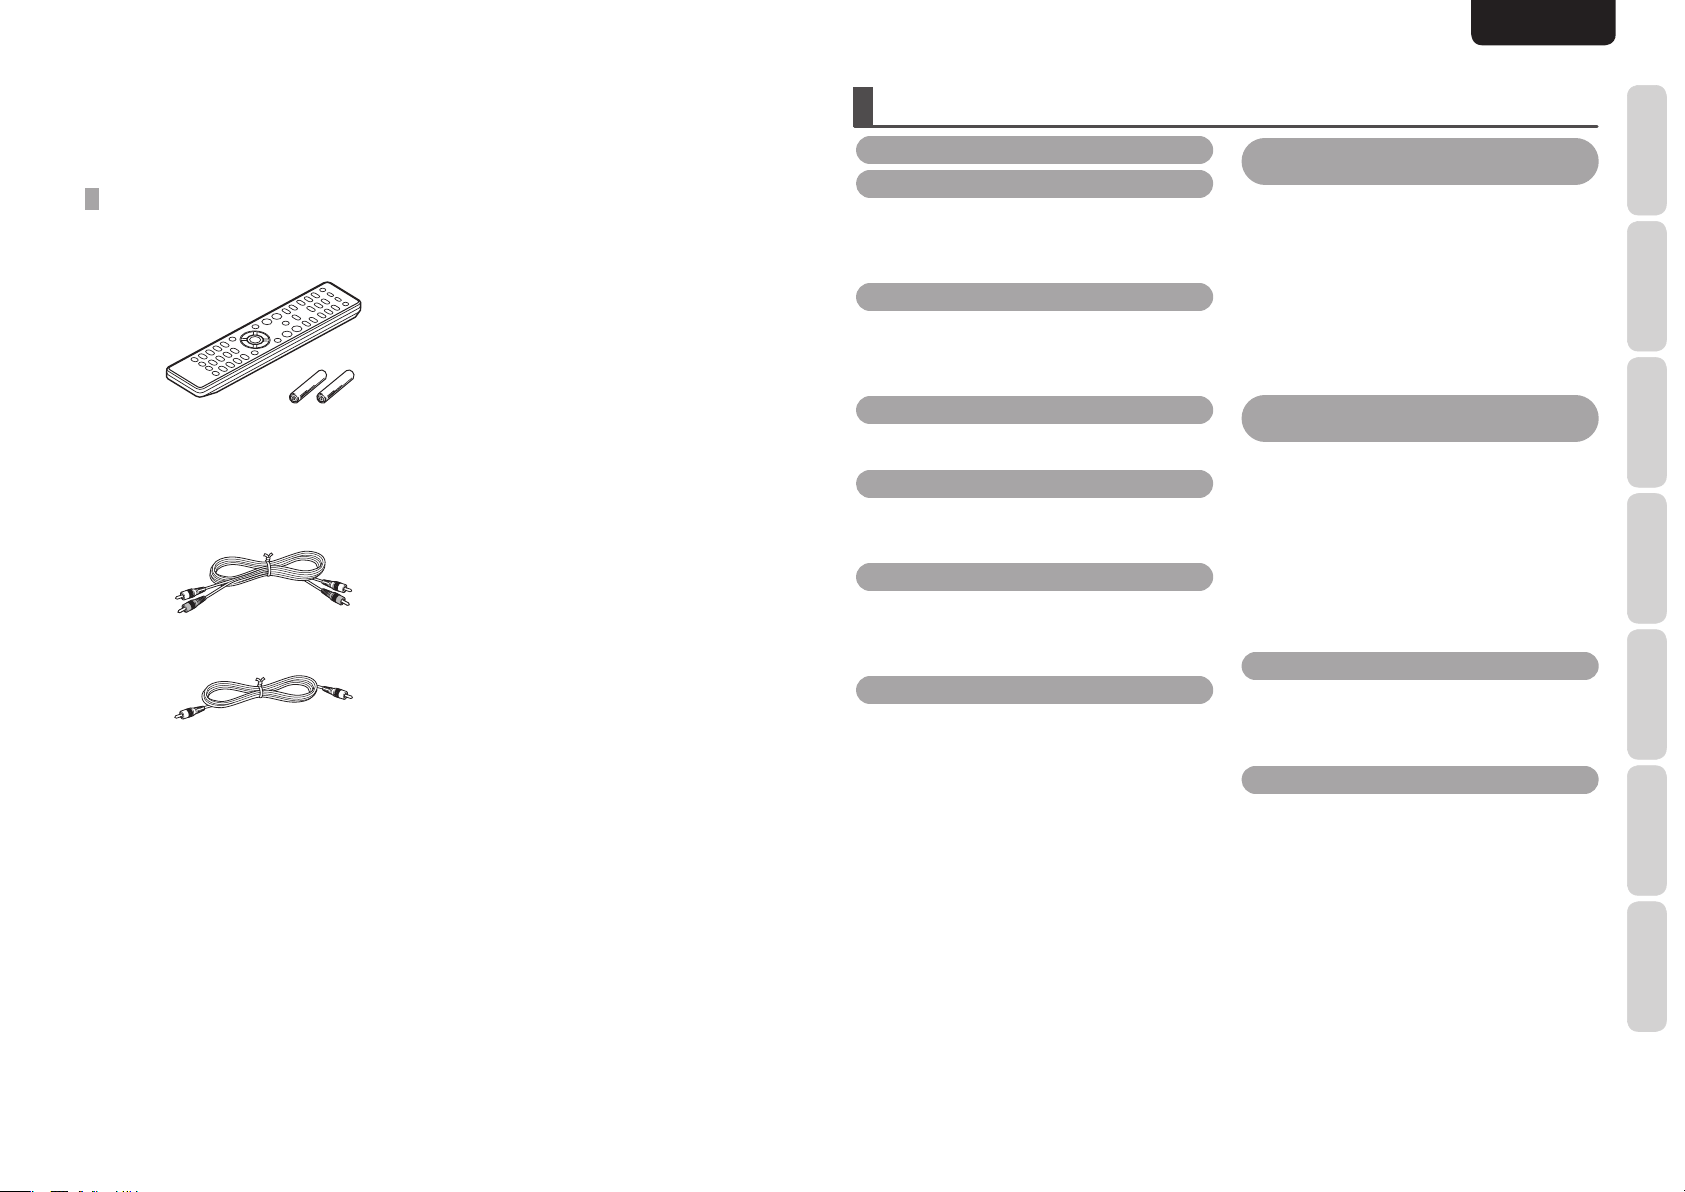
ACCESSORIES CHECK
Before use, check the below accessories were included in the package.
• Remote controller .............................................. 1
• AAA-size batteries .............................................. 2
• AC power cord ...................................................1
• Audio connecting cable ......................................1
• Remote control connecting cable ...................... 1
• User guide .......................................................... 1
CONTENTS
FEATURES .................................................................2
BEFORE USING ........................................................2
EQUIPMENT MAINS WORKING SETTING..................... 2
INAPPROPRIATE PLACES FOR INSTALLATION ............ 2
PRECAUTIONS ..................................................................... 2
USAGE OF REMOTE CONTROLLER .................................. 3
NAMES AND FUNCTIONS ....................................4
FRONT PANEL ...................................................................... 4
DISPLAY ................................................................................4
REMOTE CONTROLLER ......................................................5
REAR PANEL ......................................................................... 6
BASIC CONNECTIONS ...........................................6
CONNECTING TO AN AMPLIFIER .................................... 6
CONNECTING THE POWER SUPPLY ............................... 6
BASIC OPERATIONS –AUDIO CD– .....................7
PLAYING CDS ....................................................................... 7
PLAYING A SPECIFIC TRACK ............................................ 7
PLAYING A SPECIFIC PART OF A SPECIFIC TRACK .....7
ADVANCED CONNECTIONS ................................. 8
CONNECTING TO A DIGITAL AUDIO COMPONENT .... 8
USB MEDIA/iPod CONNECTION ...................................... 8
REMOTE CONTROL CONNECTION .................................. 8
TIMER PLAY .......................................................................... 8
ADVANCED OPERATIONS –AUDIO CD– ...........9
TO CHANGE TIME DISPLAY .............................................. 9
REPEAT PLAY
(PLAYING THE SAME TRACKS REPEATEDLY) ............... 9
RANDOM PLAY
(PLAYING TRACKS IN A RANDOM SEQUENCE) ......... 10
AMS PLAY (SEARCHING FOR A SPECIFIC TRACK) ....10
WHILE PLAYING, REPLAY A SMALL TRACK PORTION
AND LISTEN AGAIN (QUICK REPLAY) .......................... 10
PROGRAM PLAY
(PLAYING TRACKS IN THE PREFERRED SEQUENCE)
DELETE PROGRAM PLAY
(PLAY WITH UNDESIRED TRACKS SKIPPED) ............. 11
CD-TEXT .............................................................................. 12
PITCH CONTROL (CHANGING THE PLAY SPEED) ...... 13
DIGITAL OUTPUT OFF ....................................................... 13
AUDIO EX SELECTION ...................................................... 13
... 11
ENGLISH
ADVANCED OPERATIONS –MP3, WMA, AND
AAC FILES RECORDED ON A DISC– ..................14
SELECTING A RANGE OF FILES TO BE PLAYED .......... 14
PLAYING ..............................................................................14
SELECTING THE FOLDER TO LISTEN TO ......................14
PLAYING A SPECIFIC FILE ............................................... 14
PLAYING A SPECIFIC PART OF A SPECIFIC FILE ........15
REPEAT PLAY
(PLAYING THE SAME TRACKS REPEATEDLY) ............. 15
RANDOM PLAY
(PLAYING FILES IN A RANDOM SEQUENCE) ..............15
AMS PLAY (SEARCHING FOR A SPECIFIC FILE) ......... 15
ADVANCED OPERATIONS
(USB/iPod OPERATION) .......................................16
NORMAL PLAYBACK ........................................................16
PLAYING A SPECIFIC FILE ............................................... 16
PLAYING YOUR FAVORITE PARTS OF A TRACK
(SEARCH) ............................................................................ 17
USING “REPEAT PLAY” MODE ....................................... 17
RANDOM PLAY
(PLAYING TRACKS IN A RANDOM SEQUENCE) ......... 17
AMS PLAY (SEARCHING FOR A SPECIFIC FILE) ......... 17
USB MEDIUM OPERATION ............................................. 18
iPod OPERATION ...............................................................19
TROUBLESHOOTING ............................................ 21
GENERAL ............................................................................. 21
DISC PLAYBACK ................................................................21
USB PLAYBACK .................................................................22
iPod PLAYBACK ................................................................. 22
OTHERS ................................................................... 23
ABOUT WMA PLAYBACK ................................................ 23
ABOUT MP3 PLAY BACK ................................................. 23
ABOUT AAC PLAYBACK ..................................................23
ABOUT WAV PLAYBACK USB MEDIUM ONLY ........... 23
ABOUT iPod PLAY BACK .................................................24
PLAYING CD-R/CD-RW DISCS ........................................ 24
ABOUT PLAYING COPY-CONTROLLED CDs ................. 24
ABOUT DUALDISC PLAYBACK ....................................... 24
ABOUT USB MEDIA .......................................................... 24
SPECIFICATIONS ...............................................................25
DIMENSIONS ..................................................................... 25
NOTES ABOUT THE DISCS .............................................. 26
CLEANING OF EQUIPMENT EXTERNAL SURFACES .. 26
REPAIRS ..............................................................................26
FUNCTIONS
NAMES AND
BASIC
CONNECTIONS
BASIC
OPERATIONS
ADVANCED
CONNECTIONS
ADVANCED
OPERATIONS
TROUBLESHOOTING
OTHERS
1
Page 8

NAMES AND
FUNCTIONS
ENGLISH
FEATURES
BEFORE USING
USING MARANTZ ORIGINAL HDAM®SA2
The unit uses an HDAM®SA2, whose quality has
been proved in Super Audio CD players and high-
CONNECTIONS
end amplifi ers, as a high-speed buffer amplifi er.
You can enjoy the high speed and high-quality sound
like that produced by high-end equipment.
BASIC
INCORPORATES A CIRRUS LOGIC
ADVANCED D/A CONVERTER, CS4398
OPERATIONS
CONNECTIONS
A D/A converter is an essential element for the
audio quality of a CD player. The CS4398 Cirrus
BASIC
Logic D/A Converter, which has a reputation for high
precision and has been adopted for other Marantz
Super Audio CD players, is adopted for this unit.
AUDIO EX FUNCTION
ADVANCED
Audio EX mode, which allows setting of pitch
control, digital output, and display function to OFF,
is provided in order for you to enjoy higher quality
sound. (See page 13)
HIGH GRADE HEADPHONE CIRCUIT
OPERATIONS
ADVANCED
The high-grade headphone circuit incorporates a
high-speed buffer amplifi er to enable headphone
listening of high quality sound reproduction, late at
night or in other such situations.
TROUBLESHOOTING
SUPPORTS MP3 AND WMA, AAC FILE
PLAYBACK
MP3 and WMA, AAC fi les that have been recorded
onto CD-R or CD-RW discs can be played back on
this CD player. (See page 14)
PITCH CONTROL FUNCTION
(AUDIO CDs ONLY)
The “pitch control” function enables the play speed
(pitch) to be varied over a ±12 step. (See page 13)
QUICK REPLAY FUNCTION
(AUDIO CDs ONLY)
By a single-action operation, the “quick replay”
function enables play to be moved back from the
current play position for the time equivalent to the
setting (setting range: 5 to 60 seconds) and play to
be resumed.
This function makes it possible to return to a part
of the track that was just played so it can be heard
again. (See page 10)
SUPPORTS CD-TEXT DISPLAY
CD-Text is an extension to the existing audio CD
standard that enables text information, such as the
name of the artist, album title and song titles to be
stored on an audio CD.
CDs with the following logos support this function.
CD TEXT
Text information is recorded on the parts that are not
used in the conventional Audio CDs.
This CD player enables the text information stored
on a CD-Text CD to be read (applies only to English
alphanumeric text).
TEXT
EQUIPMENT MAINS
WORKING SETTING
Your Marantz product complies with the household
power and safety requirements in your area.
This product can be powered by 230 V AC only.
INAPPROPRIATE PLACES
FOR INSTALLATION
To keep your unit in perfect working order for the
longest possible time, avoid installing the unit in the
following locations.
• Wherever it will be exposed to direct sunlight
• Wherever it will be close to a heater or other heatradiating appliance
• Wherever the humidity is high or ventilation is
poor
• Wherever it is very dusty
• Wherever it will be subject to vibration
• On top of a rickety stand or in an unstable location
which is tilted at an angle
• Near windows where there is a chance of
exposure to rain, etc.
• On top of an amplifi er or other component which
dissipates a great deal of heat
To ensure proper heat dissipation, install the unit
while leaving clearances between the unit and
wall or other components, as shown in the fi gure
below.
Left 0.1 m (4 in)
or more
Above 0.1 m
(4 in) or more
Right 0.1 m
(4 in) or more
PRECAUTIONS
• In winter, droplets of water form on the insides
of the windows of a heated room: this is called
condensation. This unit uses an optical lens,
so the condensation may form in the following
cases.
- In a room immediately after the heating has
been turned on
- In a room where the humidity level is high
- When the unit has been suddenly brought from
a cold location into a warm room
Since, in cases like this, the track numbers
may not be read and the unit is prevented from
operating properly, wait about 30 minutes, and
then operate the unit.
• If this unit is placed on an object that generates
substantial heat, such as an amplifi er, the laser
inside this unit may be deteriorated.
• This unit may cause interference on a tuner or TV
set. If this is the case, place it further away from
the tuner or TV set.
• Compact discs have much less noise than analog
records and hardly any noise is heard before play
starts.
Bear in mind, therefore, that if the volume control
on the amplifier is set too high, you will risk
damaging other audio components.
• This unit cannot play CD-ROMs used with
personal computers, game CDs, video CDs,
DVDs (video/audio) or DTS-CDs.
• We do not recommend the use of lens cleaners.
• If this unit is placed in a rack with glass doors,
do not attempt to open the disc tray with the 0
OPEN/CLOSE button on the remote controller
with the glass doors shut. Impeded disc-tray
movement may result in a failure.
PLAYBACK OF USB AUDIO (MP3/WMA/AAC/
OTHERS
WAV)/iPod
This unit can play back MP3, WMA, WAV, and AAC
fi les by connecting an USB device or iPod to its USB
connector.
2
Rear 0.1 m (4 in)
or more
DO NOT PLACE OBJECTS ON TOP
Refrain from placing any objects on top of the unit.
Page 9
ENGLISH
BEFORE USING
USAGE OF REMOTE CONTROLLER
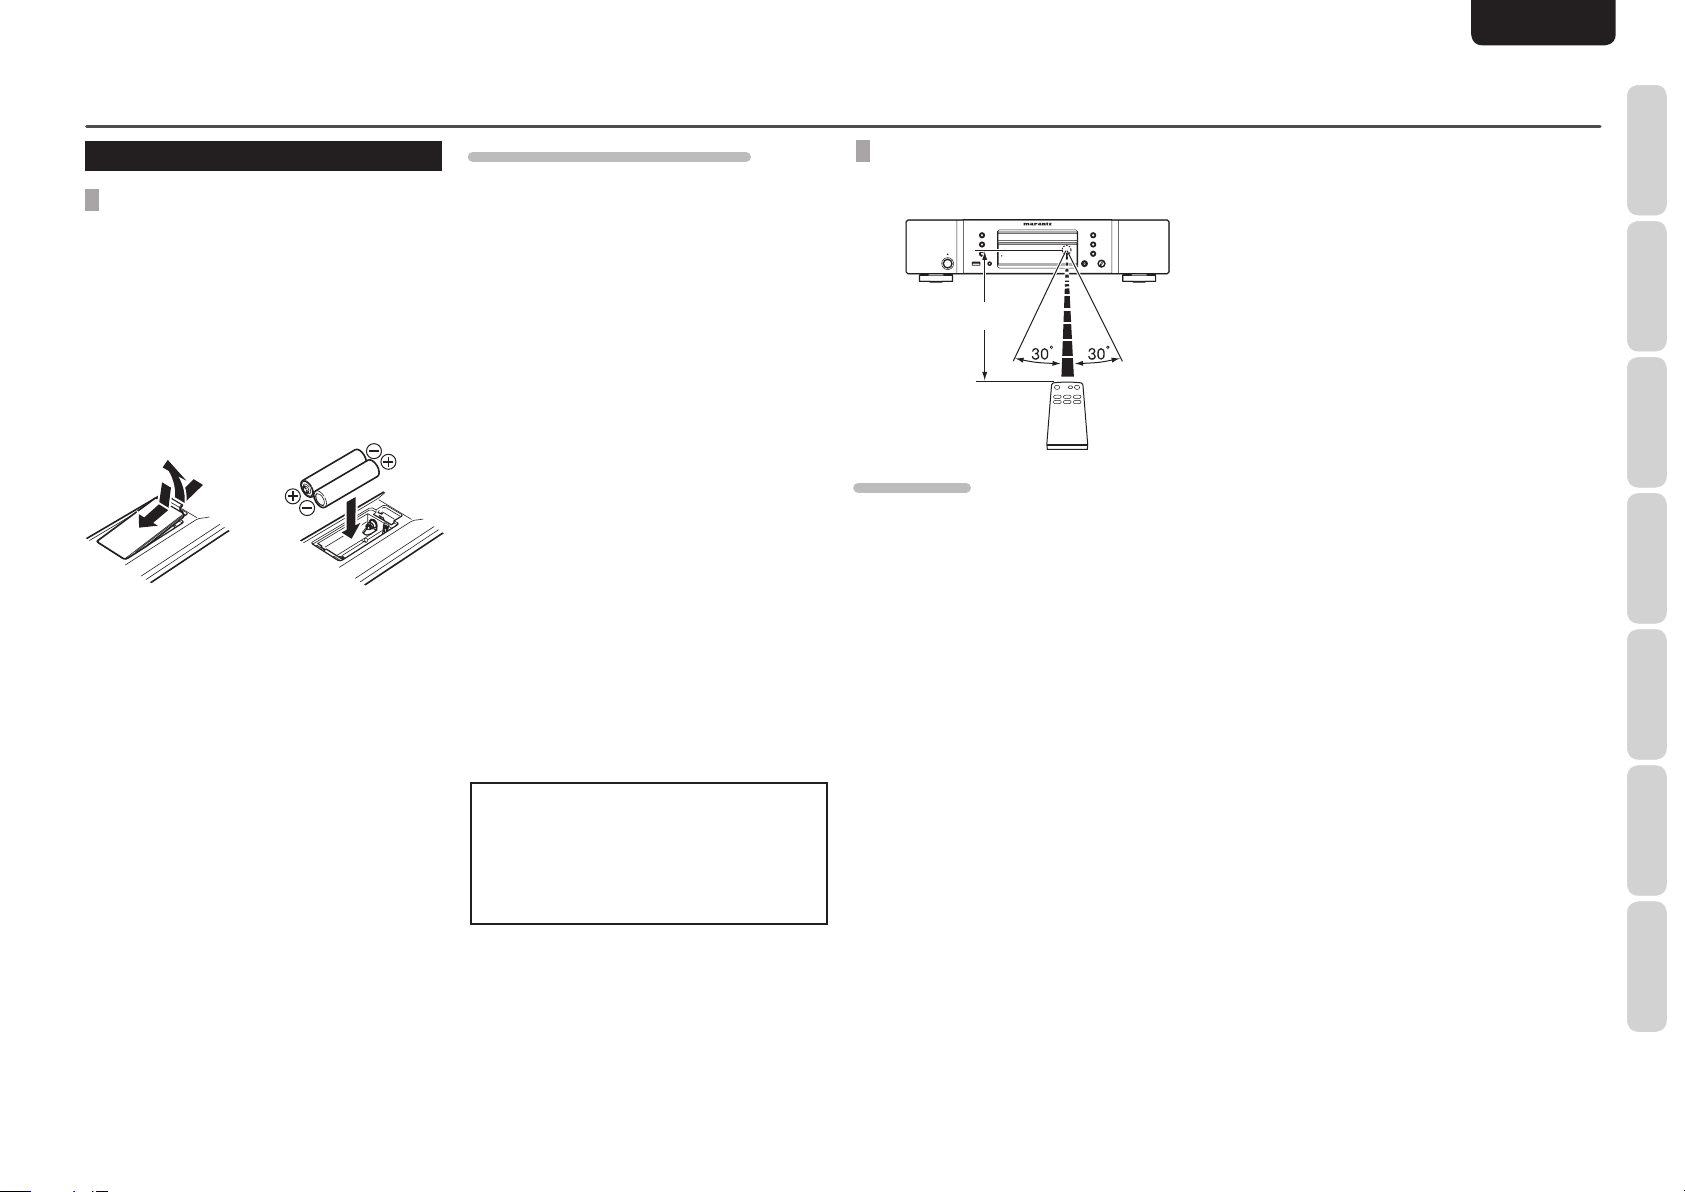
LOADING BATTERIES
Before using the remote controller for the fi rst time,
load the batteries in the remote controller. The
batteries provided are used to verify the operations
of the remote controller only.
1. Remove the battery cover.
2. Paying close attention to polarity indicators
(ª plus and · minus), be sure to insert
batteries correctly and as indicated.
3. Return the battery cover to its original
position.
1
3
2
CAUTIONS ON HANDLING BATTERIES
Misusing batteries can lead to fi re, injury or soiling
of surrounding area as a result of leakage, rupture
or corrosion.
Carefully read the following precautions before
using batteries.
• Insert the batteries while ensuring that their
ª and · poles are properly aligned with
the corresponding markings on the remote
controller.
• Batteries of the same size and shape may have
different voltages. Do not use any battery except
the type indicated. Do not use old and new
batteries together, and do not use different types
of batteries together.
• Do not recharge batteries.
• Keep batteries out of the reach of children. Seek
medical attention if accidentally ingested.
• Do not carry or store batteries together with
metal ball point pens, necklaces, coins, hair pins,
etc.
• If you will not be using the remote controller for
an extended time (1 month or more), remove the
batteries to prevent leakage. If batteries leak, do
not touch the fl uid with bare hands. Wipe away
any fl uid in the case and put in new batteries.
When doing so, handle with care, because fl uid
on skin or clothing presents a burn risk. If you
accidentally get fl uid on your skin, immediately
wash with water and seek medical attention.
• Do not heat or take apart batteries or put them in
fl ame or water.
• When disposing of used batteries, please
comply with governmental regulations or
environmental public instruction’s rules that
apply in your country or area.
• Do not expose the batteries to excessive heat
such as direct sunlight, fi re or the like.
OPERATIONAL RANGE
Operate the unit with the remote controller within
the range of the illustration below.
Approx. 5m (16.4 ft)
PRECAUTIONS
• Do not allow direct sunlight, an inverter fl uorescent
light or other strong source of light to shine onto
the unit’s infrared signal reception window
(remote sensor). Otherwise, the operation of the
remote controller may be disabled.
• Bear in mind that operating the remote controller
may cause other devices operated by infrared
rays to be operated by mistake.
• The remote controller cannot be operated if
the space between the controller and the unit’s
remote sensor is obstructed.
• Do not place any objects on top of the remote
controller. Doing so may cause one or more
buttons to be held down which will cause the
batteries to run down.
FUNCTIONS
NAMES AND
BASIC
CONNECTIONS
BASIC
OPERATIONS
ADVANCED
CONNECTIONS
ADVANCED
OPERATIONS
TROUBLESHOOTING
3
OTHERS
Page 10
NAMES AND
NAMES AND
FUNCTIONS
FUNCTIONS
ENGLISH
NAMES AND FUNCTIONS
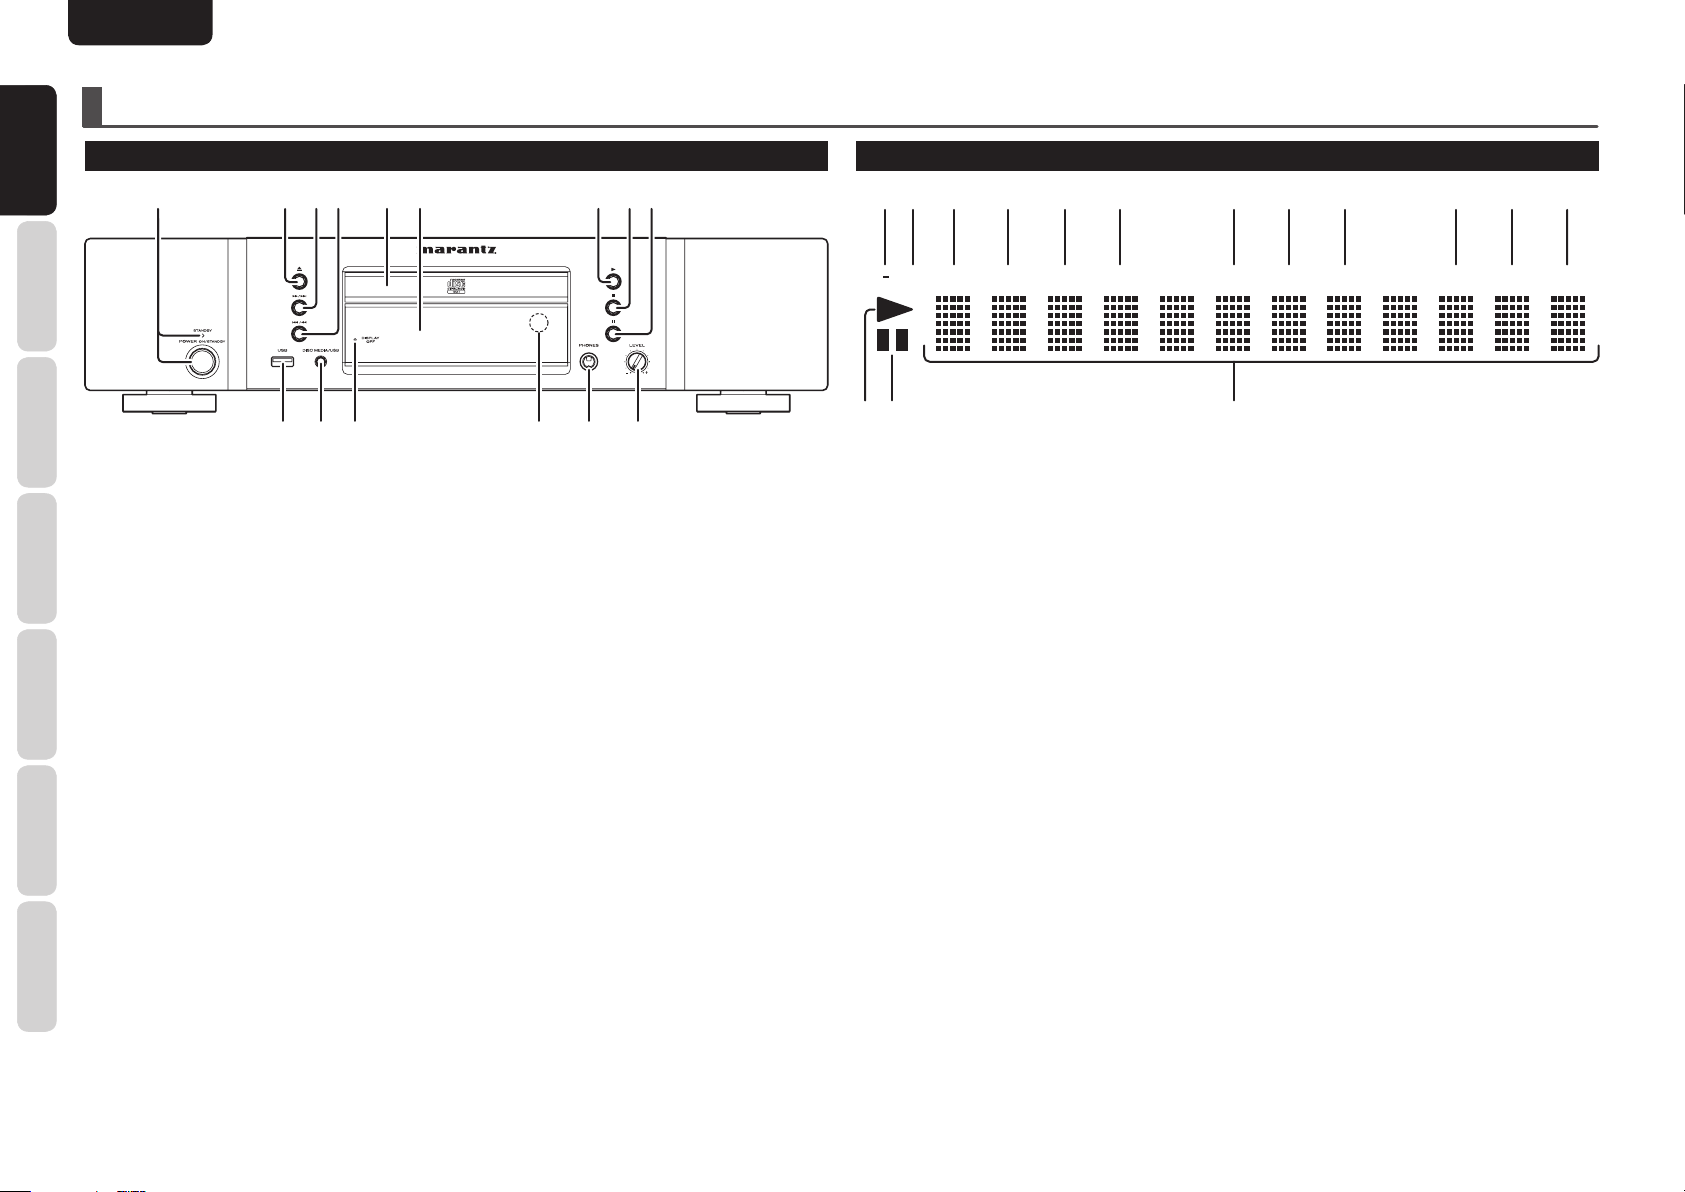
FRONT PANEL
CONNECTIONS
BASIC
OPERATIONS
BASIC
q POWER ON/STANDBY switch
CONNECTIONS
ADVANCED
OPERATIONS
ADVANCED
TROUBLESHOOTING
OTHERS
STANDBY indicator
This is used to switch the unit’s power ON and
STANDBY. (See page 7)
w 0 button
See page 7.
e ¡/¢ button
See page 7.
r 4/1 button
See page 7.
t Disc tray
The disc to be played is placed on the tray (see
page 7).
y Display
u 2 button
See page 7.
q wer uio
t y
!2!3!4!5 !0!1
i 7 button
See page 7.
o 8 button
See page 7.
!0 LEVEL control
This is used to adjust the headphones volume level.
The level increases when turned clockwise.
!1 PHONES jack
The headphones are connected to this jack. Use
headphones that come with a standard plug.
!2 Remote sensor
This sensor senses the infrared control signals sent
from the remote controller.
!3 DISPLAY OFF indicator
See page 5.
!4 DISC MEDIA / USB button
See page 16.
DISPLAY
sa d f g h j
RPT RNDM PROG TRK
1
A
a A-B indicator
This indicator lights up during A-B repeat play.
s 1 indicator
This indicator lights up during repeat play of one
track.
d RPT indicator
This indicator lights up during repeat play.
f RNDM indicator
This indicator lights up during random play.
g PROG indicator
This indicator lights up during program play.
h TRK indicator
This indicator lights up above the display of the track
number currently being played.
j CD indicator
This indicator indicates the type of disc on the disc
tray (CD).
k l ¡0 ¡1 ¡2
CD FILE USB DOFF REMAIN TTLMB
¡3¡4¡5
l USB indicator
This indicator lights up during operation in the USB/
iPod mode.
¡0 D OFF indicator
This indicator lights up when the digital output
setting of the audio CD signal is set to OFF (see
page 13).
¡1 REMAIN indicator
This indicator lights up above the remaining playback
time of a track, when it is displayed.
¡2 TTL indicator
This indicator lights up above the total remaining time
or the total program time, when it is displayed.
¡3 Main display area
This area displays the time display and text
information of the disc to be played, as well as the
setting menu items, etc.
¡4 8 indicator
This indicator lights up when play is paused.
!5 USB connector
See page 8, 16.
k M FILE indicator
This indicator indicates the type of disc on the disc
tray (WMA/MP3/AAC).
¡5 3 indicator
This indicator lights up during disc play.
4
Page 11

ENGLISH
NAMES AND FUNCTIONS
REMOTE CONTROLLER
¤4
¤3
¤2
¤1
¤0
⁄9
⁄8
⁄7
⁄6
⁄5
⁄4
⁄3
z
x
c
v
b
n
m
,
.
⁄0
⁄1
⁄2
z POWER button
This is used to switch the unit’s power ON and
STANDBY. (See page 7)
x A-B (A-B repeat) button
This is used to set start point (A) and end point (B)
when a particular section is to be played repeatedly.
(See page 9, 15)
c CANCEL button
This is used to cancel the programmed tracks. (See
page 11, 12, 19)
v RANDOM button
This is used to play the tracks in a random sequence.
(See page 10)
b SCROLL/RECALL button
This is used to scroll the text display when text is
displayed.
When it is pressed during program play, it is possible
to check which tracks have been programmed. (See
page 12)
n TEXT button
This is used to switch the main display from the
time display to the text display. (See page 12, 14)
m TIME button
This switches the main display from the text display
to the time display.
It can also switch the time display during play. (See
page 9)
CD:
It can display how much time has elapsed and how
much play time remains for the current track as well
as how much play time remains for the whole disc.
MP3/WMA/AAC:
The elapsed time and time remaining for the fi le can
be displayed.
, 5, ∞ (VOLUME) button
%, fi (INPUT) button
MUTE button
These are used to operate the corresponding
functions of a Marantz integrated amplifier. For
each function, refer to User Guide supplied with the
Integrated Amplifi er.
. Q. REPLAY button
Jump back a set time before the current playing
position and resume play. (See page 10)
⁄0 8 button
See page 7.
⁄1 7 button
See page 7.
⁄2 ENTER button
Saves the current settings.
⁄3 MENU button
This button displays the various settings.
⁄4 Numeric buttons
See page 7.
⁄5 1, ¡ buttons
See page 7.
⁄6 4, ¢ buttons
See page 7.
⁄7 3 button
See page 7.
⁄8 REPEAT button
This is used to play one track or all the tracks on the
disc repeatedly. (See page 9, 15, 17)
⁄9 +, RESET, – buttons
These are used to adjust the play speed (pitch) with
a ±12 step. (Audio CD only) (See page 13)
These buttons are also used to select MP3/WMA/
AAC folders. (See page 14)
These buttons are used for USB folder search and
iPod album selection.
¤0 DISPLAY button
Press this button when switching the display ON
and OFF.
The display becomes dimmer each time the button
is pressed. When the button is pressed for the third
time, the display turns off and the DISPLAY OFF
indicator lights up. The last setting is retained even
if the power is turned off.
¤1 PROGRAM button
This is pressed to initiate program play.
(See page 11)
¤2 AMS button
This is used to play the intros of all the tracks
in sequence starting from the fi rst track for the
duration equivalent to the setting.
(See page 10)
¤3 SOUND MODE button
This is used to switch Audio EX mode (See page
13), and to set use of pitch control (See page 13).
¤4 0 button
See page 7.
FUNCTIONS
FUNCTIONS
NAMES AND
NAMES AND
BASIC
CONNECTIONS
BASIC
OPERATIONS
ADVANCED
CONNECTIONS
ADVANCED
OPERATIONS
TROUBLESHOOTING
OTHERS
5
Page 12

NAMES AND
REMOTE CONTROL
DIGITAL AUDIO OUT
ANALOG OUT
EXTERNAL
INTERNAL
OPTICAL
COAXIAL
IN
OUT
LR
AC IN
REMOTE CONTROL
DIGITAL AUDIO OUT
ANALOG OUT
OPTICAL
COAXIAL
NIN
UOUT
LR
NAMES AND
FUNCTIONS
FUNCTIONS
NAMES AND FUNCTIONS
ENGLISH
BASIC CONNECTIONS
REAR PANEL
CONNECTIONS
CONNECTIONS
BASIC
BASIC
OPERATIONS
BASIC
q ANALOG OUT connectors
The music signals during play are output from these
ADVANCED
connectors.
CONNECTIONS
w DIGITAL AUDIO OUT COAXIAL
connector
The music signals during play are output digitally
from this coaxial output connector.
OPERATIONS
ADVANCED
Note
Digital signals are not output at some settings.
For details, see “DIGITAL OUTPUT OFF” and
“AUDIO EX SELECTION” (See page 13).
TROUBLESHOOTING
e DIGITAL AUDIO OUT OPTICAL
connector
The music signals during play are output digitally
from this optical output connector.
Note
Digital signals are not output at some settings.
For details, see “DIGITAL OUTPUT OFF” and
OTHERS
“AUDIO EX SELECTION” (See page 13).
6
ANALOG OUT
DIGITAL AUDIO OUT
COAXIAL
OPTICAL
REMOTE CONTROL
IN
OUT
EXTERNAL
INTERNAL
AC IN
yr tq w e
r REMOTE CONTROL IN and OUT
connectors
Using the supplied remote control connecting cable,
these connectors enable this unit to be connected
to a Marantz component equipped with remote
control connectors. These connections make it
possible to control an entire system that centers on
the amplifi er or other such component.
t EXTERNAL/INTERNAL switch
The switch is set to INTERNAL, when fi rst purchased,
enabling the unit’s built-in signal reception window
to be used.
Before using the supplied connecting cable to make
the connection between the unit and the remote
control connectors on a Marantz equipment, set the
switch to EXTERNAL.
Note
Signals cannot be received from the remote
controller if the switch is kept at EXTERNAL when
the unit is to be used on its own.
y Power cord connector socket
Use the supplied power cord to connect to a
standard household power supply outlet.
Connect the unit so that the power cord can
be removed easily as a precaution against
possible accidents.
CONNECTING TO AN AMPLIFIER
ANALOG OUT
(Red) (White)
Audio connecting cable (supplied)
To the CD input
connectors
Amplifi er
Notes
•Do not connect this unit and other components
to mains power until all connections between
components have been completed.
• Insert all plugs and connectors securely.
Incomplete connections may make noise.
• Be sure to connect the left and right channels
properly.
• Be sure to connect input and output properly.
• Refer to the instructions for each component that
is connected to this unit.
• Do not bind audio/video connection cables with
power cord and speaker cables this will result in
generating a hum or other noise.
• Do not connect the unit to the PHONO input
connectors on the amplifi er.
DIGITAL AUDIO OUT
OPTICAL
COAXIAL
CONNECTING THE POWER
SUPPLY
1. Plug the power cord into AC IN jack on the
rear panel.
REMOT
I
O
2. Plug the power cord into an AC outlet.
3. Turn on the power switch of the audio unit
(amplifi er, etc.) that is connected with this
unit. Set the selector on the connected unit
to this unit.
AC IN
Page 13

BASIC OPERATIONS –AUDIO CD–
ENGLISH
PLAYING CDS
1. 2. 3. 4.
2. 3.
1. Press the POWER button on the unit or on
the remote controller to turn on the power.
2. Press the 0 button on the unit or on
the remote controller. Place the CD to be
played in the extended disc tray while
ensuring that the label with the printed text
is facing up.
In the case of a single (8 cm) CD, align it
with the indentation in the center of the
tray.
1.
4.
3. Press the 0 button to retract the disc tray.
Once the disc tray has been retracted, “TOC
Reading” appears on the display, after
which the total number of CD tracks and
total playing time are displayed.
Caution
Do not close the disc tray by pressing it in with your
hand, as this will damage it.
4. Press the 3 button on the unit or remote
controller to start play. Adjust the volume
level at the amplifi er.
PAUSING PLAY
During play, press the 8 button on the unit or remote
controller to temporarily suspend play.
To resume play from the place where it was
temporarily suspended, press the 3 button or 8
button on the unit or the 3 button or 8 button on
the remote controller.
STOPPING PLAY
Press the 7 button on the unit or remote controller
during play.
REMOVING THE CD
After play has fi nished, press the 0 button on the
unit or on the remote controller to extend the disc
tray, and remove the CD.
After the CD has been removed, press the 0 button
again to retract the disc tray. The disc tray should
always be retracted when the unit is not in use.
PLAYING A SPECIFIC TRACK
¡/¢4/1
¢
4
Numeric
button 0-9
SPECIFYING THE NUMBER OF A TRACK
TO BE PLAYED (DIRECT SEARCH)
Select the number of the track to be played directly
by pressing the numeric buttons (0 to 9) on the
remote controller.
To select track number 10 or above, use the numeric
buttons to select the higher digit first and then
select the lower digit.
Once the number of the track is selected, play will
start automatically.
(Example)
Track 3: Press the “3” numeric button.
Track 12: Press the “1” numeric button. Within
1.5 second, press the “2” numeric
button.
PLAYING A PREVIOUS OR SUBSEQUENT
TRACK (TRACK SKIP)
ADVANCING TO A SUBSEQUENT TRACK
Press the ¡/¢ button on the unit or ¢ button
on the remote controller for the number of times
equivalent to the number of tracks through which
play is to be advanced.
RETURNING TO THE START OF THE CURRENT
TRACK OR A PREVIOUS TRACK
When the 4/1 button on the unit or 4 button
on the remote controller is pressed, play returns to
the start of the current track. Pressing the same
button several times will locate the start of a track
the equivalent number of track starts before the
current play position.
PLAYING A SPECIFIC PART OF A
SPECIFIC TRACK
¡/¢4/1
¡
1
SEARCHING A SPECIFIC PART OF A TRACK
(SEARCH)
While listening to a track being played, it is possible
to search for a specifi c part of that track by a forward
or backward search.
FORWARD SEARCHING THROUGH THE
CURRENT TRACK
The search (forward search) mode is established by
holding down the ¡/¢ button on the unit or ¡
button on the remote controller. Holding down the
button initiates a forward search.
BACKWARD SEARCHING THROUGH THE
CURRENT TRACK
The search (backward search) mode is established
by holding down the 4/1 button on the unit or
1 button on the remote controller. Holding down
the button initiates a backward search.
FUNCTIONS
NAMES AND
BASIC
CONNECTIONS
BASIC
BASIC
OPERATIONS
OPERATIONS
ADVANCED
CONNECTIONS
ADVANCED
OPERATIONS
TROUBLESHOOTING
OTHERS
7
Page 14

NAMES AND
REMOTE CONTROL
DIGITAL AUDIO OUT
EXTERNAL
INTERNAL
OPTICAL
COAXIAL
IN
OUT
REMOTE CONTROL
DIGITAL AUDIO OUT
EXTERNAL
INTERNAL
OPTICAL
COAXIAL
IN
OUT
OUT
IN
REMOTE
CONTROL
AC IN
FUNCTIONS
ENGLISH
ADVANCED CONNECTIONS
CONNECTING TO A DIGITAL
AUDIO COMPONENT
CONNECTIONS
OPERATIONS
CONNECTIONS
CONNECTIONS
OPERATIONS
The unit has one digital optical output connector and
one digital coaxial output connector.
You can enjoy digital recording when the unit
BASIC
is connected to a CD recorder or other digital
recording component.
Caution
Signals are sent from the Digital Audio Output
(Optical and Coaxial) terminals only when playing
back audio CDs or CD-layers of super audio CDs.
BASIC
There are no signals when other media are being
played back.
CONNECTING THE OPTICAL/COAXIAL
OUTPUT CONNECTORS
Use an optical/coaxial digital connecting cable
ADVANCED
ADVANCED
available on the market.
Insert the plug of the optical digital connecting cable
fi rmly in until it clicks into place.
Do not bend or bundle the optical digital connecting
cable.
ADVANCED
TROUBLESHOOTING
DIGITAL AUDIO OUT
OPTICAL
COAXIAL
REMOTE CONTROL
OUT
USB MEDIA/iPod CONNECTION
Connect the unit to USB media/iPod.
Caution
• Connect the USB media/iPod while in power off
or when the input source is something other than
USB. Connecting/disconnecting USB memory
when the input source is USB and the power is on
may damage the USB memory.
• When using an USB device, do not use an USB
extension cable.
REMOTE CONTROL CONNECTION
Connecting this unit to additional Marantz audio
equipment using the supplied remote control
connecting cable enables remote control of the
connected equipment as a single audio system.
• When connecting equipment incorporating a
remote sensor, connect the “remote control
out” connector of the equipment to the “remote
control in” jack of the unit.
When doing this, set this unit’s switch to
“EXTERNAL.” This will stop its remote control
IR receiver from operating and the unit can now
TIMER PLAY
This unit can perform timer play by cooperating with
your audio timer.
Connect this unit’s power cord to the audio timer’s
power socket and the timer’s power cord to power
outlet.
• For connection to audio timer and it’s operation,
please refer to the instruction manual of your
audio timer.
Audio Timer
be controlled via the remote control IR receiver of
the attached equipment.
DIGITAL AUDIO OUT
OPTICAL
COAXIAL
REMOTE CONTROL
OUT
IN
EXTERNAL
INTERNAL
AC IN
TIMER PLAY SETTING
Set to “EXTERNAL.”
Remote control
IN
EXTERNAL
INTERNAL
connecting cable
(supplied)
Time Play is set in the following hierarchical logic.
TIMERPlay=>
1Off
2On
1CD
2USB/iPod
OTHERS
8
Coaxial digital
connecting
cable (available
on market)
ANALOG IN/OUT
L
R
OUTPUT
INPUT
Optical digital
or
connecting cable
(available on market)
Signal fl ow
:
DIGITAL IN/OUT
OPTICAL COAXIAL
INPUT OUTPUT
OUTPUT
INPUT
CD recorder, MD deck, AV amplifi er,
etc.
REMOTE
CONTROL
IN
OUT
EXTERNAL
INTERNAL
iPod cable
(supplied with iPod)
Amplifi er
REMOTE
CONTROL
1.
IN
OUT
3. 4.
5. 6.
2. 7.
3. 4.
5. 6.
Page 15

ENGLISH
ADVANCED CONNECTIONS
1. Press the POWER switch to turn the unit
on.
2. During stop, press the MENU button on the
remote controller.
3. Use the 4 or ¢ button to display “TIMER
Play=>” on the display, then press the
ENTER button on the remote controller.
4. Use the 4 or ¢ button to display “2
On” on the display, then press the ENTER
button on the remote controller.
5. To play disc media by timer, display “1 CD”,
using the 4 or ¢ button, then press the
ENTER button on the remote controller.
6. To play USB media by timer, display “2
USB/iPod”, using the 4 or ¢ button,
then press the ENTER button on the remote
controller.
If USB media is selected, the track to be
played during timer play can be selected.
For the selection method, refer to USB
media selection method (see page 16).
7. Press the MENU button on the remote
controller to complete the setting.
8. If disc media is selected, insert the disc to
be played.
9. Set the audio timer.
Note
If selecting USB with timer play, please connect
USB media to the unit beforehand.
ADVANCED OPERATIONS –AUDIO CD–
TO CHANGE TIME DISPLAY
TIME
Press the TIME button on the remote controller.
Each time TIME button is pressed, display will
change in the following order.
Track elapsed
time
Total remaining
time
• Track remaining time
(The remaining playing time from the playing
point to the end of the current track)
• Total remaining time
(The remaining playing time from the playing
point to the end of the last track)
Track remaining
time
“REMAIN” is displayed
“REMAIN TTL” is displayed
REPEAT PLAY (PLAYING THE
SAME TRACKS REPEATEDLY)
PLAYING ALL TRACKS REPEATEDLY
(ALL-TRACK REPEAT)
This function repeatedly plays all the tracks. Repeat
play is possible even during random play or program
play.
Press the REPEAT button on the remote controller.
The “RPT” indicator on the display lights, and the
repeat play of all the tracks starts.
Light up
To stop all track repeat play and resume normal play,
press the REPEAT button on the remote controller
to turn off the “RPT” indicator on the display.
PLAYING ONE TRACK REPEATEDLY
(1-TRACK REPEAT)
This function repeatedly plays one track only. Even
during random play or program play, it repeats the
track being played.
Press the REPEAT button on the remote controller
twice while the track to be repeated is playing.
The “RPT” and “1” indicators light, and track now
playing is repeated.
Light up
A-B
REPEAT
To stop 1-track repeat play and resume normal play,
press the REPEAT button on the remote controller
to turn off the “RPT” indicator on the display.
PLAYING A SPECIFIC PART REPEATEDLY
(A-B REPEAT)
This function repeatedly plays a specifi c part of a
track that you want to hear.
1. During play, press the A-B button on the
remote controller at the start point of the
part to be repeated.
The “A-” indicator on the display now
lights.
Light up
2. Press the A-B button on the remote
controller at the end point of the part to be
repeated.
The “A-B” indicator on the display now
lights, and the designated part (from point
A to point B) is played repeatedly.
Light up
To stop A-B repeat play and resume normal play,
press the A-B button on the remote controller to
turn off the “A-B” indicator on the display.
Note
The A-B repeat play function cannot be used during
random play.
FUNCTIONS
NAMES AND
BASIC
CONNECTIONS
BASIC
OPERATIONS
ADVANCED
ADVANCED
CONNECTIONS
CONNECTIONS
ADVANCED
ADVANCED
OPERATIONS
OPERATIONS
TROUBLESHOOTING
OTHERS
9
Page 16

ENGLISH
NAMES AND
FUNCTIONS
ADVANCED OPERATIONS –AUDIO CD–
RANDOM PLAY (PLAYING TRACKS
IN A RANDOM SEQUENCE)
CONNECTIONS
OPERATIONS
CONNECTIONS
OPERATIONS
OPERATIONS
This function rearranges the tracks into a random
sequence and it then plays all the tracks in this
random sequence. If it is used together with repeat
BASIC
play, the same tracks can be repeatedly played but
in a different sequence every time.
BASIC
ADVANCED
During play or stop, press the RANDOM button on
the remote controller.
The “RNDM” indicator on the display lights, and
random play starts.
ADVANCED
ADVANCED
To stop random play and resume normal play, press
the RANDOM button on the remote controller. The
“RNDM” indicator on the display goes off.
TROUBLESHOOTING
SKIPPING TRACKS DURING RANDOM
PLAY TO SEARCH OTHER TRACKS
When the ¡/¢ button on the unit or ¢ button
on the remote controller is pressed during random
play, the next track is selected at random and
OTHERS
played.
Conversely, when the 4/1 button on the unit
or 4 button on the remote controller is pressed
during random play, play returns to the start of the
track now playing.
Light up
RANDOM
¢
4
AMS PLAY (SEARCHING FOR A
SPECIFIC TRACK)
This feature is convenient for searching where your
favorite track is.
AMS
3
If the AMS button is pressed while a track is
stopped, the PLAY indicator “2” fl ashes, and the
fi rst ten seconds of each track on the disc will be
played starting from the fi rst track.
Also, if the AMS button is pressed during playback,
the PLAY indicator “2” fl ashes, and the program
jumps to the next track after approximately
10 seconds elapses on the display time.
Flashes
Once you fi nd a song that you want to listen to,
press the AMS button again or press the 2 button.
The PLAY indicator “2” lights up and normal
playback resumes from the current track.
WHILE PLAYING, REPLAY A
SMALL TRACK PORTION AND
LISTEN AGAIN (QUICK REPLAY)
If the Q.REPLAY button is pressed during playback,
the play position will jump back by the length of time
set in MENU, and then resume.
Q.REPLAY
2. 3. 4.
2. 3. 5.
1. 6.
Note
Jump back cannot go beyond the beginning of the
current track.
When the Q.REPLAY button is pressed, if the total
length of the track being played is shorter than the
time set for quick replay, or if the track elapsed
playing time is shorter than the time set for quick
replay, the play position will return to the beginning
of the track and resume playing.
HOW TO SET THE QUICK REPLAY TIME
1. During stop, press the MENU button on the
remote controller.
2. Use the 4 or ¢ button to display “CD
Setup =>” on the display, then press the
ENTER button on the remote controller.
3. Use the 4 or ¢ button to display “Q
Replay =>” on the display, then press the
ENTER button on the remote controller.
The set time will be displayed on the
display.
(At the time of purchase, this is set to 10
seconds.)
4. Set the desired time with the 4 or ¢
buttons (5 - 60 s).
5. After setting the time, press the ENTER
button.
6. Press the MENU button on the remote
controller to complete the setting.
10
Page 17

PROGRAM PLAY (PLAYING TRACKS
IN THE PREFERRED SEQUENCE)
The order in which the CD tracks are played can
be rearranged into the sequence desired. Up to 30
tracks can be programmed.
2. 5. 4.
4. 1.
5.
2.
4.
2.
1. During stop, press the PROGRAM button
on the remote controller.
“Program” appears for an instant on the
main display.
Flashes
The PROG indicator flashes, and the
program mode is established.
Flashes
2. Press the numeric buttons on the remote
controller the tracks can also be selected
using the 4 and ¢ buttons on the
remote controller or 4/1 and ¡/¢
buttons on the unit. To select track number
10 or above, use the numeric buttons to
select the higher digit fi rst and then select
the lower digit.
DISPLAY EXAMPLE: WHEN TRACK 2 HAS BEEN
SELECTED
Flashes
3. Repeat step 2. to program the desired
tracks in sequence. At each step of the
programming, the number of tracks
programmed and their total time appear
on the main display. Up to 30 tracks can be
programmed.
4. Once all the tracks have been programmed,
press the 7 button on the unit or remote
controller or press the PROGRAM button
on the remote controller.
The PROG indicator stops flashing and
lights up instead, and the program is
entered.
5. Press the 3 button on the unit or
remote controller. Play now starts in the
programmed sequence.
Program play will start even when step 4. is
omitted.
DELETE PROGRAM PLAY
(PLAY WITH UNDESIRED
TRACKS SKIPPED)
This function makes it possible to skip those tracks
that you do not want to hear during CD play. Up to
30 tracks can be deleted from the program.
2. 4. 3.
1. 3.
1.
4.
2.
3.
2.
1. During stop, press the PROGRAM button
on the remote controller, and then press
the CANCEL button.
“Delete Prog.” appears for an instant on
the main display.
Flashes
ENGLISH
ADVANCED OPERATIONS –AUDIO CD–
The total number of CD tracks and the total
play time appear on the main display, the
PROG indicator flashes, and the delete
program mode is established.
Flashes
2. Press the numeric buttons on the remote
controller that you do not want to hear (the
track can also be selected using the 4
and ¢ buttons on the remote controller or
4/1 and ¡/¢ buttons on the unit).
DISPLAY EXAMPLE: WHEN TRACK 2 HAS BEEN
SELECTED
Flashes
3. Repeat step 2., and upon completion of
the programming, press the 7 button
on the unit or remote controller or press
the PROGRAM button on the remote
controller.
The PROG indicator in the display stops
flashing and lights up instead, and the
delete program is entered. Up to 30 tracks
can be deleted from the program.
4. Press the 3 button on the unit or remote
controller. The CD is now played but with
the deleted tracks skipped.
FUNCTIONS
NAMES AND
BASIC
CONNECTIONS
BASIC
OPERATIONS
ADVANCED
CONNECTIONS
ADVANCED
ADVANCED
OPERATIONS
OPERATIONS
TROUBLESHOOTING
OTHERS
11
Page 18

NAMES AND
FUNCTIONS
ADVANCED OPERATIONS –AUDIO CD–
ENGLISH
CONNECTIONS
BASIC
OPERATIONS
BASIC
CONNECTIONS
ADVANCED
CHECKING THE PROGRAM OR DELETE
PROGRAM CONTENTS
OPERATIONS
OPERATIONS
During programming operation or program play,
ADVANCED
ADVANCED
press the SCROLL/RECALL button on the remote
controller.
With program play, each time the SCROLL/RECALL
button is pressed, the programmed tracks are
displayed one after another in sequence on the
main display.
TROUBLESHOOTING
With delete program play, the deleted tracks are
displayed one after another in sequence on the
main display.
CHANGING THE PROGRAM OR DELETE
PROGRAM CONTENTS
OTHERS
DELETING TRACKS WHICH WERE PROGRAMMED
FOR PROGRAM PLAY
When the SCROLL/RECALL button on the remote
controller is pressed during programming, the
programmed tracks are displayed one after the
other in sequence.
As soon as the track to be deleted from the program
has appeared, press the CANCEL button on the
remote controller immediately.
12
CANCELING THE DELETION OF TRACKS WHICH
WERE DELETED FOR DELETE PROGRAM PLAY
When the SCROLL/RECALL button on the remote
controller is pressed during delete programming,
0
0
PROGRAM
SCROLL/RECALL
CANCEL
¢
4
9
9
the deleted tracks are displayed one after the other
in sequence.
As soon as the track whose deletion is to be
canceled has appeared, press the CANCEL button
on the remote controller immediately.
ADDING TRACKS TO THE PROGRAM
Press the PROGRAM button on the remote controller
during stop. The status of the PROG indicator in the
display changes from lighted to fl ashing, and more
tracks can be added to the program.
RETURNING PROGRAM PLAY TO
NORMAL PLAY (CANCELING THE ENTIRE
PROGRAM)
Press the 7 button on the unit or remote controller
twice during program play or once during stop. The
PROG indicator on the display goes off, and the
entire program is canceled.
Alternatively, a program can be canceled when the
disc tray is opened by pressing the 0 button on the
unit or on the remote controller.
CD-TEXT
The text information recorded on a CD-TEXT disc
can be viewed on this unit.
A maximum of 32 characters can be displayed.
DISPLAY OF PLAYER
When the TEXT button on the remote controller is
pressed, the CD-TEXT information will be displayed
as outlined in the diagram on the right.
However, the recorded information differs from one
disc to another so that not all the information given
below will necessarily be displayed.
DURING PLAY
Each time the TEXT button on the remote controller
is pressed, the information items are displayed in the
following sequence. During play, the information of
track now playing is mainly displayed.
Title of track xx now playing
PRECAUTIONS FOR PROGRAM AND
DELETE PROGRAM PLAY
• When using the numeric buttons to select tracks
1 to 9 on a CD with 10 or more tracks in total,
allow 1.5 seconds or so to elapse after the button
corresponding to the number of the previous
track was pressed before pressing the button
corresponding to the number of the next track.
• When using the numeric buttons to select track
10 or up on a CD with 10 or more tracks in
total, press the button corresponding to lower
digit within 1.5 seconds or so after the button
corresponding to the higher digit was pressed.
• When using the 4 and ¢ buttons for
programming, keep pressing one of these buttons
with less than 1.5 seconds or so in between until
the number of the desired track is displayed.
• If the total time for a program exceeds 99 minutes
59 seconds, the time display will appear as “– – :
– –”.
xx Artist (artist of track xx)
Album Title
CHANGING THE INFORMATION ITEM
THAT IS DISPLAYED FIRST
TEXT
2. 3. 4.
1. 5.
2. 3. 4.
1. During stop, press the MENU button on the
remote controller.
2. Use the 4 or ¢ button to display “CD
Setup =>” on the display, then press the
ENTER button on the remote controller.
3. Use the 4 or ¢ button to display “File
Info =>” on the display, then press the
ENTER button on the remote controller.
4. To display the track titles fi rst, display “2
Title”, using the 4 or ¢ button, then
press the ENTER button on the remote
controller.
To display the artist names fi rst, display “3
Artist”, using the 4 or ¢ button, then
press the ENTER button on the remote
controller.
To display the album titles fi rst, display “4
Album”, using the 4 or ¢ button, then
press the ENTER button on the remote
controller.
To always display time information without
displaying text information, display “5
Time”, using the 4 or ¢ button, then
press the ENTER button on the remote
controller.
5. Press the MENU button on the remote
controller to complete the setting.
Page 19

ENGLISH
ADVANCED OPERATIONS –AUDIO CD–
IN THE STOP MODE
Each time the TEXT button on the remote controller
is pressed, the information items are displayed
in the following sequence. When the 3 button
is pressed while “-- Title” is displayed, the track
concerned starts playing.
Time display
Album Title
Album Artist
-- Title (title of track --)
PITCH CONTROL
(CHANGING THE PLAY SPEED)
During stop, press the SOUND MODE button on
the remote controller several times until “Audio EX
OFF” appears on the display.
SOUND MODE
RESET
+
–
The play speed (pitch) can be changed across a
±12 step.
Note
Digital signals are not output during pitch control.
(Signals are output when the pitch control is set
to 0).
INCREASING THE PLAY SPEED
Press the PITCH+ button on the remote controller.
Each time the + button is pressed, the playback
speed will increase (max. +12).
REDUCING THE PLAY SPEED
Press the PITCH- button on the remote controller.
Each time the - button is pressed, the playback
speed will decrease (min. -12).
RETURNING PLAY TO THE NORMAL
SPEED
Press the RESET button on the remote controller.
“Pitch: 0” appears on the main display.
If the RESET button on the remote controller is
pressed again, play returns to the previous speed
setting.
DIGITAL OUTPUT OFF
If digital output is not to be used, turn digital output
OFF, and you can enjoy higher-quality sound.
SETTING DIGITAL OUTPUT ON OR OFF
2. 3.
2. 3.
1. 4.
1. During stop, press the MENU button on the
remote controller.
2. Use the 4 or ¢ button to display
“DigitalOut=>” on the display, then
press the ENTER button on the remote
controller.
3. To turn on the digital audio output, display
“1 On”, using the 4 or ¢ button, then
press the ENTER button on the remote
controller.
To turn off the digital audio output, display
“2 Off”, using the 4 or ¢ button, then
press the ENTER button on the remote
controller. “D OFF” will be lit on the display
when the digital output is set to OFF.
(At the time of purchase, this is set to “1
On”.)
4. Press the MENU button on the remote
controller to complete the setting.
AUDIO EX SELECTION
For higher-quality sound, select the Audio EX
setting, referring the table below.
Audio EX changes as shown below each time the
SOUND MODE button on the remote controller is
pressed during stop.
Audio EX OFF
Audio EX 1
Audio EX 2
AUDIO EX OFF
• Pitch control
Usable
• Digital output
Yes (*1) (when the pitch control setting is 0)
• Display
Yes
AUDIO EX 1
When fi rst purchased. Audio EX 1 offers better
sound.
• Pitch control
Not usable
• Digital output
Yes (*1)
• Display
Yes
AUDIO EX 2
Audio EX 2 offers best sound from analog outputs.
• Pitch control
Not usable
• Digital output
No
• Display
No (during play) (*2)
(*1) Setting of Digital Out on the MENU (see page
13) takes priority.
(*2) Pressing the DISPLAY button on the remote
controller shows the display for three
seconds.
(When fi rst purchased)
FUNCTIONS
NAMES AND
BASIC
CONNECTIONS
BASIC
OPERATIONS
ADVANCED
CONNECTIONS
ADVANCED
ADVANCED
OPERATIONS
OPERATIONS
TROUBLESHOOTING
OTHERS
13
Page 20

NAMES AND
FUNCTIONS
ENGLISH
ADVANCED OPERATIONS –MP3, WMA, AND AAC FILES RECORDED ON A DISC–
SELECTING A RANGE OF FILES
TO BE PLAYED
CONNECTIONS
OPERATIONS
CONNECTIONS
OPERATIONS
OPERATIONS
You can select whether all fi les on a disc or the fi les
in a specifi c folder are to be played.
BASIC
BASIC
1. During stop, press the MENU button on the
ADVANCED
ADVANCED
ADVANCED
TROUBLESHOOTING
OTHERS
remote controller.
2. Use the 4 or ¢ button to display “CD
Setup =>” on the display, then press the
ENTER button on the remote controller.
3. Use the 4 or ¢ button to display “Range
Spec=>” on the display, then press the
ENTER button on the remote controller.
4. To play all fi les on the disc, display “1 All”,
using the 4 or ¢ button, then press the
ENTER button on the remote controller.
To play the fi les in a specifi c folder, display
“2 Folder”, using the 4 or ¢ button,
then press the ENTER button on the remote
controller.
(At the time of purchase, this is set to “1
All”.)
5. Press the MENU button on the remote
controller to complete the setting.
Note
In normal/random playback or AMS play, fi les of
the selected range will be played.
2. 3. 4.
2. 3. 4.
1. 5.
PLAYING
1. 3.1.
3.
1. Press the POWER button on the unit to turn
on the power. Place the disc to be played in
the extended disc tray.
2. On closing the disc tray, after “TOC
Reading” has displayed, the title of fi le that
be played will be displayed.
3. Press the 3 button on the unit or remote
controller to start play. Adjust the volume
level at the amplifi er.
Pausing or stopping playback or CD
removal are carried out in the same way as
with an Audio CD. (See page 7)
Folder No. File No. File name
Note
There are certain playback functions, such as
program playback and pitch control, which cannot
be used when MP3, WMA or AAC fi les are being
played back.
SELECTING THE FOLDER TO
LISTEN TO
1.
2.
1. While not playing, select the folder using
the + or – buttons on the remote controller.
The folder name will be displayed.
2. Press the ENTER button on the remote
controller. The fi rst fi le name in the folder
will be displayed.
PLAYING A SPECIFIC FILE
¡/¢4/1
¢
4
ADVANCING TO A SUBSEQUENT FILE
Press the ¡/¢ button on the unit or ¢ button
on the remote controller for the number of times
equivalent to the number of fi les through which play
is to be advanced.
DISPLAYING TEXT INFORMATION
Each time the TEXT button on the remote controller
is pressed, the display will change in the order
shown below. During playback, mainly information
about the fi le currently playing will be displayed.
File Name (currently playing)
Song Title
Artist Name
Album Name
• Depending on the type of file being played,
information may not be displayed.
• Only alphanumeric characters can be displayed.
14
Tip
A maximum of 511 fi les, organized within up to 255
folders, can be played back per disc.
(The maximum number of folders plus fi les is 512.)
RETURNING TO THE START OF THE FILE
NOW PLAYING OR A PREVIOUS FILE
When the 4/1 button on the unit or 4 button
on the remote controller is pressed, play returns to
the start of the current fi le.
Pressing the same button several times will locate
the start of a fi le the equivalent number of fi le starts
before the current play position.
Page 21

ENGLISH
ADVANCED OPERATIONS –MP3, WMA, AND AAC FILES RECORDED ON A DISC–
PLAYING A SPECIFIC PART
OF A SPECIFIC FILE
While listening to a fi le being played, it is possible
to search a specifi c part of that fi le by a forward or
backward search.
¡/¢4/1
¡
1
FORWARD SEARCHING THROUGH THE
FILE NOW PLAYING
The search (forward search) mode is established by
holding down the ¡/¢ button on the unit or ¡
button on the remote controller. Holding down the
button initiates a forward search.
BACKWARD SEARCHING THROUGH THE
FILE NOW PLAYING
The search (backward search) mode is established
by holding down the 4/1 button on the unit or
1 button on the remote controller. Holding down
the button initiates a backward search.
REPEAT PLAY (PLAYING THE
SAME TRACKS REPEATEDLY)
PLAYING REPEATEDLY
REPEAT
All fi les or one fi le can be played repeatedly. The allfi le repeat function plays back all fi les on a disc or in
a folder, as previously set (see page 14).
Each time the REPEAT button on the remote
controller is pressed, the repeat function mode
changes, as shown below:
OFF
Press the 3 button to start the selected repeat play.
(See page 9.)
PLAYING A SPECIFIC PART REPEATEDLY
(A-B REPEAT)
This function repeatedly plays a specifi c part of a fi le
that you want to hear. (See page 9)
Note
• The A-B repeat play function cannot be used
during random play.
• There are cases in which difficulties will be
experienced, when setting the B point, if the fi leʼs
bit rate is low.
All
1
RANDOM PLAY (PLAYING
FILES IN A RANDOM SEQUENCE)
This function rearranges the fi les into a random
sequence and it then plays all the files in this
random sequence. If it is used together with repeat
play, the same fi les can be repeatedly played but in
a different sequence every time.
During play or stop, press the RANDOM button on
the remote controller. (See page 10)
Note
This function plays back all the fi les on a disc or in
a folder, as previously set (see page 14).
AMS PLAY (SEARCHING
FOR A SPECIFIC FILE)
AMS
You can play the fi rst 10 seconds of each fi le starting
from the fi rst fi le.
Press the AMS button on the remote controller to
automatically begin AMS play (see page 10).
Note
This function plays back all the fi les on a disc or in
a folder, as previously set (see page 14).
FUNCTIONS
NAMES AND
BASIC
CONNECTIONS
BASIC
OPERATIONS
ADVANCED
CONNECTIONS
ADVANCED
ADVANCED
OPERATIONS
OPERATIONS
TROUBLESHOOTING
15
OTHERS
Page 22

NAMES AND
FUNCTIONS
ENGLISH
ADVANCED OPERATIONS (USB/iPod OPERATION)
NORMAL PLAYBACK
CONNECTIONS
BASIC
2. 1. 3. 5.
OPERATIONS
CONNECTIONS
OPERATIONS
OPERATIONS
1. Connect the USB medium to the USB port
BASIC
ADVANCED
ADVANCED
ADVANCED
TROUBLESHOOTING
OTHERS
on the front panel.
2. Press the POWER switch to turn the unit
on.
The display cycles from “Power On” →
“TOC Reading” → “No Disc” (when no disc
is loaded).
3. Press the DISC MEDIA/USB button on the
front panel.
4. While the unit searches for USB media, the
display will read as follows.
When the unit finishes getting the USB
medium file information, the display
changes to the following.
78
Folder No. File No. File Name
Note
When no USB medium is connected, the display
cycles from “USB Reading” → “USB”.
5. Press the 2 button.
Selected fi le information within the menu
and time information are displayed.
Folder No. File No. Time Information
If the number of fi les exceeds 1,000, the
display will change, as shown below:
File Volume Time Information
TO STOP PLAYBACK
Press the 7 button.
TO PAUSE PLAYBACK
Press the 8 button.
Pause indicator “8”will light and playback is paused
at the point that the button is pressed.
To resume playback, press the 8 button again or
press the 2 button.
Tip
• When playing USB media fi les, the unit can play
up to 65,535 fi les, 700 folders, and a maximum of
8 levels.
• The iPodʼs equalizer cannot be operated from
the Marantz player. We recommend that you turn
“off” the iPodʼs equalizer before connecting the
iPod to the main unit.
• When connecting an iPod touch, make sure to
unlock the iPod touch.
• Random Play cannot be done for Podcasts.
• Do not use iTunes' individual track options
(equalizer presets, etc.) as the settings may not be
refl ected or malfunction may result.
• If, after connecting the iPod, it performs differently
than it has in the past, please reset the iPod and
try using it again.
• Some operations may differ depending on the
iPod model.
CHOOSING FILES FROM A DIFFERENT
FOLDER
1.
2.
1. While not playing, select the folder using
the + or – buttons on the remote controller.
2. Press the ENTER button on the remote
controller. The fi rst fi le name in the folder
will be displayed.
PLAYING A SPECIFIC FILE
¡/¢4/1
¢
4
the numeric
buttons 0-9
SPECIFYING A FILE NUMBER TO PLAY
(DIRECT SEARCH)
Specify a fi le number with numerical buttons (0-9)
on the remote controller.
(Example)
3rd fi le: Press “3”.
12th fi le: Press “1” and then press “2” (within
approximately 1.5 seconds).
IF A WRONG NUMBER IS PRESSED
If a fi le number that is not in the folder is specifi ed,
the display will return to its previous state.
Press the correct number.
16
Page 23

ENGLISH
ADVANCED OPERATIONS (USB/iPod OPERATION)
SKIPPING TO THE PREVIOUS OR NEXT
FILE (TRACK SKIP)
ADVANCING TO A SUBSEQUENT FILE
Press the ¡/¢ button on the unit or ¢
button on the remote controller a number of times
equivalent to the number of fi les through which play
is to be advanced.
RETURNING TO THE START OF THE CURRENT
FILE OR A PREVIOUS FILE
When the 4/1 button on the unit or 4 button
on the remote controller is pressed, play returns to
the start of the current fi le.
Pressing the same button several times will locate
the start of a fi le the equivalent number of fi le starts
before the current play position.
PLAYING YOUR FAVORITE
PARTS OF A TRACK (SEARCH)
¡/¢4/1
¡
1
The search mode is established by holding down
the 4/1 or ¡/¢ button on the player or
1/¡ button on the remote controller.
Note
Sounds do not come out during search operations.
USING “REPEAT PLAY” MODE
All fi les or one fi le can be played repeatedly. The allfi le repeat function plays back all fi les in a medium or
in a folder, as previously set (see page 18).
REPEAT
Each time the REPEAT button on the remote
controller is pressed, Repeat Play mode cycles in
the following order.
OFF
Press the 2 button to begin playback in the selected
repeat mode (see page 9).
All
1
RANDOM PLAY (PLAYING
TRACKS IN A RANDOM SEQUENCE)
You can randomly play songs.
RANDOM
AMS PLAY (SEARCHING FOR
A SPECIFIC FILE)
You can play the fi rst 10 seconds of each track
starting from the fi rst track.
Press the AMS button on the remote controller to
automatically begin AMS play (see page 10).
AMS
Tip
This function plays back all the songs in a medium
or in a folder, as previously set (see page 18).
FUNCTIONS
NAMES AND
BASIC
CONNECTIONS
BASIC
OPERATIONS
ADVANCED
CONNECTIONS
ADVANCED
ADVANCED
OPERATIONS
OPERATIONS
During stop, press the RANDOM button on the
remote controller. (See page 10)
Tip
This function plays back all the songs in a medium
or in a folder, as previously set (see page 18).
TROUBLESHOOTING
OTHERS
17
Page 24

NAMES AND
FUNCTIONS
ADVANCED OPERATIONS (USB/iPod OPERATION)
ENGLISH
USB MEDIUM OPERATION
The USB medium works in the following hierarchical
logic.
CONNECTIONS
USBSetup=>
BASIC
OPERATIONS
BASIC
CONNECTIONS
OPERATIONS
OPERATIONS
TROUBLESHOOTING
OTHERS
iPodSetup=>
ADVANCED
ADVANCED
ADVANCED
* Default setting
FILE INFORMATION DISPLAY SELECTION
You can view MP3 tags and other fi le information
when playing a USB medium.
FileInfo=>
RangeSpec
=>
Resume
=>
Database=>
FileInfo
=>
Resume
=>
1FileName*
2Title
3Artist
4Album
5Time
1All*
2Folder
1Off*
2On
5.
2. 3. 4.
1. During stop, press the MENU button on the
remote controller.
2. Use the 4, ¢ buttons to display “USB
Setup=>” and press ENTER button on the
remote controller.
3. Use the 4, ¢ buttons to display “File
Info=>” and press ENTER button on the
remote controller.
4. To view file names, use the 4 , ¢
buttons to display “1 File Name” and press
ENTER button on the remote controller.
To view track titles, use the 4, ¢ buttons
to display “2 Title” and press ENTER button
on the remote controller.
To view artist names, use the 4, ¢
buttons to display “3 Artist” and press
ENTER button on the remote controller.
To view album names, use the 4, ¢
buttons to display “4 Album” and press
ENTER button on the remote controller.
To always view time information without
viewing fi le information, use the 4, ¢
buttons to display “5 Time” and press
ENTER button on the remote controller.
5. Press the MENU button on the remote
controller unit to complete the setting.
• Press the TEXT button on the remote
controller during normal playback to
view selected fi le information.
• Press the TEXT button again to view the
track title. If “track title” was the selected
fi le information option, then the artist
name will be displayed.
• Each time the TEXT button on the remote
controller is pressed, the display changes
in the following order: Track Title → Artist
Name → Album Name →Track Title.
SELECTING A RANGE OF FILES TO BE
PLAYED
You can select whether all fi les in USB media or the
fi les in a specifi c folder are to be played.
2. 3. 4.
2. 3. 4.
1. 5.
1. During stop, press the MENU button on the
remote controller.
2. Press the 4 or ¢ button several times
to display “USB Setup =>” on the display,
then press the ENTER button on the remote
controller.
3. Use the 4 or ¢ button to display “Range
Spec=>” on the display, then press the
ENTER button on the remote controller.
4. To play all fi les in USB media, display “1
All”, using the 4 or ¢ button, then
press the ENTER button on the remote
controller.
To play the fi les in a specifi c folder, display
“2 Folder” on the display using the 4 or
¢ button, then press the ENTER button
on the remote controller.
(At the time of purchase, this is set to “1
All”.)
5. Press the MENU button on the remote
controller to complete the setting.
PLAYING TRACKS FROM WHERE THEY
WERE PREVIOUSLY STOPPED (RESUME
PLAY)
2. 3. 4.
2. 3. 4.
1. 5.
1. During stop, press the MENU button on the
remote controller.
2. Use the 4, ¢ buttons to display “USB
Setup=>” or “iPod Setup” and press ENTER
button on the remote controller.
3. Use the 4 , ¢ buttons to display
“Resume=>” and press ENTER button on
the remote control.
4. To enable Resume Play, use the 4, ¢
buttons to display “2 On” and press ENTER
button on the remote controller.
To disable Resume Play, use the 4, ¢
buttons to display “1 Off” and press ENTER
button on the remote controller.
5. Press the MENU button on the remote
controller to complete the setting.
Note
• Resume Play only works when an identical USB
medium is inserted. If another USB medium is
inserted, the unit will start playing from the fi rst
fi le.
• The unit may not play your desired fi le if fi les have
been added to or deleted from the identical USB
medium.
• In the case of an iPod, playback will be resumed
from the beginning of the current fi le.
18
2. 3. 4.
1. 5.
Page 25

ENGLISH
ADVANCED OPERATIONS (USB/iPod OPERATION)
iPod OPERATION
The iPod works in the following hierarchical logic.
iPodSetup=>
* Default setting
Database=>
FileInfo=>
Resume=>
iPod DATABASE SELECTION
1. During stop, press the MENU button on the
remote controller.
2. Use the 4, ¢ buttons to display “iPod
Setup=>” and press ENTER button on the
remote controller.
3. Use the 4 , ¢ buttons to display
“Database=>” and press ENTER button on
the remote controller.
1Album*
2Artist
3Genre
4Playlist
5Track
1Title*
2Artist
3Album
4Time
1Off*
2On
2. 3. 4.
2. 3. 4.
1. 5.
4. To select albums by album name, use the
4, ¢ buttons to display “1 Album”
and press ENTER button on the remote
controller.
To select albums by artist name, or if you
would like to play all tracks for a selected
artist, use the 4, ¢ buttons to display
“2 Artist” and press ENTER button on the
remote controller.
To select artists by genre, use the 4, ¢
buttons to display “3 Genre” and press
ENTER button on the remote controller.
To play tracks in a playlist, display “4
Playlist”, using the 4 or ¢ button, then
press the ENTER button on the remote
controller.
To play tracks without using the database,
use the 4, ¢ buttons to display “5
Track” and press ENTER button on the
remote controller.
5. Press the MENU button on the remote
controller to complete the setting.
Note
Please refer to your iPod for information on how to
use with each database.
SELECTING FILES BY ANOTHER ARTIST
CANCEL
+
–
3
¢
4
ENTER
When the iPod database is set to “Artist”
1. Press the +, – button and search for your
desired artist.
Press the CANCEL button on the remote
controller and the currently selected artist
will be cancelled.
2. When your desired artist is displayed, press
ENTER button on the remote controller and
either “All Album”, album name, or track
title will be displayed.
(Selecting from All Album)
3. When selecting from “All Album”, press
ENTER button on the remote controller and
the title of the fi rst track by the artist will be
displayed.
4. Use the 4 or ¢ button to select your
desired fi le. Press the 3 button to register
the selection and play.
(Selecting from Album)
3. When selecting from “Album”, press the
+, – button on the remote controller and
the names of albums by the artist will be
displayed.
4. When your desired album is displayed,
press ENTER button on the remote
controller and the title of the fi rst track from
the album will be displayed.
5. Use the 4 or ¢ button to select your
desired fi le. Press the 3 button to register
the selection and play.
Tip
You can also use the remote controllerʼs numeric
keys 0-9 to select albums or fi les.
Please refer to your iPod for information on how to
use with each database.
SELECTING FILES FROM A DIFFERENT
GENRE
CANCEL
+
–
3
¢
4
ENTER
When the iPod database is set to “Genre”
1. Press the +, – button on the remote
controller to display your desired genre.
Press the CANCEL button on the remote
controller and the currently selected
database will be cancelled. When the
selected database is canceled, all currently
selected tracks will be displayed.
FUNCTIONS
NAMES AND
BASIC
CONNECTIONS
BASIC
OPERATIONS
ADVANCED
CONNECTIONS
ADVANCED
ADVANCED
OPERATIONS
OPERATIONS
TROUBLESHOOTING
OTHERS
19
Page 26

NAMES AND
FUNCTIONS
ADVANCED OPERATIONS (USB/iPod OPERATION)
ENGLISH
2. When your desired genre is displayed, press
ENTER button on the remote controller and
either “All Artist” or artist name will be
CONNECTIONS
BASIC
OPERATIONS
BASIC
CONNECTIONS
ADVANCED
OPERATIONS
OPERATIONS
ADVANCED
ADVANCED
displayed.
3. Press the +, – button on the remote
controller and select either “All Artist” or
an artist name. Press the ENTER button,
and either “All Album” or an album name
will be displayed.
(Selecting from All Album)
4. Select “All Album” and press the ENTER
button, and the title of the fi rst track from
the selected artist will be displayed.
5. Use the 4 or ¢ button to select your
desired fi le. Press the 3 button to register
the selection and play.
(Selecting from Album)
4. Select an album name and press the
ENTER button, and the name of the fi rst fi le
from the selected album will be displayed.
5. Use the 4 or ¢ button to select your
desired fi le. Press the 3 button to register
the selection and play.
SELECTING FILES FROM A DIFFERENT
ALBUM
TROUBLESHOOTING
OTHERS
When the iPod database is set to “Album”
1. 2.
3.
3.
2.
1. Press the +, – button on the remote controller
to display the name of the current album.
2. Press the + or – button, and when your
desired album is displayed, press the
ENTER button on the remote controller.
The title of the fi rst track from the album
will be displayed
3. Use the 4 or ¢ button to select your
desired fi le. Press the 3 button to register
the selection and play.
Tip
You can also use the remote controllerʼs numeric
keys 0-9 to select albums or fi les.
FILE INFORMATION DISPLAY SELECTION
5.
2. 3. 4.
2. 3. 4.
1. 5.
You can view fi le information when playing iPod
fi les.
1. During stop, press the MENU button on the
remote controller.
2. Use the 4, ¢ buttons to display “iPod
Setup=>” and press ENTER button on the
remote controller.
3. Use the 4, ¢ buttons to display “File
Info=>” and press ENTER button on the
remote controller.
4. To view track titles, use the 4, ¢ buttons
to display “1 Title” and press ENTER button
on the remote controller.
To view artist names, use the 4, ¢
buttons to display “2 Artist” and press
ENTER button on the remote controller.
To view album names, use the 4, ¢
buttons to display “3 Album” and press
ENTER button on the remote controller.
To always view time information without
viewing fi le information, use the 4, ¢
buttons to display “4 Time” and press
ENTER button on the remote controller.
5. Press the MENU button on the remote
controller to complete the setting.
• Press the TEXT button on the remote
controller during normal playback to
view selected fi le information.
• Press the TEXT button again to view the
track title. If “track title” was the selected
fi le information option, then the artist
name will be displayed.
• Each time the TEXT button on the remote
controller is pressed, the displayed
information changes in the following
order: Track Title→Artist Name→Album
Name→Track Title.
OPERATING AN iPod WITH ITS OWN
CONTROLS
You can specify whether operation of an iPod is
performed with its own controls or from this unit.
2. 3. 4.
2. 3. 4.
1. 5.
1. During stop, press the MENU button on the
remote controller.
2. Use the 4 or ¢ button to display “iPod
Setup =>” on the display, then press the
ENTER button on the remote controller.
3. Use the 4 or ¢ button to display “iPod
Ctrl =>” on the display, then press the
ENTER button on the remote controller.
4. To operate the iPod with its own controls,
display “1 Direct”, using the 4 or ¢
button, then press the ENTER button on the
remote controller.
To operate the iPod from this unit or
this unit’s remote controller, display “2
Remote”, using the 4 or ¢ button,
then press the ENTER button on the remote
controller.
5. Press the MENU button on the remote
controller to complete the setting.
Note
With the “1 Direct” setting, you can use the Play,
Pause, Next, Previous, and Stop commands from
the remote controller.
When a 1G Nano or 5G iPod is connected with the
“1 Direct” setting, the setting will be automatically
changed to “2 Remote” as these models do not
support this function.
20
Page 27

TROUBLESHOOTING
If you have any problem using this product, please be sure to check the items in the following table.
If you trouble cannot be solved, please unplug the power cord immediately and contact your Marantz authorized dealer or service center.
GENERAL
DISC PLAYBACK
ENGLISH
FUNCTIONS
NAMES AND
Symptom Cause Solution Page
Plug the AC power cord fi rmly into
No power.
No sound or
distorted sound.
No sound from
the connected
headphones or
distorted sound.
No digital audio
output.
This unit cannot
be controlled
with the remote
controller.
The AC power cord is not properly
connected.
The output cables are not fi rmly
connected.
The analog outputs of this unit are
connected with the PHONO input
connectors of the amplifi er.
Improper amplifi er operation.
Playback of this unit is paused. Press the Play button. 7
The headphones plug is not fi rmly
connected.
The headphones level is set to the
minimum.
The digital output setting is set to
OFF.
The AUDIO EX setting is set to 2. Set AUDIO EX to 1. 13
The batteries of the remote
controller are exhausted.
The remote controller is located
outside its operable range.
Some object is placed between
the unit and remote controller.
The remote sensor of the unit is
exposed to strong light.
The EXTERNAL/INTERNAL
switch on the rear panel is set to
EXTERNAL.
the unit.
Plug the AC power plug fi rmly into
a wall outlet.
Connect the output cables fi rmly
into the connectors of this unit and
the amplifi er.
Do not connect the analog outputs
of this unit with the PHONO input
connectors of the amplifi er.
Confi rm the input selection, audio
volume adjustment, and speaker
settings of the amplifi er.
Insert the headphones plug fi rmly
into the headphones jack of this
unit.
Adjust the headphones level. 4
Set the digital output setting to
ON.
Replace with new batteries. 3
Check the operable range of the
remote controller and use it within
that range.
Remove the object. 3
Avoid exposing the remote sensor
to the strong light.
Set the EXTERNAL/INTERNAL
switch to INTERNAL.
6
6
6
6
6
4
13
3
3
6, 8
Symptom Cause Solution Page
No playback with
a disc.
No playback with
a CD-R/CD-RW
disc.
The disc is not loaded properly in
the tray.
The disc is placed upside-down.
(The label of the disc is facing
down.)
The disc is dirty. Clean the disc’s surface. 26
The disc is scratched.
The disc is warped.
A disc that is not supported by this
unit is attempted to be played.
Condensation has formed on the
lens inside this unit.
The disc has not been fi nalized.
The recorded data are not in
CDDA format for music. Or, an
MP3/WMA/AAC fi le has not been
recorded properly.
Load the disc properly. 7
Place the disc with its label facing
upward.
A disc with many scratches may
not be playable.
The disc may be unable to be
played if it is badly warped.
Use a disc that is supported by
this unit.
Turn on the unit then wait for
about 30 minutes before turning it
back on again and using it.
Perform fi nalization of the disc,
using writing software.
Record data in a proper format
supported by this unit.
7
26
26
23, 24
2
24
24
BASIC
CONNECTIONS
BASIC
OPERATIONS
ADVANCED
CONNECTIONS
ADVANCED
OPERATIONS
TROUBLESHOOTING
TROUBLESHOOTING
OTHERS
21
Page 28

NAMES AND
FUNCTIONS
TROUBLESHOOTING
ENGLISH
USB PLAYBACK
Symptom Cause Solution Page
CONNECTIONS
OPERATIONS
CONNECTIONS
OPERATIONS
TROUBLESHOOTING
TROUBLESHOOTING
“OverCurrent” is
displayed on the
BASIC
display.
“FAT Error” or
“Cluster Err” is
displayed on the
display.
“No File” is
BASIC
displayed on the
display.
“DRM Stream” is
displayed on the
display.
ADVANCED
“Can'tConnect” is
displayed on the
display.
It takes substantial
time for reading
data from the USB
ADVANCED
device.
No sound or
distorted sound.
The overcurrent protection
function for the USB connector of
this unit was activated.
A fi le system not supported
is used. Or, this unit does not
support a USB memory device
whose capacity is 128 MB or less.
No fi le exists that can be played
with this unit.
The corresponding fi le is protected
by digital-rights management.
A device that cannot be recognized
by this unit is connected.
It takes substantial time for
reading data if the number of
folders and fi les is large.
This unit is used an extension for
the USB cable.
This unit is in disc media play
mode.
The USB device is not fi rmly
connected with this unit.
The USB device is damaged. Replace the USB device. –
The USB device is connected to
this unit via a USB hub.
That USB device is not supported.
Use a USB device whose
operating load current is 500 mA
or less.
Use a USB memory device whose
capacity is more than 256 MB and
has been formatted in a supported
fi le system (FAT32 or FAT).
Check the supported formats of
this unit.
Playback is not possible because
the corresponding fi le is protected
by digital-rights management that
is not supported by this unit.
Some fi les stored in USB devices
belonging to a class of USB mass
storage cannot be played back.
(This does not constitute a failure.)
Wait until reading is completed. –
Do not use an extension for the
USB cable.
Press the DISC MEDIA/USB
button to change to USB device
play mode.
Firmly connect the USB device
with this unit.
Do not connect the USB device via
a USB hub.
23, 24
8, 16
24
23
24
16
iPod PLAYBACK
Symptom Cause Solution Page
No playback
–
8
8
when an iPod is
connected.
No sound.
The iPod was in inoperable mode
when it was connected.
The 5th-generation and earlier
iPods are unsupported.
Set the iPod to an operable mode
then connect it to this unit.
See “iPod OPERATION”. 24
–
OTHERS
22
Page 29

OTHERS
ENGLISH
ABOUT WMA PLAYBACK
• Windows Media is a trademark of the Microsoft
Corporation in the US and other countries.
• WMA is an abbreviation for “Windows Media
Audio” and is an audio compression technology
developed by the Microsoft Corporation. WMA
data may be encoded using Windows Media
Player Ver. 7, 7.1, Windows Media® Player for
Windows® XP, or Windows Media® Player 9
Series.
• Use discs recorded conforming to the ISO
9660 Level 1/Level 2 CD-ROM fi le system and
extended format (Joliet, Romeo).
• WMA fi les having DRM copy protection cannot
be played.
• Encode WMA fi les using applications that have
received Microsoft Corporation certifi cation. If an
uncertifi ed application is used, it may not operate
normally.
• Titles, artist names, and album titles are displayed
as text information.
• The TEXT display is alphanumeric only. If nonalphanumeric characters have been recorded, the
characters will be displayed as “*”.
®
ABOUT WINDOWS MEDIA DRM
Windows Media Digital Rights Management (DRM)
(referred to below as WMDRM) is a platform
to prevent playback on computers, digital audio
players, network devices and the like in order to
securely distribute digital content.
Content protected by WMDRM may be played back
only when connected to a media server that has
WMDRM functionality.
This system does no comply with any contents
protected by WMDRM.
WMA FILES
Conforming to Microsoft Windows
Media Audio 9.2
The following are unsupported
Standard
Extension .wma
Bit rate
[kbps]
Sampling
frequency
[kHz]
Channels 2ch (Stereo)
• WMA9 Series Professional
• WMA9 Series Voice
• WMA9 Series Lossless
• WMA with Video
Disc media: 48–192
USB media: 48–320
44.1
ABOUT MP3 PLAY BACK
• Use discs recorded conforming to the ISO
9660 Level 1/Level 2 CD-ROM fi le system and
extended format (Joliet, Romeo).
• “No File” is displayed when an attempt is made
to play the MPEG1 Audio Layer-3 fi les that are not
recorded at sampling frequencies specifi ed for
the device. This device cannot play such fi les.
• Variable Bit Rate (VBR) is not supported (when
playback is possible, the time display in the
display window will speed up and slow down).
• For audio quality, a recording rate of 128 kbps or
higher is recommended.
• Titles, artist names, and album titles are displayed
as text information.
• The TEXT display is alphanumeric only. If nonalphanumeric characters have been recorded, the
characters will be displayed as “*”.
MP3 FILES
Standard MPEG-1 Audio Layer3
Extension .mp3
Bit rate
[kbps]
Sampling
frequency
[kHz]
Channels 2 ch (Stereo)
Emphasis OFF
For MPEG-1 Audio Layer3,
32 - 320
For MPEG-1 Audio Layer3,
32/44.1/48
ABOUT AAC PLAYBACK
• AAC is an abbreviation for “Advanced Audio
Coding”. It is the basic format related to the audio
compression technology used in MPEG-2 and
MPEG-4.
• Playing of AAC files that have the extension
“.m4a” encoded using iTunes® is supported
with this device. However, fi les may be unable
to be played due to having DRM copy protection
(copyright protection) or because of the version of
iTunes they have been encoded with.
• iTunes is a trademark of Apple Inc. that is
registered in the US and other countries.
• This applies to fi les created with iTunes.
• Titles, artist names, and album titles are displayed
as text information.
• The TEXT display is alphanumeric only. If nonalphanumeric characters have been recorded, the
characters will be displayed as “*”.
Standard MPEG-4/AAC LC (Low Complexity)
Extension .m4a
Bit rate
[kbps]
Sampling
frequency
[kHz]
Channels 2 ch (Stereo)
8 - 320
32/44.1/48
FUNCTIONS
NAMES AND
BASIC
CONNECTIONS
BASIC
OPERATIONS
ADVANCED
CONNECTIONS
ADVANCED
OPERATIONS
ABOUT WAV PLAYBACK
USB MEDIUM ONLY
• Some WAV fi les cannot be played back, depending
on the software used for fi le creation.
Standard RIFF Waveform Audio Format
Format Linear PCM
Extension .wav
Sampling
frequency
[kHz]
Number of
bits [bit]
Channels 2 ch (Stereo)
Textual
information
Linear PCM: PCM 32/44.1/48
Those other than the above, not
supported.
Linear PCM: 16
None
TROUBLESHOOTING
OTHERSOTHERS
23
Page 30

NAMES AND
FUNCTIONS
OTHERS
ENGLISH
ABOUT iPod PLAY BACK
• Supported iPod Models
CONNECTIONS
OPERATIONS
CONNECTIONS
OPERATIONS
Made for
BASIC
BASIC
ADVANCED
ADVANCED
TROUBLESHOOTING
OTHERSOTHERS
• iPod touch
• iPod classic
• iPod with video
• iPod nano (4th generation)
• iPod nano (3rd generation)
• iPod nano (2nd generation)
• iPod nano (1st generation)
• Some operations may differ depending on the
iPod model.
• If the iPod’s software is old, it may not operate
properly. Please be sure to use up-to-date iPod
software.
• The TEXT display is alphanumeric only. If nonalphanumeric characters have been recorded in
the iPod, the characters will be displayed as “*”.
• The iPod is a device licensed for the private
duplication and playback of uncopyrighted material
or material for which duplication and playback are
legally permitted. Violation of copyright is legally
prohibited.
• The iPod equalizer cannot be operated from the
unit. Before connecting an iPod to this unit, it is
recommended that the iPod equalizer be set to
“OFF”.
• It is recommended to set “Clicker/Sound Effects”
setting of the iPod to “Off” or “Speaker”.
• Please note that we offer no compensation if
problems occur in the iPod data when using this
unit with an iPod.
• Any fi les that can be played on an iPod (AAC,
MP3, WMA, Apple Lossless, WAV and AIFF) can
be played on this unit.
• “Made for iPod” means that an electronic
accessory has been designed to connect
specifi cally to iPod and has been certifi ed by the
developer to meet Apple performance standards.
Apple is not responsible for the operation of
this device or its compliance with safety and
regulatory standards.
iPod is a trademark of Apple Inc. registered in the
US and other countries.
PLAYING CD-R/CD-RW DISCS
This unit can play back the CD-RW (ReWritable)
discs as well as ordinary Audio CD and CD-R
(Recordable) discs.
• The CD-R and CD-RW discs should contain
properly-recorded TOC* information so that they
can be played back. In CD recorders, the task of
writing TOC information is referred to as fi nalizing
the disc. Discs that are not fi nalized cannot be
properly recognized as an Audio CD and played
back by regular CD players and Super Audio CD
players. For details, please read the instruction
manual provided with a CD recorder.
* TOC stands for Table Of Contents and contains
information such as the total number of tracks
and total playing time of the disc.
• This unit can play CD format, and CD-R/CD-RW
discs which contain WMA/MP3/AAC music data.
However, some discs may have problems such
as unable to play, noise or sound distortion.
• This device is exclusively a playback device. It
cannot record CD-R/CD-RW discs.
• As the playback of a CD-RW disc necessitates
partial change of the player setup, it may take
longer time for reading the TOC information than
when an Audio CD or CD-R disc is played.
• Depending on the application settings and
environment, discs recorded with a personal
computer may not be able to be played. Please
record with the correct format. (For details,
please inquire at your application sales agent.)
• Discs recorded with the packet writing system
cannot be played.
• Mixed mode CD/enhanced CD and DTS CD discs
cannot be played.
ABOUT PLAYING
COPY-CONTROLLED CDs
Some copy-controlled CDs may not conform to
offi cial CD standards. They are special discs and
may not play on the unit.
ABOUT DUALDISC PLAYBACK
• “DualDisc” contains DVD-standard-compliant
video and audio on one side and audio for playing
on a CD player on the other side, respectively.
• Since the non-DVD audio side does not conform
to common CD physical standards, it may not be
able to be played.
• In regard to details such as “DualDisc”
specifi cations and standards, please inquire at
your selling agent or distributor.
ABOUT USB MEDIA
• Music files cannot be played by connecting
this unit to a personal computer with a USB
cable. This is a device that belongs to a class
of USB mass storage such as USB memory
(FAT16, FAT32 format supported), which this unit
supports.
• There are cases where playback of all USB
memory or supplying electrical power cannot
be guaranteed. In addition, please note that we
cannot assume any responsibility in the unlikely
event of loss of USB memory fi les.
24
Page 31

ENGLISH
OTHERS
SPECIFICATIONS
AUDIO CHARACTERISTICS
Channels ....................................................................................................................................2 channels
Frequency response ........................................................................................................... 2 Hz to 20 kHz
Dynamic range ................................................................................................................................ 100 dB
Signal-to-noise ratio (A-weighted) ................................................................................................ 110 dB
Channel separation (1 kHz) ............................................................................................................ 110 dB
Harmonic distortion (1 kHz) ...........................................................................................................0.002%
Wow & flutter .............................................................................................................. Precision of quartz
Audio output ................................................................................................................ 2.35 V rms, stereo
Headphone output (variable maximum) ...................................................................... 18 mW/32 ohms
Digital output
Coaxial output (pin jack) ...........................................................................................0.5 Vp-p, 75 ohms
Optical output (square optical connector) .......................................................................................................
OPTICAL READOUT SYSTEM
Laser .....................................................................................................................AlGaAs semiconductor
Wavelength .................................................................................................................................... 780 nm
SIGNAL SYSTEM
Sampling frequency ..................................................................................................................... 44.1 kHz
Quantization ...................................................................................................................16-bit linear PCM
POWER SUPPLY
-19 dBm
DIMENSIONS
(Unit: mm (in))
440 (17-3/8)
6.5 (5/16)4 (3/16)
339 (13-3/8)
328.5 (12-15/16)
FUNCTIONS
NAMES AND
BASIC
CONNECTIONS
BASIC
OPERATIONS
ADVANCED
CONNECTIONS
ADVANCED
OPERATIONS
Power requirement ...................................................................................................... AC 230 V 50/60 Hz
Power consumption .......................................................................................................................... 19 W
Standby power consumption .......................................................................................................... 0.3 W
This unit’s specifi cations and exterior are subject to change without notice for improvements.
Weight: 6.6 kg
90.5 (3-5/8)
106 (4-3/16)
15.5 (5/8)
CLASS 1 LASER PRODUCT
LUOKAN 1 LASERLAITE
KLASS 1 LASERAPPARAT
TROUBLESHOOTING
OTHERSOTHERS
25
Page 32

NAMES AND
FUNCTIONS
OTHERS
ENGLISH
NOTES ABOUT THE DISCS
* Handle the discs carefully so as not to
CONNECTIONS
BASIC
OPERATIONS
BASIC
CONNECTIONS
ADVANCED
OPERATIONS
ADVANCED
TROUBLESHOOTING
OTHERSOTHERS
scratch their surfaces.
* Keep the surfaces of the discs clean at all
times.
When cleaning the surfaces of discs, always be sure
to use the special cleaner and wipe the surfaces in
the directions shown in the fi gure below.
• Wipe the surface
radially from the
center.
* Do not attach pieces of paper or stickers
to the label surfaces of the discs.
When a disc has a piece of plastic tape or rental
CD label with paste protruding from the edge or
when a disc still bears traces of sticky tape or
adhesive labels, do not attempt to play it. If such a
disc is played on the CD player, you may fi nd that
you cannot remove it or that some other kind of
malfunctioning may occur.
• Do not wipe the surface
in the circumferential
direction.
* Do not use discs which come in special
shapes.
Do not attempt to play heart-shaped or octagonal
discs or discs with any other special shapes. You
may find that you cannot remove them or that
some other kind of malfunctioning may occur in
the player.
* Use discs which satisfy the CD standards
such as those with the “CD logo”, “
” or “
surfaces.
No guarantees are made for playback if discs which
do not satisfy the appropriate CD standards are
used.
Similarly, no guarantees are made for their sound
quality even if it is possible to play such discs.
” mark on their disc label
TEXT
* To protect your discs from damage, avoid
placing them in the following locations.
• Where they will be exposed to direct sunlight or
where they will be close to a heater or other heatradiating appliance
• Where the humidity level is high or it is very
dusty
• Near a window or other such location where they
may be exposed to rain
* Get into the habit of putting the discs
back in their cases after use.
CLEANING OF EQUIPMENT
EXTERNAL SURFACES
The exterior fi nish of your unit will last indefi nitely
with proper care and cleaning, Never use scouring
pads, steel wool, scourging powders or harsh
chemical agents (e.g., lye solution), alcohol, thinner,
benzine, insecticide or other volatile substances as
these wil mar the fi nish of the equipment. Likewise,
never use cloths containing chemical substances. If
the equipment get dirty, wipe the external surfaces
with a soft, lint-free cloth.
If the equipment becomes heavily soiled:
• Dilute some washing up liquid in water, in a ratio
of one part detergent to six parts water.
• Dip a soft, lint free in the solution and wring the it
is damp.
• Wipe the equipment with the damp cloth.
• Dry the equipment by wiping it with a dry cloth.
REPAIRS
Only the most competent and qualified service
technicians should be allowed to service the
factory-trained warranty station personnel have
the knowledge and special facilities needed for
repair and calibration of this precision equipment.
After the warranty period has expired, repairs will
be performed for a charge if the equipment can be
returned to normal operation.
In the event of diffi culty, refer to your dealer or write
directly to the nearest location to you that is listed
on the Marantz Authorized Service Station list. If
writing, please include the model and serial number
of the equipment together with a full description of
what you think is abnormal about the equipment’s
behaviour.
26
Page 33

www.marantz.com
You can find your nearest authorized distributor or dealer on our website.
is a registered trademark.
Printed in China 05/2009 541110298038M mzh-d
 Loading...