

Page 1
Model CD5400 User Guide
CLASS 1 LASER PRODUCT
LUOKAN 1 LASERLAITE
KLASS 1 LASERAPPARAT
Compact Disc Player
Page 2
IMPORTANT SAFETY
INSTRUCTIONS
READ BEFORE OPERATING EQUIPMENT
This product was designed and manufactured to meet strict quality and
safety standards. There are, however, some installation and operation
precautions which you should be particularly aware of.
1. Read Instructions – All the safety and operating instructions
should be read before the product is operated.
2. Retain Instructions – The safety and operating instructions should
be retained for future reference.
3. Heed Warnings – All warnings on the product and in the operating
instructions should be adhered to.
4. Follow Instructions – All operating and use instructions should be
followed.
5. Cleaning – Unplug this product from the wall outlet before
cleaning. Do not use liquid cleaners or aerosol cleaners. Use a
damp cloth for cleaning.
6. Attachments – Do not use attachments not recommended by the
product manufacturer as they may cause hazards.
7. Water and Moisture – Do not use this product near water-for
example, near a bath tub, wash bowl, kitchen sink, or laundry tub,
in a wet basement, or near a swimming pool, and the like.
8. Accessories – Do not place this product on an unstable cart,
stand, tripod, bracket, or table. The product may fall, causing
serious injury to a child or adult, and serious damage to the
product. Use only with a cart, stand, tripod, bracket, or table
recommended by the manufacturer, or sold with the product. Any
mounting of the product should follow the manufacturer’s
instructions, and should use a mounting accessory recommended
by the manufacturer.
9. A product and cart combination should be moved with care. Quick
stops, excessive force, and uneven surfaces may cause the
product and cart combination to overturn.
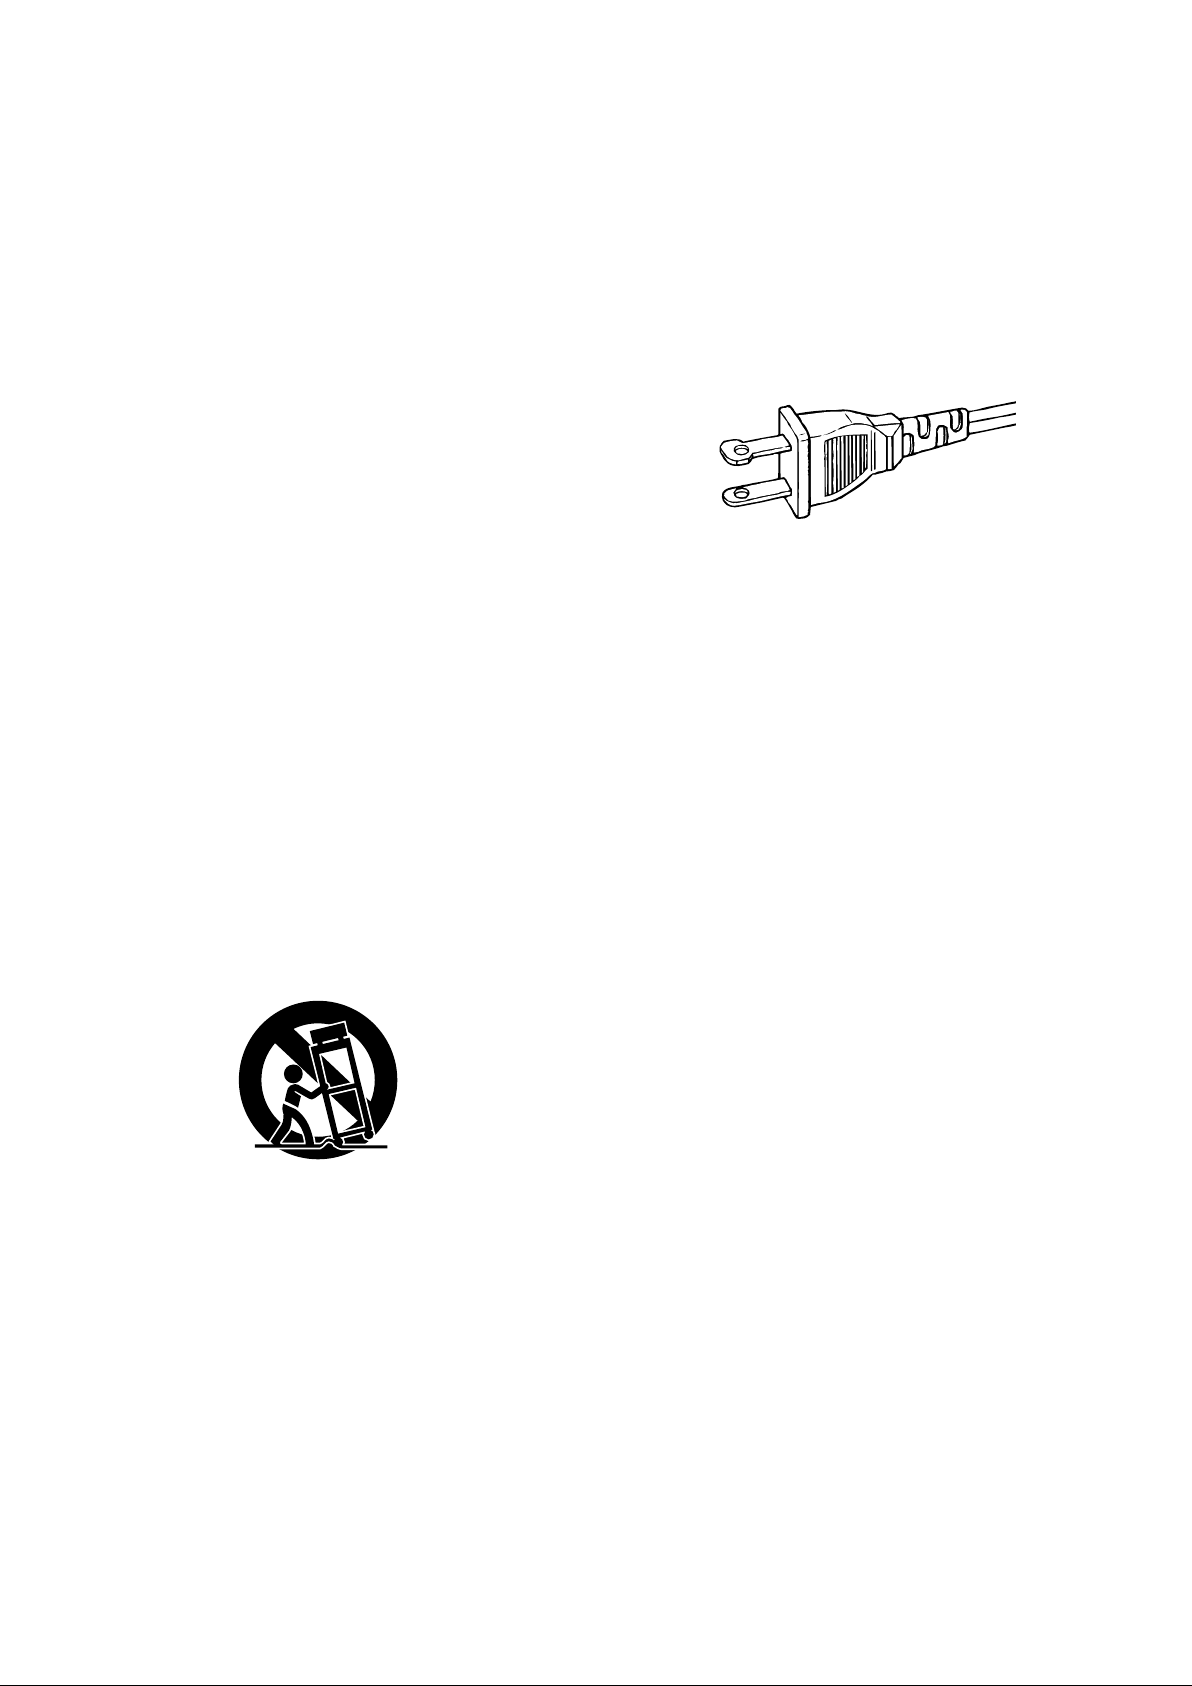
12. Grounding or Polarization – This product may be equipped with a
polarized alternating-current line plug (a plug having one blade
wider than the other). This plug will fit into the power outlet only
one way. This is a safety feature. If you are unable to insert the
plug fully into the outlet, try reversing the plug. If the plug should
still fail to fit, contact your electrician to replace your obsolete
outlet. Do not defeat the safety purpose of the polarized plug.
AC POLARIZED PLUG
13. Power-Cord Protection – Power-supply cords should be routed so
that they are not likely to be walked on or pinched by items placed
upon or against them, paying particular attention to cords at plugs,
convenience receptacles, and the point where they exit from the
product.
14. Protective Attachment Plug – The product is equipped with an
attachment plug having overload protection. This is a safety
feature. See Instruction Manual for replacement or resetting of
protective device. If replacement of the plug is required, be sure
the service technician has used a replacement plug specified by
the manufacturer that has the same overload protection as the
original plug.
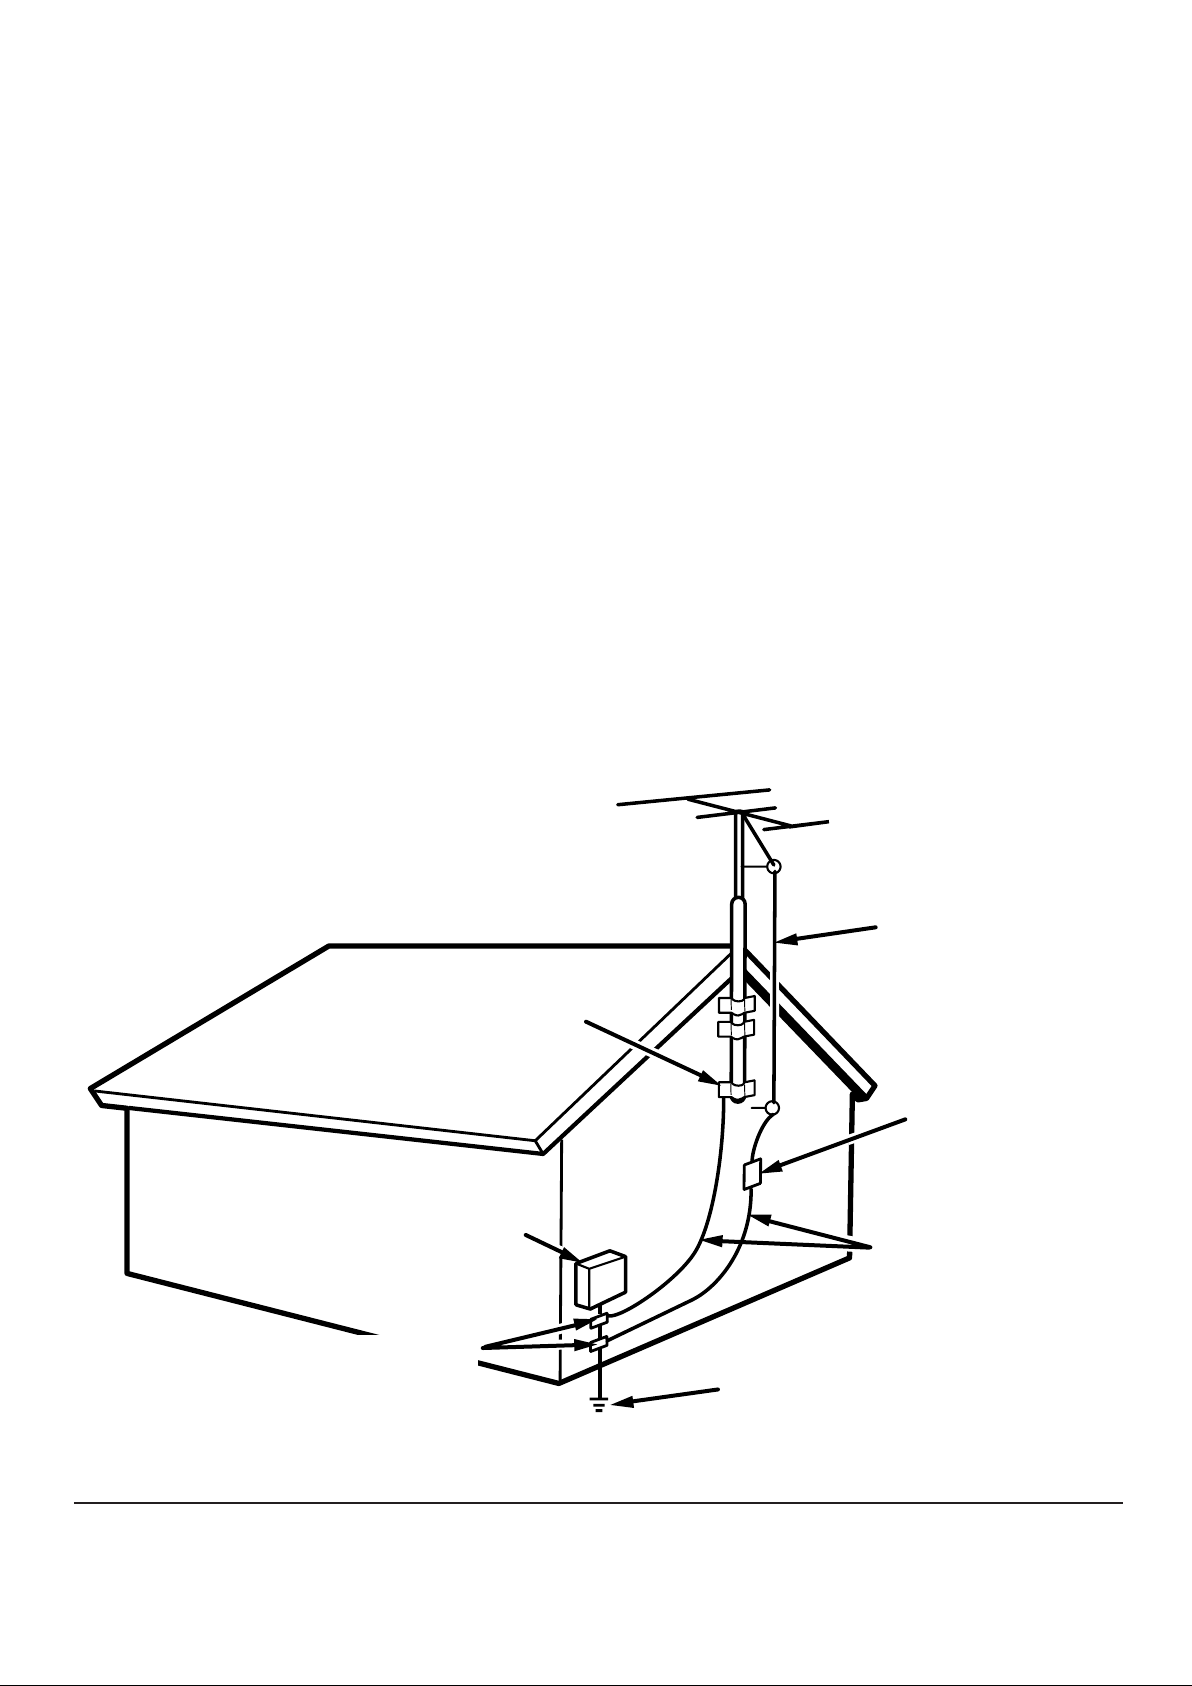
15. Outdoor Antenna Grounding – If an outside antenna or cable
system is connected to the product, be sure the antenna or cable
system is grounded so as to provide some protection against
voltage surges and built-up static charges. Article 810 of the
National Electrical Code, ANSI/NFPA 70, provides information
with regard to proper grounding of the mast and supporting
structure, grounding of the lead-in wire to an antenna discharge
unit, size of grounding conductors, location of antenna-discharge
unit, connection to grounding electrodes, and requirements for the
grounding electrode. See Figure 1.
10. Ventilation – Slots and openings in the cabinet are provided for
ventilation and to ensure reliable operation of the product and to
protect it from overheating, and these openings must not be
blocked or covered. The openings should never be blocked by
placing the product on a bed, sofa, rug, or other similar surface.
This product should not be placed in a built-in installation such as
a bookcase or rack unless proper ventilation is provided or the
manufacturer’s instructions have been adhered to.
11. Power Sources – This product should be operated only from the
type of power source indicated on the marking label. If you are not
sure of the type of power supply to your home, consult your
product dealer or local power company. For products intended to
operate from battery power, or other sources, refer to the
operating instructions.
16. Lightning – For added protection for this product during a lightning
storm, or when it is left unattended and unused for long periods of
time, unplug it from the wall outlet and disconnect the antenna or
cable system. This will prevent damage to the product due to
lightning and power-line surges.
17. Power Lines – An outside antenna system should not be located
in the vicinity of overhead power lines or other electric light or
power circuits, or where it can fall into such power lines or circuits.
When installing an outside antenna system, extreme care should
be taken to keep from touching such power lines or circuits as
contact with them might be fatal.
18. Overloading – Do not overload wall outlets, extension cords, or
integral convenience receptacles as this can result in a risk of fire
or electric shock.
19. Object and Liquid Entry – Never push objects of any kind into this
product through openings as they may touch dangerous voltage
points or short-out parts that could result in a fire or electric shock.
Never spill liquid of any kind on the product.
Page 3
20. Servicing – Do not attempt to service this product yourself as
opening or removing covers may expose you to dangerous
voltage or other hazards. Refer all servicing to qualified service
personnel.
21. Damage Requiring Service – Unplug this product from the wall
outlet and refer servicing to qualified service personnel under the
following conditions:
a. When the power-supply cord or plug is damaged.
b. If liquid has been spilled, or objects have fallen into the product.
c. If the product has been exposed to rain or water.
d. If the product does not operate normally by following the operating
instructions. Adjust only those controls that are covered by the
operating instructions as an improper adjustment of other controls
may result in damage and will often require extensive work by a
qualified technician to restore the product to its normal operation.
e. If the product has been dropped or damaged in any way, and
f. When the product exhibits a distinct change in performance – this
indicates a need for service.
22. Replacement Parts – When replacement parts are required, be
sure the service technician has used replacement parts specified
by the manufacturer or have the same characteristics as the
original part. Unauthorized substitutions may result in fire, electric
shock, or other hazards.
23. Safety Check – Upon completion of any service or repairs to this
product, ask the service technician to perform safety checks to
determine that the product is in proper operating condition.
24. Wall or Ceiling Mounting – The product should be mounted to a
wall or ceiling only as recommended by the manufacturer.
25. Heat – The product should be situated away from heat sources
such as radiators, heat registers, stoves, or other products
(including amplifiers) that produce heat.
FIGURE 1
EXAMPLE OF ANTENNA GROUNDING AS PER
NATIONAL ELECTRICAL CODE, ANSI/NFPA 70
GROUND
CLAMP
ELECTRIC
SERVICE
EQUIPMENT
ANTENNA
LEAD IN
WIRE
ANTENNA
DISCHARGE UNIT
(NEC SECTION 810-20)
GROUNDING CONDUCTORS
(NEC SECTION 810-21)
GROUND CLAMPS
POWER SERVICE GROUNDING
ELECTRODE SYSTEM
(NEC ART 250, PART H)
NEC - NATIONAL ELECTRICAL CODE
This Class B digital apparatus complies with Canadian ICES-003. Cet appareil numérique de la Classe B est conforme à la norme
NMB-003 du Canada.
Page 4
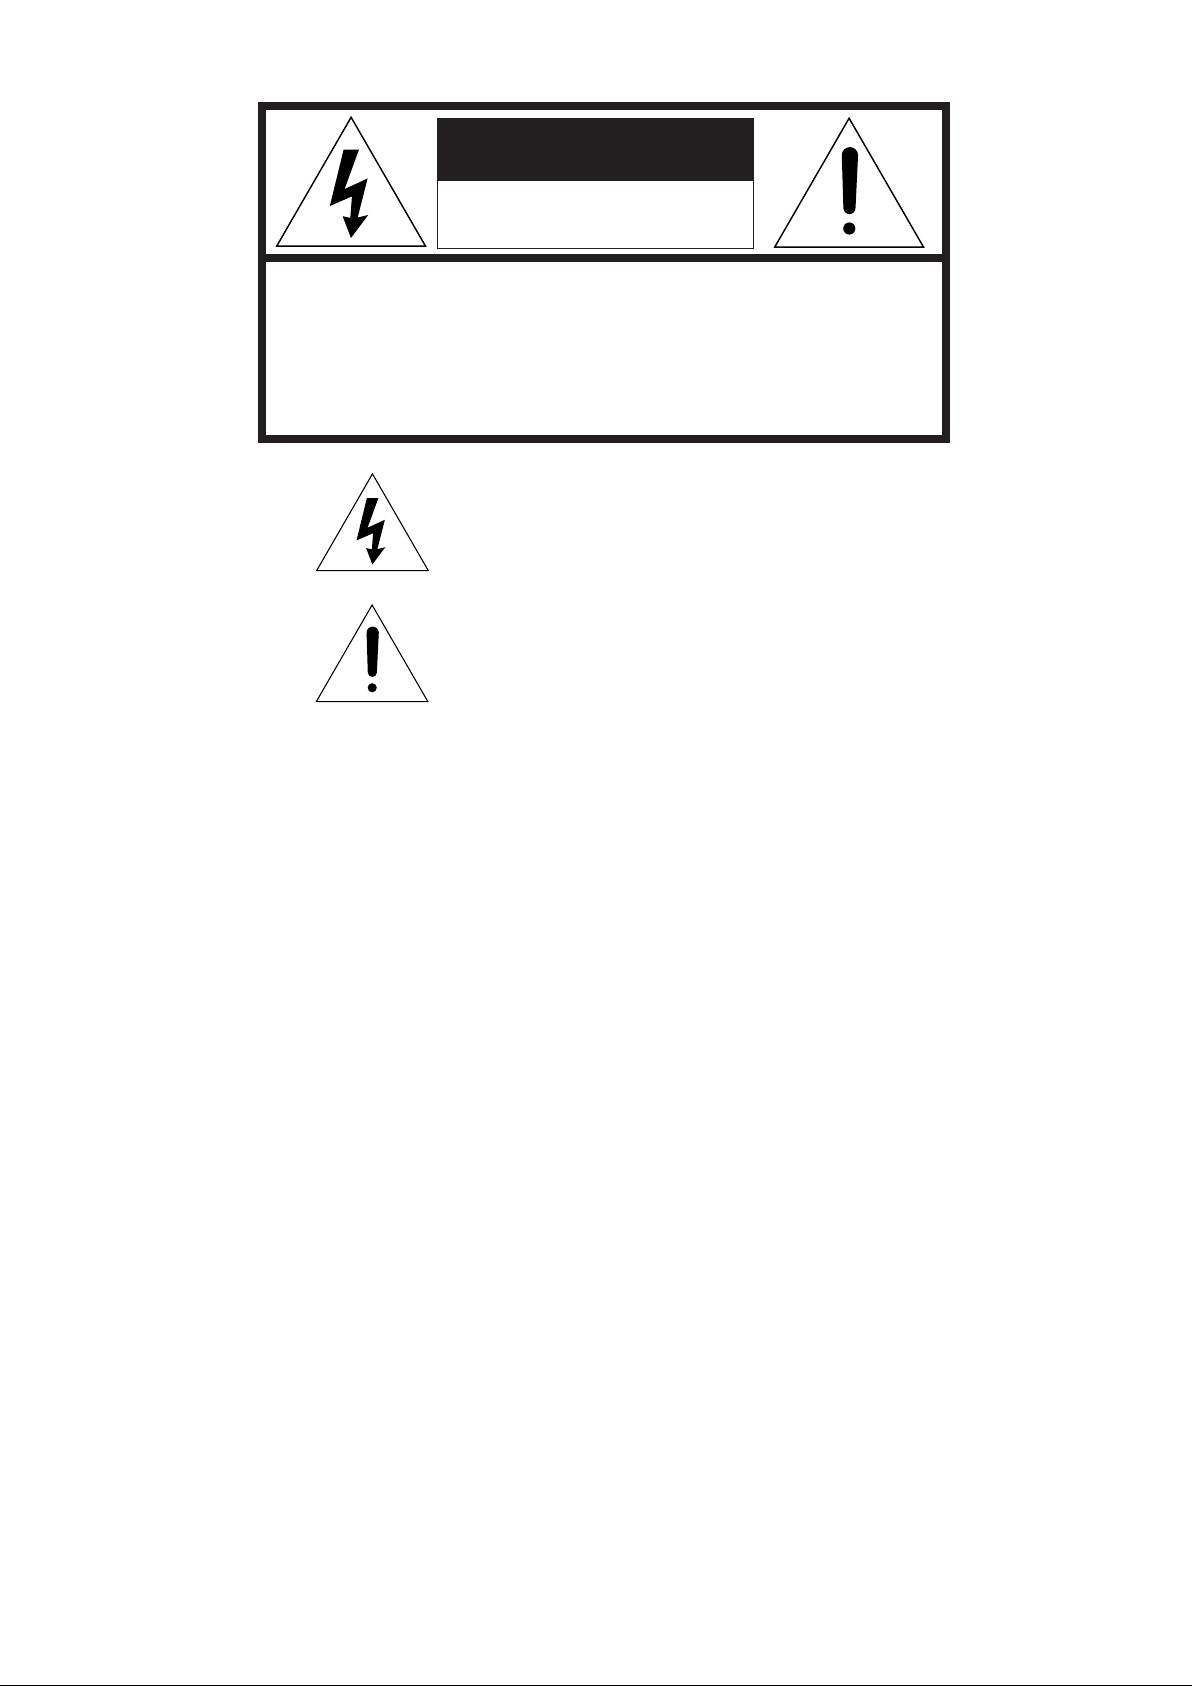
CAUTION
RISK OF ELECTRIC SHOCK
DO NOT OPEN
CAUTION: TO REDUCE THE RISK OF ELECTRIC SHOCK,
DO NOT REMOVE COVER (OR BACK)
NO USER-SERVICEABLE PARTS INSIDE
REFER SERVICING TO QUALIFIED SERVICE PERSONNEL
The lightning flash with arrowhead symbol
within an equilateral triangle is intended to
alert the user to the presence of uninsulated
“dangerous voltage” within the product’s
enclosure that may be of sufficient magnitude
to constitute a risk of electric shock to persons.
The exclamation point within an equilateral
triangle is intended to alert the user to the
presence of important operating and
maintenance (servicing) instructions in the
literature accompanying the product.
WARNING
TO REDUCE THE RISK OF FIRE OR ELECTRIC SHOCK,
DO NOT EXPOSE THIS PRODUCT TO RAIN OR MOISTURE.
CAUTION:
BLADE OF PLUG TO WIDE SLOT, FULLY INSERT.
ATTENTION:
INTRODUIRE LA LAME LA PLUS LARGE DE LA FICHE DANS LA
BORNE CORRESPONDANTE DE LA PRISE ET POUSSER
JUSQU’AU FOND.
NOTE TO CATV SYSTEM INSTALLER:
This reminder is provided to call the CATV (Cable-TV) system installer’s attention to Section 820-40 of the NEC which provides
guidelines for proper grounding and, in particular, specifies that the cable ground shall be connected to the grounding system of the
building, as close to the point of cable entry as practical.
NOTE:
This equipment has been tested and found to comply with
the limits for a Class B digital device, pursuant to Part 15
of the FCC Rules. These limits are designed to provide
reasonable protection against harmful interference in a
residential installation. This equipment generates, uses
and can radiate radio frequency energy and, if not
installed and used in accordance with the instructions,
may cause harmful interference to radio communications. However, there is no guarantee that interference
will not occur in a particular installation. If this equipment
does cause harmful interference to radio or television
reception, which can be determined by tuning the
equipment off and on, the user is encouraged to try to
correct the interference by one or more of the following
measures:
TO PREVENT ELECTRIC SHOCK, MATCH WIDE
POUR ÉVITER LES CHOC ÉLECTRIQUES,
- Reorient or relocate the receiving antenna.
- Increase the separation between the equipment and receiver.
- Connect the equipment into an outlet on a circuit different
from that to which the receiver is connected.
- Consult the dealer or an experienced radio/TV technician for
help.
NOTE:
Changes or modifications not expressly approved by the
party responsible for compliance could void the user’s
authority to operate the equipment.
Page 5

ENGLISH
ENGLISH
1
Page 6

ENGLISH
CONTENTS
1. BEFORE USING.................................................................................................... 3
2. ACCESSORIES ..................................................................................................... 5
3. FEATURES ............................................................................................................ 6
4. CONNECTIONS .................................................................................................... 7
5. NAMES AND FUNCTIONS.................................................................................... 8
Front panel ........................................................................................................................................................ 8
Display .............................................................................................................................................................. 9
Remote control unit ......................................................................................................................................... 10
Rear panel ...................................................................................................................................................... 11
6. BASIC OPERATIONS.......................................................................................... 12
Playing CDs .................................................................................................................................................... 12
Playing a specific track ................................................................................................................................... 13
Playing a specific part of a specific track ........................................................................................................ 14
7. ADVANCED OPERATIONS................................................................................. 15
Repeat play (playing the same tracks repeatedly) .......................................................................................... 15
Random play (playing tracks in a random sequence) ..................................................................................... 16
AMS play (searching for a specific track) ....................................................................................................... 16
Program play (playing tracks in the preferred sequence) ............................................................................... 17
Delete program play (play with undesired tracks skipped) ............................................................................. 19
Peak search (searching for the loudest passage) .......................................................................................... 22
Editing (recording a disc on a tape) ................................................................................................................ 22
Pitch control (changing the play speed) .......................................................................................................... 25
8. OTHER FUNCTIONS .......................................................................................... 26
CD-TEXT ........................................................................................................................................................ 26
9. SPECIFICATIONS AND DIMENSIONS ............................................................... 27
Specifications .................................................................................................................................................. 27
2
Dimensions (unit: mm) ....................................................................................................................................27
10. TROUBLESHOOTING......................................................................................... 28
Page 7
ENGLISH
ENGLISH
TEXT
1. BEFORE USING
CD PLAYER CD5400
POWER
ON/STANDBY
STANDBY
STOPPLAY
PAUSE
PHONES LEVEL
OPEN/CLOSE
TIME EDIT PEAK DISPLAY OFF
DISC
TTL
TRK
PEAK
TTL
TIME
RNDM
RROGA –
B RPT 1
PITCH
EDIT
TEXT
123456 7891011121314151617181920
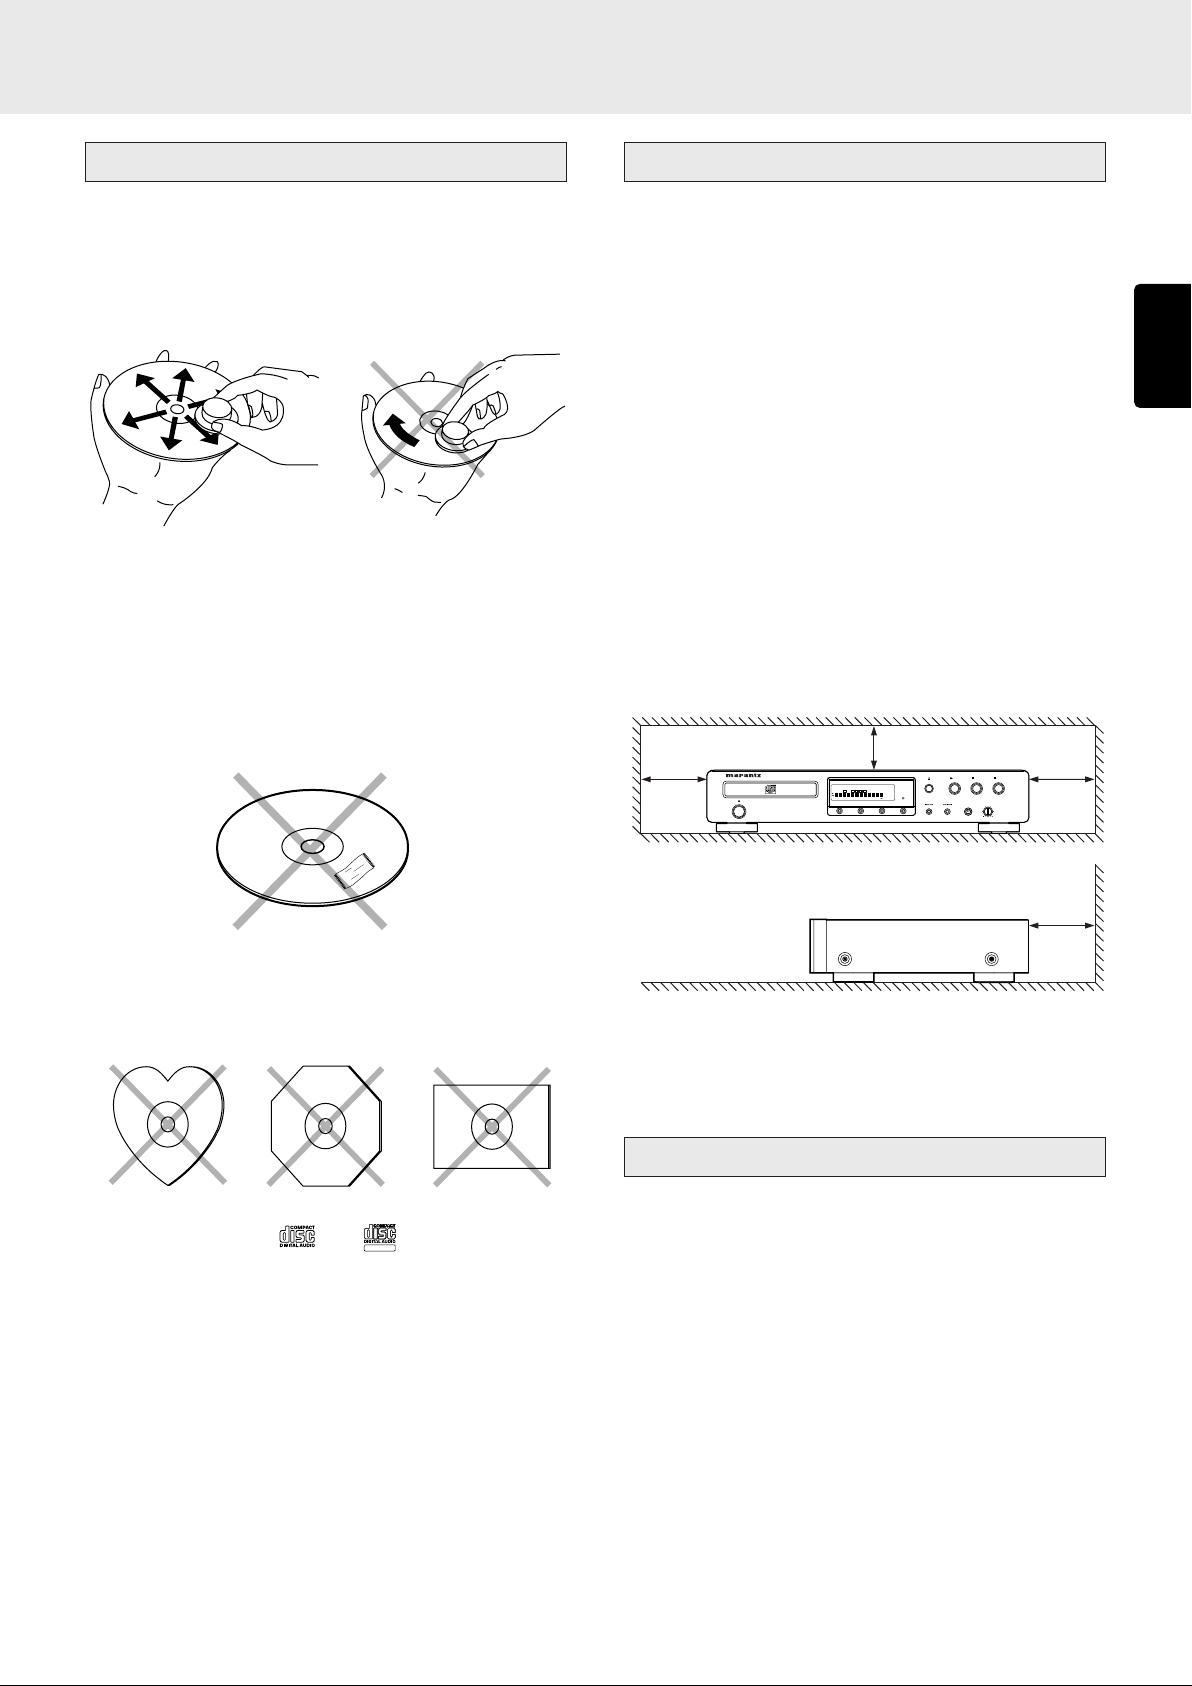
Notes about the discs
* Handle the discs carefully so as not to scratch their
surfaces.
* Keep the surfaces of the discs clean at all times.
When cleaning the surfaces of discs, always be sure to use
the special cleaner and wipe the surfaces in the directions
shown in the figure below.
• Wipe the surface radially
from the center.
* Do not attach pieces of paper or stickers to the label
surfaces of the discs.
When a disc has a piece of plastic tape or rental CD label
with paste protruding from the edge or when a disc still bears
traces of sticky tape or adhesive labels, do not attempt to
play it. If such a disc is played on the CD player, you may
find that you cannot remove it or that some other kind of
malfunctioning may occur.
• Do not wipe the surface in
the circumferential direction.
Inappropriate places for installation
To keep your player in perfect working order for the longest
possible time, avoid installing the player in the following
locations.
• Wherever it will be exposed to direct sunlight
• Wherever it will be close to a heater or other heat-radiating
appliance
• Wherever the humidity is high or ventilation is poor
• Wherever it is very dusty
• Wherever it will be subject to vibration
• On top of a rickety stand or in an unstable location which
is tilted at an angle
• On top of an amplifier or other component which dissipates
a great deal of heat
• In an audio rack with little space at the top and bottom or
other location where the heat dissipation will be obstructed
To ensure proper heat dissipation, install the player while
leaving clearances between the player and wall or other
components, as shown in the figure below.
10 cm or more
2 cm or more
10 cm or more
* Do not use discs which come in special shapes.
Do not attempt to play heart-shaped or octagonal discs or
discs with any other special shapes. You may find that you
cannot remove them or that some other kind of
malfunctioning may occur in the player.
* Use discs which satisfy the CD standards such as those
with the “CD logo”, “
” or “
” mark on their disc
label surfaces.
No guarantees are made for playback if discs which do not
satisfy the appropriate CD standards are used.
Similarly, no guarantees are made for their sound quality
even if it is possible to play such discs.
* To protect your discs from damage, avoid placing them
in the following locations.
• Where they will be exposed to direct sunlight or where
they will be close to a heater or other heat-radiating
appliance
• Where the humidity level is high or it is very dusty
• Near a window or other such location where they may be
exposed to rain
* Get into the habit of putting the discs back in their cases
after use.
5 cm or more
About playing copy-controlled CDs
Some copy-controlled CDs may not conform to official CD
standards. They are special discs and may not play on the
CD5400.
3
Page 8

ENGLISH
BEFORE USING
Do not place objects on top
• Refrain from placing any objects on top of the player.
Cautions on handling power cord
• Do not touch the power cord with wet hands.
• When disconnecting the power cord, always make sure
that you take hold of the plug. Yanking out or bending the
cord can damage it and/or cause electric shocks or a fire.
• Get into the habit of disconnecting the power plug before
leaving home.
Do not attempt repairs yourself
• Refrain from lubricating the player: doing so can cause
malfunctioning.
• Only qualified engineers with specialized expertise are
authorized to repair the pick-up and parts inside the player.
Precautions
Cautions on handling batteries
Misuse of the batteries can result in electrolyte leakage,
rupturing, corrosion, etc.
Bear in mind the following points when using batteries.
• Remove the batteries from the remote control unit if the
unit is not going to be used for a prolonged period (a month
or more).
• Do not use an old battery together with a new one.
• Insert the batteries while ensuring that their ª and · poles
are properly aligned with the corresponding markings on
the remote control unit.
• Batteries with the same shape may have different voltages.
Do not use different types of batteries together.
• If electrolyte has leaked, thoroughly wipe the inside of the
battery compartment, and then insert new batteries.
• In winter, droplets of water form on the insides of the
windows of a heated room: this is called condensation.
This CD player uses an optical lens, so the condensation
may form in the following cases.
- In a room immediately after the heating has been turned
on
- In a room where the humidity level is high
- When the player has been suddenly brought from a cold
location into a warm room
Since, in cases like this, the track numbers may not be
read and the player is prevented from operating properly,
wait about 30 minutes, and then operate the player.
• This player may cause interference on a tuner or TV set. If
this is the case, place it further away from the tuner or TV
set.
• Compact discs have much less noise than analog records
and hardly any noise is heard before play starts. Bear in
mind, therefore, that if the volume control on the amplifier
is set too high, you will risk damaging other audio
components.
• This player is designed to play music CDs only. It cannot
play CD-ROMs used with personal computers, game CDs,
video CDs or DVDs (video/audio).
4
Page 9
ENGLISH
ENGLISH
2. ACCESSORIES
1
DISPLAY
POWER
RESET
SCROLL/
TIME
RECALL
TEXT
AMS A-B
REPEAT
PITCH
23
65
4
7
89
PROGRAM0CANCEL
RANDOM
QUICK REPLAY
REMOTE CONTROLLER
RC5400CD
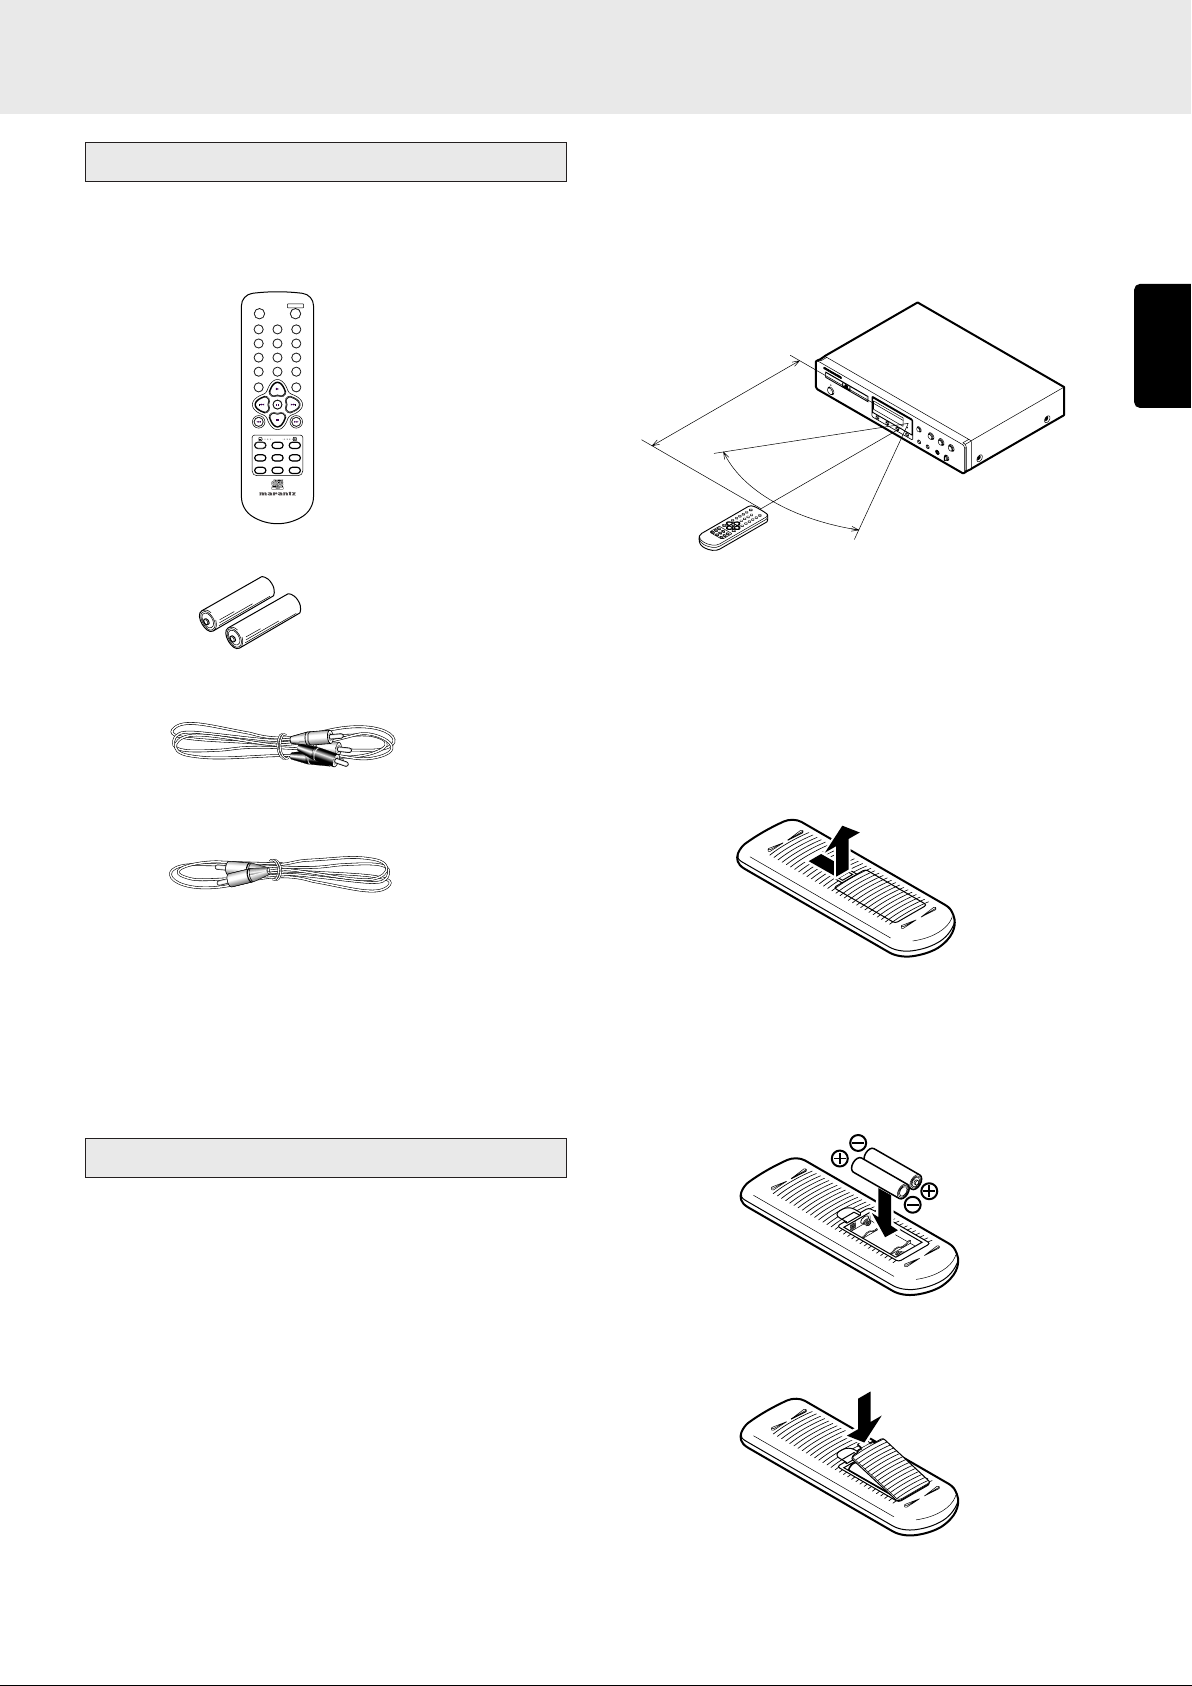
Checking the accessories
After opening the cover of the packing box, check that the
following accessories are included.
• Remote control unit (RC5400CD)
• Size “AAA” batteries x 2
• Audio connecting cord
• Operational range
As shown in the figure below, the player can be operated
by the remote control unit in a range which of about 5 meters
from the player’s remote sensor and over an angle up to
30 degrees to the left and 30 degrees to the right of the
position directly in front.
5m
60°
• Loading batteries
Before using the supplied remote control unit for the first
time, load the batteries in the remote control unit. The
batteries provided are used to verify the operations of the
remote control unit only.
• Remote control connecting cord
• User Guide
• Registration Card
Usage of REMOTE CONTROL UNIT
• Precautions
- Do not allow direct sunlight, an inverter fluorescent light
or other strong source of light to shine onto the player’s
infrared signal reception window (remote sensor).
Otherwise, the operation of the remote control unit may
be disabled.
- Bear in mind that operating the remote control unit may
cause other devices operated by infrared rays to be
operated by mistake.
- The remote control unit cannot be operated if the space
between the controller and the player’s remote sensor is
obstructed.
- Do not place any objects on top of the remote control
unit. Doing so may cause one or more buttons to be
held down which will cause the batteries to run down.
1 Take hold of the tab on the battery cover which is found
on the back side of the remote control unit, and pull it up.
2 Load the two new size “AAA” batteries inside the battery
compartment while taking care to align their polarities
correctly with the polarity markings (ª with ª and ·
with ·).
Size “AAA” (SUM-4) batteries x 2
3 Push the battery cover down in the direction of the arrow
to close it.
5
Page 10

ENGLISH
3. FEATURES
• CS4392 high-performance D/A converter made by
Cirrus Logic used
The CS4392 D/A converter whose CD playback circuitry
has the same design as the CS4396 D/A converter, which
was also made by Cirrus Logic and which has proved to
be a valuable asset for the Marantz CD player, has been
adopted.
During CD play, the PCM signals recorded on the disc are
oversampled to 128fs inside the D/A converter and then
processed by a combination of the dynamic element
matching (DEM) and multi-element switched capacitors
to achieve playback characterized by a high linearity.
This new CD playback technology opens the door to new
dimensions in high-sound-quality CD play.
• Display OFF function incorporated
The “display OFF” function enables the main unit display
to be turned off. By turning off this display, the pulsive
noise generated from the display is reduced, thus
eliminating its effects on the music signals.
• Pitch control function
The “pitch control” function enables the play speed (pitch)
to be varied over a ± 12 step. This feature is particularly
useful for musical instrument practice sessions.
• Quick replay function
By a single-action operation, the “quick replay” function
enables play to be moved back from the current play
position for 10 seconds and play to be resumed.
This function makes it possible to return to a part of the
track that was just played so it can be heard again.
• CD-TEXT display supported
6
Page 11

ENGLISH
ENGLISH
4. CONNECTIONS
L
R
ANALOG OUT
OPT.COAX.
DIGITAL OUT
E
AC IN
OUTINOUTIN
CD-RMD/TAPE
AUX/DVD
TUNER
CD
R L
R L
SYSTEM 2
SYSTEM 1
SPEAKER SYSTEM
SYSTEM 1 : 4 -16
SYSTEM 2 : 4 -16
SYSTEM 1+2 : 8 -16
L
R
PHONO
GND
:
L
R
ANALOG OUT
OPT.COAX.
DIGITAL OUT
REMOTE
CONTROL
EXTERNAL INTERNAL
IN
OUT
INTERNAL
EXTERNAL
OUTPUT
DIGITAL IN/OUT
INPUT
OPTICAL COAXIAL
CONTROL
REMOTE
INPUT OUTPUT
IN
OUT
:
INTERNAL
EXTERNAL
OUTPUT
OUTPUT
R
L
DIGITAL IN/OUT
INPUT
OPTICAL COAXIAL
CONTROL
REMOTE
INPUT OUTPUT
IN
OUT
L
R
ANALOG OUT
OPT.COAX.
DIGITAL OUT
REMOTE
CONTROL
EXTERNAL INTERNAL
IN
OUT
:
This CD player is connected to an amplifier, CD recorder and
other components for use. To ensure that the components
are connected properly, refer to the instruction manuals that
come with the components to be connected.
Before connecting the components, be absolutely sure to turn
off their power.
Connecting to an amplifier
Use the audio connecting cord to connect the player with a
stereo amplifier or AV amplifier. Do not connect the player to
the PHONO input connectors on the amplifier.
When making the connections, insert the plugs securely into
the connectors. Failure to insert the plugs securely may result
in noise.
• Connecting the optical output connector
Use an optical digital connecting cable available on the
market. Insert the plug firmly in until it clicks into place. Do
not bend or bundle the optical digital connecting cable.
Optical digital connecting cable
(available on market)
Signal flow
(Red)
(Red)
Audio connecting cord (supplied)
(White)
Amplifier
(White)
Signal flow
CD recorder, MD deck, AV amplifier, etc.
• Connecting the coaxial output connector
Use a coaxial digital connecting cable available on the market.
Coaxial digital connecting cable
(available on market)
Signal flow
Connecting to a digital audio component
The player has one digital optical output connector and one
digital coaxial output connector.
You can enjoy digital recording when the player is connected
to a CD recorder or other digital recording component.
CD recorder, MD deck, AV amplifier, etc.
7
Page 12

ENGLISH
5. NAMES AND FUNCTIONS
CD PLAYER CD5400
POWER
ON/STANDBY
STANDBY
STOPPLAY
PAUSE
PHONES LEVEL
OPEN/CLOSE
TIME EDIT PEAK DISPLAY OFF
DISC
TTL
TRK
PEAK
TTL
TIME
RNDM
RROGA –
B RPT 1
PITCH
EDIT
TEXT
12 34 56 78910111213141516 17181920
z x m , . Ú0 Ú4 Ú5 Ú6 Ú7
cvb Ú1 Ú2 Ú3
n
Front panel
z POWER ON/STANDBY switch and Standby
indicator
This is used to turn the player’s power ON and STANDBY.
When it is pressed, the display lights and the power is
turned on; when it is pressed again, the power is turned
off and STANDBY indicator lights.
x Disc tray
This is where the CD to be played is placed.
c OPEN/CLOSE
00
0 button
00
This is used to open and close the disc tray. When it is
pressed, the disc tray opens; when it is pressed again, it
closes.
v Remote sensor
This senses the infrared control signals sent from the
remote control unit.
b DISPLAY OFF indicator
This lights in the DISPLAY OFF mode (when the display is
off).
n Display
This shows the settings, play status, text information, etc.
m TIME button
Switches the time shown on the display to the remaining
time of the current track or the remaining time of the entire
disc.
With a CD-TEXT disc, this switch is also used to switch
the displayed information from the text display mode to
the time display mode.
. PEAK button
When the PEAK button is pressed, searching for the
loudest passage (peak) on a CD or in a program.
⁄0 DISPLAY OFF button
This is used to turn off the display (DISPLAY OFF mode).
When it is pressed, the display is turned off; when it is
pressed again, the display comes on.
⁄1 PLAY
33
3 button
33
This is used to start play.
⁄2 STOP
77
7 button
77
This is used to stop play.
⁄3 PAUSE
88
8 button
88
This is used to temporarily suspend play.
44
⁄4
11
4/
1 (previous track/search backward)
44
11
button
When this button is pressed, play returns to the start of
the track now being played. The same number of tracks
as the number of times the button is pressed can be
skipped in the reverse direction. When the button is held
down, tracks are searched (fast backward).
¡¡
⁄5
¢¢
¡/
¢ (search forward/next track) button
¡¡
¢¢
The same number of tracks as the number of times the
button is pressed are skipped in the forward direction.
When the button is held down, tracks are searched (fast
forward).
, EDIT button
8
Press to engage the editing function, which helps record
a disc onto a tape by playing the tracks according to the
tape length and leaving a nonrecorded blank of 4 seconds
between every track.
⁄6 PHONES jack
The headphones are connected to this jack. Use
headphones that come with a standard plug.
⁄7 PHONES LEVEL control
This is used to adjust the headphones volume level. The
level increases when it is turned clockwise.
Page 13

ENGLISH
ENGLISH
NAMES AND FUNCTIONS
DISC
TTL
TRK
PEAK
TTL
TIME
RNDM
RROGA –
B RPT 1
PITCH
EDIT
TEXT
12 34 56 78 910 1112 1314 1516 1718 1920
b r
ed f g h i j kl m n o p q
a
c
Display
a Main display
This displays the time information and text information of
the disc played, the setting menus, etc.
b TEXT indicator
This lights when a disc supporting CD-TEXT has been
loaded.
88
c
8 (pause) indicator
88
This lights when play is temporarily suspended.
33
d
3 (play) indicator
33
This lights during play.
e DISC indicator
This flashes during readout of the table of contents (TOC)
information on the disc.
f TTL (total track) indicator
This lights above the display of the total number of tracks
recorded on the disc.
g RNDM (random) indicator
This lights during random play.
k RPT (repeat) indicator
This lights during repeat play.
l 1 (1-track repeat) indicator
This lights during 1-track repeat play.
m PITCH (pitch control) indicator
This lights the pitch control setting.
n EDIT indicator
This lights during edit mode.
o PEAK indicator
This lights during peak search, and flashes during
playback of the peak.
p TTL (total time) indicator
When the total remaining time or total program time is
displayed, this lights above that display.
q TIME indicator
This lights while the elapsed time or other such time is
displayed.
h TRK (track) indicator
This lights above the display of the number of the track
being played, etc.
i PROG (program) indicator
This lights during program play.
j A-B (A-B repeat) indicator
This lights during A-B repeat play.
r 1 - 20, (music calendar)
This displays the track numbers recorded on the disc, the
track numbers still to be played, and the track numbers
programmed for program play.
9
Page 14

ENGLISH
NAMES AND FUNCTIONS
1
DISPLAY
POWER
RESET
SCROLL/
TIME
RECALL
TEXT
AMS A-B
REPEAT
PITCH
23
65
4
7
89
PROGRAM
0
CANCEL
RANDOM
QUICK REPLAY
REMOTE CONTROLLER
RC5400CD
q
w
e
r
t
u
i
o
!5
!2
!3
!4
!8
y
!0
!1
!9
!7
!6
Remote control unit
11
i
¡¡
1,
¡ (search) buttons
11
¡¡
1 : This button is used to search backward when it is
held down during play.
¡ : This button is used to search forward when it is held
down during play.
o PITCH -/RESET/+ (pitch control down/reset/
up) buttons
These are used to adjust the play speed (pitch) with a
± 12 step.
!0 AMS (auto music scan) button
This is used to play the intros of all the tracks in sequence
starting from the first track for the duration equivalent to
the setting.
!1 TEXT button
This is used to switch the main display from the time display
to the text display.
q DISPLAY button
This is used to turn off the display (DISPLAY OFF mode).
w Numeric buttons (0 to 9)
These are used to specify the numbers of the tracks to be
played.
e PROGRAM button
This is pressed to initiate program play.
r RANDOM button
This is used to play the tracks in a random sequence.
33
t
3 (play) button
33
This is used to start play.
88
y
8 (pause) button
88
This is used to temporarily suspend play.
77
u
7 (stop) button
77
This is used to stop the play.
!2 POWER button
This is used to switch the player’s power ON and STANDBY.
!3 CANCEL button
This is used to cancel the programmed tracks.
!4 QUICK REPLAY button
This is used to search backward from the current play
position for 10 seconds and resume play.
44
!5
¢¢
4,
¢ (track skip) buttons
44
¢¢
4 : Use this to return to the start of the track now playing
or return to the start of the previous track.
¢ : Use this to advance to the start of the subsequent
track.
!6 REPEAT button
This is used to play one track or all the tracks on the disc
repeatedly.
!7 A-B (A-B repeat) button
This is used to set start point (A) and end point (B) when a
particular section is to be played repeatedly.
!8 TIME button
This switches the main display from the text display to the
time display. It can also switch the time display during play.
It can display how much time has elapsed and how much
play time remains for the current track as well as how much
play time remains for the whole disc.
!9 SCROLL/RECALL button
This is used to scroll the text display when text is displayed.
When it is pressed during program play, it is possible to
check which tracks have been programmed.
10
Page 15

ENGLISH
ENGLISH
NAMES AND FUNCTIONS
L
R
ANALOG OUT
OPT.COAX.
DIGITAL OUT
REMOTE
CONTROL
EXTERNAL INTERNAL
IN
OUT
AC IN
A D EB CF
Rear panel
A ANALOG OUT (analog output) connectors
The music signals during play are output from these
connectors.
B DIGITAL OUT COAX. (digital coaxial output)
connector
The music signals during play are output digitally from
this coaxial output connector.
* Digital signals are not output during pitch control play.
C DIGITAL OUT OPT. (digital optical output)
connector
The music signals during play are output digitally from
this optical output connector.
* Digital signals are not output during pitch control play.
D REMOTE CONTROL IN and OUT connectors
Using the supplied remote control connecting cable, these
connectors enable this player to be connected to a
Marantz component equipped with remote control
connectors. These connections make it possible to control
an entire system that centers on the amplifier or other such
component.
E EXTERNAL/INTERNAL switch
Before the player was shipped from the factory, this switch
was set to INTERNAL to enable the remote sensor built
into the player to be used.
Before using the supplied connecting cable to make the
connection between the player and the remote control
connectors on a Marantz equipment, set the switch to
EXTERNAL.
Note:
Signals cannot be received from the remote control
unit if the switch is kept at EXTERNAL when the player
is to be used on its own.
F AC POWER SOURCE CONNECTION
Plug the mains lead into a mains outlet providing the right
voltage.
11
Page 16

ENGLISH
6. BASIC OPERATIONS
1
DISPLAY
POWER
RESET
SCROLL/
TIME
RECALL
TEXT
AMS A-B
REPEAT
PITCH
23
65
4
7
89
PROGRAM0CANCEL
RANDOM
QUICK REPLAY
REMOTE CONTROLLER
RC5400CD
CD PLAYER CD5400
POWER
ON/STANDBY
STANDBY
STOPPLAY
PAUSE
PHONES LEVEL
OPEN/CLOSE
TIME EDIT PEAK DISPLAY OFF
DISC
TTL
TRK
PEAK
TTL
TIME
RNDM
RROGA –
B RPT 1
PITCH
EDIT
TEXT
12 3456 78 910 11121314 151617181920
2 3, 4 5
5
RANDOM
QUICK REPLAY
Playing CDs
• Stopping play
1. Turn on the power of the amplifier to which the player is
connected, and use the input selector on the amplifier to
select “CD” (the player’s input source which has been
connected).
2. Press the POWER button on the player to turn on the power.
3. Press the OPEN/CLOSE 0 button on the player. Place
the CD to be played in the extended disc tray while
ensuring that the label with the printed text is facing up.
STOP
ONES LEVEL
PAUSE
Press the 7 button on the player or remote control unit during
play.
• Pausing play
STOP
ONES LEVEL
During play, press the 8 button on the player or remote control
unit to temporarily suspend play.
To resume play from the place where it was temporarily
suspended, press the 3 button or 8 button on the player or
the 3 button or 8 button on the remote control unit.
PAUSE
In the case of a single (8 cm) CD, align it with the
indentation in the center of the tray.
4. Press the OPEN/CLOSE 0 button on the player to retract
the disc tray. Pushing the front of the disc tray lightly also
causes the tray to be retracted. Once the disc tray has
been retracted, “TOC Reading” appears on the display,
after which the total number of CD tracks and total
remaining time are displayed. In the case of a disc that
supports CD-TEXT, the album title is displayed, and then
the total number of CD tracks and total remaining time are
displayed.
5. Press the 3 button on the player or remote control unit to
start play. Adjust the volume level at the amplifier.
12
• Removing the CD
OPEN/CLOSE
DISPLAY OFF
After play has finished, press the OPEN/CLOSE 0 button on
the player to extend the disc tray, and remove the CD.
After the CD has been removed, press the OPEN/CLOSE 0
button again to retract the disc tray. The disc tray should
always be retracted when the player is not in use.
PLAY
Page 17

ENGLISH
ENGLISH
BASIC OPERATIONS
1
DISPLAY
POWER
23
PLAY
OPEN/CLOSE
DISPLAY OFF
Playing a specific track
• Specifying the number of a track to be
played (direct search)
Select the number of the track to be played directly by pressing
the numeric buttons (0 to 9) on the remote control unit.
To select track number 10 or above, use the numeric buttons
to select the higher digit first and then select the lower digit.
Once the number of the track is selected, play will start
automatically.
Example: To play track 3
Press the “3” numeric button.
DISPLAY
1
Example: To play track 12
Press the “1” numeric button.
POWER
23
• Playing a previous or subsequent track
(track skip)
Advancing to a subsequent track
OPEN/CLOSE
DISPLAY OFF
Press the ¡/¢ button on the player or ¢ button on the
remote control unit for the number of times equivalent to the
number of tracks through which play is to be advanced.
Returning to the start of the track now playing or a
previous track
PLAY
Within 1 second, press the “2” numeric button.
DISPLAY
1
POWER
23
When the 4/1 button on the player or 4 button on the
remote control unit is pressed, play returns to the start of the
track now playing. Play returns to the previous track which is
equivalent to the number of times the button was pressed.
13
Page 18

ENGLISH
BASIC OPERATIONS
PLAY
OPEN/CLOSE
DISPLAY OFF
Playing a specific part of a specific track
•
Searching a specific part of a track (search)
While listening to a track being played, it is possible to search
a specific part of that track by a forward or backward search.
Forward searching through the track now playing
OPEN/CLOSE
DISPLAY OFF
The search (forward search) mode is established by holding
down the ¡/¢ button on the player or ¡ button on the
remote control unit.
Holding down the button initiates a forward search.
PLAY
Backward searching through the track now playing
• Playing the last 10 seconds again during
play (quick replay)
PROGRAM
RANDOM
When the QUICK REPLAY button on the remote control unit is
pressed during play, play will be returned by 10 seconds,
and the same section will be played again.
CANCEL
0
QUICK REPLAY
The search (backward search) mode is established by holding
down the 4/1 button on the player or 1 button on the
remote control unit.
Holding down the button initiates a backward search. (Returns
during backward searches are not constant.)
14
Page 19

ENGLISH
ENGLISH
7. ADVANCED OPERATIONS
12 34 56 78 910 1112 1314 1516 1718
TTL
TRK
TIME
RPT
5
5
5
5
5
5
12 34 56 78 910 1112 1314 1516 1718
TTL
TRK
TIME
A
–
5
5
5
5
5
5
12 34 56 78 910 1112 1314 1516 1718
TTL
TRK
TIME
A –B
5
5
5
5
5
5
5
5
12 34 56 78 910 1112 1314 1516 1718
TTL
TRK
TIME
RPT 1
5
5
5
5
5
5
5
5
Repeat play (playing the same
tracks repeatedly)
• Playing all tracks repeatedly (all-track
repeat)
This function repeatedly plays all the tracks. Repeat play is
possible even during random play or program play.
Press the REPEAT button on the remote control unit.
PITCH
RESET
AMS A-B
REPEAT
The “RPT” indicator on the display lights, and the repeat play
of all the tracks starts.
To stop all-track repeat play and resume normal play, press
the REPEAT button on the remote control unit twice. The “RPT”
indicator on the display goes off.
• Playing one track repeatedly (1-track
repeat)
This function repeatedly plays one track only. Even during
random play or program play, it repeats the track being played.
Press the REPEAT button on the remote control unit twice while
the track to be repeated is playing.
• Playing a specific part repeatedly (A-B
repeat)
This function repeatedly plays a specific part of a track that
you want to hear.
1. During play, press the A-B button on the remote control
unit at the start point of the part to be repeated.
PITCH
RESET
AMS A-B
REPEAT
The “A-” indicator on the display now lights.
Display example: A-B repeat , point A (start), track 1, 5 sec.
2. Press the A-B button on the remote control unit at the end
point of the part to be repeated.
PITCH
RESET
AMS A-B
REPEAT
PITCH
RESET
AMS A-B
REPEAT
The “RPT” and “1” indicators light, and track now playing is
repeated.
To stop 1-track repeat play and resume normal play, press
the REPEAT button on the remote control unit to turn off the
“RPT” indicator on the display.
The “A-B” indicator on the display now lights, and the
designated part (from point A to point B) is played
repeatedly.
Display example: A-B repeat , point B (end), track 1, 20 sec.
To stop A-B repeat play and resume normal play, press the AB button on the remote control unit to turn off the “A-B” indicator
on the display.
Note:
The A-B repeat play function cannot be used during
random play.
15
Page 20

ENGLISH
ADVANCED OPERATIONS
78 910 1112 1314
RNDM
5
5
5
5
5
5
5
5
12 34 56 78 910 1112 1314 1516 17
TTL
TRK
TIME
RNDM
5
5
5
5
5
5
5
5
12 34 56 78 910 1112 1314 1516 1718
5
5
5
5
5
5
12 34 56 78 910 1112 1314 1516 1718
TTL
TRK
TIME
5
5
5
5
5
5
Random play (playing tracks in a
random sequence)
This function rearranges the tracks into a random sequence
and it then plays all the tracks in this random sequence. If it
is used together with repeat play, the same tracks can be
repeatedly played but in a different sequence every time.
During play or stop, press the RANDOM button on the remote
control unit.
PROGRAM
RANDOM
The items on the music calendar appear on the display one
after the other, and the “RNDM” indicator lights.
CANCEL
0
QUICK REPLAY
AMS play (searching for a specific track)
This function comes in handy when searching for a specific
track that you want to hear.
You can choose whether to play 10, 20 or 30 seconds of each
track.
During stop or play, press the AMS (auto music scan) button
on the remote control unit.
PITCH
RESET
AMS A-B
Press the AMS button repeatedly to switch through the different
scan modes.
“
(
”, “ ”, “ ”, “ ”...
aborts the scan function) light on the display,
and the “3” indicator flashes.
REPEAT
Random play now starts.
To stop random play and resume normal play, press the
RANDOM button on the remote control unit. The “RNDM”
indicator on the display goes off.
• Skipping tracks during random play to
search other tracks
When the ¡/¢ button on the player or ¢ button on the
remote control unit is pressed during random play, the next
track is selected at random and played.
Conversely, when the 4/1 button on the player or 4
button on the remote control unit is pressed during random
play, play returns to the start of the track now playing. If the
same operation is repeated, play is initiated in the reverse
order in which the tracks were played.
The intros of all the tracks starting from track 1 are played in
succession for the duration which has been select.
Once the track you want to hear has been found, press the 3
button. The “3” indicator now lights, and the track found and
whatever comes after that track will now be played normally.
When the RANDOM button on the remote control unit is
pressed during AMS play, the AMS play function is released,
and the random play mode is established.
16
Page 21

ENGLISH
ENGLISH
ADVANCED OPERATIONS
TEXT
12 34 56 78 910 1112 1314 1516 1718
TTL
TTL
TIME
7
89
PROGRAM
0
CANCEL
TEXT
RROG
5
5
5
5
5
5
5
5
TEXT
TTL
TTL
TIME
RROG
5
5
5
5
5
5
5
5
TEXT
2
TTL
TRK
TTL
TIME
RROG
5
5
5
5
5
5
5
5
TEXT
246810
TTL
TRK
TTL
TIME
RROG
5
5
5
5
5
5
5
5
TEXT
246810
TTL
TTL
TIME
RROG
Program play (playing tracks in the
preferred sequence)
The order in which the CD tracks are played can be rearranged
into the sequence desired. Up to 30 tracks can be
programmed.
• Program play in the time display mode
In the case of a CD-TEXT disc, first press the TIME button on
the remote control unit to set the main display to the time
display mode.
AMS A-B
TEXT
SCROLL/
RECALL
REPEAT
TIME
1
4
7
PROGRAM
23
65
89
CANCEL
0
Display example: When track 2 has been selected
1. During stop, press the PROGRAM button on the remote
control unit.
“Program” appears for an instant on the main display.
3. Repeat step 2 to program the desired tracks in sequence.
At each step of the programming, the number of tracks
programmed and their total time appear on the main
display. Up to 30 tracks can be programmed.
4. Once all the tracks have been programmed, press the 7
button on the player or remote control unit or press the
PROGRAM button on the remote control unit.
STOP
ONES LEVEL
PAUSE
PROGRAM
RANDOM
CANCEL
0
QUICK REPLAY
The PROG indicator flashes, and the program mode is
established.
2. Press the numeric buttons on the remote control unit the
tracks can also be selected using the 4 and ¢ buttons
on the remote control unit or 4/1 and ¡/¢ buttons
on the player. To select track number 10 or above, use
the numeric buttons to select the higher digit first and then
select the lower digit.
The PROG indicator stops flashing and lights up instead,
and the program is entered.
5. Press the 3 button on the player or remote control unit.
Play now starts in the programmed sequence.
Program play will start even when step 4 is omitted.
17
Page 22

ENGLISH
ADVANCED OPERATIONS
TEXT
12 34 56 78 910 1112 1314 1516 1718 19
7
89
PROGRAM
0
CANCEL
TEXT
RROG
5
5
5
5
5
5
5
5
TEXT
2 3 4 5 6 7 8 9 10 11 12 13 14 15 16 17 18 19
TEXT
246810
TTL
TTL
TIME
RROG
• Program play in the text display mode
In the case of a CD-TEXT disc, tracks can be selected by title
for program play.
If the main display is set to the time display mode, press the
TEXT button on the remote control unit to establish the text
display mode.
AMS A-B
TEXT
SCROLL/
RECALL
REPEAT
TIME
1. During stop, press the PROGRAM button on the remote
control unit.
The title of each selected track is scrolled, and once it
has been scrolled, it is programmed automatically. If you
do not want to program the track, select another track
before the scrolling is completed.
3. Repeat step 2 to program the desired tracks in sequence.
Up to 30 tracks can be programmed.
4. Once all the tracks have been programmed, press the 7
button on the player or remote control unit or press the
PROGRAM button on the remote control unit.
STOP
ONES LEVEL
PAUSE
PROGRAM
RANDOM
CANCEL
0
QUICK REPLAY
“Program” appears for an instant on the main display. Then
the PROG indicator flashes, and the program mode is
established.
2. Press the 4 and ¢ buttons on the remote control unit
or 4/1 and ¡ /¢ buttons on the player to select
the track. (The track can also be selected using the
numeric buttons on the remote control unit but in this case
the title is not displayed).
OPEN/CLOSE
DISPLAY OFF
PLAY
The PROG indicator stops flashing and lights up instead,
and the program is entered.
5. Press the 3 button on the player or remote control unit.
Play of the selected tracks now starts in the programmed
sequence.
Program play will start even when step 4 is omitted.
Note:
Programming in the text display mode cannot be
performed for tracks which have no text information for
their titles.
18
Page 23

ENGLISH
ENGLISH
ADVANCED OPERATIONS
TEXT
12 34 56 78 910 1112 1314 1516 1718
TTL
TTL
TIME
TEXT
12 34 56 78 910 1112 1314 1516 1718 19
RROG
5
5
5
5
5
5
5
5
TEXT
12 34 56 78 910 1112 1314 1516 1718
TTL
TTL
TIME
RROG
5
5
5
5
5
5
5
5
TEXT
1 3 4 5 6 7 8 9 10 11 12 13 14 15 16 17 18
TTL
TRK
TTL
TIME
RROG
5
5
5
5
5
5
5
5
TEXT
1357911131517
TTL
TTL
TIME
RROG
Delete program play (play with
undesired tracks skipped)
This function makes it possible to skip those tracks that you
do not want to hear during CD play. Up to 30 tracks can be
deleted from the program.
• Delete program play in the time display
mode
In the case of a CD-TEXT disc, first press the TIME button on
the remote control unit to set the main display to the time
display mode.
AMS A-B
TEXT
SCROLL/
RECALL
REPEAT
TIME
1. During stop, press the PROGRAM button on the remote
control unit, and then press the CANCEL button.
7
PROGRAM
89
CANCEL
0
2. Press the numeric buttons on the remote control unit that
you do not want to hear (the track can also be selected
using the 4 and ¢ buttons on the remote control unit
or 4/1 and ¡/¢ buttons on the player).
1
4
7
PROGRAM
23
65
89
CANCEL
0
Display example: When track 2 has been selected
3. Repeat step 2, and upon completion of the programming,
press the 7 button on the player or remote control unit or
press the PROGRAM button on the remote control unit.
STOP
PAUSE
PROGRAM
RANDOM
CANCEL
0
QUICK REPLAY
“Delete Prog.” appears for an instant on the main display.
The total number of CD tracks and the total play time
appear on the main display, the PROG indicator flashes,
and the delete program mode is established.
ONES LEVEL
The PROG indicator in the display stops flashing and lights
up instead, and the delete program is entered. Up to 30
tracks can be deleted from the program.
4. Press the 3 button on the player or remote control unit.
The CD is now played but with the deleted tracks skipped.
19
Page 24

ENGLISH
ADVANCED OPERATIONS
TEXT
12 34 56 78 910 1112 1314 1516 1718 19
7
89
PROGRAM
0
CANCEL
TEXT
12 34 56 78 910 1112 1314 1516 1718 19
RROG
5
5
5
5
5
5
5
5
TEXT
12 34 56 78 910 1112 1314 1516 1718 19
TTL
TTL
TIME
RROG
5
5
5
5
5
5
5
5
TEXT
2 3 4 5 6 7 8 9 10 11 12 13 14 15 16 17 18 19
RROG
5
5
5
5
5
5
5
5
STOP
PAUSE
TEXT
1357911131517
TTL
TTL
TIME
RROG
• Delete program play in the text display
mode
In the case of a CD-TEXT disc, the tracks that are not desired
can be selected by title for delete program play.
If the main display is set to the time display mode, press the
TEXT button on the remote control unit to establish the text
display mode.
AMS A-B
TEXT
SCROLL/
RECALL
REPEAT
TIME
2. Press the 4 and ¢ buttons on the remote control unit
or 4/1 and ¡ /¢ buttons on the player to select
the track which you do not want to hear. (The tracks can
also be selected using the numeric buttons on the remote
control unit but in this case the titles will not be displayed.)
OPEN/CLOSE
DISPLAY OFF
The title of each selected track is scrolled, and once it
has been scrolled, it is deleted automatically. If you do
not want to delete the track, select another track before
the scrolling is completed.
PLAY
1. During stop, press the PROGRAM button on the remote
control unit, and then press the CANCEL button.
“Delete Prog.” appears for an instant on the main display.
The total number of CD tracks and the album title appear
on the main display, the PROG indicator flashes, and the
delete program mode is established.
3. Repeat step 2, and upon completion of the programming,
press the 7 button on the player or remote control unit or
press the PROGRAM button on the remote control unit.
PROGRAM
RANDOM
The PROG indicator in the display stops flashing and lights
up instead, and the delete program is entered. Up to 30
tracks can be deleted from the program.
CANCEL
0
QUICK REPLAY
20
4. Press the 3 button on the player or remote control unit.
The CD is now played but with the deleted tracks skipped.
Note:
Delete programming in the text display mode cannot be
performed for tracks which have no text information for
their titles.
Page 25

ENGLISH
ENGLISH
ADVANCED OPERATIONS
RESET
SCROLL/
TIME
RECALL
TEXT
AMS A-B
REPEAT
PITCH
PROGRAM
0
CANCEL
RANDOM
QUICK REPLAY
• Checking the program or delete program
contents
AMS A-B
TEXT
During programming operation or program play, press the
SCROLL/RECALL button on the remote control unit.
With program play, the programmed tracks are displayed one
after the other in sequence on the main display.
With delete program play, the deleted tracks are displayed
one after the other in sequence on the main display.
SCROLL/
RECALL
REPEAT
TIME
• Changing the program or delete program
contents
• Returning program play to normal play
(canceling the entire program)
STOP
ONES LEVEL
Press the 7 button on the player or remote control unit twice
during program play or once during stop. The PROG indicator
on the display goes off, and the entire program is canceled.
Alternatively, a program can be canceled when the disc tray
is opened by pressing the OPEN/CLOSE 0 button on the
player.
PAUSE
DISPLAY OFF
OPEN/CLOSE
PLAY
Deleting tracks which were programmed for program
play
When the SCROLL/RECALL button on the remote control unit
is pressed during programming, the programmed tracks are
displayed one after the other in sequence.
As soon as the track to be deleted from the program has
appeared, press the CANCEL button on the remote control
unit immediately. The number of the deleted track is cleared
from the music calendar on the display.
Canceling the deletion of tracks which were deleted
for delete program play
When the SCROLL/RECALL button on the remote control unit
is pressed during delete programming, the deleted tracks are
displayed one after the other in sequence.
As soon as the track whose deletion is to be canceled has
appeared, press the CANCEL button on the remote control
unit immediately. The number of the track whose deletion
was canceled is displayed in the music calendar on the
display.
Adding tracks to the program
7
PROGRAM
Press the PROGRAM button on the remote control unit during
stop. The status of the PROG indicator in the display changes
from lighted to flashing, and more tracks can be added to the
program.
89
CANCEL
0
• Precautions for program and delete
program play
When using the numeric buttons to select tracks 1 to 9 on
∗
a CD with 10 or more tracks in total, allow 1.5 seconds or
so to elapse after the button corresponding to the number
of the previous track was pressed before pressing the
button corresponding to the number of the next track.
When using the numeric buttons to select track 10 or up
∗
on a CD with 10 or more tracks in total, press the button
corresponding to lower digit within 1.5 seconds or so after
the button corresponding to the higher digit was pressed.
When using the 4 and ¢ buttons for programming,
∗
keep pressing one of these buttons with less than half a
second or so in between until the number of the desired
track is displayed.
If the total time for a program exceeds 99 minutes, the time
∗
display will appear as “– – : – –.”
21
Page 26

ENGLISH
TTL
TRK
PEAK
TIME
TEXT
12 34 56 78 910 1112 1314 1516 17 18 19 20
TTL
TRK
PEAK
TIME
TEXT
12 34 56 78 910 1112 1314 1516 1718 1920
5
5
5
5
5
5
5
5
EDIT
TEXT
12 34 56 78 910 1112 1314 1516 1718 1920
EDIT
5 6 13 14
5
5
5
5
5
5
5
5
EDIT
TEXT
12 34 56 78 910 1112 1314 1516 1718 1920
TTL
TRK
TTL
TIME
A
–
EDIT
TEXT
12 34 56 78 910 1112 1314 15
5
5
5
5
5
5
5
5
5
5
5
5
ADVANCED OPERATIONS
Peak search (searching for the
loudest passage)
If the cassette deck recording level is adjusted in relation to
the peak level on the disc, it is possible to avoid distortion
and noise in recording. This facility allows the peak over the
entire disc or in the programmed to be detected tracks before
proceeding to editing.
1. Press the PEAK button on the player. "PEAK" will light up
and the peak search operation will begin from the first
passage on the disc. Searching may need a few minutes.
2. When peak search of the last passage is completed, play
will be repeated for approximately 6 seconds with the
volume at a comparatively high level. Adjust the record
level of the cassette deck. (Please see the instruction
manual for the cassette deck.)
This example shows that, when the tape recording time is
90 minutes, track 15 is the last track on tape side A and
track 28 the last track on tape side B. In other words, by
using a 90-minute tape, all of the 28 disc tracks can be
accommodated by assigning tracks 1 to 15 on tape side
A and tracks 16 to 28 on tape side B.
2. To change the tape recording time, specify the new tape
recording time using the ¢ or 4 button or the numeric
buttons (0 to 9).
• Use of ¢ and 4 buttons
Each press of the ¢ button allows you to change the
recording time in the order 90 → 46 → 54 → 60 → 74 → 90.
Each press of the 4 button allows you to change the
recording time in the order 90 → 74 → 60 → 54 → 46 → 90.
Each press of the ¡ button allows you to increase the
recording time by 1 minute.
Each press of the 1 button allows to decrease the
recording time by 1 minute.
• When numeric buttons are used to specify a C-46 tape,
for example, press 4 then 6.
Flashes.
3. Press the 7 button on the player or remote control unit to
stop the peak search operation.
Note:
As a CD may contain several peaks, a different peak may
be found every time the auto peak level search operation
is performed.
Editing (recording a disc on a tape)
When recording from a compact disc to a tape, use this
function to match the tape length to the playing time of the
tracks to be recorded and to create 4-second intervals
between the tracks.
• Simple edit
This operation fits tracks into a specified tape length while
keeping the tracks in their original order.
1. Press the EDIT button in stop mode to light up the EDIT
indicator.
(Example: When a disc with 28 tracks is loaded)
This display example shows that, with a 46-minute tape,
tracks 1 to 8 will be recorded onto tape side A and tracks
9 to 16 will be recorded onto tape side B.
The blinking arrow on the right end of the character display
shows that tracks 17 and after cannot be recorded on the
tape.
3. Press the EDIT button again and set the editing contents.
Total playing time of side A
Number indicators of tracks assigned to side A light up.
Total number of tracks on side A
Blinks.
22
The tape recording time display (90) appears.
Last track on tape side A
Last track on tape side B
Page 27

ENGLISH
ENGLISH
TTL
TRK
TTL
TIME
A
–
EDIT
TEXT
12 34 56 78 910 1112 1314 15
TTL
TRK
TTL
TIME
B
EDIT
TEXT
16 17 18 19 20
ADVANCED OPERATIONS
• Program edit
This procedure allows you to record tracks in any desired
order while fitting the tracks into a specified tape length.
1. Program tracks according to the programming procedure
in section “PROGRAM PLAY” (page 17).
2. The rest of the program edit procedure is the same as
step 1 to 3 in the simple edit procedure.
• Delete program edit
When recording from a disc to a tape, this procedure allows
you to omit the tracks you do not want to record, while fitting
the tracks into a specified tape length.
1. Program tracks according to the “delete programming”
procedure in the “PROGRAM PLAY” section (page 19).
2. The rest of the delete program edit procedure is the same
as step 1 to 3 in the simple edit procedure.
Note:
• During the simple edit play, program edit play and delete
program edit play, any operations other than the STOP,
OPEN/CLOSE and TIME Display OFF buttons are
disabled. This is intended to prevent mistakes in
recording due to erroneous operation.
• While editing, remote control operations are disabled.
• The display is always in the time display mode during
edit play. It is not possible to switch to the text display
mode.
• Start Edit Recording
Before start editing, connect remote control input of Marantz
cassette deck with remote control output of CD5400 by remote
control cable.
Reverse mode switch may be set to any of one side (
),
both sides ( ) and continuous play ( ).
- Synchro recording with Marantz auto reverse cassette
deck set to both sides ( ) or continuous play ( )
mode.
1. After setting up, setup the cassette deck to rec pause
state.
2. Press 3 or 8 buttons of the player to start A side program.
The player sends out signal to start recording and starts
playing A side program after 4 seconds.
3. After A side program complete, player turns to the pause
state at the beginning of B side program.
Total number of tracks on side B
Number indicators of tracks assigned to side B light up.
Total playing time
of side B
4. When A side of the tape ends up, cassette deck inverts
its recording direction and set to rec pause state
automatically.
5. Press 3 or 8 buttons of the player manually to start B side
recording. Player sends out signal to restart recording and
starts playing B side program after 4 seconds.
STOPPLAY
PHONES LEVEL
PAUSE
6. After B side program complete, player stops playing and
clears edit program automatically.
Note:
• If the tape ends up before edit program of one side
completes, for example by wrong tape length have
chosen, cassette deck send out signal to player to let
the player cancel the rest of program. Player jumps to
the beginning of B side if it was A side or stop playing
and clear edit program if it was B side.
• Synchro recording can be started only when a Marantz
autoreverse cassette deck (ex. SD4050, SD555 etc.) with
synchro recording compatibility is connected to the CD
player.
• Synchro recording is performed through the remote line
connection (rear panel jacks).
PHONES LEVEL
STOPPLAY
PAUSE
23
Page 28

ENGLISH
STOPPLAY
PAUSE
PHONES LEVEL
ADVANCED OPERATIONS
- Synchro recording with Marantz one-way cassette deck,
or Marantz auto reverse cassette deck set to one side
(
) mode.
1. After setting up Edit program, setup the cassette deck to
rec pause state.
2. Press 3 or 8 buttons of the player to start A side program.
The player sends out signal to start recording and starts
playing A side program after 4 seconds.
STOPPLAY
PHONES LEVEL
PAUSE
3. After A side program complete, player turns to the pause
state at the beginning of B side program.
4. When A side of the tape ends up, Reverse cassette tape
or invert recording direction manually and set to rec pause
state.
5. Press 3 or 8 buttons of the player manually to start B side
recording. Player sends out signal to restart recording and
starts playing B side program after 4 seconds.
- Recording with Marantz cassette deck without remote
cable connection, and recording with the cassette deck
other than Marantz.
1. After setting up Edit program, start recording of cassette
deck first.
2. Press 3 or 8 buttons of the player to start A side program.
Then player starts playing A side program after 4 seconds.
STOPPLAY
PHONES LEVEL
PAUSE
3. After A side program complete, player turns to the pause
state at the beginning of B side program.
4. When A side of the tape ends up, Reverse cassette tape
or invert recording direction manually and start recording.
5. Press 3 or 8 buttons of the player to start B side recording.
Then player starts playing B side program after 4 seconds.
STOPPLAY
PHONES LEVEL
PAUSE
6. After B side program complete, player stops playing and
clears edit program automatically.
6. After B side program complete, player stops playing and
clears edit program automatically.
24
Page 29

ENGLISH
ENGLISH
ADVANCED OPERATIONS
12 34 56 78 910 1112 1314 1516 1718
PITCH
5
5
5
5
5
5
5
5
12 34 56 78 910 1112 1314 1516 1718
PITCH
5
5
5
5
5
5
5
5
12 34 56 78 910 1112 1314 1516 1718
Pitch control (changing the play
speed)
The play speed (pitch) can be changed across a ±12 step.
Digital signals are not output during pitch control.
∗
• Increasing the play speed
Press the PITCH+ button on the remote control unit.
PITCH
RESET
The “PITCH” indicator on the display lights.
Each time the button is pressed, the play speed is increased,
and it is displayed on the main display.
• Returning play to the normal speed
Press the PITCH RESET button on the remote control unit.
PITCH
RESET
The “PITCH” indicator on the display goes off and “Pitch: 0”
appears on the main display.
If the PITCH RESET button on the remote control unit is pressed
again, play returns to the previous speed setting.
• Reducing the play speed
Press the PITCH- button on the remote control unit.
PITCH
RESET
The “PITCH” indicator on the display lights.
Each time the button is pressed, the play speed is reduced
and it is displayed on the main display.
25
Page 30

ENGLISH
8. OTHER FUNCTIONS
CD TEXT
TEXT
TEXT
12 34 56 78 910 1112 1314 1516 1718 1920
TTL
TRK
TTL
TIME
CD-TEXT
“CD-TEXT” refers to a new kind of music disc which differs
from a conventional music disc in that album titles, track titles
and other text information are recorded on it. CDs with the
following logos support this function.
The text information is recorded on those parts which were
not used by conventional music CDs.
This means that discs with recorded CD-TEXT can be played
in the same way as in the past on existing CD players but the
text information can be viewed only when they are played on
a player that supports CD-TEXT.
This player automatically identifies whether a disc supports
CD-TEXT, and it displays the information on the display.
Display of player
This lights when the disc that has been read
is identified as supporting CD-TEXT.
• During play
Each time the TEXT button on the remote control unit is
pressed, the information items are displayed in the following
sequence. During play, the information of track now playing
is mainly displayed.
Title of track xx now playing
Album Title
xx Title (title of track xx)
xx Artist (artist of track xx)
xx Songwriter (songwriter of track xx)
The following items of the text information on CD-TEXT discs
can be displayed in sequence by pressing the TEXT button
on the remote control unit.
However, the recorded information differs from one disc to
another so that not all the information given below will
necessarily be displayed. Items not recorded are
automatically omitted and skipped by the player, and only
the existing items are displayed.
xx Composer (composer of track xx)
xx Arranger (arranger of track xx)
Time display
• In the stop mode
Each time the TEXT button on the remote control unit is
pressed, the information items are displayed in the following
sequence. When the 3 button is pressed while “-- Title” is
displayed, the track concerned starts playing. The maximum
of characters that can be displayed is 64.
Time display
Album Title
26
Album Artist
-- Title (title of track --)
Page 31

ENGLISH
ENGLISH
9. SPECIFICATIONS AND DIMENSIONS
17-5/16 (440)
1/2
(13)
1/2
(13)
3-1/2
(89)
12-1/2 (317)
1/4
(6)
CD PLAYER CD5400
POWER
ON/STANDBY
STANDBY
STOPPLAY
PAUSE
PHONES LEVEL
OPEN/CLOSE
TIME EDIT PEAK DISPLAY OFF
DISC
TTL
TRK
PEAK
TTL
TIME
RNDM
RROGA –
B RPT 1
PITCH
EDIT
TEXT
1234 56 7891011121314151617181920
Specifications
Audio characteristics
Channels .............................................................. 2 channels
Frequency response ...................................... 2 Hz to 20 kHz
Dynamic range........................................................... 100 dB
Signal-to-noise ratio ................................................... 110 dB
Channel separation ....................................... 100 dB (1 kHz)
Harmonic distortion ..................................... 0.0025% (1 kHz)
Wow & flutter ........................................... Precision of quartz
Error correction system ...................... Cross-interleave Reed
Solomon code (CIRC)
Audio output............................................... 2.0 V rms, stereo
Headphone output ......18 mW/32 ohms (variable maximum)
Digital output
Coaxial output (pin jack) .................... 0.5 Vp-p, 75 ohms
Optical output (square optical connector) ......... -19 dBm
Optical readout system
Laser ................................................ AlGaAs semiconductor
Wavelength ............................................................... 780 nm
Signal system
Sampling frequency ................................................ 44.1 kHz
Quantization ..........................................16-bit linear/channel
Power supply
U version ...................................................... AC 120 V 60 Hz
Power consumption ...................................................... 12 W
Cabinet, etc.
Maximum dimensions ... 17-5/16 (W) x 3-1/2 (H) x 12-1/2 (D) in.
(440 (W) x 89 (H) x 317 (D) mm)
Weight ......................................................... 8.14 lbs (3.7 kg)
Allowable operating temperature....................... +5 to +35°C
Allowable operating humidity.... 5 to 90% (no condensation)
This player’s specifications and exterior are subject to change
without notice for improvements.
Dimensions (unit: inch (mm))
27
Page 32

ENGLISH
10. TROUBLESHOOTING
If you think that something is wrong with your player, first check
the points listed below. Incorrect operations can sometimes
be taken for trouble and malfunctions. If the trouble persists
even after the following points have been checked, consult
your dealer or nearest Marantz sales office or service center.
Disc fails to turn.
• Has the power cord been connected properly?
• Has the player’s power been turned on?
• Has the disc been placed in the proper position?
• Is the disc upside down? (Is the disc’s label surface facing
up?)
• Is the disc dirty?
• Is the disc scratched?
• Is the disc warped?
Disc turns but no sound is heard.
• Have the amplifier and speakers been connected properly?
• Has the amplifier’s power been turned on?
• Has the amplifier’s function or selector switch been set to
“CD” or “AUX” (or to whichever connectors the player has
been connected)?
• Is the amplifier’s volume at its lowest setting?
Disc starts turning but then stops at some point.
• Is the disc dirty?
• Is the disc scratched?
• Is the disc warped?
• Is the disc being played a music CD? CD-ROMs for
personal computers, etc. cannot be played.
No remote control operations.
• Is the transmitter of the remote control unit (RC5400CD)
pointed at the remote sensor of the player? Is there anything
between the player and remote control unit which is
blocking the signals?
• Have the batteries of the remote control unit (RC5400CD)
run down?
• Is a strong light shining on the remote sensor of the player?
• Is the REMOTE CONTROL switch on the rear panel set to
the EXTERNAL position? (Set it to the INTERNAL position
if the player is to be used on its own.)
CD-R/CD-RW discs cannot be played.
• Has the disc been placed upside down on the disc tray?
• Is the recorded information in a format (CD-DA) used for
music applications?
• Has the disc been finalized? If it is not finalized (closed), it
cannot be played.
28
Page 33

www.marantz.com
You can find your nearest authorized distributor or dealer on our website.
JAPAN Marantz Japan, Inc. 35-1 Sagami Ohno 7-Chome, Sagamihara-shi, Kanagawa 228-8505, Japan
U.S.A. Marantz America, Inc. 1100 Maplewood Drive, Itasca, IL 60143, U.S.A.
EUROPE Marantz Europe B.V. P.O. Box 8744, 5605 LS Eindhoven, The Netherlands
is a registered trademark.
Printed in China
2003/04 ecms 24AW851250
 Loading...