

Page 1
Q-0600 Compressor Replacement
Installation Instructions
NOTE: THIS REPLACEMENT IS ONLY FOR THE Q-SERIES MACHINES. NO CHANGES WITH
START/RUN COMPONENTS ARE NEEDED.
1. Disconnect power to the ice machine at the electrical
disconnect (moving the toggle switch to the off
position will not disconnect line voltage).
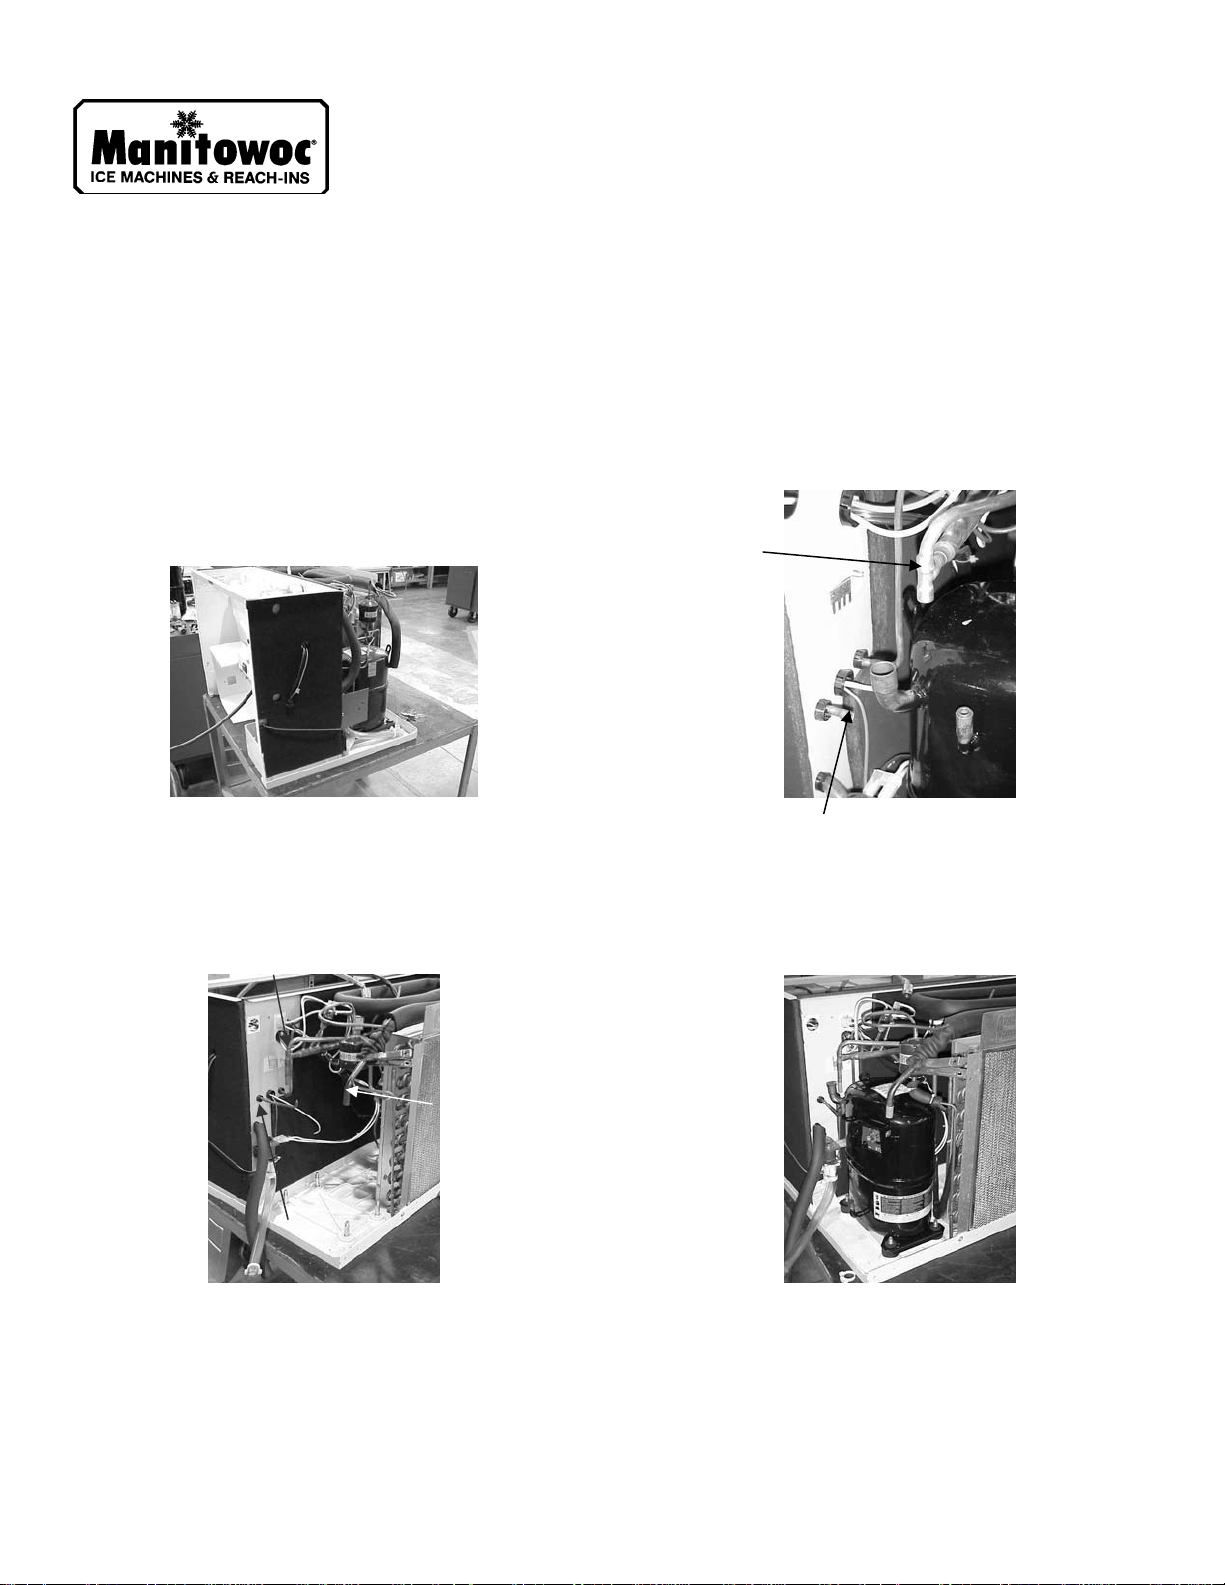
2. Remove panels (top, front, left and right sides).
3. Recover refrigerant from ice machine.
4. Remove right side corner post (when facing the front
of the machine) and back panel.
8. Remove extra section of suction service valve
process tube from the ice machine at swedge joint.
Repeat this procedure with discharge line. Remove
up to T section.
T Section
5. Remove wiring from compressor terminals.
6. Cut tubing (suction, discharge, and process lines) at
the compressor ports.
7. Remove compressor from machine. Make sure to
crimp and braze shut ports to compressor.
Discharge
Suction
Process
Swedge Joint
9. Insert new compressor into the machine as shown.
Manitowoc Ice, Inc.
2110 South 26 Street, P.O. Box 1720, Manitowoc, WI 54221-1720 USA 8006173
Telephone 920-682-0161, Fax - Sales: 920-683-7589, Service/Parts: 920-683-7585, Other: 920-683-7879 Sheet 1 of 3
Web Site -
www.manitowocice.com 06/25/01
Page 2
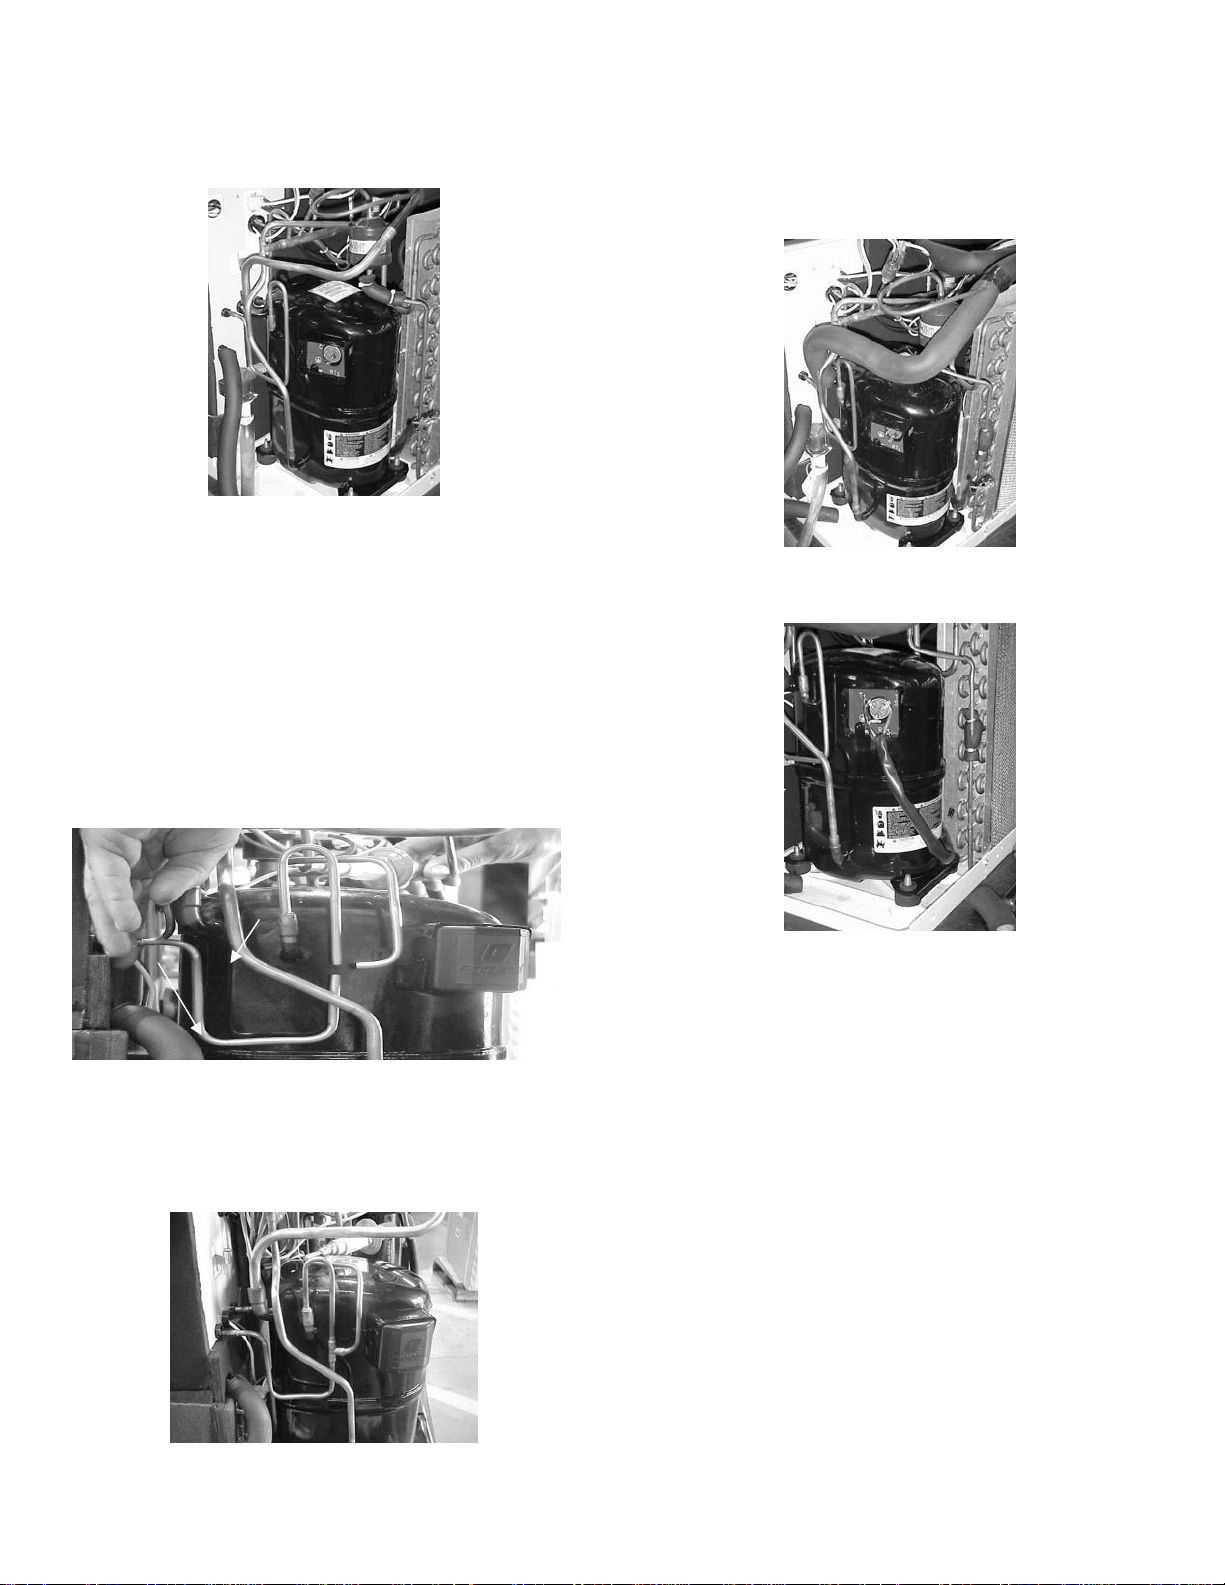
10. Fit tubing provided into the proper place, as shown.
Make sure that the discharge line ends up on the
inside of the suction line. Cut ice machine suction
line to fit new tubing. Deburr suction line before
fitting new tubing in.
NOTE: IF REPLACING COMPRESSOR INTO
A REMOTE CONDENSER ICE MACHINE,
MAKE SURE TO FIRST FOLLOW THE
INSTRUCTIONS A, B, AND C BELOW
BEFORE PROCEEDING TO INSTRUCTION
#11.
A. Cut process tubing approximately 3” from the
horizontal portion of the tube. Make sure to cut
both ends of the tube to make sure that a “T”
fitting can be placed in between the pieces.
11. Place armaflex insulation provided in kit on suction
line, as shown in picture below. Slide insulation up
tubing and secure while brazing.
12. Braze all tubing into place. Purge system with
nitrogen during all brazing operations on the ice
machine.
13. Use electrical tape to seal suction line insulation.
14. Reattach the wiring harness to the compressor.
Approx. 3”
Horizontal
Portion
B. Place “T” fitting in between process tubing and
place pieces of additional tubing between open
end of T and HPR valve, as shown below.
C. Return to instruction #11.
15. Replace the filter/dryer before evacuating the
machine. Make sure that filter/dryer tubing is not
rubbing against the compressor.
16. Evacuate machine to 500 microns.
17. Charge the machine with nameplate charge.
18. Make sure that all tubing is not rubbing against
anything else in the machine.
19. Reinstall corner post that was removed earlier and
place electrical cover on compressor.
20. Reinstall back panels of ice machine.
8006173
Sheet 2 of 3
06/25/01
Page 3

21. Reinstall all other panels.
22. Reconnect power and test run ice machine.
8006173
Sheet 3 of 3
06/25/01
 Loading...