

Page 1

K00333/K00334 TRAY SLIDE KIT 1/2/3 DOOR
Installation Instructions
TOP VIEWS OF CABINET SHOWING TRAY SLIDE PILASTER POSITIONS
1 Dr.
Thumbscrew
3 Dr.
2 Dr.
K00333 PARTS LIST
Item Qty. Part No. Description
1 4 3203343 Wire Shelf Pilaster
2 16 6022201 Tray Slide
3 4 6022301 Tray Slide Pilaster
K00334 PARTS LIST
Item Qty. Part No. Description
1 4 3203343 Wire Shelf Pilaster
2 16 6022201 Tray Slide
3 1 6022191 Tray Slide Pilaster - 2 Dr.
4 3 6022301 Tray Slide Pilaster
5 47” 9202503 Tape, Extruded
READ INSTRUCTIONS COMPLETELY BEFORE INSTALLATION
1. Remove all wire shelves from door opening. Remove existing pilasters by removing the thumbscrews at the top and
lifting up and off the mounting studs.
2. (Use steps 2 and 3, when installing on bottom half.) Use top slotted holes on tray slide pilaster, as shown in Fig. 3.
Press in and down to lock into place.
Manitowoc Ice, Inc.
2110 South 26 Street, P.O. Box 1720, Manitowoc, WI 54221-1720 USA 8010553
Telephone 920-682-0161, Fax - Sales: 920-683-7589, Service/Parts: 920-683-7585, Other: 920-683-7879 Sheet 1 of 2
Web Site - www.manitowocice.com Rev. 04/01/99
Page 2
3. Install your precut wire shelf pilasters to the top half of your cabinet above the tray slide pilaster. Note: when
installing your wire shelf pilaster above the tray slide pilaster on the 2-door, the top of the pilaster closest to the drain
tube must be cut off to an overall length of 17.625” for clearance. The thumbscrews should be used to lock the shelf
pilasters in place at the top of the cabinet.
4. (Use steps 4 and 5, when installing on top half.) Install your precut wire shelf pilasters to the bottom half of the
cabinet first.
5. Install your tray slide pilasters using the bottom slotted holes on the pilaster, as shown in Fig. 4. Press in and down
to lock into place. Use the thumbscrews to lock into place.
6. When installing a full cabinet door of tray slides, always start with the bottom and work up, making sure the top and
bottom pilasters are flush where they meet.
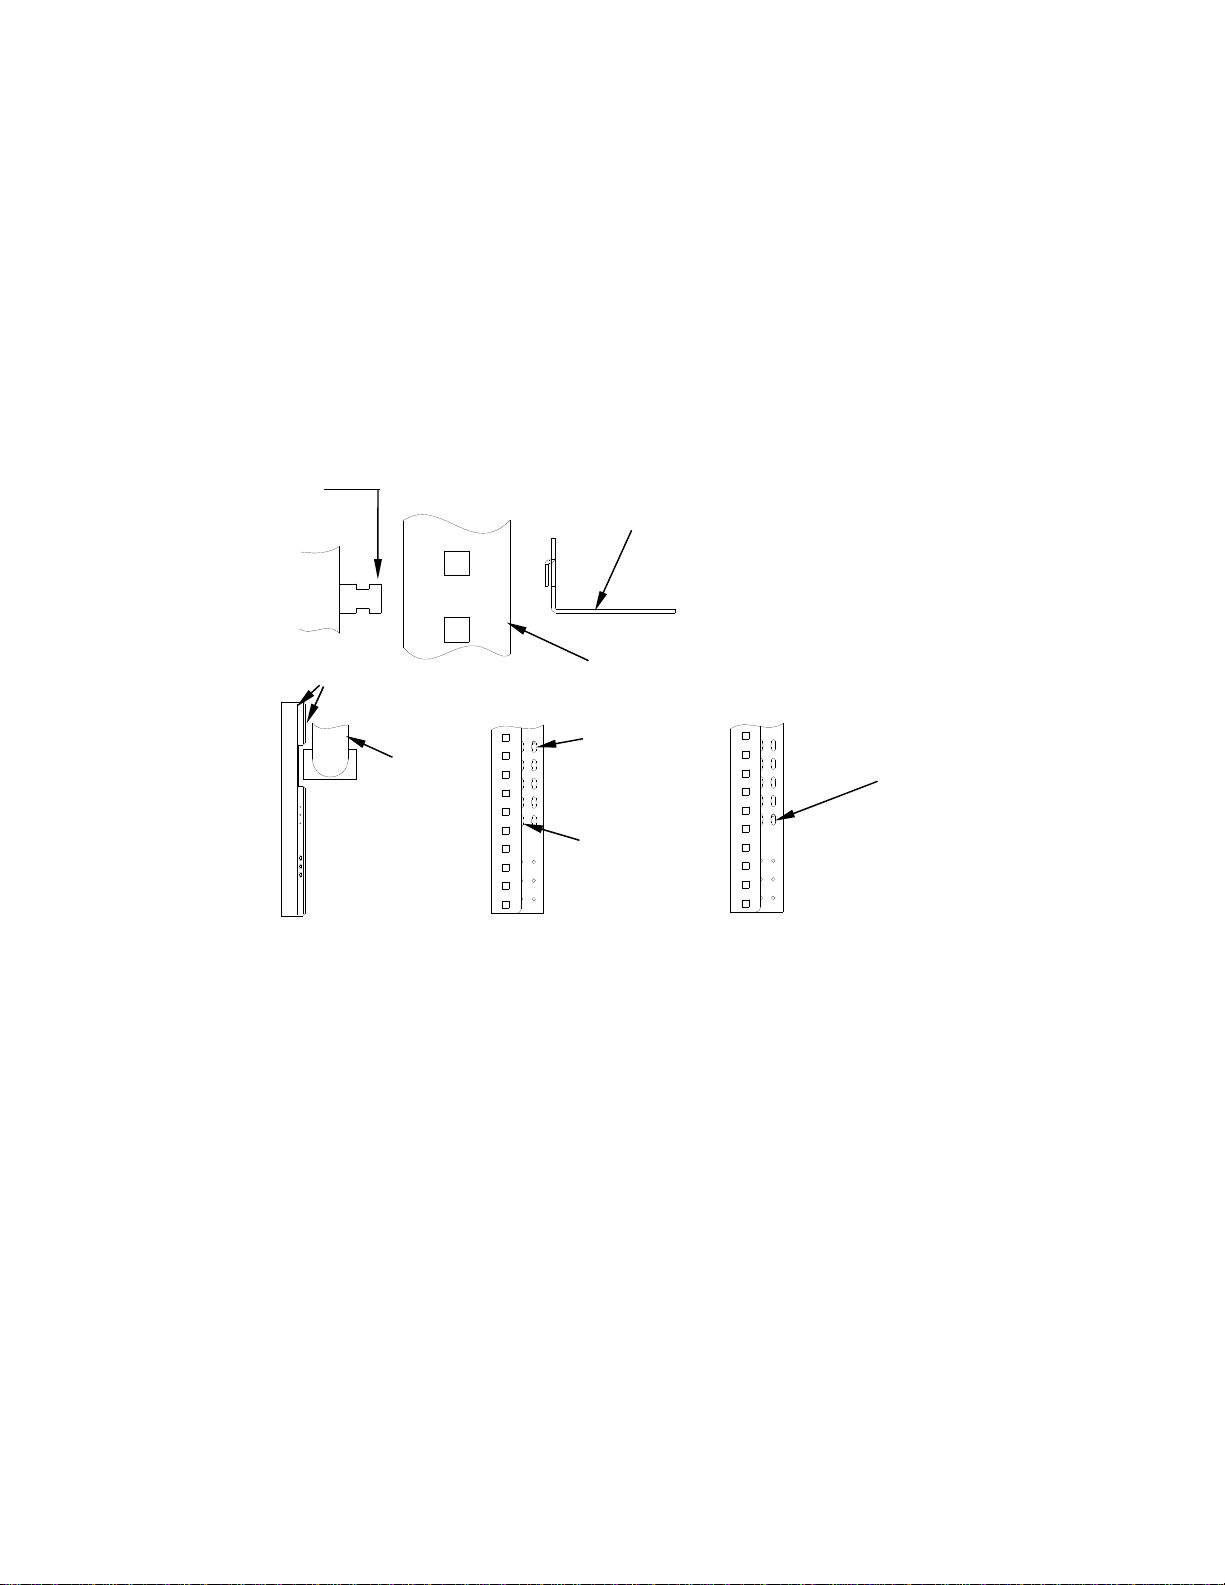
7. Hang tray slides on tray slide pilaster with tap openings facing down (see Fig. 1). Insert shelf clips at desired levels.
There should be no less than a minimum of 9” between the top wire rack or tray slide and evaporator drain pan.
NOTE: The 2-door kit is K00334. When installing this kit, the notched pilaster goes around the drain tube on the top
back wall. The foam tape should be installed between the tray slide pilaster (on the pilaster) and the back wall of the
cabinet (see Fig. 2).
Mounting Stud
Tray Slide
Cabinet
Foam Tape
Fig. 2
Drain
Tube
Fig. 1
Fig. 3
Bottom Half
Tray Slide Pilaster
Mounting Stud
Bottom Half
Inside Set of
Slots are used
for Left/Right
Front Corner
Location
Mounting Stud
Top Half
Fig. 4
Top Half
8010553
Sheet 2 of 2
Rev. 04/01/99
 Loading...