

Page 1
Power Sprayer
Super pulvérisateur
Sprühgerät
Spruzzatore a motore
Motorsproeier
ISTRUZIONI D’USO
Pulverizadores Motorizados
English / French / German
Italian / Dutch / Spanish / Português
MANUAL DE INSTRUCCIONES
Pulverizador Motorizado
Important:
INSTRUCTION MANUAL
MANUEL D’INSTRUCTIONS
BETRIEBSANLEITUNG
ISTRUZIONI D’USO
GEBRUIKSAANWIJZING
MANUAL DE INSTRUCCIONES
Read this instruction manual carefully before putting the into
operation and strictly observe the safety regulations! Preserve instruction
manual carefully!
Recommandation importante:
Lire soigneusement ce manuel d’instructions avant de mettre la
Conserver soigneusement ce manuel d’instructions.
Wichtlg:
Bitte lesen Sie dieses Anweisungshandbuch sorgfältig durch, bevor Sie die
strikt! Bewahren Sie das Anweisungshandbuch sorgfältig auf.
Importante:
Prima di mettere in funzione il , leggere attentamente il
presente manuale; rispettare rigorosamente le norme di sicurezza! Conservare
il manuale delle istruzioni per l’uso!
Belangrijk:
Lees voor het in gebruik nemen van de deze gebruiksaarwijzing
zorgvuldig door en neem alle veiligheidsvoorschriften in acht. Bewaar de
gebruiksaanwijzing voor eventuele naslag.
Importante:
Leer cuidadosamente este manual de instrucciones antes de poner en marcha
la máquina y observar estrictamente las normas de seguridad. Conservar este
manual de instrucciones con cuidado.
SP-252.4R
en service et observer rigoureusement les consignes de sécurité!
in Betrieb nehmen, und beachten Sie die Sicherheitsvorschriften
MANUAL DE INSTRUÇÕES
Page 2

English
Thank you very much for purchasing a DOLMAR POWER SPRAYER. We are pleased to offer you a
product that is the result of an extensive development program and many years of knowledge and
experience.
To safely obtain the best possible results from your DOLMAR POWER SPRAYER, please read this
manual thoroughly before using the machine, and follow all instructions given herein to ensure proper
operation.
Table of Contents Page
Symbols
Safety instructions
Technical data
Designetion of parts
Assembly instructions
Before start of operation
Mixing aguricultual chemicals
Starting the engine
Stopping the engine
Operation
Inspection and maintenance
Troubleshooting
㨯㨯㨯㨯㨯㨯㨯㨯㨯㨯㨯㨯㨯㨯㨯㨯㨯㨯㨯㨯㨯㨯㨯㨯㨯㨯㨯㨯㨯㨯㨯㨯㨯㨯㨯㨯㨯㨯㨯㨯㨯㨯㨯㨯㨯㨯
㨯㨯㨯㨯㨯㨯㨯㨯㨯㨯㨯㨯㨯㨯㨯㨯㨯㨯㨯㨯㨯㨯㨯㨯㨯㨯㨯㨯㨯㨯㨯㨯㨯㨯㨯㨯㨯
㨯㨯㨯㨯㨯㨯㨯㨯㨯㨯㨯㨯㨯㨯㨯㨯㨯㨯㨯㨯㨯㨯㨯㨯㨯㨯㨯㨯㨯㨯㨯㨯㨯㨯㨯㨯㨯㨯㨯㨯㨯
㨯㨯㨯㨯㨯㨯㨯㨯㨯㨯㨯㨯㨯㨯㨯㨯㨯㨯㨯㨯㨯㨯㨯㨯㨯㨯㨯㨯㨯㨯㨯㨯㨯㨯㨯㨯
㨯㨯㨯㨯㨯㨯㨯㨯㨯㨯㨯㨯㨯㨯㨯㨯㨯㨯㨯㨯㨯㨯㨯㨯㨯㨯㨯㨯㨯㨯㨯㨯㨯㨯
㨯㨯㨯㨯㨯㨯㨯㨯㨯㨯㨯㨯㨯㨯㨯㨯㨯㨯㨯㨯㨯㨯㨯㨯㨯㨯㨯㨯㨯㨯㨯
㨯㨯㨯㨯㨯㨯㨯㨯㨯㨯㨯㨯㨯㨯㨯㨯㨯㨯㨯㨯㨯㨯㨯㨯㨯㨯㨯
㨯㨯㨯㨯㨯㨯㨯㨯㨯㨯㨯㨯㨯㨯㨯㨯㨯㨯㨯㨯㨯㨯㨯㨯㨯㨯㨯㨯㨯㨯㨯㨯㨯㨯㨯㨯
㨯㨯㨯㨯㨯㨯㨯㨯㨯㨯㨯㨯㨯㨯㨯㨯㨯㨯㨯㨯㨯㨯㨯㨯㨯㨯㨯㨯㨯㨯㨯㨯㨯㨯㨯
㨯㨯㨯㨯㨯㨯㨯㨯㨯㨯㨯㨯㨯㨯㨯㨯㨯㨯㨯㨯㨯㨯㨯㨯㨯㨯㨯㨯㨯㨯㨯㨯㨯㨯㨯㨯㨯㨯㨯㨯㨯㨯㨯㨯
㨯㨯㨯㨯㨯㨯㨯㨯㨯㨯㨯㨯㨯㨯㨯㨯㨯㨯㨯㨯㨯㨯㨯㨯㨯㨯㨯㨯
㨯㨯㨯㨯㨯㨯㨯㨯㨯㨯㨯㨯㨯㨯㨯㨯㨯㨯㨯㨯㨯㨯㨯㨯㨯㨯㨯㨯㨯㨯㨯㨯㨯㨯㨯㨯㨯㨯
SYMBOLS
It is very important to understand the following symbols when reading this instruction manual.
Read, Understand and Follow Instruction
Manual
Fuel(Gasoline)
2
3
7
8
9
10
12
12
14
15
16
19
WARNING/DANGER
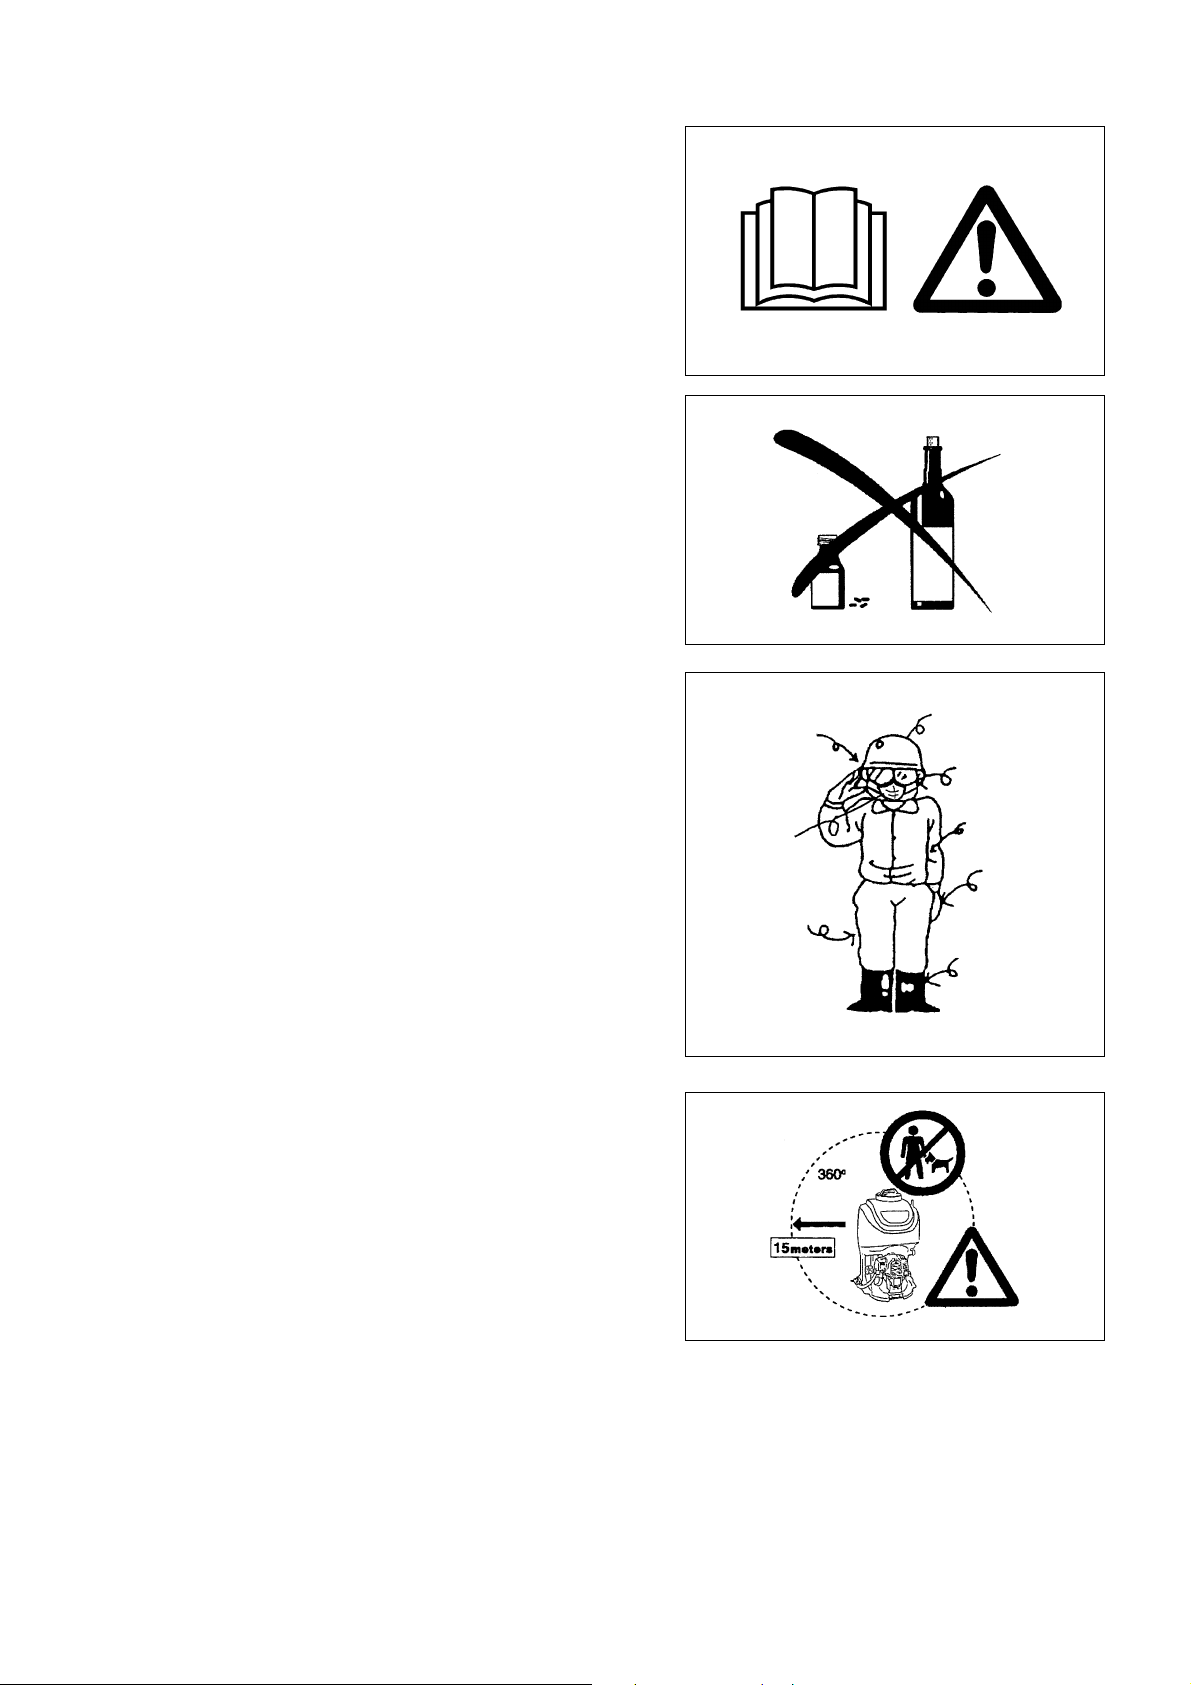
Forbidden
No smoking
No Open Flame
Wear protective gloves
Keep the area of Operation
clear of all persons and pets
Wear eye protection, protective mask
and ear protection
Engine-manual Start
Emergency Stop
First Aid
ON/START
OFF/STOP
Recycling
2
Page 3
SAFETY INSTRUCTIONS
General Instructions
– To ensure correct and safe operation, the user must read, understand and
follow this instruction manual to assure familiarity with the handling of the
power sprayer. Users insufficiently informed will risk danger to themselves
as well as others due to improper handling.
– It is recommended only to loan the power sprayer to people who have proven
to be experienced with power sprayers.
– Always hand over the instruction manual.
– First-time users should ask the dealer for basic instructions to familiarize
oneself with the handling of a power sprayer.
– Children and young persons aged under 18 years must not be allowed to
operate the power sprayer. Persons over the age of 16 years may however
use the tool for the purpose of being trained only while under the direct
supervision of a qualified trainer.
– Use power sprayer with the utmost care and attention.
– Operate the power sprayer only if you are in good physical condition.
– Perform all work conscientiously and carefully. The user has to accept
responsibility for others.
– Never use the power sprayer while under the influence of alcohol or drugs.
– Do not use the unit when you are tired.
– Save these instructions for future referral.
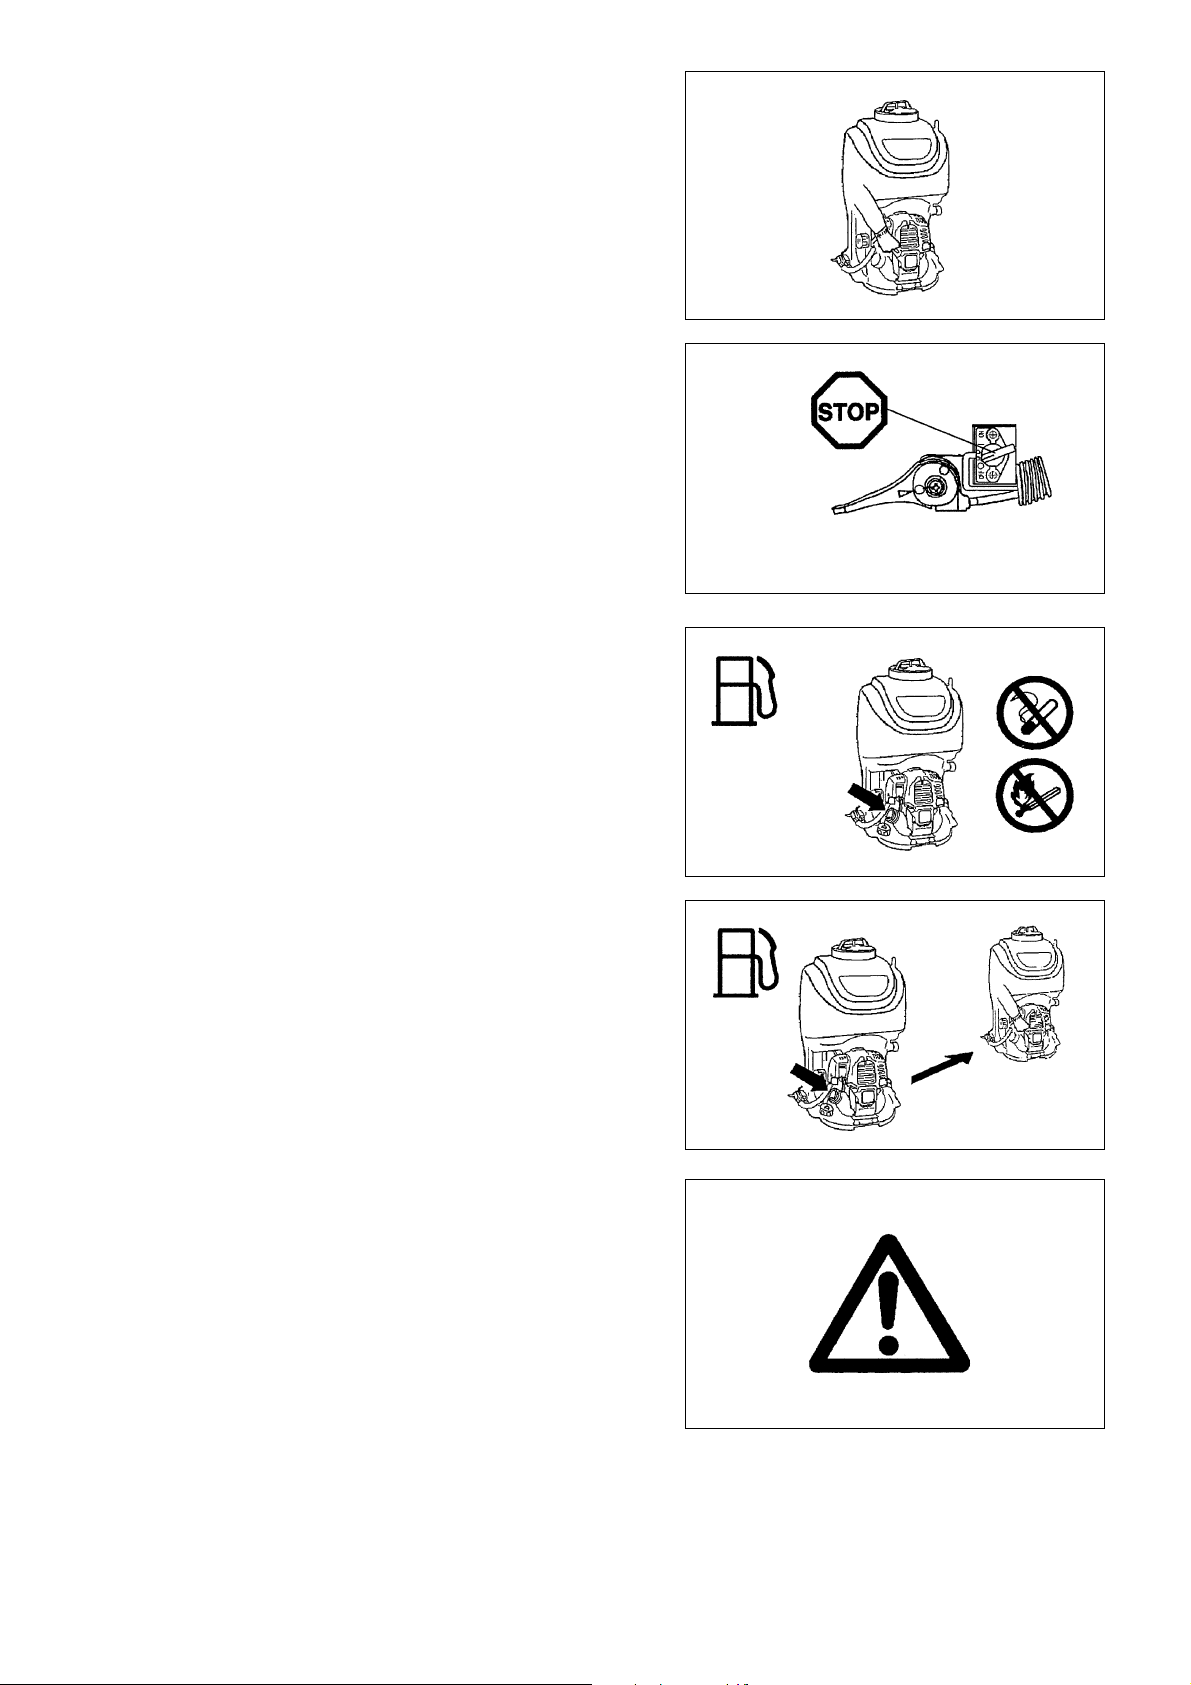
Personal protective equipment
– The clothing worn should be functional and appropriate, i. e. It should be
tight-fitting but not cause a hindrance. Do not wear jewelry, clothing or long
hair which could be drawn into the air intake.
– In order to avoid head-, eye-, hand- or foot injuries as well as to protect you
hearing the following protective equipment and protective clothing must be
used during operation of the power sprayer.
Pay particular attention to the following regulations
– Please wear clothing that is functional and tight-fitting, without restricting
movement when operating the power sprayer. Do not wear clothing or jewelry
that could get tangled with foliage or the machine.
– For adequate protection against head, eye, feet, hand, and hearing injuries,
the following protective equipment and clothing must be used when working
with the power sprayer.
1. Always wear adequate face protection (mask, protective goggles, etc.) to
protect the face, eyes and lungs from dust and chemicals.
2. To avoid hearing damage, wear adequate hearing protection at all times.
3. To protect skin from dust and chemicals, wear work clothes with long
sleeves and long pants at all times.
4. Always wear rubber gloves when operating or servicing the power sprayer.
5. When using the power sprayer, always wear sturdy shoes with non-slip
soles. Special work shoes are available to ensure good footing and protect
against injury.
– Always secure loose clothing, hair, and accessories such as towels etc.
Loose objects may become tangled in moving parts of the machine and
cause serious injury.
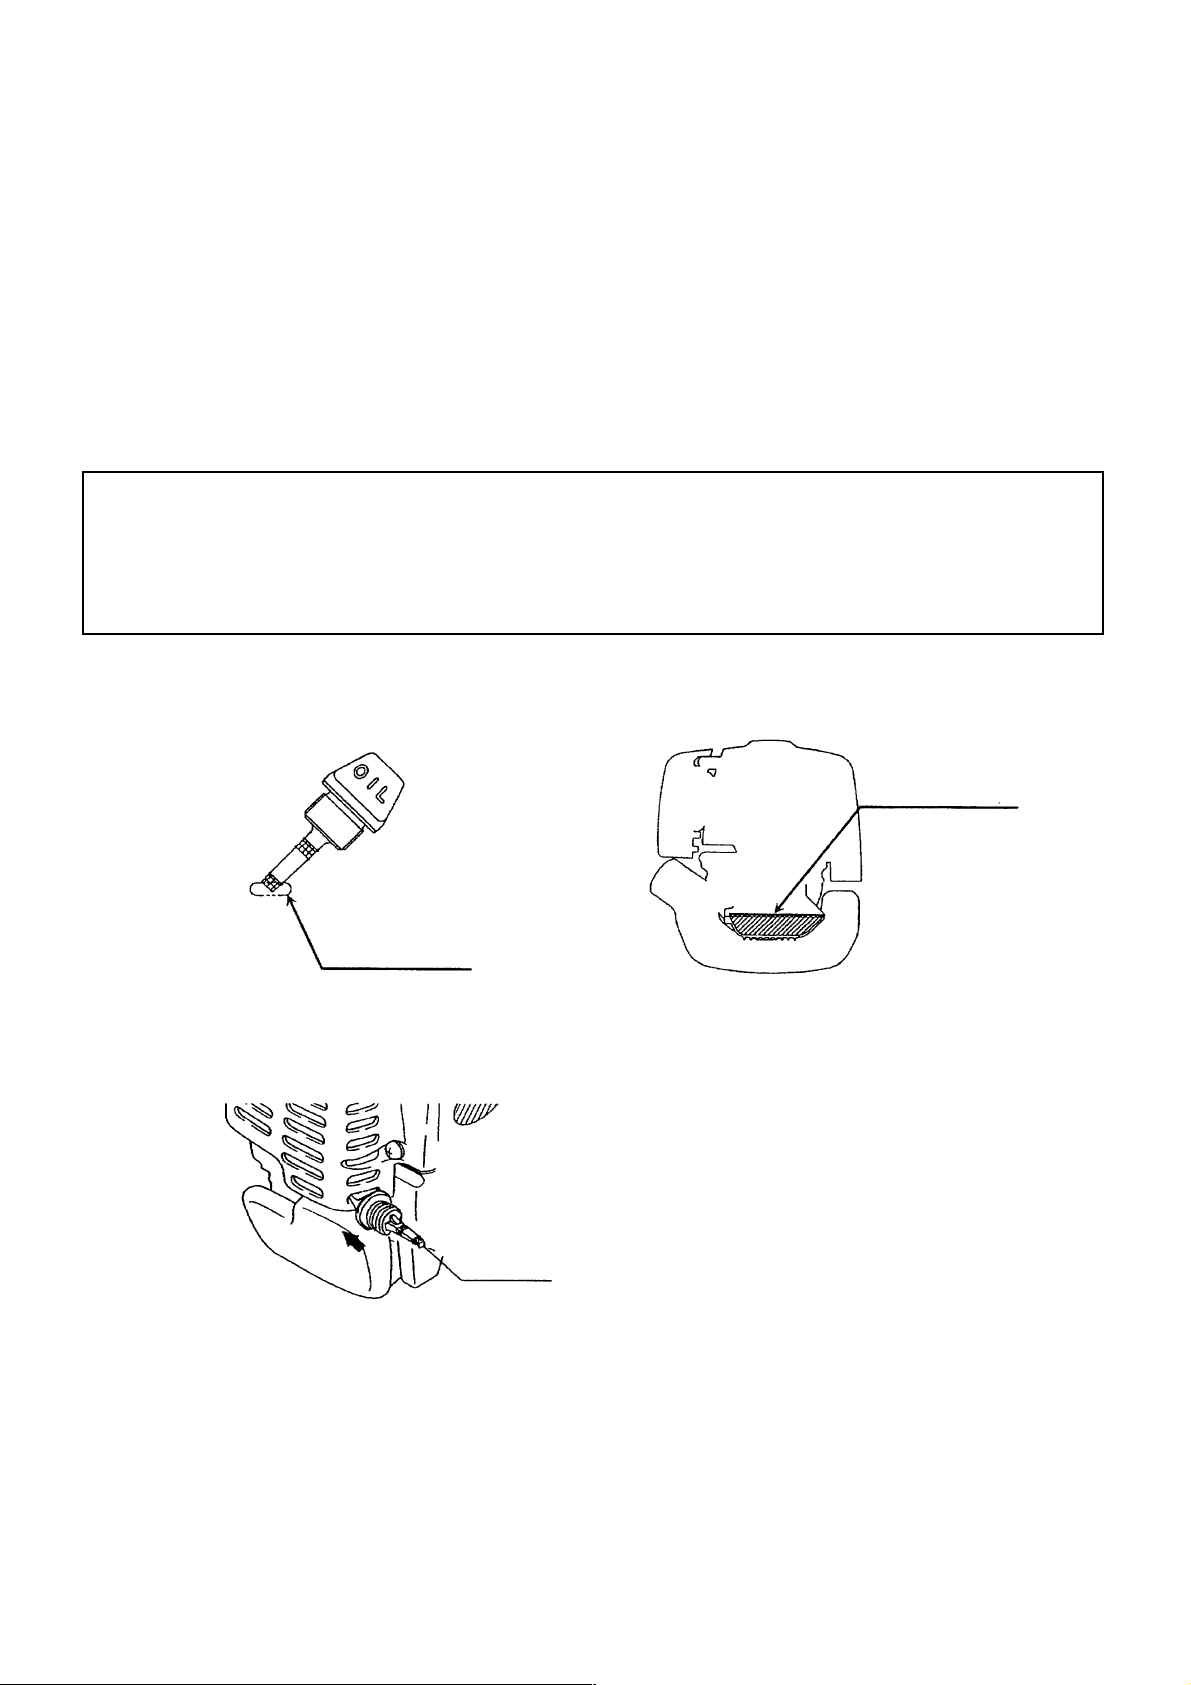
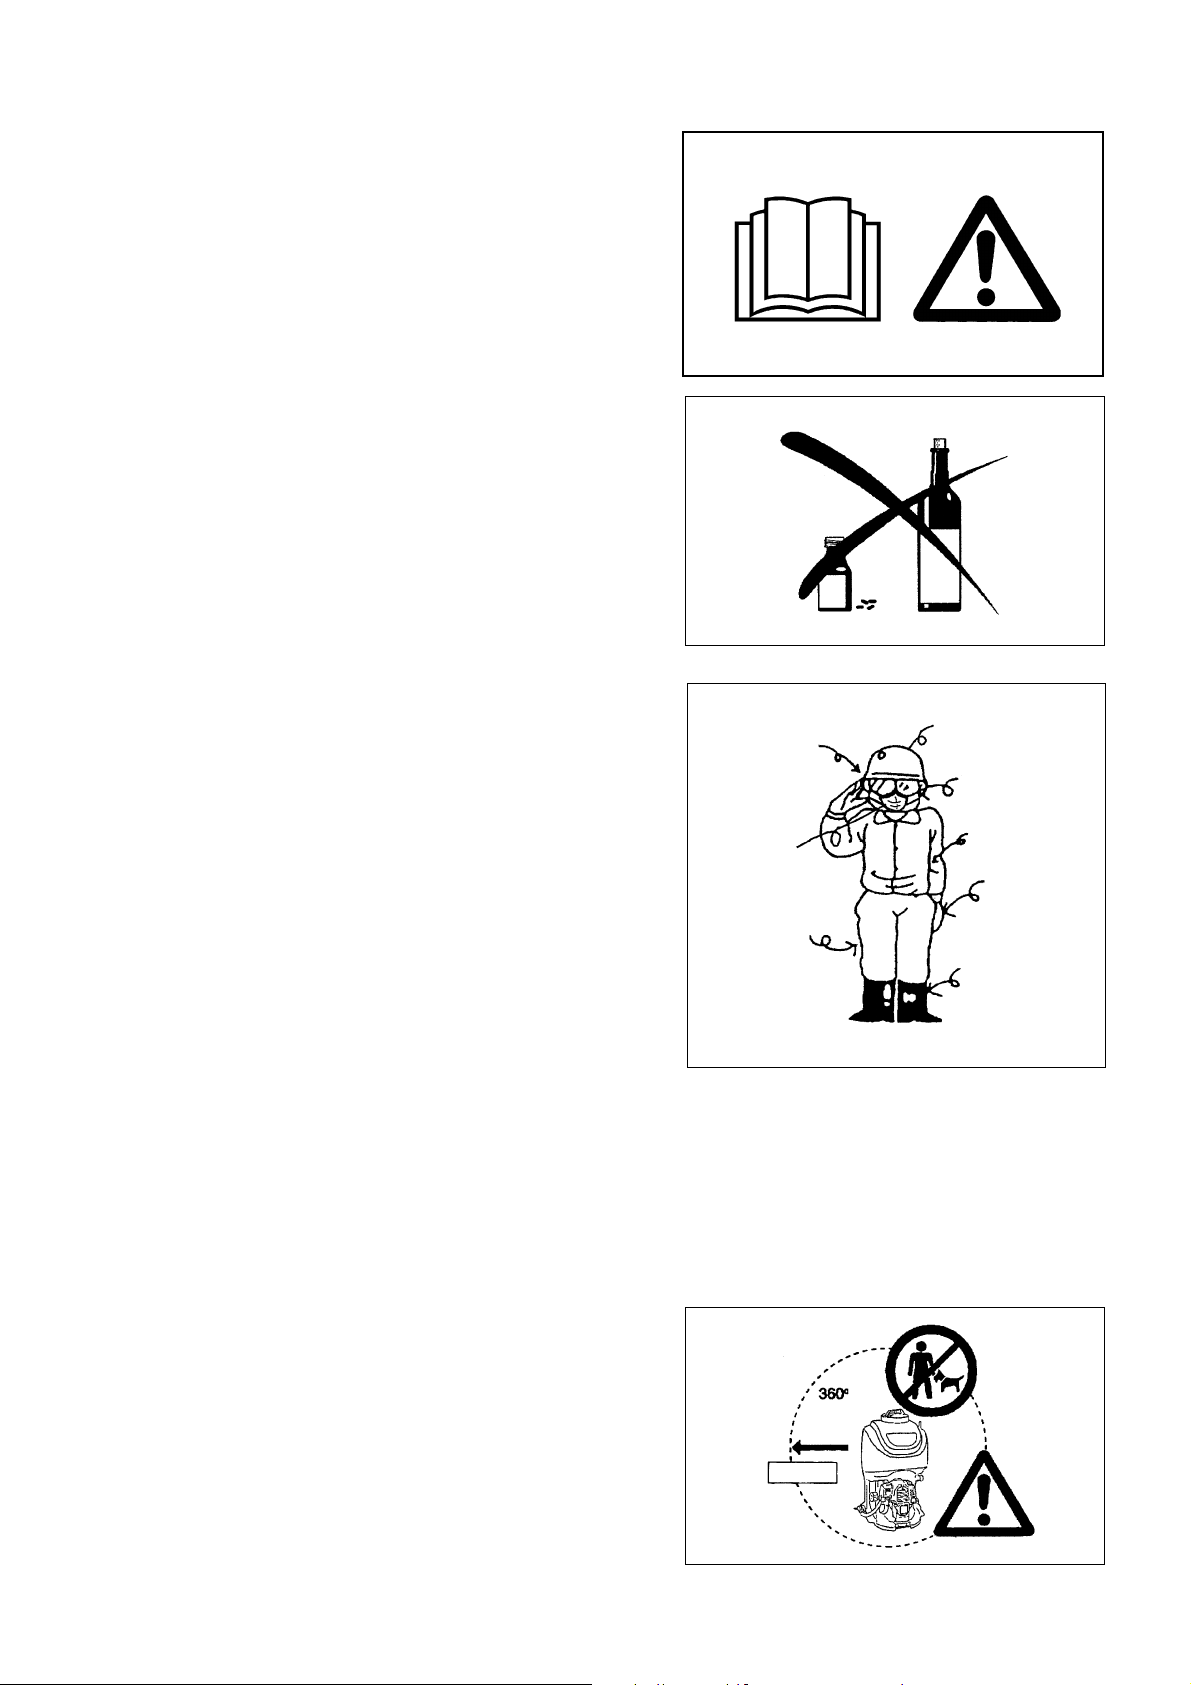
Starting up the Power Sprayer
– Please make sure that there are no children or other people within a working
range of 15 meters, also pay attention to any animals in the working vicinity.
Never use the power sprayer in urban areas.
– Before operating, always check that the power sprayer is safe for operation:
Check the security of the throttle lever. The throttle lever should be checked
for smooth and easy action. Check for clean and dry throttle lever and test
the function of the I - O switch.
Ear protection
Waterproof cap
Protective
goggles
Long sleeves
Protective mask
Rubber
gloves
Long pants
Work shoes
3
Page 4
– Before starting the power sprayer, always make sure that the machine is in
safe operational condition and check whether the throttle lever is functioning
properly.
– Always check for and remove tools used during assembly of the machine.
Attached tools may be flung from the engine when it is started, causing
serious injury.
– Make sure that the power sprayer is clean and dry and test the STOP switch
to ensure that it is functioning properly.
– Stop the engine immediately if experiencing engine problems.
– When operating the power sprayer, take extra care not to inhale exhaust
fumes.
– Exhaust fumes are poisonous. Never operate the machine in an enclosed
room or an area with insufficient ventilation (risk of suffocation and gas
poisoning).
– Do not operate the power sprayer continuously for longer than one hour, and
observe a rest time of at least 30 minutes between each working hour.
– Stop the engine when resting or when the power sprayer is left unattended.
To protect other people and the power sprayer from damage, place the
machine in a safe location and make sure that no combustible material is
nearby. Never place a hot power sprayer onto dry grass or combustible
material. Placing the machine on dry grass or near combustible material is
extremely dangerous and may result in a fire.
– Never operate the engine if the muffler is malfunctioning.
– Always turn off the engine before moving the power sprayer to a new
location.
– Wait until the engine has cooled down, empty the fuel tank, and securely
attach the power sprayer before transporting the machine in a vehicle.
– Make sure that the fuel tank is completely empty and dry before shipping the
power sprayer.
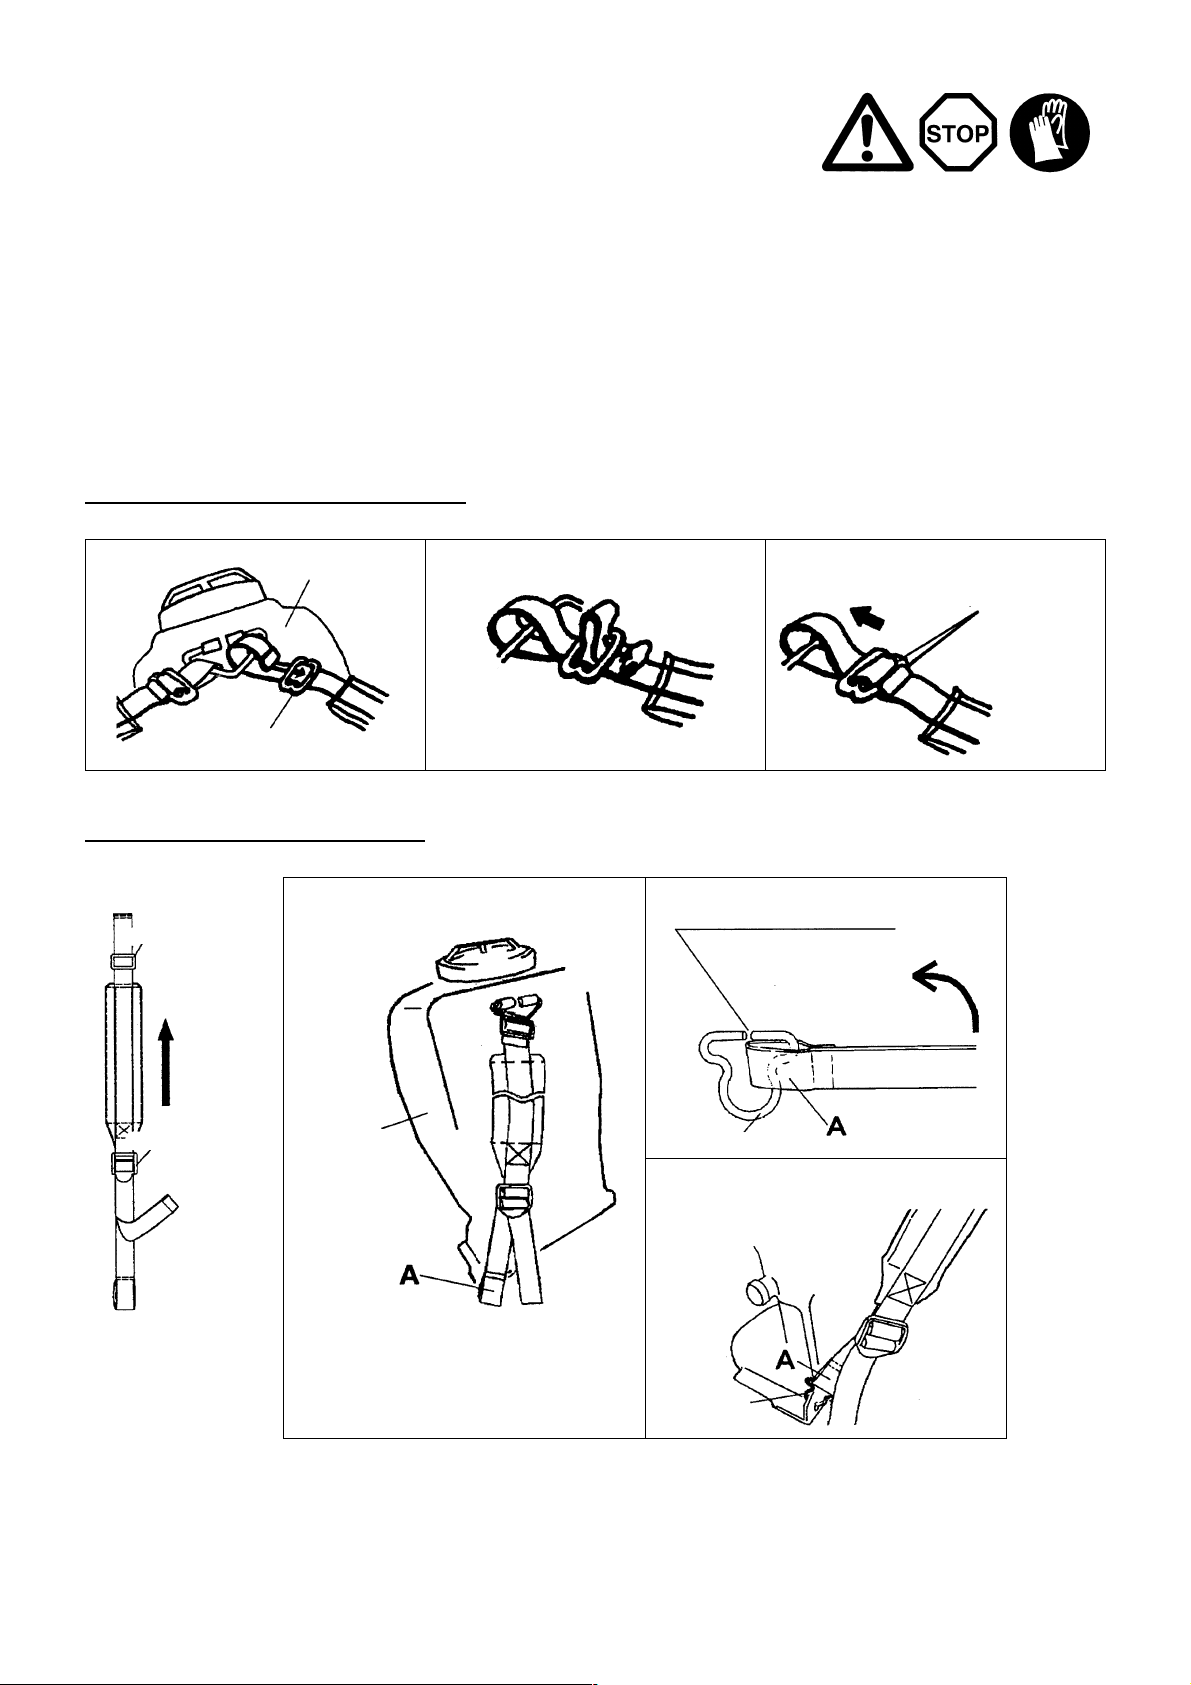
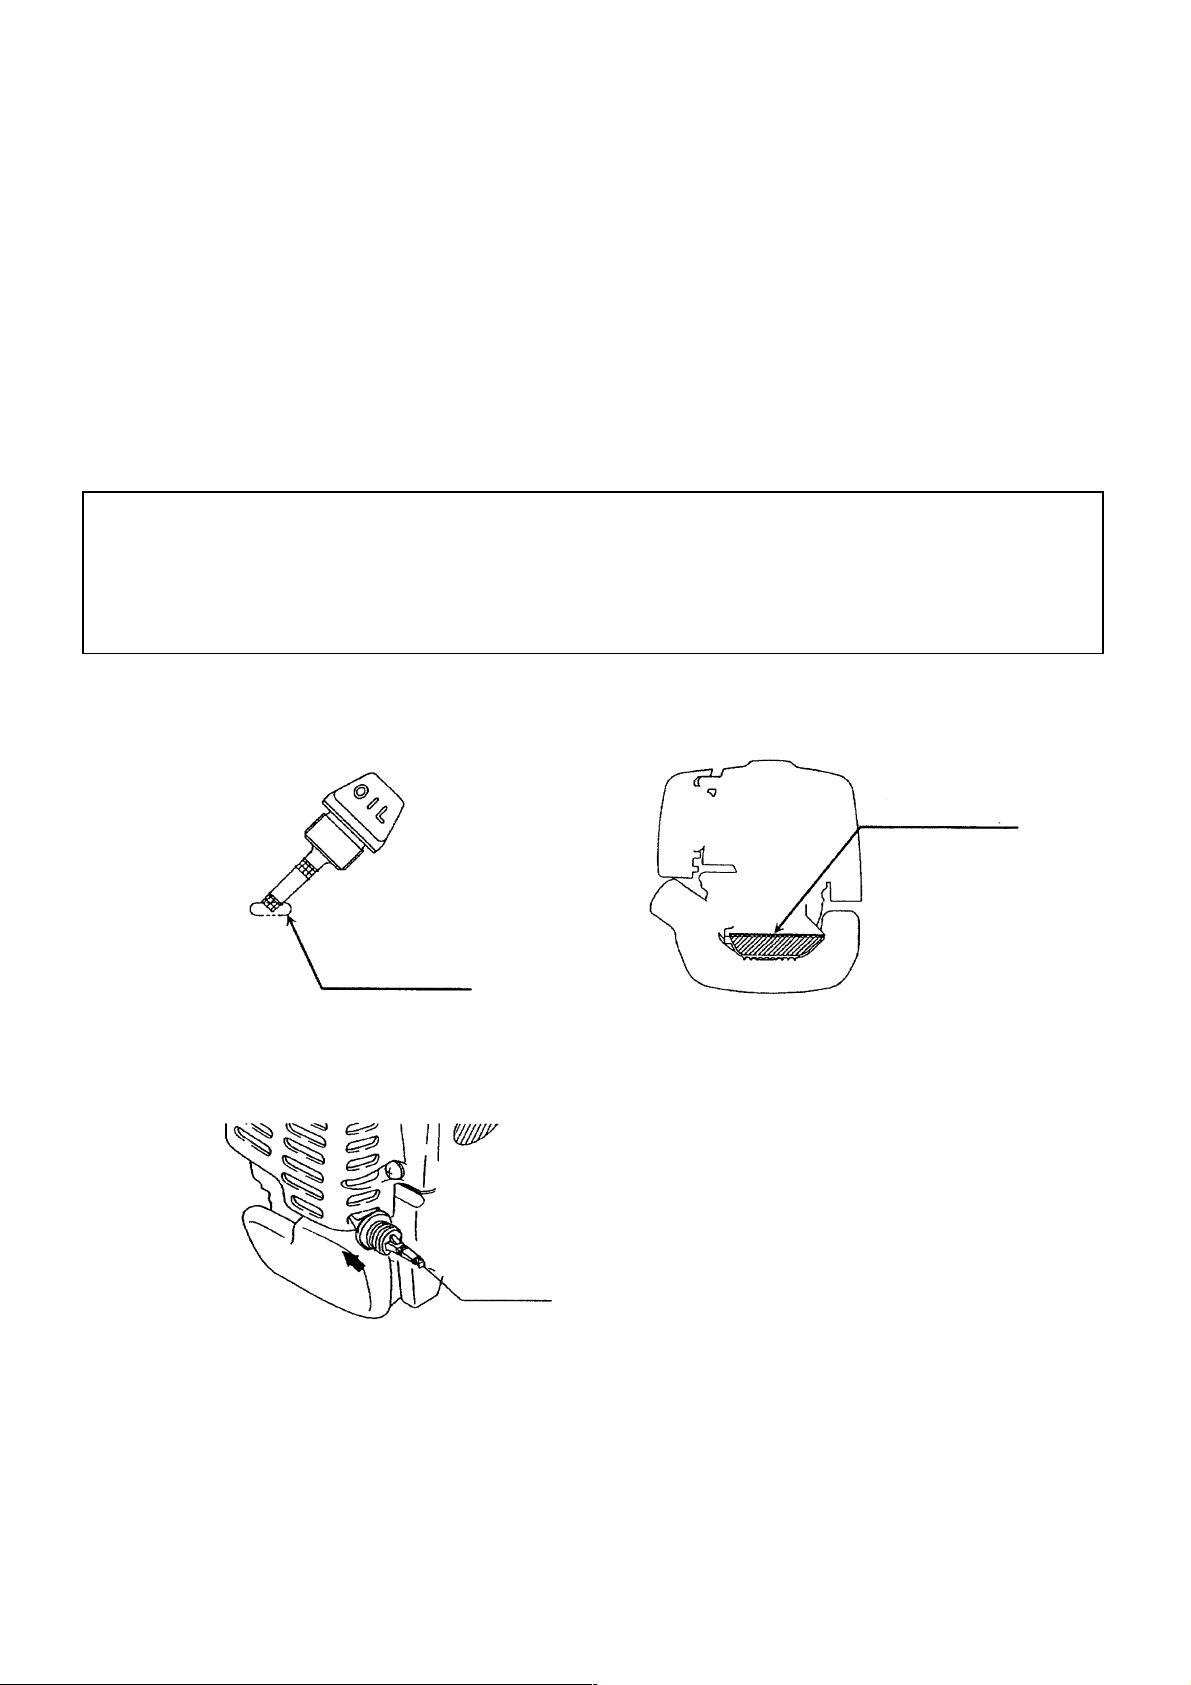
Refueling
– Shut off the engine during refuelling, keep well away from open flame and do
not smoke.
– Avoid skin contact with petroleum products. Do not inhale fuel vapor.
Always wear protective gloves during refuelling. Change and clean
protective clothing at regular intervals.
– Take care not to spill either fuel or oil in order to prevent soil contamination
(environmental protection). Clean the power sprayer immediately after fuel
has been spilt. Allow wet cloths to dry before disposing in proper, covered
container to prevent spontaneous combustion.
– Avoid any fuel contact with your clothing. Change your clothing immediately
if fuel has been spilled on it (danger hazard).
– Inspect the fuel cap at regular intervals making sure that it stays securely
fastened.
– Carefully tighten the locking screw of the fuel tank. Change locations to
start the engine (at least 3 meters away from the place of refuelling).
– Never refuels in closed rooms. Fuel vapors accumulate at ground level (risk
of explosions).
– Only transport and store fuel in approved containers. Make sure stored fuel
is not accessible to children.
– Do not attempt to refuel a hot or a running engine.
Method of operation
– Only use the power sprayer in good light and visibility conditions. Never use
the power sprayer at night. Do not use the power sprayer during rainfall or
immediately after rain (danger of injury through slipping and falling in wet
conditions).
– Beware of slippery and wet areas (ice and snow) as there is a danger of
slipping, and always ensure secure footing.
– Never use the power sprayer while standing on a ladder.
– Never climb a tree to use the power sprayer from the tree.
– Never use the power sprayer while standing on an unstable surface.
– Do not point the nozzle of the power sprayer towards people or animals.
Flying debris may cause serious injury.
– Do not touch the spark plug connector while the engine is running.
– Do not touch moving parts of the power sprayer while the engine is running.
– Do not touch the muffler or other engine parts during operation or for a period
after the engine has stopped. These engine parts are extremely hot and may
cause serious burns.
Resting
Transport
Refuelling
Maintenance
Tool replacement
3 meters
4
Page 5

– Ensure that the toxicity of the pesticides or herbicides to be used is known
before use, and carefully read related use instructions to familiarize yourself
with the proper procedures for using the chemicals in question. If
pesticides/herbicides come in contact with your skin, immediately rinse the
affected area and thoroughly wash with soap. Firmly tighten the cap of the
sprayer tank in order to avoid chemical leaks.
Maintenance instructions
– Be kind to the environment. Operate the power sprayer with as little noise
and pollution as possible. In particular check the correct adjustment of the
carburetor.
– Clean the power sprayer at regular intervals and check that all screws and
nuts are securely tightened.
– Never service or store the power sprayer in the vicinity of open flames,
sparks, etc.
– Always store the power sprayer in a well-ventilated locked room and with an
emptied fuel tank.
Observe and follow all relevant accident prevention instructions issued by the
trade associations and by insurance companies. Do not perform any
modifications to the power sprayer as this will risk your safety.
The performance of maintenance or repair work by the user is limited to those
activities as described in this instruction manual. All other work is to be done
by Authorized Service Agents.
Use only genuine spare parts and accessories supplied by DOLMAR.
Use of non-approved accessories and tools means increased risk of accidents
and injuries. DOLMAR will not accept any liability for accidents or damage
caused by the use of any non-approved attachment or accessories.
First aid
In case of accident make sure that a well-stocked first-aid kit, is available in the
vicinity of the operations. Immediately replace any item taken from the first
aid kit.
When asking for help, please give the following information:
– Place of accident
– What happened
– Number of injured persons
– Extent of injuries
– Your name
Packaging
– The DOLMAR power sprayer is delivered in a protective cardboard box to
prevent shipping damage. Cardboard is a basic raw material and is therefore
consequently reusable or suitable for recycling (waste paper recycling).
5
Page 6

EC-DECLARATION OF CONFORMITY
Model; SP-252.4R
We declare under our sole responsibility that this product is in compliance with the following standards of standardized
documents, EN292, EN55012 in accordance with Council Directives, 89/392/EEC, amended 98/37/EEC, 93/68/EEC,
89/336/EEC, amended 92/31/EEC.
Measured Sound Power: 98 dB
Guarantee Sound Power: 102 dB
These sound power levels wear measured in accordance with Council Directive, 2000/14/EC.
Conformity assessment procedure: Annex V.
CE2007
Shigeharu kominami Rainer Bergfeld
Managing Director Managing Director
Responsible Manufacturer:
Makita Corporation.
3-11-8,Sumiyoshi-cho, Anjo, Aichi, JAPAN
Authorized Representative in Europe:
DOLMAR Gmbh
Jenfelder Str. 38, 22045 Hamburg, Germany
6
Page 7

TECHNICAL DATA
Model SP-252.4R
Dimensions: (length x width x height) mm 380 x 420 x 635
Dry weight kg 9.1
Chemical tank capacity L 20
Pump
Type Horizontal opposed twin pistons
Max. Pressure MPa 2.5
Suction L 7.1
Engine
Model EH025A
Displacement cm
Fuel Automobile gasoline
Fuel tank capacity L 0.5
Engine oil
Engine oil capacity L 0.08
Caburetor type WALBRO WYL
Ignition system type Solid state ignition
Spark plag type NGK CMR6A (C type)
Electrode gap mm 0.7 - 0.8
3
SAE 10-W-30 oil API SF or later (4-stroke automobile engine oil)
24.5
Sound pressure levels
Sound pressure level (Lpa) to 98/37/EC
Guaranteed sound power level (Lwa) to 2000/14/EC
dB 84.0
dB 102.0
Note: 1. Use the oil and spark plug specified by DOLMAR.
2. This specification is subject to change without prior notice.
7
Page 8

DESIGNATION OF PARTS
No
1
2
3
4
5
6
7
8
DESIGNATION OF PARTS
I-O Switch
Throttle lever
Choke lever
Air cleaner cover
Plug cover
Starter knob
Fuel tank
Fuel tank cap
No
9
10
11
12
13
14
15
16
DESIGNATION OF PARTS
Muffler
Oil gauge
Primer Pump
Chemical tank drain cap
Chemical tank cap
Chemical tank
Pressure dial
Sprayer hose
No
17
18
19
20
21
22
23
24
DESIGNATION OF PARTS
Quick connector
Handgrip
Nozzle lever
Nozzle pipe
Nozzle pipe holder
Nozzle (wide angle twin head)
8
Page 9

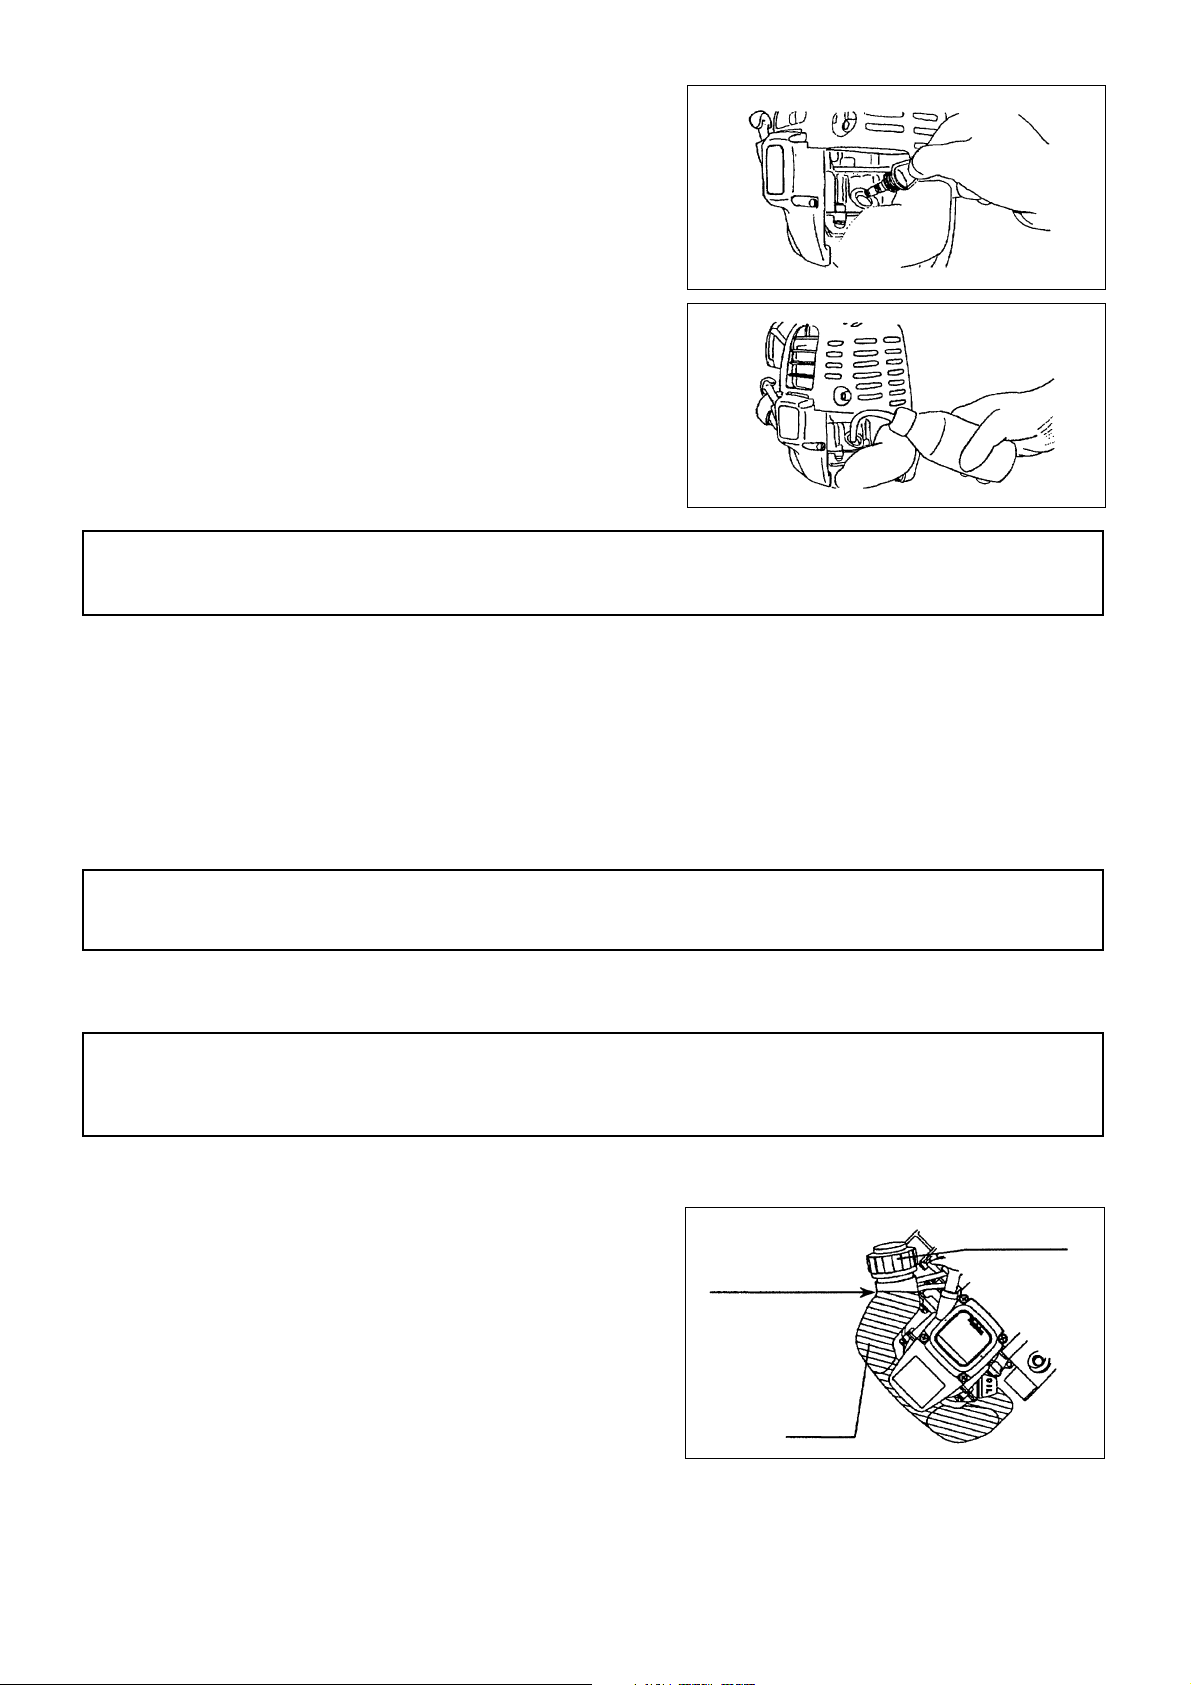
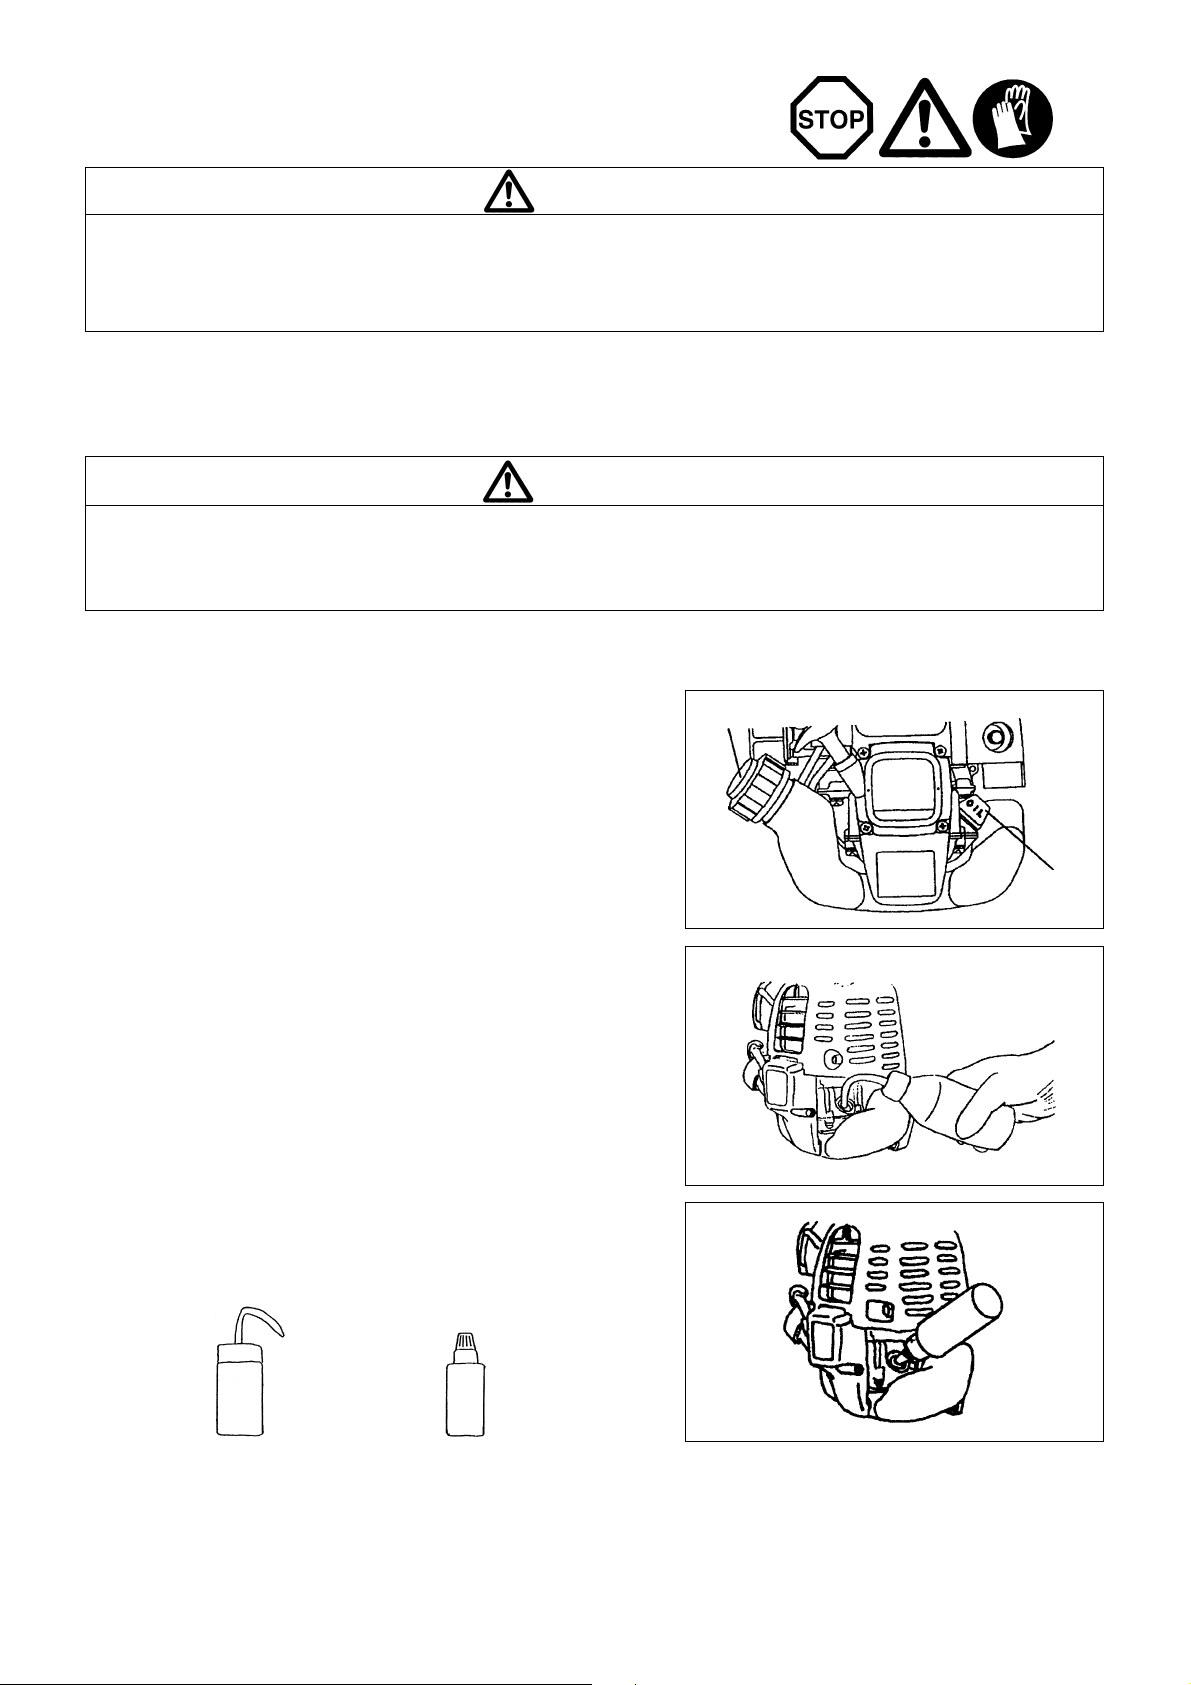
ASSEMBLY INSTRUCTIONS
CAUTION: Before performing any work on the power sprayer, always switch off the motor and pull the spark plug connectors off the spark plug.
Always wear protective gloves!
CAUTION: Start the power sprayer only after having assembled it completely.
1. ASSEMBLY OF NOZZLE
Refer to the figure on the previous page (DESIGNATION OF PARTS) to assemble handgrip, nozzle lever, nozzle pipe and nozzle. Be careful to
put parts together properly to prevent leaks.
2. SETTING OF SHOULDER HARNESS
Set the two shoulder harnesses on a chemical tank in a way shown below without any twists of the shoulder harnesses. Instructions are given
about the ones for one of the shoulder harnesses.
Setting upper part of shoulder harness
㽲 㽳 㽴
Chemical tank
Pull the harness in the direction of
the arrow and put its folded end at
the lower end of the buckle.
Upper buckle
Setting lower part of shoulder harness
Upper buckle
Lower buckle
Chemical tank
Put the part 'A', of the harness
㽳 㽲
through this gap of the metallic hook.
Then raise the harness to
the degree of 90, in the
direction of the arrow.
Metallic hook
Repeat the same instructions for the
㽴
other shoulder harness to finish the
setting.
Put the back harnesses 'A'. one of the
twooverlapped harnesses, at the metallic
hook in a way shown below at ԙ and Ԛ.
Metallic hook
9
Page 10
BEFORE START OF OPERATION
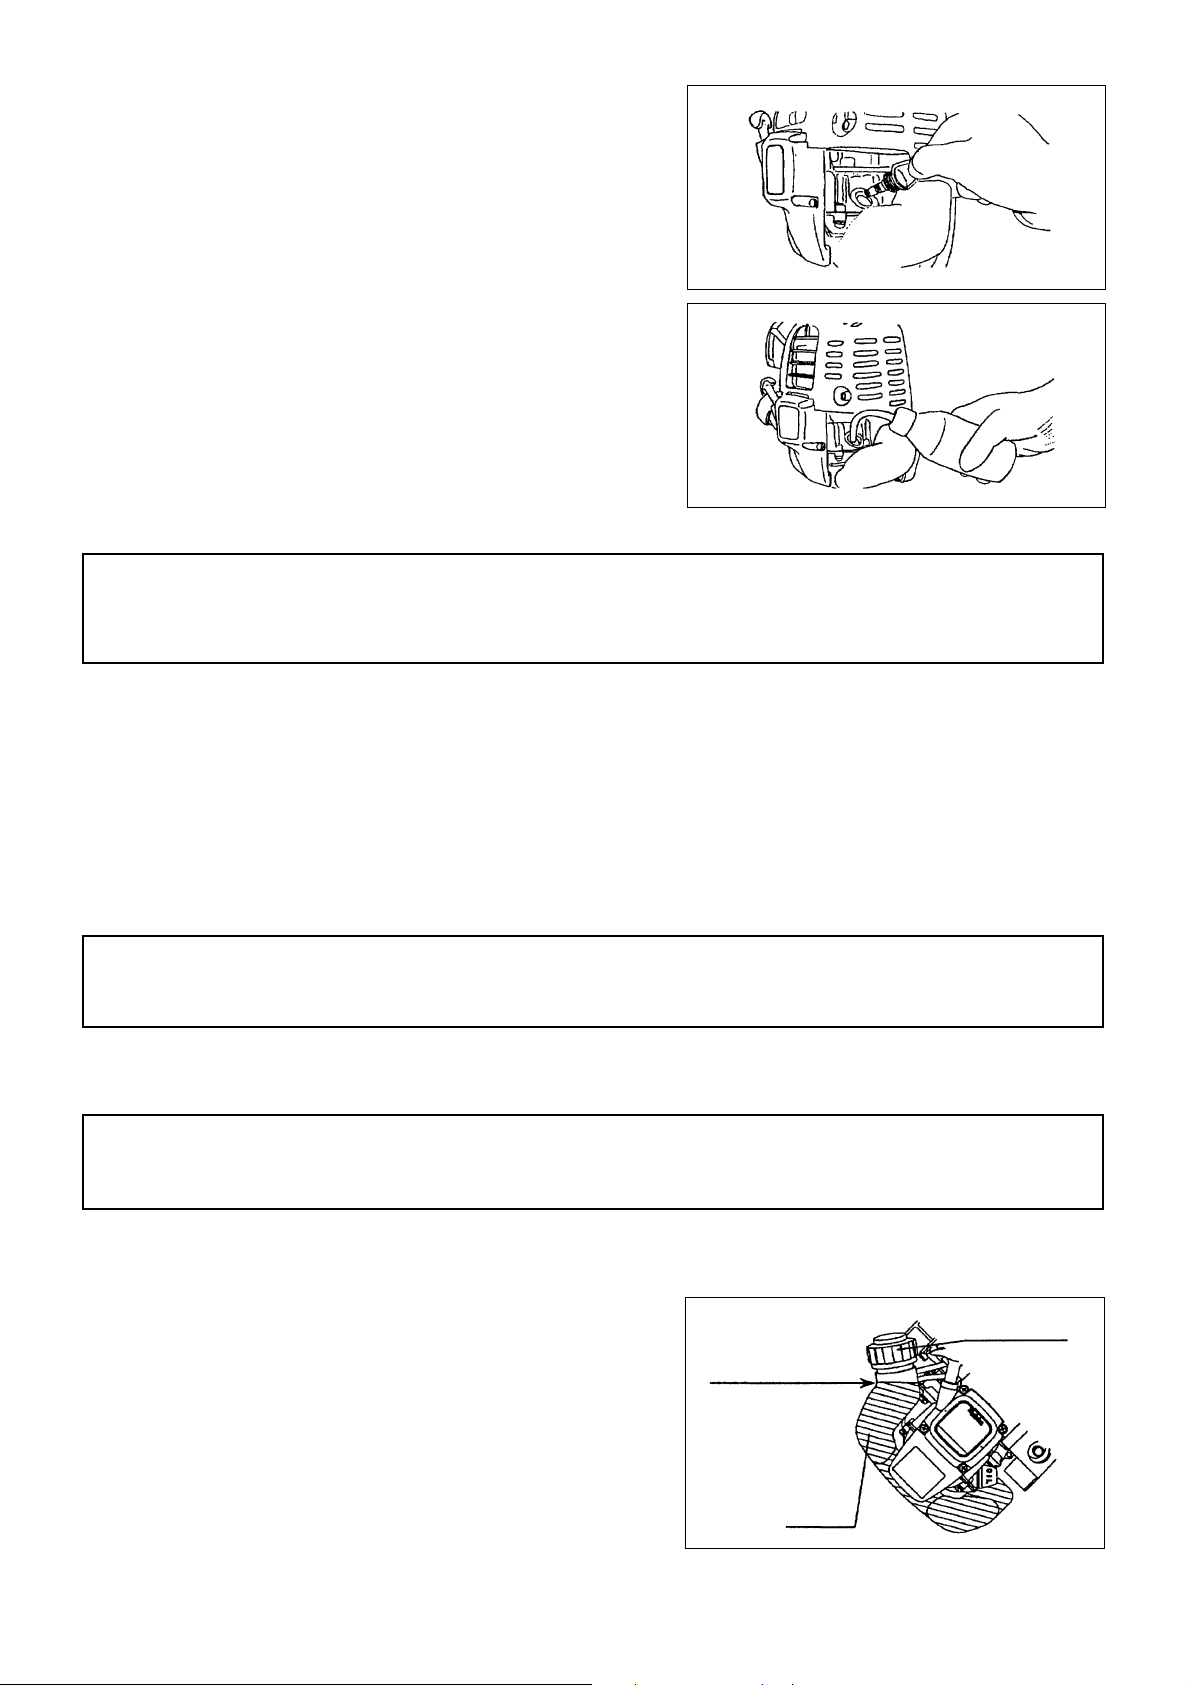
Inspection and Refill of Engine Oil
– Perform the following procedure, with the engine cooled down.
– While keeping the engine level, remove the oil gauge, and confirm that the oil is filled within the upper and lower limit marks.
When the oil is in short in such a way that the oil gauge touches the oil only by its tip, in particular with the oil gauge remaining inserted in the
crankcase without screwing-in (Fig. 1), refill new oil near the port (Fig. 2).
– For reference, the oil refill time is about 10h (10 times or 10 tanks of oil refill).
– If the oil changes in color or mixes with dirt, replace it with new one. (For the interval and method of replacement, refer to P 16)
Recommended oil: SAE 10W-30 oil of API Classification, Class SF or higher (4-stroke engine for automobile)
Oil volume: Approx. 0.08 L
Note: If the engine is not kept upright, oil may go into around the engine, and may be refilled excessively.
If the oil is filled above the limit, the oil may be contaminated or may catch fire with white.
Point 1 in Replacement of Oil “Oil Gauge”
– Remove dust or dirt near the oil refill port, and detach the oil gauge.
– Keep the detached oil gauge free of sand or dust. Otherwise, any sand or dust adhering to the oil gauge may cause
irregular oil circulation or wear on the engine parts, which will result in troubles.
– As an example to keep the oil gauge clean, it is recommended to insert the oil gauge on its knob side into the engine cover,
as shown in Fig.3.
Upper limit
(Edge of oil refill port)
If oil adheres around
this tip, refill new oil.
Fig.1 Fig.2
Oil gauge
Fig.3
10
Page 11
1) Keep the engine level, and detach the oil gauge.
2) Fill oil up to the edge of the oil refill port. (Refer to Fig.2 of the preceding
page).
Feed oil with the lubricant refill container.
3) Securely tighten the oil gauge. Insufficient tightening may cause oil leakage.
Point 2 in Replacement of Oil: “If oil spills out”
– If oil spills out between the fuel tank and engine main unit, the oil is sucked into through the cooling air intake port, which
will contaminate the engine. Be sure to wipe out spilt oil before start of operation.
REFUELING
Handling of Fuel
It is necessary to handle fuel with utmost care. Fuel may contain substances similar to solvents. Refueling must be performed in a sufficiently
ventilated room or in the open air. Never inhale fuel vapor, and keep fuel away from you. If you touch fuel repeatedly or for a long time, the skin
becomes dry, which may cause skin disease or allergy. If fuel enters into the eye, clean the eye with fresh water. If your eye remains still
irritated, consult your doctor.
Storage Period of Fuel
Fuel should be used up within a period of 4 weeks, even if it is kept in a special container in a well-ventilated shade.
If a special container is not used or if the container is not covered, fuel may deteriorate in one day.
STORAGE OF MACHINE AND REFILL TANK
– Keep the machine and tank at a cool place free from direct sunshine.
– Never keep the fuel in the cabin or trunk.
Fuel
The engine is a four-stroke engine. Be sure to use an automobile gasoline (regular gasoline or premium gasoline).
Points for Fuel
– Never use a gasoline mixture which contains engine oil. Otherwise, it will cause excessive carbon accumulation or
mechanical troubles.
– Use of deteriorated oil will cause irregular startup.
Refueling
WARNING: INFLAMMABLES STRICTLY PROHIBITED
Gasoline used: Automobile gasoline (unleaded gasoline)
– Loosen the tank cap a little so that there will be no difference in atmospheric
pressure.
– Detach the tank cap, and refuel, discharging air by tilting the fuel tank so that
the refuel port will be oriented upward. (Never refill fuel full to the oil refill
port.)
– Wipe well the periphery of the tank cap to prevent foreign matter from
entering into the fuel tank.
– After refueling, securely tighten the tank cap.
• If there is any flaw or damage on the tank cap, replace it.
• The tank cap is consumable, and therefore should be renewed every two to
three years.
Fuel upper limit
Fuel tank
Fuel tank cap
11
Page 12

MIXING AGURICULTUAL CHEMICALS
1) Mixing aguricultual chemicals
1. Aguricultual chemicals are toxic. When working with aguricultual
chemicals, strictly follow the instructions provided by the manufacturer
at all times.
2. Always use the provided strainer when pouring aguricultual chemicals
into the chemical tank.
3. Firmly tighten the chemical tank cap to prevent leaks.
4. If chemicals are to be mixed inside the chemical tank, alwys add water
before other sguricultual chemicals.
CAUTION:
• Always handle agricultural chemicals with the utmost care. Should your skin come into contact with agricultural chemicals by accident,
immediately rinse the affected area with large amounts of water.
2) Using a different type of chemical agent
1. Take extra care to thoroughly rinse the sprayer tank, pump and nozzle
before adding different chemical agents to the sprayer tank. Mixing the
residues of previously used agricultural chemicals with other chemical
agents may cause toxin-induced diseases.
STARTING THE ENGINE
WARNING
• Never attempt engine start in a place where the fuel has been supplied. When starting the engine, keep a distance of at least 3m.
- Otherwise, it will may cause ignition or fire.
• Exhaust gas from the engine has toxic consequences. Do not operate the engine in a poorly-ventilated place. Such as in a tunnel,
building, etc.
-Operating the engine in the poorly-ventilated place may cause poisoning by exhaust gas.
• In case of derection of any abnormality sound, odor, vibration after start, stop the engine immediately and carry out inspection.
- If the engine is operated without attending such abnomality, an accident may occur.
• Confirm that the engine stops when the stop switch is set to “O” position.
1) Before starting the engine, always confirm that the chemical tank contains
fluid.
2) Turn the nozzle lever to the CLOSED position.
NOZZLE LEVER
CLOSED
12
Page 13
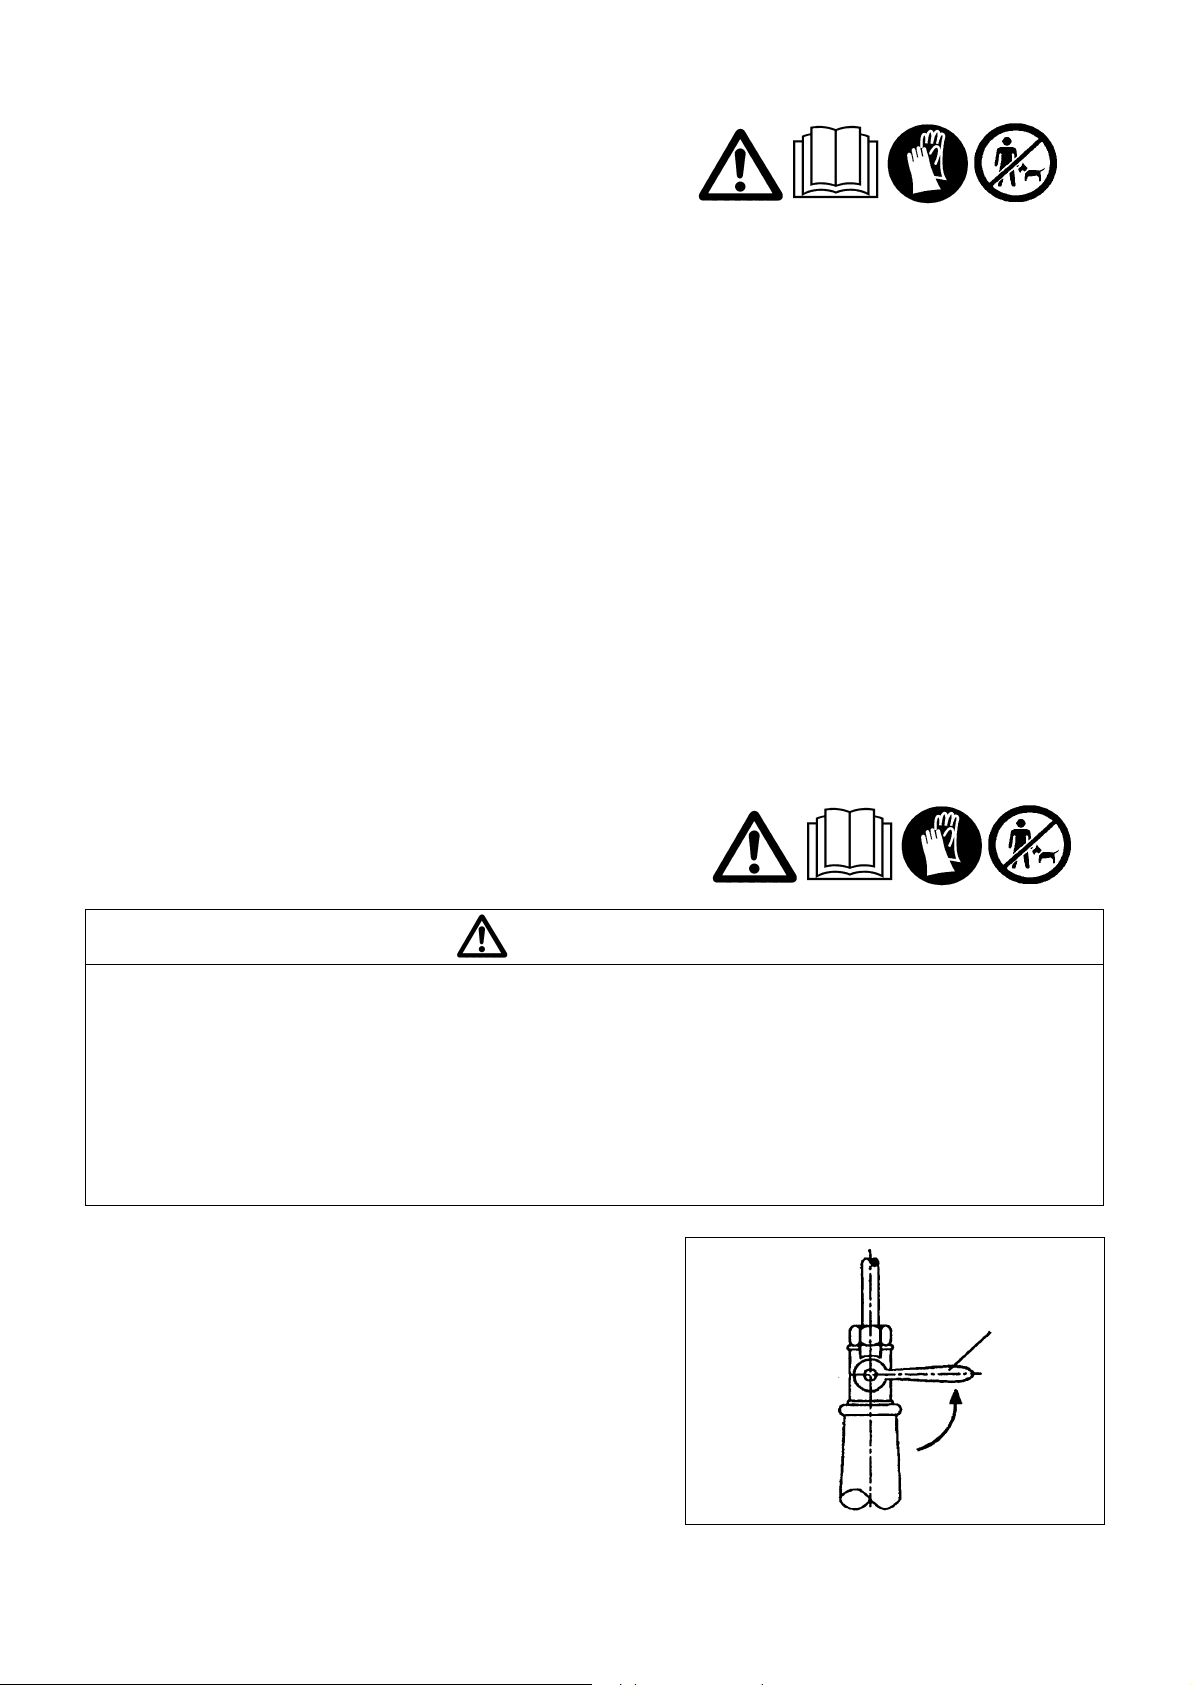
3) Rotate the pressure dial and align the STARTING tab with the mark.
1) When the engine is cold, or when the fuel it refueled
(1) Set this machine on a flat space.
(2) Set the I-O switch to “ I “ position.
(3) Make sure that the throttle lever is the SLOW position.
(4) Continue to push the primer pump untill fuel enters into the primer
pump.
• In general, fuel enters into the carburetor by 7 to 10 Pushes.
• If the primer pump is pushed excessively, an excess of gasoline
returns to the fuel tank.
(5) Lifting the choke lever of the air cleaner right side, close the choke
lever.
(6) Hold the element cover with a left hand to prevent the engine from
moving, settle down to take the stable position.
(7) Pull out slowly the starter handle till a certain resistance is felt. Return
the starter handle backward once from this position, then pull it out
with force.
• Never pull the rope to the full.
• Once the start knob is pulled, never release your hand immediately.
Hold the start knob until it returns to its original point.
(8) When the engine starts, open the choke lever.
• Open the choke lever progressively while checking the engine
operation. Be sure to open the choke lever to the full in the end.
• In cold or when the engine is cooled down, never open the choke
lever suddenly. Otherwise, the engine may stop.
(9) Continue warm-up operation for 2 to 3 minutes.
(10) Rotation of the engine speed stabilizes and when from low speed
making at high speed rotation, if reaches the point where it
accelerates smoothly, it is completion of warming-up.
“STARTING” TAB
PRESSURE DIAL
SLOW
Throttle lever
Primer pump
switch
Close
Open
13
Page 14
2) When the engine is warm
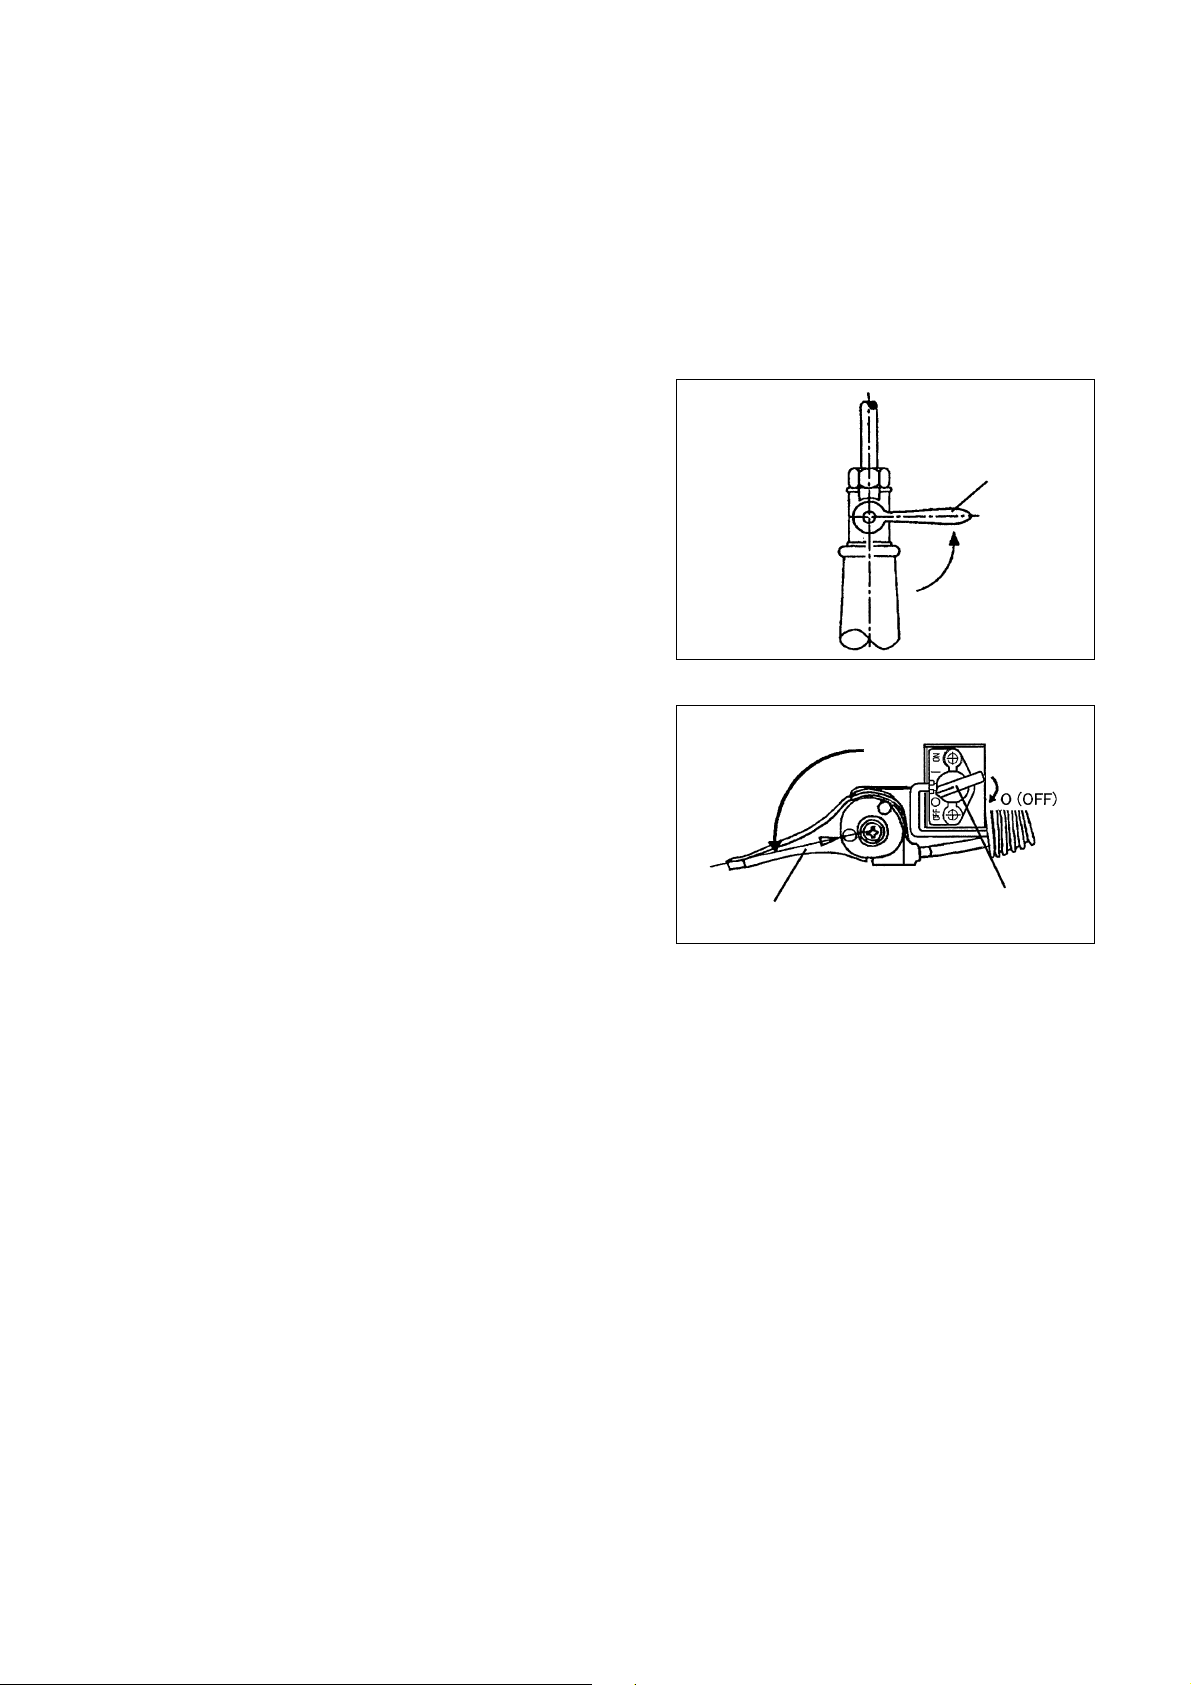
(1) Place the engine on a flat ground.
(2) Press the primary pump several times.
(3) Confirm that the choke lever is open.
(4) Hold the element cover with a left hand to prevent the engine from moving, settle down to take the stable position.
(5) Pull out slowly the starter handle till a certain resistance is felt. Return the starter handle backward once from this position, then pullit
out with force.
(6) When the engine is difficult to start, open the throttle valve by about 1/3.
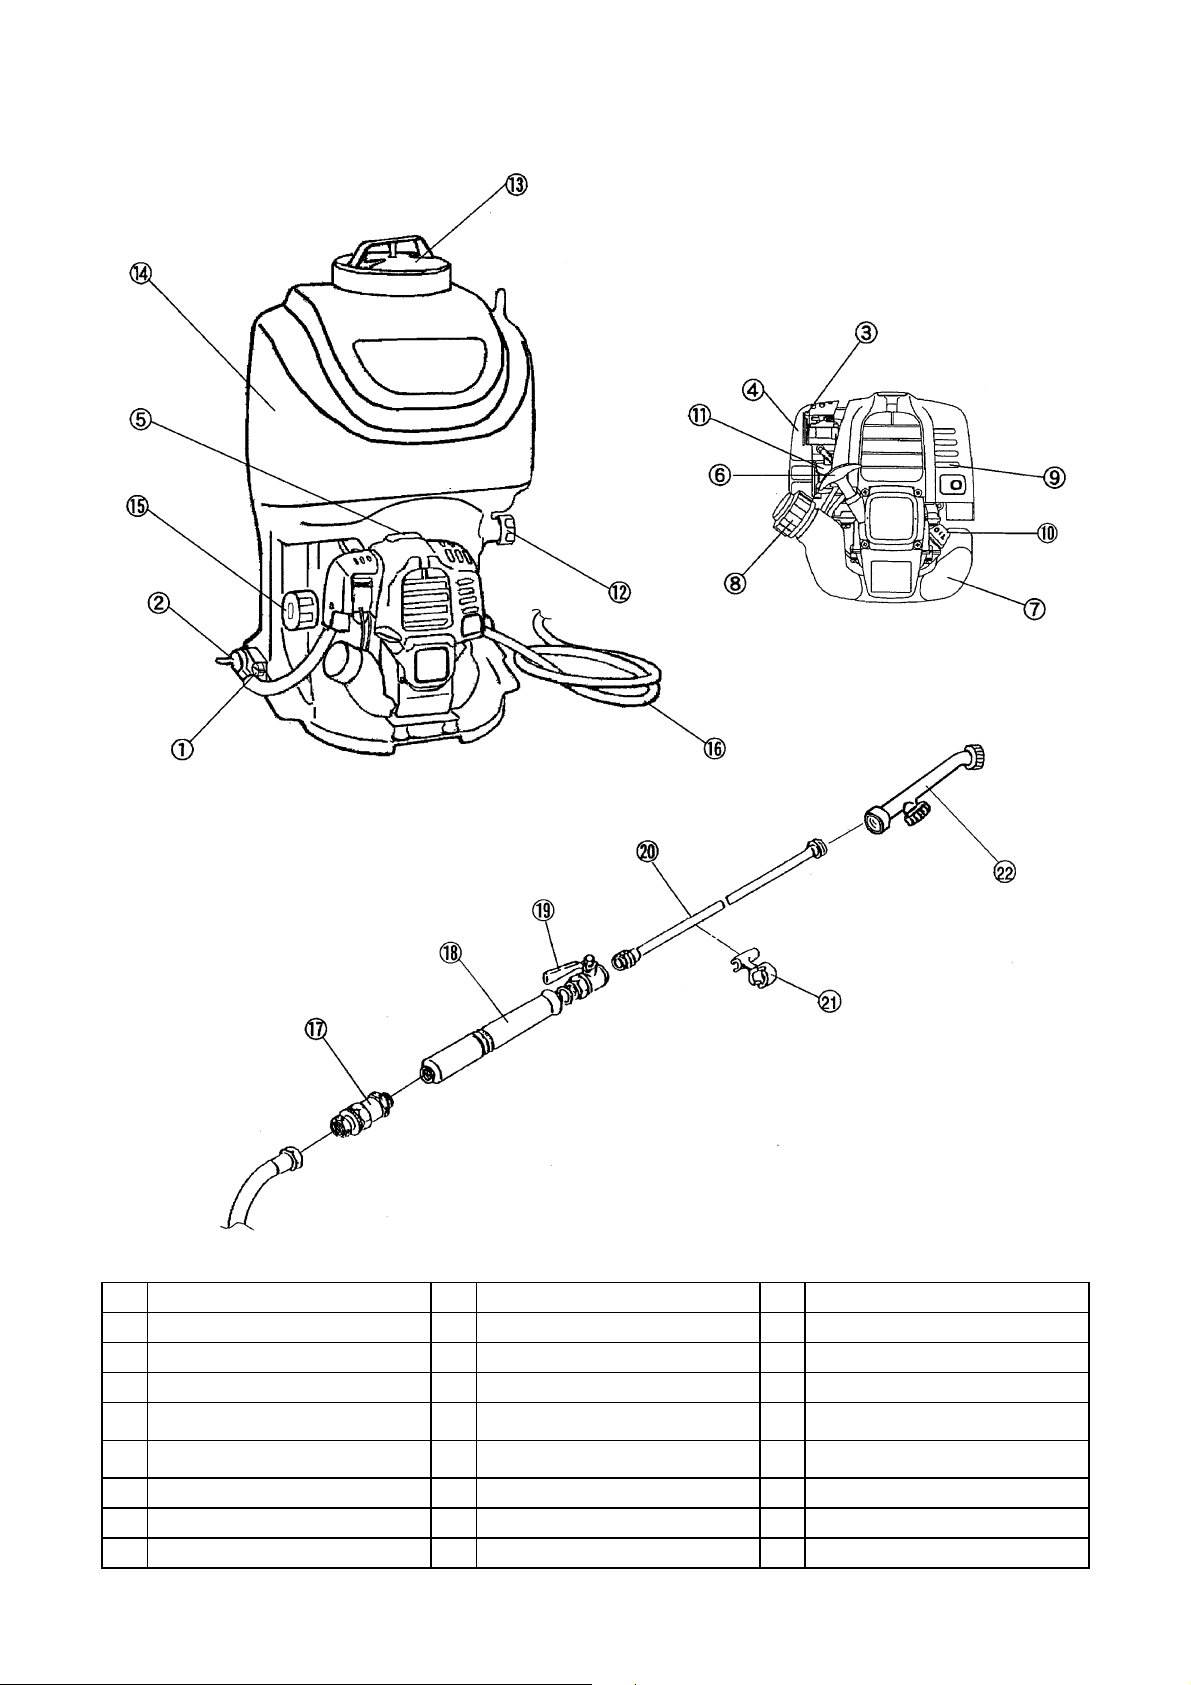
STOPPING THE ENGINE
1) Turn the nozzle lever to the CLOSE position.
2) Turn the I-O switch to “O” Position.
3) Move the throttle lever to the SLOW position.
SLOW
Throttle lever
NOZZLE LEVER
CLOSED
I-O switch
14
Page 15
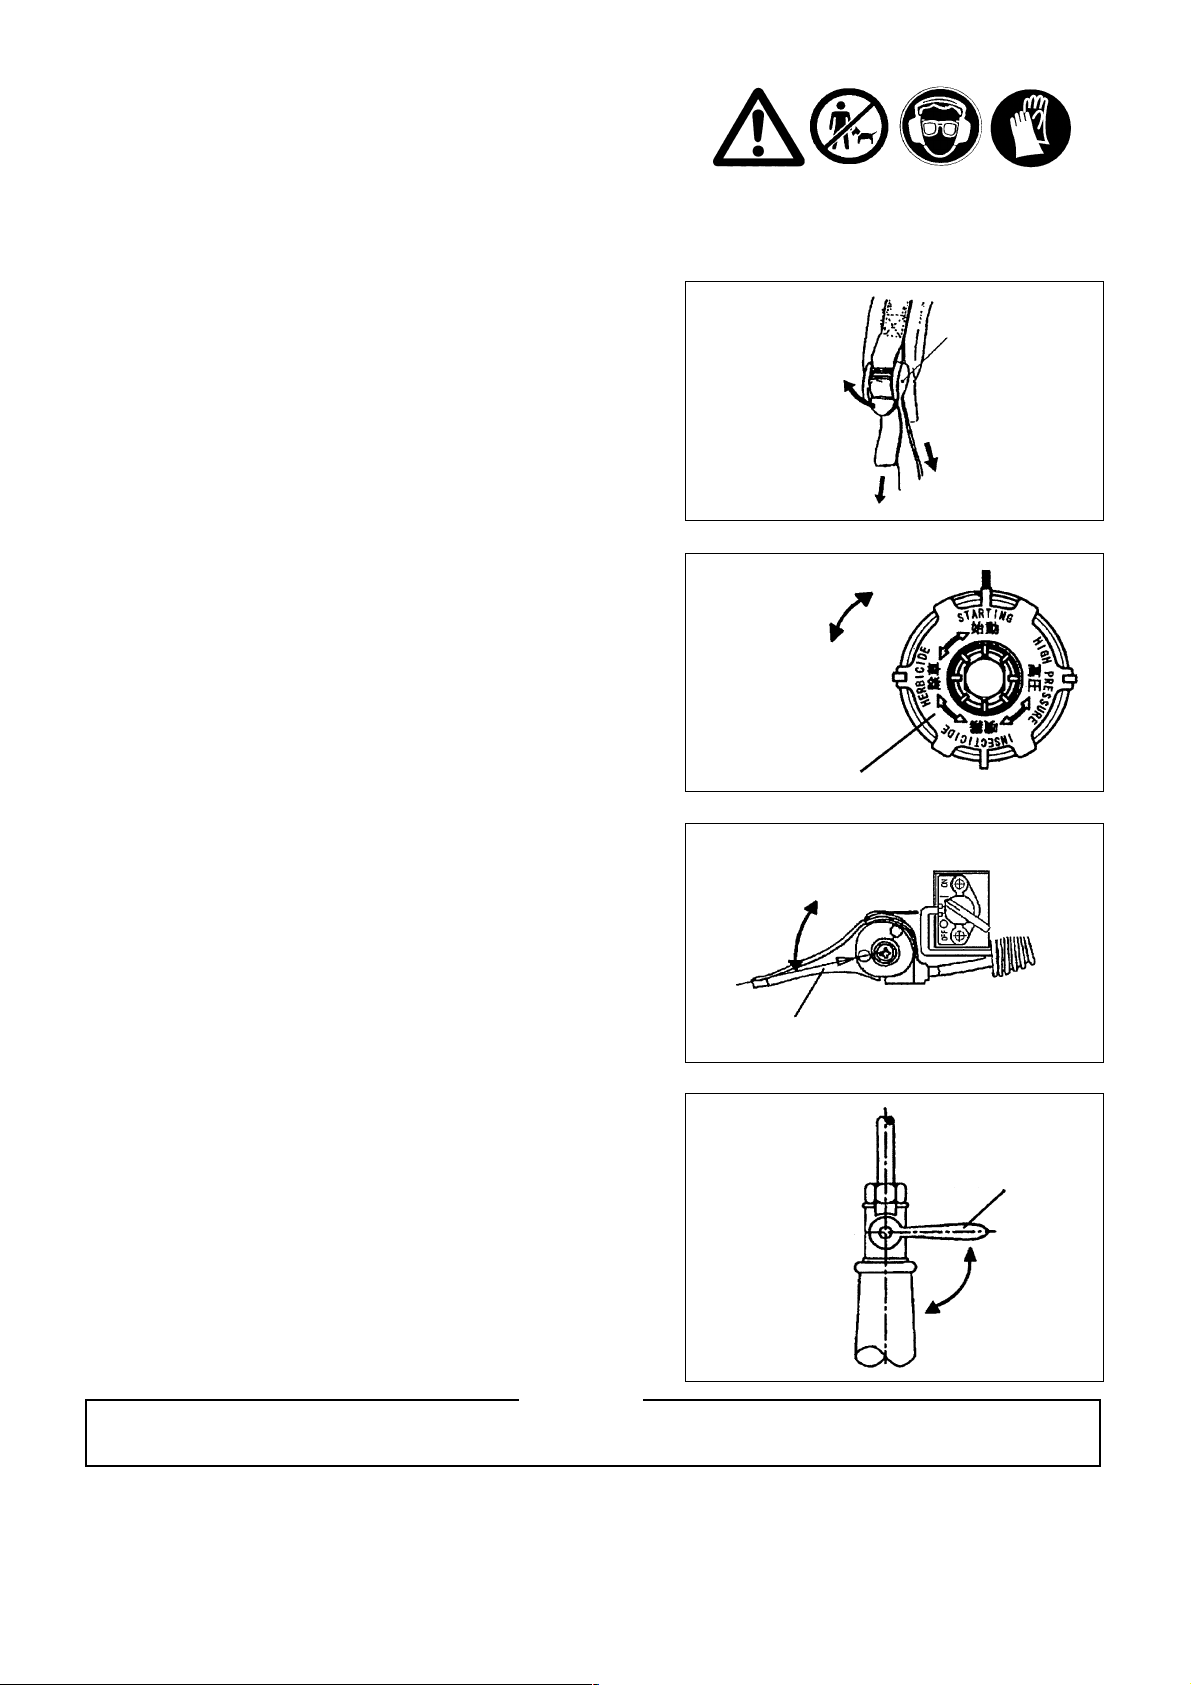
OPERATION
1. Start the engine (see page 12)
2. After starting the engine, mount the power sprayer on your back and adjust the shoulder straps so as to keep the unit as close to your body
as possible. Put the engine in idle and take care not to tilt the power sprayer unit too much.
Adjust straps as follows.
1) Loosening straps: Ԙ Raise buckle
ԙPull on the end of the strap attached to the power
sprayer.
2) Tightening straps: Ԛ Pull on the free end of the strap.
Note: If straps do not carry any weight, they can be tightened with
relative ease.
3. Serect the desired opereting position the pressure dial.
4. Move the throttle lever at the desired position with the nozzle lever moved
while observing the spray.
When using the power sprayer always spray downwind. Take special care to avoid situations where sprayed chemicals are blown back
towards you.
CAUTION
LOW PRESSURE
PRESSURE DIAL
SLOW
Throttle lever
Ԙ
Ԛ
Loosen
HIGH PRESSURE
FAST
Buckle
ԙ
Tighten
NOZZLE LEVER
CLOSED
OPEN
15
Page 16
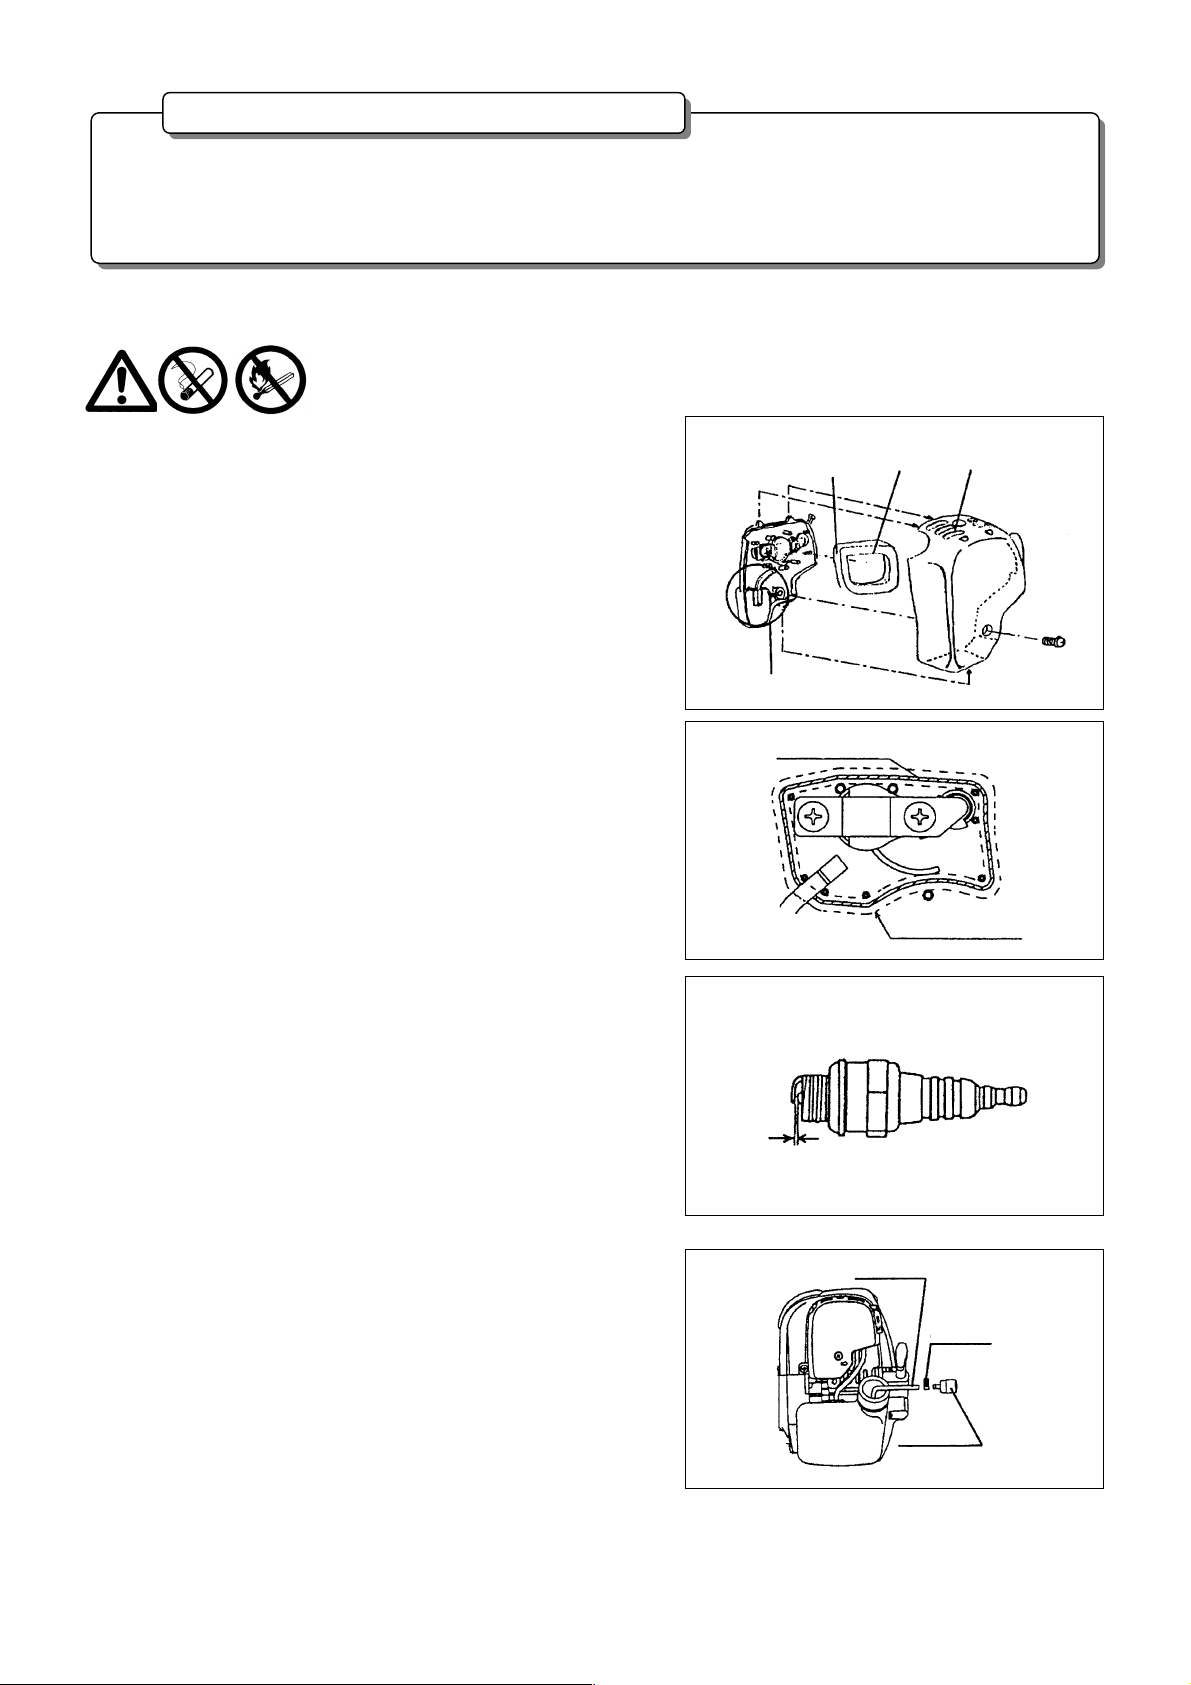
INSPECTION AND MAINTENANCE
!
!
!
DANGER
• Before inspection and maintenance, stop the engine and allow it to cool. Remove also the spark plug and plug cap.
- If inspention or maintenance is attempted immediately after engine stop or with the plug cap left attached, the operator may suffer buun or
an accident due to careless startup.
• After inspection and maintenance, be sure to confirm that all parts are assembled. Then, proceed to operation.
㩷
1. Replacement of engine oil
Deteriorated engine oil will shorten the life of the sliding and rotating parts to a great extent. Be sure to check the period and quantity of
replacement.
㩷
DANGER
• In general, the engine main unit and engine oil still remain hot just after the engine is stopped. In replacement of oil, confirm that the
engine main unit and engine oil are sufficiently cooled down. Otherwise, there may remain a risk of scald. In addition just after of the
engine stopping because oil does not finish to return in the oil case, becomes cause of the oil inserting too much
• If the oil filled above the limit, it may be contaminated or may catch fire with white smoke.
Interval of replacement: Initially, every 20 operating hours, and subsequently every 50 operating hours
Recommended oil: SAE10W-30 oil of API Classification SF Class or higher (4-stroke engine oil for automobile)
In replacement, perform the following procedure.㩷
1) Confirm that the tank cap is tightened securely.
2) Detach the oil gauge.
- Keep the oil gauge free from dust or dirt.
3) Use the provided oil extraction bottle to remove the old oil from the oil
reservoir.
• Squeeze the body of the bottle to and insert the nozzle into the oil.
Release pressure on the bottle to draw the old oil from the oil reservoir.
• When the oil reservoir is almost empty, tilt the power sprayer unit
slightly in order to facilitate removal of the remaining engine oil.
4) Return the engine to level. Using the lubricant refill bottle, fill with new oil
up to the top of the oil reservoir.
5) Replace and securely tighten the dip stick. Insufficient tightening will lead
to oil leaks.
• Use the provided oil extraction bottle and lubricant refill bottle for their
intended purposes.
Oil extraction bottle Lubricant refill bottle
Fuel tank cap
Oil gauge
16
Page 17
A
A
t
㩷
㩷
• Never discard replaced engine oil in garbage, earth or sewage ditch. Disposal of oil is regulated by law. In disposal, always follow the
relevant laws and regulations. For any points remaining unknown, contact Authorized Service Agent.
• Oil will deteriorate even when it is kept unused. Perform inspection and replacement at regular intervals (replace with new oil every 6
months).
Points in replacement of engine oil㩷
㩷
㩷㩷
2. Cleaning of air cleaner
WARNING: INFLAMMABLES STRICTLY PROHIBITED
Interval of Cleaning and Inspection: Daily (every 10 operating hours)
– Remove the air cleaner cover-fixing bolts.
– Pull the lower side of the cover and detach the air cleaner cover.
– Fully close the choke, and ensure that the carburetor is free from dust or dirt.
– Remove the air cleaner element, wash element with neutral detergent diluted
with tepid water, and let element dry. Replace the element in the position
indicated by the dotted line in fig. 1.
– Use a piece of paper to wipe off any oil adhering to the air cleaner cover and
plate breather.
– Immediately after cleaning, attach the cleaner cover and use the attachment
bolt for fixing. (When remounting, position the upper part of the cover first
and then the lower.).
Place cut part in
this position (top left)
Plate
Breather section
Fig.1
Line (slashed line)
Element
Element (dotted lines)
ir cleaner cover
bolt
ttachmen
3. Checking the spark plug
– Only use the supplied universal wrench to remove or to install the spark plug.
– The gap between the two electrodes of the spark plug should be 0.7-0.8mm
(0.028”-0.032”). If the gap is too wide or too narrow, adjust it. If the spark
plug is clogged with carton or fouled, clean it thoroubhly or replace it.
CAUTION: Never touch the spark plug connector while the engine is running
(danger of high voltage electric shock).
4. Cleaning of fuel filter
WARNING: INFLAMMABLES STRICTLY PROHIBITED
Interval of Cleaning and Inspection: Monthly (every 50 operating hours)
0.7~0.8 mm
(0.028”-0.032”)
Fuel pipe
Hose clamp
Suction head in the fuel tank
– The fuel filler (1) of the suction head is used to filler the fuel required by the
carburetor.
– A periodical visual inspection of the fuel filter is to be conducted. For that
purpose open the tank cap, use a wire hook and pull out the suction head
through the tank opening. Filters found to have hardened, been polluted or
clogged up are to be replaced.
– Insufficient fuel supply can result in the admissible maximum speed being
exceeded. It is therefore important to replace the fuel filter at least quarterly
to ensure satisfactory fuel supply to the carburetor.
Fuel
filter (1)
17
Page 18

Fault location
Fault System Observation Cause
Engine not starting or with
difficulty
No ignition spark STOP-switch operated, wiring fault or short circuit, spark
Fuel supply Fuel tank filled Incorrect choke position, carburetor defective, fuel
Compression No compression when
Mechanical fault Starter not engaging Broken starter spring, broken parts inside of the engine
Warm start problems Tank filled ignition spark
Engine starts but dies Fuel supply Tank filled Incorrect idling adjustment, carburetor contaminated
Fuel tank vent defective, fuel supply line interrupted,
Insufficient performance Several systems
Operating time
Item
Engine oil
Tightening parts
(bolt, nut)
Ignition system Ignition spark O.K. Fault in fuel supply or compression system, mechanical
defect
plug or connector defective, ignition module faulty
supply line bent or blocked, fuel dirty.
Cylinder bottom gasket defective, crankshaft seals
pulled over
damaged, cylinder or piston rings defective or improper
sealing of spark plug
Carburetor contaminated, have it cleaned
existing
cable or STOP-switch faulty
Engine idling poor Air filter contaminated, carburetor contaminated, muffler
may simultaneously
clogged, exhaust duct in the cylinder clogged
be affected
Before
operation
After
lubrication
Daily
(10h)
30h
50h
200h
Shutdown/r
est
Inspect/clean ٤
Replace
٤
*1
Inspect ٤
Fuel tank
Drain fuel
٤
*3
Throttle lever Check function ٤
Stop switch Check function ٤
Low-speed rotation Inspect/adjust ٤
Air cleaner Clean ٤
Ignition plug Inspect ٤
Cooling air duct Clean/inspect ٤
Inspect ٤
Clean/inspect ٤
Fuel pipe
Replace ٧
*2
Fuel filter Clean/replace ٤
Clearance between air intake
valve and air discharge valve
Adjust ٧
*2
Oil tube Inspect ٧*2
Engine overhaul ٧*2
Carburetor Drain fuel ٤*3
*1 Perform initial replacement after 20h operation.
*2 For the 200 operating hour inspection, request Authorized Service Agent or a machine shop.
*3 After emptying the fuel tank, continue to run the engine and drain fuel in the carburetor.
18
Page 19

TROUBLESHOOTING
– Before making a request for repairs, check a trouble for yourself. If any abnormality is found, control your machine according to the
description of this manual. Never tamper or dismount any part contrary to the description. For repairs, contact Authorized Service Agent or
local dealership.
State of abnormality Probable cause (malfunction) Remedy
Failure to operate primer pump Push 7 to 10 times.
Low pulling speed of starter rope Pull strongly.
Lack of fuel Feed fuel.
Clogged fuel filter Clean
Broken fuel tube Straighten fuel tube
Engine does not start
Engine stops soon
Engine speed does not increase
Engine does not stop.
Run engine at idling, and set choke
lever to CLOSE.
Deteriorated fuel
Excessive suction of fuel
Detached plug cap Attach securely
Contaminated spark plug Clean
Abnormal clearance of spark plug Adjust clearance
Other abnormality of spark plug Replace
Abnormal carburetor Make request for inspection and maintenance.
Starter rope cannot be pulled Make request for inspection and maintenance
Abnormal drive system Make request for inspection and maintenance
Insufficient warm-up Perform warm-up operation
Choke lever is set to “CLOSE” although engine
is warmed up
Clogged fuel filter Clean
Contaminated or clogged air cleaner Clean
Abnormal carburetor Make request for inspection and maintenance
Abnormal drive system Make request for inspection and maintenance
Detached throttle wire Attach securely
Detached connector Attach securely
Abnormal electric system Make request for inspection and maintenance.
Deteriorated fuel makes starting more difficult.
Replace with new one. (Recommended
replacement: 1 month)
Set throttle lever from medium speed to high
speed, and pull starter handle until engine
starts.
If engine will not start still, remove spark plug,
make electrode dry, and reassemble them as
they originally are. Then, start as specified.
Set to “OPEN”
When the engine does not start after warm-up operation:
If there is no abnormality found for the check items, open the throttle by about 1/3 and start the engine.
19
Page 20
French
Nous vous remercions d’avoir choisi le super pulvérisateur DOLMAR. Nous sommes heureux de
pouvoir vous offrir un produit qui est le fruit d’un programme de développement intensif et de plusieurs
années de savoir et d'expérience.
Prière de lire entièrement ce manuel avant d’utiliser l’appareil et de suivre les instructions données afin
d’obtenir le meilleur résultat et le bon fonctionnement de votre super pulvérisateur DOLMAR.
Table des matières Page
Symboles
㨯㨯㨯㨯㨯㨯㨯㨯㨯㨯㨯㨯㨯㨯㨯㨯㨯㨯㨯㨯㨯㨯㨯㨯㨯㨯㨯㨯㨯㨯㨯㨯㨯㨯㨯㨯㨯㨯㨯㨯㨯㨯㨯㨯
Consignes de sécurité
Caractéristiques techniques
Liste des pièces
㨯㨯㨯㨯㨯㨯㨯㨯㨯㨯㨯㨯㨯㨯㨯㨯㨯㨯㨯㨯㨯㨯㨯㨯㨯㨯㨯㨯㨯㨯㨯㨯㨯㨯㨯㨯㨯㨯
Instructions de montage
Avant mise en marche
Melange des chimiques agricoles
Démarrage du moteur
Arrêt du moteur
Mise en marche
㨯㨯㨯㨯㨯㨯㨯㨯㨯㨯㨯㨯㨯㨯㨯㨯㨯㨯㨯㨯㨯㨯㨯㨯㨯㨯㨯㨯㨯㨯㨯㨯㨯㨯㨯㨯㨯㨯㨯
㨯㨯㨯㨯㨯㨯㨯㨯㨯㨯㨯㨯㨯㨯㨯㨯㨯㨯㨯㨯㨯㨯㨯㨯㨯㨯㨯㨯㨯㨯㨯㨯㨯㨯㨯㨯㨯㨯
Inspection et maintenance
Dépannage
㨯㨯㨯㨯㨯㨯㨯㨯㨯㨯㨯㨯㨯㨯㨯㨯㨯㨯㨯㨯㨯㨯㨯㨯㨯㨯㨯㨯㨯㨯㨯㨯㨯㨯㨯㨯㨯㨯㨯㨯㨯㨯
SYMBOLES
Lors de la lecture de ce manuel, prêtez une attention particulière aux symboles ci-après:
㨯㨯㨯㨯㨯㨯㨯㨯㨯㨯㨯㨯㨯㨯㨯㨯㨯㨯㨯㨯㨯㨯㨯㨯㨯㨯㨯㨯㨯㨯㨯㨯㨯
㨯㨯㨯㨯㨯㨯㨯㨯㨯㨯㨯㨯㨯㨯㨯㨯㨯㨯㨯㨯㨯㨯㨯㨯㨯㨯㨯㨯
㨯㨯㨯㨯㨯㨯㨯㨯㨯㨯㨯㨯㨯㨯㨯㨯㨯㨯㨯㨯㨯㨯㨯㨯㨯㨯㨯㨯㨯㨯㨯
㨯㨯㨯㨯㨯㨯㨯㨯㨯㨯㨯㨯㨯㨯㨯㨯㨯㨯㨯㨯㨯㨯㨯㨯㨯㨯㨯㨯㨯㨯㨯㨯㨯
㨯㨯㨯㨯㨯㨯㨯㨯㨯㨯㨯㨯㨯㨯㨯㨯㨯㨯㨯㨯㨯㨯㨯
㨯㨯㨯㨯㨯㨯㨯㨯㨯㨯㨯㨯㨯㨯㨯㨯㨯㨯㨯㨯㨯㨯㨯㨯㨯㨯㨯㨯㨯㨯㨯㨯㨯
㨯㨯㨯㨯㨯㨯㨯㨯㨯㨯㨯㨯㨯㨯㨯㨯㨯㨯㨯㨯㨯㨯㨯㨯㨯㨯㨯㨯㨯
20
21
25
26
27
28
30
30
32
33
34
37
Lire et suivre le manuel de fonctionnement. Essence et huile
AVERTISSEMENT/DANGER
INTERDIT
Interdit de fumer
Port de gants de protection obligatoire
Interdiction d’utilisation de produits
inflammables
Zone de fonctionnement interdite aux
humains et aux animaux
Moteur - Mise en marche manuelle
Arrêt d’urgence
Premiers secours
Marche
Arrêt
Recyclage
Porter de protection d'oeil, masque
protecteur et protection auditives
20
Page 21
CONSIGNES DE SECURITE
Généralités
– Pour tirer le meilleur parti de votre machine, vous devez lire, assimiler et
respecter les instructions figurant dans ce manuel.
Les utilisateurs mal informés risquent, par des manipulations inappropriées,
de se blesser ou de blesser leur entourage.
– Il est conseillé de ne prêter cet appareil qu’aux personnes ayant déjà une
certaine expérience des super pulvérisateurs.
– Dans ce cas, leur confier aussi le manuel d’instruction.
– Les utilisateurs qui ne connaissent pas encore le fonctionnement de la
machine devront demander à leur vendeur les explications qui leur
permettront de se familiariser avec le super pulvérisateur.
– Les enfants et les adolescents ne doivent pas être autorisés à utiliser la
machine. Au-delà de 16 ans, ils peuvent cependant apprendre à s’en servir,
mais uniquement sous le contrôle direct d’une personne qualifiée.
– Soyez toujours très prudent.
– N’utilisez la machine que si vous êtes en bonne condition physique.
Faites très attention à tout ce que vous faites. N'oubliez pas que vous êtes
responsable des autres.
– N’utilisez jamais l’appareil lorsque vous avez bu ou pris des calmants.
– N’utilisez pas l’appareil lorsque vous êtes fatigué.
– Conservez soigneusement ce manuel afin de pouvoir vous y référer
ultérieurement.
Equipements de protection
– Portez des vêtements fonctionnels, c’est-à-dire des vêtements légers, ne
provoquant aucune gêne. Evitez les bijoux, les vêtements ou les cheveux
longs, qui pourraient être happés par l’entrée d’air.
– Pour éviter de vous blesser et vous protéger contre tous les accidents
éventuels, il est conseillé d’utiliser les équipements décrits ci-après.
Notez notamment que;
– Porter des vêtements fonctionnels et près du corps sans toutefois entraver
les mouvements. Ne pas porter de bijoux ou de vêtements qui risquent de
s'accrocher dans les feuillages ou la machine.
– Porter l'équipement et les vêtements de protection suivants lors de
l'utilisation du super pulvérisateur pour éviter tout risque de blessures à la
tête, aux yeux, aux mains ou aux pieds et pour protéger son ouïe.
1. Porter toujours un casque de protection (masque, lunettes, etc.) pour se
protéger le visage, les yeux et les poumons de la poussière et des
produits chimiques.
2. Porter toujours un équipement de protection contre le bruit approprié
pour éviter une détérioration de l'ouïe.
3. Pour se protéger la peau de la poussière et des produits chimiques,
porter toujours une combinaison de travail avec des manches longues et
un pantalon.
4. Porter toujours des gants de travail en cuir épais lors de l'utilisation ou de
la réparation du super pulvérisateur.
5. Lors de l'utilisation du super pulvérisateur, il faut toujours porter des
chaussures solides munies d'une semelle antidérapante. Il existe des
chaussures spécial travail qui permettent d’éviter tout risque de blessure
et de déséquilibre.
– Attacher toujours les vêtements larges, les cheveux et tout accessoire tel
qu’une serviette ou autre pour éviter qu’ils ne s’accrochent aux pièces
mobiles de la machine et de provoquer des blessures.
Mise en route de l’appareil
– Assurez-vous qu’il n’y a personne dans un rayon de 15 mètres de l’appareil.
Ne l'utiliser jamais dans des zones urbaines.
– Avant de le mettre en route, vérifiez toujours la sécurité de la levier des gaz,
qui doit fonctionner facilement et sans à-coup.
Vérifiez également le fonctionnement de son système de verrouillage.
Assurez-vous que les poignées sont propres et sèches et vérifiez le
fonctionnement du commutateur de marche/arrêt.
Protections
auditives
Masque protectif
Pantalons longs
15 mètres
Waterproof cap
Lunettes de
protection
Manches
longues
Gants en
caoutchouc
Chaussures de
travail
21
Page 22
– Avant de démarrer le super pulvérisateur, vérifier toujours que la machine
peut fonctionner en toute sécurité et que le levier des gaz peut être actionné
facilement.
– Vérifier toujours et retirer tout outil utilisé pour assembler la machine pour
éviter qu’il ne soit projeter par le démarrage du moteur et qu’il ne provoque
des blessures.
– Vérifier que le super pulvérisateur est propre et sec et essayer le bouton
d’arrêt STOP pour voir s’il fonctionne correctement.
– Arrêter immédiatement le moteur en cas de problèmes.
– Faire très attention pour éviter l'inhalation du gaz d'échappement en utilisant
le super pulvérisateur.
– Les gaz d’échappement sont toxiques. Ne jamais utiliser la machine dans
des espaces clos ou avec une mauvaise ventilation (risque d’étouffement et
d'intoxication au gaz).
– Ne pas utiliser le super pulvérisateur en continu pendant plus d’une heure et
faire un repos d’au moins 30 minutes entre les heures de travail.
– Arrêter le moteur pendant le repos ou lorsque la machine est sans
surveillance. Pour protéger les personnes ainsi que la machine, ranger le
pulvérisateur dans un endroit sûr et s’assurer qu’aucun produit combustible
n’est à proximité. Ne jamais poser le super pulvérisateur chaud sur de
l’herbe sèche ou du combustible. Ceci est extrêmement dangereux et risque
de provoquer un incendie.
– Ne jamais démarrer le moteur lorsque le pot d'échappement est défectueux.
– Couper toujours le moteur pour transporter la machine d’un endroit à un
autre.
– Attendre que le moteur refroidisse, vider le réservoir de carburant et attacher
fermement le super pulvérisateur avant de le transporter dans un véhicule.
– Vérifier que le réservoir de carburant est complètement vide et sec avant de
transporter le super pulvérisateur.
Ravitaillement
– Coupez le moteur, Assurez-vous qu’il n’y a aucune flamme à proximité.
– Ne fumez pas. Evitez tout contact avec la peau et les produits dérivés du
pétrole. N’inhalez pas les vapeurs d’essence. Portez toujours des gants de
protection. Changez et nettoyez régulièrement les gants de protection.
– Veillez à ne pas renverser de carburants ou d’huile, pour éviter de
contaminer le sol (protection de l’ environnement). En cas de fuite de
carburant, même légère, nettoyez immédiatement l’appareil.
Faites toujours sécher les chiffons avant de les jeter dans un conteneur
approprié et couvert, pour éviter tout risque de combustion spontanée.
– Evitez tout contact du carburant avec les vêtements. Si nécessaire, changez
immédiatement de vêtement.
– Vérifiez régulièrement le bon fonctionnement du bouchon du réservoir.
– Assurez-vous que le bouchon du réservoir est bien serré, et ne mettez le
moteur en marche qu’à un minimum de 3 m de l’endroit ou vous avez fait le
plein.
– Ne faites jamais le plein de carburant dans des pièces fermées : les vapeurs
s’accumulent au niveau du sol (risque d’explosion).
– Ne transportez et ne stockez du carburant que dans des conteneurs
appropriés. Veillez à ce que les enfants n’y aient pas accès.
– Ne faites jamais le plein d’un moteur chaud ou en marche.
Fonctionnement
– Utiliser le super pulvérisateur seulement dans des conditions de bonne
visibilité et de lumière adéquate. Ne jamais utiliser le super pulvérisateur la
nuit. Ne pas l’utiliser sous la pluie ou immédiatement après la pluie (danger
de blessure en glissant dans des endroits mouillés).
– Faire attention aux endroits glissants et mouillés (verglas et neige) à cause
du risque de glisade et assurer toujours une bonne stabilité sur les pieds.
– Ne jamais utiliser le super pulvérisateur en se tenant sur une échelle.
– Ne jamais grimper sur un arbre pour utiliser le super pulvérisateur.
– Ne jamais utiliser le super pulvérisateur en se tenant sur une surface
instable.
– Ne pas pointer le pulvérisateur vers des personnes ou des animaux. Les
débris risquent de les blesser.
– Ne pas toucher la bougie d’allumage lorsque le moteur tourne.
– Ne pas toucher les pièces mobiles du super pulvérisateur lorsque le moteur
tourne.
– Ne pas toucher le pot d’échappement ou d’autres pièces pendant le
fonctionnement ou pendant un moment après l’arrêt du moteur. Ces pièces
sont extrêmement chaudes et peuvent causer des brûlures graves.
٨ Repos
٨ Transport
٨ Plein
٨ Maintenance
٨ Remplacement d’outil
3 mètres
22
Page 23

– Il faut être concient de la toxicité des pesticides et des désherbants à utiliser
et lire attentivement les instructions d’utilisation relatives pour se familiariser
avec les procédures adéquates en cas d’utilisation de produits chimiques. Si
la peau vient en contact avec les pesticides/désherbants, rinser
immédiatement la zone touchée et la laver au savon. Serrer fermement le
bouchon du réservoir du pulvérisateur pour éviter toute fuite de produit
chimique.
Maintenance
– Respectez l’environnement; vérifiez notamment le bon réglage du
carburateur pour polluer aussi peu que possible l’atmosphère.
– Vérifiez régulièrement le super pulvérisateur, et assurez-vous que ses vis et
écrous sont bien fixés.
– Pendant toutes les opérations de maintenance ou de stockage, évitez
soigneusement la présence de flammes, d’étincelles ou autres.
– Stockez toujours l’appareil dans une pièce fermée à clé et bien aérée. Avant
de le stocker, videz soigneusement son réservoir.
Respectez toujours les instructions de prévention d’accidents des associations
professionnelles et des
compagnies d’assurances. Ne modifiez pas l’appareil.
N’effectuez aucune opération de maintenance ou de réparation qui ne soit pas
prévue par ce manuel. Toutes les autres opérations doivent être effectuées par
des représentants autorisés. N’utilisez-que des
pièces et des accessoires d’origine, fournis par DOLMAR.
L'utilisation d’outils et d’accessoires non agréés augmente les risques
d’accident. DOLMAR décline toute responsabilité en cas d’accident ou de
dommage provoqué par l’utilisation d’accessoires ou d’outils non
agréés.
Premiers secours
Veillez à avoir toujours à portée de la main une trousse de premiers secours
respectant les règlementations en vigueur. Assurez-vous que la trousse est
toujours complète.
En cas d’accident, appelez les services de secours et
fournissez-leur les informations suivantes:
– lieu de l’accident
– circonstances de l’accident
– nombre de personnes blessées
– type de blessures
– vos coordonnées
Emballage
– Le super pulvérisateur DOLMAR est livré dans un carton de protection afin
d'éviter tout dommage au cours du transport. Le carton est une matière
première réutilisable et recyclable (recyclage des vieux papiers).
23
Page 24

DECLARATION DE CONFORMITE CE
Modèle : SP-252.4R
Nous prenons la responsabilité pour déclarer que le présent produit est conforme aux normes suivantes énoncées aux
documents EN292, EN55012 conformément aux Drectives du Conseil, 89/392/CEE, 98/37/CEE, 93/68/CEE, 89/336/CEE
modifiées et 92/31/CEE modifiée.
Niveau sonore mesuré : 98 dB
Niveau sonore garanti : 102 dB
Niveaux sonores mesurés conformément à la Directive du Conseil, 2000/14/CE.
Procédure d'évaluation de conformité㧦Annexe V
CE2007
Shigeharu kominami Rainer Bergfeld
Directeur Général Directeur Général
Producteur responsable:
Makita Corporation.
3-11-8,Sumiyoshi-cho, Anjo, Aichi, JAPAN
Représentant autorisé en Europe:
DOLMAR Gmbh
Jenfelder Str. 38, 22045 Hamburg, Germany
Michigan Drive, Tongwell, Milton Keynes, Bucks MK15 8JD, ENGLAND
24
Page 25

CARACTÉRISTIQUES TECHNIQUES
Modèle SP-252.4R
Dimensions: (longueur x largeur x hauteur) mm 380 x 420 x 635
Poids sec kg 9.1
Volume (réservoir des liquides chimiques) L 20
Pump
Type à deux pistons opposés
Pression maxi. MPa 2.5
Aspirarion L 7.1
Moteur
Modèle EH025A
Cylindrée cm
Carburant Essence automobile
Volume (réservoir de carburant) L 0.5
Huile moteur
Volume (huile moteur) L 0.08
Carburateur type WALBRO WYL
Système d’allumage type Allumage monolithique
Bougie d’allumage type NGK CMR6A (C type)
Distance entre électrodes mm 0.7 - 0.8
3
Huile SAE 10W-30 API SF ou ultérieure
(huile moteur automobile à 4 temps)
24.5
Niveau de pression de son
Niveau de pression de son (Lpa) pour 98/37/EC
Niveau de pression garanti (Lwa) pour 2000/14/EC
dB 84.0
dB 102.0
Notes: 1. Utiliser l’huile et la bougie désignés par DOLMAR.
2. La spécification peut être soumise à changement sans avis préalable.
25
Page 26
LISTE DES PIÈCES
F Désignation des pièces F Désignation des pièces F Désignation des pièces
1 Interrupteur I-O (marche/arrêt) 9 Silencieux 17 Connecteur rapide
2 Levier des gaz 10 Jauge d’huile 18 Poignée
3 Levier d’étrangleur 11 Pompe d’amorçage 19 Levier du gicleur
4 Couvercle de l’épurateur d’air 12
5 Couvercle de prise 13
6 Poignée du démarreur 14 Réservoir des liquides chimiques 22 Gicleur (grand angle à double tête)
7 Réservoir de carburant 15 Cadran de pression 23
8 Bouchon du réservoir de carburant 16 Tuyau du pulvérisateur 24
Couvercle de purge du reservoir des
liquides chimiques
Couvercle du réservoir des liquides
chimiques
20 Tube du gicleur
21 Support du tube du gicleur
26
Page 27
INSTRUCTIONS DE MONTAGE
Remarque : Avant de commencer toute opération sur le super pulvérisateur, il faut toujours couper le contact du moteur, et retirer les prises de
la bougie d’allumage. Toujours porter des gants.
Remarque : Ne démarrer le super pulvérisateur que après avoir confirmé le montage complet du super pulvérisateur.
1. MONTAGE DU GICLEUR
Se référer à la figure dans la page précédante (Désignation des pièces) afin de monter la poignée, le levier du gicleur, le tube du gicleur et le
gicleur. Prendre grade de monter les pieces avec precision pour eviter toute fuite.
2. MONTAGE DE LA SANGLE
Monter les deux sangles sur un réservoir des liquides chimiques, d’une facon indiquée ci-desous sans aucun tortillon des sangles. Se référer
aux instructions établies pour les sangles.
Montage de la partie supérieure de la sangle
㽲 㽳 㽴
Réservoir des
liquides chimiques
Retirer la sangle dans le sens de la
flèche et mettre le bout replié au
bout inférieur de la boucle.
Boucle supérieure
Pose de la partie inférieure de la sangle
Boucle supérieure
Boucle inférieure
Réservoir des
liquides chimiques
Mettre la partie ‘A’ de la sangle à travers
㽳 㽲
l’interstice du crochet métallique.
Puis, relever la sangle à
angle droit dans le sens de
la flèche.
Crochet
métallique
Répéter les mêmes instructions pour
㽴
l’autre sangle pour completer la pose.
Mettre la sangle arrière ‘A’, une des sangles
superposes, dans le crochet métallique de la
façon indiquée ci-dessous à ԙ et Ԛ.
Crochet
métallique
27
Page 28
AVANT MISE EN MARCHE
Controle et ravitaillement de l’huile moteur
– Faire la méthode suivante après avoir vérifié que le moteur refroidit.
– Maintenir le moteur en position et en lever, la jauge d’huile afin de vérifier que le niveau est situe entre les repères inférieur et supérieur.
Lorsque l’huile devient insuffisante en telle manière que la jauge la touche seulement par son extrémité, en particulier lorsque la jauge reste
insérée dans le carter sans vissage (Fig. 1), ravitailler en huile nouvelle (Fig.2).
– Le niveau d’huile doit être fait tous les 10 heures. (10 fois ou 10 réservoirs de ravitaillement en huile)
– Si l’huile est trop usage, il faut la remplacer. (Pour l’intervalle et la méthode de remplacement, se référer à la page 34.)
Huile recommandée : SAE 10W – 30 huile de la classification API, classse SF ou supérieure (moteur à quatre temps pour automobile)
Volume d’huile : Env. 0.08 L
Nota: Si le moteur n’est pas debout, l’huile peut se déplacer aux alentours du moteur, et elle peut être ravitaillée excessivement.
Si l’huile est furnie au-dessus de la limite, l’huile peut être contaminée ou elle peut prendre feu, emettant une fumée blache.
Remplacement de l’huile “Jauge d’huile”
– Enlever les poussières et les impuretés à proximité de l’orifice de ravitaillement, et déposer la jauge d’huile.
– Tenir la jauge loin du sable et de poussière. Toute impureté adhérant à la jauge pourrait provoquer un problème de fonctionnement
moteur.
– A titre d’exemple, pour maintenir la jauge nette, il est recommandé d’insérer la jauge d’huile sur le côté poignée dans le
couvercle de moteur, comme l’indique Fig. 3.
Limite supérieure
(Extrémité de l’orifice
de ravitaillement en
huile)
Si l’huile adhère autour
de ce bout, ravitailler
en huile.
Fig.1 Fig.2
Jauge d’huile
Fig.3
28
Page 29
1) Tenir moteur de niveau, et déposer la jauge d’huile.
2) Mettre de l’ huile jusqu’au bout de l’orifice de ravitaillement. (Se référer à la
figure de la page précédante.)
Mettre de l’huile a l’aide récipient de ravitaillement en lubrifiant.
3) Serrrer fermement la jauge d’huile. Un serrage insuffisant causera une
fuite d’huile.
L’essentiel 2 lors de remplacement de l’huile: “Si de l’huile se renverse”
– Si de l’huile se renverse entre le réservoir à carburant et le groupe moteur, l’huile est aspirée en dedans par l’orifice
d’entrée d’air refroidissant, ce qui salira le moteur. Ne jamais oublier d’essuyer l’huile renversée avant commencement de
la marche.
RAVITAILLEMENT
Manipulation du carburant
Il est nécessaire de manipuler le carburant avec un soin particulier. Le carburant peut contenir des matières similaires aux solvants. Le
ravitaillement doit être fait dans une chambre bien ventilée ou en plein air. Ne jamais aspirer de la vapeur de carburant, et s’éloigner du
carburant. Un contact prolongé ou régulier avec de l’essence pout provoquer un dessèchement de la peau ainsi que des maladies et des
réactions allergiques. En cas de contact avec les yeux il faut rincer avec de l’eau. Si l’oeil reste irrité consulter un médecin.
Durée de stockage du carburant
Le carburant doit être utilisé totalement dans un délai de quatre semaines, même s’il est contenu dans un récipient spécial et stocké à l’ombre
bien aérée.
Si le carburant n’est pas stocké dans un récipient spécial ou si le récipient n’est pas couvert, le carburant se détériore dans un jour.
ENTREPÔSAGE DE L’APPAREIL ET DU RÉSERVOIR DE RAVITALLEMENT
– Garder l’appareil et le réservoir à un endroit sans être exposé aux rayons du soleil.
– Ne jamais garder le carburant dans une cabine ou sur le camion.
Carburant
Le moteur est à quatre temps. Utiliser de l’essénce sans plomb 98 (essence régulier ou essence de première qualité).
Les essentiels pour le carburant
– Ne jamais utiliser de mélange d’essence contenant de l’huile à moteur.
– Une huile détériorée causera un démarrage irrégulier.
Ravitaillement
Avertissement : produit inflammable
Essence utilisée : Essence sans plomb 98
– Desserrer un peu le bouchon de réservoir de telle qu’il n’ait pas de différence
en pression atmosphérique.
– Desserer le bouchon du réservoir et orienter l’orifice du réservoir vers l’eau
pour éviter les poches d’air. Attention de ne pas fair de plein du carburant
dans le réservoir d’huile.
– Essuyer complètement les alentours du bouchon de réservoir afin de
prévenir l’entrée de matières étrangères dans le réservoir à carburant.
– Après ravitaillement, serrer fermement le bouchon de réservoir.
• S’il y a aucune fissure sur le couvercle du réservoir, le remplacer.
• Le couvercle du réservoir est une pièce consomptible. Par conséquent, elle
doit être remplacé tous les deux à trois ans.
29
Bouchon de réservoir
à carburant
Limite supérieure
du carburant
Réservoir à
carburant
Page 30
MÉLANGE DES CHIMIQUES AGRICOLES
1) Mélange des chimiques agricoles
1. Les chimiques agricoles sont toxiques. Faire très attention à suivre
strictement les instructions du fabriquant lors del a manipulation de
chimiques agricoles.
2. Utilisr toujours l’entonnoir fourni pour verser les chimiques agricoles
dans le réservoir chimiques.
3. Visser fermement le bouchon du réservoir du chimiques pour éviter les
fuites.
4. S’il faut mélanger les produits chimiques dans le réservoir du
chimiques, ajouter toujours de l’eau avant les les autres produits
chimiques.
Précaution
• Manipuler les produits chimiques agricoles avec le plus de précautions possibles. Si la peau vient en contact avec ce genre de
produit, la rinser abondamment à l’eau froide.
2) Utilisation d’un type différent d’agent chimique
1. Faire très attention à bien rinser le réservoir du pulvérisateur, la pompe
:
et le tuyeau avant de mettre de nouveaux agents chimiques dans le
réservoir du pulvérisateur. Le mélange de résidus de produits
chimiques agricoles précédents avec d’autres agents peut provoquer
des maladies par toxicité.
DÉMARRAGE DU MOTEUR
㩷㩷
㩷㩷
AVERTISSEMENT
㩷㩷㩷㩷
• Ne jamais tenter de démarrer le moteur dans l’endroit où le carburant a été alimenté. Le démarrage du moteur doit s’effectuer en
maintenant une distance de 3 m au moins.
− Sinon, l’inflammation ou l’incendie peut se provoquer.
• Le gaz d’échappement du moteur comporte de substances toxiques. Ne pas mettre le moteur en marche dans l’endroit faiblement
ventilé, tel que dans le tunnel, le bâtiment, etc.
− La manoeuvre du moteur dans l’endroit faiblement ventilé peut causer l’empoisonnement par le gaz d’échappement.
• En cas de constatation des anomalies du bruit, de l'odeur ou de la vibration après la mise en marche, arrêter immédiatement le moteur
et effectuer l’inspection.
− Si le moteur est mis en marche sans porter attention à ces anomalies, un incident pourra se produire.
• S’assurer que le moteur s’arrête quand l’interrupteur d’arrêt est mis à la position “O”.
1) Avant de démarrer le moteur, il faut toujours vérifier que le réservoir des
liquides chimiques contient les liquides.
2) Faire tourner le levier du gicleur vers la position FERMÉ.
LEVIER DU GICLEUR
FERMÉ
30
Page 31

3) Faire tourner le cadran de pression et aligner la patte STARTING au repère.
1) Quand le moteur est froid, ou quand du carburant a été ravitaillé.
(1) Positionner cette machine à un lieu plat.
(2) Mettre l’interrupteur I-O sur la position “ I ” (marche).
(3) Vérifier que le levier des gaz est placé sur la position petite
vitesse.
(4) Continuer à pousser la pompe d’amorçage jusqu’à ce que le
carburant entre dans la pompe d’amorçage.
En général, le carburant entre dans le carburateur par 7 à 10
poussées.
Si la pompe d’amorçage est poussée excessivement, un excès de
l’essence retourne au réservoir à carburant.
(5) Soulever le levier d’étrangleur à côté droit et fermer l’étrangleur.
(6) Tenir le cache élément avec la main gauche pour éviter de faire bouger le
moteur et se placer en position stable.
(7) Tirer la poignée de démarrage jusqu’à ce qu’il soit difficile de tirer
(point de compression). Puis, laisser revenir la poignée de
démarrage, et la tirer fortement.
Ne jamais tirer la corde completement.
Une fois que la poignée de démarrage est tirée, ne jamais lâcher
prise du câble tout à coup. Saisir la poignée de démarrage jusqu’à
ce qu’elle retourne au point original.
(8) Lorsque le moteur démarre, ouvrir le levier de starter.
Ouvrir le levier de starter pas à pas, en vérifiant la marche du
moteur. Ne pas manquer d’ouvrir le levier de réglage pleinement à
la fin.
A froid ou lorsque le moteur reste froid, ne pas ouvrir le levier de
réglage subitement. Autrement, le moteur s’arrêtera.
(9) Augmenter la température pendant deux ou trois minutes.
(10) On peut terminer le réchauffage du moteur quand il fonctionne à une
vitesse stable et s’accélère sans à-coups de petite à grande vitesse..
ONGLET “STARTING”
CADRAN DE PRESSION
Petite vitesse
Levier des gaz
Pompe d’amorçage
Interrupteur I-O
Fermer
Ouvrir
31
Page 32

2) Quand le moteur est échauffé
(1) Mettre le moteur sur la terre plate.
(2) Pousser la pompe d’amorçage à quelques fois.
(3) S’assurer que le levier d’étrangleur est ouvert.
(4) Tenir le cache élément avec la main gauche pour éviter de faire bouger le moteur et se placer en position stable.
(5) Faire sortir lentement la poignée de démarreur jusqu’à la constatation d’une certaine résistance. De cette position, retourner la poignée
de démarreur une fois à l’arrière, puis tirer la poignée avec la force.
(6) S’il est difficile de démarrer le moteur, ouvrir l’étrangleur jusqu’à 1/3 environ.
ARRET DU MOTEUR
1) Faire tourner le levier du gicleur vers la position FERMÉ.
2) Faire tourner l’interrupteur I-O vers la position “O”(arret).
3) Déplacer le levier des gaz vers la position petite vitesse.
Petite vitesse
Levier des gaz
LEVIER DU GICLEUR
FERMÉ
Interrupteur I-O
32
Page 33

MISE EN MARCHE
1. Démarrer le moteur (voir la page 30)
2. Après le démarrage du moteur, porter sur le dos le super pulvérisateur et régler les sangles pour tenir la machine aussi près du corps que
possible. Mettre le moteur au ralenti et faire attention à ne pas trop basculer le super pulvérisateur.
Régler les sangles comme suit.
1) Desserrer les sangles : Ԙ Soulever la boucle
ԙ Tirer sur un bout de la sangle fixée au
super pulvérisateur.
2) Serrer les sangles : Ԛ Tirer sur la partie libre de la sangle
Remarque: Si les sangles ne portent pas de poids, elles peuvent être serrées
facilement.
3. Choisir la position de marche désirée sur le cadran de pression.
4. Déplacer le levier des gaz vers la position désirée, pendant que le levier du
gicleur est déplacé en observant la pulvérisation.
Précaution
BASSE PRESSION
CADRAN DE PRESSION
Petite vitesse
Levier des gaz
Ԙ
Ԛ
Desserrer
HAUTE PRESSION
Pleine vitesse
Boucle
ԙ
Serrer
LEVIER DU GICLEUR
FERMÉ
OUVRIR
Pulvériser toujours dans la direction du vent. Faire attention à ce que les produits chimiques pulvérisés ne reviennent vers soi.
33
Page 34

INSPECTION ET MAINTENANCE
!
!
!
DANGER
• Avant l’inspection et la maintenance, arrêter le moteur et le laisser refroidir. Enlever également la bougie d’allumage et le capot de
bougie.
− Si l’inspection ou la maintenance est effectuée immédiatement après l’arrêt du moteur ou avec le capot en place, l’opérateur a un
risque d’être brûlé ou de subir un accident dû au démarrage inattendu.
• Après l’inspection et la maintenance, s’assurer que toutes les pièces sont rassemblées. Puis, procéder à la manoeuvre.
㩷
1. Remplacement de l’huile à moteur
Une huile à moteur détériorée peut diminuer la durée considérablement. Ne pas manquer de vérifier la période et la quantité de remplacement.
㩷
DANGER
• En général, le bloc moteur et l’huile à moteur restent chauds immédiatement après que le moteur s’arrête. Lors de remplacement d’huile,
confirmer que le bloc moteur et l’huile à moteur sont refroidis complètement. Autrement, il y a un risque de brûlure. Immédiatement
après le moteur s’arrête, l'huile ne rentre pas totalement dans la boîte à huile, ce qui peut causer un débordement de l'huile.
• Si l'huile est remplie au-dessus de la limite, elle peut se contaminer ou prendre feu par suite de la fumee blanche.
Intervalle de remplacement: Initialement, toutes les 20 heures de marche, et ensuite toutes les 50 heures de marche.
Huile recommandée: SAE10W-30 de la classification API, Classe SF ou supérieure (moteur à quatre temps pour automobile)
Lors de remplacement, faire les procédés suivants.㩷
1) Vérifier que le bouchon de réservoir à carburant est serré complètement.
2) Déposer la jauge d’huile.
- Tenir la jauge d’huile propre de toutes poussières ou d’impuretés.
3) Utiliser la bouteille d’extraction d’huile fournie et enlever l’huile usagée du
réservoir à huile.
• Serrer la bouteille dans la main, l’introduire dans l’huile, puis lâcher
pour aspirer l’huile du réservoir.
• Lorsque le réservoir d’huile est presque vide, basculer légèrement le
super pulvérisateur pour faciliter l’aspiration du résidu d’huile moteur.
4) Remettre le moteur droit. Remettre de l’huile neuve dans le réservoir à
l’aide de la bouteille à lubrifiant.
5) Remettre et serrer fermement la jauge d’huile pour éviter tout risque de
fuite d’huile.
• Utiliser la bouteille d’extraction d’huile et celle à lubrifiant fournies pour
l’usage auquel elles sont destinées.
Bouteille d’extraction d’huile Bouteille à lubrifiant
Bouchon du
réservoir de carburant
Jauge
d’huile
34
Page 35

(lig
)
Pl
g
)
㩷
㩷
• Ne jamais déposer de l’huile du moteur vidé dans des ordures, dans la terre, ou dans un égout. Le dépôt de l’huile usée est
réglementé par la loi. Lors du rejet, il faut observer les lois et règlements concernés.
• L’huile se détériore même si elle est stockée intacte. Faire le contrôle et le remplacement à des intervalles réguliers (renouveler
l’huile tous les six mois.)
L’essentiel lors de remplacement de l’huile à moteur
㩷㩷㩷㩷
2. Nettoyage du filtre a air
AVERTISSEMENT: PRODUITS INFLAMMABLES STRICTEMENT INTERDITS
Intervalle de nettoyage et de contrôle : Quotidien (toutes les 10
heures de marche)
– Déposer les boulons de fixation du couvercle de filtre à air.
– Tirer le côté inférieur du couvercle et déposer le couvercle du filtre à air.
– Fermer complètement le starter et s’assurer que le carburateur ne contient ni
poussière ni impureté.
– Déposer le filtre à air, le laver avec un détergent neutre dilué dans de l’eau
tiède et le laisser sécher. Remettre le filtre dans la position indiquée par la
ligne en pointillé dans la fig.1.
– Utiliser un papier pour essuyer complètement l’huile adhérante au couvercle
du filtre à air et au reniflard.
– Immédiatement après le nettoyage, remettre le couvercle du filtre et le serrer
avec le boulon de fixation. (Lors de la fixation, mettre d’abord le couvercle
supérieur puis le couvercle inférieur).
acer la partie coupée
dans cette position (en
Plaque
auche
haut à
Section du reniflard
Ligne (ligne pointillée)
Fig.1
Elément
filtre à air
Elément filtre à air
Couvercle du filtre
à air
nes en pointillées
3. Contôle de la bougie d'allumage
– Utiliser uniquement la clé universelle fournie pour retirer ou monter la bougie
d'allumage.
– L'espacement entre les deux électrodes de la bougie d'allumage devrait être
de 0,7 - 0,8mm (0,028" - 0,032"). Si l'espacement est trop large ou trop
étroit, le régler. Si la bougie d'allumage est bouchée avec de la calamine
ou encrassée, la nettoyer soigneusement ou la remplacer.
ATTENTION: Ne jamais toucher le connecteur de la bougie d'allumage lorsque
le moteur tourne (risque d'électrocution haute tension).
0.7~0.8 mm
(0.028”-0.032”)
4. Nettoyage du filtre a carburant
Avertissement : Produit inflammable
Intervalle de nettoyage et contrôle : Mensuel (toutes les 50 heures de marche)
Tête d'aspiration dans le réservoir de carburant
– Le filtre à carburant (1) de la tête d'aspiration est utilisé pour filtrer le
carburant requis par le carburateur.
– Procéder à une inspection visuelle périodique du filtrer à carburant. Ouvrir
le bouchon du réservoir à cet effet, utiliser un crochet et retirer la tête
d'aspiration à travers l'ouverture du réservoir. Remplacer les filtres durcis,
pollués ou bouchés.
– Une alimentation en carburant insuffsante peut empêcher le moteur
d'atteindre sa vitesse de fonctionnement optimale. Il est donc important de
remplacer le filtre à carburant au moins tous les 4 mois afin d'assurer une
alimentation en carburant satisfaisante du carburateur.
Tuyau à carburant
Collier de flexible
Filtre à carburant (1)
Boulon de
fixation
35
Page 36

Localisation des défauts
Défaut système Observation
Pas de démarrage du
moteur ou démarrage
Système d'allumage Étincelle d'allumage
présente
Cause
Défaut dans l'alimentation en carburant ou dans le systèm
de compression. Défaut mécanique
difficile
Pas d'étincelle
d'allumage
Alimentation en
carburant
Réservoir de carburant
rempli
Compression Pas de compression
au tirage
Défaut mécanique Câble non enclenché
Interrupteur d'arrêt actionné, défaut du fil ou court-circuit,
bougie d'allumage ou connecteur défectueux, module
d'allumage défectueux
Position incorrecte de l'étrangleur, carburateur défectueux,
tête d'aspiration sale, tuyau d'alimentationen carburant plié
ou bloqué
Joint d'étanchéité du fond du cylindre défectueux,
soudures du carter endommagées, piston ou segments
défectueux ou fuite par la fixation de la bougie d'allumage
Ressort du câble cassé, pièces cassées à l'intérieur du
moteur
Problèmes en démarrage à
chaud
Réservoir rempli
Étincelle d'allumage
Carburateur sale, le nettoyer
présente
Le moteur démarre mais
est immédiatement noyé
Alimentation en
carburant
Réservoir rempli
Réservoir rempli Réglage de marche à vide incorrect, tête
d'aspiration ou carburateur sale
Orifice du réservoir de carburant bouché.Tuyau
d'alimentation en carburant plié, câble ou interrupteur
STOP défectueux
Performances insuffisantes Plusieurs circuits sont
peut-être affectés
Régime de marche à
vide médiocre
Filtre à air sale, carburateur sale, conduit d’échappement
du cylindre bouché
Simultanément.
Article
Durée de marche
Avant
marche
Après
lubrification
Quotidien
Vérifier/Nettoyer ٤
Huile à moteur
Remplacer ٤
Pièces à serrer
(boulons, écrous)
Vérifier ٤
Nettoyer/Vérifier ٤
Réservoir à carburant
Evacuer le carburant ٤
(10h)
30h
50h 200h
*1
Arrêt/
repos
*3
Levier d’étranglement Vérifier les fonctions ٤
Interrupteur d’arrêt Vérifier les fonctions ٤
Rotation à petite vitesse Vérifier/Ajuster ٤
Filtre à air Nettoyer ٤
Bougie d’allumage Vérifier ٤
Conduite d’air de
Nettoyer/Vérifier ٤
refroidissement
Vérifier ٤
Tuyau à carburant
Remplacer ٧
*2
Filtre à carburant Nettoyer/Remplacer ٤
Espace entre soupape
d’entrée d’air et soupape de
Ajuster
٧
*2
déchargement d’air
Tube d’huile Vérifier
٧
*2
Révision générale du moteur ٧*2
Carburateur Evacuer le carburant ٤*3
*1 Faire le remplacement premier après 20h de marche.
*2 Pour le contrôle de 200 heures de marche, s’adresser à l’agent du service après-vente habilité ou à un atelier des réparations.
*3 Après vidage du réservoir à carburant, continuer à faire fonctionner le moteur et évacuer le carburant dans le carburateur.
36
Page 37

DEPANNAGE
Avant de faire une demande de réparations, vérifier un inconvénient par soi-même. S’il y a aucune anomalie, régler votre machine suivant la
description de ce manuel. Ne jamais manipuler ou déposer aucune partie contrairement à la description. Pour les réparations, s’adresser à
l’agent du service après-vente habilité.
Etat d’anomalie Cause probable (fonctionnement irrégulier) Remède
Panne de la pompe d’amorçage Pousser 7 à 10 fois
Petite vitesse de tirage du câble de démarreur Tirer fortement
Manque de carburant Remplir
Colmatage du filtre à carburant Nettoyer
Tuyau à carburant plie Redresser le tuyau à carburant
Le moteur ne démarre pas
Le moteur s’arrête toute de suite.
Le moteur ne s’augmente pas
Le moteur ne s'arrête pas
Faire marcher le moteur au ralenti, et
mettre le levier de réglage à “CLOSE”
Carburant détérioré Un carburant détérioré laisse le démarrage
Aspiration excessive du carburant Ajuster la rotation du levier d’étranglement de
Bouchon déposée Reposer fermement
Bougie d’allumage tachée Nettoyer
Espace anormal de la bougie d’allumage Ajuster l’espace
D’après les types d’anomalie de la bougie
d’allumage
Carburateur anormal Faire une demande de contrôle et de
La corde de démarreur ne peut pas être tirée Faire une demande de contrôle et de
Système de commande anormal Faire une demande de contrôle et de
Réchauffage insuffisant Faire le réchauffage
Le levier de réglage est mis à “CLOSE” même
si le moteur est réchauffé.
Colmatage du filtre à carburant Nettoyer
Filtre à air sale ou colmate Nettoyer
Carburateur anormal Faire une demande de contrôle et de
Système de commande anormal Faire une demande de contrôle et de
Fil d’étranglement déposé Reposer fermement
Connecteur déposé Reposer fermement
Système électrique anormal Faire une commande de contrôle et de
plus difficile. Renouveler. (Remplacement
recommandé: 1 mois)
vitesse moyenne à la haute, et tirer la poignée
de démarreur jusqu’à ce que le moteur
démarre. Si le moteur ne démarre pas,
déposer la bougie d’allumage, dessécher
l’électrode, et les remonter comme ils étaient
initialement. Puis, démarrer suivant les
instructions.
Remplacer
maintenance.
maintenance
maintenance
Mettre à “OPEN”
maintenance
maintenance
maintenance
Lorsque le moteur ne démarre pas après le réchauffage :
S’il n’y a pas aucune anomalie pour les points de vérification, ouvrir le levier d’étranglement par un tiers, et démarrer le moteur.
37
Page 38

German
Herzlichen Glückwunsch zum Kauf des DOLMAR Sprühgerätes. Dieses Gerät ist das Produkt
sorgfältiger Entwicklungsarbeit und langjähriger Erfahrung in der Herstellung von motorisierten
Gartengeräten. Wir sind überzeugt, dass das DOLMAR Sprühgerät Ihnen über lange Zeit wertvolle
Dienste leisten wird.
Die vorliegende Betriebsanleitung enthält detaillierte Anweisungen bezüglich der vielseitigen
Einsatzmöglichkeiten des DOLMAR Sprühgerätes und gibt Ihnen nützliche Hinweise für bestmögliche
Resultate bei dessen Gebrauch.
Inhaltsverzeichnis Seite
Symbole
Sicherheitsvorschriften
Technische Daten
Bezeichnung der Teile
Montageanleitungen
Vor Inbetriebnahme
Agrarchemikalien mischen
Motor starten
Motor abstellen
Betrieb
Inspektion und Wartung
Störungssuche
㨯㨯㨯㨯㨯㨯㨯㨯㨯㨯㨯㨯㨯㨯㨯㨯㨯㨯㨯㨯㨯㨯㨯㨯㨯㨯㨯㨯㨯㨯㨯㨯㨯㨯㨯㨯㨯㨯㨯㨯㨯㨯㨯㨯㨯
㨯㨯㨯㨯㨯㨯㨯㨯㨯㨯㨯㨯㨯㨯㨯㨯㨯㨯㨯㨯㨯㨯㨯㨯㨯㨯㨯㨯㨯㨯㨯㨯
㨯㨯㨯㨯㨯㨯㨯㨯㨯㨯㨯㨯㨯㨯㨯㨯㨯㨯㨯㨯㨯㨯㨯㨯㨯㨯㨯㨯㨯㨯㨯㨯㨯㨯㨯㨯
㨯㨯㨯㨯㨯㨯㨯㨯㨯㨯㨯㨯㨯㨯㨯㨯㨯㨯㨯㨯㨯㨯㨯㨯㨯㨯㨯㨯㨯㨯㨯㨯㨯
㨯㨯㨯㨯㨯㨯㨯㨯㨯㨯㨯㨯㨯㨯㨯㨯㨯㨯㨯㨯㨯㨯㨯㨯㨯㨯㨯㨯㨯㨯㨯㨯㨯㨯
㨯㨯㨯㨯㨯㨯㨯㨯㨯㨯㨯㨯㨯㨯㨯㨯㨯㨯㨯㨯㨯㨯㨯㨯㨯㨯㨯㨯㨯㨯㨯㨯㨯㨯㨯
㨯㨯㨯㨯㨯㨯㨯㨯㨯㨯㨯㨯㨯㨯㨯㨯㨯㨯㨯㨯㨯㨯㨯㨯㨯㨯㨯㨯㨯
㨯㨯㨯㨯㨯㨯㨯㨯㨯㨯㨯㨯㨯㨯㨯㨯㨯㨯㨯㨯㨯㨯㨯㨯㨯㨯㨯㨯㨯㨯㨯㨯㨯㨯㨯㨯㨯㨯㨯㨯㨯
㨯㨯㨯㨯㨯㨯㨯㨯㨯㨯㨯㨯㨯㨯㨯㨯㨯㨯㨯㨯㨯㨯㨯㨯㨯㨯㨯㨯㨯㨯㨯㨯㨯㨯㨯㨯㨯㨯㨯
㨯㨯㨯㨯㨯㨯㨯㨯㨯㨯㨯㨯㨯㨯㨯㨯㨯㨯㨯㨯㨯㨯㨯㨯㨯㨯㨯㨯㨯㨯㨯㨯㨯㨯㨯㨯㨯㨯㨯㨯㨯㨯㨯㨯㨯㨯
㨯㨯㨯㨯㨯㨯㨯㨯㨯㨯㨯㨯㨯㨯㨯㨯㨯㨯㨯㨯㨯㨯㨯㨯㨯㨯㨯㨯㨯㨯㨯
㨯㨯㨯㨯㨯㨯㨯㨯㨯㨯㨯㨯㨯㨯㨯㨯㨯㨯㨯㨯㨯㨯㨯㨯㨯㨯㨯㨯㨯㨯㨯㨯㨯㨯㨯㨯㨯㨯㨯
SYMBOLE
Es ist beim Lesen dieser Bedienungsanleitung sehr wichtig, dass Sie die folgenden Symbole richtig verstehen.
Die vorliegende Bedienungsanleitung, lesen,
verstehen und befolgen.
Kraftstoff (Benzin)
38
39
43
44
45
46
48
48
50
51
52
55
WARNUNG/GEFAHR
Verbot
Rauchverbot
Kein offenes Feuer
Schutzhandschuhe tragen
Personen und Tiere vom Einsatzgebiet
fernhalten
Augenschutz, Schutzmaske und
Ohrenschutz tragen.
Manueller Motorstart
Notstopp
Erste Hilfe
EIN/START
AUS/STOPP
Recycling
38
Page 39

SICHERHEITSVORSCHRIFTEN
A
Allgemeine Bestimmungen
– Um einen ordnungsgemäßen und sicheren Betrieb zu gewährleisten muss
der Benutzer diese Bedienungsanleitung lesen, verstehen und befolgen, um
sich ausreichend mit dem Umgang mit dem Gerät vertraut zu machen.
Unzureichend informierte Benutzer laufen Gefahr, sich selbst und Andere
durch falschen Gebrauch zu gefährden.
– Es wird empfohlen, dieses motorisierte Sprühgerät ausschließlich an
Personen zu verleihen, die nachgewiesenermaßen Erfahrung im Umgang mit
motorisierten Sprühgeräten haben.
– Die Bedienungsanleitung stets mit dem Gerät überreichen.
– Anfänger sollten den Händler bitten, ihnen entsprechende grundlegende
Anleitungen zu erteilen, um sich ausreichend mit dem Umgang mit dem
motorisierten Sprühgerät vertraut zu machen.
– Kinder und Jugendliche unter 18 Jahren dürfen das motorisierte Sprühgerät
nicht benutzen. Personen über 16 Jahren dürfen das Gerät jedoch im
Rahmen einer Ausbildung unter Aufsicht einer qualifizierten Ausbildungskraft
einsetzen.
– Das motorisierte Sprühgerät nur mit äußerster Vorsicht und Umsicht
einsetzen.
– Das motorisierte Sprühgerät nur bedienen, wenn Sie sich in einem
gesundheitlich guten Zustand befinden.
– Alle Arbeiten gewissenhaft und vorsichtig ausführen. Der Benutzer ist für die
Sicherheit anderer Personen verantwortlich.
– Das motorisierte Sprühgerät niemals unter dem Einfluss von Alkohol oder
Drogen verwenden.
– Das Gerät nicht verwenden, wenn Sie müde sind.
– Bewahren Sie diese Anleitung zum Nachschlagen auf.
Personenschutz-Ausrüstung
– Die getragene Kleidung sollte funktionell und angebracht sein. D.h., sie sollte
dicht anliegen, aber nicht behindern. Keinen Schmuck, Kleidung oder lange
Haare tragen, die in den Ansaugstutzen eingesaugt werden könnten.
– Um Kopf-, Augen-, Hand- oder Fußverletzungen zu vermeiden, sowie auch
Ihr Gerhör zu schützen, muss die nebenstehende Schutzkleidung beim
Betrieb des motorisierten Sprühgerätes getragen werden.
Bitte beachten Sie die folgenden Regelungen
– Tragen Sie stets angemessene und funktionelle Arbeitskleidung, die eng am
Körper anliegt, ohne jedoch Ihre Bewegungsfreiheit einzuschränken. Tragen
Sie weder Kleidungsstücke noch Schmuckstücke, die sich im Gestrüpp oder
Unterholz verfangen könnten.
– Um Kopf-, Augen-, Hand- und Fußverletzungen, sowie Gehörschäden zu
vermeiden, sollten beim Gebrauch des Sprühgerätes stets die im Folgenden
erwähnten Ausrüstungsartikel für Personenschutz verwendet werden.
1. Tragen Sie immer ausreichenden Gesichtsschutz (Maske, Schutzbrille
usw.) um Gesicht, Augen und Atemorgane vor aufgewirbelten Staubteilen,
bzw. vor in der Luft liegenden Chemikalien zu schützen.
2. Um Gehörschäden vorzubeugen muss beim Gebrauch des Gerätes ein
angemessener Lärmschutz getragen werden.
3. Um die Haut vor Schmutz und Chemikalien zu schützen, sollte immer
Arbeitskleidung mit langen Ärmeln und Hosenbeinen getragen werden.
4. Tragen Sie immer Schutzhandschuhe aus Gummi wenn Sie mit dem
Sprühgerät arbeiten.
5. Um einen sicheren Halt zu gewährleisten, und um die Füße vor
Verletzungen zu schützen, sollten bei der Arbeit mit dem Sprühgerät
immer robuste Arbeitsschuhe mit rutschfester Profilsohle getragen
werden.
– Sichern Sie stets lose Kleidungstücke, loses Haar, Halstücher, Zubehör usw.
Lose Objekte können in die beweglichen Teile des Motors geraten und
schwerwiegende Verletzungen verursachen.
Das motorisierte Sprühgerät anlassen
– Bitte achten Sie darauf, dass sich keine Kinder oder andere Personen
innerhalb eines Arbeitsbereiches mit einem Durchmesser von 15 m aufhalten.
Achten Sie ebenfalls darauf, dass sich in diesem Arbeitsbereich keine Tiere
aufhalten. Das motorisierte Sprühgerät niemals im Stadtbereich einsetzen.
– Prüfen Sie vor Inbetriebnahme immer erst, ob ein sicherer Betrieb des
motorisierten Sprühgerätes gewährleistet ist:
Prüfen Sie die Sicherheit des Gashebels. Der Gashebel sollte auf eine
reibungslose, leichte Bedienbarkeit hin geprüft werden. Achten Sie darauf, dass
der Gashebel sauber und trocken ist und prüfen die Funktion des l-O Schalters.
Gehörschutz
Schutzmaske
Lange
Hosenbeine
15meter
Wasserdichte
Kappe
Schutzbrille
Lange Ärmel
Gummihand
schuhe
rbeitsschuhe
39
Page 40

– Überzeugen Sie sich vor Gebrauch von der Betriebssicherheit des
Sprühgerätes und prüfen Sie, ob der Gashebel sich leicht bedienen lässt und
tadellos funktioniert.
– Vergewissern Sie sich, dass sich am Gerät keine Werkzeuge mehr befinden,
die beim Zusammenbau verwendet wurden. Ein vergessenes Werkzeug
könnte beim Anlassen des Motors weggeschleudert werden und
schwerwiegende Verletzungen verursachen.
– Prüfen Sie ob das Sprühgerät sauber und trocken ist, und überzeugen Sie
sich davon, dass der STOPP-Schalter einwandfrei funktioniert.
– Bei Motorstörungen jeglicher Art muss der Motor unverzüglich abgeschaltet
werden.
– Geben Sie beim Betrieb des Sprühgerätes besonders darauf Acht, keine
Auspuffabgase einzuatmen.
– Abgase sind giftig! Lassen Sie den Motor nie in einem geschlossenen Raum
oder an einem Ort mit schlechter Belüftung laufen (Erstickungs- und/oder
Vergiftungsgefahr).
– Benutzen Sie das Sprühgerät nicht ununterbrochen für länger als eine
Stunde, und planen Sie unbedingt eine Pause von mindestens 30 Minuten
pro Arbeitsstunde ein.
– Schalten Sie den Motor immer ab, wenn Sie das Gerät zwecks Arbeitspause
unbeaufsichtigt lassen. Platzieren Sie das Sprühgerät immer an einem
sicheren Ort und achten Sie darauf, dass sich in unmittelbarer Nähe kein
brennbares Material befindet. Legen Sie das erhitzte Gerät nie auf trockenes
Gras oder anderes leicht brennbares Material (erhöhte Brandgefahr). (6)
– Lassen Sie den Motor nicht laufen, wenn der Auspuff defekt ist.
– Stellen Sie den Motor ab, bevor das Gerät transportiert wird.
– Falls das Sprühgerät per Fahrzeug transportiert werden soll, warten Sie
zuerst bis sich der Motor abgekühlt hat. Entleeren Sie dann den
Kraftstofftank und zurren Sie das Gerät fest.
– Vergewissern Sie sich unbedingt vor jedem Transport, dass der
Kraftstofftank vollkommen leer ist.
Auftanken
– Beim Auftanken den Motor ausschalten. Von offenem Feuer fernhalten und
nicht rauchen.
– Vermeiden Sie Hautkontakt mit Erdölprodukten. Die Kraftstoffdämpfe nicht
einatmen. Beim Auftanken immer Schutzhandschuhe tragen. Schutzkleidung
in regelmäßigen Abständen wechseln und reinigen.
– Achten Sie darauf, den Kraftstoff nicht zu verschütten, um so eine
Verschmutzung der Erde zu vermeiden (Umweltschutz). Das motorisierte
Sprühgerät unmittelbar nach Verschütten von Kraftstoff reinigen. Lassen Sie
feucht gewordene Kleidung erst trocknen, bevor Sie diese in gut schließenden
Behältern entsorgen, um eine spontane Entzündung zu vermeiden.
– Jeden Kontakt von Kraftstoff mit Ihrer Kleidung vermeiden. Falls Kraftstoff
auf Ihre Kleidung verschüttet wurde, diese sofort wechseln (Feuergefahr).
– Inspizieren Sie den Tankdeckel in regelmäßigen Abständen, um zu prüfen,
ob dieser sicher verschlossen bleibt.
– Die Klemmschraube am Tankdeckel sorgfältig anziehen. Bewegen Sie sich
an einen anderen Ort, um den Motor anzulassen (mindestens 3 Meter vom
Ort des Auftankens entfernt).
– Niemals in geschlossenen Räumen auftanken. Kraftstoffdämpfe sammeln
sich in Bodenhöhe (Explosionsgefahr).
– Kraftstoff ausschließlich in den dafür zugelassenen Behältern transportieren
und lagern. Achten Sie darauf, dass gelagerter Kraftstoff für Kindern nicht
zugänglich ist.
– Bitte nicht versuchen, eine heiße oder laufende Maschine aufzutanken.
Bedienung
– Benutzen Sie das Sprühgerät nur bei günstigen Licht- und
Wetterverhältnissen. Benutzen Sie das Gerät niemals bei Nacht und Nebel.
Vermeiden Sie es ebenfalls, mit dem Sprühgerät bei Regen (oder gleich
nach einer Regenschauer) zu arbeiten (Rutsch- und Sturzgefahr wegen
Nässe).
– Seien Sie besonders vorsichtig während der Wintermonate, da wegen
nasser Flächen, Eis und Schnee erhöhte Rutschgefahr herrscht. Achten Sie
stets auf sicheren Stand und guten Halt.
– Verwenden Sie das Sprühgerät nie auf einer Leiter stehend.
– Klettern Sie niemals auf einen Baum, um von dort aus mit dem Sprühgerät
zu arbeiten.
– Verwenden Sie das Sprühgerät nicht, wenn Sie sich auf instabilem Grund
befinden
– Richten Sie die Düse des Sprühgerätes niemals gegen Personen oder Tiere.
Chemische Stoffe oder aufgewirbelte Partikel können schwere
Gesundheitsschädigungen oder Verletzungen herbeiführen.
– Vermeiden Sie es, bei laufendem Motor den Zündkerzenstecker zu berühren.
– Achten Sie darauf, beim Betrieb des Gerätes nicht mit beweglichen
Motorteilen in Berührung zu kommen.
– Vermeiden Sie es, beim Betrieb des Gerätes, sowie für eine gewisse Zeit
nach dem Ausschalten des Motors, den Auspuff oder die Kühlrippen des
Motors zu berühren. Diese Geräteteile sind äußerst heiß und können
schwere Verbrennungen verursachen.
Arbeitspause
Transport
Auftanken
Wartung
Geräteersatz
3 meter
40
Page 41

– Informieren Sie sich vor Gebrauch von Insekten- und
Unkrautvertilgungsmittel unbedingt über deren Giftigkeitsgrad, und befolgen
Sie bei der Verwendung von flüssigen Chemikalien strikte die dazugehörigen
Anweisungen. Sollte Ihre Haut versehentlich mit Insekten- oder
Unkrautvertilgungsmittel in Berührung kommen, spülen Sie die betroffene
Stelle sofort unter fließendem Wasser ab, und waschen Sie sie darauf
gründlich mit Seife. Um ein Auslaufen von Chemikalien zu verhindern, muss
der Deckel des Sprühmitteltankes immer gut festgezogen und auf Dichtheit
überprüft werden.
Wartungsanleitungen
– Seien Sie freundlich zur Umwelt. Betreiben Sie das Sprühgerät mit so wenig
Geräusch und Verschmutzung wie möglich. Prüfen Sie insbesondere die
richtige Einstellung des Vergasers.
– Reinigen Sie das Sprühgerät in regelmäßigen Abständen und prüfen Sie, ob
alle Schrauben und Muttern fest angezogen sind.
– Das Sprühgerät niemals in der Nähe von offenem Feuer, Funken oder
anderen Zündquellen lagern.
– Das Sprühgerät immer in gut gelüfteten, verschlossenen Räumen mit
entleertem Tank lagern.
Beachten und befolgen Sie alle relevanten Unfallschutzanleitungen, die von der
Handelsvereinigung sowie Versicherungsgesellschaften ausgestellt werden.
Nehmen Sie am motorisierten Sprühgerät keine Veränderungen vor, da dies
Ihre Sicherheit beeinträchtigen wird.
Die Durchführung von Wartungsarbeiten oder Reparaturen durch den Benutzer
beschränkt sich auf die in dieser Anleitung beschriebenen Prozeduren. Alle
anderen Arbeiten müssen von autorisierten Kundendienstfirmen durchgeführt
werden.
Verwenden Sie ausschließlich Original Ersatzteile und von DOLMAR geliefertes
Zubehör. Die Verwendung nicht zugelassener Zubehörteile oder Werkzeuge
bedeutet ein erhöhtes Unfall- und Verletzungsrisiko. DOLMAR übernimmt
keinerlei Haftung für Unfälle oder Schäden, die durch den Gebrauch nicht
zugelassener Ansätze oder Zubehörteile entstehen.
Erste Hilfe
Achten Sie darauf, dass für den Fall eines Unfalls ein gut ausgestatteter Erste
Hilfe Kasten in der Nähe des Arbeitsbereiches bereitsteht. Alle Posten, die aus
dem Erste Hilfe Kasten entfernt wurden, sofort wieder ersetzen.
Bei Bitte um Hilfe die folgenden Informationen angeben:
– Unfallort
– Beschreibung des Unfalls
– Anzahl verletzter Personen
– Art der Verletzungen
– Ihr Name
Verpackung
– Das DOLMAR motorisierte Sprühgerät wird in einem Schutzkarton geliefert,
um Beschädigungen beim Versand zu vermeiden. Pappkarton ist
grundsätzlich ein Rohmaterial and daher konsequenterweise
wiederverwendbar oder ansonsten für eine Wiederverwertung geeignet
(Altpapier Wiederverwertung).
41
Page 42

EU-Konformitätserklärung
Der Unterzeichnete, der nachstehenden Hersteller bzw. Inverkehrbringer
Makita Corporation
3-11-8, Sumiyoshi-cho, Anjo, Aichi, JAPAN
(Hersteller)
sowie
DOLMAR GmbH
Jenfelder Str. 38, 22045 Hamburg, Germany
(authorisierter Repräsentant in Europa)
vertritt, erklärt hiermit, daß das Produkt
DOLMAR Blasgerät
Modell; SP-252.4R
in Übereinstimmung ist mit den Bestimmungen der nachstehenden EG-Richtlinie(n)
einschließlich aller zutreffenden Änderungen:
• Richtlinie des Rates zur Angleichung der Rechtsvorschriften der Mitgliedstaaten für Maschinen 89/336/EWG, abgeändert durch
93/68/EWG und in der Folge ersetzt durch 98/37/EG
• Richtlinie des Rates zur Angleichung der Rechtsvorschriften der Mitgliedstaaten über die elektromagnetische Verträglichkeit
89/336/EWG, abgeändert 92/31/EWG
und daß folgende Normen und/oder technische Spezifikationen zur Anwendung gelangt sind:
EN 292, EN 55012
Gemessene Lautstärke: 98 dB
Garantierte maximale Lautstärke: 102 dB
Diese Lautstärkepegel sind in Übereinstimmung mit der Richtlinie 2000/14/EC des europäischen Parlaments und des Rates vom 8. Mai
200 gemessen worden.
Interne Fertigungskontrolle gemäß Anhang V der Richtlinie 2000/14/EC.
Shigeharu kominami Rainer Bergfeld
Geschäftsführer Geschäftsführer
Makita Corporation Dolmar GmbH
42
Page 43

TECHNISCHE DATEN
Modell SP-252.4R
Abmessungen (L x W x H) mm 380 x 420 x 635
Trockengewicht kg 9.1
Fassungsvermögen des Chemikalientanks l 20
Pumpe
Typ Horizontal gegenüberliegende Doppelkolben
Max. Druck MPa 2.5
Absaugen L 7.1
Motor
Modell EH025A
Hubraum cm
Kraftstoff Bleifreies Normalbenzin
Fassungsvermögen des Kraftstofftanks L 0.5
Motorenöl
Fassungsvermögen des Motoröltanks L 0.08
Vergaser Typ WALBRO WYL
Zündsystem Typ Festkörper-Zündung
Zündkerze Typ NGK CMR6A (Typ C)
Elektrodenabstand mm 0.7 - 0.8
3
SAE 10-W-30-Öl der API-Klassifizierung, SF-Klasse oder höher (für
24.5
4-Takt-Automotoren)
Schalldruckpegel
Schalldruckpegel (Lpa) bis 98/37/EC
Garantierter Schalldruckpegel (Lwa) bis 2000/14/EC
dB 84.0
dB 102.0
ANMERKUNG:
1. Verwenden Sie nur von DOLMAR empfohlene Öle und Zündkerzen.
2. Die Spezifikation kann ohne Ankündigung geändert werden.
43
Page 44

BEZEICHNUNG DER TEILE
D BEZEICHNUNG DER TEILE D BEZEICHNUNG DER TEILE D BEZEICHNUNG DER TEILE
1
I-O-Schalter
2
Gashebel
3
Choke-Hebel
4
Luftreinigergehäuse
5
Zündkerzenstecker
6
Starter mit Rücklauf
7
Kraftstofftank
8
Tankdeckel (Kraftstofftank)
9
Auspuff
10
Ölfühler
11
Anlasseinspritzpumpe
12
Deckel für Chemikalientankabfluss
13
Chemikalientankdeckel
14
Chemikalientank
15
Druckregler
16
Sprühschlauch
17
Schnellverschluss
18
Handgriff
19
Düsenhebe
20
Düsenrohr
21
Düsenrohrhalterung
22
Düse (Weitwinkel-Doppelkopf)
23
24
44
Page 45

MONTAGEANLEITUNGEN
A
Achtung: Vor der Durchführung irgendwelcher Arbeiten am motorisierten Sprühgerät immer erst den Motor ausschalten und den
Kerzenstecker von der Zündkerze abziehen.
Immer Schutzhandschuhe tragen.
Achtung: Das motorisierte Sprühgerät nur dann wieder einschalten, wenn es vollständig wieder zusammengebaut wurde.
1. Montage der Düse
Beziehen Sie sich hinsichtlich Zusammenbau von Handgriff, Düsenhebel, Düsenschlauch und Düse auf die Abbildung auf der vorhergehenden
Seite (Bezeichnung der einzelnen Teile). Achten Sie darauf, die Teile ordnungsgemäß zusammenzubauen, um Lecks zu vermeiden.
2. Einstellung der Schultergurte
Die beiden Schultergurte wie unten dargestellt am Chemikalientank derart befestigen, dass sich die Gurte nicht dabei verdrehen. Anleitungen
werden für einen einzelnen Gurt beschrieben.
Einstellung der oberen Schultergurte
㽲 㽳 㽴
Chemikalientank
Gurt in Pfeilrichtung ziehen und dann
dessen zusammengelegtes Ende an
das untere Ende der Schnalle legen.
obere Schnalle
Einstellung der unteren Schultergurte
obere Schnalle
untere Schnalle
Chemikalientank
Stecken Sie den Teil 'A' des Gurtes
㽳 㽲
durch diesen Spalt im Metallhaken.
nschließend den Gurt um
90 Grad in Pfeilrichtung
aufrichten
Metallhaken
Befolgen Sie die gleichen Anleitungen
㽴
für den anderen Schultergurt, um die
Einstellung zu beenden.
Stecken Sie die Rückengurte 'A', einen der
beiden sich überlappenden Gurte, wie in
den Abbildungen ԙ und Ԛ unten
dargestellt in den Metallhaken.
Metallhaken
45
Page 46

VOR INBETRIEBNAHME
A
A
A
Motoröl prüfen und Nachfüllen
– Die folgende Prozedur nur bei abgekühlter Maschine durchführen.
– Den Ölfühler herausnehmen, während das Gerät dabei gerade gehalten wird und überprüfen, ob der Ölstand zwischen den Markierungen für
den oberen und unteren Ölstand liegt. Wenn so viel Öl verbraucht wurde, dass der Ölfühler nur an seiner Spitze vom Öl benetzt wird,
insbesondere wenn der Ölfühler nur in den Getriebekasten hineingesteckt, aber nicht eingeschraubt wird (Abbildung 1), neues Öl über den
Stutzen einfüllen.
– Hinweis: Die Nachfüllzeit für das Öl beträgt etwa 10 Stunden (jedes 10 × tanken)
– Wenn sich das Öl verfärbt oder verschmutzt, dieses durch Neues ersetzen. (Beziehen Sie sich hinsichtlich Prozedur und Intervalle auf Seite
52).
Empfohlenes Öl: SAE 10W-30 Öl der API Klassifizierung, Klasse SF oder höher (4-Taktmotor für Autos).
Ölvolumen: etwa 0.08 l
Hinweis: Wenn der Motor nicht aufrecht gehalten wird, kann Öl in den Motor laufen und daher übermäßig nachgefüllt werden.
Wenn das Öl bis über den oberen Stand eingefüllt wird, kann das Öl verschmutzt werden oder sich unter Entwicklung weißen
Rauches entzünden.
Punkt 1 Ersatz des Ölfühlers
– Staub und Schmutz in der Nähe des Einfüllstutzens entfernen und dann den Ölfühler entfernen.
– Den entfernten Ölfühler von Sand und Staub freihalten. Andernfalls könnte am Ölfühler anhaftender Sand oder Staub zu
unregelmäßigem Ölkreislauf führen oder Verschleiß von Maschinenteilen verursachen, welcher wiederum zu Störungen
führen kann.
– Als Beispiel wie der Ölfühler sauber gehalten werden kann, wird empfohlen den Ölfühler wie in der Abbildung 3 dargestellt
an seinem Knauf halten und so in die Motorabdeckung einzustecken.
Wenn Öl nur an der
Spitze anhaftet, neues
Öl einfüllen.
bb.1
Ölfühler
bb.3
Oberer Ölstand
(Kante des Öleinfüllstutzens)
bb.2
46
Page 47

1) Das Gerät gerade halten und dann den Ölfühler herausnehmen.
2) Öl bis an den Oberrand des Öleinfüllstutzens einfüllen. (Beziehen Sie sich
hierzu auf die Abbildung 2 auf der vorhergehenden Seite)
Öl mit Hilfe der Schmierkanne einfüllen.
3) Den Ölfühler wieder festschrauben. Wenn dieser nicht ausreichend
festgeschraubt wird, kann es zu Öllecks kommen.
Punkt 2 Ölwechsel: "Wenn Öl verschüttet wird"
– Wenn Öl zwischen dem Kraftstofftank und dem Motor verschüttet wird, wird dieses über die Ansaugöffnung für die Luftkühlung in
den Motor eingesogen und führt so zu einer Kontaminierung des Motors. Achten Sie darauf, verschüttetes Öl vor Inbetriebnahme
abzuwischen.
Auftanken
Umgang mit Kraftstoff
Kraftstoff muss mit größter Vorsicht behandelt werden. Kraftstoff kann ähnliche Substanzen wie Lösungsmittel enthalten. Das Auftanken muss
immer in gut gelüfteten Räumen oder an der freien Luft vorgenommen werden. Niemals Kraftstoffdämpfe einatmen und einen Kontakt mit dem
Kraftstoff vermeiden. Wenn Sie wiederholt oder über lange Zeit in Kontakt mit Kraftstoff kommen, trocknet die Haus aus und kann somit zu
Hautkrankheiten oder Allergien führen. Bei Augenkontakt mit dem Kraftstoff die Augen mit frischem Wasser reinigen. Wenn die Reizung der
Augen bestehen bleibt, einen Arzt aufsuchen.
Lagerdauer für Kraftstoff
Kraftstoff sollte innerhalb eines Zeitraums von vier Wochen verbraucht werden. Dies gilt selbst, wenn dieser in Spezialbehältern an einen gut
gelüfteten, schattigem Ort gelagert wird.
Wenn kein Spezialbehälter verwendet oder der Behälter nicht abgedeckt wird, kann es innerhalb eines Tages zu einer Verschlechterung des
Kraftstoffs kommen.
Lagerung von Motor und Nachfülltank
– Den Motor und Tank an einem kühlen, vor direkter Sonneneinstrahlung geschützten Ort lagern.
– Niemals den Kraftstoff im Auto oder im Kofferraum lagern.
Kraftstoff
Bei dem Motor handelt es sich um einen 4-Taktmotor. Achten Sie darauf, Autobenzin zu verwenden (Normalbenzin oder Super).
Den Kraftstoff betreffende Punkte
– Niemals eine Benzinmischung verwenden, die Motoröl enthält. Anderenfalls könnte es zu einer übermäßigen Ansammlung von
Kohlenstoff oder zu mechanischen Störungen kommen.
– Gebrauch von verfallenem Öl kann zu unregelmäßigem Anlassen führen.
Auftanken
WARNUNG: KEIN OFFENES FEUER! ABSOLUTES RAUCHVERBOT!
Verwendetes Benzin: Autobenzin (bleifreies Benzin)
– Den Tankdeckel ein wenig lösen, um einen Druckausgleich mit dem
Atmosphärendruck zu erreichen.
– Den Tankdeckel abnehmen und auftanken, wobei die Luft vertrieben wird,
indem der Tank leicht geneigt und somit der Einfüllstutzen nach oben
gewandt wird. (Kraftstoff niemals bis an den Rand des Einfüllstutzens
einfüllen.)
– Die Umgebung des Einfüllstützens gut sauber wischen, um zu verhindern,
dass Fremdmaterial in den Kraftstofftank eindringt.
– Nach dem Auftanken den Tankdeckel wieder fest aufschrauben.
• Wenn der Tankdeckel Defekte aufweist oder beschädigt ist, diesen durch
einen Neuen ersetzen.
• Der Tankdeckel ist ein Verschleißartikel und sollte daher alle zwei bis drei
Jahre ersetzt werden.
Oberer Kraftstoffstand
Kraftstofftank
Tankdeckel
47
Page 48

AGRARCHEMIKALIEN MISCHEN
1)
Agrarchemikalien mischen
1. Agrarchemikalien sind toxisch. Halten Sie bei der Arbeit mit
Agrarchemikalien immer die vom Hersteller vorgelegten Anleitungen
strikt ein.
2. Verwenden Sie immer den mitgelieferten Siebfilter, wenn Sie
Agrarchemikalien in den Chemikalientank einfüllen
3. Den Deckel des Chemikalientanks fest verschließen, um Lecks zu
vermeiden.
4. Wenn Chemikalien im Tank miteinander gemischt werden sollen,
geben Sie immer erst Wasser in den Tank, bevor Sie andere
Chemikalien einfüllen.
Vorsicht
• Handhaben Sie landwirtschaftliche Chemikalien immer mit äußerster Vorsicht. Sollte Ihre Haut versehentlich mit Insekten- oder
Unkrautvertilgungsmittel in Berührung kommen, waschen Sie die betroffene Stelle sofort unter fließendem Wasser ab.
2) Verwendung von verschiedenen Chemikalien
1. Falls ein anderes Sprühmittel verwendet werden soll, müssen
Sprühmitteltank, Pumpe, Sprührohr und Düse des Sprühgerätes
gründlich ausgespült werden, um Rückstände des vorher verwendeten
Mittels vollständig zu entfernen. Das Vermischen von zwei
verschiedenen Sprühmitteln könnte Vergiftungskrankheiten
hervorrufen.
MOTOR STARTEN
WARNUNG
• Versuchen Sie bitte niemals, den Motor an einem Ort anzulassen, an dem Kraftstoff bereitgestellt wird. Halten Sie beim Anlassen des
Motors einen Abstand von mindestens 3 m zur Tankstelle ein.
- Anderenfalls besteht die Gefahr, dass es zur Entzündung oder Feuerentwicklung kommt.
• Auspuffgase vom Motor haben toxische Auswirkungen. Den Motor nicht an schlecht gelüfteten Orten, wie zum Beispiel einem Tunnel
oder Gebäude oder dergleichen betreiben.
- Bei Betrieb des Motors an schlecht gelüfteten Orten kann es zur Vergiftung durch Auspuffgase kommen.
• Wenn Sie nach Anlassen des Motors Anomalien bei Klang, Geruch oder Vibration bemerken, den Motor sofort wieder ausschalten und
eine Inspektion vornehmen.
- Wenn der Motor betrieben wird, ohne dass derartige Anomalien angemessen behandelt werden, kann es zu Unfällen kommen.
• Achten Sie darauf, dass der Motor auch anhält, wenn der Stopschalter auf “O” geschaltet wird.
1) Vor Anlassen des Motors immer darauf achten, dass sich Flüssigkeit im
Chemikalientank befindet.
2) Den Düsenhebel in die GESCHLOSSEN Stellung drehen.
DÜSENHEBEL
GESCHLOSSEN
48
Page 49

3) Den Druckregler drehen und den STARTTAB mit der entsprechenden
A
Markierung zur Deckung bringen.
1) Bei kaltem Motor oder wenn Kraftstoff aufgetankt wird
(1) Die Maschine auf einer flachen Unterlage abssetzen.
(2) Den I-O Schalter in die“ I “ Stellung schalten.
(3) Achten Sie darauf, dass der Gashebel sich in der LANGSAM Stellung
befindet.
(4) Solange mit der Anlaßeinspritzpumpe pumpen, bis Kraftstoff in die
Anlaßeinspritzpumpe eintritt.
• Im Allgemeinen tritt der Kraftstoff nach 7 bis 10 Pumpbewegungen in
den Vergaser ein.
• Wenn die Anlaßeinspritzpumpe übermäßig betätigt wird, läuft
überschüssiges Benzin wieder in den Kraftstofftank zurück.
(5) Den Choke-Hebel auf der rechten Luftfilterseite anheben und dann
den Choke-Hebel schließen.
(6) Die Elementabdeckung mit der linken Hand halten, um zu verhindern,
dass sich die Maschine bewegt und diese dann in einer stabilen
Position abstellen.
(7) Den Starterhandgriff langsam soweit herausziehen, bis ein Widerstand
gefühlt wird. Den Starterhandgriff wieder in seine Ausgangsposition
zurückkehren lassen und anschließend noch einmal kraftvoll
herausziehen.
• Das Seil niemals vollständig herausziehen.
• Wenn der Startknopf einmal gedrückt wurde, diesen nicht sofort
wieder loslassen. Halten Sie den Starterhandgriff solange, bis er
wieder in seine Ausgangsstellung zurückgekehrt ist.
(8) Wenn der Motor anspringt, den Choke-Hebel ziehen.
• Den Choke-Hebel allmählich weiter öffnen, während Sie dabei den
Betrieb des Motors beobachten. Achten Sie darauf, den
Choke-Hebel nicht bis an den Anschlag zu öffnen.
• In der Kälte oder nachdem der Motor abgekühlt ist, den
Choke-Hebel nicht plötzlich öffnen. Anderenfalls könnte der Motor
stehen bleiben.
(9) Den Motor zum Anwärmen für 2 bis 3 Minunten laufen lassen.
(10) Die Drehgeschwindigkeit des Motors stabilisiert sich allmählich und
wenn sich das Aufdrehen von niedrigen auf hohe
Drehgeschwindigkeiten reibungslos vornehmen lässt, ist die
Aufwärmphase abgeschlossen.
STARTTAB
Druckregler
LANGSAM
Gashebel
nlaßeinspritzpumpe
Schalter
Geschl
Offen
49
Page 50

2) Wenn der Motor warm ist
(1) Die Maschine auf flachem Boden absetzen.
(2) Die Anlasseinspritzpumpe mehrfach bedienen.
(3) Achten Sie darauf, dass der Choke-Hebel offen ist.
(4) Den Hauptgriff mit der linken Hand halten, um eine Rotation des Motors zu vermeiden und diesen dann auf einer flachen Unterlage
abssetzen.
(5) Den Starterhandgriff langsam soweit herausziehen, bis ein Widerstand gefühlt wird. Den Starterhandgriff wieder in seine
Ausgangsposition zurückkehren lassen und anschließend noch einmal kraftvoll herausziehen.
(6) Wenn sich der Motor nur schlecht starten lässt, die Drosselklappe um etwa 1/3 öffnen.
MOTOR ABSTELLEN
1) Den Düsenhebel in die GESCHLOSSEN Stellung drehen.
2) Den I-O Schalter in die “O” Position drehen.
3) Den Gashebel in die LANGSAM Stellung drehen.
LANGSAM
Gashebel
DÜSENHEBEL
GESCHLOSSEN
I-O Schalter
50
Page 51

BETRIEB
W
1. Motor anlassen (siehe Seite 48)
2. Laden Sie das Sprühgerät nach Anlassen des Motors auf Ihren Rücken und ziehen Sie die Schulterriemen stramm, um das Gerät möglichst
dicht an Ihrem Körper zu halten. Stellen Sie den Gashebel auf Leerlauf und achten Sie darauf, dass das Gerät nicht zu viel Schräglage
bekommt.
Verstellen Sie die Länge der Schulterriemen wie folgt:
1) Riemen lösen: Ԙ Schnalle anheben
ԙ Ziehen Sie am Ende des Riemens, das am
Sprühgerät befestigt ist.
2) Riemen strammziehen: Ԛ Ziehen Sie am freien Ende des Riemens.
Anmerkung: Falls die Schulterriemen nicht belastet sind, lassen sie sich
relativ leicht strammziehen.
3. Die gewünschte Betriebsposition mit dem Druckregler auswählen.
4. Den Drosselklappenhebel mit dem Gashebel in die gewünschte Stellung
bringen und dabei den Sprühnebel beobachten.
Vermeiden Sie es unbedingt, beim Arbeiten mit dem Sprühgerät gegen den Wind zu sprühen, da sonst das Sprühmittel in Ihre
Richtung geweht werden könnte.
arnung
NIEDERDRUCK
Druckregler
LANGSAM
Gashebel
Ԙ
Ԛ
Lösen
HOCHDRUCK
SCHNELL
Schnalle
ԙ
Strammziehen
DÜSENHEBEL
GESCHLOSSEN
OFFEN
51
Page 52

INSPEKTION UND WARTUNG
!
!
!
GEFAHR
• Vor Inspektions- und Wartungsarbeiten den Motor ausschalten und abkühlen lassen. Außerdem die Zündkerze und den Kerzenstecker entfernen.
- Wenn versucht wird Inspektions- und Wartungsarbeiten unmittelbar nach dem Ausschalten des Motors oder bei aufgesetztem
Kerzenstecker durchzuführen, kann sich der Bediener verbrennen oder es zu einem unbeabsichtigtem Anspringen des Motors kommen.
• Achten Sie darauf, dass nach den Inspektions- und Wartungsarbeiten alle Teile wieder zusammengebaut wurden. Anschließend den
Betrieb aufnehmen.
㩷
1. Motoröl auswechseln
Verdorbenes Motoröl führt zu einer wesentlich verkürzten Lebensdauer der gleitenden oder sich drehenden Teile. Achten Sie darauf, die
Ersatzintervalle sowie auch die Ersatzmenge zu prüfen.
㩷
GEFAHR
• Im Allgemeinen verbleiben der Motorblock und das Motoröl unmittelbar nach dem Ausschalten des Motors noch heiß. Achten Sie bei
Ersatz des Motoröls darauf, dass sich sowohl der Motor wie auch das Motoröl ausreichend weit abgekühlt haben. Anderenfalls besteht
die Gefahr von Verbrennungen. Darüber hinaus kann ein Ölwechsel unmittelbar nach dem Ausschalten des Motors dazu führen, dass
zuviel Öl eingefüllt wird, weil das Motoröl noch nicht vollständig in die Ölwanne zurückgelaufen ist.
• Wenn Öl bis über die Obergrenze eingefüllt wird, kann dieses verschmutzt werden oder sogar Feuer fangen und dann unter Entwicklung
weißen Rauches verbrennen.
Ersatzintervalle: Anfänglich alle 20 Betriebsstunden und dann später alle 50 Betriebsstunden
Empfohlenes Öl: SAE10W-30 Öl der API-Klassifikation, SF Klasse oder höher (4-Takt Motoröl für Autos)
Bitte befolgen Sie beim Ersatz die nachstehende Prozedur.㩷
1) Achten Sie darauf, dass der Tankverschluss fest geschlossen ist.
2) Den Öldeckel abnehmen.
- Den Öldeckel Staub- und schmutzfrei halten.
3) Verwenden Sie die im Zubehör inbegriffene spezielle Flasche um das
alte Öl aus der Ölwanne zu saugen.
• Drücken Sie die Flasche zusammen und führen Sie die Verlängerung
durch den Einfüllstutzen in die Ölwanne. Lockern Sie Ihren Griff um
das alte Öl abzusaugen.
• Wenn die Ölwanne beinahe leer ist, bringen Sie das Sprühgerät in eine
leichte Schräglage, damit auch der letze Rest von Öl abgesaugt
werden kann.
4) Bringen Sie das Gerät wieder in die Waagrechte und benutzen Sie die im
Zubehör inbegriffene Nachfüllflasche, um frisches Öl bis zur Unterkante
des Einfüllstutzens einzufüllen.
5) Setzen Sie den Ölmessstab wieder ein und schrauben Sie ihn vollständig
fest. Ungenügendes Verschließen des Ölmessstabs kann ein Überlaufen
von Öl zur Folge haben.
• Benutzen Sie die Im Zubehör inbegriffenen Ölbehälter (Absaugflasche
und Nachfüllflasche) für deren entsprechenden Verwendungszwecke.
Absaugflasche Nachfüllflasche
Benzintankverschluss
Ölfühler
52
Page 53

p
A
㩷
㩷
• Niemals Altöl mit dem Hausmüll entsorgen, in den Boden oder einen Abwasserkanal schütten. Die Entsorgung von Alöl ist rechtlich
geregelt. Bei der Entsorgung immer die gültigen Gesetze und Bestimmungen einhalten. Bitte wenden Sie sich an einen autorisierten
Kundendienst, wenn diesbezüglich noch Fragen bestehen.
• Öl verliert an Qualtität, selbst wenn es unbenutzt gelagert wird. Das Öl in regelmäßigen Abständen kontrollieren und ersetzen (alle 6
Monate durch neues Öl ersetzen).
Beim Ölwechsel zu beachtende Punkte㩷
㩷
㩷㩷
2.Reinigung des Luftreinigers
WARNUNG: KEIN OFFENES FEUER! ABSOLUTES RAUCHVERBOT!
Häufigkeit von Reinigung und Inspektion: täglich (alle 10 Betriebsstunden)
– Entfernen Sie die Halteschraube des Luftreinigergehäuses.
– Ziehen Sie den unteren Teil des Luftreinigergehäuses nach außen und
heben Sie das Gehäuse ab.
– Schließen Sie den Choke vollständig und vergewissern Sie sich, dass der
Vergaser frei von Staub und Schmutz ist.
– Entfernen Sie das Luftreiniger-Element und verwenden Sie mit lauwarmem
Wasser verdünnten Allzweckreiniger um das Element zu waschen. Nachdem
das Element vollständig getrocknet ist, setzen Sie es wieder ein. Verwenden
Sie die punktierte Linie in Abb. 1 als Referenz für die richtige Positionierung
des Luftreiniger-Elementes.
– Benutzen Sie einen Lappen oder saugfähiges Papier um Ölreste vom
Luftreinigergehäuse und der Ansaugplatte zu wischen.
– Setzen Sie sofort nach der Reinigung das Gehäuse des Luftreinigers wieder
auf und befestigen Sie es mit der Halteschraube (zuerst oberen Teil
aufsetzen, dann unteren Teil einpassen).
Geschnittenen Teil in
dieser Position
latzieren (oben links)
Platte
nsaugvorrichtung
Abb.1
Linie (schraffiert)
Element
Element (punktiert)
Luftreinigergehäuse
Halteschraube
3. Kontrolle der Zündkerze
– Verwenden Sie zum Ein- und Ausbau der Zündkerze nur den mitgelieferten
Universalschlüssel.
– Der Abstand zwischen den zwei Elektroden der Zündkerze sollte 0,7 - 0.8
mm betragen. Justieren Sie den Abstand falls notwendig.
Reinigen Sie dei Elektroden gründlich von Ruß - und Ölrückständen, oder
ersetzen Sie die Zündkerze.
WARNUNG: Berühren Sie den Zündkerzenstecker nie während der Motor läuft
(Gefahr eines elektrischen Schocks)
4. Reinigung des Benzinfilters
WARNUNG: KEIN OFFENES FEUER! ABSOLUTES RAUCHVERBOT!
Häufigkeit von Reinigung und Kontrolle:
1 mal monatlich (alle 50 Betriebsstunden)
0.7~0.8 mm
(0.028”-0.032”)
Benzinleitung
Schlauchklemme
Saugkopf im Kraftstofftank
– Der Benzinfilter (1) des Saugkopfes dient dazu, den vom Vergaser
benötigten Kraftstoff zu filtern.
– Der Kraftstofffilter muss in regelmäßigen Abständen inspiziert werden.
Öffnen Sie zu diesem Zweck den Tankdeckel und verwenden einen
Drahthaken, um den Saugkopf aus der Tanköffnung herauszuziehen.
Verhärtete, verschmutzte oder verstopfte Filter müssen ersetzt werden.
– Eine unzureichende Versorgung mit Kraftstoff kann dazu führen, dass die
zuIässige Höchstgeschwindigkeit überschritten wird. Es ist daher wichtig,
dass der Kraftstofffilter mindestens alle Vierteljahre ersetzt wird, um eine
zufriedenstellende Kraftstoffversorgung des Vergasers zu gewährleisten.
Benzinfilter (1)
53
Page 54

A
Fehlersuche
Störung System Beobachtung Ursache
Motor springt nicht oder nur
schwierig an
Zündsystem Zündkerze O.K. Störung im Kraftstoffversorgungs- oder
Kompressionssystem, oder mechanische Störung
Kein Zündfunke STOP-Schalter wurde betätigt, Verkabelungsfehler oder
Kurzschluss, fehlerhafte Zündkerze oder defekte
Anschlüsse, Störung des Zündmoduls
Kraftstoffversorgung Kraftstofftank voll Falsche Choke-Position, defekter Vergaser,
Kraftstoffleitung verbogen oder blockiert, schmutziger
Kraftstoff.
Kompression Keine Kompression
wenn übergezogen
Zylinderbodendichtung defekt, Kurbelwellendichtung
beschädigt, Zylinder- oder Kolbenringe defekt oder
unzureichende Dichtung der Zündkerze
Mechanische
Störung
Probleme beim Warmstart Tank gefüllt, Zündfunke
Starter springt nicht Beschädigte Starterfeder, beschädigte Teile innerhalb
des Motors
Vergaser verschmutzt, reinigen lassen
vorhanden
Motor springt an, geht aber
Kraftstoffversorgung Tank gefüllt Falsche Leerlaufeinstellung, Vergaser verschmutzt
wieder aus
Lüftung des Kraftstofftanks defekt,
Kraftstoffversorgungsleitung unterbrochen, Kabel oder
STOP-Schalter defekt
Unzureichende Leistung Mehrer Systeme
können gleichzeitig
Schlechter Leerlauf Luftfilter verschmutzt, Vergaser verschmutzt, Auspuff
verstopft, Auspuffrohr im Zylinder verstopft
betroffen sein
Betriebszeit
rtikel
Motoröl
Prüfen/Reinigen
Auswechseln
Befestigungen
(Schrauben, Muttern)
Prüfen
Prüfen/Reinigen
Benzintank
Entleeren
Gashebel Funktions-Check
STOPP-Schalter Funktions-Check
Leerlauf
Prüfen/
Einstellen
Luftreiniger Reinigen
Zündkerzenstecker Prüfen
Kühlluftschacht Prüfen/Reinigen
Prüfen
Benzinleitung
Auswechseln
Benzinfilter Prüfen/Reinigen
Freiraum zwischen Lufteinlassund Luftauslassventil
Einstellen
Ölschlauch Prüfen
Motor überholen
Vergaser Entleeren
Vor
Inbetrieb
nahme
Nach
Schmierung
10h 50h 200h
Betriebs-
einstellung /
Pause
٤ ٤
*1
٤
٤
٤
٤
*3
٤
٤
٤
٤
٤
٤
٤
*2
٧
٤
*2
٧
٧
٧
٤
*2
*2
*3
*1 Den ersten Ersatz nach 20 Betriebsstunden vornehmen.
*2 Beauftragen Sie für die 200-Stunden Inspektion einen autorisierten Kundendienst oder eine Werkstatt.
*3 Nach Entleeren des Kraftstofftanks den Motor noch weiterlaufen lassen, um den Kraftstoff aus dem Vergaser ablaufen zu lassen.
54
Page 55

STÖRUNGSSUCHE
– Prüfen Sie mögliche Störungsursachen, bevor Sie eine Reparatur in Auftrag geben. Stellen Sie Maschine entsprechend der Beschreibungen
in dieser Bedienungsanleitung ein. Wenn Störungen gefunden werden. Niemals irgendwelchen anderen Teile als die in der Anleitung
beschriebenen modifizieren oder abbauen. Bitte wenden Sie sich hinsichtlich Reparaturen an einen autorisierten Kundendienst oder eine
lokale Vertretung.
Störung Mögliche Ursache (Funktionsfehler) Maßnahme zur Behebung
Anlass-Einspritzpumpe wurde nicht betätigt. Betätigen Sie die 7 bis 10 mal
Mit zu wenig Kraft am Starterseil gezogen. Kräftig ziehen.
Kein Benzin im Tank. Benzin nachfüllen
Verstopfter Benzinfilter. Filter reinigen.
Benzinleitung geradebiegen oder
auswechseln.
Minderwertiges Benzin erschwert den
Startvorgang. Tank entleeren und frisches
Benzin nachfüllen. (Empfohlene
Verbrauchsdauer für Benzin: ca. 1 Monat).
Den Drosselklappenhebel von mittlerer auf
hohe Geschwindigkeit umstellen und dann am
Startergriff ziehen, bis der Motor anspringt.
Wenn der Motor nicht anspringen will, die
Zündkerze einmal entfernen, die Kontakte
trocknen und wieder einbauen. Anschließend
wie vorgeschrieben Motor anlassen.
Stecken Sie den Kerzenstecker richtig auf die
Zündkerze.
Folgen Sie den Anweisungen in der
Betriebsanleitung um den Motor genügend
aufzuwärmen.
Choke öffnen.
Motor springt nicht an.
Motor stirbt nach dem Anlassen gleich
wieder ab.
Motors kann nicht beschleunigt werden.
Geknickte Benzinleitung.
Qualitätsverschlechterung beim Benzin.
Zuviel Benzin angesaugt
Kerzenstecker lose.
Schmutzige Zündkerze. Zündkerze reinigen.
Falscher Elektroden-Abstand. Abstand justieren.
Andere Fehlfunktionen der Zündkerze. Zündkerze auswechseln.
Vergaser funktioniert nicht richtig. Überprüfen und reparieren lassen.
Starterseil kann nicht gezogen werden. Überprüfen und reparieren lassen.
Antriebssystem funktioniert nicht richtig. Überprüfen und reparieren lassen.
Motor unzureichend aufgewärmt.
Choke ist geschlossen, obwohl Motor warm
ist.
Benzinfilter verstopft. Reinigen.
Luftreiniger verstopft oder verschmutzt. Reinigen.
Vergaser funktioniert nicht richtig. Überprüfen und reparieren lassen.
Antriebssystem funktioniert nicht richtig. Überprüfen und reparieren lassen.
Drosselklappenseilzug abnehmen Fest anbringen
Verbindungsstecker lose oder getrennt. Einstecken. Motor läßt sich nicht abstellen.
Bei Leerlauf Choke schließen.
Wenn der Motor nach dem Warmlaufbetrieb nicht anspringt:
Wenn sich keine Störungen der einzelnen Prüfpunkte finden, den Gashebel um etwa 1/3 öffnen und dann den Motor anlassen.
Elektrisches System funktioniert nicht richtig. Überprüfen und reparieren lassen.
55
Page 56

Italian
Vi ringraziamo per aver scelto lo spruzzatore a motore DOLMAR. Siamo lieti di consigliarvi l’uso di
questo utensile che è il risultato di un lungo programma di sviluppo e parecchi anni di pratica ed
esperienza.
Per ottenere i migliori risultati possibile dal vostro spruzzatore a motore DOLMAR, vi preghiamo di
leggere questo opuscolo che ne descrive in dettaglio le prestazioni.
Indice Pagina
Simboli
Norme di sicurezza
Dati tecnici
Nome dei componenti
Istruzioni per il montaggio
Prima della messa in moto
㨯㨯㨯㨯㨯㨯㨯㨯㨯㨯㨯㨯㨯㨯㨯㨯㨯㨯㨯㨯㨯㨯㨯㨯㨯㨯㨯㨯㨯㨯㨯㨯㨯㨯㨯㨯㨯㨯㨯㨯㨯㨯㨯㨯㨯㨯
㨯㨯㨯㨯㨯㨯㨯㨯㨯㨯㨯㨯㨯㨯㨯㨯㨯㨯㨯㨯㨯㨯㨯㨯㨯㨯㨯㨯㨯㨯㨯㨯㨯㨯㨯
㨯㨯㨯㨯㨯㨯㨯㨯㨯㨯㨯㨯㨯㨯㨯㨯㨯㨯㨯㨯㨯㨯㨯㨯㨯㨯㨯㨯㨯㨯㨯㨯㨯㨯㨯㨯㨯㨯㨯㨯㨯㨯㨯
㨯㨯㨯㨯㨯㨯㨯㨯㨯㨯㨯㨯㨯㨯㨯㨯㨯㨯㨯㨯㨯㨯㨯㨯㨯㨯㨯㨯㨯㨯㨯㨯㨯㨯㨯
㨯㨯㨯㨯㨯㨯㨯㨯㨯㨯㨯㨯㨯㨯㨯㨯㨯㨯㨯㨯㨯㨯㨯㨯㨯㨯㨯㨯㨯㨯
㨯㨯㨯㨯㨯㨯㨯㨯㨯㨯㨯㨯㨯㨯㨯㨯㨯㨯㨯㨯㨯㨯㨯㨯㨯㨯㨯㨯㨯
Miscelazione di sostanze chimiche per agricoltura
Avvio del motore
Arresto del motore
Uso dello spruzzatore
Controlli e manutenzione
㨯㨯㨯㨯㨯㨯㨯㨯㨯㨯㨯㨯㨯㨯㨯㨯㨯㨯㨯㨯㨯㨯㨯㨯㨯㨯㨯㨯㨯㨯㨯㨯㨯㨯㨯㨯㨯㨯
㨯㨯㨯㨯㨯㨯㨯㨯㨯㨯㨯㨯㨯㨯㨯㨯㨯㨯㨯㨯㨯㨯㨯㨯㨯㨯㨯㨯㨯㨯㨯㨯㨯㨯㨯㨯
㨯㨯㨯㨯㨯㨯㨯㨯㨯㨯㨯㨯㨯㨯㨯㨯㨯㨯㨯㨯㨯㨯㨯㨯㨯㨯㨯㨯㨯㨯㨯㨯㨯
㨯㨯㨯㨯㨯㨯㨯㨯㨯㨯㨯㨯㨯㨯㨯㨯㨯㨯㨯㨯㨯㨯㨯㨯㨯㨯㨯㨯㨯㨯
Localizzazione ed eliminazione dei guasti
SIMBOLI
E’ molto importante conoscere il significato dei simboli contenuti nel manuale:
㨯㨯㨯㨯㨯㨯㨯㨯㨯
㨯㨯㨯㨯㨯㨯㨯㨯㨯㨯㨯㨯㨯㨯㨯㨯
56
57
61
62
63
64
66
66
68
69
70
73
Leggere il manuale e seguire le istruzioni
ATTENZIONE/PERICOLO
Da non fare
Vietato fumare
Non utilizzare fiamme libere
Indossare guanti di protezione.
Tenere persone ed animali lontano dal
raggio d’azione dell’ apparecchio
Carburante (Benzina)
Avviamento manuale
Arresto di emergenza
Misure di pronto soccorso
ON/Avviamento
OFF/Arresto
Riciclaggio
Usare protezione degli occhi, mascherina
protettiva e protezione dell'orecchio.
56
Page 57

NORME DI SICUREZZA
Istruzioni generali
– Per un uso corretto e sicuroè necessario leggere, comprendere e seguire le
istruzioni contenute nel manuale in modo da acquisire familiarità con l’uso
del spruzzatore a motore. In questo modo saranno ridotti al minimo i danni
sia per l’operatore stesso che per gli altri.
– Si raccomanda l’uso dell’apparecchio solo a persone esperte.
Insieme al spruzzatore a motore consegnare anche il manuale di istruzioni.
– Gli utilizzatori inesperti devono informarsi presso il rivenditore circa le nozioni
basilari riguardanti l’impiego di un spruzzatore a motore.
– E’ vietato l’uso dell’apparecchio ai minori di anni 18. Tuttavia i giovani di età
superiore ai 16 anni possono utilizzare l’apparecchio a scopo di
addestramento, sotto la supervisione di persone qualificate.
– Utilizzare il spruzzatore a motore prestando la massima attenzione.
– Utilizzare il spruzzatore a motore solo in condizioni fisiche perfette. Eseguire
il lavoro con calma e attenzione. L’utilizzatore è responsabile verso terzi.
– Non utilizzare il spruzzatore a motore sotto l’effetto di alcool o droghe.
– Non utilizzare l’apparecchio in condizioni di stanchezza.
– Conservare il manuale delle istruzioni.
Equipaggiamento protettivo
– L’operatore deve indossare indumenti funzionali e adeguati; questi devono
essere aderenti senza tuttavia impedire i movimenti. Non indossare gioielli o
capi di abbigliamento che potrebbero venir aspirati dall’apparecchio. Fare
attenzione ai capelli lunghi.
– Onde evitare ferite o danni a testa, occhi, mani o piedi e per proteggere
l’udito, è necessario indossare l’equipaggiamento protettivo di seguito
descritto.
Rispettare con particolare attenzione le seguenti norme:
– Indossare abiti che siano funzionali e stretti, ma che non ostacolino i
movimenti durante il lavoro. Non portare abiti o gioielli che possano venir
presi in foglie o nell’utensile.
– Per proteggere adeguatamente testa, occhi, piedi, mani e orecchi, durante il
lavoro portare sempre i seguenti indumenti protettivi.
1. Per evitare ferite al viso, alla testa o danni ai polmoni dovuti a polvere o
sostanze chimiche, portare sempre protezioni adeguate sul viso.
2. Per evitare danni all’udito, portare sempre paraorecchie.
3. Per proteggere la pelle da polvere e sostanze chimiche, portare abiti da
lavoro con maniche lunghe e calzoni lunghi.
4. Quando si usa o assiste lo spruzzatore a motore, portare sempre guanti
di gomma.
5. Per lavorare con lo spruzzatore a motore, portare sempre scarpe robuste
con suole antisdrucciolo. Usando scarpe speciali da lavoro vi
assicurerete una buona presa e una certa protezione dalle ferite.
– Fermare sempre abiti che svolazzano e capelli lunghi o asciugamani. Essi
possono altrimenti impigliarsi in parti mobili e causare incidenti.
Avviamento del spruzzatore a motore
– Assicurarsi che non ci siano persone o animali entro un raggio di 15 metri.
Non utilizzare il spruzzatore a motore all’ interno di aree urbane.
– Prima di usare lo spruzzatore si raccomanda di verificarne le condizioni di
sicurezza:
controllare la stato di sicurezza della leva di accelerazione. La leva deve
essere sempre ben scorrevole e facile da usare. Deve inoltre essere
sempre mantenuta pulita e asciutta e si deve altresì verificare il corretto
funzionamento dell'interruttore I - O.
Cuffie antirumore
Maschera di
protezione
Calzoni lunghi
15 metri
Casco
impermeabile
Occhialoni
Maniche lunghe
Guanti di
gomma
Scarpe da lavoro
57
Page 58

– Prima di avviare lo spruzzatore a motore, controllare sempre che la
macchina funzioni bene e che l’acceleratore funzioni regolarmente.
Controllare sempre se ci sono utensili usati durante il montaggio e, se se ne
trovano, toglierli. Essi possono venire scagliati con forza dall’utensile quando
si avvia, causando ferite anche gravi.
– Controllare che l’utensile sia ben pulito ed asciutto e provare l’interruttore
STOP per controllare che funzioni a dovere. Fermare il motore
immediatamente se si hanno problemi meccanici.
– Quando si usa lo spruzzatore a motore, fare attenzione a non aspirarne i gas
di scarico.
– I gas di scarico sono velenosi. Non usare mai la macchina in una stanza
chiusa o in un’area insufficientemente ventilata, dato che si rischiano il
soffocamento e l’avvelenamento.
– Non usare mai l’utensile continuamente per più di un’ora e fermarsi per
almeno 30 minuti per ogni ora di lavoro.
– Fermare il motore quando si riposa o si lascia l’utensile incustodito. Per
proteggere terze parti e l’utensile da danni, metterlo in una posizione sicura e
controllare che non vi siano materiali combustibili nelle vicinanze. Non
mettere mai uno spruzzatore a motore caldo su erba secca o materiale
combustibile. Ciò è molto pericoloso e può risultare in incendi.
– Non accendere mai il motore se la marmitta non funziona bene.
– Prima di spostare lo spruzzatore a motore, spegnere sempre il motore.
– Prima di trasportare lo spruzzatore a motore in automobile, attendere che il
motore sia completamente freddo, svuotare il serbatoio e fissare bene in
posizione l’utensile.
– Prima di trasportare lo spruzzatore a motore, controllare che il serbatoio sia
completamente vuoto e secco.
Rifornimento
– Durante il rifornimento, spegnere il motore, non avvicinarsi a fiamme libere e
non fumare.
– Evitare che il carburante entri in contatto con la pelle. Non inalarne i vapori.
Durante il rifornimento indossare sempre i guanti protettivi.
Cambiare e lavare l’abbigliamento protettivo a intervalli regolari.
– Non versare carburante, né olio onde evitare di inquinare il terreno
(protezione ambientale). Pulire immediatamente il spruzzatore a motore in
caso di fuoriuscita di carburante. Far asciugare gli stracci bagnati prima di
smaltirli in appositi contenitori coperti per evitare fenomeni di combustione
spontanea.
– Togliere immediatamente gli abiti impregnati di carburante.
– Controllare il tappo del serbatoio a intervalli regolari e assicurarsi che
rimanga perfettamente chiuso.
– Serrare con cura la vite di bloccaggio del serbatoio. Prima di avviare il
motore, allontanarsi di almeno 3 metri dal luogo in cui è avvenuto il
rifornimento.
– Non eseguire il rifornimento al chiuso. I vapori si accumulano a livello del
terreno (rischio di esplosione).
– Il carburante va trasportato e conservato solo in appositi contenitori
omologati. Conservare fuori dalla portata dei bambini.
– Non eseguire il rifornimento quando il motore è caldo o in funzione.
Durante il lavoro
– Usare il tagliasiepi solo in condizioni di buona illuminazione e visibilità. Non
usarlo mai di notte. Non usarlo quando piove o subito dopo la pioggia, dato
che in tali condizioni è facile scivolare e cadere.
– Fare attenzione alle aree scivolose e bagnate, ad esempio quando nevica e
c’è ghiaccio, dato che c’è il pericolo di scivolare, ed accertarsi di poggiare i
piedi in una posizione sicura.
– Non usare mai lo spruzzatore a motore stando su di una scala.
Non salire mai su di un albero per lavorare su di esso con lo spruzzatore.
Non usare l’utensile stando su superfici instabili.
– Non puntare l’ugello dell’utensile verso persone ed animali. I detriti che
volano possono ferire qualcuno.
– Non toccare il connettore della candela a motore acceso.
– Non toccare parti in movimento del motore mentre questo è in moto.
– Non toccare la marmitta o altre parti del motore durante il lavoro o per
qualche tempo dopo l’arresto del motore.
– Queste parti si surriscaldano e possono causare ustioni serie.
٨ Pausa
٨ Trasporto
٨ Rifornimento
٨ Manutenzione
٨ Sostituzione accessori
3 metri
58
Page 59

– Assicurarsi di conoscere in anticipo la tossicità dei pesticidi o erbicidi da
usare e leggere sempre le istruzioni che li accompagnano per accertarsi di
conoscerne bene le norme di uso. Se entrassero in contatto con la pelle,
risciacquare immediatamente l’area in questione con acqua abbondante e
lavarla con acqua e sapone. Per evitare la perdita di sostanze chimiche,
stringere sempre bene il tappo del serbatoio apposito dello spruzzatore.
Manutenzione
– Rispettare l’ambiente. Per mantenere al minimo i livelli di rumore e
inquinamento, controllare il carburatore.
– Pulire il spruzzatore a motore a intervalli regolari e verificare che tutte le viti e
i dadi siano ben serrati.
– Non eseguire operazioni di manutenzione, né custodire il spruzzatore a
motore nelle vicinanze di fiamme libere.
– Custodire il spruzzatore a motore in un locale chiuso e ben aereato e con il
serbatoio completamente vuoto.
Rispettare tutte le norme di prevenzione degli infortuni previste dalle
associazioni di categoria e dalle compagnie di assicurazione. Per motivi di
sicurezza personale, non apportare alcuna modifica al spruzzatore a motore.
L’utilizzatore si deve limitare ad eseguire le operazioni di manutenzione e
riparazione descritte nel manuale. Tutti gli altri lavori devono essere eseguiti da
personale autorizzato del Servizio Assistenza. Utilizzare solo ricambi e
accessori originali DOLMAR.
L’impiego di accessori e utensili non omologati aumenta il rischio di incidenti.
La DOLMAR declina ogni responsabilità in caso di incidenti o danni provocati
dall’uso di utensili da taglio, attrezzi o accessori non autorizzati.
Misure di pronto soccorso
In caso di incidente assicurarsi che nelle immediate vicinanze sia disponibile
una cassetta del pronto soccorso, come previsto dalla norma DIN 13164.
Sostituire subito i prodotti medicinali utilizzati.
In caso di richiesta di aiuto, fornire le seguenti informazioni:
– luogo dell’incidente
– descrizione dell’accaduto
– numero di feriti
– tipo di ferite
– proprie generalità
Imballo
– Il spruzzatore a motore DOLMAR è imballato in una scatola di cartone per
evitare danni dovuti al trasporto. Il cartone è una materia prima fondamentale
e può essere riutilizzato o riciclato (riciclaggio della carta).
59
Page 60

DICHIARAZIONE DI CONFORMITÀ ALLE NORME CE
Modello: SP-252.4R
Con la presente dichiariamo sotto la nostra esclusiva responsabilità che questo prodotto è conforme agli
standard EN292 e EN55012 emanati in accordo alla direttiva 89/392CEE, successivamente modificata dalla
98/37/CEE e dalla 93/68/CEE, e alla direttiva 89/336/CEE successivamente modificata dalla 92/31/CEE.
Pressione acustica misurata: 98 db
Pressione acustica garantita: 102 db
Tali valori di pressione acustica sono stati misurati in accordo alla direttiva 2000/14/CEE.
Procedura di valutazione di conformità: Appendice 5.
CE2007
Shigeharu kominami Rainer Bergfeld
Direttore Generale Direttore Generale
Produttore responsabile:
Makita Corporation.
3-11-8,Sumiyoshi-cho, Anjo, Aichi, GIAPPONE
Rappresentante esclusivo per l’Europa:
DOLMAR Gmbh
Jenfelder Str. 38, 22045 Amburgo, Germania
60
Page 61

DATI TECNICI
Modello SP-252.4R
Dimensioni: lunghezza x larghezza x altezza mm 380 x 420 x 635
Peso a secco kg 9.1
Capacità serbatoio sostanze chimiche L 20
Pompa
Motore
Tipo Horizontal opposed twin pistons
Pressione massima MPa 2.5
Aspirazione L 7.1
Modello EH025A
Cilindrata cm³ 24.5
Carburante Benzina per auto
Volume serbatoio L 0.5
Olio motore
Volume serbatoio dell'olio motore L 0.08
Carburatore tipo WALBRO WYL
Sistema accensione tipo A stato solido
Candela accensione tipo NGK CMR6A (C tipo)
Distanza tra gli elettrodi mm 0.7 - 0.8
SAE 10W- 30 olio della classificazione API,classe SF o
superiore(motore a quattro tempi per automobile)
Livello di pressione acustica
Livello di pressione acustica (Lpa) secondo la direttiva 98/37/CE dB 84.0
Livello di potenza acustica garantito (Lwa) secondo la direttiva
2000/14/CE
Nota: 1. Usare l’olio e la candela di accensione indicati da DOLMAR.
2. I dati tecnici possono essere modificati senza preavviso.
dB
102.0
61
Page 62

NOME DEI COMPONENTI
No
1
2
3
4
5
6
7
8
NOMI DELLE PARTI
Interruttore I-O 9 Marmitta 17 Connettore rapido
Leva di accelerazione 10
Leva diffusore 11 Pompa avviamento 19 Rubinetto
Coperchio filtro aria 12
Coperchio candele 13
Manopola di avviamento 14
Serbatoio carburante 15
Tappo serbatoio carburante 16
No
NOMI DELLE PARTI
Indicatore di livello dell’olio
Tappo di scarico serbatoio sostanze
Tappo serbatoio sostanze chimiche
Serbatoio sostanze chimiche
Manopola di regolazione pressione
Tubo spruzzatore
No
18 Impugnatura
20 Tubo di spruzzo
21 Porta-tubo di spruzzo
22 Ugello (a doppia testa grandangolare)
23
24
NOMI DELLE PARTI
62
Page 63

ISTRUZIONI PER IL MONTAGGIO
AVVERTENZA: prima d'intervenire in qualsiasi modo sullo spruzzatore si raccomanda di spegnerne il motore e di rimuovere il cappuccio della
candela. Si devono inoltre sempre calzare guanti protettivi!
AVVERTENZA: lo spruzzatore deve essere avviato solo dopo averlo completamente assemblato.
1. MONTAGGIO DELL'ELEMENTO DI SPRUZZO
Osservando la figura della pagina precedente (NOMI DELLE PARTI) procedere con l'assemblaggio dell'impugnatura, del rubinetto, del tubo di
spruzzo e dell'ugello. Ogni parte deve essere correttamente montata in modo da prevenire le perdite.
2. FISSAGGIO DELLE CINGHIE DA SPALLA
Come mostrato nelle figure che seguono, senza torcerle fissare le due cinghie da spalla al serbatoio delle sostanze chimiche. Le istruzioni si
riferiscono al fissaggio di una delle due cinghie.
Fissaggio dell'estremità superiore delle cinghie da spalla
㽲 㽳 㽴
Serbatoio sostanze
chimiche
Tirare la spallina in direzione della freccia
sino a quando l'estremità ripiegata si
arresta sull'estremità inferiore della fibbia.
Fibbia superiore
Fissaggio dell'estremità inferiore delle cinghie da spalla
㽲
Fibbia superiore
Fibbia inferiore
Serbatoio
sostanze
chimiche
Inserire la parte 'A' della cinghia nella
㽳
fessura del gancio metallico.
Sollevare quindi la cinghia a
90 gradi in direzione della
freccia.
Gancio metallico
Ripetere la stessa procedura per l'altra
㽴
cinghia.
Come mostrato nelle figure ԙ e Ԛ, fissare
al gancio metallico la cinghia 'A' delle due
sovrapposte.
Gancio
metallico
63
Page 64

PRIMA DELLA MESSA IN MOTO
ISPEZIONE E RABBOCCO DELL’OLIO A MOTORE
– A motore freddo, seguire le seguentl istruzioni.
– Manatenendo in piano il motore, togliere l’indicatore dell’olio e verificare che il livello sia compreso tra i limiti superiore ed inferiore.
– Se l’indicatore dell’olio, insento ma non avvitato nella sua sede, sfiora appena il livelio dell’olio nel motore (Fig.1), l’olio è insufficiente e
necessita di rabbocco.
– A titolo informativo, il periodo di rabbocco dell’olio è circa 10 ore (10 utilizzi o 10 rifomimenti di carburante.)
– Se l’olio cambia di colore oppure si mischia con sporcizia, rinnovarlo.
(Quanto all’intervallo e metodo di sostituzione, consultare la pagina 70.)
Olio raccomandato : SAE 10W - 30 olio della classificazione API, Classse SF o superiore (motore a quattro tempi per automobile)
Capacitá del serbatoio : Ca. 0.08 L
Attenzione : Se il motore non rimane montante, l’olio può entrare in tutto il motore con rifornimento eccessivo.
Se l’olio è riempito oltre il limite, l’olio può essere inquinato o prendere fuoco con fumo bianco.
NOTA 1: sostituzione dell’olio nell” indicatore di livello d’olio”
– Togliere le polveri e le sporcizie vicini al foro di rifornimento dell’olio, e levare l’indicatore di livello dell’olio.
– Mantenere pulito l’indicatore del livello dell’olio. Diversamente, lo sporco, aderendo all’indicatore, puó provocare una
circolazione irregolare dell’olio e/o gravi danni al motore.
– Per tenere pulito l’indicatore stesso per esempio, è raccomandato di inserire l’indicatore di livello d’olio nel coperchio del
motore come da Fig. 3.
Limite superiore
(Estremità del foro di
rifornimento d’olio)
Se l’olio aderisce vicino
a questo punto, rifornire
d’olio.
Fig.1 Fig.2
Indicatore di
livello d’olio
Fig.3
64
Page 65

1) Tenere il motore a livello, e togliere l’indicatore di livello dell’olio.
2) Rabboccare l’olio fino al foro di rifornimento. (Consultare la figura della
pagina precedente).
Aggiungere l’olio con il suo recipiente di rifornimento di lubrificante.
3) Stringere fermamente l’inicatore di livello d’olio. Una chiusura insufficiente
provocherà una perdita d’olio.
Nota 2: Sostituzione dell’olio : “Se l’olio si sparge”
– Se l’olio si sparge fra il serbatoio di carburante e il corpo motore, l’olio è aspirato all’interno attraverso la presa d’aria di
raffredamento, sporcando il motore. Non mancare di pulire l’olio sparso prima di mettere in moto.
RIFORNIMENTO
Trattamento del carburante
E’necessario trattare il carburante con cura particolare. Il carburante può contenere delle materie simill ai solventi. Il rifornimento deve essere
fatto in una locale ben ventilato o all’aperto. Non inalare mai il vapore di carburante, tenere lontano dal carburante. Se si tocca il carburante
spesso o per lungo tempo, la pelle si dissecherà, provocando diversi disturbi della pelle e allergie. ln caso di contatto con gli occhi. lavare
immediatamente con acqua. Se l’occhio rimane irritato ancora, consultare il medico.
Conservazione del carburante
Il carburante deve essere utilizzato totalmente entro quattro settimane, anche se è conservato in un recipiente speciale all’ombra e ben
ventilato.
Se il carburante non è conservato nel recipiente speciale o se il recipiente non è coperto, il carburante si deteriora in un giorno.
IMMAGAZZINAGGIO DELLA MACCHINA E DEL SERBATOI DI RIFORNIMENTO
– Conservare la macchina e il serbatoio in un luogo fresco al riparo della luce diretta.
– Non conservare mai il carburante nella cabina o nel bagaliaio.
Carburante
Il motore è a quattro tempi. Utilizzare sempre la benzina per automobile (benzina senza plombo ou benzina super).
NOTA: il carburante
– Non utilizzare nessuna miscela di benzina che comprende dell’oliomotore. Questo provocherebbe un’accumulazione
eccessiva di residui carboniosi o disturbi meccanici.
– Un olio deteriorato provocherà un avviamento irregolare.
Rifornimento
AVVERTIMENTO : DIVIETO DI ACCENDERE FUOCHI
Benzina utilizzata : benzina per automobile
– Allentare un poco il tappo di serbatoio in modo che ci non sia nessuna
differenza di pressione atmosferica.
– Togliere il tappo di serbatoio, scaricare l’aria, inclinando il serbatoio di
carburante in modo che il foro di carburante sia voltato in alto.
(Non rifornire mai di carburante fino al foro di rifornimento d’olio.)
– Pulire completamente le vicinanze del tappo di serbatoio per prevenire
l’entrata di corpi estranei nel serbatoio di carburante.
– Dopo di rinfornimento, stringere fermamente il tappo di serbatoio.
• Se c’è qualsiasi difetto o guasto sul tappo del serbatoio, sostituirlo.
• Il tappo del serbatoio, che è un pezzo di consumo, deve essere rinnovato
tutti i due o tre anni.
Limite superiore
di carburante
Serbatoio di
carburante
Tappo del serbatoio
di carburante
65
Page 66

MISCELAZIONE DI SOSTANZE CHIMICHE PER AGRICOLTURA
1) Miscelazione di sostanze chimiche per agricoltura
1. Le sostanze chimiche per agricoltura sono sempre tossici. Nell’usarle,
osservare sempre accuratamente le norme di uso del loro fabbricante.
2. Nel versare sostanze chimiche nel serbatoio apposito dell’utensile,
usare sempre il retino in dotazione.
3. Per evitare perdite, stringere sempre bene il tappo del serbatoio delle
sostanze chimiche.
4. Se le sostanze chimiche usate devono venir mescolate all’interno del
serbatoio dell’utensile, aggiungere sempre l’acqua prima delle sostanze
chimiche.
Attenzione:
• Trattare le sostanze chimiche con la massima cautela. Se dovessero entrare in contatto con la pelle, lavare immediatamente la parte
interessata con acqua fresca abbondante.
2) Prima dell’uso di un tipo differente di agente chimico
1. Prima di usare un agente chimico differente, lavare accuratamente il
serbatoio delle sostanze chimiche, il tubo dello spruzzatore, la pompa e
l’ugello. Miscelando sostanze chimiche diverse si possono produrre
tossine pericolose per la salute.
AVVIO DEL MOTORE
AVVERTENZE
• Non avviare il motore nel luogo stesso del rifornimento, ma almeno a 3 metri di distanza.
− E’ possibile provare incendi.
• Il gas di scarico del motore è tossico. Non usare l’apparecchio in luoghi chiusi, o mal aereati (esempio gallerie, etc..) per evitare rischi di
intossicazione da gas di scarico.
• Se dopo l’avviamento si sentono rumori, odori particolari o vibrazioni anomale, spegnere subito il motore per un’ispezione.
− Se si continuasse l’uso, si potrebbero provocare danni o incidenti.
• Accertarsi che il motore si spenga quando si porta l´interruttore d’arresto sulla posizione ”O“.
1) Prima di avviare il motore si raccomanda di verificare che il serbatoio delle
sostanze chimiche non sia vuoto.
2) Ruotare il tubinetto nella posizione CHIUDERE.
RUBINETTO
CHIUDERE
66
Page 67

3) Ruotare la manopola di regolazione della pressione sino ad allinearla con la
A
posizione STARTING.
1) Quando il motore è freddo, o dopo il rifornimento di carburante.
(1) Mettere la macchina in piano.
(2) Posizionare l’interruttore arresto sulla posizione “ I ”.
(3) Controllare che la leva di accelerazione crociera si trovi nella posizione
di bassa velocità.
(4) Continuare a premere la pompa di avviamento finché il carburante
entra nella stessa.
• In generale, il carburante entra nel carburatore dopo 7/10 spinte.
• Non eccedere premendo troppe volte la pompa di avviamento onde
evitare che l’eccesso di benzina torni nel serbatoio.
(5) Alzare la leva diffusore posta a destra del filtro dell´aria per chiudere il
diffusore stesso.
(6) Tenere la copertura dell'elemento con la mano sinistra per evitare che
il motore si muova ed assumere una posizione stabile.
(7) Tirare la manopola di avviamento finché risulta difficoltoso (punto di
compressione). Poi, rilasciare la manopola e tirare la nuovamente con
forza.
• Non tirare il cavo al massimo.
• Una volta che la manopola è tirata, non abbandonare la presa
immediatamente. Rilasciare lentamente la manopola finché essa
non ritorna al punto di partenza.
(8) Quando il motore si avvia, aprire la leva di regolazione.
• Aprire la leva di regolazione lentamente, verificando la rotazione del
motore. Assicurarsi di aprire la leva dello starter al massimo.
• In caso di basse temperature o quando il motore si è raffreddato,
non aprire la leva dello starter bruscamente, altrimenti il motore puó
arrestarsi.
(9) Continuare l’operazione di riscaldamento per due o tre minuti.
(10) L’operazione di riscaldamento è completa quando la rotazione del
motore si stabilizza e si ha un’accelerazione uniforme dalla velocità
bassa a quella alta.
Posizione “STARTING”
MANOPOLA DI REGOLAZIONE PRESSIONE
Bassa
velocità
Leva di accelerazione
Pompa avviamento
Interruttore I-O
Chiudere
prire
67
Page 68

2) Quando il motore è caldo
(1) Mettere l’apparecchio in piano.
(2) Premere la pompa di avviamento qualche volta.
(3) Controllare che la leva diffusore sia aperta.
(4) Tenere la copertura dell'elemento con la mano sinistra per evitare che il motore si muova ed assumere una posizione stabile.
(5) Tirare lentamente l´impugnatura starter fino a sentirne la resistenza e dopo averla fatta ritornare alla posizione iniziale, tirarla
nuovamente con forza.
(6) Se dovesse essere difficile avviare il motore, aprire la valvola a farfalla per un terzo per favorire l’avviamento.
ARRESTO DEL MOTORE
1) Ruotare il rubinetto nella posizione CHIUDERE.
2) Ruotare l'interruttore I-O nella posizione “O”.
3) Ruotare la leva di accelerazione nella posizione bassa velocità.
Bassa
velocità
Leva di accelerazione
RUBINETTO
CHIUDERE
Interruttore I-O
68
Page 69

USO DELLO SPRUZZATORE
A
A
A
A
1. Avviare il motore (vedere a pagina 66)
2. Avviato il motore, mettersi in spalla l’utensile e regolare le spalline in modo da tenerlo il più possibile vicino al proprio corpo. Mettere il
motore in folle e non inclinare troppo l’utensile.
Uso delle spalline
Regolare la lunghezza delle spalline nel modo seguente.
1) Per allentarle: Ԙ sollevare la fibbia.
ԙ Tirare l’estremità della spallina legata allo spruzzatore a
motore.
2) Per stringerle: Ԛ tirare l’estremità libera della spallina.
Nota: se le cinghie non portano alcun peso possono venire regolate con
facilità.
3. Ruotare la manopola di regolazione pressione nella posizione desiderata.
4. Ruotare la leva di accelerazione nella posizione desiderata e, mentre si ruota
il rubinetto, osservare lo spruzzo.
Spruzzare sempre sottovento. Fare particolare attenzione in situazioni in cui le sostanze chimiche possano venire tornare verso di voi
col vento.
Attenzione
BASSA PRESSIONE
MANOPOLA DI
REGOLAZIONE
PRESSIONE
Bassa
velocità
Leva di accelerazione
Ԙ
Ԛ
Stringere
LTA PRESSIONE
lta velocità
Fibbia
ԙ
llentare
RUBINETTO
CHIUDERE
PRIRE
69
Page 70

CONTROLLI E MANUTENZIONE
!
!
!
㩷 ATTENZIONE
• Prima del controllo e della manutenzione, spegnere e raffreddare il motore e rimuovere il coperchio della candela di accensione e la
candela stessa.
− Onde evitare di bruciarsi o causare l’avviamento imprevisto provocando un incidente.
• Dopo l’ispezione e la manutenzione, procedere all’avvio, dopo aver controllato che tutte le parti siano montate correttamente.
㩷
1. Sostituzione dell’olio motore
Un olio motore deteriorato diminuirà considerevolmente la lubrificazione. Verificare gli intervalli di sostituzione e la quantità di olio da sostituire.
㩷
㩷㩷ATTENZIONE
• In generale, il corpo del motore e l’olio motore rimangono a lungo caldi dopo dell’arresto del motore. Per sostituire l’olio, controllare che il
corpo del motore e l’olio motore siano sufficientemente freddi, altrimenti sussiste pericolo di ustione. Poiché non tutto l’olio ritorna subito
nel serbatoio dopo l´arresto, è anche possibile che l’olio, una volta aggiunto, ecceda il limite massimo.
• Se l’olio è rifornito oltre il limite, esso può essere inquinato o può prendere fuoco con fumo bianco.
Intervallo di sotituzione: Inizialmente, ogni 20 ore di funzionamento, e successivamente ogni 50 ore di funzionamento
Olio raccomandato: SAE 10W- 30 olio della classificazione API, classe SF o superiore (motore a quattro tempi per automobile)
Al momento della sostituzione, seguire il metodo seguente.㩷
1) Verificare che il tappo di serbatoio è stretto perfettamente.
2) Togliere l’indicatore di livello d’olio.
- Tenere l’indicatore di livello d’olio senza polvere o sporcizia.
3) Togliere l’olio vecchio dalla coppa usando la bottiglia apposita in
dotazione.
• Schiacciare il corpo della bottiglia e quindi inserirne l’ugello nell’olio.
Lasciare andare la bottiglia e l’olio viene aspirato in essa.
• Quando la coppa dell’olio è quasi vuota, inclinare l’utensile
leggermente per facilitare l’uscita dell’olio rimasto.
4) Riportare in piano la bottiglia dell’olio. Usare la bottiglia di rabbocco e
riempire la coppa con olio nuovo.
5) Rimettere a posto e stringere l’astina dell’olio. Se fosse
insufficientemente stretta si potrebbero avere perdite.
• Usare la bottiglia di estrazione dell’olio e quella di rabbocco dell’olio
solo per gli scopi per cui sono state costruite.
bottiglia estrazione olio bottiglia rabbocco olio
Tappo del serbatoio di carburante
Indicatore di
livello d’olio
70
Page 71

)
㩷
㩷
• Non gettare l’olio motore nei rifiuti, sul terreno o nelle fognature. La disposizione per lo smaltimento degli oli usati è soggetta a
controllo legale. Nello smaltimento, rispettare le leggi e I regolamenti. In caso di dubbi, consultare il Servizio Assistenza Autorizzato.
• L’olio può deteriorarsi anche se non viene utilizzato. Fare il controllo e la sostituzione ad intervalli periodici (sositituzione con un olio
nuovo ogni 6 mesi)
NOTE SULLA SOSTITUZIONE DELL’OLIO
㩷㩷㩷㩷
2. Pulizia del filtro dell’aria
AVVERTENZA : NON USARE FLUIDI INFIAMMABILI.
Intervallo di pulizia e controllo: quotidiano (ogni 10 ore di funzionamento)
– Rimuovere i bulloni di fissaggio del coperchio del filtro dell’aria.
– Tirare il lato inferiore del coperchio e levare il coperchio del filtro dell’aria.
– Chiudere del tutto la leva dello starter e controllare che il carburatore sia ben
pulito.
– Togliere il filtro, lavarlo con detergente neutro diluito in acqua tiepida ed
asciugarlo completamente. Rimontare il filtro nella posizione indicata dalle
righe tratteggiate in Fig. 1.
– Utilizzare uno strofinaccio e pulire l’olio dal coperchio del filtro dell’aria e dallo
sfiato.
– Rimontare il coperchio del filtro e serrarlo con il bullone di fissaggio. Durante
il rimontaggio, mettere in posizione prima la parte superiore e poi quella
inferiore del coperchio del filtro.
Mettere l’intaglio in
questo posizione (in
alto a sinistra
Piastra
Sezione sfiato
Linea (riga tratteggiata)
Fig 1
Elemento
Elemento (riga a punti)
Coperchio filtro
aria
Bullone
fissaggio
3. Ispezione della candela d’accensione
– Per montare o smontare la candela utilizzare solo la chiave universale in
dotazione.
– Tra gli elettrodi ci deve essere uno spazio di 0,7-0,8 mm. Se lo spazio è
troppo largo o troppo stretto, regolarlo. Se la candela è sporca, pulirla o
sostituirla.
ATTENZIONE: non toccare il connettore della candela mentre il motore è in
funzione (pericolo di scossa elettrica ad alta tensione).
4. Pulitura del filtro di carburante
ATTENZIONE: DIVIETO DI ACCENDERE FUOCHI
Intervallo di pulitura e di controllo : Mensile (ogni 50 ore di funzionamento)
Tubo d’aspirazione del serbatoio
– Il filtro di carburante (1) del tubo d’aspirazione serve a filtrare il carburante.
– Il filtro va controllato periodicamente. A questo scopo aprire il tappo del
serbatoio e, aiutandosi con un gancio, estrarre il tubo d’aspirazione. Se
necessario sostituire il filtro.
– Una cattiva alimentazione del carburante può provocare un aumento
eccessivo della velocità consentita. Per questo motivo è molto importante
che il filtro venga sostituito almeno ogni tre mesi onde garantire un’adeguata
alimentazione del carburante.
0.7~0.8 mm
(0.028”-0.032”)
Tubo di carburante
Fascetta
Filtro di carburante(1)
71
Page 72

Localizzazione dei guasti
Guasto Sistema Osservazione Causa
Il motore non parte o parte
con difficoltà
Assenza scintilla
Alimentazione
Compressione Compressione assente
Guasto meccanico Manopola di avvio non
Problemi con l’avviamento a
caldo
Il motore parte ma si arresta
subito
Sfiatatoio del serbatoio difettoso, linea di alimentazione
Rendimento insoddisfacente Può riguardare
Intervallo di
funzionamento
Articolo
Olio motore
Pezzi da serrare
(bulloni, dadi)
Serbatoio di carburante
Farfalla
Interruttore d’arresto
Rotazione a velocità bassa
Filtro dell’aria Pulire ٤
Sistema di iniezione Scintilla d’accensione
presente
Guasto nell’alimentazione del carburante o nel sistema
di compressione, difetto meccanico
Interruttore su STOP, guasto all’impianto elettrico o corto
d’accensione
circuito, candela o connettore difettosi, modulo
d’iniezione difettoso
Serbatoio pieno Posizione leva diffusore errata, carburatore difettoso,
carburante
tubo di aspirazione sporco, linea di alimentazione
carburante piegata o intasata, carburante deteriorato
Guarnizione fondo cilindro difettosa, guarnizioni albero a
all’avvio
gomiti danneggiate, anello cilindro o pistone difettoso
difetto nella tenuta della candela
Molla avviatore rotta, parti rotte all’interno del motore
funziona
Serbatoio pieno candela
Il carburatore va pulito
presente
Alimentazione
carburante
Serbatoio pieno Errata regolazione del minimo, tubo d’aspirazione o
carburatore sporchi
carburante interrotta, cavo o interruttore di arresto guasti
diversi sistemi
Controllare/
pulire
scadente
Prima del
funziona-m
ento
Dopo la
lubrifica-
zione
٤
Sostituire ٤
Minimo del motore
Filtro aria sporco, carburatore sporco, marmitta intasata,
tubo di scarico del cilindro intasato
Quotidiano
(10 ore)
30 ore 50 ore 200 ore
*1
Arresto/
quiete
Controllare ٤
Pulire/
controllare
Scaricare il
carburante
Verificare le
funzioni
Verificare le
funzioni
Controllare/
regolare
٤
٤
٤
٤
٤
*3
Candela d’accensione Controllare ٤
Condotto dell’aria di
raffreddamento
Pulire/
controllare
٤
Controllare ٤
Tubo del carburante
Filtro del carburante
Spazio fra valvola della presa
d’aria e valvola di scarico
Sostituire ٧
Pulire/
sostituire
٤
Regolare ٧
*2
*2
dell’aria
Tubo dell’olio Controllare ٧*2
Ispezioni motore ٧*2
Carburatore
Scaricare il
carburante
٤
*3
*1 Fare la prima sostituzione dopo 20 ore di funzionamento.
*2 Per il controllo dopo 200 ore di funzionamento, rivolgersi ad un Servizio Assistenza Autorizzato.
*3 Dopo aver svuotato il serbatoio, continuare a far funzionare il motore finché il carburante non si esaurisce.
72
Page 73

LOCALIZZAZIONE ED ELIMINAZIONE DEI GUASTI
Prima di fare richiesta di riparazione, verificate personalmente un guasto. Se c’è un cattivo funzionamento, controllare la vostra macchina
secondo la descrizione di questo manuale. Non manomettere o smontare nessuna parte contrariamente alla descrizione. Per le riparazioni,
consultare il Servizio Assistenza Autorizzato.
Problema Causa probabile (malfunzionamento) Rimedio
La pompa d’avviamento vuota Spingere 7 -10 volte
Difficoltà nel tirare il cavetto dello starter Tirare forza
Mancanza di carburante Rifornire di carburante
Filtro del carburante otturato Pulire
Tubo del carburante guasto Sostituire il tubo del carburante
Il motore non si avvia
Il motore si arresta subitoLa velocità del
motore non aumenta
II motore non si arresta.
Fare funzionare il motore al minimo, e
mettere la leva di regolazione sulla
posizione “CLOSE”
Carburante deteriorato
Aspirazione eccessiva di carburante
Tappo semiaperto Serrare bene
Candela di accensione sporca Pulire
Distanza anormale elettrodi candela di
accensione
Altra anomalia della candela di
accensione
Carburatore anormale Fare richiesta di controllo e manutenzione
La manopola di avviamento non può
essere tirata.
Anomalie nei sistemi di comando Fare richiesta di controllo e manutenzione
Riscaldamento insufficiente Fare il riscaldamento
La leva di regolazione è messa sulla
posizione “CLOSE” anche se il motore
è caldo
Filtro del carburante otturato Pulire
Filtro dell’aria sporco o otturato Pulire
Non perfetta carburazione Fare richiesta di controllo e manutenzione
Anomalie nei sistemi di comando Fare richiesta di controllo e manutenzione
Filo regolatore dell’accelleratore
smontato
Connettore staccato Serrare bene
Sistema elettrico anormale Fare richiesta di controllo e manutenzione
Un carburante deteriorato provoca un avviamento più
difficile. Sostituire con quello nuovo. (Sostituzione
raccomandata : 1 mese)
Regolare la farfalla dalla velocità media alla alta, e
tirare la leva del diffusore finché il motore si avvia.
Se il motore non si avvia ancora, togliere la candela
di accensione, asciugare gli elettrodi, e rimontarla.
Poi, avviare secondo le istruzioni.
Regolare la distanza
Sostituire
Fare richiesta di controllo e manutenzione
Mettere sulla posizione “OPEN”
Serrare bene
Quando il motore non si avvia dopo il riscadamento :
Se non c’è nessuna anomalia per gli articoli di controllo, aprire la farfalla circa un terzo e avviare il motore.
73
Page 74

Dutch
Hartelijk voor het kiezen van onze DOLMAR MOTORSPROEIER. We zijn er trots op u dit product te
kunnen aanbieden, het resultaat van een uitgebreid ontwikkelingsprogramma en onze door de jaren
opgebouwde kennis en ervaring.
Om veilig en optimaal te kunnen profiteren van uw DOLMAR MOTORSPROEIER, dient u deze
handleiding zorgvuldig door te lezen voor u de machine gaat gebruiken en dient u alle instructies erin
op te volgen om er zeker van te kunnen zijn dat de machine naar behoren zal functioneren.
Inhoudsopgave Bladzijde
Symbolen
veiligheidsvoorschriften
Technische gegevens
Benaming van onderdelen
Montage instrukties
Voor gebruik
㨯㨯㨯㨯㨯㨯㨯㨯㨯㨯㨯㨯㨯㨯㨯㨯㨯㨯㨯㨯㨯㨯㨯㨯㨯㨯㨯㨯㨯㨯㨯㨯㨯㨯㨯㨯㨯㨯㨯㨯㨯㨯㨯㨯
㨯㨯㨯㨯㨯㨯㨯㨯㨯㨯㨯㨯㨯㨯㨯㨯㨯㨯㨯㨯㨯㨯㨯㨯㨯㨯㨯㨯㨯㨯㨯㨯
㨯㨯㨯㨯㨯㨯㨯㨯㨯㨯㨯㨯㨯㨯㨯㨯㨯㨯㨯㨯㨯㨯㨯㨯㨯㨯㨯㨯㨯㨯㨯㨯㨯
㨯㨯㨯㨯㨯㨯㨯㨯㨯㨯㨯㨯㨯㨯㨯㨯㨯㨯㨯㨯㨯㨯㨯㨯㨯㨯㨯㨯㨯
㨯㨯㨯㨯㨯㨯㨯㨯㨯㨯㨯㨯㨯㨯㨯㨯㨯㨯㨯㨯㨯㨯㨯㨯㨯㨯㨯㨯㨯㨯㨯㨯㨯㨯㨯
㨯㨯㨯㨯㨯㨯㨯㨯㨯㨯㨯㨯㨯㨯㨯㨯㨯㨯㨯㨯㨯㨯㨯㨯㨯㨯㨯㨯㨯㨯㨯㨯㨯㨯㨯㨯㨯㨯㨯㨯㨯
Het mengen van chemische bestrijdingsmiddelen
Starten van de motor
Stoppen van de motor
Werken met de motorsproeier
Inspection and maintenance
Oplossen van problemen
㨯㨯㨯㨯㨯㨯㨯㨯㨯㨯㨯㨯㨯㨯㨯㨯㨯㨯㨯㨯㨯㨯㨯㨯㨯㨯㨯㨯㨯㨯㨯㨯㨯㨯
㨯㨯㨯㨯㨯㨯㨯㨯㨯㨯㨯㨯㨯㨯㨯㨯㨯㨯㨯㨯㨯㨯㨯㨯㨯㨯㨯㨯㨯㨯㨯㨯㨯
㨯㨯㨯㨯㨯㨯㨯㨯㨯㨯㨯㨯㨯㨯㨯㨯㨯㨯㨯㨯㨯㨯㨯㨯㨯㨯
㨯㨯㨯㨯㨯㨯㨯㨯㨯㨯㨯㨯㨯㨯㨯㨯㨯㨯㨯㨯㨯㨯㨯㨯㨯㨯㨯㨯
㨯㨯㨯㨯㨯㨯㨯㨯㨯㨯㨯㨯㨯㨯㨯㨯㨯㨯㨯㨯㨯㨯㨯㨯㨯㨯㨯㨯㨯㨯
Symbolen
Het is erg belangrijk de volgende symbolen te herkennen en begrijpen wanneer u deze gebruiksaanwijzing doorleest.
㨯㨯㨯㨯㨯㨯㨯㨯㨯
74
75
79
80
81
82
84
84
86
87
88
91
Lees, begrijp en volg gebruiksaanwijzing
WAARSCHUWING/GEVAAR
Verboden
Niet roken
Geen open vuur
Beschermende handschoenen dragen
Houd werkomgeving vrij van personen en
dieren
Draag oog- en gehoorsbescherming
Autobenzine
Met de hand starten van de motor
Noodstop
Eerste hulp
Aan/start
Recycling
Draag ogenbescherming, beschermende
masker en oorbescherming
74
Page 75

VEILIGHEIDSVOORSCHRIFTEN
Algemene instructies
– Om verzekerd te zijn van een correcte en veilige bediening moet de
gebruiker de gebruiksaanwijzing lezen, begrijpen en opvolgen om vertrouwd
te geraken met de motorsproeier.
Niet volledig geïnstrueerde gebruikers riskeren ongelukken voor zichzelf en
voor anderen door niet correct gebruik.
– Het is aan te bevelen de machine enkel uit te lenen aan mensen die
vertrouwd zijn met de werking hiervan. Reik altijd de gebruiksaanwijzing over.
– Onervaren gebruikers moeten zich door de dealer op de hoogte laten stellen
van het correcte gebruik van de motorsproeier.
– Kinderen en personen onder de 18 jaar mogen niet werken met de machine.
Personen boven de 16 jaar mogen enkel onder begeleiding van deskundigen
met de machine werken.
– Gebruik de motorsproeier met de meeste zorg en waakzaamheid.
– Gebruik de motorsproeier enkel wanneer u in een goede, lichamelijke
conditie verkeert. Werk met de grootste waakzaamheid. De gebruiker is
verantwoordelijk voor derden.
– Gebruik de motorsproeier nooit indien de gebruiker onder invloed van alcohol
of medicijnen is.
– Werk niet met de machine indien u zich moe voelt.
– Bewaar deze instructies zodat u er later nog iets in kunt naslaan.
Persoonlijke beschermingsmiddelen
– De te dragen kleding moet functioneel zijn en afdoende bescherming bieden.
De kleding mag de werkzaamheden niet hinderen. Draag nooit kettingen,
loszittende kledingstukken of lang haar wat door de aanzuigtrechter kan
worden ingezogen.
– Om hoofd-, oog-, of voetverwondingen te voorkomen en uw gehoor te
beschermen moet u tijdens de werkzaamhen de volgende beschermende
maatregelen nemen:
Geef de volgende voorschriften extra aandacht:
– Uw kleding moet functioneel zijn en goed passen zonder u te hinderen in uw
bewegingen bij het werken met de motorsproeier. Draag geen kleding of
sieraden die verstrikt kan raken in het gewas of in de machine zelf.
– U moet de volgende beschermingsmiddelen en kledingstukken gebruiken
wanneer u met de motorsproeier werkt om letsel aan uw hoofd of uw ogen,
uw voeten of handen alsmede schade aan uw gehoor te voorkomen.
1. Om letsel aan uw gezicht of ogen te voorkomen en uw luchtwegen te
beschermen tegen stof en chemische middelen, moet u daartoe
geschikte gezichtsbescherming (masker, veiligheidsbril enz.) dragen.
2. Om schade aan het gehoor te voorkomen moet u te allen tijde
oorbeschermers dragen.
3. Om uw huid te beschermen tegen stof en chemische middelen, moet u
te allen tijde kleding met lange mouwen en pijpen dragen.
4. Draag altijd stevige, rubberen werkhandschoenen wanneer u met de
motorsproeier werkt of er onderhoud aan uitvoert.
5. U moet stevige schoenen met een anti-slip zool dragen wanneer u met
de motorsproeier werkt. Speciale werkschoenen zorgen ervoor dat u
stevig kunt blijven staan en beschermen tegen eventueel letsel.
– U moet eventueel loshangende kleding, haren en andere uitrustingsstukken,
bijvoorbeeld een handdoek enz. goed vastmaken. Losse voorwerpen kunnen
verstrikt raken in de bewegende onderdelen van de machine, hetgeen kan
leiden tot ernstig persoonlijk letsel.
Het starten van de motorsproeier
– Verzeker u ervan dat er zich geen kinderen of andere personen bevinden
binnen een straal van 15 meter, sla ook acht op eventuele aanwezigheid van
dieren. Gebruik de motorsproeier niet in druk bevolkte gebieden.
– Voor u de motorsproeier gaat starten, moet u controleren of de machine in
een goede, bedrijfswaardige en veilige staat verkeert.
Controleer of het veiligheidsmechanisme van de gashendel goed werkt. De
gashendel moet soepel en gemakkelijk te bedienen zijn. De gashendel moet
schoon en droog zijn. Test de werking van de I-O schakelaar.
Oorbeschermers
Gezichtsmasker
Lange broek
15meter
Waterdichte
hoofdbescherming
Veiligheidsbril
Lange mouwen
Rubberlaarzen
Werkschoenen
75
Page 76

– Voor u de motorsproeier gaat starten, moet u controleren of de machine in
goede, bedrijfswaardige eb veilige staat verkeert en moet u controleren of de
gashendel naar behoren functioneert.
– Bij het monteren van de machine moet u controleren of alle gebruikte
gereedschappen inderdaad verwijderd zijn. Nog aanwezig gereedschap kan
ernstig letsel veroorzaken wanneer dit bij het starten van de machine wordt
weggeslingerd.
– Controleer of de motorsproeier schoon en droog is en test of de STOP
schakelaar naar behoren functioneert.
– Controleer of het veiligheidsmechanisme van de gashendel goed werkt. De
vergrendeling moet soepel en gemakkelijk te bedienen zijn. Controleer of de
vergrendeling goed werkt. Kijk of de handgrepen schoon en droog zijn en
test de STOP schakelaar om te controleren of deze goed werkt.
– Stop de motor onmiddellijk als deze problemen vertoont.
– Bij het gebruik van de motorsproeier moet u extra voorzichtig zijn dat u geen
uitlaatgassen inademt.
– Uitlaatgas is giftig. U mag daarom in geen geval de machine gebruiken in
een afgesloten of onvoldoende geventileerde ruimte (vergiftigings- en
verstikkingsgevaar).
– Vergeet niet dat koolmonoxide een geurloos gas is. Zorg er altijd voor dat het
werkterrein waar de motor gebruikt gaat worden goed geventileerd is.
– Werk niet meer dan een uur achter elkaar met de motorsproeier en neem
tenminste 30 minuten rust na elk uur werk.
– Stop de motor wanneer u een rustpauze inlast of wanneer u de
motorsproeier onbeheerd achter laat. Ter bescherming van derden en om de
motorsproeier te vrijwaren van beschadiging, dient u de machine alleen
achter te laten op een veilige plek en dient u ervoor te zorgen dat er zich
geen brandbare materialen in de buurt van de machine bevinden. Leg een
heet geworden motorsproeier in geen geval op droog gras of ander
brandbaar materiaal. Het is zeer gevaarlijk om een hete motorsproeier op
droog gras of ander brandbaar materiaal te leggen, daar dit kan leiden tot
brand.
– Werk niet met de motorsproeier als de uitlaat kapot is.
– Zet de motor uit voor u de machine gaat vervoeren.
– Wacht eerst tot de motor is afgekoeld, maak de brandstoftank leeg en maak
de motorsproeier goed vast wanneer u deze met een voertuig gaat
vervoeren.
– Controleer of de brandstoftank helemaal leeg en droog is voor u de
motorsproeier opstuurt.
Tanken
– Schakel de motor uit bij tanken (7), houdt de machine weg bij open vuur en
rook beslist niet.
– Voorkom huidcontact met benzine. Inhaleer geen benzinedampen. Draag
altijd beschermende handschoenen bij het tanken. Wissel en reinig
regelmatig beschermende kleding.
– Voorkom het spillen van benzine en olie uit veiligheids-en milieu
overwegingen. Veeg gemorste benzine direct af en reinig de machine. wissel
direct kledingstukken indien u hierover qemorst hebt met benzine.
– Voorkom ieder contact van benzine op uw kleding. Trek direct kleding uit
indien deze in contact is geweest met de brandstof om brandgevaar en
huidcontact te voorkomen.
– Controleer met regelmaat de benzinetankdop op lekkage en of deze goed
afdicht.
– Draai de benzinetankdop altijd goed aan en start de machine op een andere
plaats (min.3 meter verder) dan waar u heeft bijgetankt (9).
– Tank nooit bij in afgesloten ruimten. Benzinedampen vormen zeer brandbare
gassen op grondniveau (gevaar voor explosies).
– Transporteer en sla de benzine enkel op in goedgekeurde cans. Verzeker u
dat de benzine volgens voorschriften is opgeslagen en geen toegang heeft
voor derden.
– Tank nooit een hete of nog draaiende motor bij.
Bediening
– Gebruik de motorsproeier alleen bij goed licht en zicht. Gebruik de
motorsproeier in geen geval 's nachts. Gebruik de motorsproeier niet als het
regent of net geregend heeft (gevaar van letsel door uitglijden en vallen als
het nat is).
– Wees zeer voorzichtig op gladde of natte oppervlakken (ijs en sneeuw) in de
winter waar er gevaar voor uitglijden bestaat en zorg er te allen tijde voor dat
u stevig op de grond kunt blijven staan.
– Gebruik de motorsproeier in geen geval wanneer u op een ladder staat.
– Klim niet in een boom om uit de hoogte de motorsproeier te kunnen
gebruiken.
– Gebruik de motorsproeier in geen geval wanneer u op een onstabiele
ondergrond staat.
– Richt het mondstuk van de motorsproeier niet op mensen of dieren.
Uitgeworpen materiaal kan ernstig letsel veroorzaken.
– Raak de bougie-aansluiting niet aan terwijl de motor loopt.
– Raak geen bewegende onderdelen van de motorsproeier aan terwijl de motor
loopt.
– Raak de uitlaat of andere motoronderdelen niet aan terwijl u de machine
gebruikt of kort geleden gebruikt heeft. Deze motoronderdelen kunnen zeer
heet worden en ernstige brandwonden veroorzaken.
٨ Pauze
٨ Transport
٨ Bijtanken
٨ Onderhoud
٨ Delen Vervangen
3 meter
76
Page 77

– Verzeker u ervan dat de giftigheid van de te gebruiken pesticiden of
herbiciden bekend is voor gebruik en lees de bijbehorende
gebruiksaanwijzingen zorgvuldig door zodat u vertrouwd bent met de juiste
procedures voor het gebruik van de chemische middelen in kwestie. Als de
pesticiden/herbiciden in aanraking komen met uw huid, dient u de
betreffende plek onmiddellijk af te spoelen en goed met zeep te wassen. Doe
de dop van de sproeitank goed dicht om te voorkomen dat er chemische
middelen uit kunnen lekken.
Onderhoudsinstructies
– Wees milieubewust. Werk met zo min mogelijk lawaai en belasting van het
milieu als mogelijk. Laat de afstelling van de carburateur checken.
– Reinig de motorsproeier met regelmaat en controleer alle bouten, moeren en
schroeven op hun bevestiging.
– Onderhoud of plaats de motorsproeier nooit in nabijheid van open vuur,
vonken, etc.
– Sla de motorsproeier altijd op met een lege tank in een goed geventileerde
ruimte.
Sla acht en volg alle relevante veiligheidsinstrukties, uitgegeven door
overheidsinstellingen en verzekeraars.
Voer geen enkele modifikatie uit aan uw motorsproeier, omdat dit uw veiligheid
in gevaar brengt.
Het uitvoeren van onderhoud of reparaties door de gebruiker is beperkt tot de in
deze gebruiksaanwijzing omschreven punten.
Alle andere werkzaamheden dienen door de erkende vakman/dealer uitgevoerd
te worden. Gebruik enkel originele DOLMAR-onderdelen.
Gebruik van niet originele onderdelen of toebehoren verhoogt de kans op
verwondingen en ongelukken. DOLMAR accepteert geen enkele claim die
voortvloeit uit het gebruik van niet-originele onderdelen of toebehoren.
Eerste Hulp
In geval van ongelukken dient een goed gevulde Eerste hulp-koffer volgens
DIN 13164 aanwezig te zijn. Vul direct na gebruik van de inhoud de koffer weer
volledig aan.
Wanneer u hulp inroept, geef altijd de volgende informatie:
– Plaats van ongeluk
– Wat er gebeurt is
– Aantal verwonde mensen
– Aard van verwondingen
– Uw naam
Verpakking
– De motorsproeier wordt geleverd in een beschermende kartonnen doos om
transportschade te voorkomen. Karton is een grondstof die kan worden
hergebruikt (papier kringloop).
77
Page 78

EU-CONFORMITEITSVERKLARING
Model; SP-252.4R
Wij verklaren onder ons exclusieve aansprakelijkheid dat dit product voldoet aan de volgende normen van de standaard
documenten, EN292, EN55012 in overeenstemming met EU richtlijnen, 89/392/EEC, zoals gewijzigd bij 98/37/EEC, 93/68/EEC,
89/336/EEC, zoals gewijzigd bij 92/31/EEC.
Gemeten geluidsdrukniveau: 98 dB
Gegarandeerd geluidsdrukniveau:102 dB
Deze geluidsdruk waarden waren gemeten in overeenstemming met EU richtlijnen 2000/14/EC.
Conformiteits beoordelingsmethode: Annex V.
CE2007
Shigeharu kominami Rainer Bergfeld
Managing Director Managing Director
De verantwoordelijke fabrikant:
Makita Corporation.
3-11-8,Sumiyoshi-cho, Anjo, Aichi, JAPAN
Gevolmachtigd Vertegenwoordiger in Europa:
DOLMAR Gmbh
Jenfelder Str. 38,22045 Hamburg, Duitsland
78
Page 79

TECHNISCHE GEGEVENS
Model SP-252.4R
Afmetingen: (lengte x breedte x hoogte) mm 380 x 420 x 635
Leeg gewicht kg 9.1
Inhoud sproeiertank L 20
Pomp
Type Horizontal opposed twin pistons
Maximale druk MPa 2.5
Flux L 7.1
Motor
Model EH025A
Cilinderinhoud cm
Brandstof Autobenzine
Inhoud brandstoftank L 0.5
Motorolie
Inhoud olietank L 0.08
Carburateur type WALBRO WYL
Ontstekingssysteem type Elektronische ontsteking
Bougie type NGK CMR6A (C type)
Elektrodenafstand mm 0.7 - 0.8
3
SAE 10W-30 olie API SF of later (4-takt automotorolie)
24.5
Geluidsdruk volgens
Geluidsdruk (Lpa) volgens 98/37/EC
Maximale geluidsdruk (Lwa) volgens 2000/14/EC
dB 84.0
dB 102.0
Opmerkingen: 1. Gebruik uitsluitend de door DOLMAR gespecificeerde olie en bougie.
2. Deze technische gegevens kunnen zonder kennisgeving vooraf gewijzigd worden.
79
Page 80

BENAMING VAN ONDERDELEN
No Benaming van onderdelen No Benaming van onderdelen No Benaming van onderdelen
1 I-O-schakelaar 9
2 Gashendel 10
3 Chokehendel 11
4 Luchtfilter deksel 12 Sproeiertank dop aflaatopening 20 NozSproeipijp
5 Bougie afdekking 13 Sproeiertank dop vulopening 21 Sproeipijphouder
6 Trekstarter 14 Sproeiertank 22 Mondstuk (groothoek, dubbele kop)
7 Brandstoftank 15 Instelling sproeidruk 23
8 Brandstoftankdop 16 Spuitslang 24
Uitlaat
Oliepeilstok
Opvoerpomp
17 Snelkoppeling
18 Handgreep
19 Afsluiter
80
Page 81

MONTAGE INSTRUKTIES
WAARSCHUWING: Voor aanvang van werkzaamheden aan de motorsproeier, ALTIJD de motor UITSCHAKELEN en de bougiekapjes van de
bougies aftrekken. ALTIJD werkhandschoenen dragen.
WAARSCHUWING: De motorsproeier alleen weer starten nadat deze VOLLEDIG is samengesteld.
1. MONTAGE VAN DE SPROEIER
Raadpleeg de afbeelding op de vorige bladzijde (Lijst van onderdelen) voor de montage van de handgreep, kraan, sproeipijp en het mondstuk.
Let op dat u de onderdelen op de juiste wijze monteert om lekkage te voorkomen.
2. INSTELLEN VAN HET SCHOUDERHARNAS
Maak de twee schouderriemen vast zoals aangegeven op de afbeeldingen hieronder en controleer of de riemen niet verdraaid zijn.
Deze instructie beschrijft de procedure voor 1 riem. Monteer de 2de riem op dezelfde manier.
Instellen van het bovenste deel van de schouderriemen
㽲 㽳 㽴
Sproeiertank
Trek de schouderriem in de richting
van de pijl, en steek het omgeslagen
uiteinde weer terug in de sluiting.
Onderste sluiting
Instellen onderste deel van de schouderriemen
㽲
Onderste sluiting
Bovenste sluiting
Sproeiertank
Haal het deel, gemarkeerd met 'A',
㽳
door de spleet in de metalen haak.
Draai daarna de
schouderriem 90 graden, in
de richting van de pijl.
Metalen haak
Herhaal deze bewerking voor de
㽴
andere schouderriem. De instelling is
daarmee afgesloten.
Steek het deel van de schouderriem,
gemarkeerd met 'A', een van de beide
overlappende schouderriemen, in de
metalen haak, zoals te zien in ԙ en Ԛ.
Metalen haak
81
Page 82

VOOR GEBRUIK
A
A
A
Inspectie en bijvullen van motorolie
– Voer de volgende procedure uit wanneer de motor is afgekoeld.
– Houd de motor horizontaal, verwijder de oliepeilstok en kijk of het oliepeil zich tussen de markeringen voor het maximale en het minimale
oliepeil bevindt. Wanneer er zo weinig olie in de motor zit dat alleen de tip van de oliepeilstok de olie raakt wanneer de oliepeilstok in het
carter steekt zonder vastgedraaid te zijn (Afb. 1), dient u motorolie toe te voegen (Afb. 2).
– Voor uw informatie, het duurt ongeveer 10 uur voor er olie bijgevuld moet worden (10 keer, of 10 tanks).
– Als de olie verkleurd blijkt, of wanneer u vuil in de olie aantreft, dient u de olie te verversen. (Zie bladzijde 88 voor de intervallen en manier
van verversen.)
Aanbevolen olie: SAE10W-30 olie van API Classificatie SF Klasse of hoger (4-takt olie voor auto's)
Hoeveelheid olie: Ongeveer 0,08 L.
NOOT: Als de motor niet recht wordt gehouden, kan er olie in de motor terecht komen en kunt u teveel olie in het blok doen. Als er teveel olie
in het carter gedaan is, kan de olie verontreinigd raken, of verbranden met een witte rook als resultaat.
Opmerking 1 bij het verversen van de olie; de "oliepeilstok"
– Verwijder stof en vuil rond de olievul-opening en haal de oliepeilstok los.
– Houd de losgemaakte oliepeilstok vrij van zand en stof. Doet u dat niet, dan kunnen vuil dat aan de oliepeilstok blijven hangen de
circulatie van de olie door de motor belemmeren of het binnenwerk beschadigen, wat kan leiden tot problemen.
– Om de oliepeilstok schoon te houden kunt u deze bijvoorbeeld met zijn knop in de motor-afdekking steken, zoals in Afb. 3 te zien is.
Maximale oliepeil
(Rand van de
olievul-opening)
Vul motorolie bij als er
alleen aan de tip olie
zit.
fb.1
Oliepeilstok
fb.3
fb.2
82
Page 83

1) Houd de motor horizontaal en haal de oliepeilstok los.
2) Vul bij met motorolie tot aan de rand van de olievul-opening. (Zie Afb. 2 op
de vorige bladzijde).
Gebruik bijvoorbeeld een spuitfles om de olie makkelijker in de opening te
krijgen.
3) Zet de oliepeilstok weer goed vast. Doet u dat niet, dan kan er olielekkage
optreden.
Opmerking 2 bij het verversen van olie: "Als er olie gemorst wordt"
– Als er olie gemorst wordt tussen de brandstoftank en de motor zelf, kan de olie in de inlaat van de luchtkoeling gezogen worden,
waardoor de motor verontreinigd kan raken. Vergeet niet om gemorste olie op te nemen voor u de motor weer in gebruik neemt.
TANKEN
Omgaan met brandstof
U moet brandstof met de grootst mogelijke voorzichtigheid behandelen. Brandstof kan aan oplosmiddelen verwante stoffen bevatten. U moet
tanken in een voldoende geventileerde ruimte of in de open lucht. Adem de brandstofdampen niet in en houd de brandstof zo veel mogelijk bij
u vandaan. Als u herhaaldelijk en voor langere tijd in aanraking bent met brandstoffen, zal de huid uitdrogen en kan zich een huidziekte of
allergie ontwikkelen. Als er brandstof in uw oog komt, dient u het oog te spoelen met water. Als u oog dan nog pijn blijft doen, dient u een arts
te raadplegen.
Opslagtermijn van brandstof
Brandstof hoort binnen 4 weken opgebruikt te worden, zelfs al wordt het bewaard in een speciale container in een goed geventileerde, donkere
ruimte.
Als u geen speciale container gebruikt, of als de container open is, kan brandstof binnen een dag onbruikbaar worden.
Opslag van de machine en de tank
– Bewaar de machine en de tank op een koele plek, uit de zon.
– Bewaar in geen geval brandstof in de passagiersruimte of de bagageruimte van uw auto.
Brandstof
De gebruikte motor is een 4-takt motor. Let er op dat u benzine voor auto's gebruikt (normaal of super).
Opmerkingen over brandstof
– Gebruik nooit een benzine-olie mengsel. Doet u dit toch, dan kan er zich een koolstof afzetting vormen en kunnen er mechanische
problemen op gaan treden.
– Gebruik van slechte brandstof zal de motor onregelmatig doen starten.
Tanken
WAARSCHUWING: ONTVLAMBARE MATERIALEN TEN STRENGSTE VERBODEN
Gebruikte benzine: benzine voor auto's
– Maak de tankdop een beetje los om eventuele gassen te laten ontsnappen.
– Haal de tankdop los en doe brandstof in de tank terwijl u er voor zorgt dat de
gassen in de tank kan ontsnappen door de vulopening naar boven te houden.
(Doe nooit brandstof in de vulopening voor de motorolie.)
– Veeg de omgeving van de tankdop goed schoon om te voorkomen dat
vreemde voorwerpen in de brandstoftank terecht komen.
– Doe de tankdop weer goed vast als u klaar bent met tanken.
• Als er een beschadiging of onvolkomenheid is aan de tankdop, dient u deze
te vervangen.
• De tankdop is aan slijtage onderhevig en dient elke twee a drie jaar
vervangen te worden.
83
Maximale
brandstofpeil
Brandstoftank
Brandstoftankdop
Page 84

HET MENGEN VAN CHEMISCHE BESTRIJDINGSMIDDELEN
A
1) Mengen van chemische bestrijdingsmiddelen
1. Chemische bestrijdingsmiddelen zijn giftig. Wanneer u met chemische
bestrijdingsmiddelen werkt, dient u te allen tijde de door de fabrikant
verstrekte instructies strikt op te volgen.
2. Gebruik te allen tijde de meegeleverde zeef wanneer u chemische
bestrijdingsmiddelen in de sproeiertank giet.
3. Doe de dop van de sproeiertank stevig dicht om lekkage te voorkomen.
4. Als u de chemische bestrijdingsmiddelen in de sproeiertank zelf wilt
mengen, moet u het water als eerste in de tank doen, voor de te
gebruiken chemische bestrijdingsmiddelen.
Let op
:
• Wees te allen tijde uiterst voorzichtig met chemische bestrijdingsmiddelen gebruik. Mocht uw huid onverhoopt in aanraking komen
met chemische bestrijdingsmiddelen gebruik, dan dient u de betreffende plek onmiddellijk af te spelen met grote hoeveelheden water.
2) Gebruiken van een ander chemisch middel
1. U moet de sproeiertank, de pomp en het mondstuk extra goed
uitspoelen voor u een ander chemisch middel in de sproeiertank gaat
doen. Mengen van restjes van eerder gebruikte chemische middelen
met andere middelen kan leiden tot ziektes en andere aandoeningen.
STARTEN VAN DE MOTOR
WAARSCHUWING
• Start de motor in geen geval op dezelfde plek als waar u getankt heeft. Ga minstens 3m bij de tankplek vandaan voor u de motor start.
− Doet u dit niet, dan kan er brand ontstaan.
• De uitlaatgassen van de motor zijn giftig. Gebruik de motor niet op een slecht geventileerde plek, bijvoorbeeld in een tunnel, in een
gebouw enz..
− Gebruik van de motor op een slecht geventileerde plek ka leiden tot vergiftiging door uitlaatgassen.
• Stop en inspecteer de motor onmiddellijk wanneer u na het starten iets abnormaals bespeurt, zoals een vreemd geluid, geur, of trilling.
− Als u de motor blijft gebruiken terwijl zich een dergelijk abnormaal verschijnsel voordoet, kan dat leiden tot een ongeval.
• Controleer of de motor inderdaad stopt wanneer de stopschakelaar op de “O” stand wordt gezet.
1) Vóór het starten van de motor, ALTIJD controleren dat er vloeistof in de
sproeiertank zit.
2) Zet de afsluitkraan in de stand DICHT.
fsluitkraan sproeier
DICHT
84
Page 85

3) Draai de instelling van de sproeidruk tot de aanduiding “STARTING” op de
markeerstreep staat.
1) Wanneer de motor koud is of als er is bijgetankt.
(1) Laat het gas los en zet de omwentelingssnelheid van de motor
op het minimum.
(2) Zet de stopschakelaar op "I".
(3) Controleer of de gashendel op de lage-snelheid stand staat.
(4) Blijf op de opvoerpomp drukken tot er brandstof in de
opvoerpomp komt.
In het algemeen zal er na 7 tot 10 keer drukken brandstof in
de opvoerpomp komen.
Als u de opvoerpomp te intensief gebruikt, zal het teveel aan
benzine teruggevoerd worden naar de brandstoftank.
(5) Doe de chokehendel aan de rechterkant naar boven en doe de
choke dicht.
(6) Houd de afdekking van het element met uw linkerhand vast om
te voorkomen dat de motor van zijn plaats komt en zet uzelf
schrap.
(7) Trek rustig aan de trekstarter tot u weerstand voelt
(compressiepunt). Laat de trekstarter vervolgens terugkeren
en trek er dan krachtig aan.
Trek de trekstarter nooit volledig uit.
Laat nooit direct los nadat u de trekstarter heeft uitgetrokken.
Houd de trekstarter vast totdat deze terugkeert naar zijn
oorspronkelijke positie.
(8) Zet de chokehendel open wanneer de motor start.
Zet de chokehendel steeds verder open terwijl u controleert
hoe de motor loopt. Vergeet niet dat de chokehendel
uiteindelijk helemaal open moet staan.
Als het koud is of wanneer de motor is afgekoeld, mag u nooit
de chokehendel ineens helemaal open zetten. Doet u dit toch,
dan kan de motor stilvallen.
(9) Laat de motor 2 a 3 minuten opwarmen.
(10) Het toerental van de motor zal zich stabiliseren en de
overgang van laag naar hoog toerental zal soepeler gaan. De
motor is nu opgewarmd.
Markering “STARTING“
Instelling sproeidruk
Lage-snelheid
Gashendel
Opvoerpomp
I-O schakelaar
DICHT
OPEN
85
Page 86

2) Wanneer de motor warm is.
A
(1) Plaats de motor op een vlakke ondergrond.
(2) Druk een paar keer op de opvoerpomp.
(3) Controleer of de chokehendel open staat.
(4) Houd de afdekking van het element met uw linkerhand vast om te voorkomen dat de motor van zijn plaats komt en zet uzelf schrap.
(5) Trek de hendel van de trekstarter voorzichtig uit tot u weerstand voelt. Laat de trekstarter terugkeren naar de uitgangspositie en trek er
vervolgens stevig aan.
STOPPEN VAN DE MOTOR
1) Draai de afsluitklep op de sproeier in de stand DICHT.
2) Draai de I-O schakelaar in de stand “O“.
3) Zet de gashendel in de stand lage-snelheid.
Lage-snelheid
Gashendel
fsluitkraan sproeier
DICHT
I-O schakelaar
86
Page 87

WERKEN MET DE MOTORSPROEIER
A
1. Start de motor (zie pagina 84)
2. Doe de motorsproeier op uw rug nadat u de motor gestart heeft en stel de schouderriemen zo af dat de machine zo dicht mogelijk bij uw
lichaam blijft. Laat de motor stationair lopen en zorg ervoor dat u de motorsproeier niet te veel kantelt.
Stel de riempjes als volgt af.
1) Losmaken van de riempjes: Ԙ Til de sluiting op.
ԙ Trek aan het uiteinde van het riempje
dat aan de motorsproeier vast zit.
Ԛ Trek aan het losse uiteinde van het
riempje.
2) Strakker trekken van de riempjes.
Opmerking: Als de riempjes niet belast zijn, zijn ze relatief gemakkelijk te
verstellen.
3. Selecteer de gewenste werkdruk met de instelling werkdruk.
4. Stel de gashendel in op de gewenste positie, open de afsluitkraan op de
sproeier, tot de gewenste straal bereikt is.
Sproei altijd met de wind mee. Wees extra waakzaam om situaties te vermijden waarin de gesproeide chemische middelen terug naar
uzelf toe worden geblazen.
Let op
LAGE DRUK
INSTELLING WERKDRUK
Lage snelheid
Gashendel
Ԙ
Ԛ
Losser
HOGE DRUK
Hoge snelheid
Sluiting
ԙ
Vaster
fsluitkraan sproeier
DICHT
OPEN
87
Page 88

INSPECTIE EN ONDERHOUD
!
!
!
GEVAAR
• Stop de motor en laat deze afkoelen voor u inspectie en onderhoud gaat uitvoeren. Verwijder ook de bougie en de bougiekap.
− Als u inspectie of onderhoud uitvoert direct nadat de motor gestopt is of wanneer de bougiekap nog op zijn plaats zit, kunt u zich
branden of een ongeval oplopen omdat de motor onverwacht opstart.
• Controleer of alle onderdelen goed op hun plek zitten na inspectie of onderhoud. Ga pas daarna de machine opnieuw gebruiken.
㩷
1. Verversen van de motorolie
Te lang gebruikte motorolie zal de levensduur van de heen en weer bewegende en roterende onderdelen flink bekorten. Vergeet niet te
controleren wanneer en hoeveel olie ververst moet worden.
㩷
GEVAAR
• In het algemeen zullen de motor zelf en de motorolie nog enige tijd heet blijven ook al is de motor gestopt. Als u de olie wilt gaan
verversen, moet u eerst controleren of de motor zelf en de motorolie daarin voldoende zijn afgekoeld. Doet u dat niet, dan bestaat het
gevaar dat u zich zult branden. Net nadat de motor gestopt is, circuleert er nog olie in de motor en is niet alle olie teruggekeerd in de
oliepan. Bijvullen kan nu zorgen voor teveel olie.
• Als er teveel olie in het carter gedaan is, kan de olie verontreinigd raken, of verbranden met een witte rook als resultaat.
Verversingsinterval: In het begin na elke 20 bedrijfsuren, daarna na elke 50 bedrijfsuren.
Aanbevolen olie: SAE10W-30 olie van API Classificatie SF Klasse of hoger (4-takt olie voor auto's)
Voer de volgende procedure uit bij het verversen van de olie.㩷
1) Controleer of de tankdop goed dicht zit.
2) Maak de oliepeilstok los.
– Houd de oliepeilstok vrij van stof of vuil.
3) Gebruik de meegeleverde afgewerkte oliefles om de oude olie uit het
carter te halen.
• Knijp de onderkant van de fles in en steek de tuit in de olie. Laat de
onderkant van de fles los om de oude olie uit het carter op te zuigen.
• Wanneer het carter bijna leeg is, kunt u de motorsproeier een beetje
proberen te kantelen zodat u de resterende olie gemakkelijker kunt
verwijderen.
4) Zet de machine weer recht. Gebruik de olievulfles om het carter tot boven
aan met olie te vullen.
5) Doe de peilstok weer terug en doe deze stevig vast. Als u de peilstok niet
goed vast doet, kan er olielekkage optreden.
• Gebruik de meegeleverde afgewerkte oliefles en de olievulfles alleen
voor de bestemde doeleinden.
Afgewerkte oliefles Olievulfles
Brandstoftankdop
Peilstok
88
Page 89

)
㩷
㩷
• Gooi afgewerkte motorolie niet weg met het normale vuilnis en loos het niet in de natuur of in een sloot. Het afvoeren van olie is
wettelijk geregeld. Volg altijd de geldende wetten en regelgeving wanneer u zich van afgewerkte motorolie wilt ontdoen. Neem
contact op met een erkende onderhoudsmonteur als u hieromtrent vragen hebt.
• Ook wanneer u olie gewoon bewaart zal de olie op den duur bederven. Controleer regelmatig of de olie die u wilt gebruiken nog goed
is (vervang de olie minstens elke 6 maanden).
Opmerkingen bij het verversen van de motorolie
㩷㩷㩷㩷
2. Schoonmaken van het luchtfilter
!WAARSCHUWING: BRANDBARE MATERIALEN STRIKT VERBODEN
Interval voor reiniging en controle: dagelijks (elke 10 bedrijfsuren)
– Verwijder de bouten die het deksel van het luchtfilter vastzetten.
– Trek aan de onderkant van het deksel en maak het deksel van het luchtfilter
los.
– Doe de choke helemaal dicht en zorg ervoor dat de carburateur vrij blijft van
stof en vuil.
– Verwijder het element van het luchtfilter, was het element met een neutraal
wasmiddel opgelost in lauw water en laat het element goed drogen. Doe het
element weer terug op zijn plaats zoals aangegeven door de stippellijn in Afb.
1.
– Gebruik een stuk papier om eventuele olie van het deksel van het luchtfilter
en van de plaat waarop de inlaat is gemonteerd te verwijderen.
– Onmiddellijk na het reinigen dient u het deksel van het luchtfilter terug te
zetten en vast te maken met de bevestigingsbout. (Bij het in elkaar zetten
dient u eerst de bovenkant aan te brengen en dan pas de onderkant.)
Plaats uitsnede hier
(links boven)
Plaat
nlaat-gedeelte
Afb.1
Lijn (gearceerd)
Line (slashed line)
Element
Element (stippellijn
Deksel luchtfilter
Bevestigings
bout
3. Controlen van de bougie
– Gebruik enkel de originele bougiesleutel om een bougie te vervangen of te
controleren.
– De afstand tussen de 2 elektroden moet 0,7-0,8mm bedragen. Is de
afstand te groot of the nauw, stel deze bij. Als de bougie aangekoekt is,
vervang deze of maak deze schoon.
WAARSCHUWING: Raak nooit de bougiekabel aan met draaiende motor
(gevaar voor elektrische schok met hoog voltage).
4. Schoonmaken van het brandstoffilter
0.7~0.8 mm
(0.028”-0.032”)
Brandstofleiding
GEVAAR: ONTVLAMBARE MATERIALEN TEN STRENGSTE
VERBODEN
Interval voor reiniging en inspectie: Maandelijks (om de 50 bedrijfsuren)
Slangenklem
Zuigkop in de benzinetank
– Het brandstoffilter (1) van de zuigkop filtert de benzine voordat deze in de
carburateur komt.
– Regelmatige controle van dit brandstoffilter is aanbevolen. Verwijder de
tankdop en haak de zuigkop naar buiten. Vervuilde of uitgeharde
brandstoffilters uitwisselen.
– Onvoldoende benzinetoevoer door vervuilde zuigkoppen kunnen allerlei
storingen veroorzaken, wissel daarom regelmatig het brandstoffilter uit, op
zijn minst om de paar maanden.
Brandstoffilter (1)
89
Page 90

Storing lokaliseren
Storing Onderdeel Observatie Oorzaak
Motor start niet of nauwelijks Ontsteking Bougie vonkt Oorzaak in benzinetoevoer of compressiesysteem, of
mechanische oorzaak
Vonkt niet Stopschakelaar, kabelbreuk, kortsluiting, bougie of
aansluiting defect ontstekingsspoel defect
Benzinetoevoer Tank gevuld Onjuiste chokepositie, carburateur defect, vervuilde
zuigkop, breuk, knik of vuil in benzineleiding
Compressie Geen compressie bij
start
Voetpakking stuk, krukaskeerringen defect, zuigerveren
gebroken of lekke bougiepakking
Mechanische storing Starter functioneert niet Gebroken startveer, defecte startpallen
Warm start problemen Tank gevuld bougie
Carburateur vervuild, laten reinigen
vonkt
Motor start maar valt stil Benzinetoevoer Tank gevuld Onjuiste afstelling, vervuilde zuigkop of carburateur
Defecte ontluchting, breuk benzineleiding, kabelbreuk,
ontsteking defect
Onvoldoende vermogen Diverse oorzaken Stationairloop
onregelmatig
Luchtfilter vervuild, carburateur vervuild, uitlaat verstopt
uitlaatpoort vervuild
Onderdeel
Bedrijfsuren
Motorolie
Onderdelen vastzetten
(bouten, moeren)
Inspecteren/
reinigen
Verversen
Inspecteren
Reinigen/
inspecteren
Voor
gebruik
Na smering
Dagelijks
(10 u.)
30 u 50 u 200 u
Motor uit/
rustpauze
٤
٤
*1
٤
٤
Brandstoftank
Brandstof
aftappen
٤
*3
Gashendel Werking
٤
controleren
Stopschakelaar Werking
٤
controleren
Stationaire draaisnelheid Inspecteren/
٤
bijstellen
Luchtfilter Reinigen
Bougie Inspecteren
Kanaal luchtkoeling Reinigen/
٤
٤
٤
inspecteren
Inspecteren
٤
Brandstofleiding
Vervangen
Brandstoffilter Reinigen/
٤
vervangen
Speling tussen
luchtinlaatklep en uitlaatklep
Olieleiding Inspectie
Reviseren motor
Carburateur Brandstof
Bijstellen
٤
aftappen
٧
٧
٧
٧
*2
*2
*2
*2
*3
*1 Voer de eerste verversing uit na 20 bedrijfsuren.
*2 Laat de inspectie na 200 bedrijfsuren uitvoeren door een erkende onderhoudsmonteur of motor-werkplaats
*3 Laat de motor gewoon even doorlopen nadat u de brandstoftank heeft leeg gemaakt om alle brandstof uit de carburateur te verwijderen.
90
Page 91

OPLOSSEN VAN PROBLEMEN
Ga eerst zelf na wat er aan de hand zou kunnen zijn voor u om een reparatie gaat verzoeken. Als u iets abnormaals vindt, voer dan de
handelingen beschreven in deze handleiding uit. Knoei niet met onderdelen en demonteer geen onderdelen als dat niet in de handleiding
beschreven wordt. Neem contact op met een erkende onderhoudsmonteur of uw dealer voor eventuele reparaties.
Probleem Waarschijnlijke oorzaak (storing) Oplossing
U heeft de opvoerpomp niet gebruikt. Druk 7 tot 10 keer op de opvoerpomp.
De motor start niet
Motor valt stil.
Motorsnelheid neemt niet toe.
De motor stopt niet.
Laat de motor stationair lopen en zet
de chokehendel op CLOSE (dicht).
Er wordt niet snel genoeg aan de
trekstarter getrokken.
Niet genoeg brandstof. Ga tanken.
Brandstoffilter verstopt. Reinig het brandstoffilter.
Brandstofleiding geknakt of kapot. Haal de knik eruit of vervang de brandstofleiding.
Slechte brandstof.
Te grote toevoer van brandstof
(verzuipen).
Losse bougiedop. Zet de bougiedop weer vast.
Vuile bougie. Maak de bougie schoon.
Abnormale elektrodenafstand. Stel de afstand tussen de elektroden van de
Andere problemen met de bougie. Vervang de bougie.
Problemen met de carburateur. Verzoek om inspectie en onderhoud.
De trekstarter werkt niet. Verzoek om inspectie en onderhoud.
Problemen met de overbrenging. Verzoek om inspectie en onderhoud.
Niet genoeg opgewarmd. Laat de motor eerst opwarmen.
De chokehendel staat op "CLOSE" (dicht),
alhoewel de motor al opgewarmd is.
Brandstoffilter verstopt. Reinig het brandstoffilter.
Luchtfilter verstopt of verontreinigd. Reinig het luchtfilter.
Problemen met de carburateur. Verzoek om inspectie en onderhoud.
Problemen met de overbrenging. Verzoek om inspectie en onderhoud.
De gaskabel zit niet goed vast. Maak de gaskabel op de juiste wijze vast.
Stekkertje los. Maak het stekkertje vast.
Problemen met het elektrische systeem. Verzoek om inspectie en onderhoud.
Trek harder.
Als de brandstof oud of slecht is, is de motor
moeilijker te starten, Gebruik verse brandstof.
(Ververs de brandstof in de tank minstens een
keer per maand.)
Zet de gashendel op halve of hoge snelheid en
trek aan de trekstarter totdat de motor start. Als de
motor nog steeds niet wil starten, dient u de bougie
eruit te draaien, af te drogen en weer in te draaien.
Start de motor vervolgens zoals beschreven.
bougie bij.
Zet de chokehendel open.
Wanneer de motor niet start na het opwarmen:
Als u geen problemen vindt via de bovenstaande controles, dient u het gas ongeveer 1/3 open te zetten en vervolgens de motor te starten.
91
Page 92

Spanish
Muchas gracias por comprar la Pulverizadores motorizados DOLMAR. Nos complace recomendarle el
uso de un producto que es el resultado de un extenso programa de investigación desarrollado tras
años de estudio y experiencia.
Para su seguridad y para obtener el mejor resultado posible de su Pulverizadores motorizados
DOLMAR, por favor lean completamente este manual antes de utilizar la máquina y respete las
instrucciones dadas para utilizarla correctamente.
Índice Página
Símbolos
Instrucciones de seguridad
Datos técnicos
Denominación de partes
Instrucciones de montaje
Antes de empezar el trabajo
㨯㨯㨯㨯㨯㨯㨯㨯㨯㨯㨯㨯㨯㨯㨯㨯㨯㨯㨯㨯㨯㨯㨯㨯㨯㨯㨯㨯㨯㨯㨯㨯㨯㨯㨯㨯㨯㨯㨯㨯㨯㨯㨯㨯
㨯㨯㨯㨯㨯㨯㨯㨯㨯㨯㨯㨯㨯㨯㨯㨯㨯㨯㨯㨯㨯㨯㨯㨯㨯㨯㨯㨯㨯
㨯㨯㨯㨯㨯㨯㨯㨯㨯㨯㨯㨯㨯㨯㨯㨯㨯㨯㨯㨯㨯㨯㨯㨯㨯㨯㨯㨯㨯㨯㨯㨯㨯㨯㨯㨯㨯㨯㨯
㨯㨯㨯㨯㨯㨯㨯㨯㨯㨯㨯㨯㨯㨯㨯㨯㨯㨯㨯㨯㨯㨯㨯㨯㨯㨯㨯㨯㨯㨯㨯
㨯㨯㨯㨯㨯㨯㨯㨯㨯㨯㨯㨯㨯㨯㨯㨯㨯㨯㨯㨯㨯㨯㨯㨯㨯㨯㨯㨯㨯㨯
㨯㨯㨯㨯㨯㨯㨯㨯㨯㨯㨯㨯㨯㨯㨯㨯㨯㨯㨯㨯㨯㨯㨯㨯㨯㨯㨯
Mezcla de productos químicos líquidos
Arranque del motor
Modo de parar
Funcionamiento
Inspección y mantenimiento
investigación de averías
㨯㨯㨯㨯㨯㨯㨯㨯㨯㨯㨯㨯㨯㨯㨯㨯㨯㨯㨯㨯㨯㨯㨯㨯㨯㨯㨯㨯㨯㨯㨯㨯㨯㨯
㨯㨯㨯㨯㨯㨯㨯㨯㨯㨯㨯㨯㨯㨯㨯㨯㨯㨯㨯㨯㨯㨯㨯㨯㨯㨯㨯㨯㨯㨯㨯㨯㨯㨯㨯㨯㨯㨯㨯
㨯㨯㨯㨯㨯㨯㨯㨯㨯㨯㨯㨯㨯㨯㨯㨯㨯㨯㨯㨯㨯㨯㨯㨯㨯㨯㨯㨯㨯㨯㨯㨯㨯㨯㨯㨯㨯
㨯㨯㨯㨯㨯㨯㨯㨯㨯㨯㨯㨯㨯㨯㨯㨯㨯㨯㨯㨯㨯㨯㨯㨯㨯㨯㨯
㨯㨯㨯㨯㨯㨯㨯㨯㨯㨯㨯㨯㨯㨯㨯㨯㨯㨯㨯㨯㨯㨯㨯㨯㨯㨯㨯㨯㨯㨯
SÍMBOLOS
Es de gran importancia comprender los símbolos siguientes es para la lectura de este manual de instrucciones.
Lea, comprenda y siga el Manual de
Instrucciones
Combustible (Gasolina)
㨯㨯㨯㨯㨯㨯㨯㨯㨯㨯㨯㨯㨯㨯㨯㨯㨯
92
93
97
98
99
100
102
102
104
105
106
109
ADVERTENCIA/PELIGRO
Prohibido:
No Fumar
No acercar llamas
Deben utilizarse guantes protectores
Mantener el Area de Operació n libre de
personas y animales
Llevar protección de ojos, máscara
protectora y protección para oídos
Encendido manual del motor
Paro de Emergencia
Primeros Auxilios
ON/ENCENDIDO
OFF/APAGADO
Reciclaje
92
Page 93

INSTRUCCIONES DE SEGURIDAD
Instrucciones Generales
– Para asegurar un funcionamiento correcto y seguro, el usuario debe leer,
comprender y seguir este manual de instrucciones para familiarizarse con el
pulverizador motorizado. Los usuarios que no se informen suficientemente,
ocasionarán un peligro a s’í mismos y a otros.
– Se recomienda prestar el pulverizador motorizado ú nicamente a gente que
demuestre experiencia en el uso de pulverizador motorizado.
Siempre debe entregar el manual de instrucciones.
– Los que utilizan la máquina por vez primera deben preguntar al vendedor las
instrucciones básicas para familiarizarse con el manejo de un pulverizador
motorizado.
– No se debe permitir el uso del pulverizador motorizado a niños y personas
menores de 18 años. Las personas mayores de 16 años pueden, sin
embargo, utilizar la máquina para aprendizaje únicamente, bajo supervisió n
directa de un monitor cualificado.
– Utilizar la máquina con el máximo cuidado y atención.
– Manejar el pulverizador motorizado só lo si se encuentra en buena condición
física.
Realizar el trabajo con calma y cuidadosamente.
El usuario debe aceptar su responsabilidad con otras personas.
– Nunca utilizar el pulverizador motorizado después del consumo de alcohol o
drogas, o si se encuentra cansado o enfermo.
– Conserve estas instrucciones para referencia futura.
Equipo Personal de Protección
– La ropa utilizada debe ser funcional y adecuada. Por ejemplo, debe quedar
ajustada, sin causar estorbo. No llevar joyas o ropa que puede quedar
atrapada con matorrales o arbustos, o con la máquina.
– Para evitar heridas en cabeza, ojos, manos, o pies, así como para proteger
su oído, el siguiente equipo y ropa de protecci ó n debe usarse durante el
uso del pulverizador motorizado.
Preste una atención especial a las siguientes medidas:
– Utilice ropa funcional y adaptada al cuerpo pero que no impida los
movimientos cuando haga funcionar la pulverizador motorizado. No utilice
ropa o joyas y accesorios que puedan enredarse en la maleza o con la
máquina.
– Para una correcta protección contra heridas en la cabeza, ojos, pies, manos
y audición, deberá utilizarse el siguiente equipo de protección y ropa cuando
trabaje con la pulverizador motorizado.
1. Utilice siempre protección apropiada para el rostro (máscara, gafas
protectoras, etc.) para proteger el rostro, ojos y pulmones contra el polvo
y productos químicos.
2. Para no dañar su audición, utilice protección apropiada para los oídos en
todo momento.
3. Para proteger su piel contra el polvo y productos químicos, utilice ropa
de trabajo con mangas largas y pantalones largos en todo momento.
4. Utilice guantes de goma para el funcionamiento o el servicio de la
pulverizador motorizado.
5. Cuando utilice la pulverizador motorizado, calce siempre zapatos
resistentes con suela que no patina. Hay zapatos especiales para
trabajo que le permiten apoyarse firmemente en el suelo y lo protegen
contra heridas en sus pies.
– Apriete su ropa floja, cabello y accesorios, tales como toallas, etc. Los
objetos flojos pueden enredarse en las piezas móviles de la máquina y
provocar heridas de gravedad.
Encendido del pulverizador motorizado
– Asegurar que no hay niños u otras personas en un radio de 15 metros
también preste atención a cualquier animal en la proximidad del área de
trabajo. No utilice el pulverizador motorizado punce en áreas urbanas.
– Antes de su uso, asegúrese siempre de que el pulverizador motorizado esté
en condiciones de funcionamiento seguro, y que la palanca del acelerador
funciona correctamente de forma suave y cómoda. Compruebe que la
palanca del acelerador esté limpia y seca, y el interruptor de encendido y
apagado (I - O), para confirmar que funciona correctamente.
Protección para
Máscara protectora
Pantalones
largos
15 metros
Casco impermeable
Gafas
protectoras
Mangas largas
Guantes de
goma
Zapatos para
trabajo
93
Page 94

– Antes de arrancar la pulverizador motorizado, asegúrese siempre de que la
máquina está en condiciones de funcionamiento seguro y compruebe que la
palanca de acelerador está funcionando correctamente.
– Compruebe siempre que se han sacado las herramientas utilizadas durante
el armado de la máquina. Las herramientas que se han olvidado en la
máquina pueden saltar del motor al arrancar, provocando heridas de
gravedad.
– Asegúrese de que la pulverizador motorizado está limpia y seca pruebe el
interruptor STOP para confirmar que funciona correctamente.
– Pare inmediatamente el motor cuando tenga problemas en el motor.
– Cuando haga funcionar la pulverizador motorizado, tenga especial cuidado
de que el humo del escape no entre en sus pulmones.
– El humo del escape es mortal. No haga funcionar la máquina en una
habitación cerrada o en un área que no tenga buena circulación de aire
(puede ahogarse o puede morir al aspirar el gas).
– No haga funcionar la pulverizador motorizado continuamente durante más
de una hora, tómese un descanso de por lo menos 30 minutos por cada
hora de trabajo.
– Pare el motor cuando esté descansando o cuando deje la pulverizador
motorizado sin vigilancia. Para proteger otras personas y la pulverizador
motorizado contra daños, guarde la máquina en un lugar seguro y
compruebe que no haya materiales combustibles en las cercanías. Nunca
apoye una pulverizador motorizado caliente sobre pasto seco o material
combustible. Esto es muy peligroso ya que puede provocar un incendio (6).
– No haga funcionar el motor si el silenciador tiene una avería.
– Apague el motor antes de llevar la pulverizador motorizado a otro lugar.
– Espere hasta que el motor se haya enfriado lo suficiente, vacíe el tanque de
combustible e instale firmemente la pulverizador motorizado antes de
transportar la máquina en un vehículo.
– Asegúrese de que el tanque de combustible está completamente vacío y
seco antes de transportar la pulverizador motorizado..
REABASTECIEMIENTO
– Apagar el motor durante el reasbastecimiento, mantenerse alejado de llamas,
y no fume.
– Evite el contacto de los productos derivados del petróleo con su piel. No
inhale en vapor del combustible. Siempre lleve guantes protectores durante
el reabastecimiento. Cambie y limpie la ropa protectora en intervalos
periódicos.
– Tome la precaución de no derramar combustible o aceite para impedir la
contaminación del suelo (protección del medio ambiente).
Limpie el pulverizador motorizado inmediatemente si se ha derramando
combustible.
Deje que las ropas húmedas se sequen bien antes de echarlas a un
contenedor cubierto para prevenir la combustión instantánea.
– Evite el contacto del combustible con su ropa. Cambie su ropa
inmediatemente si se ha vertido combustible (riesgo importante).
– Inspeccione la tapa de combustible periódicamente y asegúrese que queda
firmemente sujeta.
– Apriete cuidadosamente el tornillo de cierre del tanque de combustible.
Cambie de lugar para arrancar el motor ((por lo menos a una distancia de 3
metros del lugar de reabastecimiento) .
– Nunca reponer combustible en habitaciones cerradas. Los vapores de
combustible se acumulan al nivel del suelo (riesgo de explosión).
– Unicamente transporte y almacene el combustible en contenedores
aprobados. Asegúrese que el combustible almacenado no queda al alcance
de niños.
– No intente reponer combustible en un motor caliente o en marcha.
Metodo de funcionamiento
– Utilice siempre la pulverizador motorizado en condiciones de buena luz y
visibilidad. Nunca utilice la pulverizador motorizado de noche. No utilice la
pulverizador motorizado durante la lluvia o inmediatamente después de una
lluvia (peligro de herirse por patinar o caerse cuando el suelo está mojado).
– Tenga cuidado en lugares donde pueda patinar y que estén mojadas (hielo y
nieve) ya que existe el peligro de patinarse, y apoye sus pies firmemente
sobre el suelo.
– No utilice nunca la pulverizador motorizado mientras está subido a una
escalera.
– Nunca suba a un árbol para utilizar la pulverizador motorizado desde arriba
de un árbol.
– Nunca utilice la pulverizador motorizado si está parado sobre una superficie
inestable.
– No apunte la tobera de la pulverizador motorizado hacia gente o animales.
Los restos que vuelan pueden provocar heridas de gravedad.
– No toque el conector de bujías con el motor en marcha.
– No toque piezas móviles de la pulverizador motorizado con el motor en
marcha.
– No toque el silenciador u otras piezas del motor durante el funcionamiento y
espere un tiempo después de parar el motor. Las piezas del motor están
muy calientes y puede quemarse.
٨
Descanso
٨
Transporte
٨
Reabastecimiento
٨
Mantenimiento
٨
Cambio de Herramienta
3 metros
94
Page 95

– Estudie bien el peligro para la salud humana de los pesticidas o herbicidas
utilizados antes de su uso y lea cuidadosamente las instrucciones
contenidas para familiarizarse con el procedimiento correcto para el uso de
estos productos químicos. Si los pesticidas/herbicidas entran en contacto
con su piel, lave inmediatamente el área con jabón. Apriete firmemente la
tapa del tanque pulverizador para que no haya fugas de estos productos
químicos.
Instrucciones de mantenimiento
– Guarde respeto al medio ambiente. Trabaje con el pulverizador motorizado
realizando el mínimo ruido y polución posibles. En particular, compruebe que
el a ajuste del carburador es el adecuado.
– Limpie el pulverizador motorizado periódicamente y compruebe que todos
los tornillos y tuercas están firmemente apretados.
– Nunca efectuar el mantenimiento o almacenaje del pulverizador motorizado
cerca de llamas, chispas, etc.
– Siempre almacene el pulverizador motorizado en una habitación cerrada y
bien ventilada, y con el tanque de combustible vacío.
Observe y siga todas las instrucciones de prevención de accidentes aplicables,
emitidas por asociaciones, sindicatos y compañías de seguros. No realice
ninguna modificación en el pulverizador motorizado dado que esto pondría en
riesgo su seguridad.
La realización del mantenimiento o reparaciones por parte del usuario se limita
a las actividades que se describen en el manual de operaciones. Las
operaciones restantes deben efectuarse por el Agente Autorizado de Servicio.
Utilice sólo piezas de recambio y accesorios suministrados por DOLMAR.
La utilización de piezas no aprobadas conlleva un aumento en el riesgo de
accidentes y daños. DOLMAR no aceptaría ninguna responsabilidad por los
accidentes o daños que sean causados por el uso de herramientas de corte o
accesorios no aprobados.
Primeros auxilios
Para el caso de accidente asegúrese que un botiquín de primeros auxilios
según DIN 13164 esté disponible cerca del lugar de trabajo.
Reponer inmediatamente cualquier producto que se utilice del botiquín.
Cuando se pida ayuda, se debe proporcionar la siguiente
información.
– Lugar del accidente.
– Qué ha ocurrido.
– Número de personas heridas.
– Clase de heridas.
– Su nombre.
Embalaje
– El pulverizadores motorizados DOLMAR se suministra en una caja
protectora de cartón para impedir daños durante el transporte. El cartón es
una materia primaria básica y puede ser reutilizado consecuentemente o
reciclado.
95
Page 96

Declaración de conformidad de la Comunidad Europea (EC)
Tipos: SP252.4R
Declaramos bajo nuestra única responsabilidad que este producto está de acuerdo con las normas siguientes
de los documentos de normalización EN292 y EN55012 según indican las Directivas del Consejo 89/392/EEC,
98/37/EEC enmendada, 93/68/EEC, 89/336/EEC y 92/31/EEC enmendada.
Fuerza del sonido medida: 98 dB
Fuerza del sonido garantizada: 102 dB
Estos niveles de fuerza del sonido fueron medidos de acuerdo con la Directiva del Consejo 2000/14/EC.
Los procedimientos de la evaluación de la conformidad: Anexo V
CE2007
Shigeharu kominami Rainer Bergfeld
Director Gerente Director Gerente
Fabricante responsable:
Makita Corporation.
3-11-8, Sumiyoshi-cho, Anjo, Aichi, Japón
Representante autorizado en Europa:
DOLMAR Gmbh
Calle de Jenfelder 38, 22045 Hamburgo, Alemania
96
Page 97

DATOS TÉCNICOS
Modelo SP-252.4R
Dimensiones: largo x ancho x alto mm 380 x 420 x 635
Peso kg 9.1
Volumen (tanque de productos químicos) L 20
Bomba
Tipo Horizontal opposed twin pistons
Presión maxima MPa 2.5
Succión L 7.1
Motor
Modelo EH025A
Desplazamiento cm
Combustible Gasolina para autos
Volumen (tanque de combustible) L 0.5
Aceite del motor
Volumen (tanque de aceite) L 0.08
Carburador tipo WALBRO WYL
Sistema de encendido tipo Incendido en estado sólido
Bujías tipo NGK CMR6A (C tipo)
Separación del electrodo mm 0.7 - 0.8
3
Aceite SAE10W 30 de la categoría superior a la clase SF de la
clasicficación API (Aceite de motor de cuatro tiempos para autos)
24.5
Nivel de presión del ruido
Nivel de presión del ruido (Lpa) a 98/37/EC
Nivel garantizado de potencia de ruido (Lwa) a 2000/14/EC
dB 84.0
dB 102.0
Note: 1. Utilice el aceite y la bujá de alta tension designados por DOLMAR.
2. Las especificaciones se podrán modificar sin previo aviso.
97
Page 98

DENOMINACIÓN DE PARTES
No
DENOMINACIÓN DE PARTES
Interruptor I-O 9 Silenciador 17 Conector rápido
1
Palanca de acelerador 10 Bayoneta de nivel de aceite 18 Empuñadura
2
Palanca de la estrangulación 11 Bomba cebadora 19 Grifo del pulverizador
3
Cubierta del filtro de aire 12
4
Caperuza de bujía 13
5
Pomo de arranque 14 Tanque de productos químicos 22
6
Tanque de combustible 15 Dial de presion 23
7
Tapa del tanque de combustible 16 Manguera de riego 24
8
No
DENOMINACIÓN DE PARTES
Tapa de drenaje del tanque de
productos químicos
Tapa del tanque de productos
químicos
No
DENOMINACIÓN DE PARTES
20 Tubo pulverizador
21 Soporte del tubo pulverizador
Tobera (cabeza doble de ángulo
ancho)
98
Page 99

INSTRUCCIONES DE MONTAJE
PRECAUCIÓN: Antes de realizar cualquier acción con el pulverizador, apagar siempre el motor y desenchufar los conectores de la bujía.
¡Usar siempre guantes protectores!
PRECAUCIÓN: Arrancar el pulverizador sólo después de su completo ensamblaje.
1. EMSAMBLAJE DE PIEZAS
Consulte la figura de la página anterior (DENOMINACIÓN DE PIEZAS) para ensamblar la empuñadura, el grifo del pulverizador, el tubo
pulverizador y la tobera. Tenga cuidado de armar correctamente todas las piezas para evitar fugas.
2. COLOCACIÓN DE LAS CORREAS
Coloque las dos correas de hombros del tanque de productos químicos como se muestra a continuación sin que haya ningún giro o lazo en las
correas. Se dan instrucciones sobre su colocación para una de las correas.
Colocación de la parte superior de las correas
㽲 㽳 㽴
Tanque de
productos químicos
Tire de la correa en el sentido de la
flecha hasta que la punta plegada
atrape el refuerzo de metal.
Hebilla Superior
Colocación de la parte inferior de las correas
㽲
Hebilla Superior
Hebilla Inferior
Chemical tank
Introduzca la parte 'A', de la correa
㽳
por el hueco de la hebilla metálica.
Después alce la correa 90
grados en la dirección de la
flecha.
Enganche
metálico
Repita los mismos pasos para la
㽴
correa del otro hombro para terminar
la colocación.
Coloque las correas traseras 'A'. una de las
dos correas enrolladas, en el enganche
metálico de la forma mostrada a
continuación en ԙ y Ԛ.
Enganche
metálico
99
Page 100

ANTES DE EMPEZAR EL TRABAJO
INSPECCIÓN Y REABASTECIMIENTO DE ACEITE DE MOTOR
– Haga lo siguiente con el motor frío.
– Manteniendo el motor nivelado, saque la bayoneta de nivel de aceite y confirme que el nivel del aceite está entre las marcas de límite inferior
y superior.
Cuando hay poco aceite, de modo que la bayoneta de nivel solamente toca el aceite con su punta, y especialmente cuando la bayoneta está
insertada en el carter sin enroscar (Fig. 1), eche aceite por el orificio de reabastecimiento (Fig. 2).
– Para su referencia, debe reabastecerse aceite cada 10 horas (10 veces ó 10 tanques de aceite de reabastecimiento).
– Si ha cambiado el color del aceite o tiene impurezas, cámbielo. (Consulte la página 106 referente al intervalo y al método de
reabastecimiento.)
Aceite recomendado : Aceite SAE 10W-30 de clasificación API, clase SF o superior (para motores de automóviles de 4 tiempos)
Volumen de aceite : 0.08L aproximadamente
Nota : Si el motor no es puesto derecho, el aceite puede entrar en todo el motor con reabastecimiento excesivo.
Si el aceite esta reabastecido más del límite, el aceite puede ensuciarse o prender fuego con humo blanco.
Punto 1 de reabastecimiento de aceite: bayoneta de aceite
– Elimine el polvo y la suciedad de los alrededores del orificio de reabastecimiento y saque la bayoneta de nivel de aceite.
– No ensucie la bayoneta de nivel con arena o polvo. Si lo hace, la arena y el polvo que se han adherido a la bayoneta de
nivel causarán una circulación irregular del aceite y se desgastarán las piezas del motor, lo que causará problemas de
funcionamiento.
– Una manera de conservar la bayoneta limpia es insertarla por su asa en la cubierta del motor (Fig. 3).
Eche aceite limpio si el
nivel aceite sólo llega
a la punta.
Fig.1 Fig.2
Bayoneta de
nivel de aceite
Fig.3
Límite superior (borde
del orificio de
reabastecimiento)
100
 Loading...