

Page 1
GB
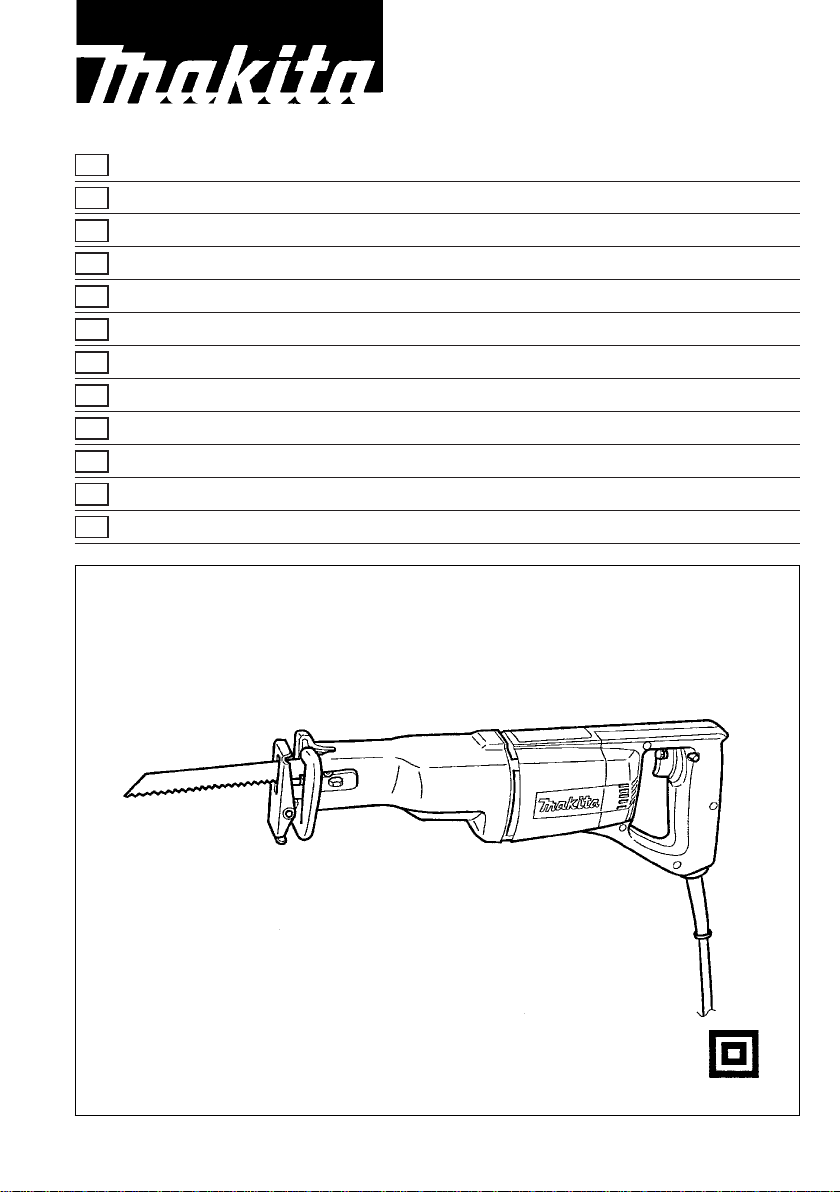
Recipro saw Instruction Manual
F
Scie recipro Manuel d’Instructions
D
Reciprosäge Betriebsanleitung
I
Seghetto diritto Istruzioni d’Uso
NL
Reciprozaag Gebruiksaanwijzing
E
Sierra alternativa Manual de Instrucciones
P
Serra de sabre Manual de Instruço˜es
DK
Bajonet sav Brugsanvisning
S
Tigersåg Bruksanvisning
N
Bajonettsag Bruksanvisning
SF
Puukkosaha Käyttöohje
GR
¶·ПИУ‰ЪФМИОfi ЪИФУИ √‰ËÁ›Â˜ ÃÚ‹Ûˆ˜
JR3000
JR3000V
Page 2
1 2
3 4
5 6
7 8
2
Page 3

ENGLISH
Explanation of general view
1 Hex wrench
2 Bolt
3 Shoe
4 Bolt
5 Speed change switch
6 Switch trigger
7 Lock button/Lock-off button
8 Speed control screw
9 High
0 Low
q Limit mark
w Brush holder cap
e Screwdriver
SPECIFICATIONS
Model JR3000 JR3000V
Length of stroke .......................................................................... 30 mm 30 mm
Strokes per minute ...................................................................... Hi : 2,500 Low : 1,900 0 – 2,300
Overall length .............................................................................. 400mm 400 mm
Net weight ................................................................................... 2.9 kg 2.9 kg
•
Due to the continuing program of research and
development, the specifications herein are subject
to change without prior notice.
•
Note: Specifications may differ from country to
country.
Power supply
The machine should be connected only to a power
supply of the same voltage as indicated on the
nameplate, and can only be operated on single-phase
AC supply. They are double-insulated in accordance
with European Standard and can, therefore, also be
used from sockets without earth wire.
Safety hints
For your own safety, please refer to enclosed Safety
instructions.
These symbols mean:
Read instruction manual.
DOUBLE INSULATION
ADDITIONAL SAFETY RULES
1. Avoid cutting nails. Inspect for and remove all
nails from the workpiece before operation.
2. Do not cut oversize workpiece.
3. Check for the proper clearance beyond the
workpiece before cutting so that the blade will
not strike the floor, workbench, etc.
4. Hold the machine firmly.
5. Make sure the blade is not contacting the
workpiece before the switch is turned on.
6. Keep hands away from moving parts.
7. When cutting through walls, floors or wherever ‘‘live’’ electrical wires may be encountered, DO NOT TOUCH ANY METAL PARTS OF
THE MACHINE! Hold the machine by the insulated grasping surfaces to prevent electric
shock if you cut through a ‘‘live’’ wire.
8. Do not leave the machine running. Operate the
machine only when hand-held.
9. Always switch off and wait for the blade to
come to a complete stop before removing the
blade from the workpiece.
10. Do not touch the blade or the workpiece immediately after operation; they may be extremely
hot and could burn your skin.
SAVE THESE INSTRUCTIONS.
OPERATING INSTRUCTIONS
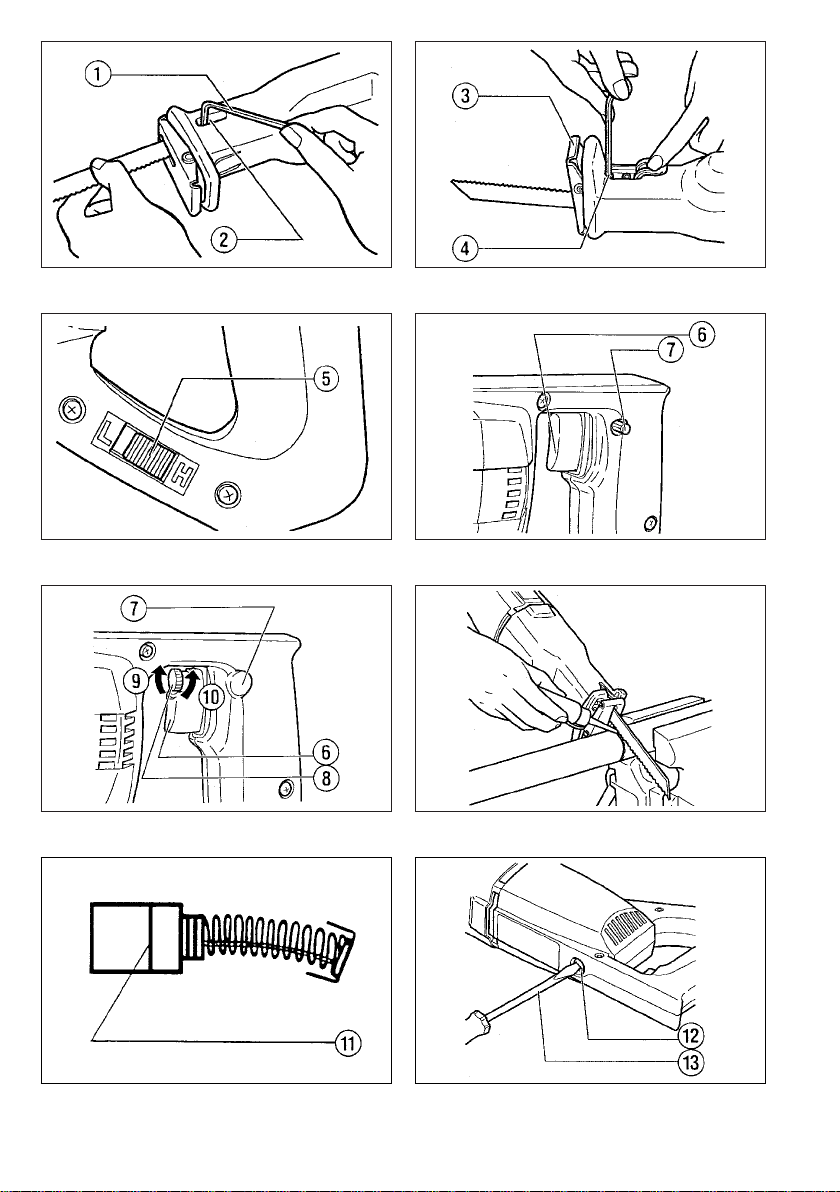
Installing saw blade (Fig. 1)
Important:
Always be sure that the machine is switched off and
unplugged before installing or removing the blade.
First, use the hex wrench to loosen the bolt. With the
blade teeth facing upward or downward, insert the
blade until the hole in the blade shank is just over the
protrusion on the slider. Then tighten the bolt to
secure the blade.
Adjusting shoe (Fig. 2)
Loosen the two bolts holding the shoe. Then slide the
shoe back or forth to the desired position and tighten
the two bolts securely. When the blade loses its
cutting effectiveness in one place, reposition the shoe
to obtain better cutting in another.
Speed change (For JR3000 only) (Fig. 3)
CAUTION:
Use the speed change switch only after the machine
comes to a complete stop.
To change the machine speed, move the speed
change switch to the ‘‘L’’position for low speed or the
‘‘H’’ position for high speed.
High speed: ordinary wood, plys or plastics
Low speed: metals (steel pipe, sheet metal, stainless
or copper)
Switch action (For JR3000) (Fig. 4)
CAUTION:
Before plugging the machine, always check to see
that the switch trigger actuates properly and returns to
the ‘‘OFF’’ position when released.
3
Page 4

For machines with lock button
To start the machine, simply pull the trigger. Release
the trigger to stop. For continuous operation, pull the
trigger and then push in the lock button. To stop the
machine from the locked position, pull the trigger fully,
then release it.
For machines with lock-off button
To prevent the trigger from being accidentally pulled,
a lock-off button is provided. To start the machine,
press in the lock-off button and pull the trigger.
Release the trigger to stop.
Switch action (For JR3000V) (Fig. 5)
CAUTION:
Before plugging the machine, always check to see
that the switch trigger actuates properly and returns to
the ‘‘OFF’’ position when released.
For machines with lock button
To start the machine, simply pull the trigger. Machine
speed is increased by increasing pressure on the
trigger. Release the trigger to stop. For continuous
operation, pull the trigger and then push in the lock
button. To stop the machine from the locked position,
pull the trigger fully, then release it. A speed control
screw is provided so that maximum machine speed
can be limited (variable). Turn the speed control
screw clockwise for higher speed, and counterclockwise for lower speed.
For machines with lock-off button
To prevent the trigger from being accidentally pulled,
a lock-off button is provided. To start the machine,
press in the lock-off button and pull the trigger.
Machine speed is increased by increasing pressure
on the trigger. Release the trigger to stop. A speed
control screw is provided so that maximum machine
speed can be limited (variable). Turn the speed
control screw clockwise for higher speed, and counterclockwise for lower speed.
Operation
Turn the machine on and wait until the blade attains
full speed. Then press the shoe against the workpiece
and apply pressure to cut the workpiece.
CAUTION:
Excessive pressure that causes bending or twisting of
the blade may snap it.
Metal cutting (Fig. 6)
Always use a suitable coolant (cutting oil) when
cutting metal. Failure to do so will cause significant
blade wear.
MAINTENANCE
CAUTION:
Always be sure that the machine is switched off and
unplugged before carrying out any work on the
machine.
Replacement of carbon brushes
(For JR3000 only) (Fig.7&8)
Replace carbon brushes when they are worn down to
the limit mark. Both identical carbon brushes should
be replaced at the same time.
To maintain product safety and reliability, repairs,
maintenance or adjustment should be carried out by
Makita Authorized Service Center.
4
Page 5

NEDERLANDS
Verklaring van algemene gegevens
1 Zeskantsleutel
2 Zeskant imbusbout
3 Zoolplaat
4 Zeskant imbusbout
5 Toerentalschakelaar
6 Trekschakelaar
7 Vastzetknop
8 Toerenschroef
9 Hoog
0 Laag
q Limietmarkering
w Koolborsteldop
e Schroevedraaier
TECHNISCHE GEGEVENS
Model JR3000 JR3000V
Slaglengte ................................................................................... 30 mm 30 mm
Aantal zaagbewegingen/min ....................................................... Hoog : 2 500 Laag : 1 900 0 – 2 300
Totale lengte ................................................................................ 400 mm 400 mm
Netto gewicht .............................................................................. 2,9 kg 2,9 kg
•
In verband met ononderbroken research en
ontwikkeling behouden wij ons het recht voor bovenstaande technische gegevens te wijzigen zonder
voorafgaande kennisgeving.
•
Opmerking: De technische gegevens kunnen van
land tot land verschillen.
Stroomvoorziening
De machine mag alleen worden aangesloten op een
stroombron van hetzelfde voltage als aangegeven op de
naamplaat, en kan alleen op enkel-fase wisselstroom
worden gebruikt. De machine is dubbel-geı¨soleerd volgens de Europese standaard en kan derhalve ook op
een niet-geaard stopcontact worden aangesloten.
Veiligheidswenken
Vooruw veiligheid dient u de bijgevoegde Veiligheidsvoorschriften nauwkeurig op te volgen.
Deze symbolen betekenen:
Lees de gebruiksaanwijzing.
DUBBELE ISOLATIE
7. Wanneer u zaagt door muren, vloeren of
andere plaatsen waar onder spanning staande
elektrische draden aanwezig kunnen zijn,
RAAK DAN GEEN VAN DE METALEN ONDERDELEN VAN DE MACHINE AAN! Houd de
machine vast bij de geı¨soleerde handgreep om
een elektrische schok te voorkomen wanneer
u per ongeluk in een onder spanning staande
draad zaagt.
8. Laat de machine nooit ingeschakeld achter.
Schakel de machine alleen in wanneer u deze
vast houdt.
9. Schakel altijd de machine uit en wacht tot het
zaagblad volledig tot stilstand is gekomen
alvorens het zaagblad van het werkstuk te
verwijderen.
10. Raak het zaagblad of het werkstuk niet aan
onmiddellijk na gebruik; deze kunnen uiterst
heet zijn en brandwonden veroorzaken.
BEWAAR DEZE VOORSCHRIFTEN.
AANVULLENDE
VEILIGHEIDSVOORSCHRIFTEN
1. Vermijd het zagen op spijkers. Controleer het
werkstuk alvorens te gaan zagen en verwijder
alle eventueel aanwezige spijkers.
2. Zaag geen bovenmaatse werkstukken.
3. Alvorens te gaan zagen, controleren of er
achter het werkstuk voldoende vrije ruimte is,
zodat het zaagblad niet tegen de vloer, de
werkbank e.d. zal stoten.
4. Houd de machine stevig vast.
5. Zorg ervoor dat het zaagblad niet met het
werkstuk in aanraking is wanneer u de
machine inschakelt.
6. Houd uw handen uit de buurt van bewegende
onderdelen van de machine.
BEDIENINGSVOORSCHRIFTEN
Installatie zaagblad (Fig. 1)
Belangrijk:
Kontroleer alltijd of het gereedschap is uitgeschakeld
en de stekker uit het stopkontakt is verwijderd alvorens het zaagblad te verwijderen of te installeren.
Het blad wordt door het voorste gedeelte van de zool
geschoven zodat het gaatje past over de nok aan de
binnenkant van de klem. Zet daarna de imbusbout
goed vast.
Verstelbare schoen (Fig. 2)
Draai de twee borgbouten van de zoolplaat los. Schuif
dan de zoolplaat heen en weer tot in de gewenste
positie en draai de twee bouten stevig vast. Wanneer
een bepaald gedeelte van het blad niet meer goed
snijdt, dient u de positie van de schoen te veranderen
om met een beter snijdend gedeelte te kunnen
werken.
11
Page 6

Veranderen van het toerental
(Alleen voor JR3000) (Fig. 3)
LET OP:
Bedien de toerentalschakelaar alleen nadat de
machine volledig tot stilstand is gekomen.
Om het toerental van de machine te veranderen, de
toerentalschakelaar op ‘‘L’’ zetten voor laag toerental
of op ‘‘H’’ voor hoog toerental.
Hoog toerental: gewoon hout, gelaagd hout of plastic
Laag toerental: metalen (staalpijp, plaatstaal, roestvrij
staal of koper)
Werking van de trekschakelaar (Voor JR3000)
(Fig. 4)
LET OP:
Alvorens het netsnoer van de machine op een stopcontact aan te sluiten, altijd eerst controleren of de
trekschakelaar behoorlijk werkt en bij het loslaten
naar de ‘‘OFF’’ positie terugkeert.
Om de machine te starten, drukt u gewoon de trekschakelaar in. Laat de schakelaar los om de machine
te stoppen. Voor continu gebruik, eerst de trekschakelaar en dan de vastzetknop indrukken. Om de
machine vanuit de vergrendelde stand te stoppen, de
trekschakelaar helemaal indrukken en dan loslaten.
Trekschakelaar (Voor JR3000V) (Fig. 5)
Voor continu gebruik met het gewenste toerental.
Deze schroef kan tegelijk gebruikt worden met de
vastzetknop om een geschikt toerental te bereiken
tussen de 0 — 2 300 t.p.m. Deze schroef wordt ingedraaid voor lagere toeren. Daarna wordt de trekschakelaar ingedrukt zover als deze wil gaan en in
deze positie vastgezet door de vastzetknop. Daarna
trekschakelaar loslaten en de machine draait continu
het bereikte toerental. Om te stoppen de trekschakelaar weer indrukken en loslaten.
Voorzieningen bij het zagen
Bij het zagen altijd de zool tegen het materiaal
drukken. Wanner dit niet wordt gedaan kan het zaagblad buigen en breken.
LET OP:
Wanneer u te hard drukt, raakt het zaagblad verbogen of vervormd en kan het breken.
Zagen van metaal (Fig. 6)
Gebruik koelolie op het zaagblad bij het zagen van
metaal, daar anders de levensduur van het zaagblad
word verkort.
ONDERHOUD
LET OP:
Zorg er altijd voor dat de machine is uitgeschakeld en
de stekker uit het stopcontact is verwijderd alvorens
werken aan de machine uit te voeren.
Vervangen van koolborstels
(Alleen voor JR3000) (Fig. 7 en 8)
Vervang de borstels wanneer ze tot aan de aangegeven limiet zijn afgesleten. Beide koolborstels
dienen tegelijkertijd te worden vervangen.
Opdat het gereedschap veilig en betrouwbaar blijft,
dienen alle reparaties, onderhoud of afstellingen te
worden uitgevoerd bij een erkend Makita service
centrum.
12
 Loading...