

Makita CL070D Series, CL100D Series, CL070DS, CL070DZ, CL070DZX Technical Information
...
T
ECHNICAL INFORMATION
Models No.
Description
CL070D, CL100D
Cordless Cleaner
PRODUCT
P 1/ 6
H
CONCEPT AND MAIN APPLICATIONS
Models CL070D and CL100D are handy cordless cleaners of
cloth filtration type powered by Makita Li-ion battery;
CL070D by 7.2V/1.0Ah battery BL7010,
CL100D by 10.8V/1.3Ah battery BL1013.
These products are available in the following variations.
CL070D
Model No.
CL070DS
CL070DZ
CL070DZX
CL100D
Model No.
CL100DW
CL100DZ
CL100DZX
The models also includes the accessories listed below
in "Standard equipment".
(Li-ion 1.0Ah)
(Li-ion 1.3Ah)
Battery
type quantity
BL7010
Battery
type quantity
BL1013
1
1
Charger
DC07SA
NoNo
Charger
DC10WA
NoNo
Housing
color
Ivory
Ivory
Makita-blue
Housing
color
Ivory
Ivory
Makita-blue
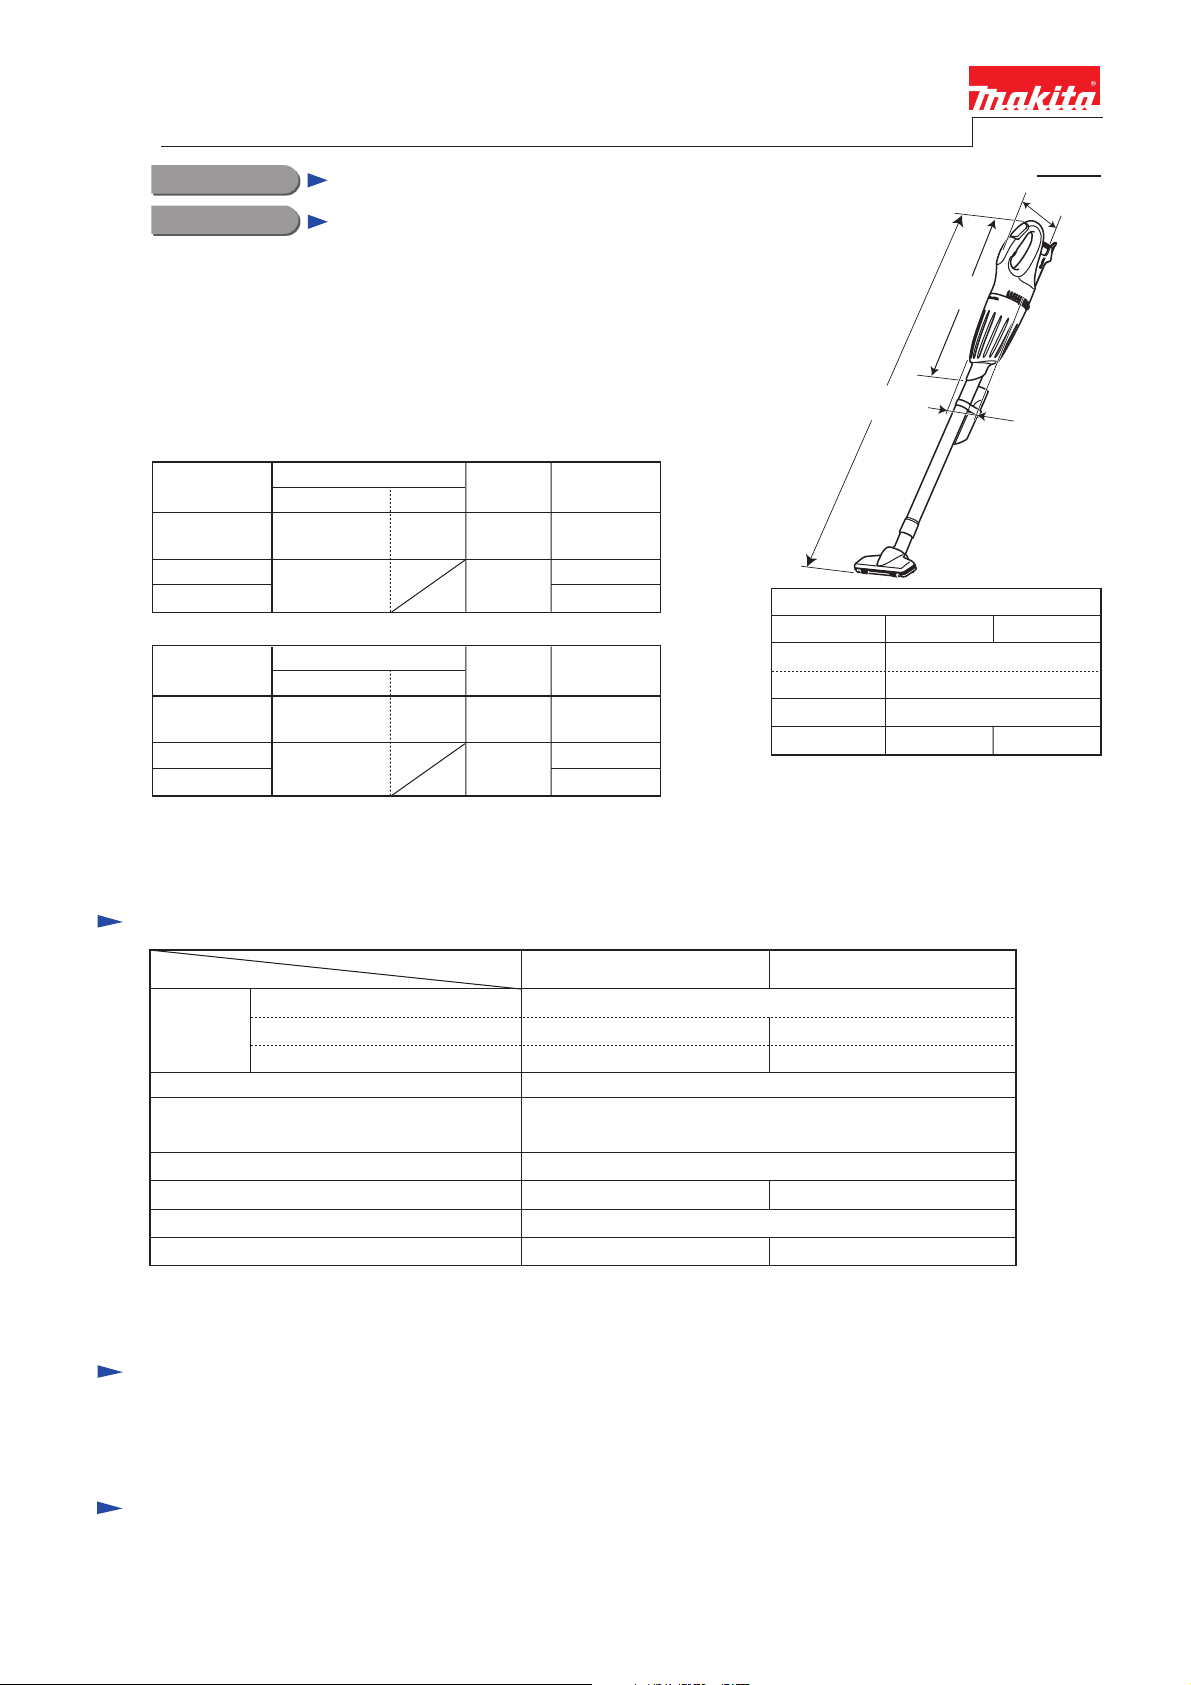
L1
L2
Dimensions: mm (")
CL070D CL100D
Length (L1) 454 (17-7/8)
Length (L2) 966 (38)
Width (W)
Height (H)
L1: without T-nozzle and Extension pipe
L2: with T-nozzle and Extension pipe
142 (5-5/8) 150 (5-7/8)
W
103 (4-1/16)
Specification
Specification
Cell
Battery
Max. air flow: m3/minute
Max. sealed suction: kPa [Column of water]
Suction power: W
Continuous use (approx.): minute
Dust capacity: mL
Net weight*1: kg (lbs)
*1 Weight according to EPTA-Procedure 01/2003
*2 with Battery BL7010, without T-nozzle and Extension pipe
*3 with Battery BL1013, without T-nozzle and Extension pipe
Voltage: V
Capacity: Ah
Model
CL070D CL100D
7.2
1.0
[180mmH2O]
0.81 (1.8)*2 0.88 (1.9)*3
Standard equipment
Nozzle assembly (T-nozzle) ........ 1
Pipe (Extension pipe) .................. 1
Note: The standard equipment for the tool shown above may vary by country.
Sash nozzle ..................... 1
Sash nozzle holder .......... 1
Li-ion
10.8
1.3
1.2
1.8
14
128
600
Filter (factory-mounted) ............... 1
Pre-filter (factory-mounted) ......... 1
Optional accessories
Battery BL7010 (CL070D only)
Battery BL1013 (CL100D only)
Charger DC07SA (CL070D only)
Charger DC10WA
Nozzle assembly (for rug/carpet)
Shelf brush
Flexible hose
Round brush
Filter
Pre-filter
P 2/ 6
Repair
CAUTION: Remove the battery cartridge from the machine for safety before repair/
maintenance in accordance with the instruction manual!
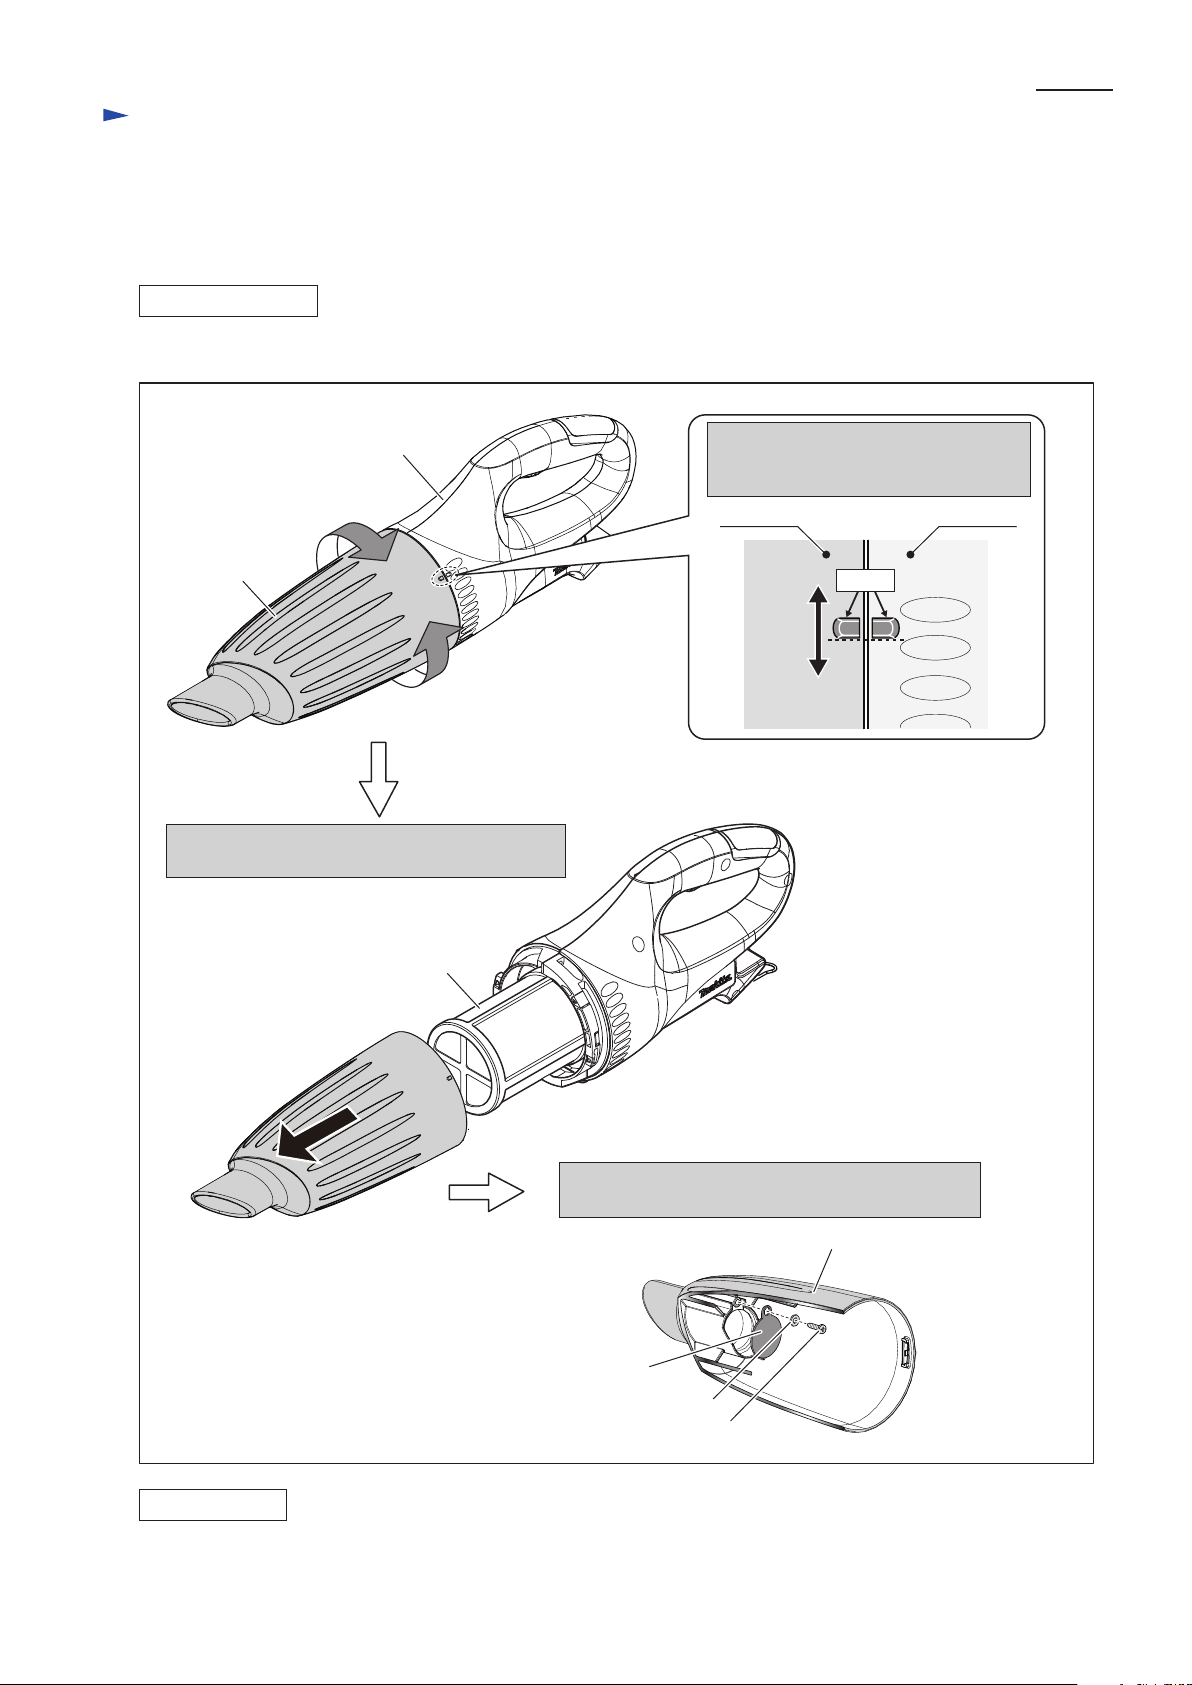
[3] DISASSEMBLY/ASSEMBLY
[3]-1. Capsule Section
DISASSEMBLING
ASSEMBLING
Do the reverse of the disassembly steps. (Fig. 1)
2) Separate Capsule from Housing by pulling it
in the direction of the arrow.
3) Remove 4x18 Tapping screw and Flat washer 4.
Valve can now be disassembled from Capsule.
4x18 Tapping screw
Flat washer 4
Valve
Capsule
Pre-filter
Capsule section can be disassembled as illustrated in Fig. 1.
Capsule
Housing
Mark
1) Align the Mark of Capsule with
that of Housing by turning Capsule
clockwise or counterclockwise.
Fig. 1
Capsule
Housing
 Loading...