

Page 1
GB Finishing Sander Instruction manual
F Ponceuse de finissage Manuel d’instructions
D Schwingschleifer Betriebsanleitung
I Levigatrice orbitale Istruzioni per l’uso
NL Afwerkschuurmachine Gebruiksaanwijzing
E Lijadora orbital Manual de instrucciones
P Lixadeira Manual de instruções
DK Sandsliber Brugsanvisning
GR Παλμικό τριβείο Οδηγίες χρήσης
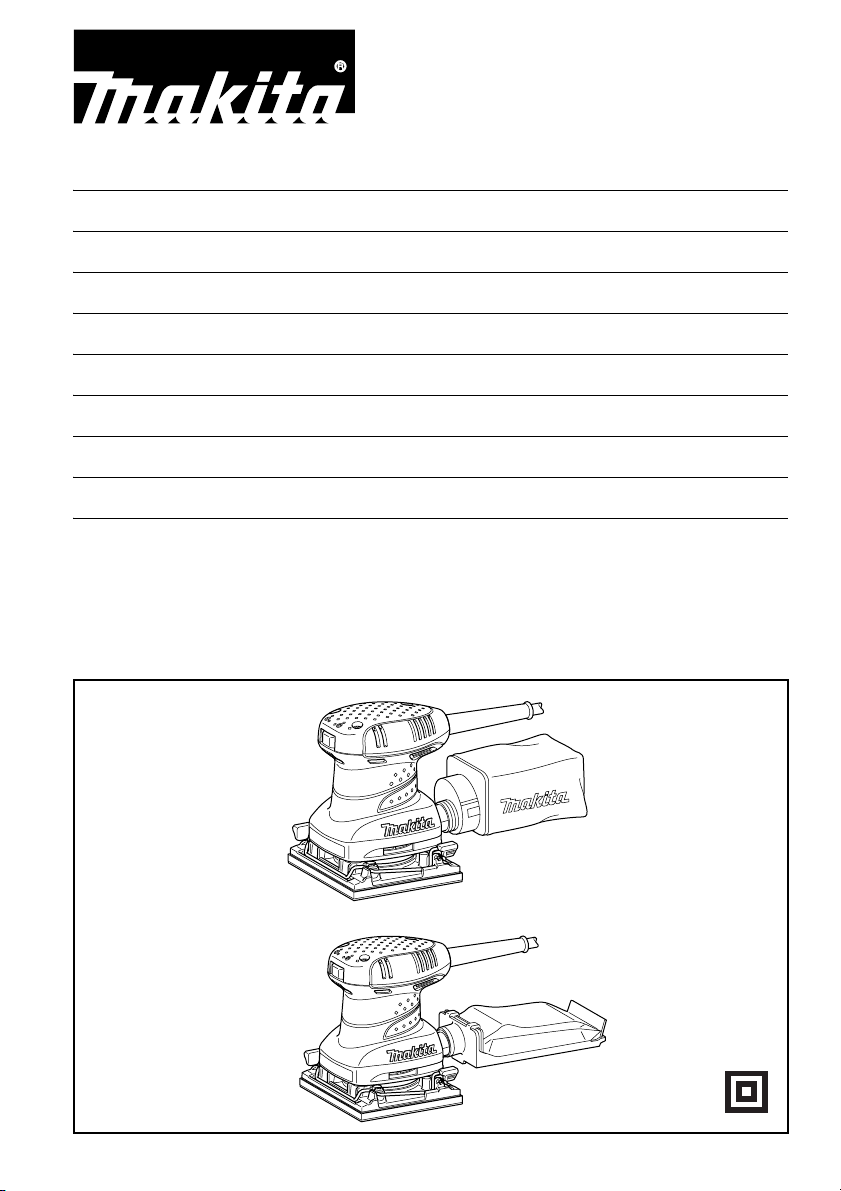
BO4555
BO4556
BO4557
BO4558
Page 2

1
12
2
3
4
34
6
5
7
56
9
8
10
11
12
78
2
Page 3

4
13
910
11
3
Page 4

ENGLISH (Original instructions)
Explanation of general view
1. Switch
2. Punch plate
3. Sandpaper
4. Guide
5. Velcro sandpaper
6. Base
7. Dust bag
8. Groove
9. Front fixing cardboard
10. Front side of paper dust bag
11. Claws
12. Upper part
13. Notch
SPECIFICATIONS
Model BO4555 BO4556 BO4558 BO4557
Pad size 112 mm x 102 mm
Orbits per minute (min
Dimensions (L x W x H)
Net weight 1.1 kg 1.2 kg 1.0 kg
Safety class /II
• Due to our continuing programme of research and development, the specifications herein are subject to change without
notice.
• Specifications may differ from country to country.
• Weight according to EPTA-Procedure 01/2003
Intended use
The tool is intended for the sanding of large surface of
wood, plastic and metal materials as well as painted
surfaces.
Power supply
The tool should be connected only to a power supply of
the same voltage as indicated on the nameplate, and can
only be operated on single-phase AC supply. They are
double-insulated in accordance with European Standard
and can, therefore, also be used from sockets without
earth wire.
General Power Tool Safety
Warnings GEA010-1
WARNING Read all safety warnings and all
instructions. Failure to follow the warnings and
instructions may result in electric shock, fire and/or
serious injury.
-1
) 14,000
131 mm x 112 mm x
142 mm
ENE052-1
ENF002-1
131 mm x 112 mm x 141 mm
6. Some material contains chemicals which may be
toxic. Take caution to prevent dust inhalation and
skin contact. Follow material supplier safety data.
7. Use of this tool to sand some products, paints and
wood could expose user to dust containing
hazardous substances. Use appropriate
respiratory protection.
8. Be sure that there are no cracks or breakage on
the pad before use. Cracks or breakage may cause
a personal injury.
131 mm x 112 mm x
137 mm
SAVE THESE INSTRUCTIONS.
WARNING:
DO NOT let comfort or familiarity with product (gained
from repeated use) replace strict adherence to safety
rules for the subject product. MISUSE or failure to
follow the safety rules stated in this instruction
manual may cause serious personal injury.
FUNCTIONAL DESCRIPTION
Save all warnings and
instructions for future reference.
SANDER SAFETY WARNINGS
GEB021-4
1. Always use safety glasses or goggles. Ordinary
eye or sun glasses are NOT safety glasses.
2. Hold the tool firmly.
3. Do not leave the tool running. Operate the tool
only when hand-held.
4. This tool has not been waterproofed, so do not
use water on the workpiece surface.
5. Ventilate your work area adequately when you
perform sanding operations.
CAUTION:
• Always be sure that the tool is switched off and
unplugged before adjusting or checking function on the
tool.
Switch action (Fig. 1)
CAUTION:
• Before plugging in the tool, always check to see that
the tool is switched off.
To start the tool, press the “ I ” side of the switch. To stop
the tool, press the “O”side of the switch.
4
Page 5

ASSEMBLY
CAUTION:
• Always be sure that the tool is switched off and
unplugged before carrying out any work on the tool.
Installing or removing abrasive paper
(Fig. 2)
Open the paper clamp by raising on the lever to release
from the locking port and then Insert the paper end into
the clamping part, aligning the paper edges even and
parallel with the sides of the base. (Bending the paper
beforehand makes attachment easier). Once the paper is
in place, return the lever to its original position. (Fig. 3)
Repeat the same process for the other end of the base,
maintaining the proper paper tension.
After inserting the paper, make sure the clamping part
hold it securely. Otherwise the paper will be loose and
subject to slippage, resulting in uneven sanding operation.
(Fig. 4)
When using the dust bag, make holes in the abrasive
paper using the punch plate as follows:
1. Set the tool upside down.
2. Place the punch plate over the abrasive paper so that
the bent sides of the punch plate are flush with the
paper edges.
3. Press the punch plate to make holes in the abrasive
paper.
CAUTION:
• Be sure to remove the punch plate before operating the
tool.
Model BO4555 only
NOTE:
Use Makita hook-and-loop sandpaper with this sander.
(Fig. 5)
1. Set the tool upside down so that the pad is on top.
2. Position the sandpaper to fit the shape of the base. Be
sure to align the holes on the sandpaper with the
holes on the pad (the dust will be sucked into these
holes; it is therefore important to leave them open).
3. Press the paper firmly over the pad.
To remove the sandpaper:
1. Set the tool upside down so that the sandpaper is on
top.
2. Grasping one corner of the sandpaper, peel it from the
pad.
NOTE:
• If the sandpaper is in good condition, save it for further
use.
Dust bag (accessory) (Fig. 6)
The use of the dust bag makes sanding operations clean
and dust collection easy. To attach the dust bag, fit the
bag’s entry port onto the dust spout on the tool. Make sure
that the hole in the bag’s entry port is just over the pimplelike protrusion on the dust spout. For the best results,
empty the dust bag when it becomes approximately half
full, tapping it lightly to remove as much dust as possible.
Installing paper dust bag (accessory)
(Fig. 7)
Place the paper dust bag on the paper dust bag holder
with its front side upward. Insert the front fixing cardboard
of the paper dust bag into the groove of the paper dust
bag holder. (Fig. 8)
Then press the upper part of the front fixing cardboard in
arrow direction to hook it onto the claws. (Fig. 9 & 10)
Insert the notch of the paper dust bag into the guide of the
paper dust bag holder. Then install the paper dust bag
holder set on the tool.
OPERATION
Sanding operation (Fig. 11)
CAUTION:
• Never run the tool without the abrasive paper. You may
seriously damage the pad.
• Never force the tool. Excessive pressure may decrease
the sanding efficiency, damage the abrasive paper
and/or shorten tool life.
Hold the tool firmly. Turn the tool on and wait until it
attains full speed. Then gently place the tool on the
workpiece surface. A finishing sander is generally used to
remove only a small amount of material at a time. Since
the quality of the surface is more important than the
amount of stock removed, do not bear down on the tool.
Keep the base flush with the workpiece at all times.
MAINTENANCE
CAUTION:
• Always be sure that the tool is switched off and
unplugged before attempting to perform inspection or
maintenance.
To maintain product SAFETY and RELIABILITY, repairs,
carbon brush inspection and replacement, any other
maintenance or adjustment should be performed by
Makita Authorized Service Centers, always using Makita
replacement parts.
ACCESSORIES
CAUTION:
• These accessories or attachments are recommended
for use with your Makita tool specified in this manual.
The use of any other accessories or attachments might
present a risk of injury to persons. Only use accessory
or attachment for its stated purpose.
If you need any assistance for more details regarding
these accessories, ask your local Makita Service Center.
• Abrasive paper (without pre-punched holes)
• Paper dust bag
• Paper dust bag holder
• Punch plate
• Dust bag
For Model BO4555
Noise
The typical A-weighted noise level determined according
to EN60745:
Sound pressure level (L
Uncertainty (K): 3 dB (A)
): 80 dB (A)
pA
ENG104-2
5
Page 6

The noise level under working may exceed 80 dB (A).
Wear ear protection.
Vibration
ENG212-2
The vibration total value (tri-axial vector sum) determined
according to EN60745:
Work mode: sanding metal plate
Vibration emission (a
Uncertainty (K): 1.5 m/s
): 2.5 m/s2 or less
h
2
For Model BO4556
Noise
ENG102-3
The typical A-weighted noise level determined according
to EN60745:
Sound pressure level (L
Sound power level (L
Uncertainty (K): 3 dB (A)
): 82 dB (A)
pA
): 93 dB (A)
WA
Wear ear protection.
Vibration
ENG211-2
The vibration total value (tri-axial vector sum) determined
according to EN60745:
Work mode: sanding metal plate
Vibration emission (a
Uncertainty (K): 1.5 m/s
): 3 m/s
h
2
2
For Model BO4557
Noise
ENG104-2
The typical A-weighted noise level determined according
to EN60745:
Sound pressure level (L
Uncertainty (K): 3 dB (A)
): 76 dB (A)
pA
The noise level under working may exceed 80 dB (A).
Wear ear protection.
Vibration
ENG211-2
The vibration total value (tri-axial vector sum) determined
according to EN60745:
Work mode: sanding metal plate
Vibration emission (a
Uncertainty (K): 1.5 m/s
h
): 3.5 m/s
2
2
For Model BO4558
Noise
ENG104-2
The typical A-weighted noise level determined according
to EN60745:
Sound pressure level (L
Uncertainty (K): 3 dB (A)
): 79 dB (A)
pA
The noise level under working may exceed 80 dB (A).
Wear ear protection.
Vibration
ENG211-2
The vibration total value (tri-axial vector sum) determined
according to EN60745:
Work mode: sanding metal plate
Vibration emission (a
Uncertainty (K): 1.5 m/s
h
): 3.5 m/s
2
2
ENG901-1
• The declared vibration emission value has been
measured in accordance with the standard test method
and may be used for comparing one tool with another.
• The declared vibration emission value may also be
used in a preliminary assessment of exposure.
WARNING:
• The vibration emission during actual use of the power
tool can differ from the declared emission value
depending on the ways in which the tool is used.
• Be sure to identify safety measures to protect the
operator that are based on an estimation of exposure in
the actual conditions of use (taking account of all parts
of the operating cycle such as the times when the tool
is switched off and when it is running idle in addition to
the trigger time).
For European countries only
ENH101-13
EC Declaration of Conformity
We Makita Corporation as the responsible
manufacturer declare that the following Makita
machine(s):
Designation of Machine: Finishing Sander
Model No./Type: BO4555, BO4556, BO4557, BO4558
are of series production and
Conforms to the following European Directives:
98/37/EC until 28th December 2009 and then with
2006/42/EC from 29th December 2009
And are manufactured in accordance with the following
standards or standardised documents:
EN60745
The technical documentation is kept by our authorised
representative in Europe who is:
Makita International Europe Ltd.,
Michigan, Drive, Tongwell,
Milton Keynes, MK15 8JD, England
8th April 2009
Tomoyasu Kato
Director
Makita Corporation
3-11-8, Sumiyoshi-cho,
Anjo, Aichi, JAPAN
6
Page 7

NEDERLANDS (Originele instructies)
Verklaring van algemene gegevens
1. Aan/uit-knop
2. Gatenpons
3. Schuurpapier
4. Geleider
5. Klittenbandschuurpapier
6. Zool
7. Stofzak
8. Groef
9. Bevestigingskarton aan de
voorkant
10. Voorkant van papieren stofzak
11. Klauwen
12. Bovenste deel
13. Inkepingen
TECHNISCHE GEGEVENS
Model BO4555 BO4556 BO4558 BO4557
Grootte van schuurvlak 112 mm x 102 mm
Aantal rondgangen per
minuut (min
Afmetingen (L x B x H)
Netto gewicht 1,1 kg 1,2 kg 1,0 kg
Veiligheidsklasse /II
• Als gevolg van ons doorlopende onderzoeks- en ontwikkelingsprogramma, kunnen de technische gegevens van dit
gereedschap zonder voorafgaande kennisgeving worden gewijzigd.
• De technische gegevens kunnen van land tot land verschillen.
• Gewicht volgens EPTA-procedure 01/2003
Gebruiksdoeleinden
Het gereedschap is bedoeld voor het schuren van grote
oppervlakken hout, kunststof en metaal, naast geverfde
oppervlakken.
Voeding
Het gereedschap mag uitsluitend worden aangesloten op
een voeding met dezelfde spanning als aangegeven op
het identificatieplaatje en werkt alleen op enkele-fase
wisselstroom. Het gereedschap is dubbel geïsoleerd
volgens de Europese norm en mag derhalve ook op een
niet-geaard stopcontact worden aangesloten.
-1
)
131 mm x 112 mm x
142 mm
ENE052-1
ENF002-1
131 mm x 112 mm x 141 mm
Algemene
veiligheidswaarschuwingen voor
elektrisch gereedschap GEA010-1
WAARSCHUWING Lees alle
veiligheidswaarschuwingen en alle instructies. Het
niet volgen van de waarschuwingen en instructies kan
leiden tot elektrische schokken, brand en/of ernstig letsel.
14.000
131 mm x 112 mm x
137 mm
4. Dit gereedschap is niet waterdicht. Gebruik dus
geen water op het oppervlak van het werkstuk.
5. Zorg voor afdoende ventilatie van uw werkplek
wanneer u schuurwerkzaamheden uitvoert.
6. Sommige materialen bevatten chemische stoffen
die giftig kunnen zijn. Neem
voorzorgsmaatregelen tegen het inademen van
stof en contact met de huid. Volg de
veiligheidsinstructies van de leverancier van het
materiaal op.
7. Als dit gereedschap wordt gebruikt voor het
schuren van bepaalde producten, verflagen en
hout, kan de gebruiker worden blootgesteld aan
stof waarin gevaarlijke bestanddelen zitten.
Gebruik geschikte
ademhalingbeschermingsapparatuur.
8. Controleer vóór gebruik dat het schuurvlak niet is
gebarsten of kapot is. Als er barsten in zitten of
het oppervlak kapot is kan dit leiden tot
persoonlijk letsel.
BEWAAR DEZE INSTRUCTIES.
Bewaar alle waarschuwingen en
instructies om in de toekomst te
kunnen raadplegen.
VEILIGHEIDSWAARSCHUWINGEN
SCHUURMACHINE
1. Gebruik altijd een veiligheidsbril. Een gewone bril
of een zonnebril is GEEN veiligheidsbril.
2. Houd het gereedschap stevig vast.
3. Laat het gereedschap niet ingeschakeld liggen.
Bedien het gereedschap alleen wanneer u het
vasthoudt.
GEB021-4
WAARSCHUWING:
Laat u NIET misleiden door een vals gevoel van
comfort en bekendheid met het gereedschap (na
veelvuldig gebruik) en neem alle
veiligheidsvoorschriften van het betreffende product
altijd strikt in acht. VERKEERD GEBRUIK of het niet
volgen van de veiligheidsinstructies in deze
gebruiksaanwijzing kan leiden tot ernstig persoonlijk
letsel.
18
Page 8

BESCHRIJVING VAN DE
FUNCTIES
LET OP:
• Controleer altijd of het gereedschap is uitgeschakeld
en de stekker uit het stopcontact is getrokken alvorens
de functies van het gereedschap te controleren of af te
stellen.
Aan/uit-schakelaar (zie afb. 1)
LET OP:
• Controleer voor u de stekker in het stopcontact steekt
altijd of de machine uitgeschakeld is.
Druk om de machine te starten op de zijde “I” van de
schakelaar. Druk om de machine te stoppen op de zijde
“O” van de schakelaar.
ONDERDELEN AANBRENGEN/
VERWIJDEREN
LET OP:
• Controleer altijd of het gereedschap is uitgeschakeld
en de stekker uit het stopcontact is getrokken alvorens
enige werk aan het gereedschap uit te voeren.
Het schuurpapier aanbrengen en
verwijderen (zie afb. 2)
Open de papierklem door de klemhendel iets op te tillen
zodat deze uit de vergrendelhaak loskomt. Steek daarna
het uiteinde van het schuurpapier in de klemmond en let
erop dat de rand van het schuurpapier evenwijdig loopt
aan de zijkant van de zool. (Als u van tevoren het
schuurpapier buigt, kunt u het gemakkelijker
aanbrengen.) Als het schuurpapier op de juiste plaats ligt,
zet u de klemhendel terug in de gesloten stand
(zie afb. 3).
Herhaal dezelfde werkwijze voor de andere uiteinde van
het schuurpapier en zorg daarbij voor de juiste
papierspanning.
Nadat u het uiteinde van het schuurpapier in de
klemmond hebt gestoken, zorgt u ervoor dat het stevig
wordt vastgeklemd. Als u dat niet doet, zal het
schuurpapier los gaan zitten en verschuiven waardoor
een ongelijkmatige schuurbediening ontstaat (zie afb. 4).
Bij gebruik van de stofzak maakt u met behulp van de
gatenpons als volgt gaten in het schuurpapier:
1. Plaats het gereedschap ondersteboven.
2. Plaats de gatenpons zodanig op het schuurpapier dat
de omgevouwen zijden van de gatenpons langs de
randen van het schuurpapier liggen.
3. Duw op de gatenpons om gaten te maken in het
schuurpapier.
LET OP:
• Vergeet niet de gatenpons van het gereedschap af te
halen alvorens het gereedschap te gebruiken.
Alleen model BO4555
OPMERKING:
Gebruik met deze schuurmachine alleen
klittenbandschuurpapier van Makita (zie afb. 5).
1. Plaats het gereedschap ondersteboven zodat het
schuurvlak naar boven wijst.
2. Plaats het schuurpapier precies op de vorm van de
zool. Zorg ervoor dat de gaten in het schuurpapier
uitgelijnd zijn met de gaten in het schuurvlak (deze
gaten moeten open blijven omdat het stof hierin wordt
gezogen).
3. Druk het schuurpapier stevig op het schuurvlak.
Om het schuurpapier te verwijderen:
1. Plaats het gereedschap ondersteboven zodat het
schuurpapier naar boven wijst.
2. Pak een hoek van het schuurpapier beet en trek het
van het schuurvlak af.
OPMERKING:
• Als het schuurpapier nog goed is, kunt u het bewaren
om later nogmaals te gebruiken.
Stofzak (los verkrijgbaar) (zie afb. 6)
Door de stofzak te gebruiken werkt u schoon en kan het
schuurstof eenvoudig worden opgeruimd. Om de stofzak
te bevestigen, plaatst u de inlaatmond van de stofzak over
de stofuitwerpmond van het gereedschap. Zorg ervoor dat
het gaatje in de inlaatmond van de stofzak net over het
uitsteeksels op de stofuitwerpmond valt. Voor de beste
resultaten leegt u de stofzak wanneer deze ongeveer
halfvol is. Tik bij het legen voorzichtig tegen de stofzak om
zo veel mogelijk stof eruit te verwijderen.
Een papieren stofzak (los verkrijgbaar)
aanbrengen (zie afb. 7)
Plaats de papieren stofzak op de papieren-stofzakhouder
met de voorkant omhoog. Steek het bevestigingskarton
aan de voorkant van de papieren stofzak in de gleuf van
de papieren-stofzakhouder (zie afb. 8).
Duw vervolgens het bovenste deel van het
bevestigingskarton aan de voorkant van de papieren
stofzak in de richting van de pijl om dit aan de klauwen
vast te haken (zie afb. 9 en 10).
Steek inkepingen op de achterkant van de papieren
stofzak in de geleider van de papieren-stofzakhouder.
Bevestig tenslotte de papieren-stofzakhouder aan het
gereedschap.
BEDIENING
Schuren (zie afb. 11)
LET OP:
• Schakel het gereedschap nooit in zonder dat
schuurpapier is aangebracht. Hierdoor kan het
schuurvlak ernstig worden beschadigd.
• Dwing het gereedschap nooit. Door buitensporige druk
kan de efficiëntie van het schuren lager worden, het
schuurpapier beschadigd worden en/of de levensduur
van het gereedschap verkort worden.
Houd het gereedschap stevig vast. Schakel het
gereedschap in en wacht totdat het op volle snelheid
draait. Plaats daarna het gereedschap voorzichtig op het
oppervlak van het werkstuk. Een afwerkschuurmachine
wordt doorgaans gebruikt om slechts een kleine
hoeveelheid materiaal tegelijkertijd te verwijderen.
Aangezien de kwaliteit van het oppervlak belangrijker is
dan de hoeveelheid verwijderd materiaal, mag u geen
grote druk uitoefenen op het gereedschap. Houd de zool
te allen tijde vlak met het oppervlak van het werkstuk.
19
Page 9

ONDERHOUD
LET OP:
• Zorg er altijd voor dat het gereedschap is
uitgeschakeld en de stekker uit het stopcontact is
getrokken, voordat u een inspectie of onderhoud
uitvoert.
Om de VEILIGHEID en BETROUWBAARHEID van het
gereedschap te handhaven, dienen alle reparaties,
controle en vervanging van de koolborstels, onderhoud en
afstellingen te worden uitgevoerd door een erkend
Makita-servicecentrum, en altijd met gebruikmaking van
originele Makita-vervangingsonderdelen.
ACCESSOIRES
LET OP:
• Deze accessoires of hulpstukken worden aanbevolen
voor gebruik met het Makita-gereedschap dat in deze
gebruiksaanwijzing wordt beschreven. Het gebruik van
andere accessoires of hulpstukken kan gevaar voor
persoonlijk letsel opleveren. Gebruik de accessoires of
hulpstukken uitsluitend voor de aangegeven
gebruiksdoeleinden.
Mocht u meer informatie willen hebben over deze
accessoires, dan kunt u contact opnemen met uw
plaatselijke Makita-servicecentrum.
• Schuurpapier (zonder gaten)
• Papieren stofzak
• Papieren-stofzakhouder
• Gatenpons
•Stofzak
Voor model BO4555
Geluid
De typische, A-gewogen geluidsniveaus zijn gemeten
volgens EN60745:
Geluidsdrukniveau (L
Onzekerheid (K): 3 dB (A)
): 80 dB (A)
pA
Het geluidsniveau kan tijdens gebruik hoger worden dan
80 dB (A).
Draag gehoorbescherming.
Trilling
De totale trillingswaarde (triaxiale vectorsom) zoals
vastgesteld volgens EN60745:
Gebruikstoepassing: schuren van metalen platen
Trillingsemissie (a
Onzekerheid (K): 1,5 m/s
): 2,5 m/s2 of minder
h
2
Voor model BO4556
Geluid
De typische, A-gewogen geluidsniveaus zijn gemeten
volgens EN60745:
Geluidsdrukniveau (L
Geluidsvermogenniveau (L
Onzekerheid (K): 3 dB (A)
): 82 dB (A)
pA
wA
): 93 dB (A)
Draag gehoorbescherming.
Trilling
De totale trillingswaarde (triaxiale vectorsom) zoals
vastgesteld volgens EN60745:
Gebruikstoepassing: schuren van metalen platen
Trillingsemissie (a
Onzekerheid (K): 1,5 m/s
): 3 m/s
h
2
2
ENG104-2
ENG212-2
ENG102-3
ENG211-2
Voor model BO4557
Geluid
ENG104-2
De typische, A-gewogen geluidsniveaus zijn gemeten
volgens EN60745:
Geluidsdrukniveau (L
Onzekerheid (K): 3 dB (A)
): 76 dB (A)
pA
Het geluidsniveau kan tijdens gebruik hoger worden dan
80 dB (A).
Draag gehoorbescherming.
Trilling
ENG211-2
De totale trillingswaarde (triaxiale vectorsom) zoals
vastgesteld volgens EN60745:
Gebruikstoepassing: schuren van metalen platen
Trillingsemissie (a
Onzekerheid (K): 1,5 m/s
h
): 3,5 m/s
2
2
Voor model BO4558
Geluid
ENG104-2
De typische, A-gewogen geluidsniveaus zijn gemeten
volgens EN60745:
Geluidsdrukniveau (L
Onzekerheid (K): 3 dB (A)
): 79 dB (A)
pA
Het geluidsniveau kan tijdens gebruik hoger worden dan
80 dB (A).
Draag gehoorbescherming.
Trilling
ENG211-2
De totale trillingswaarde (triaxiale vectorsom) zoals
vastgesteld volgens EN60745:
Gebruikstoepassing: schuren van metalen platen
Trillingsemissie (a
Onzekerheid (K): 1,5 m/s
h
): 3,5 m/s
2
2
ENG901-1
• De opgegeven trillingsemissiewaarde is gemeten
volgens de standaardtestmethode en kan worden
gebruikt om dit gereedschap te vergelijken met andere
gereedschappen.
• De opgegeven trillingsemissiewaarde kan ook worden
gebruikt voor een beoordeling vooraf van de
blootstelling.
WAARSCHUWING:
• De trillingsemissie tijdens het gebruik van het elektrisch
gereedschap in de praktijk kan verschillen van de
opgegeven trillingsemissiewaarde afhankelijk van de
manier waarop het gereedschap wordt gebruikt.
• Zorg ervoor dat veiligheidsmaatregelen worden
getroffen ter bescherming van de operator die zijn
gebaseerd op een schatting van de blootstelling onder
praktijkomstandigheden (rekening houdend met alle
fasen van de bedrijfscyclus, zoals de tijdsduur
gedurende welke het gereedschap is uitgeschakeld en
stationair draait, naast de ingeschakelde tijdsduur).
Alleen voor Europese landen
ENH101-13
EU-verklaring van conformiteit
Wij, Makita Corporation, als de verantwoordelijke
fabrikant, verklaren dat de volgende Makitamachine(s):
Aanduiding van de machine: Afwerkschuurmachine
Modelnr./Type: BO4555, BO4556, BO4557 en BO4558
in serie zijn geproduceerd en
Voldoen aan de volgende Europese richtlijnen:
98/37/EC tot en met 28 december 2009 en daarna
aan 2006/42/EC vanaf 29 december 2009
20
Page 10

En zijn gefabriceerd in overeenstemming met de
volgende normen of genormaliseerde documenten:
EN60745
De technische documentatie wordt bewaard door onze
erkende vertegenwoordiger in Europa, te weten:
Makita International Europe Ltd.,
Michigan Drive, Tongwell,
Milton Keynes, MK15 8JD, Engeland
8 april 2009
Tomoyasu Kato
Directeur
Makita Corporation
3-11-8, Sumiyoshi-cho,
Anjo, Aichi, JAPAN
21
Page 11

Makita Corporation
Anjo, Aichi, Japan
884717F998 www.makita.com
ALA
 Loading...