

Makita 447M User Manual
447 M
R
auto
english Operating Instructions................................1-13
deutsch Betriebsanleitung......................................14-26
français Notice d’utilisation....................................27-39
nederlands Gebruiksaanwijzing ..................................40-52
italiano Istruzioni sull’uso......................................53-65
dansk Driftsvejledning.........................................66-78
español Instrucciones de manejo .......................... 79-91
português Instruções de operação..........................92-104
302001615 - 2008-11-12
MAKITA 447 M
1
8
7
auto
2
3
6
4
5
DEUTSCH
ERKLÄRUNG DER ÜBEREINSTIMMUNG MIT DEN
Hiermit erklärt der Unterzeichner, Tomoyasu Kato, Bevollmächtigter
von Makita Corporation, 3-11-8 Sumiyoshi-Cho, Anjo, Aichi, 446
Japan, dass die Sauger
hergestellt von ALTO Deutschland GmbH, Guido-Oberdorfer-Str.
2-8, D-89287 Bellenberg, gemäß den Ratsdirektiven 2006/42/EG,
2006/95/EG, 2004/108/EG und mit den folgenden Normen bzw.
Normendokumenten übereinstimmen:
EN ISO 12100-1 (2004) EN 60335-2-69 (2004)
EN ISO 12100-2 (2004) EN 61000-3-2 (2006)
EN 55014-1 (2006) EN 61000-3-3 (2005)
EN 55014-2 (2001)
EG-NORMEN
Model Makita 447 M
ENGLISH
CE-DECLARATION OF CONFORMITY
The undersigned Tomoyasu Kato, authorised by Makita Corporation,
3-11-8 Sumiyoshi-Cho, Anjo, Aichi, 446 Japan, declares that the
cleaners
Model Makita 447 M
manufactured by ALTO Deutschland GmbH, Guido-Oberdorfer-Str. 28, D-89287 Bellenberg are in compliance with the following standards
or standardized documents,
EN ISO 12100-1 (2004) EN 60335-2-69 (2004)
EN ISO 12100-2 (2004) EN 61000-3-2 (2006)
EN 55014-1 (2006) EN 61000-3-3 (2005)
EN 55014-2 (2001)
in accordance with Council Directives 2006/42/EC, 2006/95/EC and
2004/108/EC.
Tomoyasu Kato, Director Bellenberg, 2008-11-10
FRANÇAIS
DÉCLARATION DE CONFORMITÉ CE
Je soussigné Tomoyasu Kato, mandaté par Makita Corporation,
3-11-8 Sumiyoshi-Cho, Anjo, Aichi, 446 Japan, déclare que les
Aspirateurs
fabriquées par ALTO Deutschland GmbH, Guido-Oberdorfer-Str. 2-8,
D-89287 Bellenberg sont conformes aux normes ou aux documents
normalisés suivants,
EN ISO 12100-1 (2004) EN 60335-2-69 (2004)
EN ISO 12100-2 (2004) EN 61000-3-2 (2006)
EN 55014-1 (2006) EN 61000-3-3 (2005)
EN 55014-2 (2001)
conformément aux Directives du Conseil, 2006/42/CE, 2006/95/CE et
2004/108/CE.
Tomoyasu Kato, Director Bellenberg, 2008-11-10
Modèle Makita 447 M
Tomoyasu Kato, Director Bellenberg, 2008-11-10
NEDERLANDS
CE-VERKLARING VON CONFORMITEIT
De ondergetekende, Tomoyasu Kato, gevolmachigd door Makita
Corporation, 3-11-8 Sumiyoshi-Cho, Anjo, Aichi, 446 Japan, verklaart
dat de Stofzuigers
vervaardigd door ALTO Deutschland GmbH, Guido-OberdorferStr. 2-8, D-89287 Bellenberg vodoen aan de volgende normen of
genormaliseerde documenten,
EN ISO 12100-1 (2004) EN 60335-2-69 (2004)
EN ISO 12100-2 (2004) EN 61000-3-2 (2006)
EN 55014-1 (2006) EN 61000-3-3 (2005)
EN 55014-2 (2001)
in overeenstemming met de richtlijnen van de Raad, 2006/42/EG,
2006/95/EG en 2004/108/EG.
Tomoyasu Kato, Director Bellenberg, 2008-11-10
Model Makita 447 M
ITALIANO
DICHIARAZIONE DI CONFORMITA CON LE NORME DELLA
Il sottoscritto Tomoyasu Kato, con l'autorizzazione della Makita
Corporation, 3-11-8 Sumiyoshi-Cho, Anjo, Aichi, 446 Japan, dichiara
che i Aspiratore
fabbricate dalla ALTO Deutschland GmbH, Guido-Oberdorfer-Str.
2-8, D-89287 Bellenberg conformi alle direttive europee riportate di
seguito,
EN ISO 12100-1 (2004) EN 60335-2-69 (2004)
EN ISO 12100-2 (2004) EN 61000-3-2 (2006)
EN 55014-1 (2006) EN 61000-3-3 (2005)
EN 55014-2 (2001)
secondo le direttive del Consiglio 2006/42/CE, 2006/95/CE e
2004/108/CE.
COMUNITA EUROPEA
Model Makita 447 M
DANSK
CE-DECLARATION
OM KONFORMITEIT
Undertegnede, Tomoyasu Kato, med fuldmagt fra Makita Corporation,
3-11-8 Sumiyoshi-Cho, Anjo, Aichi, 446 Japan, erklaer hermed, at
Suger
Model Makita 447 M
fremstillede af ALTO Deutschland GmbH, Guido-Oberdorfer-Str. 2-8,
D-89287 Bellenberg er i overenstemmelse ed de folgende standarder
eller normsaettende dokumenter,
EN ISO 12100-1 (2004) EN 60335-2-69 (2004)
EN ISO 12100-2 (2004) EN 61000-3-2 (2006)
EN 55014-1 (2006) EN 61000-3-3 (2005)
EN 55014-2 (2001)
i overenstemmelse med Radets Direktiver 2006/42/EF, 2006/95/EF og
2004/108/EF.
Tomoyasu Kato, Director Bellenberg, 2008-11-10
ESPAÑOL
DECLARACIÓN DE CONFORMIDAD DE LA CE
El abajo firmante, Tomoyasu Kato, autorizado por Makita Corporation,
3-11-8 Sumiyoshi-Cho, Anjo, Aichi, 446 Japan, declara que los
Aspirador
Model Makita 447 M
fabricados por ALTO Deutschland GmbH, Guido-Oberdorfer-Str. 2-8,
D-89287 Bellenberg cumplen las siguientes normas o documentos
normalizados,
EN ISO 12100-1 (2004) EN 60335-2-69 (2004)
EN ISO 12100-2 (2004) EN 61000-3-2 (2006)
EN 55014-1 (2006) EN 61000-3-3 (2005)
EN 55014-2 (2001)
de acuerdo con las directivas comunitarias 2006/42/CE, 2006/95/CE y
2004/108/CE.
Tomoyasu Kato, Director Bellenberg, 2008-11-10
Tomoyasu Kato, Director Bellenberg, 2008-11-10
PORTUGUÊS
DECLARAÇÃO DE CONFORMIDADE CE
O signatário, Tomoyasu Kato, autorizado por Makita Corporation, 311-8 Sumiyoshi-Cho, Anjo, Aichi, 446 Japan, declara que o aspirador
Modelo Makita 447 M
manufaturada por ALTO Deutschland GmbH,
Guido-Oberdorfer-Str.2-8, D-89287 Bellenberg estão na conformidade
com os seguintes normas ou os originais estandardizados,
EN ISO 12100-1 (2004) EN 60335-2-69 (2004)
EN ISO 12100-2 (2004) EN 61000-3-2 (2006)
EN 55014-1 (2006) EN 61000-3-3 (2005)
EN 55014-2 (2001)
de acordo com as diretrizes orientadoras de conselho 2006/42/CE,
2006/95/CE e 2004/108/CE.
Tomoyasu Kato, Director Bellenberg, 2008-11-10

MAKITA 447 M
Contents
1 Important safety
instructions
2 Description
3 Before start-up
4 Operation
5 Applications and
techniques
6 After finishing work
7 Maintenance
8 Troubleshooting
9 Further information
english
............................................................................................2
2.1 Purpose ................................................................................4
2.2 Operating elements ..............................................................5
3.1 Assembling the cleaner ........................................................5
4.1 Connections .........................................................................5
4.1.1 Connecting the suction hose................................................5
4.1.2 Electrical connection ............................................................5
4.1.3 Connecting electrical appliances..........................................6
4.2 Switching on the vacuum cleaner.........................................6
4.2.1 Switch position “I”.................................................................6
4.2.2 Switch position „auto“...........................................................6
4.2.3 Suction power control...........................................................6
4.3 Check volume flow monitor ..................................................6
4.4 Acoustic warning ..................................................................7
4.5 Cleaning the filter element....................................................7
5.1 Techniques...........................................................................7
5.1.1 Picking up dry substances....................................................7
5.1.2 Picking up liquids..................................................................8
6.1 Switching the vacuum cleaner off and storage.....................8
7.1 Maintenance plan .................................................................9
7.2 Maintenance work ................................................................9
7.2.1 Replacing the waste bag......................................................9
7.2.2 Replacing the filter bag.........................................................9
7.2.3 Replacing filter element......................................................10
7.2.4 Emptying dirt tank ..............................................................10
..........................................................................................11
9.1 Recycling the vacuum cleaner ...........................................12
9.2 Guarantee ..........................................................................12
9.3 Tests and approvals............................................................12
9.4 Technical data ....................................................................13
9.5 Accessories ........................................................................13
1
MAKITA 447 M
english
1 Important safety instructions
Symbols used to mark
instructions
For your own safety
Purpose and intended use
2
Before using the
vacuum cleaner,
always read the
operating instructions and keep
them readily
available.
This symbol is
used to mark safety instructions that
must be observed
to prevent damage
to persons.
Only allow the vacuum cleaner
to be used by persons who have
been trained in its use and who
have been explicitly authorized
to use it.
Despite its simple handling the
vacuum cleaner is not suitable
for children.
The use of the vacuum cleaner
is subject to valid national regu-
The vacuum cleaners described
in this operating manual are suitable for
– commercial use, e.g. in ho-
tels, schools, hospitals, factories, shops, offices and
rental businesses.
– for separation of dust with an
exposure limit of greater than
0,1 mg/m³, (dust class M).
The following materials should
not be picked up by the vacuum
cleaner:
– hot materials (burning ciga-
rettes, hot ash, etc.)
– flammable, explosive, ag-
gressive liquids (e.g. petrol,
This symbol is
used to mark
safety instructions
that must be observed to prevent
damage to the
vacuum cleaner and its performance.
This symbol indicates tips and
instructions to
simplify work and to ensure safe
operation.
lations. Besides the operating
instructions and the binding accident prevention regulations
valid in the country of use, observe recognized regulations for
safety and proper use.
Do not use any unsafe work
techniques.
solvents, acids, alkalis, etc.)
– flammable, explosive dust
(e.g. magnesium or alumini-
um dust, etc.)
When dust removers are used,
the rate at which air is exchanged in the room must be
adequate if the exhaust air from
the vacuum cleaner is blown into
the room (please observe regulations valid in your country).
Before starting work, the operating staff must be informed on
– use of the vacuum cleaner
– risks associated with the ma-
terial to be picked up
– safe disposal of the picked
up material.
3
MAKITA 447 M
english
Precautions and safety
regulations when using the
vacuum cleaner
Before start-up
Inspect power cord regularly
to detect signs of damage, e.g.
cracks or ageing.
If the power cord is damaged, it
must be replaced by the Service
or an electrician to avoid danger
before use of the vacuum cleaner is continued.
Use only the type of power cord
specified in the operating manual.
Do not damage the power cord
(e.g. by moving over it or pulling
or crushing it).
Disconnect the power cord by
pulling the plug only (do not pull
or tug the power cord).
Inspect the vacuum cleaners to
ensure that they are in proper
condition. Plugs and couplings
in power cords must at least
have splash protection.
Never use the vacuum cleaner if
the filter element is damaged.
Picking up liquids
If foam develops or liquid emerges, stop work immediately and
empty the dirt tank.
Regularly clean the built in level
indicator hose to limit the water level and check that it is not
damaged.
See section 5 for information on
handling liquids and (hazardous) dust.
If you are using an extension
cord, use only those specified
by the manufacturer or higher
quality ones (see section 9.4
„Technical data“).
It is recommended that the vacuum cleaner should be connected via a residual current circuit
breaker. This stops the supply
of electricity if the leakage current to earth exceeds 30 mA for
30 ms or it has an earth tester
circuit.
When using an extension lead,
check the minimum cross-sections of the cable:
Cable lengthmCross section
<25 A
<16 A
up to 20 m
20 to 50 m
ø1.5mm² ø2.5mm²
ø2.5mm² ø4.0mm²
Arrange the electrical parts
(sockets, plugs and couplings)
and lay down the extension lead
so that the protection class is
maintained.
Never spray water on to the upper section of the vacuum cleaner. Danger for persons, risk or
short-circuiting.
Observe the latest edition of the
IEC regulations.
Electrical components
Check the rated voltage of the
vacuum cleaner before connecting it to the mains supply system.
Ensure that the voltage shown
on the rating plate corresponds
to the voltage of the local mains
power supply.

MAKITA 447 M
english
Tool socket
Use the socket on the vacuum
cleaner for the purpose defined
in the operating instructions
only.
Before plugging an appliance
into the appliance socket:
1. Switch off the vacuum cleaner
2. Switch off the appliance to
be connected.
CAUTION!
Follow the operating instructions
and safety instructions for appliances connected to the power
tool socket.
Maintenance, cleaning and
repair
Accessories and spare parts
Only carry out maintenance
work described in the operating
instructions.
Always pull out the mains plug
before cleaning and maintenance of the vacuum cleaner.
During maintenance and cleaning, handle the vacuum cleaner
in such a manner that there is no
danger for maintenance staff or
other persons.
In the maintenance area
– use filtered compulsory ven-
tilation
– wear protective clothing
– clean the maintenance are
so that no harmful substanc-
es get into the surroundings.
Before removing the vacuum
cleaner from the area contaminated with harmful substances:
Use only the brushes supplied
with the vacuum cleaner or
specified in the operating manual. The use of other brushes can
adversely affect safety.
– clean the outside of the vac-
uum cleaner, wipe it clean or
pack the vacuum cleaner in
well sealed packaging
– and avoid spreading depos-
ited harmful dust.
During maintenance and repair
work all contaminated parts that
could not be cleaned satisfactorily must be:
– packed in well sealed bags
– disposed of in a manner that
complies with valid regulations for such waste removal.
A dust test must be performed
at least once every year by the
Service or a trained person.
This test includes, for example,
whether there is damage to
the filter, the vacuum cleaner is
sealed to the air and the control
equipment works properly.
Use only original accessories
and spare parts (see section
9.5). The use of other parts can
adversely affect safety.
2 Description
2.1 Purpose
4
This cleaner is suitable to pick
up dry, nonflammable dust, liquids, sawdust and hazardous
dusts with maximum room concentration values r 0.1 mg/m
(dust class M).
Depending on how hazardous
the dust is, the cleaner must
be fitted with appropriate filters.
See table in section 5.1.1.
3
5
MAKITA 447 M
english
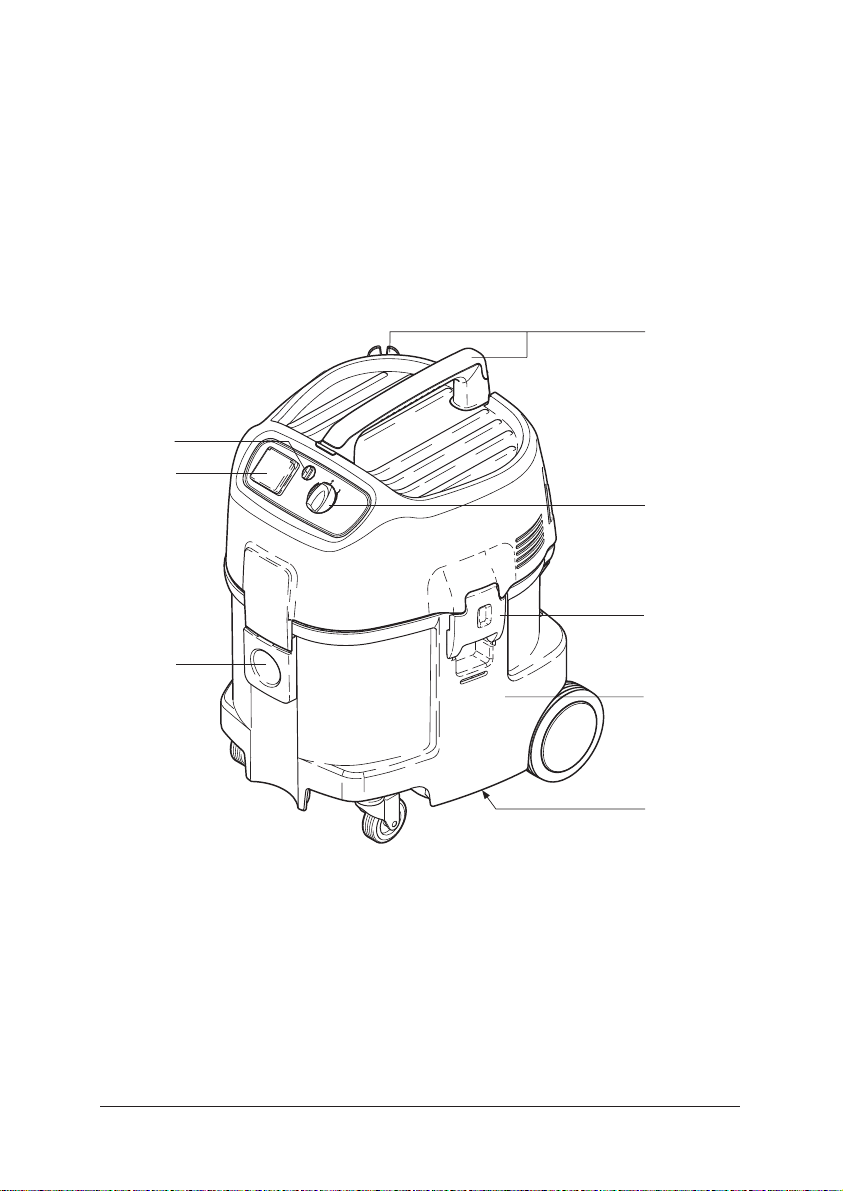
2.2 Operating elements
See fold-out page at the front of
these operating instructions.
1 Handle with cable hook
2 Switch with suction power
control
3 Before start-up
3.1 Assembling the cleaner
On delivery some of the accessories
are lying in the tank and must be removed before the vacuum cleaner
is used for the first time.
Remove the upper section of the
vacuum cleaner:
The mains plug should not be inserted into a socket.
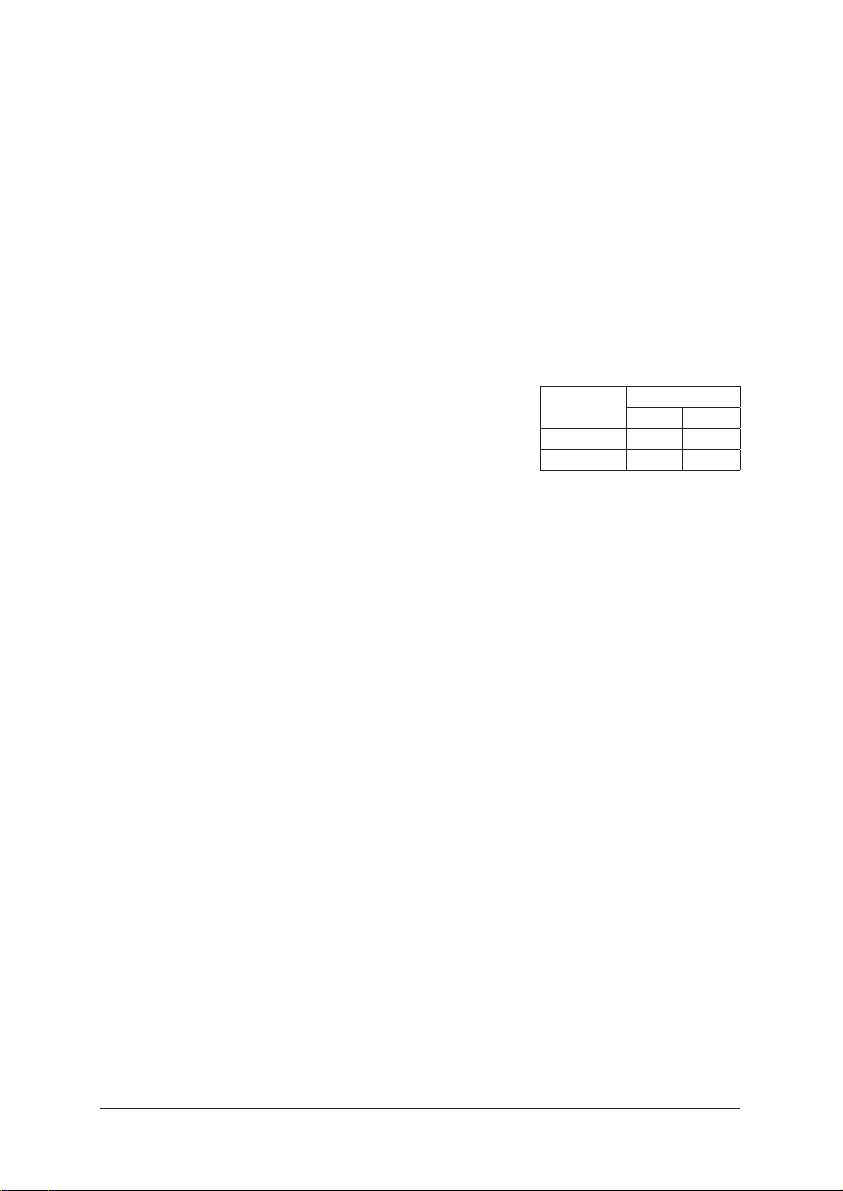
1. Open the retaining clamps
and lift off the upper section
of the cleaner.
2. Take the accessories out of
the dirt tank and the packag-
ing.
3 Retaining clamp
4 Dirt tank
5 Grip to empty tank
6 Inlet fitting
7 Tool socket
8 Hose diameter setting
3. To pick up dust with maximum room concentration
values:
Insert the filter bag into the
dirt tank according to the
instructions (instructions included).
To pick up harmless dust:
Insert the disposal bag (instructions included) into the
tank.
IMPORTANT: Press
the filter bag connection firmly on to the inlet fitting.
4. Fit the upper section of the
vacuum cleaner and close
the retaining clamps.
NOTE: Ensure that the
retaining clamps fit properly.
4 Operation
4.1 Connections
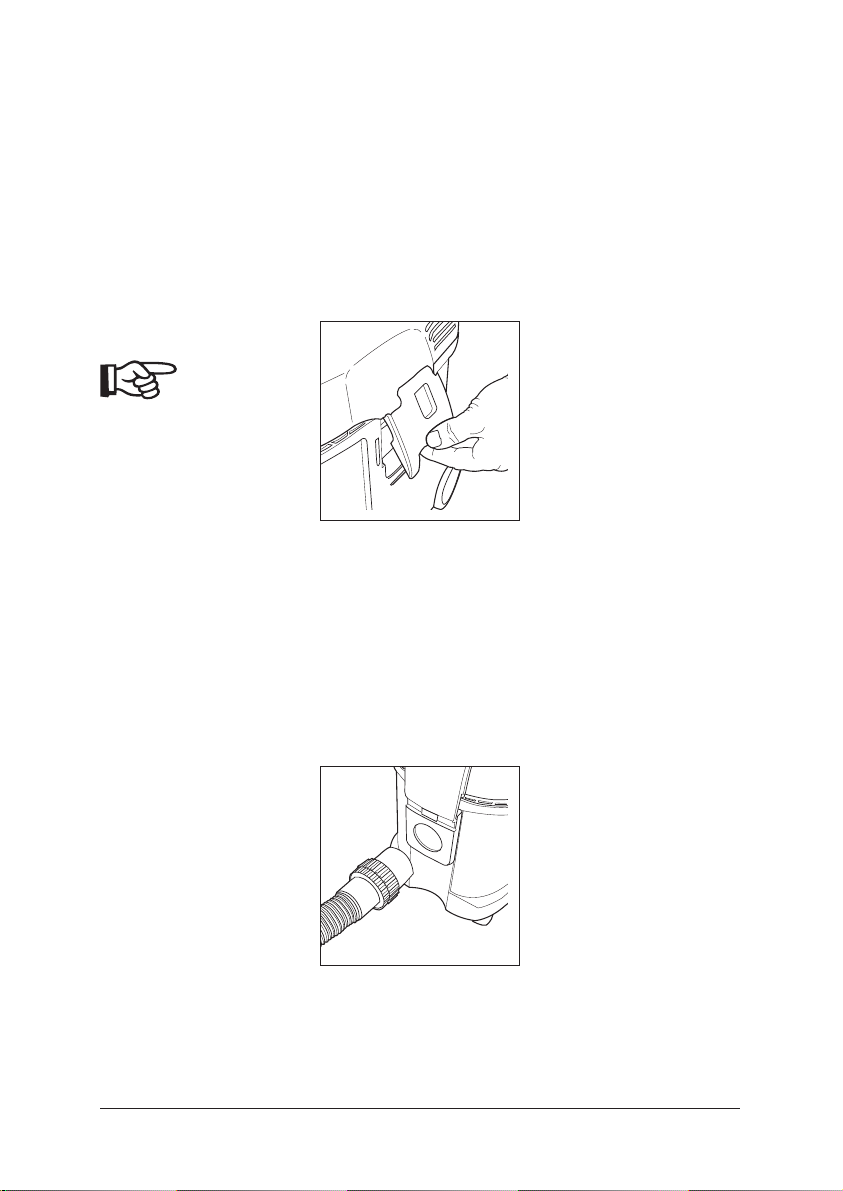
4.1.1 Connecting the suction
hose
4.1.2 Electrical connection
The operating voltage shown on the
rating plate must correspond to the
voltage of the mains power supply.
1. Connect the suction hose.
The suction hose diameter must
suit the position of the switch in
order to pick up dry, nonflammable dust with maximum room
concentration values.
1. Ensure that the vacuum
cleaner is switched off.
2. Insert the power cord into a
properly installed and fused
socket with an earthing contact.
 Loading...