

Page 1
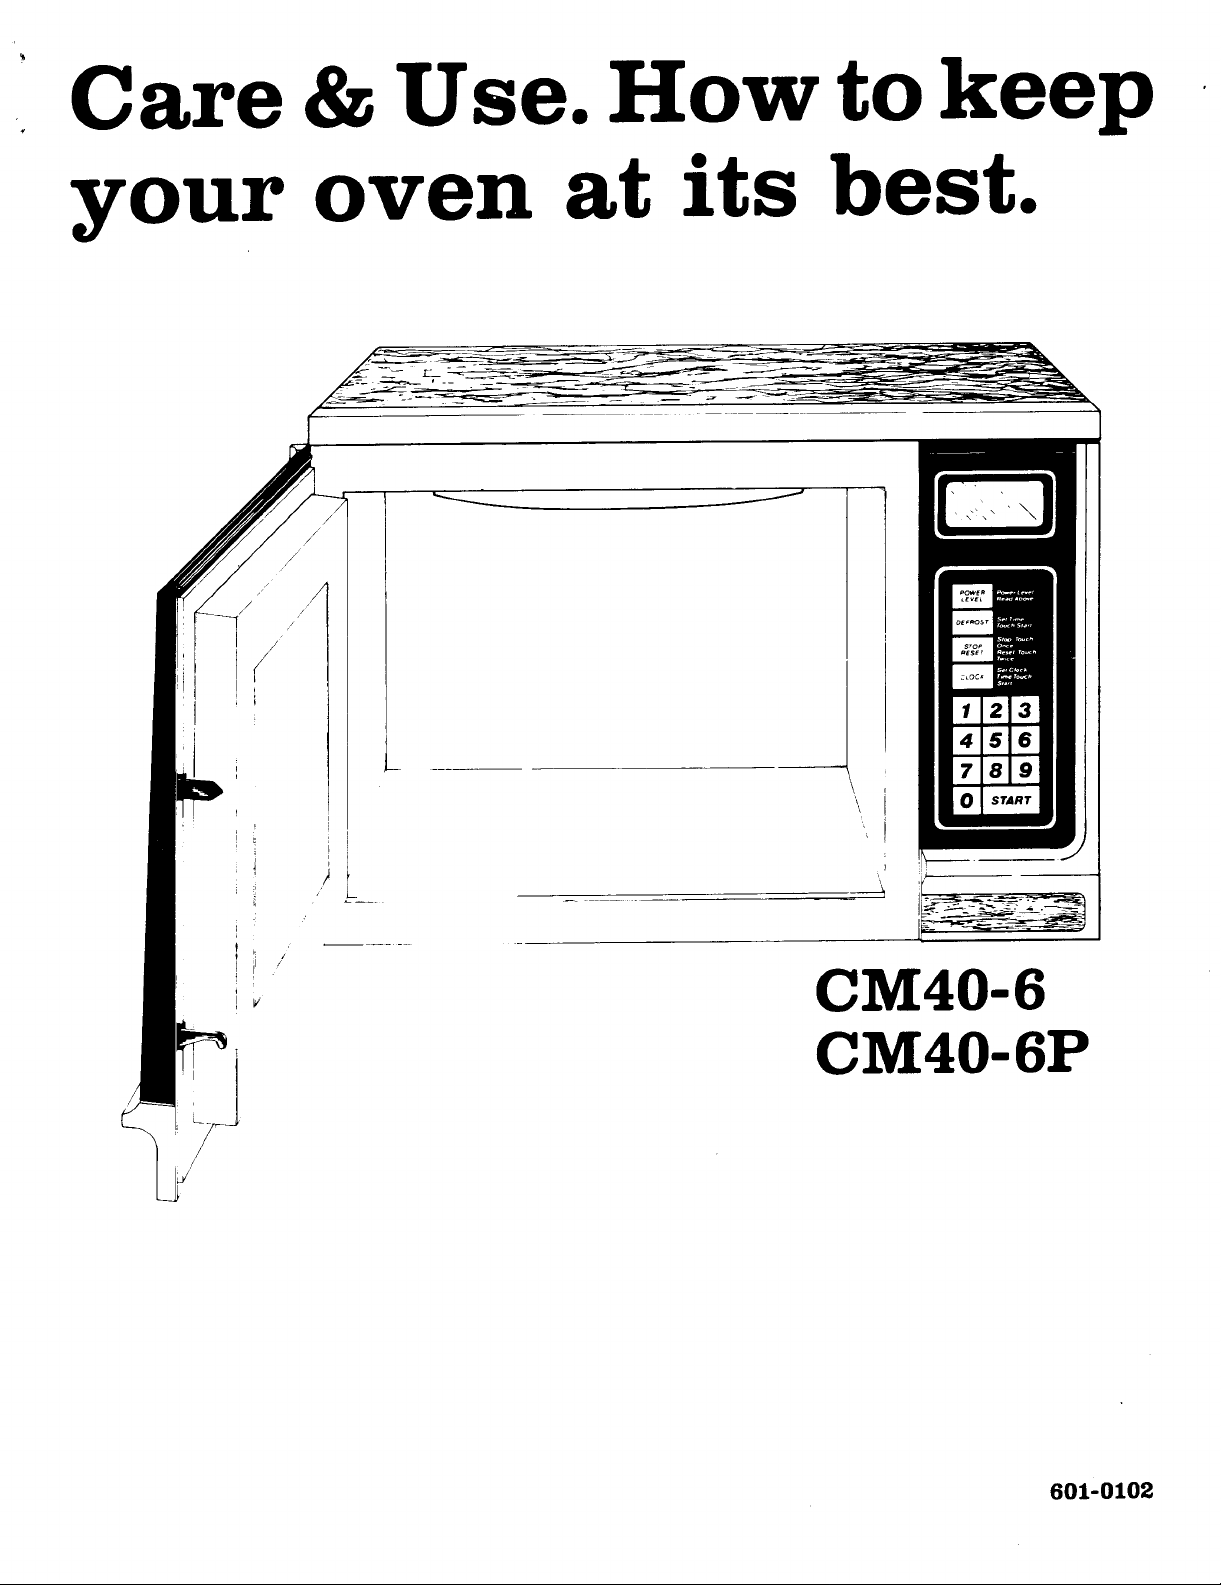
Care & Use. How to keep
your oven at its best.
r 1
J
/" /
,/
/
I
I
L
/
CM40-6
CM40-6P
601-0102
Page 2

Table Of Contents
Safety Instructions ...................................................................................... 1
Bringing Your New Microwave Home ................................................................... 2
A Word About Wiring and Grounding .................................................... •............... 2
Where To Put Your Microwave .......................................................................... 2
Precautions To Avoid Possible Exposure To Microwave Energy ........................................ 2
An Explanation Of The Function Pads .................................................................. 3
How To Use Your Microwave Oven .................................................................... 4-5
Defrost .6
How To Use Your Automatic Thermometer ........................................................... 7-8
Automatic Keep Warm ................................................................................... 8
Questions and Answers ............................................................................... 9-10
How To Replace Light Bulb ........................................................................... 10
Microwave Cleaning Instructions ..................................................................... 11
Registration Requirement ............................................................................. 11
Service ................................................................................................. 11
Warranty ............................................................................................... 12
IMPORTANT SAFETY INSTRUCTIONS
When using electrical appliances basic safety 10. Do not cover or block any openings on the
precautions should be followed, including the appliance or remove spacer on the back.
following. 11. When cleaning oven door and surfaces of the
WARNING ° To reduce the risk of burns, electri- oven which face and/or contact the oven door,
cal shock, fire, injury to persons or exposure to use only mild, non-abrasive soaps or
excessive microwave energy: detergents applied with a sponge or soft cloth.
1. Read all instructions before using the appliance 12. Use only cooking utensils or accessories of the
2. Read and follow the specific "PRECAUTIONS type or types described in this manual and in
TO AVOID POSSIBLE EXPOSURE TO EX-
CESSIVE MICROWAVE ENERGY" found in 13. Some products such as whole eggs, and sealed
this manual, containers - for example, closed glass jars -
3. This appliance must be grounded and properly may explode and should not be heated in this
polarized. Connect only to a properly grounded oven.
and polarized outlet. (See grounding instruc- 14. To reduce the risk of fire in the oven cavity:
tions page 2). (a) Do not overcook food, especially starchy
4. Install this appliance only in accordance with items such as potatoes and fatty items
the installation instructions described in this such as bacon.
manual. (b) Remove wire twist-ties from paper or
5. Use this appliance only for its intended use as
described in the manual. Do not use for drying specifically described in the manual or
clothes, linens, newspapers, or similar non-
food type items.
6. Make sure that all persons using this appliance,
especially children, are closely supervised
properly instructed on how to use this
appliance, should ever ignite, keep the oven door closed,
7. Do not operate this appliance if it has a and disconnect the power cord or shut off
damaged cord or plug, if it's not working power at the fuse or circuit breaker panel.
properly, or if it has been damaged or dropped.
8. Do not attempt to service or repair this
appliance. This appliance should be serviced 17. Do not immerse cord or plug in water.
only by qualified service personnel. Contact 18. Keep cord away from heated surfaces.
nearest authorized service facility for
examination, repair or replacement. 19. Do not let cord hange over edge of table or
9. Do not store items on top of this appliance if
there are louvers on the top.
the cookbook.
plastic bags before placing bag in oven.
(c) Do not put metal inside the oven, except as
cookbook accompanying this oven.
15. The appliance should be carefully attended if
paper, plastic, or other combustible materials
are placed inside the oven to accommodate
cooking, if any materials inside the oven
16. Do not use outdoors.
counter.
SAVE THESE INSTRUCTIONS
!
Page 3
Bringing The New Microwave
Oven Home
First, look it over.
The microwave oven was carefully packed and If it is necessary to use an extension cord, use only
shipped in good condition. If you find shipping a 3-wire extension cord that has a 3-blade
damages, notify the dealer immediately. Also, grounding plug, and a 3°slot receptacle that will
remove all packing material around and inside accept the plug on the appliance. The marked
the oven before using it. rating of the extension cord shall be equal to or
greater than the electrical rating of the appliance.
Grounding Instructions
This appliance must be grounded. In the event of No other major appliance or heating devices
an electrical short circuit, grounding reduces the should be on the same circuit with the microwave
risk of electric shock by providing an escape wire oven.
for the electric current. This appliance is
equipped with a cord having a grounding wire
with a grounding plug. The plug must be plugged
into an outlet that is properly installed and
grounded in accordance with applicable electri- Now, pick a place.
cal codes. The outlet must be rated equal to the
electrical rating of the appliance. (As indicated on
the serial plate), table, room divider or rolling cart - whatever is
WARNING- Improper use of the grounding plug additional clearance at the top or sides just
can result in a risk of electric shock, enough at the back to accommodate the power
Consult a qualified electrician or serviceman if
the grounding instructions are not completely This oven can be built in at any time using trim
understood, or if doubt exists as to whether the kit, model BKM41A supplied by the manufacturer
appliance is properly grounded, of this oven.
The oven can be set on any sturdy counter, shelf,
most convenient. This oven requires no
cord.
ii
Precautions to avoid possible exposure
to excessive microwave energy
(a) Do not attempt to operate this oven with the (c) Do not operate the oven if it is damaged. It is
door open, since open-door operation can particularly important that the oven door
result in harmful exposure to microwave closes properly, and that there is no damage
energy. It is important not to defeat or to the: (1) door (bent); (2) hinges and latches
tamper with safety interlocks. (broken or loosened); (3) door seals and
(b) Do not place any object between the oven
front face and the door, or allow soil or (d) The oven should not be adjusted or repaired
cleaner residue to accumulate on sealing by anyone except properly qualified
surfaces, service personnel.
i i i
2
sealing surface.
Page 4
An Explanation Of The Function Pads
On Your New Microwave Oven
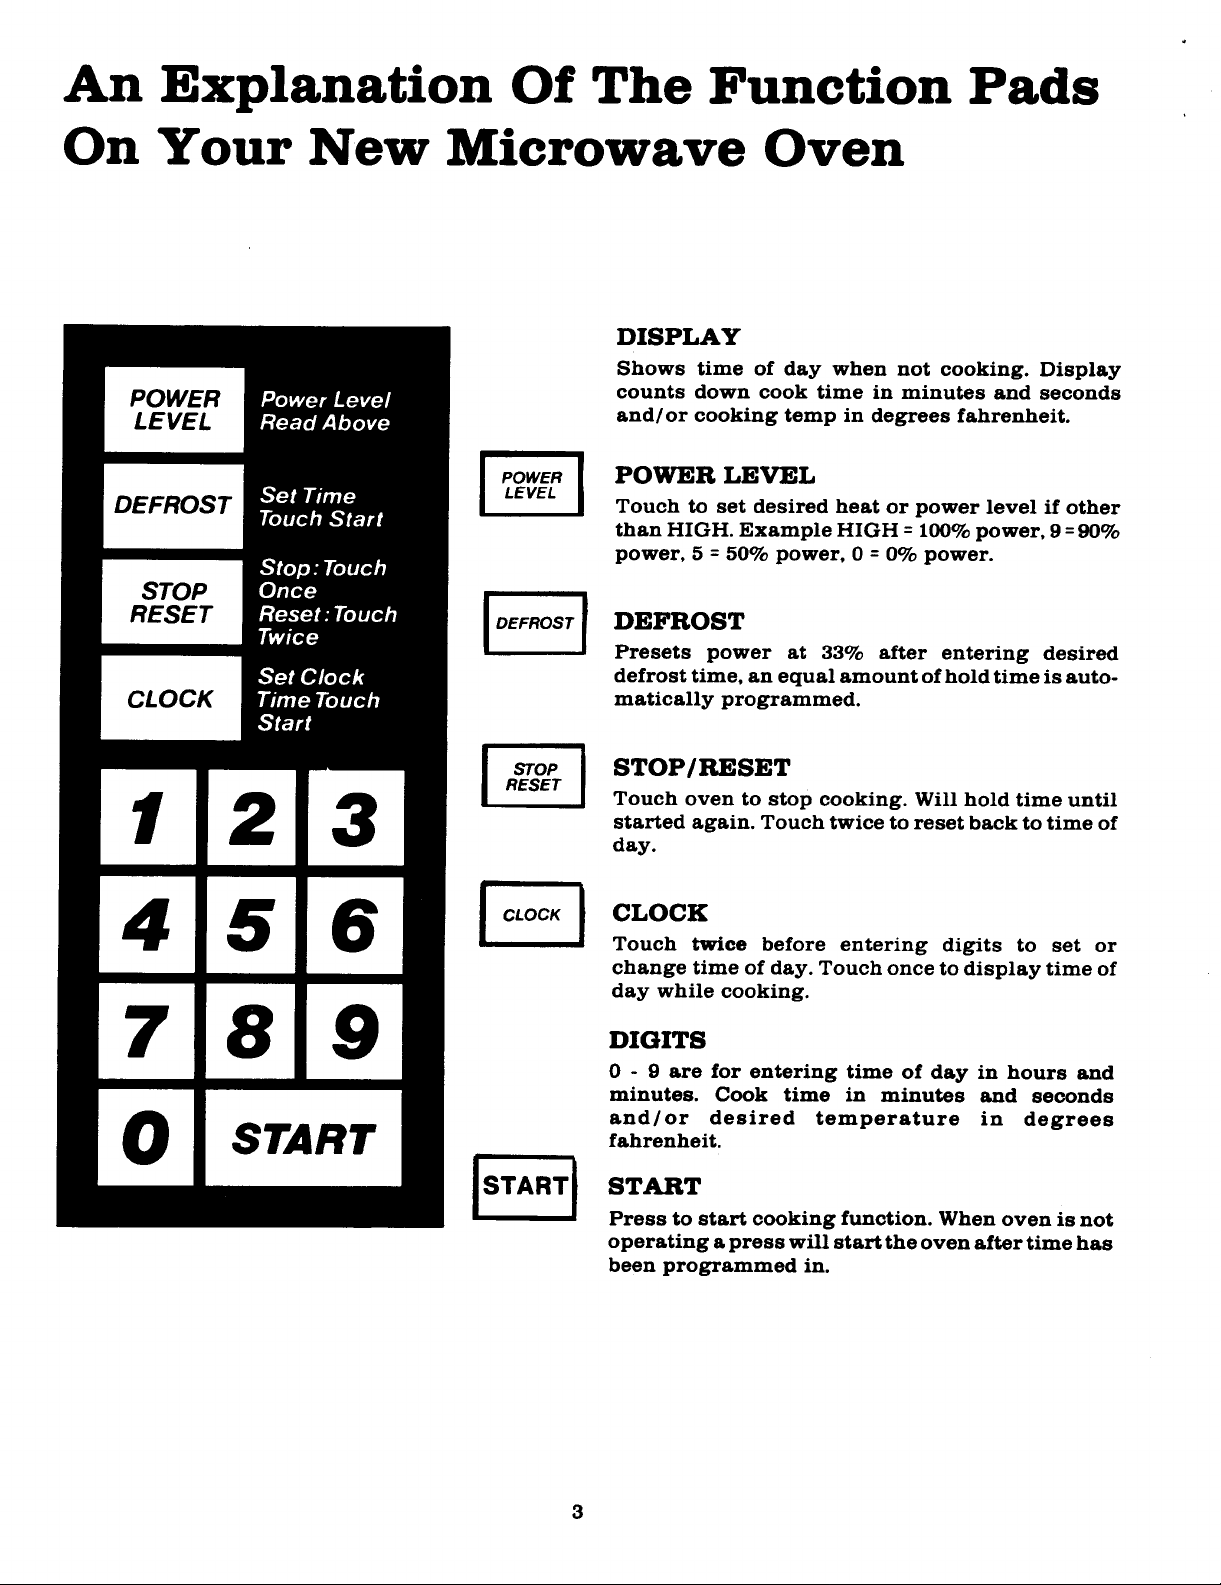
DISPLAY
Shows time of day when not cooking. Display
counts down cook time in minutes and seconds
and/or cooking temp in degrees fahrenheit.
I POWER I POWERLEVEL
LEVEL Touch to set desired heat or power level ff other
than HIGH. Example HIGH = 100% power, 9 = 90%
power, 5 = 50% power, 0 = 0% power.
[DEFROST[DEFROST
]sroPISTOP/RESETREsET
123 Touch oven to stop cooking. Will hold time until
456 i I °
Presets power at 33% after entering desired
defrost time, an equal amount of hold time is auto-
matically programmed.
started again. Touch twice to reset back to time of
day.
Touch _wlce before entering digits to set or
change time of day. Touch once to display time of
day while cooking.
789 °
0 - 9 are for entering time of day in hours and
minutes. Cook time in minutes and seconds
START fahrenheit.
and/or desired temperature in degrees
Press to start cooking function. When oven is not
operating a press will start the oven after time has
been programmed in.
Page 5

How To Use Your Microwave Oven
It's time to set your oven clock.
The clock that's built into your microwave oven
keeps track of the time of day in hours and
minutes even when you are using the oven. Set the
clock now following these directions.
I. Plug your oven cord into a grounded wall oufleL
The Time/Temp display will flash.
I-I I-I • I-I I-I
LI LI • I_1 I_1
TIME TEMP DEF CLOCK
/ COOK MODE /
•,,, J
1'--"--3
2. Press the CLOCK pad ICLOCK] _wlce within 3 If you wish to know the time of day while
seconds. Pressing the pad twice tells the oven cooking, press ] CLOCKI once. The correct time
you are going to enter or change the clock time. of day will show on the Time/Temp display.
3. Press the proper number pads in sequence, and then automatically go back to the updated
EXAMPLE: To set 5:00, press 5, then 0, then 0 cooking program.
again.
4. Press the START pad . This starts the cooking, the Time/Temp display will show a
clock and stores the Correct time of day con- continuous countdown of the remaining
tinually, no matter what other information cooking time in minutes and seconds.
may appear in the Time/Temp display while
you cook. With your Automatic Thermometer you can
When there is no other information to be shown, Time/Temp display will show actual internal
the TIME/TEMP display automatically goes
back to showing the correct time of day. YOU CANNOT RE-PROGRAM TIME WHEN
When you unplug the oven, the clock stops, down.
When you plug it in again, the clock will flash
00:00. Set it to the correct time by repeating IMPORTANT- Remember to press clock twice
steps, 2, 3, and 4. within 3 seconds. Otherwise, when the digits
iS
The correct time of day will show for 3 seconds
When you use your microwave oven for
cook to temperature instead of time. And the
temperature of the food in degrees Fahrenheit.
THE OVEN IS COOKING - holding or counting
are pressed cook time will be entered.
4
Page 6

Regular Cooking With Your
Microwave Oven
THESE ARE OPERATING INSTRUCTIONS ONLY o SEE YOUR COOKBOOK FOR
SPECIFIC COOKING INSTRUCTIONS
Place food in oven and close door before pro- Foods are best when they have been defrosted
i_'amming, just to the point where a fork can be inserted, but
Set Time and Power Level. still have some ice crystals remaining.
Additional standing time before cooking is
Select digits for desired cook time. When the first needed to complete the defrosting and to allow the
digit is pressed the indicator bar over time will food to equalize or even the temperature distri-
light up. Press the desired cook time in sequence bution throughout the food.
from left to right. As each new digit is selected the There are different ways you can defrost using
ones in the display will move one place to the left. your microwave oven.
For food which weighs no more than a pound,
Remember. you set it like you say it. Two minutes and are no more than 1 _" to 2" in height, micro-
is 2:00 not 1:20 for 120 seconds, wave heating at Defrost using the directions and
chart in the cookbook. Standing time is automati-
EXAMPLE: To set oven for two minutes (2:00), cally programmed.
press 2, then press 0 twice. Each number will
show on the Time/Temp display and will shift one EXAMPLE: To defrost a 1 pound Sirloin steak.
position to the left as each new number is entered. I I
PRESS 2 PRESSDEFROST
PRESS 0 PRESS DIGITS for desired_time 5:00
PRESS 0 PRESS START i STARTI
The indicator bar over defrost will flash and the
To select Power Level time will count down. When 5 minutes is up the
The oven is always on HIGH unless programmed oven will beep twice and an equal amount of hold
for another heat level. If you wish to cook on time (5:00) will appear in the display and start
HIGH you need to do nothing except select time. counting down. The indicator bar will stay steady
To choose a heat level other than HIGH press on, indicating the microwave power is off.
__H Frozen foods larger than one pound or that are
places in the display indicating the oven is on ways.
HIGH. To select another level just press the de-
sired number within 3 seconds 0-9 = 90% of power,
8 = 80%, 5 =50%, 4 = 40%, 2 = 20%, etc. 0 = rest or no Figure the total defrosting time:
power; acts as a hold time or a count down timer. A 2-pound pot roast, total defrost time 9
As the individual digit is pressed, the 2 digit per- minutes: Quickly defrost this. divide the total
centage of power number will appear in the two time by 3. Program the oven three times for equal
right hand places in the display, time periods. The first at 70% power, the second at
If you make a mistake it is easy to correct press
RESET and start again. LARGE AND UNEVENLY SHAPED FOODS
IGH will appear in the two right hand unevenly shaped, can be defrosted in one of two
SPEED DEFROST
50% power and the third at 30% power.
DEFROST These foods defrost better when the defrost time
One of the greatest conveniences of your defrost time is allowed for in between the defrost
microwave oven is defrosting. For the best results periods.
it is important to understand how microwave
energy defrost food. EXAMPLE: A 4 pound Rump Roast: total defrost
As the microwaves contact the outside portion time 20 minutes.
of the food, energy is created which produces heat
which is then conducted to the center of the food. Defrost 10 minutes, let time out, then set Defrost
Defrosting is recommended at settings which for 10 minutes again. Total time will be 40
cycle microwave power on and off. The off time minutes.
allows heat to transfer to the center of the food
before the outside overcooks.
is divided in half and a standing time equal to the
5
Page 7

ADDITIONAL DEFROST TIPS: TIPS FOR EFFICIENT USE OF THE
-- Unwrap frozen food from freezer wrap and MICROWAVE OVEN.
place in dish or tray to catch juices while 1. Do not store food, dishes or paper materials,
defrosting, cover lightly to prevent drying, such as cookbooks and literature, in the oven
cavity.
-- Puncture airtight wrappings and pouches to
allow steam to escape freely. 2. Use only popcorn, popcorn packaging and/or a
popcorn popper designed specifically for
-- Check foods during defrost time, particularly microwave cooking. Follow product directions
foods which are unevenly shaped - turn if exactly.
necessary.
-- When freezing your own foods remember: the cookbook. If necessary, add time at the end
Foods frozen in smaller portions defrost and to complete cooking. As in conventional cook-
cook faster and more evenly than large ing, excessive cooking of any food can cause a
portions, fire.
THESE THINGS ARE NORMAL AND MAY 4. Set cooking time carefully and always double
OCCUR IN YOUR OVEN. check the display to insure that you have
1. Steam or vapor escaping around the door. This entered the correct time.
comes as foods cook and give off steam. This is
a perfectly safe condition. 5. Do not cook or reheat eggs in the shell. Eggs
2. Moisture droplets inside the oven in the door, shell can cause the eggs to explode.
walls, or the floor after cooking some foods.
3. Dimming oven light and change in blower wave in order to incorporate air and prevent
sound may occur while operating at power eruptions.
3. Microwave all food for times recommended in
heat so quickly that rapid pressure inside the
6. Stir or pour liquids before heating in the micro°
levels other than HIGH. 7. Pierce foods with heavy skins, such as potatoes
4. The top of the oven and the trim may feel hot to and squash, before heating in the microwave
the touch. This happens as the hot moist air oven. This allows built-up steam to escape and
from the foods cooking is exhausted from the prevents explosion.
top of the oven. 8. Pierce microwavable plastic bags and pouches
5. Some TV - Radio interference might be noticed before heating, also to prevent explosion.
while using your microwave. This is similiar to
the interference caused by any other small 9. Do not use containers with restricted openings,
appliance and does not indicate any type of such as pop bottles or salad dressing bottles, as
problem, these types of containers are likely to break.
10. Use only those thermometers designated for
the microwave oven. Do not use conventional
meat and candy thermometers.
11. Avoid using paper products made from re-
cycled paper. They can contain small bits of
metal that can cause the paper to ignite.
12. When microwaving fresh pork products follow
cookbook directions carefully to insure
proper doneness. Microwave until no more
pink color remains in the meat and the juices
run clear. Observe proper standing time and
check with meat thermometer to insure all
places have reached at least 170°F.
13. IN CASE OF FIRE, TURN THE OVEN OFF.
KEEP DOOR CLOSED AND FIRE WILL EX-
TINGUISH ITSELF.
6
Page 8

How To Use Your Automatic
Thermometer
(PROBE MODELS ONLY)
If you want to cook to an exact temperature in- r •
stead of an exact time, use the Automatic Thermo-
meter. Large roasts, meat loaf, casseroles, etc.
need to reach a certain internal temperature to /r'_ L_//_
insure perfect doneness. When you cook those L,I
foods, it's the temperature of the food that's TOUCH 4
important. With your Automatic Thermometer, it T/ME TEMP DEF CLOCK
is easy to be sure that the proper internal / COOK MODE /
temperature is reached. _ /
Here's how you do it:
1. Insert the Automatic Thermometer into the
food. Make surethe tip of the Thermometer ' _' '--' /E
isn't touching bone, strips of fat, or the TOUCH 0 I LI
container.
2. Insert the plug on the end of the Thermometer / COOK MODE /
cord into the socket inside your oven. CLOSE _
THE DOOR BEFORE PROGRAMMING.
TIME TEMP DEF CLOCK
As the second digit is pressed the first digit
selected (4) will move one place to the left.
digits.
In the above example if you attempted to enter all
In the temp mode the oven will only accept 2
_:: +_::_': three digits 140 - you would end up with 114. If you
make a mistake it is easy to fix, just press RESET
Indicator bar above Temp will be lit and the and reprogram the oven. Remember you're
display will show 100°F. setting the highest internal temperature you want
3. To program the oven to the exact temperature or lower than 100 is set, the oven will not accept
you want the food to reach you need only to pro- the entry.
gram the last two digits. After you have entered a desired temp select a
EXAMPLE: To set the oven for 140 degrees power level if you wish to cook on something
Fahrenheit touch 4... then 0. other than high.
/ display will show 100°F until the internal temp
the food to reach. If a temperature higher than 199
[ POWER[
Press I LEVEL] then press the desired digit.
4. Press START cooking begins. The Time/Temp
of the food reaches 105 degrees. At that point
/ ,--, '--' /: the "5° increase in temperature will sh°w until___ ___ the food reaches the temperature you
-- originally set. When the final temperature is
TIME TEMP DEF CLOCK reached and before it is actually displayed, the
/ COOK MODE __/ oven will turn itself off and signal, and the
_ Time/Temp display will show the current time
of day.
7
Page 9

OVEN DOOR. Remove thermometer plug from Do not remove Automatic Thermometer from the
the oven socket and remove thermometer from the food or from the oven by pulling on the cord.
food.
Do not force Automatic Thermometer into food. If
LET FOOD STAND. Follow cookbook instruc- food has been frozen make sure it is thoroughly
tions for covering foods during standing time defrosted before inserting probe into food.
after cooking.
If you are microwaving more than one food at a
CLEAN THERMOMETER. Wipe off with warm time, do not use the Automatic Thermometer,
soapy water or clean in top rack of dishwasher. Do since different foods heat at different rates the
not scrub tip with an abrasive cleaner nor soak in results could be unsatisfactory.
water for a long period of time. Store outside the
oven.
When cooking with the temperature probe
internal temperature in other parts of the food can
be checked by moving the probe into other
positions. To do this the food must remain in the
oven and the probe plugged into the jack. The
temperature will read out in the Time/Temp
display. After removing the automatic
thermometer press reset to go back to time of day.
AUTOMATIC KEEP WARM FEATURE
When you select to cook to an internal tempera-
ture between 140 ° and 199 ° the oven has an
automatic keep warm feature. Here's how it
works: When the selected temperature between
140 ° and 199 ° is reached the end of cooking signal
will sound and the oven will go into an automatic
Keep Warm. When this happens the word HOLD
will appear in the display.
The oven will continue keeping warm for 3 hours
or until you press I STOP I or open the door. If you
wish to check the food you can open the door,
check the food and, if you desire, close the door,
press _ and the food will continue keeping
warm. To cancel the Keep Warm program press
_ twice or the door, remove the food
and the probe from the oven.
When the door is opened the actual temperature
will show on the display. Other parts of the food
can be checked for temperature using the
procedure above,
open
8
Page 10

Some Of These Questions May Arise
While You Learn To Use Your
Microwave Oven
Q_ Can my microwave oven get turned on acci- Q; Why doesn't my oven always cook as fast as
dently? the cookbook says it should?
A: It's nearly impossible. Remember, ittakes a A: Check with your cookbook again, to make
minimum of three steps.., in the right seq- sure you've followed directions exactly and to
uence.., to start the cooking process, see what might cause variations in cooking
Q suggestions chosen to help prevent overcook-
: Even when I'm cleaning the MEMORY ing. Undercooking is the most common pro-
panel? blem in getting use'to a microwave. Variations
A: No it won't respond to random button push- could require longer cooking time. Use your
ing with a cloth or sponge; not even with rub-
ber gloves. It takes your fingertip touching gestions to test doneness, just as you do with
controls in the proper sequence - and even then conventional cooking.
nothing happens till you touch START.
time. Cookbook times and heat settings are
in the size, shape, weight and dimensions
own judgement along with the cookbook sug-
Even if you accidently change the Time/ Q.* Can I check the time of day while progr_m-
Temp display, no cooking begins until START ruing?
is touched in the proper sequence. Just touch A: No. Only while cooking.
RESET, and the time of day will show again.
While
Q: IsitsafetoleavetheAutomaticThero-
meter in the oven all the time, so it's handy? flicker, changing back and forth by 5 to 10
why does the display indicatt_ng temperature
using
Automatic Thermometer,
my
A: No Using the thermometer without food degrees?
could cause arcing, which would damage the A: The thermometer is very sensitive. It is sen-
oven as well as the thermometer. When you sing changes of heat currents in the food
finish using the Automatic Thermometer, take
it out of the oven and leave it out until you need Q
it again. _-: Can I use foil or metal in my microwave?
A* Yes. When used as outlined in your cook-
Q: If I want to delay the cooking process for book, foil or metal containers present to parti-
awhile, do I have to take the partially- cooked cular problems. Care should always be
food out of the oven and then reprogr_m to exercised to keep any metal or foil at least an
start cooking again? inch or more away from the sides, door, or top
of the oven. If arcing occurs using foil or
A_ Not for just a short period of time. Touch metal, cooking shouldbe stopped immediately
STOP... that will interrupt the cooking pro- and the container or item re-positioned to
cess until you touch START again. When you eliminate arcing.
touch START, the cooking cycle will pick up
exactly where it left off and continue till the Q_ I _m cooking with the Automatic Thermo-
cycle has been completed. For long delay meter and the oven goes into immediately
periods where harmful bacterial growth could HOLD.
result, take the food out of the oven and refri-
gerate; reprogram when you're ready to finish A: The Automatic Thermometer may be broken
cooking, or shorted.
Page 11

Q." Can I d=maEe my microwave oven if I _; Can I use the microwave oven timer to time
operate it empty? other things, while I'm not cooking?
a_ The oven has been safety engineered to pre- a_ Yes, press desired time. Next, touch POWER
vent damage when operated empty• But you'd LEVEL, then 0, then START. You'll hear the 3
be wasting energy, and it would serve no second tone, when the time is up.
logical purpose. You can't see the microwaves
•.. only the wonderful cooking they do. Q** Can I use my microwave on an extension
cord?
Q.* Is it dangerous to look in the oven window
while food is cooking? _lk_ Yes, but it is not a recommended practice.
_Jk; No. You can look through it just like you can reduces the wattage available and conse-
look through a conventional oven window, quently reduces oven performance. When the
Q_ Should some food containers get hot in the must be three (3) wire grounded cord, and
microwave oven? capable of carrying at least 20 amps if under 20
• IL; Yes, because the heat from the food inside is
warming
tainer that absorbs microwave energy. See
your cookbook. A: You must press SELECT HEAT twice.
Q: What should I do if the interior light doesn't Q: Why is the display flickering?
come on, but the oven cooks normally?
them;
or because
you're using
a con-
A.
_'-_, Check to see if the lightbulb is burned out.
See directions below, polarized. See page 3.
A.
Each foot of distance from the power sourceA.
temporary use of an extension is mandatory, it
feet and 30 amps if over 20 feet.A.
_** If I want to go back to HIGH. What do I do?
A_ Your oven may not be properly grounded or
Q_ What should I do if cooking won't start after
the food is in the oven, and I've done all the pro-
gr!mming steps?
A.
_ (1) Make sure the door is closed and latched
tightly. How To Replace The Oven Lightbulb.
(2) Check to see that the power cord is Unplug the oven. Loosen hex nut with 1/4" nut
securely plugged into the wall outlet, driver. Remove old bulb and replace with a
similar 25 watt bayonet base bulb. Refasten light
(3) Touch START... just in case you forgot cover, and plug in oven.
the first time.
Touch RESET. Then feed all information _
(4)
into the oven again right from the
beginning.
(5) Check the house fuse or circuit-breaker. _ jJ
(6) Remove plug from wall socket and
inspect for damage. _ _!i_i
00:00. What happened to the program? i I I_/////
II I|
A: Line voltage may have dropped low enough
to turn off the oven. Or, it may have been
momentarily interrupted, such as during a
storm. See page 4 to enter correct time and then
reprogram•
10
Page 12

How to Care For Your You Must Register
Microwave Oven
Your Microwave Oven
To clean your oven
This is a Federal requirement.
The Federal government requires that records be
filed on the location of all microwave ovens. A
registration card is included in the literature
packed inside this oven at the factory.
PLEASE:
1. Fill in the registration card now, and mail it to
US.
2. If you move, please establish registration at
your new address ,by writing to us at the
address below.
3. If you bought this microwave oven from a pre-
vious owner, please establish your ownership
Use a soft cloth, and clean the outside of the oven by writing to:
with a mild, non-abrasive detergent and warm
water. Rinse well. Clean the inside the same way. Microwave Records Service Center
Make sure you thoroughly wipe the top, side and 740 King Edward Avenue
back walls as well as the shelf. Cleveland, Tennessee 37311
4. Please include MODEL NUMBER and SEt=_IAL
NUMBER in all correspondence.
For Service
If you need service, contact your dealer, oi" con st:It
the Yellow Pages of your telephone direr'tory
under "'Ranges," for the service source nearest
you. For additional information about your
microwave oven, write to:
Service Department
740 King Edward Avenue
Cleveland, Tennessee 37311
Never use scouring pads, cleaning powders, or
other abrasive materials. Be sure spills arewiped If you write concerning your oven, be sure to
off the shelf with a damp cloth every time you use include the model numbers that are shown on the
the oven. Accumulated spills will dry, and be serial plate on the front of the oven.
more difficult to wipe off.
Use the same soft cloth/mild detergent cleaning
methods for the rubber door seals. Always make it
a point to keep grease and food spatters from
gathering on the door seals.
11
Page 13

LIMITEDONEYEARWARRANTY
• MICROWAVEOVENWARRANTY
Bet MODELSCM40
Duringthefirst year themanufacturerwillrepairor replacewithoutcharge,inthecustomershome,any partof
the oven which evidences a defect in material or workmanship.
EXCLUSIONS
OBLIGATIONSUNDERTHIS WARRANTYSHALL NOT EXTENDTOANY MALFUNCTIONOROTHERPROBLEM
CAUSEDBY:
1.Damageunless attributable to a defectin material THIS WARRANTYDOESNOTCOVER:
or workmanship. 1.The replacement of light bulbs.
2. Unreasonable use or misuse, such as, but not 2. Microwave ovens purchased or used for
limited to, improper setting of controls, improper commercial purposes.
electrical supply and improper installation. 3. Cost of transporting microwave oven to the
3. Damages resulting from or problems caused by service agency.
any installation, repair, alteration, modification,
or adjustment of the appliance not performed by
an authorized dealer or service agency.
LIMITATIONOFLIABILITY
In no event shallthe manufacturerbe liablefor any incidental or consequentialdamages(including, but not
limited to, food loss) or for any special damages or any further loss as a result of any breach of these
warranties. Some states do not allow the exclusionor limitations of consequentialdamages;sothe above _j_
limitation or exclusion may not apply to you.
TOSECUREWARRANTYSERVICE
Beforerequestingservice, besurethat you have readand followedallproceduresintheOwner'sGuide.Should _
serviceberequired,contactthe localdealerfromwhom you purchasedthe microwaveovenortheauthorized
service agency listed in the yellow pagesof your telephonedirectory. Evidenceofpurchaseddatemust be
provided to obtain warranty service.
If you are not satisfied with the local response to your service requirements and wish to contact the
manufacturer, please address your letter to the Customer Relations Department, Cleveland, Tennessee37311
or call 615-472-3371.Customers in California may contact Customer Relations Department, 247 N.Vineland
Avenue, City of Industry, California 91746or call 818-330-3372.To save time, your letter should include the
complete model andserial numberof the warranted appliance, the nameandaddress of the dealer from whom
you purchased the appliance, the date of purchase and details concerning your problem.
ADDITIONALRIGHTS
Thesewarrantiesarethe onlywritten orexpresswarranties givenbYthemanufacturer.Nooneis authorizedto
increase,alter, or enlarge the manufacturer's responsibilitiesor obligations under these warranties.These
_ state,warranties give you specific legal rights, and you may also have other rights which may vary from state to
agic Chef"
CONTACT YOUR DEALER, OR CONSULT THE YELLOW PAGES IN YOUR TELEPHONE
DIRECTORY UNDER RANGES FOR THE SERVICE SOURCE NEAREST YOU.
 Loading...