

Page 1
Gas Range Featuring
* Sealed surface burners
• Clock and timer, if equipped
• Pilotless ignition
8113P043-60
(1/93)
Page 2

CONTENTS
Dear Consumer:
This booklet contains basic information for the safe use
and care of your appliance. It also covers other models
which may have different features from your appliance.
In our continuing effort to improve the quality of our
products, it may be necessary to make changes to the
product without revising this booklet. For example, a
CONTENTS
SAFETY PRECAUTIONS ................... 1-3
SURFACE COOKING ...................... 4-6
Surface Light .............................. 5
(2ooktop ................................... 4
Surface Burners ............................ 4
Solid State Ignit!on .......................... 4
How Burner Works ......................... 5
Correct Flame Size .......................... 5
Removing Burner ........................... 6
Griddle!Fifth Burner ......................... 6
OVEN AREA ............................. 7-10
How Oven Burner Works .................... 7
Oven Temperature Control ................... 8
Oven Selector Control ....................... 8
Oven Timer Control ......................... 8
Oven Light ................................ 8
Indicator Lights ............................. 8
Oven Door ................................ 8
Oven Door Window ........................ 9
Oven Racks ................................ 9
Oven Bottom ............................... 9
Broiler Compartment ........................ 9
Cover Panel/Heat Shield .................... 10
Leveling Legs ............................. 10
OVEN COOKING ....................... 11-16
Oven Characteristics ........................ 11
Low-Temp Setting ......................... 11
Preheating ................................ 1 I
Use of Aluminum Foil ...................... 11
knob on your range may not look like the illustration
in this book.
It is our sincere desire that you experience the
maximum cooking enjoyment from this appliance. To
do so, the first step is to learn how to correctly use
and care for the product. Therefore, we suggest that
you read this booklet before you begin cooking.
Baking/Baking Problems .................... 12
Broiling/Charts ............................ 14
Roasting/Chart ............................ 16
FEATURES ............................. 17-21
Clock .................................... 17
Minute Minder ............................ 17
Eye-Level Oven ........................... 17
Self-Clean Oven ........................... 18
Continuous Clean Oven ..................... 20
Automatic Oven Cooking
I) Delay Cook & Off ..................... 21
2) Cook & Off ..................... ..... 22
Programmed Oven Cooking
1) Cook & Hold ......................... 22
TROUBLESHOOTING CHART .............. 23
To Obtain Service .......................... 23
GENERAL CLEANING GUIDE ........... 24-25
MAINTENANCE & ADJUSTMENTS ....... 26-29
Type of Gas .............................. 26
Pressure Regulator ......................... 26
Gas Shut-Off Valve ........................ 26
Electrical Connections ...................... 26
Lighting Pilots ............................ 27
Adjusting Surface Pilots ..................... 27
Operation of Solid State Ignition
During Power Failure ..................... 27
Tri-Temp Burner Adjustment ................ 28
Oven Light Replacement .................... 28
Surface Light Replacement .................. 29
Warranty ................................. 30
MODEL IDENTIFICATION
The model, manufacturing (serial*), and serial (consecutive*)
numbers identify your appliance. These three numbers are
listed on the rating plate which is located in one of the
following places:
30" Freestanding and Eye Level Units: under cooktop
in burner box area.
30" Freestanding with Self-Clean Oven Feature: on
right side of the lower front frame, behind cover paneI.
20" Freestanding Unit: under cooktop, at rear center of
burner box.
24" Built-ln Oven: on main front oven frame.
30" Surface Unit: on left flange of burner box.
*The second terms (given above in parenthesis) are being replaced by the preceding terms. Your appliance rating plate may use either or both
of these terms or names for these identifying numbers. Note that the term "serial" is applied differently in the new and (old) number
terminology,
All three of the identifying numbers must be used when
ordering parts or service from your dealer, serviceman, or
from us. Record the three numbers here so they will be
readily available should you need them.
MODEL NUMBER:
MANUFACTURING
(SERIAL*) NUMBER:.
SERIAL
(CONSECUTIVE*) NUMBER:
DATE OF PURCHASE:
Page 3
I,SAFETYPRECAU
manufactureridentificationsuchasoven
proofor ovensafe.
c.Useproperpansize.Basedonsafetycon-
siderations, select utensilshaving flat
bottoms large enough to cover the
surfaceor burnergrateandadjustflame
to size of pan. The use of undersized
utensils will expose a portion of the
flamestodirectcontactandmayresultin
ignition of clothing. Adjustingsize of
The Installation,adjustmentandserviceofthis
rangemustbeperformedbyaqualifiedtechnician,
Thisis necessaryto insureproperoperation
andto avoidthepossibilityof damageto the
appliance or injury to users. Before the
installerleavesyourpremisesyoumay wish
to question him on the following points:
a. Adequateelectricalserviceis availableto
yourhome.
b. Therange will not overloadtheindividual
circuiton whichit is used.
c, Clearances. Besureto checkthe installa-
tion manualfor minimumclearanceto any
combustiblesurface. Also, keep in mind
some types of wall tile may melt when
exposedto highheat.
d. Grounding. Be sure the appliance is
properly grounded to avoid electrical
shock,DONOTcutoff 3rd prong.
e. Shut off valve has beeninstalledbefore
your range in gas supply line.
flame to utensils will also improve
efficiency.
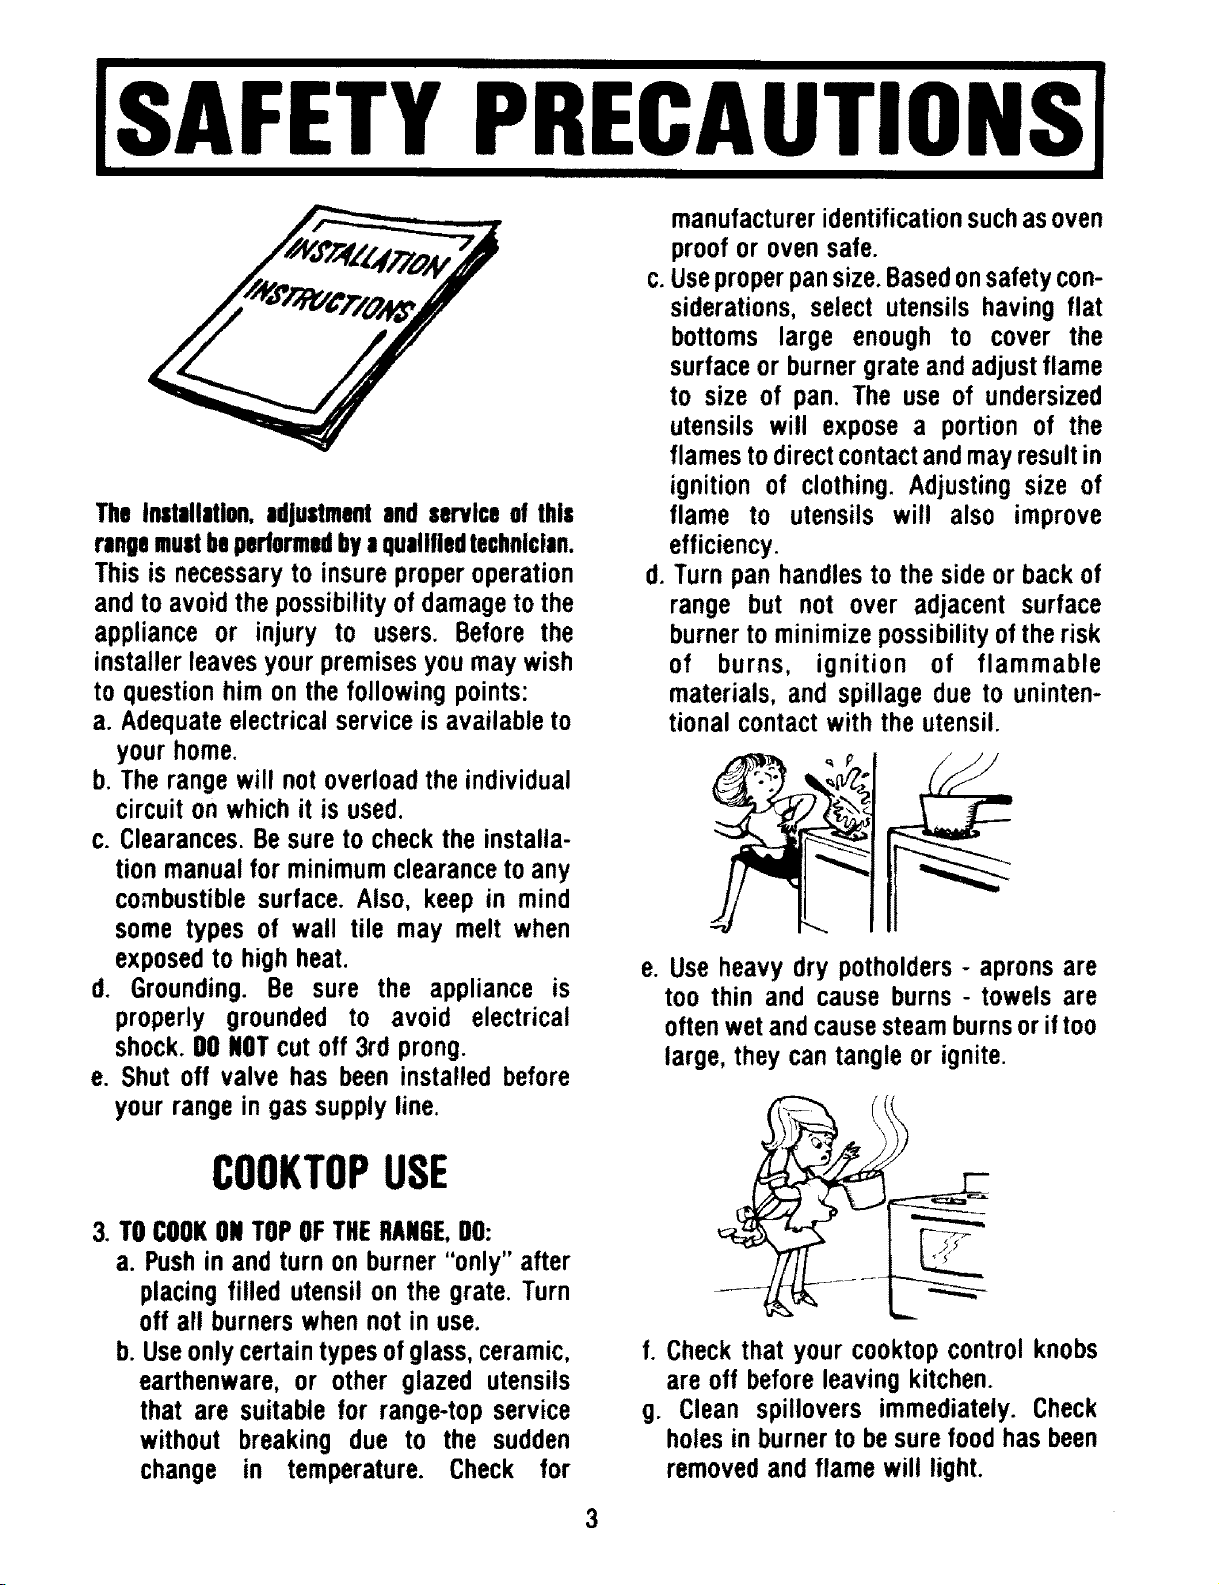
d. Turn pan handlesto the side orbackof
range but not over adjacent surface
burnerto minimizepossibilityoftherisk
of burns, ignition of flammable
materials, and spillage due to uninten-
tional contactwith the utensil.
e. Use heavy dry potholders - apronsare
too thin and cause burns- towels are
oftenwetandcausesteamburnsoriftoo
large, they can tangle or ignite.
COOKTOPUSE
3. TOCOOKONTOP OFTHERANGE,DO:
a. Push in and turn on burner "only" after
placing filled utensil on the grate. Turn
off all burners when not in use.
b. Useonly certain types of glass, ceramic,
earthenware, or other glazed utensils
that are suitable for range-top service
without breaking due to the sudden
change in temperature. Check for
f. Check that your cooktop control knobs
are off before leaving kitchen.
g. Clean spillovers immediately. Check
holes in burner to be sure food has been
removed and flame will light.
Page 4

],,,SAFETYPRECAUTIONSI
OVENUSE
4. REPLACINGOVENLIGHTBULBS.DO:
a. Wait until oven and bulb are cool.
b. Always handle bulb with dry (never a
wet) cloth to protect hands° (See "Oven
Light" under Features & Options in this
manual).
c. If light bulb should break, before chang-
ing bulb, disconnect power to the range
by removing fuse or throwing circuit
breaker.
Electrical power supply to the range must
be disconnected before any component
that is attached with a screw or fastener
is removed.
5. WHENUSINGTHEOVEN,go:
a. Stand to one side when opening heated
oven to let air or steam escape before
removing or replacing food.
b. Check to see that rack is in its proper
position before heating oven --impro-
perly installed or tilted racks can cause
burns from utensils and/or food spills.
e, FORELEVATEDOVENONLY-Check utensils
and food weights, if they are too heavy to
handle easily (especially those with large
amounts of fats or liquids) heat in a lower
oven or separate into several smaller
containers.
HOODS
1. Clean Ventilating HoodsFrequently- grease
should not be allowed to accumulate on
hood or filter.
2. Turn fan off when flaming foods under the
hood. Thefan, if operating, may spread the
flame.
BROILERPAN
.
a. Stand to one side when opening a heated
oven or broiler compartment to prevent
grease flame-up and to let air or steam
escape before removing or replacing
food.
b. Always remove the broiler pan from the
compartment as soonas you are finished
broiling. It makes the pan much easier to
wash and there will be nochance that the
pan and drippings will be forgotten.
Grease left in the pan can catch fire if the
oven is usedwithout removing the broiler
pan.
c. In using the broiler, if meat istoo closeto
the burner, fat may ignite.
c. Place oven racks in desired location
while oven is cool. If rack must bemoved
while oven is hot, do not let potholder
contact a hot bake or broil burner in the
oven.
d. Pull oven rack out when adding or
removing foods (pushing and pulling
should be at the center of the rack).
d. Broiler pan should be placed back in the
broiler compartment for storage after
cleaning.
Page 5

ISAFETYPRECAUTIONSi
7. IN CASEOFFIRE.DO:
a. Turn off heat source and ventila-
tion hood.
b. Smother flames by:
1. Chemical fire extinguisher.
2. Baking soda.
3. Lid cover or cookie sheet.
NOTE:NEVERuse water ona grease fire.
c. Leave burning utensil where it is
sitting. Trying to carry it couldcause
spillage and fire in other areas of
your home or could cause serious
burns.
N
IMPORTANTPRECAUTIONS
9. DONOT TOUCHBURNERSORGRATES:
Eventhough they appear cool, they may be
hot enough to cause burns (including areas
surrounding heat source suchas vents, top
of oven door, oven window grates, etc.).
10. 00 NOTWEARLOOSEFITTINGORHANGING
GARMENTS.Which can:
a. Catch on pan handles.
b. Make contact with heat and catch fire.
8. DONOTLEAVECHILDREN:
a. Unattended while range or cooktop is in
use,
b. Playing on or near range or cooktop.
Teach children not to play with range
controls. CAUTION:Keepitems of interest
such as toys or treats stored away from
range, backguard, or shelving above
range so a child will not be tempted to
climb upon range to reach such items.
c. Within reach of hot range, hot cooktop or
hot pans.
11. DONOTLEAVECOOKTOPCOOKING
UNATTENDED.Spillovers can ignite or
smoke.
I
5
Page 6

iSAFETYPRECAUTIONSJ
II IIII II I II IIII
12.00 NOTUSlECOOKTOPOROVENASSTORAGE.
Containersmay catchfire or melt.
o
13. O0 NOTUSEANYFLAMMABLESONORNEAR
RANGEORCOOKTOP.
a. Avoid using aerosol sprays near a
range as most are highly flammable.
Follow instructions on the container
label.
b. Do not store or use gasoline or other
flammable vapors and liquid in the
vicinity of this or any other appliance.
c. Fats and grease should be disposed of
promptly.
d. Excessbuild up of dirt and grease make
cleaning difficult and could result infire.
17. DONOTHEATUNOPENEOGLASSORMETAL
CONTAINERSof food. Build up of pressure
could cause serious injury or damage to
your range.
18. 00 NOT USE OVENDOORAS A STEPPING
STOOLRANGECOULDTIP:
a. Causing serious injury.
b. Resulting damage to door could cause
extensive heat loss and uneven
cooking.
19.BASEOONSAFETYCONSIOERATIONS,DONOT
USERANGEAS HEATER.
a. Never use the range as a kitchen heater.
Prolonged use for heating without
adequate ventilation can bedangerous.
b. Ovens and cooktops are not designed
for heating use and can fail with such
abuse.
!4. DONOTUSEWATERONGREASEFIRES.
Water causes fire to splatter and spread.
15. DONOTBLOCKVENTOPENINGS.
16. DONOTUSEALUMINUMFOILCoveringoven
racks, broiler grill or oven bottom could
alter cooking results.
Page 7

20.DONOTLEAVEDEEPFATFRYINGOPERATION
UNATTENDED.
a. Pan must be large and deep enough to
allow for the increased boil whenfoodis
added -- this will avoid a boil over and
grease fire.
b. Never try to move a pan containing
quantities of hot fat. Wait until the fat is
cool.
21. DONOTSERVICEYOUROWNRANGE.
Do not replace any part of the appliance
unless it is specifically recommended in
the literature you receive with the
appliance. All servicing should bereferred
to a qualified technician. Insist that
authorized replacement parts be used in
the repair of your appliance. For service,
contact your dealer or authorized service
agency.
22.SELFCLEANRANGESONLY
a. Do not clean door gasket - the door
gasket is essential for a good seal. Care
should be taken not to rub, damage, or
move the gasket.
b. Do not use oven cleaners - no commer-
cial oven cleaner or oven liner
protective coating of any kind should be
used in or around any part of the oven.
c. Clean only parts listed in manual.
d. Before self-cleaning the oven- remove
broiler pan, racks and other utensils.
7
Page 8

(FOUND UNDER COOKTOP)
COOKTOP &
CONTROLS
UNIBURNER
CLOCK
& BROILER
VENT
TOP
OVEN RACKS
LIFT OUT
OVEN
E_ROILER DRAWER-
(EXCEPT GAS SELF
LEG LEVELER
/
OVEN DOOR
"OVEN WINDOW
(ON SELECTED MODELS)
8
Page 9

(NOTFOUNDONALLRANGES)
LIGHTSWITCHES- Locate the switch on your
range to turn on your surface light.
PUSHON/OFF
PUSHON/OFF
ROCKER TWISTON/OFF
SURFACELIGHT- For those models equipped,
remove the cook top light glass by removing
two screws. Change bulb replace the glass &
two screws.
LEG LEVELER- Most floors are not level. In
order for proper baking, level your oven by
turning the screws on all 4 legs until your
range is level.
BOTTOMCORNEROFRANGE
OVEN RACKS(LOWEROVENS)- It is recom-
mendedthat you use rack positions 1,2,and 3
when baking or broiling. Onself-clean models
rack position 4 will place foods too close to
the waist high broiler for proper baking or
broiling.
Other models, flip up the backouard and
change the bulb.
OVENLIGHT- When replacing an oven light
bulb, be sure the oven is cool, DISCONNECT
POWERto the range and use a dry cloth to
handle the bulb.
To replace, remove bulb shield and gasket (if
equipped). Replace bulb with a heat resistant
appliance bulb. Replace shield and gasket (if
equipped).
SELFCLEANOVENLIGHT
SHIELDILLUSTRATED
C_ ] _,1,-- 3rd position
TO INSERTOVENRACK- Place locking bar (B)
(up turned end) on shelf support - lifting up
slightly on the front of the rack (A) push
toward rear of the oven - when Iockbar (B)
clears shelf support groove, set rack on shelf
support and it should glide in easily.
RACK
P
TOREMOVE
, f
iill
ml
TO REMOVERACK- Pull the rack out to stop
position (B), lift up on the front (A) and pull to
clear shelf support.
Page 10

IFEATURE'S& OPTIONSI
(NOTFOUNDONALLRANGES)
TOPLACEPANSOFFOODIN OVEN- Pullfront of
rack (A) out to lock position. Place pan on
rack and slide back into oven.
For cookies or biscuits, we recommenda
standard9 x 14or 10x 14inchcookiesheet.
Larger cookiesheetsdo not allow room for
the proper air circulation neededfor good
browning. Larger pans may be used for
roasting.
BROILERDRAWER- Lift and rotate the two
levers"A" totheside,pulldrawerforward,up
and out.
When replacing drawers, line up hookson
drawer slides "B" with holesin drawer and
push until hooks are caught. Returnlevers
"A" to lockingposition.
OVENDOOR-The oven door is removable. (The
oven door on the top oven of elevated oven
models, is not removable).
When door is cool, open door to first stop
position. Grasp each side of the door near the
bottom, one side in each hand. Lift the doorup
and over the support arms.
When replacing door, line up the doorsupport
arms with slots in door. Slip the door down
over the arms as far as it will go.
UNIBURNER- To remove: Lift cooktop, grab
hold of uniburner slide straight back toward
rear of range and lift out - CAUTION:Remove
only when cool. Clean with soap & water or in
dishwasher. Check to see that all holes and
burner ports are open,clear of dried food and
thoroughly dry before returning to range for
operation.
10
Page 11

Page 12

SURFACECONTROLS
3111111111 I I
CONTROLS- To operate your top burner check
graphics shown below. These will identify
which burner your controls operate.
LEFT &EFT _
MAJ' _lr M_JB
go @o go o@
@0 O0 O@ O0 I
&# LF R# #F
L# LF R# mf
VALVEOPERATION- Your range is equipped
with knobs that must be pushed in before
turning. These knobs operate & control the
size or height of the flame on the cooktop.
Your range will be equipped with one of the
following valves:
SETTINGFORDESIREDHEAT- For safety consi-
derations, flame should hugbottom of pan but
should not be above or around sides of pan.
High lapping flames around sides of pan
could cause clothing to ignite.
HI - Instant heat needed to bring foods to
rollingboil.
SIMMER- Lower flame required to keep foods
at a medium boil.
WARM-Keepfoodswarm withoutadditional
cooking.
NOTE:Sometimes, if a knob is turned very
quickly from high to a low setting, the flame
will go out. Should this happen, turn the knob
to the OFF position. Wait several seconds,
then light again by turning knob to HIGH.
(1) OFF/NIGH- To light, push in knob,then turn
counter-clockwise to Hi (lite). Adjust
flame height by turning back toward OFF
position.
(2) HIGH/SIMMER/WARM - To light, push in
knob, then turn counter-clockwise to Hi
(lite). Then adjust for flame heightdesired.
This knob has three preset positions and a
choice of settings in between. A click can
be heard at HIGH and SIMMER positions.
The WARM is the final position.
(3)
PILOTLESSIGNITION - To light ranges
equipped with pilotless (or electric)
ignition; push in the knob, turn it to the
LITE position. You will hear an electric
spark. After ignition, turn knobslightly to
discontinue spark.
GRIDDLE-Somemodelsare equippedwith a
griddle. Be sure to remove griddle cover
before cooking. Griddle operation can be
foundin thismanualunderSurfaceControls.
GRATES-Burnergratesareinterchangeableto
insureproperseating.Whenreseating- place
curvedsidestogethersostraightsidesare at
front and rear as shown.
Oo not operate the
burners without a pan
on the grate. The
porcelain finish may
chip without a pan to
absorb the intense
heat.
12
Page 13

TO REMOVEVALVEKNOBS- Place cloth under
and around knob, twist cloth tightly into a
long handle, pull firmly on twisted cloth until
knob slides off. (See illustration below).
GRIDOLE- Some ranges are equipped with
griddles. Before using the griddle for the first
time:
1. Remove griddle cover.
a. Peessdown on any corner.
b. Slide fingers under 2 sides of griddle
cover and lift off. DONOTpry off with any
instrument or tool.
2. Wash griddle thoroughly with soap and
water.
3. Wipe clean.
TO OPERATEGRIDDLE- Select desired flame
height (Hi, Simmer, or Warm position).
Preheat griddle 3 to 5 minutesbefore cooking,
then sprinkle a few drops of water onit to test
the heat.
GREASEPAN- There is a grease pan located at
the center rear of the griddle burner. This pan
should be removed and cleaned as necessary.
FIFTHBURNER- The griddle burner can beused
as a fifth surface burner. Merely remove the
griddle and replace with extra grate provided.
GREASE PAN
......
.... J
5th BURNER
UNDER GRIDDLE
13
Page 14
III I II III /
OVEN,.CONTROLS,
MANUAL,ADJUSTMENTKNOB(AVAILABLEONSOMEMODELS)
Your new range has the latest design oven
controls and has been accurately calibrated
at the factory for proper oven temperature.
When cooking for the first time in your new
oven, use the recipe time as a guide for
cooking times. Your old oven thermostaL
over a period of years, may have "drifted"
from the factory setting. If, in comparison
with your old oven, you find that your foods
consistently brown too little or too much you
may wish to use the "browning adjustment"
feature on your oven knob.
ESTABLISHYOURBROWNINGPREFERENCE
Bake a can of store purchased refrigerated
biscuits as follows:
1.Select refrigerated biscuits that are packed
lOto a can and require a cooking time of 10
to 12 minutes at 400°F.
2. Place the biscuits on a metal cookie sheet or
according to the food manufacturers in-
structions. Do not use a dark or black
cookie sheet.
3. Preheat the oven to 400°F.
4. Place the cookie sheet near the center of the
oven.
5. Watch biscuits, observe the time closely.
Bake at least 10minutes and no longer than
12 minutes.
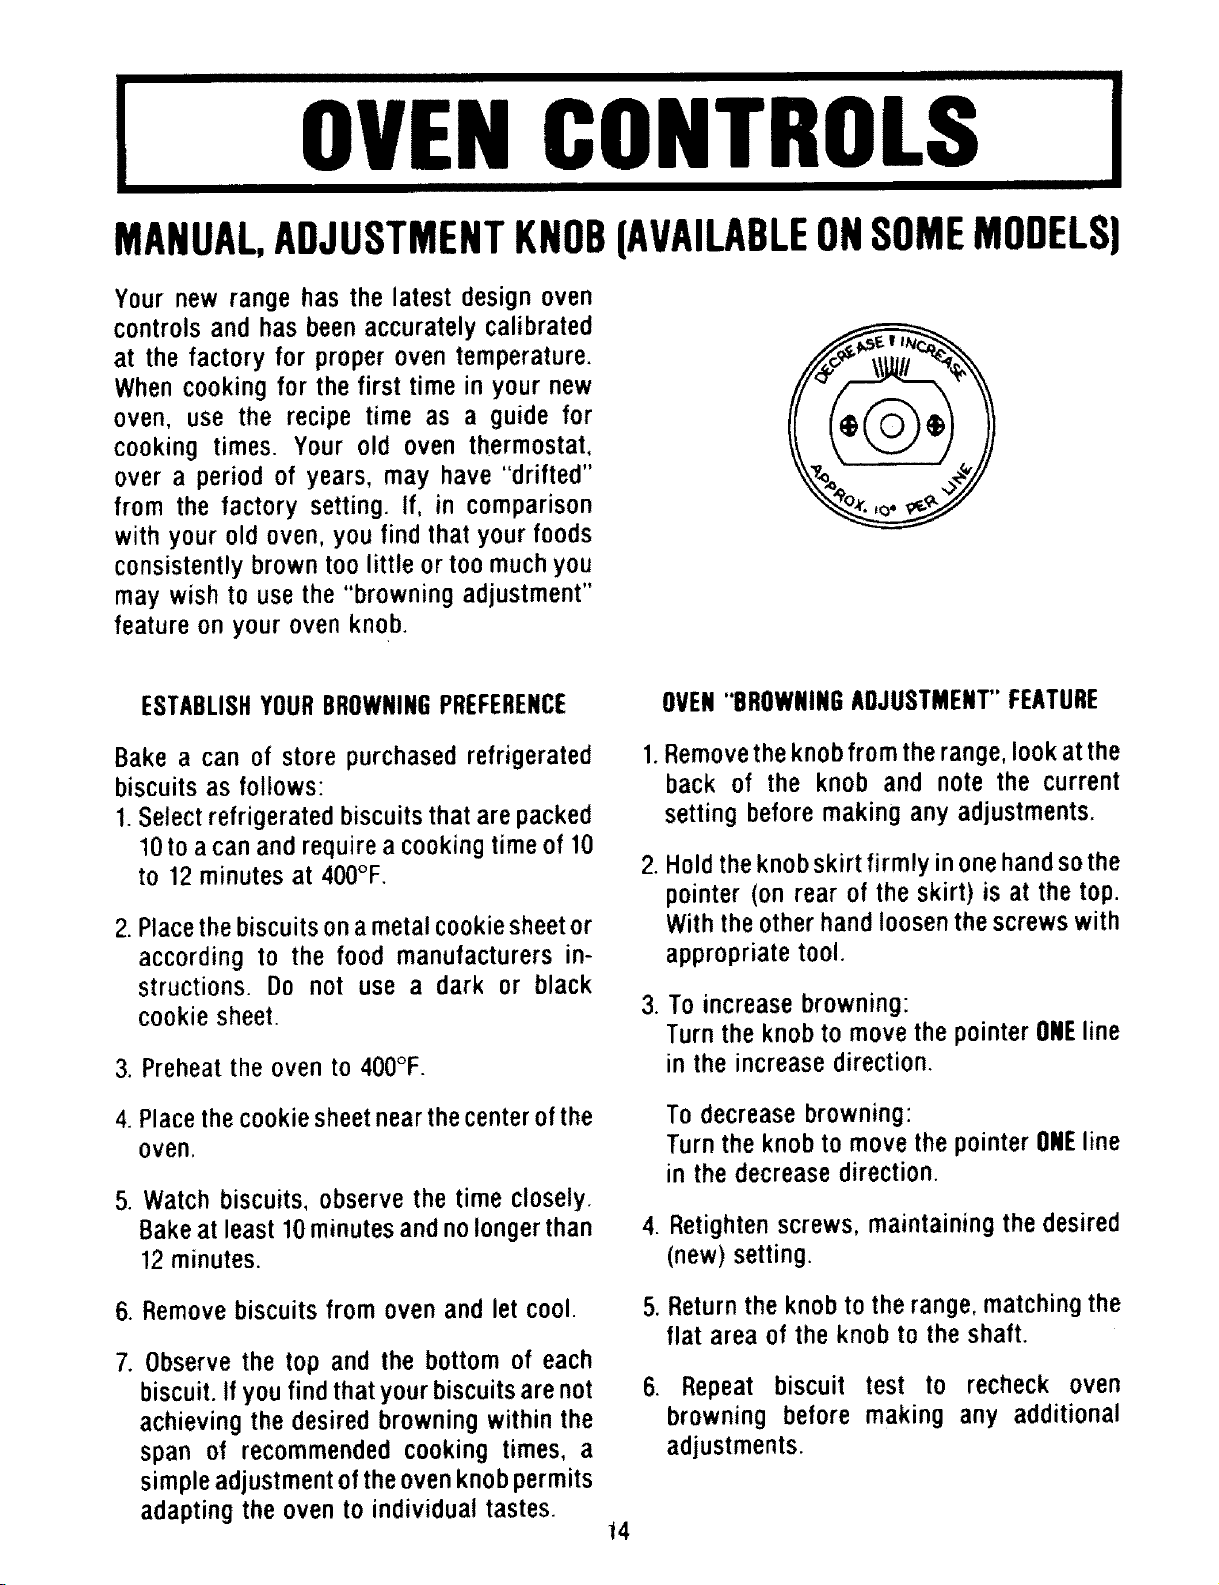
OVEN"BROWNINGADJUSTMENT"FEATURE
1.Remove the knob from the range, look at the
back of the knob and note the current
setting before making any adjustments.
. Hold the knob skirt firmly inone hand so the
pointer (on rear of the skirt) is at the top.
With the other hand loosen the screws with
appropriate tool.
3. To increase browning:
Turn the knob to move the pointer ONEline
in the increase direction.
To decrease browning:
Turn the knob to move the pointer ONEline
in the decrease direction.
4. Retighten screws, maintaining the desired
(new)setting.
6. Remove biscuits from oven and let cool.
7. Observe the top and the bottom of each
biscuit. If you find that your biscuits are not
achieving the desired browning within the
span of recommended cooking times, a
simple adjustment of the oven knob permits
adapting the oven to individual tastes.
5. Return the knob to the range, matching the
flat area of the knob to the shaft.
6. Repeat biscuit test to recheck oven
browning before making any additional
adjustments.
t4
Page 15

I LJ IIIIIIIIIIIIIIIIIIIIIIIIIIII
[ OVENCONTROLS
IIIIl! I111111111111111111111 IIIIIIIIIIII IIII1[
ALL ovens are controlled by a thermostat which regulates howhot theoven will get. Topreheat-
setthermostat to desired heat, wait approximately 10- 15 minutes, then insert food for cooking.
Some models will also have a selector dial, ifso, it must be set on bake position for the oven to
preheat.
THERMOSTATOIAL- Turn the knob counter- /_-"_
clockwise to the desired temperature setting.
There is a delay of approximately 45 seconds
before the main burner ignites. This isnormal,
and there is no gas escaping during this
delay. Theoven thermostat will automatically "_"P6^__ __ _._
keep the oven heat at the desired temperature
you have chosen.
ELECTRICIGNITION - Some models will be
equipped with automatic electric ignition.
CONSTANTPILOT- Some models are equipped
with a constant burning pilot. Thispilotmusthe
Ill helorothe ovenwill operate.
1. Turn the oven thermostat to OFF.
2. Oven door may be removed for easier
access.
3. Remove oven racks.
4. To removeoven bottom(A or B on right):
a. Slidethe two rear catchesforward.
b.Lift the backedgeupwardwhileslidingit
towardstherearuntilthecatchesinfront
release and oven bottom can be
removed.(Thefront edgeis heldby two
pinsor catches).
Other ovens, you:
a. Pushoven bottom towards oven back.
b. Lift front end up.
3. Pull towards you & out
_/!/////A
l
_///////A
f
PILOT LIGHT ,__
30" RANGE
-- (STEP 1)
IIIIIIIIIIIIIIIIIIII11
"-'I
5. Light the standingpilot(avery smallpilot)
withamatch.(Gascannotflow tothe oven
burner until approximately 45 seconds
afterthepilotisrelit,evenifthethermostat
is open.
6.Replacethe baffle,ovenbottom,racksand
ovendoor.
(STEP 2)
20" & 36" RANGES
15
Page 16

I
BROILING
i
LOWERBROILERCOMPARTMENT
The oven is equippedwith a lower broiler
compartment.WhentheBROILsettingisused,
the ovencannotbe usedat the sametime.
BROILERDRAWER METHOD - Broiling is a
method of cooking tender foods by radiant
heat under the burner. Generally, the distance
between the meat and the burner and broiling
time regulates degree of doneness.
1. Prepare food for broiling. Remove excess
fat from meat and slash remaining fat
around the eges. This will prevent excess
spattering and the meat "curling." Do not
slash the meat or the juices will drain out
during cooking.
3. Placefoodontheinsertofbroilerpan.Place
broilerpaninthebroilcompartmentsothat
top surface of meat is from 2 to 5 inches
fromthe broil burner.NOTE:This is a per-
sonal choice- dependingonthe degreeof
doneness desired. Generally, for brown
exteriorand rare interior,the meatshould
beclosetotheburner.Placefurtherdownif
you want it well done.If meat is closeto
burner,watchto seethat fat doesnotignite
fromhigh broilingtemperatures.
4. Whena little over half ofthe broilingtime
has passed, season, turn, and finish
cooking on the second side. Serve
immediately.
WAISTHIGHBROIL
SELFCLEANONLY
.
Preparefoodfor broiling.
2.
Setyour thermostatto broil.
3.
Set selectorto cook (bake/broil).
4.
Place food on insert of broilerpan. Place
broiler pan on any of the 3 lower rack
positions.Generally,for brownexteriorand
rareinterior,themeatshouldbeclosetothe
burner. Place further down if you want it
well done.
2. Setyouroventhermostatto broil.Preheat-
ingisnotnecessaryfor precookedfoodsor
foodsto becookedto thewell-donestage.
Fora charcoallike exterioron meatsto be
cookedto the rare or medium-rarestage,
preheat the broilerinsertfor 5 minutes.
IMPORTANT:Forbroilingit isrecommended
you use any rack position exceptthevery
top. If meat is too close to the burnerit
may ignite.
. Whena little over half ofthe broiling time
has passed, season, turn, and finish
cooking on the second side. Season the
second side and serve immediately. On
SELFCLEANmodelsDONOTslidelockbarto
the right during broilingor baking.Range
doorwill lock, turn broileror bake burner
off andstay lockedfor upto 1 hour.
16
Page 17

CLEANINGLOWORHIGHBROILERS
1.Removebroiler pan&insert during preheat.
Foods placed on a hot insert will stick.
2. Remove broiler insert immediately after
cooking. Thecompartment may still behot
and will bake drippingsonbroilerinsert.
3. Soak broilerpanas soonas possibleafter
cooking, sprinkle with soap or liquid
detergent and a little water. Foods will
loosenduringyour meal& makeclean up
easy.
DONOTUSEaluminum foil to cover broiler
insert. This prevents the fat from draining
out of the heat zone into the broiler pan.
The broilerpan and insertare designedto
allow drippingfat to drain away from the
foodsto a protectedarea. The meltedfat is
thus kept away from the high heat. You
shouldnotcovertheinsertwith foil orbroil
withoutthe insert.Theexposedmeltedfat
couldflamewhen door is opened.
17
Page 18

Follow directions for the model you are using. If your clock is not featured below, see other
examples in this book.
TO SETTIME OF DAYCLOCK
Push in minute minder control (A) and turn
clockwise (while holding in) to desired time of
day.
TOSETMINUTEMINOER(TIMER)
Turn minute minder control (A) clockwise
until pointer rests on desired minutes (do not
push in). A signal will sound at the end of
count down time. The signal stops when
pointer is turned to the "OFF" position. NOTE:
On clocks other than digital, the minute
markings are the inside markings on the
clock.
12
. r_ •
Min_t "_¢r
A
12
g 13
,&
J
A
NOTE:If yourclock is not shownabovecheckthefollowing pagesfor your clock.
18
Page 19

IIIIIIIIIII IIII I III Illl IIIIIII I
IAUTOMAT=CCOOKINGCLOCKSI
WITHSTOP&STARTTIMECLOCKS(NONSELFCLEAN-- FORSELF
CLEANDELETEREFERENCESTO "PUSHFORMANUAL")
TO SET TIME OF DAYCLOCK- Push in minute
minder control (A) and turn clockwise (while
holding in) to desired time of day.
TO SETMINUTEMINOER(TIMER)- Turn minute
minder (A) clockwise to desired minutes (do
not push in). A signal will sound at the end of
count down time. The signal stops when con-
trol is turned to the "OFF" position. NOTE:On
clocks otherthan digital, the minute markings
are the inside markings on the clock.
TO SETSTARTTIME- If you are leaving home
and would like a roast to start cooking after
you leave: (1) Set thermostat dial to desired
temperature. (2) Set selector to 'TIME BAKE'if
equipped. (3) Push in and turn knob (B) to the
time you want the roast to start cooking. Knob
will pop out at start of cooking. (4) You must
also set the stop time knob (C).
1
1
I I
B C
@ @
A
B C
TOSETSTOPTIME- Pushin and turn knob (C)
to time you wish the roast to stop cooking -
knob will pop out at the end of cooking. This
knobmustbe pushedback in for rangeto work
manually.
TO STOPTIME BAKE- if you should decide to
stop in the time bake cycle:
1. Turn thermostat control to OFF.
2. Rotate start control (B) until it matches
time-of-day and pops out.
3. Rotate stop control (C) until it matches
time-of-day and pops out. Then push back
in for manual operation.
12
6
19
Page 20

IIIIIIIIIIIIIIIIIIIIIIIIIIIIIIIIII IIIII I]
ICLEANINGINSTRUCTIONSI
I I II ]HH] ] H ]
TOCLEANCOOKTOP
1.Cleancooktopwith caution- ifa wetsponge
or cloth is used to wipe spills on a hot
cookingarea, be careful to avoid steam
burn.Somecleanerscan producenoxious
fumesif appliedto a hot surface.
2. To clean area below cooktoplift cooktop
and wipe cleanwith soap & warm water.
TOCLEANWINDOWS
Whenovenis cool,usea mild,non-abrasive
glasscleaningagenton dampcloth.
PORCELAINORSTANDARDOVEN
PORCELAIN
Can bechipped if misused - use ammonia ora
commercial cleaner. It is suggested that fruit
juices, vinegar and other acid mixtures be
wiped up immediately.
TOCLEANUNIBURNER
Whenburneriscool,remove,cleanwithsoap
& water or place in dishwasher before
returningto the range,besure all holesand
portsareopenandclearofbakedonfood.To
openholesscrubwithsoap&waterandnylon
brush. Dry thoroughly before returning
uniburnerto your range.
gAILYMAINTENANCE
Warm soapy water in a slightlywarm oven
(nothot)- willremovespillsimmediatelyafter
spillover (a fine steel wool can be usedon
stubbornareas).
SOILEDOVEN
1.Place 8 oz. glass or enamel container full of
household ammonia in oven overnight or
several hours prior to washing (this'will
loosen soil).
2. Wash with warm soapy water.
3. Scour stubborn areas.
4. Rinse throughly with clean water.
HEAVYBUILDUPORLARGESPILLOVERS
1. Follow directions on can of commercial
cleaner.
2. Rinsethoroughly with one tbsp. vinegar in
one cup of water.
NOTE:Protect metaltrim with maskingtape.
DONOTMIX CLEANINGAGENTS.
20
Page 21

ill llllllll lllllll lllllll |
! CLEANINGINSTRUCTIONS I
II I I I I||||1
CONTINUOUSCLEANOVEN
CONTINUOUSCLEAN
A continuouscleanoven has a very special
finish,it willbeslightlyroughtothetouchand
if it were magnified, you would see many
peaks and valleys. This polycrystalline
surfaceallows grease,oil, and other soil to
spreadoveritsmanya surfacessothat more
of thesoilwill beexposedtotheair.Whileyou
cook,the heat of your ovenwill thenoxidize
or burnthe soiled areas away slowly. The
soiledareas will notdisappealimmediately.
This cleaning is a gradual or continuous
process.
IFSOILISHEAVY,youmayfinditnecessaryto
operate the oven empty at approximately
400°Fapproximately1hoursothe spotswill
lighten(somesmokingmay appear).
SPECIALCLEANINGINSTRUCTIONS
DONOTUSECOMMERCIALOVENCLEANERS
ORABRASIVES.
FORLARGESPILLOVERS
1. Start when oven is cool.
2. Remove all racks and cooking utensils.
3. Remove spillover by gently prying up - DO
NOT SCRAPE - (lightly rub with plastic
mesh).
4. Wash with detergent.
4. Rinse thoroughly with small amounts of
clean water.
6. Blot dry with sponge or towel. O0NOTWIPE.
21
Page 22

OVENPREPARATION
1. Removeall pans from the oven. Theracks
may beleft in but will bediscolored and not
slide as easily.
CI_AN M VENT
OPENINGS ON
BACKGUARD
2. Wipe outexcessgreaseor spilloversfrom
bottomof oven. Otherwisesmokingmay
occurbecauseoftemporarilyover-loading
the smokeeliminator
Theseareasarenotexposedtothecleaning
heatsotheyshouldbecleanedbeforeusing
the CLEANcycle.Otherwise,theyget just
hot enoughto bake on the soil making it
harderto remove.
4. DONOTuseovencleaners.Nocommerical
oven cleaner or oven liner protective
coatingof any kind shouldbe usedin or
aroundany part of the oven.
WiPE THIS AREA
.
Wipe clean oven vents, backsplash,
backguard,facingsandovendooroutside
the seal. With gentle cleanser,also clean
the slantedand flangededgesof the door
lining.
_ --FACIIIGS
--SLANTED
EDGES
CAUTION
5. DO NOT clean, rub, or scrape the oven
gasket.Thisisessentialfor a tight seal on
theoven. Careshouldbetakennotto rub,
damageor movethe gasket.
6.Cleanonly partsreferencedinthismanual.
GOOn
DOOR& WINDOWMAYBECOMEHOTTOTHETOUCH,
DONOTLETCHILDRENPLAYONORNEARTHERANGE
22
Page 23

I I |I|
SELFCLEANINSTRUCTIONS
1. Close door, moveovenlatchuntil it rests in
the lock position on right.
2. Set thermostatdial to "clean."
3. Turn selectorto "clean time bake."
4. Check starttime knob. it should be in the up
(or out) position. To check, push in knob, if
it springs back out, it will be in the up (or
out) position.
5. Check stoptime knob.
a. It will read the same time as your time of
day clock. NOTE:The knob should be in
the up (or out) position. To check,push in
knob, if it springs back out it will be inthe
up (or out) position.
b. Push in the stop time knob and turn
pointer forward 3 hours. Youhave set the
amount of time your oven will clean.
NOTE:Knob will stay in the "in" position.
c. When clean cycle is complete, the stop
time knob will pop out and once again
read the same as your time of day clock.
d. Return latch to its original position after
the lock light goes out. NOTE:The door
will not open for approximately 1 hour
after cleaning or until oven has cooled
considerably.
6. The lock light is a visual indicator that your
door is locking for self cleaning. To avoid
damage to the lock, DONOTattempt to open
the door at any time while the lock light is
on. Approximately 1 hour after the com-
pletion of the clean cycle, the lock light will
turn off and latch can be returned to its
original position.
7. When you open the dooryou will see quite a
bit of ash deposit. Don'tbealarmed! Most of
this wipes right up with a damp sponge or
cloth. Depending upon the amount of soil,
some of the ash appears to be a light film,
and some will look heavier and darker.
If thereare a few stubbornspots,youmay
eitherscourwithfine,soap-filledsteelwool
pad or leavethemuntilthenextcleancycle.
Sometimes fine hair-like lines appear inthe
oven interior or door. This is a common
condition, resulting from heating and
cooling. These lines do not affect the per-
formance of the oven.
]
,_, I • _, i • ]
1
12
G
NOTE:Thoughwe donotrecommendleavingovenracksintheovenduringa cleancycle,youmay
prefercleaningthemautomaticallyin spite of the discoloration.
23
Page 24

II IIIIIII I
TO INTERRUPTCLEANINGCYCLEOR
TO RESETRANGEFORNORMAL USEAFTERCLEANING
1.Advancestoptimecontroluntilitpopsup(or
out)NOTE:Stoptime pointerwill readsame
as time of day clock.
2. Turn thermostatoff.
3. Turnselectorbackto cook. (Bake/Broil).
4.Checkstarttimeknob.itshouldbeintheup
(orout)position.Tocheck,pushinknob,if
it springsbackout,it will be in the up (or
out) position. To put start time knob in
up/out position,rotate knob until it pops
up/out.
5. Doorcan not be unlatched until lock in-
dicator light goes out. DONOTattempt to
open door while lock light is on.
6. Lock lloht will stay "lit" until oven has
cooleddown (approximately1hour).
7. Unlatchdoorwhen lock light goesout.
24
Page 25

[
PART
BroilerPan& Rack
Control Knobs
Grate
Exterior(Porcelain
enamel)
Glass
Metals
Interior
(standardclean)
Continuous Clean
Self Clean
SiliconeRubberDoor
Gaskets(standard&
continuousclean).
BraidedGaskets
(self-clean)
OvenVent soap & water not removable- wash in place.
Racks soap& water wash and rinse- commercialcleanerscandis-
Broil Drawer soap & water removedrawer- wash insoapandwater- DONOT
(noton self clean) USEABRASIVE.
Uniburner soap & water removeuniburner- wash in soapandwater or
CLEANINGAGENT
soap& water
scourpad
mildsoap& water
spap & water
steelwool
soap&water
drytowel
soap & water
or glass cleaner
soap& water
chromecleaner
soap& water
commercialoven
cleaneror scouring
powder
detergentex. 409,
Fantastic
Janitor in a Drum
high heat
soap& water
commercialcleaner color your racks- test beforeusing.
remove the broil pan immediately after broiling,
let cool slightly, sprinkle pan with soap and lay
wet paper towel in it - let stand a few minutes -
wash - scour if necessary - dry.
pull knobs off - wash gently and return to range
do not soak.
wash with soap - scour with cleanser or steel
wool - dry thoroughly.
wipe up spills immediately with paper towel when
surfaces are cool, wash with soap and polish with
dry cloth. DO NOT use abrasive cleaners.
wash with soap, polish with dry cloth or wash
with glass cleaner and paper towel.
wash, rinse, then'polish with dry cloth - DO NOT
use abrasives or other cleaners.
use a small glass of household ammonia - let
stand overnight inside your oven - then clean with
soap and water or use a cleaner following instru-
ctions on can - use the scouring pad on stubborn
soil - rub gently- rinse and wipe thoroughly with
one tbsp. vinegar to one cup of water - DONOT
MIX CLEANERS.
do not scrape - oven is always burning off soil -
if areas are heavily soiled, run over to lighten
spots or wash with detergent and plastic scour-
ing pad - DO NOT USE ABRASIVE rinse and blot
dry.
lock in place according to direction in this manual
set selector and thermostat - oven will clean it-
self - wipe out ashes with damp cloth sponge.
wash with soap - rinse thoroughly.
DO NOT REMOVE.
DONOT CLEAN.
dishwasher.Usesmall wire to reopenholesfor
flame. _
INSTRUCTIONS
25
Page 26

lllllllllllII
HANDY HINfS
I
CONSERVINGENERGY
1.Choosemediumweight metalcookwarewith flat bottoms,straightsidesandfitted covers.
2. Thesizeofthepanshouldcompletelycovertheheatedportionofyoursurfaceelement.Ongas
ranges,adjustyour flameto pansize.
3. Preheatpans onlywhenrecommendedandthensaveenergyby usingthepan immediately.
4. Usethe leastamountofliquidsor fats to shortencookingtime andretainthemostvitamins
and minerals.
5. Startfoodsonhigherheatthenturnthemdownoroffduringtheremainderofthecookingtime.
6. Properlyusedcooktopelementsor burnersaremoreefficientthanyouroven- usethemwhen
applicable.
7. Heat the pan - not the airTAlways placethe utensil on surface element or burner grate before
turning it on and turn it off. Use residual heat from the pan to finish cooking before removing
pan.
I
8. Useonly refrigeratedor roomtemperaturefoodswhencooking.Thaw frozenfoodsbefore
cooking.
9.Duringcookingorbaking,avoidfrequentdooropeningsorlidlifting,asitresultsinlossofheat
and unsatisfactoryresults.
10. Cook more than one item together - potatoes, vegetables, etc. can be cooked with the main
dish.
11. Do your baking directly after an oven meal to avoid reheating the oven.
12. Whenever possible use covers while cooking to retain heat.
SAVES
YOU
MONEY
Page 27

IMPROVE COOKINGPERFORMANCE I
SURFACECOOKING
should be heavy gauge and lined with
COOKINGUTENSILS
anothermetal.
1. Flat bottomutensils arethe best and most
efficient in using the heatfrom the cooktop
(checkfor flatness by rotating a straight
edge ruler on the bottom of the pan,
checking for dips or unevenessas you
rotate).Unevenutensilscauseslowuneven
cooking.
'. Mediumweightutensilsare bestsuitedfor
cooking because they heat evenly and
quickly. Theyarealsolightweightandeasy
to handleeven when full. Sauce pan and
broilerinformationlisted below.
A/uminum is moderately priced, light-
weight,and a goodconductorofheat.The
heavier the gauge (thickness), the more
durable.Aluminummaystainfrom mineral
in water and in foods.
Stain/ess stee/ is exceptionally durable,
easyto clean, anddoesn'treactwithfoods
or detergents. Because stainless steel
alQneisa relativelypoorconductorofheat,
it isusuallycombinedwith othermetalsto
provide moreeven heat distribution.
G/ass ceramic's chief advantage is its
multiuses; it can go from freezer to top of
range or oven to table.
,
The correct heat setting for each utensil is
very important for good results - check
your cookware directions for
recommended heat setting for each pan.
.
Utensils should have tightly secured
handlesmade of a heat resistant material -
theyshouldbefree ofroughedges,cracks,
wells, etc. that would make them hardto
clean.
,
Tea pots may have a ledge or rim around
the bottom. If this ledge extends over the
heating element, or grate it can overheat
and damage the porcelain top and heat
element or grate.
METHODS
Baste- To moisten food while it cooks, so that
the surface doesn't dry out and flavor is
added. Melted fat, drippings, sauce and fruit
juice are the liquids generally used.
\
Castiron is heavy to handle, but durable
and inexpensive.Cast iron heats slowly
and retains heat well. It tends to rust and
alsoto discoloreggsandfoods containing
acidsuch as wine or vinegar.
Copper is good looking, very expensive,
and an excellent conductor of heat. It
Blanch-To cook a few minutes in boiling water
either to help loosen the skin from some
foods, or as a stop in preparing vegetables for
freezing.
27
Page 28

SURFACECOOKING
Bell- To cookfoodoverhighheat inliquidin
which bubblesrise constantlyto the surface
and break.
Braise-Tocookfoodover lowheatina small
amountofliquidinacoveredpan.(Foodmay
ormaynotbebrownedfirstinasmallamount
of fat).
C|ramllize - Tostir inskillet over low heat until
it melts and develops characteristic flavor
and golden-brown color.
Deep-fry- To cook food in hot fat deep enough
for food to float on it.
Fry- To cookfood over highheatin a small
amount of fat. See also deep-fry, pan-fry,
saute.
Pan- To cook, covered, in very small amount
of liquid.
Poach - To cook food over low heat in
simmering liquid.
Preesure-uok- To cook in steam underhigh
pressure,usinga specialsaucepan.
Saute-To brownquicklyinasmallamountof
fat, with frequent turning. Used as a verb
meaningto fry in a small amountof fat.
Sear - To brown the surface of meat by the
short application of intense heat. Meat is
seared for the purpose of developing flavor
and improving appearance.
Scald- To heat liquid just to below the boiling
point.
Simmer-To cook food over low heat in aliquid
just below the boiling point in which bubbles
form slowly and collapse just below the
surface.
Pan-broil-To cook food, uncovered, over high
heat on ungreased or lightly greased hot
surface, pouring off accumulating fat.
Panfry- Tocookfoodoverhighheatinasmall
amountof fat.
Parboil- To boil until partially cooked, usually
before completing cooking by another
method.
Steam-Tocookfoodonarackorina colander
in a coveredpanover steaminghot water.
Stew - To cook food over low heat in a
simmeringliquid.
Stir-fry- To cook sliced food quickly Chinese-
style in a skillet or wok.
28
Page 29

!
UTENSILS
BAKING
I
1. Use the size utensilrecommendedin the
recipe- DONOToverorunderfilltheutensil.
Always allow for expansionof foods or
liquids.
HOWTOMEASUREPANS
Be sure your pans are the kind and size
specifiedin the recipe.The size of some
cookwareis expressedin liquidmeasure-
mentat its level full capacity.
Measuretip insideel bake-
warefarlength,widther
dlamMlf:measureperpendi-
cularinsidefardepth.
2. Whenusingmorethanoneutensilin oven,
staggerthem on the same rack or on two
racks so that oneis notdirectlybelowthe
other- makesurethatthepansdonottouch
and are at least 11hto 2 inchesaway from
the ovenwalls and otherpans.
Sizesfor skilletsar frypmss
andorlddlaisare statedas the
topoutsidedimensions,ex-
clusiveof handles,
3. Choosethe correctutensilfor what youare
baking.
a. Shinyutensils- reflectheatthebestand
will producea lightevencrustoncakes
and pies.
b. Rough,dark or dull utensils- absorb
heatandwill producea heavier,darker
crust.
c.Glassutensils-absorbheat- youshould
turnyourovendown25° lowerthanthe
suggested temperature when using
glass- they producea heaviercrust.
METHODS
Bake- To cook by dry indirect heat until food
begins to brown or dry the exterior surface
and interior has reached desired temperature.
Defrostor Thaw - To melt ice crystals from
frozenfoodsby placingin a warm oven.
a. Placein deep panto catch run-off.
b. Place in 150°F oven (most foods defrost
approximately four times faster than at
roomtemperature).
c. Cookfoodsimmediatelyafter defrosting.
d. NEVERrefreeze.
NUMBER
OFPANS
1
2
3-4
RACK
POSITION
2or3
2or3
2or3
PLACEMENT
center
oppositecornersandat
least 11hto 2 inches
apart.
oppositecorneron two
racks so that no pan is
aboveorbelowtheother.
Rout - To bake slowly, (at approximately
325°F) tender cuts of meats, in an uncovered
pan.
a. Calculate cooking time per pound.
b. Set meat fat side up so it will baste itself.
c. Place on lowest shelf.
d. Insert meat thermometer to measure
internal temperature.
e. Allow meat to stand 15-20minutes, before
carving. The internal temperature will rise
5°F during standing time.
29
Page 30

I
BAKING
II
RACKPOSITIONS
It is importantto cookfoods on the proper
rack.
* Checkrackpositionbeforeany baking.
* Always changeracks while oven is cold,
TYPEOFBAKING
Angelfood
Biscuits, cookies
RACKPOSITION
2or3
HIGHEST
MED.HI
MED.LOW
LOWEST
4th position
3rd position
2nd position
1st position
" , _ {1
REASON
Heat mustbe ableto deflect to
browntop.
Middlepositionallows for the
mostcirculationand oven
heating.
Cakes- casseroles
lira
Frozenpies
Muffinsandbreads
Roasting
Turkeyor
largeroast
2or3
oncookiesheet#1
2or3
i ,,,i u
2or3
Heat must beable to deflectto
browntopcrust.
Middlepositionallows most
circulationand even heating.
Allowseasy accessfor basting.
3O
Page 31

I I
I II IIIIIIII IIIII I II I I II
IIIII
CUT
Rib
Boneless Rib
RolledRump
(highquality)
,,, i iii1,11 ,i iii i, , i iii
Sirloin Tip
ROASTINGCHAR[
IIIHIIIIII II IIIIIIII II _ I
(OVENTEMPERATURE325°)
APPROX.WEIGHT
6to 8 pounds
4 to 6 pounds
4 to 6 pounds
31/4to 4 pounds
APPROX.MIN.
PERLB.
23-25
27-30
32-35
26-32
34-38
40,42
25-30
35-40
INTERNAL
MEATTEMP.
140Rare
160Med.
170Well
140
160
170
150- 170
140- 170
!
Pork(fresh)Loin
BonelssHam
Cookbeforeeatingham
Precookedham
i
Shoulderpicnicham
LambLeg
Shoulder(whole)
Shoulder(boned)
Veal
Leg.lamb shoulder
Poultry
Chicken
3 to 5 pounds
5-7
2-5
H i
Under10pounds
10- 15
5 to 8 pounds
3 to 5 pounds
3 to 5 pounds
3 to 5 pounds
6 to 8 pounds
3 to 5 pounds
Over5 pounds
30-35
35-40
30-45
20 - 30
17- 20
14- 18
25-35
20-35
30-35
40-45
30-40
25-35
30-40
35-40
170
170
170
155- 160
155- 160
130
170
170- 190
170- 180
170- 190
170- 180
170- 180
185- 190
185- 190
Turkey
6 to 16pounds
16to 20 pounds
Over20 pounds
31
20-25
18 - 20
15- 18
180- 185 (in thigh)
180- 185
180- 185
Page 32

I ill I lllll
BROILING
!
UTENSILS- Broilingpanandgrid(includedin
oven)anddeepmetal pan with rack.
BROILINGMETHOD- Broiling is a method of
cooking tender foods by direct heat under the
burner. Generally, the distance between the
meat and the burner and broiling time
regulates degree of doneness.
Any steak for broilingshouldbe at least _
inchthick. Thinnercutswill be done before
they are brown and should be pan broiled
instead.
Veal and Pork should not be broiled;veal
becauseit is too lean; and pork because it
requires long, slow cooking to be eaten
safely.
Fish needsto be brushed in oil before broiling
and placed skin side down in greased broiler
pan.
an excessiveamountof smoke,the rack
has beenplacedtoocloseto the broiler.
C*
Turnselectordialto broil,turnthermostat
dial to broil - preheat is not necessary
except for charcoal exterior with rare
interior(steaks)preheat5 - 10 minutes.
do
Broilingshouldbedonewiththeovendoor
openon electricovensanddoorshutongas
ovens.
e.
Follow suggestedtimes on broil chart-
meat should be turned once about half
way throughbroilingtime.
Checkthe donenessbycuttingslit in meat
near centerfor desiredcolor.
g.
Remove broiler pan immediately after
broilingso that drippingwill not bake on
and cause messycleanup.
Chickenneeds to be less than 3 lbs. and
occassionallybasted with fat (will need a
lower rack setting).
a. Prepare meat - remove excess fat from
meat and slash remaining fat being
carefulnotto cutintomeat- thiswill help
excessfat to drain and keepsmeatfrom
curling.
b. Positionrack sothat meatwill beapproxi-
matelyI inchfromthebroiler.Ifyounotice
EASYCLEANING
Allow to cool slightly then:
1. Remove broiler pan immediately after
broiling.
2. Drain drippings.
3. Sprinkle with soap and cover bottom with
wet paper towel - this will soften baked on
foods and make clean up easy.
32
Page 33

i
BROILINGCHART
Thetimesgiveninthechartshouldbeusedonlyasaguide.Increaseordecreasebroilingtimesto
suit individualtastefor aloneness.
FOOD
, i,,i ,,
BeefSteaks
BeefSteaks
Frozen
BeefSteaks
Fresh
ChickenBroiler
Split & Quartered
FishFillets
Fresh
Frozen
i q l
Hamburger
Fresh
,unlm,
Hamburger
Frozen
|1
Hamslice
precooked
Lamb Chops
Fresh
Frozen
THICKNESS&
QUANTITY
8 slices
3/4"
3/4"
,,i
1"
i,i
.
1"
HHHI
1/2"
1/2"
3/4"
3/4"
OONENESS
crisp
morecrisp
rare
medium
well
rare
medium
well
rare
medium
well
180°
internal
rare
medium
well
medium
150-160
internal
medium
well
medium
ill i
ii i
MIN.COOKTIME
SlOEI SlOE
3
5 3
5-6
7-8
10-11
6-7
8-9
16-17
8-9
11-12
18-20
20 skin
down
6-7
8-9
5-6
6-7
9-10
9-10
9-10
6-8
8-9
8-9
3-4
3-5
6-8
4-5
6-7
10-12
6-8
10-12
15-18
15skin
up
i,imm
4-5
5-7
4-5
4-5
5-6
5-6
3-5
6-7
6-7
2
TOTAL
5
8
8-10
10-13
16-19
10-12
14-16
26-29
14-17
21-20
33-38
35
10-12
13-16
9-11
10-12
14-16
14-16
16-18
9-13
14-16
14-16
,i
Liver-Fresh
Lobster Fresh
Frozen
=l ,,
112"- 3/4"
7 oz.
33
4
shell up
7-8
14-16
3-4
shelldown
6-7
11-12
7-8
13-15
25-28
Page 34

COOKINGTERMS
i
BAKINGPOWDER- A leavening agent which.
makes foods rise when they are baked. It is a
combination of baking soda, a dry acid or
acid salt and starch or flour. The acid
ingredient reacts with the baking soda to
produce gas bubbles in the mixture. Double-
acting baking powder produces gas bubbles
twice: first during mixing and second during
baking.
BAKINGSODA - An essential ingredient of
baking powder, may be used alone as a
leavening agent in mixtures containing an
acid ingredient such as buttermilk or in
combination with baking powder. Mixtures
containing baking soda should be baked as
soon as mixed, since the soda starts to react
as soon as it comes in contact with the liquid.
BARBECUE.To roast or broil food on a rack or
spit over coals, or under a heat unit. The food
is usually brushed with a highly seasoned
sauce during the last of the cooking time.
BRUSHWITH- To use a pastry brush to spread
food lightly with liquid such as salad oil,
melted fat, milk, heavy cream or beaten egg.
CHOP- To cut food into small pieces with a
knife, blender or food processor.
COAT- To sprinkle food with, or dip it into,
flour, sauce, etc., until covered.
CUBE-
1. To cut food into small cubes (about _hinch).
2. To cut surface of meat in checkered pattern
to increase tenderness by breaking tough
meat fibers.
CUTIN - To distribute solid fat in flour or flour
mixture by using pastry blender or two knives
scissor-fashion until flour-coated fat
particles are of desired size.
DICE- To cut food into very small pieces
(about1/4 inch).
BATTER- A mixture of fairly thin consistency,
made of flour, liquid and other ingredients.
BEAT- To make a mixture smooth with rapid,
regular motion using a wire whisk, spoon,
hand beater or mixer. When using a spoon,
the mixture should be lifted up and over with
each stroke.
BLEND- To mix thoroughly two or more
ingredients;or to preparefood in blender until
pureed, chopped, etc., as desired.
BREAD- To coat with breadcrumbs,cracker
crumbs or cornmeal. Food may first be
floured,then dipped in beatenegg or other
liquidto helpcrumbsto adhere.
BROIL- To cook food by direct heat on a rack
or spit.
DICINGANONION-Cutonion in half lengthwise,
with cut sidedown, cutonion crosswise in 1/4
inch thick slices.
Hold onionfirmly and give quarter turn; cut in
1/4 inch pieces. Repeat with other onion half.
34
Page 35

TERMS
I
DRAWoTo removeentrails from, and clean,
poultry or game. Drawnfish are wholefish
that have beencleaned(eviscerated)butnot
boned.
DOT To scatter bits, as of butter or
margarine,oversurfaceof food.
DREDGE- To cover or coat food, as with flour,
cornmeal, etc.
DRESS- To mix salad or other food with
dressingor sauce.
DRIPPINGS- Fat andjuicegivenoffbymeator
poultryas it cooks.
FLAME- To ignite warmed alcoholic beverage
poured over food. Also known as flambe.
FLOUR- 1.All-purpose.Madefroma varietyof
wheats, it producesgoodresultsfor a wide
varietyofbakedgoods.Whole-wheatflouris
milledfromtheentirewheatkernelwhilerye
flourismilledfromthe ryekernel.Cakeflour
is milled especiallyfor cakesand otherlight
bakedproducts.For bestresultsalways use
the flour called for in the recipe. In recipes
calling for all-purposeand whole wheat or
rye, a certainproportionofall-purposeto the
otherflourisneededfor bestresults;sodon't
substituteflour. 2. To coatlightlywith flour.
FLUTE- To makedecorativeindentations.
FOLDIN-Tocombinedelicateingredientssuch
as whippedcreamorbeateneggwhiteswith
otherfoodsbyusinga gentle,circularmotion
to cut downintothemixture,slideacrossthe
bottom of the bowl to bring some of the
mixtureup and overthe surface.
FONDUE- Most often a dish of hot melted
cheese and wine, into which bread is dipped
and then eaten. For meat fondues, at thetable,
cubes of meat are dipped in hot fat to cook,
thenintoa choiceofsauces.Dessertfondues
includechocolateorothersaucesfordipping
chunksof poundcakeor fruit. The termalso
denotesa bakedmaindishmadewithcheese,
milk and bread.
GELATIN- Availableas unflavoredandfruit-
flavored. Theyare not interchangeable.
GLACE- 1.Glazed,aswith afrosting.2.Frozen.
GluL 1. TOcoatwitha glossymixture.2. Con-
centratedstockusedto add flavor.
GRATE.To rub food on a grater (or chopin
blenderor food processor)to producefine,
mediumor coarse particles.
6RATIN-AFrenchtermdefininga browncrust
formedby bakingor broilingbreadcrumbs,
cheese, butter or a mixture on top of a
casseroleor other dish.
GREASE-To rub surface ofdish orpan with fat,
to keep food from sticking.
GARNISH- To add a decorativetouchto food,
as with parsley, croutons or prepared
vegetables.
GRILL- To cook food on a rack by direct heat;
also the appliance or utensil used for this type
of cooking.
GRIND- To reduceto particlesinfoodgrinder,
blenderor food processor.
KNEAD- To work a food mixture (usually
dough) with a press-fold motion.
LUKEWARM- At a temperature of about 95°F.
Lukewarm food feels neither warm nor cold
when in contact with inside of the wrist.
MARBLED- Term used to describe meat with
visible fat running through the lean.
35
Page 36

I I IIIII]1
IIIIIIIIIIIIIIIIII
TERMS
HI III]
MARGARINE-Comesin severalforms.Regular
margarinewith80 percentfat isinterchange-
able with butterin recipes.
MARINADE-Aseasonedliquid,inwhichfoodis
soakedto enhanceflavor.
MARINATE- To soak in a marinade.
MEAT TENDERIZER- Papain from natural
tenderizerssuchaspapayais usedto soften
meat tissue. It is usually sprinkled on the
meat beforemeat is cooked.
MERINGUE- Mixture of stiffly beaten egg
whites and sugar. Also the cooked soft
mixture on desserts or the cooked "hard"
mixtureas a dessertshell.
MINCE- Tocut intovery small pieces, using
knife, food grinder or blender, or food
processor.
PEEL- To remove outer covering of foods by
trimming away with knife or vegetable peeler,
or by pulling off.
POT-ROAST- To cook large piecesof meator
poultry by braising;alsocertain meat cuts.
PIT - To remove seed from whole fruit.
SCORE- 1. To cut shallow slits in surface of
food to increase tenderness or to prevent fat
covering from curling. 2. To decorate.
SHRED- To cut food into slivers or slender
pieces, usinga knife or shredder.
SHUCK- To remove meat of oysters,clams,
etc. from their shellsor to removethe husk
from corn.
SKIM-To removefat orscumfromsurfaceof
food.
TOSS - To mix foods lightly with a lifting
motion, using two forks or spoons.
TRUSS - To secure poultry with string or
skewers, to hold its shape while cooking.
VINEGAR- An acid liquid usedfor flavoring and
preserving. Among the types: Cider vinegar,
made from apple juice, has a mellow fruit
flavor; distilled white vinegar, usually made
from grain alcohol; herb vinegars flavored
with herbs; and red or white wine vinegars
which also may be flavored with garlic.
PREHEAT To heat oven to desired WHIP- To beat rapidly with mixer, wire whisk
temperature before putting food into bake. or hand beater, to incorporate air and
increase volume.
PUNCHDOWN-To deflatea risenyeastdough
by pushingit down withthe fist.
PUREE- 1.Athick mixture made from a pureed
vegetable base. 2. To press food through a
fine sieve or food mill, orto blendinblenderor
food processer to a smooth, thick mixture.
YEAST-Micro-organisms that producecarbon
dioxide and alcohol from carbohydrates to
cause baked goods to rise, fruits to ferment,
etc.
36
Page 37

EQUIVALENTMEASURES
Dash
1 tablespoon
i
1/4 cup
1/3 cup
1/2 cup
1 cup
1 pint
! quart
1 gallon
I peck
,,,,,,,,,,,,,
1 bushel
1 pound
2 to 3 drops or less than 1/8 teaspoon
3 teaspoons
4 tablespoons
5 tablespoonsplus 1 teaspoon
8 tablespoons
ii,
16 tablespoons
2 cups
4 cups
4 quarts
8 quarts
4 pecks
16 ounces
BAKINGPAN EQUIVALENTS
4 - CUP BAKINGDISH:
9 inch pie plate
9 x 1¼ inch layer cake pan
7% x 3% x 21/, inch loaf pan
6 - CUPBAKINGDISH:
8 or 9 x 11hinch layer cake pan
10 inch pie plate
81hx 31/tx 2 2/8 inch loaf pan
8 - CUPBAKINGDISH:
8 x 8 x 2 inch square pan
11x 7 x 11/2inch baking pan
9 x 5 x 3 inch loaf pan
10- CUPBAKINGDISH:
9 x 9 x 2 inch square pan
11_/_x 71h x 13/4inch baking pan
15 x 10 x 1 inch jelly roll pan
12 - CUPBAKINGDISHANDOVER:
131hx 81hx 2 inch glass baking pan - 12 cups
13 x 8 x 2 inch metal baking pan - 15 cups
14 x lO_hx 2% inch roasting pan - 19 cups
37
Page 38

I IIIIIIIIIIIIIIII IIIIIIIIII IIIIIIII IIIIIII I II
ICAUSE & CORRECTION
iiiiiiii
PROBLEM
BROWNIN6:
Uneven bottom browning
Too brown on bottom
Too brown on top.
Crack on top.
Crumbly or dry.
CAUSE
1. Dented or warped pan.
2. Oven not preheated.
3. Range not level.
1. Improper rack placement.
2. Oven door has been opened
too often.
3. Oven not preheated.
4. Panstouchingwalls or other
pans.
5. Warped, dark or dull finished
pan (include glass).
1. Oven doors open too often.'
2. 0vermeasuring.
(fats-sugars-liquids).
3. Oven temp. too low.
4. Pan size too large.
1. Oven temperature too high.
2. 0vermeasuring.
i i ii
1. Oven temp. too high.
2. Over baking.
3. Over measuring.
CORRECTION
1. Use even bottomed pan.
2. Preheat to desired temp.
before adding food.
3. Adjust leg levelers (see
Use and Care).
1. Check for correctrack posi-
tion before starting while
oven is cold.
2. Opendooronly after food has
been baked for shortest re-
commendedbaking time.
3. Preheatto desiredtemp. be-
fore adding foods.
4. Pans should not be closer
than 11hto 2 inches from
each other or oven walls.
5. Use even bottomed, shiney
pans for light browning.
1. open dooronly after foodhas
been baked for shortest re-
commendedbaking time.
2. Use standard measuring
cups.
3. Doublecheckrecipe for cor-
rect oven temperature.
4. Use pan size recommendedin
recipe. ..............
1. Double checkrecipe for cor-
rect oven temperature.
2. Use standard measuring
Cups.
N,H II mll I
1. Doublecheck recipefor cor-
rect oven temp. - excess
heat dries food.
2. Check foods after shortest
baking time.
3. Use standard measuring
cups.
iiii,,,z
i
38
Page 39

PROBLEM
CAUSE
CORRECTION
Fallen
i, ,,,,
Flat
un i ill l ii i
Mound or peaked center
1. Ovendooropenedtoosoon.
,
Oven temperaturetoo low.
.
Old or too little baking
powder.
4.
Too much batter or too little
pan.
5.
Too much or too little liquid.
6.
Under baked.
1. Improper rack placement.
2, Old or too little baking
powder.
3. Oven temperature too high
or too low.
4. Pan too large for amount ol
batter.
5. Too much or too little liquid.
1. Baking time too long.
2. Oven temperature too high.
3. Pan too large or too small
4. Pans touchingwalls or
other pans.
5. Too little liquid.
1. Check food only after the
shortest recommended
baking time.
2. Check recipe for correct
oven temperature.
3. Use standard measuring
utensils.
4. Use correct pan size.
5. Use standard measuring
utensils.
6. Check food after shortest
recommendedbaking time.
1. Check rack position, before
starting and while oven is
still cold.
2. Use standard measuring
utensil.
3. Checkrecipefor correctoven
temp. and correct type of
utensil (glass utensils) re-
quire lower temperature.
4. Use recommendedbaking
utensil.
5. Use standard measuring
utensil.
1. Check food after shortestre-
commendedbaking time.
2. Check recipe for correct
oven temperature.
3. Use recommendedbaking
utensil.
4. Pans should not be closer
than 11/2to 2 inches.
5. Use standard measuring
utensils.
Shrinkage (more than
necessary).
1. Baking time too long.
2. Oven temperature too high
3. Pans touchingwalls or othe
pans.
39
1. Check food after shortest
recommendedbaking time.
2. Check recipe for correct
oven temperature.
3. Pans should not be closer
than 11/2to 2 inches.
Page 40

PROeLEM
CAUSE
iii
CORRECTION
Uneven top
Uneventexture holes
and tunnels.
1. Pans touchingwalls or other
pans.
2. Oven temperature too low,
3, Range not level.
4. Too much liquid.
5. Underbaking.
6. Undermixing.
1. Baking time too short,
2. Improper rack placement.
3. Not baking immediately
after mixing.
4. Oven temperature too high.
5. Too much baking powder.
6. Undermixing.
1. Pans should not be closer
than 11hto 2 inches.
2, Check recipe for correct
oven temperature
3. Adjust leg levelers (consult
Use and Care Manual).
4. Use standard measuring
utensils.
5. Check food after shortest
recommendedbaking time,
6. Check recipe.
i i i
1. Check foods after shortest
recommendedbaking time.
2. Check rack position before
starting and while oven is
cold.
3. Always bake immediately,
4, Check recipe for correct
oven temperature.
5. Use standard measuring
utensils,
6. Use standard measuring
utensils.
40
Page 41

SERVICING
BEFOREYOUCALLA SERVICETECHNICIANCHECKTHEFOLLOWING
SOMEORNONEoF YOURRANGEOPERATES:
Is your range plug disconnected from the electrical outlet?
Are your house fuses blown?
Is your circuit breaker tripped?
is the range plug loose or improperly plugged?
ELEMENTWON'THEAT:ISURFACEUNITS ONLY)
Are your elements properly in place?
Are element prongs bent or dirty?
BAKED600DS NOTTURNINGOUT:
Are your racks properly in place and in correct position for what you are baking?
__ Is your range level? (Check leg levelers).
Are you using the proper pan? Is it bright, not soiled or dark colored?
Have you used foil during cooking or to line your oven?
Are you using standard measuring utensils?
OVENWILL NOTOPERATE:
Did you turn the selector and thermostat switches to correct positions?
Clocks - are knobs in,correct positions? See section on clocks and timers.
OVENLIGHTWILL NOTWORK:
Is your bulb burned out?
is your bulb loose?
NEEDSERVICE?WHENYOURRANGEREQUIRESSERVICEORREPLACEMENTPARTS,CONTACTYOUR
DEALEROR AUTHORIZEDSERVICEAGENCY.CONSULTTHE YELLOWPAGESIN YOURTELEPHONE
DIRECTORYUNDER"RANGES"FORTHESERVICENEARESTYOU.
DESURETOINCLUDE:NAME,ADDRESS,PHONE,MODELNUMBER,SERIALNUMBER,ANDCOMPLAINT.SEE
WARRANTYSHEETINCLUDEDWITHTHIS MANUALFORMANUFACTURERSADOHESS.
41
 Loading...