

Page 1
Table of @ontents
(;as Range
important Safety instructions .. 1=4
Surface Cooking ......................... 5=6
Surface Controls
Sealed Gas Burners
Oven Cooking ............................ 7=18
IVlanual Clean Oven Controls
Clock Baking
Timer Broiling
Manual Clean Oven Knob Control
Baking Broiling
Self-Clean Oven Controls
Clock Delay Bake
Timer Keep Warm
Baking Broiling
Cook & Hold Oven Racks
Care & Cleaning ...................... 19=22
Self-Clean Oven
Cleaning Procedures
Maintenance ............................ 23=24
Troubleshooting ...................... 25=26
Warranty & Service ....................... 27
Guide de I'utilisateur .................... 28
Guia del Usuario ............................ 58
Form No. A/01/06 Part No, 8113P560-60 @2006 Maytag Appliances Sales Co. Litho U.S.A.
Page 2
ImpomntSafety
any part of your appliance unless it is specifically recom-
mended in this guide. All other servicing should be
referred to a qualified servicer. Have the installer show
you the location of the gas shut off valve and howto
shut it off in an emergency.
Always disconnect power to appliance before servicing.
Warning and Important Safety Instructions appearing in
this guide are not meant to cover all possible conditions
and situations that may occur. Common sense, caution,
and care must be exercised when installing, maintaining,
or operating the appliance.
Always contact the manufacturer about problems or
conditions you do not understand.
Recognize Safety Symbols, Words, Labels
Read and follow all instructions before using this
appliance to prevent the potential risk of fire, electric
shock, personal injury or damage to the appliance as a
result of improper usage of the appliance. Use appliance
only for its intended purpose as described in this guide.
General instructions
To ensure proper and safe operation: Appliance must
be properly installed and grounded by a qualified techni-
cian. Do not attempt to adjust, repair, service, or replace
Page 3
ImpomntSefetyInstructions
To check if device is properly installed, look underneath
range with a flashlight to make sure one of the rear
leveling legs is properly engaged in the bracket slot. The
anti-tip device secures the rear leveling leg to the floor
when properly engaged. You should check this anytime
the range has been moved.
To Prevent Fire or Smoke
Damage
Be sure all packing materials are removed from the
appliance before operating it.
Keep area around appliance clear and free from com-
bustible materials, gasoline, and other flammable vapors
and materials.
If appliance is installed near a window, proper precau-
tions should be taken to prevent curtains from blowing
over burners.
NEVER leave any items on the cooktop. The hot air from
the vent may ignite flammable items and may increase
pressure in closed containers which may cause them to
burst.
Do not use water on grease fires. Use baking soda, a
dry chemical or foam-type extinguisher to smother fire
or flame.
Child Safety
NEVER leave children alone or unsupervised near the
appliance when it is in use or is still hot.
NEVER allow children to sit or stand on any part of the
appliance as they could be injured or burned.
Children must be taught that the appliance and utensils
in it can be hot. Let hot utensils cool in a safe place, out
of reach of small children. Children should be taught
that an appliance is not a toy. Children should not be
allowed to play with controls or other parts of the unit.
Many aerosol-type spray cans are EXPLOSIVE when
exposed to heat and may be highly flammable. Avoid
their use or storage near an appliance.
Many plastics are vulnerable to heat. Keep plastics away
from parts of the appliance that may become warm or
hot. Do not leave plastic items on the cooktop as they
may melt or soften if left too close to the vent or a
lighted surface burner.
To eliminate the hazard of reaching over hot surface
burners, cabinet storage should not be provided directly
above a unit. If storage is provided, it should be limited
to items which are used infrequently and which are
safely stored in an area subjected to heat from an
appliance. Temperatures may be unsafe for some items,
such as volatile liquids, cleaners or aerosol sprays.
In Case of Fire
Turn off appliance and ventilating hood to avoid spread-
ing the flame. Extinguish flame then turn on hood to
remove smoke and odor.
• Cooktop: Smother fire or flame in a pan with a lid or
cookie sheet.
NEVER pick up or move a flaming pan.
* Oven: Smother fire or flame by closing the oven door.
About Your Appliance
The oven vent is located at the base of the backguard.
Avoid touching oven vent area while oven is on and for
several minutes after oven is turned off. Some parts of
the vent and surrounding area become hot enough to
2
Page 4
Importent$efetyinstructions
cause burns. After oven is turned off, do not touch the
oven vent or surrounding areas until they have had
sufficient time to cool.
Other potentially hot surfaces include cooktop, areas
facing the cooktop, oven vent, surface near the vent
opening, oven door, area around the oven door and
oven window.
Do not touch a hot oven light bulb with a damp cloth as
the bulb could break. Should the bulb break, disconnect
power to the appliance before removing bulb to avoid
electrical shock.
Do not use the cooktop or ovens as a storage area for
food or cooking utensils.
Cooking Safety
Always place a pan on a surface burner before turning it
on. Be sure you know which knob controls which
surface burner. Make sure the correct burner is turned
on and that the burner has ignited. When cooking is
completed, turn burner off before removing pan to
prevent exposure to burner flame.
Always adjust surface burner flame so that it does not
extend beyond the bottom edge of the pan. An exces-
sive flame is hazardous, wastes energy and may damage
the appliance, pan or cabinets above the appliance.
NEVER leave a surface cooking operation unattended
especially when using a high heat setting or when deep
fat frying. Boilovers cause smoking and greasy spillovers
may ignite. Clean up greasy spills as soon as possible.
Do not use high heat for extended cooking operations.
NEVER heat an unopened container on the surface
burner or in the oven. Pressure build-up may cause
container to burst resulting in serious personal injury or
damage to the appliance.
Use dry, sturdy potholders. Damp potholders may cause
burns from steam. Dish towels or other substitutes
should never be used as potholders because they can
trail across hot surface burners and ignite or get caught
on appliance parts.
Always let quantities of hot fat used for deep fat frying
cool before attempting to move or handle.
Do not let cooking grease or other flammable materials
accumulate in or near the appliance, hood or vent fan.
Clean hood frequently to prevent grease from accumu-
lating on hood or filter. When flaming foods under the
hood turn the fan on.
NEVER wear garments made of flammable material or
loose fitting or long-sleeved apparel while cooking.
Clothing may ignite or catch utensil handles.
Always place oven racks in the desired positions while
oven is cool. Slide oven rack out to add or remove food,
using dry, sturdy potholders. Always avoid reaching into
the oven to add or remove food. If a rack must be moved
while hot, use a dry potholder. Always turn the oven off at
the end of cooking.
Use racks only in the oven in which they were shipped/
purchased.
Use care when opening the oven door. Let hot air or
steam escape before moving or replacing food.
PREPARED FOOD WARNING: Follow food
manufacturer's instructions. If a plastic frozen food
container and/or its cover distorts, warps, or is otherwise
damaged during cooking, immediately discard the food
and its container. The food could be contaminated.
NEVER use aluminum foil to cover oven racks or oven
bottom. This could result in risk of electric shock, fire, or
damage to the appliance. Use foil only as directed in this
guide.
Utensil Safety
Use pans with flat bottoms and handles that are easily
grasped and stay cool. Avoid using unstable, warped,
easily tipped or loose-handled pans. Also avoid using
pans, especially small pans, with heavy handles as they
could be unstable and easily tip. Pans that are heavy to
move when filled with food may also be hazardous.
Be sure utensil is large enough to properly contain food
and avoid boilovers. Pan size is particularly important in
deep fat frying. Be sure pan will accommodate the vol-
ume of food that is to be added as well as the bubble
action of fat.
To minimize burns, ignition of flammable materials and
spillage due to unintentional contact with the utensil, do
not extend handles over adjacent surface burners. Always
turn pan handles toward the side or back of the appli-
ance, not out into the room where they are easily hit or
reached by small children.
Never let a pan boil dry as this could damage the utensil
and the appliance.
Follow the manufacturer's directions when using oven
cooking bags.
3
Page 5
Importent$efetyinstructions
Only certain types of glass, glass/ceramic, ceramic or
glazed utensils are suitable for cooktop or oven usage
without breaking due to the sudden change in tempera-
ture. Follow manufacturer's instructions when using
glass.
This appliance has been tested for safe performance
using conventional cookware. Do not use any devices or
accessories that are not specifically recommended in
this guide. Do not use eyelid covers for the surface
units, stovetop grills, or add-on oven convection sys-
tems. The use of devices or accessories that are not
expressly recommended in this manual can create
serious safety hazards, result in performance problems,
and reduce the life of the components of the appliance.
Cleaning Safety
Turn off all controls and wait for appliance parts to cool
before touching or cleaning them. Do not touch the
burner grates or surrounding areas until they have had
sufficient time to cool.
Clean appliance with caution. Use care to avoid steam
burns if a wet sponge or cloth is used to wipe spills on a
hot surface. Some cleaners can produce noxious fumes
if applied to a hot surface.
Self-Clean Oven (:select models:)
Clean only parts listed in this guide. Do not clean door
gasket. The door gasket is essential for a good seal.
Care should be taken not to rub, damage, or move the
gasket. Do not use oven cleaners of any kind in or
around any part of the self-clean oven.
It is normal for the cooktop of the range to become hot
during a self-clean cycle. Therefore, touching the
cooktop during a clean cycle should be avoided.
important Safety Notice and
Warning
The California Safe Drinking Water and Toxic Enforce-
ment Act of 1986 (Proposition 65:} requires the Governor
of California to publish a list of substances known to the
State of California to cause cancer or reproductive harm,
and requires businesses to warn customers of potential
exposures to such substances.
Users of this appliance are hereby warned that the
burning of gas can result in low-level exposure to some
of the listed substances, including benzene, formalde-
hyde and soot, due primarily to the incomplete combus-
tion of natural gas or liquid petroleum (LP:}fuels. Prop-
erly adjusted burners will minimize incomplete combus-
tion. Exposure to these substances can also be mini-
mized by properly venting the burners to the outdoors.
Users of this appliance are hereby warned that when
the oven is engaged in the self-clean cycle, there may
be some low-level exposure to some of the listed
substances, including carbon monoxide. Exposure to
these substances can be minimized by properly venting
the oven to the outdoors by opening the windows and/
or door in the room where the appliance is located
during the self-clean cycle.
IMPORTANT NOTICE REGARDING PET BIRDS:
Never keep pet birds in the kitchen or in rooms where
the fumes from the kitchen could reach. Birds have a
very sensitive respiratory system. Fumes released during
an oven self-cleaning cycle may be harmful or fatal to
birds. Fumes released due to overheated cooking oil, fat,
margarine and overheated non-stick cookware may be
equally harmful.
Save These instructions for Future Reference
4
Page 6
¢ookln
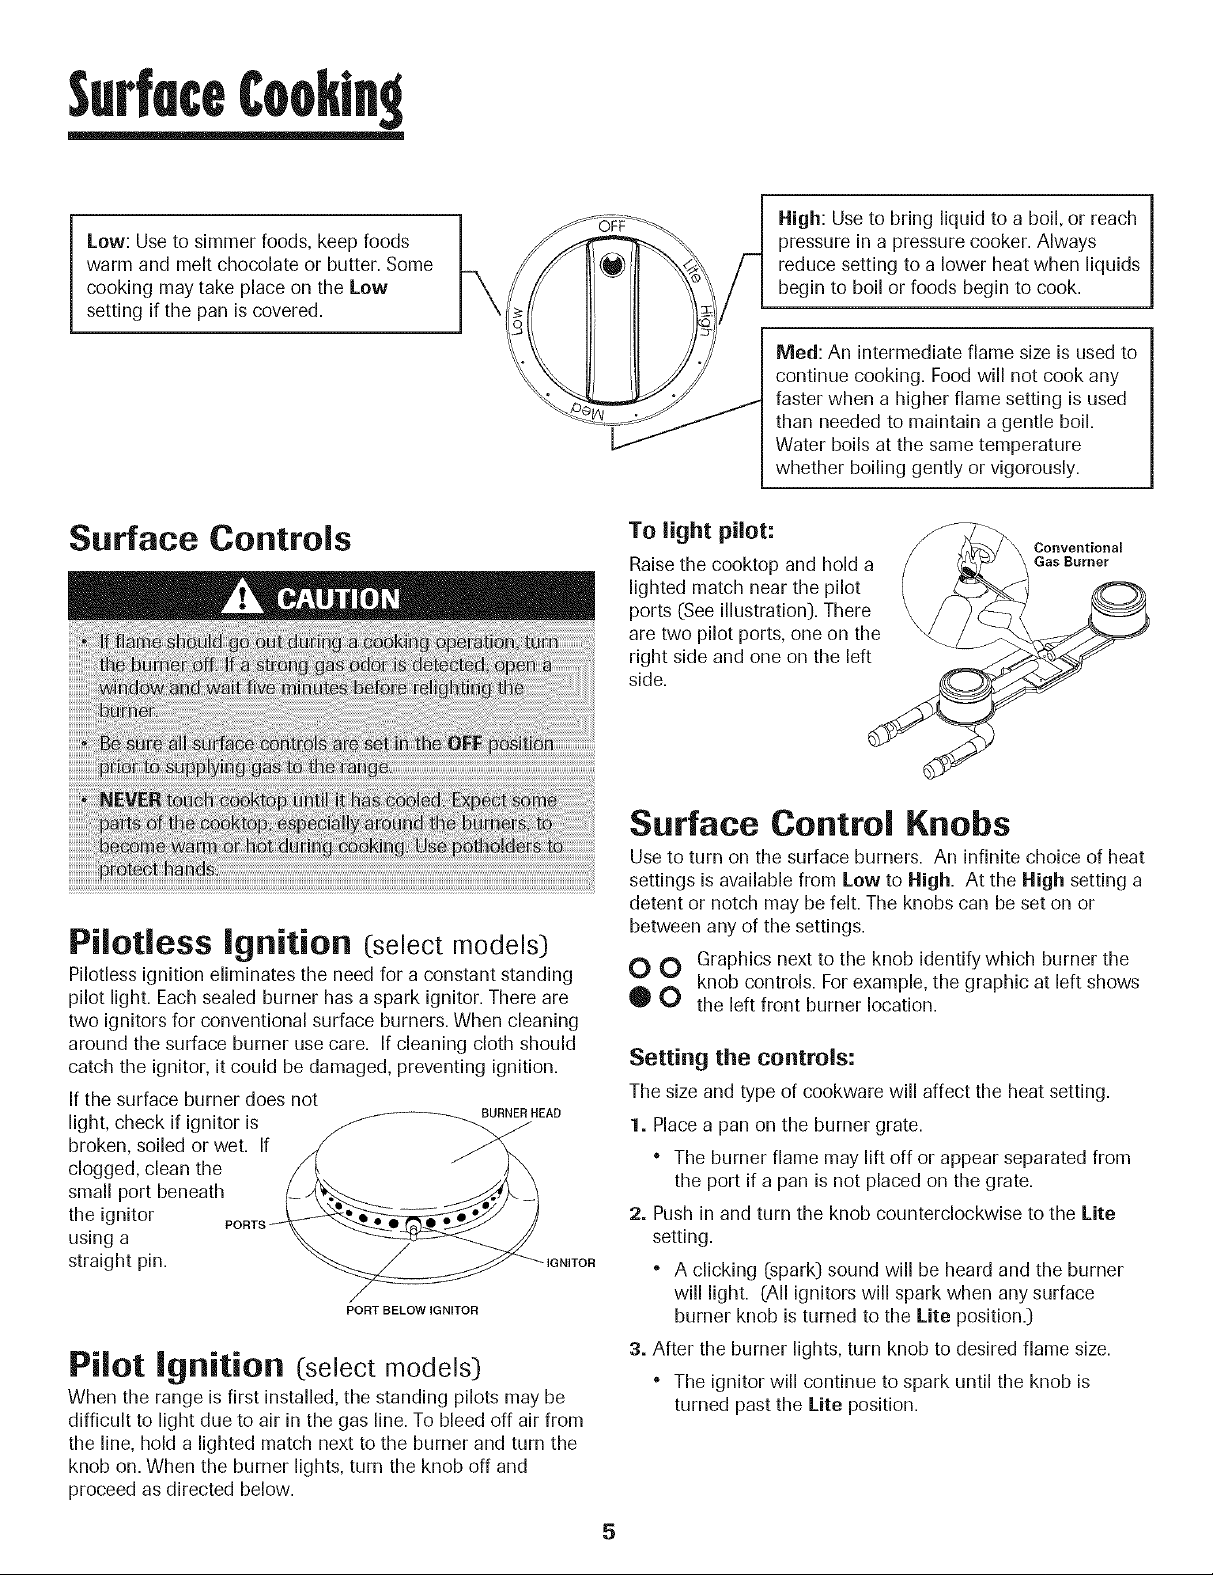
Low: Use to simmer foods, keep foods
warm and melt chocolate or butter. Some
cooking may take place on the Low
setting if the pan is covered.
High: Use to bring liquid to a boil, or reach
pressure in a pressure cooker. Always
reduce setting to a lower heat when liquids
begin to boil or foods begin to cook.
Med: An intermediate flame size is used to
continue cooking. Food will not cook any
faster when a higher flame setting is used
than needed to maintain a gentle boil.
Water boils at the same temperature
whether boiling gently or vigorously.
Surface Controls
Pilotless Ignition (selectmodels:)
Pilotless ignition eliminates the need for a constant standing
pilot light. Each sealed burner has a spark ignitor. There are
two ignitors for conventional surface burners. When cleaning
around the surface burner use care. If cleaning cloth should
catch the ignitor, it could be damaged, preventing ignition.
If the surface burner does not
light, check if ignitoris _F_HEAD
broken, soiled or wet. If /y
clogged,clean the / _,, " _ X
small port beneath (- _ _ Jd_._ # -1
the ignitor PORTB___ /
using a _.
straight pin. _ _IGNITOR
PORT BELOW IGNITOR
Pilot Ignition (selectmodels:)
When the range is first installed, the standing pilots may be
difficult to light due to air in the gas line. To bleed off air from
the line, hold a lighted match next to the burner and turn the
knob on. When the burner lights, turn the knob off and
proceed as directed below.
To light pilot:
Raisethe cooktop and hold a
lighted match near the pilot
ports (See illustration).There
are two pilot ports, one on the
right side and one on the left
side.
Surface Control Knobs
Use to turn on the surface burners. An infinite choice of heat
settings is available from Low to High. At the High setting a
detent or notch may be felt. The knobs can be set on or
between any of the settings.
O 0 Graphics next to the knob identify which burner the
knob controls. For example, the graphic at left shows
0 O the left front burner location.
Setting the controls:
The size and type of cookware will affect the heat setting.
1. Place a pan on the burner grate.
The burner flame may lift off or appear separated from
the port if a pan is not placed on the grate.
2. Push in and turn the knob counterclockwise to the Lite
setting.
A clicking (spark) sound will be heard and the burner
will light. (All ignitors will spark when any surface
burner knob is turned to the Lite position.)
3. After the burner lights, turn knob to desired flame size.
The ignitor will continue to spark until the knob is
turned past the Lite position.
5
Page 7
¢ookln
Operating During a
Power Failure
1. Hold a lighted match to the desired surface burner head.
2. Push in and turn the control knob slowly to lite.
3. Once lit, adjust the flame to the desired level.
Cooktop
To prevent the cooktop from discoloring or
staining:
Clean cooktop after each use.
* Wipe acidic or sugary spills as soon as the cooktop has
cooled as these spills may discolor the porcelain.
Sealed Burners
The sealed burners of your range are secured to the cooktop
and are not designed to be removed. Since the burners are
sealed into the cooktop, believers or spills will not seep
underneath the cooktop.
However, the burner should be cleaned
after each use. (See page 21 for cleaning
directions.)
Unlike a range with standard gas burners,
this cooktop does not lift-up nor is it
removable. Do not attempt to lift the
oktop for any reason.
Conventional Burners
Freestanding ranges with conventional gas burners feature a
lift-up cooktop.
To raise the cooktop:
When cool, grasp the front edge
of the cook-top and gently lift up
until the two support rods, if
equipped, at the front of the i
cooktop snap into place, i
To lower:
Hold the front edge of the cooktop and carefully push back
on each support rod, if equipped, to release the notched
support. Then gently lower the top into place. The support
rods will slide into the cooktop frame.
I
High Performance Burner
(selectmodels) (12,000BTU _')
Thereisone highspeedburneron yourrange,locatedinthe
rightfrontposition.Thisburneroffershigherspeedcooking
thatcanbe used toquicklybringwatertoa boiland forlarge-
quantitycooking.
SillrllTler Burner (select models)
This burner is located in the left rear position. The simmer
burner offers a lower BTU*flame for delicate sauces or
melting chocolate.
BTU ratings will vary when using LPgas.
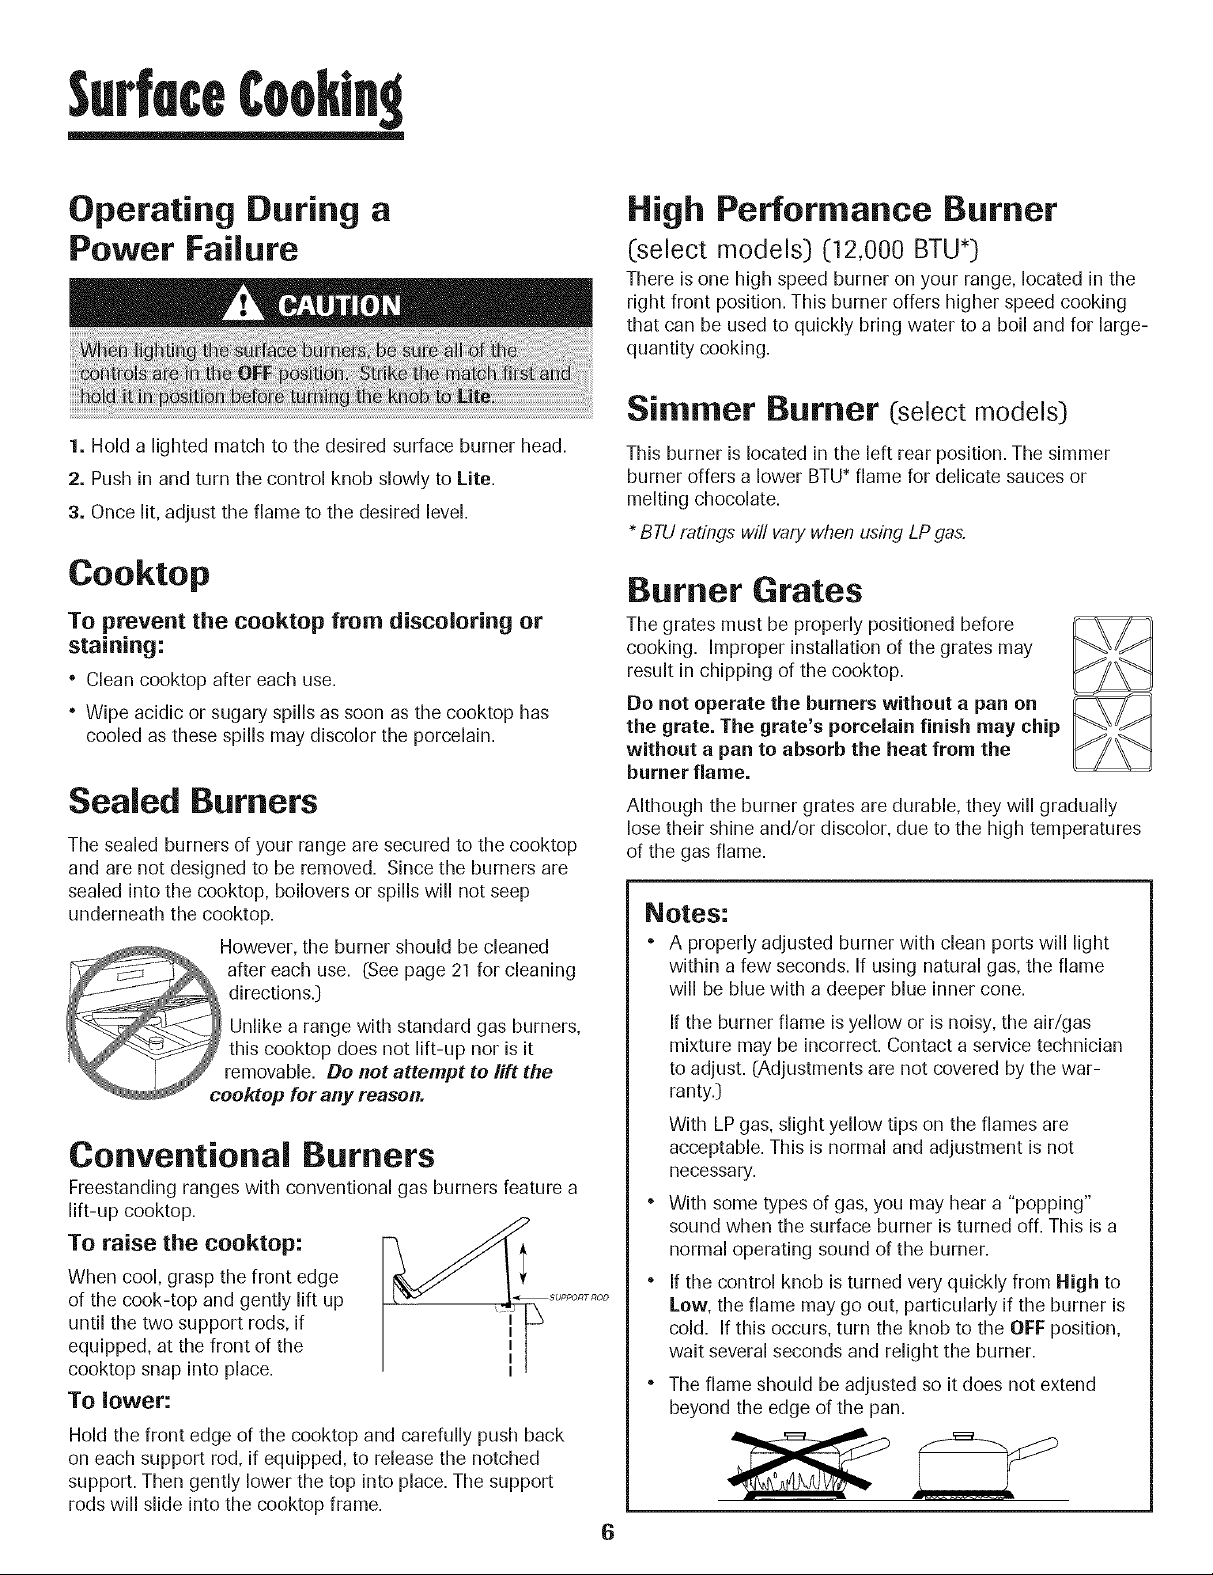
Burner Grates
The grates must be properly positioned before
cooking. Improper installation of the grates may
result in chipping of the cooktop.
Do not operate the burners without a pan on
the grate. The grate's porcelain finish may chip
without a pan to absorb the heat from the
burner flame.
Although the burner grates are durable, they will gradually
lose their shine and/or discolor, due to the high temperatures
of the gas flame.
Notes:
, A properly adjusted burner with clean ports will light
within a few seconds. If using natural gas, the flame
will be blue with a deeper blue inner cone.
If the burner flame is yellow or isnoisy, the air/gas
mixture may be incorrect.Contact a service technician
to adjust. (Adjustments are not covered by the war-
ranty.)
With LPgas, slight yellow tips on the flames are
acceptable. This is normal and adjustment is not
necessary.
With some types of gas, you may hear a "popping"
sound when the surface burner isturned off. This is a
normal operating sound of the burner.
* If the control knob is turned very quickly from High to
Law, the flame may go out, particularly if the burner is
cold. If this occurs, turn the knob to the OFF position,
wait several seconds and relight the burner.
* The flame should be adjusted so it does not extend
beyond the edge of the pan.
6
Page 8
Manual Clean Oven Control
([select models)
A B
BAKE
BROIL
TIMER CLOCK CANCEL .......
C D E F
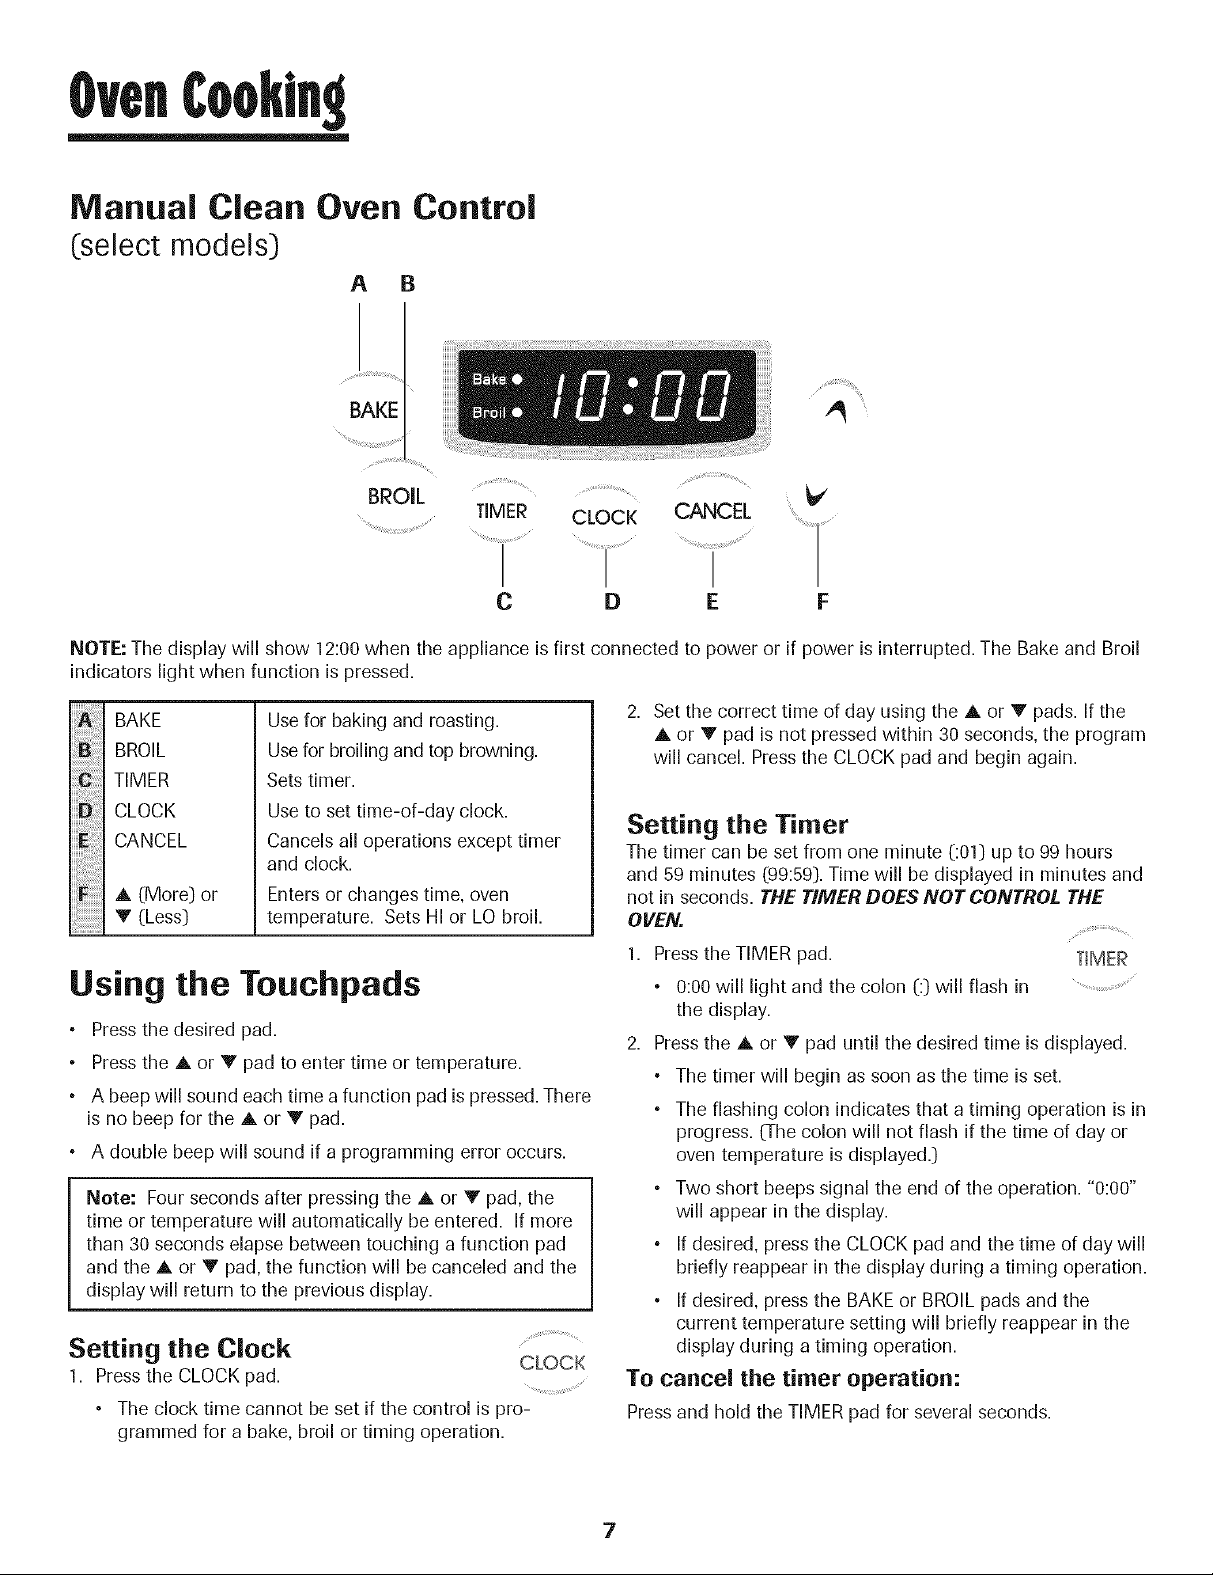
NOTE: The display will show 12:00when the appliance is first connected to power or if power is interrupted.The Bake and Broil
indicatorslight when function ispressed.
BAKE
B
BROIL
iiiiiiiCililiiii:S¸
TIMER
CLOCK
CANCEL
A(More] or
V(Less]
Use for baking and roasting.
Usefor broiling and top browning.
Sets timer.
Use to set time-of-day clock.
Cancels all operations except timer
and clock.
Enters or changes time, oven
temperature. Sets HI or LO broil.
Using the Touchpads
• Pressthe desired pad.
• Pressthe A or V pad to enter time or temperature.
• A beep will sound each time a function pad is pressed.There
is no beep for the A or V pad.
° A double beep will sound if a programming error occurs.
Note: Four seconds after pressing the A or V pad, the
time or temperature will automatically be entered. If more
than 30 seconds elapse between touching a function pad
and the A or V pad, the function will be canceled and the
display will return to the previous display.
Setting the Clock
1. Press the CLOCK pad.
° The clock time cannot be set if the control is pro-
grammed for a bake, broil or timing operation.
CLOCK
2. Set the correct time of day using the A or V pads. If the
A or V pad is not pressed within 30 seconds, the program
will cancel. Pressthe CLOCK pad and begin again.
Setting the Timer
The timer can be set from one minute (:01] up to 99 hours
and 59 minutes (99:59]. Time will be displayed in minutes and
not in seconds. THE TIMER DOES NOT CONTROL THE
Pressthe TIMER pad. TIMER
• 0:00will light and the colon [:] will flash in
the display.
2. Pressthe A or V pad until the desired time is displayed.
° The timer will begin as soon as the time is set.
° The flashing colon indicates that a timing operation is in
progress. (The colon will not flash if the time of day or
oven temperature is displayed.]
• Two short beeps signal the end of the operation. "0:00"
will appear in the display.
If desired, press the CLOCK pad and the time of day will
briefly reappear in the display during a timing operation.
If desired, press the BAKE or BROIL pads and the
current temperature setting will briefly reappear in the
display during a timing operation.
To cancel the timer operation:
Press and hold the TIMER pad for several seconds.
7
Page 9
Baking, Roasting and Broiling
Setting the Controls For Baking or Roasting:
1. Press BAKE pad.
• 000will light and the Bake indicatorlight BAKE
will flash in the display. ......
• Ifyou press the BAKE pad and do not set an oven temp-
erature within 30 seconds, the program will automatically
cancel and the time of day will reappear in the display.
2. Press the A or V pad until the desired oven temperature is
displayed.
• The oven temperature can be set from 170° to 550° F.
• 350° will appear in the display when either A or V pad
is pressed once.
• Pressand tap the A or V pad to change the oven temp-
erature by 5° increments or press and hold the A or V
pad to change the oven temperature by 10° increments.
100° or the actual oven temperature, whichever is higher,
will appear in the display when the oven turns on.
• The temperature in the display will increase in 5°
increments until preset temperature is reached. A single
beep will sound when the oven is preheated.
• Allow 10 to 15 minutes for the oven to preheat.
• To recall preset temperature during preheat, press the
BAKE pad. The temperature will be displayed for three
seconds.
• To change oven temperature during cooking, press
the Bake pad, then press the A or V pad until the
desired temperature isdisplayed.
• To change oven temperature during preheat, press
the Bake pad twice, then press tile A or V pad until
the desired temperature isdisplayed.
3. Place food in the oven. Check food for doneness at the
minimum cooking time.
4. At the end of cooking, press the CANCEL pad to turn the
oven off and remove the food from the oven.
• The oven features an automatic shut-off. If the oven is
left on for 12 hours it will automatically turn off and 000
will appear in the display. Pressthe CANCEL pad and
the time of day will reappear in the display.
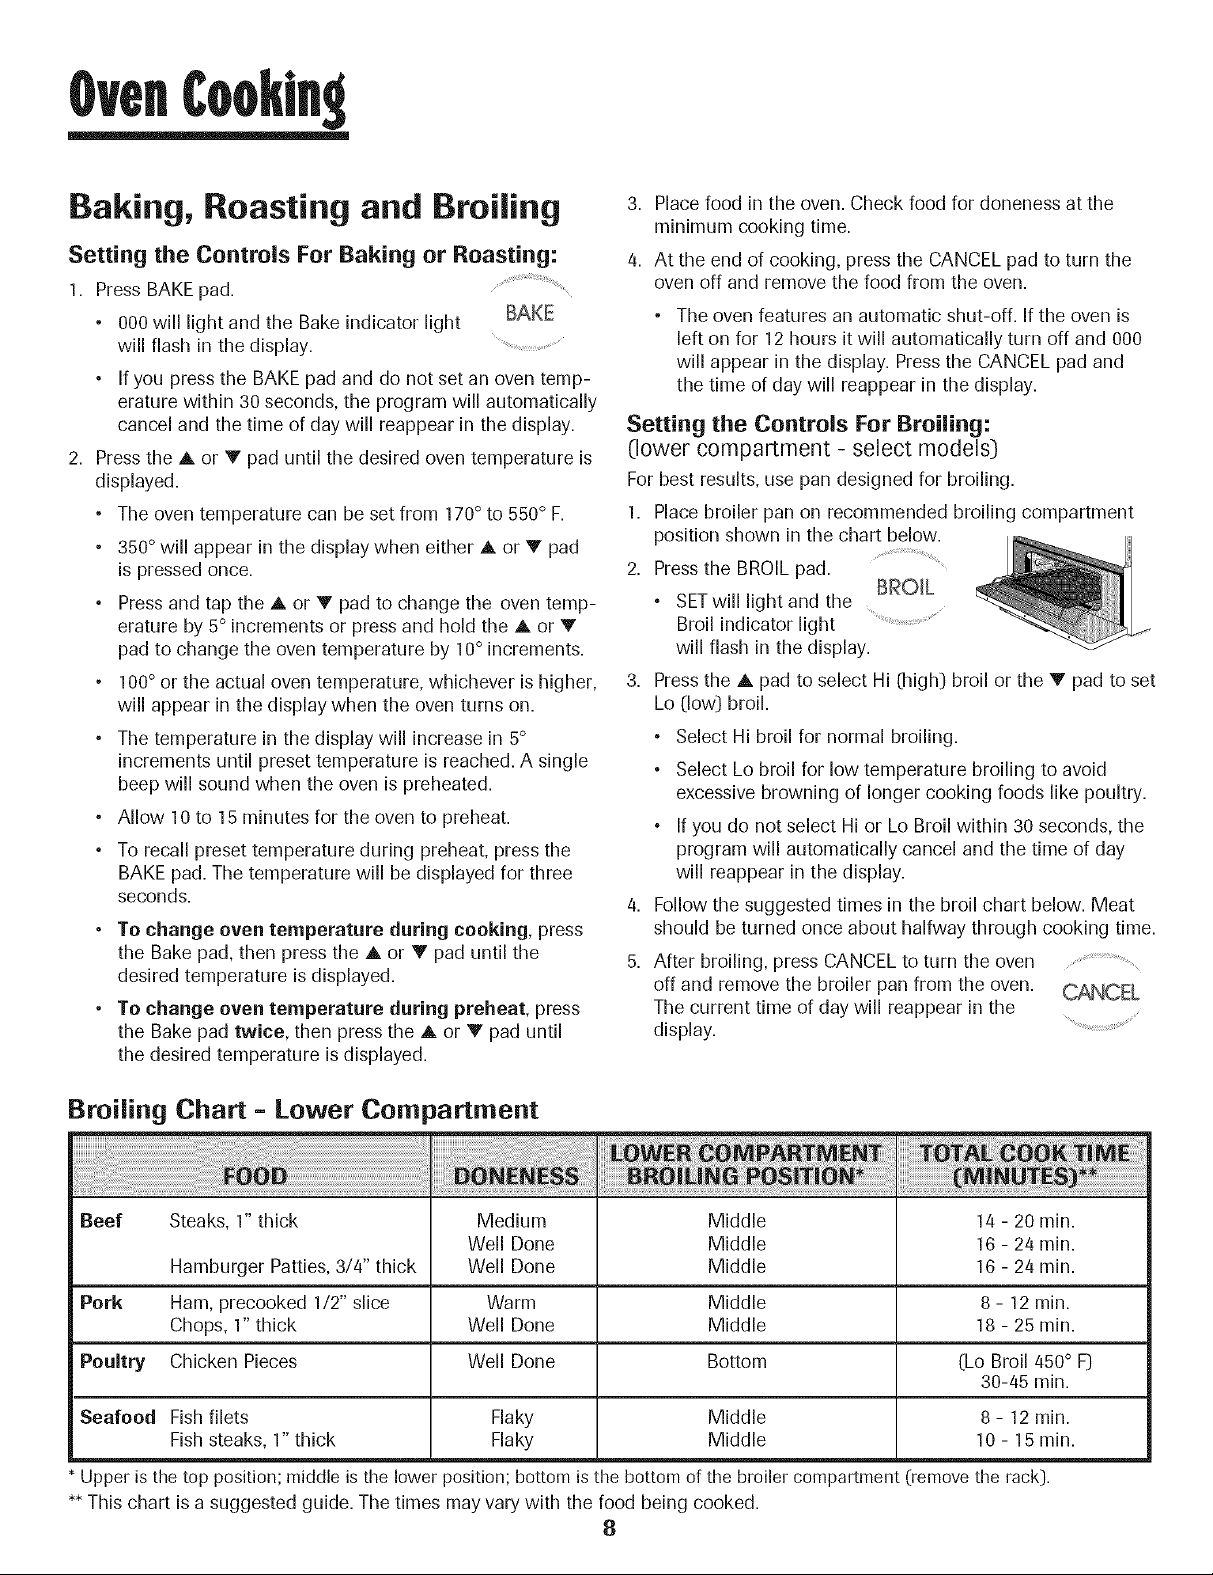
Setting the Controls For Broiling:
(lower compartment - select models:)
For best results, use pan designed for broiling.
1. Place broiler pan on recommended broiling compartment
position shown in the chart below.
2. Pressthe BROIL pad.
• SETwill light and the
Broil indicator light ..........................................................
will flash in the display.
3. Pressthe A pad to select Hi (high] broil or the V pad to set
Lo (low] broil.
° Select Hi broil for normal broiling.
• Select Lo broil for low temperature broiling to avoid
excessive browning of longer cooking foods like poultry.
If you do not select Hi or Lo Broil within 30 seconds, the
program will automatically cancel and the time of day
will reappear in the display.
4. Follow the suggested times in the broil chart below. Meat
should be turned once about halfway through cooking time.
5. After broiling, press CANCEL to turn the oven
off and remove the broiler pan from the oven.
The current time of day will reappear in the
display.
/
Broiling Chart = Lower Compartment
Beef
Pork Ham, precooked 1/2" slice
Poultry Chicken Pieces
Seafood Fish filets
Upper is the top position; middle is the lower position; bottom isthe bottom of the broiler compartment (remove the rack].
** This chart is a suggested guide. The times may vary with the food being cooked.
Steaks, 1" thick
Hamburger Patties, 3/4" thick
Chops, 1" thick
Fish steaks, 1" thick
Medium
Well Done
Well Done
Warm Middle
Well Done Middle
Well Done Bottom
Flaky
Flaky
Middle
Middle
Middle
Middle
Middle
8
14 - 20 min.
16 - 24 min.
16 - 24 min.
8 - 12 min.
18 - 25 min.
[Lo Broil 450° F]
30-45 min.
8 - 12 min.
10 - 15 min.
Page 10

Manual Clean Oven
Knob Control
(select models:) //_
Oven Temp Knob
The Oven Temp knob is used to select
and maintain the oven temperature. Always
turn this knob just to the desired temperature. Do not turn to
a higher temperature and then back.
Setting the Control for Baking and Roasting:
1. Push in and turn Oven Temp knob to desired temperature.
Allow 10-15 minutes for preheating.
2. Place food in the center of oven. Check food for doneness
at minimum time in recipe. Cook longer if necessary.
3. Remove food from oven and turn Oven Temp knob to OFF.
Setting the Control for Broiling:
1. For best results, use a broiling pan. Place the broiler pan
on recommended rack position (see chart on page 8).
2. Turn Oven Temp knob to BROIL or, for lower temperature
broiling, to 450° F.
• Lower temperature broiling avoids excessive browning
of longer cooking foods such as poultry.
3. Follow the suggested times in the broil chart on page 8.
Meat should be turned once about halfway through
cooking time.
4. Check the doneness by cutting a slit in the meat near the
center to check the color.
Pilotless Ignition (selectmodels:)
Your range is equipped with pilotless ignition. With this type
of ignition system, the gas automatically shuts off and the
oven will not operate during a power failure.
A lighted match will not light the oven burner. No attempt
should be made to operate the oven during a power failure.
Pilot Ignition (selectmodels:)
Light the right rear burner first before lighting the oven pilot
light. This will remove air from the gas system and aid in the
ignition of the pilot light. If this step is not performed, ignition
time may be longer than expected.
To light pilot:
When cool, open the broiler door and remove the broiler rack
and broiler pan.
While in the OFF position, push in and hold the
Oven Ternp knob and hold a lighted match
to the pilot located at the back of the
oven burner (see illustration).Once
the pilot lights, let go of the
Oven Ternp knob and replace
the broiler rack and pan. (NOTE:
The oven burner is shown with
the metal flame spreader
removed.)
5. After broiling, turn the Oven Temp knob to OFF. Remove
the broiler pan from the oven.
Page 11

Self-Clean Oven Control (select models)
A B C
KEEP
....................................................HOLD CLEAN DE_Y CLOCK WARM
D
TIMER
E F G H I
The control panel isdesigned for easeinprogramming. The displaywindow on thecontrol shows time ofday, timer and ovenfunctions.
Control panel shown includesmodel specific features. [Styling may vary depending on model.]
BROIL
BAKE
iiiiiiC;zil;iiiii
More (A] or
Less (V]
TIMER
COOK& HOLD
CLEAN
DELAY
CLOCK
iiliiiiiiiiii!!!!!i!!j!_!!
KEEPWARM
CANCEL
Use for broiling and top browning.
Use for baking and roasting.
Enters or changes time, oven
temperature. Sets HI or LO broil.
Sets timer.
Bakes for a presettime, then holds food
warm for 1 hour.
Use to set self-clean cycle.
Programs the oven to start baking at
a later time.
Use to set time of day clock.
Use to keep cooked food warm in oven.
Cancels all operations except timer
and clock.
Using the Touchpads
Pressthe desired pad.
Pressthe A or V to enter time or temperature.
• A beep will sound when any pad is touched.
• A double beep will sound if a programming error occurs.
Note: Four seconds after pressing the A or V pads, the
time or temperature will automatically be entered. If more
than 30 seconds elapse between touching a function pad
and the A or V pads, the function will be canceled and
the display will return to the previous display.
Clock
The clock can be set to display time in a 12-hour or 24-hour
format. The clock is set at the factory for the 12-hour format.
To change the clock to 24=hour format:
1. Pressand hold the CANCEL and DELAY
pads for three seconds. ..............................................
2. Press A or V to select 12 or 24 hour.
3. Set the time of day following the
directions below. -- DELAY
To set the Clock: ................................
1. Presstile CLOCK pad.
° Time of day and colon flash in the ...........................
display. CLOCK
2. Press A or V to set the time of day.
• Colon continues flashing. ....
3. Pressthe CLOCK pad again or wait four
seconds.
When electrical power is supplied or after a power
interruption, the last clock time before power was
interrupted will flash.
To recall the time of day when another time function is
showing, press the CLOCK pad.
Clock time cannot be changed when the oven has been
programmed for cook or clean Delay or Cook & Hold.
%¸.¸¸¸¸¸/¸
cont.
10
Page 12
To cancel the Clock display:
If you do not want the time of day to display:
Press and hold the CANCEL and CLOCK pads
for three seconds. The time of day will
disappear from the display
When the clock display is canceled, press
the CLOCK pad to briefly display the time of day.
-- CLOCK
To restore the Clock display:
Press and hold the CANCEL and CLOCK pads for three
seconds. The time of day will reappear in the display.
Timer
The timer can be set from one minute (00:01) up to 99 hours
and 59 minutes (99:59).
The timer can be used independently of any other oven
activity. It can also be set while another oven function is
operating.
The Timer does not control the oven. It only controls a
beeper.
To set the Timer: .....
1. Press the TIMER pad. TDT_ER
• 0:00lights in the display.
• The colon will flash.
Locking the Controls
Tile touch pad controls carl be locked for safety, cleaning, or
to prevent unwanted use. They will not function when locked.
If the oven is currently in use, the controls cannot be locked.
The current time of day will remain in the display when the
controls are locked.
To lock:
Press and hold the CANCEL and COOK &
HOLD pads for three seconds.
LOCKflashes in the display. __ COOK&
HOLD
To unlock: .............................
Press and hold the CANCEL and COOK & HOLD pads for
three seconds.
LOCKdisappears from the display.
Fault Codes
BAKE or LOCK may flash rapidly in the display to alert you if
there is an error or a problem. If BAKE or LOCK flash in the
display, press the CANCEL pad. If BAKE or LOCKcontinue to
flash, disconnect power to the appliance. Wait a few minutes,
and then reconnect power. If the flashing still continues,
disconnect power to the appliance and call an authorized
servicer.
2. Press the A or V pad until the
correct time appears in the display.
° The colon will continue to flash.
3,
PressTIMER pad again or wait four seconds.
• The colon continues flashing and the time begins
counting down.
° The last minute of the timer countdown will be displayed
as seconds.
4. At the end of the set time, one long beep will sound.
To cancel the Timer:
1. Press and hold tile TIMER pad for three seconds.
OR
2. Press the TIMER pad and set the time to 00:00.
11
Page 13
Baking
To set Bake:
1. Press the BAKE pad. BAKE
• BAKEwill flash. ...... .....
• 000 will light in the display.
2. Select the oven temperature. The oven tempera-
ture can be set from 170°to 550°. Pressor press
and hold the A or V pads. V
• 350° will light when either pad is first pressed.
• Press the A pad to increase the temperature.
• Press the V pad to decrease the temperature.
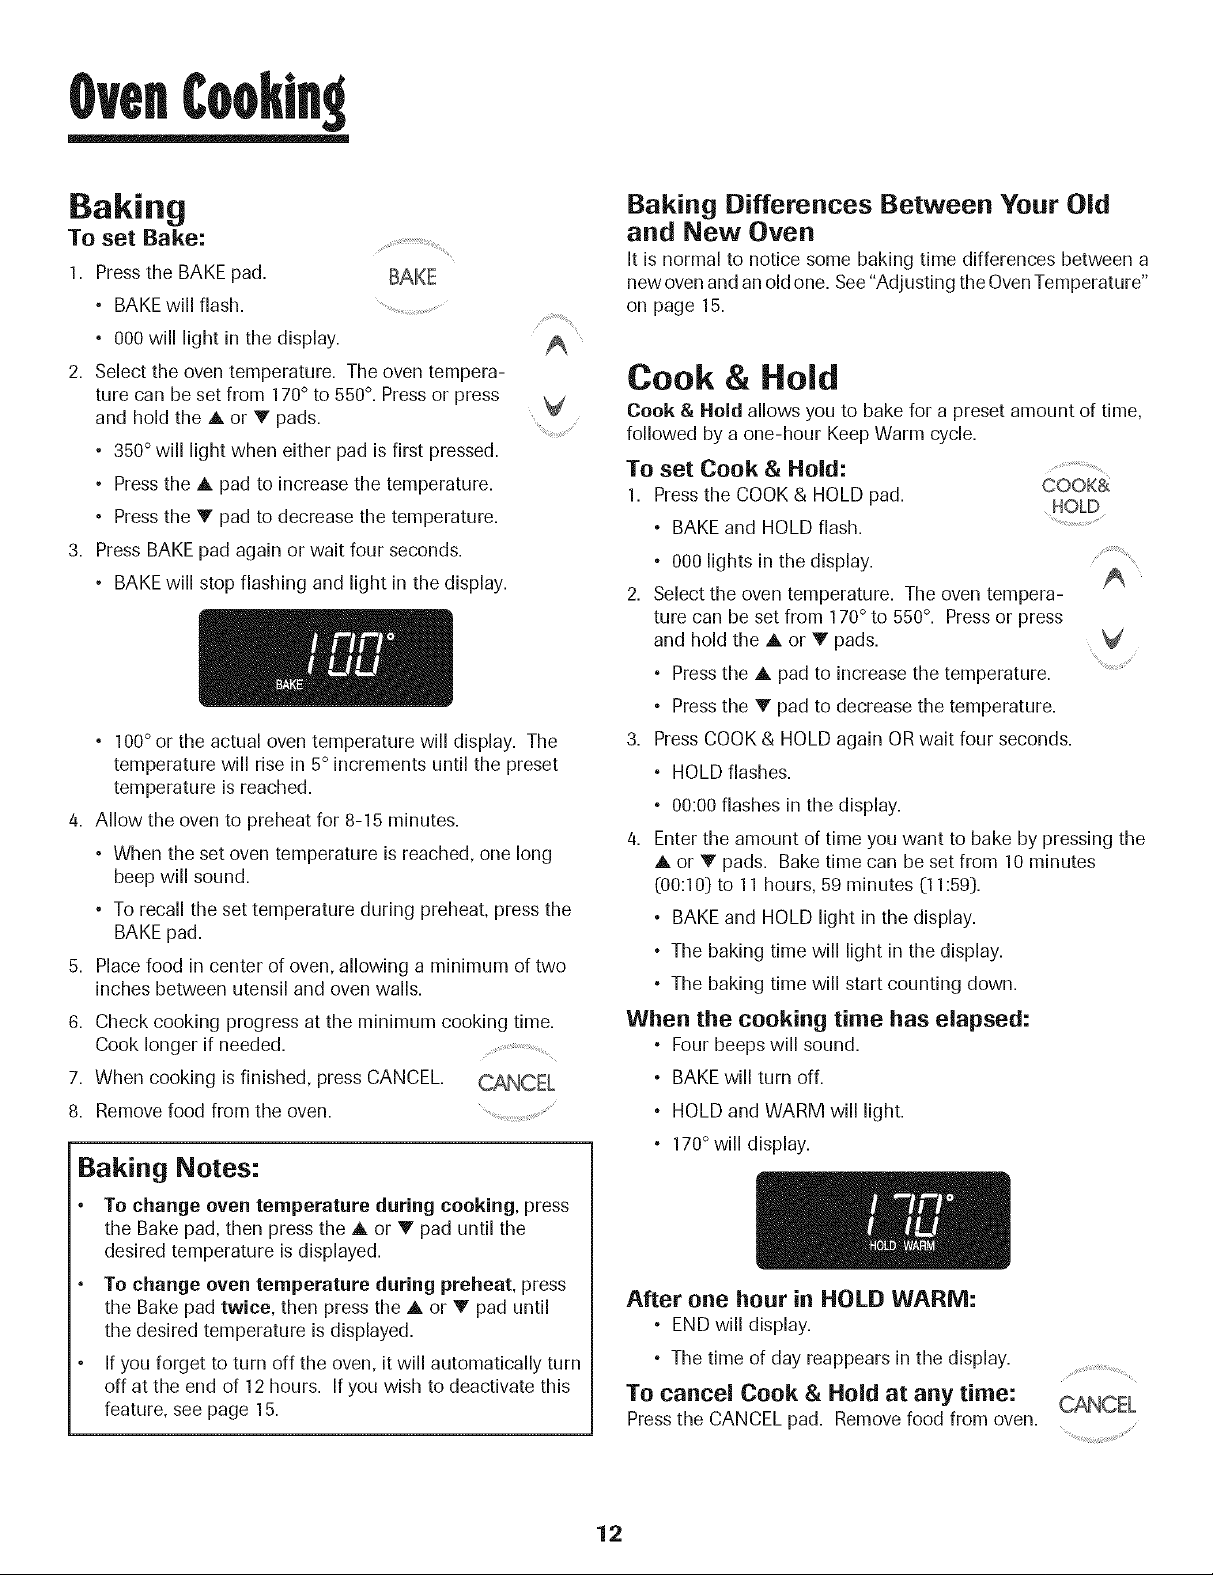
3. Press BAKE pad again or wait four seconds.
• BAKEwill stop flashing and light in the display.
• 100° or the actual oven temperature will display. The
temperature will rise in 5° increments until the preset
temperature is reached.
4. Allow the oven to preheat for 8-15 minutes.
• When the set oven temperature is reached, one long
beep will sound.
• To recall the set temperature during preheat, press the
BAKE pad.
5. Place food in center of oven, allowing a minimum of two
inches between utensil and oven walls.
6. Check cooking progress at the minimum cooking time.
Cook longer if needed.
7. When cooking is finished, press CANCEL.
8. Remove food from the oven
Baking Notes:
To change oven temperature during cooking, press
the Bake pad, then press the A or V pad until the
desired temperature is displayed.
To change oven temperature during preheat, press
the Bake pad twice, then press the A or V pad until
the desired temperature is displayed.
If you forget to turn off the oven, it will automatically turn
off at the end of 12 hours. If you wish to deactivate this
feature, see page 15.
Baking Differences Between Your Old
and New Oven
It is normal to notice some baking time differences between a
new ovenandan old one. See"Adjusting the OvenTemperature"
on page 15.
Cook & Hold
Cook & Hold allows you to bake for a preset amount of time,
followed by a one-hour Keep Warm cycle.
To set Cook & Hold: ..............................
1. Pressthe COOK& HOLD pad. COOK_
• BAKE and HOLD flash. ............................
• 000 lights in the display. ....
2. Select the oven temperature. The oven tempera-
ture can be set from 170°to 550°. Pressor press
and hold the A or V pads.
° Pressthe A pad to
• Pressthe V pad to
Press COOK& HOLD
° HOLD flashes.
° 00:00flashes in the display.
4. Enter the amount of time you want to bake by pressing the
A or V pads. Bake time can be set from 10 minutes
(00:10) to 11 hours, 59 minutes (11:59).
• BAKE and HOLD light in the display.
• The baking time will light in the display.
° The baking time will start counting down.
increase the temperature.
decrease the temperature.
again ORwait four seconds.
When the cooking time has elapsed:
• Four beeps will sound.
• BAKE will turn off.
• HOLD and WARM will light.
° 170°will display.
After one honr in HOLD WARM:
° END will display.
° The time of day reappears in the display.
To cancel Cook & Hold at any time:
Press tile CANCEL pad. Remove food from oven.
HOLD
V
12
Page 14
Delay Bake
When using Delay, the oven begins to cook later in the day.
Set the amount of time that you want to delay before the oven
turns on and how long you want to cook. The oven begins to
heat at the selected time and cooks for the specified length of
time.
Delay time can be set from 10 minutes (00:10} to 11 hours, 59
minutes (11:59).
To set a Delayed Baking cycle:
1. Press the DELAY pad.
• DELAY flashes.
• 00:00 flashes in the display.
2. Press the A or V pad to set the delay time.
While DELAY is still flashing:
3. Press the COOK& HOLD pad.
• 000 lights in the display.
• BAKEand HOLD flash.
4.
Press A to set the baking temperature.
• 00:00 and HOLD flash.
, BAKE stays lit.
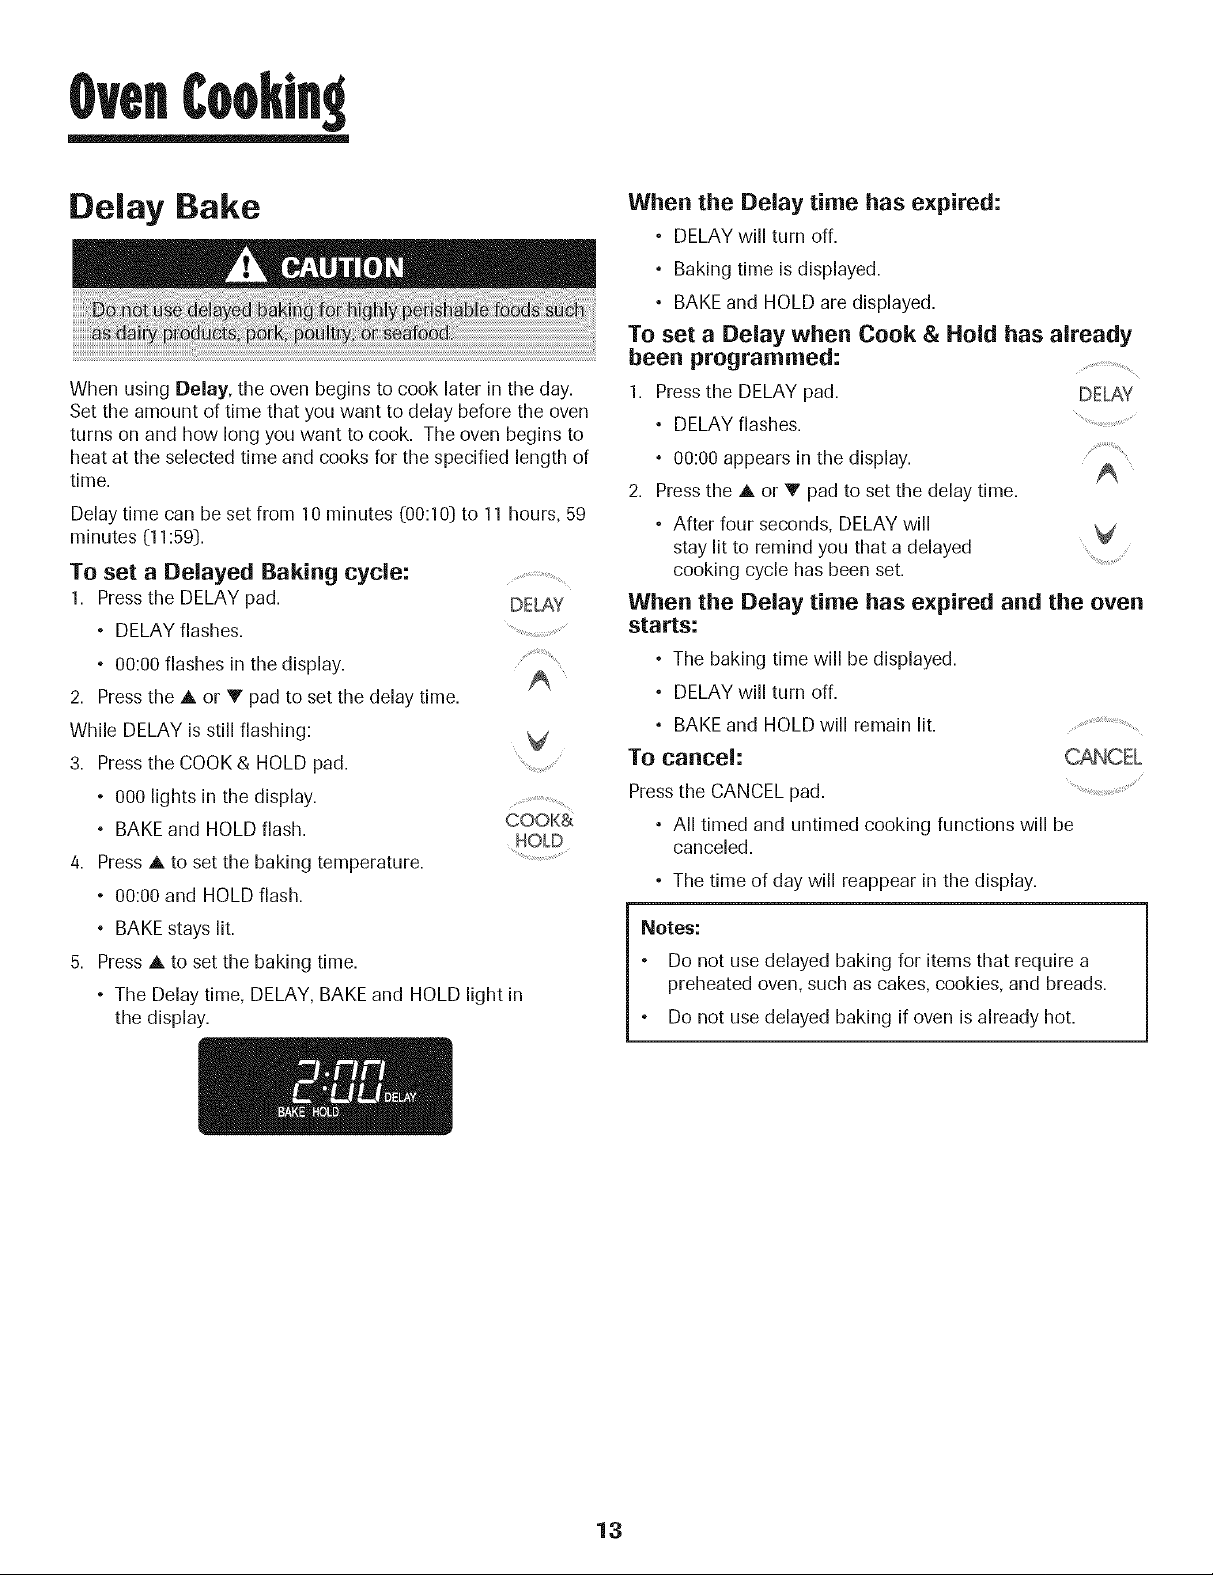
Press A to set the baking time.
• The Delay time, DELAY, BAKE and HOLD light in
the display.
......., %.
DELAY
COOK&
HOLD
When the Delay time has expired:
• DELAY will turn off.
° Baking time is displayed.
° BAKE and HOLD are displayed.
To set a Delay when Cook & Hold has already
been programmed:
1. Pressthe DELAY pad. DE_Y
° DELAY flashes. ...........................
° 00:00 appears in the display. ..........................
2. Pressthe A or V pad to set the delay time.
• After four seconds, DELAY will V
stay lit to remind you that a delayed ......
cooking cycle has been set.
When the Delay time has expired and the oven
starts:
• The baking time will be displayed.
• DELAY will turn off.
• BAKE and HOLD will remain lit .................................................
To cancel:
Press the CANCEL pad. .......................................
• All timed and untimed cooking functions will be
canceled.
• The time of day will reappear in the display.
NOtGS= =
Do not use delayed baking for items that require a
preheated oven, such as cakes, cookies, and breads.
Do not use delayed baking if oven is already hot.
13
Page 15

Keep Warm
Forsafely keeping foods warm or for warming breads and
plates.
To set Keep Warm:
1. Press the KEEPWARM pad. KEEP
• WARM flashes. ..................................
• 000 appears in the display.
Select the Keep Warm temperature. The Keep ,A
Warm temperature can be set from 145° to 190°.
Press or press and hold the A or V pads.
• 170°will light when either pad is first pressed. V
• Press the A pad to increasethe temperature.
• Press the Y pad to decrease the temperature.
WARM and the temperature will be displayed while Keep
Warm isactive.
To cancel Keep Warm:
1. Press the CANCEL pad.
2. Remove food from the oven.
WARM
Keep Warm Notes:
° Foroptimal food quality, ovencooked foods should be kept
warm for no longer than 1 to 2 hours.
° To keep foods from drying, cover loosely with foil or a lid.
• To warm dinner rolls:
- cover rolls loosely with foil and place in oven.
- press KEEPWARM and A pads to set 170° F.
- warm for 12-15 minutes.
• To warm plates:
- place 2 stacks of up to four plates each in the oven.
- press KEEPWARM and A pads to set 170° F.
- warm for five minutes, turn off the oven and leave plates
in the oven for 15 minutes more.
- use only oven-safe plates, check with the manufacturer.
- do not set warm dishes on a cold surface as rapid
temperature changes could cause crazing or breakage.
14
Page 16

Automatic Shut-Off/Sabbath
Mode
The oven will automatically turn off after 12 hours if you
accidentally leave it on. This safety feature can be turned off.
To cancel the 12-hour shut=off and run the
oven continuously for 72 hours:
1. Set the oven to bake (see page 12]..........
2. Press and hold the CLOCK pad for five seconds. CLOCK
• SAb will be displayed and flash for five seconds.
• SAb will then be displayed continuously until turned off
or until the 72-hour time limit is reached.
• BAKEwill also be displayed if a bake cycle is in use
while the oven is in Sabbath Mode.
All other functions EXCEPTBAKE (Timer, Keep Warm,
Clean, etc.) are locked out during the Sabbath Mode.
To cancel Bake when in Sabbath Mode:
Press CANCEL...... ....
• BAKEwill turn off in the display.
° No beeps will sound.
To cancel the Sabbath Mode:
1. Press the CLOCK pad for five seconds. CLOCK
OR ..........
2. After 72 hours, the Sabbath Mode will end.
• SAb will flash for 5 seconds.
Adjusting the Oven Temperature
Oven temperatures are carefully tested for accuracy at the
factory. It is normal to notice some baking or browning
differences between a new oven and an old one. As ranges
get older, the oven temperature can shift.
You may adjust the oven temperature if you think the oven is
not baking or browning correctly. To decide how much to
change the temperature, set the temperature 25° higher or
lower than your recipe recommends, then bake. The results
of the "test" should give you an idea of how much to adjust
the temperature.
To
adjust the oven temperature:
1.
Press BAKE. BAKE
2.
Enter 550° by pressing the A pad
3.
Pressand hold the BAKE pad for several
seconds or until 0° appears in the display.
If the oven temperature was previously adjusted, the
change will be displayed. For example, if the oven tem-
perature was reduced by 15° the display will show "-15 °".
Pressthe A or V pad to adjust the temperature.
Eachtime a pad is pressed, the temperature changes by
5°. The oven temperature can be increased or decreased
by 5° to 35°.
The time of day will automatically reappear in the display.
You do not need to readjust the oven temperature if there
is a power failure or interruption. Broiling and cleaning
temperatures cannot be adjusted.
° The time of day will return to the display.
Sabbath Mode Notes:
• Sabbath Mode can be turned on at any time with or
without the oven on.
• Sabbath Mode cannot be turned on if the touchpads are
locked out or when the door is locked.
° If the oven is baking when Sabbath Mode is set, BAKE
will go out at the end of the baking cycle. There will be
no audible beeps.
° When the Sabbath Mode is started, no preheat beep will
sound.
• All prompts, messages and beeps are deactivated when
Sabbath Mode isactive.
• Pressing CANCEL will cancel a bake cycle, however the
control will stay in the Sabbath Mode.
° If power fails, the oven will power up in Sabbath Mode with
72 hours remaining and no cycle active.
15
Page 17
Broiling
To set Broil:
1. Press the BROIL pad.
• BROILflashes.
• SET isdisplayed.
Press the A pad to set HI broil or press the V pad to set
LO broil.
• HIor LOwill be displayed.
• Select HI broil (550° F) for normal broiling. Select
LO broil (450° E)for low-temperature broiling of longer
cooking foods such as poultry.
3. After four seconds, the oven will start.
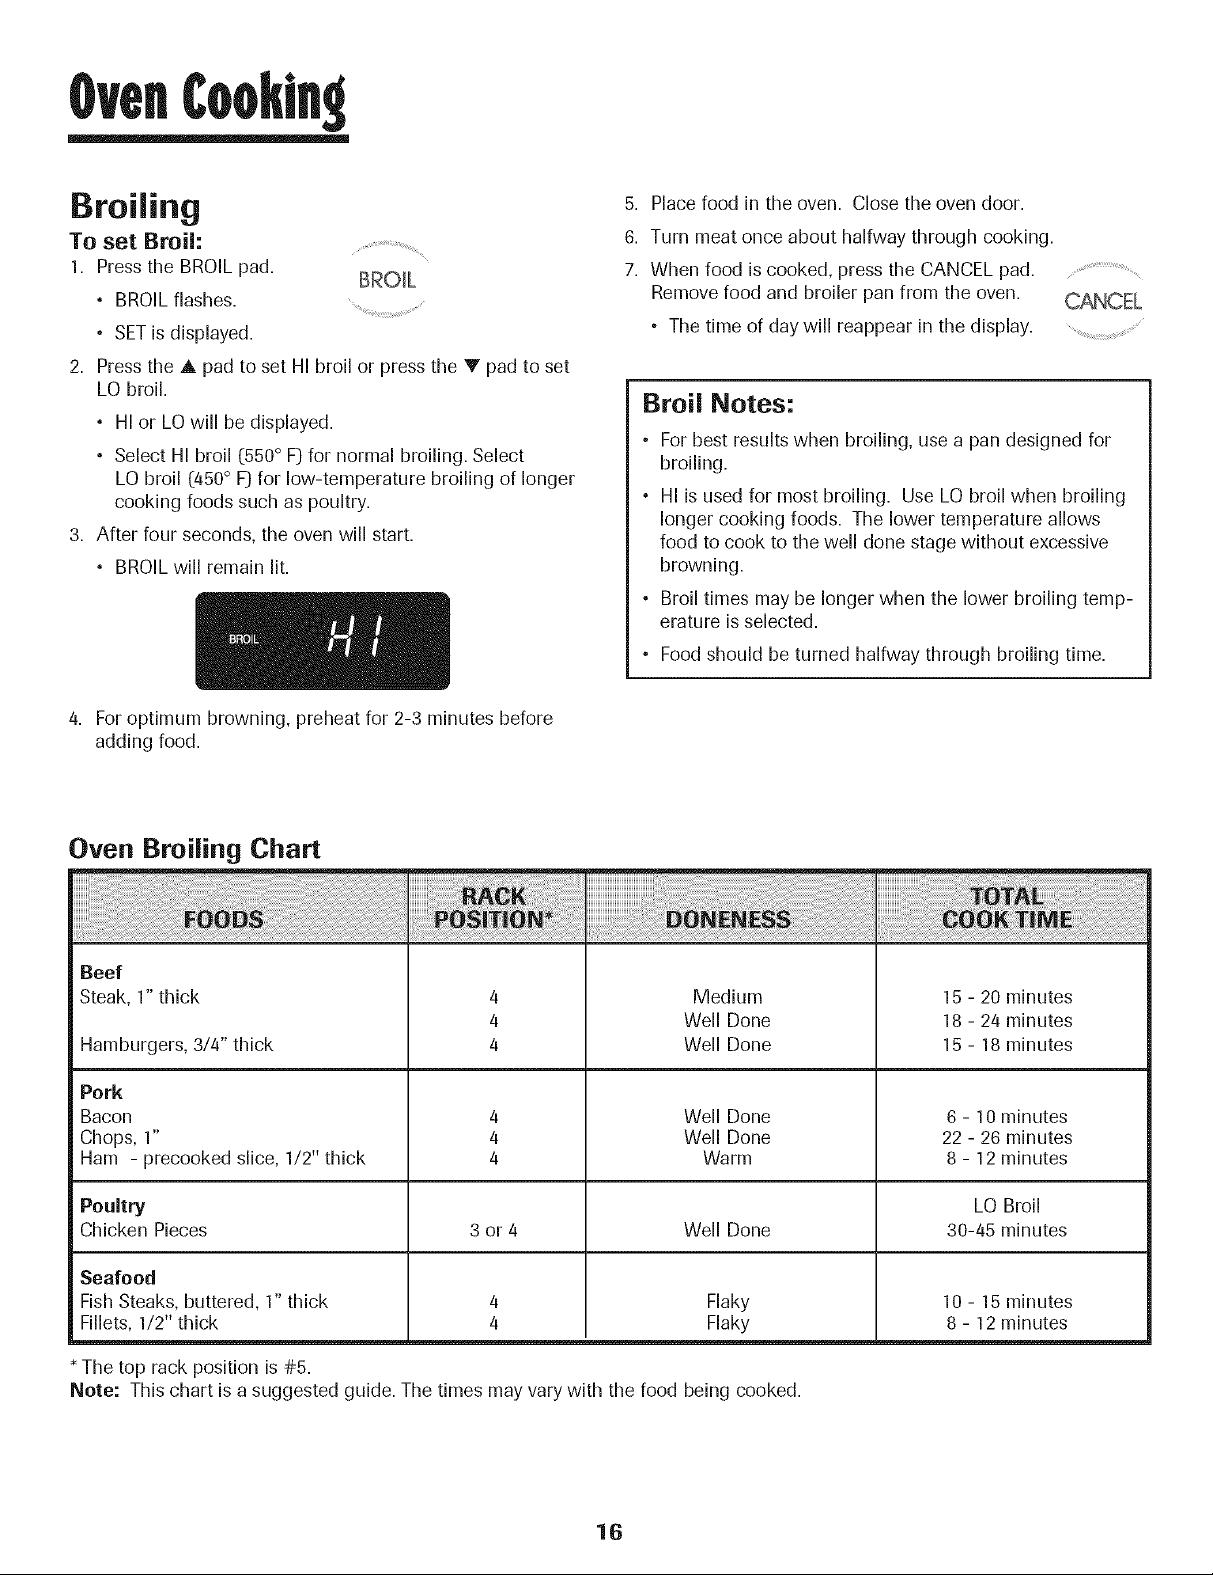
• BROILwill remain lit.
4. For optimum browning, preheat for 2-3 minutes before
adding food.
_ ,_s f
5. Place food in the oven. Close the oven door.
6. Turn meat once about halfway through cooking.
7. When food is cooked, press the CANCEL pad.... ....
Removefood and broiler pan from the oven.
• The time of day will reappear in the display....................................................
Broil Notes:
• For best results when broiling, use a pan designed for
broiling.
• HI is used for most broiling. Use LO broil when broiling
longer cooking foods. The lower temperature allows
food to cook to the well done stage without excessive
browning.
• Broil times may be longer when the lower broiling temp-
erature is selected.
• Food should be turned halfway through broiling time.
Oven Broiling Chart
Beef
Steak, 1" thick
Hamburgers, 3/4" thick
4
4
4
Pork
Bacon
Chops, 1"
Ham - precooked slice, 1/2" thick
4
4
4
Poultry
Chicken Pieces
3 or 4 Well Done 30-45 minutes
Seafood
Fish Steaks, buttered, 1"thick
Fillets, 1/2" thick
*The top rack position is#5.
Note: This chart is a suggested guide. The times may vary with the food being cooked.
Medium
Well Done
Well Done
Well Done
Well Done
Warm
Flaky
Flaky
15 - 20 minutes
18 - 24 minutes
15 - 18 minutes
6 - 10 minutes
22 - 26 minutes
8 - 12 minutes
LO Broil
10 - 15 minutes
8 - 12 minutes
16
Page 18

Oven Vent
When the oven is in use the area near the vent may become
hot enough to cause burns. Never block the vent opening.
]'he oven vent is located below the backguard vent
shield on your range.
OVEN VENT
plastics near the
vent opening as
heat from the
vent could distort
Do not place
or melt the
plastic.
Press the oven light pad to turn the oven light on
Oven Light (select models)
and off.
oven light
Oven Bottom
Protect oven bottom against spillovers, especially acidic or
sugary spills, as they may discolor the porcelain enamel. Use
the correct pan size to avoid spillovers and boilovers. Never
place utensils or foil directly on the oven bottom.
Oven Racks
Your oven has two racks. They are designed with a lock-stop
edge.
To remove:
1. Pull rack straight out until it
stops at the lock-stop position.
2. Lift up on the front of the rack
and pull out.
To replace:
1. Place rack on the rack support in the oven.
2. Tilt the front end up slightly. Slide rack back until it clears
the lock-stop position.
3. Lower front and slide back into the oven.
Do not cover an entire rack with aluminum foil or place
foil on the oven bottom. Baking results will be affected
and damage may occur to the oven bottom.
Rack Positions
...............5
4
...................3
..................2
....1
RACK 5 (highest position): Used for toasting bread or broiling
thin, non-fatty foods.
BACK 4: Used for most two-rack baking.
RACK 3: Used for most baked goods on a cookie sheet or
jelly roll pan, layer cakes, fruit pies, or frozen convenience
foods.
cont.
17
Page 19
RACK 2: Used for roasting small cuts of meat, casseroles,
baking loaves of bread, bundt cakes, custard pies or two-rack
baking.
RACK 1: Used for roasting large cuts of meat and poultry,
frozen pies, dessert souffles, angel food cake, or two-rack
baking.
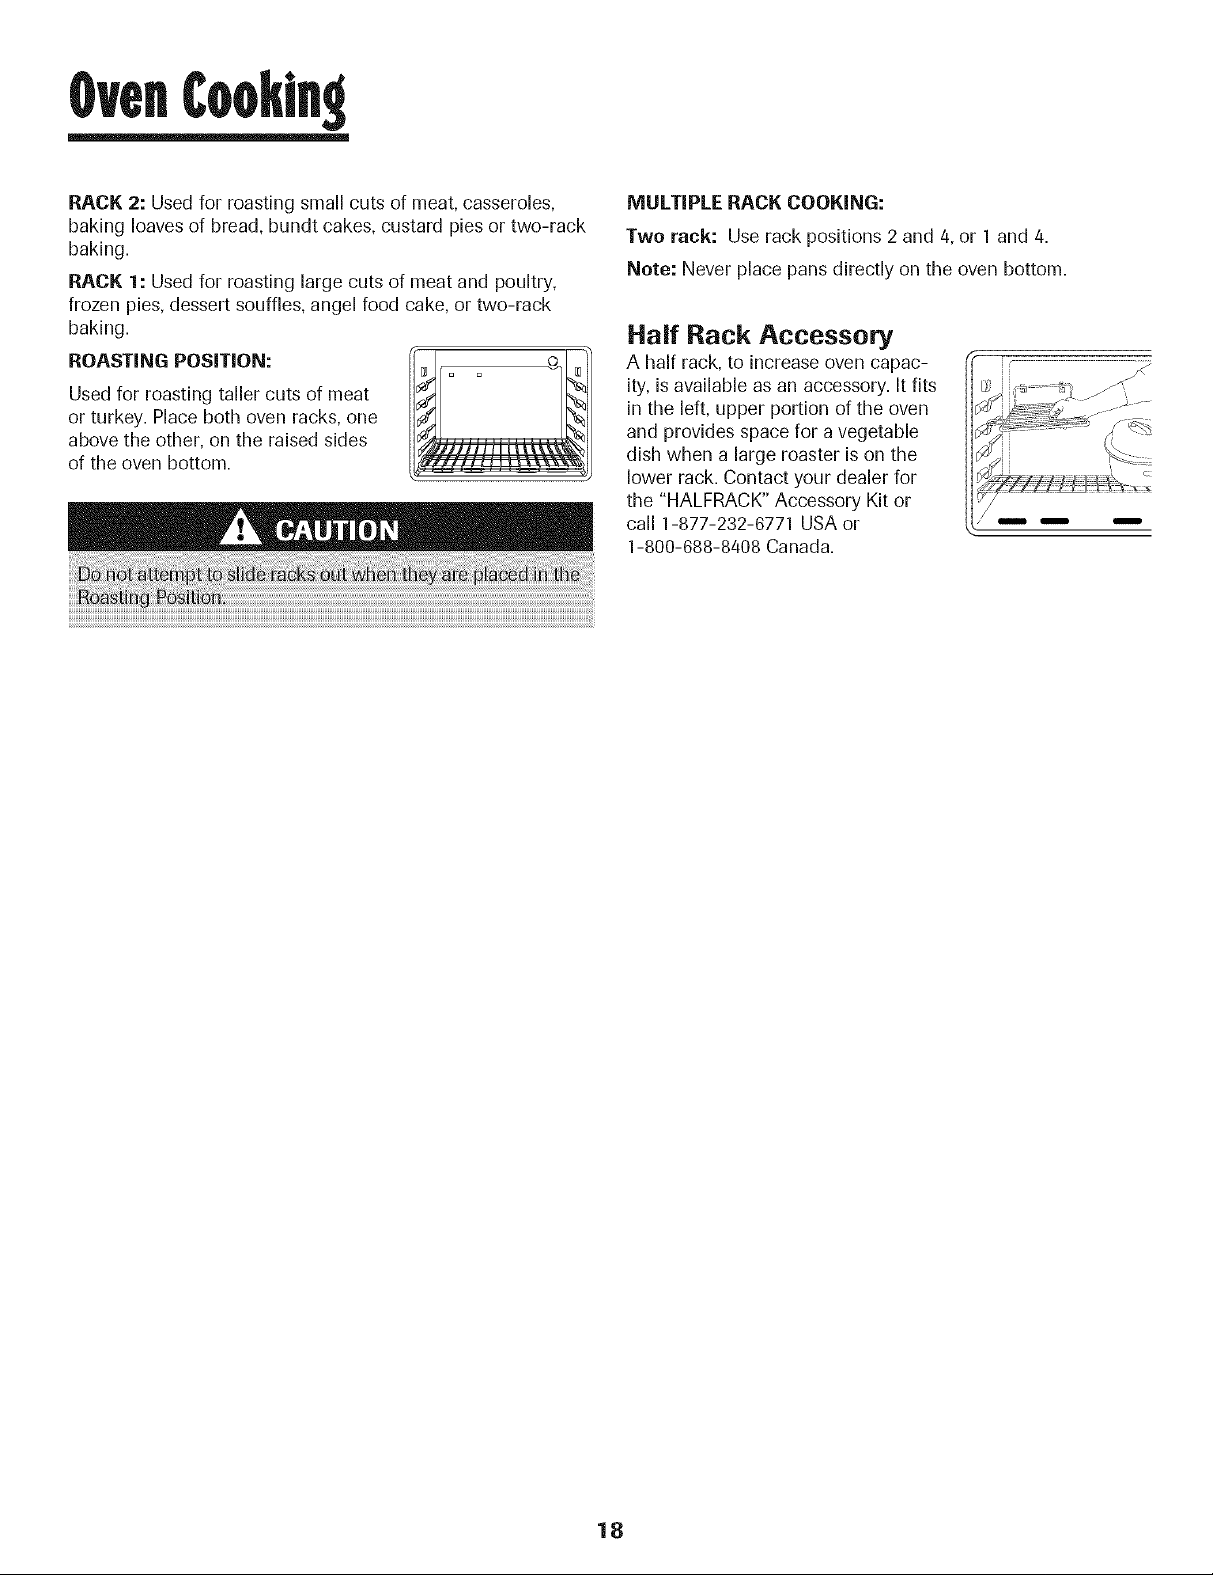
Used for roasting taller cuts of meat
or turkey. Place both oven racks, one
ROASTING POSITION: I_ _"__
above the other, on the raised sides
of the oven bottom.
MULTIPLE RACK COOKING:
Two rack: Userack positions 2 and 4,or 1 and 4.
Note: Never place pans directly on the oven bottom.
Half Rack Accessory
A half rack, to increase oven capac-
ity, is available as an accessory. It fits
in the left, upper portion of the oven
and provides space for a vegetable
dish when a large roaster is on the
lower rack. Contact your dealer for
the "HALFRACK" Accessory Kit or
call 1-877-232-6771 USA or
1-800-688-8408 Canada.
18
Page 20
¢leentn9
Self-Clean Oven (:select models)
Note: For manual clean oven, see page 22. i
The self-clean cycle uses above-normal cooking temperatures
to automatically clean the oven interior. Do not force the oven
door or lock lever open. This may result in exposure to high
temperatures and be a burn hazard.
The oven should be cleaned regularly by wiping up spillovers
to prevent excessive smoke and flare-ups. Do not allow a
heavy build-up of soil to accumulate in the oven.
During the cleaning process, the kitchen should be well
ventilated to get rid of normal odors associated with cleaning.
Before Self=Cleaning
1. Turn off the oven light before cleaning. The light may burn
out during the clean cycle.
2. Remove broiler pan, all pans, and oven racks from the
oven. The oven racks will discolor and may not slide easily
after a self-clean cycle if they are not removed.
3. Clean oven frame, door frame, area
outside of gasket, and around the
opening in the door gasket with a
nonabrasive cleaner such as Ben
Ami* or detergent and water. The
self-cleaning process does not
clean these areas. They should be
cleaned to prevent soil from baking on during the clean
cycle. 0-he gasket is the seal around the oven door and
window.)
4. To prevent damage, do not clean or rub the gasket around
the oven door. The gasket is designed to seal in heat
during the clean cycle.
5. Wipe up excess grease or spillovers from the oven bottom.
This prevents excessive smoking, flare-ups or flaming
during the clean cycle.
6. Wipe up sugary and acidic spillovers such as sweet
potatoes, tomato, or milk-based sauces. Porcelain enamel
is acid-resistant, not acid-proof. The porcelain finish may
discolor if acidic spills are not wiped up before a self-
clean cycle.
To set Self=Clean:
Note: Oven temperature must be below 400° F to program
a clean cycle.
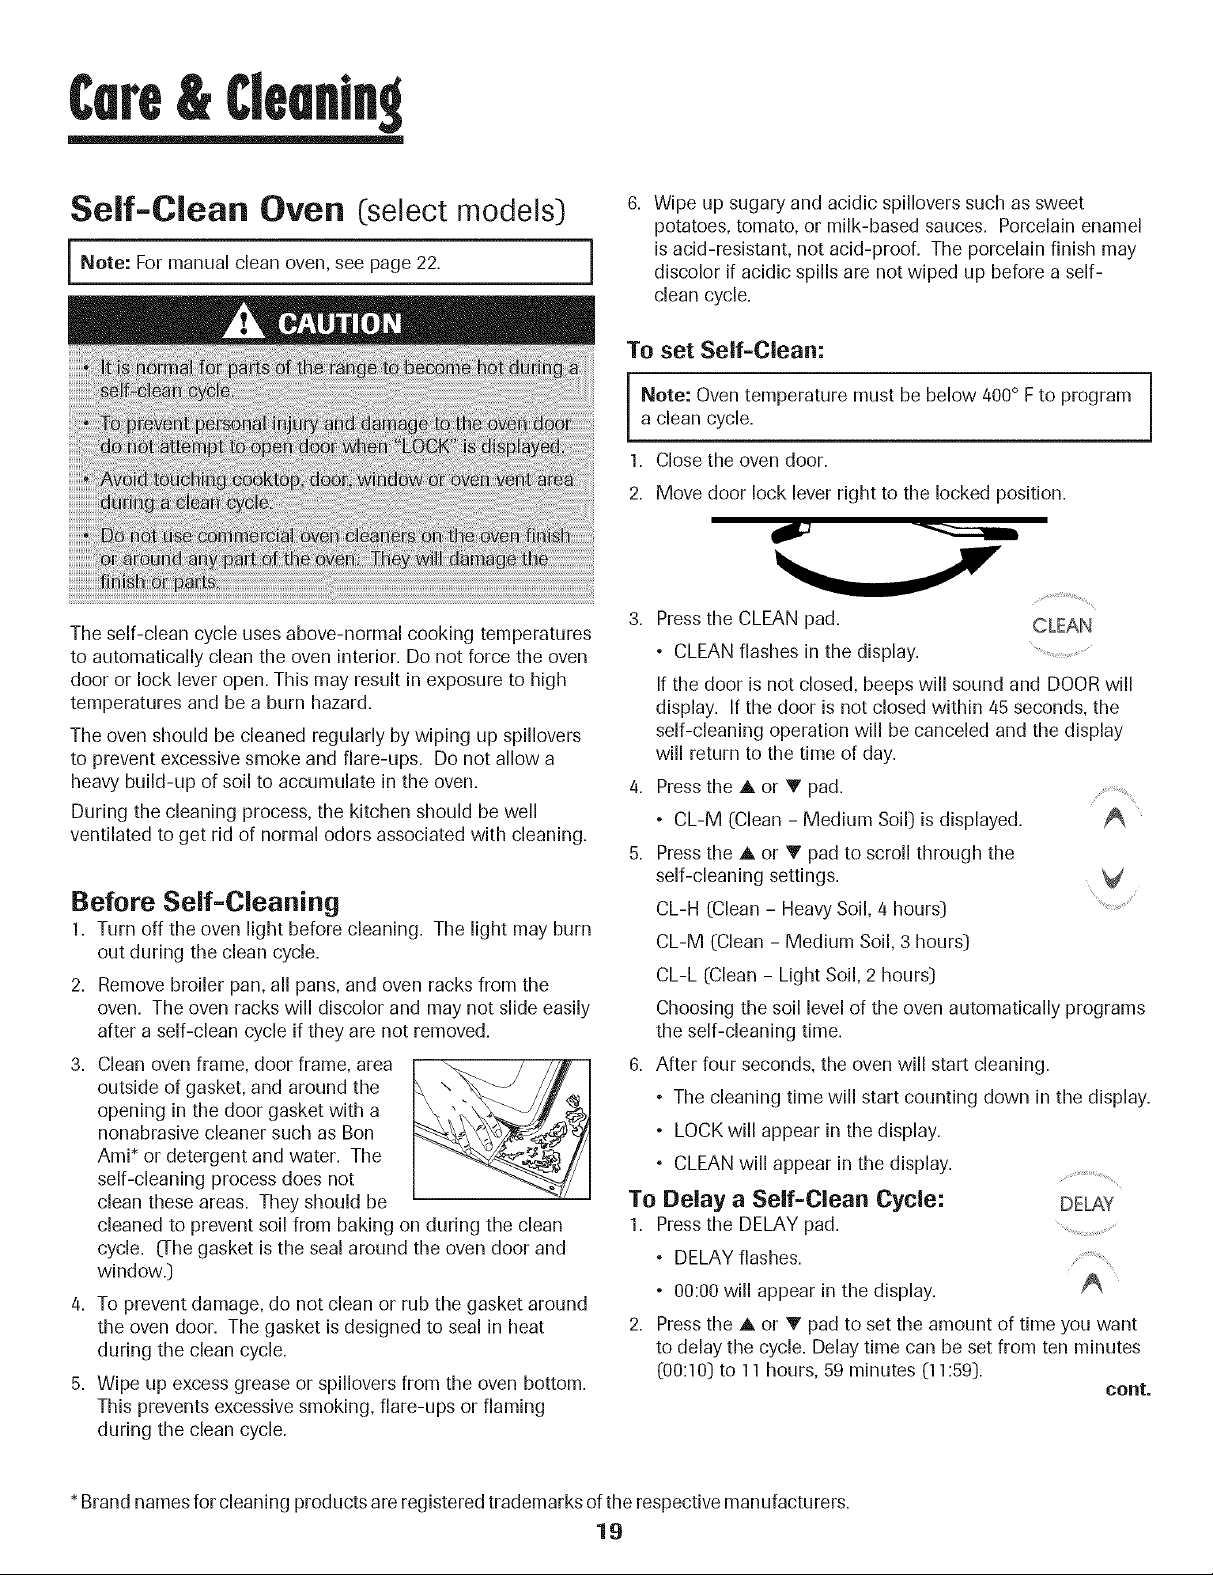
1. Close the oven door.
2. Move door lock lever right to the locked position.
3. Press the CLEAN pad. CLEAN
• CLEAN flashes in the display.
If the door is not closed, beeps will sound and DOOR will
display. If the door is not closed within 45 seconds, the
self-cleaning operation will be canceled and the display
will return to the time of day.
4. Press the A or V pad. .....
• CL-M (Clean - Medium Soil) is displayed. A
5. Press the ,_ or V pad to scroll through the
self-cleaning settings.
CL-H (Clean - Heavy Soil, 4 hours)
CL-M (Clean - Medium Soil, 3 hours)
CL-L (Clean - Light Soil, 2 hours)
Choosing the soil level of the oven automatically programs
the self-cleaning time.
6. After four seconds, the oven will start cleaning.
• The cleaning time will start counting down in the display.
• LOCK will appear in the display.
° CLEAN will appear in the display.
To Delay a Self-Clean Cycle:
1. Press the DELAY pad.
° DELAY flashes.
• 00:00 will appear in the display.
2,
Press the ,I, or V pad to set the amount of time you want
to delay the cycle. Delay time can be set from ten minutes
(00:10) to 11 hours, 59 minutes (11:59).
¸¸¸¸.¸.¸¸¸¸¸¸¸¸¸¸¸-¸¸¸¸¸¸.%
DELAY
cent.
*Brand names for cleaning products are registered trademarks of the respective manufacturers.
19
Page 21

¢leanln
3. Press the CLEAN pad. ............................
• CLEAN will flash. CLEAN
4. Press the A or V pad.
• CL-M (Clean - Medium Soil) is displayed. A
5. Press the A or V pad to scroll through the
self-cleaning settings. V
CL-H (Clean HeavySoil, 4 hours) .....
CL-M (Clean - Medium Soil, 3 hours)
CL-L (Clean - Light Soil, 2 hours)
Choosing the soil level of the oven automatically programs
the self-cleaning time.
6. After four seconds, CLEAN, DELAY and LOCK will appear
in the display to show that the oven is set for a delayed
clean operation. The delay time is displayed.
During the Self=Clean Cycle
When LOCK shows in the display, the door cannot be opened.
To prevent damage to the door, do not force the door open
when LOCK is displayed.
Smoke and Smells
You may see some smoke and smell an odor the first few
times the oven is cleaned. This is normal and will lessen in
time.
Smoke may also occur if the oven is heavily soiled or if a
broiler pan was left in the oven.
Sounds
As the oven heats,you may hear sounds of metal parts
expanding and contracting. This is normal and will not
damage the oven.
After Self=Cleaning
About one hour after the end of the self-clean cycle, LOCK
will turn off. The door can then be opened. Move door lock
lever to the left to unlock.
If the oven has already been set for a clean
cycle and you wish to set a delay:
1. Press the DELAY pad. DELAY
• DELAY flashes. ............................
• 00:00 will appear in the display.
Press the A or V pad to set the amount of time
you want to delay the cycle.
After four seconds, CLEAN, DELAY and LOCK will appear
in the display to show that the oven is set for a delayed
clean operation. The delay time is displayed.
When the Self=Clean cycle starts:
• DELAY will turn off.
• The clean time will appear in the display.
To cancel the Self=Clean cycle:
Press the CANCEL pad.
° All words disappear from the display,
• All functions are canceled,
• The time of day appears in the display,
Some soil may leave a light gray, powdery ash. Remove
itwith a damp cloth. If soil remains after wiping, that means
the clean cycle was not long enough. The soil will be re-
moved during the next clean cycle.
If oven racks were left in the oven and do not slide
smoothly after a clean cycle, wipe racks and rack supports
with a small amount of vegetable oil to make them easier to
move.
Fine lines may appear in the porcelain because it went
through heating and cooling. This is normal and will not
affect performance.
A white discoloration may appear after cleaning if acidic
or sugary foods were not wiped up before the self=clean
cycle. This discoloration is normal and will not affect perfor-
mance.
Notes-"
• If the oven door is left open, DOORwill flash in the
• The oven door will be damaged if the oven door is
display and a signal will beep until the door is closed
and the CLEAN pad is pressed again.
forced to open when LOCK is still displayed.
2O
Page 22
¢leentn9
Cleaning Procedures
Brand names are registered trademarks of the
respective manufacturers.
To order call 1-877-232-8771 USA and
1-800-688-8408 Canada.
!U!!iiii!ili_i_ii!ii!ii!ii!i!i!i!i!ii!ili!i!ilililiiililiiiiilililiiililiiilili!!i!iiii!il!ii!ii!ii!ii!ii!i!!ii!il!ii!ii!ii!ii!ii!i!!ii!ii!ii!i!!ii!i!iii!i_!j!!!,!ii_i!_i'_i_!i!_!_iii_!i_!i_!i_!i_!i_!i_!i_!i_!i_!i_!i_!i_!i_ii_ii_!ililililiiilillii!_i_!ii!il!ii!ii!ii!ii!ii!ii!ii!il!ii!ii!ii!ii!ii!ii!ii!il!!!i!i!i!i!i!ili!ii!iii!_i!iii_i_i_i_!_i_!_i_!_i_iiiiiiiiiiiiiiiiiiiiiiiiiiiiiiiiiiiiiiiiiiiiiiiiiiiiiiiiiilili!ili!ili_ii_ii_ii_ii_ii_ii_ii_ii_ii_ii_ii_ii_ii_ii_ii_ii_ii_ii_ii_ii_i!_!!_i!_!!_i_i__ii_ii_ii_ii!_i_i_i_i_!_i_!_i_!_!!_!!_!!_!!_!!_!!_!!_!!_!!_!!_!!_!!_!!_!!_!!_!!_!!_!!_!!_!!_!!_!!_!!_!!i!i!ililililil!ii!!ii!!ii_i_!_iiii!iiiii!iiilliiiiiiiiiii_i_ii!ii!i!iii!i!!i!!i!!!ili!ii!iii_i_i!!i!!i!!i!!i!!i!!i!!i!!i!!i!!i!!i!!i!!i!!i!!i!!i!!i!!i!!i!!i!!i!!i!!i!!i!!i!!i!!i!!i!!i!!i!!i!!i!!i!!i!!i!!i!!i!!i!!i!!i!i_i_i_i_i_i_i!_i!_i!_i!_i!_i!_i!_i!_i!_i!_i!_i!_i!_i!_i!_i!_i!_i!_i!_i!_i!_i!_i!_i!_i!_i!_i!_i!_i!_i!_i!_i!_i!_i!_i!_i!_i!_i!_i!_i!_i!_i!_i!_i!_i!_i!_i!_i!_i!_i!_i!_ii_ii_iiiii!ii!iiiii!i!!!i!ii!_i_ilililililililililililililililiiiiiiiii_i_!i_!i_ii_ii_ii_ii_ii_ii_ii_ii_ii_ii_ii_ii_ii_ii_ii_ii_ii_ii_ii_ii_ii_ii_ii_ii_ii_ii_ii_ii_ililililililiiiiii!i_i_i_i_i_iiiii_i_i_i_i_i_i_i_i_i_i_ii_ii_ii_ii_ii_ii_ii_ii_i!_ii_i!_ii_i!!i!i!i!i!i!i!i!i!i!i!i!i!i!i!i!i!i!i!i!i!i!i!i!i!i!i!i!i!ii_
Broiler Pan Never cover inse£t with aluminum foil as this prevents the fat from draining to the pan below.
and Insert • Place soapy cloth over insert and pan; let soak to loosen soil.
Surface • Clean frequently. Allow burner to cool. Clean with soap and plastic scouring pad. Forstubborn soils, use
Burners a non-abrasive cleaner and a cloth. Try to prevent the cleaner from seeping into the gas ports asthis will
=Conventional affect the flame.If thecleaner doesenter the ports, cleanwith asoft bristle brush or a straight pin especially
=Sealed the port below the ignitor. Do not enlarge or distort holes.
Burner Box The burner box is located under the lift-up cooktop. Clean frequently to remove spillovers. If soil is allowed
=Conventional to accumulate, it may damage the finish.
Burners Only ° Remove grates and surface burners. Raise lift-up top.
Burner Grates ° Wash grates with warm, soapy water and a nonabrasive, plastic scrubbing pad. Forstubborn soils, clean
_ _ _ _ _ _ _ __ _ _ _ _ _; ...................._ ; _ _ .............................._ _ _ _ _ _
• Wash in warm soapy water. Use scouring pad to remove stubborn soil.
• Broiler pan and insertcan be cleaned in dishwasher.
• Be careful not to get water into burner ports.
° Use care when cleaning the ignitor. If the ignitor iswet or damaged the surface burner will not light.
° Conventional Burners: Dry burners in the oven set at 170° F.
° Clean with soap and water, rinse and dry.
• Forstubborn soils,use mildly abrasive cleaning agents such asbaking soda/water paste or BonAmi*,and
a non-abrasive plastic scrubbing pad.
with a soap-filled, nonabrasive pad or a sponge and Cooktop Cleaning Creme (Part #20000001)._
° For burned on soils, remove grates, place on newspapers and carefully spray with commercial oven
cleaner. (Do not spray surrounding surfaces.) Place in plastic bags for several hours or overnight.
Wearing rubber gloves, remove from bags. Wash, rinse, dry and replace on cooktop.
Clock and ° To activate "Control Lock" for cleaning, see page 11.
Control Pad ° Wipe with a damp cloth and dry. Do not use abrasive cleaning agents as they may scratch the finish.
Area • Glass cleaners may be used if sprayed on a cloth first. DO NOTspray directly on centrelpad and
display area.
Control Knobs ° Remove knobs in the OFFposition by pulling forward.
• Wash, rinse and dry. Do not use abrasive cleaning agents as they may scratch the finish.
• Turn on each burner to be sure the knobs have been correctly replaced.
Cooktop and Porcelain enamel isglassfused on metal and may crack or chip with misuse. Itisacid resistant, notacid proof.
Control Panel = All spillovers, especially acidic or sugary spillovers, should be wiped up immediately with a dry cloth.
Porcelain Enamel • When cool, wash with soapy water, rinse and dry.
° Never wipe off a warm or hot surface with a damp cloth. This may cause cracking or chipping.
° Never use oven cleaners, abrasive or caustic cleaning agents on exterior finish of range.
21
Page 23
¢leentn9
Side Panels,
Storage Drawer,
Oven Door
CseJectmodeJs),
Lower Broiler
Door Cseiect
models) and
Door Handles -
Painted Enamel
Oven Window
and Door - Glass
(select models)
Oven interior
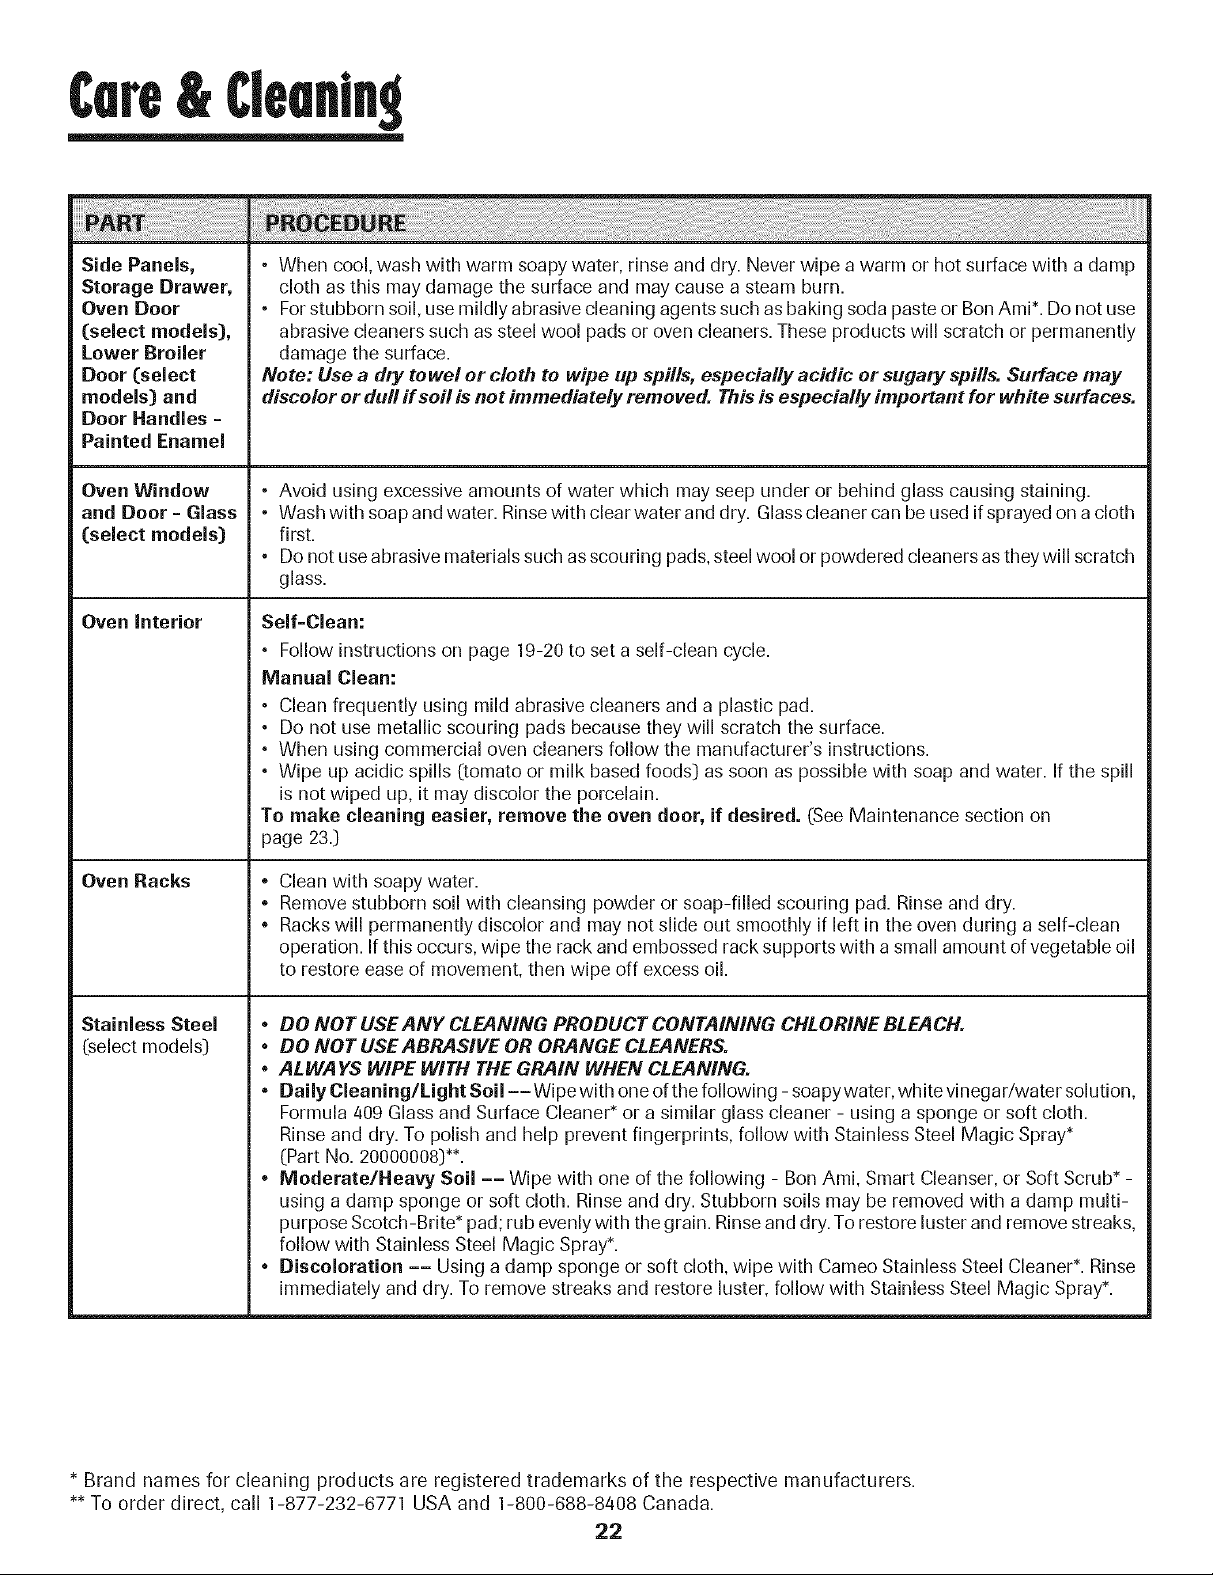
• When cool, wash with warm soapy water, rinse and dry. Never wipe a warm or hot surface with a damp
cloth as this may damage the surface and may cause a steam burn.
• Forstubborn soil, use mildly abrasive cleaning agents such as baking soda paste or BonAmi*. Do not use
abrasive cleaners such as steel wool pads or oven cleaners. These products will scratch or permanently
damage the surface.
Note: Use a dry towel or cloth to wipe up spills, especially acidic or sugary spills. Surface may
discolor or dull if soil is not immediately removed. This is especially important for white surfaces.
• Avoid using excessive amounts of water which may seep under or behind glass causing staining.
• Wash with soap and water. Rinsewith clear water and dry. Glasscleaner can be used if sprayed on a cloth
first.
• Do not use abrasive materials such asscouring pads,steel wool or powdered cleaners astheywill scratch
glass.
Soil=Clean:
° Follow instructions on page 19-20 to set a self-clean cycle.
Manual Clean:
° Clean frequently using mild abrasive cleaners and a plastic pad.
° Do not use metallic scouring pads because they will scratch the surface.
° When using commercial oven cleaners follow the manufacturer's instructions.
° Wipe up acidic spills [tomato or milk based foods:) as soon as possible with soap and water. If the spill
is not wiped up, it may discolor the porcelain.
To make cleaning easier, remove the oven door, if desired. _See Maintenance section on
page 23.]
Oven Racks
Stainless SteeJ
Cselectmodels_
e
Clean with soapy water.
e
Removestubborn soil with cleansing powder or soap-filled scouring pad. Rinse and dry.
e
Racks will permanently discolor and may not slide out smoothly if left in the oven during a self-clean
operation. If this occurs, wipe the rack and embossed rack supports with a small amount of vegetable oil
to restore ease of movement, then wipe off excess oil.
* DO NOT USE ANY CLEANING PRODUCT CONTAINING CHLORINE BLEACH.
° DO NOT USEABRASIVE OR ORANGE CLEANERS.
* ALWAYS WIPE WITH THE GRAIN WHEN CLEANING.
* Daily Cleaning/Light Soil -- Wipe with one oftile following - soapywater, white vinegar/water solution,
Formula 409 Glass and Surface Cleaner_or a similar glass cleaner - using a sponge or soft cloth.
Rinse and dry. To polish and help prevent fingerprints, follow with Stainless Steel Magic Spray_
(Part No. 20000008D_.
* Moderate/Heavy Soil -- Wipe with one of the following - Bon Ami, Smart Cleanser, or Soft Scrub _-
using a damp sponge or soft cloth. Rinse and dry. Stubborn soils may be removed with a damp multi-
purpose Scotch-Brite _pad; rub evenly with the grain. Rinse and dry.To restore luster and remove streaks,
follow with Stainless Steel Magic Spray_.
* Discoloration -- Using a damp sponge or soft cloth, wipe with Cameo Stainless Steel Cleaner_. Rinse
immediately and dry. To remove streaks and restore luster, follow with Stainless Steel Magic Spray_.
Brand names for cleaning products are registered trademarks of the respective manufacturers.
_ To order direct, call 1-877-232-6771 USA and 1-800-688-8408 Canada.
22
Page 24
Melntenence
Oven Door
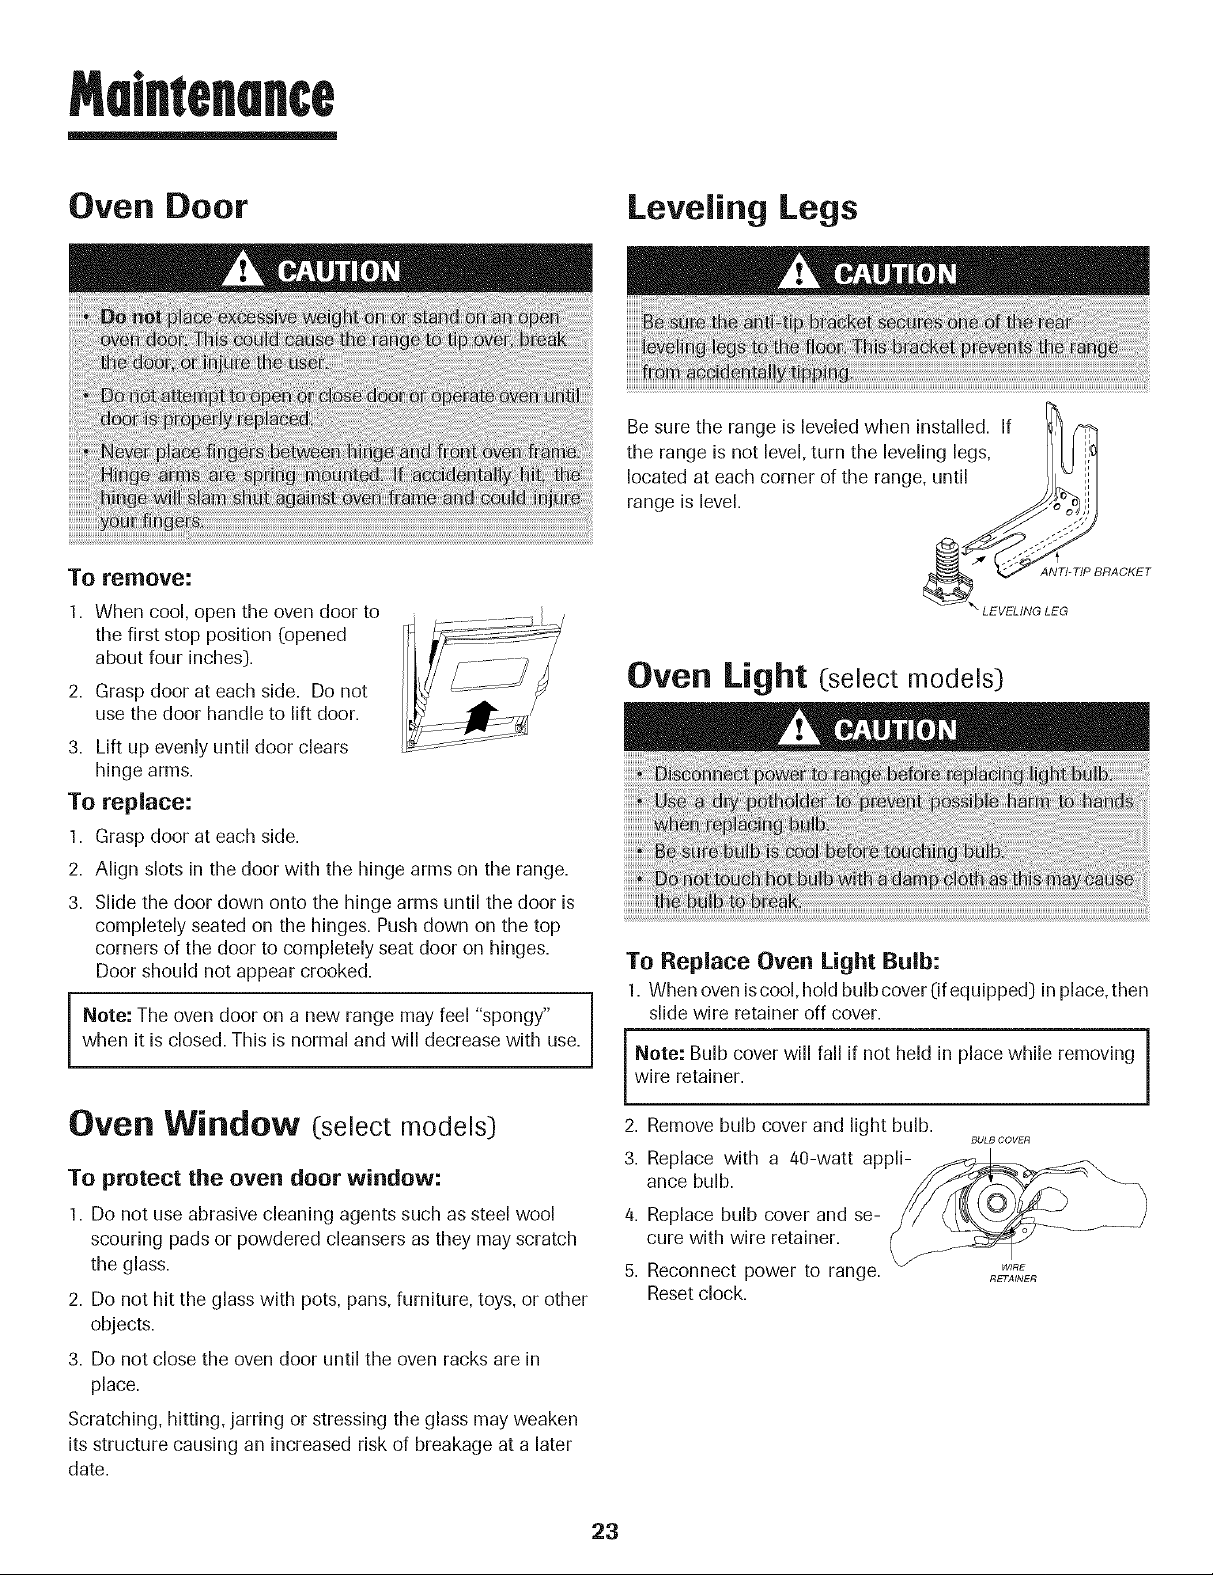
To remove:
1. When cool, open the oven door to
the first stop position (opened
about four inches).
2. Grasp door at each side. Do not
use the door handle to lift door.
3. Lift up evenly until door clears
hinge arms.
To replace:
1. Grasp door at each side.
2. Align slots in the door with the hinge arms on the range.
3. Slide the door down onto the hinge arms until the door is
completely seated on the hinges. Push down on the top
corners of the door to completely seat door on hinges.
Door should not appear crooked.
when it is closed. This is normal and will decrease with use.
i Note: The oven door on a new range may feel "spongy"
Leveling Legs
F_
Be sure the range is leveled when installed. If II/]
the rangeis not level, turn the leveling legs, II[LII
located at each corner of the range, until /1_._
range is level. _i_/
"_'__IP BRACKET
\ LEVELING LEG
Oven Light (selectmodels)
To Replace Oven Light Bulb:
1. When oven iscool, hold bulb cover (ifequipped) inplace, then
slide wire retainer off cover.
Note: Bulb cover will fall if not held in place while removing
wire retainer.
1
Oven Window (select models)
To protect the oven door window:
1. Do not use abrasive cleaning agents such as steel wool
scouring pads or powdered cleansers as they may scratch
the glass.
2. Do not hit the glass with pots, pans, furniture, toys, or other
objects.
3. Do not close the oven door until the oven racks are in
place.
Scratching, hitting, jarring or stressing the glass may weaken
itsstructure causing an increased risk of breakage at a later
date.
2. Remove bulb cover and light bulb.
3. Replace with a 40-watt appli-
ance bulb.
4. Replace bulb cover and se-
cure with wire retainer.
5. Reconnect power to range.
Resetclock.
23
BULB COVER
RETAINER
Page 25

Electrical Connection
Appliances which require electrical
power are equipped with a three=
prong grounding plug which must be
plugged directly into a properly grounded
three-hole 120volt electrical outlet.
Always disconnect power to appliance before servicing.
The three-prong grounding plug offers protection against
shock hazards. DO NOT CUT OR REMOVE THE THIRD
GROUNDING PRONG FROM THE POWER CORD PLUG.
If an ungrounded, two-hole or other type electrical outlet is
encountered, it isthe personal responsibility of the
appliance owner to have the outlet replaced with a
properly grounded three-hole electricM outlet.
Removal of Gas Appliance
Gasappliance connectors used to connect this appliance to
the gas supply are not designed for continuous movement.
Once installed,DO NOT repeatedly move this gas appliance
for cleaning or to relocate. If this appliance has to be moved
and/or removed for servicing, follow the procedure described
in the installationinstructions.Forinformation, contact
Customer Assistance at 1-800-688-1120 USA and Canada.
To prevent range from accidentally tipping, range must be
secured to the floor by sliding rear leveling leg into the anti-
tip bracket.
Conventional Surface Burners
(:select models:)
Under no circumstances are the surface burner assemblies to
be taken apart for cleaning. The surface burner assembly can
be removed to clean the burner box area.
Freestanding range only:
Tile two surface burner assemblies are secured in place
during transportation with screws. Once the range is installed,
these screws may be removed to allow quick and easy
removal of the burner assemblies.
To remove:
Allow the burner assembly to cool. Lift up cooktop. Grasp the
burner assembly and rotate it slightly toward the left to
release the two tabs on the assembly, Then lift the assembly
and pull toward the back of the cooktop until the air shutter
ends on the assembly release from the valves,
To replace:
Insert tile air shutter ends on tile burner assembly over the
valves and lower the assembly into place. Be sure to secure
the two tabs on the burner assembly into the two slots on the
burner support bracket which is mounted to the burner
bottom. (NOTE: If the tabs are not properly inserted into the
slots, the assembly may rock and the burners may not light
properly.}
Storage Drawer (:select models:)
The storage drawer can be removed to allow you to clean
under the range.
To remove:
1. Empty drawer and pull out to the first stop position.
2. Lift up the front of the drawer.
3. Pull out to the second stop position.
4. Grasp sides and lift drawer up and out.
To replace:
1. Fit tile ends of tile drawer glides intothe rails in tile range.
2. Lift up the front of the drawer and gently push in to the
first stop position.
3. Lift drawer up again and push until drawer is closed.
Oven Bottom
Protect oven bottom against spillovers, especially acidic or
sugary spills, as they may discolor the porcelain enamel. Use
the correct pan size to avoid spillovers and boilovers.
24
Page 26
froubleshoofln9
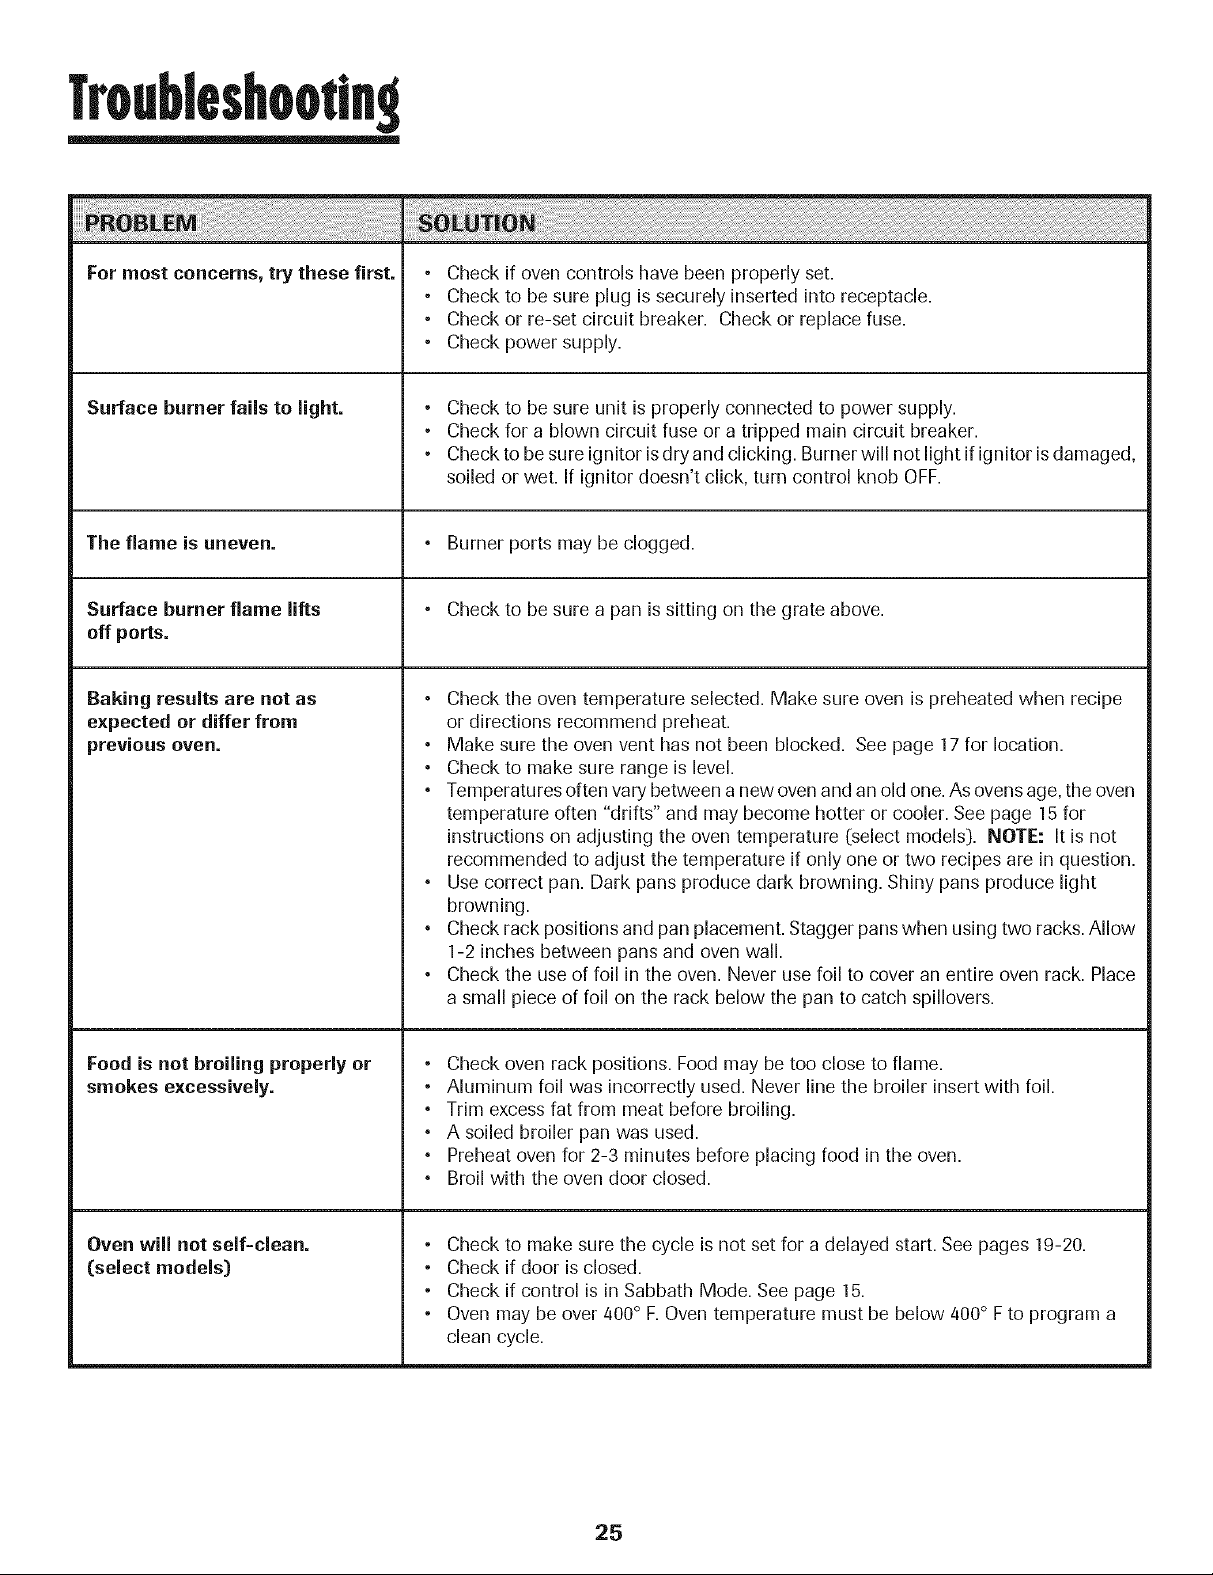
For most concerns, try these first. •
Surface burner fails to light. °
The flame is uneven.
Surface burner flame lifts
off ports.
Baking results are not as °
expected or differ from
previous oven. °
Check if oven controls have been properly set.
o
Check to be sure plug is securely inserted into receptacle.
o
Check or re-set circuit breaker. Check or replace fuse.
o
Check power supply.
Check to be sure unit is properly connected to power supply.
o
Check for a blown circuit fuse or a tripped main circuit breaker.
o
Check to be sure ignitor isdry and clicking. Burner will not light if ignitor isdamaged,
soiled or wet. If ignitor doesn't click, turn control knob OFF.
° Burner ports may be clogged.
• Check to be sure a pan issitting on the grate above.
Check the oven temperature selected. Make sure oven is preheated when recipe
or directions recommend preheat.
Make sure the oven vent has not been blocked. See page 17 for location.
°
Check to make sure range is level.
°
Temperatures often vary between a new oven and an old one.As ovens age,the oven
temperature often "drifts" and may become hotter or cooler. See page 15 for
instructions on adjusting the oven temperature (select models:). NOTE: It is not
recommended to adjust the temperature if only one or two recipes are in question.
°
Use correct pan. Dark pans produce dark browning. Shiny pans produce light
browning.
°
Check rack positions and pan placement. Stagger panswhen using two racks. Allow
1-2 inches between pans and oven wall.
°
Check the use of foil in the oven. Never use foil to cover an entire oven rack. Place
a small piece of foil on the rack below the pan to catch spillovers.
Food is not broiling properly or •
smokes excessively.
Oven will not self=clean. °
(select models) •
Check oven rack positions. Food may be too close to flame.
Aluminum foil was incorrectly used. Never line the broiler insert with foil.
°
Trim excess fat from meat before broiling.
°
A soiled broiler pan was used.
°
Preheat oven for 2-3 minutes before placing food in the oven.
°
Broil with the oven door closed.
Check to make sure the cycle is not set for a delayed start. See pages 19-20.
Check if door is closed.
o
Check if control is in Sabbath Mode. See page 15.
o
Oven may be over 400° F.Oven temperature must be below 400° F to program a
clean cycle.
25
Page 27

froubleshootln9
Oven did not self=clean properly
(select models).
Oven door will not unlock
after self=clean cycle
(select models)
Moisture collects on oven
window or steam comes from
oven vent.
There is a strong odor or light
smoke when oven is turned on.
Fault Codes
(select models)
• Longercleaning time may be needed.
• Excessivespillovers, especially sugary and/or acidic foods, were not removed prior
to the self-clean cycle.
° Oven interiorisstill hot. Allow about one hour for the oven to cool after the
completion of a self-clean cycle, The door can be opened when "LOCK" is not
displayed,
° The control and door may be locked, See pages 11 and 20 to unlock,
• This is normal when cooking foods high in moisture.
• Excessive moisture was used when cleaning the window.
° This is normal for a new range and will disappear after a few uses. Initiating a clean
cycle will "burn off" the odors more quickly.
° Turning on a ventilation fan will help remove the smoke and/or odor.
° Excessivefood soils on the oven bottom. Use a self-clean cycle.
• BAKEor LOCK may flash rapidly in the display to alert you if there is an error
or a problem. If BAKEor LOCK appear in the display, press the Cancel pad.
If BAKE or LOCK continue to flash, disconnect power to the appliance.
Wait a few minutes, and then reconnect power. If the flashing still continues,
disconnect power to the appliance and call an authorized servicer.
• If the oven is heavily soiled, excessive flareups may result in a fault code during
cleaning. Press the CANCEL pad and allow the oven to cool completely, wipe out
excess soil, then reset the clean cycle. If the fault code reappears, contact an
authorized servicer.
Noises may be heard.
There are no beeps and
no display.
"SAb" flashing and then
displayed continuously.
° Theoven makes several low level noises. You may hear the oven relays asthey go on
and off. This is normal.
° As the oven heats and cools, you may hear sounds of metal parts expanding and
contracting. This is normal and will not damage your appliance.
° Control may be in Sabbath Mode. See page 15.
• Oven is in Sabbath Mode. To cancel, press and hold the Clock pad for five
seconds.
26
Page 28

Warranty
CUSTOMER'SSOLEAND EXCLUSIVE
REMEDY UNDER THIS LIMITED
WARRANTY SHALL BE PRODUCTREPAIR
AS PROVIDEDHEREIN. IMPLIED
WARRANTIES, INCLUDING WARRANTIES
OFMERCHANTABILITY OR FITNESSFORA
PARTICULAR PURPOSE,ARE LIMITED TO
ONEYEAR ORTHE SHORTESTPERIOD
ALLOWED BY LAW. MAYTAG
CORPORATIONSHALL NOT BE LIABLE
FOR INCIDENTAL OR CONSEQUENTIAL
DAMAGES. SOME STATESAND
PROVINCESDO NOT ALLOW THE
EXCLUSION OR LIMITATION OF
INCIDENTAL OR CONSEQUENTIAL
DAMAGES, OR LIMITATIONS ON THE
DURATION OF IMPLIED WARRANTIES OF
MERCHANTABILITY OR FITNESS,SO
THESEEXCLUSIONSOR LIMITATIONS
MAY NOT APPLYTO YOU. THIS
WARRANTY GIVESYOU SPECIFICLEGAL
RIGHTSAND YOU MAY ALSO HAVE
OTHERRIGHTS,WHICH VARY STATETO
STATEOR PROVINCETO PROVINCE.
What is Not Covered By These Warranties
1. Conditions and damages resulting from any of the following:
a. Improper installation, delivery, or maintenance.
b. Any repair, modification, alteration, or adjustment not authorized by the
manufacturer or an authorized servicer.
c. Misuse, abuse, accidents, or unreasonable use, or acts of God.
d. Incorrect electric current, voltage, electrical and/or gas supply.
e. Improper setting of any control.
2 Warranties are void if the original serial numbers have been removed, altered,
or cannot be readily determined.
3. Light bulbs, water filters and air filters.
4. Products purchased for commercial or industrial use.
5. The cost of service or service call to:
a. Correct installation errors. For products requiring ventilation, rigid metal
ducting must be used.
b. Instruct the user on the proper use of the product.
c. Transport the appliance to and from the servicer.
8. Any food loss due to refrigerator or freezer product failures.
7. Expenses for travel and transportation for product service in remote locations.
8. Outside of the United States and Canada this warranty does not apply.
Contact your dealer to determine if another warranty applies.
9. Consequential or incidental damages sustained by any person as a result of
any breach of these warranties. Some states do not allow the exclusion or
limitation of consequential or incidental damages, so the above exclusion may
not apply.
If You Need Service
First see the Troubleshooting section in your Useand Care Guide or call the
dealer from whom your appliance was purchased or call Maytag Services, LLC,
Customer Assistance at 1-800-688-9900 USA and 1-800-688-2002 Canada to
locate an authorized servicer.
• Be sure to retain proof of purchase to verify warranty status. Refer to
WARRANTY for further information on owner's responsibilities for warranty
service.
• If the dealer or service company cannot resolve the problem, write to Maytag
Services, LLC, Attn: CAIR:_Center, P.O.Box 2370, Cleveland, TN 37320-2370, or
call 1=800-688=9900 USA and 1=800-688-2002 Canada. U.S.customers
using TTY for deaf, hearing impairedor speech impaired,call 1-800-688-2080.
• User's guides, service manuals and parts information areavailable from Maytag
Services, LLC, Customer Assistance.
Notes= =When writing or calling about a service problem, please include:
a. Your name, address and telephone number;
b. Model number and serial number;
c. Name and address of your dealer or servicer;
d. A clear description of the problem you are having;
e. Proof of purchase (sales receipt).
27
Page 29

29=33
................. 34=36
surface de cuisson
ir .................... 37=48
oyage manuel
Cuisson courante
Gril
Cuisi.i re Sa=
Nettoyage ....................................... 49=52
Four autonettoyant
M6thodes de nettoyage
Entretien .......................................... 53=54
Recherche des pannes ................ 55=56
Garantie et service apres=vente ....... 57
Guia del Usuario ................................... 58
Jra nettoyage manuel
Gril
ir _ autonettoyage
Cuisson courante diff6r6
Maintie q au chaud
Gril
1 Grillesdu four
Page 30

Instructionsde
s
que pourrait susciter une utilisation incorrecte de rappareil.
Utiliser rappareil uniquement pour los fonctions prevues,
decrites dans ce guide.
Pour une utilisation adequate et en s_curit_, il faut que
rappareil soit convenablement installe par un technicien
qualifie, et relic _ la terre. Ne pas regler, reparer ni remplacer
un composant, _ moins que cela ne soit specifiquement
recommande darts ce guide. Toute autre reparation doit etre
effectuee par un technicien qualifie. Demander _ rinstallateur
de montrer ou se trouve le robinet d'arret de gaz et comment
le former en cas d'urgence.
Toujours debrancher rappareil avant d'y faire de rentretien.
impomntes
Les instructions de securite importantes et les paragraphes
_{avertissement >>de ce guide ne sont pas destines _ couvfir
toutes les conditions et situations qui pourraient se presenter.
II faut faire preuve de bon sens, de prudence et de soin lots de
rinstallation, de rentretien ou du fonctionnement de rappareil.
Toujours prendre contact avec le fabricant darts le cas de
problemes ou de conditions qui ne seraient pas comprises.
Reconnaitre los _tiquettes, paragraphes et
symboles sur la s6curite
Lire routes los instructions avant d'utiliser cot appareil;
observer toutes los instructionspour eliminer les risques
d'incendie, choc electrique, dommages materiels et corporels
29
Page 31

securlt6imponentes
instructions g nerales
Utiliser une lampe torche pour determiner si la bride
antibasculement est convenablement installeesous la
cuisiniere. L'un des pieds arriere de regiage de I'aplomb doit
etre convenablement engage duns la fente de la bride.
Lorsque la cuisiniere est convenablement calee, la bride
antibasculement immobilisele pied arriere contre le sol.
Verifier la parfaite immobilisationde la cuisiniere par la bride
apres chaque d@iacement de la cuisiniere.
Pour viter un incendie ou des
dommages par la fumee
S'assurer que tous [es materiaux de conditionnement sont
retires de I'appareil avant de le mettre en marche.
Garder les materiaux combustibles, [essence et autres
matieres et vapeurs inflammables bien eloignes de I'appareil.
composants de I'apparei[ susceptibies de devenir tiedes ou
chauds. Ne pus hisser des articles en plastique sur la table
de cuisson: un article en plastique trop proche de I'event du
four ou d'un breleur allume pourrait s'amollir ou fondre.
Pour eliminer le besoin d'atteindre quelque chose par-dessus
les breleurs de surface, il est preferable qu'il n'y air aucune
armoire de cuisine directement au-dessus de I'appareil. S'il y
a une armoire, on ne devrait y remiser que des articles peu
frequemment utilises et capables de resister _ la chaleur
emise par I'appareil. La temperature pourrait etre excessive
pour certains articles, comme liquides volatils, produits de
nettoyage ou flacons d'aerosol.
En cas d'incendie
Interrompre le fonctionnement de I'apparei[ et de la hotte de
ventilation pour minimiser le risque d'extension des flammes.
Eteindre les flammes, puis mettre la hotte en marche pour
evacuer la fumee et Fairvici&
• Table de cuisson : Utiiiser un couvercle ou une plaque
biscuits pour etouffer les flammes d'un feu qui se declare
dans un ustensiie de cuisine.
NE JAMAB saisir ou d@lacer un ustensile de cuisine
enflamme.
• Four : Fermer la porte du four pour etouffer les flammes.
Ne pas projeter de I'eau sur un feu de graisse. Utiliser du
bicarbonate de sodium ou un extincteur _ mousse ou 3roduit
chimique sec pour eteindre les flammes.
S curit pour les enfants
Si I'appareil est installe pres d'une fenetre, des precautions
appropriees doivent etre prises pour eviter que le vent entrai'ne
les rideaux au-dessus des brQleurs.
NEJAMAIS laisser des articles sur la table de cuisson. L'air
chaud de I'event peut les enflammer et mettre egalement sous
pression des contenants fermes qui pourraient alors exploser.
De nombreux flacons d'aerosol peuvent EXPLOSERIorsqu'on
les expose _ la chaleur, et ilspeuvent contenir un produit tres
inflammable.@iter d'utiliser ou remiser un flacon d'aerosol
proximite de I'appareil.
De nombreux articles en plastique peuvent etre deteriores par
la chaleur. Conserver les articles en plastique _ distance des
NEJANIAIS hisser des enfants seuls ou sans supervision
Iorsque I'appareil est en service ou encore chaud.
NEJAMA[$ hisser un enfant s'asseoir ou se tenir sur une
partie quelconque de I'appareil. II pourrait se blesser ou se
breler.
3O
Page 32

securlteimponentes
II est important d'enseigner aux enfants que la cuisiniere et les
ustensiles places dessus ou dedans peuvent etre chauds.
Laisser refroidir les ustensiles en un lieu sQr,hors d'atteinte
des enfants. II est important d'enseigner aux enfants qu'un
appareil menager n'est pas un jouet, et qu'ils ne doivent
toucher aucune commande ou autre composant de I'appareil.
Familiarisation avec I'appareil
Ne pas remiser des aliments ou ustensiles de cuisine sur la
table de cuisson ou darts le four.
Cuisson et s6curit
Placer toujours un ustensile sur un brQleur de surface avant de
I'a[lumer. Veiller _ bien connaitre la correspondance entre les
boutons de commande et les brQleurs.Veiller _ allumer le
brQleur correct et verifier que le brQleur s'allume
effectivement. A la fin de la periode de cuisson, eteindre le
brQleur avant de retirer I'ustensile, pour eviter une exposition
aux flammes du brQleur.
Vefller _ toujours ajuster correctement la taille des flammes
pour qu'elles ne depassent pas sur la peripherie de I'ustensile.
Des flammes de trop grande taille sur un brQleur sont
dangereuses, elles entrainent un gaspfllage d'energie et elles
peuvent faire subir des dommages _ I'ustensile, _ I'appareil ou
I'armoire situee au-dessus.
NE JANIAIS hisser un brQleur de surface allume sans
surveillance, particulierement avec une puissance de
chauffage elevee ou Iors d'une operation de friture. Un
debordement pourrait provoquer la formation de fumee et des
produits gras pourraient s'enflammer. Oiminer des que
possible les produits gras renverses. Ne pas utfliser une
puissance de chauffage elevee pendant une periode
prolongee.
L'event du four est situe _ la base du tableau de commande.
Eviter de toucher le voisinage de I'event du four Iorsque le four
est utilise et pendant plusieurs minutes apres I'arret du four.
Certains composants de I'event et la zone voisine peuvent
devenir suffisamment chauds pour provoquer des brQlures.
Apres I'arret du four, ne pas toucher I'event du four ou la zone
voisine avant que ces composants aient pu se refroidir
suffisamment.
Autres surfaces potentiellement chaudes: table de cuisson,
zones faisant face Qla table de cuisson, event du four, zone
voisine de I'event, porte du four et zone voisine de la porte et
du hublot.
Ne pas toucher I'ampoule chaude du four avec un linge
humide; le choc thermique pourrait la briser. Encas de bris de
I'ampoule, debrancher I'appareil de la source d'electricite
avant d'enlever I'ampoule, pour eviter un choc electrique.
NE JANIAIS faire chauffer un recipient non ouvert darts le
four ou sur un brQleur de surface; I'accumulation de pression
darts le recipient pourrait provoquer son eclatement et de
graves dommages materiels ou corporels.
Utfliser des maniques robustes et seches. Des maniques
humides peuvent provoquer la formation de vapeur brQlante.
Ne jamais utfliser un torchon _ vaisselle ou autre article textile
la place de maniques; un tel article pourrait trainer sur un
brQleur et s'enflammer, ou accrocher un ustensile ou un
composant de I'apparefl.
Laisser toujours refroidir un recipient d'hufle de friture chaude
avant de tenter de le deplacer et le manipuler.
Ne pas hisser la graisse de cuisson ou autre materiau inflam-
mable s'accumuler darts ou pres de I'appareil, de la hotte ou
du ventflateur de I'event. Nettoyer frequemment la hotte pour
empecher toute accumulation sur la hotte elle-meme ou sur le
ffltre. Lors du flambage d'aliments sous la hotte, mettre le
ventflateur en marche.
31
Page 33

instructionsdesecurlteimpomntes
NE JAMAIS porter, Iors de rutilisation de rappareil, des
vetements faits d'un materiau inflammable, ou amples, ou
Iongues manches. De tels vetements peuvent s'enflammer ou
accrocher la poignee d'un ustensile.
Placer toujours les grilles _ la position appropriee dans le four
Iorsque le four est froid. Fairecoulisser la grille vers rexterieur
avant d'ajouter ou enlever un plat; utiliser pour cela une
manique robuste et seche. Eviter d'introduire la main dans le
four pour y placer ou retirer un plat. S'il est necessaire de
deplacer une grille Iorsqu'elle est chaude, utiliser une manique
seche. Veiller _ toujours arreter le four _ la fin d'une periode
de cuisson.
N'utiliser les grilles que dans le four dans lequel elles ont ete
achetees/expediees.
Ouvfir toujours la porte du four tres prudemment. Laisser rair
chaud ou la vapeur s'echapper avant de retirer/introduire un
plat.
AVERTISSEMENT : Mets prepares : Respecter les instruc-
tions du fabricant. Si le contenant ou le couvercle en plastique
d'un mets surgele seddorme ou est endommage durant la
cuisson, jeter immediatement le recipient et son contenu. Les
aliments pourraient etre contamines.
NE JAMAIS garnir la sole ou une grille du four avec de la
feuille d'aluminium. Ceci pourrait susciter un risque de choc
electrique ou d'incendie, ou une autre deterioration de
rappareil. Utiliser de la feuille d'aluminium uniquement selon
les instructions de ce guide.
Ustensiles et s curit6
Utiliser des ustensiles _ fond plat comportant une poignee
qu'on peut facilement saisir et qui reste fro[de. Eviterd'utiliser
un ustensile instable ou ddorm& qui pourrait facilement
basculer, ou dont la poignee est mal fixee. Eviter egalement
d'utiliser des ustensiles de petite taille comportant une
poignee Iourde; ces ustensiles sont generalement instables et
peuvent facilement basculer. Un ustensile Iourd Iorsqu'il est
rempli peut egalement etre dangereux Iors des manipulations.
Veiller 8 utiliser un ustensile de taille suffisante pour que le
contenu ne risque pas de deborder. Ceci est particulierement
important pour un ustensile rempli d'huile de friture. Verifier
que la taille de rustensile est suffisante pour qu'il puisse
recevoir les produits alimentaires _ cuire, et absorber
raugmentation de volume suscitee par rebullition de la
graisse.
Pour minimiser les risques de brQlure, d'inflammation de
matieres et de renversement par contact non intentionnel avec
un ustensile, ne pas ofienter la poignee d'un ustensile vers un
brQleur adjacent; ofienter toujours la poignee d'un ustensile
vers le cote ou rarfiere de rappareil; ne pas hisser non plus la
poignee d'un ustensile deborder _ ravant de rappareil, ou un
jeune enfant pourrait facilement la saisir.
Veiller _ ne jamais laisser le contenu liquide d'un ustensile
s'evaporer completement; rustensile et rappareil pourraient
subir des dommages.
Appliquer les instructions du fabficant Iors de remploi d'un
sachet pour cuisson au four.
Seuls certains matefiaux en verre, vitroceramique, ceramique,
ou certains ustensiles vitrifies/emailles peuvent etre utilises sur
la table de cuisson ou dans le four sans risque de bfis sous
I'effet du choc thermique. Observer les instructions du
fabficant lots de rutilisation d'un ustensile en verre.
La secufite de fonctionnement de cet appareil a ete testee
I'aide d'ustensiles de cuisine conventionnels. Ne pas utiliser un
ustensile ou accessoire qui n'est pas specifiquement
recommande dans ce guide. Ne pas utiliser de couvre-brQleur,
gril place sur la table de cuisson ou systeme de convection
additionne[. L'utilisation d'un dispositif ou accessoire qui n'est
pas expressement recommande dans ce guide peut degrader
[a securite de ['apparei[ ou sa performance, ou reduire [a
Iongevite des composants.
Nettoyage et s curit
Arreter toutes les commandes et attendre le refroidissement
de tousles composants avant de les toucher ou d'entre-
prendre le nettoyage. Ne pas toucher la grille d'un brQleur ou
la zone voisine avant que ces composants aient pu suffisam-
ment refroidir.
Exercer une grande prudence Iors du nettoyage de rappareil.
Travailler prudemment pour eviter des brQlures par la vapeur
en cas d'utilisation d'un chiffon ou d'une eponge humide Iors
de relimination d'un produit renverse sur une surface chaude.
Certains produits de nettoyage peuvent generer des vapeurs
nocives Iorsqu'on les applique sur une surface chaude.
32
Page 34

instructionsdesecurlteimpomntes
Four autonettoyant
(certains modeles)
Nettoyer uniquement les pieces mentionnees dans ce guide.
Ne pas nettoyer le joint de porte; le joint joue un rele essentiel
quant _ retancheite. Ne pas frotter, endommager ou d@lacer
le joint. Ne pas utiliser de produit de nettoyage du four dans
le four autonettoyant ou sur les zones voisines.
II est normal que la surface de cuisson devienne chaude
durant une operation d'autonettoyage; par consequent, eviter
de toucher la surface de cuisson durant rautonettoyage.
Avertissement et avis
important pour ia s curit
La [oi californienne <<Safe Drinking Water and Toxic Enforce-
merit Act >>de 1986 (proposition 65)stipule la publication par
le gouvemeur de la Caiifornie d'une [iste de substances que
retat de Californie considere comme cancerigenes ou
dangereuses pour le systeme reproducteur, et impose aux
entreprises commerciales robligation de signaler _ leurs
clients les risques d'exposition _ de relies substances.
Les utilisateurs de cet appareil peuvent etre exposes _ une
faible concentration de certaines substances figurant dans la
liste mentionnee ci-dessus, dont benzene, formaldehyde et
suie, du fair de la combustion incomplete du gaz naturel ou du
gaz de petrole liquefie. Pour minimiser la combustion
incomplete, veiller _ ce que les brQleurs soient parfaitement
regles. Pour minimiser rexposition _ ces substances, veiller
bien evacuer les gaz de combustion _ rextefieur.
Nous informons les utilisateurs de cet appareil que Iors d'une
operation d'autonettoyage, ils peuvent etre exposes _ une
faible concentration de certaines substances figurant duns la
liste mentionnee ci-dessus, dont le monoxyde de carbone.
Pour minimiser rexposition, veiller _ ce que la piece ou se
trouve le four soit convenablement aeree durant une operation
d'autonettoyage par rouverture d'une fenetre ou d'une porte.
AVIS IMPORTANT - OISEAUX FAMIUERS : Les oiseaux ont
un systeme respiratoire tres sensible. Ne pus garder un oiseau
familier duns la cuisine ou dans une piece ou il pourrait etre
expose aux fumees. Les fumees emises durant une operation
d'autonettoyage peuvent etre dangereuses ou mortelles pour
un oiseau, de meme que les fumees emises Iors du chauffage
excessif de graisse, huile, margarine, et du chauffage excessif
dans un ustensile _ revetement antiadhesif.
Conserver ces instructions pour consuJtation uJterieure
33
Page 35

Caissonsurla
Low (Basse]: S'utilisepour le mijotageou le
maintiendelatemp6ratured'un mets,ou pour
lafusiondechocolatou beurre.Lorsquele plat
ou I'ustensileest couvert,und_but de cuisson
peutseproduireavecla puissancede
chauffageLow.
Commandes de la
surface de caisson
High (€levde]:S'utilisepour porterun liquide
6bullitionou atteindrela bonnepressiondunsun
autocuiseur.R6duireensuitela puissancede
chauffageapr_s led_but de 1'6bullitionoudela
cuissondes aliments.
ivied(Moyen]:Unepuissancede chauffage
interm_diaireest utilisdepourla poursuitede la
cuisson.Lesalimentsnecuisentpusplus
rapidementsi on utilise unepuissancede
chauffageplus 61ev6equen_cessairepour le
maintiend'une douce6bullition.L'eau bout
toujoursa lam6metemp6rature,que I'_bullition
soittranquille ouvigoureuse.
positionON(MARCHE].Unefois le
brQleurallum6,mettrelebouton ala
positionOFF(ARRET)et proc6der
commeil est indiqu_ci-dessous.
Allumage de la veilleuse :
Releverla tablede cuissonettenir une
allumetteenflamm6eprosdes
orificesde la veilleuse(Voltillustra-
tion], un _ droite etI'autreagauche.
Allumage sans flamme de
veille (certains modeles)
Lesyst_med'allumagesansflammede veille
rend inutileI'alimentationpermanente
d'une flammede veille.ChaquebrQleur
scellede latable decuissonest dotc!d'un
allumeur_ 6tincelles.IIy a deuxallumerspour
lesbrQleursde surfaceconventionnels.Proc6deravecprudenceIors
du nettoyageauvoisinaged'un brQleurde latablede cuisson.Si le
chiffon utilis6accrochait ledispositifd'allumageil pourraitle
d6t6riorer,cequi emp6cheraitensuiteI'allumagedubrQleur.
Si unbrQleurdelatable decuissonnes'allumepus,dc!terminersi
I'allumeurest bris6,souill_ou mouilk!.Lecas6ch6ant,d_boucher
avecuneaiguilleou unebrocherectiligneI'orifice situc!juste au-
dessousde I'allumeur.
ORIFICESOUSLALLUMEUR
Allumage par veilleuse (certains
modeles)
Lorsde I'installationinitiale dela cuisini_re,ilpeut6tredifficile
d'allumerlesveilleusescontinuesa causedeI'airqui setrouve duns
la conduitedegaz.Pourpurger I'air delaconduite,tenir une
allumetteenflamm6eprosdu brQleuretmettrele boutona la
Boutons de commande de la
surface de caisson
Onutilise cesboutonspour commanderI'allumagedesbrOleursde
surface.Onpeut r(!glerchaqueboutona toute positionentreles
positionsextr6mesLow (Basse)etNigh [Elev6e).On peutpercevoir
uned_tentedecalage_ lapositionNigh. Onpeut choisirtoute
positionder6glageentrelesdeux positionsextr6mes.
O O Ungraphique prosdechaque boutonidentifiele brOleurde
surfacecommand6parce bouton.Parexemple,legraphique
O O a gaucheidentifiele brQleuravant/gauche.
R_glage des commandes :
Lapuissancede chauffage_ employerdc!penddu type etde lataille
de I'ustensileutilis&
1. Placerunustensilesurla grille du brOleur.
• Siaucun ustensilen'estplac6 surla grille du brQleur,les
flammespeuventavoirtendancea sesdparerdu brQleur.
2. Appuyeret tournerle boutonduns lesensanti-horaire,jusqu'ala
positionLite [Allumage].
• On peutpercevoirlecliquetis correspondantala production
desdtincelles,etlebrOleurs'allume.(Lesquatreallumeurs
produisentdesdtincellesIorsqu'onplacele boutonde I'undes
brQleursa la positionLife.)
suite...
34
Page 36

Culssonsurlesurfece
3. Apr_sI'allumagedubrQleur,r6glerla tailledes flammesselonle
dc!sirentournantle boutondecommando.
. L'allumeurcontinue) produiredes_tincellesaussi Iongtemps
que leboutonest alapositionLite.
Utilisation durant une panne
d'6iectricit
1. Approcherune allumetteenflamm6edu brOleur_utiliser.
2. Enfonceret fairetournerlentement leboutonde commando
jusqu'alapositionUte.
3. Quands'allume,ajuster losflammes_ lataille d6sir6e.
Surface de cuisson
Pour 6viter la formation de tacbes ou un
cbangement de couleur de la surface de cuisson :
• Nettoyerlasurface decuissonapr_schaqueutilisation.
• Enleverlesrc!sidusrenvers_sde produitsacidesousucr6sd_sque
la surfacede cuissona refroidi;cos produitsrenvers6speuvent
fairechangerlacouleurde 1'6mail.
Br leurs scell s
LesbrQleursscell6sdelacuisini6resont fixdssur lasurfacede
cuisson;ils nesont pasconguspour 6treenlev6s.Commeles
brCJleurssontscell6s,un produitquiddborded'un ustensilene
s'infiltrerapassousla surfacede cuisson.
OndevraitcependantnettoyerlesbrOleursapr_s chaqueutilisation.
Br leurs conventionnel
Lescuisini_resautonomesa brQleurs_ gazconventionnelsse
caract6risentparunetable decuisson relevable.
Pour relever la table de cuisson :
Lorsqu'elleestfroide,la saisirpar le bord
avantet lasouleverdoucementjusqu'a ce .......
que lesdeuxtigesdesupport, lecas _ch6ant, J
sur I'avant,s'enclenchentenplace. _
Pour baisser la table de cuisson : Maintenirlebord avant
et pousserdoucementsurchacunedestiges desupport,lecas
6ch_ant,pour libdrerI'enclenchement.Puisbaisserdoucementle
dessusenplace.Lestigesdesupport secoulissentdansle cadrede
latable de cuisson.
Br_leur de haute
performance ([certainsmodeles)
(12,000 BTU*)
Cettecuisini6reestdot6ed'unbrCfleur_ hautevitesse,plac6
I'avantdroit.CebrQleurpermetunecuissonrapidequi poutservir
fairebouillir rapidernentdeI'eauou a cuireunegrandequantitc!
d'aliments.
Br_leur de mijotage [certains
modeles)
CebrQleurestsituc!a la positionarri_regauche.IIoffreune plus
faiblepuissance_pour lacuissondesaucesd_licatesou lafusiondu
chocolat.
Lapuissancethermique(BTU)desbrdeursest diff_renteIorsde
I'alimentationaugazdep_troleliqudi_.
I
_A la diff6renced'unecuisiniSredot6ede
brQleursagazstandard,lasurfacedecuisson
_:_ de cettecuisini6ren'estpas amovibleou
_1_ 07oirlesinstructionsde nettoyagea la page51.)
relevable.Nepas tenter derelever la
surface decuisson, quelle qu'ensoit la
EBIson.
35
Page 37

Culssonsurlesurfece
Grilles de br leur
Avant uneop6rationde cuisson,v6rifierquela grille est
correctementplacc!e.Unegrille de brCJleurincorrectement _///
installc!epeut 6caillerI'_mailde latable decuisson.
Ne pas faire fenctienner un br_leursans qu'un _/
ustensileseit plac_sur la grille. L'_mailde la grille ///_
peut s'_caillers'il n'y a aucun ustensilecapable
d'ahserberla chaleur_rnise par le br_leur.
M6mesi lesgrilles de brt31eursonttr_s durables,ellesperdront
progressivementleurlustreet changerontdecouleur,du fait des
temp6ratures_lev_esauxquelleslesbrOleurslesexposent.
Remarques :
, Un brt_leurconvenablementr_gl6et dont lesorifices sont
propress'allumeenquelquessecondes.Lotsde ralimentation
au gaznaturellesflammessont bleues,avecun coneinterne
bleu intense.
Si lesflammesd'un brCfleursontjaunes ousi la combustion
est bruyante,le ratio air/gazpeut_treincorrect.Demander
un techniciend'effectuerle r6glage.(Lagarantie necouvre
pasce r6glage.]
Lorsde I'alimentationau gazdep_trole liqudi6, il est accept-
able queI'extrc!mit6desflammessoit jaune.Ceciestnormal;
aucunrc!glagen'estnc!cessaire.
, Aveccertainstypesde gaz,on peutpercevoirun petitbruit
d'explosionlots de I'extinctiond'un brQleurdesurface.Ceci
est normal.
, Si on fait passerrapidementleboutondecommandede la
position High[Elev_e)a lapositionLow (Basse),lesflammes
peuvents'6teindre,particuli_rementsi le br01eurestfroid.Si
ceci seproduit,placerle boutondecommandea laposition
OFF(Arr6t)et attendrequelquessecondesavantd'allumer de
nouveaule brQleur.
° Ajuster la puissancede chauffagedetelle mani_reque les
flammesnedc!bordentpas_ lap6riph_riede I'ustensile.
36
Page 38

¢ulssondenslefour
Commandes du four nettoyage manuel (certains modeles)
A B
,,,,; "" %.
BROIL .....................................................
TIMER CLOCK CANCEL .....
C D E F
REMARQUE: L'afficheurindique 12:00IorsqueI'appareilestbranch_lapremierefoisou encas depannede courant.Lest6moinslumineux
de cuissoncouranteet decuissonaugril s'allumentIorsqueI'on appuiesur latouche defonction correspondante.
Cuisson courante
Gril
Minuterie
Diiiiiiiiiiiiii!!
Horloge
ANNULER
Fil;il;il;il;il;il;il;ii_!
A (Plus)ou
'It (Moins)
i;i;i;i;i;i;i;i;i;i;i_!ii_
S'utilisepour la cuissoncouranteet le
rOtissage.
S'utilisepour la cuissonau gril et le
rissolagesurpattie supc!rieure.
Programmela minuterie.
S'utilisepour programmerI'heuredujour.
Annuletouteslesopc!rationssaufminuterie
et horloge.
S'utilisepourentrerouchangerladurc!e,la
temp6raturedu four.Etablitle gril
temp6rature_lev_eou basse.
Utilisation des touches
• Appuyersurla touched_sirc!e.
• AppuyersurA (Plus)ou • (Moins)pour entrerladur6eou la
temp6rature.
• Un bip retentit IorsqueI'onappuiesur unetouchede fonction.II
n'yapasde bippourlatouche A ou T.
• Un doublebip retentit encasd'erreurdeprogrammation.
Remarque : Quatresecondesapr_savoirappuy6sur lestouches
A ou T, la durc!eou latemp6ratureseront automatiquement
entr_es.Siplusde30secondess'6coulententrela pressionsur
une touchedefonction etsur les touchesA ou Y, la fonction
seraannuk!eet I'afficheurreviendra_I'affichagepr6c6dent.
2. Mettre a rheure _ I'aidedestouchesA ou T. Si I'onn'appuie
passur cestouchesen moinsde30secondes,leprogrammeest
annuk!.Appuyer surla toucheCLOCKet recommencer.
Programmation de ia minuterie
La minuteriepeut6treprogramm6edeune minute C01)jusqu'a99
heureset 59minutes(99:59).Ladur6e seraaffich6een minuteset
non ensecondes.LAMINUTERIENECOMMANDE PASLEFOUR.
1. Appuyersur latoucheTIMER[Minuterie). ...........
• 0:00s'allumeet lesdeuxpoints [:) clignotent ..........
I'afficheur.
2. Appuyersur A ou T jusqu'ace que ladur6edc!sirdesoit
affich6e.
• Laminuteriecommence_ dc!compterd_sque ladurc!ea €!t6
programm_!e.
• Lesdeux pointsquiclignotent indiquentqu'un d_!compteest
en cours.(Lesdeuxpointsne clignotentpassi rheure oula
temperaturedu four sontaffich6es.)
, Deuxbips courtssignalentla fin de I'op_ration.0:00parait
I'afficheur.
• Si ron veut,appuyersur latouche CLOCKet I'heuredujour
r_!apparaftbri_vement_I'afficheurpendantune opt!ration
minut_e.
• Si ron veut,appuyersurles touchesBAKEou BROILet le
r_!glagede temp(!ratureactueller_apparaitbri_vement
I'affichagependantuneopt!rationminut6e.
Annulation de la minuterie :
TIMER
R6glage de I'horioge CLOCK
1. Appuyersur latoucheCLOCK[Horloge).......
, L'horlogenepeut pas6trer_gl6esi lefour estdc!japrogrammc!
pouruneop6rationde cuissoncourante,degrilou une
operationminut6e.
Appuyersur latoucheTIMERet la maintenirainsi pendantplusieurs
secondes.
37
Page 39

Culssondenslefour
Caisson courante, r6tissage et
cu=sson au gril
Programmation des commandos pour une cuisson
courante ou un r6tissage :
1. Appuyersurlatouche BAKE(Cuissoncourante). BAKE
• 000s'allumeetlet6moin lumineuxde cuisson ........
couranteclignotearafficheur.
• Si I'onappuiesur latoucheBAKE,sansprogrammerune temp-
c!raturedufourdansles30secondessuivantes,le programme
est automatiquementannul6et I'heuredu jour r6apparait
rafficheur.
2. Appuyersurlatouche ,L (Plus)ouT (Moins)jusqu'acequela
tempc!ratured6sirc!edu foursoit affichc!e.
• Latemp6raturepeut6treprogrammc!ede 75a 285°C(170
550OF).
• 350°paraitarafficheurIorsqueI'onappuieunefoissurlatouche
AouV.
• Appuyera plusieursreprisessurlatoucheA ou T pour
changerla temperaturedu four parintervallesde 3°C(5oF}ou
appuyersur latoucheA ou Ten maintenantlapression,
pour changerlatempc!raturedufourpar intervallesde6 °C
(lo oF}.
• 100°ou latemperaturerc!elledu four,selonlaquelleest laplus
_lev6e,paraitaI'afficheurIorsquelefoursemeten marche.
• Latemp6rature) I'afficheuraugmentepar intervallesde 3°C
(5°F),jusqu'aceque latemperaturepr@rogramm6esoit
atteinte.UnseulhipretentitIorsquelefour estencoursde
pr6chauffage.
, Laisserlefourpr6chaufferpendant10_ 15minutes.
• Pourrappelerlatemperaturepr@rogrammc!ependantle
prc!chauffage,appuyersurlatoucheBake.Latempc!raturesera
affich6ependanttroissecondes.
• Pourchangerla temperature du fourpendant la cuisson,
appuyersur Bake,puissur latoucheA ouT jusqu'a ce que la
tempc!raturedc!sirc!esoit affich6e.
• Pourchangerla temperature du fourlots du pr_ehauffage,
appuyerdeuxlois sur latouche Bake,puis surla touche
A ou T jusqu'_ceque latemp6raturedc!sir6esoitaffichc!e.
3. Placerla nourrituredanslefour.Vc!rifierI'avancementdela cuisson
la dur_eminimalede cuisson.
4. Lorsquelacuissonesttermin_e,appuyersurlatoucheCANCEL
(Annule0pourc!teindrelefour, puisretirerla nourrituredu four.
• Lefourse caract_riseparun arr6tautomatique.S'ilestlaissc!
en marchependant12heures,il s'arr6teraautomatiquementet
000paraitra_I'afficheur.AppuyersurlatoucheCancelet
I'heurer6apparaitraaI'afficheur.
Programmation des commandes pour la
cuisson au grii : (cornpartirnent inf_rieur -
certains modeles)
Pourde meilleursr6sultats,utiliserI'ustensilepr@upourcegenrede
cuisson.
1. PlacerlaI_chefrite_ lapositionrecommand6e(voirletableauci-
dessous)danslecompartimentdecuissonaugril.
2. Appuyersur latoucheBROIL
(GriD. ...........................................
• SEts'allumeetlet6moin
lumineuxde cuissonaugril ....
clignote_ I'afficheur.
BROIL
Tableau de cuisson ate gril -
Compartiment inf_rieur
Boeuf
Porc Jambon, precuit - tranche de 1,3cm (% pc) TiSde Moyen 8 - 12rain.
Velaille Poulet en morceaux Bien cuit Fond Gril mn. (232° C)
Poisson La chairse detache
Haut= positionsup_rieure;moyen= positioninterm_diaire
**Tempsdecuissonapproximatifs,variablesselonlescaract6ristiquesdechaquep_ecedeviande.
Steaks,@aisseur 2,5cm (1 pc)
Boeuf hach_ - steakettes,
@aisseur 2 cm( 3/4pc}
C6telettes, @aisseur 2,5 cm (1 pc) Bien cuit Moyen 20 - 28 rain.
Filets,@aisseur1,3cm (V2pc)
Dames,@aisseur2,5cm it pc)
Cuissonmoyenne
Biencuit
Biencuit
Lachair se detache
fond= lefondducorr
Moyen
Moyen
Moyen
Moyen
Moyen
,artimentdecuissonaugril(enleverlagrille).
38
14- 20 min.
16- 24 min.
14- 18 min.
(Lo Broil 450°F} 30-45 min.
8 - 12rain.
10 - 15min.
Page 40

Culssondenslefour
3. AppuyersurlatoucheA pour choisirungril atemp6ratureHi
(€lev(_e)ousur latouche_' pourchoisirungril atempc!ratureLo
(Basse).
, Choisirle rc!glageHipourun gril normal.
° Choisirle rc!glageLopour un gril_temperaturebasse,afin
d'_viterun rissolageexcessifdesalimentsn_cessitantdes
durc!esde cuissonplusIongues,commelavolaille.
, SiI'onnechoisitpusle r6glageHiou Loen moinsde30
secondes,le programmeseraautomatiquementannulc!et
I'heurerc!apparaitra_I'afficheur.
4. Utiliserlostempsdecuissonsugg_r6sdunsletableauenpage38.
Retournerlospi_cesdeviandevers lemilieude la pc!riodede
cuisson.
5. Apr_sle gril,appuyersurCANCELpour6teindrele
four,puisretirerlaI_chefritedufour. L'heuredujour
r6apparait_I'afficheur.
R gulateur de four
(certains modeles)
R6glage du bouton
Le boutonOvenTempO-emp6raturedu four)
permetdes61ectionneret maintenirla
temp6raturedu four.On dolttoujoursfaire
tourner ce boutonexactementJUSQU'Ala positionde latem3drature
d6sir6e.Nepusfairetournerle boutonau-delade la positiondc!sir6e
pour lefairetournerensuiteverslesonsinverse.
Reglage du four pour une caisson courante ou
an r6tissage :
1. Enfoncer/fairetourner le boutonOvenTemp0-emp6raturedu
fou0, jusqu'a la positioncorrespondantalatemp6ratured_sirde.
Laisserlefour prdchaufferpendant 10_ 15minutes.
2. Placerlanourritureau centredu four.A I'expirationdu tempsde
cuissonminimumindiqu6dunsla recette,6vaher le degr6de
cuisson.Poursuivrelacuissonsi c'est n_cessaire.
3. Retirerle metsdufour etramenerleboutonOvenTemp
0-emp6raturefour) alapositionOFF(Arr6t).
R6glage du four pour caisson au gril
(certains modeles) :
1. Pourobtenir les meilleursrc!sultats,utiliser un ustensilecon(_u
pour lacuissonau gril. Placerla I_chefrite_la positionre-
commandc!edartsle grille du four.[Voirle tableauen page38.)
2. Placerle boutonOvenTempO-emp(!raturedu four) _ la position
BROIL(Gril)ou _ laposition(232° C)/450° F pourunecuissonau
gril a bassetempc!rature.
, Utiliserla temp(!ratureplusbassepour lacuissonau gril pour
_!viterunbrunissageexcessifoupourun metsn_!cessitantune
Ionguecuisson[parexemplevolatile).
3. Utiliserlestemps decuissonsugg_r_sdansletableauenpage38.
Retournerlespiscesdeviandeverslemilieu delap_!riodede
cuisson.
4. Contr61erle degrdde cuisson:inciser lapiecedeviandeprosdu
centre pourenobserverla couleur.
5. A lafin de lap_riodede cuisson,ramenerleboutonOvenTemp
0-empdraturedu four)_ la positionOff [Arr_t).Retirerla
I_chefritedu four.
Allurnage sans flamme de veille
(certains modules)
La cuisini_reeatdot_ed'unsyst_med'allumagesansfiammede
veille.Cesyst_mefermeautomatiquementI'arriv_edegazet
emp_che tout fonctien_ement du fourlots d'uneinterruption
de I'alimentation#lectrique.
II neserapuspossibled'allumer le br0leurdufour avecune
allumette.Ne pustenterdefaire fonctionnerle four Iorsd'une
interruption deI'alimentation_!lectrique.
Allumage par veilleuse (certains modeles)
Allumezle brtileurarri_reen premier,avantlaveilleusedu four. Ceci
enlSveraI'airdu circuit degazet favoriseraI'allumagede la veilleuse.
Sinon,la durocdeI'allumagepout_treplus Ionguequecelloqui est
pr_wJe.
Ailurnage de la veilleuse du four :
Unefois la portedu grilloir refroidie,I'ouvriretretirer lagrilleet la
I_chefrite.
Touten_!tant_ la positionARRET,appuyezet maintenez
enfonc_lebouton de latemperature du four et
tenezuneallumetteallum_eau-dessusde la
veilleusesitu_!e_I'arri_redu brOleur(volt
I'illustration).Unelois laveilleuseallum_!e,
rel_chezle bouton de temperature du
four et remettezla I_chefriteet le plateau.
(REMARQUE: Le brOleurdu four est
illustr_ sanslediffuseurde flammeen
m_!tal.)
39
Page 41

Culssondenslefour
Commande du four & autonettoyant (certains modeles)
A B
BROIL .............................
COOK& ...................................................................................................
......................................................CLEAN DELAY CLOCK
C D
TIMER
....................................CANCEL
KEEP
E F G H I
Le tableaude commandeestcongu pourfaciliter la programmation.Lafen6tre d'affichageindique I'heure,lesfonctionsavecminuterieet
fonctionsdufour.Le tableaudecommanderepr6sent6comprendcaract6ristiquesspdcifiquesat] mod@le.(Lestyle poutvariersolon le
module.]
Gril
Cuissoncourante
A (Plus)ou
iiiiiiiiiii
iiiiiiiiiii
V (Moins)
Minuterie
Cuissonet
maintien
Nettoyage
D_marrage
diff(!r6
Horloge
Maintienau
chaud
Annuler
Utilisation des touches
• Appuyersur latouche d6sir6e.
• AppuyersurlatoucheA (Plus)ou_' (Moins]pourentrerladur6eou
latemp@ature.
• Unbip retentitIorsqueI'on appuiesur unetouche.
• Undoublebip retentitencasd'erreurde programmation.
S'utilisepourlacuissonaugril etlerissolage
surpartiesup6rieure.
S'utilisepourlacuissoncouranteet le
r6tissage.
S'utilisepourentrerouchangerladur@,la
temp6raturedu four.Etablitle gril
temp6ratureELEVEEou BASSE.
Programmelaminuterie.
Pourcuirependantunedur6epr66tablie,
avecmaintienauchaudpendantuneheure.
S'utilisepourprogrammerlecycle
d'autonettoyage.
Programmelefourpourd6buterunecuisson
plustard.
S'utilisepourprogrammerI'heuredujour.
S'utilisepourmaintenirau chauddanslefour
lesalimentscuits.
Annuletouteslesop6rationssaulminuterie
ethorloge.
Remarque : Quatresecondesapr_s avoirappuy_sur lestouches
,_,ou T, la dur_eoulatemp@atureseraautomatiquemententrc!e.
Si plusde 30secondess'c!coulententre lapressionet surune
Itouche de fonctionsur lestouchesA ouT, lafonctionsera
[ annulc!eet I'afficheurreviendra_I'affichagepr6cc!dent.
Horloge
L'horlogepeut 6treprogramm6epour afficherla dur_edansun
formatde 12ou24 heures.L'horlogeestprogrammc!een usinepour
un formatde 12heures.
Changement de I'horloge _ un format de 24 heures :
1. Appuyersur lestouches CANCEL ....
(Annuler)et DELAY(D6marragediff6rc!]et
maintenirla pressionpendanttrois
secondes.
2. Appuyersurla toucheA ou T pour
programmerun formatde 12ou24heures.
3. ProgrammerI'heureen suivantles instructions
donn6esendessous.
R_glage de I'horloge
1. Appuyersur latoucheCLOCK(Horloge].
• L'heuredujour etdeuxpointsclignotent
I'afficheur.
2. Appuyersurla toucheA ou T pour
programmerI'heuredujour.
. Deuxpointscontinuent_clignoter.
3. Appuyer) nouveausur latouche CLOCKou attendrequatre
secondes.
-- DE_Y
CLOCK
suite...
4O
Page 42

Culssondenslefour
Lorsquele courant61ectriquearriveouapr_sune interruptionde
courant,la derniSreheureavantI'interruptiondecourantva
clignoter.
PourrappelerI'heuredujour Iorsqu'uneautrefonctionde dur6e
s'affiche,appuyersur latouche CLOCK.
L'heurede I'horlogenepeut 6trechang6eIorsquele foura €!t6
programm6pour unecuissonou unnettoyagediffc!rc!oupourla
fonctionde cuissonet maintien.
Annulation de I'affichage de I'heure :
Si ronned6sire pasraffichagedeI'heuredu jour :
Appuyersur lestouchesCANCEL(Annuler]et
CLOCK(Horloge)et lesmaintenirainsipendant
trois secondes.L'heuredu jour disparaitde
I'afficheur.
LorsqueI'affichagedeI'heureest annulc!,appuyersur
la toucheClockpour afficherbri_vementrheuredu jour.
-- CLOCK
R_affichage de I'heure :
Appuyersur lestouchesCANCELet CLOCKet lesmaintenirainsi
pendanttrois secondes.L'heuredu jour r6apparait_ I'afficheur.
Annulation de la minuterie :
1. Appuyersur latoucheTIMERet lamaintenirainsi pendanttrois
secondes.
OU
2. Appuyersurla toucheTIMERetr_gler rheure_00:00.
Verrouillage des commandes
Lestouchespeuvent6treverrouill6espour desraisonsde s_curit6,
nettoyageou pouremp6chertoute utilisationnon souhaitc!e.Ellesne
pourront6treutilis6essielles sontverrouill6es.
Si lefour estencoursd'utilisation,lescommandesne peuvent6tre
verrouill6es.
L'heureactuelledujour restera_ I'afficheurIorsquelescommandes
serontverrouill_es.
Verrouillage : ................................................
Appuyersur lestouches Cancelet Cook& Hold
(Cuissonet maintien)et lesmaintenirainsi /
pendanttrois secondes.
• LemotLOCK[VERROUILLAGE) __ COOK&
clignote aI'afficheur. HOLD
F
[
Minuterie
La minuteriepeut6treprogrammc!edeuneminute(00:01)jusqu'_
99 heureset59minutes(99:59).
La minuteriepeut6treutilis_eind6pendammentdetouteautre
activit6dufour.Ellepeut 6treaussiprogrammc!ealorsqu'uneautre
fonctiondu four esten cours d'utilisation.
La minuterienecommandepasle four.Ellenesert qu'_ c!mettre
desbips.
Programmation de la minuterie :
1. Appuyersur latoucheTIMER(Minuterie). TIMER
, 0:00s'alhme _ I'afficheur. .....
, Lesdeuxpointsclignotent.
A
2. Appuyersurla toucheA ou T jusqu'aceque rheure
juste paraisseaI'afficheur.
, Lesdeuxpointscontinuent_clignoter. _
3. Appuyeranouveausur latouche Timerouattendrequatre
secondes.
, Lesdeuxpointscontinuent_ clignoteret le dc!comptede la
durc!ecommence.
, Laderni_reminutedu d6compteseraaffichc!esousformede
secondes.
D_verrouillage :
Appuyersur lestouches CANCELet COOK& HOLDet lesmaintenir
ainsipendanttroissecondes.
° Lemot LOCKdisparaitde rafficheur.
Codes d'anomalie
Lesmots BAKE[CUISSONCOURANTE]ou LOCK07ERROUILLAGE]
peuventclignoter rapidement_ I'afficheurpourpr6veniren cas
d'erreurou de probl_me.Si tel est lecas,appuyersur latouche
CANCEL.Si lesmots BAKEouLOCKcontinuent _clignoter,
dc!brancherI'appareil.Attendre quelquesminutes,puisrebrancher
I'appareil.Si run des motscontinue_ clignoter,d_brancherrappareil
et prendrecontactavecun rc!parateurautorise!.
4. A la fin de ladur6e programm6e,un bip long retentit.
41
Page 43

Culssondenslefour
Cuisson COUrante
Programmation de la cuisson courante :
1. Appuyersur latoucheBAKE(Cuissoncourante].
BAKE
• Lemot BAKE{CUISSONCOURANTE)clignote.
• 000clignote a I'afficheur.
2. S61ectionnerlatemp6raturedu four.Latemp6rature A
pout6treprogramm6ede75_ 290°C070 _ 550°F).
Appuyerunelois sur latouche A ou _r ou appuyer
sur latouche A ouVet lamaintenirainsi. V
. 175° (350°) s'allumeIorsqueI'onappuie la
premierelois sur I'unedestouches.
• Appuyersurla toucheA pour augmenterla temp6rature.
• Appuyersurla touche_' pour diminuerlatemp6rature.
3. Appuyeranouveausur latouche BAKEouattendrequatre
secondes.
• Lemot BAKEs'arretede clignoteret s'allumea I'afficheur.
• 38° (100°]oula temp6raturereelledufour seraaffichee.La
temperatureaugmenterapar intervallede 3 °C{5°F)jusqu'_
ceque latemperaturepr6programmeesoitatteinte. 2.
4. Laisserlefour prechaufferpendant8a 15minutes.
, Lorsquelatemperatureprogrammeepour lefour est atteinte,
un hiplongretentit.
• Pourrappelerla temp6ratureprogrammeependantle
prechauffage,appuyersurla touche BAKE.
5. Placerlanourritureau centredu four,en laissantunminimumde 3.
2 pouces(5cm] entreI'ustensileet lospatoisdu four.
6. V6rifierI'avancementde la cuissona la dur6eminimalede
cuisson.Cuireplus Iongtempsaubesoin.
7. Lorsquelacuissonest terminee,appuyersur 4.
latoucheCANCEL{Annule0.
8. Retirerla nourrituredufour.
Diff6rences de cuisson entre I'ancien
four et ie nouveau
II estnormalde remarquerquelquesdifferencesdansladur6ede
cuissonentre unfour neufet un fourancien.VoirAjustementde la
temp6raturedu four a la page45.
Remarques sur la cuisson courante
au [our :
. Pourchangerla temp6rature dufour pendantla cuisson,
appuyersur Bake,puissur latouche ,LouT jusqu'a ceque la
temperatured_sireesoitaffich_e.
• Pourchanger la temp6rature dufour lots du pr6chauffage,
appuyerdeu×lois sur latouche Bake,puissur latouche
A ou _' jusqu'_ ceque la temperaturedesireesoitaffich6e.
° Si I'onoublied'arreterle four, il s'arreteraautomatiquement
apr_s12heures.Si I'ondesired_sactivercettefonction,voir
page45.
Cuisson et maintien
Lafonction cuissonet maintienpermetdecuire pendantune duree
pr6determinee,suivieparuncyclede maintienat]chaudd'une
heure.
Programmation de la fonction cuisson et maintien :
AppuyersurlatoucheCOOK& HOLD{Cuisson .........................
et maintien]. COOK&
• LosrootsBAKE(CUISSON)et HOLD ..............................
(MAINTIEN)clignotent.....................
• 000s'allumea I'afficheur.
Selectionnerlatemperaturedu four. Latemperature
poutetreprogramm6ede 75a290 °C070 _550 °F).
Appuyerunefois surla touche ,L ou _r ou appuyersur ................................
latouche ,Lou _' et la maintenirainsi.
• Appuyersur latouche A pour augmenterla temperature.
• Appuyersur latouche _' pour diminuerlatemperature.
Appuyer) nouveausur latouche COOK& HOLDOUattendre
quatresecondes.
• Le mot HOLDclignote.
• 00:00clignote_I'afficheur.
Entrerla dur6ependantlaquelleI'on desireque la cuissonait lieu
en appuyantsur lostouches A ou T. Laduree decuissonpout
etre programmeede 10minutes[00:10]a 11heures,59minutes
(11:59).
• LesrootsBAKEet HOLDs'allument_ I'afficheur.
• La dur6e de cuisson s'allume a I'afficheur.
• La dur6ede cuissoncommencele comptea rebours.
HOLD
suite...
42
Page 44

Culssondenslefour
Lorsque la dur_e de cuisson s'est 6coul6e :
• O,uatrebips retentissent.
• Lemot BAKEs'6teint.
• LosrootsHOLDet WARM(CHAUD)s'allument.
• 75° (170°)paraitaI'afficheur.
4. Appuyersur _,pour programmerlatemp@aturedecuisson.
• 00:00et le motHOLDclignotent.
• LemotBAKEresteallumc!.
5. Appuyersur ,Lpour programmerladurc!edecuisson.
• Ladur6ed'attente,losrootsDELAY,BAKEet HOLDs'allument
I'afficheur.
Apr_s une heure de MAINTIEN AU CHAUD :
• Lemot END[Fin)s'affiche.
• L'heuredujour rc!apparaita I'afficheur.
Annulation de la fonction cuisson et maintien _ tout
moment : .........................................
Appuyersur latoucheCANCEL[Annuler).Retirerla
nourrituredu four.....
Lorsque la dur6e d'attente s'est 6coulee :
• LemotDELAYs'_teint.
, Ladur6ede cuissonestaffichc!e.
, LosmotsBAKEet HOLDsont affich(!s.
Pour programmer un temps d'attente Iorsque la
fonction cuisson et maintien a d_j_ _t_
programm6e :
Cuisson diff r e
1. Appuyersur latoucheDELAY[D6marragediff@_). DELAY
, Lemot DELAY(ATTENTE]clignote. ..........................
• 00:00paraita I'afficheur.
2. Appuyersurla toucheA ou T pour programmer
ladur@ d'attente.
Avec lafonctiondiff_r_e,lefour semet acuire plustard dunsla
journ6e.Programmerladur_ed'attented6sirc!eavantque le four
nese mottoen marcheet ladurc!edecuissondc!sirc!e.Lefour
commencea chauffer_ I'heures_lectionn@et cultpourla durc!e
spc!cifi@.
La durc!ed'attentepeut6tre programmc!ede 10minutes(00:10)
11heures,59 minutes(11:59].
Programmation d'un cycle de cuisson courante
diff_r_e :
1. Appuyersur latoucheDELAY[D6marragediffc!rc!). .................................
• Lemot DELAY[ATi-ENTE)clignote.
• 00:00clignote_I'afficheur........................
2. Appuyersurla touche,I, ou T pour program-
merla dur6ed'attente.
Alors que le motDELAYclignotetoujours :
3. Appuyersurla toucheCOOK& HOLD(Cuisson
et maintien).
• 000s'allumea I'afficheur.
• LosrootsBAKE(CUISSONCOURANTE)
et HOLD(MAINTIEN)clignotent.
DE_Y
COOK&
HOLD
Lorsque la duroc d'attente s'est ecoulee et que
le four se met en marche :
Annulation :
Appuyersur latoucheCANCEL(Annuler).
Remarques :
• Apres quatresecondes,le motDELAYreste
allure6pourrappelerqu'uncyclede cuisson .........................
diffc!rc!ea 6t6 programme!.
, Ladur6ede cuissonet latemp_!ratureseraaffich_!e.
, Lemot DELAYs'_teint.
•Les rootsBAKEet HOLDresteallum_!.
• Touteslesfonctionsde cuissonminut_eet non
minut_eserontannul_es.
• L'heuredu jourr_apparait_ I'afficheur.
Nepusutiliserlacuissondiff_!r_epour desarticlesqui
n_!cessitentque lefour soit pr_chauff_,commelosg_teaux,
lospetits biscuitset lospains.
Nepusutiliserlecycle decuissonet maintiendiff_!r_!ssile
four estd_!jachaud.
43
Page 45

Culssondenslefour
Maintien au chaud
Pourmaintenirauchauddansle four desalimentscultsetchauds
ou pourr6chaufferpainset assiettes.
Program[nation du maintien au chaud :
1. Appuyersur latoucheKEEPWARM[Maintien au KEEP
chaud). WARM
• Lemot WARM(CHAUD)clignote.
, 000parait_ I'afficheur. ....
^
2. S_lectionnerlatemperaturede maintienau chaud.
Celle-cipeut6trerc!gl_ede 63a90 °C(145
190°F).Appuyerunelois surla toucheA ou 'IVou V
appuyersur latoucheA ou Yet la maintenirainsi. ..........................
• 75° 070°)s'allumeIorsqueron appuiela
premierelois sur I'unedestouches.
, Appuyersurla toucheA pour augmenterla tempc!rature.
• Appuyersurla toucheT pour diminuerlatempc!rature.
Lemot WARM(CHAUD)et la temp6ratureseront affich_s
pendantque la fonctionmaintienau chaudestactive.
Rernarquessur la fonction maintien au
chaud :
• Pourobtenirdesqualit6salimentaireset nutritivesoptimales,
losalimentscuits aufour ne doiventpas6tre gardc!sau chaud
plusde I _ 2heures.
, Pouremp6cherlosalimentsdedess6cher,los recouvrirde
papieraluminium,sansserrer,ou d'uncouvercle.
• Pourr_chaufferdespetits pains :
- recouvrirlespetits painsde papieraluminiumsanssetter et
losplaceraufour.
- appuyersur lostouchesKEEPWARMet A pour
programmer75°C[170°F).
- r6chaufferpendant 12a15minutes.
• Pourr_chauffer des assiettes :
- placerdeux pilesdequatreassiettesmaximumdans lefour.
- appuyersur lostouchesKEEPWARMet A pour
programmer75°C070 oF).
- r_chaufferpendant5minutes,arr_terle four et laisserlos
assiettesaufour pendantencore15minutes.
- n'utiliserquedesassiettespouvantalleraufour,a v_rifier
avec lefabricant.
Annulation du maintien au chaud :
1. Appuyersur latoucheCANCEL(Annuler].
2. Rotiferla nourrituredu four. ...................
- nepasposerdesassiettestildes sur une surfacefroide, les
changementsrapidesde tempc!raturepouvantcasser
I'assietteou lafendiller.
44
Page 46

Culssondenslefour
Arr t automatique/
Mode sabbat
Lefour s'arr6teautomatiquementapres12heuress'il a 6td
accidentellement]aisseen marche.Cettecaracteristiquede s6curite
peutetrearret6e.
Pour annuler I'arr_t 12 heures et faire fonetionner le
four en continu pendant 72 heures :
1. Programmerlefour pour une cuissoncourante[voir page42).
2. Appuyersurla toucheCLOCK(Horloge)et la ...................................
maintenirainsipendantcinqsecondes. CLOCK
° SAbsera afficheetclignotera pendantcinqdes.
° SAbsera ensuiteaffich6en continujusqu'a ce qu'on I'arrSteou
jusqu'aceque ladur6elimite de 72heuressoit atteinte.
° Lemot BAKE(CUISSONCOURANTE)seraaussiaffichesi un
cyclede cuissoncouranteesten coursalorsquelefour esten
modesabbat.
Touteslosautresfonctions(Minuterie,Maintien auchaud,Nettoyage,
etc.)sont verrouill6es,saul BAKE,pendantle modesabbat.
Annulation de la euisson courante alors que le four
est en mode sabbat :
Appuyersur latoucheCANCEL[Annuler).
, Lemot BAKEs'6teinta I'afficheur.
° Aucun bip sonorene retentit.
Annulation du mode sabbat :
1. Appuyersur latoucheCLOCKpendantcinqsecondes.
OU
2. Apres72heures,le modesabbatsetermine.
, SAbclignote pendantcinq secondes.
, L'heuredujour revient_ I'afficheur.
Ajusternent de la temperature
du four
La pr6cisiondestemperaturesdu four a6t6soigneusementvdrifi6e
I'usine.IIestnormalde remarquerquelquesdiff6rencesdansla
cuissonentre unfour neufet un four ancien.Au fur eta mesureque
loscuisinieressontmoinsneuves,la temp6raturedufour poutvarier.
II estpossibled'ajuster latemperaturedu four siI'on pensequele
four necuit pasou nerissolepascorrectement.Pourdecider de
I'ajustementaapporter,r6glerle four_ unetemp6raturede 15°C
(25 °F)pluseleveeou plusbassoquela temp6ratureindiqu_edarts
la recette,puisfairecuire la pr@aration.Lesr6sultatsdu _{test >>de
cuissondoiventdonner uneideedu nombrede degresduquella
temp6raturedoit 6treajust6e.
Ajustement de la temp6rature du four :
1. Appuyersur latoucheBAKE(Cuissoncourante). BAKE
2. Entrer285 °C(550°F)en appuyantsurla touche A. .
3. Appuyersurla toucheBAKEet la maintenirainsi
pendantphsieurs secondesoujusqu'_ ceque 0° A
paraisse_ I'afficheur.
Si latemperaturedu four a 6t_prec6demmentajustee,le
changementseraaffich& Parexemple,si la temp6raturedu four
a _t6 reduitede 8 °C (15°F),I'afficheurindiquera-8° (-15°).
4. Appuyersurla toucheA ou T pour ajusterlatemperature.
A chaquelois que I'onappuiesur unetouche,latemp6rature
changede3 °C(5 °F).Latemperaturedufour poutetre
augment6eou diminueede3 a20°C (5_ 35°F).
5. L'heuredujour r6apparaitautomatiquement_I'afficheur.
IIn'estpasnecessairede reajusterlatemp6raturedu fouren cas
de panneoud'interruptiondecourant. Lostemp6raturesde
cuissonau gril etdenettoyagenepeuventetreajust6es.
Remarques sur le mode sabbat :
• Le modesabbatpeutetremis en marche_ tout moment,que
le foursoit en marcheounon.
° Le modesabbatne peutpas _tremisen marchesiles
commandossont verrouilleesou laporte verrouillde.
° Sile four esten modecuissonIorsquelemodesabbatest
programme,lemot BAKE(CUISSONCOURANTE)s'6teint_ la
fin du cycledecuisson.IIn'y auraaucunsignalsonoreaudible.
, Lorsquelemodesabbata demarre,aucunhip de pr_chauffage
ne retentit.
° Tousles messageset lesbips sontd6sactiv_sIorsquelemode
sabbatestactif.
• Si I'on appuie sur la touche CANCEL, un cycle de cuisson
courante au four sera annul& Cependant, le programmateur
restera en mode sabbat.
• Apres unepannedecourant,le four revienten modesabbat
avec72heuresrestanteset aucuncycleactif.
45
Page 47

Culssondenslefour
Cuisson au grU
Programmation de la cuisson au gril :
1. Pourcommencer,appuyersur latouche ..........
BROIL(Gril).
• Le mot BROIL(GRIL)clignote. ......
• Le motSET[VALIDER)est affichc!.
2. Appuyersur latoucheA pour programmerun gril ) temp6rature
c!levc!eousur latouche _' pour programmerun gril
temp6raturebasse.
• Los rootsHI(ELEVEE)ouLO (BASSE)serontaffich6s.
• S61ectionnerHI broil (Grila temcrature 6levee)(290°C
[550°F])pourun gril normal.S61ectionnerLObroil(Gril
temp6raturebasse)(230°C[450°F]) pourungril
temp6ratureinfc!rieured'alimentsa cuissonplusIongue
commela volaille.
3. Apr_squatresecondes,le fourse meten marche.
• Le mot BROILrestealhm6.
4. Pourun rissolagemaximum,prc!chaufferlefourpendant2 ou 3
minutesavantd'ajouterla nourriture.
5. Placerla nourrituredanslefour. Formerlaporte dufour.
6. Retournerlaviandeunefoisa la moiti6de ladurc!ede cuisson.
7. LorsqueI'alimentestcult, appuyersur latouche CANCEL
(Annulet).Retirerlanourritureet la I_chefritedu four
, L'heuredujour r_apparait_ rafficheur.
Remarques sur la cuisson au gril :
• Pourde meilleursr6sultatsIorsdu gril,se servird'un ustensile
pr_vupour cetypede cuisson.
• Legril au rc!glageHI (Elevc!)est utilis_pour lamajorit6des
op6rationsde cuissonau gril.Utiliser legrilau r_!glageLO
(Bas)pour la cuissonde metsdevantcuireplus Iongtemps,
afinde leur permettred'6tre bien cuitssansrissolageexcessif.
° Losdur6esde cuissonau gril peuvent6treplus Ionguesavec
unetemp6raturede gril inf6rieure.
° Retournerla nourritureIorsquela moitic!de la dur6e pr6vue
pour lacuissonau grils'estc!coulc!e.
Tableau de cuisson au gril du four
B_u|
Bifteck, 2,5 cm (1 pc) d'c!paisseur
Hamburgers,2 cm (3/4pc) d'6paisseur
Porc
Bacon
COtelettes,2,5cm (1 pc)
Jambon- pr&cuit tranche de 1,3cm (1/2pc)
Volaille
Pouletenmorceaux 3ou4 Bien cuit
Fruitsde rner
Damesde poisson,beurr6es,2,5cm (1 pc) d'c!paisseur /4 Lachair sed6tache
Filetes,1,3cm (1/2 pc] d'@aisseur 4 Lachair sed_tache
Grillesucrieure a lapositionn° 5.
Remarque : Cetableaun'estqu'un guidede suggestions.Losdur6espeuventvariersolonI'alimenta cuire.
4
4
4
4
4
4
Cuisson moyenne
Bien cuit
Bien cuit
Bien cuit
Bien cuit
TiSde
15 - 20 minutes
18 - 24 minutes
15 - 18 minutes
6 - 10 minutes
22 - 26 minutes
8 - 12 minutes
LOBroil-
Gril _temp6raturebasse
30 -/45minutes
10- 15minutes
8 - 12minutes
46
Page 48

Culssondenslefour
f
Event du four
Lorsquelefour fonctionne,lessurfacesvoisinesde I'c!ventpeuvent
devenirassezchaudespourentrainerdesbrQlures.Nejamaisbloquer
I'c!vent.
L'_vent est situ_sous le proteeteur d'_ventdudosseret,sur la
euisini_re. _ F.VENT
/ I OU FOUR
/_ _J / Nepasmettrede
I_ __ plastiquesprosde
I '_ ___ I'c!vent,lachaleur
I _ _/ -_,. pouvantlos dc!forrner
Ecla=rage du four
(certains modeles)
Appuyersur le commutateurd'c!clairagedu four situc!
sur letableaude commandopourallumerouc!teindre
la lampe. Oven
Light
Fond du four
Prot6gerlefond dufour,particuli_rementcontre lesproduitsacides
ou sucresqui pourraient6tre renvers_s;cospro-duits fontchangerla
couleurde I'_mail.Utiliserun ustensilede taille appropri_e pour
_viter renversementou d_bordernent.
Grilles du four
Le fourest dot6de deuxgrilles; cesgrillescomportentundispositif
de calage.
1. Tirerla grille en lignedroitejusqu'_
cequ'elles'arr6tea lapositionde
calage.
2. Souleverlagrille_ I'avantpour
pouvoirI'extraire.
R_installation :
1. Placerlagrillesur lossupports danslefour.
2. SouleverIc!g_rementI'avant.Faireglisserla grillevers I'arri_re
au-deladelapositionde calage.
3. Abaisserla grille etla faireglisserdartsle four.
Ne pas recouvrir la totalit_ d'une grilleavee de lafeuille
d'aiuminium,nigarnir le fonddu fouravec de la feuille
d'aluminium.Cecimodifieraitles r_sultatsde euissonau four,
et le fond du four pourraitsubir des dommages.
Positions des grilles
5
4
.................3
..................2
1
POSITION5 [positionla plus haute):Pourcuisson br_veau gril -
pain grill6 ou alimentsmincescontenant peu de graisse.
POSITION4 : Pourlaplupart descuissonssur deuxgrilles.
POSITION3 : Pourla plupartdescuissonsdep_tisseries
surune tOle_ biscuits- g_teauxa 6tages,tartesauxfruits,mets
surgelc!s.
suite...
47
Page 49

Culssondenslefour
POSITION2 : PourrOtissagede pi_cesde viande,metsensauce,
cuissonde pain,g_teau16geren couronne[baba)ou entremets,ou
cuissonsur deuxgrilles.
POSITION1 : Pourle rOtissaged'unegrossepiecedeviandeou
volatile,tartes surgel_es,souffldsou g_teauxdesanges,ou cuisson
surdeux grilles.
POSITIONPOURROTISSAGE:
Utilisercette positionpourla cuisson
d'un grosrOtiou d'unedinde.Placerles
deuxgrilles dufour I'unesurI'autre,en
appuisur lessupportslat6rauxdu fond
du four.
CUISSONSUR PLUSIEURSGRILLES:
Deux grilles: Placerles grillesauxpositions2 et 4 ou 1et 4.
Remarque: Ne jamaisplacerleplat directementsur lefond du four.
Demi-grille
Unedemi-grille estdisponibleenaccessoire.Elleaugmentela
capacit6du four et s'accrochea gauche,a lapartie sup_rieure.
Elleestutile pour lacuissond'un platde
IdgumesIorsqu'ungrosr0tise trouvesur
la grilleinf6rieure.Prendrecontactavec
le revendeurpourdemanderI'accessoire
HALFRACK[demi-grille_ou pour
commander,composerle
1-877-232-8771E.-U.ou
1-800-688-8408Canada.
48
Page 50

Four autonettoyant
(certains modeles)
Eliminerlesr_sidusdegraisseoude produitsrenvers_ssur la
soleavantle nettoyage.Ceciemp6chelaformationde flammes
ou defumc!edurant le nettoyage.
Essuyerlesr6sidussucreset acides,commelespatatesdouces,
Remarque : Pourla nettoyagemanualvoirle page52. 6.
latomateou lessaucesa basede lait.La porcelainevitrifi6e
poss_deune certainerc!sistanceaux compos_sacides,maisqui
n'estpaslimit6e.Ellepeutsed_colorersiles r6sidusacidesou
sucr6snesont pasenlev6savantde commencerI'autonettoyage.
Programmation de I'autonetteyage :
de 205°C(400°F)pour programmerun cycled'autonettoyage.
i Remarque: Latempc!raturedu four doit6tresitu6een dessous
1. Fermerla portedu four.
2. Placerlamanettede verrouillage_ lapositiondeverrouillage.
L'autonettoyageutilisedestemp6raturessup6rieures_ cellesdela
cuissonnormalepour nettoyerautomatiquementI'int6rieurdu four.
Neforcez pasla portedu four nile levierde verrouillagepourles
ouvrir.Cecipeutprovoqueruneexposition_ destemp6ratures
61ev6es,etdoncpr6senterun risquede br01ure.
Lefour doit 6tre nettoyc!r6guli_rement.Les6claboussuresdoivent
6treessuyc!espour 6viteruneproduction excessivedefum_e ou
I'apparitiondefiammes.Nelaissezpasderc!siduss'accumulerdarts
lefour.
Durantle processusd'autonettoyage,il convientdebiena6rer la
cuisinepour_liminerlesodeursnormalement_misesdurantle
nettoyage.
3,
Appuyersur latoucheCLEAN(Nettoyage). CLEAN
• Le mot CLEAN(NETTOYAGE)clignote_I'afficheur.
Si laporten'estpasferm6e,deships retentissentetle motDOOR
(PORTE)paraita I'afficheur.Silaporte n'estpasferm6edartsles
45secondes,I'opc!rationd'autonettoyageestannulc!eet
I'afficheurrevient_ I'heuredujour.
4,
Appuyersur latoucheA ou T.
• CL-M (Nettoyage- saletc!moyenne)estaffich6.
5,
Appuyersur latoucheA ou T pourvoir driller
lesdiffc!rentsrc!glagesde I'autonettoyage.
Avant I'autonettoyage
1. Eteindrelalampedu fouravant le nettoyage.Ellerisqueraitsinon,
de griller.
2. Enleverla 18chefrite,tous lesplatset lesgrilles dufour. Lesgrilles
risquentdesed(!coloreret de ne plusglisseraussibienapr_sun
cycled'autonettoyagesion ne lesenl_ve )as.
CL-H (Nettoyage-salet6importante,4 heures)
CL-M (Nettoyage- salet_moyenne,3 heures)
CL-L (Nettoyage- salet_I_!g_re,2 heures)
Le choixduniveau desalet_dufour programme
automatiquementladurocducycle d'autonettoyage.
6. Apr_squatresecondes,lefour commencele nettoyage.
la porte,lazone_ I'ext6rieurdujoint et \ ....
3. Nettoyerlecadredufour, lecadrede _.__
autour de I'ouverturedanslejoint de la _ "\_/\ ._,_Jy,_?A
porte,aI'aided'un produit de
nettoyagenonabrasifcommeBon
• La dur6ede nettoyagecommenceled_compte_ I'afficheur.
• Le mot LOCK_VERROUILLAGE)parait aI'afficheur.
• Le mot CLEANparait _ I'afficheur.
Ami* oud'eauadditionn6ede
d6tergent.Leprocessus
d'autonettoyagene nettoiepasceszones.Ellesdoivent6tre
nettoy6espour emp6cherlasalet6des'incrusterpendantle cycle
D_marrage diff_r_ d'un cycle d'autenetteyage :
1. Appuyersur latoucheDELAY(D_marragediff_!r_!). ..........
• Le mot DELAY[ATfENTE]clignote. DELAY
de nettoyage.(Lejoint assureI'c!tanchc!it_!autour dela porte et du
hublotdu four.)
• 00:00paraita I'afficheur.
/4. Pouremp_chertout dommage,nepas nettoyerni frotter lejoint
qui setrouveautourdela portedufour. Cejoint estcon_upour
_viter lespertesde chaleurpendantlecycle d'autonettoyage.
*Lesnomsdemarquedesproduitsde nettoyagesontdes marquesd_!pos6esdesdiff6rentsfabricants.
49
suite...
Page 51

2. Appuyersurla toucheA ou V pour programmer
la durc!ed'attenteavantquenecommencelecycle. A
Ladurc!ed'attente peut6treprogrammBede 10
minutes(00:10)_ 1] heureset 59minutes[11:59).
V
3. Appuyersurla toucheClean(Nettoyage).
. Lemot CLEAN[NETTOYAGE)vaclignoter
4. Appuyersurla toucheA ou T. CLEAN
• CL-M [Nettoyage- salet6moyenne)estaffichB. " .....
5. Appuyersurla toucheA ou V pour voirdriller los ,
diffBrentsrBglagesdeI'autonettoyage.
CL-H(Nettoyage- salet6importante,4heures)
CL-M [Nettoyage- salet6moyenne,3 heures)
CL-L[Nettoyage-salet616g_re,2 heures)
Lechoixdu niveaude salet6dufour programme
automatiquementladurBedu cycled'autonettoyage.
6. Apr_squatresecondes,losmotsCLEAN,DELAYet LOCK
paraissentaI'afficheurpour indiquerquelefour est programme
pouruneoperationde nettoyagediffc!rc!.Letempsd'attente
paraita I'afficheur.
Si ie four a dej_ ere programme pour un cycle de
nettoyage et que I'on desire etablir un delai :
1. Appuyersur latoucheDELAY(DBmarragedifferS).................
• Lemot DELAYclignote. DELAY
. 00:00parait_ I'afficheur. .....
2. Appuyersurla toucheA ou T pour programmerla
durBedc!sirc!ede I'attenteavantque ned_butele
cycle.
Apr_squatresecondes,lesmots CLEAN,DELAYet V
LOCKparaissent_ I'afficheurpour indiquerque lefour
estprogramme!pour une operationde nettoyagediffc!rc!.
Letempsd'attente paraita I'afficheur.
Lorsque le cycle d'autonettoyage debute :
. Lemot DELAYs'Bteint.
. Ladurc!edenettoyageparaita I'afficheur.
Annulation du cycle d'autonettoyage :
Appuyersur latoucheCANCEL(Annulet). ..............
Pendant le cycle d'autonettoyage
Lorsquele mot LOCKparaita I'afficheur,la portene peut6tre
ouverte.Pour6viterd'endommagerla porte,ne pasla forcer pour
I'ouvrirIorsquele motLOCKest affichB.
Fum_e et odeurs
Lapremierelois ot'Jlefour est nettoyc!,il peuty avoir production
d'odeuretde fumc!e.Ceciest normaletdisparaitra_ I'usage.
Sile four esttr_s saleou si la I_chefritea c!tc!laissc!edansle four, il
poutyavoirproductionde fumc!e.
Bruits
Pendantque lefour chauffe,il poutse produiredes bruitsde metal
en dilatationouen contraction.Ceciestnormalet n'indiquepasque
le fours'abime.
Apr_s le cycle d'autonettoyage
Environuneheureapr_slafin du cycle,lemotLOCKs'_teint.Ace
moment,laportepeut 6tre ouverte.Pousserla manettede la porte
versla gauchepour d_verrouiller.
Lasalet6 poutavoir laiss6un rBsidugris poudreux.L'enlever
avecunlingehumide.S'il restedelasaletc!,cela indiquequele cycle
de nettoyagen'apas 6t6assezlong.Cettesalet6restantesera
enlevc!eau prochaincycled'autonettoyage.
Si losgrillesont 6t6 laissBes_ rintBrieur du four pendant le
cycled'autonettoyageet qu'elles glissent real surleurssup-
ports,lesenduire,ainsiquelossupports,d'unefine couched'huile
v_g_!tale.
De fines lignespeuventapparaitre dans la porcelaineparce
qu'elle asubi chaleur et refroidissement.Ceciest normalet
n'affecterapaslaperformance.
Une d6colorationblanchepeut apparaitre apr_s le nettoyage
sides alimentsacidesou sucr6sn'ont pas6t6 enlevBs avant
que ne commenceI'autonettoyage. Lad_!colorationestnormale
et n'affecterapas laperformancedu four.
P_eilrlarques:
° si la portedu four n'estpasfermSe,le motDOOR[PORTE)
clignote _I'afficheuret le four_!metdesbipsjusqu'acequela
portesoit ferm_!eetque I'on appuie_nouveausurClean.
° Laportedufour setrouveraendommag_esiI'onforceson
ouverturealorsque le mot LOCKest encoreaffich_.
° Touslos rootsdisparaissentde I'afficheur.
• Touteslosfonctionssont annulc!es.
. L'heuredujour parait_ I'afficheur.
5O
Page 52

M6thodes de nettoyage
* Losnomsde marquesontdes marques
d6posdesdesdiffdrentsfabricants.
** Pourcommanderdirectement,
composerle 1-877-232-6771E.-U.ou
1-800-688-8408Canada.
L_ehefriteet
sa grille
Br_leurs
surface
=Conventionnel
=Scell_s
Cadrede Br_leur
=Br_ieurs
conventionneJs
seulement
Nejamais couvrir la grille de papier d'aluminium;cela emp_che la graisse de cou/er dartsla I_chefrite.
• Recouvrirla I_chefriteetsagrille d'un lingesavonneux;laisseragir pour ddtacherlesrdsidus.
• Laveravecde I'eausavonneusetidde.Utiliser untampona rdcurerpourdliminer lossouillurestenaces.
• On poutplacerlosdeuxcomposantsde laIdchefritedansun lave-vaisselle.
• Nettoyerfrdquemment.Laisserle br01eurrefroidir.Nettoyeravecdu savonetun tampon_rdcurerde plastique.Pour
dessouillurestenaces,utiliser un produitde nettoyagenonabrasifavecun chiffon. Eviterdelaisserleproduit de
nettoyages'introduiredanslesorifices desortiedu gaz;cecipourraitaffecter lacombustiondu gaz.Sile produitde
nettoyagepdn_tredanslosorifices,nettoyeravecun pinceausoupleou une brochedroite,particuli_rementrorifice
situd au-dessousde I'allumeur.Veiller _ne pasddormer ou agrandirlostrous.
• Veillera nepashisser deI'eaus'introduiredans losorificesdubr01eur.
• ProcdderprudemmentIorsdu nettoyagedeI'allumeur.Le brCJleurne s'allumerapassi I'allumeurestmouilldou
endommagd.
• Br01eursconventionnels:LosbrCJleurssecsdanslefour ont placd_ 75°C (170° F).
Lecadre debr01eurestsitud soussoulevent-versletabledecuissonrelevable.Nettoyezfrdquemmentpourenleverdes
ddbordements.Sion permet_ lesolde s'accumuler,il peutendommagerlafinition.
• Retirezlosgrilleset losbr01eursextdrieurs.Augmentezletablede cuissonrelevable.
• Nettoyeravecdusavonet I'eau,rincageet sdchez.
• Pourlossolst6tus,utilisezlosproduits d'dpurationmoddrdmentabrasifstelsque une patede le bicarbonatede soude
et eauou le nettoyantBonAmi*,et un garniturede frottementenplastiquenon-abrasive.
, Laverles grillesavecde I'eausavonneusetilde et untampon_ rdcurerdeplastiquenon abrasif.Pourlessouillures
tenaces,nettoyeravecunedpongeou un tamponnonabrasifsavonneuxet la CooktopCleaningCreme
(produitn°20000001)**.
• Pourlosrdsidusalimentairescarbonisds,enleverlosgrillespourlosplacersurdu papier-journal,et pulvdriser
prudemmentun produit commercialde nettoyagedefour (nopasprojeterle produitsur lasurfaceenvironnante).
Placerlos grillesdartsun sachetde plastiquependant plusieursheuresou pendantune nuit.Porterdesgants
de caoutchoucetretirerlos grillesdu sachet.Lavedrincedfairesdcheretrdinstallerlos grillessurlatable decuisson.
Zonede la
consolede
eornrnandeet
horloge
Boutonsde
co[nlnande
Table decuisson
et tableau de
Comlnande =
_rnail vitrifi_
Pourutiliser lafonctionVerrouillagedescommandospour le nettoyage,voirpage41.
• Laver,rinceret fairesdcher.Ne pasutiliserun agentdenettoyageabrasifsusceptiblederayerlafinition.
On peututiliser un produitde nettoyageduverre,pulvdrisdd'abordsur un chiffon.NEPASprojeterlepreduit
directementsur lostouches de commando ou sur I'afficheur.
Placerchaque boutona lapositiond'ARRET,et retirerchaqueboutonen letirant.
• Laver,rinceret fairesdcher.Ne pasutiliserun agentdenettoyageabrasifsusceptiblederayerlafinition.
Fairefonctionner bri_vementchaquebrQleurpourvdrifier quele bouton adtd correctementrdinstalld.
L'dmailvitrifid estdu verrelid au mdtalpar fusion.IIpeutse fissurerous'dcailleren casde mauvaiseutilisation.II est
rdsistantauxacides,maispastotalement inattaquablepar lesacides.Tousles produitsrenversds,en particulieracides
ou sucrds,doivent6treessuydsimmddiatementavecunlingesec.
• Unefois refroidi,laveravecde I'eausavonneuse,rinceret sdcher.
• Nejamaisessuyerune surfacetiddeou chaudeavecunlinge humide.Cecipourrait lafissurerou I'dcailler.
• Nejamaisutiliserde nettoyantspourfour,d'agentsdenettoyagecaustiquesou abrasifssur lefini extdrieurde la
cuisini_re.
51 suite...
Page 53

m m m m
iiiiiiiiiiii_iii_i_iEii_ilEiii!!I!iii!iliii!iiiiiiiiiiiiiiiiiiiiiiiiiiiiiiiiiiiiiiiiiiiiiiiiiiiiiiiiiiiiiiiiiiiiiiiiiiiiiiiiiiiiiiiiiiiiiiiiiiiiiiiiiiiiiiiiiiiiii!ii!ii!ili!iii!_iiiiE_!i_!_iiEiiiiiliiiiiiiiiiiiiiiiii!!i I!i!!!i!iii!ii!ii!ii!ii!ii!ii!ii!ii!ii!ii!ii!ii!ii!ii!ii!ii!ii!ii!ii!ii!ii!ii!ii!ii!ii!ii!ii!ii!ii!ii!ii!ii!ii!ii!ii!ii!ii!ii!ii!ii!ii!ii!ii!ii!!i!ii!!i!ii!!i!ii!!i!ii!!!!!!!i!!i!!i!!i!!i!!i!!ii!i!!ii!ii!ii!ii!!i!!!i!!i!!i!!i!!i!!i!!i!!i!!i!!i!!i!iii!i!iii!i!iii!i!iii!i!iii!i!!i!i!i!iiiiiiiiiiiiii_ii_ii_ii!ii!i!!!!!i!_i!_i!_i!_i!!!_!i!i!_!i_!i_ii_iiiiiiiiiiiiiiiiiiiiiiiiiiiiiiiiiiiiiiiiiiiiiiiiiiiiilililililililili!i!i!i!i!i!i!i!i!iiiili!i!i!i!i!i!i!i!iiiiiiiiiiiiiiiiiiiiiiiiiiiii!i!i!!!i!i!!!i!ii!!i!!i!!i!!i!!i!iii!i!iii!i!iii!i!iii!i!iii!i!ii!iliiiiiiiliiiiiiiiiiiiii!ili!i!ili!iiiii!iiiiiiiiiiiiiiiiiiiiiiiiiiiiiiiiiiiiiiiiiiiiiiiiiiiiiiiiiiiiiiiiiiiiiii!i!i!i!i!iiiiiiiiiiiiiiiiiiiiiiiiiiii!ii!i!!i!!i!!i!!i!!i!!i!!i!!i!!i!iii!i!iii!i!iii!i!ii_!_!_i_!_!!i!!!!!i!!!!!i!ii!ii!ii!ii!ii!ii!ii!ii!ii!ii!ii!ii!ii!ii!ii!ii!ii!ii!ii!ii!ii!i!!i!!i!!i!!i_!_____!___iii!i!i!i!!!!!!i!i!!!i!i!i!ii!iiiiiiiiiiiiiiiiiiiiiiiiiiiiiiiiiiiiiiiiiiiiiiiiiiiiiiiiiiiiiiiiiiiiiiiiiiiiiiiiiiiiiiiiiiiiiiiiiiiiiiiiiiiiiiiiiiiiiiiiiiiiiiiiiiiiiiiiiiiiiiiiiiiiiiiiiiiiiiiiiiiiiiiiiiiiiiiiiiiiiiiiiiiiiiiiiiiiiii!i!i!i!i!i!i!i!i!iiiiiiiilliiiiiiiiiiiiiiiiiiiiiilliiiiiiiliiiiiiiiii!i!iii!i!iii!i!iii!ii!ii!ii!ii!ii!ii!ii!ii!ii!ii!iiiii_____i__i_____i__i__i__ii_ii_ii_ii_i___i_i__i_i_i_ii_ii_i!_!___!_!___!_!i__!i!___!J___!
Panneaux
lat_raux,tiroir
de remisage,
porte dufour
[curtainsmodules),
porte du gril
inferior (curtains
modules)et
poign_es
de porte =
_mail point
Hublotet porte
du fouren verre
(curtainsmodules)
int_rieur dufour
• Unefois lospi_cesrefroidies,loslaveraI'eausavonneusetilde, rincer et s6cher.Nejamaisessuyerunesurface
tilde ou chaudeavecun lingo humide,cecipouvantendommagerlasurface etentrainerune brQlureparla vapeur.
• Pourlostaches rebelles,utiliserdesagentsde nettoyageI_g_rementabrasifscommela p_teau bicarbonatede
soudeou BonAmi*.Ne pasutiliser de nettoyantsabrasifs,caustiquesou6nergiquescommelos nettoyantspour
four ou leatamponsen laine d'acier.Cosproduitsraieraientouendommageraientde fa_onpermanentelasurface.
Remarque : Utiliserun lingo ou un terchonsec pour essuyer lospreduits renvers#s,surtout s'ils sent acides
ou sucres. La surface pourrait se d#colorer ou se temir si la salet# n'#tait pas imm#diatement enlev#e. Ceci
est particuli#rement important dans lecas de surfaces blanches.
• Eviterd'utilisertrop d'eau,qui risqueraitde s'infiltrersousou derrierele verreet detacher.
• Lavera reau et ausavon.RinceravecdeI'eaupropre etsc!cher.Unproduitde nettoyageduverrepout 6treutilisc!en
le vaporisantd'abordsur un lingo.
• Nepas utiliserdeproduits abrasifscommetampons_r6curer,lained'acierou produit de nettoyageenpoudrequi
risqueraientde rayerleverre.
Fourautonettoyant:
• Executorlosinstructionsprc!sentc!esauxpages49-50pour I'autonettoyagedu four.
Nettoyage manual:
• Nettoyerfr6quemmentavecun tamponde plastiqueet un produitde nettoyagemoyennementabrasif.
• Nepas utiliseruntampon a r6curerm_tallique,qui formeraitdesrayuressur la surface.
• Lorsde remploid'unproduit commercialde nettoyagede four,appliquer leainstructionsdu fabricant.
• Eliminerd_sque possiblelosproduits acidesrenvers6s(produitsa basedelaitou detomato)aveceauet savon;cos
produitspeuventfairechangerlacouleur de1'6mailIorsd'uncontactprolong&
Pourfaciiiter ie nettoyage,on poutenlever ia portedu four. Noir la sectionEntretien,page53.)
Grillesdu four
Acier inoxydaMe
[curtainsmodules)
• Nettoyeravecde I'eausavonneuse.
• Eliminerlossouillurestenacesavecunepoudrede nettoyageou un tampon_r6curersavonneux.Rinceretfaire
secher.
• Silosgrilles sontlaissc!esdartsle four pendantlecycled'autonettoyage,oliosse dc!colorentetpeuventne plustr_s
bien glisser.Si ceciseproduit, appliquerparessuyageun peu d'huilevc!g6talesur lagrille et sossupportsen relief
pour faciliterle mouvement,et enleverI'exc_sd'huile.
• NEPAS UTILISERDEPROBUITSDENETTOYAGECONTENANTDUJAVELLISANT.
• NEPAS UTILISERDE NETTOYANTS. ORANGE. OUABRASIFS.
• TOUJOURSE$SUYERDANS LESEN$DE LA TEXTUREDEL'/tCIER LORSDU NETTOYAGE.
• Nettoyage journalier/salet_ I_g_re =EssuyeravecI'undesproduitssuivants:eausavonneuse,vinaigre blanc/eau,
produitde nettoyagepourverre etsurfaceFormula409*ou unproduitsemblablepour verre- avecun lingosouple
etune @onge.Rinceret sc!cher.Pourpolir et enleverlos marquesdedoigts,fairesuivrepar unevaporisationde
Magic Spray*pouracierinoxydable[produit n°20000008)**.
• Salet_ mod_r_e/_paisse =EssuyeravecI'undes produitssuivants:BonAmi*,SmartCleanser*ouSoftScrub*-
I'aided'un lingosoupleou d'une @ongehumide.Rinceret s_cher.Leatachesrebellespeuvent6treenlev_esavec
un tamponmulti-usagesScotch-Brite*humidi% Frotteruniform6mentdanslesonsdu m_tal.Rinceret s_cher.
Pourredonnerdu lustreet retirerlos rayures,fairesuivrepar unevaporisationdeMagic Spray*pour acier
inoxydable.
• D_coloration =A raide d'une @ongehumidifi6eoud'un lingosouple,essuyera I'aidedunettoyantCameo*pour
acierinoxydable.Rincerimm_diatementets_cher.Pourenleverlosmarquesetredonnerdu lustre,faire suivrepar
unevaporisationde MagicSpray*pouracierinoxydable.
* Losnomsdemarquesontdes marquesd@os_esdesdiff,!rentsfabricants.
** Pourcommanderdirectement,composerle 1-877-232-6771E.-U.ou1-800-688-8408Canada.
52
Page 54

Porte du four
D_pose de la porte:
1. Apr_slerefroidissementdu four, ouvrirla
porte- positionde cuissonaugril (porte
entrouverted'environ10cm [4 pouces]).
2. Saisirla portede chaquec6t& Nepas
utiliser lapoign6edeporte pourla
soulever.
Pieds de r glage de I'aplomb
VSrifierque la cuisini_reest d'aplombune lois
install6e.Sielle ne rest pas,tourner lespiedsde
r6glagede I'aplomba chacundesanglesde la
cuisini_re,jusqu'aceque celle-ci soit d'aplomb. _,,JJ
__TIBASI_EMENT
PIED DE REGLAGE
DE L 'APLOMB
Lampe du four (certainsmodules)
3. Souleveruniformc!mentpour d6gagerlaportedescharni_res.
Reinstaiiation:
1. Saisirlaporte dechaquecot&
2. Aligner lesfentesaveclesbrasdecharni_resur lacuisini_re.
3. Fakedescendrela portepour la positionnercorrectementsur les
charni_res.Poussersurlesanglessupc!rieursde la portepour
renfoncer compl_tementsur lescharni_res.IIfautque laporte
soit parfaitementd'aplomb.
la fermeturede la portedu four d'unecuisiniSreneuve;ceci est
Remarque: Onpeut percevoirunecertaine_61asticit6_Iorsde
normal;cet effetdisparaitprogressivement.
Hublot du four (certainsmodeles)
Pour prot_ger le hublot de la porte du four :
1. Nepasutiliserdeproduitsnettoyantsabrasifscornmedes
tampons_ r6curerenlained'acier ou desproduitsde nettoyage
en poudrequirisqueraientderayer leverre.
2. Ne pasheurterle hublotenverreavecun ustensile,unarticlede
mobilier,un jouet,etc.
3. Ne pasfermerla portedu four avantque lesgrilles nesoienten
placedans lefour.
Toutede!gradationdu hublotde verre- rayure,choc,tension,etc. -
peutaffaiblir sastructureet augmenterle risquede bris_ unedate
ultc!rieure.
Pour remplacer I'ampoule du four :
1.Apr_s lerefroidissementdu four, CABOCHON
maintenirle cabochon(si6quipd)
tout enenlevantlapiece
m6talliquequilamaintienten
place.Rernarque: Le
cabochontomberasi on ne le
maintientpasenplace.
2.Enleverlecabochonet
I'ampoule.
3.Installeruneampoulede 40wattspourappareilmc!nager.
4.R6installerlecabochonetle fil m6talliquede retenue.
5.R(!tablirI'alimentationde la cuisini_re.R_glerde nouveau
I'horloge.
RESSORTDE RETENUE
(fl7m#tallique)
53
Page 55

D placement d'un appareil tt
gaz
kes raccords des appareils _ gaz servant _ brancher cet appareil a
ralimentation de gaz ne sont pas pr6vus pour 6tre d_plac6s
continuellement. Une fois I'appareil install6, NF PAS le d_placer de
fa(;onrc!pCtCepourle nettoyerou lechangerde place.Sicet
appareildolt6tre d_m_nag6et/ou enlev_pour 6trerCparC,suivre la
mc!thodedc!critedartslosinstructionsd'installation.Pourtoute
information,prendrecontactavecleservice_ laclienteleau
1-800-688-1120E.-U.et Canada.
IIfaut que lepiedarri_rede la cuisini_resoit engage!dans labride
antibasculementpourque la cuisini_rene puissebasculer
accidentellement.
Tiroir de remisage
(certains modeles)
Letiroir de remisagepeut6treenlevc!pourvous permettrede
nettoyersousla cuisiniSre.
D_pese :
1. Viderle tiroir et letirer jusqu'alapositionde la premierebutc!e.
2. SouleverI'avant.
3. Tirerjusqu'ala positionde la secondebutCe.
4. Saisirle tiroir par loscCtc!setsoulever/tirerpour I'extraire.
R_installatien :
1. Insc!rerlosextrCmitc!sdesglissi_resdutiroir dans losrailsdela
cuisiniSre.
2. SouleverI'avantdutiroir etpousserdoucementjusqu'_ la
positiondelapremierebutCe.
3. Souleverde nouveauletiroir et le pousserpourle former.
Br leurs conventionnel
(certains modeles )
Enaucunecirconstance,il ne faut d_monterlosensemblesde
br_deursde surfacepourles nettoyer.Un ensembledebrOleurpout
_treenlev_d'un blocpour nettoyerlazonecorrespondante.
Los cuisini res autonomes seulement:
Losdeuxensemblesde brQleurssent fixc!sen placependantle
transport_ [aide devis.Unefoislacuisini_reinstallCe,ilest possible
d'enlevercosvispour permettreunedCposerapideetfacile des
ensemblesdebrQleurs.
DCpese :
LaisserI'ensemblede brC]leurrefroidir.Souleverlatable decuisson.
SaisirI'ensemblede brQleuret letourner 16g_rementvers lagauche
pour libc!rerlosdeuxpattesde I'ensemble.Puis,souleverI'ensemble
et letirer versI'arri_rede latable decuissonjusqu'_ ceque les
extrCmitCsde I'obturateurd'air de [ensemblesedc!gagentdes
soupapes.
Remise en place :
IntroduirelosextrCmit_sde I'obturateurd'air surI'ensemblede
brCJleur,par-dessuslossoupapes,et baisserI'ensembleen place.
S'assurerde fixerlosdeuxpattesdeI'ensembledebr01eurdans los
deuxfentes dusupportde brQleurmontdau dessousdu brQleur.
(REMARQUE:Si lospattesnesent pascorrectementintroduites
danslosfentes,I'ensemblepeutbasculeret losbrCfleurspeuventne
pass'allumercorrectement.)
Sole du four
Prot_gerlasoledufour centrelosrenversements(particuli_rement
pour losproduits acidesou sucres),quipeuventsusciterun
changementdecouleurdeI'd!mailvitri% Utiliserun ustensilede la
taille appropri_epour _vitertout renversementou d_!bordement.
Raccordement lectrique
Losappareils nCcessitantunealirnentation _-_---- _/..........
61ectrique cornportentunefiche _ trois hroche._ _L.(_ I
raise_ la terrequi dolt _tre branch_edirectement
dartsuneprisede 120volts_ trois cavit_set
correctementraisea latorte.
Toujoursd#brancherI'appareilavantd'y fairedeI'entretien.
Lafiche_trois brochesraisealaterre fournit uneprotection centre
losd_charges_lectriques.NEPASCOUPERNI ENLEVER[A
BROCHEDE TERREDU CORDOND'ALIMENTATION.
Sila prisene comporteque deuxcavit_s,n'estpasmisea laterre ou
n'estpasappropri_!e,le propriCtairede rappareil a la responsa=
bilit6 defaire rempiacer la prise par uneprise _trois cavitCs
correctementraise_ la torte.
54
Page 56

Becherchedes
Pourla plupartdes problbmes
observbs,essayer d'abord les
solutionspossibles,_ droite.
• V_rifierque lescommandosdufour sont correctementrc!gl6es.
• V@ifiersi lafiche est bien ins6rc!edartsla prise.
• Inspectedr6armerle disjoncteur.Inspectedremplacerlosfusibles.
• Contr61erla sourced'alimentationc!lectrique.
Un brSleurde surfacene s'allume
pas.
o
V_rifierque I'appareilestcorrectementraccord_a lasourced'_lectricitc!.
o
D6terminersi I'alimentation61ectriqueest interrompue(fusiblegrillddisjoncteur ouvert).
o
V@ifierque I'allumeurestsec et qu'il c!metdesc!tincelles.LebrOleurne pouts'allumersi
I'allumeurestendommag6,souilk!oumouill6.SiI'allumeur neg_n_repasd'6tincelles,ramener
le boutonde commandeala position OFF(ARRETJ.
Rammes nonuniformes. • Orificesdu brQleurobstru6s.
S_parationentre losflammes et • Veiller_placercorrectementI'ustensilesur la grilledubrOleur.
le br_leur.
Rbsuitats de cuisson au four
cliff,rents des attentes ou de ceux
produits par le four ant_rieur.
°
V@ifierque la temp@atures_lectionn6eest correcte.Veiller_ prc!chaufferlefour si
ceciest demandc!danslarecette.
° D6terminersi I'@entdu four estobstruc!.Voirsonemplacementpage47.
° S'assurerquelacuisini_reest d'aplomb.
• Losr6glagesdetemp@aturevarientsouvententre un four neufet le four qu'il remplace.
Onobservesouventune ti!!rivedu r_glagede temp6ratured'unfour _ mesurequ'il vieillit;
il poutdevenirpluschaudou moinschaud.Voir page45 lesinstructionsd'ajustementde
latemp6raturedufour (certainsmodules).BEMARQUE:IIn'estpasutiledemodifierlerc!glage
detemp6raturesi lavariationn'affectequ'uneou deuxrecettes.
• Utiliserlosborisustensiles.Losustensilesfonc6sdonnentun brunissementdecouleurfonc6e,
lesustensilesbrillants,unbrunissementplusclair.
° V@ifierlapositiondesgrillesetdesustensiles.Lorsdelar@artition surdeuxgrilles,ne pas
superposerlosplats. Veiller_laisserunespacede 2,5_5cm (1 a2 po)entrelosplatset los
paroisdu four.
° ContrOlerI'utilisationdefeuilled'aluminiumdanslefour. Nejamais recouvrircompl_tement
unegrilledufouravecdelafeuilled'aluminium.Placerun petitmorceaudefeuilled'aluminium
surla grille sousle plat pourr6cup@erlosmati_resrenvers6es.
R_suitatsincorrects lots de la
cuissonau gril, ou _rnission
excessivede furn_e.
• D6terminerla positiondesgrilles.Lesalimentspeuvent6tretrop prosdes flammes.
• Utilisationincorrectede feuilled'aluminium.Nejamais garnir lagrille deI_chefriteavec
de lafeuille d'aluminium.
• EnleverI'exc_sdegraissesur la piecede viandeavantla cuissonaugril.
Utilisationd'uneI_chefritesouill6e.
Pr6chaufferlefour pendant2 a 3 minutesavantde placerle platdartsle four.
Portedu four ferm6edurant la cuissonau gril.
suite...
55
Page 57

Becherchedes
Impossibilit_d'autonettoyage
du four (certains mod_les).
Lefour ne se autonettoie pus
correctement (certains mod_les).
Laporte dufour ne se d_verrouille
pusapr_s rautonettoyage
(certains mod_les).
Accumulationd'humidit_ surle ° Ceciestnormaldurantla cuissond'alimentscontenantbeaucoupd'eau.
hublotou vapeursortantde I'_vent. • Utilisationexcessived'humidit6 Iorsdu nettoyagedu hublot.
Emission d'uneforte odeur ou de
fum_e lots de la raise en marche
du four.
• D6terminerque I'appareiln'a pus_tc!programm6pour unautonettoyagediff6r6.Voir
pages49-50.
• V6rifierque laporteestfermc!e.
• V@ifiersi lacommandoestenMode Sabbat.Voirpage45.
• Lefour estpout6tre_ unetemp6raturesup@ieurea205°C (400°F).La temp@aturedu
four dolt6treinfc!rieurea205°C[400°F)pour pouvoirprogrammeruncycled'autonettoyage.
• Untempsde nettoyagepluslong peut6tren6cessaire.
° Onn'apus61imin6avantI'op6rationd'autonettoyagelosaccumulationsexcessivesderc!sidus,
particuliSrementlosr6sidusd'alimentsacidesou sucrc!s.
L'int6rieurdu four estencorechaud.Attendreenviron uneheureapr_sI'ach_vementde la
p@ioded'autonettoyage.IIestpossibled'ouvrir laporteapr6sladisparitiondumessageLOCK
G/ERROUILLAGE)surI'afficheur.
o
Loscommandosetlaportesentpeut-6treverrouillc!es.Voirpages41et50pourledeverrouillage
• Ceciestnormal pourunecuisini_reneuveetdisparaitapr_squelquesutilisations.
Uncycled'autonettoyage_brt_flera_plus rapidementlos odeurs.
• Lamiseen marched'unventilateur aidearetirer fum6eet odeurs.
Pr6sencede salet6ssur lasole.Proc6dera unautonettoyage.
Codes d'anemalie
(certains mod_les).
Des bruits se font entendre.
II n'y a ni hip ni affichage. • Lefour estpeut-6tre enMode Sabbat.Voir page45.
_ $Ab _ clignote puis
resteallum_.
• LesmotsBAKEouLOCKpeuventclignoterrapidement_I'afficheurpourprc!venird'uneerreur
ou d'un probl_me.Sile motBAKEou LOCKparait_ I'afficheur,appuyersurlatoucheCancel.
Sile mot BAKEou LOCKcontinue_clignoter,d6brancherI'appareil.Attendrequelques
minutes,puisrebrancherI'appareil.Si le mot continueaclignoter,d6brancherI'appareilet
prendrecontactavecunr@arateur autoris6.
• Silefour esttr_ssale,losflamm_chespeuventproduireuncoded'anomalieaucoursducycle
d'autonettoyage.Appuyersur la toucheCancelet laisserlefour refroidircompl_tement,
essuyerlasalet6enexc_spuisreprograminerI'autonettoyage.Silecoded'anomalierc!apparait,
prendrecontactavecunr@arateur autorisc!.
o
Lefourfait plusieursbruitsfaibles.IIestpossibled'entendrelesrelaisdufour qui semettent
en marcheets'arr6tent.Ceciest normal.
o
Alorsquelefourser6chauffeetserefroidit,il estpossibled'entendredesbruitscorrespondant
ladilatationeta lacontractiondespi_cesm6talliques.Ceciestnormaletn'endommagepus
I'appareil.
• Lefour esten modesabbat.Pourannulet,appuyersurlatouche Clocket maintener-la
enfonc_!ependantcinq secondes.
56
Page 58

6erentteet epres-vente
Ne sont pas couverts par ces garanties
1. Lesprobl_meset dommagesrc!sultantdessituationssuivantes:
a.Miseen service,livraisonou entretieneffectu6sincorrectement.
b.Touter@aration,modification,alt6rationet tout r6glagenonautorisc!spar le
fabricantou parun prestatairedeserviceapr_s-venteagrc!&
c. Mauvaisemploi,emploiabusif,accidents,usagenon raisonnable,ou catastrophe
naturelle.
d.Courant61ectrique,tension,alimentation_lectriqueouengazincorrects.
e.R6glageincorrectd'unecommande.
2. Lesgarantiesnepeuvent6trehonor6essi lesnum_rosde sc!ried'origine ont _tc!
enlev6s,modifi6sou nesont pasfacilementlisibles.
3. Ampoules,filtres_ eauet filtresa air.
4. Lesproduitsachet6sa desfinscommercialesou industrielles.
5. Lesfrais ded@annageou de visitepour :
a.Correctiond'erreursderaiseen service.Pourlesproduitsn6cessitantune
ventilation,unconduitm6talliquerigidedolt 6treutilis&
b.InitiationdeI'utilisateuraI'emploideI'appareil.
c.Transportde I'appareilchezler@arateuret retourde I'appareilchezI'utilisateur.
6. Tout alimentperdu enraisonde pannesdu rc!frigc!rateurou ducong61ateur.
7. D@ensesded@lacementet detransportpour la r@arationdu produit dansdes
endroitsc!loign6s.
8. Cettegarantien'estpasvalidea I'ext(!rieurdesEtats-Uniset du Canada.Communiquez
LESEULETUNIQUERECOURSDUCLIENTEN
VERTUDE CETTEGARANTIELIMITEEESTLA
REPARATIONDUPRODUITCOMMEDECRITE
PRECEDEMMENT.LESGARANTIESIMPLICITES,
Y COMPRISLESGARANTIESDEQUALITE
MARCHANDEOUD'ADAPTATIONA UN USAGE
PARTICULIER,SONTLIMITEESA UNAN OUA
LA PERIODELA PLUSCOURTEPERMISEPARLA
LOI.MAYTAGCORPORATIONNESERAPAS
TENUERESPONSABLEDESDOMMAGES
DIRECTSOUINDIRECTS.CERTAINSETATSET
CERTAINESPROVINCESINTERDISENT
L'EXCLUSIONETLA LIMITATIONDES
DOMMAGESDIRECTSOUINDIRECTSAINSI
QUELESLIMITATIONSSURLA DUREEDES
GARANTIESIMPLICITESDEQUALITE
MARCHANDEOUD'ADAPTATIONA UN USAGE
PARTICULIER.IL ESTDONCPOSSIBLEQUECES
LIMITATIONSNES'APPLIQUENTPASA VOUS.
CETTEGARANTIEVOUSCONFEREDESDROITS
JURIDIQUESSPEClFIQUESETILSEPEUTQUE
VOUSAYIEZD'AUTRESDROITS,QUIVARIENT
D'UNETATA L'AUTREOUD'UNEPROVINCEA
L'AUTRE.
avecvotre d6taillantpoursavoirsi uneautregaranties'applique.
9. Dommagesindirectsouaccessoiressuns partoute personne_lasuite d'une
quelconqueviolationdesgaranties.CertainsEtatsou provincesnepermettentpas
I'exclusionou lalimitationde responsabilit6en cequi concerneles dommagesdirects
ou indirects.L'exclusionci-dessuspeut enconsequencene pass'appliquera votrecas.
Si vous avez besoin d'aide
Consultezd'abordlasectionsur led@annagedansle manueld'utilisation etd'entretien,
puisappelezled_taillantde qui vousavezachet6votre appareiloule servicea laclientele
de MaytagServices,LLCau 1-800-688-9900aux Etats-Unisetau1-800-688-2002au
Canadapoursavoiro0 trouverun rc!parateurautorisc!.
, Veilleza conserverla factured'achatpourjustifier de lavalidit_de la garantie.Pour
d'autresrenseignementsconcernantlesresponsabilit6sdu propri6tairea I'%ard du
servicesousgarantie,voirletexte delaGARANTIE.
, Si led_taillant ou I'agencede serviceapr_s-ventenepeut r6soudreleprobl6me,_crivez
MaytagServices,LLCaI'adressesuivante: CAIR:R:Center,P.O.Box2370,Cleveland,TN
37320-2370Etats-Unis,ouappelezau 1=800=688=9900aux Etats=Unisou au
1=800=688=2e02aa Canada.
Lesguidesd'utilisation,lesmanuelsdeserviceet lesrenseignementssur lespi_cessont
disponiblesaupr_sdu servicea laclienteledeMaytagServices,LLC.
Rel]l]arq[ies : Veillez_fournir I'informationsuivanteIorsquevouscommuniquez
avecnousau sujetd'un probl_me:
a.Vos nora,adresseet num_rode t_l@hone;
b.Num_!rode moduleet num_rodes_!riede I'appareil;
c.Noraetadressedevotre d_taillantou de votreagencede service;
d.Descriptiond_tailk!edu probl_meobserw!;
e.Preuved'achat [facturede vente).
57
Page 59

Estufa a Gas
...............................59=63
............ 64=65
Gas Sellados
66=77
impieza Manual
Hornear
Asar
de L[mpieza Manual
Asar
_iante
Parrillas del Homo
Mantener Caliente
Asal
Diferido
Cuidado y Limpieza ......................... 78=81
Horno Autolimpiante
Procedimientos de Limpieza
Nlantenimiento ................................. 82=84
Localizaci6n y Soluci6n
de Averias ..........................................85=86
Garantia y Servicio .................................87
Page 60

como resultado de su uso inapropiado. Utilice este
electrodomestico solamente para el prop6sito que ha sido
destinado segQnse describe en esta gufa.
Para asegurar funcionamiento correcto y seguro: El
electrodom_stico debe set instalado debidamente y puesto a
tierra por un tScnico calificado. No intente ajustar, reparar,
prestar servicio o reemplazar ninguna pieza de este electro-
domestico a menos que sea espedficamente recomendado en
esta gufa. Todas las reparaciones deben set realizadas por un
t_cnico calificado. Pidaal instalador que le indique la
ubicaci6n de la v_lvula de cierre del gas y como cerrafla en
caso de una emergencia.
Siempre desenchufe el electrodomestico antes de efectuar
alguna reparaci6n.
Las advertencias e instrucciones importantes sobre seguridad
que aparecen en esta gu{a no est_n destinadas a cubfir todas
las posibles circunstancias y situaciones que puedan ocurrir.
Se debe ejercer sentido com_n, precauci6n y cuidado cuando
instale, realice mantenimiento o haga funcionar el artefacto.
Siempre p6ngase en contacto con el fabficante si surgen
problemas o situaciones que usted no comprenda.
Reconozca los simbolos, advertencias,
etiquetas de seguridad
Lea y siga todas las instrucciones antes de usar este
electrodorn_stico para evitar el riesgo potencial de incendio,
choque electrico, lesi6n personal o da_o al electrodomestico
59
Page 61

Impomntes Segurlded
Instrucciones Generales
Paravefificar si el dispositivo est_ debidamente instalado, mire
debajo de la estufa con una linterna pare asegurarse de que
uno de los tornillos niveladores traseros est6 debidamente
enganchado en la ranura del soporte. Eldispositivo antivuelco
asegura el tornillo nivelador trasero al piso cuando est_
debidamente enganchado. Estodebe vefificarse carla vez
que la estufa seamovida.
Muchos pl_sticos son vulnerables al calor. Mantenga los
pl_sticos alejados de las piezas de la estufa que puedan estar
tibias o calientes. No deje artfculos de pl_stico sobre la
cubierta de la estufa pues se pueden derretir o ablandar si
est_n demasiado cerca del respiradero o de un quemador
superior encendido.
Paraeliminar el fiesgo de pasar sobre los quemadores
superiores calientes, no se deben guardar articulos en los
armarios que est_n directamente sobre la estufa. Si tales
armarios son usados para almacenamiento, debe limitarse a
colocar artfculos de use poco frecuente y que pueden
guardarse en forma segura en una _rea que est_ sujeta al
calor proveniente de la estufa. Las temperaturas pueden no
ser apropiadas para algunos artfculos, tel come Ifquidos
vol_tiles, limpiadores o sprays en aerosol.
En Case de Incendio
Apague el electrodom6stico y la campana de ventilaci6n para
evitar que las llamas se dispersen. Extinga las llamas luego
encienda la campana para expulsar el humoy el olor.
• Enla cubierta: Apague el fuego o la llama en una sart6n
con una tapa o una bandeja de hornear.
NUNCA levante o mueva una sart6n en llamas.
• Enel berne: Apague el fuego o la llama cerrando la puerta
del horno.
Para Evitar un Incendio o
Da o Causado per el Humo
AsegQrese de que se hayan retirado todos los materiales de
empaque del electrodom6stico antes de su use.
Mantenga el _rea alrededor del electrodom6stico libre y
exenta de matefiales combustibles, gasolina u otros vapores y
matefiales inflamables.
Si el electrodom6stico es instalado cerca de una ventana, se
debe tenet cuidado para evitar que lascortinas pasen sobre
los quemadores.
NUNCA deje artfculos sobre la cubierta de la estufa. Elaire
caliente del respiradero puede encender los artfculos
inflamables y aumentar la presi6n en los envases cerrados
hasta haceflos reventar.
Muchos envases de tipo aerosol son EXPLOSIVOScuando son
expuestos al calory pueden ser altamente inflamables. Evite
su use o su almacenamiento cerca del electrodom6stico.
No use agua en los incendios de grasa. Use bicarbonate, un
producto qufmico seco o un extinguidor del tipo con espuma
para apagar un incendio o la llama.
Seguridad para los Ni os
NUNCA deje a los nifios solos o sin superviskSncuando el
electrodom6stico est6 en use o est6 caliente.
NUNCA permita que los nifios se sienten o se paren en
ninguna parte del electrodom6stico pues se pueden lesionar o
quemar.
6O
Page 62

Impomntes Segurlded
Se les debe ense_ar a los ni_os que el electrodom6stico y
los utensilios que estSn en 61o sobre 61pueden estar
calientes. Deje enfriar los utensilios calientes en un lugar
seguro, fuera del alcance de los ni_os peque_os. Se les
debe ense_ar a los ni_os que un electrodom6stico no es un
juguete. No se debe permitir que los ni_os jueguen con los
controles u otras piezas de la estufa.
Generalidades
desconecte la corriente el6ctrica hacia la estufa antes de sacar
el foco para evitar choque el6ctrico.
No use la cubierta o el homo como una _rea para almacenar
alimentos o utensilios de cocina.
Seguridad Para Cocinar
Siempre coloque un utensilio en un quemador superior antes
de encendeflo. AsegQresede usar la perilla correcta que
controla cada quemador superior. Asegt_resede encender el
quemador correcto y comprobar de queen efecto el
quemador haya sido encendido. Cuando haya terminado de
cocinar, apague el quemador antes de retirar el utensilio para
evitar exposici6n a la llama del quemador.
Siempre ajuste la llama del quemador superior de modo que
no se extienda m_s all_ del borde inferior del utensilio. Una
llama excesiva es peiigrosa, desperdicia energfa y puede
daffar la estufa, el utensilio o los armarios que est_n sobre la
estufa.
NUNCA deje sin supervisi6n la cubierta de la estufa cuando
est6 cocinando, especialmente cuando usa un ajuste de calor
alto o cuando est6 usando una freidora. Los reboses pueden
producir humo y los derrames de grasa pueden inflamarse.
Limpie los derrames grasosos tan pronto como sea posible.
No use calor alto durante perfodos de cocci6n prolongados.
NUNCA caliente un envase cerrado en el quemador superior
o en el horno. La acumulaci6n de presi6n puede hacer
explotar el envase causando una lesi6n personal grave o daffo
a la estufa.
El respiradero del homo se encuentra en la base del panel de
control.
Evite tocar el _rea del respiradero del homo cuando el homo
est6 encendido y durante vafios minutos despu6s de que el
homo haya sido apagado. Algunas piezas del respiradero y
del _rea circundante se calientan Iosuficiente como para
causar quemaduras. Despu6s de que el homo haya sido
apagado, no toque el respiradero ni las _reas circundantes
hasta que elias hayan tenido tiempo suficiente para enfriarse.
Otras superficies potencialmente calientes incluyen la cubierta
de la estufa, las _reas dirigidas hacia la cubierta de la estufa,
el respiradero del homo, la superficie cerca de la abertura del
respiradero, la puerta del homo y la _rea akededor de la
puerta y la ventana del homo.
No toque un foco caliente del homo con un paso ht_medo
pues el foco se puede quebrar. Sise quiebra el foco,
Usetomaollas secos y gruesos. Los tomaollas ht_medos
pueden causar quemaduras a causa del vapor. Las toallas u
otros sustitutos no deben set usados como tomaollas porque
eilos pueden quedar colgando a trav6s de los quemadores
superiores y encenderse o enredarse en las piezas de la
estufa.
Siempre deje enfriar la grasa caliente que se ha usado en la
freidora antes de intentar mover o manipulafla.
No permita que se acumule grasa u otros materiales
inflamables en la estufa o cerca de ella, en [acampana o en el
ventilador aspirador. Limpie la campana extractora con
frecuencia para evitar que la grasa u otros materiales
inflamables se acumulen en la campana o en el filtro.
Encienda el ventilador cuando cocine alimentos flameados
debajo la campana.
NUNCA use vestimentas de materiales inflamables, ropa
suelta o de mangas largas cuando est6 cocinando. La
vestimenta se puede encender o enganchar en los mangos de
los utensilios.
61
Page 63

Siemprecoloquelasparrillasdelhornoenlaposici6ndeseada
cuandoelhomoestefifo. Deslicelaparrilladelhomohacia
afueraparaagregaroretiraralimento,usandotomaollassecos
yresistentes.Siempreevitealcanzardentrodelhomopara
agregaroretiraralimentos.Siunaparrilladebesetsacada
cuandoest,1todavfacaliente,useuntomaollasseco.Siempre
apagueelhomodespuesdehaberterminadodecocinar.
Uselasparrillassolamenteenelhomoenquefueron
enviadas/compradas.
Tengacuidadocuandoabralapuertadelhomo.Dejeque
escapeelaimoelvaporcalienteantesdesacarovolver
colocarelalimento.
ADVERTENCIA SOBRE LOS ALIMENTOS PREPARADO$:
Siga las instrucciones del fabricante de los alimentos. Si un
envase de pl_stico de alimento congelado y/o su tapa se
deforma, se comba o se dafia de alguna otra manera durante
la coccidn, descarte inmediatamente el alimento y su envase.
Elalimento puede estar contaminado.
NUNCA use papel de aluminio para cubrir una parrilla del
homo o la parte inferior del homo. El uso incorrecto puede
resultar en un fiesgo de choque electrico, incendio o dafio al
electrodomestico. Use papel de aluminio solamente como se
indica en esta gu[a.
Utensilios Apropiados
Use sartenes con fondos pianos y mangos que sean f_icilesde
tomar y que permanezcan frios. Evite usar sartenes u ollas
inestables, combadas que se pueden volcar f_cilmente u ollas
cuyos mangos est6n sueltos. Adem_is evite usar utensilios
especialmente pequefios o sartenes con mangos pesados
pues ellos pueden ser inestables y volcarse f_cilmente. Los
utensilios que son pesados de mover cuando est_n Ilenos con
alimento pueden tambi_n ser un peligro.
AsegQrese de que el utensilio sea Io suficientemente grande
como para contener en forma debida los alimentos y evitar
derrames. El tamafio es particularmente importante cuando
se utilizan freidoras. AsegQrese de que el utensilio tiene
capacidad para el vohmen de alimentos que seva a agregar
al igual que para la formaci6n de burbujas de la grasa.
Para reducir a un minimo las quemaduras y que los matefiales
inflamables y los derrames se enciendan debidos a contacto
no intencional con el utensilio, los mangos no deben
extenderse sobre el quemador superior adyacente. Siempre
gire los mangos de los utensilios hacia el lado o hacia la parte
trasera de la estufa, no hacia la habitaci6n donde puede ser
f_icilmente golpeados o alcanzados pot los nifios pequefios.
Nunca deje que un utensilio hierva hasta quedar seco pues
esto puede dafiar el utensilio y la estufa.
Siga las instrucciones del fabricante cuando use bolsas para
cocinar en el homo.
Solamente ciertos tipos de utensilios de vidrio cer_imico, de
cer_imica o glaseados son convenientes para uso en la
cubierta de la estufa o en el homo sin quebrarse debido al
cambio repentino de temperatura. Siga las instrucciones del
fabricante cuando use utensilios de vidrio.
Esteelectrodomestico ha sido probado respecto asu
rendimiento seguro usando utensilios de cocina
convencionales. No use ning_n dispositivo o accesorio que no
haya sido especfficamente recomendado en esta gufa. No use
tapas para cubrir los quemadores supefiores, rejillas para la
cubierta de la estufa ni agregue sistemas de convecci6n para
hornos. El uso de dispositivos o accesorios que no son
expresamente recomendados en esta gufa, puede crear serios
peligros de seguridad, resultar en problemas de rendimiento y
reducir la vida t]til de los componentes de la estufa.
Seguridad de la Limpieza
Apague todos los controles y espere que se enfrfen las piezas
de la estufa antes de tocaflas o limpiaflas. No toque las
rejillas de los quemadores o las _ireas circundantes hasta que
elias no hayan tenido tiempo suficiente de enfriarse.
Limpie la estufa con cuidado. Tenga cuidado para evitar
quemaduras de vapor si se usa una esponja o un patio mojado
para limpiar los derrames en una superficie caliente. Algunos
limpiadores pueden producir vapores nocivos cuando se
aplican a una superficie caliente.
Homo Autolimpiaflte
(modelos selectos)
Limpie solamente las piezas que se indican en esta gufa. No
limpie la junta de la puerta. La junta es esencial para un
sellado hermetico. No restriegue, dafie, ni mueva la junta de
la puerta. No use limpiadores de homo de ninguna clase en el
homo ni alrededor de cualquier parte del homo autolimpiante.
62
Page 64

Impomntes Segurlded
Esnormal que la cubierta de la estufa se caliente durante el
ciclo de autolimpieza. Por Io tanto, se debe evitar tocar la
cubierta durante un ciclo de autolimpieza.
Aviso y Advertencia
Irnportante Sobre Seguridad
La Propuesta 65 de la Ley de 1986 del Estado de California
Sobre Seguridad y Contaminaci6n del Agua Potable (California
Safe Drinking Water and Toxic Enforcement Act of 1986) exige
que el Gobernador de California publique una lista de las
sustancias que seg_n el estado de California causan c_ncer o
da_o al sistema reproductivo y exige que las empresas
adviertan a sus clientes sobre la exposici6n potencial a tales
sustancias.
Se advierte a los usuarios de esta estufa que la combusti6n
del gas puede resultar en exposici6n de bajo nivel a algunas
de las sustancias publicadas en la lista, incluyendo benceno,
formaldehfdo y hollfn, debido principalmente a la combusti6n
incompleta del gas natural o de los combustibles de petr61eo
licuado. Los quemadores ajustados en forma debida
reducir_n la combusti6n incompleta. La exposici6n a estas
sustancias puede tambi6n ser reducida a un mfnimo
ventilando los quemadores al exterior en forma adecuada.
Se advierte a los usuarios de este electrodom6stico que
cuando el homo est_ funcionando en el ciclo de autolimpieza,
puede haber exposici6n de bajo nivel a algunas de las
sustancias indicadas en la lista, incluyendo mon6xido de
carbono. La exposici6n a estas sustancias puede ser reducida
a un mfnimo ventilando el homo al exterior en forma
adecuada, abriendo las ventanas y/o la puerta en la habitaci6n
en donde est_ ubicado el electrodom6stico durante el ciclo de
autolimpieza.
AVISO IIVlPORTANTE RESPECTO A LOS PAJAROS
DOIVlESTICOS:
Nunca mantenga los p_jaros en la cocina o en las
habitaciones donde puedan Ilegar los humos de la cocina. Los
p_jaros tienen un sistema respiratorio muy sensitivo. Los
humos producidos durante el ciclo de autolimpieza del homo
pueden ser perjudiciales o mortales para los p_jaros. Los
humos que despide el aceite de cocina recalentado, la grasa,
margarina y los utensilios antiadherentes recalentados pueden
tambi6n ser perjudiciales.
Conserve estas Instrucciones para Referencia Futura
63
Page 65

CoclnandoenluEstafa
'Low' (Bajo):Seusapara calentaralimentosa
fuegolento,mantenerlosalimentoscalientesy
derretirchocolateomantequilla. Sepuede
cocinarenelajuste'Low' siempreque el
utensilioestc!tapado.
Controles Superiores
'High' (Alto): Seusa parahacerhervirun
liquidoo alcanzarla presi0nadecuadaenuna
olin apresiOn.Siemprereduzcael ajusteaun
calor m_sbajocuandolos Ifquidoscomiencena
herviro cuandolosalimentoscomiencena
cocinarse.
'Med' [Median0):Seusauna llamade tama_o
intermedioparacontinuarcocinando. El
alimentonosecocinar_im_isr@idocuandose
usaun ajustede llamam_salto queelnecesario
paramantenerun hervorsuave. Elaguahiervea
la mismatemperaturasi est_hirviendosuaveo
vigorosamente.
Encendido Sin Piloto
(modelos selectos)
El encendidosin piloto elimina la
necesidaddeunaluz piloto
constante.Existendos encendedores
para los quemadoressuperiores ................._NCENDEDOR
tradicionales.Cadauno de losquemadores
selladossuperiorestiene un encendedorde chispa. Tengacuidado
cuando limpiealrededorde los quemadoressuperiores. Siel paso
de limpiezase enredaraen el encendedorpuededa_arlo e impedir
su igniciOn.
Si unquemadorsuperiorno enciende,verifique si el encendedor
est,1roto,sucio o mojado. Si est_obstruido,limpieel orificio
peque_odebajodelencendedorusandoun alfiler derecho.
Encendido por Piloto
(modelos selectos)
Cuandola estufase instalapor primeravez,puedeque seadificil
encenderlos pilotosdebidoal aireque hayen latuberfadel gas.
Paradrenarelairede la tuber[a,coloqueun f6sforoencendidocerca
del quemadory gire la perillaa la posici6n"ON" [Encendido).
Cuandoel quemadorseencienda,gire la perilla alaposici6n"OFF"y
procedacomoseindicaa continuaci6n.
Para encender el piloto:
Levantela cubiertaycoloqueun
f0sforoencendidocercadelos
orificiosdel piloto (VerilustraciOn). \
Haydosorificiosdepilotos, unoen
el ladoderechoy otro enel lado
izquierdo.
Quemador de
Gas Traditional
Perillas de Control de los
Elementos Superiores
Seutilizanparaencenderlosquemadoressuperiores. Sedisponede
una selecciOninfinitade ajustesde calor desde'Low' a 'High' (Bajo
aAlto). Enel ajuste'High' sepuedesentir untope o una muesca.
Lasperillaspuedensetajustadasexactamenteen losajustes
correspondienteso entrecualquieradeellos.
Lasilustracionescercade laperilla identificancuales el
O O quemadorquecontrolaesaperilla. Potejemplo,la
O O ilustraci6na izquierdamuestrala ubicaci6ndelquemador
Programaci6n de los Controles:
Eltama_oyel tipo de utensilioafectar_inelajustedecalor.
1. Coloqueun utensiliosobrela rejilladel quemador.
2. Optimay gire la perillaa la izquierdaal ajuste'[.ite' (Encendido).
3. Despu_squeelquemadorseha encendido,gire la perillaal
delanteroizquierdo.
, Lallama delquemadorpuedelevantarseo parecerseparada
del orificiosi nosecoloca un utensilioenla rejilla.
, Seoir_ un chasquido(chispa)y el quemadorse encender&
(Loscuatro quemadoresproducir_nchispacuandosecoloca
la perilladecualquierade losquemadoresen la posici0n
'[ite'.)
tama_odellamadeseado.
, Elencendedorcontinuar_iproduciendochispashastaque la
perillaseagirada m_sall_de laposici0n'Lite'.
64
Page 66

Coclnandoenlu[stafa
Funcionamiento durante una
Interrupci6n de la Energ[a
El ctrica
1. Acerqueun fOsforoencendidoa la cabezadel quemador
superiordeseado.
2. Oprimay gire la perilladecontrollentamentea la posiciOn'Life'.
3. Cuandolallamaesencendidoajustealniveldeseado.
Cubierta
Para evitar que la cubierta se descolore o se manche:
• Limpielacubiertade la estufadespuc!sdecadauso.
• Limpie losderrames_icidoso azucaradostanpronto comola
cubiertasehayaenfriadopuesestos derramespuedendescolorar
la porcelana.
Quemadores Sellados
Losquemadoresselladosde suestufa est_naseguradosa la
cubiertay no hartsido disefiadosparasersacados. Debidoaque
losquemadoresest_nselladosen la cubierta,los derrameso
rebosesno seescurrir_indebajode la cubiertadelaestufa.
Sinembargo,losquemadorespuedenset limpiadosdespu6sde
._.I instruccionessobrelalimpieza.)
A diferenciade unaestufacon quemadoresde
gasest;indar,estacubierta nose levantani
_ _adauso. (Veren la p_gina80las
Quemadores Tradicionales
Lasestufasautoestablesconquemadorestradicionalesest_n
equipadascon unacubiertaque puedeser levantada.
Para levantar la cubierta:
Cuandoest_fria,sujeteel bordedelanterode la
cubiertay lev_intelocuidadosamentehastaque
lasdos varillasdesoporte,si lastiene,situadas
en elfrentede la cubiertaentrenen su lugarconun chasquido.
Para bajar:
Sujeteel bordedelanterode la cubiertay cuidadosamentelev_intelo
haciaatr_sencadavarilla desoporte,si lastiene,para desengan-
charlas. Luegobajecon cuidadolacubierta haciasu lugar. Las
varillasde soportesedeslizar_nhaciadentro delmarcodela cubierta.
tampocoes removible.No intentelevantar
la cubiertaper ning_nmotive.
Quemador de Alto Rendimiento
(modelos selectos) (12.000 BTU)*
Existeunquemadordealto rendimientoensuestufa,situadoen la
posici6nderechadelantera. Estoquemadorofrececocci6n m_is
r_piday puedeset usadoparahervir aguacon rapidezo paracocinar
grandescantidadesde alimento.
Quemador para Cocinar a
Fuego Lento (modelosselectos)
Estequemadorse encuentraen laposici6nizquierdatrasera. El
quemadorparacocinara fuegolento ofreceunallamademenor
intensidad(BTU*inferio0paracalentarsalsasdelicadaso derretir
chocolate.
*Elr4gimennominaldeBTUvariardcuandoseusagaslicuado.
Rejillas de los
Quemadores
Lasrejillasdebenestardebidamentecolocadasantesde _._u_
comenzaracocinar. LainstalaciOnincorrectade las ///_
rejillaspuederesultarenpicadurasde lacubierta. ==_=_=
No use losquemadoressin tenet un utensilieen la parrilla. El
acabade de porcelanade lasparrillas puedepicarse si no existe
an atensilie qae absorba eLealorde la llama del quemador.
Aunquelasparrillasdelosquemadoressondurables,gradualmente
perder_insu brillo y/o sedescolorar_in,debido alasaltastemperaturas
de lallamadel gas.
NOtaS:
• Un quemadorajustadode maneracorrectaconorificioslimpios
seencender_dentrode unospocossegundos. Siest_usando
gasnaturallallamaser_azulcon un conointeriorazulprofundo.
Sila llamadel quemadoresamarillao esruidosa,lamezclade
aire/gaspuedesetincorrecta. P6ngaseen contactocon un
t(!cnicodeserviciopara ajustarla. [Losajustesnoest_incubiertos
pot la garant[a.)
Congas licuadoson aceptablesalgunaspuntasamarillasen la
llama. Estoesnormal yno esnecesariohacerningOnajuste.
, Conalgunostipos de gas,ustedpuedeo[run "chasquido"
cuandoel quemadorsuperiorseapaga. Esteesun sonido
normaldelfuncionamientodelquemador.
, Sila perilla decontrolsegira muyr_pidamentede 'High' a 'Low',
la llamapuedeapagarse,particularmentesi el quemadorest_frio.
Siestoocurre,girela perilla a la posici6n'OFF' (Apagado),
esperealgunossegundosyvuelvaencenderelquemador.
• La llamadebeserajustadade modoque no seextiendam_sall_
del bordedelutensilio.
65
Page 67

CoclnaMoenel Homo
Controles del Homo de Limpieza Manual
(modelos selectos) A B
¸¸¸¸.¸¸¸¸¸¸¸¸¸¸¸¸¸¸"¸¸¸=¸¸¸¸¸¸%¸¸¸
BAKE
BROIL
TIMER CLOCK CANCEL .....
C D E F
NOTA:Elindicadorvisualdespliega12:00cuandoseconectael electrodom6sticopor prirneravezo si seinterrumpeelsuministroel6ctrico.
Lasluces indicadoras'Bake'y 'Broil' sedespliegancuandoseactiva lafunci6ncorrespondiente.
'BAKE'(Hornear)
'BROIL'[Asar)
'TIMER'0-emporizador)
'CLOCK'[Reloj)
'CANCEL'[Cancela0
Seusaparahornearyasar.
Seusaparaasaralaparrillaydorarlos
alimentos.
Programael temporizador.
Seusaparaprogramarla horadeldia.
Cancelatodaslasfuncionesaexcepci6n
deltemporizadory delreloj.
Seusanparaseleccionaro cambiarel
tiempoylatemperaturadelhomo.
Seleccionalosajustesdeasado'HI'[Alto)
o 'LO'(Bajo).
Usa de las Teclas
•Oprima latecla deseada.
• Oprima lateclaA (M_s)oV (Menos)paraseleccionareltiempoo
la temperatura.
• Seescuchar_unasepalsonoracadavezque oprimaunatecla.No
seescuchar_unasepalsonoracuandose oprimanlasteclasA o
Y.
• Seescuchar_ndosse_alessonorassiocurreun erroren la
programaciOn.
Nora: Cuatrosegundosdespu6sdeoprimir latecla A o V, el
tiempoo latemperaturaque sedespliegaseprogramar_
autom_ticamente.Sitranscurrenm_sde 30segundosdespu6sde
haberoprimidounatecla de funci6nyla teclaA o V, la funci6n
ser_canceladay el indicadorvisualvolver_al despliegueanterior•
Programaci6n del Reloj CLOCK
1 Oprimalatecla 'CLOCK'.
, Lahora del relojnosepuedeprogramarsi elcontrol hasido
programadoparahornearo asaro parausareltemporizador.
Programelahoracorrectadeldfa usandolasteclasA o V. Si la
tecla A o V noseoprimeen 30segundos,laprogramaciOndel
relojser_cancelada.Oprimalatecla 'CLOCK'paracomenzarde
nuevo.
Programaci6n del Temporizador
Eltemporizadorpuedeserprogramaticde unminuto(:01)hasta99
horasy 59minutos[99:59).Eltiemposedesplegar_ien minutosy no
en segundos.EL TEMPORIZADORNO CONTROLAELttORNO.
1. Oprimalatecla 'TIMER'. .......
• Enel indicadorvisualdesplegard0:00y losdos TIMER
puntos(:]destellardnenel indicadorvisual• .........
2. Oprimalatecla A o V hastaque sedespliegueeltiempo
deseado.
• Eltemporizadorcomenzar_a funcionar cuandoseprogrameel
tiempo.
, Losdospuntosdestellantesindicanque un conteodel
temporizadorest_enprogreso.(Losdospuntosno destellansi
el indicadorvisualmuestralahoradel d[ao latemperaturadel
homo.)
, AI final del tiempoprogramado,seescuchar_ndosse_ales
sonoras.Elindicadorvisualdesplegar_"0:00".
° Si as[Iodesea,oprimala tecla 'CLOCK'duranteel
funcionamientodel temporizadorparadesplegarbrevemente
la horadeldfa.
• Si as[Iodesea,oprimala tecla 'BAKE'o 'BROIL'duranteel
funcionamientodel temporizadorparadesplegarbrevemente
el ajusteactualdetemperatura.
Para cancelar el temporizador:
Oprimaymantengaoprimidalatecla 'TIMER'durantevariossegundos.
66
Page 68

¢o¢inandoenelHomo
Horneado, Asado y Asado
a la Parrilla
Ajuste de los Controles para Horneado y
Asado:
1. Optimalatecla'BAKE'. BAKE
, '000'se desplegar4y la luzindicadora'BAKE' ........
destellar_enel indicadorvisual.
, Sioprimelatecla 'BAKE'y no programalatemperaturaen30
segundos,elprogramasecancelar4autom_ticamenteyla
heradeld[asedesplegar_nuevamenteen el indicadorvisual.
2. OprimalateclaA (M_s)o V [Menos)hastaque latemperatura
deseadasedespliegueenelindicadorvisual.
, Latemperaturadelhomo puedeserprogramadade75°a
285° C(170°a 550° F).
, '175°, (350°)sedesplegar_cuandooprima lateclaA o V per
primeravez.
° OprimalateclaA o V repetidamenteparacambiarla
temperaturaenincrementosde3°C [5°F],uoprimalay
mant6ngalaoprimidaparacambiarlatemperaturaen
incrementosde6°C [10°F].
, Enel indicadorvisualse desplegar438° (100°)o latemperatura
realdel homosi esqueessuperiora38° C (100° F)cuandose
enciendeelhomo.
° Latemperaturaaumentar_en incrementosde 3° C (5° F)hasta
Ilegara latemperaturaprogramada.Cuandoelhomosehaya
precalentado,se escuchar_iunasepalsonora.
, Esperea queelhomo seprecalientedurante 10-15minutes.
° Paraverificarlatemperaturaprogramadaduranteel precalenta-
mientodelhomo,oprimalatecla 'BAKE'.Latemperaturase
desplegar_idurantetressegundos.
=Para cambiarla temperatara del homo duranteel preceso
de cecci6n,optimalatecla 'Bake',luegooptima A o V hasta
quesedesplieguelatemperaturadeseada.
• Para cambiar Jatemperatura deJhome durante'Preheat',
oprimades veceslatecla 'Bake',luegooprimaA o V hasta
quesedesplieguelatemperaturadeseada.
3,
Coloqueelalimentoel en homo.Verifiqueelprogresodela
cocci6ncuandohayatranscurridoeltiempominimorecomendado.
4.
AIt6rminode lacocci6n,optimalatecla'Cancel'paraapagarel
homoy retireel alimentodel homo.
• Elhomocuentacon unafunci6ndeapagadoautom4tico.Si
sedejaencendidodurante12horas,elhomo seapagar_i
autom_ticamentey elindicadorvisualdesplegar_'000'.Oprimala
tecla'CANCEL'yla heradeldfase desplegar4nuevamenteenel
indicadorvisual.
Ajuste de los Controles para Asar a ia Parrilla:
(compartimiento inferior - modelos selectos)
Paraobtenermejoresresultados,useun utensiliodise_ado
especialmenteparaasara la parrilla.
1. Coloquela asaderaen laposici6ndelcompartimientorecomendado
paraasara laparrillaquesemuestraenlatablasiguiente.
2. Oprimalatecla'BROIL'. ....... ,
• 'SEt'se desplegaray la
luzindicadora'BROIL'
destellar_en el indicadorvisual.
3. OprimalateclaA paraprogramarelasadoen el
ajuste'HI' (alto)oV paraelajuste'LO'[bajo).
• Seleccioneelajuste'HI' [alto)paraasadoa laparrillanormal.
• Seleccioneelajuste'LO' (bajo)paraasadoa laparrillaabajas
temperaturasparaevitarel doradoexcesivoen alimentosque
requierenmayorestiemposdecocci6ntalescomela camede
ave. Cent.
Tabla para Asar a la Parrilla -
Compartimento inferior
Came de Res Bistecs,2,5 cm [1") de grossor Medio Centre 14- 20 rain.
Hamburguesas,2 em [3/4") Bien heeho Centre 14- 19 rain.
de grossor
Cerde Rebanadasde Jamb6n, preeoeidas, Tibio Centre 8- 12 min.
Ave Polio en Presas Bien heeho Inferior
Pescado Desmenuzado Centro
Superioreslaposici6nm_isalta,Centreesla posici6nm4sbaja; Fondoesel fondodelcompartimientodelasador(sacarlaparrilla).
**Lostiemposdecocci6nsonaproximadosy puedenvariardependiendodelacame.
1,3em [1/2")de grossor
Chuletas,2,5 em[1") de grossor Bien heeho Centre
Filetes,1,3cm [V2") degrossor
Bistecs,2,5 cm [1") de grossor
Bien hecho Centre 16- 24 rain.
18 - 25 rain.
[LOBroil232°C(450°F)
30-45rain.
8- 12min.
Desmenuzado Centre
10- 15rain.
67
Page 69

CoclnaMoenelHorno
, Sino seleccionaun ajustedeAsado['HI'o 'LO')en30segundos,
el programasecancelar_autom_iticamenteyla horadeldfase
desplegar_inuevamenteenel indicadorvisual.
4. Sigalostiempossugeridosen latablaparaasarala parrillaquese
incluyeacontinuaci6n.Lacamedebedarsevueltaunavezcuando
est,1amitaddeltiempodecocciOn.
5. Cuandoterminedeasara la parrilla,oprimalatecla
'CANCEL'paraapagarel homoy retireel utensilio
del homo.Lahoradel dfavolver_a desplegarseen
el indicadorvisual.
PerUla del Homo de Limpieza
NlarluaJ (modelos selectos)
Perilla de la Temperatura
del Homo
Laperilla 'OvenTemp'0-emperaturadel
Homo)seusaparaseleccionary mantenerla
temperaturadel homo.Siempregireesta
perillajusto HASTAlatemperaturadeseada.
Nogire a unatemperaturam_saltayluego
retroceda.
Ajuste del Homo para Horneado y asado:
1. Oprimaygire laperilla'OvenTemp'a la temperaturadeseada.
Espere10a 15minutesparael precalentamiento.
2. Coloqueelalimentoenel centro del homo.Verifiquesi el
alimentosecocin6 en eltiempom[nimoindicadopara la receta.
Cocinepor m_istiemposi esnecesario.
3. Saqueel alimentodel homoy girelaperilla'OvenTemp'a la
posici0n"OFF".
Ajuste de los Controles para Asado a la
Parrilla 0nodelos selectos):
1. Paraobtenermejoresresultados,useun utensiliodise_ado
especialmentepara asara la parrilla.Coloquela asaderaenla
posici0nde laparrillarecomendado.[Verla tablaen p_gina67.)
2. Girela perilla'OvenTemp'a 'Broil' paraasadoa la parrillaa
temperaturasm_isbajas,a 232° C [450° F).
• Elasadoa laparrillaatemperaturasm_sbajasevitaeldorado
excesivode losalimentosquesecocinanpot m_stiempo,
tales comolascarnesde ave.
3. Sigalostiempossugeridosen latablaen p%ina 67 paraasara la
parrillaqueseincluyea continuaciOn.La camedebedarsevuelta
una vezcuandoest_a mitaddel tiempodecocciOn.
4. Verifiqueelt6rmino de cocciOnhaciendoun corteenlacame
cercadel centroparaverificar elcolor.
5. Despuc!sdeasara la parrilla,coloque laperilla'OvenTemp'en la
posiciOn"Off". Saquela asaderadelhomo.
Encendido Sin Piloto
(modelos selectos)
Suestufaest,1equipadacon un encendidosin piloto. Conestetipo
de sistemadeencendido,elgasseapagaautom_ticamentey el
heine no eperar_ duranteuna interrupci6n dela cerriente
el_ctrica.
Unf6sforoencendidono encender_elquemadordelhomo. Nose
debeintentarencenderel homodurantelainterrupci6nde la
corrienteel_ctrica.
Encendido per Piloto
(modelos selectos)
Enciendaelquemadortraseroantesdeencenderel piloto del homo.
Estoremover_el airedel sistemadesuministrode gasy ayudar_ia
encenderla llamapiloto.Sino serealizaestepaso,el tiempode
encendidopuedeserm_islargode Ioesperado.
Para encender el piloto del homo:
Cuandoel homoest6if[o, abra lapuertadel asadory retirela parrilla
del asadory la asadera.
Enla posici0n'OFF'[APAGADO),optimay mantenga
oprimidala perilla'Oven Temp' (Temperaturadel
Homo)ysostengaunacerillaencendidasobre el
pilotoque seencuentraen la partetraseradel
quemadordel homo(verilustraciOn).Una
vezqueseenciendael piloto,sueltela
perilla'Oven Temp' ywJelvaa colocar la
rejilladel asadoryla bandeja. (NOTA:El
quemadordel homo se muestrasin tener
instaladoel difusordellama metdlico.)
68
Page 70

¢odnandoend Homo
Controles del Homo Autolimpiante (modelos selectos)
A B C D
I
TIMER
BAKE
¸¸¸¸%¸¸¸¸¸¸¸¸:;;¸¸¸¸¸¸¸;;¸¸¸//¸ ¸%¸¸:;¸¸¸¸¸¸¸¸¸¸¸¸¸¸¸¸¢¸¸¸¢¸¸¸¸¸¸
COO[(& [(EEP
HOLD CLEAN DELAY CLOCK WARM
E F G H I
Elpaneldecontrolhasido disehadoparasu f_icilprogramaci6n.Elindicadorvisualenel panelde control muestrala hora del d[a,el
temporizadory lasfunciones delhomo.Elpanelde control mostradoarribainchye lascaracter[sticasespecfficasdel modelo. (Elestilo del
paneldecontrolvar[asegOnel modelo.)
'BROIL'[Asara
laParrilla)
iiiiBiiiiiii;!!
'BAKE'(HorneaO
iiiiCi_iii;
,_,(M_s)o
V (Menos)
'TIMER'(Temporizado0
'COOK& HOLD'
(CocciOnyMantener
Caliente)
'CLEAN'(Limpieza)
'DELAY'(Diferido]
'CLOCK'(Reloj)
!i];!,!iiiiiiiiiiii
'KEEPWARM'
[MantenerCaliente)
'CANCEL'(Cancelar)
!!i!ii!ii!ii!ii!ii!ii!i!!!!_!i!iiiiiii_iiill
Usa de las Teclas
•Oprima latecla deseada.
• OptimaA o Y paraprogramareltiempo o latemperatura.
• Seescuchar_unasepalsonoracadavezque oprimaunatecla.
• Seescuchar_ndosse_alessonorassiocurreun errorenla
programaciOn.
Seusaparaasara laparrillaydorarlos
alimentos.
Seusaparahornearyasar.
Programaocambialahora,la
temperaturadelhomo.Programaasara
laparrilla'HI'o'LO'.
Programaaltemporizador.
Seusaparahornearduranteuntiempo
seleccionado,hegomantieneelalimento
calienteduranteunahora.
Seusaparaprogramarunciclode
autolimpieza.
Programaelhomoparacomenzara
hornearo limpiarsea unahoraposterior.
Seusaparaprogramarlahoradeldfa.
Seusaparamantenercalienteenel
homoelalimentococinado.
CancelatodaslasfuncionesaexcepciOn
deltemporizadoryelreloj.
Nora" Cuatrosegundosdespu6sde haberoprimidolatecla A o
V, se programardautom_ticamenteeltiempoo latemperatura.
Si transcurrenm_sde30 segundosdespu_sdehaberoprimido
unatecladefunciOny antesdeoprimir lateclaA o V, la
funciOnser_canceladayelindicadorvisualvolveraaldespliegue
anterior.
'Clock' (Reioj:
El relojpuedeserajustadoparadesplegarla horayaseaenformato
de 12horaso 24 horas.Elrelojhasido programadoenla f_ibrica
parael formatode 12horas.
Para cambiar el reloj a formato de 24 betas:
1. Oprimay mantengaoprimidaslasteclas .......
'CANCEL'y 'DELAY'durantetres
segundos.
2. Oprima A o V paraseleccionarel
formatode 12horaso24 horas.
3. Programela horadeldia siguiendolas
instruccionesindicadasabajo.
ProgramaciOn del Reloj: ..................................
1. Oprimalatecla'CLOCK'. ................................
• Lahora del dfay dospuntosdestellanenel
indicador. .................................
2. OprimaA o V para programarla horadel dfa.
° Losdos puntoscontin@n destellando.
3. Optimala tecla'CLOCK'nuevamenteo espere
cuatrosegundos, cent.
-- DELAY
CLOCK
V
69
Page 71

¢oclnandoenelHorno
Cuandose conectaenergfael6ctricaal homoo despuc!sdeuna
interrupciOnde la energ[ael6ctrica,la t31timahoradel reloj previaa
la interrupciOndestellar_ien el indicador.
Paradesplegarla horadel d[acuandoelindicadorest6 mostrando
otrafunciOndetiempo,oprimalatecla 'CLOCK'.
La horadelreloj no puedesercambiadacuandoel homoha sido
programaticpara'DELAYCOOK','CLEAN'o 'COOK&HOLD'.
Para cancelar el despliegue del reloj:
Si nodeseaque el indicadorvisualmuestrelahora del d[a:
Optimay mantengaoprimidalasteclas'CAN-
CEL'y 'CLOCK'durantetressegundos.Lahora
del d[adesaparecer_en el indicador.
Cuandose cancelaeldesplieguedel reloj,
optima latecla'CLOCK'paradesplegar -- CkOCK
brevementelahoradel alia
Para restaurar el despliegue del reloj:
Oprimay mantengaoprimidalasteclas'CANCEL'y 'CLOCK'durante
tres segundos.Lahoradel d[areaparecer_enelindicador.
'Timer' (Tempodzador)
Eltemporizadorpuedeserprogramadode un minuto(00:01)hasta
99 horasy59minutos (99:59).
Eltemporizadorpuedeserusadoindependientementedecualquier
otraactividadde[homo.Adem_ispuedeser programadocuando otra
funci6n delhornoest6en funcionamiento.
Eltemporizadornocontrolael homo.Solamentecontrolauna sepal
sonora.
Para programar el temporizador:
1. Oprimalatecla'TIMER'0-emporizador).....................................
. '0:00'destellaen el indicadorvisual. TIMER
, Losdospuntosdestellar_n. .............................
2. Optimalatecla A o V hastaqueeltiempo
correctoaparezcaenel indicadorvisual. A
Para cancelar el temporizador:
1. Oprimay mantengaoprimidala tecla'TIMER'durantetres
segundos.
U
2. Optima latecla 'TIMER'ycoloque lahoraa 00:00.
Bloqueo de los Controles
Eltecladopuedesetbloqueadoparaseguridad,limpiezao evitarel
usono autorizado.Nofuncionar_ncuandoestc!nbloqueados.
Siel homoest_en uso,loscontrolespuedenbloquearse.
La horaactualdeldia permanecer_en elindicadorcuandolos
controlesest6nbloqueados.
Para bloquear: ,.....
Optimay mantengaoprimidaslasteclas
'CANCEL'y 'COOK&HOLD'durantetres
segundos. ....
'LOCK'destellaenel indicadorvisual. __ COOK&.
HOLD
Para desbloquear: ...............
Oprimay mantengaoprimidaslasteclas'CANCEL'y 'COOK& HOLD'
durantetres segundos.
'LOCK'desaparecedel indicadorvisual.
C6digos de Errores
'BAKE'o 'LOCK'puedendestellarr_pidamenteparaadvertirleque
hayun error o unproblem&Si'BAKE'o 'LOCK'destellanen el
indicadorvisual,oprimala tecla 'CANCEL'.Si'BAKE'o 'LOCK'
contint3andestellando,desconectelacorrienteel6ctricahaciael
artefacto.Espereunospocosminutosyvuelvaa conectarla
corrienteel6ctrica.SilaspalabrasaOncontinOandestellando,
desconectela corrienteek!ctricahaciael artefactoy Ilamea un
tc!cnicodeservicioautorizado.
, Losdospuntoscontint_andestellando.
3. Optimanuevamentelatecla'TIMER'o esperecuatro .......
segundos.
° Losdos puntoscontint_andestellandoy comienzalacuenta
regresivadel tiempo.
, El01timominutode la cuentaregresivadeltemporizadorse
desplegar_ensegundos.
4. AI final deltiempoprogramatic,se escuchar_iuna sepalsonora
larga.
V
70
Page 72

¢ocinandoene(Homo
'Bake' (Horneado)
Para programar 'Bake':
1. Oprimalatecla'BAKE'. BAKE
• 'BAKE'destellar& .......................................
• '000'destellarden elindicadorvisual. .......................
2. Seleccionelatemperaturadel homo. Latemperatura
del homopuedeserprogramadade 75° a285° C
070°a 550° F).Oprimau oprimay mantenga
oprimidala tecla A o V. ...........................
° Cuandocualquierade estasdosteclasseoprime
por primeravez,'175°, ['350°')se iluminar&
• Optimalatecla A paraaumentarlatemperatura.
• Optimalatecla V paradisminuirla temperatura.
3. Optimalatecla 'BAKE'nuevamenteo esperecuatrosegundos.
, 'BAKE'dejardde destellary seiluminardenelindicadorvisual.
• '100°,o latemperaturaactualdel homose desplegar&La
temperaturase elevarden incrementosde 5° hastaquese
alcancela temperaturaprogramada.
'Cook & Hold' (CocciOn y
'Cook & Hold' le permitehornearduranteunacantidad
determinadadetiempo,seguidodeun ciclo 'KeepWarm'de una
hora.
Para programar 'Cook & Hold':
Notas sobre Horneado:
Paracambiar latemperatara de( homo darante el proceso
decocci6n, optima latecla'Bake',luegooptima A o V hasta
quesedesplieguelatemperaturadeseada.
Paracambiar latemperatura del homo darante 'Preheat',
oprimados veces latecla 'Bake',luegooptima A o V hasta
quesedesplieguelatemperaturadeseada.
Si olvidaapagarel homo, seapagar_autom_iticamentedespu6s
detranscurrir 12horas.Sideseadesactivarestacaracter[stica,
veala p_gina74.
Mantener Caliente)
1.Oprimala tecla'COOK& HOLD'.
• 'BAKE'y 'HOLD'destellan.
• '000' seiluminaenelindicador visual.
COOK&
NOD
4. Espereaqueelhomo seprecalientedurante 8-15minutos.
, Cuandoel homoIlegaa latemperaturaprogramadase
escuchar_unasepal sonoralarga.
, Paraverificarla temperaturaprogramadaduranteel
precalentamientodel homo,optima latecla'BAKE'.
5. Coloqueel alimentoenel centrodel homo, dejandounmfnimode
dospulgadasentreel utensilioy lasparedesdel homo.
6. VerifiqueelprogresodelacocciOncuando hayatranscurridoel
tiempo m(nimorecomendado.Contintiela cocciOnsiesnecesario.
7. AIt6rminode la cocciOn,optima latecla 'Cancel'. ..........
8. Retireel alimentodel homo.
Diferencias del horneado entre st= homo
antiguo y su homo nuevo
Esnormal observaralgunasdiferenciasen eltiempode horneadode
suhomo antiguoy suhomo nuevo.Vea"Ajustede la Temperatura
del Homo"en la p%ina 74.
2.Seleccionelatemperaturadelhomo.Latemperatura
del homopuedeserprogramadade 75°a 285° C 070°
a 550°F).Oprimauoprimay mantengaoprimidala
tecla A o Y.
V
• Oprima lateclaA paraaumentarla
temperatura.
• Optima latecla V paradisminuirlatemperatura.
3.Oprimalatecla'COOK& HOLD'nuevamenteoesperecuatro
segundos.
• 'HOLD'destella.
• '00:00'destellaenel indicadorvisual.
4.Programelacantidaddetiempodurantelacual usteddesea
hornearoprimiendola tecla ,A.o V. Eltiempodehorneado
puedeprogramarsedesde10minutes (00:10)hasta 11horas,
59 minutos[11:59).
• 'BAKE'y 'HOLD'seiluminanenel indicadorvisual.
• Eltiempode horneadose iluminar_en el indicadorvisual.
• Comenzar_la cuentaregresivadeltiempo dehorneado.
71
Page 73

¢oclnandoenelHomo
Cuando haya expirado el tiempo de cocci6n:
• Seescuchar_incuatrose_alessonoras.
• 'BAKE'seapagar&
• 'HOLD'y 'WARM'se iluminar_in.
• Enel indicadorsedesplegar_i'75°,('170°').
Despu_s de nna hera en 'HOLD WARM' (Mantener
Caliente):
• 'End' sedesplegar&
• La heradel d[avolver_a desplegarseen elindicadorvisual.
Para cancelar 'Cook & Hold' en cualquier memento:
Oprimala tecla 'CANCEL'.Retireel alimentodelborne.
'Delay Bake' (Horneado
Diferido)
Cuandousa 'Delay', el homo comienzaacocinarmdstardeen el
dfa.Programelacantidaddetiempo queusteddeseadiferirantes
de queseenciendael homo y cuantotiempodeseacocinarel
alimento.Elhomocomienzaa calentarenlaheraseleccionaday
cocinaduranteel tiernpoespecificado.
Eltiempodiferido puedeprogramarsede 10minutes(00:10)hasta
11horas,59minutes[11:59).
Para programar an ciclo de horneado diferido:
1. Oprimalatecla'DELAY'. .............
• 'DELAY'destella.
• '00:00'destellaenel indicadorvisual.
2. Oprimalatecla A o V paraprogramarel A
tiempo diferido.
Cuando'DELAY'est6todav[adestellando:
3. Oprimalatecla'COOK&HOLD'.
• '000'seilumina enelindicadorvisual. .....
• 'BAKE'y 'HOLDdestellan. HOLD
DELAY
COOK&
4. Optima A paraprogramarla temperaturade horneado.
• 00:00y 'HOLD'destellan.
• 'BAKE'permaneceiluminado.
5. Optima A paraprogramarel tiempode horneado.
• Enel indicadorvisualseiluminan'DELAY','BAKE',y
'HOLD'.
Cuando el tiempo diferido ha expirado:
• 'DELAY'seapagar&
• Sedespliegael tiempoy latemperaturade horneado.
° Sedespliega'BAKE'y 'HOLD'.
Para programar un tiempo diferido cuando ya se ha
programado 'Cook & Hold':
1. Oprimalatecla 'DELAY'.
• 'DELAY'destella. ............................
• '00:00'sedespliegaenelindicadorvisual. .....
2. Oprimalatecla A o V paraprogramarel
tiempo diferido.
• Despu6sde cuatrosegundos, 'DELAY'
permanecer_iluminadopararecordarleque se ........................
haprogramadoun ciclo de horneadodiferido.
DELAY
Cuando ha expirado el tiempo diferido y el homo
comienza a funcionar:
° Sedesplegar_ieltiempoy la temperaturade horneado.
• 'DELAY'seapagar&
° 'BAKE'y'HOLD' permanecer_niluminados.
Para cancelar:
Oprimala tecla 'CANCEL'.
° Todaslasfuncionesde horneadocontroladasono perel
temporizadorser_ncanceladas.
• Laheradelaliavolver_ia desplegarseen el indicadorvisual.
Notas:
• Nouse horneadodiferidopara losartfculosque necesitan
precalentamientodel homo,tal como pasteles,galletasy panes.
° No usehorneadodiferidodiferido si el homoyaest_caliente.
72
Page 74

¢o¢inandoenelnorno
'Keep Warm' (Mantener
Caliente)
Paramantenercalientesenforma seguraalimentoscalienteso para
calentarpanesyplates.
Para programar 'Keep Warm': ..............................
KEEP
I. Optimalatecla'KEEPWARM'. WARM
. 'WARM'destella.
• '000'sedespliegaenel indicadorvisual......................
2. Seleccionelatemperaturade 'KeepWarm'.La A
temperaturapara 'KeepWarm'puedeser pro-
gramadade63°a90° C (145°a 190° F).Oprimau
oprimay mantengaoprimidalatecla A o V. ....................
, Cuandocualquierade estasdosteclasse oprimeper primera
vez,'75°,('170°') seiluminar&
• Optimalatecla A paraaumentarlatemperatura.
• Optimalatecla V paradisminuirla temperatura.
'WARM'y latemperaturasedesplegar_nenel indicadorcuando
el ciclo'KeepWarm'est6active.
Notas sobre 'Keep Warm':
• Paracalidad@tima de losalimentos,losalimentoscocinados
• Paraevitarquelosalimentosse sequen,ct_braloslevemente
° Para caJentarpanecilles:
° Para calentar plates:
en elhomo debensetmantenidoscalientespernom_sde 1a
2 horas.
con papelde aluminioo unatap&
- cubra levementelospanecillosconpapelde aluminioy
col0quelosenel homo.
- optima 'KEEPWARM'y latecla A para programar
75°C [170° F].
- calientedurante 12a 15minutes.
- coloque2 pilasdecuatro platescarlaunaen el homo.
- optima 'KEEPWARM'y latecla A para programar
75°C [170° F].
- caliente losplatesdurantecinco minutes,apagueel homoy
deje losplatesen elhomodurante 15minutesm_s.
- usesolamenteplatesresistentesal homo,verifique conel
fabricante.
Para eanoelar 'Keep Warm':
1. Oprimalatecla'CANCEL'.
2. Retireel alimentodel homo.
- nocoloquelosplatescalientessobreuna superficiefrfa
puesel cambior_ipidode temperaturapuedecausarfisuras
superficiales.
73
Page 75

¢o¢inandoenelnorno
Cierre Autom tico/Nlodo
Sab tico
Elhornoseapagar_autom_ticamentedespu6sde 12horassi ustedIo
dejaaccidentalmenteencendido. Estacaracteristicade seguridad
puedeserdesactivada.
Para cancelar el cierre aurora;trice de 12 heras y
dejar que el home funciene continuamente durante
72 heras:
1. Programeel homol)ara hornear(verl)%ina 71).
2. Oprimay mantengaoprimidalatecla 'CLOCK' CLOCK
durantecinco segundos. ...................
• 'SAb'sedesl)legar_ydestellar_durantecincosegundos.
• 'SAb'sedesplegar_continuamentehastaquese desactiveo
hastaque transcurrael Ifmitede 72betas.
° 'BAKE'tambi_nsedesplegar_siseest,1usandoun ciclo de
horneadocuandoel homo est,1en modesab_tico.
TodaslasotrasfuncionesEXCEPTO'BAKE'['Timer','Keel)Warm',
'Clean',etc.)est_nbloqueadasduranteel Mode Sab_itico.
Para cancelar 'Bake' cuande el Mode Sab_tice
est_ active:
Oprimala tecla 'CANCEL'.
• 'BAKE'seal)agar_ien elindicadorvisual.
° Nose oir_ningunasepalsonora.
Para cancelar el Mode Sab;itice:
1. Ol)rimalatecla'CLOCK'durantecincosegundos. CLOCK
O
2. Desl)uc!sde 72horas,elMode Sab_ticoterminar&
° 'SAb'destellar_durantecincosegundos.
• Lahera deld[a reaparecer_en el indicadorvisual.
Ajuste de la temperatura del
homo
Laexactitudde lastemperaturasdel borneescuidadosamente
probadaenlaf_brica. Esnormal notaralgunadiferenciaentrela
teml)eraturade horneado,entreun homonuevoy un homoantiguo.
Conel correrdel tieml)o,latemperaturadel homo l)uedecambiar.
Ustedl)uedeajustarla temperaturadel homo,si consideraquesu
homo noest_ horneandoo dorandoenforma correct& Paradecidir
cuantodebecambiarlatemperatura,programelateml)eraturadel
homoa 15° C (25° F)m_salta o m_sbajaque lateml)eratura
indicadaen sus recetas,luego hornee. Los resultadosde la
"prueba"l)uedendarleuna ideade cuantoajustarlatemperatura.
Ajuste de la temperatura del homo:
1. Oprimalatecla 'BAKE'. BAKE
2. Programe550°oprimiendolatecla A .......................................
3. Ol)rimay mantengaoprimidala tecla'BAKE'durante
variessegundosohastaque0°aparezcaen el
indicadorvisual.
Si latemperaturadel homo haside l)reviamenteajustada,el
cambioal)arecer_ien el indicadorvisual, l)or ejemplo,si la
teml)eraturadel homoruereducidaen8°C [15°F)el indicador
mostrar_i'- 8°, ('-15°').
4. Oprimalatecla A o V paraajustarlateml)eratura.
Cadavezquese el)rimeuna tecla,latemperaturacambiaen
3° C(5° F). Lateml)eraturadel homo puedeseraumentadao
disminuidaen3°a 20° C[5° a 35° F).
5. Laheradel dfareal)arecer_autom_iticamenteenel indicador
visual.
Nonecesitareajustarlatemperaturadel homosi hayuna fallao
interrupciOnde energ[ael6ctrica. Lasteml)eraturasdeasara la
parrilla y limpiezano l)uedenserajustadas.
Notas Sobre el Mode Sab_tico:
• ElMode Sab_ticol)uedeseractivadoen cualquiermemento,
est6onoel homo encendido.
. ElMode Sab_ticonopuedeser activadosi lasteclasest_n
bloqueadasocuandolapuerta est_bloqueada.
• Siel homo est_horneandocuando elModeSab_iticoes
l)rogramado, 'BAKE'seal)agar_ial final del ciclode horneado.
Nose emitir_nso,ales sonoras.
• CuandocomienzaelMode Sab_tico,noseemitir_ lasepal
sonorade precalentamiento.
° Cuandoel Mode Sab_iticoest_active,todoslosavisos,
mensajesyso,ales sonorasest_ndesactivadas.
° Sioprimela tecla'CANCEL'secancelar_un ciclo 'Bake',sin
embargoel control permanecer_ien ModeSab_itico.
• Sifalla lacorrienteelc!ctrica,cuandovuelvalaenergfael homo
seactivar_enMode Sab_ticocon72 horasrestantesy ningOn
ciclo active.
74
Page 76

¢ocinandoenelnorno
'Broiling' (Asar a la Parrilla)
(modelos selectos)
Para programar 'Broil':
1. Paracomenzar,oprima la tecla'BROIL'.
• 'BROIL'destella.
• 'SET'sedespliegaenel indicador.
2. Oprimalatecla A paraprogramarasara la parrilla'HI' u oprima
la teclaV paraprogramarasar laparrilla'LO'.
• Enel indicadorvisualsedesplegar_'HI' o'LO'.
• Selecciones'HI broil'285°C [550° F)para asadoala parrilla
normal. Seleccione'LObroil' 230°C [450° F)paraasara la
parrillacontemperaturabajaalimentosque debenset
cocinadospot m_stiempo,tal como lacamede ave.
3. Despuc!sde cuatrosegundos,elhomo comenzar_a funcionar.
• 'BROIL'continuar_iluminado.
4. Paraun dorado6ptimo,precalienteel homoa la parrilla durante
2 a3minutos antesdecolocarelalimento.
5. Coloqueelalimentoen el homo. Cierrelapuerta del homo.
6. D6vueltaa lacame unavezaproximadamentea mitadde la
cocci6n.
7. Cuandoelalimentoest6cocinado,oprimalatecla
'CANCEL'.Retireel alimentoy laasaderadelhomo. CANCEL
, Lahoradeldfavolver_ia desplegarseen el
indicadorvisual.
Notas Sobre Asado a la Parrilla:
° Paramejoresresultadoscuandoaseala parrilla,useuna
asaderadisefiadapara asarala parrilla.
• 'Hi' se usapara la mayoriadelos asadosa laparrilla. Use'LO
broil'cuandoasea laparrillaalimentosque necesitancocci6n
prolongada. Latemperaturainferior permite queelalimentose
cocine hastaquedarbienasadosindorarsedemasiado.
• Lostiemposdeasadoa laparrillapuedenser m_slargos
cuandoseseleccionala temperaturam_sbajadeasara la
parrilla.
• Elalimentodebeserdado vueltacuandoest_a mitaddel
tiempo deasar.
Tabla de Asar a la Parrilla dei Homo
Came de Res
Biftec,2,5cm [1")
Hamburguesas,1,9cm [3/4") degrosor
Came de Cerdo
Tocino
Chuletas,2,5cm [1")
JamOn- Rebanadasprecocidas,1,3cm (1/2")de grosor
Came deAve 'LOBroil'
Presasde polio 3 o 4 Bienasado 30 - 45minutos
IVlariscos
Bistecsde pescado,con mantequilla,2,5cm(1")de grosor
Filetesdepescado,1,3cm 0/2") de grosor
Laposici6nde la parrillasuperiores#5.
Nora: Estatabla ess61ounagufa. Lostiempospuedenvariarcon eltipo dealimentoquese est_cocinando.
4
4
4
4
4
4
4
4
A medicasar
Bienasado
Bienasado
Bienasado
Bienasado
Tibio
Desmenuzado
Desmenuzado
15 - 20 minutos
18 - 24 minutos
15 - 18 minutos
8 - 10 minutos
22 - 26 minutos
8 - 12 minutos
10 - 15 minutos
8 - 12 minutos
75
Page 77

CoclnaMoenelHomo
Respiradero del Homo
Cuandoel horno est,1en uso,el _ireacercadel respiraderopuede
calentarseIosuficientecomoparacausarquemaduras.Nunca
bloqueela aberturadel respiradero.
Elrespiraderodel homo se encuentradebajo del respaldo
protectorde su estufa.
RESPIRADERO
Nocoloquepl_sticos
cercadelaabertura
del respiraderopues
el calorque sale
puededeformaro
derretirel pl_istico.
'Oven Light' [Luz del Homo)
(modelos selectos)
Oprimael interruptorde la luzdel homo enel panel
de controlparaencenderyapagarla luzdel homo.
Oven
Light,
Fondo del Homo
Protejaelfondodel homo contraderrames,especialmentederrames
_icidoso azucarados,puespuedendescolorarlaporcelanaes-
maltada.Useel taraafio correcto deutensilio para evitar
derramesy reboses.
Parrillas del Homo
Su homotiene dos parrillas. Hansidodise_adascon untope de
engancheen el horde.
Para retirar la parrilla:
1. Tirede la parrilladerechohacia
afuerahastaquesedetengaen la
posiciOndel topede enganche.
2. Levanteelfrente de la parrillay tire
de laparrillahaciaafuera.
Para reinstalar la parrilla:
1. Coloquelaparrillaen elsoportede laparrillaenel horno.
2. Inclinelevementehaciaarribael extremodelantero;deslicela
parrillahaciaatr_shastaque pasosobre lostopesde enganche.
3. Bajeel frente de laparrillay deslicelahaciaadentrodel homo.
No cubra una parrillacompleta con papelde aluminio ni
coloquepapel de aluminioen la parte inferior delhomo. Se
afectarztn los resultadosdel horneadoy se puededafiar la
parte inferiordelhomo.
Posiciones de la Parrilla
PARRILLA5
(posici6nm_salta):
Seusaparatostar
pan oasara la
parrilla alimentos
delgadosno
grasosos.
PARRILLA4: Usada
para lamayor[adel
horneadocon dos parrillas.
PARRILLA3:Seusaparahornearalimentosen unabandeja
de horneargalletasoun molde parafolio de mermelada,para
pasteles,paysde frutaso alimentoscongelados.
PARRILLA2: Usadaparaasarcortesde came peque_os,cacerolas,
hornearpan,pastelen moldede tubo,fianesu horneadocondos
parrillas.
PARRILLA1: Usadoparaasarcortesde camegrandesy
came deave,pastelescongelados,sufl6s,pastelesponjosou
horneadocon dosparrillas.
__ ............. 5
cont.
76
Page 78

¢oclnan@enelHorno
POSICiONPARAHGRNEAR:
Usadoparaasarcortesm_saltosdecame _ 9qL_
de reso de pavo.Coloqueambasparrillas
del homo,unasobre laotra,enlas
salienteslateralesde laparteinferior del
hor[/o. _ _ _,, ,
HORNEADOCONVARIAS PARRILLAS:
Dos parrillas:Uselasposiciones2y 4,o 1y 4.
Nora: Nuncacoloque losutensiliosde cocinadirectamenteen el
fondodel homo.
Accesorio de la Media Parrilla
Sedispone,comoaccesorio,de una media _, /
parrilla paraaumentarlacapacidaddel homo.
Seinstalaenlasecci6n superiordel lado
izquierdodel homoy ofreceespacioparauna
platode verdurascuandose hacolocadouna
asaderagrandeen la parrilla inferior.
POngaseen contactocon su distribuidorpara _ _
obtenerelaccesorio"HALFRACK"o para
solicitar,Ilameal 1-877-232-6771EE.UU.o 1-800-688-8408Canada.
77
Page 79

CuldadoUmplem
Homo Autolimpiante
(modelos selectos )
i Nora: Parala limpiezamanual,verp_gina81.
i 6.
Limpieel excesodegrasao derramesdela parteinferior del
homo. Estoevitahumoexcesivoo Ilamaradasduranteel ciclo de
limpieza.
Limpielos derramesazucaradoso _cidostalescomo papadulce
[camote),tomateso salsasabasede leche.Laporcelana
esmaltadaes resistenteal _cidopero no a pruebade_cidos. El
acabadode porcelanapuededescolorarsesi losderrames_icidos
o azucaradosnosonlimpiadosantesde unciclode autolimpieza.
Para programar 'Self=Clean' (Autolimpieza):
Nora: Latemperaturadel homodebeserinferiora 205°C
(400° F)paraprogramarun ciclodelimpieza.
],
Cierrela puertadelhomo.
2.
Muevala palancade bloqueodelapuertaa laderechaa la
posici6nbloqueada.
Elciclo deautolimplezausatemperaturassuperioresalas
temperaturasnormalesde cocciOnpara limpiarautom_iticamenteel
interiordel homo. Nofuerce la puertadel homo ni la palancade
bloqueoparaabrirla.EstopuedecausarexposiciOnalas
temperaturasaltasy constituir un riesgode quemadura.asnormales
para limpiarautomaticamentetodo el interiordel homo.
Limpieel homo con frecuenciaremoviendolosderramesparaevitar
humoexcesivoy Ilamaradas.Nopermitaqueseacumuledemasiado
sucioenelhomo.
Duranteel procesodelimpieza,la cocinadebeestarbienventilada
para eliminarlosoloresnormalesasociadosconlalimpieza.
Antes de la Autolimpieza
1. Apague laluzdel homoantesde la limpieza.La luzdel horno
puedefundirse duranteel ciclo delimpieza.
2. Retirelaasadera,todos losutensiliosy lasparrillasdel homo.Las
parrillasdel homosedescolorar_iny no sedeslizar_nf_cilmente
despuc!sde unciclo deautolimpiezasi no sonretiradasdel homo.
3. Limpieel marcodel homo,elmarcode la puerta,el _ireafuerade
lajunta de la puertay alrededorde laaberturaen lajunta de la
puerta,con un agentede limpiezanoabrasivotal como'Bon
AmP o con detergentey agua.El procesode autolimpiezano
limpiaestasareas.Eliasdebenset
limpiadasparaevitarquelasuciedad
se horneeduranteelciclo de
autolimpieza. (Lajunta esel sello
alrededordelapuertay ventanadel
homo.)
/4. Paraevitarda_o nolimpie ni frotela
junta situadaalrededorde la puertadel homo.Lajunta est_
dise_adaparasellarhermc!ticamenteel calorduranteel ciclo de
limpieza.
*Losnombresdelosproductosson marcasregistradasde sus respectivosfabricantes.
3. Optimalatecla 'CLEAN'.
• 'CLEAN'destellaenel indicadorvisual.
Sila puertano secierra,seoir_unasepal sonoray lapalabra
'DOOR'se desplegar_enel indicadorvisual. Si la puertanoes
cerradadentro de45segundos,la operaciOnde autolimpieza
ser_canceladay elindicadorvolver_a desplegarla horadel dfa.
4. OprimalateclaA o T.
• Sedespliega'CL-M (Limpieza- Suciedad
Moderada).
5. OprimalateclaA o V paradesplazarlos
ajustesdeautolimpieza.
'CL-H'(Limpieza- SuciedadIntensa,4horas)
'CL-M' (Limpieza- SuciedadModerada,3 horas)
'CL-L'(Limpieza- Suciedadleve,2horas)
AI seleccionarelniveldesuciedaddelhomose programa
autom_ticamenteel tiempo delimpieza.
6. Despu_sdecuatrosegundos,el homo comenzar_a limpiar.
• Eltiempo de limpiezacomenzar_lacuentaregresivaen el
indicador.
• 'LOCK'se desplegar_enel indicadorvisual.
• 'CLEAN'sedesplegar_en elindicadorvisual.
Para diferir un title de autolimpieza:
1. Oprimalatecla'DELAY'.
• 'DELAY'destella.
• '00:00'sedesplegardenel indicadorvisual.
78
1
CLEAN
DELAY
cont.
Page 80

CuldadoUmplem
2. Optima latecla A,o V para programarla cantidadde
tiempo queusteddeseadiferir el ciclo.Eltiempodiferido A
puedesetprogramaticde 10minutes(00:10)a
]1 horns,59 minutes(11:59).
3. Optima latecla 'CLEAN'. V
• 'CLEAN'destellard.
4. Optima latecla A o V.
, 'CL-M' (Limpieza- SuciedadModerada)se
despliegaen el indicador.
CLEAN
A
5. OprimalateclaA o V paradesplazarlosajustesde
autolimpieza.
'CL-H'(Limpieza- SuciedadIntensa,4horns)
'CL-M' (Limpieza- SuciedadModerada,3 horas)
'CL-L' (Limpieza- Suciedadlove,2horns)
AI seleccionarelnivelde suciedaddelhomo se programa
automdticamenteel tiempo delimpieza.
6,
Despudsdecuatrosegundos,'CLEAN','DELAY'y 'LOCK'se
desplegardnenel indicadorvisualparaindicarque elhomo estd
programaticpara un ciclo delimpiezadiferido. Eltiempodiferido
tambi6nsedespliegaenel indicadorvisual.
V
Si el homo ya ha side programado para un cido de
limpieza y usted desea programar un tiempo
diferido:
1. Oprimalatecla'DELAY'.
, 'DELAY'destella.
, '00:00'se desplegar_en elindicadorvisual. ......
2. OprimalateclaA o V para programarla cantidad
detiempoqueusteddeseadiferir el ciclo.
DE_Y
^
V
Despu6sdecuatrosegundos,'CLEAN','DELAY'y
'LOCK'sedesplegar_nen elindicadorvisualpara
indicarqueel homo est,1programaticparaunaciclo de limpieza
diferido.Eltiempodiferidotambidnsedespliegaenel indicador
visual.
Cuando comienza el cido de autolimpieza:
° 'DELAY'se apagard.
• Eltiempo de limpiezasedesplegar_en elindicadorvisual.
Para cancelar el title de autolimpieza:
Oprimala tecla 'CANCEL'.
° Elindicadorvisualquedaenblanco.
° Todaslasfuncionesson canceladas.
Durante el title de autolimpieza
Cuandoaparece'LOCK'enel indicador,la puertanose puedeabrir.
Paraevitardahoala puerta,nofuerce la puertapara abrirlacuando
la palabra'LOCK'estddesplegadaen el indicadorvisual.
Humo y Olores
Ustedpuedever humoy sentirclot Insprimerasvecesque elborne
eslimpiado. Estoes normalydisminuir_con eltiempo.
Tambidnpuedeocurrir humosi elhomoestddemasiadosucioosi
seha dejadounaasaderaenel homo.
Sonidos
A medidaqueel bornesecalienta,usted puedeoir sonidosde
piezasmet_licasquese expandenycontraen. Estoes normaly no
dahar_elhomo.
Despu6s del title de autolimpieza
Aproximadamenteunahera despuc!sdelfin del ciclo de Iimpieza,
'LOCK'desaparecerd.Lapuerta ahorapuedeset abierta.Muevala
palancade bloqueode la puertaa la izquierdaparadesbloquearla.
Algunasuciedad puede quedar come una love ceniza gristipo
polvo. Retfrelaconun pa_o hQmedo.Si lasuciedadpermanece
despudsde limpiarla,significaque el ciclode limpiezano fueIo
suficientementelargo. Lasuciedadserdeliminadaduranteel
pr6ximociclo delimpieza.
Si Insparrillasdel homo fueron dejadasen el homo y no se
deslizansuavemente despu_sde unciclo de limpieza, Iimpie
lasparrillasy lossoportesde lasparrillas conuna pequefiacantidad
de aceitevegetalparahacerdeslizarlasconrodsfacilidad.
Puedenaparecer linens delgadasen la porcelanaal pasarper
ciclosde calentamientoy enfriamiento. Estoesnormaly no
afectar_el rendimiento.
Una descoloraci6nblanca paede aparecer despubsdel cicio
de limpiezasilos alimentos _icidos o azucaradosno fueron
limpiados antes del ciclo de autolimpieza. Estadescoloraci6nes
normaly no afectardel rendimiento.
Notas:
• Si sedejaabierta lapuertadel homo,la palabra'DOOR'
destellar_enel indicadorvisualyseescuchar_unasepal
sonorahastaque la puertaseacerraday la tecla'Clean'sea
oprimidanuevamente.
• Lapuerta delhomoseda_ardsisefuerzaparaabrirlacuando
la palabra'LOCK'continOadesplegadaenel indicador.
, Lahera deldinse despliegaen el indicadorvisual.
79
Page 81

CuldadoUmplezu
Procedimientos de Limpieza
* Losnombresde losproductossonmarcasregistradas
de susrespectivosfabricantes.
** Parahacerpedidos,Ilameal 1-877-232-6771EE.UU.o
al 1-800-688-8408Canad&
Asaderae
Inserto
Quernadoresde
la Cubierta
=Cenvencional
=Sellados
Caja de la Hornilla
Rejillasde los
Quemadores
Noncacobra el insertocon papel de alominio poes esto evita qoela grasa se escorraa la bandeja inferior.
• Coloqueun pasoenjabonadosobreel insertoy la bandeja;dejeremojar parasoltarlasuciedad.
• Laveen aguajabonosatibia.Useuna esponjadefregarparaquitar la suciedadpersistente.
• La bandejadeasary el insertopuedenserlavadosenel lavavajillas.
• Limpiefrecuentemente. Esperequeel quemadorseenfrie. Limpiecon unaesponjade fregarde pl_sticoconjab6n.
Paralasuciedadpersistente,use unlimpiadorno abrasivoy unpaso.Tratedeevitarqueel limpiadorseescurrahacia
losorificiosdelgaspuesestoafectar_ila llama.Siellimpiadorpenetraenlosorificios,limpieconunaescobilladecerdas
suavesoun alfiler derecho,especialmenteelorificio debajodel encendedor.No agrandeo distorsionelos agujeros.
• Tongacuidadode quenoentreaguaenlos orificiosde losquemadores.
• Tongacuidadocuandolimpieelencendedor.Si el encendedorest_ht_medoo da_adoel quemadorsuperior
no encender&
• HornillasConvencionales:Lashomillassecasen el homofijaron en75°C(170°F).
Lacajade lahornilla est_situadobajolacubiertaque puedeselevantada.Limpiecon frequenciaparaquitarspillovers.
Si el suelose permiteacumular,puededa_arel final.
• Quite lasrejillasy lashornillassuperficiales.Levantela cubiertaparaarribalatapa.
• Limpie conel jab6ny riegue,aclaraci6ny sequese.
• Paralossuelosobstinados,utilice losagentesdelimpiezasuavementeabrasivostalescomo unengrudodebicarbonato
de sosay aguao delBonAmi*, yuna pistaque friga pl_isticanoabrasiva.
• Lavelas rejillascon aguatibia jabonosay unaesponjade fregarde pldsticonoabrasiva.Parasuciedadpersistente,
limpiecon unaesponjano abrasivae impregnadaconjab6nocon unaesponjay unaCooktopCleaningCreme
(pieza#20000001)*_.
Parasuciedadquemada,saquelas parrillas,coloqueperiOdicosy rode cuidadosamentecon un limpiadorde homo
comercial.(Norode lassuperficiesvecinas3Coloqueenbolsasdepldsticodurantevariashorasotodalanoche.Usando
guantesde goma,retirede lasbolsas. Lave,enjuague,sequey vuelvaacolocaren la cubierta de laestufa.
Area del Reloj y
de las Teclas
de Control
Perillasde
Control
Cubiertay Panel
de Control=
Esmaltede
Porcelana
• Paraactivar'ControlLock'(Bloqueode los controles]paralalimpieza,verp_gina70.
• Lave,enjuagueyseque. No useagentesde limpiezaabrasivospuespueden rayarel acabado.
• Sepuedeusarlimpiavidriossise roc[anen el paso primero. NO recie directamente en elpanel.
• Retirelasperillascuandoest_!nen la posici6n'OFF'tir_ndolashaciaadelante.
• Lave,enjuagueyseque. No useagentesde limpiezaabrasivospuespueden rayarel acabado.
• Enciendacadaquemadorparaasegurarsedeque lasperillas hartsidocorrectamentereinstaladas.
Laporcelanaesmaltadaesvidriofundidoen metalypuedeagrietarseopicarsesi noseusacorrectamente.Esresistente
a los_cidos,noa pruebade_icidos.Todoslosderrames,especialmentelos derramesazucaradosoaddicos debenser
limpiadosinmediatamenteconunpaso seco.
Cuandose enfr[e,laveconaguajabonosa,enjuaguey seque.
• Nuncalimpie unasuperficietibia ocalienteconun pasoh_medo.Estopuedecausaragrietamientoo picaduras.
• Nuncauselimpiadoresde homo,agentesde limpiezaabrasivoso c_iusticosenel acabadoexteriorde la estufa.
8O
Page 82

CuldudoUmplem
PanelesLaterales
Gavetade
AImacenamiento,
Puerta delHomo
(modelosselectos),
Puerta dela
Parrillainferior
(modelosselectos)
y IVlanijasde
insPuerlas=
EsmaitePintado
Ventana y Puerta
del Homo =Vidrio
(modelosselectos)
, Cuandoeat6fria, laveconaguatibia jabonosa,enjuaguey seque.Nunca limpieunasuperficietibia o caliente
conun paso ht_medopues estopuededaffarlasuperficiey causaruna quemaduraa causadel vapor.
, Paramanchasrebeldes,useagentesdelimpiezalevementeabrasivostal comopastadebicarbonatoo 'BonAmi'*.
Nouselimpiadoresabrasivos,c_iusticoso _sperostalcomoesponjasdelanadeacero olimpiadoresdehornos.Estos
productospuedenrayarodaffarpermanentementela superficie.
Nota: Useuna toallao un pale seco para limpiarlos derrames, especJalmente los derrames ac[dicos o
azucarado& La superficie se puede descelorar o perder el brillo si el derrame nose limpia inmediatamente.
Estoes especialmente importante en Inssuperficies blancas.
• Eviteusarcantidadesexcesivasdeaguapues puedeescurrirsedebajoo detr_sdel vidriocausandomanchas.
° Laveconaguayjab6n. Enjuaguecon agualimpiay seque. Ellimpiador devidriopuede usarsesi se roda en un
pasoprimero.
° No usematerialesabrasivostalescomoesponjasde restregar,limpiadoresenpolvo oesponjasdelanade acero
puespuedenrayarelvidrio.
Borne autolimpiante:
° SigaInsinstruccionesen lasp_ginas78-79paraprogramarunciclode autolimpieza.
Limpieza Manual:
° Limpiefrecuentementeusandolimpiadoresabrasivossuavesy unaesponjadepl_stico.
° No useesponjasde fregarmet_ilicasporquepuedenrayarlasuperficie.
• Cuandoutilicelimpiadoresdehomo comercialessignlasinstruccionesdelfabricante.
° Limpielosderrames_cidos(alimentosa basedetomateso de leche)tan prontocomoseaposibleconaguayjab6n.
Siel derrameno eslimpiadose puededescolorarlaporcelana.
Parahacerrn_sfdcil lalimpieza,saque lapuertadelhomo,si Iodesea. [Verlasecci6nMantenimiento,p;igina82.)
Parrillasdel
Homo
Acero Inoxidable
(modelosselectos)
*Loshombresdelosproductosson marcasregistradasde sus respectivosfabricantes.
** Parahacerpedidos,Ilameal 1-877-232-6771EE.UU.o al 1-800-688-8408Canad&
° Limpiarcon aguaconjab6n.
° SacarInsmanchasdificiles conpolvodelimpiezao una esponjaIlenaconjab6n. Enjuagueyseque.
, Lasparrillassedescolorar_inpermanentementeypuedennodeslizarseconsuavidadsisondejadasenelhornodurante
unciclo deautolimpieza.Siestosucede,limpie laparrillay lossoportesenrelieveconunapeque_acantidaddeaceite
vegetalpara restaurarlafacilidadde movimiento,luegolimpieelexcesode aceite.
• NO USENINGUN PRODUCTODELIMPIEZA QUECONTENGABLANQUEADORA BASEDE CLORO.
• NO USEL/MPIADORES "ORANGE"NI LIMPIADORESABRASlVOS.
• SlEMPRELIMPIE LASSUPERFICIESDE ACEROA FAVORDELGRANO.
. LimpiezaDiaria/Suciedad Love=Limpieconuno delossiguientes- aguaconjab6n,una soluci6ndevinagre
blancocon agua,limpiador parasuperficiesyvidrio 'Formula409'*o un limpiavidriossimilar- usandounaesponja
o unpasosuave. Enjuaguey seque. Parapulir yevitar marcasdelos dodos,useel producto 'StainlessSteel
Magic Spray'*[PiezaNo.20000008)**.
, Suciedad Moderada/Intensa = Limpiecon unode lossiguientes-'Bon Ami'*, 'SmartCleanser'*o'SoftScrub'*-
usandounaesponjah_medao un pasosuave. Enjuagueyseque. Lasmanchasdificilespuedenserquitadascon
una esponjamulti-uso'Scotch-Brite'*h_meda;frotea favordel grano. Enjuaguey seque. Pararestaurarel
lustreysacar Insvetas,aplique'StainlessSteelMagic Spray'*.
• Deseoloraci6n - Useuna esponjamojadaounpaso suave,limpieconlimpiadorde acero'CameoStainlessSteel
Cleaner'*.Enjuagueinmediatamentey seque.ParaeliminarInsestriasy restaurarel lustre,usedespu6srociador
paraaceroinoxidable'StainlessSteelMagic Spray'*.
81
Page 83

Mententmlento
Puerta del Homo
Para sacar:
1.Cuandoest_fr[a,abra la puertadel homo hastala posici0n
primerodeasarala parrilla [abiertaaproximadamente10cm
[cuatro pulgadas)].
2.Sujetelapuertade cadalado. No usela
manijade lapuertaparalevantarla.
3.Levanteuniformementehastaque la puerta
sesalga delosbrazosde articulaciOn.
Tornillos Niveladores
Verifiquesi laestufa est,1niveladacuandose instala, f_
Si laestufanoest,1nivelada,gire lostornillos [ _1
niveladoresubicadosen cadaesquinade laestufa
hastaque quedenivelada. _,,/J
TORNILLO NIVELADOR
Luz del Homo (modelosselectos)
Para velvet a colocar:
1.Sujetelapuertade cadalado.
2.Alineelasranurasde lapuertaconlos brazosde articulaciOndela
estufa.
3.Deslicelapuertahacialos brazosdearticulaci6nhastaque est_
completamenteasentadaen las bisagras.Empujehaciaabajolas
esquinassuperioresde lapuertapara asentarlacompletamenteen
lasbisagras.Lapuerta nodebequedartorcida.
Nora: La puertadel homo enunaestufa nuevapuedesentirse
I "esponjosa"cuandose cierra. Estoes normaly disminuir_conel
|LJSO.
Ventana del Homo
(modelos selectos)
Para proteger la ventana de la puerta del homo:
1. No use agentesdelimpiezaabrasivostales comoesponjasde
restregardelanadeacero o limpiadoresen polvopuesellos
pueden rayarelvidrio.
2. No golpeeel vidrioconollas,sartenes,muebles,juguetes u otros
objetos.
3. No cierre lapuertadel homo hastaque lasparrillasdelhomo no
est6nensu lugar.
AIgolpear,rayar,hacervibrar o esforzarelvidriopuededebilitarsu
estructuracausandounmayorriesgode roturaen unafecha
posterior.
Para reemplazar el foco del homo:
1.Cuandoelhomoest6if[o, sujetela tapade la bombilla(siest_
equipado)ensu lugar,luegodesliceel ret6nde alambrefuerade
la cubierta.
Nora: Lacubierta dela bombillasecaer_si no essujetaen su
lugar cuandoestdsacandoel retc!nde alambre.
i
2.Saquela cubiertadel focoy el foco.
3. Coloqueunfocode 40watts para Foco
electrodomc!sticos.
4.Vuelvaacolocarlacubiertade
la bombillay asegOrelaconel
ret6ndealambre.
5.Vuelvaaenchufarlaestufa. RETENDEALAMBRE
Vuelvaa colocarla hora
correcta.
82
CUBIERTA DEL
1
Page 84

Mententmlento
Retire de la Estufa a Gas
Losconectoresde laestufaagas usadosparaconectareste
artefactoalsuministrodegas noest_indise_adosparamovimiento
continuo. Unavezinstalados,NOmuevarepetidamenteeste
artefactoagasparasulirnpiezao paraubicarloen otro lugar. Si
esteartefactotiene queset movidoy/o retiradopara reparaci6n,siga
el procedimientodescritoen lasinstruccionesde instalaci6n.Para
informaci6n,p6ngaseen contactoconel Servicioa losClientes
Ilamandoal 1-800-688-1120EE.UU.y Canad&
Paraevitarquelaestufasevuelqueaccidentalmente,sedebe
aseguraral pisocolocandoeltornillo niveladortraserodentro del
soporteantiwJelco.
Gaveta de Almacenamiento
(modelos selectos)
La gavetadealmacenamientopuedeset retiradaparaque usted
puedalimpiardebajode la estufa.
Para sacar :
1. Vaciela gavetaydeslicelahaciaafuerahastala primeraposici6n
tope.
2. Levantela partedelanterade la gaveta.
3. Tirelahastalasegundaposici6ndetope.
4. Sujetelosladosy levantela gavetapararetirarla.
Para velvet a colocar:
1. Insertelosextremosde lascorrederasdela gavetaen losrieles
de laestufa.
2. Levantela partedelanterade la gavetay suavementeemptijelaa
la primeraposici6ndetope.
3. Levantelagavetanuevamentey empt3jelahastaquequede
completamentecerrada.
Quemadores Superiores
Tradicional (modelos selectos)
Bajoningunacircunstanciase debendesarmarlosquemadores
superioresparasulimpieza. Elconjuntodel quemadorsuperior
puedeserretiradoparalimpiar el_readela cajadelquemador.
En las Estufas Aislado Solamente
Losdosconjuntosdequemadoressuperioresbansido asegurados
duranteeltransportecontornillos. Unavezquesehayainstaladola
estufa,estostornillos debenset retiradosparaquelosquemadores
puedansersacadosenformaf_cil y r_pida.
Para sacar:
Dejequeel quemadorse enfr[e.Levantela cubiertade la estufa.
Sujeteel conjuntodel quemadory g[relolevementehaciala
izquierdaparadesengancharlasdosleng(]etasdelconjunto. Luego
levanteel conjuntoytire de 61hacia lapartetraserade laestufa
hastaquelosextremosdel obturadordeaire del conjuntose
desenganchende lav_ilvula.
Para velvet a colocar:
Insertelos extremosdelobturadorde airedelconjuntodel
quemadoren lasv_lvulasy baje elquemadora su lugar.Asegurelas
doslengOetasdel quemadorenlasranurasdelsoportedel
quemadorqueest_ instaladoen la parteinferiordel quemador.
(Nora: SilaslengOetasno quedanbieninsertadasen lasranuras,el
conjuntodelquemadorquedar_inestabley puedeque los
quemadoresno enciendanen formadebida.)
Panel Inferior del Homo
Protejael panelinferiordel horno contraderrames,especialmentede
tipo ac[dicooazucarado,pues puedendescolorarlaporcelana
esmaltada.Useel utensiliodetama_ocorrectoa fin de evitar
derramesyreboses.
83
Page 85

Mententmlento
Cone×i6n El ctrica
Los electredom_sticosque requierenenergia
el_ctrica est_nequipadoscon unenchufede
tres clavijascon conexi6na tierra, el cualdebe
serenchufadodirectamenteen un tomacorriente
el6ctricode tres agujeros,para 120voltios
debidamenteconectadoatierra.
Siempredesenchufeel electrodom#sticoantesde efectuar
reparaciones.
Elenchufedetresclavijasconconexi6na tierraofreceprotecci6n
contra peligrosde choquesel6ctricos.NO CORTENI ELIMINELA
TERCERACLAVIJADE CONEXIONATIERRADELENCNUFE
DELCORDONELECTRJCO.
Sisolamenteaedisponedeuntomacorrientesinconexi6natierra,
de dosagujerosuotro tipo de tomacorfienteel6ctfico,el
prepietariodel electrodom_sticees personaimente
responsablede reemplazarel tomacorriente con un
tomacorriente el_ctrico detres agujeros debidamente puesto
a tierra.
84
Page 86

[ocaltmct6n deAwerias
Parala =nayoriade los proble=nas,
verifiquepri=neroIo siguiente.
Eique=nadorsuperiorno se
enciende.
[.a llama es dispareja. Losorificiosdel quemadorpueden°star obstruidos.
Lallama del que=nadorsuperiorse • Verifiqueparaasegurarsede queelutensilioest_asentadoen laparrillasobreel quemador.
levanta delorificio.
Losresultadosdel horn°ado no son
co=nose esperaban o son
direr°hies a losdel homo anterior.
Revisesi loscontrolesdel homo °stUndebidamenteajustados.
• Verifiquesiel enchufeest,1firmementeinsertadoen eltomacorriente.
, Verifiqueovuelvaa reponerel disyuntor. Verifiqueo reemplaceel fusible.
, Verifiqueelsuministrode energ[ael_ctrica.
°
Verifiquesi laestufaest_debidamenteconectadaala fuente dealimentaciOn.
°
Verifiquesi est,1fundido un fusibledel circuitoo si se dispar6el disyuntorprincipal.
Verifiqueparaasegurarsede queelencendedor°st6 secoyque emitachasquidos. El
quemadornoseencender_si elencendedorest_da_ado,sucioo mojado.Siel encendedor
no produceun chasquido,gire la perillade controlala posiciOn'Off'.
°
Verifiquela temperaturadel homo seleccionada.Asegt_resede queel homoest_!
precalentadocuandola recetao instruccionesrecomiendanprecalentamientodel homo.
°
As°gLares°dequeelrespiraderodelhomo no°st6 bloqueado.Verp_gina76paralaubicaciOn.
Verifiqueparaasegurarsede quelaestufaest_nivelada.
Lastemperaturasamenudovarfanentreun homonuevoy unoantiguo.A medidaquepasa
eltiempo,la temperaturadel homocambiay puede hacersem_scalienteo m_isfr[a. Ver
p%. 74 paralasinstruccionescomeajustarlatemperaturadel homo (modelosselectos).
NOTA:No serecomiendaajustarlatemperaturasi hatenidoproblemasconsolounao dos
recetas.
Useel utensiliocorrecto.Losutensiliososcurosproducendoradooscuro.Losutensilios
brillantesproducendoradoclare.
Verifiquelasposicionesdelasparrillasy lacolocaci6ndelos utensilios.Alternelosutensilios
cuandouse dosparrillas.Deje2,5-5cm (1-2pulgadas)entrelos utensiliosylaspar°desdel
homo.
Verifiqueel usede papelde aluminioen el homo. Nuncausepapelde aluminioparacubrir
unaparrillacompletadelhomo.Coloqueunpedazopeque_odepapeldealuminioenlaparrilla
queest,1debajodel utensilio pararecibirlosderrames.
Losali=nentosno se asan a la
parrillaen for=nadebida o sale
de=nasiadoha=no.
• Verifiquelasposicionesde lasparrillasdelhomo. Elalimentopuede°star muycercade
la llama.
Elpapeldealuminioseus0demaneraincorrecta.Nuncaforreelinsertodelasadorconpapel
de aluminio.
Recorteelexcesodegrasade lacame antesdeponerlaa asaralaparrilla.
, Se us0unaasaderasucia.
Precalienteel homodurante dosa tres minutesantesde colocarel alimentoenel homo.
, As° a la parrillaconla puertadel homocerrada.
85
Page 87

[ocaltmci6n$oludonde
Elhomo no se autolimpia
(rnodelos selectos).
Elhomo no se limpi6en
forma debida(modelosselectos).
Lapuerta del homo nose
desbloqueadespu6sdel ciclo
deautolimpieza (modelos selectos).
Sejunta humedaden la ventana
del homoo salevapor per
el respiraderodelhomo.
Hayun olor fuerte o humo leve
cuandose enciendeel homo.
• Verifiqueparaasegurarsede queel ciclo noest6ajustadoparauncomienzodiferido.Ver
p_ginas78-79.
, Verifiquesila puertaest,1cerrada.
, Verifiquesiel controlest_en ModoSab_tico.Verp_g. 74.
, Elhomopuedeestara m_sde205°C (400° F). Latemperaturadelhomo debeset inferiora
205° C(400° F)paraprogramarunciclode limpieza.
• Puedequeseanecesariountiempo de limpiezam_slargo.
• Losderramesexcesivos,especialmentedealimentosazucaradosy/o _cidosno fueron
limpiadosantesdelciclodeautolimpieza.
, Elinteriordelhomo todavfaest_caliente. Dejeque paseaproximadamenteuna hora
paraqueelhomo seenfrfeantesde quesecompleteun ciclode autolimpieza. Lapuerta
puedeset abiertacuandodesaparezcala palabra'LOCK'del indicadorvisual.
, Elcontroly la puertapuedeestarbloqueada. Verlasp_ginas70y 79 parasedesbloqueo.
• Estoesnormalcuando secocinanalimentosconaltocontenidode humedad.
• Seus6humedadexcesivacuandolimpi6 laventana.
• Estoesnormalen una estufanuevay desaparecer_idespu_sde unospocosusos.
AI iniciarunciclo de autolimpiezase"quemar_in"los oloresm_sr_pidamente.
• Sise enciendeel ventiladorayudar_ia eliminarel humoy/o el olor.
• Suciedadexcesivadealimentosenelpanelinferior delhomo. Useun ciclo deautolimpieza.
C6digosde Errores
(rnodelos selectos).
Se escuchanruidos.
_0 se escuchan sella_e$ sonoras
y el indicadorvisualno se activa.
'SAb' destella y luegose
despliegacontinuamente.
• 'BAKE'o 'LOCK'puedendestellarr_ipidamenteen el indicadorparaavisarleque hayunerror
oun problema. Si 'BAKE'o'LOCK'aparecenenel indicadorvisual,oprimalatecla 'Cancel'.
Si'BAKE'o'LOCK'contin_andestellando,desconectelaenergfaelectricaalelectrodomc!stico.
Espereunospocosminutosyvuelvaareconectarlaenergfaelc!ctrica.Sicontint_andestellando,
desconectelaenergiael_ctricadelelectrodom6sticoyIlamealt6cnicodeservicioautorizado.
° Siel homoest,1demasiadosucio, puedenocurrirdemasiadasIlamaradasIo cualresultar_en
uncOdigodeerrordurantela limpieza. Oprimalatecla 'Cancel'y dejequeel homoseenfrfe
completamente,limpieelexcesodesuciedady luegowJelvaa programarelciclo delimpieza.
Si elcOdigode errorreaparece,Ilamea un tc!cnicoautorizado.
• Elhomoemitevariossonidosbajos. Ustedpuedeoirlosrelc!sdelhomocuandoseencienden
y seapagan.Estoesnormal.
, A medidaqueelhomo secalientayseenfrfa,ustedpuedeofrsonidosdepiezasmet_licasque
seexpandeny contraen. Estoes normaly no da_ar_isuelectrodomc!stico.
• ElhomopuedeestarenModoSab_itico.Verp%. 74.
° Elhomoest,1en modosab_itico.Paraanularelmodosab_itico,optimay mantengaoprimidala
tecla 'Clock'[Reloj)durantecinco segundos.
86
Page 88

Servtclo
LA 0NICAY EXCLUSIVASOLUCIONPARAEL
CLIENTEBAIO ESTAGARANTiALIMITADAES
LA REPARACIONDELPRODUCTOSEGUNSE
INDICAAQUi.LASGARANTiASIMPLiCITAS,
INCLUYENDOLASGARANTiASDE
COMERCIALIZACION0 DEAPTITUDPARAUN
PROPOSITOFNPARTICULARFSTA,N
LIMITADASA UNANO0 AL PFRIODODE
TEMPO MiNIMOPERMITIDOPORLA LFY.
MAYTAGCORPORATIONNO SFRA,
RFSPONSABLFDEDANOSINCIDENTALES0
CONSFCUENTES.ALGUNOSFSTADOSY
PROVINCIASNOPERMITENLA FXCLUSION0
LIMITACIONDEDAI':,IOSINCIDENTALES0
CONSECUENTFS0 LA LIMITACIONDELA
DURACIONDELASGARANTiASIMPLiCITASDE
COMERCIALIZACIONOAPTITUD,PORLOQUE
ESTASEXCLUSIONESOLIMITACIONES
PUEDENNO APLICARSEENSUCASO.ESTA
GARANTiALEOTORGADERECHOSLEGALES
ESPECiFICOS.USTEDTAMBIENPUEDETENER
OTROSDERECHOSQUEVARiANDEUN
ESTADOA OTROO DEUNAPROVlNCIAA
OTRA.
Lo que no cubren estas garantias
1. Situacionesy da_osresultantesde cualquierade Jassiguientessituaciones:
a.InstalaciOn,entregao mantenimientoinapropiados.
b.CualquierreparaciOn,modificaciOn,alteraciOnoajusteno autorizadosporel
fabricanteo tallerde servicioautorizado.
c.Mal uso,abuso,accidentes,usono razonableo hechosfortuitos.
d.Corriente,voltaje,suministroelOctricoosuministrode gasincorrectos.
e.Ajuste inadecuadodecualquiercontrol.
2. Lasgarant[asquedanhulassi losnOmerosde serieoriginaleshansidoretirados,
alteradoso nosepuedendeterminarf_cilmente.
3. Bombillas,filtrosde aguayfiltros deaire.
4. Losproductoscompradosparausocomercialo industrial.
5. Elcostodelservicioo Ilamadadeserviciopara:
a.Corregirerroresde instalaciOn.Paralosproductosque requieranventilaciOn,se
debenusarconductosde metalr[gido.
b.Instruir alusuarioen elusoadecuadodelproducto.
c.Transportedelelectrodom_!sticoal establecimientode servicioy de regreso.
6. Cualquierp_!rdidade alimentosdebidoafallasdel refrigeradoro congelador.
7. Costosdeviajey transportede servicioen_ireasremotas.
8. Estagarantfano seaplicafuera de losEstadosUnidosy Canad&POngaseen contacto
consu distribuidorparadeterminarsi seaplicacualquierotragarant[a.
9. Losda_osconsecuenteso incidentalessufridosporcualquierpersonacomoresultado
del incumplimientodeestagarantia.Enalgunosestadosno sepermitela exclusiono
limitaciOndeda_osconsecuentesoincidentales,por Iotanto la limitaciOno exclusion
anteriorpuede noaplicarseen sucaso.
Si necesita servicio
Primerorevisela secciOnde IocalizaciOny soluciOndeaver[asen sugu[adeuso ycuidado
o Ilameal distribuidordondeadquiriOelelectrodom_stico.Tambi_npuedeIlamara Maytag
Services,LLC,AtenciOnalcliente,al 1-800-688-9900en EE.UU.y al 1-800-688-2002en
Canada1paraubicar aunagentede serviciocalificado.
, AsegOresede conservarel comprobantedecompraparaverificarel estadode la
garant[a.Consultela secciOnsobre laGARANTiAparamayorinformaciOnsobrelas
responsabilidadesdelpropietarioparaobtenerservicio bajolagarant[a.
° Si eldistribuidorola compa_[adeserviciono puedenresolverelproblem&escribaa
MaytagServices,LLC,Attn: CAIR+ Center,P.O.Box2370,Cleveland,TN37320-2370o
Ilameal 1=800=688=9900en FE.UU.y al 1=800=688=2002enCanad&
, Lasgu[asdelpropietario,manualesde servicioe informaci0nsobre laspiezaspueden
solicitarsea MaytagServices,LLC,AtenciOnalcliente.
NOtaS- =CuandoIlameo escribaacercadeun problemadeservicio,por favor
incluyala siguienteinformaciOn:
a.Su nombre,direcciOny nOmerode teldono;
b.NOmerodemodeloy n_merode serie;
c. Nombrey direcciOnde sudistribuidoro tOcnicodeservicio;
d.Una descripciOnclaradelproblemaqueest_experimentando;
e.Comprobantedecompra(recibode compra).
Form No. A/01/06 Part No. 8113P560 60 (¢2006 Maytag Appliances Sales Co. Litho U.S.A.
 Loading...