

Page 1
Owner's Guide
Self-Cleaning
withElectronicControl
FOR CUSTOMER ASSISTANCE CALL 1-800-688-1120
8113P193-60
(06-99-01)
Page 2
Read all instructions before using this appliance.
Thank You...for purchasing our cooking
appliance. To help you obtain the maximum in cooking
satisfaction, we offer these suggestions:
1[7 Read this manual before using the appliance.
IE_ Review all safety and caution instructions.
lET Review the Troubleshooting Chart on
pages 29 and 30 if service becomes necessary.
Include the model and serial numbers of your
appliance when requesting service.
• Proof of purchase such as sales receipt
wilt be needed for warranty service.
You can contact us at:
Maytag Appliances Sales Company
Attn: CAIR _ Center
P. O. Box 2370
Cleveland, TN 37320-2370
1-800-688-1120
in our continuing effort to improve the quality and
performance of our cooking appliances, it may be
necessary to make changes to the appliance without
revising this manual.
WARNING: If the information in this
manual is not followed exactly, a fire or
explosion may result causing property
damage, personal injury or death.
Do not store or use gasoline or other
flammable vapors and liquids in the
vicinity of this or any other appliance.
WHAT TO DO IF YOU SMELL GAS:
• Do not try to light any appliance.
• Do not touch any electrical switch; do
not use any phone in your building.
• Immediately call your gas supplier
from a neighbor's phone. Follow the
gas supplier's instructions.
• If you cannot reach your gas supplier,
call the fire department.
- Installation and service must be
performed by a qualified installer, service
agency or the gas supplier.
WARNING
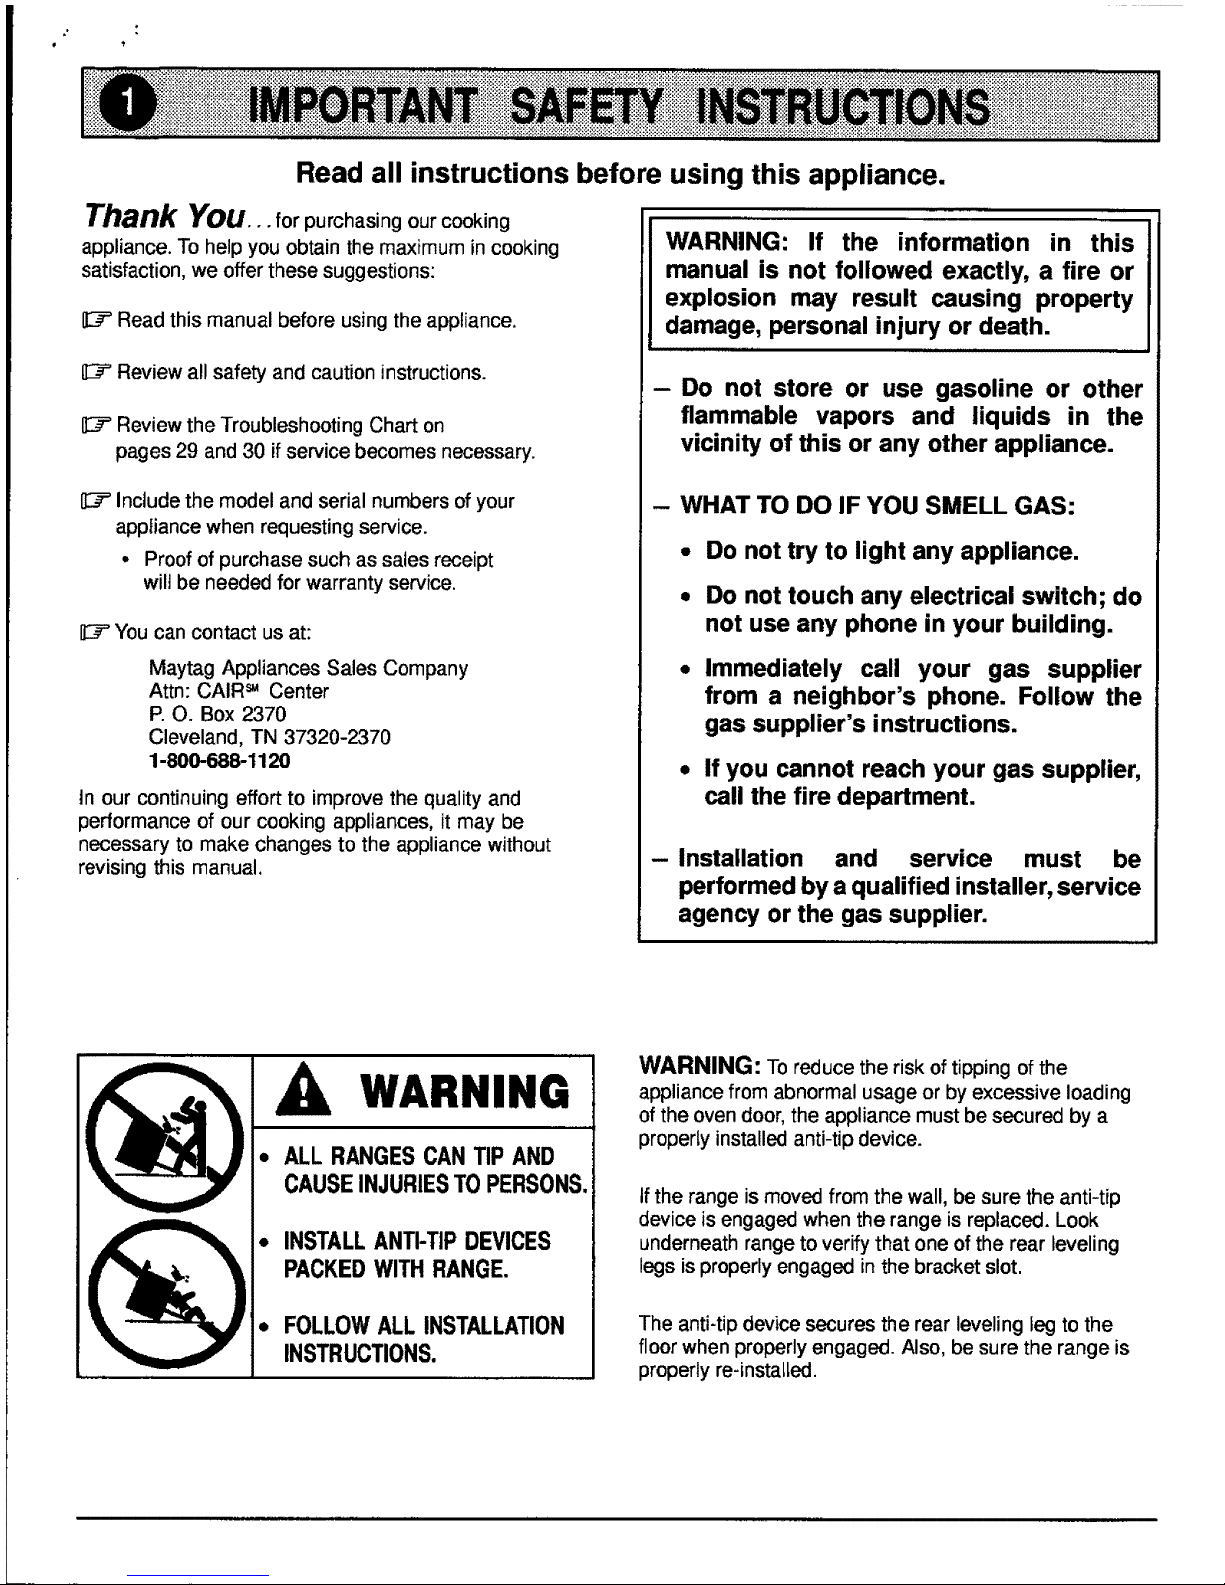
• ALLRANGESCANTIP AND
CAUSEINJURIESTOPERSONS.
• INSTALLANTI-TIPDEVICES
PACKEDWITHRANGE.
• FOLLOWALLINSTALLATION
INSTRUCTIONS.
WARNING: To reduce the risk of tipping of the
appliance from abnormal usage or by excessive loading
of the oven door, the appliance must be secured by a
properly installed anti-tip device.
Ifthe range is moved from the wall, be sure the anti-tip
device is engaged when the range is replaced. Look
underneath range to verify that one of the rear leveling
legs is properly engaged in the bracket slot.
The anti-tip device secures the rear leveling leg to the
floor when properly engaged. Also, be sure the range is
properly re-installed.
Page 3
The following instructions are based on safety
considerations and must be strictly followed to eliminate
the potential risks of fire, electric shock, or personal injury.
Have your appliance installed and properly grounded by a
qualified installer according to the installation instructions.
Have the installer show you the location of the gas shut off
valve and how to shut it off in an emergency.
Always disconnect power to appliance before servicing.
To ensure proper operation and avoid possible injury or
damage to unit do not attempt to adjust, repair, service, or
replace any part of your appliance unless it isspecifically
recommended in this book. All other servicing should be
referred to a qualified installer or servicer•
Be sure all packing materials are removed from the
appliance before operating it•
Keep area around appliance clear and free from
combustible materials, gasoline, and other flammable
vapors and materials.
If appliance is installed near a window, proper precautions
should be taken to prevent curtains from blowing over
burners.
NEVER leave any items on the cooktop. The hot air from
the vent may ignite flammable items and may increase
pressure in closed containers which may cause them to
burst.
Many plastics are vulnerable to heat. Keep plastics away
from parts of the appliance that may become warm or hot.
Do not leave plastic items on the cooktop as they may
melt or soften if left too close to the vent or a lighted
surface burner.
Many aerosol-type spray cans are EXPLOSIVE when
exposed to heat and may be highly flammable. Avoid their
use or storage near an appliance.
To eliminate the hazard of reaching over hot surface
burners, cabinet storage should not be provided directly
above a unit. If such storage is provided, it should be
limited to items which are used infrequently and which are
safely stored in an area subjected to heat from an
appliance. Temperatures may be unsafe for some items,
such as volatile liquids, cleaners or aerosol sprays.
Turn off appliance and ventilating hood to avoid spreading
the flame. Extinguish flame then turn on hood to remove
smoke and odor.
Use dry chemical or foam-type extinguisher or baking
soda to smother fire or flame• Never use water on a
grease fire.
If fire is in the oven or broiler pan, smother by closing
oven door.
If fire is in a pan on the surface burner, cover pan. Never
attempt to pick up or move a flaming pan.
NEVER leave children alone or unsupervised near the
appliance when it is in use or is still hot. NEVER allow
children to sit or stand on any part of the appliance.
Children must be taught that the
appliance and utensils in it can be
hot. Let hot utensils coot in a safe
place, out of reach of small children.
Children should be taught that an
appliance is not a toy. Children
should not be allowed to play with
controls or other parts of the unit.
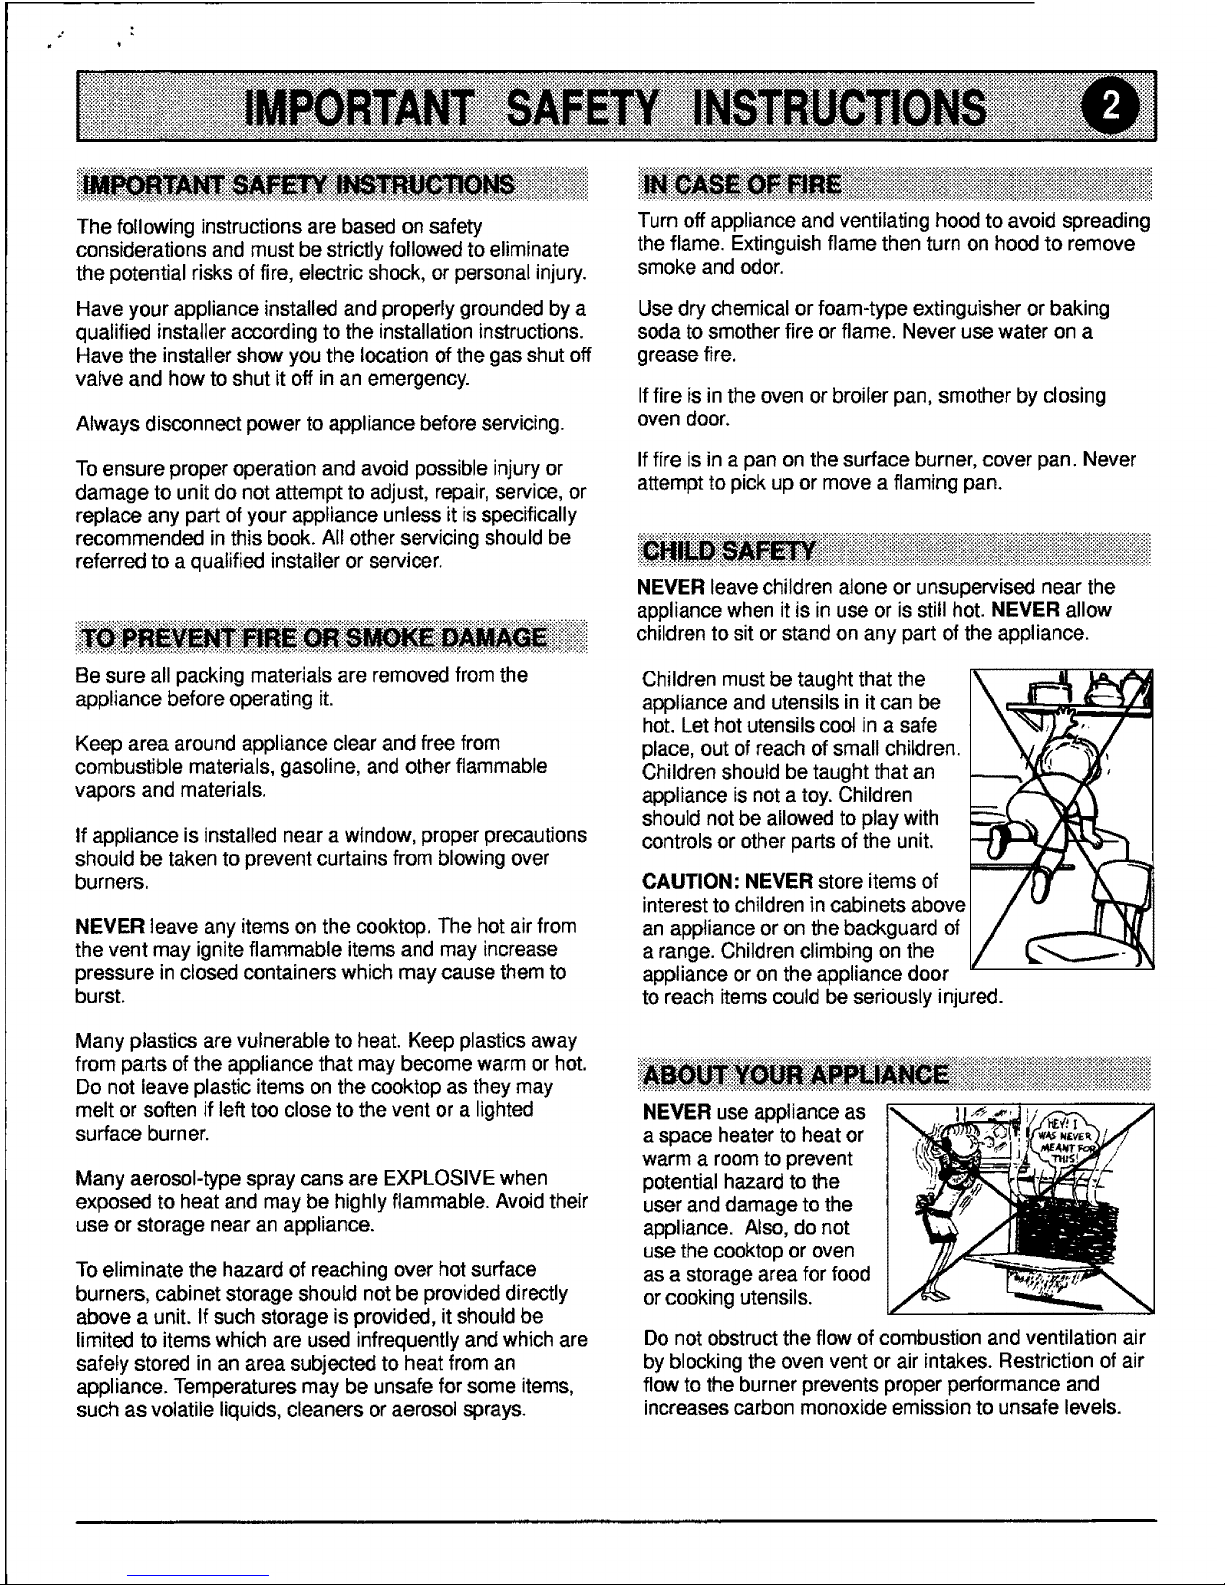
CAUTION: NEVER store items of
interest to children in cabinets above
an appliance or on the backguard of
a range. Children climbing on the
appliance or on the appliance door
to reach items could be seriously injured.
!!!!if!+
HEYER use appliance as
a space heater to heat or
warm a room to prevent
potential hazard to the
user and damage to the
appliance. Also, do not
use the cooktop or oven
as a storage area for food
or cooking utensils.
Do not obstruct the flow of combustion and ventilation air
by blocking the oven vent or air intakes. Restriction of air
flow to the burner prevents proper performance and
increases carbon monoxide emission to unsafe levels.
Page 4

Avoid touching oven vent area while oven is on and for
several minutes after oven is turned off. Some parts of the
vent and surrounding area become hot enough to cause
burns. After oven is turned off, do not touch the oven vent
or surrounding areas until they have had sufficient time to
cool.
WARNING: NEVER use
appliance door or drawer, if
equipped, as a step stool or
seat as this may result in
possible tippingof the
appliance, damage to the
appliance, and serious
injury.
Do not touch a hot oven light bulb with a damp cloth as
the bulb could break. Should the bulb break, disconnect
power to the appliance before removing bulb to avoid
electrical shock.
Always place a pan on a surface burner before turning it
on. Be sure you know which knob controls which surface
burner. Make sure the correct burner is turned on and that
the burner has ignited. When cooking is completed, turn
burner off before removing pan to prevent exposure to
burner flame.
Always adjust surface burner flame so that it does not
extend beyond the bottom edge of the pan. An excessive
flame is hazardous, wastes energy and may damage the
appliance, pan or cabinets above the appliance.
NEVER leave a surface
cooking operation unattended
especially when using a high
heat setting or when deep fat
frying. Boilovers cause
smoking and greasy spillovers
may ignite. Clean upgreasy
spills as soon as possible. Do
not use high heat for extended
cooking operations.
NEVER heat an unopened container on the surface
burner or in the oven. Pressure build-up may cause
container to burst resulting in serious personal injury or
damage to the appliance.
Use dry, sturdy pot holders. Damp pot holders may cause
burns from steam. Dish towels or other substitutes should
never be used as pot holders because they can trail
across hot surface burners and ignite or get caught on
appliance parts.
Always let quantities of hot fat used for deep fat frying
cool before attempting to move or handle.
Do not let cooking grease or other flammable materials
accumulate inor near the appliance, hood or vent fan.
Clean hood frequently to prevent grease from
accumulating on hood or filter. When flaming foods under
the hood, turn the fan on.
NEVER wear garments
made of flammable material
or loose fitting or long
hanging-sleeved apparel
while cooking. Clothing may
ignite or catch utensil
handles.
Always place oven racks in the desired positions while
oven is cool. Slide oven rack out to add or remove food,
using dry sturdy pot holders. Always avoid reaching into
the oven to add or remove food. If a rack must be moved
while hot, use a dry pot holder. Always turn the oven off at
the end of cooking.
Use care when opening the oven door. Let hot air or
steam escape before removing or replacing food.
PREPARED FOOD WARNING: Follow food
manufacturer's instructions. If a plastic frozen food
container and/or its cover distorts, warps, or is otherwise
damaged during cooking, immediately discard the food
and its container. The food could be contaminated.
Page 5
2
iii)i)i)i)i)i)iMiii)i)iiiii)i)i)i)!)ilR)i)i
Use pans with flat bottoms and handles that are easily
grasped and stay cool. Avoid using unstable, warped,
easily tipped or loose handled pans. Also avoid using
small pans, especially small pans with heavy handles, as
they can be unstable and easily tip. Pans that are heavy
to move when filled with food may also be hazardous.
Be sure utensil is large enough to properly contain food
and avoid boilovers. Pan size is particularly important in
deep fat frying. Be sure pan will accommodate the volume
of food that is to be added as well as the bubble action of
fat.
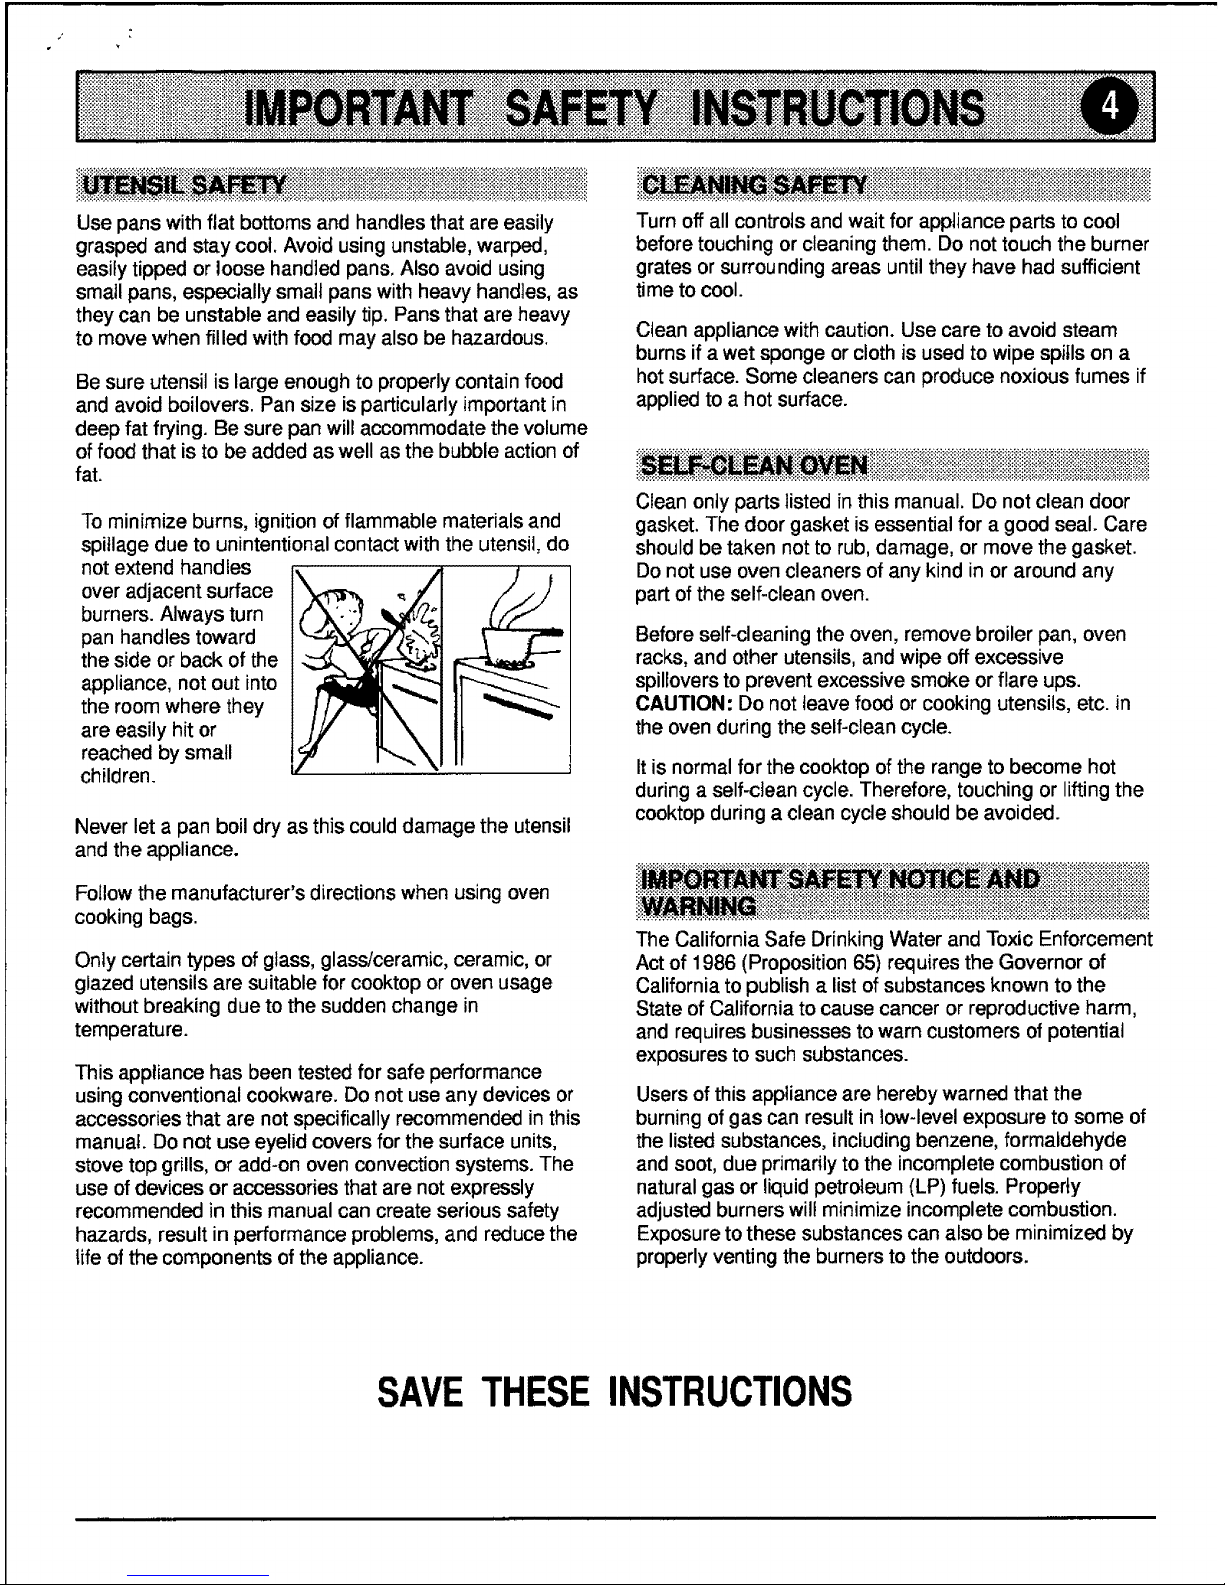
To minimize burns, ignition of flammable materials and
spillage due to unintentional contact with the utensil, do
not extend handles
over adjacent surface
burners. Always turn
pan handles toward
the side or back of the
appliance, not out into
the room where they
are easily hit or
reached by small
children.
Never let a pan boil dry as this could damage the utensil
and the appliance.
Follow the manufacturer's directions when using oven
cooking bags.
Only certain types of glass, glass/ceramic, ceramic, or
glazed utensils are suitable for cooktop or oven usage
without breaking due to the sudden change in
temperature.
This appliance has been tested for safe performance
using conventional cookware. Do not use any devices or
accessories that are not specifically recommended in this
manual. Do not use eyelid covers for the surface units,
stove top grills, or add-on oven convection systems. The
use of devices or accessories that are not expressly
recommended in this manual can create serious safety
hazards, result in performance problems, and reduce the
Ufe of the components of the appliance.
_:;........ES'"_i_'_::i'':: _'_'_"i''_" "i$"" "$'_":8""'"'"" " ":" i:i_'.)_:i'.i'.iS_$_S_¢i$_$i'.iSi$i'.!'.iS!$i:i$i$i$i$i:i$!$!:!@;$i_:!:!$!>::!:!:!:_i:_i_$!:!:!$i$!:E
il)iiiiiiil
Turn off all controls and wait for appliance parts to cool
before touching or cleaning them. Do not touch the burner
grates or surrounding areas until they have had sufficient
time to cool.
Clean appliance with caution. Use care to avoid steam
burns if a wet sponge or cloth is used to wipe spills on a
hot surface. Some cleaners can produce noxious fumes if
applied to a hot surface.
Bi@)ili@ii)ii iiii!iB@!!iBiiiiiiiiiii!iiii)iiiiii
Clean only parts listed (n this manual. Do not clean door
gasket. The door gasket is essential for agood seal. Care
should be taken not to rub, damage, or move the gasket.
Do not use oven cleaners of any kind in or around any
part of the self-clean oven.
Before self-cleaning the oven, remove broiler pan, oven
racks, and other utensils, and wipe off excessive
spiUovers to prevent excessive smoke or flare ups.
CAUTION" Do not leave food or cooking utensils, etc. in
the oven during the self-clean cycle.
It is normal for the cooktop of the range to become hot
during a self-clean cycle. Therefore, touching or lifting the
cooktop during a clean cycle should be avoided.
The California Safe Drinking Water and Toxic Enforcement
Act of 1986 (Proposition 65) requires the Governor of
California to publish a list of substances known to the
State of California to cause cancer or reproductive harm,
and requires businesses to warn customers of potential
exposures to such substances.
Users of this appliance are hereby warned that the
burning of gas can result in low-level exposure to some of
the listed substances, including benzene, formaldehyde
and soot, due primarily to the incomplete combustion of
natural gas or liquid petroleum (LP) fuels. Properly
adjusted burners will minimize incomplete combustion.
Exposure to these substances can also be minimized by
properly venting the burners to the outdoors.
SAVETHESE INSTRUCTIONS
Page 6
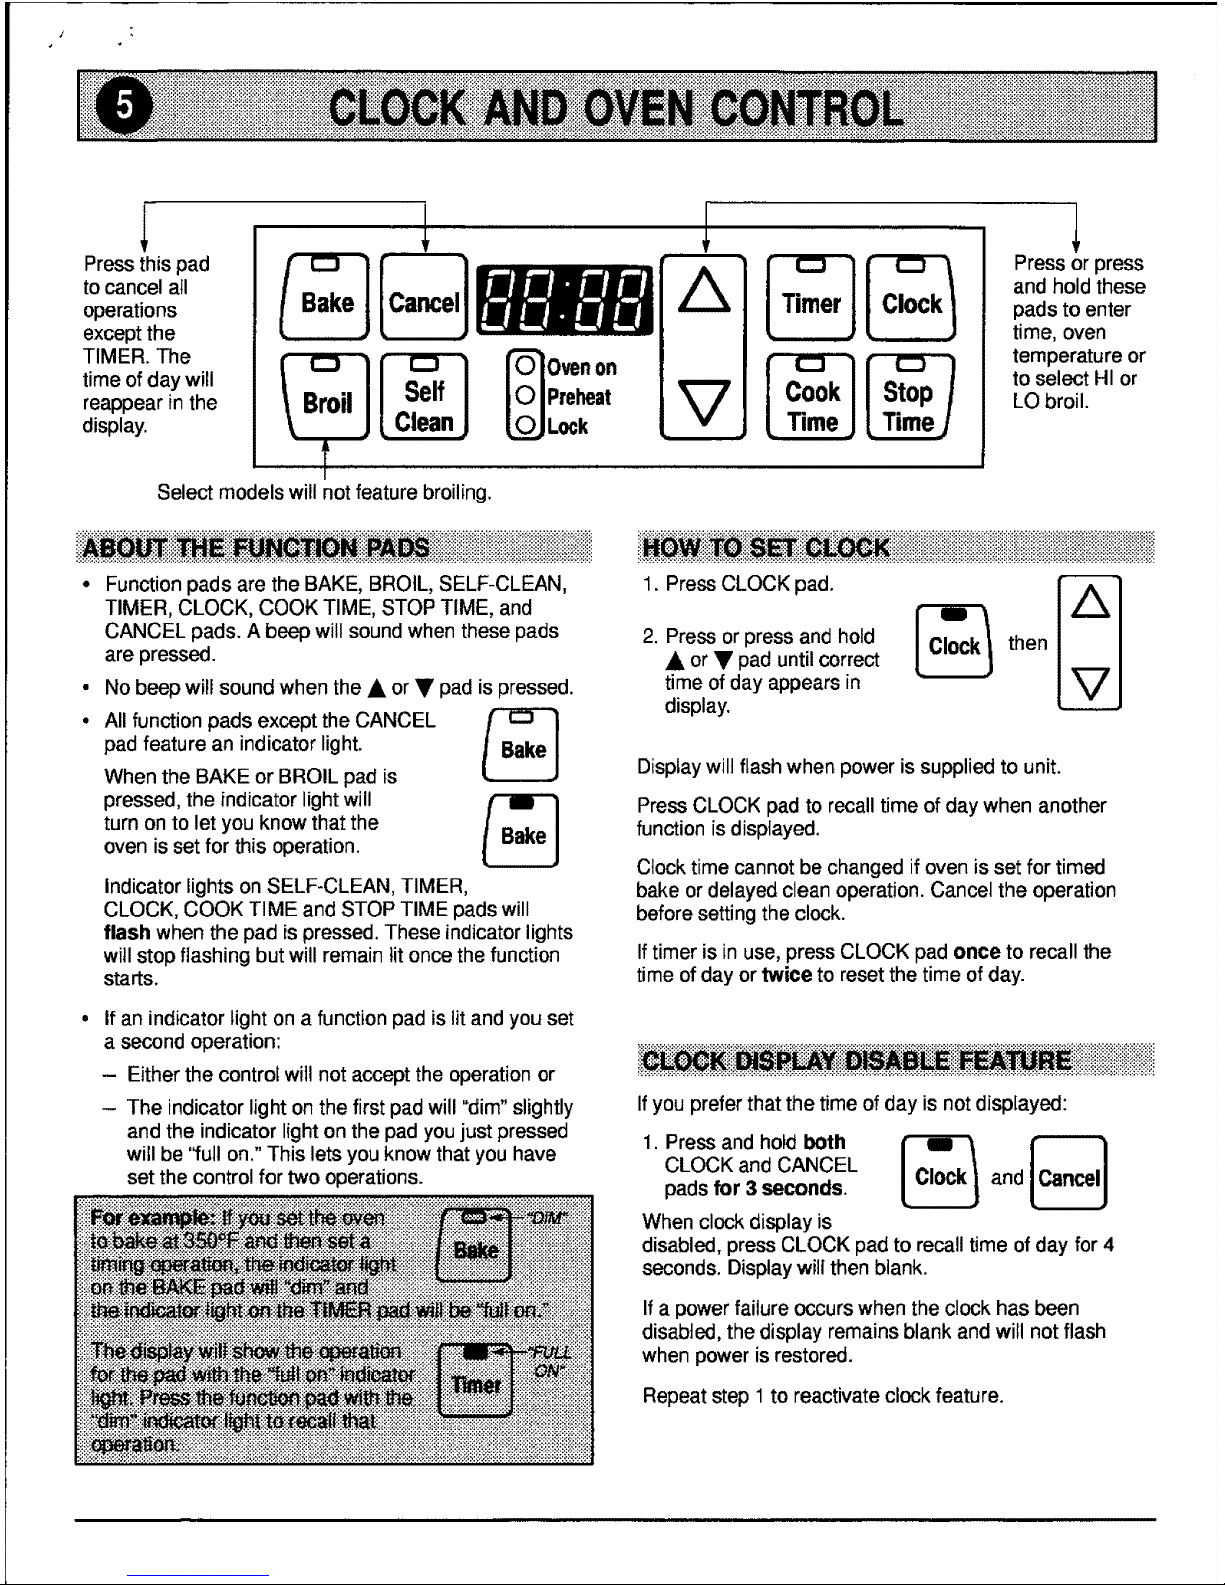
Press this pad
to cancel all
operations
except the
TIMER. The
time of day will
reappear in the
display.
Select models will not feature broiling.
Ovenon
Preheat
Lock
Press or press
and hold these
pads to enter
time, oven
temperature or
to select HI or
LO broil.
Function pads are the BAKE, BROIL, SELF-CLEAN,
TIMER, CLOCK, COOK TIME, STOP TIME, and
CANCEL pads. A beep will sound when these pads
are pressed.
I
No beep will sound when the • or V pad is pressed.
All function pads except the CANCEL
pad feature an indicator light.
When the BAKE or BROIL pad is
pressed, the fndicator lightwill /_
turn on to let you know that the
oven is set for this operation.
Indicator lights on SELF-CLEAN, TIMER,
CLOCK, COOK TIME and STOP TIME pads will
flash when the pad is pressed. These indicator lights
will stop flashing but will remain tit once the function
starts.
! ii i i!i iiiiiiiiiiiiiiii!iii ! iii iiiiiiiiii iiii iiiiiiii!i iiii i i i!i i ii i i ii! !i! ii !i ! i !
1. Press CLOCK pad.
2. Press or press and hold
• or _' pad until correct
time of day appears in
display.
then {_]
Display will flash when power is supplied to unit.
Press CLOCK pad to recall time of day when another
function isdisplayed.
Clock time cannot be changed if oven is set for timed
bake or delayed clean operation. Cancel the operation
before setting the clock.
If timer is in use, press CLOCK pad once to recall the
time of day or twice to reset the time of day.
If an indicator light on a function pad is lit and you set
a second operation:
- Either the control will not accept the operation or
- The indicator light on the first pad will "dim" slightly
and the indicator light on the pad you just pressed
will be "full on." This lets you know that you have
set the control for two operations.
If you prefer that the time of day is not displayed:
1. Press and hold both I_
CLOCK and CANCEL
pads for 3 seconds, and
When clock display is
disabled, press CLOCK pad to recall time of day for 4
seconds. Display will then blank.
If a power failure occurs when the clock has been
disabled, the display remains blank and will not flash
when power is restored.
Repeat step 1 to reactivate clock feature.
Page 7
j .*
.................i i!i!iiiriiiiiiiiii i
1. Press TIMER pad. |
2. Press or press and hold
A or • pad until correct
time appears in display, then
The timer feature does not operate the oven.
The timer can be set from 1 minute [0:01] up to 9 hours
and 50 minutes [9:50].
The timer will start automatically, The TIMER indicator on
the TIMER pad will light whenever the timer is in use. One
long beep and "End" will be briefly displayed to signal the
end of the timer operation.
To cancel timer: Press and hold TIMER pad for 3
seconds. Time ofday will reappear in the display.
The 12 Hour Energy Saver feature automatically turns off
the oven if it was accidentty left on for 12 hours. To
deactivate this feature so the oven will NOT turn off
automatically at the end of 12 hours:
1. Press and hold CLOCK pad
for 3 seconds.
2. Press A or • pad until 8:88
appears in the display.
Current time of day will
reappear in the display after
4 seconds.
Repeat steps I and 2 to reactivate the 12 Hour Energy
Saver feature. 12:00 will appear in display to indicate the
Energy Saver feature is restored.
!! !! i!i iiiii!!ii!!!!ii!ili!iiiii!iiiii!i!i!!ii!i!iii!i
The Control Lock-Out feature prevents the oven from
being turned on.
To activate:
1. Press and hold both _ [_
STOP TIME and and
CANCEL pads for 3
seconds.
.
"OFF" wilt appear in display
when this feature is activated. Only the clock and
timer functions will operate when Control Lock-Out
feature is activated.
Repeat step 1 to deactivate.
i!i::::::::::::::::::::::::::::::::::::::::::::::::i!i_!::_,,:!_ :,_::::_ii::ii.............._::':_"::i:':":::_i::i::::_::_:::':'_z":':_:_:'::_:i__iii_i_i i__!ii!!::':::i_::::'................_:::_:i!::i:,:,ii:,::_i!_::!::iiiiii!::iiii:'iiii:,iiiiii_iii_iiiiiiiiiiilii!!ii_!ii_!i!!!!i:;i!!i!iiii!i!!!::!!ii
You have a choice of three "end of cooking" reminder
beeps for the Automatic Oven Timer feature.
• Option 1: Four beeps then one beep every 30 seconds
for the next 5 minutes or until CANCEL pad is
pressed. (Default option.)
• Option 2: Four beeps. There are no other beeps.
° Option 3: Four beeps then one beep every minute for
the next 12 hours or until CANCEL pad is pressed.
How to select the desired option:
1. Press and hold both
COOK TIME and CLOCK
pads for 3 seconds.
• A single beep will sound.
• Display will show current
option.
2. Press & or V pad to
select the option number
you wish. The current time
of day will reappear in the
display after 4 seconds.
_and
Page 8
t
"Yourrange is equipped with pilotless ignition. Be sure all
surface controls are set in the OFF position prior to
supplying gas to the appliance.
IMPORTANT: When the appliance is first installed, the
surface burners may be difficult to light due to air in the
gas line. This may also occur if the appliance has been
disconnected from the main gas supply or if it has not
been used for several days or weeks.
To remove the air in the gas line, hold a tighted match
next to the burner head and turn the knob on. When
the burner lights, either adjust the knob to the desired
flame size or turn the burner off.
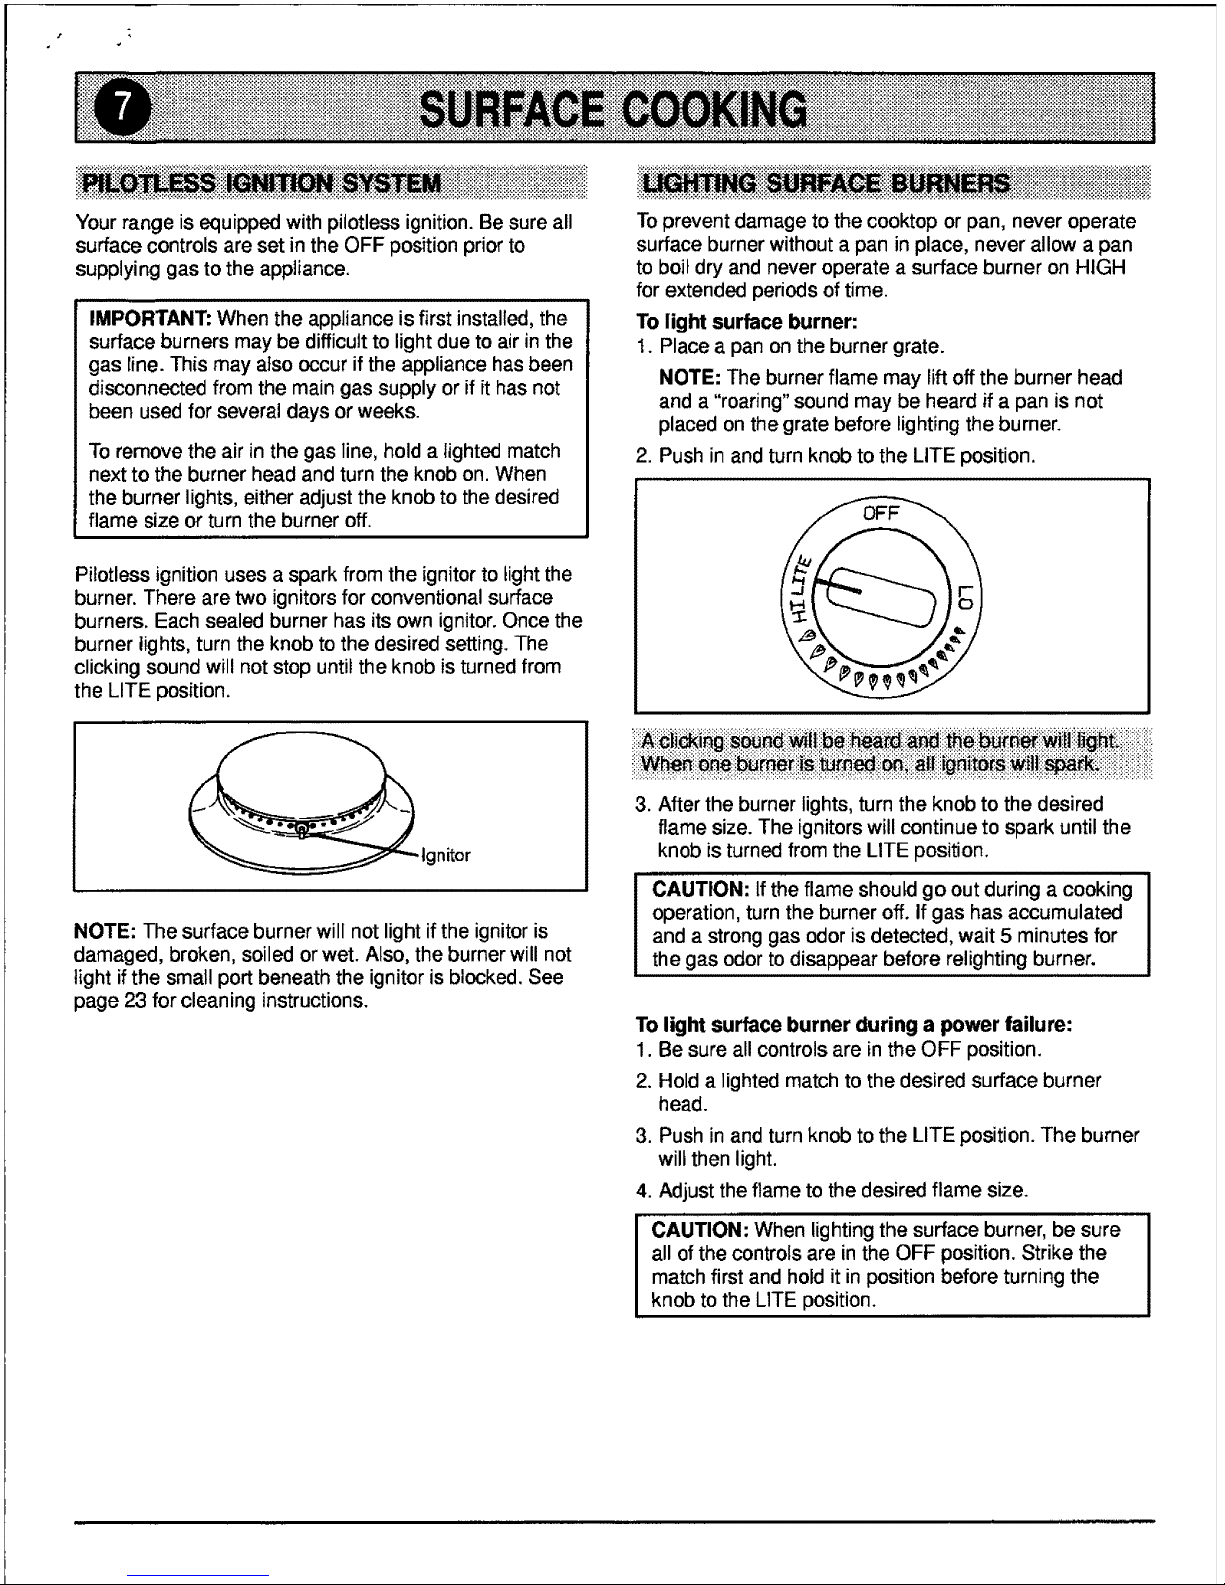
Pilotless ignitionuses a spark from the ignitor to light the
burner. There are two ignitors for conventional surface
burners. Each sealed burner has its own ignitor. Once the
burner tights, turn the knob to the desired setting. The
clicking sound will not stop until the knob is turned from
the LITE position.
NOTE: The surface burner will not light if the ignitor is
damaged, broken, soiled or wet. Also, the burner will not
light if the small port beneath the ignitor is blocked. See
page 23 for cleaning instructions.
To prevent damage to the cooktop or pan, never operate
surface burner without a pan in place, never allow a pan
to boil dry and never operate a surface burner on HIGH
for extended periods of time.
To light surface burner:
1. Place a pan on the burner grate.
NOTE: The burner flame may lift off the burner head
and a "roaring" sound may be heard if a pan is not
placed on the grate before lighting the burner.
2. Push in and turn knob to the LITE position.
3. After the burner lights, turn the knob to the desired
flame size. The ignitors will continue to spark until the
knob is turned from the LITE position,
CAUTION: Ifthe flame should go out during a cooking
operation, turn the burner off. If gas has accumulated
and a strong gas odor is detected, wait 5 minutes for
the gas odor to disappear before relighting burner.
To light surface burner during a power failure:
1. Be sure all controls are in the OFF position.
2. Hold a lighted match to the desired surface burner
head.
3. Push in and turn knob to the LITE position. The burner
will then light.
4. Adjust the flame to the desired flame size.
CAUTION: When lighting the surface burner, be sure
all ofthe controls are in the OFF position. Strike the
match first and hold it in position before turning the
knob to the LITE position.
Page 9
:_:_:_:_:_::::::_:_:_::::_::>:_:::::::_:_:_;:_;:::::::;:::::_:_:_:_:;::_`:::_::::;:_5:_:_::_:_::::_:_:::_:__ ,+, :; _; ,-;- :;_:_- ,_, :_::;,,_. .,_,+ .€+:,. -.:. ¢.- _ ; _;, :,.,,, _`_:_:::_:_:_:_;:_::::::;::_:;;::::;::::::_:::;_:_::_:::::;::::_:::::::::::::_::::_:_::::_:;_:_:_t_::::_::_` ,_;,
+++P+++++++++++++++i+J+++iiii++++P+++++++iQ+++
Use a HIGH flame setting to quickly bring liquids to a boil
or to begin a cooking operation. Then reduce to a lower
setting to contin ue cooking. Never leave food
unattended when using a HIGH flame setting.
A properly adjusted burner with clean ports will light within
a few seconds.
On natural gas, the flame will be blue with a deeper blue
core; there should be no trace of yellow in the flame.
A yellow flame indicates an improper mixture of air/gas.
This wastes fuel, so have a serviceman adjust the mixture
if a yellow flame occurs.
On LP gas, some yellow tipping is acceptable. This is
normal and adjustment is not necessary.
An intermediate flame size is used to continue a cooking
operation. Food will not cook any faster when a higher
flame setting is used than needed to maintain a gentle
boil. Remember, water boils at the same temperature
whether boiling gently orvigorously.
Use LO to simmer or keep foods at serving temperatures.
Some cooking may take place on the LO setting if the
cooking utensil is covered. If food does boil on the LO
setting, it is possible to reduce the heat by rotating the
knob toward the OFF position.
You may hear a "popping" sound on some types of gas
when the surface burner is turned off. This is a normal
operating sound of the burner.
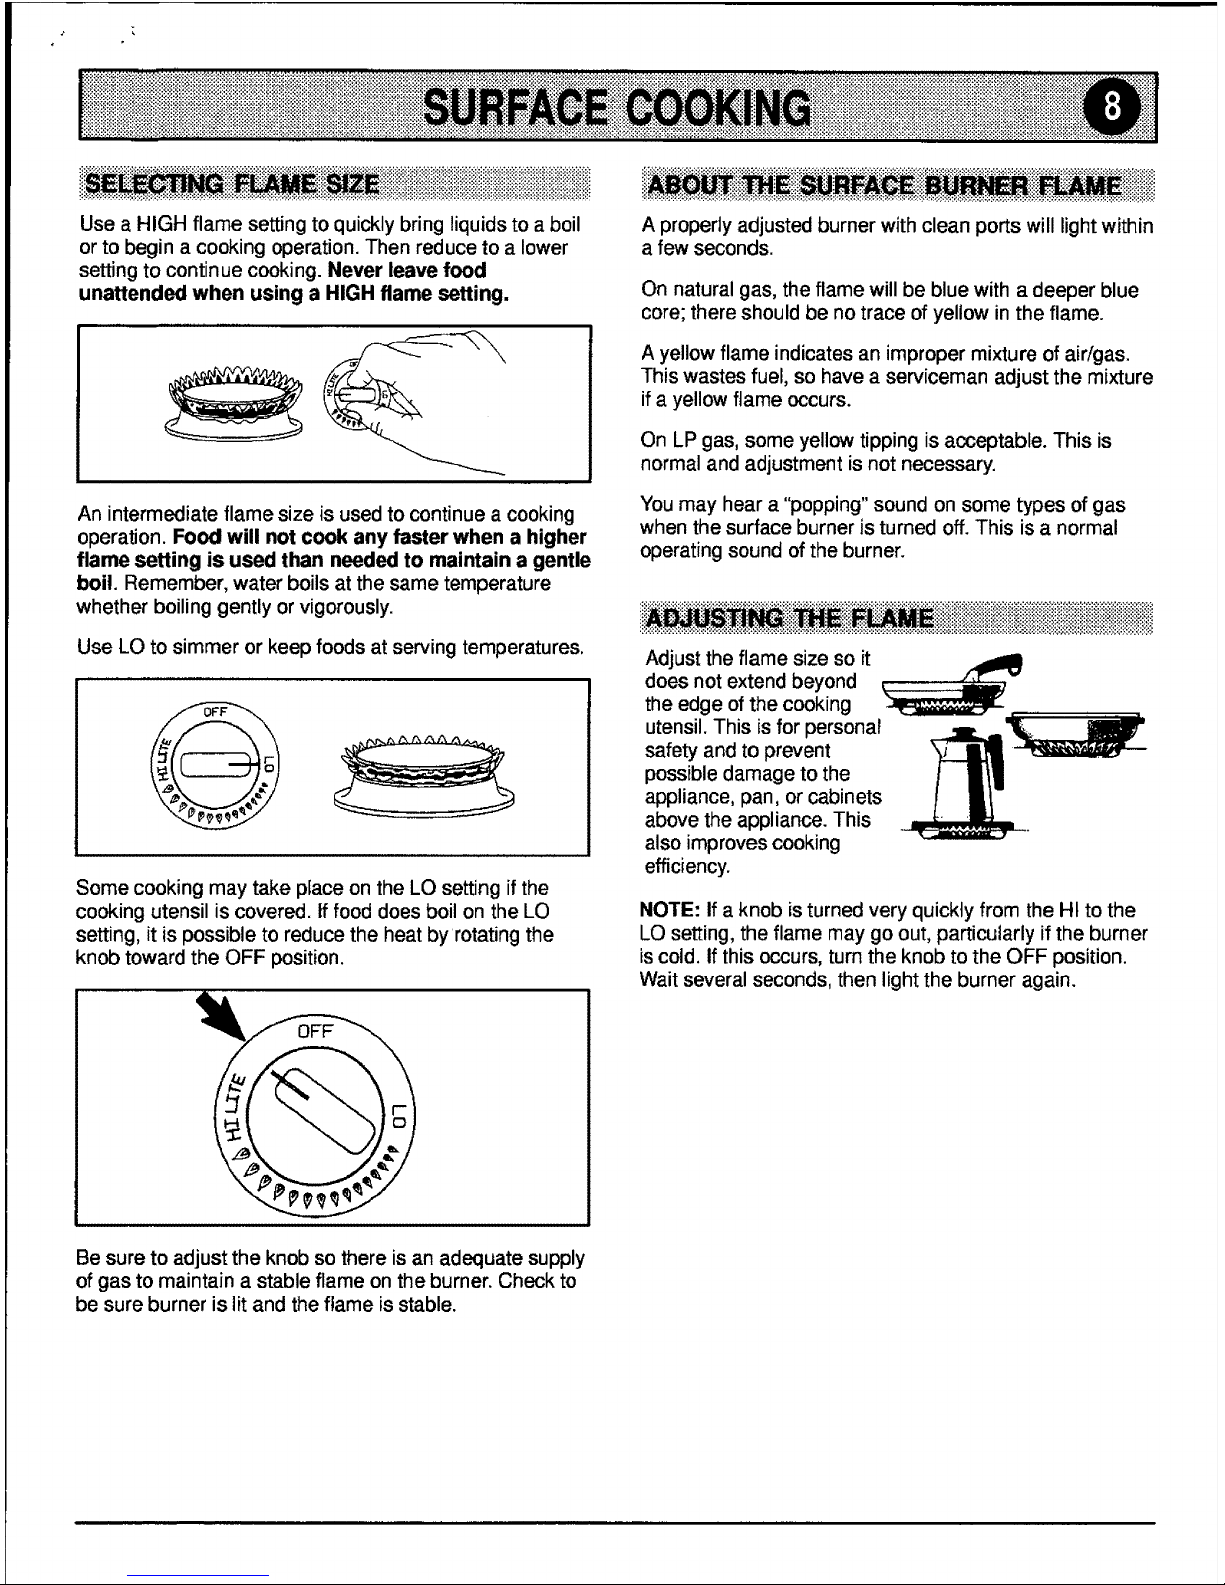
Adjust the flame size so it
does not extend beyond
the edge of the cooking
utensil. This isfor personal
safety and to prevent
possible damage to the
appliance, pan, or cabinets
above the appliance. This
also improves cooking
efficiency.
NOTE: If a knob is turned very quickly from the HI to the
LO setting, the flame may go out, particularly if the burner
iscold. If this occurs, turn the knob to the OFF position.
Wait several seconds, then light the burner again.
Be sure to adjust the knob so there is an adequate supply
of gas to maintain a stable flame on the burner. Check to
be sure burner is lit and the flame is stable.
Page 10
Undernocircumstancesarethesurfaceburner
assembliestobetakenapartforcleaning.Thesurface
burnerassemblycanberemovedtocleantheburnerbox
area.
The two surface burner assemblies are secured in place
during transportation with screws. Once the range is
installed, these screws may be removed to allow quick
and easy removal of the burner assemblies.
To remove: Allow the burner assembly to cool. Lift up
cooktop. Grasp the burner assembly and rotate it sfightly
toward the left to release the two tabs on the assembly.
Then lift the assembly and pull toward the back of the
cooktop until the air shutter ends on the assembly release
from the valves.
To replace: Insert the air shutter ends on the burner
assembly over the valves and lower the assembly into
place. Be sure to secure the two tabs on the burner
assembly into the two slots on the burner support bracket
which is mounted to the burner box bottom. (NOTE: If the
tabs are notproperly inserted into the slots, the assembly
may rock and the burners may not light properly.)
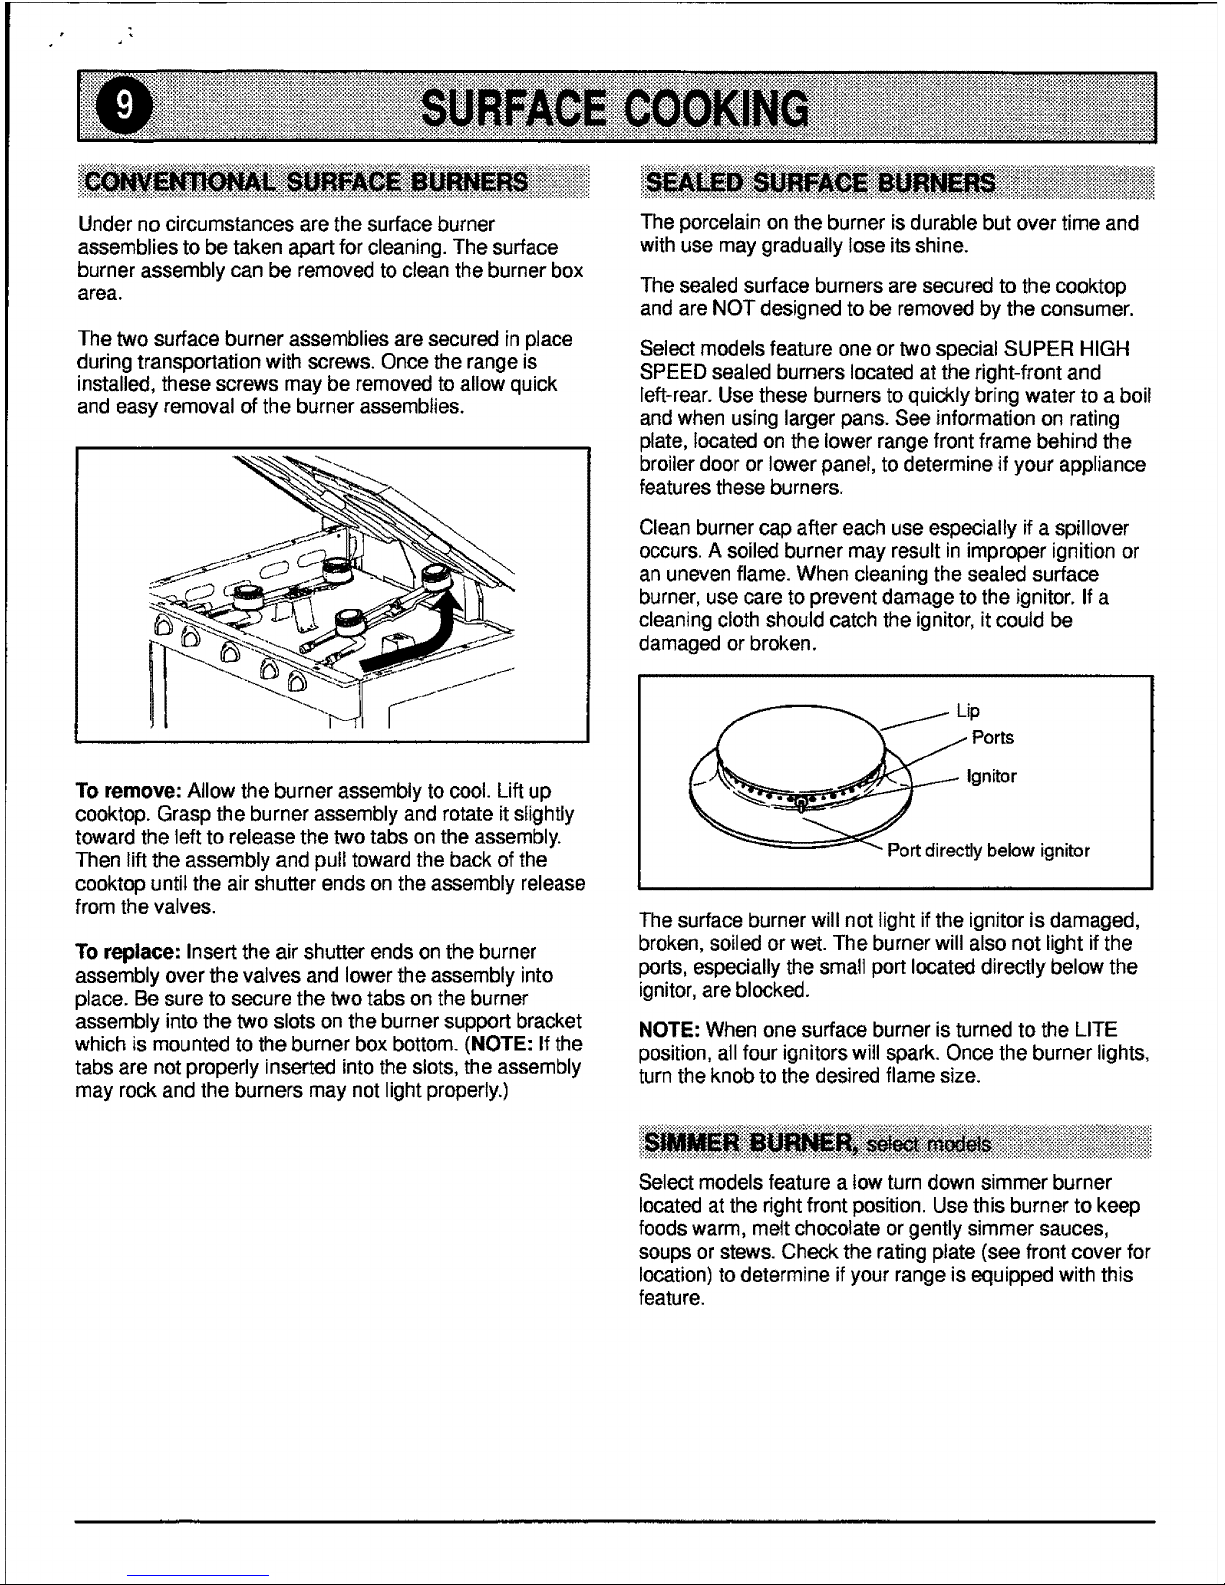
The porcelain on the burner is durable but over time and
with use may gradually lose its shine.
The sealed surface burners are secured to the cooktop
and are NOT designed to be removed by the consumer.
Select models feature one or two special SUPER HIGH
SPEED sealed burners located at the right-front and
left-rear. Use these burners to quickly bring water to a boil
and when using larger pans. See information on rating
plate, located on the lower range front frame behind the
broiler door or lower panel, to determine if your appliance
features these burners.
Clean burner cap after each use especially if a spillover
occurs. A soiled burner may result in improper ignition or
an uneven flame. When cleaning the sealed surface
burner, use care to prevent damage to the ignitor. If a
cleaning cloth should catch the ignitor, it could be
damaged or broken.
___ Lip
lgnitor
-" Port directly below ignitor
The surface burner will not light if the ignitor is damaged,
broken, soiled or wet. The burner will also not light if the
ports, especially the small port located directly below the
ignitor, are blocked.
NOTE: When one surface burner is turned to the LITE
position, all four ignitors will spark. Once the burner lights,
turn the knob to the desired flame size.
iii i!i!ili!iiiii!i!iii!iiiiiii!iiii!!!ii!i!i
Select models feature a fow turn down simmer burner
located at the right front position. Use this burner to keep
foods warm, melt chocolate or gently simmer sauces,
soups or stews. Check the rating plate (see front cover for
location) to determine if your range is equipped with this
feature.
Page 11

Iiiiiiiiiiiiiiiliiliiiiiiiiiiiiii!iiii!iiiii!ii iii iN iiiiii iii!iiiili!i!iii!iiiiiii!iiiiiii I
Cookware which extends more than two inches beyond
the grate, rests on two grates, or touches the cooktop may
cause a build up of heat which may result in damage to
the the burner grate, burner or cooktop.
Cookware, such as a wok with a support ring, which
restricts air circulation around the burner witl cause heat
to build up and may result in damage to the burner grate,
burner or cooktop.
Foods cook faster when the cookware is covered because
more heat is retained. Lower the flame size when
cookware is covered.
The cooking performance is greatly affected by the type of
cookware used. Proper cookware will reduce cooking
times, use less energy and produce more even cooking
results. For best results use a heavy gauge metal pan
with a smooth flat bottom, straight sides and atight fitting
lid.
Cookware with uneven, warped, or grooved bottoms do
not make good contact with the heating surface, will
reduce heat conductivity and result in slower, less even
heating.
To determine the flatness of the bottom of a pan, place the
edge of a ruler across the bottom of the utensil. Hold it up
to the light. Little or no light should be visible under the
ruler.
E
The pan material determines how evenly and quickly heat
is conducted from the heat source to the food. Some
widely used pan materials are:
Aluminum - excellent heat conductor. Some foods will
cause it to darken or pit. Often used as a bottom coating
to improve the heating of other pan materials.
Copper - excellent heat conductor. Discolors easily,
requires constant polishing. Often used as a bottom
coating to improve the heating of other pan materials.
Stainless Steel - slow conductor of heat. Develops hot
spots and produces uneven cooking results. Durable,
attractive, easy to clean and stain resistant. Wilt distribute
heat better if other metals (aluminum or copper) are
combined or sandwiched together as a bottom coating.
Cast Iron - slow heat conductor. Cooks evenly once
temperature is reached. Heavy. Needs seasoning to make
cleaning easier and to prevent sticking and rusting.
Glass - slow heat conductor. Easy to clean. Some types
may only be used in the oven.
Porcelain Enamel - glass-like substance fused to metal.
Heating characteristics depend on base material. Easy to
clean.
iii iiiiilliiliii!iiiiii!ili!iiiii!ii!iiiiilil iliiiiiiiill
Acceptable water-bath or pressure canners should not
be oversized and should not rest on two burner grates.
They should also have flat bottoms.
When canning, use the HI setting just until the water
comes to a boil or pressure is reached in a pressure
canner, then reduce to a setting that maintains the
pressure or a boil.
Prolonged use of the HI setting, the use of incorrect
canning utensils, or the use of improper canning
techniques may produce excessive heat and result in
permanent damage to the appliance.
NOTE: For additional canning information contact your
local County Extension Office. Or, contact Alltrista
Consumer Products Company, marketer of Ball brand
home canning products at 800-240-3340 or write:
AIItrista Corp., Consumer Affairs Dept., P.O. Box 2729,
Muncie, IN 47307-0729.
Page 12

_,,...,,,,._.,.._, ..... _``'``_'```_`_"_`-_";`_`_`_-_`_`_`_;`--_`_`_`,_```LJ_`````_`_!!_!LU!`)__```` ,....,,..,..,,,,,. ,.,. ,.._,..,.., .......,,.._.._...,,.,. ......................... L,.:.............. ,1,,..'LJ........................................................................ _J',',.,,., _, .,..,.
Be sure oven control is set in the OFF position prior to
supplying gas to the appliance.
Your appliance features pilotless ignition. A glo bar will
light the oven burner. With this type of ignition system, the
oven will not operate during a power failure or if the oven
is disconnected from the wall outlet. No attempt should
be made to operate oven during a power failure.
! y !!i i!!!i!i i!!j!iii!i!!!!!!! !!!!!!!!i!!ii!ii i!i!i iii!ii!iiiiiiiiii iiiiiiiii!i!i!ii!ii iiiiiii!iiii! iiiii!!i!i!ii!iii!!!iii ii!i!! !ii!i!!iiii! iii!i!i
The size and appearance of a properly adjusted oven
burner flame should be as shown:
Cone in center is
-.. Cone approx. 1/2-inch
smaJler
The oven temperature is maintained by cycling the burner
on and off. After the oven temperature has been set, there
will be about a 45 second delay before the burner ignites.
This is normal and no gas escapes during this delay.
iiiliEiiii!iiii!iiiii@!!!i!!!!!!i!!!!j!!!i!i!i!!iii!!iiii!Eii!i
• Do not lock oven door during a cooking operation.
If the door is locked the LOCK
indicator will light and the
operation will be canceled.
Unlock the door then reset the
operation.
Ovenon
Preheat
Lock
- If oven temperature is above 400°1, the internal
locking mechanism will engage and the door can not
be unlocked until the oven has cooled.
The oven burner cycles on and off to maintain the oven
temperature for baking. The broil burner cycles on and
off to maintain temperatures for broiling.
NOTE: Select models do not feature broiling.
If you press BAKE or BROIL pad and do not set an
oven temperature or broil setting within 30 seconds, the
program will automatically cancel. The time of day will
reappear in the display.
To change oven temperature or broil setting during
cooking:
- If temperature is displayed, press
A or y pad to select the new
temperature.
- If another function is displayed, press
BAKE or BROIL pad then press
A or _ pad to select new temperature.
During the clean cycle, and some extended oven cooking
operations, you may hear a "popping" sound when the
burner cycles off. This is a normal operating sound of the
burner.
ii i iiiiiiiiiiiiiiiililii!i iiiiiii!i!iiiii!iiiiiiii!i!iii!iiiii
The oven vent is located at the base of the backguard.
When the oven is in use, this area may feel warm or hot to
the touch.
To prevent baking problems, do not block the vent
opening in any way. Also, do not place plastics near the
vent opening as heat from the vent could distort or melt
the plastic.
Page 13

1.PressBAKEpad.
• BAKEindicatorontheBAKEpadwill light.
• 000 will light in display.
BAKE -"-_tPi_
INDICATOR _ o,_l,^ I
LIGHT
2. Press or press and hold A or V pad to select oven
temperature.
• 350 ° will light when either pad is pressed.
• Oven temperature can be set from 170° to 550°.
3. There will be a 4 second delay before the oven turns
on. When the oven turns on:
• OVEN ON indicator will light.
• PREHEAT indicator will light.
• The preselected temperature will remain in display.
Oven on
Preheat
Lock
4. Allow 8 to 15 minutes for the oven to preheat.
• A single beep will indicate that the oven has
preheated.
• The OVEN ON indicator will remain lit.
• The PREHEAT indicator will turn off.
Ovenon
Preheat
Lock
5. Place food in the oven.
NOTE: The oven temperature can be changed at
any time. if the temperature is changed, the
PREHEAT indicator will turn back on until the new
temperature is reached. A beep will signal that the
new temperature has been reached.
6. Check cooking progress at the minimum cooking
time. Cook longer if needed.
NOTE: See pages 13, 14, and 15 for additional
information on baking and roasting.
7. Press CANCEL pad and remove food from the oven,
. The BAKE indicator on the BAKE pad will turn off.
• The OVEN ON indicator will turn off.
• ]]me of day will reappear in display.
NOTE: If you forget to turn off the oven, it wilt
automatically turn off at the end of 12 hours. If
you wish to deactivate this energy saving feature,
see page 6.
Page 14

ii_iiiiiiiii iii i:':::;:_:;_;:__ _ "``:'_:::::_`:_;_;_:_:_*:':_*_:_*:_:.:*_:;:_;_:;_;_:;:;_:_:;:`:':;!_:_:;:::_:_:_":`:;_`_:_*_:_"_:_":`:_:_:_:*:_:_*:`:`:*:":`:*:`:iiii!iiiiiiiiiiiiiiiiiiiii_iiii!iiiiiiiUiiiiiiii__iii_i!ii_iii!_iiiiiii_._:_":':_":_:.:_:_:':`_:_:':_:_:'_:¢_:_:`:_:`:_:_`:_:`:_:_:_:_.':_*:':`:_:_':':_:_':_:':'_:_'_:"_ _:_"__:_.:`:.:_:_;.:.:_;_:_:::_:_:_:::::_:;_:_:_:_::::_:::_:_::_:_:::_:_:_:_:_:_:::_:_:::_:_:_:::_:_:_:._iiiiii !i iiiiiiiiiiiii!iiiii iii:_':::_::'_;iiiiii iiii_:_::::::::::;:;:;:_;:;:;5:;:;:;:::::_;_:;:;;::_;:_:_;;::_;;::_iiiiiiiii iiiiiiii 1
i iiii ! iiHii iiiiiiiiii!iiii i! ii!!i!ii ii !ii! ! i!! !!i!iiii!iiii i ii ii
Preheating is necessary for baking. Allow about 8 to 15
minutes for the oven to preheat. A single beep will
indicate that the oven is preheated. It is not necessary to
preheat for roasting.
Cool(ware material plays an important part in baking
results. Always use the type and size of pan calted for in
the recipe. Cooking times or cooking results may be
affected if the wrong size is used.
Selecting a temperature higher than desired will NOT
preheat the oven any faster, and may have a negative
effect on baking results.
• A shiny metal pan reflects heat away from the food.
This type of pan produces lighter browning and asofter
crust. Use shiny pans for baking cakes or cookies.
Do not cover an entire rack with foil or place foil directly
under cookware. To catch spillovers, place a piece of foil, a
little larger than the pan, on the rack below the pan. Do not
place foil on the oven bottom.
!i!!; i i e iiiii iiiii ii!iiiiiiii!i! i iii ii !iiiii iiii!iiiiiiii ii i iii!!i!ii! !i!i
Oven characteristics: Each oven has its own personal
baking characteristics. Therefore, do not expect that your
new oven wilt perform exactly like your previous oven. You
may find that the cooking times, oven temperatures, and
cooking results differ somewhat from your previous range.
Allow a period of adjustment.
Use a reliable recipe and accurately measure fresh
ingredients. Carefully follow directions for oven
temperature and cooking time.
Use the correct rack position. Baking results may be
affected if the wrong rack is used. For optimum results,
bake foods on one rack. Select a rack position that
locates the food in the center of the oven. If baking on two
racks, select rack positions #2 and 4, #1 and 4 or #2 and
5.
Top browning may be darker if food is located
toward the top of the oven.
Bottom browning may be darker if food is located
toward the bottom of the oven.
When using two racks for baking, allow enough space
between the racks for proper air circulation. Browning
and cooking results will be affected if air flow is
blocked.
A dark metal, dull, anodized or satin-finish pan
absorbs heat and produces darker browning with a
crisper crust. Use dark pans for pies, pie crusts or
bread.
• For optimum baking results, bake cookies and biscuits
on a flat cookie sheet. If the pan has sides, such as a
jelly roll pan, browning may not be even.
If using heat-proof glassware, or dark pans such as
Baker's Secret or Wilton reduce the oven temperature
by 25°F except when baking pies or bread. Use the
same baking time as called for in the recipe.
Allow hot air to flow freely through the oven for
optimum baking results. Improper placement of pans in
the oven will block air flow and may result in uneven
browning. For optimum browning and even cooking
results:
• Do not crowd a rack with pans. Never place more than
one cookie sheet, one 13x9x2-inch cake pan or two
9-inch round cake pans on one rack.
• Stagger pans when baking on two racks so one pan is
not directly over another pan.
• Allow two inches between the pan and the oven waits.
Check the cooking progress at the minimum time
recommended in the recipe. If necessary, continue
checking at intervals untilthe food is done. If the oven
door is opened too frequently, heat will escape the oven;
this can affect baking results and wastes energy.
Ifyou add additional ingredients or alter the recipe,
expect cooking times to increase or decrease slightly.
Page 15

COMMON BAKING PROBLEMS AND WHY THEY HAPPEN
Cakes, cookies, biscuits
too brown on bottom.
• Oven not preheated. = Pans touching each other oroven walls. • Incorrect rack
position. • Incorrect use of aluminum foil. • Placed 2 cookie sheets on one rack. • Used
glass, dark, stained warped or dull finish metal pans. (Use a shiny cookie sheet.)
Follow cookware manufacturer's instructionsfor oven temperature. Glassware and dark
cookware such as Ecko's Baker's Secret may require lowering the oven temperature by
25OE
Excessive shrinkage. • Too little leavening. • Overmixing. • Pan too large. • Temperature set too high.
• Baking time too long. • Pans too close to each other or oven wails.
.................i
Cakes have tunnels. • Not enough shortening. =Too much baking powder. • Overmixing or at too higha
speed. • Temperature set too high.
i:]:!:i_!:'.:i:!:]:i:_:!:!:i;!_i:!:!_i:!_!:!:_:i:!:i:!_i.!:i:!;i:[_]_i:!;i_!::!;!:!:i:i::i;!:!;!_'.:/.:i:!.!_i:_:!:i:!:!:i:!:i!:i:ii:i_:,i;i:!i;i:!_:i_:i_i_ii_;:i_i:;_:i:i:i_;:i:i:!:i_i:i:i:i:i;i:i_i:i_i:i_i:i_i:i:i:_i_i:i:i:i:i__i:i::i:ii:i_i'.;':'iii:i:il;_:'i_:iii':i';i!i:i;i]ii;ii:i]iil];ii;ii;ii:i_iii_i:iilii:i;ii;ii:i_ii:i:iiiiiilili_iiii:_ilii:_iliiiliiil;iiiii:i!i!ii;:i_i;_i_!i_ii:!:;!:i:il!:!!i:!:!i!!!:!:ii!i];i:!:!;_i!!!i]:!;i!:!!_:i:i:i_!!i:!]:!:i:!:i:i:_;!:i_];_:_:i:i:_:i:i!i:!:_i!:_!i:]:!_:i:_:i:;:i:;:i:i_:i:i:i:_;:;!!_ii:!
Pie crust edges too • Temperature set too high. • Pans touching each other or oven walls. • Edges of crust
brown, too thin; shield with foil.
Pies have soaked crust. • Temperature too low at start of baking. • Fi!ling too juicy. • Used shiny metal pans.
Page 16

'5'i'_,'_...v' '",_,._ ¢....... :._,., • ,_-.'.._. - _.:--:.-_:_- -:_-- .:-_." ;_."".:'-•• -. _- ._ '-_._- _"_. "__, _,'_ _._--.'._;:•-.. -,'_;--;._-..'--..:.. -.._- -:-;.-:.:..'_:,:,:.:,:.:.:.:.:.:,:.Y.,:,:.:,:.:,_:,',._-;._-.•_:;:,:,:.:.-;._-:,:.;,:,:-:-• -:-:,:,:-_:,:*:.:,:..','.;:_;:`:;_;:_:_:-:_:;:_:_`:':_```:-:_:`_`::`_;:`:`_:;:;:`:`:::;:::`:;:;:;:_:_:;:::_`:`:`:_:::`_:`:_:_:`_:_;:;_;:`:;`_;:_;:;:_:;:;:_;>_;:_::_:_::::;:_;_:_:::_:;
iiililii!iii!ii!iiiii!i!!iiiiiiiiiiiii!iiii!!iii!iiii iiiiilliiiiiiii!ii!ililiiiiiiii!ii!iiliiiiiiiii!iii!iiiiiiiiiiit
ii__ii!i!il i i iiililiii!!iiiiiiii!iliiliiiliiililiiiliiii!ii!
Roasting is the method for cooking large, tender cuts of
meat uncovered, without adding moisture. Most meats are
roasted at 325°F. it is not necessary to preheat the oven.
Place the roasting pan on either of the two lowest rack
positions.
Use tender cuts of meat weighing three pounds or more.
Some good choices are: Beef rib, ribeye, top round, high
quality tip and rump roast, pork loin roast, leg of lamb,
veal shoulder roast and cured or smoked hams.
Season meat, if desired, either before or after roasting.
Rub into the surface of the roast if added before cooking,
Place the meat fat-side-up on a rack in a shallow roasting
pan. Placing the meat on a rack holds it out of the
drippings, thus allowing better heat circulation for even
cooking. As the fat on top of the roast melts, the meat is
basted naturally, eliminating the need for additional
basting.
The cooking time is determined by the weight of the meat
and the desired doneness. For more accurate results, use
a meat thermometer. Insert it so the tip is in the center of
the thickest part of the meat. It should not touch fat or
bone.
Remove the roast from the oven when the thermometer
registers the desired internal temperature.
NOTE: For more information about food safety, call
USDA's Meat & Poultry Hotline at 1-800-535-4555. For
cooking information call or write to the National Cattle-
men's Beef Association, 444 North Michigan Avenue,
Chicago, Illinois 60611, or call 1-800-368-3138.
_i_!_i_ii!_iiJi_Ji_i_!_!iiiii!iiiili!!Jil!iii!!iiiilililililiiii!iiiiiiiiiiiiiii!iiiiiiiiiiiiiiii!iii'_iiiiiiiiiiii!i!iii!iiiiliii__i!_i_i i_!!_!_i!_iiiiiiiiiiiiiililiiiiiili_!iiiiiiiiiiiii',iiiii'_iiiii!iiiiiiiiii!iiiili!ii!iiii!ilili!!iiii',iiiii!iliiiiiiiii'_iilliiiiiiii'_iiiliiiiiiiiili
Beef
Rib Roast (cut-side-down)
Rib Eye Roast
LoinTenderloin Roast
Pork, Fresh
Shoulder Blade Roast, (boneless)
Shoulder Blade Roast
Loin Blade or Sirloin Roast
Boneless PorkLoin
Pork, Smoked
Ham, Half(fully cooked)**
Ham, Half(cook-before-eating)
4to 8
4to 6
2to3
4to6
4to 6
3to4
6to8
5to7
5to7
325°F
350°F
400OF
325°F
325°F
325°F
325°F
325°F
325°F
145°F(medium/rare)
160°F(medium)
145°F (medium/rare)
160°F (medium)
145°F (medium/rare)
160°F
160°F
160OF
160°F
140°F
140°F
Poultry
Turkey,unstuffed***
t2 to
16 to
20 to
Turkey, Breast 3 to
Chicken,Fryer 2 1/2 to
Chicken,Roaster 4 to
Leg (boneless)
Whole Leg
2to 3
5to7
16
20
24
8
31/2
6
325°F
325°F
325°F
325°F
350-375°
350-375°F
325°F
325°F
180°-185°F
180°-185°F
180°-185°F
180°F
180°F
180°F
160°F
170°F
160°F
25-- 35
30-- 35
25-- 35
30-- 35
20- 3O
_ HH,
35--45
30-- 40
35-- 40
25-- 35
25- 35
35 -- 45
18--20
16--18
t4--16
30 -- 40
20- 25
20- 25
35 - 40
40 -- 45
30-- 35
* Cooking times are approximate and may vary depending on the shape of the mast. A meat thermometer is the most accurate way
to determine doneness.
** Add water and followpackage directions.
*** Stuffed turkey requires additional masting time. Shield legs and breast with foil to prevent overbrowning and drying of skin.
Page 17

liii!i!iiiii iiiiiiiiiiii!iii!iii!ililili!iii!ii!iliiiiiili!ii!iii!i !ii i!i!i iiiiiii!iiiHiiiiiiiiiii!iill!ii!ii!i!iiiiiiiiiiiiQiil
The clock must be functioning and set at the correct time
of day for this feature to operate properly.
The Automatic Oven Timer Control is used to turn the
oven on and off at a preset time of day. This feature can
be used for either oven cooking or self-cleaning.
• Immediate start: Oven turns on immediately and
automatically turn off at a preset time.
° Delayed start: Delays the start of cooking or cleaning
and automatically turns off at a preset time.
Cook time can only be set for up to 11 hours and 59
minutes (11:59).
1. Press COOK TIME pad.
• COOK TIME indicator on the COOK TIME pad will
flash.
° 0:00 will light in display.
2. Press or press and hold • ory pad to enter cooking
time.
then
3. Press BAKE pad.
• BAKE indicator on BAKE pad witt light.
° 000 will light in display.
4. Press or press and hold • orV pad to enter oven
temperature.
NOTE: Beeps will sound and 000 will flash in display
if the BAKE pad is not pressed within 4 seconds.
5. IF YOU WISH TO DELAY THE START OF
COOKING (if not, skip to #6):
a. Press STOP TIME pad.
• STOP TIME indicator on STOP TIME pad will
flash.
b. Press or press and hold • orV pad to enter time
of day you wish oven to turn off.
c. Press CLOCK pad.
• Time of day will reappear in display.
then I_ then I_
6. When the oven turns on, the OVEN ON indicator wilt
light. The oven temperature will appear in the display.
Press the COOK TIME pad to recall the remaining
cook time.
NOTE: It is not necessary to set a start time.
Control willdetermine when to turn the oven
on based on the cook time you set.
7. Oven will automatically turn off. Four beeps willsound
and "End" will light in display. A beep will sound every
30 seconds for the next 5 minutes.
NOTE: See page 6 if you wish to change the end of
cooking reminder beeps.
8. Press CANCEL pad and beeps will stop. Remove
food from oven.
Page 18

o"
ii_ii _iiiiii_ii_i!iiiiiiiii_iiiiiiiiiiiiiii_i_iiiii_ii__ii__ii _iiiiiiiiiiiiiii!ii_iiiiiiiiiiiiiiiiiiiiiiiiiii_ii_iiliiii_!
_i!_i_@i_!_ i_i_iiiiiiiiiiiiiiiliiiiii!iiiiiiiiiiiii!il
1. Press BROIL pad.
• BROIL indicator on the BROIL pad will light.
• 000 will light in display.
BROIL _
INDICATOR
LIGHT
2. Press the A pad to select HI (high) broil or the V pad
to select LO (low) broil.
• Select HI broil for normal broiling.
• Select LO broil for low temperature broiling of long-
er cooking foods such as poultry.
3. There will be an 8 second delay before the oven turns
on. When the oven turns on:
• The OVEN ON indicator will light.
Ovenon
Preheat
Lock
4. Place food in the oven. The oven door is closed for
broiling.
NOTE: See page 18 for broiling instructions and
broiting chart.
5. Turn meat once about half way through cooking.
6. Press CANCEL pad. Remove food and broiler pan
from the oven.
• The OVEN ON indicator will turn off.
• The BROIL indicator on the BROIL pad will turn off.
• Time of day will reappear in display.
%%
NOTE: Select models do not feature broiling. The
control panel for these models will not have a
BROIL pad.
Page 19

liiii!!iiiiiiiiiiiiiii!iiiiiiiiiiiiiiiiiiiiii!iiiiiiiiiiiiiiiiii!iiiiiii iii iiiiiiiiiiiiii!iiiiiiiiiiiiiiiiiiiiiiiiiiii!iiiiiiiiiiiiiiiiQi!
iiiiiiiiiiiiiiiiiiiiiiiiiiiiiiiiiiiiiiiiiiiiiiiiii
Broiling is a method of cooking tender meats by direct
heat. The cooking time is determined by the distance
between the meat and the broil burner, the desired degree
of doneness and the thickness of the meat.
Broiling requires the use of the broiler pan and insert. The
broiler insert must be inplace to allow fat and liquid to
drain to the pan below to prevent spatters, smoke and
flare-ups. Improper use may cause grease fires.
the broiler insert with aluminum foil as this prevents fat
from draining into pan below.
Trim excess fat and slash remaining fat to help keep meat
from curling and to reduce smoking and spattering•
Season meat after cooking.
Place oven rack in the correct rack position when oven is
cool. For darker browning, place meat closer to the broil
burner. Place meat further down if you wish meat to be
well done or if exce,_sive smoking or flaring occurs•
For easier clean up, line the broiler pan with foil and spray
the insert with a non-stick vegetable spray. Do not cover
See Care and Cleaning Chart on page 21 for instructions
on cleaning the broiler pan and insert.
i!iiiii!ii iii! ii!i! i!iiii! !ii ! i !! ! ii!ii!ii iii!i ii i !H H !!i iii ii ii!ii!i Hii!ii !ill iiii !! !!i!iii i! !! ii!iiiiiiiiii!i!iiiiiii! iii iii iiiiiiiiiiiiiiiii!iiiiiiill !i! ! !! !i!! !i! ! !i! i!! ! !ii i i!iiiiiiii i i iiii ii i Uiiii ii ii!Jjiiiii* !i ! !i! i i i !i!i!! iiiiiiii !!ii!i!!i!! ! i i!!!i
_ili,__i_i_i¸i_i_!i_il!ii_ii_i_iiiii_iiii_!_!_i_iii__ii_iii!i!!!!i!iiii,ilili_ii_i_ii_ii!i_ii,i_i_ii!_i_i_i_'i_i_ili:!_i_,i_i_i_i_i_ili_i_ii_liiiii!i_ni_!i'i_iiii_¸i_i!¸:ii_i_ii_iiiii_ii_ii_i_i_iilli_i_i_i_iiiiiiil_iiii_iiii_iiii!i!iii_i_iiiii!_ii_iii!_!ii_li_ii_i_ii_ili!iiii_iiii!ii!ii!ii_i!i!i!i'ili!!il_ii!ii_i_iiiiiliiiii_iiiii_Lii_!!iii_!ii!ii_ii!i!11
BACON #4 Well Done 6 to 10
CHICKEN
Pieces #3 or #4
GROUND BEEF PA'n'IES
3/4-inchthick
PORK CHOPS
1-inch thick
#4
#4
* The top rack position is position #5.
** Broiling times are approximate and may vary depending on the meat.
Well Done
Well Done
LO BROIL
30 to45
15 to 20
Well Done 20 to 25
.... ,,,,, ,,,
Page 20

1. Move door lock lever to locked position.
II I I I
2. Press SELF-CLEAN pad.
• CLEAN indicator on the SELF-CLEAN pad will
flash.
• 3:00 will light in display.
• tf door is not locked, "dr" will appear in display.
Lock door.
3. Press • or V pad to select clean time.
• You can select from 2 up to 4 hours.
• Oven will automatically clean for 3 hours. Or,
• Select 2 hours for light soil.
• Select 4 hours for heavy soil.
then
4. IF YOU WISH TO DELAY THE START OF
CLEANING (if not, skip to #5):
a. Press STOP TIME pad.
b. Press A pad to select the time of day youwish the
oven to turn off.
• Press CLOCK pad and time of day will reappear
in display.
• Press STOP TIME pad to recafl the time you set.
I_ then [_
5. When the oven turns on:
• The OVEN ON indicator will light.
• LOCK indicator will lightwhen oven heats to 400 °.
• Internal lock will engage. Door cannot be unlocked
and opened when LOCK indicator is lit.
Ov_non
Preheat
Lock "*_ LIGHT TURNS ON WHEN
OVEN REACHES 400_F.
6. About one hour after the clean cycle ends, the LOCK
indicator will turn off. The oven door can be unlocked
and opened.
_] Ove_on
Preheat
Lock
TO CANCEL CLEAN CYCLE:
1. Press CANCEL pad.
2. If LOCK indicator is NOT lit, unlock and open oven
door.
If LOCK indicator is lit, allow oven to cool about one
hour then unlock and open oven door.
Ovenon
Preheat
Lock ..i---- WHENLIGHT TURNS
OFF, UNLOCKAND
OPEN DOOR.
Page 21

o*
liiiiiiiiiiiiiiiiiiiiiiiiilii!iii!iiiil!!iiilii!iliiiii!iiiiiiiiiiiiiiiiiiiii!i!iiiii [ iiii iiiii!i!i!iii!ii!i!iliii!i !i!!!!iii!iiiiliiiiiiiiiii ii!l
BEFORE CLEAN CYCLE
• Remove pans, broiler pan, and
oven racks. Racks may discolor
and not slide easily after cleaning.
• Clean window, oven frame and
door frame. These areas are not
exposed to cleaning temperatures;
soil may bake on during clean
cycle.
° To prevent damage, do not clean •
gasket located on oven door.
Gasket seals in heat during the
clean cycle.
• To prevent excessive smoke or
flare-ups, wipe up excess grease
or spiltoversfrom oven bottom.
• Porcelain is acid resistant, not •
acid proof and may discolor during
the clean cycle. To prevent or
reduce discoloration, wipe up
sugar or acid spills (lemon, milk,
barbecue sauce, cheese).
DURING CLEAN CYCLE
As oven heats, the LOCK indicator
will tight in the display. At this
point, the door can not be
unlocked and opened.
To prevent damage to door or lock
lever, do not force door open
when the LOCK indicator is
displayed.
Some smoke and odor may be
detected the first few times the
oven is cleaned, This is normal
and will lessen in time.
• Smoke may occur if oven is
heavily soiled or ifbroiler pan was
left in oven.
As oven heats, you may hear
sounds of metal parts expanding
and contracting. This is normal
and will not damage oven,
AFTER CLEAN CYCLE
• The LOCK indicator will turn off
about one hourafter clean cycle
ends. The door can be unlocked
and opened. Use care as oven
may stillbe hot.
• A gray powdery ash may remain
on the oven bottom orwalls. This
is normal. Use a damp cloth to
remove ash.
• If soil remains, the clean cycle
may not have been long enough.
° Wipe oven racks with a small
amount of vegetable oil if racks do
not slide easily after clean cycle.
• Clean around oven vent opening if
there is a deposit from the fumes
vented during cleaning.
• Fine lines may appear in the
porcelain. This is normal and
results from the heating and
cooling of the finish. This will not
affect oven performance.
• A white discoloration may appear
after cleaning if acid soils (milk,
tomato, lemon, etc.) or sugary
soils were not wiped up before the
clean cycle. This discoloration is
normal and will not affect the
performance of the clean cycle.
Page 22

Readandcarefullyfollowthemanufacturer'sinstructions.
Testa smallinconspicuousareausingaverylight
pressuretoseeifthesurfacemayscratchordiscolor.
Thisisparticularlyimportantforporcelainenamel,highly
polishedorshinymetalorplasticsurfaces,andpainted
surfaces.
Glass Cleaners- Bon Ami, Cinch, Glass Plus, Windex.
Dishwashing Liquid Detergents- Dawn, Dove, Ivory,
Joy.
Mild Liquid Spray Cleaners- Fantastik, Formula 409.
Non-Abrasive Cleaners - Bon Ami, paste of baking
soda and water.
Mildly Abrasive Powder or Liquid All Purpose
Cleansers - Ajax, Barkeepers Friend, Cameo, Comet,
Soft Scrub.
Non-Abrasive or Scratchless Plastic or Nylon
Scouring Pads or Sponges - Chore Boy Plastic
Cleaning Puff, Scrunge Scrub Sponges, or Scotch-Brite
No Scratch, Cookware or Kitchen Sponge.
Abrasive Scouring Pads- S.O.S., Brillo Steel Wool
Soap, Scotch-Brite Pads.
(Brand names for the above cleaning products are registered
trademarks of the respective manufacturers.)
CLEANING CHART
iiiiiiii!i!iiiiiilili ii!i!iii!iiiiilliliiiiiiliiiiiii i il ii!ii iiiiiiiiiii;i!!i!i!!iiiil]i ii ii!iii!!ii!!iiiili!iiiill!il iiili!ii!iiiiiiii!iii!iiiii!i!i!iiii!!!iii!ii!!ii!iiiililiiili!ilili!ii!!!iii!!!ii!ii!ii!ii i!
Broiler pan
and insert
(select models)
• Soap and water
• Plastic or soap
filled scouring pad
• Dishwasher
Never cover insert with aluminum foil as this prevents the fat from
draining to pan below.
!. Remove from oven after use. Cool then pour off grease.
2. Place soapy cloth over insert and pan; let soak to loosen soil.
3. Wash in warm soapy water. Use soap filled scouring pad to remove
stubborn soil.
4. Broiler pan and insert can be cleaned in the dishwasher.
Burner box
(conventional
surface burners
only)
• Soap and water
° Paste of baking
soda and water
• Non-abrasive plas-
tic pad or sponge
• Liquid cleaner
• Glass cleaner
NOTE: Sealed burner cooktopand the slide-in range cooktop do not lift-up.
1. Burner box, for cooktops with conventional burners, is located under
lift-up cooktop.
2. Clean frequently to remove spUlovers. Ifsoil is not removed and is allowed
to accumulate, it may damage the finish.
3. To clean remove grates and surface burners and clean with soap and
water, rinse and dry.
Control knobs
• Soap and water
• Mild liquid sprays
• Glass cleaners
For ease of cleaning, turn off knob and remove by pulling forward.
1. Wash, rinse, and dry. Do not use abrasive cleaning agents as they may
scratch the finish and remove the markings.
2. Turn on each element to be sure knobs have been correctly replaced.
Page 23

.........! iii !! ii iiiii iiii i!iiii!!! ii ii i !i i ii!!iiiiii i i iiiiiiii!ii!!iiiii i iiii i!i ii!i iii! ii!iii!iii ii!ii i ii i
Drip bowls,
chrome
(select models)
• Soap and water
• Plastic scouring
pads
• Mild abrasive
cleaners
° Flitz Metal Polish
Do not cover drip bowls with aluminum foil.
NOTE: Bowls can permanently discolor over time, if exposed to excessive
heat, or if soil is allowed to bake on. The discoloration will not affect the
cooking performance.
1. After each use, wash, rinse and dry.
2. If heavily soiled, gently scrub with plastic scouring pad. If soil is allowed
to burn on, it may be impossible to remove.
3. A non-abrasive metal polish such as Flitz may be used to help remove
blue/gold heat stains. Flitz is available in many automotive supply and
hardware stores. These stains are caused by overheating, and normally
occur over a period of time. They are usually permanent. Follow package
directions.
Enamel, painted
• Oven door
• Side panels
• Storage drawer
or lower panel
Glass
• Oven window
Grates
Metal finishes
such as brushed
aluminum, or
chrome
° Backguard
• Cooktop
• Manifold panel
• Oven door
° Storage door
• Trim parts
• Soap and water
° Mild liquid cleaner
• Glass cleaner
NOTE: Use dry towel or cloth to wipe up spills, especially acid (milk, lemon
juice, fruit, mustard, tomato sauce) or sugary spills. Surface may discolor or
dull ifsoil is not immediately removed. This is especially important for white
surfaces.
1. When cool, wash with warm soapy water, rinse and dry. Never wipe a
warm or hot surface with adamp cloth as this may damage the surface
and may cause a steam burn.
2. For stubborn soil, use mildly abrasive cleaning agents such as baking
soda paste or Bon Ami.
3. Do not use abrasive, caustic or harsh cleaning agents such as steel wool
pads or oven cleaners. These products will scratch or permanently
damage the surface.
• Soap and water
° Glass cleaner
• Paste of baking
soda and water
To prevent staining of the oven window, avoid using excessive
amounts of water which may seep under or behind glass.
1. Wash with soap and water. Remove stubborn soil with paste of baking
soda and water. Rinse with clear water and dry.
2. Do not use abrasive materials such as scouring pads, steel wool or
powdered cleaning agents. They will damage glass.
• Soap and water
• Non-abrasive
plastic pad
NOTE: Never operate burner without a grate in place. To protect the por-
celain finish on the grate from excessive heat, never operate surface
burner withouta cooking utensil on the grate. It is normal for grates to
lose their shine over a period of time.
1. Grates are made of porcelain-coated steel. They can be cleaned at the
sink with soap and water or in the dishwasher.
2. To clean baked on soil, place a damp soapy paper towel over the grate
and let stand for 30 minutes. Use a non-abrasive plastic pad to scour
stubborn soil.
• Soap and water
• Glass cleaner
• Plastic or non-
abrasive pad or
sponge
.
2.
3.
4.
Wash with soap and water or a glass cleaner and a soft cloth.
To prevent scratching or dulling of the finish, do not use mildly abrasive,
abrasive, or harsh cleaners, or caustic cleaners such as oven cleaners.
Toclean brushed aluminum: Use only soap and water or a soft cloth and
glass cleaner to prevent scratching or dulling of the finish.
To clean brushed chrome cooktop or door:
• Use a paste of baking soda and water and a soft cloth.
• Rub with the grain to prevent scratching, dulling or streaking of the
finish.
• Use a soft cloth and mineral oil to restore luster or to remove
fingerprints or smudges.
• Clean with an automotive chrome cleaner or polisher.
Page 24

Oven interior
Oven racks
Plastic finishes
• Door handles
• Backguard trim
• Knobs
• End caps
Porcelain enamel
• Cooktop
• Backguard
Surface burners
• Conventional
• Sealed
Porcelain enamel is acid resistant, not acid proof. Therefore, when cool,
wipe up sugary or acid spills (milk, fruit, tomato, etc.) as they occur. See
pages 19-20 for self-clean oven.
• Soap and water
° Plastic scouring
pad
• Cleansing powders
° Soap-filled scour-
ing pad
1. Clean with soapy water.
2. Remove stubborn soil with cleansing powder or soap-filled scouring pad.
Rinse and dry.
Rackswill permanently discolor and may not slide smoothly if left inthe oven
during a self-clean operation. If this occurs, wipe the rack and embossed
rack supports with a small amount of vegetable oi!to restore ease of move-
ment, then wipe off excess oil.
• Soap and water
° Non-abrasive
plastic pad or
sponge
° Glass cleaner
NOTE: To prevent staining or discoloration, wipe up fat, grease or acid
(tomato, lemon, vinegar, milk, fruit juice, marinade) immediately with a dry
paper towel or cloth.
1. When cool, clean with soap and water, rinse, and dry.
2. Use a glass cleaner and a soft cloth.
NOTE: Never use oven cleaners, abrasive or caustic liquid or powdered
cleansers on plastic finishes. These cleaning agents will scratch or mar
finish.
• Soap and water
• Paste of baking
soda and water
• Non-abrasive
plastic pad or
sponge
Porcelain enamel is glass fused on metal and may crack or chip with misuse.
It is acid resistant, not acid proof. All spillovers, especially acid or sugar
spillovers, should bewiped up immediately with a dry cloth. This is especially
important around the vent opening for smoothtop cooktop. Surface may
discolor or dul! if soil is not removed.
1. When cool, wash with soapy water, rinse and dry.
2. Never wipe off awarm or hot surface with a damp cloth. This may cause
cracking and chipping.
3. Never use oven cleaners, abrasive orcaustic cleaning agents on exterior
finish of range.
• Soap and water
° Paste of baking
soda and water
• Plastic scouring
sponge or pad
• Mildly abrasive
cleanser
All burners: For ease of cleaning, clean burners each time the cooktop is
used with warm soapy water. If a boilover occurs, remove pan to another
burner; cool burner and clean. To remove stubborn soil, use adry cloth and
mildly abrasive cleanser. Use care to prevent cleaner from clogging ports.
Burner must be dry before use. NOTE: Yellow tipping or distortion of the
flame may occur until the burner is completely dry.
Clean burner ports with a straight pin or small metal paper clip. Do not
enlarge or distort ports. Do not use a wooden toothpick as it may break off
and clog port. If ports are clogged orsoiled, the burner may not light properly
or the flame may not be even.
Conventional burners: Dry burners in the oven set at 170°E
Sealed burners: Sealed burner can not be removed by the consumer.
When cleaning burner, use care to prevent damage to the ignitor. Surface
burner will not light properly if ignitor is damaged, broken, soiled, or wet.
When cleaning the ports, be sure to clean the port directly below the ignitor.
Page 25

_i:_!:`::_!:`::!:i:!_:_:_:_:_:_:_::!_:_;`:;_;!::`_;_:_:_$_;`:!_:_i:!:_:!:!:_i:i:!:!:!_i_!_!:_!_!:_!:_::`_1:_:!_:_!_!:!:!:!!_::_:_:_:``.:_:_:_:!:_:_" ;i:_ _:_ " _.: _ ..... _:! "_: " .....:: `_:_:_!:_:_!:_:.;:_._:_1_:_:_:_:_;_:_:_;_:::_::_:_:!_:_:_:!:_:!_:_;_:_.:_;;_;:_;_:_:_:_;_:_:_:_:i:_:_:_:_:_i:_:i_::i:_:wi!_i2_
The cooktop featuring conventional surface burners has a
lift-up cooktop for easy cleaning of the burner box area.
To raise the "lift-up" cooktop: When cool, grasp the
front edge of the cooktop and gently lift up until the two
support rods at the front of the cooktop snap into place.
i
Burner grates must be properly
positioned before cooking. Burner grates
are durable but may gradually lose their
shine due to usage and high
temperatures.
Grates for the porcelain cooktop are
square. When installing square grates,
place indented sides together so straight
sides are at front and rear.
CAUTION: Do not operate a surface burner without a
pan on the grate. The porcelain finish on the grate may
chip without a pan to absorb the intense heat from the
burner flame.
To lower the top: Hold the front edge of the cooktop and
carefully push back on each support rod to release the
notched support. Then gently lower the top into place. The
support rods will slide into the cooktop frame.
The sealed burner cooktop is designed with two contour
wells to catch and contain spills. Because of this design it
is not necessary to lift up the cooktop to clean
underneath. To prevent damage to the gas tubing or top,
do not attempt to lift or remove the cooktop.
ii ii i iiiiiii!iiiii!iii!iiiiiiiiiiiiiiiiiiiiiiiii!iii!i!iiiil;i!!i!iiiiiiiiilliii!iiii!iil
CAUTION: Before replacing the light bulb,
DISCONNECT POWER TO RANGE. Be sure the bulb
is cool. Do not touch a hot bulb with a damp cloth as
the bulb may break.
To turn on oven light: Push the rocker switch located on
the backguard.
To replace oven light bulb:
1. Disconnect power to range.
2. Hold bulb cover in place then slide wire retainer off
cover. NOTE: Bulb cover will fall if not held in place
while removing wire retainer.
3. Remove bulb cover.
4. Remove light bulb and replace with a 40 watt appliance
bulb.
5. Replace bulb cover and secure with wire retainer.
6, Reconnect power to range, Reset clock.
BULB COVER
WIRE
RETAINER
Page 26

lii iliiilli!i!iii!iiii!!iiii!ii!iiiii!ii!iiiiiiiiiliU ii!iiiiiii!iii iiiliiiiiiiiiiiiiiiiii!!ili!i!iiiiiiiiii!i!iiiii!I
i:!_!ii_i:_È_:::_:_:_:_::_:::::_:_i_i_:_:_:_:_:i:i:_:_:_:_:_:_:_:i:i:_:_:!i_i_:_i!i!i_!i!:_:!_:_:_:_:i:i:i:_:i:i:_i_:_i_i!__i_i ii: i:_:_:i_::_::_!_:_:_::_:_::_:_:_;::_:::_:::::_:_::_::_:_:::::_:_;_:_:_:_;:_:_:_::::_:::_::_:_:r:_:_::_:_i L:_:_:_::::;::_:::::::::_:_:_:::_:
_i_!_i!!ii_iii_i!iiii_!Jii_i_i!!!ii_!Jii!ii!ii_i!iiiiiii!iiii_!i_!i!_i_i_iii_!ii_!!_ii!_!_iii!i!_i_
The two oven racks are designed with a safety lock-stop
position to keep the racks from accidently coming
completely out of the oven when pulling the rack out to
add or remove food.
It is important that air can circulate freely within the oven
and around the food. To help ensure this, place food on
the center of the oven rack. Allow two inches between the
edge of the utensil(s) and the oven walls.
I CAUTION: Do not attempt to change the rack positions
when the oven is hot.
To remove: Be sure the rack is cool. Pull the rack straight
out until it stops at the lock-stop position. Tilt the front end
of the rack up and continue pulling the rack out of the
oven.
To replace: Place the rack on the rack supports and tilt
the front end of the rack up slightly. Slide it back until it
clears the lock-stop position. Lower the front and slide the
rack straight in. Pull the rack out to the lock-stop position
to be sure it is positioned correctly and then return it to its
normal position.
For optimum baking results of cakes, cookies or biscuits,
use one rack. Position the rack so the food isin the center of
the oven. Use either rack position 3 or 2.
If cooking on more than one rack, stagger the food to
ensure proper air flow.
If cooking on two racks, use rack positions 4 and 2 for
cakes and rack positions 4 and t when using cookie
sheets. Never place two cookie sheets on one rack.
If roasting a large turkey, place the turkey on rack 1 or the
roasting position and the side dishes on rack 5.
iiiiii!ii!ii!iiiiiiiii!iiii!i!!iiiiiiiiiiiiiiiiiii!iiiiiiiii!ii!!ii!iiiiiiiiii!iiiiiii!iiiiiiiiiiiiiiiiiiiiiiiiiiiiii!!!!!i!iiii!iiiiiiii;iiiiii'i!!iiiiii!ii!!ii!i!iiiii_i _i_ ........._ii_!_iiiii_Ui_i!i!_ii_!iiii_!ii_i!_ii!!i!!i!i!_!!ii!!_iii_iii_i_iiUii!i!i_i_i_iiiii_!i_i!!iii_ii_!ii_ii!ii_iii_ii_i!ii!iiiii_!i!i!!i!!_!_i!_!!!_i_!ii_!iiiiili
RACK 5 ....
(highest position)
RACK4
_H,I,,
RACK3
RACK2
RACK'1
ROASTING
POSITION
Used for toasting bread, or for two-rack baking.
i , ,,,,, i,
Used for most broiling and two-rack baking.
IIH,
Used for most baked goods on a cookie sheet or
jelly roll pan, or frozen convenience foods.
Used for roasting small cuts of meat, large
casseroles, baking loaves of bread, cakes (in
either tube, bundt, or layer pans) or two-rack
baking.
Used for roasiing large cuts of meat and large
poultry, pies, souffles, or angel food cake, or for
two-rack baking.
Used for roasting taller cuts of meat or turkey.
Place both oven racks, one above the other, on
the raised sides of the oven bottom.
ROASTING
POSITION
Page 27

ii i iiiiiiiiiiiil!iiiiiiiiiiiilkililiiiiii!!iii!iiiiiiiiiiiii!iiiiii
Do not place excessive weight on an open oven door or
stand on an open oven door as, in some cases, it could
cause the range to tip over, break the door or cause
serious injury to the user.
When opening the oven door, allow steam and hot air to
escape before reaching in oven to check, add or remove
food.
Do not attempt to open or close door until the door is
completely seated on the hinge arms. Never turn on the
oven unless door is properly in place. When baking, be
sure the door is completely closed. Baking results will be
affected if the door is not securely closed.
When the range is new the door may feel "spongy" when
you close the door. This is normal and will become less
"spongy" with use.
To remove lift-off door: Open the door to the "stop"
position (opened about 6 inches) and grasp the door with
both hands at each side. Do not use the door handle to lift
the door. Lift up evenly until the door clears the hinge
arms.
i i iiiiiiiiiiiiiiiiiiii i!iiiiiiiiiiiiiiiiiiiiiii!iiiiii
To protect the oven door window:
1. Do not use abrasive cleaning agents such as steel
wool scouring pads or powdered cleansers as they
may scratch the glass.
2. Do not hit the glass with pots, pans, furniture, toys, or
other objects.
3. Do not close the oven door until the oven racks are in
place.
Scratching, hitting, jarring or stressing the glass may
weaken its structure causing an increased risk of
breakage at a later date.
i i i iiii iiiiiiii iiiiii!iiiiiiii iiii!iii!iilil
The oven door is locked for a self-clean operation only. Do
not move the door lock lever to the right or locked position
during a cooking operation. If the door is locked, the
operation will automatically be cancelled and "door" will
appear in the display. If the oven is hot enough to engage
the internal lock, the oven door witl not open. Allow the
oven to cool for up to an hour, then unlock and open the
door.
To replace door: Grasp the door at each side, align slots
in the door with the hinge arms and slide the door down
onto the hinge arms until door is seated on hinges. Push
down on top corners ofdoor to completely seat door on
hinges. The door is not completely seated on the hinges if
one side is higher or if the door appears to be crooked.
CAUTION: Hinge arms are spring mounted and wilt
slam shutagainst the range if accidently hit. Never
place hand or fingers between the hinges and the
front oven frame. You could be injured ifhinge snaps
back.
Page 28

i ii iiiiii ! !iip!iiiiii iiiii iiiiiii!iii!iii!! ii!ij!iiiiii ii i!Jiiii!iiiiiii i !!iiii!i iii!iii i
Protect oven bottom against excessive spillovers especially
acid or sugary spillovers as they may discolor the porcelain.
To protect oven bottom:
• Use the correct size cooking utensil to avoid boilovers.
° Never place cookware or aluminum foil directly on the
oven bottom.
° To prevent boil overs from soiling the oven bottom,
place a piece ofaluminum foil that is slightly larger than
the pan onthe oven rack directly below the pan.
To remove: When cool, remove the oven racks. Slide the
two catches, located at each rear corner of the oven
bottom, toward the front of the oven.
Lift the rear edge of the oven bottom slightly, then slide it
back until the front edge of the oven bottom clears the
oven front frame. Remove oven bottom from oven.
To replace: Fit the front edge of the oven bottom into the
oven front frame. Lower the rear of the oven bottom and
slide the two catches back to lock the oven bottom into
place.
iil;iiiii]!!ii!i!i!!iii
The storage drawer at the bottom of the range issafe and
convenient for storing metal and glass cookware. DO
NOT store plastic, paperware, food or flammable material
in this drawer. Remove drawer to clean under range.
To remove: Pull drawer out to the first stop position. Lift
up front of drawer and pullto the second stop position.
Grasp sides and lift up and out.
To replace: Fit the rollers located at the ends of the
drawer glides intothe rails on the range. Lift up drawer
front and gently push in to first stop position. Lift up
drawer again and continue to slide drawer to the closed
position.
',::'":::::'""_::""" "i" ]_::""":"""- _i:;:""_:i:"''"+''""" "18!:!:!:!_:!:i:_:_::!:_ik:_::k::::::::r'.:¢i:_:i:i:?i:;:_;i;i:_:_:i:i:?i:i:i:i:i:?.?.]:!:i'.!:i?.i:i:_:i:i:i:i:i:i:_:i:i-':':i:i:i:i:_:::_i:i:i::'.i:!8!:!
i
Some floors are not level. For proper baking, your range
must be level. Leveling legs are located on each corner at
the base of the range. Level by turning the legs. To
prevent range from accidentty tipping, range should be
secured to the floor by sliding a rear leveling leg into the
anti-tip bracket supplied with the range.
.k. :il
_ ANTI-TIP BRACKET
LEVELING LEG
Page 29

Appliances which require electrical power are
equipped with a three-prong grounding plug which
must be plugged directly into a properly grounded
three-hole 120 volt electrical outlet.
F
0
Always disconnect power to appliance before servicing.
The three-prong grounding plug offers protection against
shock hazards. DO NOT CUT OR REMOVE THE THIRD
GROUNDING PRONG FROM THE POWER CORD
PLUG.
If an ungrounded, two-hole or other type electrical outlet is
encountered, it is the personal responsibility of the
appliance owner to have the outlet replaced with a
properly grounded three-hole electrical outlet.
Follow these procedures to remove appliance for cleaning
or servicing:
1. Shut-off gas supply to appliance.
2. Disconnect electrical supply to appliance, if equipped.
3. Disconnect gas supply tubing to appliance.
4. Slide range forward to disengage range from the
anti-tip bracket. (See Installation Instructions for
location of bracket.)
5. Reverse procedure to reinstall. If gas line has been
disconnected, check for gas leaks after reconnection. A
quafified servicer should disconnect and reconnect the
gas supply. (See Installation Instructions for gas leak
test method.)
NOTE: A qualified servicer should disconnect and
reconnect the gas supply.
To prevent range from accidently tipping, range must be
secured to the floor by sliding rear leveling leg into an
anti-tip bracket supplied with the range.
WARNING: Possible risks may result from abnormal
usage, includingexcessive loading of the oven door
and of the risk of tip over, should the appliance not be
reinstalled according to the installation instructions.
The LOW setting should produce a stable flame when
turning the knob from HI to LO. The flame should be 1/8
inch or lower and must be stable on all ports on LOW
setting.
To adjust: Operate burner on HI for about 5 minutes to
preheat burner cap. Turn knob back to LO; remove knob,
and insert a small screwdriver into the center of the valve
stem. Adjust flame size by turning adjustment screw in
either direction.
ii ! iiiiiiiiiiii!iiiiiiiiiiii!iii!ii!iiiii!iiiiil
If a fault code appears in the display and continuous
beeps sound, press the CANCEL pad. Then, reprogram
the cooking operation. If the fault code reappears in the
display, call an authorized servicer. Do not use the oven
until the appliance has been serviced.
NOTE: If the oven is heavily soiled, excessive smoke and
flaring may result in a fault code during a self-clean cycle.
If this occurs, press the CANCEL pad and allow the oven
to cool for an hour.
Flame must be of sufficient size to be stable on all burner
ports. If flame adjustment is needed, adjust ONLY on the
LO setting. Never adjust flame size on a higher setting.
NOTE: All gas adjustments should be done by a qualified
servicer only.
Page 30

iliiiiiiii!iliiiiii
iiiiiiliiiiiii!i! iiili!iliiiiiiiiiiiiiiiiiiiliii iii!iiiii!iii!iiliiiiiiiiiii i iiiii!!
Surface burner fails to light a. power supply not connected a.
b_
C.
d.
Bumer flame uneven
Surface burner flame
• lifts offport
• yellow in color
e°
f.
air in the gas line
clogged burner port(s)
surface control not completely
turned to the LITE position or turned
too quickly from the LITE position
power failure
sealed burner models: Burner will
not light if the ignitor is damaged,
soiled, wet or if the port directly
below the ignitor is blocked.
connect power, check circuit
breaker or fuse box
b. see page 7 for instructions on
bleeding air from the gas line
c. clean ports with straight pin
d, turn control to the LITE position until
the burner ignites, then turn control
to desired flame size
e. see page 7 to light burner during a
power failure
f. clean and dry burner head. If broken
or damaged, call a serviceman.
a, clogged burner port(s) a, clean ports with straight pin
a. air/gas mixture not proper
b. no pan in place
NOTE: Lifting of flame is normal for
sealed burners. Some yellow tipping
with LP gas is normal and acceptable.
a. call serviceman to adjust burner
b. always place pan on grate before
lighting burner.
NOTE: Be sure installer properly
adjusted range at time of installation.
Surface burner ignitor a.
producting clicking sound
b,
C.
control knob is in the LITE position.
NOTE: The life of the ignition
system may be shortened if the
knob is left in the LITE position.
surface control switch is moist as a
result of cleaning the range.
malfunctioning switch
a. be sure ALL surface burner control
knobs are inthe OFF position or are
adjusted to the desired flame
setting
b. allow switch to dry then relight
burner
c. call serviceman to check
Oven burner fails to light a. power supplynot connected a. connect power, check circuit
breaker or fuse box
b. power failure b. oven will not operate during a power
failure
c. oven incorrectly set c. See pages 5 or 12
d. Automatic Oven Cooking feature d. See page 16
incorrectly set
Popping sound heard when
burner extinguishes
This is a normal sound that occurs with some types of gaswhen a hot burner is turned
off. The popping sound is not a safety hazard and will not damage the appliance.
Clock and/or oven light
does not work
a. power supply not connected
b. bulb may be loose or burned out
c. malfunctioning switch, starter or
ballast
d. malfunctioning clockor loosewiring
a. connect power supply, check circuit
breaker or fuse box
b. tighten or replace light bulb
c. call serviceman to check
d. call serviceman to check
Moisture condensation on
oven window
a. it is normal for the window to fog
during the first few minutes the oven
is on
b. cloth saturated withwater is used to
clean the window
a. leave door ajar for one or two
minutes to allow moisture to escape
b. Use a damp cloth to clean window to
prevent excess water from seeping
between the panels of glass
Page 31

Baking results not
satisfactory
• food takes too long or
o
a. oven not preheated
b. incorrect rack position
c. incorrect use of aluminum foil
d. oven bottom incorrectly replaced
e. door incorrectly replaced
a. food too close to burner
cooks too fast
pale browning
food over-done on outside
and under-done in center
• over browning
Oven smokes excessively
during a broil operation
Strong odor or light smoke
when oven is turned on the first
few times.
"F" plus a number or
letters appear in
display.
b. meat has too much fat b.
c. sauce applied too early or marinade c.
not completely drained
d. soiled broiler pan
e. broiler insert covered with aluminum
foil
"Burning off" of manufacturing oils,
lubricants used during the
manufacturing process, or
insulation.
a. preheat oven 8 to 15 minutes
b. see page 25
c. see page 13
d. replace oven bottom correctly
e. see page 26
See Problem Chart on page 14
See baking tips on page 13
a. move broiler pan down one rack
position.
trim fat.
apply sauce during last few minutes
of cooking. If meat has been
marinated, drain thoroughly before
cooking.
d. always clean broiler pan and insert
after each use.
e. never cover insert with foil as this
prevents fat from draining to pan be-
low.
a. a. This is normal for a new range and
wii disappear after a few uses. A
clean cycle will speed up the
process. Opening a window or
turning on a fan will help remove
the smoke and odor. A clean cycle
will speed up the process.
b. Food soil. b, Use self-clean feature.
This is called a FAULT CODE. If a fault code appears in the display and beeps sound, press
any pad except the CANCEL and • or V pads. If the fault code and beeps continue,
disconnect power to the appliance and call an authorized servicer.
If the oven is heavily soiled, excessive flare-ups may result in a fault code during a clean
cycle. Press any pad except the CANCEL and • or V' pads and alfow oven to cool for one
hour then reset the clean cycle.
You can adjust the oven temperature if you feel the
temperature is too hot or too cool.
To adjust the oven temperature:
1. Press BAKE pad.
2. Press • pad until 550° is
displayed.
3. Press and hold BAKE pad
for 3 seconds until 00°
appears in display.
4. Press and hold the •
or V pad to select the
temperature change
you wish.
The oven temperature can be increased or de-
creased by 5° to 35° .
If the oven temperature was previously adjusted,
the change will be displayed.
!
5. -time of day will automatically reappear in display.
It isnot necessary to readjust the oven temperature if
there is a power failure or interruption. Broiling and
cleaning temperatures cannot be adjusted.
Page 32

WHAT IS NOT COVERED BY THESE WARRANTIES:
1. Conditions and damages resulting from any of the
following:
a. Improper installation, delivery, or maintenance.
b. Any repair, modification, alteration or adjustment
not authorized by the manufacturer or an
authorized servicer.
c. Misuse, abuse, accidents or unreasonable use.
d. Incorrect electrical current, voltage or supply.
e. Improper setting of any control.
2. Warranties are void if the original serial numbers have
been removed, altered, or cannot be readily
determined.
3. Light bulbs.
4. Products purchased for commercial or industrial use.
5. The cost of service or service call to:
a. Correct installation errors.
b. instruct the user on the proper use of the product.
c. Transport the appliance to a servicer.
6. Consequential or incidental damages sustained by
any person as a result of any breach of these
warranties.
Some states do not allow the exclusion or limitation of
consequential or incidental damages, so the above
exclusion may not apply to you.
HOW TO RECEIVE WARRANTY SERVICE:
1. For authorized service, contact the dealer from whom
you purchased the appliance, or call Maytag
Appliances Sales Company at: 1-800-688-1120.
2. If you are not able to satisfactorily resolve the
complaint with local response, call or write to:
Maytag Appliances Sales Company
Attn: CAIR m Center
P. O. Box 2370
Cleveland, TN 37320-2370
1-80(_6851120
.
When requesting service, the following information
will be needed:
a. Your name, address and telephone number.
b. Model and serial numbers (found on the data plate).
c. Name and address of dealer or servicer.
d. Proof of purchase date (sales receipt).
e. A clear description of the problem and service
history.
Warranty Part No.: 8109P087-60
(09-97-00)
 Loading...