

Page 1
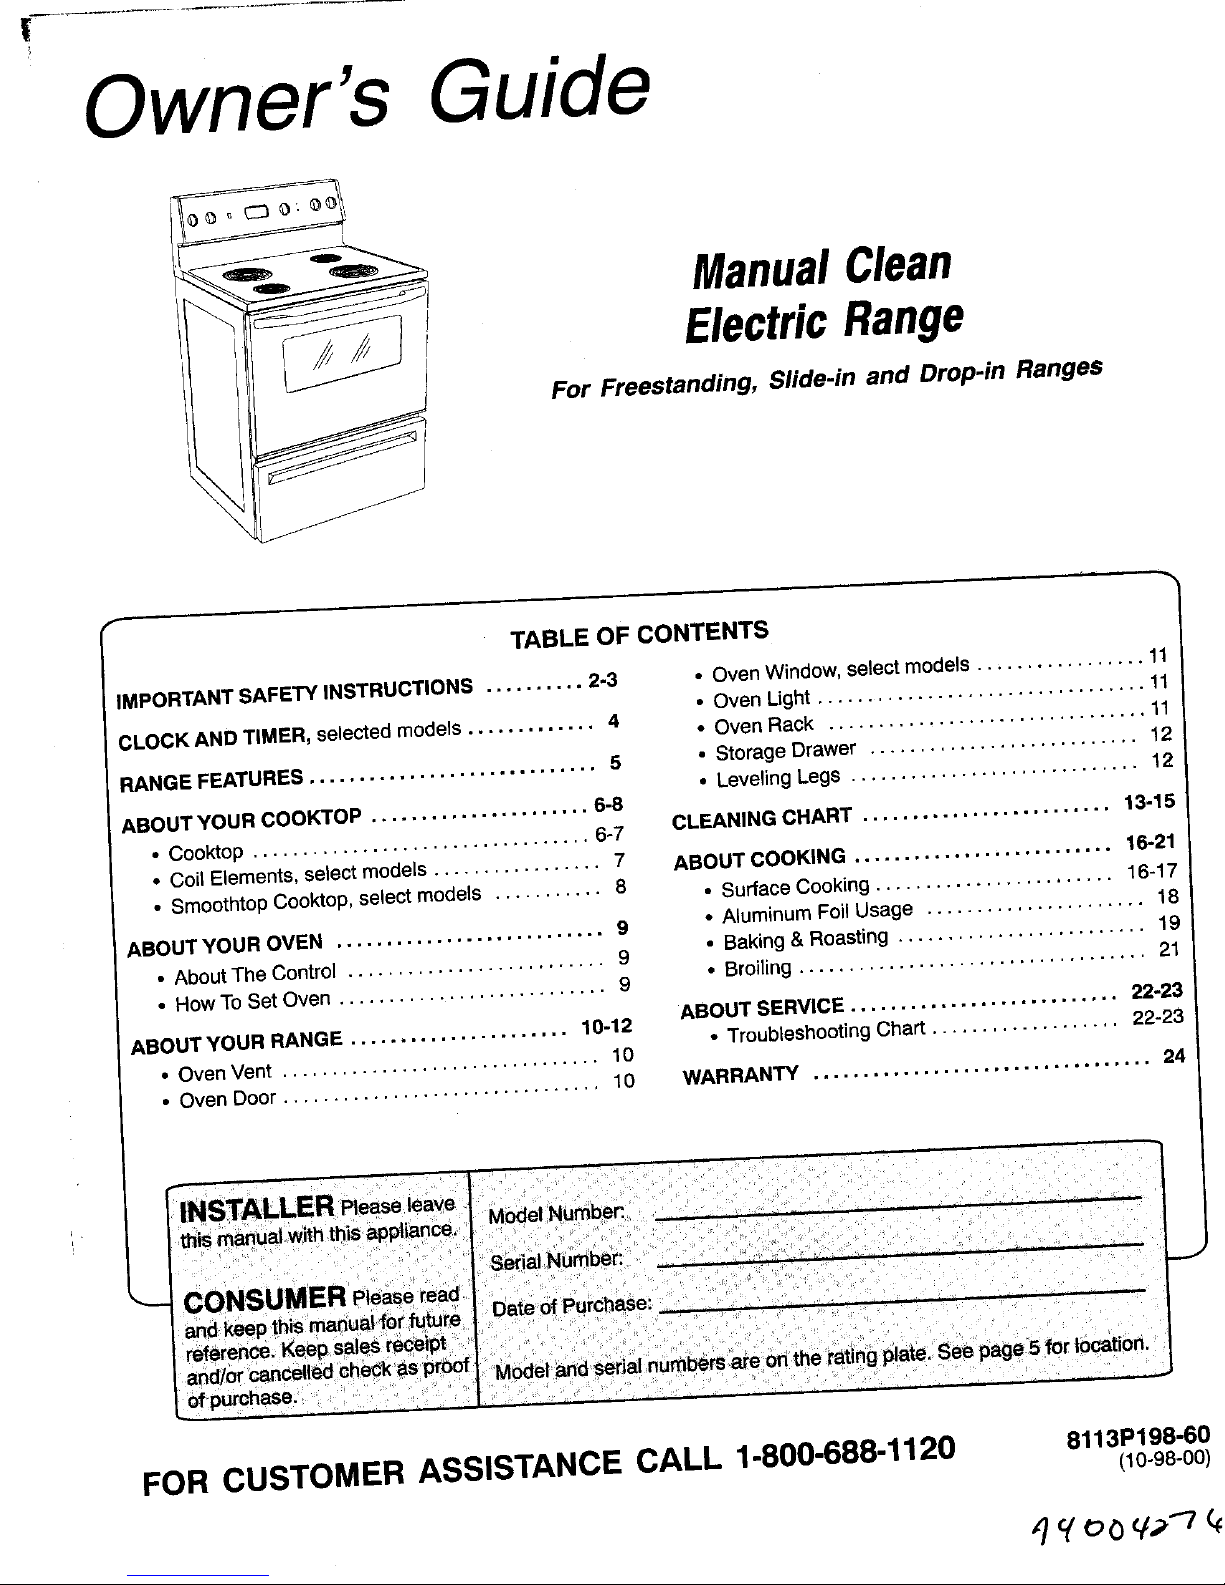
Owner's Guide
.m ManualClean
ElectricRange
For Freestanding, Sfide.in and Drop-in Ranges
r •
r
TABLE OF CONTENTS
IMPORTANTSAFETYINSTRUCTIONS .......... 2-3 • OvenWindow,selectmodels................. 11
• Oven Light ................................. 11
CLOCKAND TIMER, selectedmodels............. 4
• OvenRack ................................ 11
RANGEFEATURES............................. 5 • StorageDrawer ........................... 12
• Leveling Legs ............................. 12
ABOUTYOUR COOK'FOP...................... 6-8
• Cooktop .................................. 6-7 CLEANINGCHART ......................... 13-15
• Coil Elements,selectmodels ................. 7 ABOUT COOKING.......................... 16-21
• SmoothtopCooktop,select models ........... 8 • SurfaceCooking........................ 16-17
ABOUTYOUR OVEN ........................... 9 • AluminumFoilUsage ...................... 18
• AboutTheControl .......................... 9 • Baking& Roasting ......................... 19
• Broiling ....... 21
• How ToSet Oven ........................... 9 ............................
ABOUTSERVICE ........ 22-23
ABOUTYOUR RANGE ...................... 10-12
° TroubleshootingChart................... 22-23
• OvenVent ................................ 10
• OvenDoor................................ 10 WARRANTY .................................. 24
FOR CUSTOMERASSISTANCE CALL 1-800-688-1120 8113P198.6o
(lo-98-oo)
z/y o 0V._"7(_
Page 2
Thank You... for purchasingourcooking 1__)
appliance.Tohelp youobtainthe maximumincooking ,_ WARNING
satisfaction,we offerthesesuggestions: d
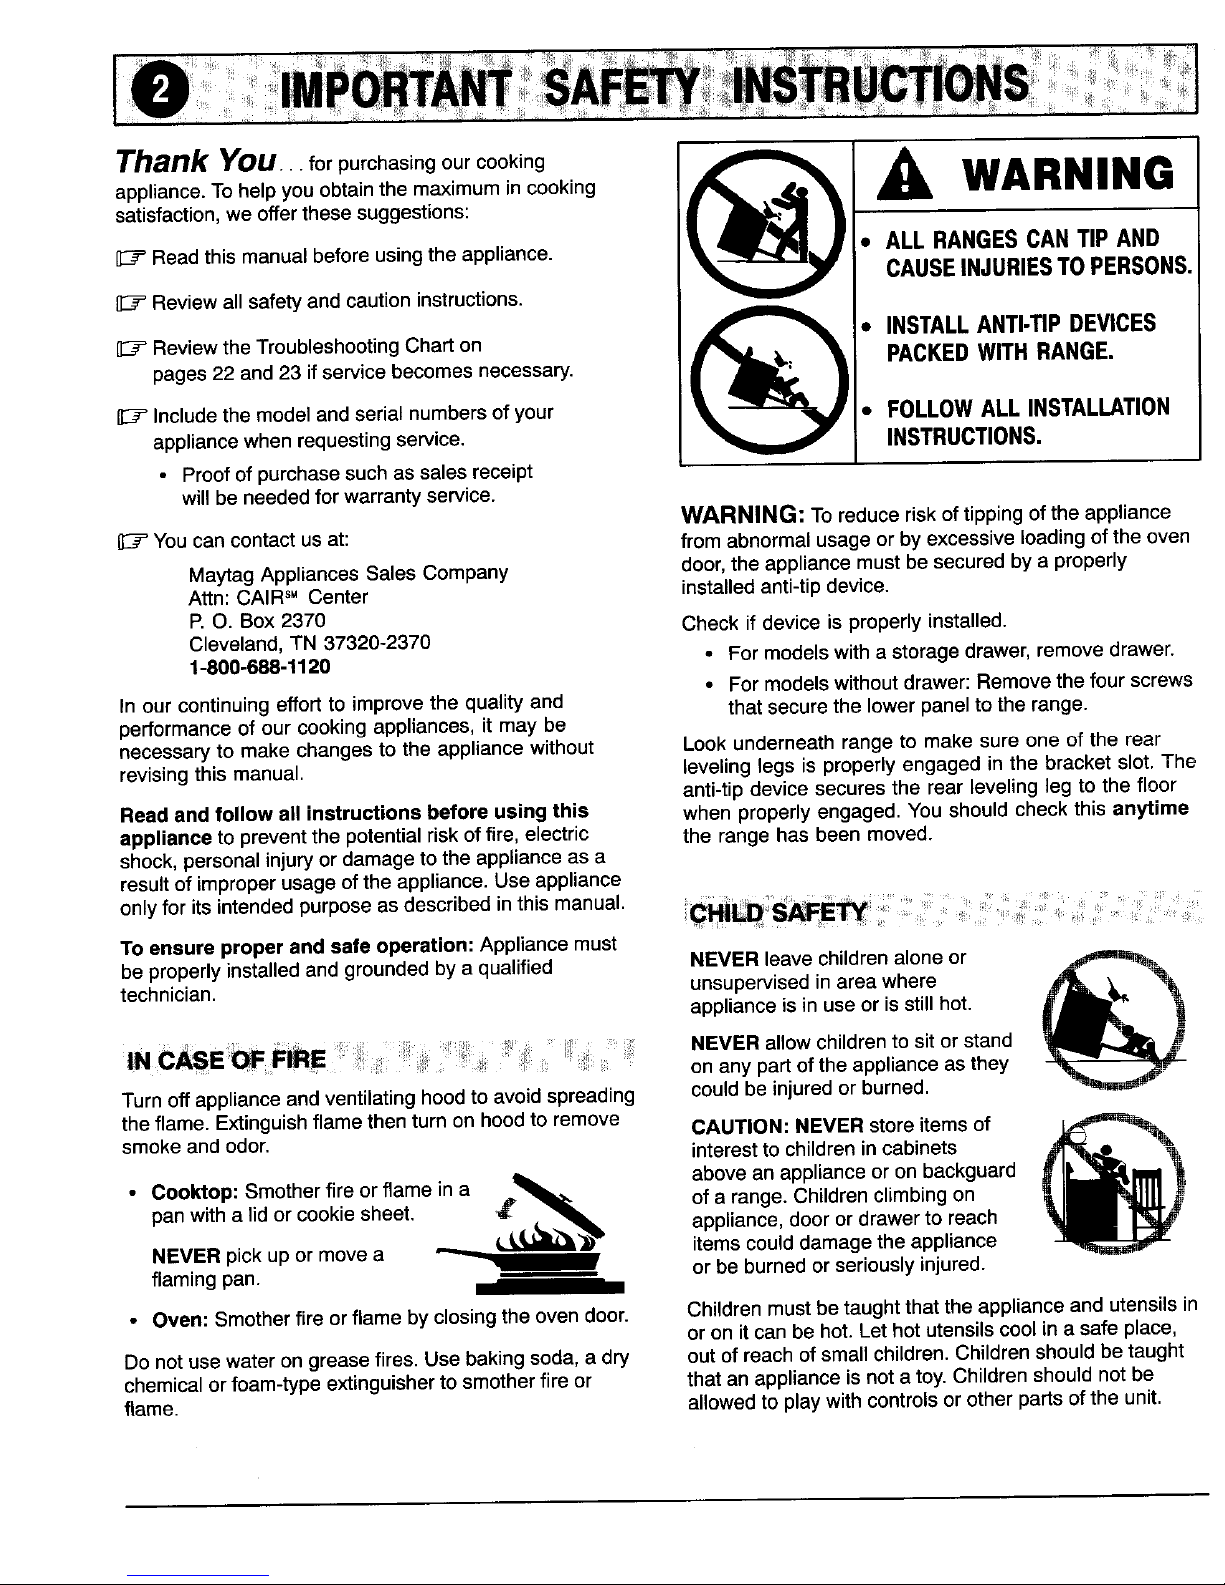
Readthismanualbefore using the appliance. • ALL RANGESCANTIP AND
CAUSEINJURIESTO PERSONS.
Reviewall safetyand cautioninstructions.
• INSTALLANTI-TIP DEVICES
ET' Reviewthe TroubleshootingCharton A PACKEDWITH RANGE.
pages22 and23 if service becomesnecessary. I
ET' Includethe modelandserial numbersofyour • FOLLOWALLINSTALLATION
appliancewhen requestJngservice. INSTRUCTIONS.
• Proofofpurchasesuch assales receipt
willbe neededfor warranty service.
WARNING: To reducerisk oftipping ofthe appliance
E7 Youcancontact us at: fromabnormalusageorby excessive loadingof theoven
MaytagAppliancesSalesCompany door,the appliancemust besecured bya properly
Attn: CAIRs" Center installedanti-tip device.
P.O. Box 2370 Check if deviceis properlyinstalled.
Cleveland,TN 37320-2370
1-800-688-1120 • Formodelswith a storagedrawer,removedrawer.
• Formodels without drawer:Removethe four screws
In our continuingeffort to improvethe quality and that securethe lower paneltothe range.
performanceof our cooking appliances, it may be
necessaryto make changesto the appliancewithout Look underneath rangeto make sure one of the rear
revisingthis manual, levelinglegs is properlyengaged in the bracket slot.The
anti-tipdevice securesthe rear levelingleg to the floor
Readandfollow all instructionsbeforeusingthis when properlyengaged. You shouldcheck this anytime
appliancetopreventthepotentialriskoffire,electric the rangehasbeen moved.
shock,personalinjuryordamagetothe applianceasa
resultof improperusageofthe appliance.Useappliance
onlyforitsintendedpurposeas describedinthismanual.
Toensureproper andsafe operation:Appliancemust
be properlyinstalledandgroundedbya qualified NEVERleavechildrenaloneor ._.,_m_
technician, unsupervisedin area where
applianceisinuseor isstillhot.
•........ _, _ ._ NEVERallowchildrento sit or stand
CASE _ F_E !' ii ,_ ': on any partof the applianceas they
Turnoff applianceand ventilatinghoodto avoid spreading couldbe injuredor burned.
theflame.Extinguishflamethenturn on hood to remove CAUTION:NEVER storeitemsof 51,,,_,_
smokeand odor. interestto children in cabinets
• Cooktop: Smotherfire or flame in a _ above an applianceor on backguard
panwith a lidor cookiesheet. _ of a range.Childrenclimbingon
appliance,door ordrawerto reach
NEVERpick up or movea itemscould damagethe appliance
flamingpan. orbe burnedor seriouslyinjured.
• Oven: Smotherfire or flame byclosing the oven door. Childrenmust betaughtthat the appliance and utensilsin
or on itcan behot. Lethot utensilscoolin a safe place,
Do not usewateron greasefires. Usebakingsoda, a dry out of reach ofsmall children.Childrenshouldbetaught
chemicalorfoam-type extinguisherto smotherfire or thatan appliance isnot a toy. Childrenshouldnot be
flame, allowedto playwith controlsor other partsof the unit.
Page 3
GENERAL INSTRUCnONS.'
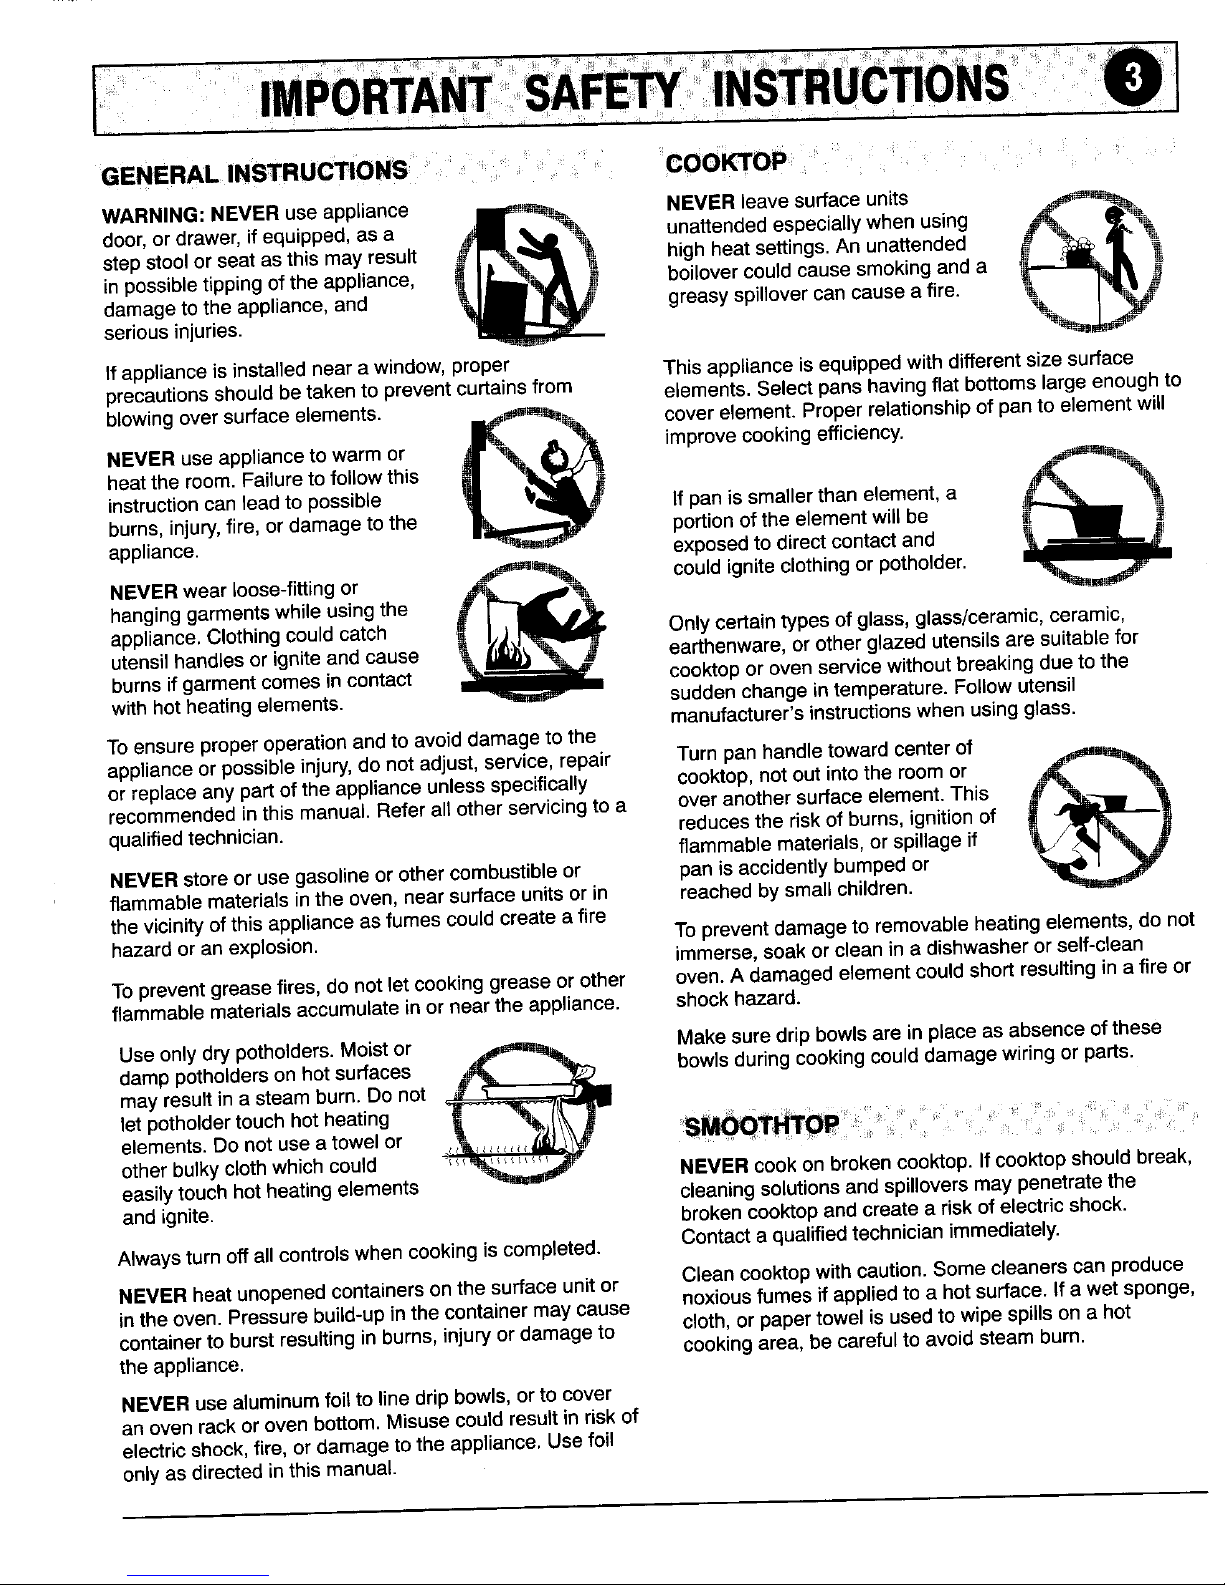
WARNING:NEVERuseappliance _ NEVERleavesurfaceunits _'_
door,ordrawer,if equipped,as a unattendedespeciallywhenusing f_... m
stepstoolor seat asthis mayresult highheat settings.An unattended _-'
inpossibletipping ofthe appliance, boilovercouldcausesmoking and a
damagetothe appliance,and greasyspillovercan cause a fire. _ j ._seriousinjuries.
Ifappliance isinstalledneara window,proper Thisappliance isequippedwithdifferentsize surface
precautionsshouldbetakento prevent curtainsfrom elements.Select panshavingflat bottomslarge enoughto
blowingoversurface elements. _'_ coverelement.Properrelationshipof pan to elementwil_
NEVERuse applianceto warmor _ improvecookingefficiency.
heatthe room. Failureto followthis _"
instructioncan lead to possible If panis smallerthan element,a
burns,injury,fire, ordamage to the portionof theelementwill be
appliance, exposedto directcontactand
NEVERwear loose-fittingor =l_ couldigniteclothingor potholder.
hanginggarmentswhile usingthe
appliance.Clothingcouldcatch Onlycertaintypesof glass, glassceramic, ceramic,
utensilhandlesor igniteand cause earthenware,orotherglazedutensilsare suitablefor
burnsif garmentcomesin contact cooktopor oven servicewithout breakingdue to the
with hot heatingelements, suddenchange in temperature.Follow utensil
manufacturer'sinstructionswhen usingglass.
To ensureproper operationand to avoiddamage tothe
applianceor possibleinjury,do not adjust,service,repair Turnpan handletoward centerof .,_=m_t_.
or replaceanypartof the applianceunless specifically cooktop,not out intothe room or
recommendedin this manual.Referall other servicingto a overanothersurfaceelement.This
qualifiedtechnician, reducesthe risk of burns, ignitionof
flammablematerials,or spillage if
NEVERstore or usegasolineor othercombustibleor pan is accidentlybumped or
flammablematerialsinthe oven,near surfaceunits orin reachedbysmall children.
thevicinityof thisapplianceas fumescould createafire
hazardor anexplosion. Topreventdamageto removableheatingelements,do not
immerse,soakor clean in a dishwasheror self-clean
Topreventgreasefires, donot let cookinggreaseor other oven. A damaged elementcould shortresultingina fireor
flammablematerialsaccumulatein or near the appliance, shockhazard.
Use only dry potholders.Moistor Makesure drip bowlsare in placeas absenceofthese
damppotholdersonhot surfaces bowlsduringcookingcoulddamagewiringor parts.
mayresult ina steam burn.Donot
letpotholdertouchhot heating
elements.Do notuse a towelor
other bulkyclothwhichcould NEVER cook on brokencooktop.Ifcooktop shouldbreak,
easilytouch hotheatingelements cleaningsolutionsand spilloversmay penetratethe
and ignite, brokencooktopand createa risk of electricshock.
Alwaysturn offallcontrolswhen cookingiscompleted. Contacta qualifiedtechnicianimmediately.
NEVERheat unopenedcontainersonthe surface unit or Clean cooktopwith caution. Somecleanerscan produce
noxiousfumes if appliedto a hot surface. If awet sponge,
inthe oven.Pressurebuild-upin the container maycause
containerto burstresultingin burns,injury or damage to cloth, or papertowel is usedto wipespillson a hot
theappliance, cookingarea, be careful to avoidsteam burn.
NEVERuse aluminumfoilto linedrip bowls, or to cover
anoven rackoroven bottom.Misusecould resultin riskof
electricshock,fire,or damage tothe appliance.Usefoil
onlyas directedin this manual.
Page 4

iii ii!ii!!¸ Jl;i;ii
"!i!_ i_i
OVEN
Usecare whenopeningdoor.Lethot _ I_j { 8EOO_ _ I
airorsteamescapebefore removing
orreplacingfood.
Forproperoven operationand I(_ (_
performance,de not blockorobstruct
ovenvent duct.
Alwaysplace ovenracksindesiredlocationswhileoven is Theelectronicdisplaywillflash when rangeisfirst
cool.If rackmustbe movedwhileovenis hot,do notlet connectedtopoweror ifpoweris interrupted.The
potholdercontacthotheatingelementin oven. displaywillstopflashingoncethetime-of-dayclockhas
beenset.
VENTILATINGHooDs : :' TOSET CLOCK:
.... ........... 1. PressCLOCKpad.
Cleanrange hoodandfilters frequentlyto preventgrease 2. Pressand holdor tap HOUR
or otherflammablematerialsfromaccumulatingon hood pad to setcorrect hours. _
orfilter and to avoidgrease fires.
C.o0.
3. Pressand hold or tap MINUTE
Turnthe fan onwhenflamb_ingfoods (suchas Cherry padtoset correctminutes.
Jubilee)underthe hood.
TO SETTIMER:
1. PressTIMERpad.0:59, oronehour,
willappear in the display. I_ IMER/I
V
Use extremecaution when movingthe greasekettle or NOTE:Thetimer willautomatically
disposingof hot grease.Allow greaseto cool before begincountingdown in incrementsof
attemptingto move pan. one minute.
2. To set the timer forless than one hour:
HEATING ELEMENTS _ PressTIMER padthen press _
....... : and holdor tap MINUTE pad
untilthedesiredtimeappears
NEVERtouch surface or oven inthe display.
heating elements,areas near
elementsor interiorsurfacesof 3. Tosetthe timer for morethan one hour:
oven. Pressthe TIMER padthen-
Heatingelementsmaybe hoteven • PressHOURpad.1:59,or
thoughtheyaredarkincolor.Areas two hours,willappearin
nearsurfaceelementsand interior thedisplay. _
surfacesofan oven may becomehot enoughto cause • PressMINUTE pad until
('.o0.b
%Y
burns.Duringand afteruse, do not touchor letclothing the desired minutes appear
or otherflammablematerialscontactheating elements, inthe display.
areasnear elements, or interiorsurfacesof oven until NOTE:Two hoursisthemaximumtime that can be
theyhave had sufficienttime to cool. set.
Otherpotentiallyhot surfaces include:Cooktop,areas 4. Whenthe time has elapsed,0:00will appear inthe
facingthe cooktop,ovenvent opening,surfaces nearthe displayand continuousbeepswill sound.
ventopening,ovendoor, areas aroundthedoor,and oven
window. 5. PressCLOCK padto cancel
thebeeps. Thecurrenttime t/mnr_'_t
of daywill reappearinthe display.
Tocancel the timer: Press CLOCK padand thedisplay
will returnto the currenttime ofday.
Page 5
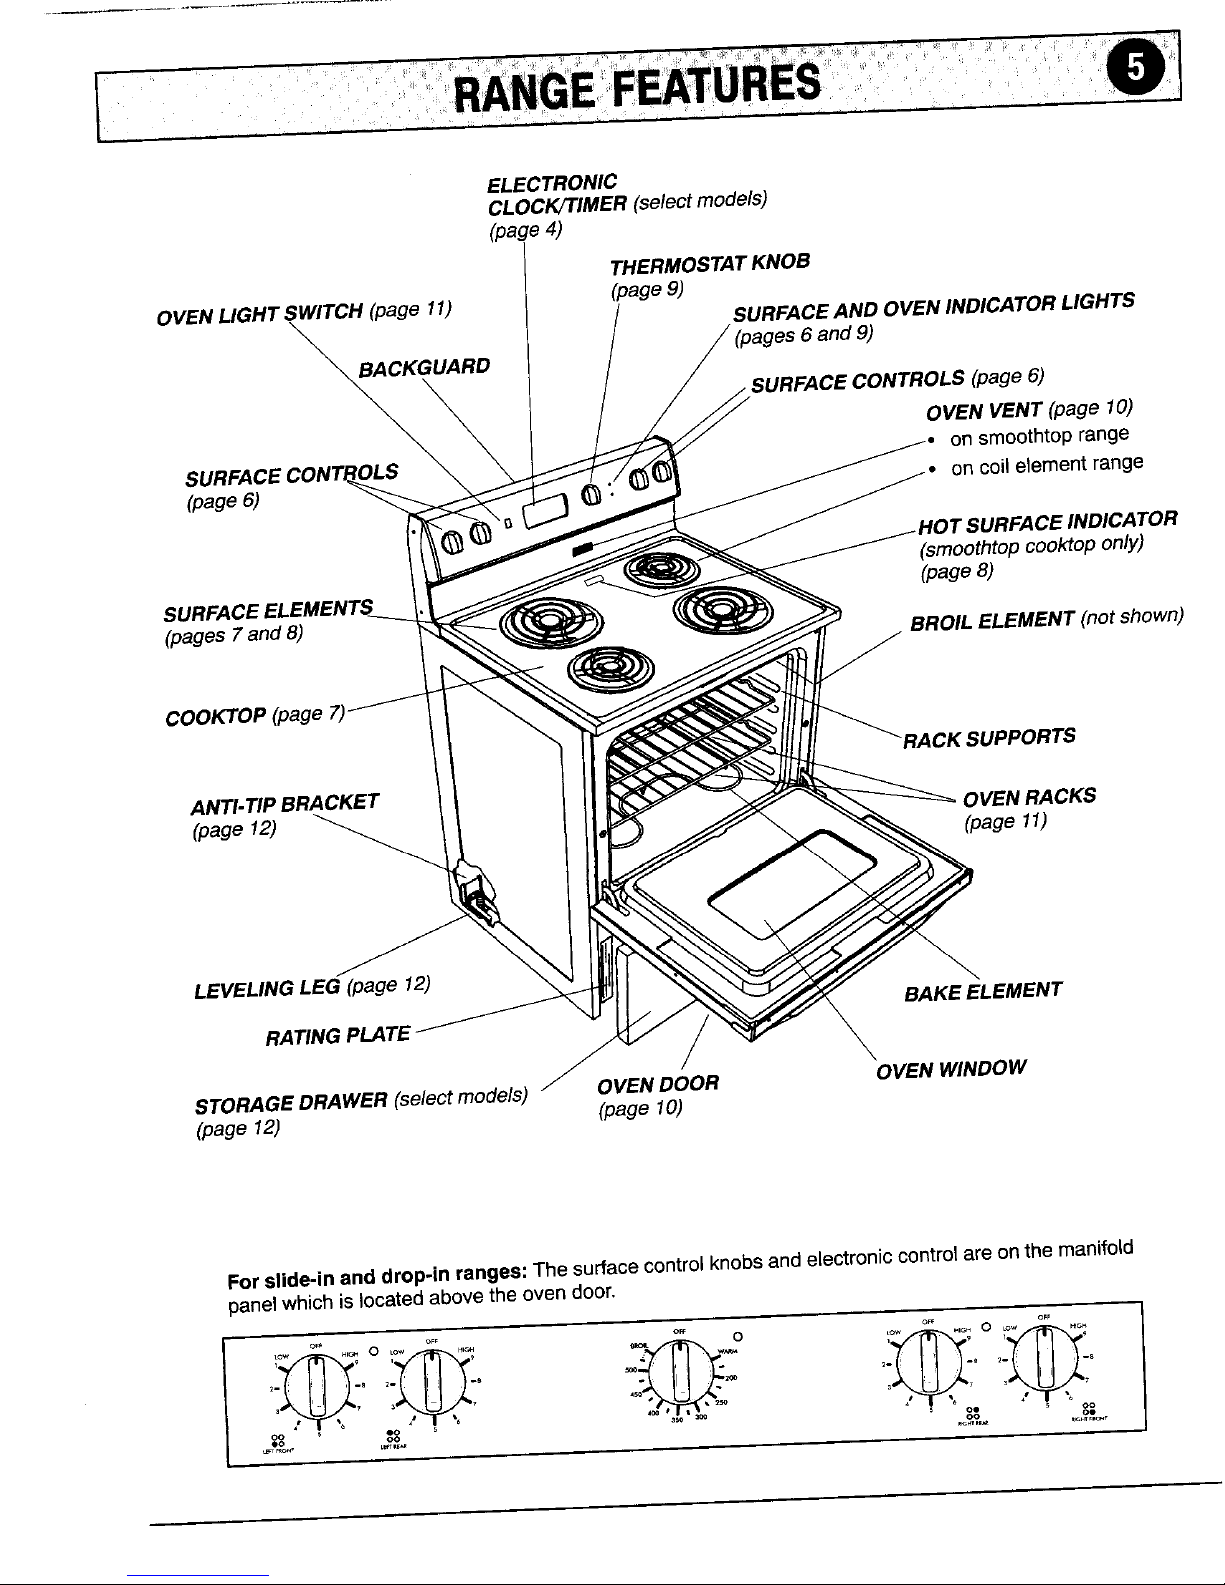
ELECTRONIC
CLOCK/TIMER(se/ectmodels)
(page4)
THERMOSTATKNOB
OVENLIGHT SWITCH(page 11) (page9)
\ SURFACEAND OVEN INDICATORLIGHTS
_KG ))
UARD
SURFACECONTROLS(page6)
OVENVENT (page 10)
on smoothtoprange
(page6) on coil elementrange
(smoothtopcook'toponly)
SURFACEELEMENTS (page8)
(pages7and 8) BROIL ELEMENT (not shown)
COOKTOP(page7)
RACK SUPPORTS
ANTI-TIP BRACKET
(page 12) _ OVENRACKS
(page 11)
LEVELINGLEG (page 12)
BAKE ELEMENT
RATINGPLATE
STORAGEDRAWER(selectmode/s) / OVENDOOR OVEN WINDOW
(page 12) (page 10)
Forslide-inanddrop-in ranges:The surfacecontrolknobsandelectroniccontrolareonthe manifold
panelwhichislocated above the oven door.
c_ oF_ or_ oP_ OFF
_. .e ;. -e
tlo oo oo oe
Page 6
Beforecooking... Othertips,..
• Alwaysplacea panonthesurfaceunitbefore you • Toeliminatethehazardofreachingoverhotsurface
turniton.Topreventdamageto range,never elementsdonotinstallcabinetstoragedirectly
operatesurfaceunitwithouta paninplace, abovea unit.
• NEVERusethecooktopasa storageareaforfood
orcookware. Ifstorageis provided,limititto itemsthat are
infrequentlyusedand can besafelystoredinan
areasubjectedto heat.
unit,Makesureyouturnedonthecorrectsurface Temperaturesmaybe unsafefor itemssuchas
unit. volatileliquids,cleanersor aerosolsprays.
• Begincookingona higherheatsettingthenreduce
• Aerosol-typespraycansare EXPLOSIVEorhighly
toa lowersettingto completetheoperation.Never
flammablewhenexposedto heat,Avoidtheiruseor
usea highheatsettingforextendedcooking.
storagenearan appliance.
• NEVERallowa pantoboildry.Thiscoulddamage
the panandtheappliance, • NEVER leaveany items,especiallyplasticitems,
• NEVERtouchcooktopuntilithascooled.Expect unattendedonthecooktop.The hotairfromthevent
somepartsofthe cooktop,especiallyaroundthe ................................. plastics,
surfaceunits,tobecomewarmorhotduring orincreasepressureinclosedcontainerscausing
cooking.Use potholderstoprotecthands, themtoburst.
Aftercooking... * NEVERallowaluminumfoil,meatprobesorany
• Besuresurfaceelementisoffaftercooking, othermetalobject,otherthana utensilon a surface
Cleanupgreasyspillsassoonas possible, element,tocontactheatingelements.
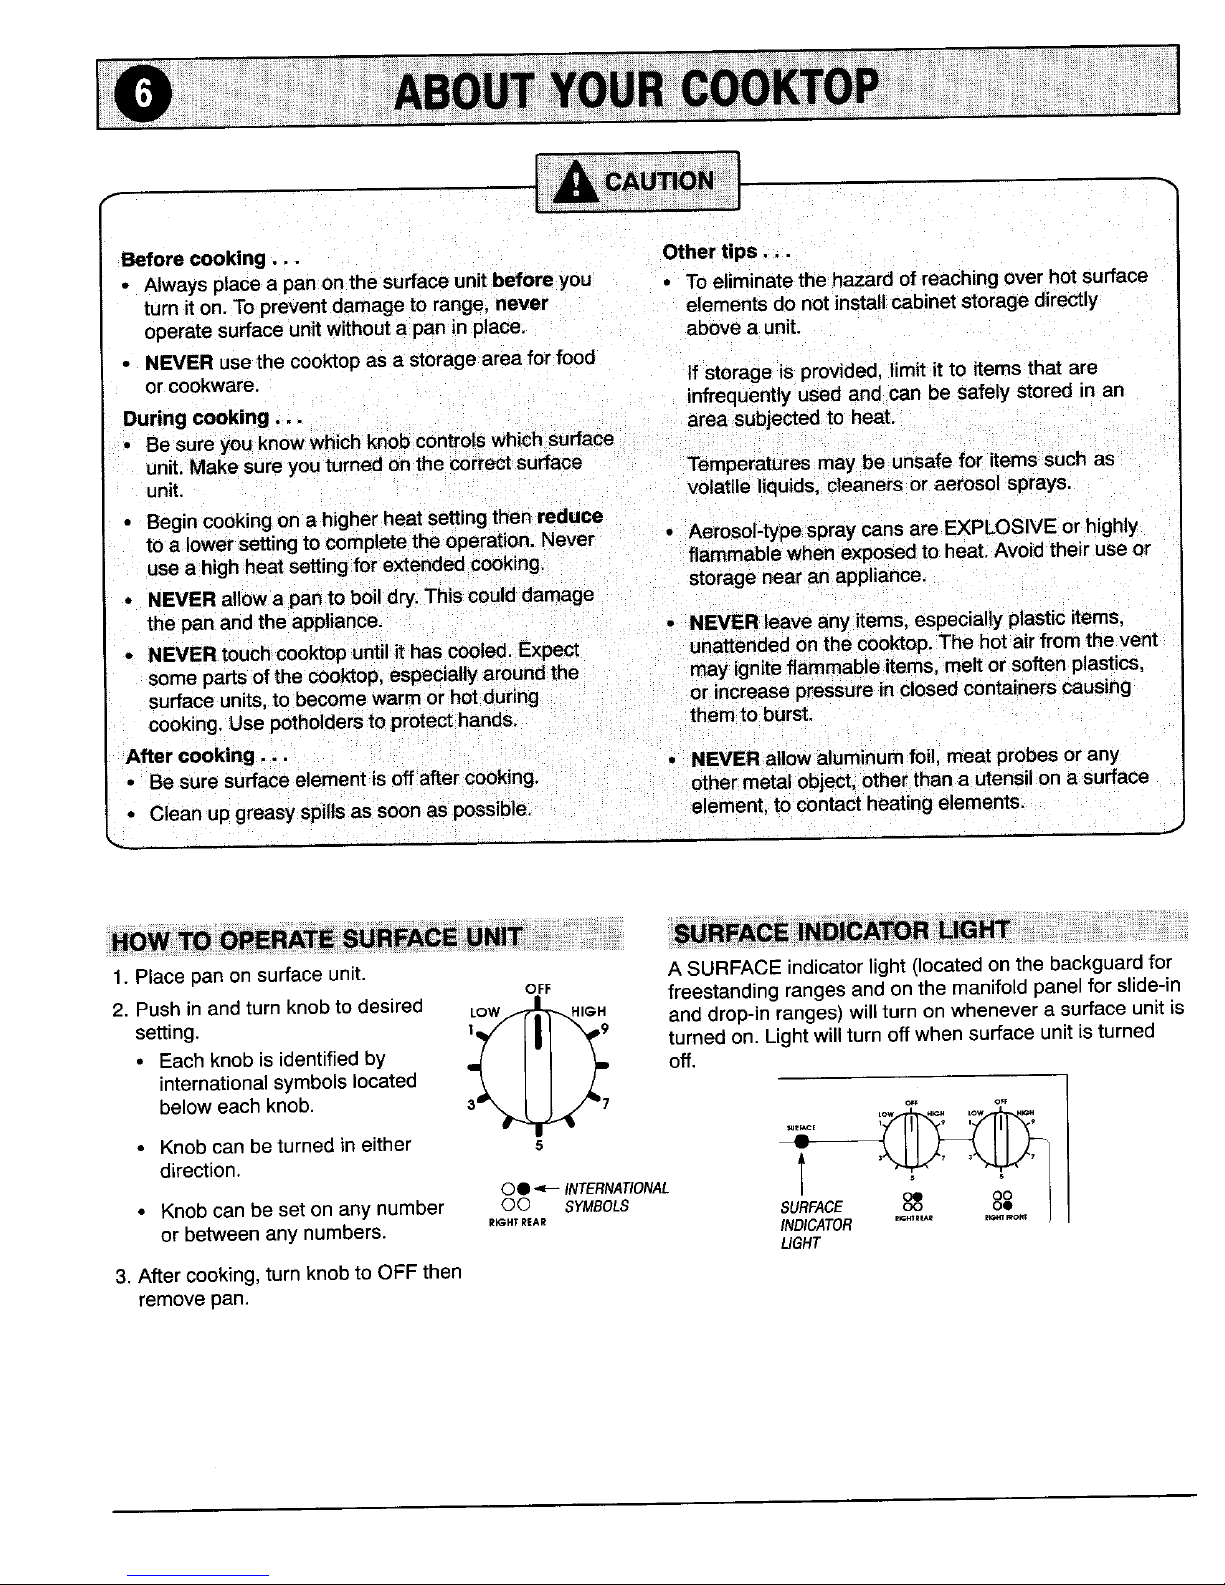
1. Placepan onsurface unit. A SURFACEindicatorlight(locatedon the backguardfor
OFF
2. Pushin and turnknobto desired LOW/_-_IGH freestandingrangesand onthe manifoldpanelfor slide-in
and drop-in ranges)will turn onwhenevera surfaceunit is
setting, ll_/" [| I _"_9 turnedon. Light willturn offwhen surface unit is turned
• Eachknob is identified by _ off.
internationalsymbolslocated
beloweach knob. o_F o_r
* direction.Kn°bcan be turnedineither s @_ i_
00 _ INTERNATIONAL i oe oo
* Knobcan beset onany number O0 SYMBOLS SURFACE oo oe
or betweenany numbers. ,,_,_REAR INDICATOR
UGHT
3. Aftercooking,turn knobto OFF then
removepan.
Page 7
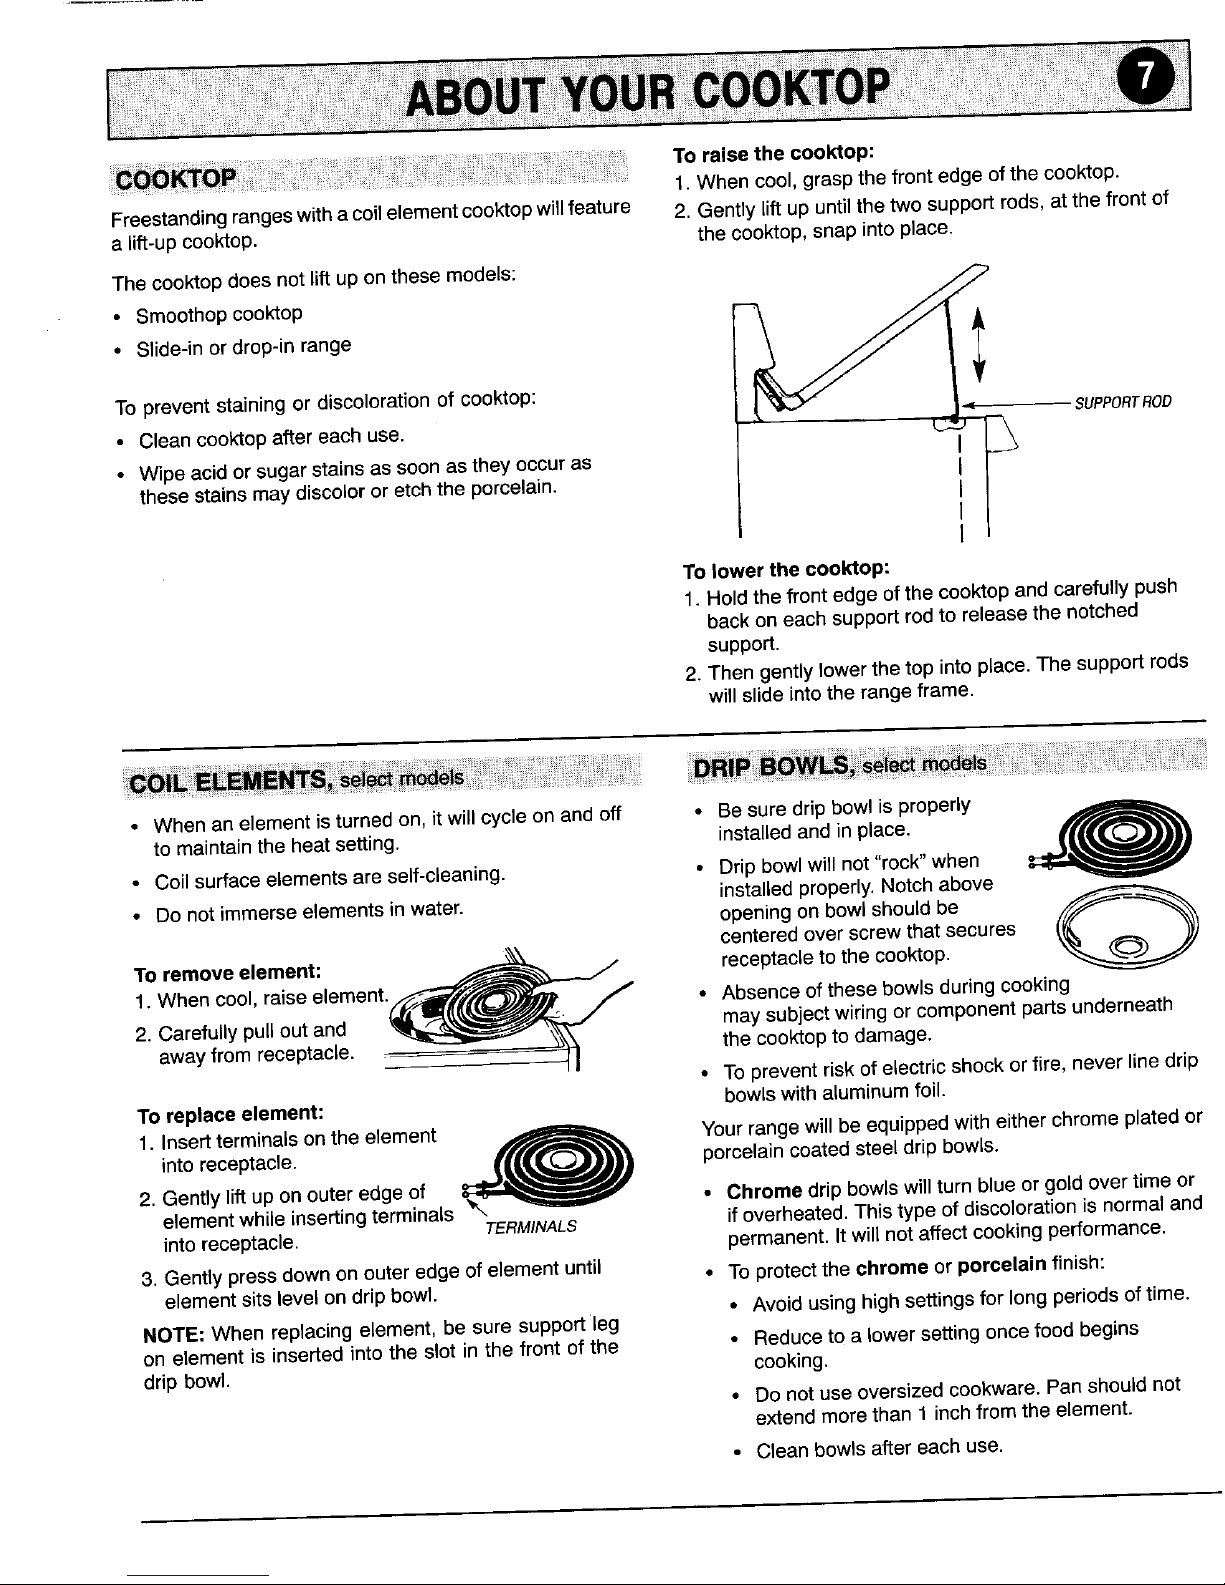
To raisethe cooktop:
1,When cool,graspthefront edgeofthe cooktop.
Freestandingrangeswithacoilelementcooktopwillfeature 2. Gently lift up until the two supportrods,at the front of
a lift-upcooktop, the cooktop, snap into place.
Thecooktopdoesnot lift upon these models:
• Smoothopcooktop _ I
• Slide-inor drop-in range
Topreventstaining or discolorationof cooktop:
•,I SUPPORTROD
• Cleancooktopafter each use. _ ) I\
• Wipeacid or sugarstains as soon as they occur as
thesestains may discolor or etchthe porcelain.
ToDowerthe cooktop:
1. Holdthefront edge ofthecooktop and carefully push
backoneach supportrodto releasethe notched
support.
2. Thengently lowerthe top intoplace. Thesupportrods
will slide intothe rangeframe.
• When an elementisturned on, itwill cycle on andoff • Besuredrip bowl is properly
to maintainthe heatsetting, installedand inplace.
• Coilsurfaceelementsare self-cleaning, • Drip bowlwill not"rock" when
• Do notimmerseelementsin water, installedproperly,Notch above
openingon bowlshouldbe S,,___
centeredover screwthat secures
Toremoveelement: ,_ _ /
receptacleto the cooktop.
1.Whencoolraisee,ement.f l / • Absenceof thesebowls duringcooking
2. Carefullypull outand _ maysubjectwiringor componentparts underneath
awayfrom receptacle. __j thecooktopto damage.
• Topreventrisk ofelectricshock orfire, never linedrip
Toreplaceelement: bowlswith aluminumfoil.
1. Insert terminalsonthe element _ Yourrangewill beequippedwith eitherchromeplatedor
intoreceptacle. _ porcelaincoatedsteel drip bowls.
2. Gently lift up on outer edge of • Chrome drip bowlswill turn blue or gold overtime or
elementwhile insertingterminals ifoverheated.This type of discolorationis normaland
intoreceptacle. TERMINALS
permanent.Itwill notaffect cookingperformance.
3. Gently press downon outer edge of elementuntil • To protectthe chrome or porcelain finish:
elementsits level ondrip bowl.
• Avoid usinghigh settingsfor long periods oftime.
NOTE: When replacingelement, be sure supportleg
on element is inserted into the slot in the front of the • Reduceto a lowersetting oncefood begins
drip bowl. cooking.
• Do not useoversizedcookware.Pan shouldnot
extend morethan 1 inchfromthe element.
• Cleanbowlsaftereach use.
Page 8

• Cooktopmayemita lightsmokeandodor thefirst few HOT SURFACElightwillturn on whensmoothtopcooktep
times cooktopis used,This is normal, is hot. Lightwill turn off when top cools. Hotsurface light
is locatedeitheron the backguardor atthe backcenterof
* Elementundersmoothtopcycleson andoff to maintain thecooktop.
the presetheatsetting. Elementwill glow redwhenit
cyclesON........ _' _'
HOTSURFACEuGHTON :_ "__'3" ',_ ,
, SmoothtopRETAINSheatfor a periodof time afterthe BACKGUARO ,o_0=o. •
unitisturnedoff. When the HOT SURFACElightturns i
off,cooktopwill becool enoughto touch. ,_,_, 8_o_ i
• Beforeusingcooktopfor thefirst time, clean it
thoroughlyas directedin the cleaningcharton page15.
Thiswill protectthe smoothtopand will guaranteea HOTSURFACE
cleancooktopwhen the elementsareturned on. LIGHTONCO_
Aluminum foil will damage thesmoothtopifit meltsonto
thetop. Never usealuminumfoil or foil-type disposable
containerssuch aspopcornpoppers.They may leave
metalmarksormay permanentlymelt ontothe
smoothtop.
Important: Watchsugaryor starchysolutionscarefullyto
avoidbelievers.If a sugar solution(jam,jelly,candy)or a
starchsolution(potatoes,rice)boilsover,it maypit or
discolorthe smoothtop.Turnelementto LOW andclean
believerimmediately. See page 15 for cleaning
instructions.
TO PROTECTSMOOTHTOPfromscratching,chipping,etching,or metal marks:
• Cleansmoothtopafter eachuse. • Never placeplasticsonwarmor hot smoothtop.
• Neverlet panboil dry asthis will permanently Plasticmaymelt ontotop.Top maychipor pit in
damagetop. attemptingto removeplastic.
• Neveruse smoothtopas a worksurfaceor cutting • Neverleave sugar,salt,sand, soil, shortening,or fat
board, onsmoothtop.They may scratchor damagetop.
• Nevercookfood directlyonsmoothtop. • Onlyuseflat-bottompansthatare freeof soil,rough
• Never placetrivetorwok ring betweentop and pan. areas,nicksor scratchesas these maysoil or
These itemscan mark or etchthe top. scratchthe top.
Page 9

TheOVENTEMP knob is used OFF 1. Whencool, positionrack OFF
to selectthe oventemperature. BR_L._W_ in oven. BRO!_,_ _--_W A
Alwaysturnthis kn°b just TO 5°°'_/ I ' _ - 3.2"Turn OVENTEMPknObTurnSELECTORknob, _,. t_o _..200
thedesiredtemperature. -.,_\ I I //--2o0 to desiredtemperature. ,oo
4so " selectmodels,to BAKE. 45o. ___
Toaccuratelyset the oven '___._,_.,
temperature,do notturn to a 4ooZ,-'..._ .250 NOTE:Oven will not 400 ,
highertemperatureand then 350 30o operate if the 350 30o
back. OVENTEMP SELECTORknobisleft OVENTEMP
The SELECTORknob, select in the OFF position.
models,determinesthe type of-_ __ 4, Placefoodincenterof o_
ovenoperation. // oven,allowing a
minimumof 2 inches
Turn this knobtothe BAKE BROP betweenutensiland
ovenwalls. BAKE B_OJL
desiredsetting. 5. Checkfoodfor
donenessat minimum
Eachsettingisidentifiedby an SELECTOR timeinrecipe.Cook SELECTOR
indent(stop)anda "click"sound. (selectmodels) longerifnecessary. (selectmodels)
6. Removefoodfrom the ovenandturn the OVEN
TEMPknoband the SELECTORknob,select
models,to OFF.
The OVENindicatorlight turns on whenevertheoven
turns on.
Whenthe ovenreachesthe presettemperature,the
indicatorlightturnsoff. TheOVEN indicatorlightwill then 1.Placeoven rack on the OFF
turn oft and on as theoven elementscycle off andon to recommendedrack BRO_O'L.,_--------_
maintainthe presetoventemperature, position. _" wan
2. Turn OVENTEMPknob 500
to BROILor,for lower ";_o 2°0
OVENINDICATOR temperaturebroiling,to 45o, "
LIGHT
/ 450°F.
OFF / O_ OF_
.,o,L ov,,y/_o,_ .,_ Low .,o. 3. TurnSELECTORknob, 350 300
,o, i selectmodels,to BROIL. OVENTEMP
-_._ooo ¢ _/j., , NOTE:Ovenwill not
" " operateifthe OFF
" _ SELECTORknobis left
oe co in the OFF position.
O0 O@
_,,_,, ,o,_,_, ,,_,o,_ 4. If desired,preheat broil 8_E S,OiL
element3 minutes
beforeplacing meat in
the oven.
5.Turn meatonceabout SELECTOR
halfwaythorughcooking. (selectmodels)
6. Removefoodfromovenandturnthe OVEN TEMP
knoband theSELECTORknob,selectmodels,to
OFF.
Page 10

• Be sureallpackingmaterial isremovedfrom oven .
beforeturningon,
• Donotuse ovenfor storingfoodor cookware. • WARNING; NEVERplaceexcessiveweight onor i
standonanopenovendoor.Thiscouldcausethe
I
• Manyaerosol-typespraycansare EXPLOSIVE rangetotipover,breakthedoor,orinjurethe user. I
whenexposedtoheatandmay be highlyflammable.
Avoidtheiruseorstorageneartheoven • NEVERplacefingersbetweenhingeandfrontoven
frame.Hingearmsare springmounted,If
• Allowsteamandhotairtoescapebeforereaching accidentlyhit thehingeWillslamshutagainstoven
intoovento check,add,or removefood. frameandcouldinjureyourfingers.
• PreparedFoodWarning:Followfoodmanufacturer's "
instructions.If a plasticfrozenfoodcontainerand]or When baking,be sureovendooriscompletelyclosed.
itscoverdistorts,warps,oris otherwisedamaged
duringcooking,immediatelydiscardthefoodandits Bakingresultswillbeaffectedifdoorisnotclosed.
container.Thefoodcouldbecontaminated. To remove lift-off oven door:
• Followthe manufacturer'sdirectionswhenusing 1.When cool,openovendoortothe broilstopposition
ovencookingbags. (openedabout4-inches).
2. Graspdoorat eachside.
3. Liftupevenlyuntildoorclearshingearms. Donotuse
doorhandleto liftdoor.
• Whenovenisin use,thearea neartheoven
ventopeningmayfeelwarmorhottothetouch.
Oncoil elementcooktops,the oven _ OVENFRAME
ventislocatedatthe RIGHTREAR
element.
• Besuredripbowlfortherightrear
elementhasa holein the centerto OVENVENT
allowproperovenventing. OPEN/NG_ DOORHINGE
• Donotcoverthisdripbowlwithaluminumfoilas this
willblockproperovenventingandmayaffectbaking
results.
Ona smoothtop,the vent islocated atthe centerof the To replaceoven door:
backguardforfreestandingrangesandatthe back ofthe 1. Graspdoorat eachside.
cooktopforslide-inand drop-inranges. 2. Alignslotsindoorwithhingearmson range.
OVENVENTLOCATION
3. Slidedoordownontohingearmsuntildoorisseatedon
onsmoothtoprange hinges.Thenpushdownontopcornersofdoorto
oncoilelementrange completelyseatdooronhinges.
Doorisnot completelyseatedifonesideis higherorif
doorappearsto becrooked.
Donotattemptto openorclosedooror operateovenuntil
dooris properlyreplaced.
Page 11

To protectthe oven door window:
1. Do notuse abrasivecleaningagentssuchas steel wool
scouringpadsor powderedcleansersastheymay
scratchtheglass.
2. Do nothitthe glass with pots,pans,furniture, toys, or
otherobjects. The oven rack isdesignedwith a safety lock-stopposition.
3. Do notclosethe oven door untilthe oven racksare in This preventstherack fromaccidentlycomingcompletely
outofthe ovenwhen pullingthe rack outto addor remove
place, food.
Scratching,hitting,jarring or stressingtheglass may
weaken itsstructurecausingan increased riskof To remove oven rack:
breakageata later date. 1.When rack iscool, pullrack straightout untilit stops at
the lock-stopposition.
NOTE: if it is necessaryto change rackposition when
reckis hot, use potholdersto protecthands.
2.Tilt the front end ofthe rack up.
3. Continuepulling rack out of oven.
• Disconnectpowerto rangebytrippingcircuit _,,__ C _ RACK
breakerorremovingfusebeforereplacinglight _ SUPPORT
/
• Besure bulb is cool beforetouchingor replacing
handswhenreplacing
° Donottouchhotbulbwitha dampclothasthis
maycausethe bulbtobreak.
...... To replaceoven rack:
1.Placerackon therack supportsinoven.
Toturn onthe oven light:Pushin _1 2.Tilt the frontendofthe rackup slightly,
rockerswitchlocatedonthebackguard _ 3. Sliderackbackuntilitclearsthelock-stopposition.
forfreestandingrangesandonthe
manifoldpanelforslide-inanddrop-in 4. Lowerfrontof rackandsliderackstraightbackinto
ranges, oven.
5. Pullrackouttothe lock-stoppositiontobe surerackis
correctlyreplaced,Pushrackbackintoovenandclose
To replaceoven light bulb:
ovendoor.
t. Disconnectpowertorange.
2. Removelightbulband replacewitha 40 wattappliance
bulb.
3. Reconnectpowerto range. Resetclock, if equipped.
Page 12

DOnotstore plastic, paperproducts;food or flammable WARNING::Theanti,tip bracket providedwiththis
materialsin thisdrawer.The drawermay becometoo | :rangemustsecure oneof the rear leveling legsto
warmfor theseitems whenthe is useI J i theaccidentlyflOOr.Thistipping.bracketpreventsthe rangefrom
The storagedrawer atthe bottomofthe freestandingor
slide-inrangeis safeand convenientfor storingmetaland
glass cookware
The storagedrawer canberemovedto clean underthe
range.
Toremovestoragedrawer:
1. Pulldrawerout to the first stopposition.
2. Liftupfrontof drawer. ._'
3. Pullout to thesecondstopposition. CKET
4. Graspsidesand liftdrawer upand out.
LEVELINGLEG
The installershouldlevelthe rangewhen it is installed.
Ifthe rangeis not level,turn theleveling legs,locatedat
each corner of the range,untilrange islevel. Place level
on an oven rackto determineif rangeis level.
Cookingresultscan be affectedif the rangewas not
• properly leveledduring installation.
Toreplacestoragedrawer:
1. Fitthe rollerslocatedatthe endsof the drawerglides
intothe rails onthe range.
2. Lift upfront ofdrawer andgently push into first stop
position.
3. Liftdrawer upagainand push until draweris closed.
NOTE:Thedrop-inrangedoes not featurethe storage
drawer.
Page 13

Readand carefullyfollow the manufacturer'sinstructions. Cleaning Puff,ScrungeScrubSponges,or Scotch-Brite
NoScratch, Cookwareor Kitchen Sponge.
Testa small inconspicuousarea using avery light
pressureto see if the surface mayscratchor discolor. AbrasiveScouringPads- S.O.S.,BrilloSteelWool
This is particularlyimportantfor porcelainenamel,highly Soap,Scotch-BritePads.
polishedor shiny metalor plasticsurfaces,and painted
surfaces. NOTE:The cleaningproductsfor thesmoothtopcooktop
are listedin the charton page 15.
Glass Cleaners - BonAmi, Cinch, Glass Plus,Windex.
(Brandnamesfortheabovecleaningproductsareregistered
Disbwashing Liquid Detergents - Dawn, Dove, Ivory, trademarksoftherespectivemanufacturers.)
Joy.
Mild LiquidSprayCleaners - Fantastik,Formula409.
Non-AbrasiveCleaners- BonAmi, pasteofbaking • Besureapplianceisoffandallpartsarecoolbefore
sodaandwater, handlingorcleaning.Thisistoavoiddamageand
MildlyAbrasive Powderor LiquidAll Purpose possibleburns.
Cleansers- Ajax,BarkeepersFriend,Cameo,Comet, • If a partisremoved,be sureitiscorrectlyreplaced.
SoftScrub.
• TOprevent staining or discoloration,clean
Non-Abrasiveor ScratchlessPlasticor Nylon appliance,after each use.
ScouringPads or Sponges- Chore Boy Plastic .
CLEANING CHART
Broilerpan and • Soapandwater Never cover insertwith aluminumfoil as this prevents the fat from
insert,select • Plasticorsoap drainingto panbelow.
models filledscouringpad 1. Removefromovenafteruse.Coolthenpouroffgrease.
• Dishwasher 2. Placesoapyclothoverinsertandpan;let soaktoloosensoil.
3. Washin warm soapywater.Use soapfilled scouringpad to remove
stubbornsoil.
4. Broilerpanandinsertcanbe cleanedinthedishwasher.
Controlknobs • Soapandwater Forease ofcleaning,turnoffknobandremovebypullingforward.
• Mildliquidsprays 1. Wash, rinse,and dry.Do notuse abrasivecleaningagentsasthey may
• Glasscleaners scratchthe finishand remove the markings.
2. Turnon eachelementto be sure knobs havebeen correctlyreplaced.
Dripbowls, Do not cover drip bowlswith aluminumfoil.
chrome,select • Soapand water Bowlscanpermanentlydiscolorovertime,ifexposedto excessiveheat,orif
models • Plasticscouring soil is allowed to bake on. The discolorationwill not affect the cooking
pads performance.
• Mild abrasive 1. Aftereach use,wash, rinseand dry.
cleaners 2. If heavilysoiled,gently scrubwith plastic scouringpad. If soilis allowed
,_ • FlitzMetal Polish to burn on, it may beimpossibleto remove.
3. A non-abrasivemetal polish such as Flitzmay be usedto help remove
blue/goldheat stains. Flitz is availablein many automotive supply and
hardwarestores. Thesestainsarecausedbyoverheating,and normally
occurovera periodoftime.Theyare usuallypermanent.Followpackage-
directions.
Drip bowls, • Soapandwater Porcelainmay discolororcrazeovertime,ifoverheated,orif soilisallowe¢
porcelain, • Mildabrasive to bakeon.Thisis normalandwillnotaffectcookingperformance.
selectmodels cleaners 1. When cool,wash aftereach use, rinseanddry to preventstainingo_
• Plasticscouring discoloration.
pads 2. To cleanheavy soil,soakin hot sudsy water,then use mildabrasiv_
• Dishwasher cleanerand plasticscouringpad.
Page 14

Elements, 1. Elementsare self-cleaning.Soilwill burnoff as elementsareused.
ovenend coil, 2. Donotspray ovencleaneronelements,electricalhookup orconnection.
selectmodels 3. Do not immersecoil-type surface elementsinwater.
, , , ,J,
Enamel, painted • Soapand water NOTE:Usedry towelor clothtowipe upspills, especiallyacid(milk,lemon
• Backguard • Mildliquid cleaner juice,fruit, mustard,tomatosauce)orsugary spills.Surfacemaydiscoloror
• Ovendoor • Glass cleaner dull if soilis notimmediatelyremoved.This isespeciallyimportantforwhite
• Sidepanels surfaces.
• Storagedrawer 1.When cool,wash with warm soapy water,rinse and dry. Neverwipe a
orlowerpanel warm orhot surfacewith a dampcloth asthis may damagethe surface
and may causea steam burn.
2. For stubbornsoil, use mildly abrasive cleaningagents such as baking
soda paste or BonAmi.
3. Donotuseabrasive,causticorharshcleaningagentssuchas steelwool
padsor ovencleaners.Theseproductswillscratchor permanentlydam-
agethe surface.
Glass • Soapandwater To preventstaining of the oven window, avoid usingexcessive
• Ovenwindow • Glasscleaner amountsof waterwhich may seep underor behind glass.
• Pasteof baking 1.Wash with soap and water.Removestubborn soil with pasteof baking
soda and water sodaand water.Rinsewith clearwater and dry.
2. Do not use abrasive materials such as scouring pads, steel wool or
powderedcleaningagents.They willdamageglass.
, ,, i , ,i
Metalfinishes • Soapandwater 1.Washwithsoapandwateror a glasscleaneranda softcloth.
such as brushed • Glasscleaner 2. Topreventscratchingordullingofthefinish,donotusemildlyabrasive,
aluminum,or • Plasticornon- abrasive,orharshcleaners,orcausticcleanerssuchasovencleaners.
chrome abrasivepador 3. Tocleanbrushedaluminum:Useonlysoapandwaterorasoftclothand
• Backguard sponge glasscleanerto preventscratchingordullingofthefinish.
• Cooktop 4. Tocleanbrushed chrome cooktopordoor:
• Ovendoor * Usea pasteofbakingsodaandwateranda softcloth.
• Storagedoor • Rubwiththegraintopreventscratching,dullingorstreakingof the
• Trimparts finish.
• Usea softclothandmineraloiltorestorelusterortoremovefinger-
printsorsmudges.
• Cleanwithanautomotivechromecleanerorpolisher.
Oveninterior Cleaningactionbegins NOTE: See porcelainenamelbelowforcleaningthe porcelainoven.
(Continuous whenevertheovenis 1.TomanuallycleanContinuousCleanOven:Brushoffheavysoilwitha
cleanoven, on.The ovenmustbe nylonorplasticpad.
selectmodels) usedfor cleaningto 2. Do notuse papertowels, cloths,orspongesbecausethe ovenwallsare
takeplace. Higher porousand particlesofthese materialswill rub off onthe walls.
oven temperatures 3.Do not use any type of oven cleaner, cleanser or detergent on this
and longerbaking surface.
timesspeedthe
cleaningaction. 4. Rinsearea withclean wateronly.
, , ,, i i ,, , ,,,, ,
Oven racks • Soapandwater 1. Cleanwith soapywater.
• Plasticscouring 2. Removestubbornsoilwithcleansingpowderorsoap-filledscouringpad.
pad Rinseanddry.
• Cleansingpowders Rackswillpermanentlydiscolorandmaynotslidesmoothlyifleftintheoven
• Soap-filled duringa self-cleanoperation.Ifthisoccurs,wipethe rackandembossed
scouringpad rack supportswitha smallamountof vegetableoil to restoreease of
movement,thenwipeoffexcessoil.
Page 15

Plasticfinishes • Soap and water NOTE: To preventstaining or discoloration, wipe up fat, grease or acid
• Doorhandles • Non-abrasiveplas- (tomato,lemon,vinegar,milk,fruit juice, marinade)immediatelywith a dry
• Backguardtrim tic pad or sponge papertowel or cloth.
• Knobs • Glasscleaner 1. Whencool,cleanwith soapand water, rinse,and dry.
• End caps 2. Use a glasscleaner anda soft cloth.
NOTE:Never useoven cleaners, abrasive or caustic liquid or powdered
cleansers on plasticfinishes. These cleaning agents will scratch or mar
finish.
Porcelain enamel • Soapand water Porcelainenamelisglassfusedonmetalandmaycrackorchip withmisuse.
• Cooktopon coil • Pasteof baking It is acid resistant,not acid proof. All spillovers, especially acid or sugar
elements sodaand water spillovers,shouldbewiped upimmediatelywith adrycloth.Thisisespecially
• Trim on • Non-abrasive important aroundthe vent opening for smoothtop cooktop. Surface may
smoothtop plasticpador discoloror dull if soilis not removed.
cooktop sponge 1. When cool,wash with soapywater,rinseand dry.
• Backguard * Oven cleaner 2. Neverwipeoff awarm or hotsurfacewith adamp cloth.Thismay cause
• Oven interior (porcelainoven crackingand chipping.
• Manifoldpanel only) 3. Neveruseovencleaners,abrasiveor causticcleaningagentsonexterior
onslide-inand finishofrange.Ovencleanerscanonlybeusedon porcelainovencavity.
drop-inranges
SiliconeRubber • Soapand water Doorgasketislocatedonthedoorplug.DO NOTREMOVEGASKET.Wash
DoorGasket with soap. Rinsethoroughly.
Smoothtop Neveruse oven NOTE:Callan authorizedservicerifthesmoothtopshouldcrack,breakorif
cooktop,select cleaners,ammonia metalor aluminumfoilshouldmelton thecooktop.
models orglass cleaners
with ammonia.
• Toclean lightto • Cooktop Cleaning Waituntilcooktop hascooledbeforecleaning.Gentlyapply cleaningagent
moderatesoil Creme* witha non-abrasiveplasticbrush,nylonorplasticpad,papertowelor clean
• Soapand water cloth. Rinsethoroughlyand completelydry.
• Paste ofbaking
soda andwater
• Toclean heavy • CooktopCleaning Gentlyscrubwith cleaningcremeand clean cloth orpapertowel. Reapply
soilor brown/ Creme* cleaner.Coverwithdamp papertowelsto keepcleanermoist.Let standfor
graystains from 30to 45 minutes. Scrubto remove remainingstain.Rinse and dry.
hardwater or
metalmarks
• Toclean • Single-edgesafety Hold razor blade scraper at 30° angle and very carefully scrape off soil.
burned-onor razorblade Clean remainingsoilwith CooktopCleaningCreme.
crustysoilsor • Cooktop Cleaning
residue Creme*
• Toclean sugar, • Single-edgesafety Immediatelyturn element to LOW and scrape from hot surface to a coo
starch,plastic razorblade held area. Then turn element OFF and cool. Clean residue with razor blad_
with a potholder scraperand cleaning creme.
• Wooden spoon or
plastichandled
metalspatula
• Aluminumfoil * Canbepurchasedfrom Aluminumfoil cannot beremovedonceit meltsonto thetop. Ifthefoil melt
yourdealer, overa cookingarea,the cookingarea cannotbeusedas itmaydamageth_
cookwareor damagethe smoothtop.
Page 16

• Ifa highersettingis usedto begina cookingoperation Acceptablewater bathor pressurecannersshouldnot be
orto bringwaterto a boil,alwaysreduceto a lower oversizedandshould haveflat bottoms.
setting oncecookingbeans orwatercomesto a boil.
• Forsmoothtopcooking, it is betterto selecta lower ,, Whencanners do not meet
settingandincreaseto a higherone later,if needed, these standards,cookingtimes
maybe longerand thecooktop
• Foodwillnot cook fasterata settingthat ishigherthan maybedamaged.
neededto maintaina gentleboil.The temperatureof
thewater is the samewhether boilingvigorouslyor On a smoothtopcooktop,the
gently, canner bottomshouldnot
Factorsaffectingthe heatsetting include: ,_ extendmore thanone-inch
• Type,flatnessandsize ofthe cookware. _" -.e .• ;...., .._ beyondthe cookingarea.
• Quantityand type of foodbeing cooked. When canning, usethe HIGHsettingjust untilthewater
• Use of a lid (coveringpansspeedscookingand saves comesto a boilor pressure isreachedin the canner,
energy), then reducetothe lowestheatsettingthat maintainsthe
• Elementvoltage or voltagesupplyto your home. boil or pressure.If the heat settingis notturned down,
damageto the cooktopmayoccur.
A special canningelement __
Whenturning knobto HIGH,there is an indentto identify (modelCE1) is availablefrom
theHiGHsetting, yourdealer for coilelement
cooktops. Itelevatesthe canner _\i\'
HIGHOR 9: Useto bringliquidto a _ OFF abovethe cooktopto reduce
boil,blanch,preheatskillet,or reach Lowf_ 3--._lGH trappedheat.This prevents
pressurein a pressurecooker. 1_t/" I I _9 damageto the porcelainsurface CANNERELEMENT
Always reduceto a lowerheat ,_ J I _ and drip bowls. (MODELCE1)
settingwhen liquidjust beginsto boil • I I •
orfood beginsto cook. 3_ } _7 Checkwith your localExtensionServiceor a
manufacturerof glasscanning jars for the latest canning
MEDIUM-HIGH(7, 8): Useto brown information.
orsear meat; heatoil for deepfat
frying;scald;to sauteor fry. Maintainfast boilfor large
amountsof liquid.
MEDIUM(4, 5,6): Use to maintainmoderatetoslowboil
forlargeamountsof liquid.Tocontinuecooking
uncoveredfoodandformostfryingoperations.
MEDIUM-LOW(2,3):Useto continuecookingcovered
foodandto maintainpressureinmostpressurecookers.
Stew,braiseorsteamoperations.Tomaintainboilfor
smallamountsofliquid,poach,steamorsimmer.
LOWOR1: Useto keepfood warmbeforeserving.Melt
chocolateor butter.
Page 17

The pan materialdetermineshow evenlyand quickly heat
istransferredfromthe heatingelementto thepan bottom.
Aluminum
Heatsevenly.Avoidthingaugealuminum.Acidicfoodsor
saltwillcause itto discoloror pit.Anodizingimproves
To achieve optimumsurfacecooking performance,select stain resistanceand pitting.Often usedas a bottom
heavygauge,flat, smoothbottompans thatfit thesize of coatingto improvetheheatingof other materials.
the surfaceunit.
Slidingaluminumpans across smoothtop may leavemetal
Properpans willreducecookingtimes, use lessenergy marks. Removethese marks immediatelyto prevent
and cookfood more evenly.Usethese teststo determine
ifpan bottomisflat. permanentmarks (seepage22_.
Copper
RulerTest: Heatsevenly;discolorseasily.Oftenusedasa bottom
1. Placea ruleracrossthebottomofthe pan. coatingto improvethe heatconductionofothermaterials.
2. Holdituptothe light,Littlelightshouldbevisibleunder Mayleavemetalmarksonthesmoothtop(seealuminum
the ruler, above).
If coppercleaner isnot completelyremovedfrom pan,the
BubbleTest: cleaningresiduemaypermanentlydamageor discolorthe
1. Put an inch of waterintothe pan,place oncooktop and smoothtopthe nexttime the pan isused.
turncontrolto HIGH.
StainlessSteel
2. Watchthe bubbleformationas the water heats. Heatsunevenlyunlesslined withcopperor has an
• Uniformbubbles= goodperformance, aluminumbottomor inner core.Durable,easy to clean
• Unevenbubbles= hot spots and unevencooking, and stain resistant.
GoodPans: CastIron
• Flatbottom,straightsides,and Heatsslowlyandevenly;retainsheat;slowtocool.Need.¢
tightfitting covers, seasoningto prevent sticking and rusting.May affectcoloJ
• Madeofa heavy gauge and taste ofsomefoods.
materialthat conducts heatwell. PorcelainEnamel
• Weightofhandledoesnottiltpan. Glass-likesubstancefusedtometal. Heating
• Pansizematchesthesizeofthesurfaceunit,Pan characteristicsdependonbasematerial(usuallysteelor
shouldnot extendmore than 1-inchbeyondthe cast iron).
surfaceunit. Glass-Ceramic
PoorPans: Heatsslowlyandunevenly.May scratchthe smoothtopif
• Groovedorwarpedpan ._llL ._'._lli_._ _ slidacrosscooktop.Sometypes mayonly be usedinthe
bottoms. _ oven.
• Panthat issmallerthan
thesurface unit.
• Thin gaugemetalpans. This appliancehasbeentestedfor safe performance
• Unstablepansuchas a smallsaucepanwitha heavy usingconventionalcookware.Donotuseany devicesor
or loosehandle, accessoriesthat are not specifically recommendedin this
• Oversizedpans or pans manual.Do not use eyelid coversfor thesurfaceunits,
that rest acrosstwo coil elements.Thesewill cause stovetop grills,or add-on ovenconvectionsystems
discolorationor damagetothe dripbowls,damageto The useof devicesor accessoriesthatare not expressly
theporcelaincooktop,and may lengthenthe cooking recommendedinthis manual cancreateserioussafety
timeon thesmoothtopcooktop, hazards,resultin performanceproblems,and reducethe
• Wokswith roundmetalrings.The ringtraps heatand lifeofthecomponentsofthe appliance.
maydamagecoil element,porcelaincooktop,and
smoothopcooktop.
Page 18

• Donotcoveran entireovenrackor ovenbottomwith • For optimumresults,airmustcirculatefreely withinthe
aluminumfoil.This will reduceheatcirculation,resultin ovenand aroundthefood.To helpensurethis, place
poorbakingandmay damagethe oven bottom, food inthe centerof the oven.Allow two inches
betweenthe edgeof the pan(s) and the oven walls.
• A small pieceof foil maybe used to catchspillovers.
Placeiton a lower rackseveral inchesbelowthefood. * Useone rackfor optimumbaking resultsof cakes,
cookiesor biscuits.
• I I - Positionthe racksothe food isin the center of the
( _ oven.Use eitherrack position2 or 3.
"_ • Ifcookingon two racks,select
--_ ,, \_,-J models,staggerthe foodto
__ ensure properairflow.° Ifcookingon two racks,
'_ select models, userack
positions2 and 4 for
/
,// _ cakesand rack positions 1
and 4 or 2 and5 when using
• Do not coverthe broilerinsertwith aluminumfoil. This cookie sheets.Neverplacetwo cookiesheets onone
preventsfat from drainingintothe panbelow and rack.
increasesflare-ups and smoke.However,the broiler
pan may be lined with foil for easierclean-up. • If roastinga largeturkey, placetheturkey on rack 1and
thesidedishesonrack 5.
RACK5 (highestposition):Usedfortoastingbread,or for
• Preheatingis necessaryfor baking, two-rackbaking.
• It is not necessaryto preheatfor roasting. RACK4: Usedfor most broiling andtwo-rack baking.
• Topreheat,settheoven tothe desiredtemperatureand RACK3: Used for most bakedgoods on a cookie sheetor
allowabout 8 to 15 minutesfor the ovento preheat, jelly rollpan,orfrozen conveniencefoods, orfor two-rack
baking.
• Whenthe ovenreachesthepresettemperature,the
ovenwill beep. RACK2: Usedfor roastingsmall cutsof meat,large
casseroles,bakingloaves ofbread,cakes (ineither tube,
• Selectinga temperaturehigherthan desiredwill NOT bundt, orlayer pans)or two-rack baking.
preheatthe oven any faster,and mayhavea negative
effecton bakingresults. RACK 1: Usedfor roastinglargecuts of meat and large
poultry,pies, souffles,or angelfoodcake, or for two-rack
baking.
Page 19

Use a reliablerecipeandaccuratelymeasurefresh Roastingisthemethodforcookinglarge,tendercutsof
ingredients.Carefullyfollow directionsforoven meatuncovered,withoutaddingmoisture.Mostmeatsare
temperatureandcookingtime.Preheatovenif roastedat325°F.Itis notnecessaryto preheattheoven.
recommended.
• Forbestresultsusetendercutsof meatweighing3-1bs.
Use the correct rack position. Bakingresultsmay be ormore.
affectedifthe wrong rackpositionis used.
• Somegoodchoices are: Beefrib,ribeye, top round,
• Top browning may be darker if food is located highqualitytip and rump roast,porkloin roast, legof
towardthe top of the oven. lamb,veal shoulderroastand cured or smokedhams,
• Bottom browningmay be darkeriffood is located • Placethe meat fat-side-upon a rack ina shallow
towardthe bottomof the oven. roastingpan. Placingthe meaton a rack holds it out of
Bakewarematerial playsan importantpartinbaking thedrippings,thusallowingbetterheatcirculationfor
evencooking.Asthefatontopoftheroastmelts,the
results.Alwaysusethetypeandsizeof pancalledfor in meatisbastednaturally,eliminatingtheneedfor
therecipe.Cookingtimesorcookingresultsmay be additionalbasting.
affectedifthewrongsizeisused.
• Shinymetalpan reflectsheatawayfromthefood, • Thecookingtimeisdeterminedbytheweightof the
produceslighterbrowninganda softercrust.Useshiny meatandthedesireddoneness.
pansforbakingcakesorcookies. • Formoreaccurateresults,usea meatthermometer.
Insertitsothetip isinthecenterofthethickestpartof
• Darkmetalpanor a panwith an anodized (dull)
bottomabsorbsheat,producesdarkerbrowninganda themeat. It shouldnottouchfator bone.
crispercrust.Usethistypeof panforpies,piecrustsor • Removetheroastfromtheovenwhenthethermomete_
bread, registersthe desireddoneness.
• Foroptimumbakingresults,bakecookiesandbiscuits
ona flat cookiesheet.Ifthe panhassides,suchasa NOTE:Formoreinformationaboutfoodsafety,call
jellyrollpan,browningmaynotbeeven. USDA'sMeat&PoultryHotlineat 1-800-535-4555.
• If usingoven-proofglassware,or dark pans such as Forcookinginformation,writetothe NationalCattle-
Baker'sSecret reducetheoventemperatureby 25°F men'sBeefAssociation,444 NorthMichiganAvenue,
exceptwhenbakingpiesorbread.Usethesame Chicago,Illinois60611,orcall1-800-368-3138.
bakingtime as calledforinthe recipe.
• If usinginsulatedbakeware,expectcookingtimesto
increaseslightly.It isnot necessaryto adjustthe oven
temperature.
Check the cooking progressatthe minimumtime
recommendedintherecipe.Ifnecessary,continue
checkingat intervalsuntilthefoodisdone.Ifthe oven
doorisopenedtoofrequently,heatwillescapefromthe
oven;thiscanaffectbakingresultsandwastesenergy.
If you add additionalingredientsoralterthe recipe,
expectcookingtimesto increaseordecreaseslightly.
Page 20

COMMON BAKING PROBLEMS AND WHY THEY HAPPEN
PROBLEM POSSIBL C*USES
Cakesare uneven. • Panstoocloseor touchingeach otheror ovenwalls.• Batterunevenin pans.
• Temperaturesettooloworbakingtimetooshort.• Ovennotlevel.• Undermixing.
• Toomuchliquid.
Cakehigh in middle. °Temperaturesettoohigh,• Bakingtimetoo long.°Overmixing.* Toomuchflour.
• PanstOuchingeachotherorovenwalls:• !ncorrectrackposition.
, i i
Cake falls. • Toomuchshorteningor sugar.• Toomuchortoo littleliquid.• Temperaturesettoo
low.=Oldortoolittlebakingpowder.• Pantoosmall.• Ovendooropenedfrequently.
• Addedincorrecttypeofoiltocakemix. • Addedadditionalingredientstocakemixor
recipe.
Cakes,cookies, biscuits _incorrecttack position:• Ovendoornot closedproperly,, Doorgasketnot sealing
don t brown evenly.i pr0pedyoi propedyattachedtodoor.• Incorrectuseof aluminumfoil,° Ovennot
: preheated_,,Pansdarkened,dentedorwarped,
Foi optimumresuitsbake ononeracRiIf bakingcakesontworacks piacepanstoward
the_ont oftheovenonthe upperrackandtowa_ thebackofthe ovenonthe lower
Cakes,cookies, biscuits • Ovennotpreheated.• Panstouchingeachotherorovenwalls.• Incorrectrack
too brown on bottom, position.• Incorrectuseof aluminumfoil.=Placed2 cookiesheetsononerack.• Used
glass,dark.stainedwarpedordullfinishmetalpans.(Usea shinycookiesheet.)
Followcookwaremanufacturer'sinstructionsfor oventemperature.Glasswareand dark
cookwaresuch as Ecko'sBaker's Secretmay requireloweringthe oven temperatureby
25OF.
! =
Cakesdon't brown. Incorrectrack _sition:, Temperatureset tooIowi, Overmixing:•Toomuchliquid.
top. • Pansizetoolarge ortoo [ttlebatterin pan.', Ovendooropened too often.
, i , : , : . ,,
Excessive shrinkage. • Toolittleleavening.• Overmixing.• Pantoolarge.• Temperaturesettoohigh.
• Bakingtimetoo long.• Panstoocloseto eachotheror ovenwalls.
i_! iquid _UndbrmiXing_TemperatUreset _b0ioW' Bakingtimeto_ sho_i
......... ,, ,, ,, ,,,,,=i ,,,,,.,,i ; : i,,,, =,,i,,,,;, ,;,,,,,,,, , ,=,,,, ; .... ,
Cakeshave tunnels. • Notenoughshortening.• Toomuchbakingpowder.• Overmixingorattoohigha
speed.• Temperaturesettoohigh.
= ,, , ,
Cake not done in • Temperaturesettoohigh.'Pan toosmai!;, Bakingtimetooshort:
middle.
if additionalingredientswereaddedtomix orrecipe,expectcookingtmeto ncrease.
.... , ,,,,, ....,....i : ..;......;.i , , , ,
Pie crust edges too ° Temperaturesettoohigh.• Panstouchingeach otheror ovenwalls.• Edgesofcrust
brown, toothin;shieldwithfoil.
Pies don't brown on • Usedshinymetalpansi° Temperaturesettoo Iowi• Incorrectrackposition.
bottom. ,Some _ozenpiesShouldbepiacedon a cookiesheet Checkpackagedirections:
Pies have soaked crust. • Temperaturetoolowat startof baking.• Fillingtoojuicy.• Used shinymetal pans.
Page 21

Broiling is used for tender cuts of meat or marinated
meats, poultry, fish and some fruits and vegetables. The
food is placed directly under the broil element.
Cooking time is determined by the desired degree of
element.d°nenessand the distance between the food and the _ _
• For best results, steaks and chops should be at least
3/4-inch thick. Thinner cuts should be pan broiled. _! d
• Before broiling, trim excess fat to prevent excessive
spattering or smoking. Cut slashes inthe outer edges
of the fat to prevent curling during cooking.
• Season meat after cooking. Salt tends to draw juices
out of the meat and delay browning.
• Preheat broil element 3 minutes for optimum browning. • For a brown exterior and rare interior, meat should be
close to the broil element. For well-done meat, place
• Use a broiler pan with an insert designed to drain the broiler pan farther from the element.
excess liquid and fat away from the cooking surface. • Increasing the distance between the meat and the broi
This is to prevent spatters and smoke, element will help reduce spattering and smoking.
• When broiling in an electric oven, the door should be • Foods that require turning should be turned only once
opened to the broil stop position (opened about during broiling. Turn after half the recommended
4-inches). cooking time.
BROILINGCHART
BACON #4 WellDone 6to 10 min.
BEEFSTEAKS
"f-inchthick #4 Medium 15to 18 min.
#4 WellDone 19to 23min.
CHICKEN
Pieces #3 Well Done 30 to45 rain.
FISH
Fillets #4 Flaky 8 to 12 min.
Steaks, /-inch thick #4 Flaky 10to 15 rain.
GROUND BEEFPATTIES
3/4-inchthick #4 WellDone 15to 18 min,
HAMSLICE, precooked
1/2-inchthick #4 Warm 8 to 12 min.
PORKCHOPS
1-inchthick #4 Well Done 22to 26 min.
* Thetop rack positionis position#5.
** Broilingtimesare approximateand mayvary dependingon the meat.
Page 22

• Donot attemptto servicethisapplianceyourself you knowwhatcausedthe problem.Alwaysreplace
unlessdirectedtodo so in this manualor the chart a blown fusewith one of the correctamperage,do
below.Refer all otherservicingto a qualifiedservicer not use a substitute.
or callus at 1-800-688-1120. • Alwaysdisconnectpowerto unit before anyservicing
• Locateand mark circuitbreaker or fuse. Never by trippingcircuit breakerto the OFF positionor by
replacea blownfuse or reset a circuit breakeruntil removingthe fuse.
TROUBLESHOOTING CHART
Part or all of 1. Rangeis disconnectedfrompower 1. Checkto be sure plug issecurelyinsertedinto
appliancedoes not oris looselyconnectedtopower, wall receptacle.
operate. 2. Trippedcircuitbreakerorblown 2. Checkorre-setcircuitbreaker.Checkorreplace
fuse. fuse.
3. Powersupplyhasbeen interrupted. 3. Waituntilpowerhasbeenrestored.
4. Surfaceor ovencontrolsnotset 4. See pages6 and9.
properly.
Surfaceor oven 1. Rangeisdisconnectedfrompower 1. Checkto besureplugissecurelyinsertedinto
elementsfail to orislooselyconnectedtopower, wallreceptacle.
operateor heatfood. 2. Trippedcircuitbreakerorblown 2. Checkor re-setcircuitbreaker.Checkorreplace
fuse. fuse.
3. Powersupplyhasbeeninterrupted. 3. Waituntilpowerhasbeenrestored.
4. Surfaceorovencontrolsnotset 4. See pages6 and9.
properly.
5. Surfaceelementisnotproperly 5. See page7 forinstructionsonhowto replace
installed, surfaceelement.
6. Ovenwas notsetto correct 6. Setoventotemperaturerecommendedinrecipe.
temperature.
7. Ovenwas notpreheatedproperly. 7. Allowoventopreheat8to 15 minutes.Then
placefoodinoven.
8. Defectivepart. 8. Haveauthorizedservicerreplacepart.
Smoothtopcooktop.
1.Tinyscratchesor 1. Coarseparticles(dust,salt,sand) 1. Tinyscratchesare notremovableanddonot
abrasions betweencookwareandcooktop, affectcooking.Intime,thescratcheswillbecome
Incorrectcleaner.Slidingglassor lessvisible.Besurecookwarebottomand
metalpanacrosstop.Using cooktoparecleanbeforeuse.Use cookwarewith
cookwarewithroughbottoms, a smooth,non-scratchingbottom.Donotslide
cookwareacrosscooktop.
2. Metal-marks 2. Slidingorscrapingmetalpansor 2. Donotslidemetalobjectacrosscooktop.When
ovenracksacrosscooktop, cool,cleanwithCooktopCleaningCreme.
3. Brownstreaks 3. Boilovers,incorrectcleaner,used 3. Cleanupboiloverbeforereusingthecooktop.Be
andspecks soiledclothorsponge,soiled surecookware,especiallybottoms,arecleanand
cookware, dry.
4. Areasofdiscolor- 4. Mineraldepositsfromwaterand 4. Usecookwarewithbottomsthatare cleanand
ationwitha metallic foods, dry.Usecorrectheatsettingtopreventboilovers.
sheen
5. Pittingorflaking 5. Sugaryboiloversfromsugarsyrups, 5. Usecorrectheatsettingandlargeenoughpan.
candy,jams,jellies,dessertsauces, Watchcookingoperationtopreventboiloversor
etc. spattering.
Page 23

Baking results are 1. Oven is too hot or too cool. 1. Select correct oven temperature. When baking,
not what you always preheat oven before adding food.
expected. 2. Food not positioned correctly in 2. See rack placement on page 18.
• Uneven browning oven.
(too dark on top or 3. Used incorrect pan. 3. Dark pans produce dark browning. Select shiny
bottom), aluminum pans or reduce the oven temperature
• Underdone or by 25°F. See page 20.
overdone. 4. Used aluminumfoil incorrectly. 4. Never use foil to cover an oven rack. Place a
• Browning is too small piece of foil on the rack below the rack
dark or light, holdingthe pan. See page 18.
• Cake is not level. 5. Oven rack was crowded with pans. 5. Stagger pans on rack. Allow 1to 2-inches
between pans and oven walls.
6. Used unreliable recipe or did not 6. Select recipes from reliable sources. Read and
follow recipe, carefully follow instructions and do not substitute
ingredients.
7. Oven vent was blocked. 7. See page 10 for information on oven vent.
8. Range is not level. 8. See page 12 for instructionson leveling range.
9. Door is not correctly installed. 9. See page 10 for instructionson replacing door.
Baking results differ 1. Oven seems hotter or cooler than 1. Oven temperatures may vary between the new
from previous oven. your previous oven. and the old oven. As ovens age, the oven
temperature often "drifts" and may become hotter
or cooler. Also, newer ovens may operate
differently from older ovens. You should expect
some differences in baking results.
Food not broiling 1. Oven incorrectly set. 1. See page 9.
properly. 2. Used incorrect rack position. 2. See page 21 for information on broiling.
3. Broil element was not preheated. 3. For optimum browning, preheat the broil element
for 3 minutes before placingfood in the oven.
4. Used aluminum foil incorrectly. 4. The broiler pan can be lined with foil; never line
the broiler insertwith foil.
5. Oven door was closed during 5. Always leave door opened to the broil stop
broiling, position (opened about 4-inches) during broiling.
Oven smokes 1. Food placed too close to broil 1. Move broiler pan down one rack position.
excessively during element.
broiling. 2. Broiler insert covered with aluminum 2. Never cover insert with foil as this prevents fat
foil. from draining to pan below.
3. Meat is too fatty. 3. Trim excess fat before broiling.
4. Marinade not completely drained 4. Completely drain marinade from meat.
before broiling.
5. Basted meat too early during 5. Baste meat during the last few minutes of
broiling, cooking.
6. Used a soiled broiler pan. 6. Always clean broiler pan and insert after use.
Moisture condensa- 1. Window may fog when cooking food 1. This condition is normal.
tion on oven window, highin moisture.
2. Used a cloth saturated with water to 2. Wring excess water from cloth before cleaning.
clean window.
Oven light does not 1. Oven light bulb is loose or burned 1. Check or replace bulb.
turn on. out.
2. Lightswitch in the OFF position. 2. See page 11 for instructions.
Strong odor or light This is normal for a new range and will disappear after a few uses. Opening a window or turning
smoke when oven is on a fan will help remove the smoke and odor.
turned on the first
few times.
Page 24

COOKINGAPPLIANCEWARRANTY
FULL WARRANTY- PartsandLabor
Forone (1) year fromthe dateof originalpurchasedate,anypartwhichfailsin normalhomeusewillbe
repairedorreplacedfreeofcharge.
LIMITEDWARRANTY- Partsonly
Foranadditionalfour (4) years beyondthefirstyearofthefullwarrantyperiod- Partslistedbelowwillbe
repairedor replacedfree ofchargeforthe partitseff,withtheownerpayingall othercosts,includinglabor,
mileage,andtransportation.
Glass-ceramiccooktopduetothermalbreakage
Glass-ceramicheatingelementswhichfailsinnormalhomeuse
CanadianResidents:The abovewarrantiesonlycoveran applianceinstalledinCanadathathasbeencertifiedor
listedbyappropriatetestagenciesforcomplianceto a NationalStandardofCanadaunlesstheappliancewas
broughtintoCanadadueto transferofresidencefromthe UnitedStatestoCanada.
Thespecificwarrantiesexpressedabovearetheonly warrantiesprovidedbythemanufacturer.Thesewarrantiesgiveyouspecificlegalrights,and
youmayalsohaveotherrightswhichvaryfromstatetostate.
WHATIS NOT COVEREDBYTHESEWARRANTIES: HOWTO RECEIVEWARRANTYSERVICE:
1. Conditionsanddamages resultingfrom any of the 1. For authorizedservice,contactthe dealerfromwhom
following: you purchasedthe appliance,or call Maytag
a. Improperinstallation,delivery,or maintenance. Appliances Sales Companyat: 1-800-688-1120.
b. Anyrepair,modification,alterationor adjustment 2. If you are not ableto satisfactorilyresolve the
notauthorizedbythe manufactureror an complaintwith localresponse,call or write to:
authorizedservicer. MaytagAppliances Sales Company
c. Misuse,abuse,accidentsor unreasonableuse. Attn: CAIRsMCenter
P.O. Box2370
d. Incorrectelectricalcurrent,voltageor supply. Cleveland,TN 37320-2370
e. Impropersetting of any control. 1-800-688-1120
2. Warrantiesare voidifthe originalserialnumbershave 3. Whenrequestingservice,thefollowinginformation
beenremoved,altered,or cannotbe readily will beneeded:
determined.
a. Your name,addressand telephonenumber.
3. Lightbulbs, b. Modelandserial numbers (foundonthedataplate).
4. Productspurchasedfor commercialor industrialuse. c. Nameand addressofdealer or servicer.
d. Proofof purchasedate (salesreceipt).
5. Thecost of service or servicecall to:
a. Correctinstallationerrors, e. A clear descriptionofthe problemandservice
history.
b. Instructthe useron the properuse of theproduct.
c. Transportthe applianceto a servicer.
6. Consequentialor incidentaldamagessustainedby
anypersonas a result of any breachof these
warranties.
Somestatesdo notallow the exclusionor limitationof
consequentialor incidentaldamages,so the above
exclusionmay notapply to you.
WarrantyPartNo.:8109P087-60
(09-97-00)
 Loading...