

Page 1
Instructions for your Electric Cooktop
CONTENTS
SAFETY INSTRUCTIONS .................... 1-3
USING YOUR COOKTOP ................... 4-11
Coil elements .......................... 4- 5
Smoothtop cooktop ..................... 6- 7
Solid disc elements ...................... 9-11
UTENSIL INFORMATION ..................... 12
GENERAL CLEANING CHART ................ 13
SERVICE .................................. 14
Circuit breaker (Canada Only)
WARRANTY ............................... 15
8112P102-60
(7/91)
Page 2
SAFETY INSTRUCTIONS
Informationin the Safety Instructionsection coversall STORAGE IN, ON OR NEAR APPLIANCE - Donot
electriccooking appliances. You may findsome infor- store orusegasolineor other flammable materials,va-
mation that does not pertain to your particular appli- porsandliquidsintheoven, nearsurfaceunitsorinthe
ance. Please review this section before using your vicinity of this or any other appliance. The fumes can
cooking appliance, create a fire hazard orexplosion. Do notuse cooktop
oroven as a storage areaforfood orcooking utensils.
The followinginstructions are based on safety consid-
erationsand must be strictly followed to eliminate the
potential risksoffire, electricshock, or personalinjury. DO NOT USE WATER ._...-_-_ _/ I I( r-_
ON GREASE FIRES -
Smother fire or flame or
PROPERINSTALLATION-Besureyourapplianceis use dry chemical or
properly installed andgrounded by a qualifiedtechni- foam-type extinguisher, __-r_::_
cian. if available or sprinkle
heavily with baking soda.
USE ONLY DRY POTHOLDERS - Moist or damp
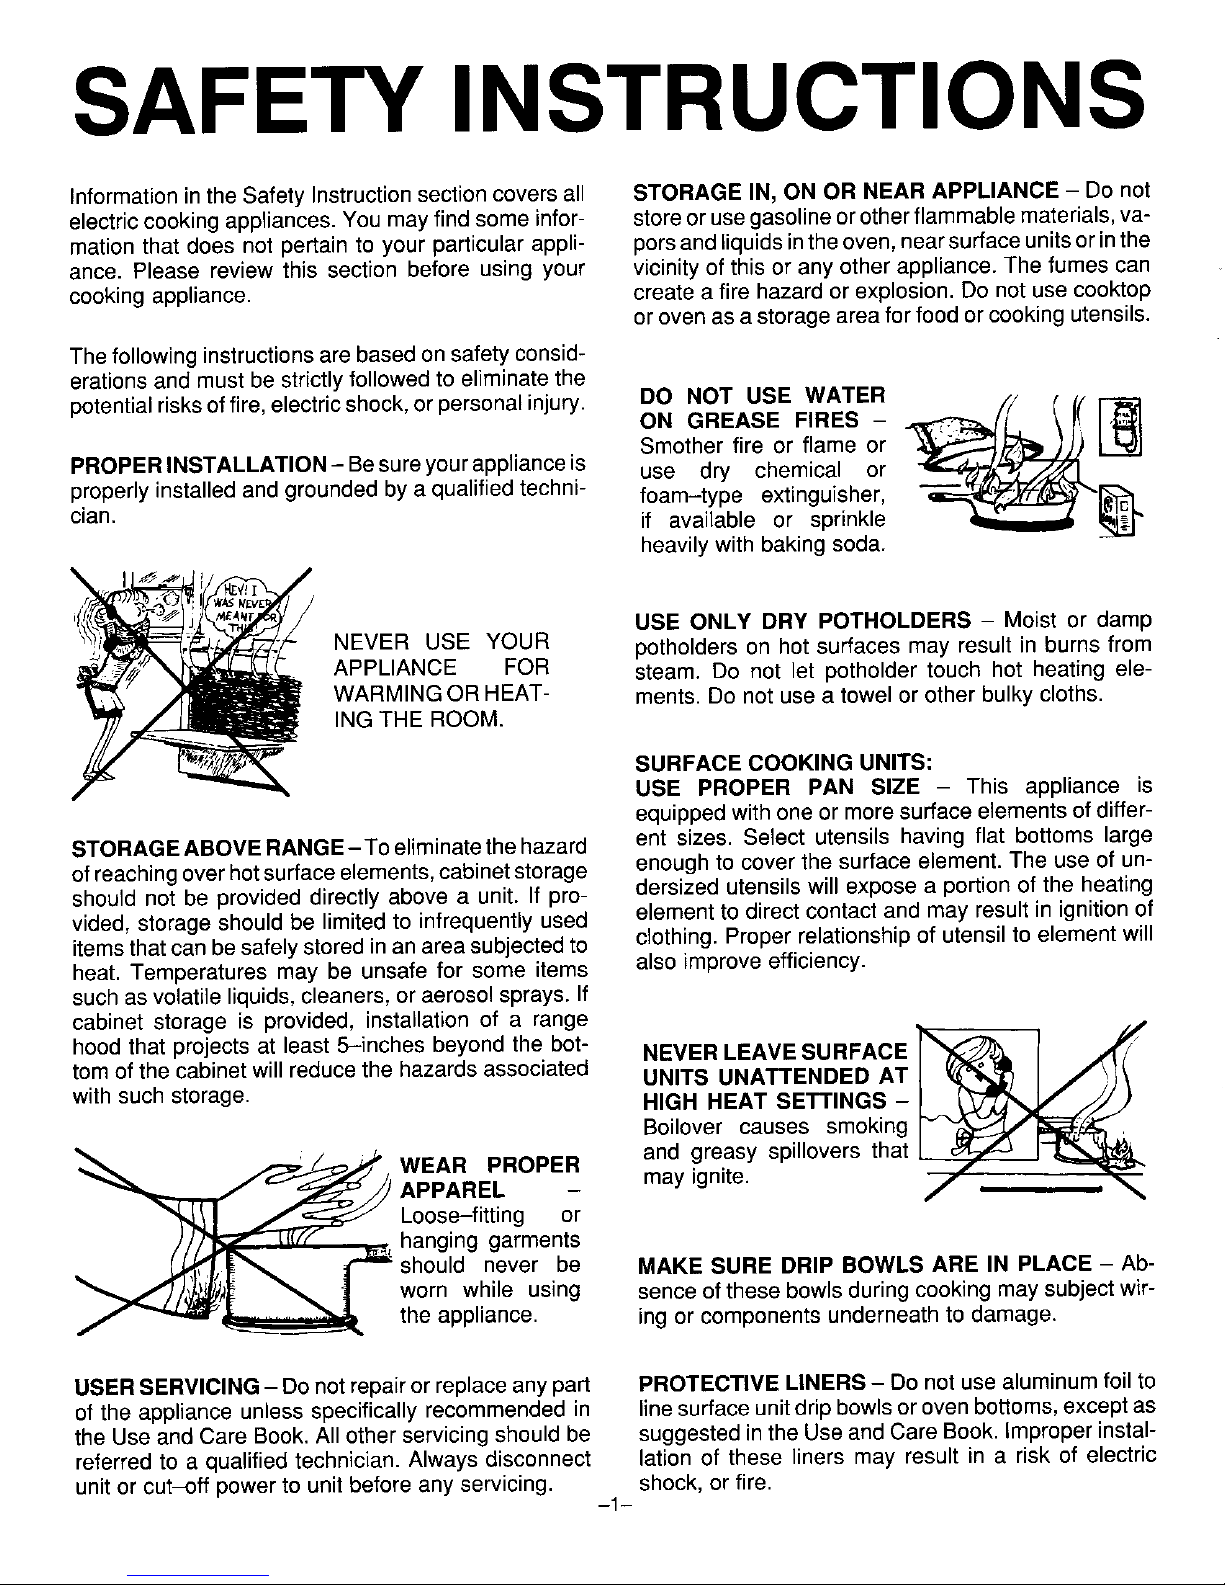
NEVER USE YOUR potholders on hot surfaces may result in burns from
APPLIANCE FOR steam. Do not let potholder touch hot heating ele-
WARMING OR HEAT- ments. Do not use a towel or other bulky cloths.
ING THE ROOM.
SURFACE COOKING UNITS:
USE PROPER PAN SIZE - This appliance is
equippedwithoneor moresurface elementsofdiffer-
STORAGE ABOVE RANGE- To eliminatethehazard ent sizes. Select utensilshaving flat bottoms large
of reachingoverhotsurfaceelements,cabinetstorage enoughto coverthe surfaceelement.The use of un-
should notbe provideddirectlyabove a unit.If pro- dersizedutensilswill exposea portionof the heating
vided,storage shouldbe limitedto infrequentlyused elementtodirectcontactandmay resultinignitionof
itemsthatcan besafelystoredinanarea subjectedto clothing.Properrelationshipof utensilto elementwill
heat. Temperaturesmay be unsafefor some items alsoimproveefficiency.
suchasvolatileliquids,cleaners,oraerosolsprays.If
cabinet storage is provided, installation of a range _ I
hood that projects at least 5-inches beyond the bot- NEVER LEAVESURFACE
tomof the cabinetwillreducethe hazardsassociated UNITS UNATTENDED AT [ _f_'_ I / _1\
withsuchstorage. HIGH HEAT SETTINGS - [ _ _ jJ)
Boilover causes smoking _"__,,
_WEAR PROPER and greasy spilloversthat [ _ I_
APPAREL - may ignite. / _'_
Loose-fitting or
hanging garments
should never be MAKE SURE DRIP BOWLS ARE IN PLACE - Ab-
worn while using senceof thesebowlsduringcookingmaysubjectwir-
the appliance, ingor componentsunderneathtodamage.
USERSERVICING - Donotrepairorreplaceanypart PROTECTIVE LINERS- Do notuse aluminumfoilto
of the applianceunlessspecificallyrecommendedin line surfaceunitdripbowlsorovenbottoms,exceptas
the Use and Care Book.All otherservicingshouldbe suggestedinthe Use andCareBook.Improperinstal-
referredto a qualifiedtechnician. Alwaysdisconnect lation of these linersmay resultin a risk of electric
unitorcut-off powerto unitbeforeany servicing, shock,orfire.
--1--
Page 3
SAFETY INSTRUCTIONS
GLAZED COOKING UTENSILS- OnLycertaintypes VENTILATING HOODS:
of glass, glass/ceramic, ceramic, earthenware, or CLEAN VENTILATING HOODS FREQUENTLY -
otherglazed utensilsaresuitablefor range-top serv- Greaseshouldnotbe allowedtoaccumulateonhood
icewithoutbreakingduetothe suddenchangeintern- orfilter. Whenflamingfoodsunderthe hood,turnthe
perature, fan off. The fan, ifoperating,may spreadthe flame.
IMPORTANT SAFETY NOTICEAND WARNING
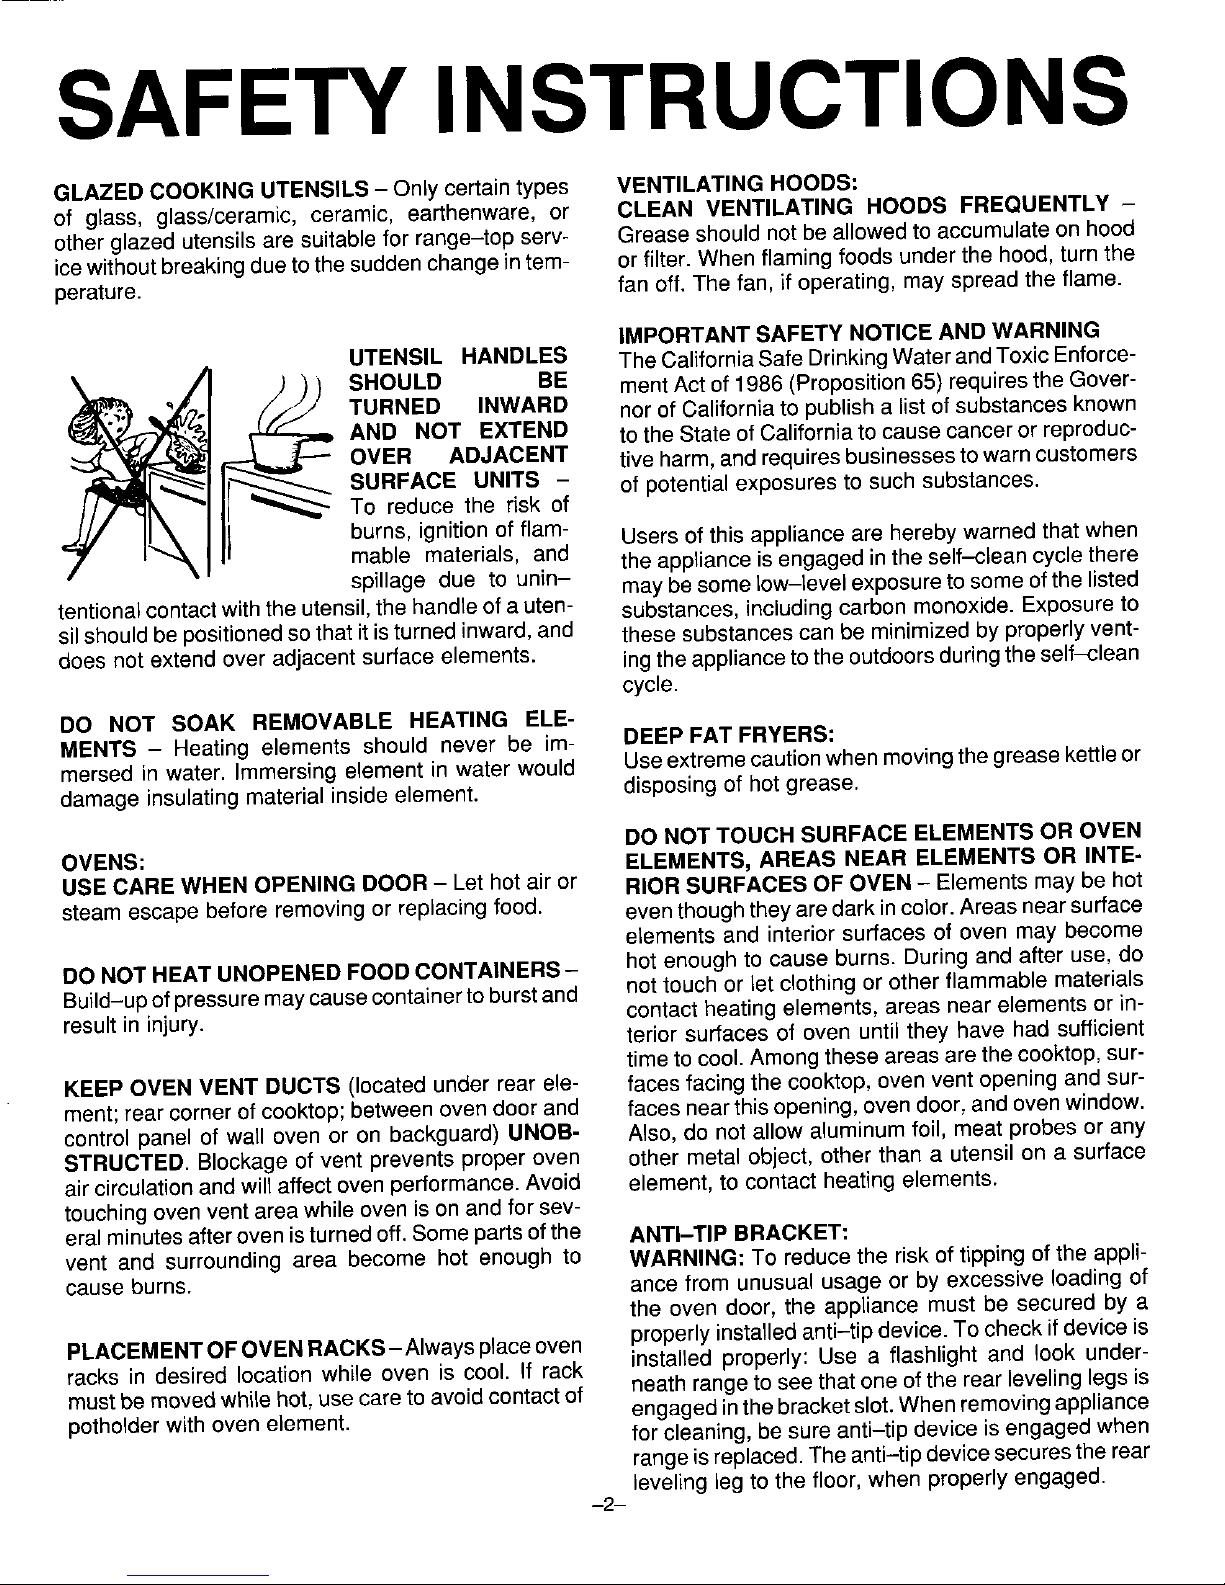
UTENSIL HANDLES TheCaliforniaSafe DrinkingWater andToxicEnforce-
_ _ SHOULD BE mentAct of 1986(Proposition65) reqaires theGOVer-
TURNED INWARD nor of California to publisha listof substances known
AND NOT EXTEND to the Stateof Californiato cause canceror reproduc-
OVER ADJACENT tiveharm,and requiresbusinessesto warncustomers
SURFACE UNITS - of potential exposures to such substances.
To reduce the risk of
burns, ignition of flam- Users of this appliance are hereby warned that when
mable materials, and theappliance is engaged inthe self-clean cycle there
spillage due to unin-
maybe somelow-level exposureto some ofthe listed
tentional contact wLththe utensil,the handle of a uten- substances, including carbon monoxide. Exposure to
sil should bepositioned so thatitisturned inward,and these substances can be minimized by properly vent-
does not extend over adjacent surface elements, ing the appliancetothe outdoors duringthe self-clean
cycle.
DO NOT SOAK REMOVABLE HEATING ELE-
MENTS - Heating elements should never be im- DEEP FAT FRYERS:
mersed in water. Immersing element in water would Use extremecaution when movingthe greasekettleor
damage insulating material insideelement, disposing of hot grease.
DO NOT TOUCH SURFACE ELEMENTS OR OVEN
OVENS: ELEMENTS, AREAS NEAR ELEMENTS OR INTE-
USE CARE WHEN OPENING DOOR - Let hotairor RIORSURFACES OF OVEN - Elements maybe hot
steamescape before removingorreplacingfood. eventhoughtheyaredarkincolor.Areasnearsurface
elements and interiorsurfaces of oven may become
DO NOT HEAT UNOPENEDFOOD CONTAINERS- hot enough to cause burns. During and after use, do
Build-up of pressuremaycausecontainer toburstand not touch or let clothingor other flammable materials
result in injury, contact heating elements, areas near elements or in-
terior surfaces of oven until they have had sufficient
time to cool. Amongthese areas are the cooktop,sur-
KEEP OVEN VENT DUCTS (located under rear ele- faces facingthe cooktop, oven vent opening and sur-
merit; rear corner of cooktop; between oven doorand faces near this opening, oven door,and ovenwindow.
control panel of wall oven or on backguard) UNOB- Also, do not allow aluminum foil, meat probes or any
STRUCTED. Blockage of vent prevents proper oven other metal object, other than a utensil on a surface
air circulation and will affect oven performance.Avoid element, to contact heating elements.
touching ovenventarea while oven ison andfor sev-
eral minutesafteroven isturnedoff. Some parts ofthe ANTI-TIP BRACKET:
vent and surrounding area become hot enough to WARNING: To reduce the risk of tLppingof the appli-
cause burns, ance from unusual usage or by excessive loading of
the oven door, the appliance must be secured by a
PLACEMENTOFOVENRACKS-Always placeoven properly installedanti-tip device. Tocheck if device is
racks in desired location while oven is cool. If rack installed properly: Use a flashlight and look under-
mustbe movedwhile hot, usecare to avoid contact of neath range tosee that one of the rearleveling legs is
potholderwith oven element, engagedinthebracket slot.Whenremovingappliance
for cleaning, besure anti-tip device isengaged when
rangeis replaced.The anti-tip devicesecuresthe rear
leveling Legto thefloor, when properly engaged.
-2-
Page 4
SAFETY INSTRUCTIONS
ADDITIONAL INFORMATION:
Afterappliance is installed, be certainall packing ma- ATTENTION: NE LAISSER AUCUN ALIMENT, US-
terials are removed from theappliance before operat- TENSILE DE CUISINE, ETC., DANS LE FOUR
ing the unit. If appliance is installed near a window, DURANT LECYCLE D'AUTONETTOYAGE.
take steps to prevent curtains from blowing over sur-
face elements creating a fire hazard. Onsome models, afanshould be heardduring theself
clean cycle. If not, cancel clean cycle andcall a serv-
Care should be givento locationofappliance. Be sure iceman before self cleaning again. (Refer to CON-
floor covering underappliance,walls adjacenttoappli- TENTS onfront coverfor locationofself clean instruc-
ance,cabinetry adjacenttoappliance, andothermate- tions and fan information.)
rials adjacent to appliance can withstand prolonged
heat.This is aheavy applianceand can settle intosoft SMOOTHTOP COOKTOP:
floor coverings such as cushioned vinyl. Use care Do not cook on broken cooktop. If cooktop should
when moving range on this type offloor covering, break, cleaning solutions and spillovers may pene-
trate the broken cooktop and create a risk of electric
shock. Contact a qualified technician immediately.
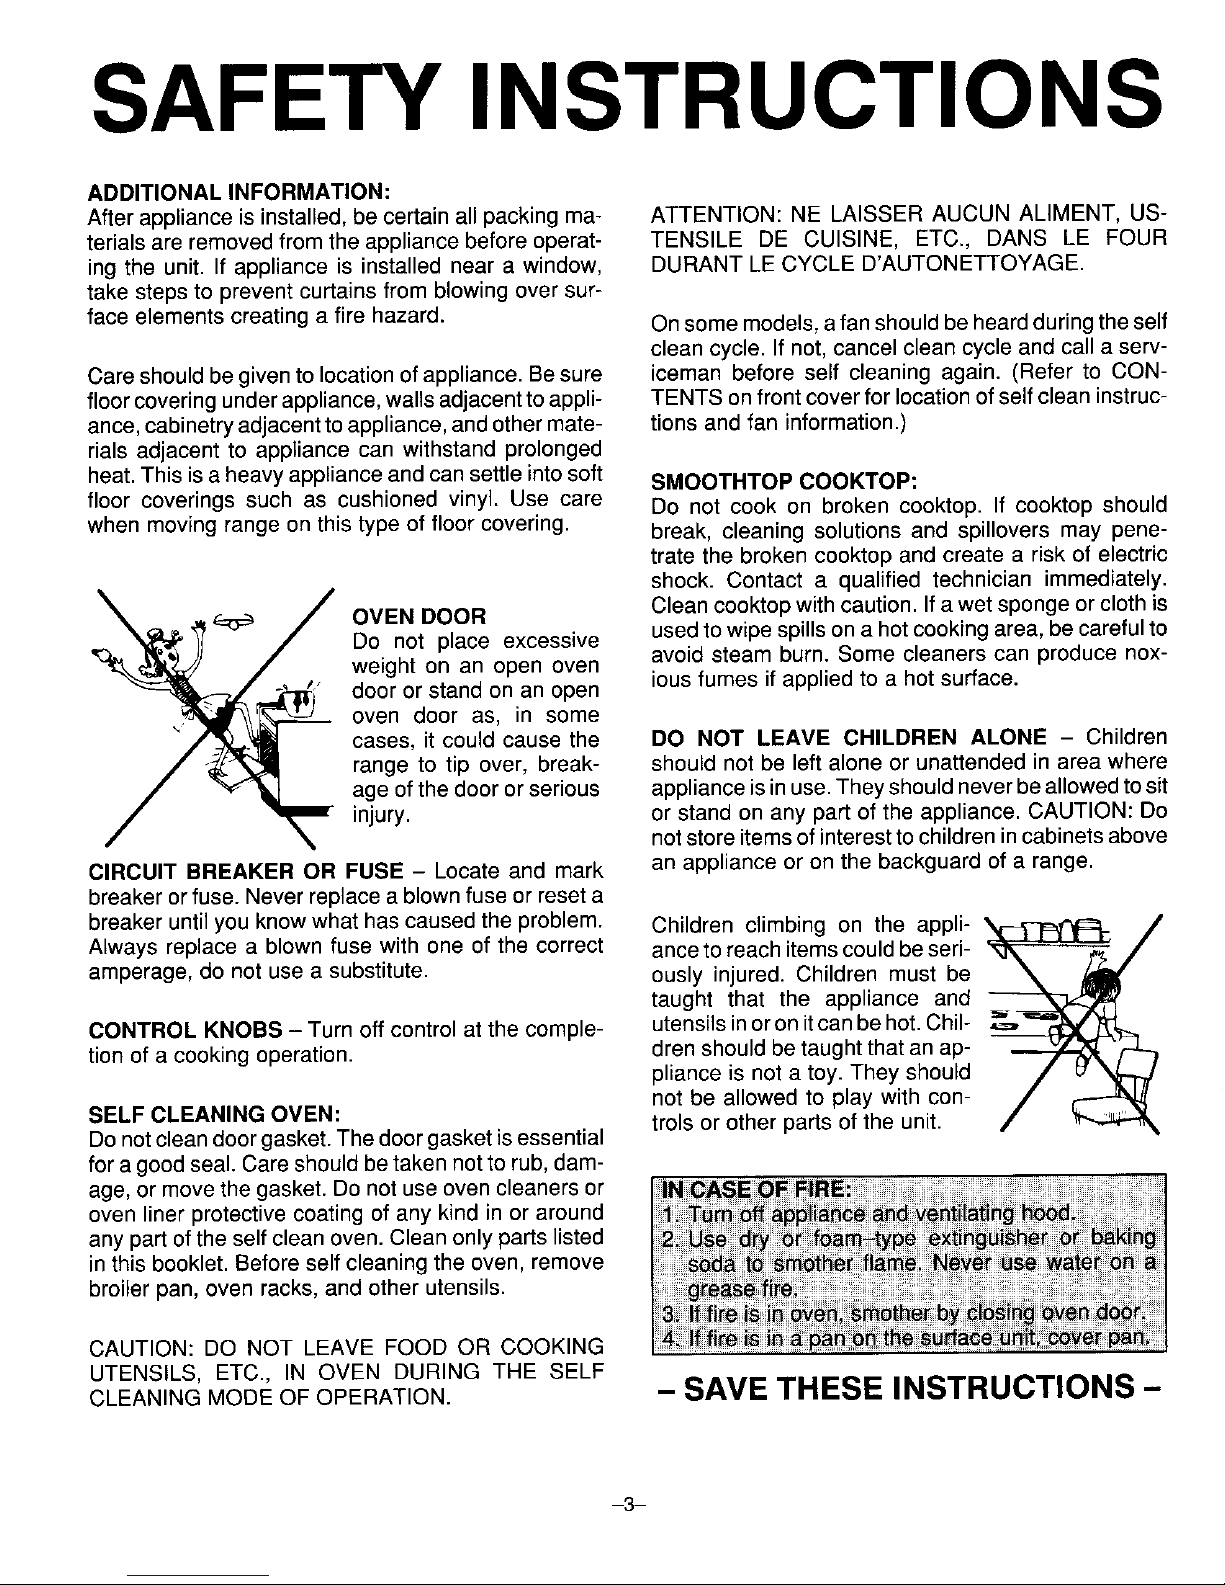
_ c_,o___ OVEN DOOR Clean ceoktopwithcaution' If a wetspOngeor ClOthis
Do not place excessive usedto wipe spills on a hotcooking area,be carefulto
weight on an open oven avoid steam burn. Some cleaners can produce nox-
door or stand on an open ious fumes if appliedto a hot surface.
oven door as, in some
cases, it could cause the DO NOT LEAVE CHILDREN ALONE - Children
range to tip over, break- should not be left alone or unattended in area where
age ofthe door orserious appliance isinuse.They should neverbeallowedto sit
injury, or stand on any part of the appliance. CAUTION: Do
notstore itemsof interesttochildren incabinets above
CIRCUIT BREAKER OR FUSE - Locate and mark an appliance or on the backguard ofa range.
breaker orfuse. Neverreplace ablownfuse or reseta
breaker untilyou knowwhat has causedthe problem. Children climbing on the appli- _ J
Always replace a blown fuse with one of the correct anceto reach itemscouldbe seri- _.,4_ _ f
amperage, do not use a substitute, ously injured. Children must be
taught that the appliance and
CONTROL KNOBS - Turn off control at the comple- utensilsinor onitcan be hot.Chil-
tion of a cooking operation, drenshould betaught that an ap-
pliance is nota toy. They should
not be allowed to play with con-
SELF CLEANING OVEN: trois or otherparts ofthe unit.
Do notcleandoorgasket. The door gasket isessential
fora good seal. Careshould betaken notto rub, dam-
age, or move thegasket. Do not use oven cleaners or
oven liner protectivecoating of any kind in or around
any partof the self clean oven. Cleanonly partslisted
in this booklet. Beforeself cleaning the oven, remove
broiler pan, oven racks, and other utensils.
CAUTION: DO NOT LEAVE FOOD OR COOKING
UTENSILS, ETC., IN OVEN DURING THE SELF
CLEANING MODE OF OPERATION. -- SAVE THESE INSTRUCTIONS -
-3-
Page 5

USING YOUR COIL ELEMENT COOKTOP
SURFACE ELEMENTS up on outer edge of element (opposite pad.Topreventscratchingthefinish, do
Surface elements are self cleaning. Do terminal-side of element) while insert- not use abrasive cleaning agents.
not immerseelements in water. When ing terminals into receptacle. Gently Rinse, dry and replace.
an element is turned on, it will cycle on press down on outer edge of element
and off to maintain theheat setting, until elementsits level on drip bowl.
To prevent risk of electric shockor fire,
do notlinedripbowlswith aluminum foil.
TO remove: Raise element WHEN DRIP BOWLS
COOL and carefullypullout and away The dripbowls,locatedundereachBur-
fromthe receptacle, faceelement,aredesignedtocatchany CONTROL KNOBS
spillsor boilovers. Your cooktop is equippedwith control
knobs that provide an infinitechoice of
Be sure drip bowls are in place. Ab- settings from LOW to HIGH.The knob
sence of these bowls during cooking can be set on any of the numbered set-
maysubject wiring or component parts tings or betweenthe numberedsettings.
underneath the cooktop to damage.
Tooperate: Pushdown andturn knobto
Clean after each use with soap and the desired setting. A signal light will
To replace: Insertthe terminals on the water. Remove stubborn stains with turn on to indicate that one or more of
element into the receptacle. Gently lift baking soda paste and plastic scouring the surface elements areon.
SUGGESTED HEAT SETTINGS
Usethefollowingchartasa GUIDELINE untilyoubecomemorefamiliarwithyourcooktop.Keepinmindthatdifferenttypesof
utensilmaterialsrequiredifferentheatsettingsforthesame cookingoperation.Wesuggestthatyouexperimenttofindtheheat
setting that bestsuits your particularcooking needs. Information in the chart is based on heavy gaugealuminum cookware.
Lowerthe heatsetting if using stainless steel, cast iron utensils or glassware designedfor surface cooking.
HI To bringliquid to a boil, blanch, preheat skillet, orbring pressure up inpressure cooker. (Note:
Alwaysfollow instructions inpressurecooker use/carebook.)Always reduceto alowerheatset-
ting when liquidsjust begin to boil or food begins to cook.
6-5 To maintain moderate to slow boil for large amounts of liquids.
1 1 1 ] ......................... 1 i;; ...... ....................................................... .......... i
LO To keep foods warmbefore serving.
NOTE: Referto utensil manufacturer's recommendations for suggested heat settings.Some manufacturersdonot recom-
mendthe use of HIGH or the use of HIGH for extended cooking operations.
-,.4_
Page 6

USING YOUR COIL ELEMENT COOKTOP
GRIDDLE-IN-THE-MIDDLE TIPS FOR SUCCESSFUL COOKING
(36-inch cooktopsonly) = Foodwillnotcookanyfasterwhenahigherheatsettingis
Beforeusing the die cast griddle for thefirst time,wash itin used than that needed to maintain a gentle boil. Water
warm soapy water, rinse anddry. Then, season it by lightly boilsat the same temperature whether boilinggently or
rubbing the surface with oil or unsalted shortening. Heat vigorously. Ifa highsetting is used,excessive spattering
griddle for 5 to 10 minutes at a medium heat setting. Cool will occurand food maystick orburn on the bottom ofthe
and wipe off excess fat with a paper towel, utensil.
• If food is cookingtoo fast or ifa boilover occurs, remove
Forevencooking results,preheatgriddleusinga mediumor lid and reduceto a lower setting. Allow enough time for
medium--highheat setting for5 minutes or until the entire the cooking area to adjustto the new setting.
cooking surface is heated. Sprinkle a few drops of water
overthe griddle. Ifwater "beadsand dances"onthe surface,
the griddle is properly preheated. If the water sizzles and • Use a higherheat settingto bring liquidto a boil orto be-
evaporates,the griddle is not hotenough, gin cooking, then reduce to a lowersetting.
To clean- When cool, wash in hot soapy water, rinse and • Neverleavefoodunattendedduring acookingoperation.
dry.
• Always place utensilon the surface element beforeturn-
ing elementon.
_ _ _ • Never let a pan boildryas this could damagethe utensilandthe appliance.
FIFTH ELEMENT
The griddleelementcanbe usedas afifthsurfaceelement.
Merelyremovethegriddletoexposethe element,
-5-
Page 7

USING YOUR SMOOTHTOP COOKTOP
COOKING AREAS SIGNAL LIGHTS materials can cause permanent dam-
Thefour surface cookingareas on your Cooktops areequipped withone to four age to thecooktop.
cooktop are identified by permanent signal lights to indicate when a surface
patterns in the cooktop. There are two element is on. The light will remain on
large and two small areas. Use the until the element is turned off. After a
smallerareas for small cooking utensils cooking operation, be sureelement and
and the larger areasfor large utensils, signal light are off.
HOT SURFACE LIGHT
The cooktopis equipped with a HOT
_._/1_ _ _ SURFACE light. This red light will turn
on to indicate that the cooking area is
_]/_ O hotandwill remain onuntilt heareahas
cooled.
® COOK NGHINTS
During the first few hours of use, you
may notice that the cooktop emits a
slight burning odor and a light smoke. To protect the top, it is not recom-
Bothofthese conditionsarenormal and
mendedtousethetopas aworksurface
are caused by the insulation material of or as a cuttingboard or tocook food di-
the heating elements in a newcooktop, rectly onthe cooktop without a utensil.
To help keep cooktop clean be sure Do not use a trivet ormetal stand (such
cooking area and utensil bottom are as a wok ring) betweenthe utensiland
clean and dry before use. the cooktop. These items can mark or
etchthe surface andaffectcooking effi-
ciency.
Turn control knob to the desired heat
KNOBS setting. If indoubtas to the correct set-
ting, it is better to select a lower setting Thin gaugealuminum cookware, alumi-
Thecooking area controls arecalled IN- and increase to a higher setting as humfoil or foil containers such as pop-
FINITE controls. This type of control needed. Itwill take longer for the cook- corn poppers are NOT recommended
provides an infinite choice of heat set-
ing area to cool to a lower temperature for use on the cooktop. They will leave
tings from LOW to HIGH. The control thanto heat upto ahighertemperature, metal marksand may permanently melt
can be set either on any of the num- onto the top.
bered settings or between the num-
bered settings. Iffood is cooking toofast or if boilovers
Do not slide glass items across the
occur, removelid and reduceto alower
To operate control: Push down and setting. Allowenough time for the cook- cooktop. They may scratch or damage
turn knob, in eitherdirection, to the de- ing areato adjustto the new setting, the top.
sired heat setting.
Do NOT slide aluminum cookware
THINGS TO REMEMBER across the cooktop. This may result in
Do not allow plastic objects, aluminum aluminummarkswhichthenmustbeim-
foil, sugar, orfoodswithhighsugarcon- mediately removed with a recom-
tentto meltontothe hot cooktop. Melted mended cooktop cleaner.
-6-
Page 8

USING YOUR SMOOTHTOP COOKTOP
SUGGESTED HEAT SETTINGS
Usethefollowingchartasa GUIDELINEuntilyou become morefamiliarwithyourcooktop.Keep inmindthat differenttypes of
utensilmaterialsrequiredifferentheat settingsforthe samecookingoperation.We suggestthat youexperimentto findtheheat
settingthat best suits your particularcooking needs. Information in the chart isbased on heavy gauge aluminum cookware.
Lower the heatsetting if using stainless steel, or cast ironutensils.
HI To bring liquid to a boil, blanch, preheat skillet,or bringpressure up in pressure cooker. (Note:
Always follow instructionsinpressure cooker use/carebook.)Always reducetoa lower heatset-
ting when liquidsjust begin to boil or food begins to cook.
6-5 To maintain moderate to slow boil for large amounts of liquids.
LO To keep foods warm before serving.
NOTE: Refertoutensilmanufacturer's recommendationsfor suggested heatsettings. Some manufacturers donot recom-
mend the useof HIGHor the useof HIGH for extended cooking operations.
-7-
Page 9

USING YOUR SMOOTHTOP COOKTOP
WARNING: BEFORE CLEANING, CLEANING CHART
BE CERTAIN ALL ELEMENTS ARE
TURNED OFF AND THE COOKTOP
IS COOL.
Clean smoothtop after each use. Use
only cleaning agents recommended in
the cleaning chart. Other materials Heavystains, Elco Cooktop Cleaning Gentlyscourwith paste andpaper towel
may damage the finish of the smooth- burned on food. Creme. Paste of baking toremoveas muchaspossible.Then re-
top. soda or and water, apply paste and let stand for 30 to 45
minutes. Coverwith damp paper towel-
Carefully blot up spillovers around the ingtokeeppaste moist.Scourtoremove
outside of the cooking area as they oc- remaining stain. Rinse completely and
cur with dry paper towels. BE CARE- dry.
FUL NOT TO BURN HANDS WHEN _Pg!_
WIPING UP SPILLS. DO NOT USE A _
DAMP CLOTH WHICH MAY CAUSE i_ite
STEAM BURNS.
When surface is cool, clean as directed
in the chart. DO NOT USE the follow- Brown or gray Elco Cooktop Cleaning Gently scour with paste to remove as
ing cleaning agents, stains from Creme. muchaspossible. Reapplypasteandlet
• Abrasives (metal scouring pads, HARD WATER stand for 30 minutes. Scour with addi-
cleansing powders, scouring clean- or metalmarks, tional paste to remove remaining stain.
ers or pads) will scratch the smooth- Rinse completely anddry.
top.
• Chemicals (oven cleaners, chlorine
bleaches, rust removers or ammo-
nia) may damage the finish of the
smoothtop.
,, Cleaning agents designed for glass-
ware which contain ammonia may PROBLEM SOLVING CHART
harm the smoothtop.
• Soiled cloth or sponge will leave an PROBLEM CAUSE TO PREVENT
invisible film on the cooktop which
may cause discoloration the next
time the cooktop is used.
CAUTION:
If metal melts onto the smoothtop, DO
NOT USE TOP. CALL AN AUTHOR-
IZED SERVICER. Do not attempt to re-
pair cooktop yourself.
Metal-marking Slidingor scraping metal Do not slide any metal object across
To prevent permanent damage to the utensils or oven racks cooktop. Clean immediately with Elco
cooktop, do not allow utensils to boil across cooktop. Cooktop Cleaning Creme.
dry.
Do not place plastics on awarm or hot
cooking area. They will melt and ad-
here to the smoothtop. The smoothtop
maychipor pitin attempting to remove Areas of discol- Mineral deposits from Use cookware with bottoms that are
melted plastic from the top. oration with a water and foods, clean and dry. Use correct heat setting
metallic sheen to prevent boilovers.
To prevent scratching or damage to the
smoothtop: Do not leave sugar, salt,
sand, soil, shortening or other fats on
the cooking area. Be sure area is free
from these before turning on cooking
area.
-8-
Page 10

USING YOUR SOLID DISC COOKTOP
IMPORTANT
BEFOREUSINGTHESOLIDDISC ELEMENTSFOR THE FIRSTTIME, HEATTHE ELEMENTS,WITHOUT A PANIN
PLACE, FOR 3 TO5 MINUTESON THE HIGH SETTING. Elementsare shipped with a special coatingwhich protects
themagainst corrosion. Heating theelements allowsthe coatingto behardened and burned intothe elements. During
thecuring process,a harmlesssmokewill becreated. Ifthe elementsare notcured, thecoating canstickto apanwhen
thesolidelement isfirst used.The ringsaroundthe elements may turn a goldencolor duringthe curing process. This is
normal. (See page 11for cleaning information.)
RED DOT ELEMENT
Thiselement has 10heat settings. The THERMAL PROTECTOR: The reddot Theelementhasametalsensingdevice
control knob can be set on any of the in the center of the element indicates located in the center of the element.
numberedsettingsfrom LOto HIor be- that the element has a built-in safety This device senses and regulates the
tween the settings to provide "infinite" thermal protector. If, for example, a temperature of the bottom of the pan.
variations of heat. utensildoes notmakegood contact with
the element or should accidently boil
dry, this safetyfeature sensestheextra
The red dot element preheats at full heat and automatically switches to a
wattagethen maintainsthe heatsetting lower wattage. The thermal protector
by cyclingthe element off and onat furl
wattage. The ontime islonger at higher prevents utensils from "meltdown" or
heat settings, warpage.
To cook: Begin cooking on a higher The Protectoralsoreduces thewattage
heatsettingthen reduceto a lowerheat if the element is operatedwithout a pan
setting to complete the cooking opera- in placeor ifan improper utensilis used.
tion. The Protector is activated whenever a
utensil is unable to properly conduct When this element is first turned on, it
heats at full wattage (high), regardless
heat away from the solid element's sur-
face. of the heat setting selected, until the
utensil reaches the preselected heat.
The element then automatically re-
duces inwattage and beginstocycle on
Cooking times will increase because and off to offera steadytemperature for
there is lessheatwhen the thermal pro- controlled cooking. The sensor regu-
tector is activated, lates this temperature until youturn the
element off.
SENSOR ELEMENT
Thiselement provides aninfinite choice To cook: Only one setting is necessary
of heatsettingsfrom LOto HI.Theknob with the Sensorelement. It isnotneces-
can beset on anyof the numberedset- sary to begin cooking on a higher heat
tingsor between thesettings to provide setting then reduce to a lowersetting as
infinitevariations of heat. suggested for the Red Dotelement.
-9-
Page 11

USING YOUR SOLID DISC COOKTOP
Usethefollowingchart asa GUIDELINEuntilyou become morefamiliarwith yourcooktop. Keepin mindthat differenttypesof
utensilmaterialsrequiredifferentheatsettingsfor the samecookingoperation. Wesuggestthatyou experimentto find the heat
settingthat best suits your particular cookingneeds. Information inthechart isbased on heavy gaugealuminum cookware.
Lowerthe heat setting if using stainless steel, cast iron utensils or glassware designed for surfacecooking.
NOTE: Refer to utensil manufacturer's recommendationsfor suggested heat settings. Some manufacturersdo not recom-
mendthe useof HIGHor the use of HIGHfor extended cooking operations.
FOR RED DOT ELEMENT
HEAT SETTINGS USES
HIGH To bring liquid to a boil, blanch, preheat skillet, or bringpressure up in pressure cooker. (Note:
Alwaysfollow instructions inpressurecookerUse/Carebook). Alwaysreduceto alowerheatset-
ting when liquids boil or food begins to cook.
SETFINGS To brown or sear meat, heat oil for deep fat frying, scald.
7-9 To fast saute or fry.To make candy.
To maintain fast broilfor large amounts of liquids, for slowerfrying or sauteing.
SETTINGS To maintain moderate to slow boil for largeamounts of liquids.
5-6
SETTINGS To continue cooking uncovered foods, and for most frying.
2-4 To continuecooking covered foods, maintainboil pressurein most pressure cookers.Stews,
braise or steam.
To maintain boil, poach, steam or simmer.
LOW To keep foods warmbefore serving.
FOR SENSOR SOLID ELEMENT
HEAT SETTINGS USES
HIGH To boillargequantitiesofwater.
SETTINGS To deepfat fry,blanch.
10-11 To pan fry. Fryin succession.
To braise,to brownorsear meat.
SETTINGS To fast saute, deep fat fry smallquantities.
6-9 To make candy,reheat,scald.
Tosteam, boilsmall quantities.
SETTINGS To slowsaute, stew.To maintainpressureinmostpressurecookers.
2-5 Toscrambleeggs. Egg basedsauces. Pot roast.
Tothickensauces, heat milk,poach,simmer.
To meltchocolate,butteror fat.
LOW To keep foodswarm.Thaw. Melt.
-10-
Page 12

USING YOUR SOLID DISC COOKTOP
WARNING: BEFORE CLEANING, BECERTAINALL ELEMENTSARE TURNEDOFFANDTHE COOKTOPAND ELE-
MENTSARE COOL.
SOLID ELEMENTS • For light soil: Use powdered To remove discoloration: Use a clean
Thebodyofthesolidelementismadeof cleansers such as Bon Ami, Bar- cloth and apply a small amountof a
castiron.Overa periodof time,theele- keepersFriend,Ajax,Comet,orsoft non-abrasive stainless steel cleaner
merit may lose itsdark luster. This is scrubbing cleansers. Rinse thor- such as Shiny Sinks, Barkeepers
normalandwillnotaffectitsheatingper- oughly. Heat element on a medium Friend,Zud,orStainlessCleaner*.Rub
formance, setting for a few minutesuntilcom- lightly to remove stainsand discolora-
pletelydry. tions. For more difficultdiscoloration,
applystainlesssteelcleaner to ring.Let
stand5 minutes,then rublightlywith a
soft cloth. Rinse thoroughlyand wipe
• For heavy soil or rust: Use soapy dry.Heatelementonmediumsettingfor
scouringpads such as S.O.S. or a few minutesuntilcompletelydry.
Brillo, a scouring pad such as
Scotch-Brite,ora brushwithscour-
ingpowders.Tofacilitatetheclean- *Stainless Cleaner maybepurchasedfromyour
ing process,first warm the element localdealerorauthorizedservicer.
ona lowsetting.Rinsethoroughlyaf-
ter cleaning.Heat elementona me-
diumsettingfor a few minutesuntil GLASS COOKTOP
TO PREVENT RUSTING: completelydry. (ifequipped)
DO NOT usewet pansor leavepan The temperedglass cooktopwillwith-
bottom wet. Moisturecould cause standtemperaturechangeswhilecook-
corrosion and will not allow your • To maintain original matte black ing.Althoughimpactresistant,treatthis
pans to heatproperly, appearance of the solid element: glass cooktopwiththe same care you
ApplyAgent Restorer* (whichwas wouldanyglass material.
packagedwith your cooktop)spar-
inglyto a lukewarmelement.Wipe,
with the applicator providedor a • Wipeupspillsimmediatelywithadry
clean sponge or cloth, in a circular cloth.Cleanglass cooktopaftersur-
motiontoevenlydistributeRestorer. face has cooled.Aftercleaning,heat
Turnelementona medium-highset- elementon mediumsettingfora few
ting for3 to 5 minutes to burn off ex- minutes until completely dry.
J cess. Somesmoke will occur.This is
DO NOT place steamed pan lids normal and non-toxic. When smok-
over elements, ingstops, turn element off. • For normal daily cleaning,wipe with
a damp sponge or cloth. Use glass
___--_ When element is cool, remove ex- cleaners to remove smudges and
.-_ _- cess cleanerfromtheelement with a stains. Buff with a clean dry cloth or
-_ S clean cloth, paper towel.
*AgentRestorer maybepurchasedfromyour
Iocaldealerorauthorizedservicer. • For more difficult to remove food
stains, use non-abrasive cleansers,
dishwashing liquids or a paste of
water and baking soda. Rinse and
_ STAINLESS STEEL drythoroughly.
SEAL RING
The ring aroundthe element prevents
foodspillsfrom runningunderthe ele- • Donotuse anycleanersnotrecom-
o For normalcleaning: Wipethe ele- ment. Made from stainless steel, the mendedfor use on glass.
ment with a damp cloth. Heat ele- ringwillchangetoagoldcolorwhenthe
ment on a mediumsetting for a few element is heated. This removable dis-
minutes untilcompletely dry. coloration is a normal characteristic of
stainlesssteeland mayoccurwhenever
the solid element is heated on a high
setting.
-11-
Page 13

UTENSIL INFORMATION
Cookingperformanceisgreatlyaffected TO DETERMINE IFTHE UTENSIL Characteristics of Utensil Materials:
by the type of utensils used. Utensils HAS A FLAT BO'I-FOM: Aluminum utensils heat quicklyand
SHOULDHAVEA FLAT BO'i-I-OM.The 1. Placetheedge ofthe ruleracross evenly.Bestsuitedforsimmering,brais-
flatbottomallowsgoodconductivitybe- the bottomof the utensil, ing,boilingandfrying.Do notusewhen
tween the utensil and the element to cookingacid based foodssuch as spa-
provideuniformcookingresults,faster 2. Holdutensiluptothe light, ghettisauce.
heatingand moreefficient use of en-
ergy. 3. Nolightshouldbevisibleunderthe
ruler. Specialprecautions for aluminum
foil and aluminum cooking uten-
L __._, sils:
• i , i ;;, : ' : ='' I • Aluminum foil will damage the
' NOTOK smoothtop cooktop if it melts
Itensils with uneven, warped, or _ ontotheglass. Do not usealumi-
rooved bottoms do not make good | _ num foil or foil-type containers
contact, reduce heat conductivity and _ _J under any circumstances.result in slower, less even heating. A _ , i ,
utensil with a badly curved bottom will • Aluminum utensils will cause
notmakegoodcontactwith the element NOTOK __ metal marks on the glass if you
and may not get enough heat to bring I I-mr slide them across the smoothtop
water to a boil. _ cooktop. Remove any metal
marksimmediately. See page 8.
NOTOK Stainless Steel is a poor heat conduc-
tor and develops hot spots. Ifcombined
CANNING
Acceptable water-bath or pressure with othermetalssuchas aluminumand
canners should not be oversized and copper, however, they will evenly dis-
'_ _ must have a flat bottom. The following tribute heat. Use for cooking functions
are not recommended: Canners with similar to aluminum.
ridged bottoms, oversized canners
(2-inches larger than the surface ele- Cast Iron utensilsare slow to heat but,
Fit the size of the utensil to the size of ment) or a very large canner that rests cook more evenly once temperature is
the element. This conserves energy, on two surfaceelements, reached. Use for long term, low heat
Oversized utensilsor utensils that rest _ ,, cooking or for browningand frying.
across two elements maytrap enough __
heat to cause damage to the cooktopor
elements. Glass ceramic, earthenware, heatproof
glass or glazed utensils can be used if
recommended by the manufacturer for
Do not use woks equipped with round surface cooking. Do notusewith trivets
metalrings.The ring,which isdesigned _ _ I" or other heat retarding pads with solid
to support the wok above the element, J/ _'_ disc elements. Utensil must be indirect
will trap heatand may damage the ele- contactwith thesolidelement forproper
mentand the cooktop. _ conduction of heat. Bestused on low to
medium heat settings.
When canning, use the HIGH setting
just until water comes toa boil or pres-
sure is reached inthe pressure canner.
Then, reduceto the lowest heatsetting
that maintains the boil or pressure.
Prolonged use of the HIGH setting, or
the use of incorrect canning utensils
produce excessive heat. Excessive
heat can cause permanent damage to
the porcelain cooktop, surface element
and the drip bowl.
-12-
Page 14

GENERAL CLEANING CHART
BE SURE ALL PARTS OF THE COOKTOP ARE COOL BEFORE CLEANING
AFTER CLEANING BE SURE ALL PARTS ARE REPLACED CORRECTLY
Control knobs Mild detergent & water. To remove knobs,for cleaning, gently pullforward. Wash
in mild detergent andwater. Donot use abrasive cleaning
agents. They will scratch finish and remove markings.
Rinse, dry and replace. Turn each element ON to see if
knobs have been replacedcorrectly.
Glass finish - cook- Soap & water. Wash withcloth wrung out in soapy water. Remove stub-
top (see page 8 for Pasteof baking soda & water, born soilwith paste of baking soda andwater. Do notuse
cleaning instructions Windowcleaningfluidor ammonia, abrasive materials such as scouring pads, steel wool or
for smoothtop cook- powderedcleaning agents.Theywill damageglass. Rinse
top.) withclearwater anddry.
Porcelain finish Mild soap &water. Porcelain enamel is glass fused on metal. It maycrack or
cooktop chip with misuse. Cleanwith soap and water when parts
arecool. All spillovers,especially acid spillovers,should be
wiped up immediately with a dry cloth. When surface is
cool, cleanwith warm soapy water. NEVER WIPE OFF A
WARM OR HOT ENAMEL SURFACE WITH A DAMP
CLOTH. THIS MAYCAUSE CRACKINGAND CHIPPING.
Never use abrasive or caustic cleaning agents on porce-
lain.(Note:Somecoil element cooktopsare designedasa
lift-up cooktopfor easy cleaning.)
Plasticfinishes Soap &water. Never use abrasive or caustic cleaning agents on plastic
finish.
-13-
Page 15

SERVICE
TROUBLESHOOTING CHART
PROBLEM CAUSE CORRECTION
Surface elements fail to turn on or a. Appliance not connected to a. Connect appliance to walloutlet,
heat food properly, powersupply, check circuit breaker or fuse box.
b. Defective element, b. Have service technician check
element.
c. Usedincorrect utensil, c. For optimum results, utensil
MUST HAVE A FLAT bottom.
(This is CRITICAL for solid ele-
ments.) See page 12 for addi-
tional information.
d. Canadiancooktoponly - tripped d. Resetcircuit breakerto ON posi-
circuit breaker, tion.
SERVICE model and serial numbersof the appli- CIRCUIT BREAKER
Do not attempt toservice theappliance ance, the name and address of the CANADIAN APPLIANCE ONLY
yourself unlessdirected to do so inthis dealer from whom you purchased the Your applianceisequippedwith acircuit
book. Contact the dealer who sold you appliance,the dateof purchaseand de- breaker box. The box is located either
the appliance for service, tails concerning your problem, on a wall or in a cabinet nextto or near
the appliance. If part or all of the appli-
HOW TO OBTAIN SERVICE If you did not receive satisfactory serv- ance does not operate, check to see it
When your cooktop requires service or ice throughyour serviceror Maycoryou one of the breakers has tripped. Reset
replacementparts, contactyour Dealer may contact the MajorAppliance Con- the breakerto the ON position.
orAuthorized Servicer.Consult the Yel- sumer Action Panel by letter including
low Pages in your telephone directory your name, address, and telephone
under ranges for the service source number, aswell as the model andserial
nearest you. Be sure to include your numbersof theapp_iance. 0
name, address, and phone number,
along with the model and serial num- MajorApplianceConsumerActionPanel
bers of the appliance.(See front cover 20NorthWackerDrive
for location of your model and serial Chicago,IL 60606
numbers,)
MACAP (Major Appliance Consumer J_l_lt_l_l
if you arenot satisfied with the local re- Action Panel) isanindependentagency
LLL
sponse to your service requirements, sponsored by three trade associations I I
callorwriteMAYCORParts andService asacourt ofappeals on consumercorn-
Company, 240 Edwards Street, S.E., plaints which have not been resolved ' -_
Cleveland,TN 37311, (615) 472-3500. satisfactorilywithin a reasonable period
Include or have available the complete of time.
-14-
Page 16

FULL ONE-YEAR WARRANTY
DOMESTIC GAS OR ELECTRIC RANGE
,laycorApplianceParts&ServiceCompany willrepairorreplace,withoutcharge,anypart ofyourproductwhichhas
defect inmaterialor workmanship during the first year afterthedate of the original installation.This warrantyextends
to any owner during the one-year warranty period.
LIMITED 5 YEAR WARRANTY
Onelectricrangesequippedwith soliddiscorsmoothtopheating elements,andongasrangeswithsealed burners,for
anadditional4yearperiod beyondthe firstyearof thegeneral coverageof thiswarranty, Maycorwill replace anyofthe
soliddiscorsmoothtop heating elements, or sealed burnerswhichfail to heatas a resultofdefective workmanship or
material. Additionally, Maycor will replace any smoothtop cooking surface which cracks or breaks during normal
householdcooking. These parts mustbe installed bya qualified person.Any laborcharge requiredfor replacement is
notcovered by thiswarranty.
HOW TO OBTAIN SERVICE
To obtain the repair or replacementof a defective part under these warranties, you shouldcontact the dealer from
whom you purchased the appliance or a servicer he designates.
WHAT IS NOT COVERED BY THESE WARRANTIES
1. Conditions and damage resulting from improper in- 5. Any product used for other than normal household
stallation, delivery, unauthorized repair, modifica- use. Itdoes not extend to products purchased for
lion, ordamage not attributabletoa defect inmate- commercial or industrial use.
rial or workmanship.
6. Anyexpense incurredfor servicecallsto correctin-
2. Conditions resulting from damage, such as: (1) im- stallation errors or to instructyouon how touse the
proper maintenance, (b) misuse, abuse, accident, products.
or (c) incorrectelectrical current orvoltage.
7. CONSEQUENTIAL OR INCIDENTAL DAMAGES
3. Warranties are voidiftheoriginalserial numberhas SUSTAINEDBY ANYPERSONAS A RESULT OF
been removed,altered, or cannot be readily deter- ANY BREACHOFTHESE WARRANTIESOR ANY
mined. IMPLIED WARRANTY. Some states do not allow
the exclusion or limitation of consequential or inci-
dental damages, so the above exclusion may not
4. Light bulbs, applyto you.
ADDITIONAL HELP
If you are notsatisfied with the localresponseto your service requirements andwish to contact Maycor, please ad-
dress your lettertothe CustomerRelationsDepartment, Maycor Parts&Service Company,240Edwards Street,S.E.,
Cleveland,TN 37311 or call (615)472-3500. To save time, your lettershould include the complete model and serial
numbersofthe warranted appliance,the name andaddressofthedealerfrom whomyou purchased theappliance,the
date of purchaseand details concerning your problem.
These warranties are the only written or expressed warranties given by Maycor.No one is authorizedto increase,
alter, or enlarge Maycor's responsibilities or obligationsunder these warranties. Thesewarranties give you specific
legalrights, and you mayalso have other rightswhich vary from state to state.
8109P059-60
(6/91)
-15-
 Loading...