

Page 1
applian_isproperlyinstalledand
groundedbyaqualifiedtechnician, neara_liance -
Careshouldbegiventolocationof
appliance- Besurefloorcoveringun- in_ oven,orinthevidnityOfthisor
derappliance,wallsadjacenttoap- anyotherappliance.Thefumescan
pliance,cabinetryadjacenttoap
pllance,andothermaterialsadjacentto
orcookingutensils.
the
Alterapplianceisinstalled provideddirectly
talnallpackingmaterialsareremoved vided,storageshouldbelimitedtoin-
fromtheappliancebeforeoperatingthe
unitfappances nstallednearawn- storedinanareasubiecledtoheat,
dow,takestepstopreventcurtains cloths.
fromblowingoverelementscreatinga Temperaturesmaybeunsafeforsome
temssuchasvoatileliqu{Is,cleaners, Prote_ liners- Donotusealu
firehazard.
orae_l sprays.
ceptassuggestedintheOwner's
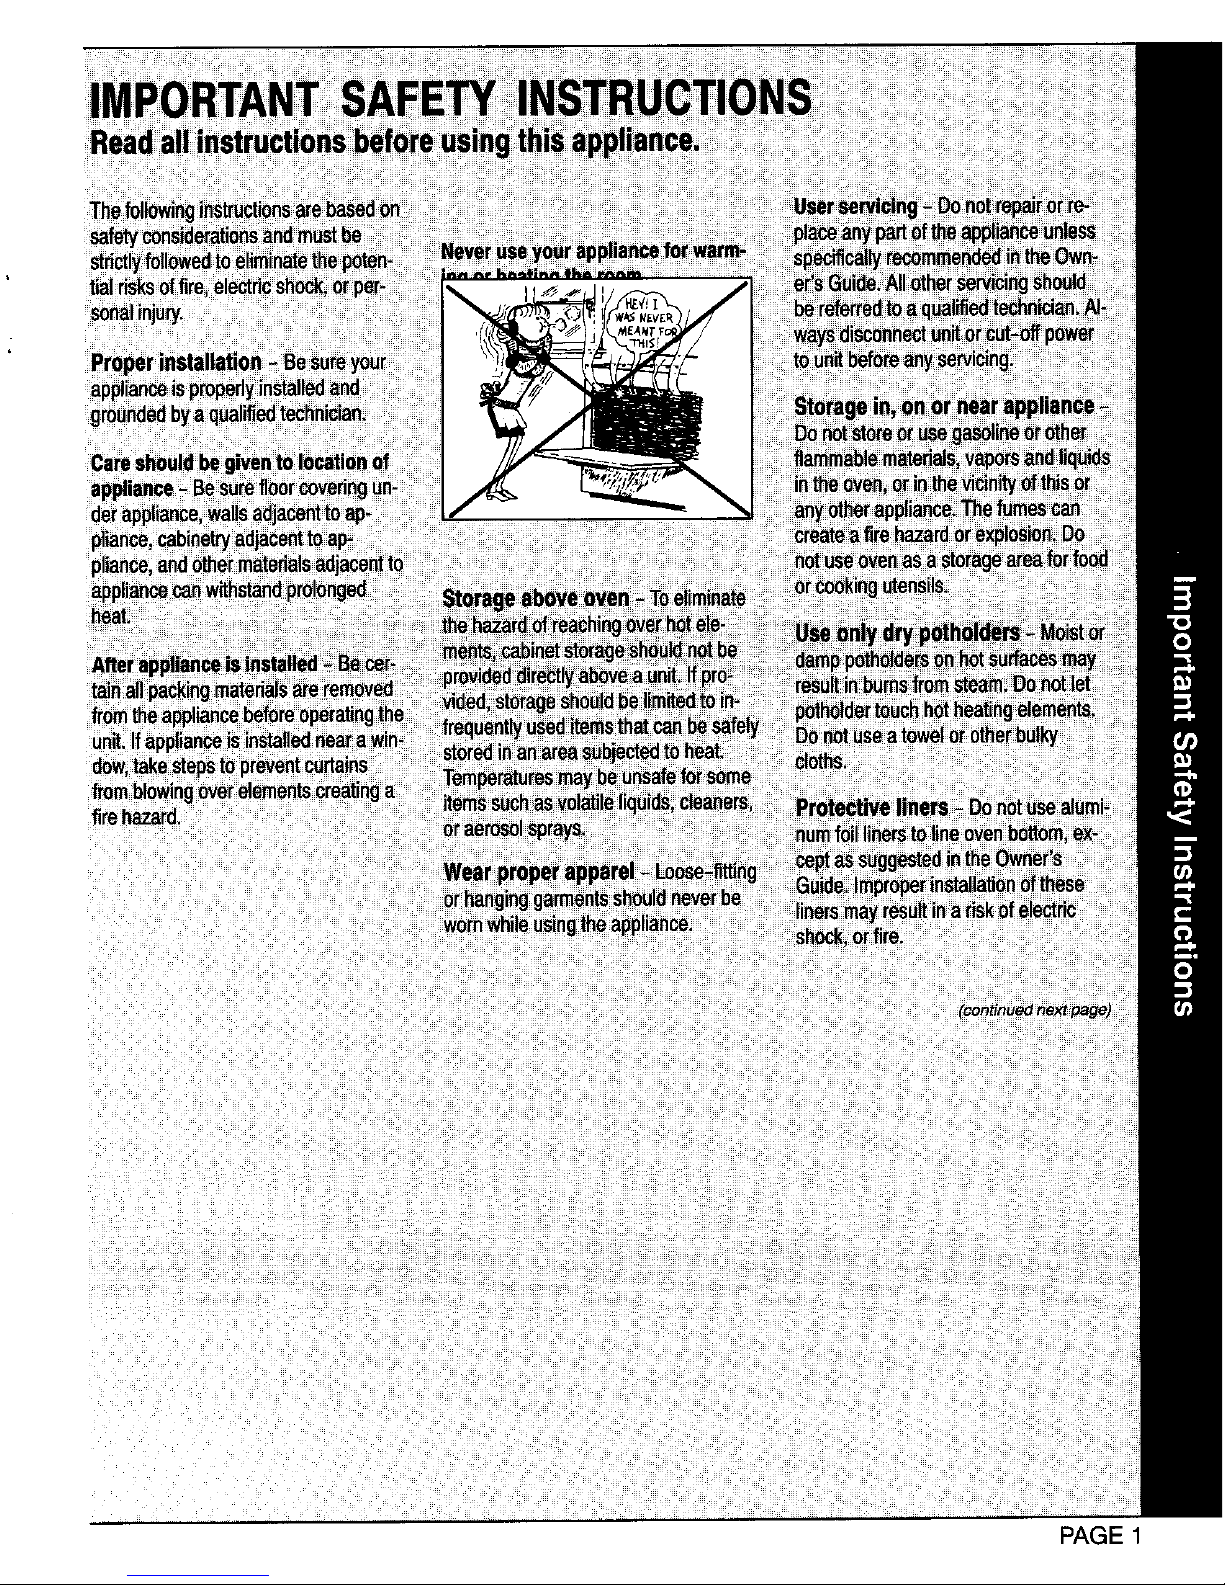
Idneverbe Guide.improperinstallationofthese
tnersmayresultinariskofelect_
wornwhieusngtheapplance, shock,orfire
(continued next page)
PAGE 1
Page 2
SAFETYINSTRUCTIONS
CHILD SAFETY Touching a hot oven light bulb with a "_____
damp cloth could cause the bulb to
Do notleavechildrenalone or unsuper- break. Should the bulb break, discon-
vised near the appliance when it is in nectpowerto the rangebefore tryingto
useor isstill hot.Children should never remove the bulb to avoid electrical
beall°wedt°sit°rstand°nanypart°f sh°ck" _ ,_=_
the appliance.Children must be taught
that the applianceandutensils in itcan Clean range with caution. If a wet
be hot. Children should be taught that spongeorcloth is used to wipespills on
an appliance is not a toy. They should
not be allowedto play with controls or a hot cooking area, be careful to avoid
steam burns. Some cleaners can pro-
other parts of the unit. Let hot utensils duce noxious fumes if applied to a hot
cool inasafeplace,out ofreachofsmall surface.
children. Be sureyou know which knob controls
GREASE which surface burner. Always make
surethecorrectburneristurnedonand
Use extremecautionwhen movingthe thattheburnerhasignited.Whencook-
greasekettleordisposingofhotgrease, ingiscompleted,turn burneroff.
Hotgrease is flammable,Avoidletting Use caution when wearing garments
grease depositscollectaround appli- made of flammable materialto avoid
ance, range hood, or ventfan. Do not clothingfires.Loosefittingorlonghang-
leave container of grease around a ing-sleevedapparelshouldnotbeworn
cookingappliance,Alwaysletquantities while cooking.Clothingmay ignite or
ofhotfatusedfordeepfatfryingcoolbe- catchutensilhandles.
foreattemptingtomoveorhandle.Inthe
eventofa greasefire, DO NOT attempt
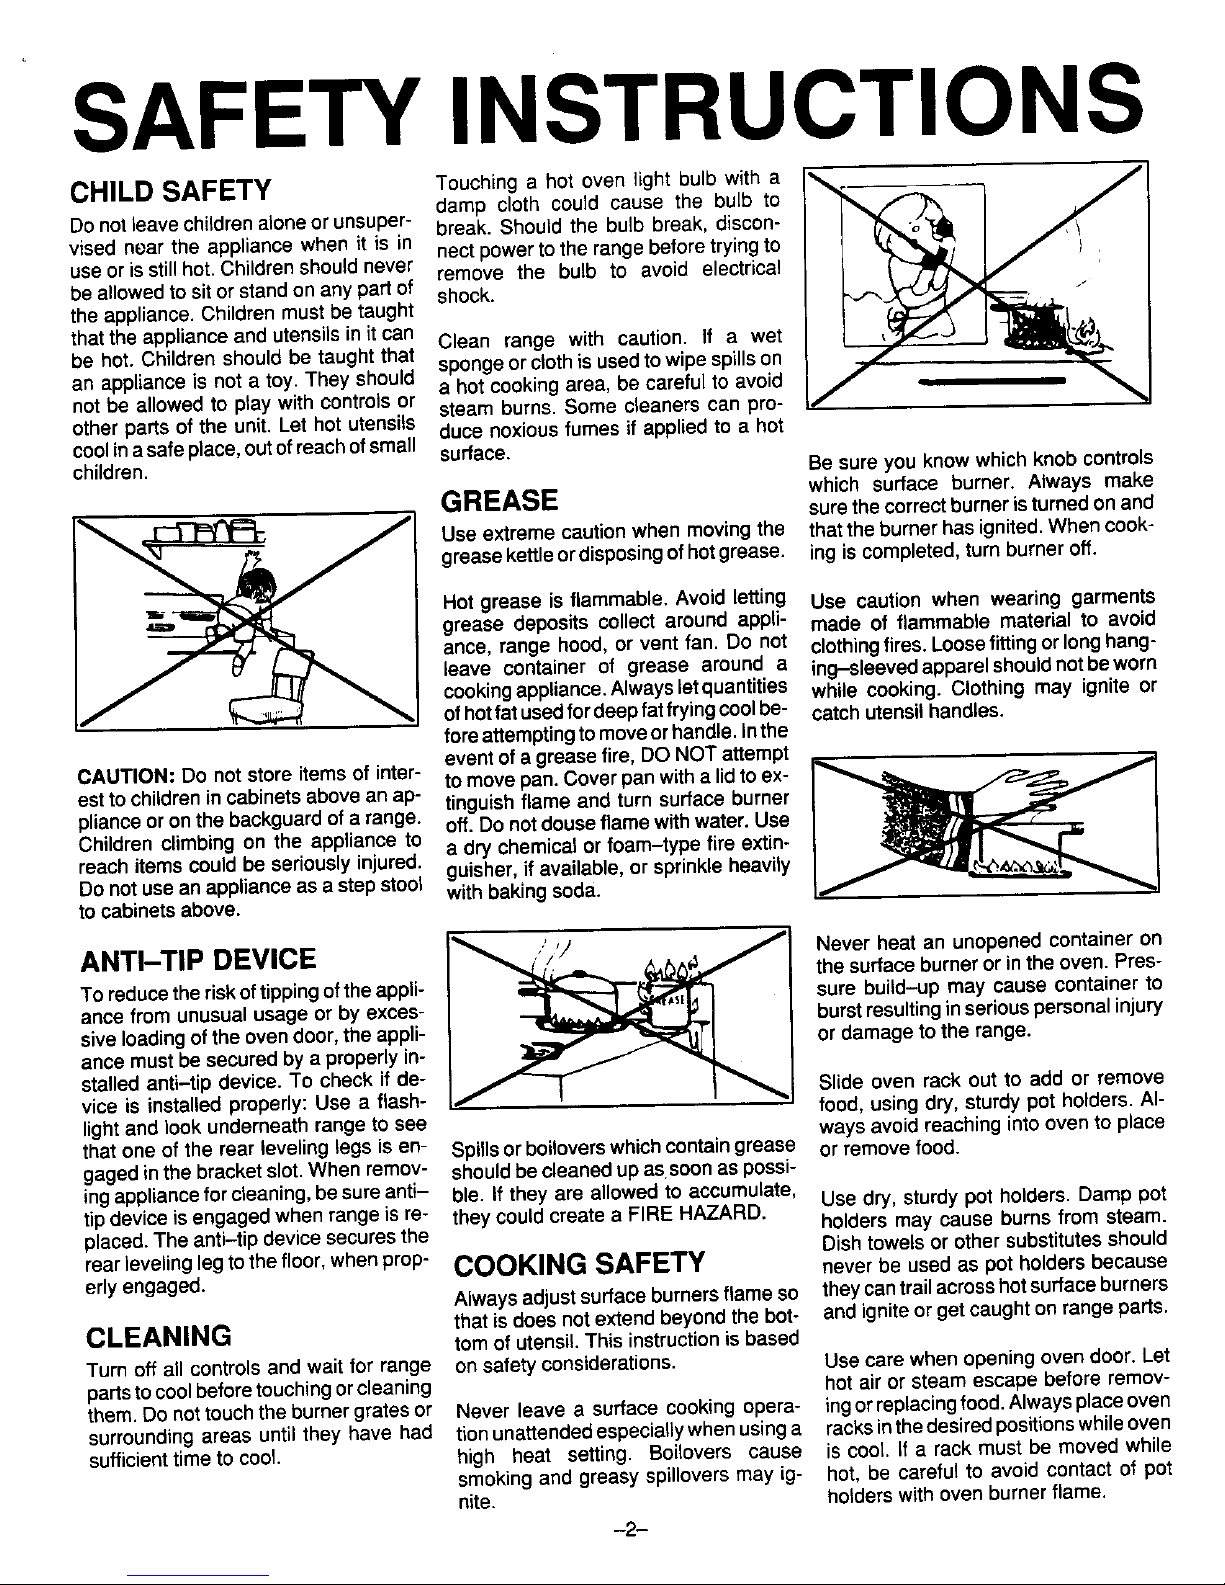
CAUTION: Donot storeitemsof inter- tomovepan.Coverpanwitha lidtoex- _,_ ,_,,,,,,,,_
estto childrenincabinetsabovean ap- tinguishflameandturnsurfaceburner
ptianceoronthe backguardofa range, off.Do notdouseflamewithwater.Use
Childrenclimbingon the applianceto a dry chemicalorfoam-type fire extin-
reachitemscouldbe seriouslyinjured, guisher,ifavailable,or sprinkleheavily
Donotuseanapplianceas a stepstool withbakingsoda.
tocabinetsabove.
ANTI-TIP DEVICE ' '/ Never heat an unopened container on
thesurfaceburnerorinthe oven.Pres-
To reducetheriskoftippingoftheappli- sure build-up may cause containerto
ancefrom unusualusageor by exces- burstresultingin seriouspersonal injury
siveloadingoftheovendoor,theappli- or damagetothe range.
ance mustbe securedbya properlyin-
stalledanti-tip device.To checkifde- Slide oven rack out to add or remove
vice is installed properly: Use a flash- food, usingdry, sturdy pot holders.AI-
light and look underneath range to see ways avoid reaching into oven to place
that one of the rear leveling legs is en- Spills or boilovers which contain grease or remove food.
gaged in the bracket slot. When remov- should be cleaned up as soonaspossi-
ingappliancefor cleaning, besure anti- ble. If they are allowed to accumulate, Usedry, sturdy pot holders.Damp Dot
tip device is engaged when range is re- they could create a FIRE HAZARD.
placed.The anti-tip device secures the holders may cause burns from steam.
Dishtowels or other substitutes should
rear)eveJinglegtothefloor,whenprop-COOKING SAFETY never be used as pot holdersbecause
erlyengaged.
AJwaysadjustsurface burnersflameso theycantrailacrosshotsurfaceburners
thatisdoes notextendbeyondthe hot- andigniteorgetcaughton rangeparts.
CLEANING tomof utensil.This instructionis based
Turn off all controlsand wait for range on safetyconsiderations. Usecare whenopeningovendoor.Let
partstocool beforetouchingorcleaning hot air or steam escape before remov-
them.Donottouchtheburnergratesor Never leave a surface cookingopera- ingorreplacingfood.Alwaysplaceoven
surroundingareas until they have had tionunattendedespeciallywhenusinga racksinthedesiredpositionswhileoven
sufficienttimetocoo1. high heat setting. Boilovers cause is cool. If a rackmustbe movedwhile
smokingand greasyspilloversmay ig- hot,be careful to avoidcontact of pot
nite. holderswithovenburnerflame.
_2--
Page 3
SAFETYINSTRUCTIONS
STORAGE ABOVE Besuroutensi}islargeenoughtoprop-IMPORTANT SAFETY
erly containfood and avoid boilovers. NOTICE AND WARNING
RANGE Pan size is particularly important in
Toeliminatethehazardofroachingover deep fatfrying. Besure panwillaccom- The CaliforniaSafe DrinkingWaterand
hot surface burners, cabinet storage modatethe volumeoffoodthatistobe ToxicEnforcementAct of1986 (Propo-
shouldnotbeprovideddirectlyabovea addedaswellasthebubbleactionoffat. sition65) requirestheGovernorofCalf-
unit. If such storage is provided, it Neverleavea deepfat fryingoperation fomia to publish a list of substances
should be limited to items which are unattended, knowntotheStateofCaliforniatocause
usedinfrequentlyand whicharesafely cancer or reproductiveharm, and ro-
quiresbusinessestowarncustomersof
storedinan areasubjectedtoheatfrom Never let a pan boil dry as this could potential exposures to such sub-
an appliance.Temperaturesin storage damagethe utensilandtheappliance.
areasabovethe unitmaybe unsafefor stances.
some items, such as volatile liquids,
cleanersor aerosolsprays. ALUMINUM FOIL Users of this appliance are hereby
UsealuminumfoilONLY as instructed warnedthat theburningof gascanre-
inthisbook.Improperuseofaluminum suitinlow-levelexposuretosomeofthe
UTENSIL SAFETY foil may causedamage tothe oven,af- listed substances, includingbenzene,
Use only pans that have flat bottoms fectcookingresults,andcan alsoresult formaldehydeandsoot,due primarilyto
andhandlesthatare easilygraspedand inshockand/orfirehazards, the incomplete combustionof natural
stay cool. Avoid using unstable, gasorliquidpetroleum(LP)fuels.Prop-
warped,easilytippedorloosehandled erly adjustedburnerswill minimizein-
pans. Do not use pans if their handles PLASTICS complete combustion. Exposure to
twistandcannotbetightened.Pansthat Many plasticsare vulnerableto heat. these substancescan also be mini-
are heavytomovewhenfilledwithfood Keepplasticsawayfrompartsoftheap- mizedbyproperlyventingtheburnersto
mayalsobehazardous, pliancethatmay becomewarm or hot. _the outdoors.
Alwaysplacea panoffoodona surface AEROSOL SPRAYS VENTILATING HOOD
burnerbeforeturningiton,andturnitoff Many aerosol-type spraycansare EX- To reducethe hazardofstorageabove
beforeremovingthe pan. PLOSIVE when exposedto heat and a range, installa ventilatinghoodthat
may be highlyflammable. Avoid their projectsat least 5 inches beyond the
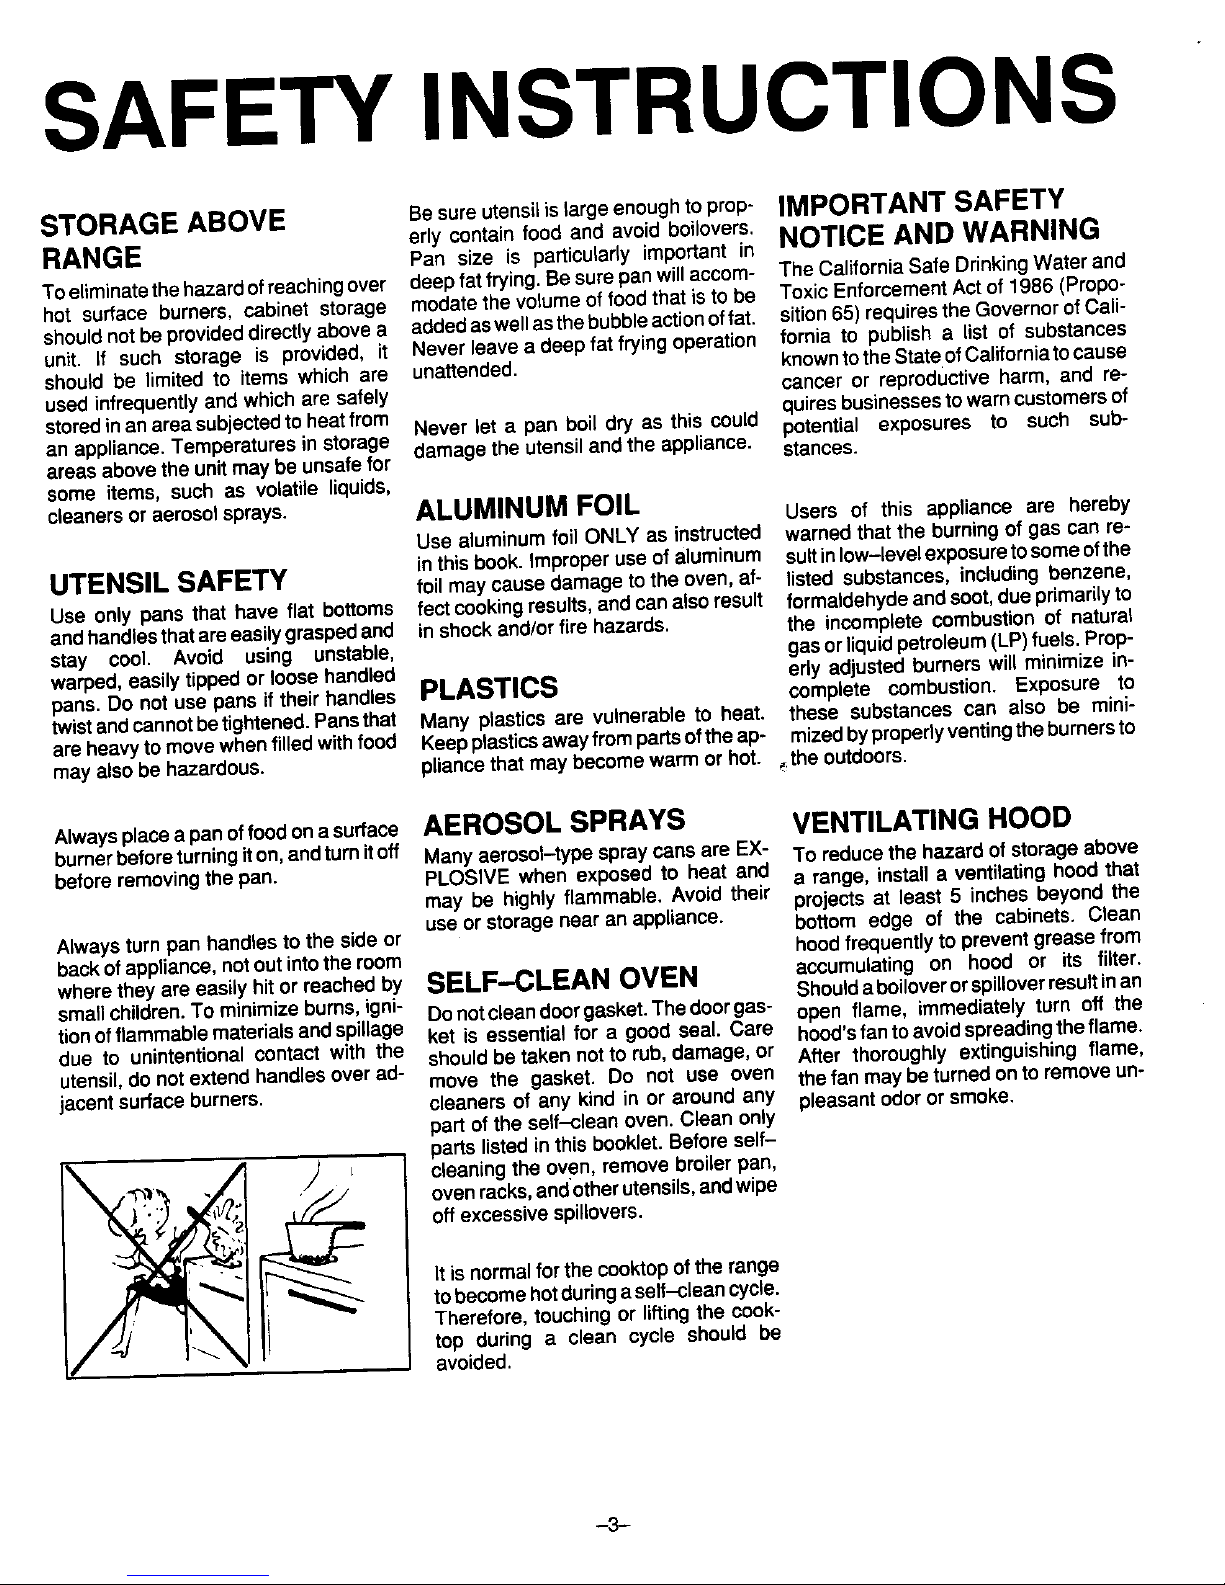
Alwaysturnpan handlesto the side or use orstorage near anappliance, bottom edge of the cabinets. Clean
backofappliance,notoutintothe room hoodfrequentlytoprevent greasefrom
wherethey areeasily hitor reached by SELF-CLEAN OVEN accumulating on hood or its filter,
Shoulda boiloverorspilloverresultinan
smallchildren.To minimizeburns,igni- Donotcleandoorgasket.Thedoorgas- open flame, immediately turn off the
tionofflammablematerialsandspillage ket is essentialfor a goodseal. Care hood'sfan toavoidspreadingtheflame.
due to unintentionalcontact with the shouldbe taken notto rub,damage,or After thoroughlyextinguishingflame,
utensil,donotextend handlesoverad- move the gasket. Do not use oven thefan may beturnedontoremoveun-
jacontsurface burners, cleanersof any kind in or around any pleasantodoror smoke.
partof the self--cleanoven. Cleanonly
partslistedinthisbooklet.Beforeself-
_. ,'_'='_ -,/ .JJl cleaningthe oven,removebroilerpan,
)..j_ _. ovenracks,andotherutensils,andwipe
off excessivespillovers.
Ifisnormalfor the cooktopoftherange
tobecomehotduringaself-cleancycle.
Therefore,touchingor liftingthecook-
top during a clean cycle should be
avoided.
-3-
Page 4
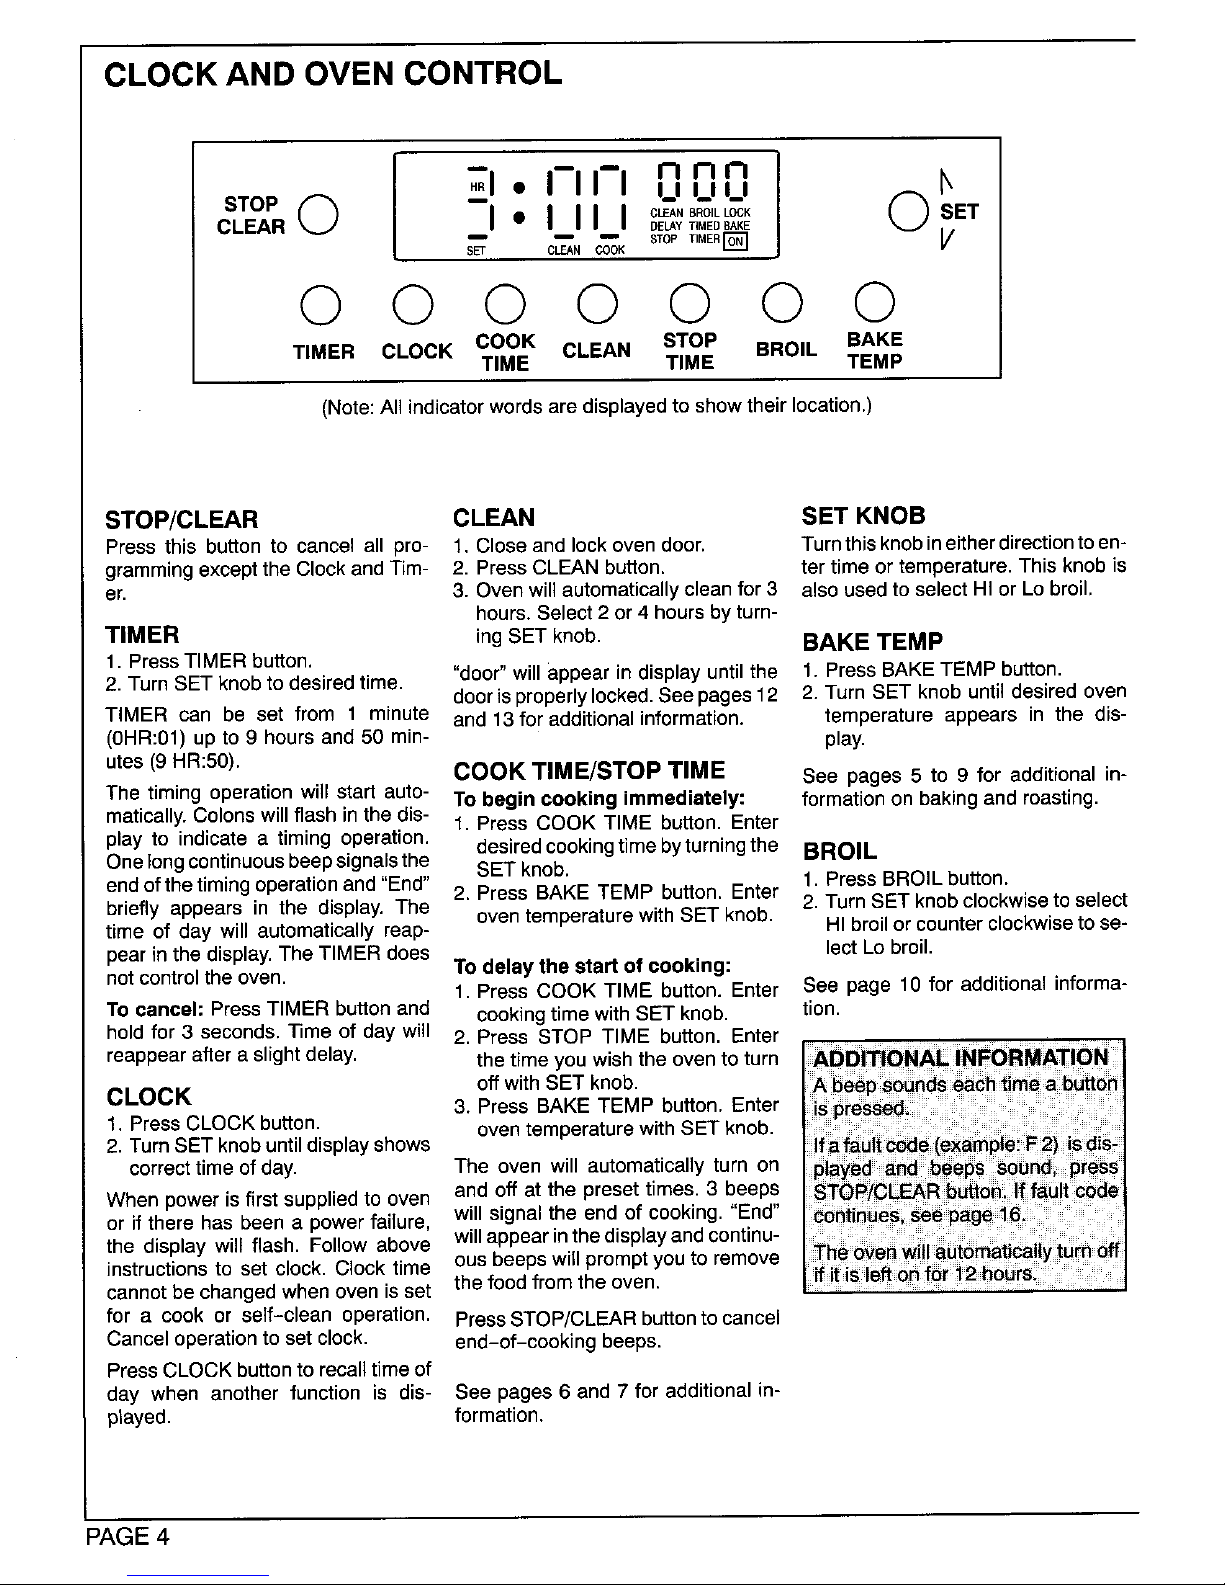
CLOCKAND OVEN CONTROL
I 71. I-II-Innn O}
STOP _ -- I_1 L I L I
CLEAR I" IIII O,.SBO,LLCOK ET
DELAYTIMEDBAKE
_ =m STOP _MERI_ 1
SET CLEAN COOK
0 0 0 0 0 0 0
TIMER CLOCK COOK CLEAN STOP BROIL BAKE
TIME TIME TEMP
(Note:All indicatorwords are displayed to show their location.)
STOP/CLEAR CLEAN SET KNOB
Press this button to cancel all pro- 1. Close and lockovendoor. Turnthis knobineitherdirectiontoen-
gramming except the Clock and Tim- 2. Press CLEAN button, ter time or temperature. This knob is
er. 3. Oven will automatically clean for 3 also used to select HIor Lo broil,
hours. Select 2 or 4 hours by turn-
TIMER ing SET knob. BAKE TEMP
1. Press TIMER button. "door" willappear in displayuntil the 1. Press BAKE TEMP button.
2. Turn SET knob to desired time. dooris properlylocked. See pages 12 2. Turn SET knob until desired oven
TIMER can be set from 1 minute and 13 for additional information, temperature appears in the dis-
(0HR:01) up to 9 hours and 50 min- play.
utes(9HR:50). COOKTIME/STOP TIME See pages 5 to 9 for additional in-
The timing operationwillstartauto- To begin cooking immediately: formationon bakingandroasting.
matically.Colonswillflash inthe dis- 1. Press COOK TIME button. Enter
play to indicatea timing operation, desiredcookingtimebyturningthe BROIL
Onelong continuousbeep signalsthe SET knob. 1. Press BROIL button.
endof the timing operation and "End" 2. Press BAKE TEMP button. Enter 2. Turn SET knob clockwise to select
briefly appears in the display. The oven temperature with SET knob.
time of day will automatically reap- HIbroilor counter clockwiseto se-
pear in the display. The TIMER does lect Lo broil.
notcontrolthe oven. To delay the start of cooking:
1. Press COOK TIME button. Enter See page 10 for additionalinforma-
Tocancel: PressTIMER buttonand cookingtimewithSET knob. tion.
holdfor 3 seconds,Time of day will 2. Press STOP TIME button. Enter
reappear after a slightdelay, the time you wish the oven to turn
off with SET knob.
CLOCK 3. Press BAKE TEMP button. Enter
1. Press CLOCK button, oven temperature with SET knob.
2. Turn SET knob untildisplay shows
correct time of day. The oven will automatically turn on
When power is first supplied to oven and off at the preset times. 3 beeps
or if there has been a powerfailure, will signal the end of cooking. "End"
the display will flash. Follow above will appear in the displayand continu-
instructions to set clock. Clock time ous beeps will prompt you to remove
cannot be changed when oven is set thefood from the oven.
for a cook or self-clean operation. PressSTOP/CLEAR buttonto cancel
Cancel operation to set clock, end-of-cooking beeps.
Press CLOCK button to recall time of
day when another function is dis- See pages 6 and 7 for additional in-
played, formation.
PAGE4
Page 5
OVEN USE
OvenCharacteristics
Everyoven hasitsowncharacteristics.Youmayfindthat Itisimportantthatair cancirculatefreelywithintheoven
the cookingtimesand temperaturesyouwere accus- and aroundthe food.Tohelpensurethis,placefood in
tomedtowithyourpreviousovenmayneedtobealtered thecenterof theoven rack.Allowtwo inchesbetween
slightlywithyournewoven.Itisnormaltonoticesome the edgeofthe utensil(s)andthe ovenwalls.If cooking
differencesbetweenthisovenand yourpreviousoven. ontwo racks,staggerthe foodtoensureproperairflow.
Fan Foroptimumbakingresultsof cakes,cookiesorbiscuits,
A fan will automaticallyturn on duringa cookingor a useonerack.Positionracksofoodisinthe centerofthe
, cleaning operation. The fan will automatically turn off oven. Use eitherrackposition2 andeitherthe straightor
whenthe unithascooled, off-set rack.
Oven Racks If cookingontwo racks,userackpositions3 and1,4 and
2 or rackpositions4 and 1. Placethe off-set rackinthe
The two ovenracksaredesignedwitha lock-stoppoem- toprackposition.Neverplacetwocookiesheetson one
tionto keep racksfrom comingcompletelyout of the rack.
oven.Donotattempttochangerackpositionswhen the
ovenis hot.
Thiswall ovenisequippedwithone"straight"rackand Use of Aluminum Foil
one "off-set" rackto offergreaterflexibilityin locating
foodinthe oven. (Doublewall oven:The lowerovenis Do notcoverentirerackwithaluminumfoilorplacefoil
equippedwithonlyonestraightovenrack.) directlyunder cookware.To catchspillovers,place a
pieceoffoil,a littlelargerthanthepan,ontherackbelow
To remove: Be sure rack is cool. Pullrackout to the thepan.Donotplacealuminumfoilacrossthebottomof
lock-stopposition.Tiltthefrontendupandcontinuepull- theoven.
ingrackoutof the oven.
Toreplace:Placerackonracksupports,tiltupandpush
towardrearofoven.Pulltherackouttothelock-stoppo-
sitiontobesurerackiscorrectlyreplaced.Thenreturnit Double Wall Oven
to its normal position. The lowerovenis equippedwithonlya bake element.
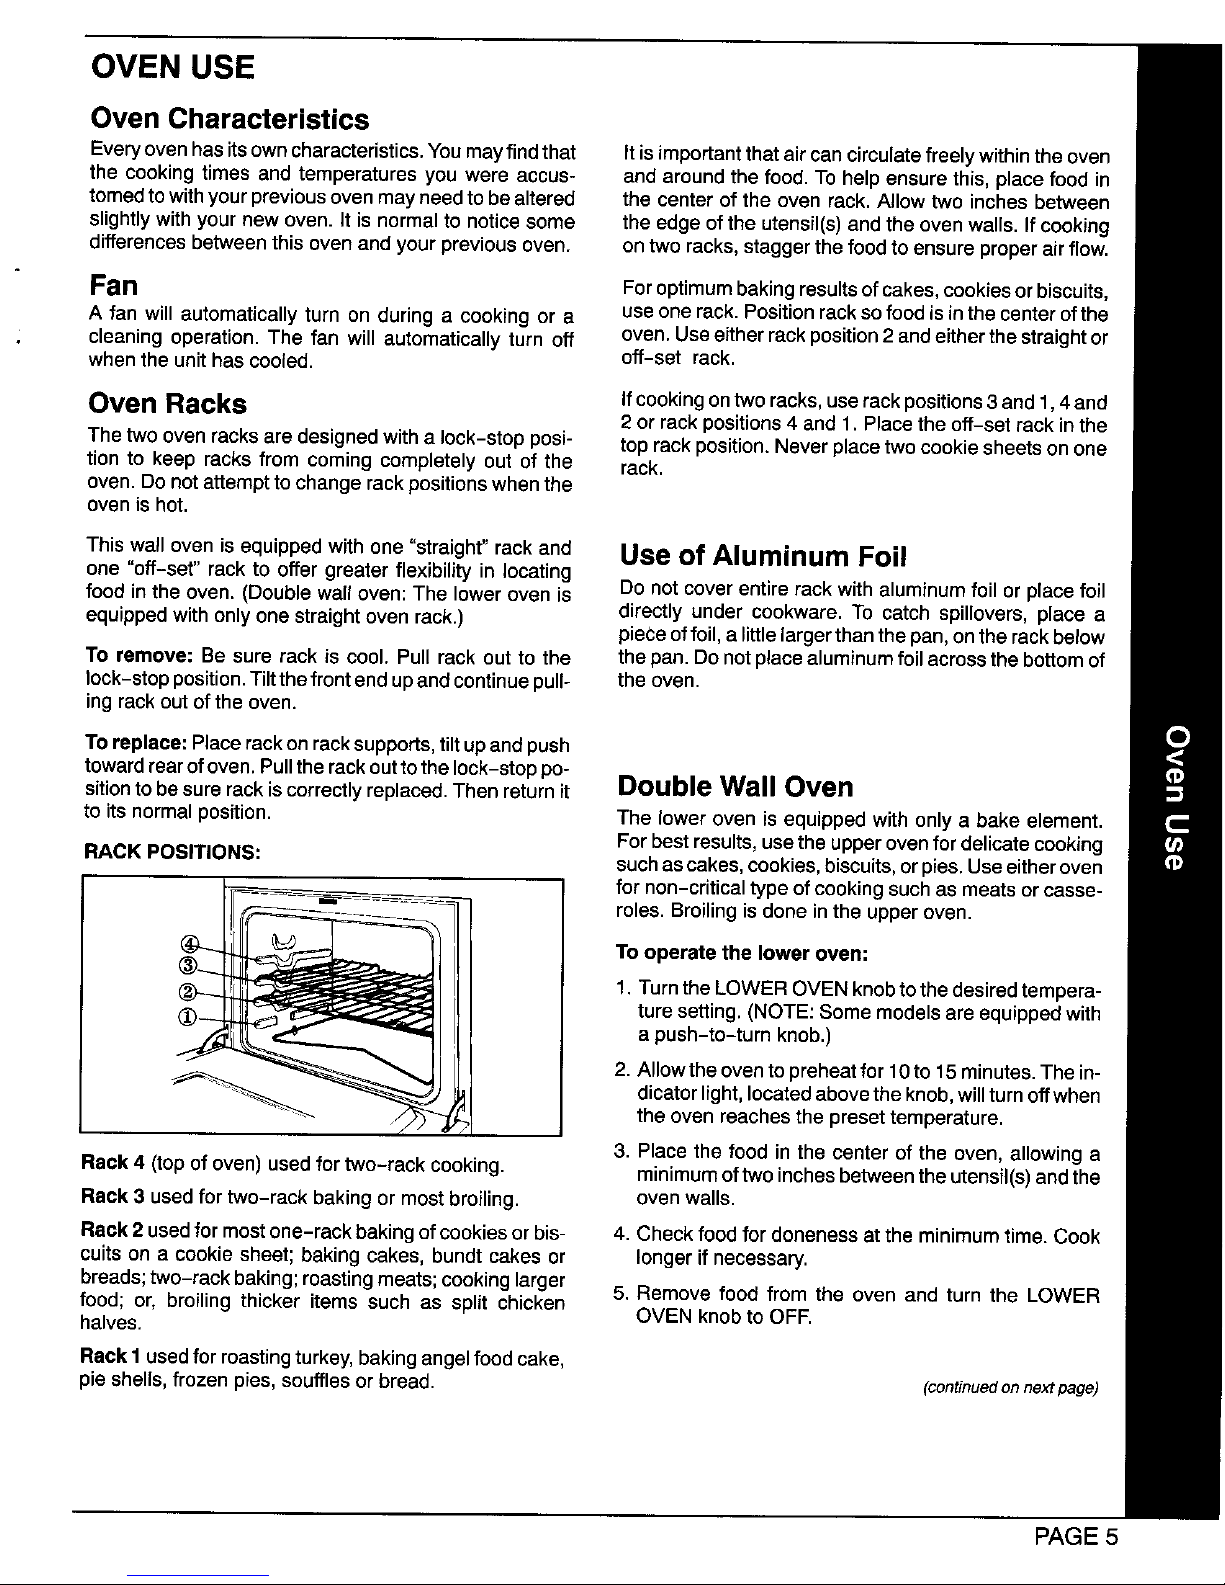
RACK POSITIONS: Forbestresults,usetheupperovenfordelicatecooking
suchascakes,cookies,biscuits,orpies.Useeitheroven
fornon-criticaltypeofcookingsuchas meatsorcasse-
roles.Broilingisdoneinthe upperoven.
To operate the lower oven:
1. TurntheLOWEROVENknobtothedesiredtempera-
turesetting.(NOTE:Some modelsare equippedwith
a push-to-turnknob.)
2. Allow the oventopreheatfor10to 15minutes. Thein-
dicatorlight,locatedabove the knob,will turn offwhen
the oven reachesthe presettemperature.
Rack 4 (top of oven) usedfor two-rack cooking. 3. Place the food in the center of the oven, allowing a
minimum oftwo inches betweentheutensil(s)and the
Rack 3 used for two-rack baking or most broiling, oven walls.
Rack 2 usedformostone-rack bakingof cookies or bis- 4. Check food for doneness at the minimum time. Cook
cults on a cookie sheet; baking cakes, bundt cakes or longer if necessary.
breads;two-rack baking;roastingmeats;cooking larger
food; or, broiling thicker items such as split chicken 5. Remove food from the oven and turn the LOWER
halves. OVEN knob to OFF.
Rack1 usedfor roastingturkey,baking angelfoodcake,
pie shells, frozen pies,souffles or bread. (continuedonnextpage)
PAGE 5
Page 6
Oven Operation Automatic Oven Cooking Feature
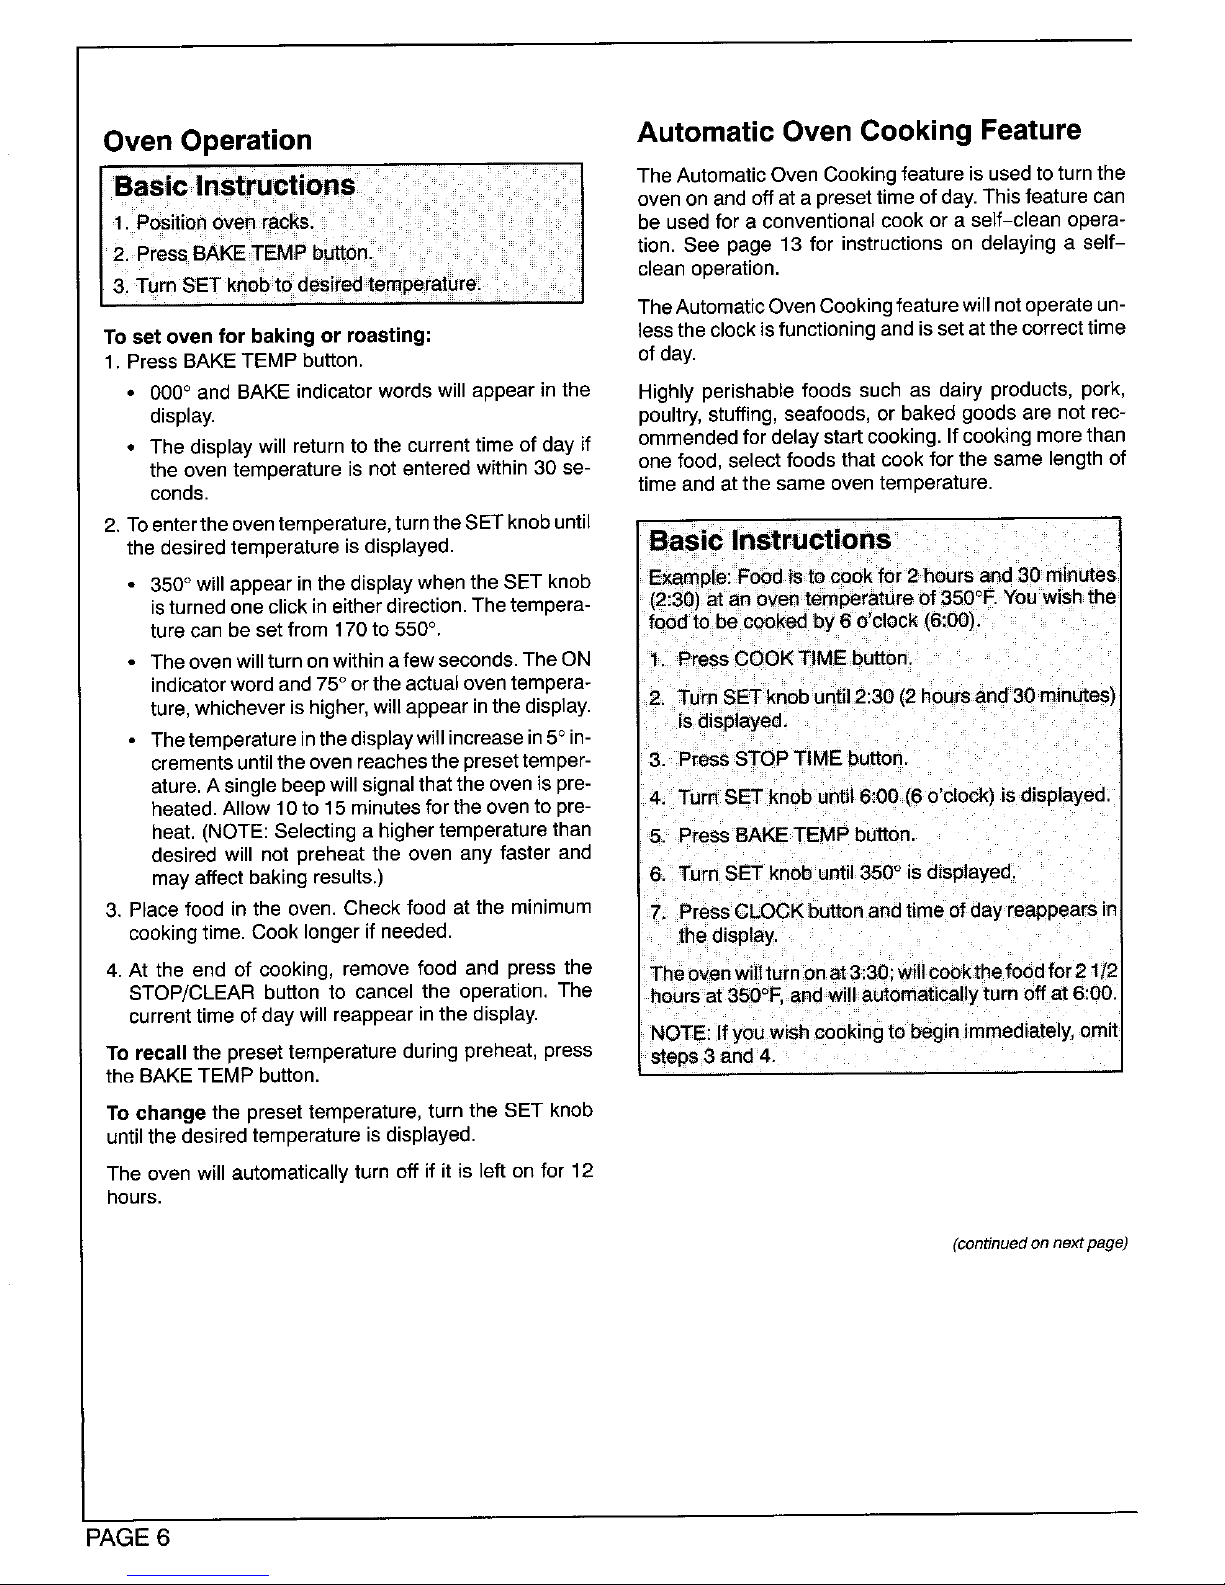
Basic Instru The AutomaticOven Cookingfeatureis usedtoturnthe
ovenonand offat a presettimeofday.Thisfeaturecan
1. Positic =.=r be usedfor a conventionalcook ora self-clean opera-
2. Press =- tion.See page 13 for instructionson delayinga self-
cleanoperation.
3 u n_ TheAutomatic OvenCooking featurewillnotoperateun-
To set oven for baking or roasting: lessthe clockisfunctioning and is setat the correcttime
1. PressBAKETEMP button, ofday.
• 000° and BAKEindicatorwordswillappearm the Highly perishablefoods such as dairy products,pork,
display, poultry,stuffing,seafoods,or bakedgoodsare notrec-
• The displaywillreturntothe currenttime of day if ommendedfordelay startcooking.Ifcookingmorethan
the oventemperatureis notenteredwithin30 se- onefood, selectfoodsthat cookforthe same lengthof
conds, timeand at the sameoventemperature.
2. Toentertheoventemperature,turntheSET knobuntil
the desiredtemperatureisdisplayed. Basic Instructions
• 350° willappearinthedisplaywhentheSET knob Example:Food isto cookfor 2 hoursand30 minutes
isturnedoneclickineitherdirection.The tempera- (2:30)at an oventemoeratureof 350°F.Youwishthe
turecanbe setfrom170 to550°. foodto be cookedby6 o'clock(6:00),
• Theovenwillturnonwithinafewseconds. TheON t. PressCOOK TIME button,
indicatorwordand 75° ortheactualoventempera-
ture,whicheverishigher,willappear inthedisplay. 2. TurnSET knobuntil2:30 (2hoursand30 minutes)
isdisplayed
• Thetemperatureinthedisplaywillincreasein5°in-
crementsuntiltheovenreachesthepresettemper- 3. PressSTOP TIME butto_
ature.A singlebeepwillsignalthattheovenis pre-
4. TurnSET knobuntil6:00 (6o'clock)isd splayed
heated.Allow10 to 15 minutesforthe oventopre-
heat. (NOTE:Selectinga highertemperaturethan 5. PressBAKETEMP button.
desired will not preheat the oven any faster and
mayaffectbakingresults.) 6. TurnSET knob until350°isdisplayed.
3. Place food in the oven. Checkfoodatthe minimum 7. PressCLOCKbuttonandtime of dayreappearsin
cookingtime.Cook longerif needed, thedisplay.
4. At the end of cooking,removefood and press the Theovenwilltumonat3:30:willcookthefoodfor21/2
STOP/CLEAR buttonto cancel the operation.The hoursat350°F. andwillautomaticallyturnoffat 6:00.
currenttimeofdaywillreappearinthedisplay.
NOTE:If youwishcookingto beginimmediately,omit
To recall the presettemperature during preheat, press steps 3 and 4,
the BAKEFEMP button.
Tochange the preset temperature, turn the SET knob
until the desiredtemperature is displayed.
The oven will automatically turn off if it is left on for 12
hours.
(continuedonnextpage)
PAGE 6
Page 7

USING YOUR COOKTOP
The cooktop and surfaceburnerson lainfinishofthegratemaychipwithouta To light burner:
thisapplianceare considerablydiffer- pantoabsorbthe intenseheatfromthe 1. Placeutensilonburnergrate.
entfromaconventionalgasappliance: burnerflame.
To ensureproperand efficientuseof 2. PushinandturnknobtotheLITEpo-
allfeatures,pleasetakeafewminutesDUAL PURPOSE sition.
toreadtheseinstructionsandbecome SEALED BURNERS*
familiarwiththeoperationofthisappli- A sparkingsoundwillbe heard and
The foursealed burnersaresecuredto the burner will light. (When one
ance. the cooktopand are NOT designedto burner is turned on, all four ignitors
COOKTOP be removedbytheconsumer, willspark.)
The cooktopisdesignedwithtwo con- Sincethe four burnersare sealedinto
touredwells which containspills until the cooktop,boiloverswon't seep un- 3. After the burnerlights,turnknobto
theycan be wiped up. Unlikethestan- derneathtothe burnerboxarea. Thus, the desiredflamesize.
dard gas appliance,THIS COOK'rOP thereare no hiddenspillsintheburner
DOES NOT LIFT-UP NOR IS IT RE- box area to clean. I
MOVABLE.To preventdamage to the
gas tubing or top, do not attempt to lift Some models feature two special HI
cooktop. SPEED sealed burners. Use the HI
SPEEDburners toquickly bringwater to
a boil and for large- pot cooking. See
i_ I informationonratingplatetodetermine
if your appliance features the HIGH
SPEED burner.
LOCATION OF BURNERS: If flameshouldgo outduringa cooking
operation,turnthe burneroff. IF GAS
HAS ACCUMULATED AND A
STRONG GAS ODOR IS DETECTED,
WAIT 5 MINUTES FOR THE GAS
ODOR TO DISAPPEAR BEFORE
GR_r TrE_escomUl_tnb DPor_ rIoYp_ _e '. RELIGHTING BURNER.
burnerswithouta pan on the grate. The HGHSPEEDBURNER IGNITORS
porcelain finish may chip without a pan A properly adjusted burner with clean All four ignitors will spark when any
to absorb the intenseheat. portswill light within a few seconds. On surface burner knob is turnedto the
naturalgas, the flame will be blue with a :L_E position......
When reinstalling squaregrates, place deeperblue innercore; there should be
indented sides together so straight notraceofyellowintheflame, indicating Once burner lights, turn knob to the de-
sides are atfront and rear. an improper mixture of air/gas. This sired setting. The sparking will not stop
wastes fuel, so have a serviceman ad- untilthe knobis turnedfromtheLITEpo-
_==_/_ justt'hemixtureifa yell°w flame °ccurs" siti°n"
You mayheara "popping"soundon LP
gas when the surface burner isturned Optional re-ignition system (if
off. This isa normal operating sound of equipped) will automatically relight the
the burner, burner if a draft should extinguish it
when using a very low setting. When
this occurs, you will hear a sparking or
clicking sound.
V/\ I
CAUTION:Donotoperatesealedburn-
erwithoutapanonthegrate.Theporce- *U.S. PatentPending
-7-
Page 8

USING YOUR COOKTOP
PILOTLESS IGNITION
Besureatlsurfacecontrolsaresetinthe I __:__ I PROPORTIONAL VALVE
OFF positionprior to supplyinggas to To obtaina lowerflamesize, turnknob
the appliance, backtowardtheOFF positionuntilthe
desiredflamesize is reached.The low-
TO OPERATE SURFACE BURNER est flame settingis locatedadjacentto
the OFF position.
DURING A POWER FAILURE. UseHIGHtoquicklybringfoodstoaboil
ortObegina cookingoperation.Reduce
1. When lighting surface burners, be to a lower setting to continuecooking.
sureall controlsare in the OFF posi- Never leave food unattended during a
tion. Hold a lighted matchto the de- cookingoperation.
sired surface burner head.
2. Turn knob to LITE, The burner will
then light. _. I
3. Adjustthe flame tothe desiredlevel. _'_
SELECTING FLAME SIZE "_--_/ _ CARE INFORMATION
If a knob is turned very quickly from _ When cteaning around the surface
HIGH toLOW setting,theflamemaygo burner,use careto preventdamageto
out,particularlyif burneriscold. If this thesparkignitorwhichis locatedat the
back--sideofeach burner.If a cleaning
occurs,turnthe knobOFF.Wait several Use LOW to simmeror keep foodsat clothshouldcatchthe ignitor,it could
seconds,thenlightagain, serving temperatures.Some cooking damageorbreakit.If theignitoris dam-
maytakeplaceiftheutensiliscovered, agedorbroken,thesurfaceburnerwill
Ignito_
REARVIEWOFSEALEDBURNER
Flameshouldbeadjustedsoitdoesnot
extend beyond the edge of cooking If a LOW settingistobe used,preheat
utensil.Thisistot personalsafetyandto theburneronH_GHfora minutethenre-
prevent damage to cabinets above duce to the LOW setting and continue
range, the cooking operation.
-8-
Page 9

USING YOUR OVEN
PILOTLESS IGNITION
GIo bar-type ignition To replace door: Grasp door at each To replace: Fit front edge of oven bot-
With this type of ignitionsystem,the side, align slots in the door with the tom intofrontframe. Lowerrearof oven
ovenwillnotoperateduringapowerfail- hinge arms and slide doordown onto bottom and slidethe catchesback to
ureor if ovenisdisconnectedfromthe thehingearmsuntilcompletelyseated lockovenbottom intoplace.
walloutlet.Noattemptshouldbemade onhinges.
tooperateovenduringa powerfailure.
Do not attemptto openor close door STORAGE DRAWER
FAN un_i door is completely seated on To remove: Pulldraweroutto the first
Slideinrangesare equippedwitha fan hingearms.Nevert,jmonovenunless stopposition.Liftupfrontofdrawerand
whichautomaticeffyturnsonwhenever doo_ispropen'y'inplaoe.WhelmbaiC-,_g,pull to the second stop position. Grasp
theoven isset forcookingor cleaning. _suredooriscomp{etelyclceed.Bak- sides and lift up and out to remove
Thefan willautomaticallyturn offwhen _ngresultswillbe affectedifdoor:isnot drawer.
theunithascooled, secure!yclosed;' ;_
OVEN DOOR OVEN BOTTOM 1t
When¢_oeningoven door, allow steam
andhotairto escapebeforereachingin Protectovenbottomagainstexcessive
ovento check,add or removefood. spilloversespeciallyacidorsugaryspil-
lovers. Use the correct size cooking
utensilto avoidboilovers.
To remove door: Open door to the
"stop"position(openedabout4 inches)
andgraspdoorwithbothhandsateach To remove: When cool, remove the
side.Donotusedoorhandletoliftdoor. oven racks. Slide the twocatches,Io- e
Liftupevenlyuntildoor clearsthehinge cated at each rear corner of the oven
arms. bottom,towardthe frontoftheoven.
To replace: Fit ends of drawerglides
ontorails.Liftupdrawerfrontandgently
drawer again and continue to slide
drawertothe closedposition.
IMPORTANT
DO NOT MOVE DOOR LOCK
LEVER TOTHE RIGHT DURING A
COOKING OPERATION. if thedoor
lock{ever is movedto the lock posI-
CAUTION: tion,the cookingoperationwillauto-
;Hingearms are spring mountedand maticallybe cancelledand =door"will
wiltslamshutagainstthe rangeifacci- Lift the rear edge of the oven bottom appear inthedisplay.
dentJyhit.Never place hand =orfin- slightly,thenslideitback untilthefront
gets between the hinges and the edgeofthe ovenbottomclearstheoven
front oven =frame.You couldbe in- frontframe. Removeovenbottomfrom
jured ifhingesnapsback. oven.
-9-
Page 10

USING YOUR OVEN
OVEN OVEN RACKS HINTS:
CHARACTERISTICS The twoovenracks are designed witha NEVER placepans directlyonthe oven
"lock-stop" position to keep racksfrom bottom. Do not cover entire rack with
Every :oven hasits own characteds- accidentally coming completely out of aluminum foil. Do not place foil directly
tics. You may find that the cooking the oven. on oven bottom or placefoil directly un-
times and temperatures you were ac- der utensil. To catch spillovers, cut a
customedto withyourpreviousrange piece of foil a little larger than the pan
may need to be altered slightly =with To remove: Be sure rack is cool. Pull and place itonthe rack below the rack
yournewrange.Please expect some rack out to the "lock-stop" position. Tilt containingthe utensil
differenceswith thisnew range; up and continue pulling until rack re-
leases.
Ifcooking on two racks,staggerpansso
OVEN BURNER one is not directly over the other. Use
To replace: Place rack on rack sup- rackpositions2 and 4, or2 and 5, de-
The size and appearanceof a properly ports,tilt up and push toward rear of pendingon baking results,whencook-
adjustedoven burnerflame shouldbe oven.Pull rackoutto "lock-stop"post- ingon two racks.
as shown: tiontobesurerackiscorrectlyreplaced.
RACK POSITIONS: PREHEATING
RACK 1 (top of oven) used for 2 rack Preheating isnecessaryfor baking. At-
cooking of oven meals, lowoventoheatfor 10to 15minutes be-
fore adding food. It is not necessary _o
-- RACK 2 used for two-rack baking or preheat oven for roasting.
Cone in centeris smaller broiling thicker cuts of meat.
RACK 3 usedfor mostone-rack baking It isnotnecessarytopreheatfor broiling
and roasting some meats, unless darker browning is desired or if
cooking thin (3/4-inch) steaks. Allow
Coneapprox.1/2-inch RACK 4 usedforoneortworack baking burnerto preheat 3 minutes,
and roasting large meats, cooking
larger foods and for baking angel food Selecting temperature higher than de-
The oven temperature is maintainedby cake or pie shells, sired will NOT preheat the oven any
cycling the burner on and off. After the RACK 5 usedfor roastingturkeyor bak- faster. Preheating at a higher tempera-
oventemperature has been set, there ing angel food cake or pie shells, lure may have a negative effecton bak-
will be about a 45 second delay before ing results.
the burner ignites. This is normal, and
no gas escapesduringthis delay. _ To preheat:Setovenforbakingand al-
lowthe oventoheat untildisplayshows
Duringthe cleancycle, and some ex- 1 the presettemperature. 100willappear
tended oven cooking operations, you in the display until the oven reaches
mayhear a "popping" sound when the 100°F. The display will then show the
burnercyclesoff. Thisisa normal oper- oventemperature in 5°increments until
ating sound of the burner, the oven reaches the preset tempera-
ture.
Once the preset temperature is
reached,andthe oventemperature has
Foroptimumbaking'results of cakes, stabilized, a single beep will sound.
cookiesorbiscuits;useone rack.Po-
sitionrack so food is in the center of Ifthe oven temperature ischangedafter
the oven. Allow 2 inches between preheating, a beep will signal that the
edge ofutensilandthe oven sidas or oven has reached the new temperature
adjacent:utensils, setting.
-10-
Page 11

USING YOUR OVEN
TO SET OVEN: tions.Preheatoven for all baking opera- _1---''-ZIIII:I 3 S nu_°J
1. Press BAKE TEMP pad. BAKE indi- 4. Place food in oven when oven has
cator turns on. preheated to set temperature, cu_< _ LqOZL
2. Turn SET knob until desired tam-5. Check food at minimumtime. Cook _)_(_(_A
perature is displayed, longer if necessary.
3. BAKE ON indicator and oven imme- 6. Press STOP/CLEAR pad to cancel Tz._ ¢=_ TZ.E rro_ TZ_ eAKE_,_
diately turn on. the operation.
COMMON BAKING PROBLEMS AND WHY THEY HAPPEN
PROBLEM CAUSE CAUSE
Cakesare uneven. Pans touching each other or Cakes don't brown on top. Incorrect rack position.
ovenwalls. Temperature set too low.
Batter uneven in pans. Overmixing.
Temperature set too low or Too much liquid.
baking time too short. Pan sizetoo large or too little
Oven not level, batter in pan.
Undermixing. Oven door opened too often.
Too much liquid.
Excessive shrinkage, Too little leavening.
Cake high in middle. Temperature set too high. Overmixing.
Baking timetoo long. Pan too large.
Overmixing. Temperature set too high.
Too much flour. Baking time too long.
Pans touching eachother or Pans too close to each other
ovenwalls, or oven walls.
Incorrectrackposition.
Cake falls. Toomuchshorteningor sugar. Uneven texture. Toomuchliquid.
Toomuchortoolittleliquid. Undermixing.
Temperaturesettoo low. Temperatureset toolow.
Oldor toolittlebakingpowder. Bakingtimetoo short.
Pantoo small.
Ovendooropened frequently. Cakeshave tunnels. Not enoughshortening.
Addedincorrecttype of oilto Toomuchbakingpowder.
cake mix. Overmixingor at too higha
Addedadditionalingredients speed.
tocake mixor recipe. Temperaturesettoohigh.
Cakes, cookies, biscuits Incorrectrackposition.
don't brown evenly. Ovendoornotclosedproperly. Cakescrack on top. Batterovermixed.
Doorgasketnot sealing Temperaturesettoohigh.
properly. Too muchleavening.
Incorrect useof aluminumfoil. Incorrectrackposition.
Oven not preheated.
Pans darkened, dented or
warped. Cakenot done in middle. Temperature settoo high.
r Pantoosmall.
two racks Bakingtimetoo short.
Lother. ....
[ ffadd_onal ingredientswereadded tomix orrecipe,ax- J
Cakes, cookies, biscuits too Oven notpreheated. [ pact cookingtime;toincrease.
brown on bottom. Panstouching each other or
oven walls.
Incorrect rack position. Pie crust edges too brown. Temperature set too high.
Incorrect use of aluminum foil. Panstouching each other or
Placed2 cookiesheetson one ovenwails.
rack. Edgesofcrusttoothin.
Usedglass,darkened, stained,
warpedor dullfinishmetal
pans.(Use a shinycookie Piesdon't brown on but- Usedshinymetalpans.
sheet.) tom. Temperaturesettoo low.
utensilmanufacturer'sinstructionsfo_
FollOWperature.Glassware and dark utensilssuch----asEcko's I Pieshave soaked crust. Temperaturetoolowat startof
BakersSecretr_quireloweringthe oventemperatureby I baking.
Fillingtoojuicy.
25° F. _ Usedshin metal ans.
-11-
Page 12

USING YOUR OVEN
HOWTO BROIL They do not provide a separate tray. To set oven:
Broiling is a method of cooking tender TO BROIL: • Press BROIL pad. "Broir fights in
meats by direct heat under the burner. 1. Prepare meat by removing excess fat the display.
The cooking time is determined by the
distance between the meat and the and slashing remaining fat, being ,, Turn SET knob clockwise to se-
burner, the desired degree of doneness careful not to cut into meat. This will lect HI for normal broiling. Turn
help keep meat from curling. SET knob counter clockwise to
and the thickness of the meat. 2. Place broiler pan on any of the recom- select LO for special _ow tern-
mended rack positions. Generally, perature broiling.
Broiling requires the use of the broiler
for brown exterior and rare interior, • "ON" lights in the display. The
pan and insert. The correct position of the meat should be close to the oven immediately turns on and
the insert in the pan is very important, burner. Place further down if you begins to heat.
The broiler insert should be placed in want meat well done.
the pan so grease will drain freely. Im-
proper use may cause grease fires. 3. Broiling should be done with oven
door closed. Use HI BROIL for most broil operations.
The broiler insert CANNOT be covered 4. Follow suggested times on broiling When broiling longer cooking foods
chart. Meat should be turned once such as pork chops, poultry or thick
with aluminum foil as this prevents fat about half way through cooking, steaks, select LO BROIL. Low tempera-
from draining into pan below. However, 5. Check aloneness by cutting a slit in ture broiling allows food to cook to the
for easier cleaning, the broiler pan can meat near center for desired color, well done stage without excessive
be lined with foil. 6. Press STOP/CLEAR pad to cancel a browning. Cooking time may increase if
Do not use disposable broiler pans. broil operation. LO BROIL is selected.
BROILING CHART
TYPE OF FOOD I RACK POSITION DONENESS TOTAL TIME
BACON #2 Well Done 6 to10 minutes
BEEF STEAKS
1-inch thick 10 to14 minutes
15 to18 minutes
#2 i Well Done 19 to22 minutes
1 112-inchthick #2 '. Ii ,Rare 18 to 20 minutes
Medium 22 to 24 minutes
Well Done 25 to30minutes
CHICKEN LO BROIL
Whole,split #3 WeirDone 45 to 60 minutes
Pieces #3 Well Done 30 to 45 minutes
FISH STEAK OR FILLET I
1/2-inch thick 10 to12 minutes
GROUND BEEF PATrlES
3/4 to 1-inchthick #2 Rare 10to13 minutes
Medium 12 to15 minutes
Well Done 15 to 18 minutes
HAM SLICE, precooked
l_noh thick #2 12to 16 minutes
1 1/2_nch thick #2 2t to 26 minutes
LAMB CHOPS
1_nch thick #2 Medium 12to15 minutes
Well Done 16 to20 minutes
1 1/2-inch thick #3 Medium 15 to19 minutes
Well Done 25 to 30 minutes
PORK CHOPS ' I
3/4-inch thick , #2 Well Done 15 to 20 minutes
l_nch thick #2 Well Done 20to 25 minutes
WIENERS, precooked
Hotdogs,smokedor Po(ishsausage,Bratwurst,etc. #2 8 to 12 minutes
BREADS TIME PER SIDE
Toast #2 5to8 minutes/side
ToasterPastries #2 5 to8 minutes/side
EnglishMuffins,buttered #2 5 minutes
-12-
Page 13

Toset oven for a self-clean cycle: To delay the start of a clean cycle:
1. Remove oven racks and close the oven door. 1. Remove oven racks and closethe oven door.
2. Move the door lock lever to the right or locked posi- 2. Move the door lock lever to the right or locked posi-
tion. tion.
3. Press the CLEANbutton. 3. Press CLEAN button.
• 3HR:00willappearinthedisplay, and SETCLEAN 4. Turn SET knobto select cleaning tirne.
TIME will flash in the display.After a few seconds
delay, the oven will automatically turn on. CLEAN 5. PressSTOP TIME button and turn SET knob to the
and ON will appear in the display, time of day you wish the oven to turn off. The stop
time and CLEAN DELAY STOP TIME will appear in
• If you wish to change the cleaning time, press the the display.
CLEAN pad and turn the SET knob to select 2
hoursfor light soil or 4 hours for heavy soil. 6. PressCLOCK button andthe currenttime of day will
• "door" will appear in the display and continous reappearinthe display.CLEAN DELAYwill appearin
beepswill sound if the oven door is not locked, the display to showthat the oven is setfora delayed
clean operation.
• Ifthe door isnot locked orthe clean time is not en-
tered within 30 seconds of pressing the CLEAN 7. At the end of a clean cycle, continuous beeps will
pad,the program will automatically be cancelled, sound. Press STOP/CLEAR button to cancel the
beeps.
4. PressCLOCKbutton and the currenttimeof day will
reappearinthedisplay.CLEANand ON willremainin To cancel clean cycle:
thedisplay to show that the oven is in a clean cycle. 1. Push STOP/CLEAR button.
About one hour after the clean cycle ends,the LOCK in- 2. If the LOCK indicator isdisplayed, allow oven to cool
dicator will turn off and the oven door can be opened, up to one hour. Once LOCK indicator turns off, the
door can be unlocked and opened.
The ovendoor anddoorlockleverwill bedamaged ifthe
oven door is forced to open when the LOCK indicatoris If the LOCK indicator is not displayed the oven door
still displayed, can be unlocked and opened.
PAGE 13
Page 14

CARE AND CLEANING CHART
Manydifferentcleaningagentsarerecommendedforthevarious partsofthewall oven.Thefollowing brands may help
youto make an appropriate selection: Mild abrasive cleaners (Bun Ami, Cameo, Soft Scrub, Comet or Ajax); mild
liquid sprays (Fantastik, Formula 409); glass cleaners (Windex, Glass Plus,Cinch); non-abrasive scouring pad
(Tufty).Ifacleaningproductis recommendedfor useonplastic,glassor porcelain, itcan beusedon the sameappliance
finish.
PARTS
Broiler pan & in- Soap & water.Plastic Removefromovenafteruse. Coolthen pouroffgrease.Placesoapy
sert scouring pad. Soap cloth overinsertand pan;let soakto loosensoil.Wash inwarmsoapy
filled scouring pad. water, Use soap filled scouring pad to remove stubborn soil. Broiler
Dishwasher. pan and insert can becleaned in the dishwasher.
Baked enamel!
Oven door
Giasscleaner, fa_eS)when safface s_b Wash Wth soap and water Do n0t use
; abrasiveor _arsh;ci_aningiiqu dsand powdersbr oven cieaners
cioth_On Smo6thtopco0ktops _iean veni open ng area after each
; OvenUsel ;
Glass: Soap & water. Paste Wash with soap andwater.Remove stubborn soilwithpaste of bak-
Ovenwindow of bakingsoda &wa- mgsodaandwater.Donot useabrasive materialssuchas scouring
tar.Glasscleaner. )ads, steel woolor powderedcleaningagents.They will damage
glass.Rinsewithclearwateranddry.Topreventstainingofovenwin-
dow,neveruseexcessiveamountsofwaterwhichmayseepunderor
behindglass.
Metalfinishes soap & waterl Pas_eof wash wi_h;Soap_hd waterlRemove stubbornsoilwithpaste of bak-
and trim bakingsoda & water, i_g_Oda and water,Do not use oven Cleaners,abrasiveorcaustic
agents They w damage the fn Sh
Oven Elements Elementsareself-cleaning.Soilwillburnoffaselementsare used.
Donotsprayovencleaneronelements,electricalhookuporconnec-
tion.Do notimmersecoil-typesurfaceelementsinwater.
Oven racks
Plasticfinishes: Soap & water. Paste of Do not use oven cleaner, powder or liquid cleansers, abrasive or,
Doorhandle,trim, baking soda & water, causticcleaningagentson plasticfinishes.These cleaningagents
knobs,end caps, Non abrasive plastic willscratchor marrfinish.Topreventstainingor discoloration,wipe
controlpanel pador sponge, upfat, grease oracid (tomato,lemon,vinegar,milk,fruitjuice,mari-
nade)immediatelywitha drypaper towelor cloth.When surfaceis
cool,cleanwithsoap and water;rinse,and dry.
Porcelainenamel: Mild liquid¢ieanerS P0rceiainenamel isglass fused on metal It may crackorchipwith
Seepages 12and detergentbrsoap& miSuSePorcelainenamelis acid reSistahtinOtacid proOf.Ailspil-
13forself-clean water C!eanshg peW- overs especia y ac d or sugarsp overs, sh0ud be wiped Up ira-
oven. dersandnonabrasive mediatelyWitha d_ Coth Surface may dsc0oror du f so _espe-
nylonOrplastibpads tinily acidsoil isnetremoved.Neverwipeoffa warm orhotsurface
; wiih a damp _loth This ma_cause Crackngand chipping, Never uSe
Lowerovenof ; oven cleahete,abrasive orcausticcleaningagentsonexteriorfinish
doubleoven models
isa nonself,clean Ofwalloven Orinthe self-clean 0venl Ovencleaner canbe usedoh
porcelainoven. the I=oweroven ofthedoublewalloven. DOnotuseovencleaneron
Followinstructions the upperoven asthis isa self-clean oven.
inthischart.
PAGE 14
Page 15

BEFORE YOU CALL FOR SERVICE
Check these points if...
Part or allof your wall oven does not operate Food does not broil correctly
• Isthe ovenpluglooseor disconnectedfromtheelec- • Wasthe controlset properlyfor broiling?(See page
tricaloutlet? 10).
• Areanyhousefusesblownorcircuitbreakerstripped? • Wastheproperrackpositionused?(See page5).
• Hasthe powersupply tothe home been interrupted? Didyou allowtimefor the broil elementto preheat?
• Are the oven controls properly set? Didyou use the broiler pan that came with the oven?
• Was the electronic control correctly set? • Wasaluminumfoilusedonthe broiler insert,blocking
• Was the door left in the locked position following a the slits for fat drainage?
self-clean cycle?
• is the oven set for automatic oven cooking? Oven light does not operate
• OnCanadLanmodels,checktoseeifa circuitbreaker • Is the bulblooseor burnedout?
hastripped.(See page 16.)
• Is the lightswitchinthe On position?
Food not bakingor cooking correctly
• Aretheovenracksproperlyplacedfor baking? Oven will not self-clean
• Haveyouusedaluminumfoilcorrectly? • Is the self-clean controlset properly?(See pages
12-13).
• Wasthe oven preheatedas recommended?
• Is the oven setfor a delayed clean operation?
• Are the controls properlyset?
• Is the oven door properlylocked?
• Isthere 2 inches ofspace between the pans and two
inchesbetween the pansandtheovenwalls?Are the • Wasthe ovenheavily soiled?
oven and oven racks level?
• Was good cookware/bakeware of the proper size Oven door will not unlock
used? • Hastheself-clean cyclebeencompletedforatleast
• Was the oven vent covered or blocked? onehour?
• Are you using a tested recipefrom a reliable source? • Was the door correctly unlocked?
Bakingresults differ from previous oven "F" plus a number appears in the display
• Oven thermostat calibration may differ between old • This is a fault code. If afault code appears inthe dis-
and new oven. The newer oven thermostat may be playand a continuous beep sounds, pressthe STOP/
more accurate than the one on you previous oven. CLEAR button, if beeps continue after pressing the
Followa reliable recipeandreview baking information STOP/CLEAR button call an authorized servicer. See
on pages8 to 9. Ifyou still feel the oven temperature
is incorrect see page 16 for information on adjusting page 16for additional information.
the oven thermostat.
PAGE 15
Page 16

SERVICE
BEFORECALLINGA SERVICETECHNICIAN,CHECKTHE FOLLOWING:
PROBLEM CAUSE CORRECTION
1. Burnerflame uneven, a. clogged burner port(s), a. clean ports with straight pin. Be
sure ignitorsare not sparking.
2. Burner fails to light, a. power supply not connected, a. connect power, check circuit
breakerorfusebox.Oven will not
operate during a power failure.
b. controller incorrectly set. b. see page 4.
3. Oven temperature inaccurate, a. oven not preheated, a. preheat oven 10 minutes.
• food takes too longor cooks to b. incorrect rack position, b. see page 10.
fast. c. incorrectuse of foil. c. see page 10.
• pale browning, d. oven bottom incorrectly re- d. replace oven bottom correctly.
• foodover-done onoutsideand placed.
under-done in center, e. oven thermostat sensing device e. reinsert sensing device securely
• over browning, outof holding clip(s), into clip(s).
'4. Clock and/or light do not work. a. power supplynot connected, a. connectpowersupply, checkcir-
cuitbreakeror fuse box.
b. burned out light bulb. b. replace light bulb.
c. malfunctioningswitch. ¢. callserviceman to check.
d. malfunctioningclockorloosewir- d. call serviceman to check.
ing.
5. Surface burnerflame a. air/gas mixture not proper a. call serviceman to adjust burner
• lifts off port primary air
• yellowin color
Fplusa number appears inthe dis- This is called a FAULT CODE. If a fault code appears inthe display, press the
playanda continuousbeepsounds. STOP/CLEARpad. If the fault code reappears, disconnect power to theunit and
(Example: F 1) call the servicer.
Controlwiltnot accept an entry. This may indicate a "stuck"pad. Press each of the sevenpads to disengage the
pad. Then, press STOP/CLEAR pad and reprogram the operation. If the control
stilldoes not accept an entry afterchecking each pad, call the servicer.
SERVICE coverfor location ofyour modeland se- If you did not receive satisfactory serv-
Do not attempt to service the appli- rial numbers.) icethrough yourservicer or Maycoryou
ance yourself unless directed to do may contactthe MajorAppliance Con-
so in this book. Contact the dealer sumer ActionPanel by letter including
who sold you the appliance for sent- Ifyouareunabletoobtainservice,write your name, address, and telephone
ice. tous.Our addressisfoundontherating number,aswellasthemodelandserial
plate.See frontcoverforlocationofrat- numbersof the appliance.
ingplate.
HOW TO OBTAIN
MajorADplianceConsumerActionPanel
SERVICE _youare notsatisfiedwiththelocalre- 20 NorthWackerDrive
When your appliancerequiresservice sponse to your service requirements, Chicago,IL 60606
or replacement parts, contact your call orwrite MAYCORApplianceParts
DealerorAuthorizedServicer.Useonly and Service Company, 240 Edwards
genuinefactory or Maycor parts if re- Street, S.E., Cleveland, TN 37311,
placementpartsarenecessary.Consult (615)472-3500. Includeor have avail- MACAP (Major Appliance Consumer
the Yellow Pages in your telephone di- able the complete model and serial Action Panet)isanindependentagency
rectory under appliance for the service numbersoftheappliance, thenameand sponsored by three trade associations
center nearest you. Be sure to include address of the dealer from whom you as acourt of appeals on consumercorn-
your name, address, and phone hum- purchased the appliance, the date of plaints which have not been resolved
bet, along with the model and serial purchase and details concerning your satisfactorilywithina reasonable period
numbers of the appliance. (See front problem, of time.
-16-
Page 17

FULL ONE-YEAR WARRANTY
/ DOMEST,CGASORELECTRICRANGE I
May_ )lianceParts&ServiceCompanywillrepairorreplace,withoutcharge,any part ofyourproductwhichhasa _" I
defect inmaterial orworkmanship during thefirst year after the date oftheoriginal installation. Thiswarranty extends I
toany ownerduringthe one-year warrantyperiod. I
/
LIMITED 5 YEAR WARRANTY
Onelectricrangesequippedwithsoliddiscorsmoothtopheatingelements,andongasrangeswithsealedburners,for
anadditional4 yearperiodbeyondthefirstyearofthegeneralcoverageofthiswarranty,Maycorwillreplaceanyofthe
soliddiscorsmoothtopheatingelements,or sealedburnerswhichfailtoheatasa resultofdefectiveworkmanshipor
material. Additionally, Maycor will replace any smoothtop cooking surface which cracks or breaks during normal
householdcooking.These parts mustbe installedbyaqualified person.Any labor chargerequired for replacementis
not covered by this warranty.
HOW TO OBTAIN SERVICE
To obtain the repair or replacementof a defective part under these warranties, you shouldcontact the dealer from
whom you purchased the appliance or a servicer he designates.
WHAT IS NOT COVERED BY THESE WARRANTIES
1. Conditions and damage resulting from improperin- 5. Any product usedforotherthannormalhousehold
stallation,delivery,unauthorizedrepair,modifica- use. It does notextendto productspurchasedfor
tion,ordamage notattributabletoa defect inmate- commercialorindustrialuse.
rialorworkmanship.
6. Anyexpenseincurredforservicecallstocorrectin-
2. Conditionsresultingfromdamage,suchas:(1) im- stallationerrorsorto instructyouonhowtousethe
propermaintenance,(b) misuse,abuse,accident, products.
or(c) Incorrectelectricalcurrentor voltage.
7. CONSEQUENTIAL OR INCIDENTAL DAMAGES
3. Warrantiesarevoidiftheoriginalserialnumberhas SUSTAINED BYANYPERSON ASA RESULTOF
been removed,altered,or cannotbe readilydeter- ANYBREACHOFTHESE WARRANTIESORANY
mined. IMPLIED WARRANTY. Some states do notallow
the exclusionor limitationof consequentialor inci-
dental damages,sothe above exclusionmay not
4. Lightbulbs, applyto you,
ADDITIONAL HELP
If youarenotsatisfiedwiththe localresponseto yourservicerequirementsandwishtocontactMaycor, pleasead-
dressyourlettertotheCustomerRelationsDepartment,MaycorParts&ServiceCompany,240 EdwardsStreet,S.E.,
Cleveland,TN 37311 orcall(615)472-3500. Tosavetime,yourlettershouldincludethe completemodelandserial
numbersofthewarrantedappliance,thenameandaddressofthedealerfromwhomyoupurchasedtheappliance,the
date ofpurchaseanddetailsconcerningyourproblem.
These warrantiesare theonlywrittenorexpressedwarrantiesgivenbyMaycor.Nooneisauthorizedto increase,
alter,or enlargeMaycor'sresponsibilitiesorobligationsunderthesewarranties.These warrantiesgiveyouspecific
;egalrights, andyoumayalsohaveother rightswhichvaryfrom statetostate.
8109P059-60
j
-19-
Page 18

SERVICE INFORMATION
Do not attempt to service the appliance yourself un- completemodeland serialnumbersoftheappliance,the
less directed to do so in this book. Contact the name and addressof the dealerfrom whomyou pur-
dealer who sold you the appliance for service, chasedthe appliance,the date of purchaseanddetails
concerningyourproblem.
How To Obtain Service Ifyou do not receivesatisfactoryservice,youmay con-
Ifyourapplianceshouldrequireserviceor replacement tactthe MajorApplianceConsumerActionPanelby let-
parts,contactyourDealerorAuthorizedServicer.Use ter includingyour name,address,and telephonenum-
onlygenuinefactorypartsif replacementpartsarenec- ber,aswellasthemodelandserialnumbersoftheappli-
essary.ConsulttheYellowPagesin yourtelephonedi- ance.
rectoryunderappliancefor theauthorizedservicecenter
nearestyou.Besuretoincludeyourname,address,and MajorApplianceConsumerActionPanel
phonenumber,alongwiththemodeland serialnumbers 20 NorthWackerDrive
ofthe appliance.(See insidefront coverfor locationof Chicago, IL 60606
yourmodelandserial numbers.)
MACAP(MajorApplianceConsumerActionPanel) isan
If you are notsatisfiedwiththe localresponseto your independentagencysponsoredbythree trade associa-
service requirements,call or write Maytag Customer tions as a court of appeals on consumercomplaints
Service, 240 Edwards Street, S.E., Cleveland, TN whichhavenotbeenresolvedsatisfactorilywithina tea-
37311, (615) 472-3500. include or have available the sonable period of time,
PAGE 17
 Loading...