

Page 1
IMP()RTANTSAFETYINSTRUCTIONS
Read all instructions before using this appliance.
Congratulationson your choice of this range featuring a Instructions on the following pages are based on safety
convection oven.As you useyour newrange, we knowyou considerations and must be strictlyfollowed to eliminatethe
will appreciate the many features that provide excellent potential risks offire, electric shock, or personal injury.
performance, ease of cleaning, convenience and
dependability. 1 __" ) i _i' WAR"II"i_
New features have dramatically changed today's cooking
appliances and the way we cook. It is therefore very d ALL RANGES
importantto understand how your new electric range
operatesBEFOREyou use itforthefirsttime. CAN TIP
In_thisOwner'sGuide,youwillfind a wealthof information INJURYTO PERSONS
regardingall aspectsofyourappliance. Byfollowing the COULD RESULT
instructionscarefully,you will be able to fully enjoy and
properlymaintainyour new range. • INSTALL ANTI-TIP
DEVICE PACKED
Inourcontinuingefforttoimprovethe qualityof ourcooking I WITH RANGE
products,it may be necessary to make changes to the
appliancewithoutrevisingthismanual.As an example,the • SEE INSTALLATION
knobonyourappliancemay notlooklikethe illustrationin INSTRUCTIONS
this manual.
Should you have any questions about using your new
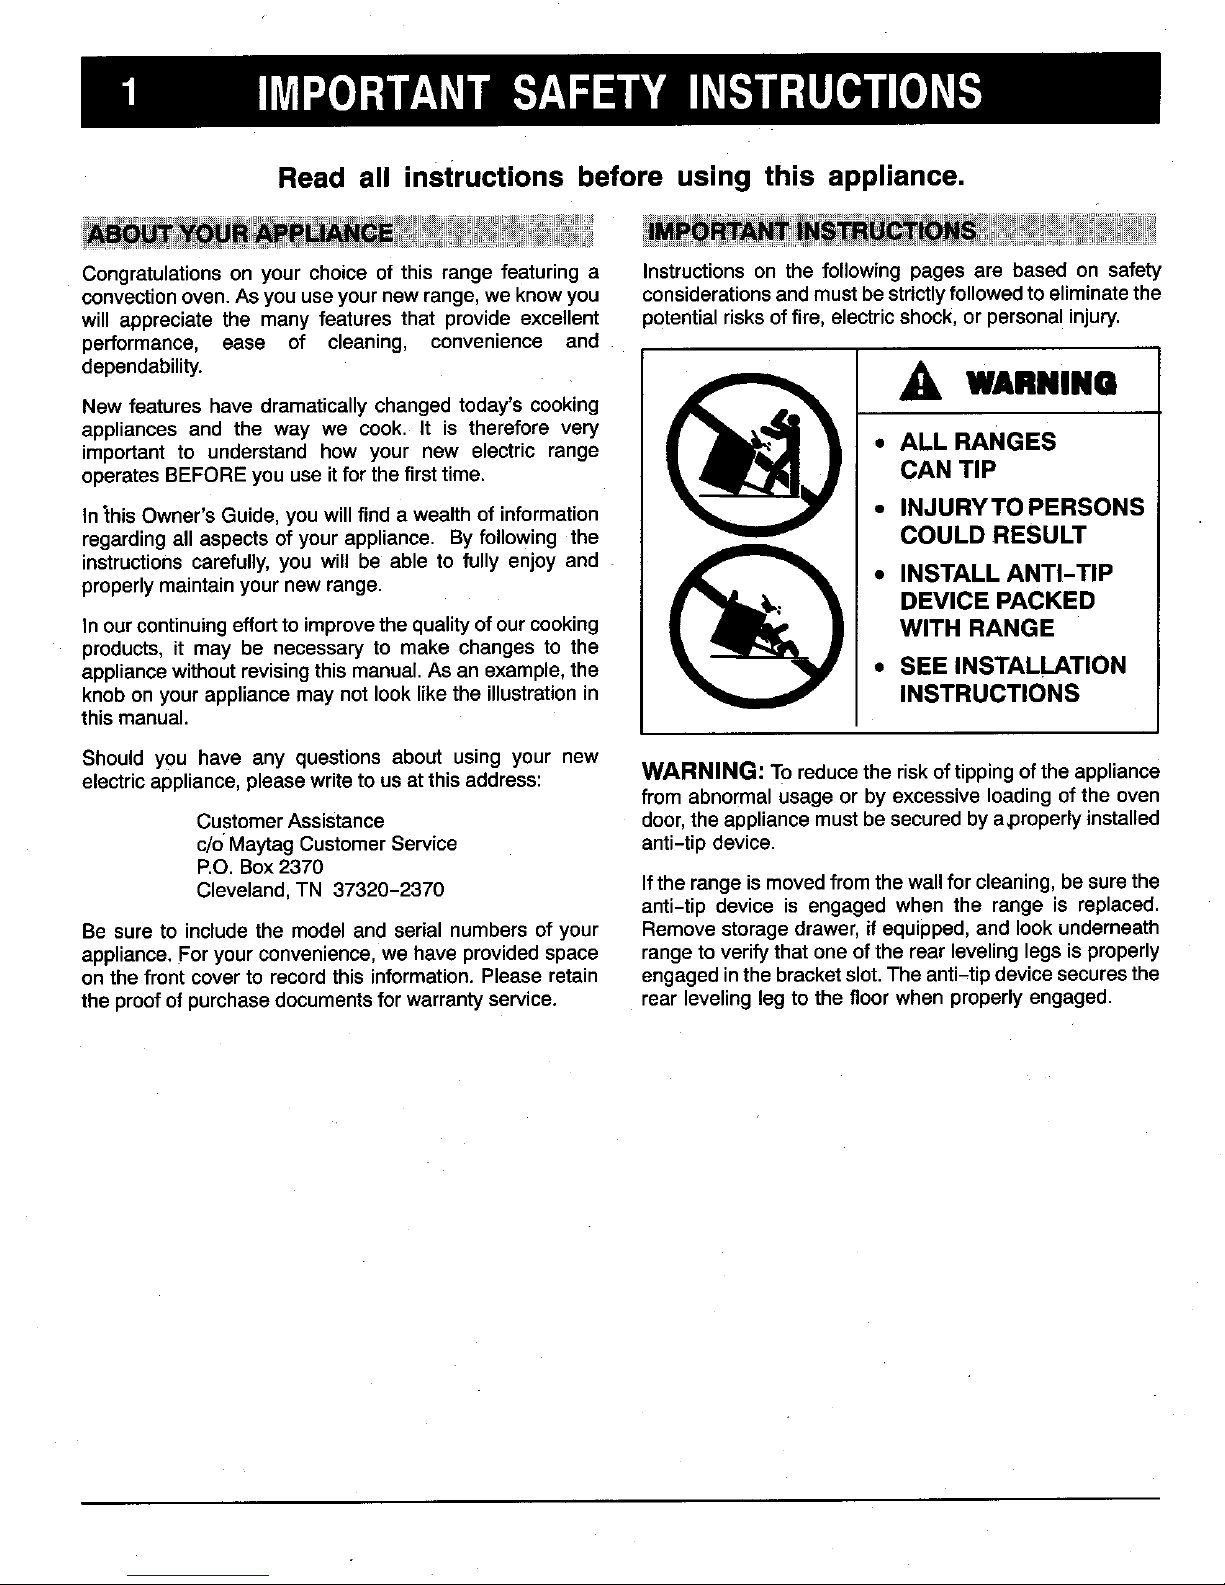
electricappliance,pleasewritetousat thisaddress: WARNING: Toreducethe riskof tippingof the appliance
fromabnormalusage or by excessiveloadingof the oven
CustomerAssistance door,the appliancemustbe securedbya,properlyinstalled
c/oMaytagCustomerService anti-tipdevice.
P.O. Box2370
Cleveland,TN 37320-2370 Iftherangeismovedfromthewallforcleaning,be surethe
anti-tip device is engagedwhen the range is replaced.
Be sureto includethe modeland serialnumbersof your Removestoragedrawer,if equipped,and lookunderneath
appliance.For yourconvenience,we have providedspace rangetoverifythat oneof the rear levelinglegsisproperly
on thefront coverto recordthisinformation.Pleaseretain engagedinthebracketslot.The anti-tipdevicesecuresthe
the proofofpurchasedocumentsforwarrantyservice, rear levelinglegto the floorwhenproperlyengaged.
Page 2
IMP(IRTANTSAFETYIN,C;TRUCTIONS
Be sure appliance is properlyinstalled and grounded by a Usedry chemicalorfoam-type extinguisherorbakingsoda
qualified technician, to smother fire or flame. Neveruse water on a grease fire.
Loca_eand mark circuit breaker or fuse. Never replace a Iffire is inthe oven or broiler pan, smother by closing oven
blown fuse or reset a circuit breaker until you know what door.
causedthe problem,Alwaysreplace a blownfuse with one If fire is ina pan on the surface element, cover pan. Never
of the correct amperage, do not usea substitute, attempt to pick up ormove a flaming pan.
To ensure proper operation and avoid possible injury or
damage to unit do not attempt to adjust, repair, service, or
replace any part of your appliance unless it is specifically
recommended in this book. All other servicing should be
referredtoaqualifiedinstallerorservicer.AIwaysdisconnest Do not leave children alone or unsupervised near the
powerto unit before any servicingby tripping circuit breaker appliancewhen itisinuseorisstillhot.Childrenshouldnever
to the OFF position or removingthefuse. be allowedto sit or stand on any part of theappliance.
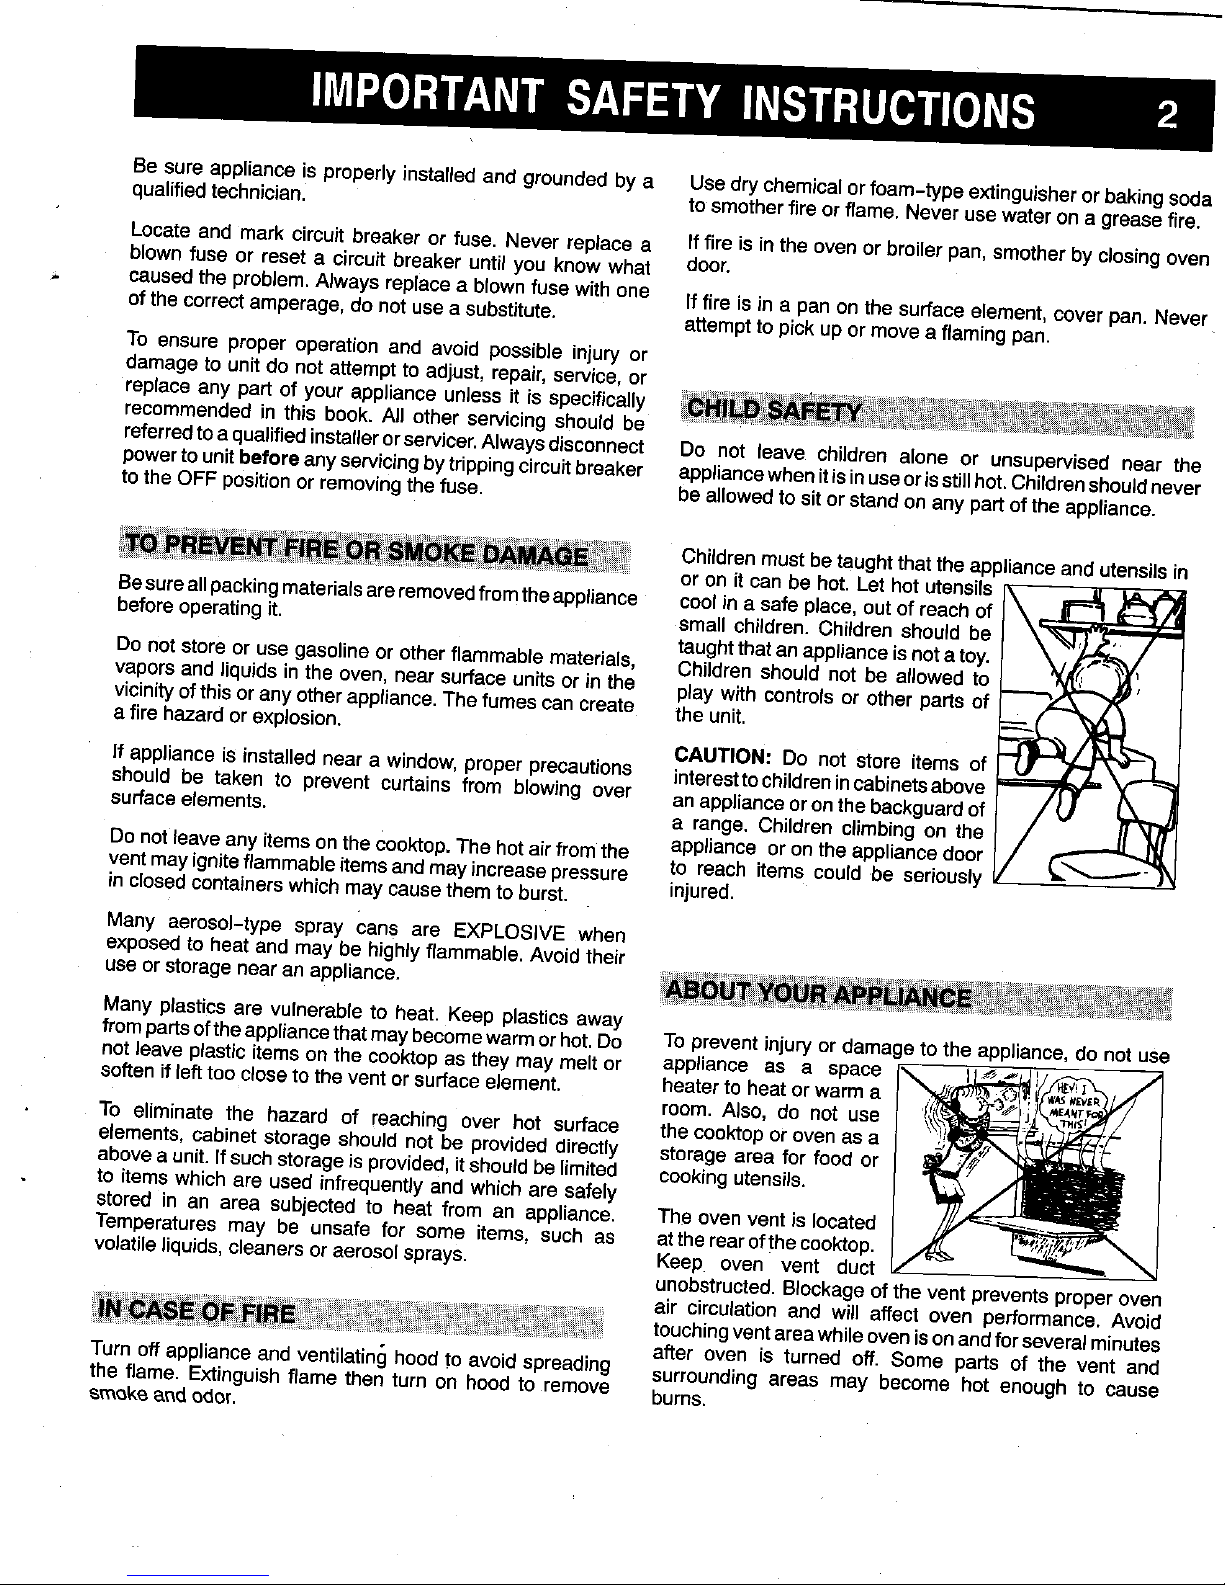
Childrenmust be taughtthat the applianceand utensilsin
or on it can be hot. Let hot utensils
BesureaI[packingmaterialsare removedfromtheappliance cool ina safe place, out of reach of
beforeoperating it. small children. Children should be
taught that an applianceis nota toy.
Do not store or use gasolineor other flammable materials, Children should not be allowed to
vapors and liquidsinthe oven, nearsurface unitsor in the play with controls or other parts of
vicinity ofthis or anyother appliance. The fumes can create the unit.
a fire hazard or explosion.
CAUTION: Do not store items of
If appliance is installed near a window, proper precautions interesttochildren incabinetsabove
should be taken to prevent curtains from blowing over an applianceor onthe backguard of=
surface elements, a range. Children climbing on the
Do notleaveany itemson theCooktop,The hot airfrom the appliance or onthe appliancedoor
ventmayigniteflammableitems and may increasepressure to reach items could be seriously
inclosed containers whichmay causethem to burst, injured.
Many aerosol-type spray cans are EXPLOSIVE when
exposedto heat and may be highly flammable. Avoid their
use orstoragenear an appliance.
Many plastics are vulnerable to heat. Keep plastics away
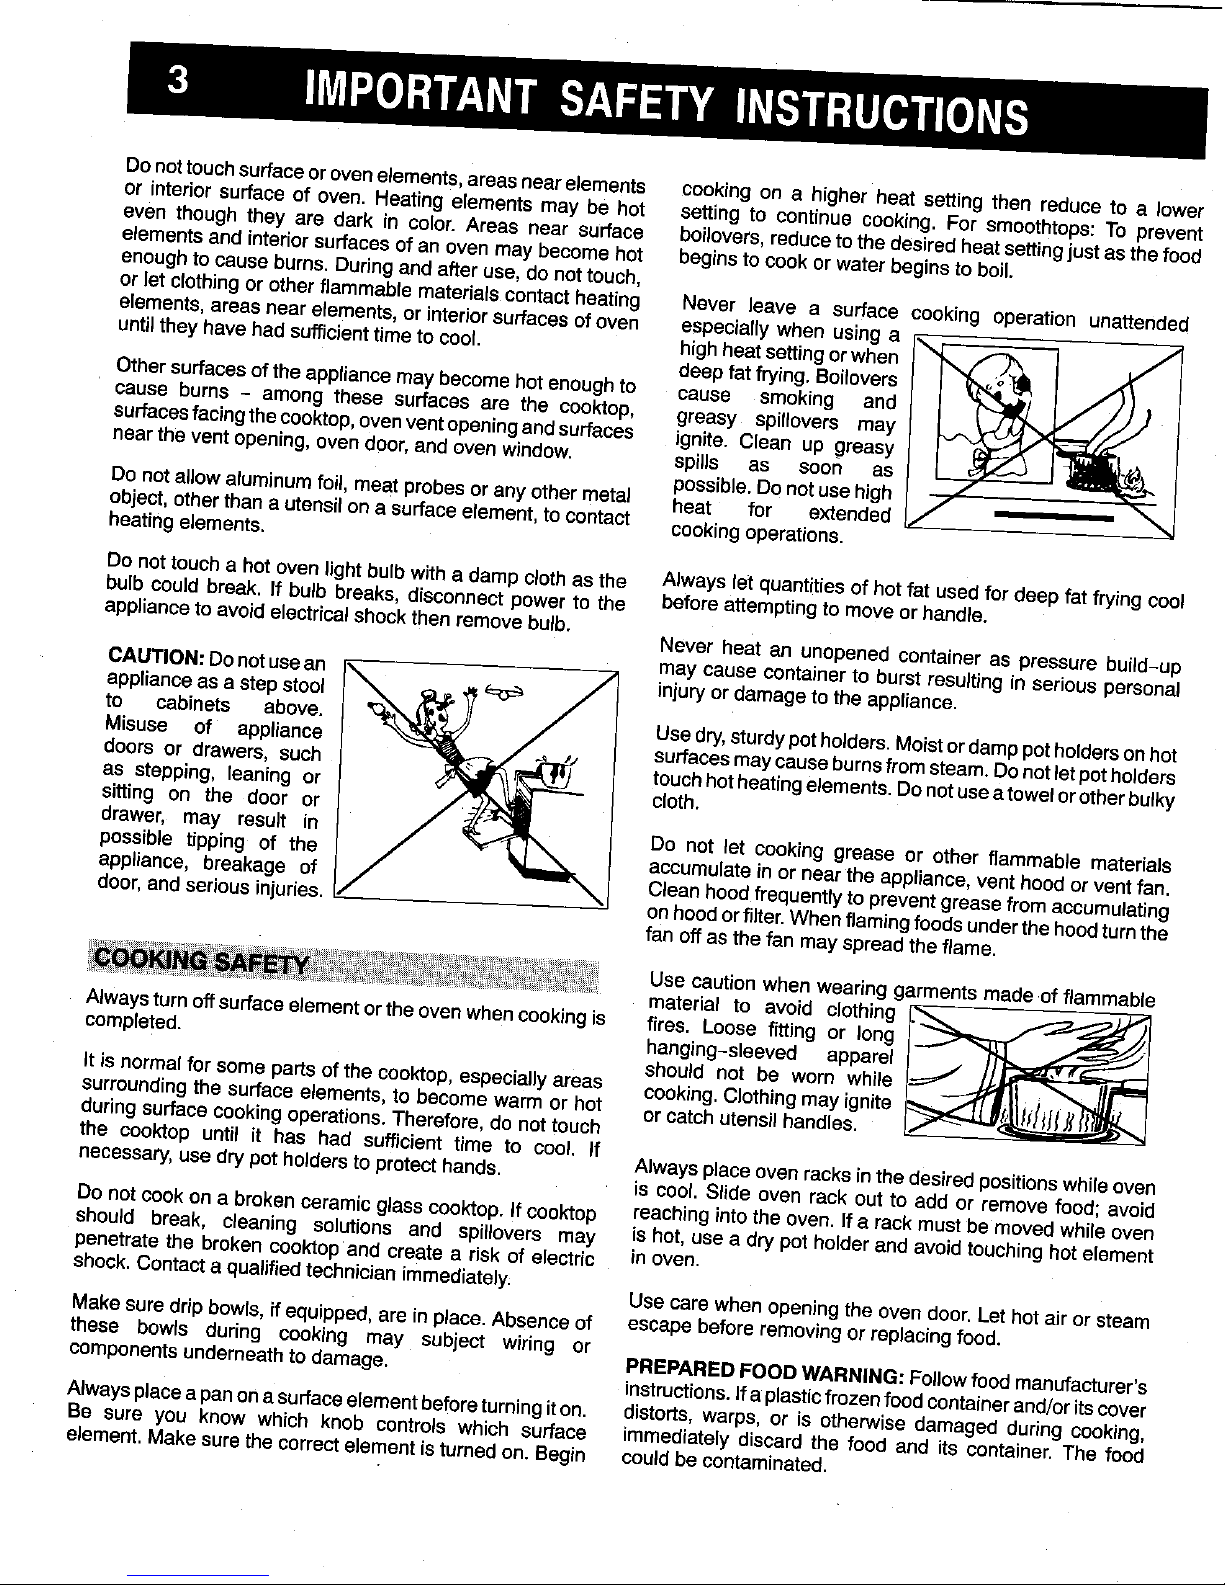
frompartsoftheappliancethat may becomewarm orhot,Do To prevent injury or damageto the appliance, do not use
not leave plasticitems on the cooktopas they may melt or appliance as a space __,_I/,._J
soften ifleft too closeto the vent orsurface element, heaterto heat or warma __r. "j
room. Also, do not use
To eliminate the hazard of reaching over hot surface the cooktoporoven as a
elements, cabinet storage should not be provided directly storage area for food or
above a unit.If suchstorage is provided, it should be limited cooking utensils.
to items which are used infrequently and which are safely
stored in an area subjected to heat from an appliance. The oven vent is located
Temperatures may be unsafe for some items, such as attherearofthecooktop.
volatile liquids,cleaners oraerosol sprays. Keep oven vent duct
unobstructed. Blockage of the vent prevents proper oven
air circulation and will affect oven performance. Avoid
touchingventareawhile oven isonand forseveral minutes
after oven is turned off. Some parts of the vent and
Turn off applianceand ventilating hood to avoid spreading surrounding areas may become hot enough to cause
the flame. Extinguish flame then turn on hood to remove burns.
smokea_d odor.
Page 3
3 IIVlPq)RTANTSAFETYINSTRUCTIONS
Do nottouch surfaceorovenelements,areasnear elements cooking on a higher heat setting then reduce to a lower
or interior surface of oven. Heating elements may be hot setting to continue cooking, For smoothtops: To prevenl
even though they are dark in color. Areas near surface boilavers,reduceto the desired heat settingjustas the food
elements and interiorsurfaces of an oven may become hot beginsto cook or water begins to boil.
enoughto cause burns. Duringand afferuse, do nottouch,
or let clothing or other flammable materials contact heating Never leave a surface cooking operation unattended
elements,areasnear elements,orinteriorsurfacesof oven especiallywhen using a
untiltheyhavehad sufficienttimetocool. highheatsettingorwhen _"_,_ I ,J
deepfat fTying.Boilovers
Othersurfacesofthe appliancemaybecomehotenoughto cause smoking and
cause burns - among these surfaces are the cooktop, greasy spillovers may
surfacesfacingthecooktop,ovenventopeningandsurfaces ignite. Clean up greasy
nearthe vent opening, ovendoor,andoven window, spills as soon as
possible.Donotusehigh
Do notallow aluminumfoil, meat probes or anyother metal heat for extended ,/
object,other than a utensilona surfaceelement,to contact cooking operations.
heating elements.
Do not touch a hot ovenlightbulb witha damp clothas the Alwayslet quantities of hot fat used for deepfat frying cool
bulb could break. If bulb breaks, disconnect power to the before attemptingto move orhandle.
applianceto avoidelectricalshock then remove bulb.
Never heat an unopened container as pressure build-up
may cause container to burst resulting in serious personal
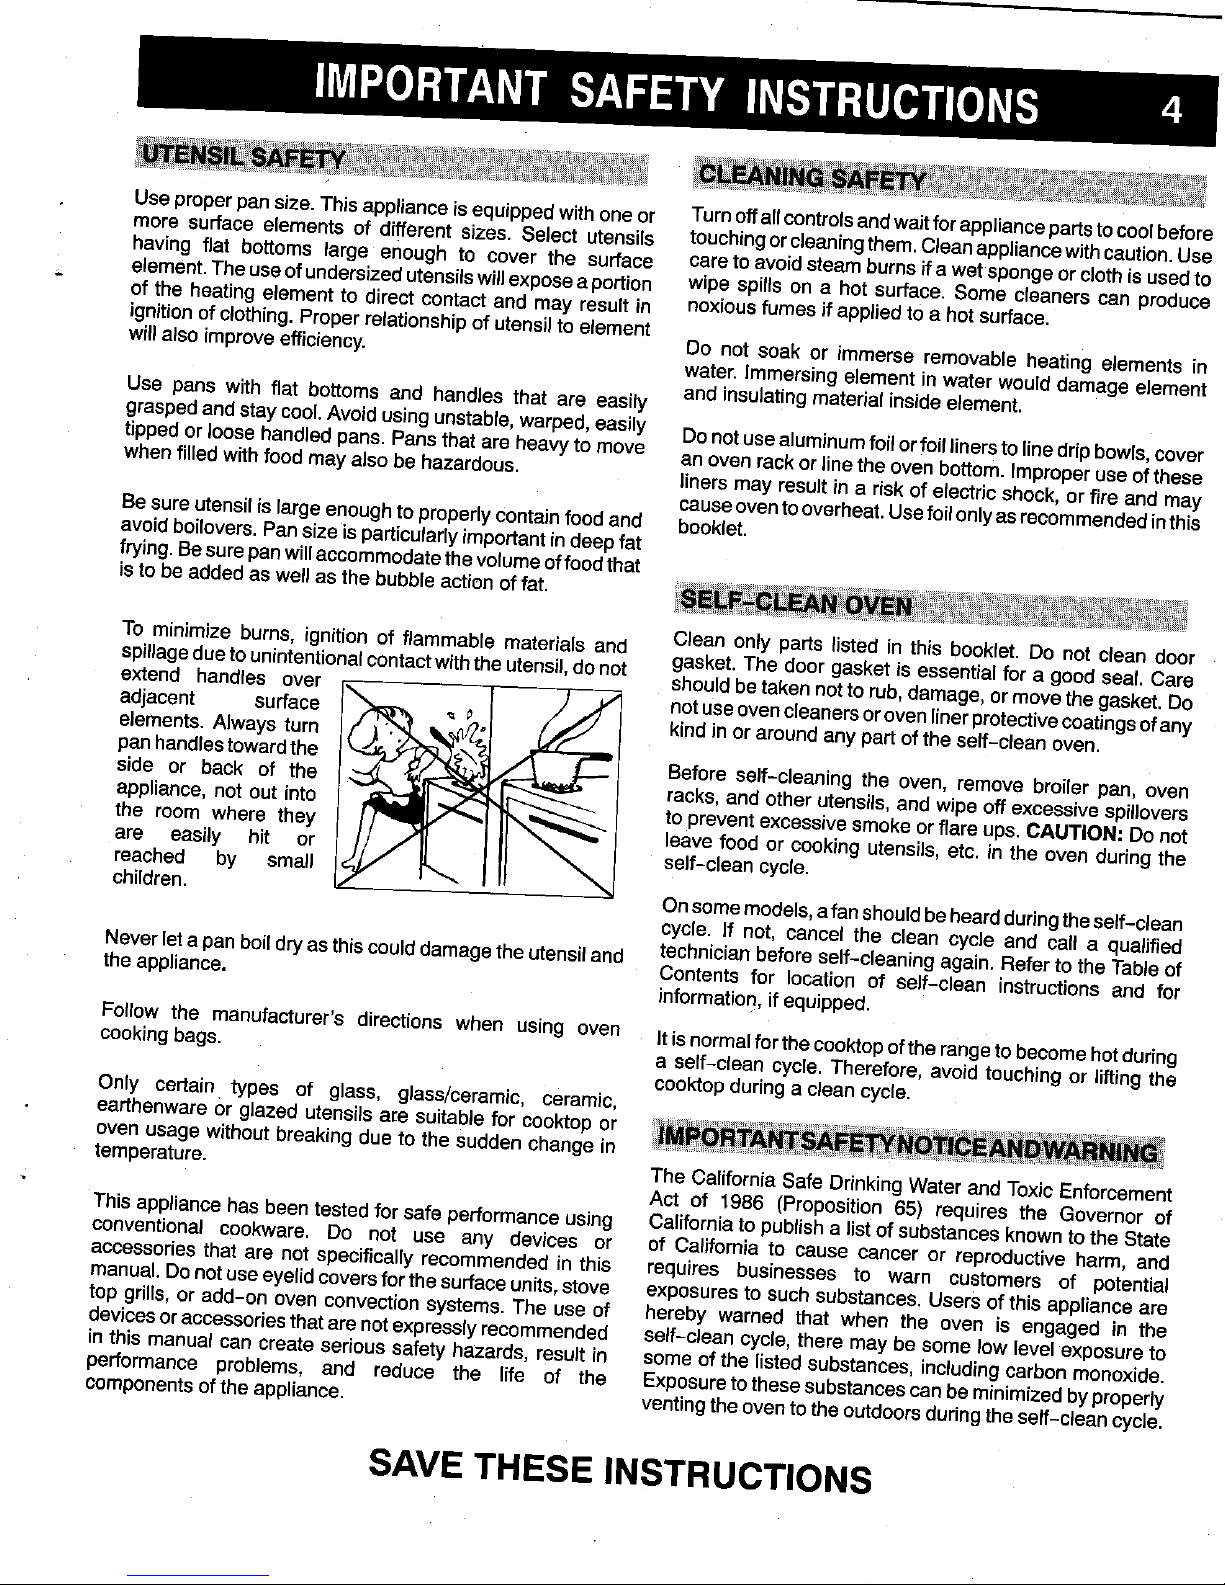
CAUTION:DOnotusean _ _=, (=_=_ J injuryor damageto the appliance.
applianceas a stepstool
to cabinets above. '_ _ Usedry,sturdypot holders.Moistor damppotholderson hot
Misuse of appliance surfaces maycause burnsfromsteam.Do notlet potholders
doors or drawers, such touchhotheating elements.Donotuseatowel orotherbulky
as stepping, leaning or cloth.
sitting on the door or
drawer, may result in _ Do not let cooking grease or other flammable materials
possible tipping of the accumulate inor near the appliance, vent hood or vent fan.
appliance, breakage of Cleanhood frequentlyto prevent grease from accumulating
door, and serious injuries, on hoodorfilter. When flamingfoods underthe hoodturnthe
fan offas the fan may spreadtheflame.
Usecaution when wearing armentsmade of flammable
material to avoid clothing _ /--_.--_,,'_
Alwaysturnoffsurfaceelementorthe ovenwhen cookingis fires. Loose fitting or long
completed, hanging-sleeved apparel
should not be worn while
Itis normalfor somepartsof thecook'top,especiallyareas cooking. Clothingmay ignite
surroundingthe surface elements,to become warm or hot or catchutensilhandles.
during surfacecooking operations.Therefore, do nottouch
the cooktop until it has had sufficient time to cool. If
necessary,use dry potholdersto protect hands. Always placeoven racks inthe desiredpositions while oven
is cool. Slide oven rack out to add or remove food; avoid
Do not cook on a broken ceramic glasscooktop. If cooktop reaching into the oven. If a rack must be moved while oven
should break, cleaning solutions and spillovers may is hot, usea dry potholder and avoid touchinghot element
penetrate the broken cooktopand create a risk of electric inoven.
shock. Contact a qualifiedtechnician immediately:
Use carewhen openingthe oven door. Let hot air or steam
Makesure drip bowls, ifequipped, are in place. Absence of escape before removingor replacingfood.
these bowls during cooking may subject wiring or
componentsunderneathto damage. PREPAREDFOOD WARNING:Followfoodmanufacturer's
instructions. Ifa plasticfrozen food container and/orits cover
Alwaysplaceapanonasurfaceelementbeforeturningiton. distorts, warps, or is otherwise damaged during cooking,
Be sure you know which knob controls which surface immediately discard the food and its container. The food
element.Makesure the correctelement is turnedon. Begin couldbe contaminated.
Page 4
IMP()RTANTSAFETYINiTRU(;TIONS 4
Use properpansize. This applianceisequippedwith oneor Turnoffallcontrolsandwaitforappliancepartstocool before
more surface elements of different sizes. Select utensils touching orcleaningthem. Cleanappliancewithcaution. Us_
having flat bottoms large enough to cover the surface care to avoid steam burns ifawet spongeor cloth isused tc
element.The useofundersizedutensilswillexposeaportion wipe spills on a hot surface. Some cleaners can produc_
of the heating element to direct contact and may result in noxiousfumes ifapplied tOa hot surface.
ignition of clothing. Proper relationshipofutensil to element
will also Improveefficiency. Do not soak or immerse removable heating elements in
water. Immersingelement in water would damage element
Use pans with flat bottoms and handles that are easily and insulating material inside element.
graspedand staycool. Avoidusing unstable,warped,easily Donotuse aluminumfoilorfoillinersto linedripbowls, cover
tipped or loose handledpans. Pans that are heavyto move an oven rack or linethe oven bottom. Improperuse ofthese
whenfilledwith food may also behazardous, liners may result ina risk of electric shock, or fire and may
causeoventooverheat. Usefoilonlyas recommendedinthis
Besure utensilis large enoughto properly containfood and booklet.
avoidboilovers.Pansize isparticularlyimportantindeepfat
frying. Besurepanwill accommodatethevolumeoffood that
isto beadded as well as the bubbleaction of fat.
To minimize burns, ignition of flammable materials and Clean only parts listed in this booklet. Do not clean door
gasket. The door gasket is essential for a good seal. Care
spillageduetounintentionalcontact withthe utensil,do not shouldbe taken notto rub, damage, ormovethe gasket. Do
extend handles over _ __ notuseovencleanersorovenlinerprotectivecoatingsofany
adjacent surface _ _o kindinor around any part of the self-clean oven.
elements.Always turn
panhandlestowardthe Before serf-cleaning the oven, remove broiler pan, oven
side or back of the racks, and other utensils,and wipe off excessivespillovers
appliance, not out into to prevent excessive smoke or flare ups. CAUTION: Do not
the room where they _ leavefood or cooking utensils, etc. in the oven during the
are easily hit or self-clean cycle.
reached by small
children. Onsomemodels,afanshouldbeheardduringtheserf-clean
cycle. ]f not, cancel the clean cycle and call a qualified
Neverletapan boil dry asthis could damage theutensil and technician before self-cleaning again, Referto the Tableof
Contents for location of self-clean instructions and for
the appliance, information, if equipped.
Follow the manufacturer's directions when using oven Itisnormalforthecooktopoftherangetobecomehotduring
cooking bags. a self-clean cycle. Therefore, avoid touching or lifting the
cooktopduring aclean cycle.
Only certain types of glass, glass/ceramic, ceramic,
earthenware Orglazed utensils are suitable for cooktop or
oven usage without breakingdue to the sudden change in
temperature. The California Safe Drinking Water and ToxicEnforcement
Act of 1986 (Proposition 65) requires the Governor of
This appliancehas beentested for safe performance using California to publish a listof substances known to the State
conventional cookware. Do not use any devices or of California to cause cancer or reproductive harm, and
accessories that are not specifically recommended in this requires businesses to warn customers of potential
manual.Do not useeyelid coversfor the surfaceunits,stove exposures to such substances. Users of this appliance are
top grills, or add-on oven convection systems.The use of hereby warned that when the oven is engaged in the
devicesoraccessoriesthat arenotexpresslyrecommended self-clean cycle, there may be some low level exposureto
inthis manual cancreate serious safety hazards, result in some of the listed substances,including carbon monoxide.
performance problems, and reduce the life of the Exposuretothesesubstancescanbeminimizedbyproperly
componentsof the appliance, ventingthe ovento the outdoors duringthe self-clean cycle.
SAVE THESE INSTRUCTIONS
Page 5
CLOCK AND OVEN CONTR(IL
I lll. l lll
co.w"tTs'E oZ.
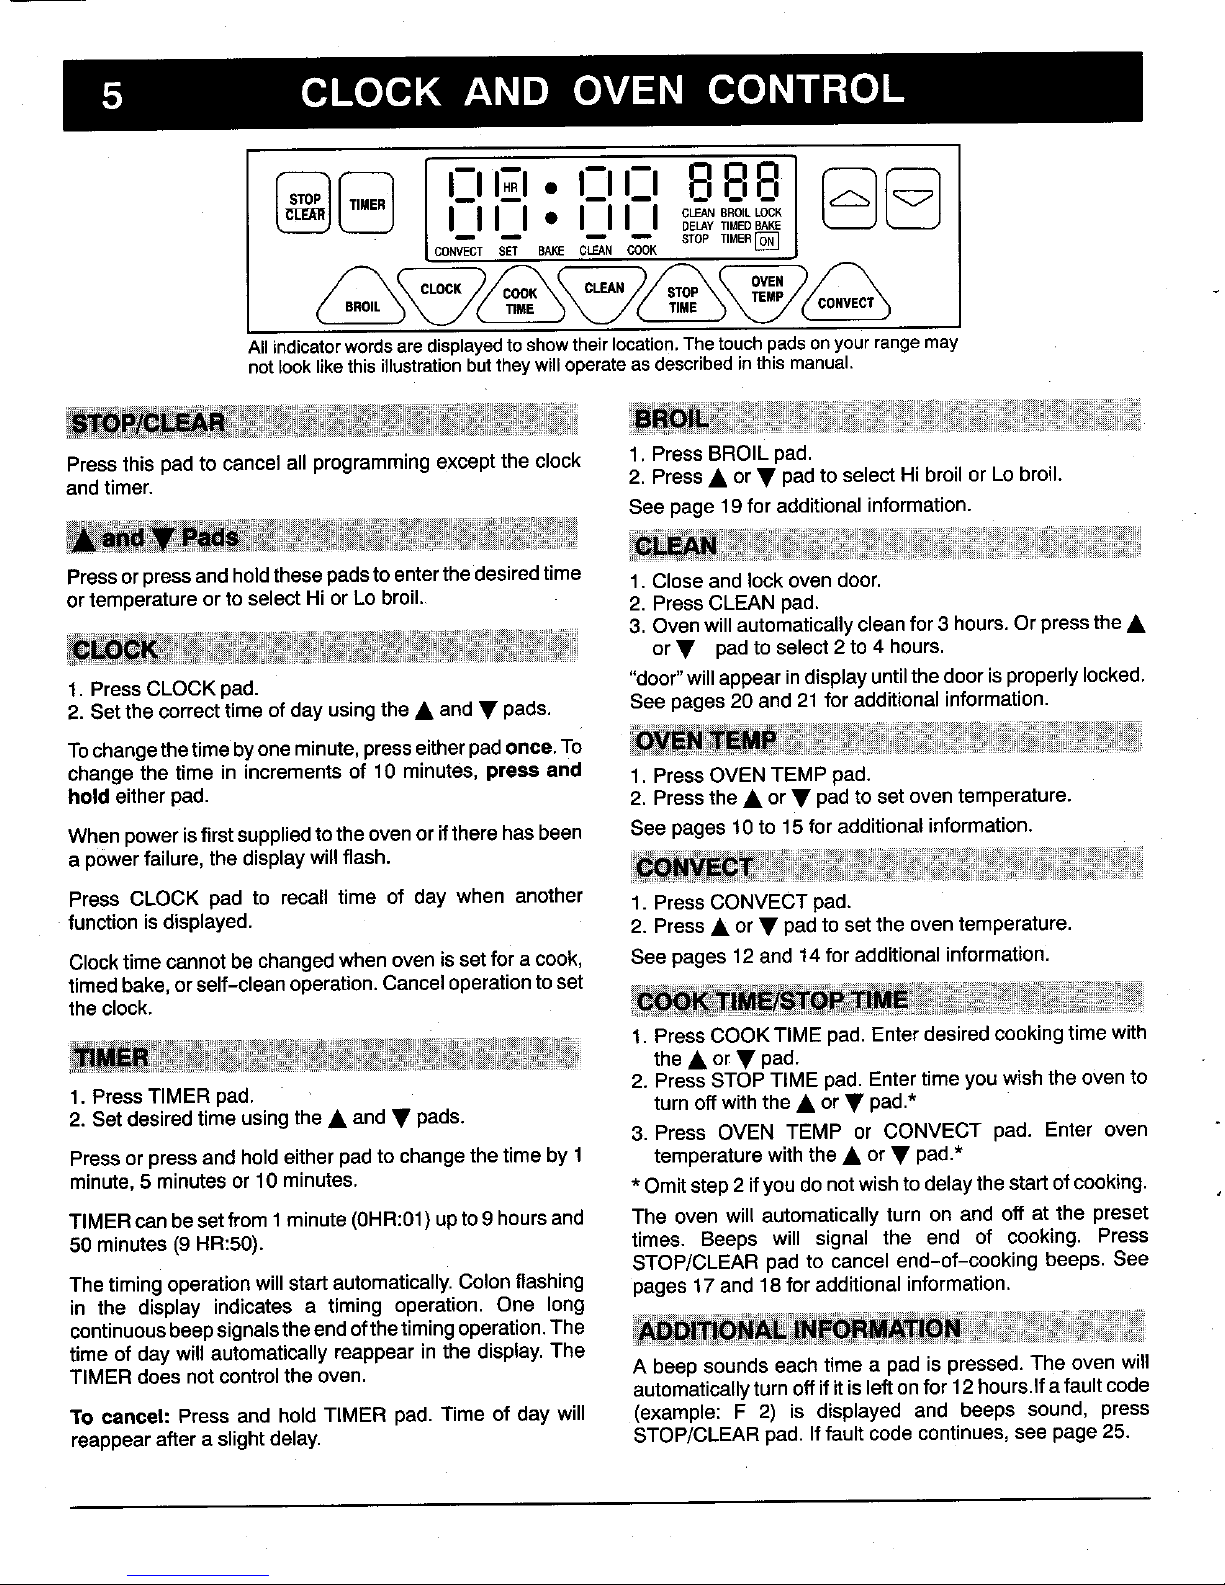
Allindicatorwordsaredisplayedtoshowtheirlocation.Thetouchpadsonyourrangemay
notlooklikethisillustrationbuttheywilloperateasdescribedinthismanual.
Press this pad to cancel all programming except the clock 1. Press BROIL pad.
2. Press • or • padto select Hi broil or Lo broil.
and timer.
See page 19 for additional information.
Pressorpressandholdthese padsto enterthe desiredtime 1.Close and lock oven door.
ortemperature orto select Hi or Lobroil. 2. Press CLEAN pad.
3. Oven will automatically cleanfor 3 hours. Or pressthe •
or• padto select 2 to 4 hours.
1. Press CLOCKpad. "door"will appear indisplayuntilthedoor isproperlylocked.
2. Set the correct time of day usingthe • and • pads. See pages 20 and 21 foradditional information.
Tochangethetimebyone minute,presseitherpad once.To
change the time in increments of 10 minutes, press and 1. PressOVEN TEMP pad.
hold either pad. 2. Pressthe • or • pad to set oven temperature.
Whenpower isfirst suppliedto the oven or if there hasbeen See pages 10 to 15for additional information.
a powerfailure, the display willflash.
Press CLOCK pad to recall time of day when another 1. Press CONVECT pad.
function isdisplayed. 2. Press • or • pad to set the oven temperature.
Clocktime cannotbe changedwhen ovenis set for acook, See pages 12and 14for additional information.
timed bake,or self-clean operation.Canceloperationto set
the clock.
1. Press COOKTIME pad. Enter desired cooking timewith
the • or • pad.
1. Press TIMER pad. 2. Press STOP TIME pad. Entertime you wish the oven to
turn off with the • or • pad.*
2. Set desired time using the • and • pads.
3. Press OVEN TEMP or CONVECT pad. Enter oven
Pressor press and hold eitherpad to changethe time by 1 temperature with the • or • pad.*
minute, 5 minutes or 10minutes. * Omit step 2 if you donot wishto delay the start of cooking.
TIMERcan beset from 1minute(0HR:01)upto 9 hoursand The oven will automatically turn on and off at the preset
50 minutes (9 HR:50). times. Beeps will signal the end of cooking. Press
STOP/CLEAR pad to cancel end-of-cooking beeps. See
The timing operationwill start automatically. Colonflashing pages 17 and 18for additional information.
in the display indicates a timing operation. One long
continuousbeep signalstheendofthetiming operation.The
time of day will automatically reappear in the display. The
TIMER does not control the oven. A beep sounds each time a pad is pressed. The oven will
automaticallyturn offif it is lefton for 12hours.If a fault code
3"0cancel: Press and hold TIMER pad. Time of day will (example: F 2) is displayed and beeps sound, press
reappear aftera slightdelay. STOP/CLEARpad. Iffault code continues, see page 25.
Page 6
SIJRFACE COOKING
Yourcooktopisequippedwithcontrol knobsthat providean Use HIGH justuntil water comes to a boil or pressure is
infinitechoice ofsettings from LOWto HIGH.The knobcan reached inthe pressurecanner.Then, reduce to the lowest
beset onor between any of the numberedsettings, heat setting that maintains the boilor pressure. Prolonged
use of HIGH or the use of incorrect canning utensils will
Tooperatepushinandturntheknobineitherdirectiontothe produce excessive heat. Excessive heat can cause
desired setting: An indicator light will glow when a surface permanent damage to the porcelain cooktop, coil element
elementis turned On.The indicatorlight will remain on until and the drip bowl. See page 9 for additional information.
theelement isturned off.After a cooking operation, besure
the elementand indicator light are off.
Cooking perforrnance is greatly affected by the type of
cookware used.Proper ceokwarewill reducecookingtimes,
uselessenergyandproduce moreeven cookingresults. For
Toprevent damage to the range orutensil,never operate best results use a heavygauge metalpanwith asmoothflat
surfaceunitwithouta paninplace,neverallow a pantoboil bottom and a tight fitting lid.
dry and never operate an element on HIGH for extended
periodsof time. Cookwarewith uneven,warped,or groovedbottoms do not
makegoodcontactwiththeheating surface,willreduceheat
Foodwillnotcook anyfaster at a highersettingthan needed conductivity and result in slower, lesseven heating.
to maintain a gentle boil. Water boils at the same
temperaturewhether boiling gently orvigorously. If a high Different types of cookware materials requiredifferent heat
settingisused,excessivespatteringwilloccur andfoodmay settingsfor the same cookingoperation. The chart below is
stickor burnonto the bottom of the pan. basedon heavygaugealuminumcookware, Lowerthe heat
setting ff using athinner gauge metal or othermaterials.
If a higher heat setting is used to bring liquidto a boil or to Oversized cookware and cookware that rests across two
begincooking,always reduceto a lower settingonce liquid elements are not recommended asthey may trap enough
comesto a boilor food begins cooking. Never leave food heat to cause damage to the cooktop or elements. This is
unattended during a cooking operation, especiallyimportantwhencanning.
Fitthesize ofthe cookwaretothesizeof the element.This Donotusewoksequippedwithroundmetalrings.The ring,
conservesenergy, whichisdesignedto supportthewokabovetheelement,wilt
trap heatandmay damagetheelementandthecooktop.
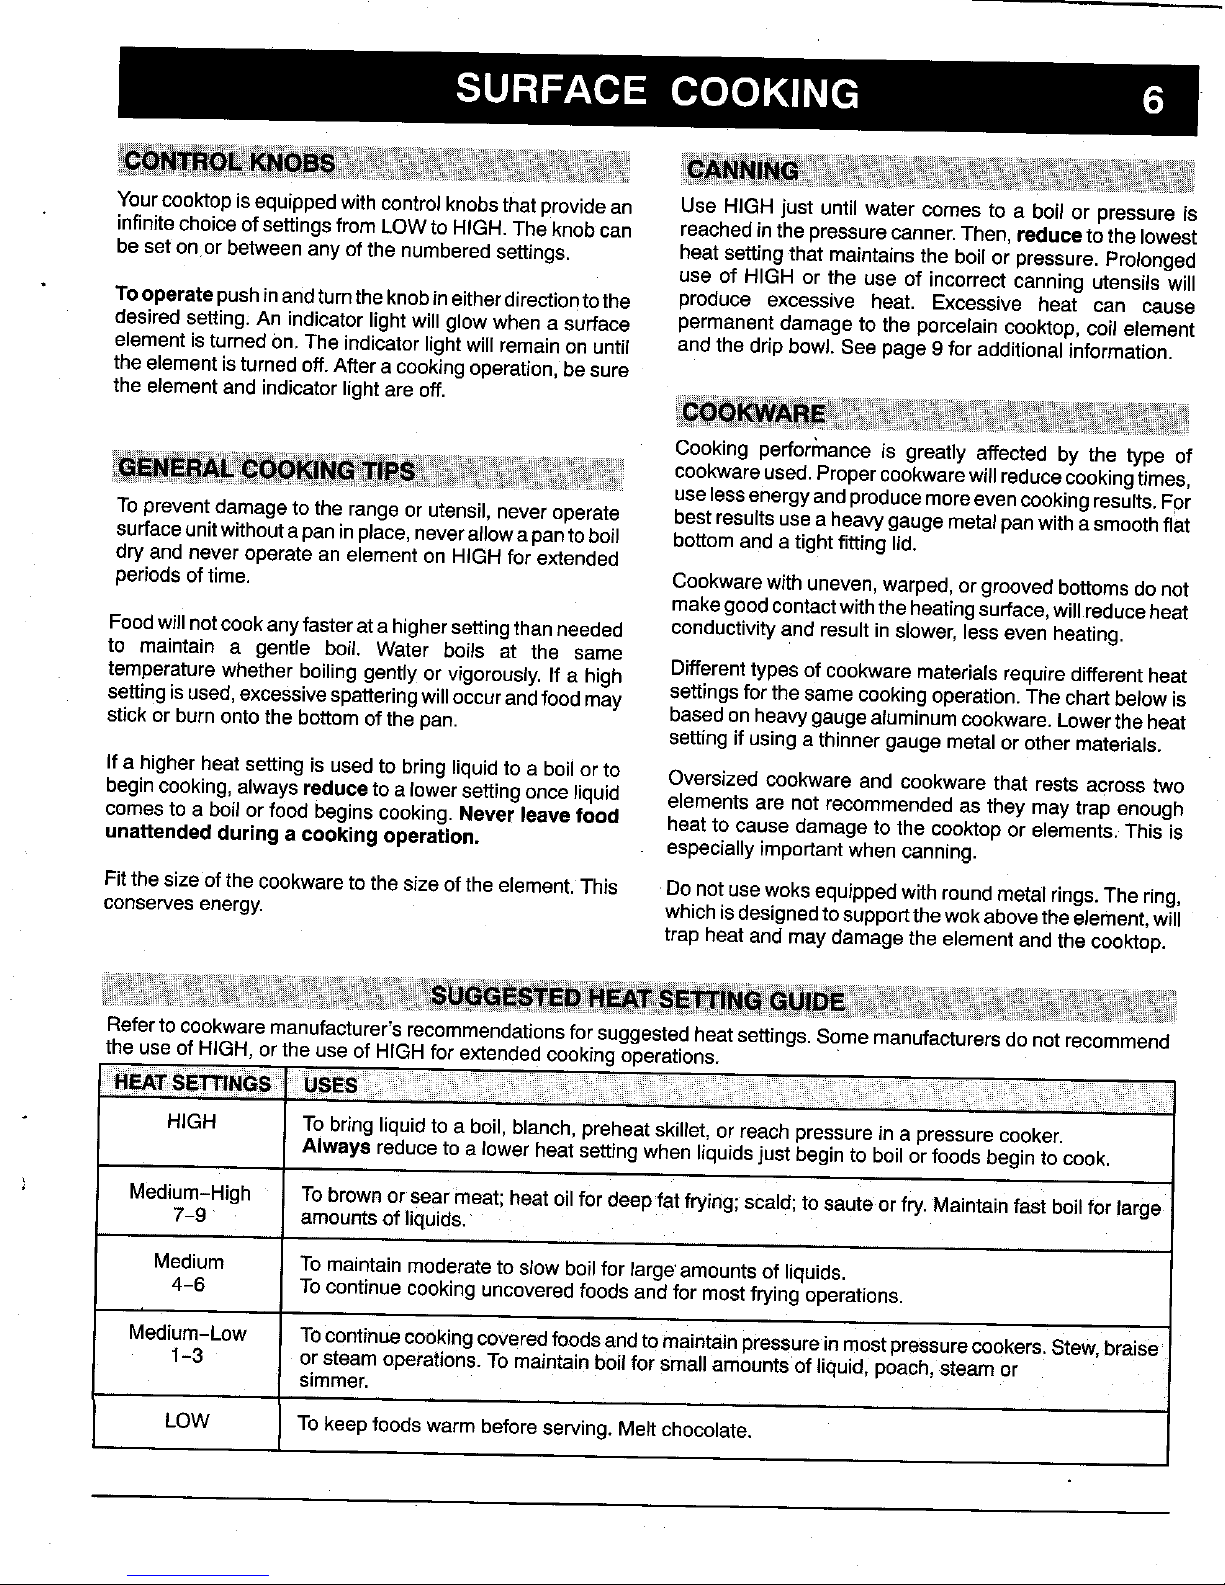
Referto cookwaremanufacturer'srecommendationsforsuggested heatsettings. Somemanufacturersdo not recommend
the useof HIGH,or the use of HIGHfor extendedcooking operations.
HIGH Tobring liquid to a boil, blanch, preheatskillet, or reachpressure in a pressure cooker.
Always reduce to a lowerheat setting when liquids just beginto boil or foods begin to cook.
Medium-High Tobrownor sear meat;heat oilfor deepfat frying; scald; to saute or fry. Maintainfastboil for large
7-9 amountsofliquids.
,,, ,....... ,...... ,,,,,
Medium Tomaintainmoderateto slowboilfor large'amountsofliquids.
4-6 To continuecookinguncoveredfoodsandfor mostfryingoperations.
Medium-Low Tocontinuecookingcoveredfoodsandto maintainpressurein mostpressure cookers. Stew, braise
1-3 or steam operations. To maintain boil for small amounts of liquid, poach,steam or
simmer.
I LOW Tokeepfoodswarm beforeserving. Melt chocolate.
Page 7
SMOOTHTOP COOKTOP
Boilovers are morelikely to occur if you start out on HIGH
then reduceto the lower setting. Ifyoudo begin cooking on
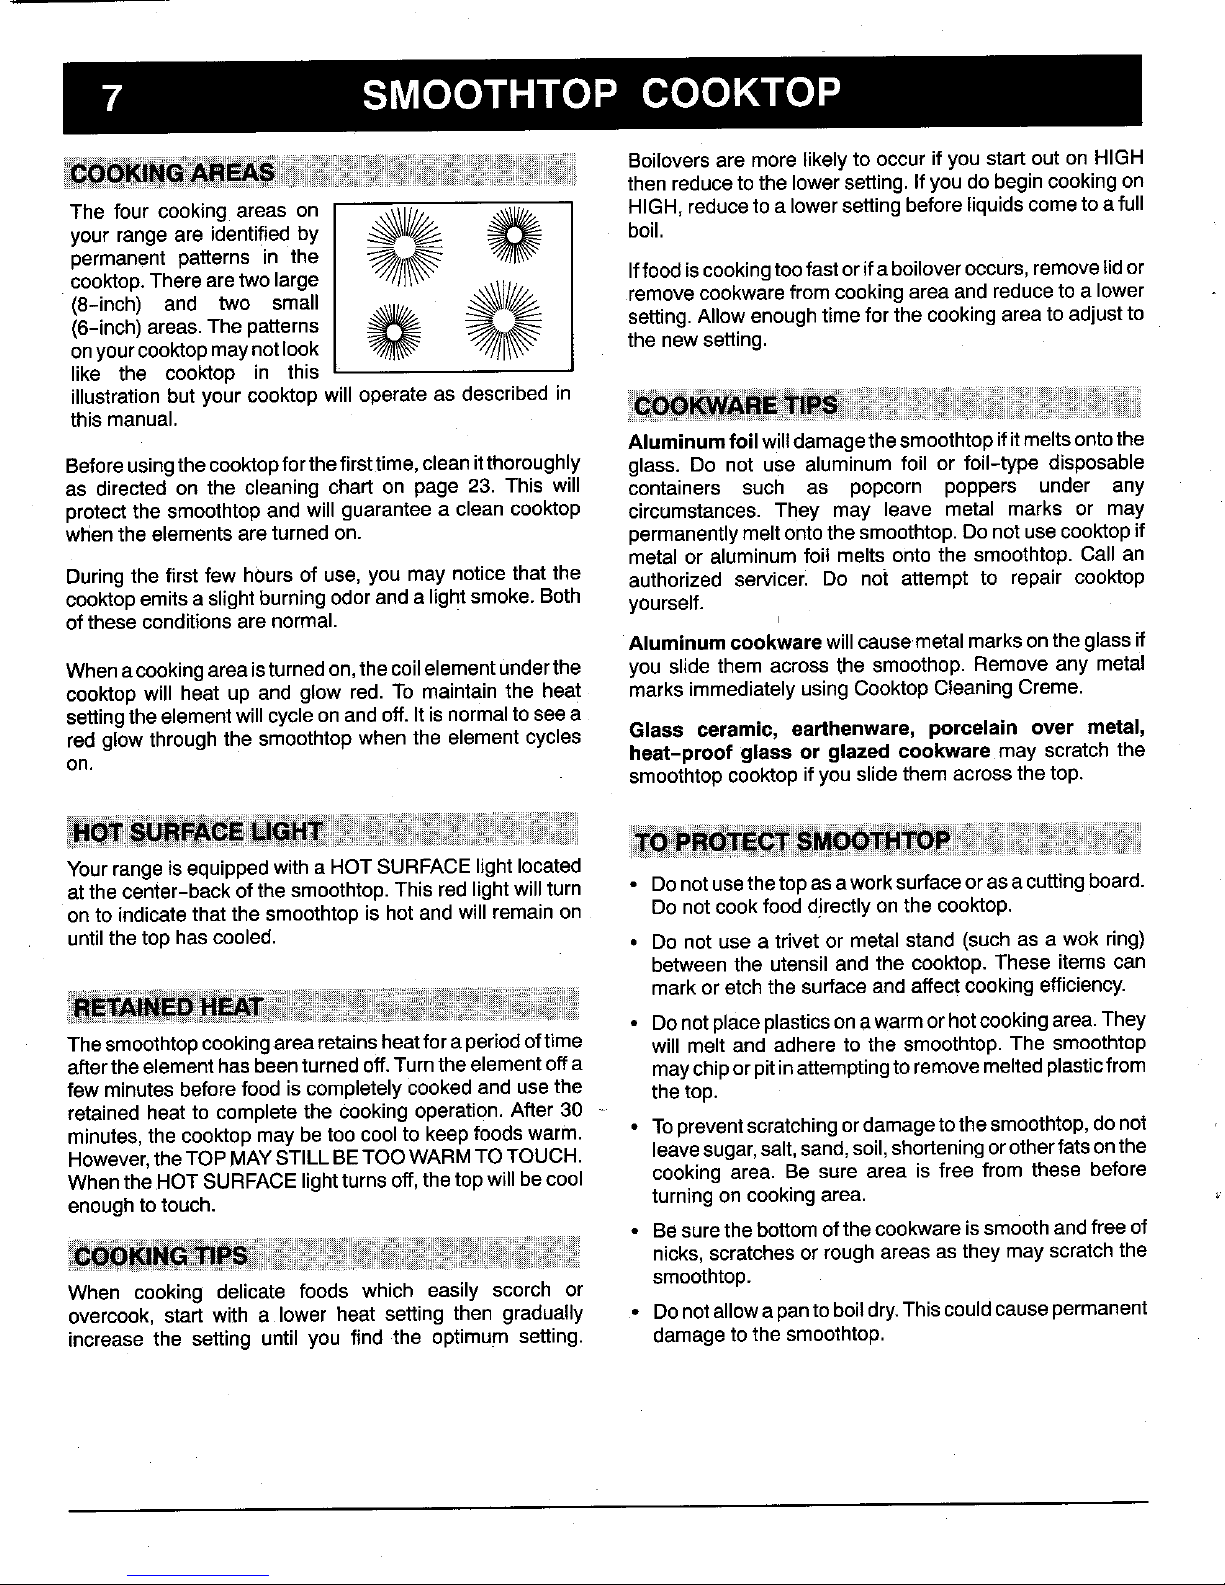
The four cooking areasOnyourrange are identified by ____/I/___ _ boil.HIGH'reduceto alowersetting beforeliquids cometo a full
permanent patterns in the --_/\_
cooktop.There aretwo large ",//I_,'1 Iffood iscooking toofast orif aboiloveroccurs,removelidor
_1//_ removecookwarefrom cooking area and reduce to alower
_8_inch)
and
two small
(6-inch) areas. The patterns _ _/l_-- theSetting'newAll°Wsetting.en°ughtimefor thecooking area to adjustto
onyour cooktopmaynot look ,,_,_,. ,,11\\ \"
like the cooktop in this
illustration but your cooktop will operate as described in
this manual.
Aluminum foil willdamage thesmoothtop ifitmelts ontothe
Beforeusingthecooktopforthefirsttime, cleanitthoroughly glass. Do not use aluminum foil or foil-type disposable
as directed on the cleaning chart on page 23. This will containers such as popcorn poppers under any
protect the smoothtop and will guarantee a clean cooktop circumstances. They may leave metal marks or may
whenthe elements areturned on. permanentlymeltontothesmoothtop. Do not usecooktop if
metal or aluminum foil melts onto the smoothtop. Call an
During the first few hours of use, you may notice that the authorized servicer. Do not attempt to repair cooktop
cooktopemitsa slightburning odor and a light smoke. Both yourself.
ofthese conditions are normal.
Aluminum cookware will causemetal marksonthe glass if
Whenacookingareaisturnedon, thecoilelementunderthe you slide them across the smoothop. Remove any metal
cooktop will heat up and glow red. To maintain the heat marks immediately using Cooktop Cleaning Creme.
settingthe element will cycle on and off. Itis normalto see a
red glowthrough the smoothtop whenthe element cycles Glass ceramic, earthenware, porcelain over metal,
heat-proof glass or glazed cookware may scratch the
on. smoothtopcooktopifyouslidethemacrossthetop.
Yourrange isequippedwith a HOT SURFACE light located
at the center-back ofthe smoothtop. This red lightwill turn • Donotusethetopasa worksurfaceorasa cuttingboard.
on to indicate that the smoothtop is hot and will remain on Donot cook food d!rectly on the cooktop.
untilthe top hascooled. • Do not use a trivet or metal stand (such as a wok ring)
between the utensil and the cooktop. These items can
markor etch the surface andaffect cooking efficiency.
• Donot placeplasticsonawarmor hotcooking area.They
Thesmoothtop cookingarearetainsheatfor aperiodoftime will melt and adhere to the smoothtop. The smoothtop
aftertheelement hasbeenturned off.Turn the elementoffa maychiporpitinattemptingto removemeltedplasticfrom
few minutes beforefood is completely cooked and use the the top.
retained heat to complete the cooking operation. After 30 -
minutes, the cooktopmay betoo cool to keepfoods warm. • Topreventscratching ordamagetothesmoothtop,donot
However,theTOP MAYSTILL BETOOWARMTO TOUCH. leavesugar,salt, sand,soil,shortening orotherfatson the
Whenthe HOT SURFACE lightturns off,thetop will becool cooking area. Be sure area is free from these before
enoughto touch, turning on cooking area.
• Besure thebottom ofthecookware issmoothand free of
nicks, scratches or rough areasas they may scratch the
smoothtop.
When cooking delicate foods which easily scorch or
overcook, start with a lower heat setting then gradually • Donotallowapantoboil dry.Thiscouldcause permanent
increase the setting until you find the optimum setting, damage to the smoothtop.
Page 8
SMOOTHTOP COOKTOP
To help keep cooktop clean, be sure cooking area and Whensurfaceiscool, cleanasdirectedinthechart.DONOT
cookware bottom are clean and dry before each use. USE the following cleaning agents.
To prevent possible damagetothe cooktop, always rinsethe • Abrasives (metal scouring pads, cleansing powders,
bottom of cookware to completely remove any cleaning scouring cleaners or pads) will scratch the smoothtop.
agent residue. This is especially important when using a • Chemicals (oven cleaners, chlorine bleaches, rust
copper or aluminum cleaner. In the presence of heat, the removers or ammonia) may damage the finish of the
cleaning residue may stain, discolor or etch the smoothtop, smoothtop.
• Glass cleaners containing ammonia may harm the
Carefully blot upspillovers around the outside of the cooking smoothtop.
area as they occur with dry paper towels. BE CAREFUL • Soiled cloth or sponge will leave an invisible film on the
NOT TO BURN HANDS WHEN WIPING UP SPILLS. DO
cooktop which may scratch or cause discoloration the
NOT USE A DAMP CLOTH WHICH MAY CAUSE STEAM next time the cooktop is used.
BURNS.
i IMPORTANT: Watch sugary solutions carefully to avoid
CAUTION: Do not use cooktop if the smoothtop is boilovers. If a sugar solution (such as jam, jelly, candy) boils
cracked, broken, or if metal melts onto the cooktop. Call over, it may pit the smoothtop. Turn element to LOW and
an authorized servicer. Do not attempt to repair the clean sugary boilovers immediately. See page 23 for
cooktop yourself, complete cleaning instructions.
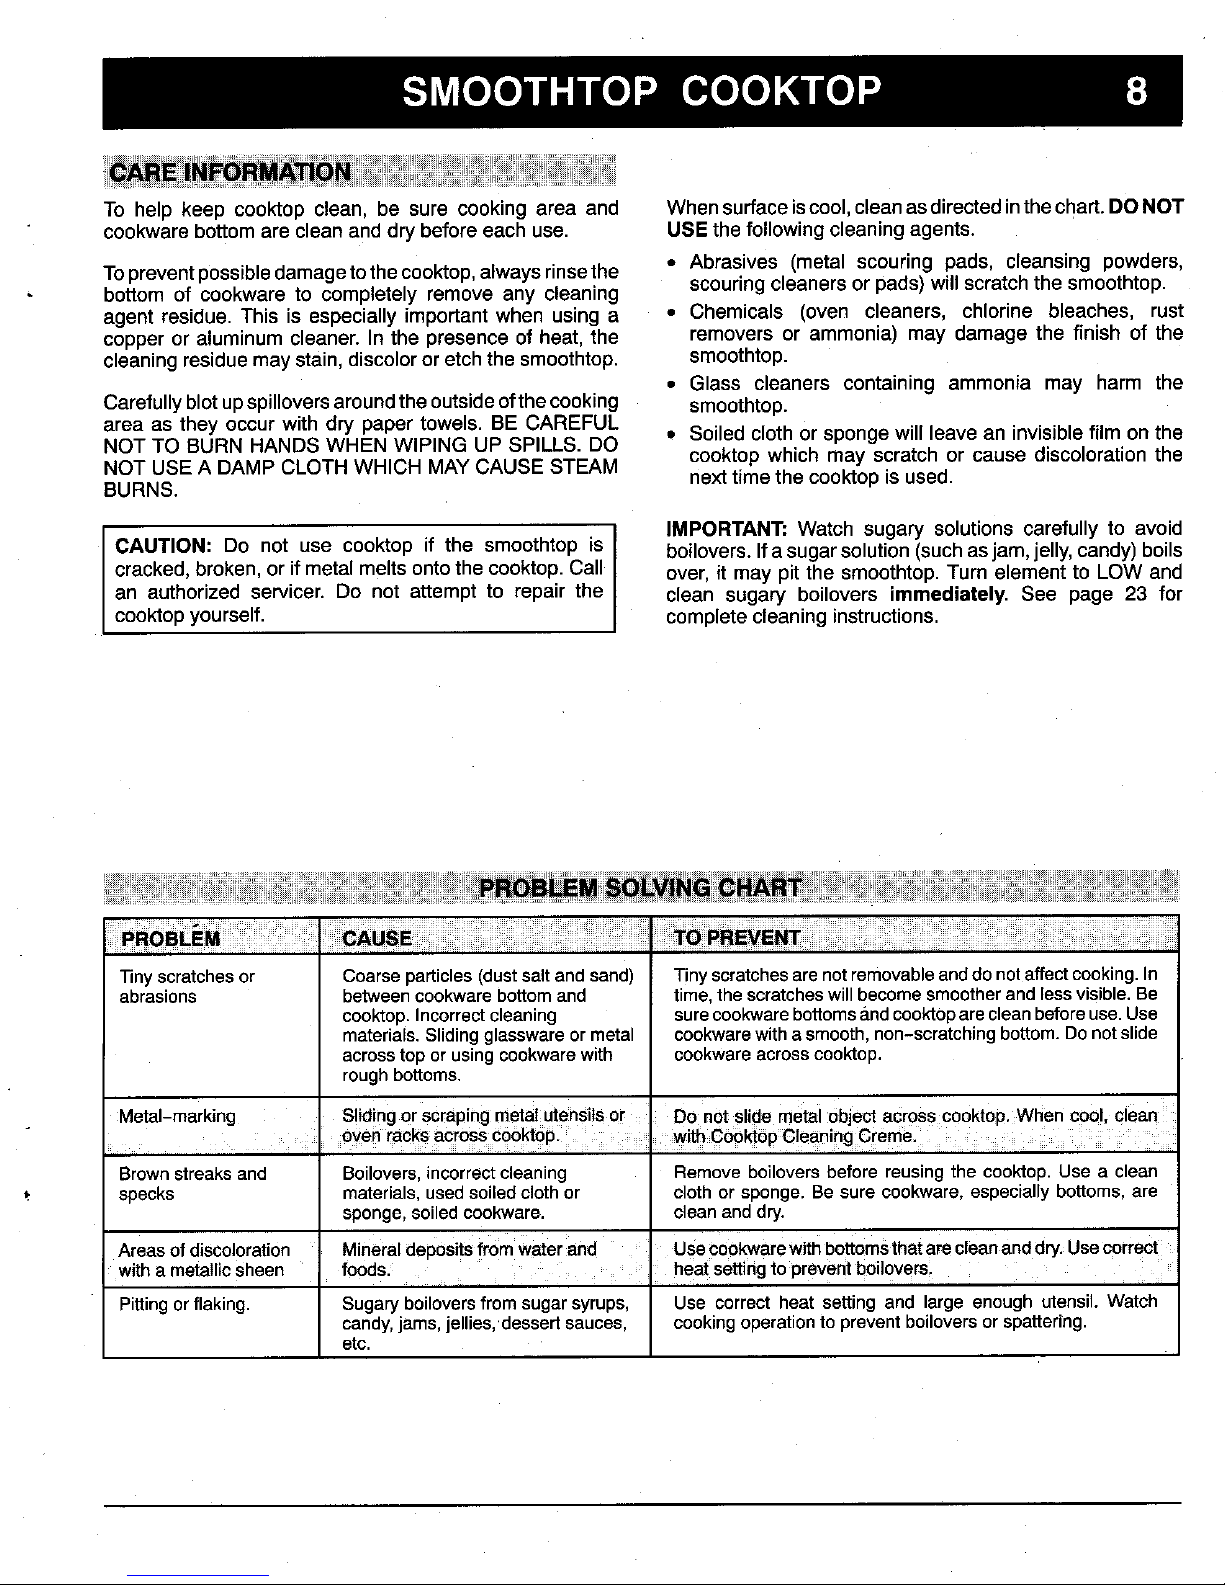
Tiny scratchesor Coarse particles (dustsalt and sand) Tiny scratches are notremovable anddo not affect cooking.In
abrasions between cookware bottom and time, the scratcheswill become smootherand lessvisible. Be
cooktop. Incorrectcleaning surecookwarebottomsa.ndcooktopareclean beforeuse. Use
materials.Sliding glassware or metal cookware witha smooth, non-scratching bottom. Do not slide
acrosstop or usingcookware with cookware across cooktop.
rough bottoms.
Metal-marking Slidingor scraping metal utensilsor Do not slide metal Object across c0oktop. When cool, clean
oven _acksacross ¢00_P_ withC_ktop GleaningCreme.
......... i , .............
Brown streaks and Boilovers, incorrect cleaning Remove boilovers before reusing the cooktop. Use a clean
t specks materials, usedsoiled cloth or cloth or sponge. Be sure cookware, especially bottoms, are
sponge, soiled cookware, clean and dry.
Areas of discoloration Mineraldepositsfrom waterand Use cookware with bottomsthatare cleananddry. Usecorrect
with a metallic sheen foods; I heat setting to prevent boilovers_ .....
Pittingorflaking. Sugary boilovers from sugar syrups, Use correct heat setting and large enough utensil. Watch
candy,jams,jellies,dessert sauces, cooking operationto prevent boilovers or spattering.
etc.
Page 9

OVEN USE
The oven lightswitchis located onthe control panel and is Your range isequipped withtwo fans - an internal cooling
markedOVEN LIGHT.Toturn the ovenlight on,push inthe fan and a convect fan located onthe backwall ofthe oven
bottom halfof the switch, cavity.
Thecooling fan isusedto helpkeep internalpartscool.This
fan wil!automaticallyturn on whenever the oven is setfor a
cooking (convection or conventional) or a self-cleaning
Theovenvent is locatedattherearof thecooktop.Whenthe operation.The fan will automaticallyturn offwhenpartshave
oven isinuse,this area mayfeelwarm or hotto thetouch.To cooled. The fan may continue to operate after the oven has
prevent baking problems, do not block the vent opening in been turned off. This is normal.
anyway.
The¢onvect fan isusedto circulatehot air intheovenwhen
the convection feature is selected. The convect fan
automatically turns on whenever the CONVECT pad is
pressed and will turn off when the convection operation is
Everyovenhasitsowncharacteristics.Youmayfindthat the cancelled.
cooking times and temperatures you were accustomed to
with your previous oven may need to be altered slightlywith
Your new oven. It is normal to notice some differences The convect fan will automatically stop whenever the
between this oven and yourpreviousoven. ovendoorisopenedduringaconvectionoperation.The
coolingfanwillremainon.
Page 10

11 OVEN USE
Thethree oven racksare designedwitha safety lock-stop center ofthe oven rack. Allowtwo inchesbetween the edge
position to keep the racks from accidenUy coming of the utensil(s)andtheoven walls.
completelyoutofthe ovenwhenpullingtherackouttoaddor
removefood. For optimum baking results of cakes, cookies or biscuits,
use one rack. Position rack so food is in the center of the
oven. Use either rackposition 3 or2.
3 RACK CONVECTION COOKING
Yourovenisequippedwiththreeracks.Thethirdrackis Ifcookingonmorethanonerack,staggerthefoodtoensure
used for multiple-rack CONVECTION cooking only. properairflow.
When convectionbakingon three racks, select rack
positions1(bottom), 3and 5 (top). Foroptimum results,
useonly one or two racksfor CONVENTIONALbaking.
Toremove: Besurethe rack iscool.Pullthe rackstraightout
untilit stopsatthe lock-stop position.Tiltthe front end ofthe
rackup and continue pullingthe rackout of the oven.
To replace: Place the rackonthe rack supportsandtilt the
frontendoftherackupslightly.Slideitbackuntilitclearsthe
lock-stopposition.Lowerthefrontandslidetherackstraight
in.Pulltherackouttothe lock-stoppositionto besure itis Ifcookingontworacks,userackpositions4 and2forcakes
positionedcorrectlyandthen return ittoitsnormalposition, and rackpositions4and 1when usingcookiesheets. Never
placetwocookiesheetsononerack.
I CAUTION: Do notattempttochangethe rackpositionsI
I
whentheovenishot. Ifconvection baking onthree racks,userackpositions5,
I
3 and 1.
Itisimportantthataircancirculatefreelywithintheovenand If mastinga largeturkey,placetheturkeyonrack1 andthe
aroundthe food. To help ensurethis, place food on the sidedishesonrack5.
RACK5 Use for toasting bread, or for three-rack
(highestposition) convectionbaking.
RACK 4 Usedfor mostbroilingandtwo-rackbaking. [_'-_-_J'SO '_,--_j
RACK 3 Usedfor mostbaked goodson a cookie sheet or _ _'-')_-_-
(middle position) jelly roll pan, or frozen conveniencefoods,orfor _ 5
three-rack convection baking. _ _]
4
RACK2 Use for roasting small cuts of meat, large
casseroles, baking loaves of bread, cakes (in _-._ 3
either tube, bundt, or layer pans) or two-rack 2
baking. 1
RACK 1 Used for mastinglarge cuts of meat and large
(lowestposition) poultry,pies, souffles,angel food cake, or for
three-rackconvectionbaking.
Page 11

OVEN USE 12
1. Pressthe OVEN TEMP or CONVECT pad. • Do not movethe door lock lever to the rightduring a
• 000°and BAKE or CONVECT BAKE indicatorwords cooking operation. If the door is locked, the cooking
operation will becancelled.Ifthe oven is hotenoughto
will appearin the display, engage the internal lock,the oven door will notopen.
2. Press the • or • pad. Then press either pad until the Ifthisoccurs,allowthe ovento cooluptoonehour,then
desiredoventemperature is displayed, unlock andopenthe door.
• 350°(f°rc°nventionalc°°king) °r325°(f°rc°nvecti°n • IfyoupresstheOVENTEMPorCONVECTpadanddo
cooking) willappear in the display when either pad is not set an oven temperature within 30 seconds, the
pressedonce. program will automatically cancel and the time of day
• The oventemperature can beset from 170°to 550°. will reappear in the display.
• The ON indicatorword and 75° or the actual oven • To recallthepresettemperatureduring preheat,press
temperature, whichever is higher, will appear in the the OVEN TEMP or CONVECT pad.
display.
• The coolingfanwill turn on. lfconvectionc0okingwas • Tochangetheoventemperatureduringcooking, press
selected,the convect fan will also turn on. the • or • pad until the desired temperature is
displayed.
• The temperature in the display will increase in 5°
increments until the oven reaches the preset • The oven will automaticallyturn off if itis left onfor 12
temperature, hours.
• Allow 10to 15minutesforthe ovento preheat.Asingle
beep will sound whenthe oven is preheated.
3. Place food in the oven. Check food for doneness at the
minimum cookingtime. Cook longerif needed.
Do not cover an entire rack with foil or place foil directly
4. At the end of cooking, turn the oven off by pressing the under cookware. Tocatch spillovers, place a piece of foil,a
STOP/CLEAR pad. Removefood from the oven. little largerthan the pan, on the rackbelowthe pan. Donot
placefoil onthe oven bottom.
Preheating is necessary for conventional and convection
baking.Allowabout10to 15minutesfortheovento preheat.
A singlebeepwillindicatethatthe ovenis preheated. Itisnot
necessaryto preheatfor roasting.
Selecting a temperature higher than desired will NOT
preheatthe oven any faster, and may havea negative
effecton baking results.
Page 12

13 OVEN USE
Use a reliable recipe and accurately measure fresh crisper crust. Use dark pans for pies, pie crusts or
ingredients. Carefully follow directions for oven bread.
temperatureandcookingtime. • Foroptimumbakingresults,bakecookiesandbiscuits
ona flatcookiesheet.Ifthepanhas sides,suchasa
Preheatovenif recommendedinthe recipeor package jelly roll pan, browningmay not be even. This is
directions.Selecting a temperature higher than the especiallyimportantforconvectionbaking.
desiredtemperaturewillnotpreheatthe ovenanyfaster.
Infact,thismay havea negativeeffectonbakingresults. • Ifusingheat-proof glassware,or darkpanssuchas
Baker's Secret or Wilton reduce the oven
temperature by 25°F except when baking pies 'or
Use the correct rack position. Bakingresultsmay be breadforconventionalbaking.Forconvectionbaking,
affectedifthewrongrack isused. Foroptimumresults, testyourrecipetodetermineifyouwishtoreducethe
bake foods on one rack. Select a rack positionthat
oven temperaturean additional 25°E (Remember:
locatesthefoodinthecenteroftheoven.If bakingontwo You normallyreducethe oven temperatureby 25°F
racks,selectrackpositions#2or4,#1 and4 or#2and5. when convectionbaking.)Use the samebakingtime
Select convection baking if using three racks as the as called for in the recipe.
circulating hotair will produce more even results.
• Top browningmay be darker iffood is locatedtoward Allow hot air to flow freely through the oven for
optimumbakingresults.Improperplacementof pansin
thetopofthe oven. the oven will block air flowand may resultin uneven
• Bottom browningmay be darker if food is located browning. For optimum browningand even cooking
towardthebottomoftheoven. results:
• Whenusingtworacksfor baking,allowenoughspace • Donotcrowda rackwithpans.Neverplacemorethan
betweentheracksforproperaircirculation.Browning one cookiesheet,one 13x9x2-inchcake pan ortwo
and cooking results will be affected if air flow is 9-inch roundcake pansonone rack.
blocked. * Staggerpanswhenbakingontwo racksso onepanis
• Use threeracksforCONVECTION cookingonly. notdirectlyoveranotherpan.
• Allowtwoinchesbetweenthepanandtheovenwalls.
Cookware material playsan importantpart in baking
results.Alwaysusethetypeandsizeofpancalledforin Check the cooking progress at the minimum time
the recipe. Cookingtimes or cooking results may be recommendedin the recipe.Thisisespeciallyimportant
affectedifthe wrongsizeisused. when convection baking using three racks. Check
cooking progress on the lower rack. If necessary,
• A shiny metal pan reflectsheatawayfromthefood. , continuecheckingatintervalsuntilthefoodisdone.Ifthe
Thistypeofpanproduceslighterbrowningandasofter ovendoorisopenedtoofrequently,heatwillescapethe
crust.Useshinypansfor bakingcakesorcookies, oven;thiscanaffectbakingresultsand wastesenergy.
• A dark, dull, anodized or satin finish metal pan If you add additional ingredients or alter the recipe,
absorbsheat and producesdarker browningwith a expectcookingtimesto increaseor decreaseslightly.
Page 13

OVEN U,C;E 14
i_i_i_i_!!i_i_ii_i_ _'iiii_i!_i__i__iiiii_ii!_ii_!i_i_i_ ii_ii_iiii!_ ii_ __j_iiii_i_!!__iii _|ii_iiii _ii _ _iiii_iii!!ii_i!iii_iii_ii!I i:_!!__i!_ i_i_ii!__i__i _':i_i!_i!_i_!i__ili_ _iii ___i _iiii !_i!ii_
• T-PsFor : ;=
.... ..............; ; ;;; ;;; Cbnv btib Bbkin Rbsti g= =' ..........................
Convectioncookingusesa smallfan to circulateheatedair aroundthefood. The fan is locatedbehinda baffleat
theback ofthe oven. Circulatingthe heatedair resultsinfaster,moreeven cookingwithenhancedbrowning.The
movingair also offersbetterbakingresultswhen bakingon two orthree racks.
Becauseofthe fastercookingand enhancedbrowning,manyfoods,especiallybakedgoods,are convectioncooked
at a loweroven temperature.
ConvectBakingTips ConvectRoastingTips
• Reducetheoventemperatureby25°Fformostbaking • The oventemperatureis notreducedwhenconvect
or 5O°Ffordelicatecakesandquickbreads.Cooking roasting.However,expectcookingtimesto beshorter.
timeswill be similarto or a few minutesless than
cooking times in the recipeor package directions. • As a general rule, roastingtime can be reduced by
about 25% when usingthe convection feature. Refer
• Use c,)nvectionwhenbaking large quantitiesoffoods, tothe RoastingCharton page 15for cookingtimes for
especiallyif bakingon three racks, both convection and conventional roasting.
• Convectionisidealfor bakingsuchfoods as cookies, • When To Use The Convection Feature For
biscuits,muffins,poundcakesandangelfoodcakes, Roasting: Selectconvectionwhenroastingmeatsor
cupcakes,or rolls, poultryinanuncoveredpan.The circulatingheatedair
helpstosealinthejuicestoproducea moremoistand
• Layer cakes and quick breads can be convection tenderroast.
baked,but reducethe oventemperatureby50°F for
moreeventopcrusts. • Selectconventional roastingifthe meatislesstender
• Cookiesheetsshouldbemadeofshinymetalandnot or ifthe meat is cookedin a covereddish or oven
havesides, cookingbag.
• Whencookingonthreeracks,checkcookingprogress • Donotuseroastingpanswithtallsidesasthistypeof
beforethe minimumtime suggestedin the recipe.It pan willblockthecirculatingheatedair.
may be necessary to removethe pan on the bottom
rack 1or2 minutesbefore the minimumcooking time • Do not cover meatwhen convectroasting. Ifyou wish
to cover the meat with a lid, aluminum foil, or oven
to prevent overbrowning, cooking bags, select the conventional method of
• Cooking times may increase slightly when convect roasting. Covering the meat blocks the circulating
baking on three racks because of the increased heated airthus eliminating the benefitsof convection
amount of food. NOTE: Do not usethree racks when roasting.
conventional baking.
• The breast and drumsticks on a turkey will cook and
• For optimum browning, place cookie sheets or brown quickly. Placea"foil tent"over theseareas after
rectangular (9"x 13")pan lengthwise, front-to-back the desired brownness is reached to _revent
onthe oven racks.This locatesthe food infront ofthe overbrowning.
fanfor moreevenbrowning, ifthe pans aretoo longto
placefront-to-back, center the pans side-to-side on • Expect convection roasted meats and poultry to be
the racks, juicier with a browner,crisperexterior•
• Arrange 3ans so they are directly over each other.
Stackingpans oneabove the other, centers the food
in front of the convection fan which improves air
circulationandbrowning.
Page 14

15 OVEN USE
Information inthe chart below covers both conventional and convection baking unless specifically noted. If you have carefully
followed the basic instructions and still experience poor results, these suggestions may be helpful
Cakesareuneven. Pans tooclose ortouchingeachother Cakes don't brown on top. Incorrectrackposition.
or oven warls. Temperatureset too low.
Batterunevenin pans. Overmixing.
Temperatureset too low orbaking time Toomuch liquid.
too short. Pan sizetoo largeortoo little
Ovennot _evel, batter in pan.
Undermixing. Ovendoor opened too often.
Too much liquid.
CONVECTION ONLY; Oven tempera- Excessive shrinkage. Toolittle leavening.
ture was not reduced 25°F or 50°F for Overmixing.
delicate cakes orquick breads. Pantoo targe.
Temperatureset too high.
Cake highin middle. Temperaturesettoo high. Bakingtimetoo long.
Bakingtime toolong. Panstoo closeto each other
Overmixing. or oven wails.
Toomuchflour. CONVECTION ONLY: Oven
Panstouchingeach otheroroven temperature wasnot reduced 25°F.
walls.
)ncorrectrack position. Uneventexture. Too muchliquid.
CONVECTION ONLY: Oven tempera- Undermixing.
ture was not reduced 25°F or 50°F for Temperature set too low.
de_catecakes orquick breads. Bakingtimetoo short.
CONVECTION ONLY: Oven tem-
, Cake falls. Toomuch shortening or sugar.
perature was not reduced 25°F or
Toomuch ortoo little liquid. 50°Ffor deticate cakes.
Temperatureset too row.
Old ortooILttlebakingpowder. Cakes have tunnels, Not enoughshortening.
Pan too smarl. Toomuch baking powder.
i Ovendoor openedfrequently. Overmixingor at too high a Speed.
Added incorrecttype of oiltocake mix, Temperatureset too high.
Added additionalingredients CONVECTION ONLY: Oven tern-
to cake mixor recipe, perature was not reduced25°F.
Cakes, cookies,biscuits Incorrect rack position. I Cakescrack on top, Batterovermixed.
don'tbrown evenly, Oven door not closed properly. Temperature set too high.
Door gasket not sealingproperly. Too muchleavening.
Incorrect useof aluminumfoil. Incorrect rack position.
Oven not preheated, ,CONVECTION ONLY: Oven tern-
Pans darkened, dented or warped, perature was not reduced 25°F or
l For optimumresultsforconventionalbaking,bakeon one 50°F for delicatecakes.
rack. If bakingcakes ontworacks, stagger panstoward Cake not done inmiddle. Temperature settoo high.
front ofoven onupperrackandpanstowardback ofoven Pantoo small
on lower rack, Baking time too short.
[ 1
Cakes, cookies, biscuits Oven not preheated: If additional ingredients were added to mix or recipe,
too brown on top or Panstouching eachother or oven expect cooking time to increase.
bottom, walls.
Oven temperaturetoo high. Pie crust edges toobrown. Temperatureset too high,
Incorrect rack position. Pans touchingeach other or
Incorrectuseof aluminumfoil oven walls.
P_aced2 cookiesheetsOnone rack. Edges of crusttoo thin;shield with
Used glass,darkened, stained,warped foil
or dullfinish metal pans. (Usea shiny CONVECTION ONLY: Oven tem-
cookiesheet.) peraturewas not reduced25°F.
CONVECTION ONLY: Oven tempera-
ture was not reduced 25°F or 50°F for Piesdon't brown on bottom. Usedshiny metal pans.
delicatecakes or breads. Temperatureset too low.
Incorrect rack position.
FOllOWcookware manufacturer's instructionsfor oven Pies have soaked crust. Temperaturetoo low atstart of
temperature: Glassware and dark cookware requite baking.
lowering the oventemperature by25° F. Fillingtoo juicy.
Used shiny metal pans.
Page 15

OVEN USE 16
Roasting isthe method for cooking large, tender cuts of meat Place the meat fat-side-up on a rack in a shallow roasting
uncovered, without adding moisture, pan. (Note: The broiler pan and insert can be used for
roasting meats.) Placing the meat on a rack holds the meat
See page 14for information on convection roasting, out of the drippings, thus allowing better heat circulation for
even cooking. As the fat on top ofthe roast melts, the meat is
Roasting Tips basted naturally, eliminating the need for additional basting.
Most meats are masted at 325°F. It is not necessary to The cooking time is determined by the weight of the meat
preheat the oven orreduce the temperature for conventional and the desired aloneness. For more accurate results, use a
or convection roasting. Place the roasting pan on a rack meat thermometer. Insert it so the tip is in the center of the
which has been placed in either of the two lowest rack thickest part of the meat. It should not touch fat or bone.
positions.
Remove the roast from the oven when the thermometer
Use tender cuts of meat weighing three pounds or more. registers approximately 5OFbelowthe doneness wanted. As
Some good choices are: beef rib, rib eye, top round, high the meat stands, the temperature will rise.
quality tip and rump roast, pork loin roast, veal and lamb leg,
shoulder roast and cured or smoked hams. I For more information on cooking meat and poultry, I
I
contact the USDA Meat and Poultry Hotline at
I
Season meat, if desired, either before or after roasting. Rub 1-800-535-4555.
into the surface of the roast if added before cooking.
Beef
Rib Roast (cut-side-down) 4to 5 325°F 140°F (rare) 25-30 20-25
160°F (medium) 30-35 25-30
Rib Eye Roast 4 to 6 350°F 140°F (rare) 25-30 20-25
160°F (medium) 30-35 25-30
TenderloinRoast 2 to 3 400°F 140°F (rare) 20-25 15-20
Sirloin Roast 3 to 6 325°F 140°F (rare) 25-30 20-25
160°F (medium) 30-35 25-30
Pork, Fresh
ShoulderBlade Roost,(boneless) 4 to 6 325°F 160°F 35-45 25-35
ShoulderBlade Roast L 4 to 6 325°F. 160°F 30-40 25-35
Lo nBlade orSiroinRoast 3 to 4 325°F . 160°F 35-40 30-40
BonelessPork Loin q 6 tO8 325°F 160°F 25-35 20-25r ii J • •
Pork, Smoked
Ham, Half (fullycooked)** 5 to 7 325°F 140°F 25-35 Not
Ham, Half (cook-before-eating) 5 to 7 325°F 140°F 35-45 Recommended
Poultry , , "
Turkey,unstuffed*** 12to 16 325°F 180°-185°F 18-20 12-16
16tO20 325°F 180°-185°F 16-18 10-15
20 tO24 325°F 180°-185°F 14-16 8-10
Turkey, Breast 3 to 8 325°F t80°F 30-40 20-30
Chicken, Fryer 2 1t2 to 3 1/2 350-375° 180°F 20-24 15-20
LambChicken'Roaster 4to 6 350-375°F t80°F 20-25 , , t5-20
Leg (boneless) 2 to 3 325°F 160°F 35-40 30-35
170°F 40-45 35-40
Whole Leg 5 to 7 325°F 160°F 30-35 25-35
• Roastingtimesareapproximateandmayvarydependingontheshapeoftheroast.Ameatthermometeristhemostaccuratewayto determine
doneness.
•* Addwaterandfollowpackagedirections.
•"**Stuffedturkeyrequiresadditionalroastingrime.Shieldlegsandbreastwithfoilto preventoverbrowninganddryingofskin.
Page 16

17 OVEN USE
The Automatic Oven Cooking feature is used to turn the TOset oven:
oven on and offat a presettime of day.Thisfeature can be
used to either: 1. Place food in the oven.
• Turn the oven on immediately (immediate start). 2. Pressthe COOK TIME pad.
• Delaythe start of cooking (delay start). • Thewords SET COOKTIME will flash in the display.
The feature can be used with either conventional or 3. Press the • or• pad to enter the cooking time.
convection oven cooking and with the self-cleaning oven
feature.Seepage21 for instructionsondelayingthe startof 4. Press the OVEN TEMP or CONVECT pad.
a clean cycle.
• The wordsBAKE or CONVECTBAKE and 000° will
The clock must befunctioning and set atthe correct time of appear in the display.
day for the Automatic Oven Cooking feature to operate
properly. 5. Pressthe • or • pad to enterthe oven temperature.
IMPORTANT Theoven willimmediatelyturn on. The wordsTIMED BAKE
ON will appear inthe display and the displaywill begin
• Highly perishable foods such as dairy products, counting downthe cookingtime.
pork, poultry, seafood, or stuffing are not
recommendedfor Delay Start cooking. At the end of the preset cooking time, the oven will
automatically turn off and END will appear in the display.
• If cooking more than ene food, select foods that Continuous beeps will remindyouto removethe food from
cook for the same length of time and at the same the oven.
oventemperature.
Press the STOP/CLEAR pad to cancel the beeps. The
To recall the preset cook time or stop time, press the current time of day will reappear in the display when the
corresponding pad. STOP/CLEARpad is pressed. Remove the food from the
oven,
To cancel theAutomatic OvenCookingoperation,pressthe
STOP/CLEAR pad.
At the end of the Automatic Oven Cooking operation, the Food is to cook for one hour and thirty minutes (1:30) at
oven will automatically turn off and continuous beeps will 375°E
sound to remind you to removefood from the oven. Press
the STOP/CLEAR pad to cancelthe beeps. 1. Pressthe COOK TIME pad.
This featurewill only delay cooking up to eleven hours and 2. Press the • pad until 1:30 (one hour and thirty minutes)
fifty five minutes (11:55). is displayed.
Ifyou delaymore than 30seconds between pressing a pad 3. Press the OVENTEMP or CONVECT pad.
and the • or • pad, the display will either:
4. Press the• pad until 375° is displayed.
• Return to the previoussetting.
The ovenwillturn onimmediatelyand willautomatically turn
• Beepand flash to indicatethe next entry, offatthepresettime. Pressthe STOP/CLEAR padtocancel
• Returntothecurrenttimeofdayandcanceltheoperation. the beeps.
Page 17

OVEN USE 18
To set oven: At the presettime, the oven will automaticallyturn on and
TIMED BAKE ON or TIMED CONVECT BAKE ON will
1. Placefoodinthe oven. appearfnthedisplay.Thedisplaywillbegincountingdown
2. Pressthe COOKTIME pad. the cookingtime.
• The wordsSETCOOK TIME willflashinthe display. At the end of the preset cooking time, the oven will
automaticallyturnoff and END willappear in the display.
3. Pressthe• or • padto enterthe cookingtime. Continuousbeepswillremindyoutoremovethefoodfrom
the oven.
• The cooking time will be displayed in hours and
minutes. Press the STOP/CLEAR pad to cancel the beeps and
4. Pressthe STOP TIME pad. removethe food from the oven. The currenttime of daywill
appear in the display when the STOP/CLEAR pad is
• The wordsSET STOPTIME will flash in the display, pressed.
5. Pressthe• or • padtoenterthetimeyouwishtheoven _E _ S_
to turn off. :_ ' _ -
Food is to cook for one hour and thirty minutes (1:30) at
6. Press the OVENTEMP or CONVECT pad, 375°F. Youwish thefood to be cooked by6:00.
• The words BAKE or CONVECT BAKE and 000° will 1. Pressthe COOKTIME pad.
appear in the display.
2. Press the • pad until 1:30 (onehourand thirty minutes)
7, Pressthe • or • pad to enter the oven temperature.
is displayed.
8. Press the CLOCK pad and the current time of day will
reappearinthe display. 3. Pressthe STOP TIME pad.
• DELAYBAKEor DELAYCONVECT BAKE will appear 4. Pressthe • pad until 6:00 is displayed.
inthedisplayto indicatethat theoven issetfor a delay
start cooking operation. 5. Press the OVEN TEMPor CONVECT pad.
Thecontrolwillautomaticallydetermine when toturn on I 6. Press the • pad until 375°is displayed.
theovenbasedon the COOKTIMEand STOPTIMEyou
I
set. Itis NOTnecessary to set a start time. The oven will automatically turn on and off at the preset
times. Pressthe STOP/CLEAR pad to cancelthe beeps.
Page 18

19 OVEN ;E
Broiling is a method of cooking tender meats by direct heat. TOset oven to broil:
The cooking time is determined by the distance between the 1. Press the BROIL pad.
meat and the broil element, the desired degree of aloneness 000 ° and BROIL indicator words will appear in the display.
and the thickness of the meat, 2. Press the • pad to select HI for normal broiling or press
the • pad to select Lo for low temperature broiling,
Broiling Tips 3. For optimum browning results, remove the broiler pan
Broiling requires the use of the broiler pan and insert. The and preheat the broi_element for 3 minutes.
broiler insert must bein place to allow fat and liquidto drainto 4. Broilwith the oven door opened to the broilstop position
the pan below to prevent spatters, smoke and flare-ups. (opened about 6-inches). Turn meat once about half way
Improper use may cause grease fires, through cooking. Check for doneness by cutting a slit in
For easier clean up, line the broiler pan with foil and spray the meat near the center for desired color.
the insertwith a non-stick vegetable spray. Do notcover the 5. At the end of cooking, remove the broiler pan and press
broiler insert with aluminum foil as this prevents fat from the STOP/CLEAR pad to cancel the broil operation. The
draining into pan below, current time of day will reappear in the display.
Trim excess fat and slash remaining fat to help keep meat
from curling and to reduce smoking and spattering. Season Use HI BROIL for most broil operations. Select Lo BROIL
meat after cooking, when broiling longer cooking foods such as poultry. The
lowertemperature allows foodto cook tothe well done stage
Place oven rack in the correct rack position when oven is without excessive browning. Cooking time may increase if
cool. For darker browning, place meat closer to the broil Lo BROIL is selected.
element. Place meat further downif you wish meat to bewell
done or if excessive smoking or flaring occurs. Broil times may need to be increased if oven is installed on a
See Care and Cleaning Chart on page 22 for instructions on 208-volt circuit.
cleaning the broiler pan and insert.
BACON #4 Well Done 6to 10
BEEF STEAKS
t-inch thick #4 Medium 15to 18
#4 Wetl Done 19to 23
CHICKEN LO BROIL
Pieces #3 or#4 Well Done 30 to45
GROUND BEEF PATTIES
3/4-inch thick #4 Well Done 15 to 18
HAM SLICE, precooked
1/2-inchthick #4 Warm 8to t2
LAMB CHOPS
1-inch thick #4 Medium 12to 15
Well Done 16 to 20
PORK CHOPS
1-inch thick #4 Well Done 22 to26
* The topracKpositionts oosition#5.
** Broilingtimesare approximateand mayvarydepending onthe meat.
Page 19

SELF-q :LEAN OVEN 20
The self-clean oven uses temperatures above normal
cookingtemperaturesto automaticallycleantheentire oven
interior. Whenthe door is lockedandthe CLEANpad ispressed,the
oven will automatically begin to heat to cleaning
CAUTION: It is normal for parts of therange to become temperatures.
hotduring acleancycle• Therefore, duringa clean cycle,
avoid touching the cooktop, oven vent area, oven door A cooling fan will automatically turn on during the self-
and w ndow. cycleCleanwhenCyCletheandovenWillautomaticallYhascooled, turn off after the c ean
Itisbettertoclean the oven regularlyratherthan towait until
there isa heavy build-up ofsoil in the oven. As the oven reaches cleaning temperatures, the LOCK
indicator will appear in the display to show that an internal
Turnoffthe ovenlightbeforeacleancycle. Ifthe ovenlightis lock mechanism has engaged. At this point, the oven door
left on, the light bulb will burn out during the cleancycle, can not be unlocked and opened.
To preventdamage to the door andlock lever,do notforce
the dooropen whenthe LOCK indicatoris displayed•,
1. Removeoven racks and close ovendoor• The first fewtimes the oven is cleaned, some smoke and
2. Lock ovendoor. odor may be detected• This is normal and will lessen or
3. Press CLEAN pad. disappear with use. If the oven is heavily soiled, or if the
broiler pan'wasaccidently left in the oven, smoke andodor
4. Press the • or • pad to selectcleaning time.
mayoccur.
• Light soil - 2 hours
• Average soil - 3 hours As the oven heats andcools, you mayhear soundsof metal
• Heavy soil - 4 hours partsexpanding and contracting•This is normaland will not
damage your appliance.
Removebroiler pan, all pans and the oven racks from the
oven•The racks will discolor and may not slide easily About one hourafter the end ofthe cleancycle, the internal
• after a clean cycle, lock will disengage and the LOCK indicatorwill turn off.At
this point, the door can be unlockedand opened. Move the
Cleanovenframe,doorframeandaroundthe ovenventwith door lockleverto the left or unlockedposition andopen the
a non-abrasive cleaning agent such as Bon Ami or door.The oven may stillbe hot.
detergent and water• These areas are not exposed to
cleaningtemperaturesandshouldbecleanedtoprevent soil Some soil may leavea lightgray,powderyashwhich can be
from bakingon during the clean cycle, removedwitha dampcloth• Ifsoil remains, it indicates that
the clean cycle was not long enough• The soil will be
Wipe upexcessgrease orspilloversfrom theovenbottomto removed during the next cleancycle•
preventexcessive smoking and flare-ups during the clean
cycle. If the oven racks were left in the oven and do not slide
smoothlyafteraclean cycle,wipe racksandembossed rack
Wipe upsugary spilloversandacid spilloverssuchaslemon supportswithasmall amountofvegetableoil torestore ease
juice, tomato sauce or milk-based sauces. Porcelain of movement•
enamel isacid resistant, notacidproof. The porcelainfinish
may discolor ifacid spills are notwiped up immediately. On the smoothtop cooktop: Clean around the vent
opening at the rear ofthe cooktop ifthere is adeposit from
Do not useoven cleaners onthe self-clean oven finishor the fumesvented duringthe clean cycle.Use detergentand
aroundany partofthe oven asthey will damagethe finishor water and a cloth or non-abrasive pad.
parts.
Fine,hair-like lines may appear inthe oveninterior oroven
Toprevent damage, do notclean or rub the gasket around door. This is a normalcondition resulting from heating and
the ovendoor.The gasket is designedto seal inheatduring cooling of the porcelainfinish. These linesdo not affect the
the cleancycle, performance of the oven.
(continued next page)
Page 20

21 SELF-(:LEAN OVEN
To set oven for a self-clean cycle: To delay the start of a clean cycle:
1. Removethe oven racks and close the door. 1. Removethe ovenracks andclosethe door.
2. Move the door lock leverto the right until itrests inthe 2. Move the door lock lever to the right or locked position.
lockedposition. 3, Press CLEAN pad.
3. Pressthe CLEAN pad. 4. Press the • or • pad to select the cleaning time.
• NOTE:"door"will appearinthe displayand beepswill
Soundifthe door is not locked, 5. Press STOPTIME pad and press the • or• pad to
selectthe time of day you wish the ovento turn off.The
• 3 HR:00 will appear inthe display and SET CLEAN stoptime and CLEAN DELAYSTOP TIMEwillappear in
TIME willflash inthe display, the display,
• After a few seconds delay, the oven and fan will 6. Press the CLOCK pad and the current time of day will
automatically turn on, CLEAN TIME and ON will reappear inthe display.CLEAN DELAYwill remain inthe
remain inthe display, displayto show that the oven is set for a delayed clean
operation.
4. Theoven willautomaticallycleanfor3hours.Or,select2
hoursforlightsoilupto4hoursforheavysoilbypressing 7. At the end of the clean cycle, continuous beeps will
the • or • pad. sound.Pressthe STOP/CLEARpadtocancelthe beeps.
5. Press the CLOCK pad and the current time of day will
reappearinthedisplay.CLEANand ONwill remaininthe
display to show thatthe ovenis in a clean cycle. To cancel clean cycle:
Ifthe doorisnotlocked orthe cleantime isnotenteredwithin 1. Pressthe STOP/CLEARpad,
30 seconds of pressing the CLEAN pad, the program will
2. Ifthe LOCKindicator isdisplayed,allow the oven to coot
automatically be cancelled, for uptoone hour.Oncethe LOCKindicatorturnsoff, the
About one hour after the clean cycle ends, the LOCK doorcan be unlockedand opened.
indicatorwillturn offand theovendoorcan be unlockedand IftheLOCKindicator is notdisplayed,the ovendoor can
opened, beunlocked and opened.
The oven door and door lock lever will be damaged if the
oven doorisforcedto openwhenthe LOCKindicator is still
displayed.
Page 21

CARE AND CLEANING CHART 22
i____ _i•_M_M_•_ _•_ii!_--_iii _!l_i_ I_!!_!_ !!_ii__i_'_•_¸_ !i__ i_i _ _Mii_i!_!i_ii_ii_ii_i_iiii_iiiiii!_iiiiii_iiiii!!!!iiiii_i_ _ i _li_i i_iii_iii _ "
Because of the many new cleaning products introduced in Non-Abrasive Cleaners - Bon Ami, paste of baking soda
the marketplace each year, it is not possible to list all and water.
products that can be safely used to clean this appliance.
Listed below are just a few examples of recommended Mildly Abrasive Powder or Liquid Cleansers - Ajax,
products. Barkeepers Friend, Cameo, Comet, Soft Scrub. (Note: Ifthe
cleaner is recommended for use on plastic, glass, or
REMEMBER, ALWAYS READ THE MANUFACTURER'S porcelain finishes, it can be used on the same appliance
INSTRUCTIONS to be sure the cleaner can be safely used finishes.)
on this appliance. Also, read and carefully follow the
manufacturer's directionswhen using any cleaning product. Non-Abrasive or Scratchless Plastic or Nylon Scouring
Pads or Sponges -Chore Boy Plastic Cleaning Puff,
To determine if a cleaning product is safe, test a small Scrunge Scrub Sponges, or Scotch-Brite No Scratch,
inconspicuousarea using a very light pressure to see ifthe Cookware or Kitchensponge.
surface may scratch ordiscolor.This isparticularly important
for porcelain enamel, highly polished, shiny, painted, or Abrasive or "Never Scratch" Scouring Pads - S.O.S.,
plastic surfaces. Brillo Steel Wool Soap, Scotch-Brite Wool Soap Pads.
(Brand names for the above cleaning products are registered
The following brands may help you to make an appropriate trademarks of the respective manufacturers.)
selection:
Glass Cleaners - Bon Ami, Cinch, Glass Plus, Windex. Before cleaning, be sure appliance is off and all parts are
cool before handling or cleaning to avoid damage and
Dishwashing Liquid Detergents - Dawn, Dove, Ivory, Joy. poss b e burns, f a part s removed, besure t s correct y
Mild Liquid Spray Cleaners - Fantastik, Formula 409. replaced.
• PARTS
BakedEnamel: • Detergentandwater Useadrypapertowelorclothtowipeupspills,especiallyacidspills,assoonasthey
•Sidepanels • Mildliquidcleaner occur.Thisisespeciallyimportantforwhitesurfaces.Whensurfaceiscool,washwith
•Storagedrawer • Glasscleaner detergentandwater.Donotuseabrasiveorharshcleaningliquidsandpowdersor
•Ovendoor ovencleaners.Thesewillscratchandpermanentlydamagethefinish.Drywithasoft
• Backpanel cloth.Onsmoothtopoooktops,cleanventopeningareaaftereachovenuse.
BroilerPanand • Detergentandwater Pretreatthebroilerpanandinsertwithanon-stickvegetablecoatingsuchasPareor
Insert • Plasticorsoap-filledscouringpad Mazolatomakecleaningeasier.
• Dishwasher Rernovefromovenafteruse.Coolthenpouroffgrease.Placesoapyclothoverinsert
andpan;letsoaktoloosensoil.Washinwarmsoapywater.Usesoapfilledscouring
• padtoremovestubborncoil.Broilerpanandinserteanbecleanedinthedishwasher.
ControlKnobs ° Detergentandwater Foreaseofcleaning,turnoffknobandremovebypullingforward.Wash,dnse,and
• Mildliquidsprays dry.Donotuseabrasivecleaningagentsastheymayscratchthefinishandremove
• Glasscleaners themarkings.Turnoneachelementtobesureknobshavebeencorrectlyreplaced.
=
DripBowls,Chrome •
• Brownfoodstains • Detergentandwater Aftereachuse,wash,rinseanddrytopreventdifficultsells.If heavilysoiled,gentty
• Plasticscouringpads scrubwithplasticscouringpad.Ifsoilisallowedtoburnon,itmaybeimpossibleto
• Mildabrasivecleaners remove.
Donotcoverwithaluminumfoil.
•Blue/goldheat • FlitzMetalPolish Thesestainsarecausedbyoverheating,andnormallyoccuroveraperiodoftime.
stains (Followpackagedirections) Theyareusuallypermanent.Torainmize:
1. Avoidexosssiveuseofthehighheatsetting.UseHIGHoolytostartcooking,then
lowerthesettingtofinishcookng.
2. Usefiatbottompansthatdonotextendmorethantwoinchesfromthesurface
element.
Anon-abrasivemetalpolishsuchasFlitzmaybeusedtohelpremovestains.Flltzis
availableinmanyautomotivesupplyandhardwarestores.
Page 22

23 CARE AND CLEANING CHART
Drip Bowls, * Detergentandwater Aftereachuse,wash,rinseanddryto preventdifficultsoils.Tocleanby hand,soak in
Porcelain • Mild abrasivecleaners hotsudsywater,then usemild abrasivecleaner and plasticscouringpad.
• Plasticscouringpads DOnotcoverwith aluminumfoil.
• Dishwasher
Efame_ aiesaff-deaning.Soilwillburnoffaselementsareused.Donotsp_ayoven
, cleaner 0n eie_tS; electrical hookup or COnnection.Do not immersecoil-type
/ Y / I
Glass • Detergentandwater To prevent stainingof the oven window,avoid using excessiveamounts of water
J* Oven window • Glass cleaner which may seep under or behind glass. Wash with detergent and water. Remove
• stubbornsoilwithpasteofbakingsodaandwater.Do notuseabrasive materialssuch
asscouring pads,steelwoolor powdered cleaning agents. They will damage gtsss.
Rinse withclear water and dry.
_,0eter_t _ w_er I D0not U_=_en:cteanet orabrasiveagents,astheywilldamagetheflhiShlRemove
= , ........ ,i ,,i i ,i ii ,, ,,,, ,, i ,i ,,i , ,_ ,
Oven Racks • Detergent andwater Cleanwithsoapywater•Removestubbornsoilwithcleansingpowderors0apfilled
• Plasticscouringpad scouringpad. Rinse and dry. Rackswill permanentlydiscolorand may notslide
• Cleansingpowders smoothlyifleftintheovenduringa self-cleanoperation.Ifthisoccum,wipetherack
• Soap-filledscouringpads and embossedracksupporLswitha smallamountofvegetableoilto restoreeaseof
movement,thenwipe off excess oil
I =D_n_ USqove_ deaner_powde_0rI_qUidcleansers,abrasive'or;causticcleaning
=age_ qn p!_¢ finlshes,TheseCleaningagentsWillScratchormart'the finish.
JTo pieve_ stai_!_ _ d_oloratj0n; remo_e fat; acid (t0mato, lemonl
: vin_ari m_lk,fruitjui_, marinape_soilsimmediatelywithadry papert0Wel0rCloth
i=;_e_suffacaiS=cool_ ¢!eanirinse, anddry. ; ;
Porcelain Enamel * Detergentand water Percela/n enamel is glass fused on metal and may crack or chip with misuse.
• Cool(top,coil • Pasteofbakingsodaandwater Porcelainenamelisacidresistant,notacidproof.Allspillovers,especiallyacidicor
elements * Nonabrasiveplasticpad orsponge sugarspinovers,shouldbe wipedupimmediatelywitha dry cloth.Thisisespecially
• Cooktoptrim, importantaround the vent openingfor smoothtopcooktopmodels•Surface may
smoothtop discolorordullifsoil, especiallyacidicscil, isnotremoved.Neverwipeoffa warm or
hotsurfacewithadampcloth.Thismaycausecrackingandchipping.Neveruseoven
cleaners,abrasiveorcausticcleaningagentsonexteriorfinishof range.
Smoothtop Cooktop
• IJghtto moderate • CcoktopCleaningCreme Wait untilcooktophascooled before cleaning.Gentlyapplycleaningagent with a
soil • Detergentandwater non-abrasiveplasticbrush,nylonor plasticpad, paper towelor cleancloth.Rinse
• Pasteofbakingsodaandwater thoroughlyandcompletelydry.
• Heavysoilorbrown] • CooktopCleaningCreme Gentlyscrubwithcleaning cremeand cleanclothorpapertowel. Rcapplycleaner.
graystainsfrom Coverwithdamppapertowelstokeepcleanermoist.Letstandfor30to45 minutes.
hardwaterormetal Scrubto removeremainingstain. Rinseand dry.
marks
• Burned-onor crusty • Single-edgesafetyrazorblade Hold razor bladescraperat 30° angle and very carefullyscrapeoff soil Clean
soilsorresidue • CooktopCleaningCreme remainingsoilwithcleaningcreme.
• Sugar,plastic • Single-edgesafetyrazorblade Immediatelyturnelementto LOW andscrapefromhotsurfacetoa coolarea•Then
heldwitha potholderora wooden turnelementOFF and cool.Clean residuewithrazorbladescraper and cleaning
handledstainlesssteelspatula creme.
NOTE:Callan authorizedservicerifthesmoothtopshouldcrack,breakorifmetalor
aluminumfoil shouldmeltontothe cooktop.
Page 23

MAINTENANCE 24
The cooktop on slide-in ranges featuring either a coil Do not attempt to open or close door until the door is
elementor smoothtopcooktopisnotdesignedtoliftupand Completelyseated on the hingearms. Neverturn on the
isnotremovable, ovenunlessdoorisproperlyinplace.Whenbaking,besure
thedooriscompletelyclosed.Bakingresultswillbeaffected
ffthe dooris notsecurelyclosed.
To remove lift-off door: Open the door to the "stop"
Turnoffthe ovenlightbeforea self-clean operation.Ifthe position(openedabout 6 inches)andgraspthe doorwith
lightislefton,the bulbmayburnout.
bothhandsateachside.Donotusethedoorhandletoliftthe
Toturn on the oven light: Pushthe rockerswitchlocated door.Liftupevenlyuntilthe doorclearsthehingearms.
onthecontrolpanel.
Toreplace ovenlight: Beforereplacingtheovenlightbulb,
DISCONNECTPOWER TO THE RANGE. Besure bulb is
cool.Do nottoucha hotbulbwitha damp clothas the bulb
maybreak.Useadrypotholder,topreventpossibleharmto
hands,andverycarefullyunscrewbulbcoverandbulb.
Toreplace door: Graspthedoorateachside,alignslotsin
the doorwiththehingearmsandslidethedoordownonto
the hinge arms untilcompletelyseatedonhinges.
Replacewitha 40 wattappliancebulb.Replacebulbcover
and reconnectpowertorange.Resetthe clock.
CAUTION: Hinge arms are springmountedand will
slam shut againstthe range if accidentlyhit. Never
place hand or fingers between the hinges and the
front oven frame. Youcouldbe injuredif hingesnaps
Do not placeexcessiveweighton an oPenovi_ndooror back.
stand onan open ovendooras, in somecases, it could
causetherangetotipover,breakthedoororcauseserious
injurytothe user.
When openingthe oven door,allowsteam and hotair to
escape beforereachingin ovento check, addor remove The ovendoor islockedfor a self-cleanoperationonly.Do
food. notmovethe doorlockleverto therightor lockedposition
during a cooking operation. If the door is locked, the
If the oven door is opened during a convection cooking operation will automatically be cancelled and "door" will
operation, the convect fan will automatically turn off.The appearinthedisplay.lftheovenishotenoughtoengagethe
convect fan will automatically turn on when the door is internallock,the ovendoor will notopen. Allow theoven to
closed. You will still hearthe cooling fan. cool for upto an hour, then unlock and openthe door.
Page 24

25 MAINTENANCE
__ _iii__:__ _L____ _S_I_;_L__¸_ _i__I _ _!! _• _ _ _ ,_ _ _L_i__ _ii_!i__¸___ ••_L_ •
The storagedraweratthe bottomofthe rangeissafe and If you have carefullyfollowedthe recipe, reviewed the
convenientforstoringmetalandglasscookware.DO NOT bakingtipsinthismanualandstillfeelcookingresultsdonot
store plastic,paperware,foodor flammablematerialin this meet your expectations, you can adjust the oven
drawer.Removedrawerto cleanunderrange, temperature. DO NOT ADJUST THE TEMPERATURE if
To remove: Emptydrawerthen pulldrawerouttothefirst onlyoneortwoitemsare notbakingproperly.
stopposition.Lift upfrontofdrawerand pulltothe second If you think the oven shouldbe hotter or cooler,you can
stop position.Grasp sidesand lift up and out to remove
drawer, adjust it yourself. To decide how much to change the
thermostat,set theoventemperature25°F higherorlower
To replace: Fittheendsof thedrawerglidesontothe rails, than thetemperatureinyourrecipe,then bake.The results
Liftupdrawerfrontand gentlypushintofirststopposition, ofthe"test"shouldgiveyouan idea ofhowmuchtoadjust
Lift up drawer again and continueto slide drawer to the the thermostat.
closedposition.
To adjust the thermostat:
1. PresstheOVEN TEMP pad.
oeoorarenOeVorrorainour.O°
range must be level. 3. Press and hold the OVEN TEMP pad for several
Levelinglegsare locatedon seconds, The display will show the ambient oven
each cornerof the base of temperaturefor a fewsecondsthen00° willappear.
the range. Level by turning
the legs. To prevent range )_ • If 00° does not appear in the display, press the
from accidently tipping, STOP/CLEAR pad and begin again.
range should be secured to the floor by sliding a rear
leveling leg into the anti-tip bracket supplied with the ° If the oventemperature was previously adjusted, the
range, change will be displayed. For example, if the
temperature was reduced by 15°, -15 ° will be
displayed.
4. Pressthe • or y padto select the temperature change
Your appliance is equ!pped with self-diagnostic software desired.
which continuouslymonitorsthe controlto ensure safe and
properoperation. If the software detects a questionable • The oven temperature can be increased upto 35° or
situation, a FAULTCODE (F plus a number)will appear in reduced by as much as35° (-35 °) in 5° increments.
the display, continuous beeps may sound and as a safety • Ifyoudelayinselectingatemperature,the programwill
precaution, the operation will becancelled.
automatically cancel and 00° will disappear. Begin
Ifa fault code appearsinthe displayand continuous beeps again if the program cancels.
sound, pressthe STOP/CLEAR pad. Then, reprogramthe
cookingoperation. Ifthe fault code reappearsinthe display, 5. Press the STOP/CLEAR pad and the time of day will
call an authorized servicer. Do not use the oven until the reappear in the display.The oven will now bake at the
appliance has been serviced, adjusted temperature.
Ifthe oven is heavily soiled, excessivesmoke andflaring It is not necessary to readjust the oven temperature if
mayresultina fault codeduringa self-clean cycle.Jfthis I there is a power interruption. This adjustment will not
occurs,presstheSTOP/CLEARpadand allowtheovento affect bro or cleantemperatures.
coolfor an hour. I
Page 25

3ERVICE INFORMATION 2(
Part or all of your electric range does not operate Oven fan not operating during convection cooking
• Isthe rangepluglooseordisconnectedfromtheelectrical • Arethe controlsset properlyfor convection?
outlet?
• Are any housefusesblownorcircuitbreakerstripped? Baking results differ from previous oven
• Oven thermostatcalibrationmay differbetweenold and
• Has thepowersupplyto thehomebeeninterrupted? new oven. The newer oven thermostatmay be more
• Arethe ovencontrolsproperlyset? accuratethanthe one on you previousoven.Follow a
reliablerecipeandreviewbakinginformationonpages11
• Wastheelectroniccontrolcorrectlyset? to15.Ifyoustillfeeltheoventemperatureisincorrectsee
• Was the door left in the locked positionfollowinga page25for informationonadjustingtheoventhermostat.
self-cleancycle?
• Is the ovensetfor automaticoven cooking? Food does not broil correctly
• Wasthecontrolsetproperlyfor broiling?(See page 19.)
Surface elements fail to turn on or heat the food • Was theproperrackpositionused?(See page19.)
properly,
• Is the rangeplug looseordisconnectfrom the electrical • Didyouallowtime forthe broilelementto preheat?
outlet? • Didyouuse the broilerpanthat camewiththe range?
• Iftherangehascoilelements,aretheyproperlyplugged • Wasaluminumfoilusedonthe broilerinsert,blockingthe
intothereceptacles? slitsforfat drainage?
• Wereappropriateutensilsused?(Seepage 6.) • Was theovendooropenedtothe broilstopposition?
• Arethe surfaceelement controlsproperlyset?
• Isvoltageto thehousereduced? Oven light does notoperate
• Is thebulb looseor burnedout?
Food not baking or cooking correctly • Isthe lightswitchinthe On position?
• Areyouusingthecorrectrackposition?
• Arethe oven racks properlyplaced forbaking? Oven will not self-clean
• Are you using more than two racks for conventional • Istheself-cleancontrolsetproperly?(Seepages20-21.)
cooking? • Is theovensetfor a delayedclean operation?
• Haveyouusedaluminumfoilcorrectly?
• Is theovendoorproperlylocked?
• Wasthe ovenpreheatedas recommended?
• Was theovenheavilysoiled?
• Are the co.rots properly set for a conventiona_or
convectionoperation? Oven doorwon't lock
• Istheretwoinchesof space betweenthe pansandtwo • Are the propercontrolssetforthe serf-clean cycle?
inchesbetweenthe pansandtheovenwalls?
• Arethe ovenandovenrackslevel? Oven door will not unlock
• Was goodcookware/bakewareofthe propersize used? • Hasthe self-cleancyclebeencompletedforatleast one
hour?
• Wasthe ovenventcoveredorblocked?
• Was the doorcorrectlyunlocked?
• Are youusinga testedrecipefroma reliablesource?
• Is the LOCKindicatorwordinthe display?
• Didyoucheckthe foodat the minimumcookingtime to
avoidover-cooking?This is especiallyimportantwhen "F" plus a number appears in the display
convectionbaking on three racks. Always check the • This isa faultcode. Ifafaultcodeappearsinthe display
bottomrackpositiona few minutesbeforetheminimum anda continuousbeepsounds,pressthe STOP/CLEAR
cookingtime. pad. If the beeps continue after pressing the
• Did you reduce the oven temperature by 25° when STOP/CLEARpad,callanauthorizedservicer.See page
convectionbaking. 25 foradditionalinformation.
Page 26

27 SERVICE NFORMATI( )N
Donot attempt to service theappliance yourself unless model and serial numbersofthe appliance, the name and
directedto dosoin this manual. Contactthe dealerwho address of the dealer from whom you purchasedthe
sold you the appliancefor service, appliance,thedateofpurchaseanddetailsconcerningyour
problem.
ifyoudo notreceivesatisfactoryservice,you may contact
If your appliance should requireservice or replacement the Major ApplianceConsumerAction Programby letter
parts,contactyourdealeror authorizedservicer. Useonly includingyourname,address,and telephonenumber,as
genuinefactory partsif replacementparts are necessary, wellasthemodelandserialnumbersofthe appliance.
Consultthe YellowPages inyourtelephonedirectoryunder
appliancefortheauthorizedservicecenternearestyou.Be MajorApplianceConsumerActionProgram
sureto includeyour name, address,and phonenumber, 20 NorthWackerDrive
alongwiththe modelandserial numbersofthe appliance. Chicago,IL 60606
(See front cover for location of your model and serial
numbers.) MACAP(MajorApplianceConsumerActionProgram)isan
independentagencysponsoredbythreetradeassociations
Ifyouare notsatisfiedwiththelocalresponsetoyourservice asa courtof appealsonconsumercomplaintswhichhave
requirements,writeto MaytagCustomerService,P.O.Box notbeenresolvedsatisfactorilywithinareasonableperiodof
2370, Cleveland,TN 37320-2370. Include the complete time.
r#ZEB_"
50%PilST-CONSUIHBFIBER
109%DE.INKnlNEWSPAP_,MAGAZINES6.CATALOGS
 Loading...