

Page 1

Using
ADOBE® CONTRIBUTE® CS4
Page 2

Copyright
© 2008 Adobe Systems Incorporated. All rights reserved.
Using and administering Adobe® Contribute® CS4 for Windows® and Mac OS
If this guide is distributed with software that includes an end-user agreement, this guide, as well as the software described in it, is furnished under license and
may be used or copied only in accordance with the terms of such license. Except as permitted by any such license, no part of this guide may be reproduced, stored
in a retrieval system, or transmitted, in any form or by any means, electronic, mechanical, recording, or otherwise, without the prior written permission of Adobe
Systems Incorporated. Please note that the content in this guide is protected under copyright law even if it is not distributed with software that includes an enduser license agreement.
The content of this guide is furnished for informational use only, is subject to change without notice, and should not be construed as a commitment by Adobe
Systems Incorporated. Adobe Systems Incorporated assumes no responsibility or liability for any errors or inaccuracies that may appear in the informational
content contained in this guide.
Please remember that existing artwork or images that you may want to include in your project may be protected under copyright law. The unauthorized
incorporation of such material into your new work could be a violation of the rights of the copyright owner. Please be sure to obtain any permission required
from the copyright owner.
Any references to company names in sample templates are for demonstration purposes only and are not intended to refer to any actual organization.
Adobe, the Adobe logo, Adobe Audition, Adobe Premiere, Acrobat, After Effects, Contribute, Creative Suite, Dreamweaver, Encore, Fireworks, Flash,
Illustrator, InCopy, InDesign, Photoshop, and Version Cue are either registered trademarks or trademarks of Adobe Systems Incorporated in the United States
and/or other countries.
Microsoft and Windows are either registered trademarks or trademarks of Microsoft Corporation in the United States and/or other countries. Mac, Macintosh,
and Mac OS are trademarks of Apple Inc., registered in the United States and other countries. All other trademarks are the property of their respective owners.
Updated Information/Additional Third Party Code Information available at http://www.adobe.com/go/thirdparty.
Portions include software under the following terms:
This product contains either BISAFE and/or TIPEM software by RSA Data Security, Inc.
Portions Copyright © 1998 Gilles Vollant
This product includes software developed by the Apache Software Foundation (http://www.apache.org/).
Flash 9 video is powered by On2 TrueMotion video technology. © 1992-2005 On2 Technologies, Inc. All Rights Reserved. http://www.on2.com.
This product includes software developed by the OpenSymphony Group (http://www.opensymphony.com/).
Portions of this code are licensed from Nellymoser (www.nellymoser.com).
Sorenson Spark™ video compression and decompression technology licensed from Sorenson Media, Inc.
MPEG Layer-3 audio compression technology licensed by Fraunhofer IIS and THOMSON multimedia (http://www.iis.fhg.de/amm/).
Certain Spelling portions of this product is based on Proximity Linguistic Technology. ©Copyright 1990 Merriam-Webster Inc. ©Copyright 1990 All rights
reserved. Proximity Technology A Division of Franklin Electronic Publishers, Inc. Burlington, New Jersey USA. ©Copyright 2003 Franklin Electronic
Publishers Inc.©Copyright 2003 All rights reserved. Proximity Technology A Division of Franklin Electronic Publishers, Inc. Burlington, New Jersey USA. Legal
Supplement ©Copyright 1990/1994 Merriam-Webster Inc./Franklin Electronic Publishers Inc. ©Copyright 1994 All rights reserved. Proximity Technology A
Division of Franklin Electronic Publishers, Inc. Burlington, New Jersey USA. ©Copyright 1990/1994 Merriam-Webster Inc./Franklin Electronic Publishers Inc.
©Copyright 1997All rights reserved. Proximity Technology A Division of Franklin Electronic Publishers, Inc. Burlington, New Jersey USA ©Copyright 1990
Merriam-Webster Inc. ©Copyright 1993 All rights reserved. Proximity Technology A Division of Franklin Electronic Publishers, Inc. Burlington, New Jersey
USA. ©Copyright 2004 Franklin Electronic Publishers Inc. ©Copyright 2004 All rights reserved. Proximity Technology A Division of Franklin Electronic
Publishers, Inc. Burlington, New Jersey USA. ©Copyright 1991 Dr. Lluis de Yzaguirre I Maura ©Copyright 1991 All rights reserved. Proximity Technology A
Division of Franklin Electronic Publishers, Inc. Burlington, New Jersey USA. ©Copyright 1990 Munksgaard International Publishers Ltd. ©Copyright 1990 All
rights reserved. Proximity Technology A Division of Franklin Electronic Publishers, Inc. Burlington, New Jersey USA. ©Copyright 1990 Van Dale Lexicografie
bv ©Copyright 1990 All rights reserved. Proximity Technology A Division of Franklin Electronic Publishers, Inc. Burlington, New Jersey USA. ©Copyright 1995
Van Dale Lexicografie bv ©Copyright 1996 All rights reserved. Proximity Technology A Division of Franklin Electronic Publishers, Inc. Burlington, New Jersey
USA. ©Copyright 1990 IDE a.s. ©Copyright 1990 All rights reserved. Proximity Technology A Division of Franklin Electronic Publishers, Inc. Burlington, New
Jersey USA. ©Copyright 1992 Hachette/Franklin Electronic Publishers Inc. ©Copyright 2004 All rights reserved. Proximity Technology A Division of Franklin
Electronic Publishers, Inc. Burlington, New Jersey USA. ©Copyright 1991 Text & Satz Datentechnik ©Copyright 1991 All rights reserved. Proximity Technology
A Division of Franklin Electronic Publishers, Inc. Burlington, New Jersey USA. ©Copyright 2004 Bertelsmann Lexikon Verlag ©Copyright 2004 All rights
reserved. Proximity Technology A Division of Franklin Electronic Publishers, Inc. Burlington, New Jersey USA. ©Copyright 2004 MorphoLogic Inc.
©Copyright 2004 All rights reserved. Proximity Technology A Division of Franklin Electronic Publishers, Inc. Burlington, New Jersey USA. ©Copyright 1990
William Collins Sons & Co. Ltd. ©Copyright 1990 All rights reserved. Proximity Technology A Division of Franklin Electronic Publishers, Inc. Burlington, New
Jersey USA. ©Copyright 1993-95 Russicon Company Ltd. ©Copyright 1995 All rights reserved. Proximity Technology A Division of Franklin Electronic
Publishers, Inc. Burlington, New Jersey USA. ©Copyright 2004 IDE a.s. ©Copyright 2004 All rights reserved. Proximity Technology A Division of Franklin
Electronic Publishers, Inc. Burlington, New Jersey USA. The Hyphenation portion of this product is based on Proximity Linguistic Technology. ©Copyright
2003 Franklin Electronic Publishers Inc.©Copyright 2003 All rights reserved. Proximity Technology A Division of Franklin Electronic Publishers, Inc.
Burlington, New Jersey USA. ©Copyright 1984 William Collins Sons & Co. Ltd. ©Copyright 1988 All rights reserved. Proximity Technology A Division of
Franklin Electronic Publishers, Inc. Burlington, New Jersey USA. ©Copyright 1990 Munksgaard International Publishers Ltd. ©Copyright 1990 All rights
reserved. Proximity Technology A Division of Franklin Electronic Publishers, Inc. Burlington, New Jersey USA. ©Copyright 1997 Van Dale Lexicografie bv
©Copyright 1997 All rights reserved. Proximity Technology A Division of Franklin Electronic Publishers, Inc. Burlington, New Jersey USA. ©Copyright 1984
Editions Fernand Nathan ©Copyright 1989 All rights reserved. Proximity Technology A Division of Franklin Electronic Publishers, Inc. Burlington, New Jersey
USA. ©Copyright 1983 S Fischer Verlag ©Copyright 1997 All rights reserved. Proximity Technology A Division of Franklin Electronic Publishers, Inc.
Burlington, New Jersey USA. ©Copyright 1989 Zanichelli ©Copyright 1989 All rights reserved. Proximity Technology A Division of Franklin Electronic
Page 3

Publishers, Inc. Burlington, New Jersey USA. ©Copyright 1989 IDE a.s. ©Copyright 1989 All rights reserved. Proximity Technology A Division of Franklin
Electronic Publishers, Inc. Burlington, New Jersey USA. ©Copyright 1990 Espasa-Calpe ©Copyright 1990 All rights reserved. Proximity Technology A Division
of Franklin Electronic Publishers, Inc. Burlington, New Jersey USA. ©Copyright 1989 C.A. Stromberg AB. ©Copyright 1989 All rights reserved. Proximity
Technology A Division of Franklin Electronic Publishers, Inc. Burlington, New Jersey USA.
Adobe Systems Incorporated, 345 Park Avenue, San Jose, California 95110, USA
Notice to U.S. government end users. The software and documentation are “Commercial Items,” as that term is defined at 48 C.F.R. §2.101, consisting of
“Commercial Computer Software” and “Commercial Computer Software Documentation,” as such terms are used in 48 C.F.R. §12.212 or 48 C.F.R. §227.7202,
as applicable. Consistent with 48 C.F.R. §12.212 or 48 C.F.R. §§227.7202-1 through 227.7202-4, as applicable, the Commercial Computer Software and
Commercial Computer Software Documentation are being licensed to U.S. Government end users (a) only as Commercial items and (b) with only those rights
as are granted to all other end users pursuant to the terms and conditions herein. Unpublished-rights reserved under the copyright laws of the United States.
Adobe Systems Incorporated, 345 Park Avenue, San Jose, CA 95110-2704, USA. For U.S. Government End Users, Adobe agrees to comply with all applicable
equal opportunity laws including, if appropriate, the provisions of Executive Order 11246, as amended, Section 402 of the Vietnam Era Veterans Readjustment
Assistance Act of 1974 (38 USC 4212), and Section 503 of the Rehabilitation Act of 1973, as amended, and the regulations at 41 CFR Parts 60-1 through 60-60,
60-250,and 60-741. The affirmative action clause and regulations contained in the preceding sentence shall be incorporated by reference.
Page 4

Contents
Chapter 1: Resources
Activation and registration . . . . . . . . . . . . . . . . . . . . . . . . . . . . . . . . . . . . . . . . . . . . . . . . . . . . . . . . . . . . . . . . . . . . . . . . . . . . . . . . . . . . . . . . . . . . 1
Help and support . . . . . . . . . . . . . . . . . . . . . . . . . . . . . . . . . . . . . . . . . . . . . . . . . . . . . . . . . . . . . . . . . . . . . . . . . . . . . . . . . . . . . . . . . . . . . . . . . . . . . . 2
Services, downloads, and extras . . . . . . . . . . . . . . . . . . . . . . . . . . . . . . . . . . . . . . . . . . . . . . . . . . . . . . . . . . . . . . . . . . . . . . . . . . . . . . . . . . . . . . . . 2
What’s new? . . . . . . . . . . . . . . . . . . . . . . . . . . . . . . . . . . . . . . . . . . . . . . . . . . . . . . . . . . . . . . . . . . . . . . . . . . . . . . . . . . . . . . . . . . . . . . . . . . . . . . . . . . 4
Chapter 2: Setting up Contribute
The Contribute workflow . . . . . . . . . . . . . . . . . . . . . . . . . . . . . . . . . . . . . . . . . . . . . . . . . . . . . . . . . . . . . . . . . . . . . . . . . . . . . . . . . . . . . . . . . . . . . . 5
Connect to a blog . . . . . . . . . . . . . . . . . . . . . . . . . . . . . . . . . . . . . . . . . . . . . . . . . . . . . . . . . . . . . . . . . . . . . . . . . . . . . . . . . . . . . . . . . . . . . . . . . . . . . 6
Connect to a website . . . . . . . . . . . . . . . . . . . . . . . . . . . . . . . . . . . . . . . . . . . . . . . . . . . . . . . . . . . . . . . . . . . . . . . . . . . . . . . . . . . . . . . . . . . . . . . . . . 6
Open Contribute . . . . . . . . . . . . . . . . . . . . . . . . . . . . . . . . . . . . . . . . . . . . . . . . . . . . . . . . . . . . . . . . . . . . . . . . . . . . . . . . . . . . . . . . . . . . . . . . . . . . . . 7
Create your blog/browse to your website . . . . . . . . . . . . . . . . . . . . . . . . . . . . . . . . . . . . . . . . . . . . . . . . . . . . . . . . . . . . . . . . . . . . . . . . . . . . . . 9
Edit your blog/website . . . . . . . . . . . . . . . . . . . . . . . . . . . . . . . . . . . . . . . . . . . . . . . . . . . . . . . . . . . . . . . . . . . . . . . . . . . . . . . . . . . . . . . . . . . . . . . 10
Publish your blog/website . . . . . . . . . . . . . . . . . . . . . . . . . . . . . . . . . . . . . . . . . . . . . . . . . . . . . . . . . . . . . . . . . . . . . . . . . . . . . . . . . . . . . . . . . . . . 10
Integrate Contribute with Adobe Creative Suite applications . . . . . . . . . . . . . . . . . . . . . . . . . . . . . . . . . . . . . . . . . . . . . . . . . . . . . . . . . . 10
Integrate Adobe Bridge with Adobe Contribute . . . . . . . . . . . . . . . . . . . . . . . . . . . . . . . . . . . . . . . . . . . . . . . . . . . . . . . . . . . . . . . . . . . . . . . 11
Reference . . . . . . . . . . . . . . . . . . . . . . . . . . . . . . . . . . . . . . . . . . . . . . . . . . . . . . . . . . . . . . . . . . . . . . . . . . . . . . . . . . . . . . . . . . . . . . . . . . . . . . . . . . . . 13
iv
Chapter 3: Workspace
OWL . . . . . . . . . . . . . . . . . . . . . . . . . . . . . . . . . . . . . . . . . . . . . . . . . . . . . . . . . . . . . . . . . . . . . . . . . . . . . . . . . . . . . . . . . . . . . . . . . . . . . . . . . . . . . . . . . 15
The Contribute workspace . . . . . . . . . . . . . . . . . . . . . . . . . . . . . . . . . . . . . . . . . . . . . . . . . . . . . . . . . . . . . . . . . . . . . . . . . . . . . . . . . . . . . . . . . . . . 22
Switch between browsing and editing . . . . . . . . . . . . . . . . . . . . . . . . . . . . . . . . . . . . . . . . . . . . . . . . . . . . . . . . . . . . . . . . . . . . . . . . . . . . . . . . 25
Browse to web pages and blog entries . . . . . . . . . . . . . . . . . . . . . . . . . . . . . . . . . . . . . . . . . . . . . . . . . . . . . . . . . . . . . . . . . . . . . . . . . . . . . . . . 26
Open web pages and blog entries without browsing . . . . . . . . . . . . . . . . . . . . . . . . . . . . . . . . . . . . . . . . . . . . . . . . . . . . . . . . . . . . . . . . . . 26
Set up access to commonly used pages . . . . . . . . . . . . . . . . . . . . . . . . . . . . . . . . . . . . . . . . . . . . . . . . . . . . . . . . . . . . . . . . . . . . . . . . . . . . . . . 29
Set Contribute preferences . . . . . . . . . . . . . . . . . . . . . . . . . . . . . . . . . . . . . . . . . . . . . . . . . . . . . . . . . . . . . . . . . . . . . . . . . . . . . . . . . . . . . . . . . . . 30
Change or disable startup password . . . . . . . . . . . . . . . . . . . . . . . . . . . . . . . . . . . . . . . . . . . . . . . . . . . . . . . . . . . . . . . . . . . . . . . . . . . . . . . . . . 32
Set browser encoding . . . . . . . . . . . . . . . . . . . . . . . . . . . . . . . . . . . . . . . . . . . . . . . . . . . . . . . . . . . . . . . . . . . . . . . . . . . . . . . . . . . . . . . . . . . . . . . . 33
Contribute accessibility features . . . . . . . . . . . . . . . . . . . . . . . . . . . . . . . . . . . . . . . . . . . . . . . . . . . . . . . . . . . . . . . . . . . . . . . . . . . . . . . . . . . . . . 33
Reference . . . . . . . . . . . . . . . . . . . . . . . . . . . . . . . . . . . . . . . . . . . . . . . . . . . . . . . . . . . . . . . . . . . . . . . . . . . . . . . . . . . . . . . . . . . . . . . . . . . . . . . . . . . . 35
Chapter 4: Working with existing web pages and blog entries
Overview of working with blogs and web pages . . . . . . . . . . . . . . . . . . . . . . . . . . . . . . . . . . . . . . . . . . . . . . . . . . . . . . . . . . . . . . . . . . . . . . . 46
Edit existing web pages and blog entries . . . . . . . . . . . . . . . . . . . . . . . . . . . . . . . . . . . . . . . . . . . . . . . . . . . . . . . . . . . . . . . . . . . . . . . . . . . . . . 50
Undo mistakes . . . . . . . . . . . . . . . . . . . . . . . . . . . . . . . . . . . . . . . . . . . . . . . . . . . . . . . . . . . . . . . . . . . . . . . . . . . . . . . . . . . . . . . . . . . . . . . . . . . . . . . 55
Save drafts . . . . . . . . . . . . . . . . . . . . . . . . . . . . . . . . . . . . . . . . . . . . . . . . . . . . . . . . . . . . . . . . . . . . . . . . . . . . . . . . . . . . . . . . . . . . . . . . . . . . . . . . . . . 55
Send web page drafts and files for review . . . . . . . . . . . . . . . . . . . . . . . . . . . . . . . . . . . . . . . . . . . . . . . . . . . . . . . . . . . . . . . . . . . . . . . . . . . . . 56
Access new review drafts . . . . . . . . . . . . . . . . . . . . . . . . . . . . . . . . . . . . . . . . . . . . . . . . . . . . . . . . . . . . . . . . . . . . . . . . . . . . . . . . . . . . . . . . . . . . . 60
Edit web page drafts . . . . . . . . . . . . . . . . . . . . . . . . . . . . . . . . . . . . . . . . . . . . . . . . . . . . . . . . . . . . . . . . . . . . . . . . . . . . . . . . . . . . . . . . . . . . . . . . . . 60
Review web page drafts . . . . . . . . . . . . . . . . . . . . . . . . . . . . . . . . . . . . . . . . . . . . . . . . . . . . . . . . . . . . . . . . . . . . . . . . . . . . . . . . . . . . . . . . . . . . . . 61
Work with template-based web pages . . . . . . . . . . . . . . . . . . . . . . . . . . . . . . . . . . . . . . . . . . . . . . . . . . . . . . . . . . . . . . . . . . . . . . . . . . . . . . . . 62
Work offline . . . . . . . . . . . . . . . . . . . . . . . . . . . . . . . . . . . . . . . . . . . . . . . . . . . . . . . . . . . . . . . . . . . . . . . . . . . . . . . . . . . . . . . . . . . . . . . . . . . . . . . . . . 65
Edit web pages in an external application . . . . . . . . . . . . . . . . . . . . . . . . . . . . . . . . . . . . . . . . . . . . . . . . . . . . . . . . . . . . . . . . . . . . . . . . . . . . . 67
Page 5

Edit web page source in an external application . . . . . . . . . . . . . . . . . . . . . . . . . . . . . . . . . . . . . . . . . . . . . . . . . . . . . . . . . . . . . . . . . . . . . . . 68
Configure blog server settings . . . . . . . . . . . . . . . . . . . . . . . . . . . . . . . . . . . . . . . . . . . . . . . . . . . . . . . . . . . . . . . . . . . . . . . . . . . . . . . . . . . . . . . . 68
Discard a draft, new page, or new blog entry . . . . . . . . . . . . . . . . . . . . . . . . . . . . . . . . . . . . . . . . . . . . . . . . . . . . . . . . . . . . . . . . . . . . . . . . . . 70
Delete a web page or blog entry . . . . . . . . . . . . . . . . . . . . . . . . . . . . . . . . . . . . . . . . . . . . . . . . . . . . . . . . . . . . . . . . . . . . . . . . . . . . . . . . . . . . . . 70
Export a web page or blog entry (Windows only) . . . . . . . . . . . . . . . . . . . . . . . . . . . . . . . . . . . . . . . . . . . . . . . . . . . . . . . . . . . . . . . . . . . . . . 72
Print a web page or blog entry . . . . . . . . . . . . . . . . . . . . . . . . . . . . . . . . . . . . . . . . . . . . . . . . . . . . . . . . . . . . . . . . . . . . . . . . . . . . . . . . . . . . . . . . 72
Add Google search . . . . . . . . . . . . . . . . . . . . . . . . . . . . . . . . . . . . . . . . . . . . . . . . . . . . . . . . . . . . . . . . . . . . . . . . . . . . . . . . . . . . . . . . . . . . . . . . . . . 73
Reference . . . . . . . . . . . . . . . . . . . . . . . . . . . . . . . . . . . . . . . . . . . . . . . . . . . . . . . . . . . . . . . . . . . . . . . . . . . . . . . . . . . . . . . . . . . . . . . . . . . . . . . . . . . . 73
Chapter 5: Adding pages, blog entries, and documents
Create or copy a page on your website . . . . . . . . . . . . . . . . . . . . . . . . . . . . . . . . . . . . . . . . . . . . . . . . . . . . . . . . . . . . . . . . . . . . . . . . . . . . . . . . 76
Create a stand-alone web page . . . . . . . . . . . . . . . . . . . . . . . . . . . . . . . . . . . . . . . . . . . . . . . . . . . . . . . . . . . . . . . . . . . . . . . . . . . . . . . . . . . . . . . 81
Create a blog entry for your blog . . . . . . . . . . . . . . . . . . . . . . . . . . . . . . . . . . . . . . . . . . . . . . . . . . . . . . . . . . . . . . . . . . . . . . . . . . . . . . . . . . . . . . 81
Set page properties for a web page . . . . . . . . . . . . . . . . . . . . . . . . . . . . . . . . . . . . . . . . . . . . . . . . . . . . . . . . . . . . . . . . . . . . . . . . . . . . . . . . . . . 85
Add keywords and a description for a web page . . . . . . . . . . . . . . . . . . . . . . . . . . . . . . . . . . . . . . . . . . . . . . . . . . . . . . . . . . . . . . . . . . . . . . . 87
Set preferences for blog entries . . . . . . . . . . . . . . . . . . . . . . . . . . . . . . . . . . . . . . . . . . . . . . . . . . . . . . . . . . . . . . . . . . . . . . . . . . . . . . . . . . . . . . . 87
Enter metadata for a blog entry . . . . . . . . . . . . . . . . . . . . . . . . . . . . . . . . . . . . . . . . . . . . . . . . . . . . . . . . . . . . . . . . . . . . . . . . . . . . . . . . . . . . . . . 88
About converting documents to PDFs (Windows only) . . . . . . . . . . . . . . . . . . . . . . . . . . . . . . . . . . . . . . . . . . . . . . . . . . . . . . . . . . . . . . . . . 92
Add Microsoft Word and Excel documents to a website . . . . . . . . . . . . . . . . . . . . . . . . . . . . . . . . . . . . . . . . . . . . . . . . . . . . . . . . . . . . . . . . 94
Open documents in Contribute from Microsoft Office applications (Windows only) . . . . . . . . . . . . . . . . . . . . . . . . . . . . . . . . . . . . . 96
Insert PDFs in Contribute pages . . . . . . . . . . . . . . . . . . . . . . . . . . . . . . . . . . . . . . . . . . . . . . . . . . . . . . . . . . . . . . . . . . . . . . . . . . . . . . . . . . . . . . 103
Insert HTML code snippets . . . . . . . . . . . . . . . . . . . . . . . . . . . . . . . . . . . . . . . . . . . . . . . . . . . . . . . . . . . . . . . . . . . . . . . . . . . . . . . . . . . . . . . . . . 105
Reference . . . . . . . . . . . . . . . . . . . . . . . . . . . . . . . . . . . . . . . . . . . . . . . . . . . . . . . . . . . . . . . . . . . . . . . . . . . . . . . . . . . . . . . . . . . . . . . . . . . . . . . . . . . 105
v
Chapter 6: Working with text
About HTML and CSS styles in the Contribute Style menu . . . . . . . . . . . . . . . . . . . . . . . . . . . . . . . . . . . . . . . . . . . . . . . . . . . . . . . . . . . . . 113
Add text to a web page . . . . . . . . . . . . . . . . . . . . . . . . . . . . . . . . . . . . . . . . . . . . . . . . . . . . . . . . . . . . . . . . . . . . . . . . . . . . . . . . . . . . . . . . . . . . . . 113
Format text . . . . . . . . . . . . . . . . . . . . . . . . . . . . . . . . . . . . . . . . . . . . . . . . . . . . . . . . . . . . . . . . . . . . . . . . . . . . . . . . . . . . . . . . . . . . . . . . . . . . . . . . . 115
Position text on the page . . . . . . . . . . . . . . . . . . . . . . . . . . . . . . . . . . . . . . . . . . . . . . . . . . . . . . . . . . . . . . . . . . . . . . . . . . . . . . . . . . . . . . . . . . . . 120
Create lists . . . . . . . . . . . . . . . . . . . . . . . . . . . . . . . . . . . . . . . . . . . . . . . . . . . . . . . . . . . . . . . . . . . . . . . . . . . . . . . . . . . . . . . . . . . . . . . . . . . . . . . . . . 121
Check spelling . . . . . . . . . . . . . . . . . . . . . . . . . . . . . . . . . . . . . . . . . . . . . . . . . . . . . . . . . . . . . . . . . . . . . . . . . . . . . . . . . . . . . . . . . . . . . . . . . . . . . . . 126
Find and replace text . . . . . . . . . . . . . . . . . . . . . . . . . . . . . . . . . . . . . . . . . . . . . . . . . . . . . . . . . . . . . . . . . . . . . . . . . . . . . . . . . . . . . . . . . . . . . . . . 126
Reference . . . . . . . . . . . . . . . . . . . . . . . . . . . . . . . . . . . . . . . . . . . . . . . . . . . . . . . . . . . . . . . . . . . . . . . . . . . . . . . . . . . . . . . . . . . . . . . . . . . . . . . . . . . 127
Chapter 7: Working with images and graphic elements
About inserting images and buttons . . . . . . . . . . . . . . . . . . . . . . . . . . . . . . . . . . . . . . . . . . . . . . . . . . . . . . . . . . . . . . . . . . . . . . . . . . . . . . . . . 131
Add an image to a page . . . . . . . . . . . . . . . . . . . . . . . . . . . . . . . . . . . . . . . . . . . . . . . . . . . . . . . . . . . . . . . . . . . . . . . . . . . . . . . . . . . . . . . . . . . . . 132
Insert shared assets into a web page . . . . . . . . . . . . . . . . . . . . . . . . . . . . . . . . . . . . . . . . . . . . . . . . . . . . . . . . . . . . . . . . . . . . . . . . . . . . . . . . . 135
Change image properties . . . . . . . . . . . . . . . . . . . . . . . . . . . . . . . . . . . . . . . . . . . . . . . . . . . . . . . . . . . . . . . . . . . . . . . . . . . . . . . . . . . . . . . . . . . . 136
Change an image’s position or orientation . . . . . . . . . . . . . . . . . . . . . . . . . . . . . . . . . . . . . . . . . . . . . . . . . . . . . . . . . . . . . . . . . . . . . . . . . . . 137
Edit an image in Contribute . . . . . . . . . . . . . . . . . . . . . . . . . . . . . . . . . . . . . . . . . . . . . . . . . . . . . . . . . . . . . . . . . . . . . . . . . . . . . . . . . . . . . . . . . . 138
Edit an image in an external application . . . . . . . . . . . . . . . . . . . . . . . . . . . . . . . . . . . . . . . . . . . . . . . . . . . . . . . . . . . . . . . . . . . . . . . . . . . . . . 141
Insert SWF content into your web page . . . . . . . . . . . . . . . . . . . . . . . . . . . . . . . . . . . . . . . . . . . . . . . . . . . . . . . . . . . . . . . . . . . . . . . . . . . . . . 142
Insert a video in your web page . . . . . . . . . . . . . . . . . . . . . . . . . . . . . . . . . . . . . . . . . . . . . . . . . . . . . . . . . . . . . . . . . . . . . . . . . . . . . . . . . . . . . . 143
Change a video’s position or orientation . . . . . . . . . . . . . . . . . . . . . . . . . . . . . . . . . . . . . . . . . . . . . . . . . . . . . . . . . . . . . . . . . . . . . . . . . . . . . 144
Add audio and video files to your blog . . . . . . . . . . . . . . . . . . . . . . . . . . . . . . . . . . . . . . . . . . . . . . . . . . . . . . . . . . . . . . . . . . . . . . . . . . . . . . . 145
Add or delete a horizontal rule . . . . . . . . . . . . . . . . . . . . . . . . . . . . . . . . . . . . . . . . . . . . . . . . . . . . . . . . . . . . . . . . . . . . . . . . . . . . . . . . . . . . . . . 148
Page 6

Insert PayPal e-commerce buttons . . . . . . . . . . . . . . . . . . . . . . . . . . . . . . . . . . . . . . . . . . . . . . . . . . . . . . . . . . . . . . . . . . . . . . . . . . . . . . . . . . 149
Reference . . . . . . . . . . . . . . . . . . . . . . . . . . . . . . . . . . . . . . . . . . . . . . . . . . . . . . . . . . . . . . . . . . . . . . . . . . . . . . . . . . . . . . . . . . . . . . . . . . . . . . . . . . . 151
Chapter 8: Working with tables
About conflicts in table formatting . . . . . . . . . . . . . . . . . . . . . . . . . . . . . . . . . . . . . . . . . . . . . . . . . . . . . . . . . . . . . . . . . . . . . . . . . . . . . . . . . . 158
Insert tables . . . . . . . . . . . . . . . . . . . . . . . . . . . . . . . . . . . . . . . . . . . . . . . . . . . . . . . . . . . . . . . . . . . . . . . . . . . . . . . . . . . . . . . . . . . . . . . . . . . . . . . . . 158
Select table elements . . . . . . . . . . . . . . . . . . . . . . . . . . . . . . . . . . . . . . . . . . . . . . . . . . . . . . . . . . . . . . . . . . . . . . . . . . . . . . . . . . . . . . . . . . . . . . . . 160
Resize tables, rows, and columns . . . . . . . . . . . . . . . . . . . . . . . . . . . . . . . . . . . . . . . . . . . . . . . . . . . . . . . . . . . . . . . . . . . . . . . . . . . . . . . . . . . . . 161
Align tables . . . . . . . . . . . . . . . . . . . . . . . . . . . . . . . . . . . . . . . . . . . . . . . . . . . . . . . . . . . . . . . . . . . . . . . . . . . . . . . . . . . . . . . . . . . . . . . . . . . . . . . . . 162
Cut, copy, and paste cells . . . . . . . . . . . . . . . . . . . . . . . . . . . . . . . . . . . . . . . . . . . . . . . . . . . . . . . . . . . . . . . . . . . . . . . . . . . . . . . . . . . . . . . . . . . . 163
Add, delete, or merge table rows and columns . . . . . . . . . . . . . . . . . . . . . . . . . . . . . . . . . . . . . . . . . . . . . . . . . . . . . . . . . . . . . . . . . . . . . . . 165
Modify table appearance . . . . . . . . . . . . . . . . . . . . . . . . . . . . . . . . . . . . . . . . . . . . . . . . . . . . . . . . . . . . . . . . . . . . . . . . . . . . . . . . . . . . . . . . . . . . 168
Sort tabular data . . . . . . . . . . . . . . . . . . . . . . . . . . . . . . . . . . . . . . . . . . . . . . . . . . . . . . . . . . . . . . . . . . . . . . . . . . . . . . . . . . . . . . . . . . . . . . . . . . . . 171
Reference . . . . . . . . . . . . . . . . . . . . . . . . . . . . . . . . . . . . . . . . . . . . . . . . . . . . . . . . . . . . . . . . . . . . . . . . . . . . . . . . . . . . . . . . . . . . . . . . . . . . . . . . . . . 172
Chapter 9: Working with links
Create text and image links . . . . . . . . . . . . . . . . . . . . . . . . . . . . . . . . . . . . . . . . . . . . . . . . . . . . . . . . . . . . . . . . . . . . . . . . . . . . . . . . . . . . . . . . . . 177
Set the advanced linking options . . . . . . . . . . . . . . . . . . . . . . . . . . . . . . . . . . . . . . . . . . . . . . . . . . . . . . . . . . . . . . . . . . . . . . . . . . . . . . . . . . . . 184
Edit links . . . . . . . . . . . . . . . . . . . . . . . . . . . . . . . . . . . . . . . . . . . . . . . . . . . . . . . . . . . . . . . . . . . . . . . . . . . . . . . . . . . . . . . . . . . . . . . . . . . . . . . . . . . . 189
Test links . . . . . . . . . . . . . . . . . . . . . . . . . . . . . . . . . . . . . . . . . . . . . . . . . . . . . . . . . . . . . . . . . . . . . . . . . . . . . . . . . . . . . . . . . . . . . . . . . . . . . . . . . . . . 190
Reference . . . . . . . . . . . . . . . . . . . . . . . . . . . . . . . . . . . . . . . . . . . . . . . . . . . . . . . . . . . . . . . . . . . . . . . . . . . . . . . . . . . . . . . . . . . . . . . . . . . . . . . . . . . 191
vi
Chapter 10: Working with pages with frames
About frames . . . . . . . . . . . . . . . . . . . . . . . . . . . . . . . . . . . . . . . . . . . . . . . . . . . . . . . . . . . . . . . . . . . . . . . . . . . . . . . . . . . . . . . . . . . . . . . . . . . . . . . 198
Edit frame content . . . . . . . . . . . . . . . . . . . . . . . . . . . . . . . . . . . . . . . . . . . . . . . . . . . . . . . . . . . . . . . . . . . . . . . . . . . . . . . . . . . . . . . . . . . . . . . . . . 199
Save and publish a page with frames . . . . . . . . . . . . . . . . . . . . . . . . . . . . . . . . . . . . . . . . . . . . . . . . . . . . . . . . . . . . . . . . . . . . . . . . . . . . . . . . . 200
Target frame content . . . . . . . . . . . . . . . . . . . . . . . . . . . . . . . . . . . . . . . . . . . . . . . . . . . . . . . . . . . . . . . . . . . . . . . . . . . . . . . . . . . . . . . . . . . . . . . . 201
Reference . . . . . . . . . . . . . . . . . . . . . . . . . . . . . . . . . . . . . . . . . . . . . . . . . . . . . . . . . . . . . . . . . . . . . . . . . . . . . . . . . . . . . . . . . . . . . . . . . . . . . . . . . . . 202
Chapter 11: Publishing web pages and blog entries
Publishing a page to your website . . . . . . . . . . . . . . . . . . . . . . . . . . . . . . . . . . . . . . . . . . . . . . . . . . . . . . . . . . . . . . . . . . . . . . . . . . . . . . . . . . . 203
Preview a page in your default browser . . . . . . . . . . . . . . . . . . . . . . . . . . . . . . . . . . . . . . . . . . . . . . . . . . . . . . . . . . . . . . . . . . . . . . . . . . . . . . 207
Publish a file from your computer to your website . . . . . . . . . . . . . . . . . . . . . . . . . . . . . . . . . . . . . . . . . . . . . . . . . . . . . . . . . . . . . . . . . . . . 208
Replace a file on your website . . . . . . . . . . . . . . . . . . . . . . . . . . . . . . . . . . . . . . . . . . . . . . . . . . . . . . . . . . . . . . . . . . . . . . . . . . . . . . . . . . . . . . . 209
Roll back to a previous version of a page . . . . . . . . . . . . . . . . . . . . . . . . . . . . . . . . . . . . . . . . . . . . . . . . . . . . . . . . . . . . . . . . . . . . . . . . . . . . . 211
Publish a document from Microsoft Office (Windows only) . . . . . . . . . . . . . . . . . . . . . . . . . . . . . . . . . . . . . . . . . . . . . . . . . . . . . . . . . . . . 212
Post content to a blog . . . . . . . . . . . . . . . . . . . . . . . . . . . . . . . . . . . . . . . . . . . . . . . . . . . . . . . . . . . . . . . . . . . . . . . . . . . . . . . . . . . . . . . . . . . . . . . 214
Post content to a blog from RSS aggregators . . . . . . . . . . . . . . . . . . . . . . . . . . . . . . . . . . . . . . . . . . . . . . . . . . . . . . . . . . . . . . . . . . . . . . . . . 217
Publish a blog entry to your blog . . . . . . . . . . . . . . . . . . . . . . . . . . . . . . . . . . . . . . . . . . . . . . . . . . . . . . . . . . . . . . . . . . . . . . . . . . . . . . . . . . . . 219
Reference . . . . . . . . . . . . . . . . . . . . . . . . . . . . . . . . . . . . . . . . . . . . . . . . . . . . . . . . . . . . . . . . . . . . . . . . . . . . . . . . . . . . . . . . . . . . . . . . . . . . . . . . . . . 222
Chapter 12: Creating and managing website and blog server connections
About creating and sending website connections . . . . . . . . . . . . . . . . . . . . . . . . . . . . . . . . . . . . . . . . . . . . . . . . . . . . . . . . . . . . . . . . . . . . 228
Enable or disable CPS for a website . . . . . . . . . . . . . . . . . . . . . . . . . . . . . . . . . . . . . . . . . . . . . . . . . . . . . . . . . . . . . . . . . . . . . . . . . . . . . . . . . . 236
Become an administrator of an existing Contribute website . . . . . . . . . . . . . . . . . . . . . . . . . . . . . . . . . . . . . . . . . . . . . . . . . . . . . . . . . . . 239
Configure Contribute administration settings . . . . . . . . . . . . . . . . . . . . . . . . . . . . . . . . . . . . . . . . . . . . . . . . . . . . . . . . . . . . . . . . . . . . . . . . 241
Send connection keys for websites . . . . . . . . . . . . . . . . . . . . . . . . . . . . . . . . . . . . . . . . . . . . . . . . . . . . . . . . . . . . . . . . . . . . . . . . . . . . . . . . . . . 251
Send connections for CPS managed sites . . . . . . . . . . . . . . . . . . . . . . . . . . . . . . . . . . . . . . . . . . . . . . . . . . . . . . . . . . . . . . . . . . . . . . . . . . . . . 253
Page 7

Add users to websites that CPS manages . . . . . . . . . . . . . . . . . . . . . . . . . . . . . . . . . . . . . . . . . . . . . . . . . . . . . . . . . . . . . . . . . . . . . . . . . . . . . 254
Remove users from sites that CPS manages . . . . . . . . . . . . . . . . . . . . . . . . . . . . . . . . . . . . . . . . . . . . . . . . . . . . . . . . . . . . . . . . . . . . . . . . . . 255
Configure dependent files for blogs . . . . . . . . . . . . . . . . . . . . . . . . . . . . . . . . . . . . . . . . . . . . . . . . . . . . . . . . . . . . . . . . . . . . . . . . . . . . . . . . . . 255
Manage website and blog server connections . . . . . . . . . . . . . . . . . . . . . . . . . . . . . . . . . . . . . . . . . . . . . . . . . . . . . . . . . . . . . . . . . . . . . . . . 256
Reference . . . . . . . . . . . . . . . . . . . . . . . . . . . . . . . . . . . . . . . . . . . . . . . . . . . . . . . . . . . . . . . . . . . . . . . . . . . . . . . . . . . . . . . . . . . . . . . . . . . . . . . . . . . 262
Chapter 13: Managing users and roles
About roles . . . . . . . . . . . . . . . . . . . . . . . . . . . . . . . . . . . . . . . . . . . . . . . . . . . . . . . . . . . . . . . . . . . . . . . . . . . . . . . . . . . . . . . . . . . . . . . . . . . . . . . . . 280
Create Contribute roles . . . . . . . . . . . . . . . . . . . . . . . . . . . . . . . . . . . . . . . . . . . . . . . . . . . . . . . . . . . . . . . . . . . . . . . . . . . . . . . . . . . . . . . . . . . . . . 281
Edit a role’s settings . . . . . . . . . . . . . . . . . . . . . . . . . . . . . . . . . . . . . . . . . . . . . . . . . . . . . . . . . . . . . . . . . . . . . . . . . . . . . . . . . . . . . . . . . . . . . . . . . 283
Manage drafts sent for review . . . . . . . . . . . . . . . . . . . . . . . . . . . . . . . . . . . . . . . . . . . . . . . . . . . . . . . . . . . . . . . . . . . . . . . . . . . . . . . . . . . . . . . 296
Reference . . . . . . . . . . . . . . . . . . . . . . . . . . . . . . . . . . . . . . . . . . . . . . . . . . . . . . . . . . . . . . . . . . . . . . . . . . . . . . . . . . . . . . . . . . . . . . . . . . . . . . . . . . . 297
Chapter 14: Windows keyboard shortcuts
File menu . . . . . . . . . . . . . . . . . . . . . . . . . . . . . . . . . . . . . . . . . . . . . . . . . . . . . . . . . . . . . . . . . . . . . . . . . . . . . . . . . . . . . . . . . . . . . . . . . . . . . . . . . . . 307
Edit menu . . . . . . . . . . . . . . . . . . . . . . . . . . . . . . . . . . . . . . . . . . . . . . . . . . . . . . . . . . . . . . . . . . . . . . . . . . . . . . . . . . . . . . . . . . . . . . . . . . . . . . . . . . 307
View menu . . . . . . . . . . . . . . . . . . . . . . . . . . . . . . . . . . . . . . . . . . . . . . . . . . . . . . . . . . . . . . . . . . . . . . . . . . . . . . . . . . . . . . . . . . . . . . . . . . . . . . . . . . 308
Insert menu . . . . . . . . . . . . . . . . . . . . . . . . . . . . . . . . . . . . . . . . . . . . . . . . . . . . . . . . . . . . . . . . . . . . . . . . . . . . . . . . . . . . . . . . . . . . . . . . . . . . . . . . 308
Format menu . . . . . . . . . . . . . . . . . . . . . . . . . . . . . . . . . . . . . . . . . . . . . . . . . . . . . . . . . . . . . . . . . . . . . . . . . . . . . . . . . . . . . . . . . . . . . . . . . . . . . . . 308
Table menu . . . . . . . . . . . . . . . . . . . . . . . . . . . . . . . . . . . . . . . . . . . . . . . . . . . . . . . . . . . . . . . . . . . . . . . . . . . . . . . . . . . . . . . . . . . . . . . . . . . . . . . . . 309
Working with blog entries . . . . . . . . . . . . . . . . . . . . . . . . . . . . . . . . . . . . . . . . . . . . . . . . . . . . . . . . . . . . . . . . . . . . . . . . . . . . . . . . . . . . . . . . . . . 309
Working in templates . . . . . . . . . . . . . . . . . . . . . . . . . . . . . . . . . . . . . . . . . . . . . . . . . . . . . . . . . . . . . . . . . . . . . . . . . . . . . . . . . . . . . . . . . . . . . . . 309
Editing text . . . . . . . . . . . . . . . . . . . . . . . . . . . . . . . . . . . . . . . . . . . . . . . . . . . . . . . . . . . . . . . . . . . . . . . . . . . . . . . . . . . . . . . . . . . . . . . . . . . . . . . . . 309
Working in tables . . . . . . . . . . . . . . . . . . . . . . . . . . . . . . . . . . . . . . . . . . . . . . . . . . . . . . . . . . . . . . . . . . . . . . . . . . . . . . . . . . . . . . . . . . . . . . . . . . . 310
Working with images . . . . . . . . . . . . . . . . . . . . . . . . . . . . . . . . . . . . . . . . . . . . . . . . . . . . . . . . . . . . . . . . . . . . . . . . . . . . . . . . . . . . . . . . . . . . . . . . 310
Getting help . . . . . . . . . . . . . . . . . . . . . . . . . . . . . . . . . . . . . . . . . . . . . . . . . . . . . . . . . . . . . . . . . . . . . . . . . . . . . . . . . . . . . . . . . . . . . . . . . . . . . . . . 311
vii
Chapter 15: Macintosh keyboard shortcuts
File menu . . . . . . . . . . . . . . . . . . . . . . . . . . . . . . . . . . . . . . . . . . . . . . . . . . . . . . . . . . . . . . . . . . . . . . . . . . . . . . . . . . . . . . . . . . . . . . . . . . . . . . . . . . . 312
Edit menu . . . . . . . . . . . . . . . . . . . . . . . . . . . . . . . . . . . . . . . . . . . . . . . . . . . . . . . . . . . . . . . . . . . . . . . . . . . . . . . . . . . . . . . . . . . . . . . . . . . . . . . . . . 312
View menu . . . . . . . . . . . . . . . . . . . . . . . . . . . . . . . . . . . . . . . . . . . . . . . . . . . . . . . . . . . . . . . . . . . . . . . . . . . . . . . . . . . . . . . . . . . . . . . . . . . . . . . . . . 313
Insert menu . . . . . . . . . . . . . . . . . . . . . . . . . . . . . . . . . . . . . . . . . . . . . . . . . . . . . . . . . . . . . . . . . . . . . . . . . . . . . . . . . . . . . . . . . . . . . . . . . . . . . . . . . 313
Format menu . . . . . . . . . . . . . . . . . . . . . . . . . . . . . . . . . . . . . . . . . . . . . . . . . . . . . . . . . . . . . . . . . . . . . . . . . . . . . . . . . . . . . . . . . . . . . . . . . . . . . . . 313
Table menu . . . . . . . . . . . . . . . . . . . . . . . . . . . . . . . . . . . . . . . . . . . . . . . . . . . . . . . . . . . . . . . . . . . . . . . . . . . . . . . . . . . . . . . . . . . . . . . . . . . . . . . . . 314
Help menu . . . . . . . . . . . . . . . . . . . . . . . . . . . . . . . . . . . . . . . . . . . . . . . . . . . . . . . . . . . . . . . . . . . . . . . . . . . . . . . . . . . . . . . . . . . . . . . . . . . . . . . . . . 314
Working in templates . . . . . . . . . . . . . . . . . . . . . . . . . . . . . . . . . . . . . . . . . . . . . . . . . . . . . . . . . . . . . . . . . . . . . . . . . . . . . . . . . . . . . . . . . . . . . . . 314
Editing text . . . . . . . . . . . . . . . . . . . . . . . . . . . . . . . . . . . . . . . . . . . . . . . . . . . . . . . . . . . . . . . . . . . . . . . . . . . . . . . . . . . . . . . . . . . . . . . . . . . . . . . . . 314
Working in tables . . . . . . . . . . . . . . . . . . . . . . . . . . . . . . . . . . . . . . . . . . . . . . . . . . . . . . . . . . . . . . . . . . . . . . . . . . . . . . . . . . . . . . . . . . . . . . . . . . . 315
Working with images . . . . . . . . . . . . . . . . . . . . . . . . . . . . . . . . . . . . . . . . . . . . . . . . . . . . . . . . . . . . . . . . . . . . . . . . . . . . . . . . . . . . . . . . . . . . . . . . 315
Index ...............................................................................................................316
Page 8

Chapter 1: Resources
Before you begin working with your software, take a few moments to read an overview of activation and the many
resources available to you. You have access to instructional videos, plug-ins, templates, user communities, seminars,
tutorials, RSS feeds, and much more.
Activation and registration
Help with installation
For help with installation issues, see the Installation Support Center at www.adobe.com/go/cs4install.
License activation
During the installation process, your Adobe software contacts Adobe to complete the license activation process. No
personal data is transmitted. For more information on product activation, visit the Adobe website at
www.adobe.com/go/activation.
1
A single-user retail license activation supports two computers. For example, you can install the product on a desktop
computer at work and on a laptop computer at home. If you want to install the software on a third computer, first
deactivate it on one of the other two computers. Choose Help
> Deactivate.
Register
Register your product to receive complimentary installation support, notifications of updates, and other services.
❖ To register, follow the on-screen instructions in the Registration dialog box, which appears after you install the
software.
If you postpone registration, you can register at any time by choosing Help > Registration.
Adobe Product Improvement Program
After you use your Adobe software a certain number of times, a dialog box may appear asking whether you want to
participate in the Adobe Product Improvement Program.
If you choose to participate, data about your use of Adobe software is sent to Adobe. No personal information is
recorded or sent. The Adobe Product Improvement Program only collects information about which features and tools
you use and how often you use them.
You can opt in to or out of the program at any time:
• To participate, choose Help > Adobe Product Improvement Program and click Yes, Participate.
• To stop participating, choose Help > Adobe Product Improvement Program and click No, Thank You.
Page 9

USING CONTRIBUTE CS4
Resources
ReadMe
A ReadMe file for your software is available online and on the installation disc. Open the file to read important
information about topics such as the following:
• System requirements
• Installation (including uninstalling the software)
• Activation and registration
• Font installation
• Troubleshooting
• Customer support
• Legal notices
Help and support
Community Help
Community Help is an integrated environment on adobe.com that gives you access to community-generated content
moderated by Adobe and industry experts. Comments from users help guide you to an answer. Search Community
Help to find the best content on the web about Adobe products and technologies, including these resources:
2
• Videos, tutorials, tips and techniques, blogs, articles, and examples for designers and developers.
• Complete online Help, which is updated regularly and is more complete than the Help delivered with your product.
If you are connected to the Internet when you access Help, you automatically see the complete online Help rather
than the subset delivered with your product.
• All other content on Adobe.com, including knowledgebase articles, downloads and updates, Developer
Connection, and more.
Use the help search field in your product’s user interface to access Community Help. For a video of Community Help,
www.adobe.com/go/lrvid4117_xp.
see
Other resources
Printed versions of the complete online Help are available for the cost of shipping and handling at
www.adobe.com/go/store. Online Help also includes a link to the complete, updated PDF version of Help.
Visit the Adobe Support website at www.adobe.com/support to learn about free and paid technical support options.
Services, downloads, and extras
You can enhance your product by integrating a variety of services, plug-ins, and extensions in your product. You can
also download samples and other assets to help you get your work done.
Page 10

USING CONTRIBUTE CS4
Resources
Adobe creative online services
Adobe® Creative Suite® 4 includes new online features that bring the power of the web to your desktop. Use these
features to connect with the community, collaborate, and get more from your Adobe tools. Powerful creative online
services let you complete tasks ranging from color matching to data conferencing. The services seamlessly integrate
with desktop applications so you can quickly enhance existing workflows. Some services offer full or partial
functionality when you’re offline too.
Visit Adobe.com to learn more about available services. Some Creative Suite 4 applications include these initial
offerings:
Kuler™ panel Quickly create, share, and explore color themes online.
Adobe® ConnectNow Collaborate with dispersed working teams over the web, sharing voice, data, and multimedia.
Resource Central Instantly access tutorials, sample files, and extensions for Adobe digital video applications.
For information on managing your services, see the Adobe website at www.adobe.com/go/learn_creativeservices_en.
Adobe Exchange
Visit the Adobe Exchange at www.adobe.com/go/exchange to download samples as well as thousands of plug-ins and
extensions from Adobe and third-party developers. The plug-ins and extensions can help you automate tasks,
customize workflows, create specialized professional effects, and more.
3
Adobe downloads
Visit www.adobe.com/go/downloads to find free updates, tryouts, and other useful software.
Adobe Labs
Adobe Labs at www.adobe.com/go/labs gives you the opportunity to experience and evaluate new and emerging
technologies and products from Adobe. At Adobe Labs, you have access to resources such as these:
• Prerelease software and technologies
• Code samples and best practices to accelerate your learning
• Early versions of product and technical documentation
• Forums, wiki-based content, and other collaborative resources to help you interact with like-minded users.
Adobe Labs fosters a collaborative software development process. In this environment, customers quickly become
productive with new products and technologies. Adobe Labs is also a forum for early feedback. The Adobe
development teams use this feedback to create software that meets the needs and expectations of the community.
Adobe TV
Visit Adobe TV at http://tv.adobe.com to view instructional and inspirational videos.
Extras
The installation disc contains a variety of extras to help you make the most of your Adobe software. Some extras are
installed on your computer during the setup process; others are located on the disc.
To view the extras installed during the setup process, navigate to the application folder on your computer.
• Windows®: [startup drive]\Program Files\Adobe\[Adobe application]
Page 11

USING CONTRIBUTE CS4
Resources
• Mac OS®: [startup drive]/Applications/[Adobe application]
To view the extras on the disc, navigate to the Goodies folder in your language folder on the disc. Example:
• /English/Goodies/
What’s new?
Workflow enhancements Assign predefined workflows to templates in Adobe® Contribute® CS4 to enforce a
disciplined author-centric publishing process. Web pages created using a template follow the workflow assigned to the
template. In all other cases, a default workflow, Author > Publish, is assigned to web pages. The following four
workflows can be assigned to templates:
• Author > Publish
• Author > Review > Publish
• Author > Approve > Publish
• Author > Review > Approve > Publish
The toolbar changes dynamically to display buttons for only those actions that are available to the user at the given
stage of the publishing cycle.
4
Edit web pages in your favorite web browser Edit a web page or blog in your favorite browser directly without
opening Contribute. The in-browser editor honors the site connection settings, permissions, and workflow settings in
Contribute. The in-browser editor supports Firefox® 2, Internet Explorer® 6, and their later versions.
Support for dynamic websites that use blog protocols Use Contribute to edit content in dynamic sites that use the
MetaWeblog, and Atom blog protocols. In dynamic sites, the contents of an entire page, or parts of it, are stored in a
database. Changes to the content in the database are reflected in the corresponding portions of the page.
Dreamweaver CS4 and Flash CS4 support Insert Flash® CS4 files into web pages or blog entries created in Contribute.
Contribute CS4 works with Dreamweaver® templates, which offer editable regions within an over-all protected design.
Contribute users can easily edit advanced layout components like Spry widgets, or access in-context editing areas
introduced in Dreamweaver CS4
Review web pages using commenting options Reviewers can use the commenting features in Contribute CS4 to
review a web page. The author can view comments posted by reviewers and sort them using the available options.
Expire and delete outdated pages Keep website content fresh with the new expiry notification feature in Contribute
CS4. Set the expiry meta tag value for a single Contribute page or a set of pages to a future date, and send notifications
to designated content contributors when pages are close to getting expired.
Specify site-root-relative paths for links Choose to set the path for links relative to the site root or to the web page.
Setting the links to the site-root-relative path helps administrators shuffle documents within the website without
worrying about the links being affected.
Auto save documents Prevent data loss resulting from unforeseen circumstances using the option to save documents
automatically at specified time intervals. Define the AutoSave frequency once and Contribute automatically stores the
updated drafts when specified. Content remains in draft format until the review and publish process is initiated.
Inline spell checker Minimize spelling errors when typing using the inline spell checker in Contribute. Any spelling
errors are flagged, and the correct options are displayed in the right-click pop-up menu.
Page 12

Chapter 2: Setting up Contribute
After you have completed installing Adobe® Contribute®, you can set it up to work with an existing website or blog.
Administrators can use the workflow in Contribute to enforce processes that help efficiently manage a website.
The Contribute workflow
Contribute works with your existing website, whether it’s an intranet or a public website. It often takes a team of people
to get a website up and running and to keep the content current.
The team may include the following people:
Web developers Create the website. The web developers (or design team) uses a website-creation application, such as
Adobe Dreamweaver®, to build the website. This team is responsible for planning, designing, developing, testing, and
publishing the website. They are also responsible for creating templates for websites that require a consistent look and
feel.
Web developers using Dreamweaver should see Dreamweaver Help for more information.
5
Contribute users Maintain the website. Contribute users are the marketers, managers, educators, students, small-
business owners, administrative assistants, project managers, and so on, who use Contribute to keep their websites upto-date. The user needs no experience in HTML or web design. Because Contribute works like a word processor, the
user experience is intuitive and familiar. Users can add or update text, images, tables, links, and Microsoft® Word and
Excel® documents.
Contribute administrators Set up Contribute users and help them use Contribute to maintain the website.
Administrators enforce document workflows to web pages by assigning predefined workflows in Contribute to
Dreamweaver templates. When you create a page using a Dreamweaver template, the page is assigned the workflow
associated with that template. The Contribute administrator is also responsible for setting folder and user permissions,
which determine who can edit website content and what contents they can edit. Only one Contribute administrator
can be designated for each website in Contribute. However, more than one person can administer the website if the
Contribute administrator shares the administration password for the website.
Note: You must connect to a website before you can edit and publish pages on that website, and you must connect to a
blog server before you can edit and publish entries in that blog.
The Contribute workflow involves the following steps:
1 Connect to a website or blog.
2 Open Contribute.
3 Create/browse to web a page or blog entry.
Use the Contribute browser to find the web page or blog entry you want to edit. The browser is familiar to users of
Microsoft Internet Explorer and other popular browsers. The browser toolbar has the normal navigation buttons plus
a Choose button to help you navigate to files that aren’t linked on your website. You can create bookmarks in
Contribute and view your Internet Explorer bookmarks. You can also use shortcuts to view current drafts quickly.
1 Open your web page or blog for editing.
2 Edit your content.
Page 13

USING CONTRIBUTE CS4
Setting up Contribute
After you browse to the desired page or blog entry, click the Edit Page or Edit Entry button in the toolbar to open
the web page or blog entry in the Contribute editor. Contribute copies the file from your web or blog server and
locks it on the server so that no one else can edit the page or blog entry while you’re working on it.
The Contribute editor works much like a word processor. You can edit text, images, tables, and links on the page
or blog entry, and you can even add Microsoft Word or Excel documents to your website or blog entry. The toolbar
contains familiar editing buttons as well as buttons for saving, discarding, or publishing your edits.
3 Send your content for review or approval.
Depending on the workflow, get your document reviewed or approved before it is published.
4 Publish the changes.
When a web page completes its workflow or you are done with editing your blog, you can publish the page or blog
entry to your website or blog server. Click the Publish button, and Contribute replaces the existing page or blog
entry on your web server or blog with the edited version. Contribute also unlocks the file on the server so other
users can edit the page or blog entry.
Connect to a blog
6
Install Contribute® if it is not already installed on your computer. Before installation, ensure that your computer meets
the minimum setup requirements.
Before you can use Adobe® Contribute to edit and update your website and blog content, you must create a connection
to the web server that stores your website or blog. By creating a connection, you enable Contribute to access the web
pages on your website and blog entries on your blog, and you can then edit pages and blog entries and publish any
changes you make.
In most cases, your Contribute administrator sets up Contribute for you or provides the information you need to
connect to your website or blog server.
You can connect to a blog account that is hosted on one of the following:
• A blog publishing service, such as Blogger™, Typepad®, or WordPress®.
• An internal server using a service such as Movable Type® or WordPress.
To connect to a blog, you need the necessary connection information for the blog so you can enter the information in
the Connection Wizard. You can use the MetaWeblog API to connect to a blog account that is hosted on a blog
publishing service, such as Blogger, WordPress, Roller, or TypePad or an internal server. If you use a Macintosh®
computer and have a .Mac account, Contribute detects the .Mac account and asks if you want to create a connection
to it.
Note: Connection keys are not used for blog connections; they are available only for website connections.
For more information about connecting to a blog, see “Create a blog server connection” on page 233.
Connect to a website
There are two ways you can connect: by using a connection key that was sent to you, or by entering the connection
information manually.
Page 14

USING CONTRIBUTE CS4
Setting up Contribute
Your Contribute administrator does one of the following to help set up a connection to your website for you:
• Send you an e-mail message with a website connection key file, which you can use to establish a connection to your
website. The connection key contains all the network information that Contribute needs for connecting to your
website.
• Provide the network location from where you can download the connection key.
Note: Connection keys are used only with website connections; they are not used for blog connections.
• Give you the necessary connection information for the website so you can enter the information in the Connection
Wizard (see
If you use a Macintosh computer and have a .Mac account, Contribute detects the .Mac account and asks if you
want to create a connection to it.
If your website is managed by Contribute Publishing Server, your administrator sends you a connection key or
gives you connection information to enter in the Contribute browser address bar.
“Create a website connection” on page 231).
Connect using a connection key
1 Open the e-mail containing the connection key.
2 Double-click the attachment.
The Import Connection Key dialog box appears or the Log In To Publishing Services dialog box appears.
7
3 Do one of the following:
• If the Import Connection Key dialog box appears, enter your name, your e-mail address, and the connection key
password, and then click OK.
• If the Log In To Publishing Services dialog box appears, enter your user name and password, and then click OK.
Note: If you don’t have the password, contact your system administrator.
4 If you are prompted for other connection information, such as FTP login, type that information, and then click OK.
When the connection is complete, the website’s home page appears in the Contribute browser.
Connect by entering the connection information manually
1 Select Edit > My Connections (Windows) or Contribute > My Connections (Mac OS), and then click Create.
The Connection Wizard or Connection Assistant appears.
2 Follow the on-screen instructions to enter your connection information.
Your web hosting service or your IT administrator can provide you with the required information. For more
information, click the Help button located at the bottom of the dialog box.
Note: During startup, Contribute will not connect to any website or blog server. To change this behavior, in the My
Connections dialog box, select the desired website or blog server, and clear the selection of the Don’t Connect To
<site/blog> at Startup.
Open Contribute
If the Require Contribute startup password option is selected in the Security category of Preferences, Contribute
prompts you for your startup password when you start the program.
Page 15

USING CONTRIBUTE CS4
Setting up Contribute
A startup password protects unauthorized users from editing or publishing pages and blog entries to your website or
blog. If you do not enter the password when you start Contribute, all web pages and blogs are disabled and cannot be
enabled. You can only browse to web pages or blog entries and create web pages or blog entries. After you enter the
correct password, you can make updates and publish changes or new entries to the connected websites and blogs until
you close Contribute.
In addition to providing secure access, when the Require Contribute Startup password option is selected, Contribute
uses a stronger encryption method when saving your connection information on your computer.
Note: If you receive a connection key that requires a Contribute startup password, you must create a startup password
before you can import that connection.
Enter a Contribute startup password
1 In the Enter Password dialog box, type the Contribute startup password.
You can enter the password incorrectly only three times before Contribute locks you out. If you are locked out, you
can restart Contribute and reenter the startup password.
If you forget your password, you have to delete all of your website connections and add them again.
2 Click OK.
Note: If you click Skip, you bypass the password prompt and Contribute starts. When you skip the password, you can
only edit or cancel existing drafts for the website. You won’t be able to edit pages other than drafts, or publish changes
to drafts until you restart Contribute and enter the correct startup password.
8
See also
“Change or disable startup password” on page 32
Start Contribute without a network connection
When you start Contribute, it checks your network connection so that it can connect to your website or blog.
Contribute alerts you if it does not detect a connection. You can do one of the following in such circumstances.
1 Start Contribute.
The Connection Failure dialog box appears.
2 Select Work Offline if you know that you’re not connected to the network. For more information, see “Work
offline” on page 65.
3 Select Try To Connect Anyway to force Contribute to continue checking for a network connection.
4 If Contribute still fails to connect, Contribute displays an error message with two options:
• Click Yes to continue trying to connect to other websites and blog servers.
• Click No to disable the rest of your websites and blog servers. You can later enable them after you resolve your
network connection problem.
5 Click OK.
Note: You can disable a website or blog at any time—not just at startup—when there’s a problem. If you have multiple
websites and blogs, you can disable the ones you aren’t currently working on, so Contribute does not maintain the
connection for an extended period of time. For more information, see
connections” on page 260.
“Disable individual website and blog
Page 16

USING CONTRIBUTE CS4
Setting up Contribute
Enable a disabled website or blog
1 Browse to any page on the website or to any blog entry in the blog, and click Connect in the toolbar.
2 Select Edit > My Connections (Windows) or Contribute > My Connections (Mac OS).
The My Connections dialog box appears.
3 Do one of the following:
• To enable a website, select the website you want to enable from the list, and click Enable.
• To enable a blog, select the blog server under which the blog is listed, and click Enable. All the blogs listed under
this blog server are enabled. You cannot enable individual blogs.
4 Click Close.
Create your blog/browse to your website
Contribute enables you to create and edit blog entries in its visual editor. You can also open and edit content from your
browser or a Microsoft® Office application.
For websites, the Contribute browser works like a standard web browser, letting you do the following:
9
• Navigate to websites and locate pages by clicking links.
• Refresh pages to see updates.
• Reload pages you’ve visited using Back and Forward buttons.
• Enter website addresses in the Address text box.
You can also create new web pages and link them to other web pages, files on your computer, pages on other websites,
and e-mail addresses.For more information, see
“Adding pages, blog entries, and documents” on page 76.
Create your blog
You can create a new blog entry from scratch. After you create the entry, you can add content such as text, images, and
multimedia.
1 On your blog homepage in the Contribute browser, click the New button in the toolbar or select File > New.
2 In the New Web Page Or Blog Entry dialog box, enter a title for your new blog entry.
3 Click OK. The new entry opens as a draft in Contribute.
Note: Use the My Connections dialog box to select websites and blog servers that Contribute must not connect to
during the startup process.
You can browse to any website with Contribute, but you can edit only the pages of websites that you’ve created
connections to.
Browse to a website
• Enter a web address (URL) in the Address text box in the toolbar.
• Click links to navigate to a web page.
• Click the Back or Forward button in the toolbar.
Page 17

USING CONTRIBUTE CS4
Setting up Contribute
Create new pages
1 In the Contribute browser, click New in the toolbar.
2 In the New Web Page Or Blog Entry dialog box, choose one of the following options:
• Use The Blank Web Page.
• Select A Template Available On The Server.
• Copy One Of The Contribute Starter Web Pages.
3 Click OK. The new page opens as a draft in Contribute.
Note: While Starter web pages are available in Contribute, templates are available on the server. Some templates may
not be updated from the server. Use the Refresh Templates button to download the desired template.
Edit your blog/website
You can edit an existing blog entry on any blog/website you’ve connected to. When you browse to such a website, the
Edit Page button is enabled.
You can also create new web pages and insert contents from Microsoft documents directly into web pages.
10
You can edit a document from a Microsoft Office application, or open a web page for editing in your favorite web
browsers.
For information on opening and editing existing web pages and blogs, see “Working with existing web pages and blog
entries” on page 46.
For information on opening and editing new web pages and blogs, see “Adding pages, blog entries, and documents”
on page 76.
Publish your blog/website
After a web page completes its workflow or you have completed editing a blog, you can publish it to your website or
blog from Contribute. You can also publish content from Microsoft Office applications or your web browser.
Note: You will not be able to publish a web page if you do not have publish permissions.
For more information on publishing blogs and websites, see “Publishing web pages and blog entries” on page 203.
Integrate Contribute with Adobe Creative Suite applications
You can run custom startup scripts during the installation of other Adobe Creative Suite® applications to enable access
from the relevant suite product to Adobe Contribute. When these scripts are run, Adobe Contribute-related menus,
options, and toolbar icons are created in the Creative Suite applications. Also, relevant Creative Suite product-related
menus, options, and toolbar icons are created in Adobe Contribute.
Page 18

USING CONTRIBUTE CS4
Setting up Contribute
Perform Adobe Contribute-related operations in Creative Suite applications
The Cross DOM is a small API that provides a set of functions that are common across Adobe Creative Suite
applications. These include functions to open files, execute scripts, and print files. You can use the Cross DOM API
for startup scripts to perform any of the following operations across the Adobe Creative Suite applications:
• Open a new web page or blog entry in Adobe Contribute from another Creative Suite application using the Open
function in the Cross-DOM API. Also, you can open files in Adobe Contribute from another Creative Suite
application using the Cross-DOM API in a startup script.
• Open files from the following Creative Suite applications in Adobe Contribute by using the Open function in the
Cross-DOM API: Adobe Bridge®, Adobe Photoshop®, Adobe Illustrato®r, Adobe InDesign®, Adobe Acrobat®,
Adobe Flash®, Adobe Dreamweaver®, and Adobe Fireworks®.
• Open video and audio files from the following Creative Suite applications using the Open function in the Cross-
DOM API: Adobe After Effects®, Adobe Premiere® Pro, Adobe Audition®, and Adobe Encore®. If the file can be
viewed in the embedded browser, it is opened in the embedded browser.
• Edit files in one of the following Creative Suite applications, and call the Reveal function to switch to Adobe
Contribute: Adobe Bridge, Adobe Photoshop, Adobe Illustrator, Adobe InDesign, Adobe Acrobat, Adobe Flash,
Adobe Dreamweaver, Adobe Fireworks, Adobe After Effects, Adobe Premiere Pro, Adobe Audition, and Adobe
Encore.
• Print files from the following Creative Suite applications in Adobe Contribute using the PDF printer and the Print
function in the Cross-DOM API: Adobe Bridge, Adobe Photoshop, Adobe Illustrator, Adobe InDesign, Adobe
Acrobat, Adobe Flash, Adobe Dreamweaver, and Adobe Fireworks.
• Print files from the following Creative Suite applications using the Print function in the Cross-DOM API: Adobe
After Effects, Adobe Premiere Pro, Adobe Audition, and Adobe Encore. (Although video files are rarely printed,
printing these files lets you verify whether the corresponding applications respond to BridgeTalk messages.)
• Close Adobe Contribute from other Creative Suite applications using the Close function in the Cross-DOM API.
• Quit Adobe Contribute from the following Creative Suite applications using the Quit function in Cross DOM API:
Adobe Bridge, Adobe Photoshop, Adobe Illustrator, Adobe InDesign, Adobe Acrobat, Adobe Flash, Adobe
Dreamweaver, Adobe Fireworks, Adobe After Effects, Adobe Premiere Pro, Adobe Audition, and Adobe Encore.
Note: Adobe Bridge scripts using the BridgeTalk protocol enable communication between Adobe Contribute and the
Adobe Creative Suite applications. The BridgeTalk message object is used to send message packets between the
applications.
11
Integrate Adobe Bridge with Adobe Contribute
The Adobe Bridge software is the new navigational control center built for Adobe Creative Suite applications and their
components. Adobe Bridge provides centralized access to your Creative Suite project files, applications, and settings.
Adobe Contribute has been integrated with the Adobe Bridge application in the Adobe Creative Suite release. This
integration lets you perform the following tasks:
• Organize assets
• Insert files
• Communicate across applications using the BridgeTalk protocol
• Access Adobe stock photos.
Page 19

USING CONTRIBUTE CS4
Setting up Contribute
Insert files from Adobe Bridge into Adobe Contribute
Using Adobe Bridge, you can insert files or folders into web pages or blog entry drafts in Adobe Contribute. If the
Contribute draft supports the selected file type, then the selected file is placed in the draft, or a link to the selected file
is displayed in the draft. File types which are not supported, are not inserted in the draft.
1 Start Adobe Contribute.
2 Open a draft of a web page or blog entry.
Note: While placing a file in Contribute, if Adobe Contribute is not running, or if a web page or blog entry draft is not
open, a message is displayed indicating that there is no open draft to place the file.
3 Select File > Browse or click the Bridge toolbar icon .
Note: You can select multiple files or folders to place in a Contribute draft.
Adobe Bridge is opened in a new window.
4 In Adobe Bridge, select the file you want to insert.
5 Select File > Place > In Contribute.
The file, or a link to the file is inserted in the Contribute draft. If you select a file type which is not supported, such
a file is not inserted in the draft.
12
Note: You can also insert a file into a Contribute web page or blog entry draft by dragging the file from Windows
Explorer or Mac OS Finder, and dropping it into the Contribute web page or blog entry draft.
See also
“Publish files from Adobe Bridge to Adobe Contribute (Windows only)” on page 13
Open files from Adobe Bridge in Adobe Contribute (Windows Only)
You can select a file in Adobe Bridge, and open the file in Adobe Contribute.
1 Start Adobe Bridge.
2 Select the file you want to open in Contribute.
Note: You can open only Microsoft Word documents with .doc or .docx extension, and Microsoft Excel documents
with .xls, .xlsm, or .xlsx extension.
3 Select Tools > Contribute > Open In Contribute.
Note: The Tools > Contribute > Open In Contribute menu is available for the Windows platform only.
Contribute is started and the contents of the Word or Excel document are inserted in the web page draft based on
the insertion option you selected.
See also
“Open documents in Contribute from Microsoft Office applications (Windows only)” on page 96
Page 20

USING CONTRIBUTE CS4
Setting up Contribute
Publish files from Adobe Bridge to Adobe Contribute (Windows only)
You can select the following file types in Adobe Bridge, and publish them in Adobe Contribute: .doc, .xls, .docx, .xlsm,
and .xlsx. When you publish a Microsoft Office document that contains other files, the additional files are copied to
your web page draft automatically.
1 Start Adobe Bridge.
2 Select the file you want to publish to Adobe Contribute.
3 Select Tools > Contribute > Publish To Website.
Note: The Tools > Contribute > Publish To Website menu is available for the Windows platform only.
The Publish To Website dialog box appears.
4 To select the settings for publishing the document, do the following:
a Select the website where you want to publish the file.
Note: If you do not have a connection to your website before you publish a document, you can create one by
selecting Create New Connection in the Select pop-up menu in the Publish To Website dialog box. For more
information on creating a website connection, see
b Select a location for storing the file.
Note: You can select multiple files or folders from Adobe Bridge to publish in Contribute.
“Create a website connection” on page 231.
13
c Enter a filename. The filename must not have any spaces, tabs, or alphanumeric characters.
d Select a format.
e (Optional) Clear the Publish Current Selection Only check box to publish the whole document instead of the
selection.
You can also set these preferences in the Microsoft Documents tab from the Edit menu in Contribute. To do
this, select Edit > Preferences > Microsoft Documents and make a selection. For more information on setting
these preferences, see
5 Click Publish.
Contribute publishes the document to your web page, and a confirmation dialog box appears.
Note: If Contribute is not running when you publish a file from Adobe Bridge to Contribute, Adobe Contribute is
started first, and then the Publish To Website dialog box is opened.
6 Click OK.
“Set Contribute preferences” on page 30.
See also
“Integrate Adobe Bridge with Adobe Contribute” on page 11
“Insert files from Adobe Bridge into Adobe Contribute” on page 12
“Publish a document from Microsoft Office (Windows only)” on page 212
Reference
This section provides information about the dialog boxes introduced in this chapter.
Page 21

USING CONTRIBUTE CS4
Setting up Contribute
Completing the Import Connection Key dialog box
Use the Import Connection Key dialog box to import a connection key that establishes a connection to your website.
Connection keys are available only for websites; they are not available for blogs.
1 Enter your name and your e-mail address.
2 Enter the password for the connection key.
Note: If you don’t have a password, contact the Contribute administrator who sent you the connection key.
3 Click OK.
When the connection is complete, the home page of the website appears in the Contribute browser.
Entering an FTP password
The Contribute administrator might send you a connection key that does not include the FTP login and password
information. An FTP password and user name are required to access password-controlled files on the server.
When you import a connection key that doesn’t include the required FTP information, Contribute displays the FTP
password dialog box after you enter your name, e-mail address, and password for the connection key.
Note: Connection keys are available only for websites; they are not available for blogs.
14
If you are connecting to a local network computer, the login information you enter in this dialog box is typically the
same as your network login information.
1 In the Username text box, type your FTP user name.
2 In the Password text box, type your password.
3 Click OK.
The Connection Failure dialog box
1 If Contribute can’t detect a network connection for one or more of your websites or blogs, the Connection Failure
dialog box gives you two choices:
• Select Work Offline if you know that you’re not connected to the network and you want to work offline. For
more information, see
• Select Try To Connect Anyway if you aren’t sure what the problem is and you want Contribute to try to connect
again. If Contribute still cannot connect, you can disable one or more of your website or blog connections.
2 Click OK.
“Work offline” on page 65.
Page 22

Chapter 3: Workspace
You can use Adobe® Contribute® as a web browser and as a web page editor. You can easily switch between browsing
web pages and editing web pages. The Contribute workspace makes it easy for you to access pages, whether you’re
browsing or editing.
You can navigate the Contribute dialog boxes and workspace without using your mouse. You can also set preferences
to customize Contribute.
OWL
Workspace overview
You create and manipulate your documents and files using various elements, such as panels, bars, and windows. Any
arrangement of these elements is called a workspace. The workspaces of the different applications in Adobe® Creative
Suite® 4 share the same appearance so that you can move between the applications easily. You can also adapt each
application to the way you work by selecting from several preset workspaces or by creating one of your own.
15
Although the default workspace layout varies in different products, you manipulate the elements much the same way
in all of them.
Page 23
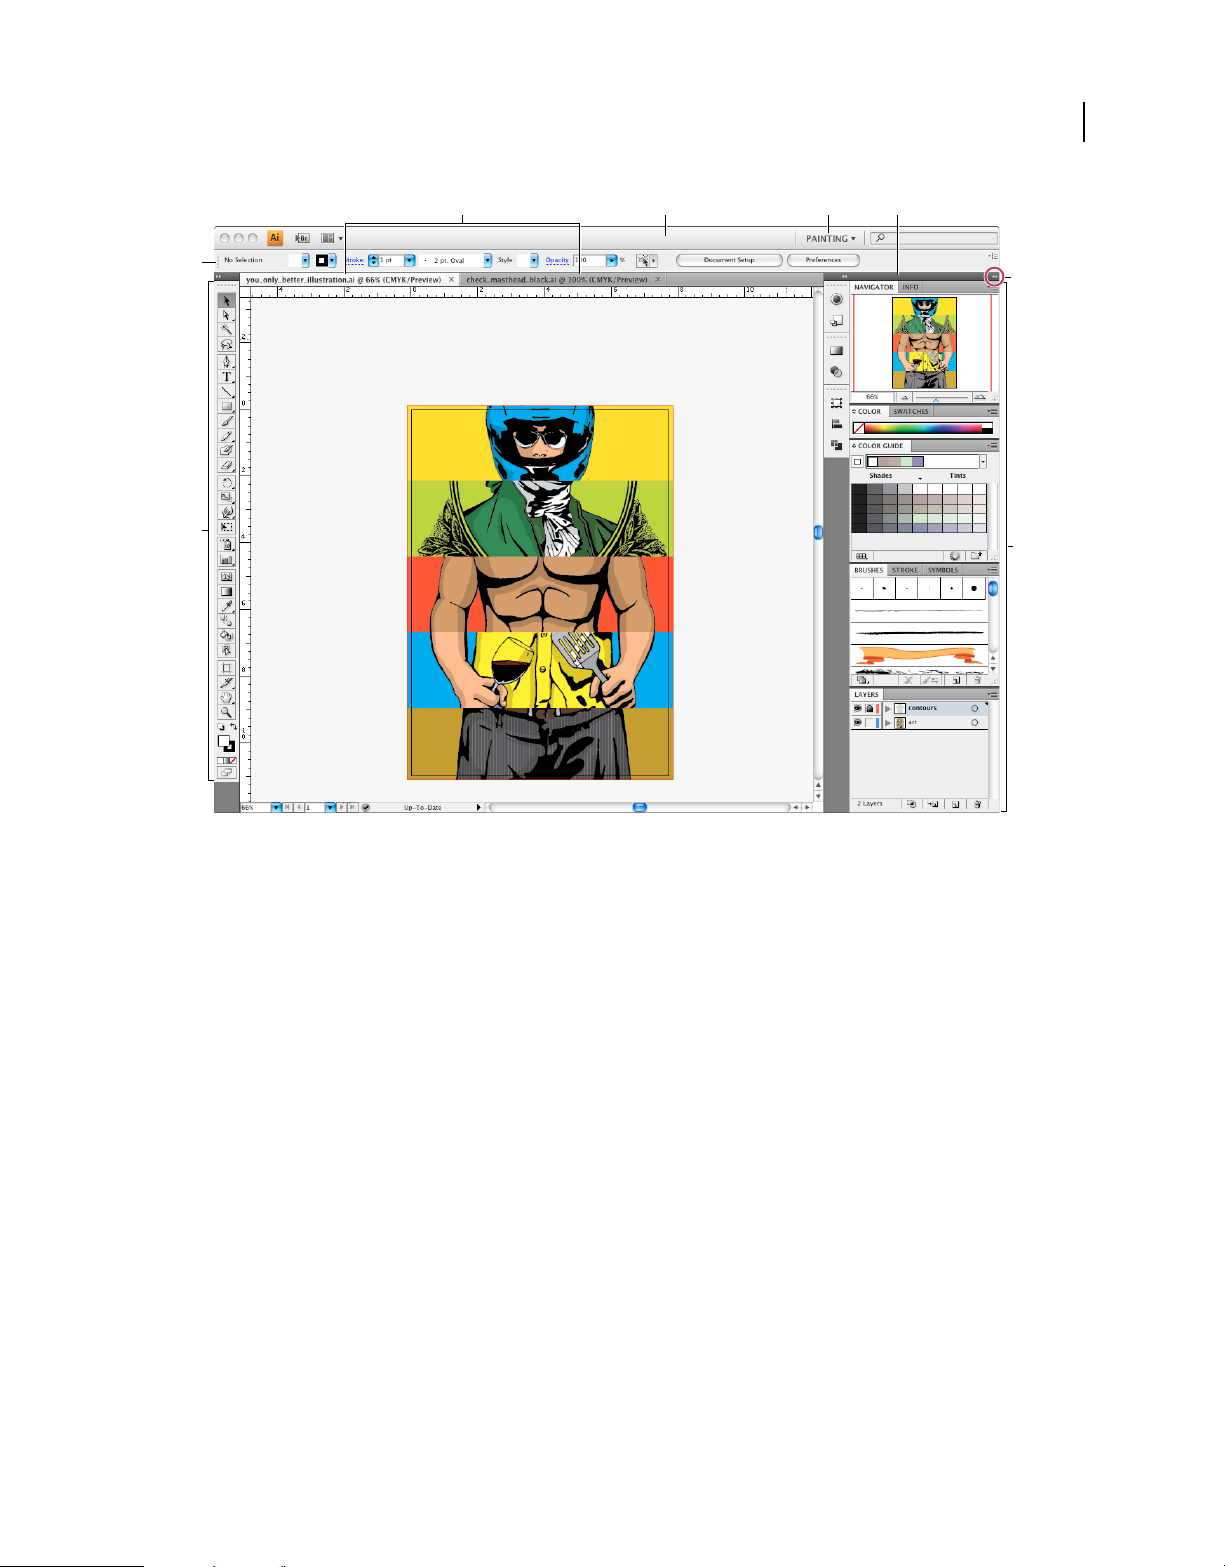
USING CONTRIBUTE CS4
Workspace
16
A
E
F
B DC
G
H
Default Illustrator workspace
A. Tabbed Document windows B. Application bar C. Workplace switcher D. Panel title bar E. Control panel F. Tools panel G. Collapse To
Icons button H. Four panel groups in vertical dock
• The Application bar across the top contains a workspace switcher, menus (Windows only), and other application
controls. On the Mac for certain products, you can show or hide it using the Window menu.
• The Tools panel contains tools for creating and editing images, artwork, page elements, and so on. Related tools are
grouped.
• The Control panel displays options for the currently selected tool. The Control panel is also known as the options
bar in Photoshop. (Adobe Flash®, Adobe Dreamweaver®, and Adobe Fireworks® have no Control panel.)
• Flash, Dreamweaver, and Fireworks have a Property inspector that displays options for the currently selected
element or tool.
• The Document window displays the file you’re working on. Document windows can be tabbed and, in certain cases,
grouped and docked.
• Panels help you monitor and modify your work. Examples include the Timeline in Flash, the Layers panel in Adobe
Photoshop®, and the CSS Styles panel in Dreamweaver. Panels can be grouped, stacked, or docked.
Page 24

USING CONTRIBUTE CS4
Workspace
• On the Mac, the Application frame groups all the workspace elements in a single, integrated window that lets you
treat the application as a single unit. When you move or resize the Application frame or any of its elements, all the
elements within it respond to each other so none overlap. Panels don’t disappear when you switch applications or
when you accidentally click out of the application. If you work with two or more applications, you can position each
application side by side on the screen or on multiple monitors. If you prefer the traditional, free-form user interface
of the Mac, you can turn off the Application frame. In Adobe Illustrator®, for example, select Window > Application
Frame to toggle it on or off. (In Flash, the Application frame is on permanently. Dreamweaver does not use an
Application frame.)
Hide or show all panels
• (Illustrator, Adobe InCopy®, Adobe InDesign®, Photoshop, Fireworks)To hide or show all panels, including the
Tools panel and Control panel, press
• (Illustrator, InCopy, InDesign, Photoshop) To hide or show all panels except the Tools panel and Control panel,
press Shift+Tab.
You can temporarily display hidden panels if Auto-Show Hidden Panels is selected in Interface preferences. It’s
always on in Illustrator. Move the pointer to the edge of the application window (Windows®) or to the edge of the
monitor (Mac
OS®) and hover over the strip that appears.
• (Flash, Dreamweaver, Fireworks) To hide or show all panels, press F4.
Tab.
17
Display panel options
❖ Click the panel menu icon in the upper-right corner of the panel.
You can open a panel menu even when the panel is minimized.
(Illustrator) Adjust panel brightness
❖ In User Interface preferences, move the Brightness slider. This control affects all panels, including the Control
panel.
Reconfigure the Tools panel
You can display the tools in the Tools panel in a single column, or side by side in two columns. (This feature is not
available in the Tools panel in Fireworks and Flash.)
In InDesign and InCopy, you also can switch from single-column to double-column (or single-row) display by setting
an option in Interface preferences.
❖ Click the double arrow at the top of the Tools panel.
Manage windows and panels
You can create a custom workspace by moving and manipulating Document windows and panels. You can also save
workspaces and switch among them.
Note: The following examples use Photoshop for demonstration purposes. The workspace behaves the same in all the
products.
Page 25

USING CONTRIBUTE CS4
A
B
C
Narrow blue drop zone indicates Color panel will be docked on its own above the Layers panel group.
A. Title bar B. Tab C. Drop zone
In Photoshop, you can change the font size of the text in the Control panel, in the panels, and in tool tips. Choose a
size from the UI Font Size menu in Interface preferences.
Manage Document windows
When you open more than one file, the Document windows are tabbed.
• To rearrange the order of tabbed Document windows, drag a window’s tab to a new location in the group.
• To undock a Document window from a group of windows, drag the window’s tab out of the group.
• To dock a Document window to a separate group of Document windows, drag the window into the group.
Note: Dreamweaver does not support docking and undocking Document windows. Use the Document window’s
Minimize button to create floating windows.
18
Workspace
• To create groups of stacked or tiled documents, drag the window to one of the drop zones along the top, bottom, or
sides of another window. You can also select a layout for the group by using the Layout button on the Application bar.
Note: Some products do not support this functionality. However, your product may have Cascade and Tile commands
in the Window menu to help you lay out your documents.
• To switch to another document in a tabbed group when dragging a selection, drag the selection over the document’s
tab for a moment.
Note: Some products do not support this functionality.
Dock and undock panels
A dock is a collection of panels or panel groups displayed together, generally in a vertical orientation. You dock and
undock panels by moving them into and out of a dock.
Note: Docking is not the same as stacking. A stack is a collection of floating panels or panel groups, joined top to bottom.
• To dock a panel, drag it by its tab into the dock, at the top, bottom, or in between other panels.
• To dock a panel group, drag it by its title bar (the solid empty bar above the tabs) into the dock.
• To remove a panel or panel group, drag it out of the dock by its tab or title bar. You can drag it into another dock
or make it free-floating.
Page 26
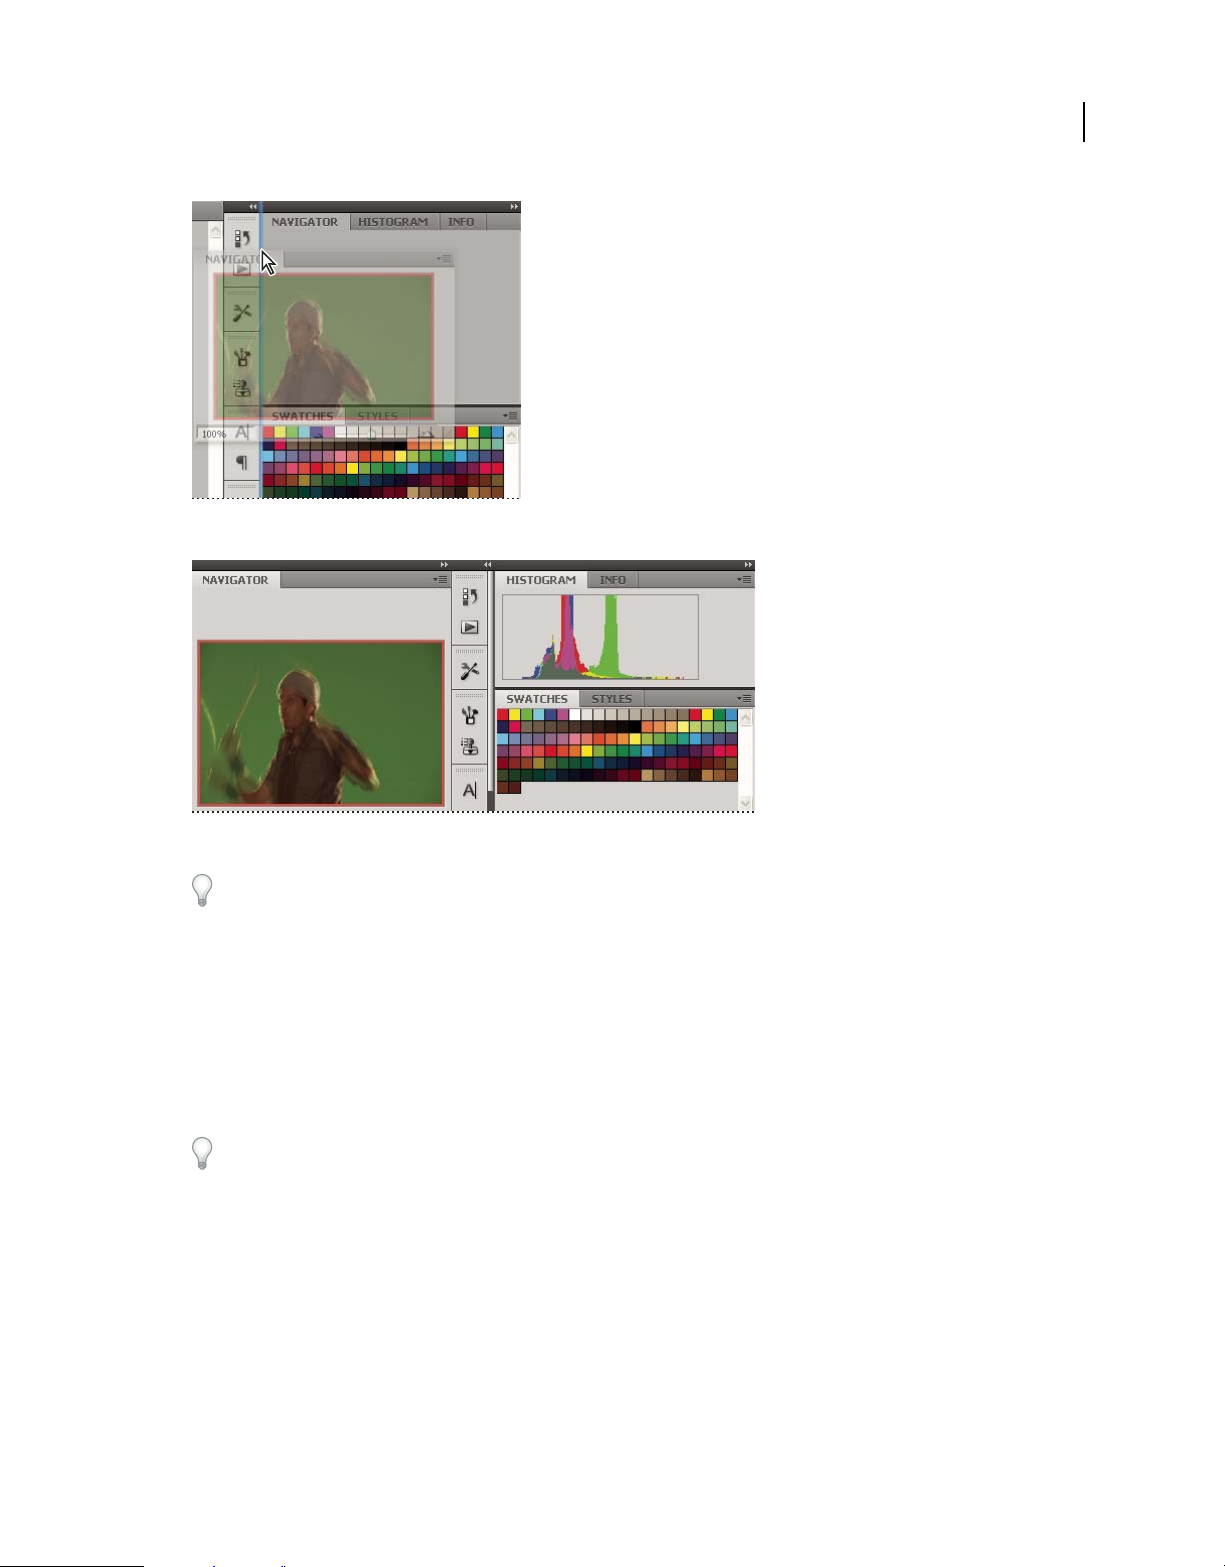
Navigator panel being dragged out to new dock, indicated by blue vertical highlight
USING CONTRIBUTE CS4
Workspace
19
Navigator panel now in its own dock
You can prevent panels from filling all the space in a dock. Drag the bottom edge of the dock up so it no longer meets
the edge of the workspace.
Move panels
As you move panels, you see blue highlighted drop zones, areas where you can move the panel. For example, you can
move a panel up or down in a dock by dragging it to the narrow blue drop zone above or below another panel. If you
drag to an area that is not a drop zone, the panel floats freely in the workspace.
• To move a panel, drag it by its tab.
• To move a panel group or a stack of floating panels, drag the title bar.
Press Ctrl (Windows) or Command (Mac OS) while moving a panel to prevent it from docking. Press Esc while
moving the panel to cancel the operation.
Note: The dock is stationary and can’t be moved. However, you can create panel groups or stacks and move them
anywhere.
Add and remove panels
If you remove all panels from a dock, the dock disappears. You can create a dock by moving panels to the right edge
of the workspace until a drop zone appears.
• To remove a panel, right-click (Windows) or Control-click (Mac) its tab and then select Close, or deselect it from
the Window menu.
• To add a panel, select it from the Window menu and dock it wherever you want.
Page 27
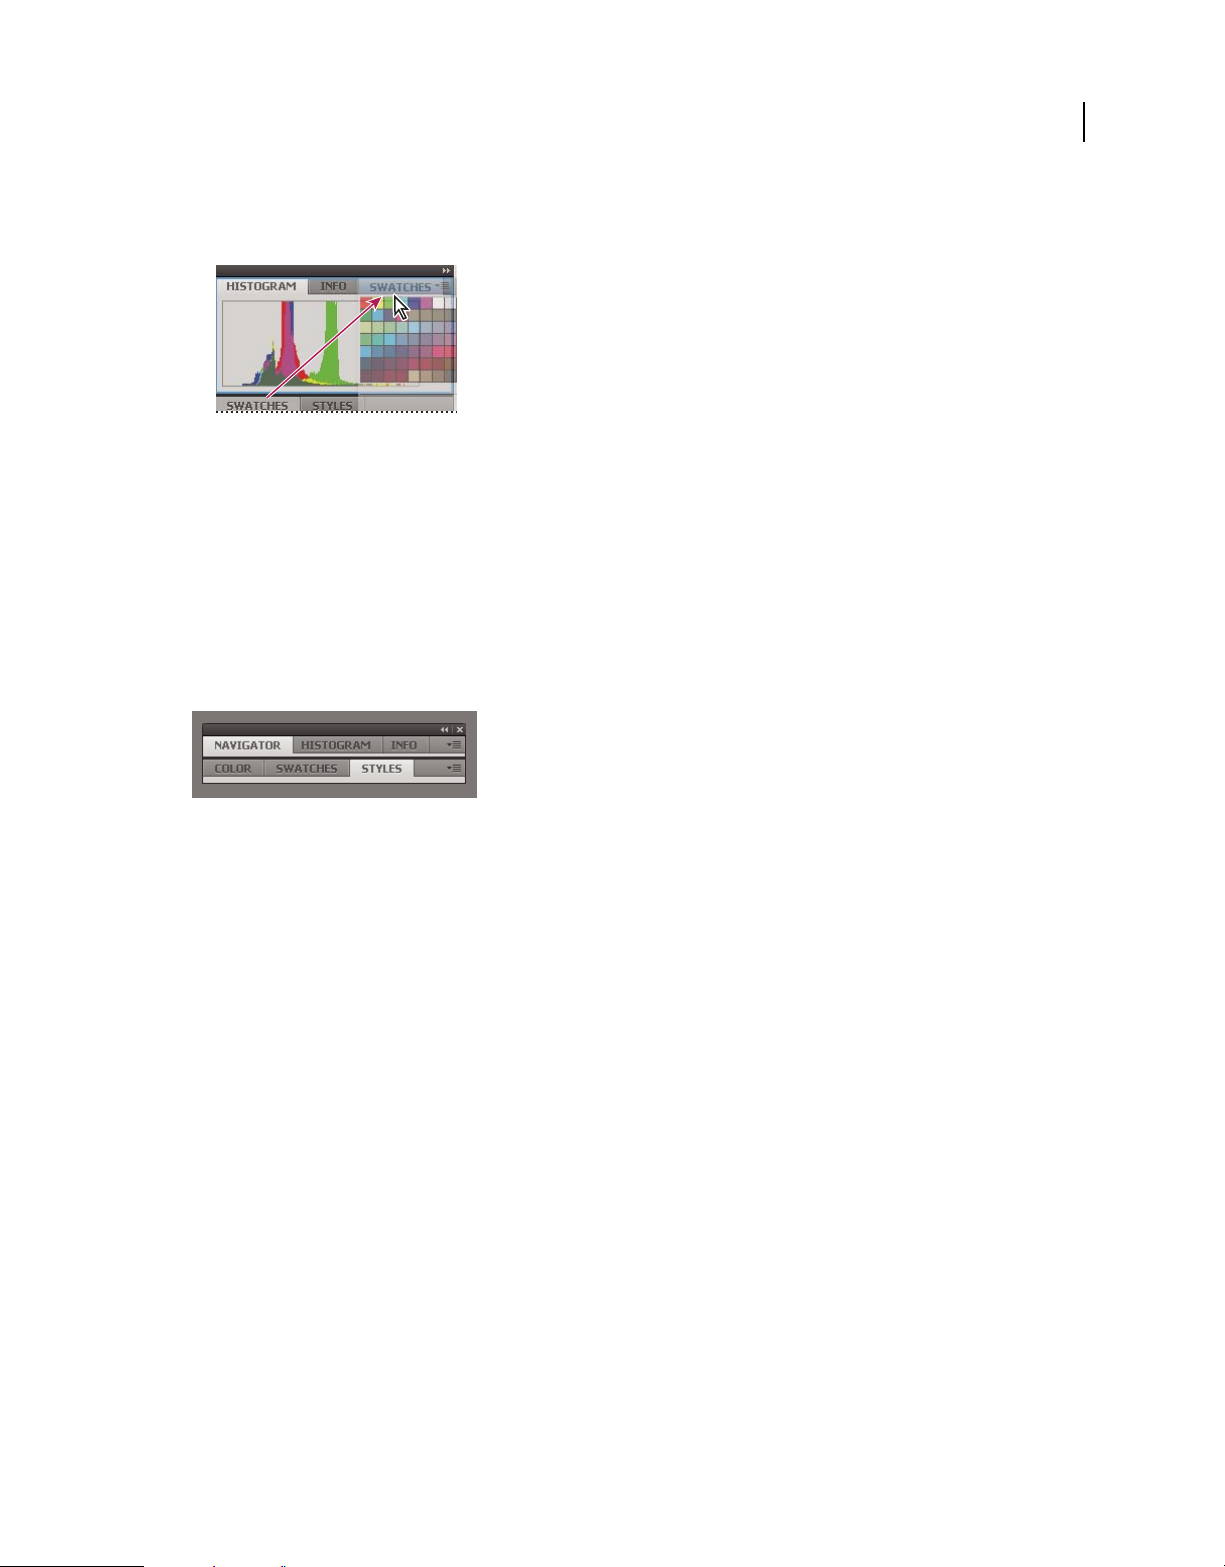
USING CONTRIBUTE CS4
Workspace
Manipulate panel groups
• To move a panel into a group, drag the panel’s tab to the highlighted drop zone in the group.
Adding a panel to a panel group
• To rearrange panels in a group, drag a panel’s tab to a new location in the group.
• To remove a panel from a group so that it floats freely, drag the panel by its tab outside the group.
• To move a group, drag the title bar (the area above the tabs).
Stack floating panels
When you drag a panel out of its dock but not into a drop zone, the panel floats freely. The floating panel allows you
to position it anywhere in the workspace. You can stack floating panels or panel groups so that they move as a unit
when you drag the topmost title bar. (Panels that are part of a dock cannot be stacked or moved as a unit in this way.)
20
Free-floating stacked panels
• To stack floating panels, drag a panel by its tab to the drop zone at the bottom of another panel.
• To change the stacking order, drag a panel up or down by its tab.
Note: Be sure to release the tab over the narrow drop zone between panels, rather than the broad drop zone in a title bar.
• To remove a panel or panel group from the stack, so that it floats by itself, drag it out by its tab or title bar.
Resize panels
• To minimize or maximize a panel, panel group, or stack of panels, double-click a tab. You can also single-click the
tab area (the empty space next to the tabs).
• To resize a panel, drag any side of the panel. Some panels, such as the Color panel in Photoshop, cannot be resized
by dragging.
Manipulate panels collapsed to icons
You can collapse panels to icons to reduce clutter on the workspace. In some cases, panels are collapsed to icons in the
default workspace.
Page 28
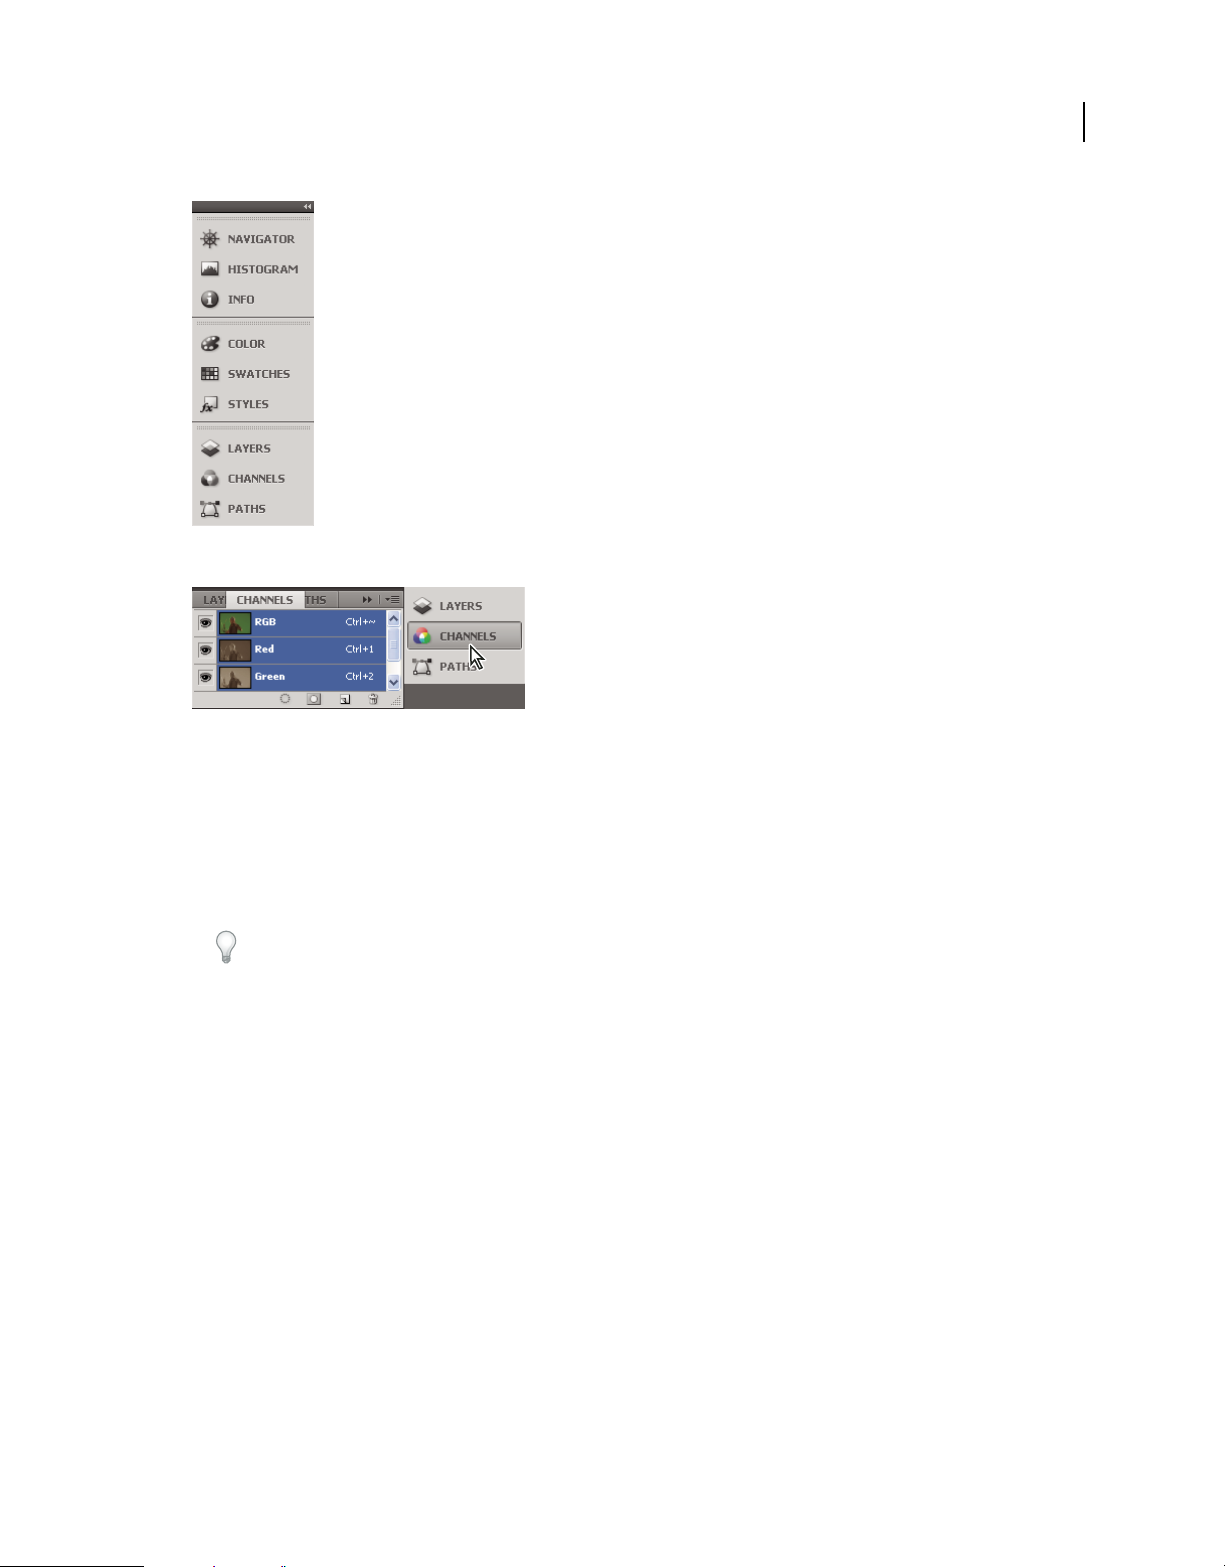
Panels collapsed to icons
USING CONTRIBUTE CS4
Workspace
21
Panels expanded from icons
• To collapse or expand all panel icons in a dock, click the double arrow at the top of the dock.
• To expand a single panel icon, click it.
• To resize panel icons so that you see only the icons (and not the labels), adjust the width of the dock until the text
disappears. To display the icon text again, make the dock wider.
• To collapse an expanded panel back to its icon, click its tab, its icon, or the double arrow in the panel’s title bar.
In some products, if you select Auto-Collapse Icon Panels from the Interface or User Interface Options preferences,
an expanded panel icon collapses automatically when you click away from it.
• To add a floating panel or panel group to an icon dock, drag it in by its tab or title bar. (Panels are automatically
collapsed to icons when added to an icon dock.)
• To move a panel icon (or panel icon group), drag the icon. You can drag panel icons up and down in the dock, into
other docks (where they appear in the panel style of that dock), or outside the dock (where they appear as floating,
expanded panels).
Restore the default workspace
• Select the default workspace from the workspace switcher in the Application bar.
• (Photoshop) Select Window > Workspace > Default Workspace.
• (InDesign, InCopy) Select Window > Workspace > Reset [Workspace Name].
Save and switch workspaces
By saving the current size and position of panels as a named workspace, you can restore that workspace even if you
move or close a panel. The names of saved workspaces appear in the workspace switcher in the Application bar.
In Photoshop, the saved workspace can include a specific keyboard shortcut set and menu set.
Page 29

Save a custom workspace
1 With the workspace in the configuration you want to save, do one of the following:
• (Photoshop, Illustrator) Choose Window > Workspace > Save Workspace.
• (InDesign, InCopy) Choose Window > Workspace > New Workspace.
• (Dreamweaver) Choose Window > Workspace Layout > New Workspace.
• (Flash) Choose New Workspace from the workspace switcher in the Application bar.
• (Fireworks) Choose Save Current from the workspace switcher in the Application bar.
2 Type a name for the workspace.
3 (Photoshop, InDesign) Under Capture, select one or more options:
Panel Locations Saves the current panel locations.
Keyboard shortcuts Saves the current set of keyboard shortcuts (Photoshop only).
Menus Saves the current set of menus.
4 Click OK or Save.
Display or switch workspaces
❖ Select a workspace from the workspace switcher in the Application bar.
In Photoshop, you can assign keyboard shortcuts to each workspace to navigate among them quickly.
USING CONTRIBUTE CS4
Workspace
22
Delete a custom workspace
• Select Manage Workspaces from the workspace switcher in the Application bar, select the workspace, and then
click Delete. (The option is not available in Fireworks.)
• (Photoshop, InDesign, InCopy) Select Delete Workspace from the workspace switcher.
• (Illustrator) Choose Window > Workspace > Manage Workspaces, select the workspace, and then click the Delete icon.
• (InDesign) Choose Window > Workspace > Delete Workspace, select the workspace, and then click Delete.
(Photoshop) Start with the last or default panel locations
When you start Photoshop, panels can either appear in their original default locations, or appear as you last used them.
In Interface preferences:
• To display panels in their last locations on startup, select Remember Panel Locations.
• To display panels in their default locations on startup, deselect Remember Panel Locations.
The Contribute workspace
The Contribute workspace has three main areas: the Contribute browser and editor, the toolbar, and the sidebar.
Page 30
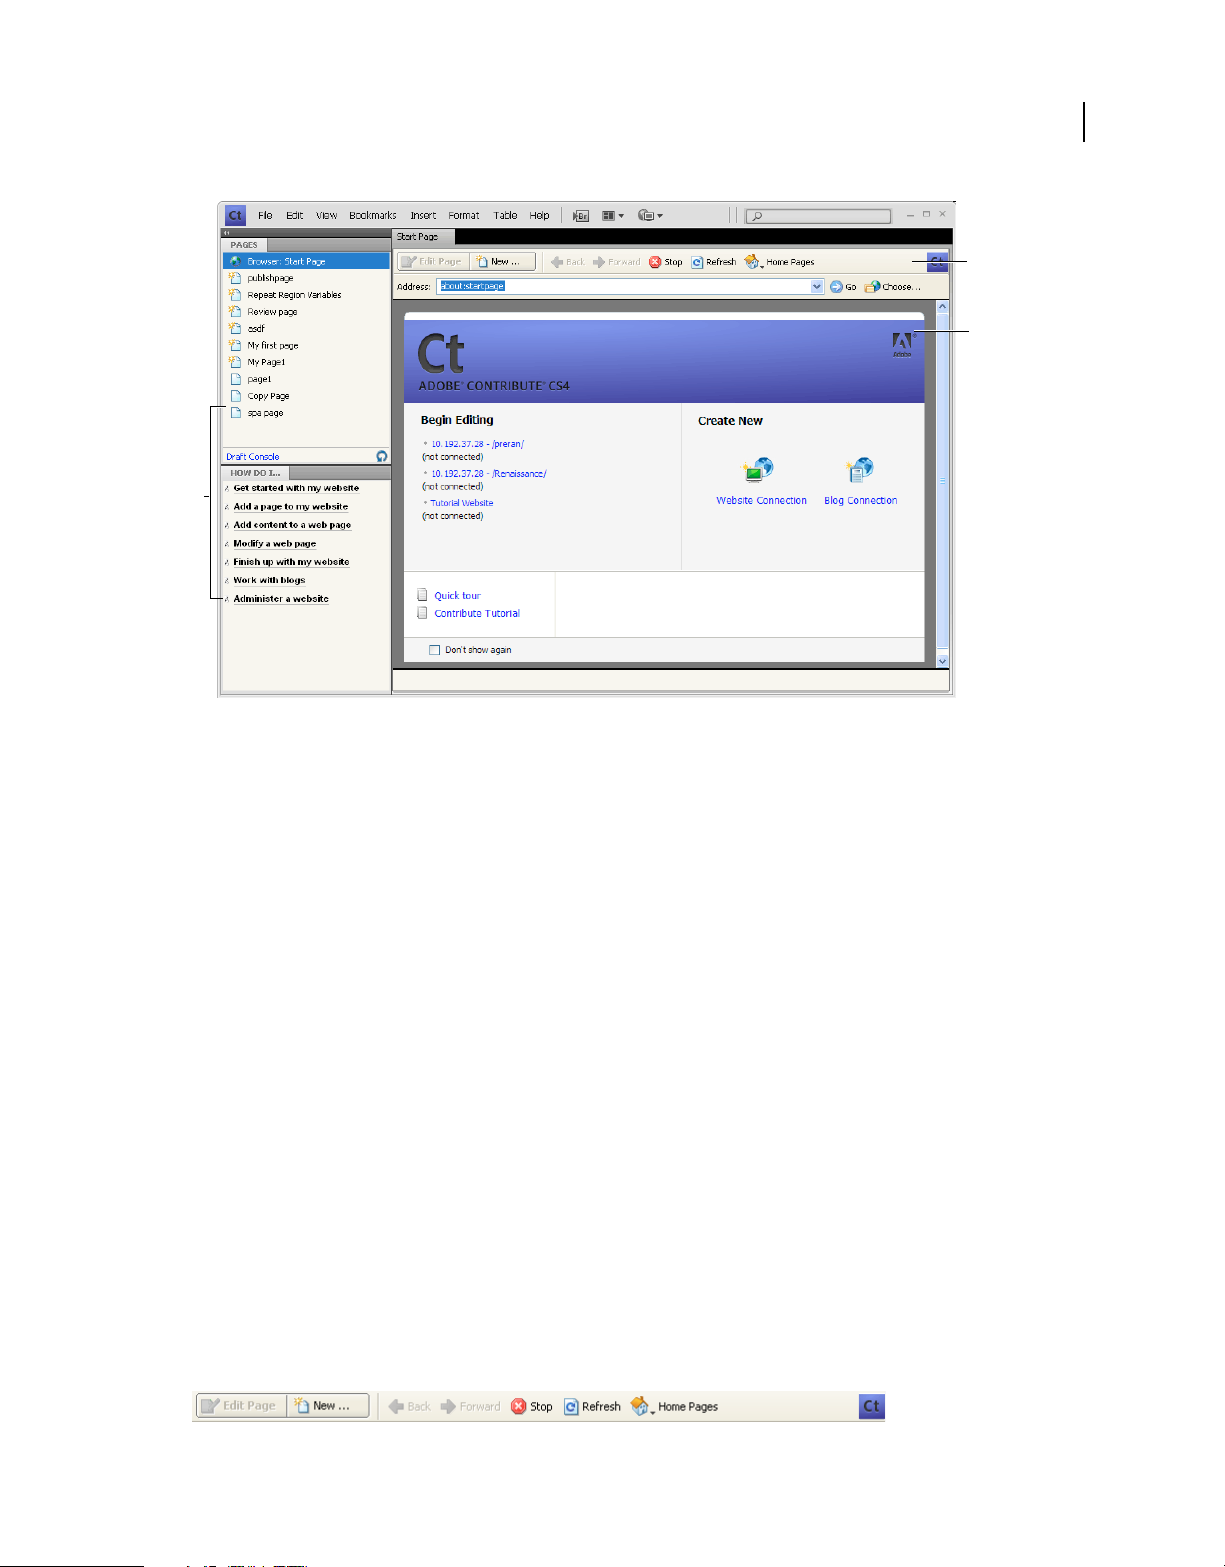
USING CONTRIBUTE CS4
Workspace
B
C
A
23
A. Sidebar B. Toolbar C. Start page in the browser and editor
The Contribute browser and editor
The main window in Contribute is used for browsing and editing. If you are not sure whether you are browsing or
editing in Contribute, look at the toolbar. The toolbars are different when you are browsing and when you are editing
a draft.
When you use the Contribute browser, you can browse to any web page—not just to pages on your website. The
Contribute browser functions as a true web browser: Click links in web pages to browse to the page you want to edit.
You can also create bookmarks to pages that you visit frequently.
When you use the Contribute editor, you can edit pages in websites you have connected to (see “Connect to a blog” on
page 6). You can edit text, images, tables, links, and pages with frames.
It’s easy to browse and edit in Contribute, and to switch between browsing and editing. For more information, see
“Switch between browsing and editing” on page 25.
The Contribute toolbars
The Contribute toolbar changes according to whether you are browsing or editing a web page or a blog entry. When
you are editing a web page, the editor toolbar lets you edit text or images, depending on the content you’ve selected.
And when you are editing a draft for your blog, the blog metadata and secondary metadata toolbars help you tag your
blog pages.
When you receive or open a web page, the toolbar displays buttons for only those actions that you can perform at that
stage of the workflow, and to which you have permissions.
The Browser toolbar Contains buttons for navigating your website or creating a page or blog entry. The browser
toolbar contains the same options for websites and blogs.
Page 31
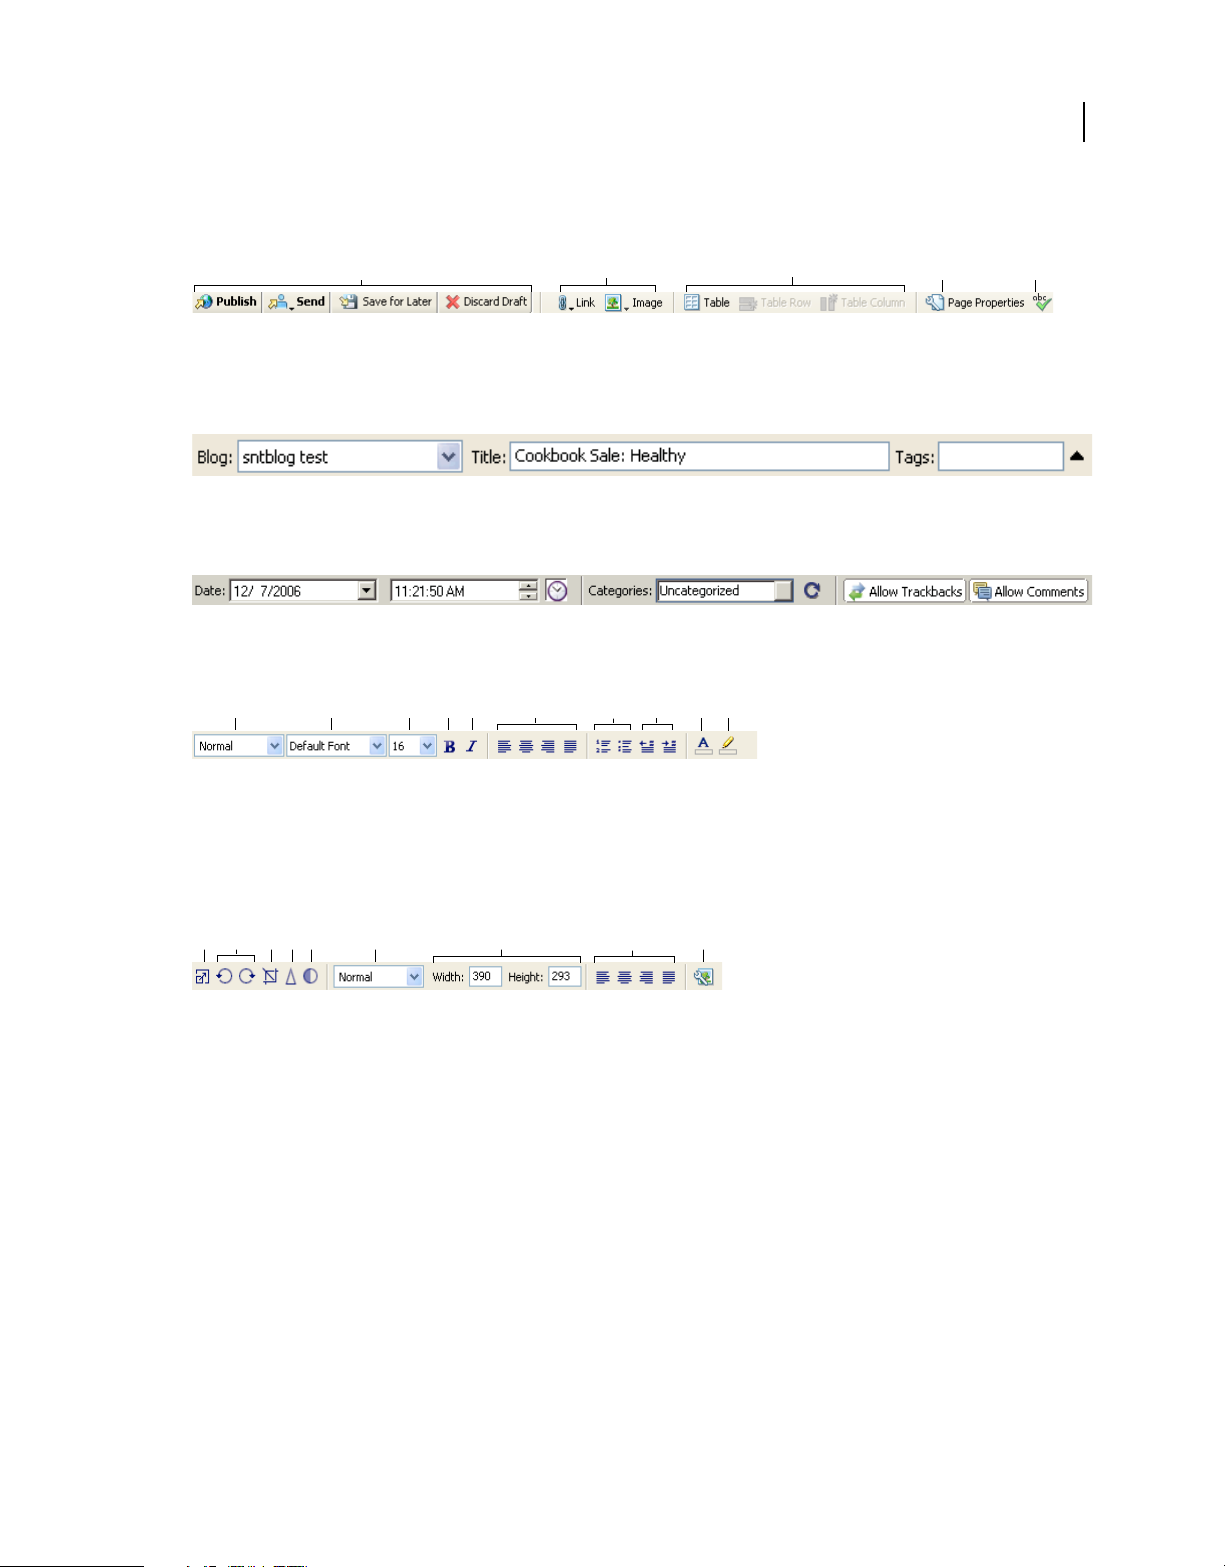
USING CONTRIBUTE CS4
Workspace
The Editing toolbar Contains buttons for common operations from the File, Insert, Format, and Table menus. The
toolbar options vary depending on whether you are working on a draft for a website or a blog.
24
A
A. Action buttons B. Insert content C. Add row or column D. Page properties E. Check Spelling
B
C
D
E
The Blog Metadata toolbar Contains information about the draft, including the blog title, the blog post title, and the
associated tags. This toolbar is available for blog drafts only.
The Secondary Metadata toolbar Contains more options for associating metadata with a blog post. This toolbar is
available for blog drafts only.
The Text Formatting toolbar Contains buttons for formatting text. The text formatting toolbar options also vary
depending on whether you are working on a draft for a website or a blog.
A
A. Style menu B. Font menu C. Font size menu D. Bold E. Italic F. Alignment buttons G. List buttons H. Outdent/Indent buttons I. Text
color J. Highlight color
B
DE F G
C
IJ
H
Note: If your Contribute administrator has restricted editing to text only, some formatting options are not available. Also,
options might be disabled if a cascading style sheet has been applied to a text selection.
The Image Editing Toolbar Contains buttons for editing images.
AB CDE F G I
A. Resize B. Rotate buttons C. Crop D. Sharpen E. Brightness/Contrast F. Style G. Resize H. Alignment I. Image Properties
H
The Contribute sidebar
The Contribute sidebar makes it easy to switch between editing and browsing, and gives you quick access to your
drafts. You can also use the sidebar to get quick instructions for performing tasks in Contribute.
The sidebar has two parts:
The Pages panel Gives you access to the web browser and all drafts you’re currently editing. There is also a link to the
Draft Console, which shows the status of your drafts.
Note: The Draft Console is not available if your website doesn’t have an administrator assigned.
The How Do I panel Provides quick step-by-step instructions to help you complete some common Contribute tasks.
The panel shows a list of browsing tasks while you are browsing, and a list of editing tasks while you are editing.
Click any link in the How Do I panel in the sidebar to get more information on that task. If the desired task is not in
the list, see Contribute Help (Help > Adobe Contribute Help) to get detailed information.
You can expand, collapse, or resize the panels and the sidebar.
Page 32

USING CONTRIBUTE CS4
Expand or collapse the sidebar
❖ Do one of the following:
• Select View > Sidebar.
• In Windows, click the arrow on the splitter bar between the sidebar and the Contribute browser and editor.
• In Mac OS, double-click the grabber on the splitter bar between the sidebar and the Contribute browser and
editor.
Resize the sidebar
❖ Drag the splitter bar between the sidebar and the Contribute browser and editor.
Expand or collapse a panel in the sidebar
❖ Double-click the panel title bar.
Resize panels vertically in the sidebar
❖ Drag the title bar in the How Do I panel.
25
Workspace
Switch between browsing and editing
You can use Contribute to browse or edit web pages and blog entries. You can switch between browsing and editing
at any time. When you leave a draft you’re editing, Contribute saves your changes so that you can return to the draft
later and continue editing where you left off.
When you switch to browsing, Contribute does not publish your draft. While you are browsing the page or blog entry,
the message area advises you that you have an unpublished draft of the page or blog entry.
If you are not sure if you are browsing or editing in Contribute, look at the toolbar. When you are browsing, you’ll see
the browser toolbar with the Edit Page (or Create Connection) button, and when you are editing, the editor toolbar
appears (see
Switch from browsing to editing
❖ Do one of the following:
• Click the Edit Page button in the toolbar to edit a web page, or click the Edit Entry button to edit a blog entry.
• Click a draft title in the Pages panel in the sidebar.
“The Contribute toolbars” on page 23).
Note: Edit Page and Edit Entry are enabled only for pages on a website or entries in a blog that you are connected
to and that you have permission to edit.
Switch from editing to browsing
❖ Do one of the following:
• Click Browser in the Pages panel in the sidebar.
• Click the Save For Later button in the toolbar.
• Select View > Browser.
Page 33

USING CONTRIBUTE CS4
Workspace
See also
“Browse to web pages and blog entries” on page 26
Browse to web pages and blog entries
The easiest way to find a web page or blog entry you want to edit is to browse to the page or entry in Contribute like
you would browse in any web browser.
To learn other ways to find your web pages or blog entries, see “Open web pages and blog entries without browsing”
on page 26.
Note: (Windows only) If you use Microsoft Internet Explorer as your primary web browser, the Contribute browser
inherits preferences from Internet Explorer. To change basic settings, such as fonts, cookies, or plug-ins, change your
preferences in Internet Explorer; then start Contribute again.
You can browse to any website or blog entry with Contribute, but you can edit only web pages and blog entries that
are in your websites and blogs; that is, websites or blogs that you’ve created connections to (for more information, see
“Connect to a blog” on page 6). When you browse to a page that is in your website or a blog entry that is in your blog
and that you have permission to edit, the Edit Page button is enabled in the toolbar.
26
❖ Do one of the following:
• Click links in web pages or blog entries to navigate to other pages.
• Type the web address (URL) of the page in the Address text box, and click Go. You can also press Enter or
Return.
• Select View > Go To Web Address, enter the web address (URL), and click OK.
See also
“Open web pages and blog entries without browsing” on page 26
“Edit existing web pages and blog entries” on page 50
Open web pages and blog entries without browsing
You can use Contribute to open web pages and blog entries without browsing to find them.
Page 34
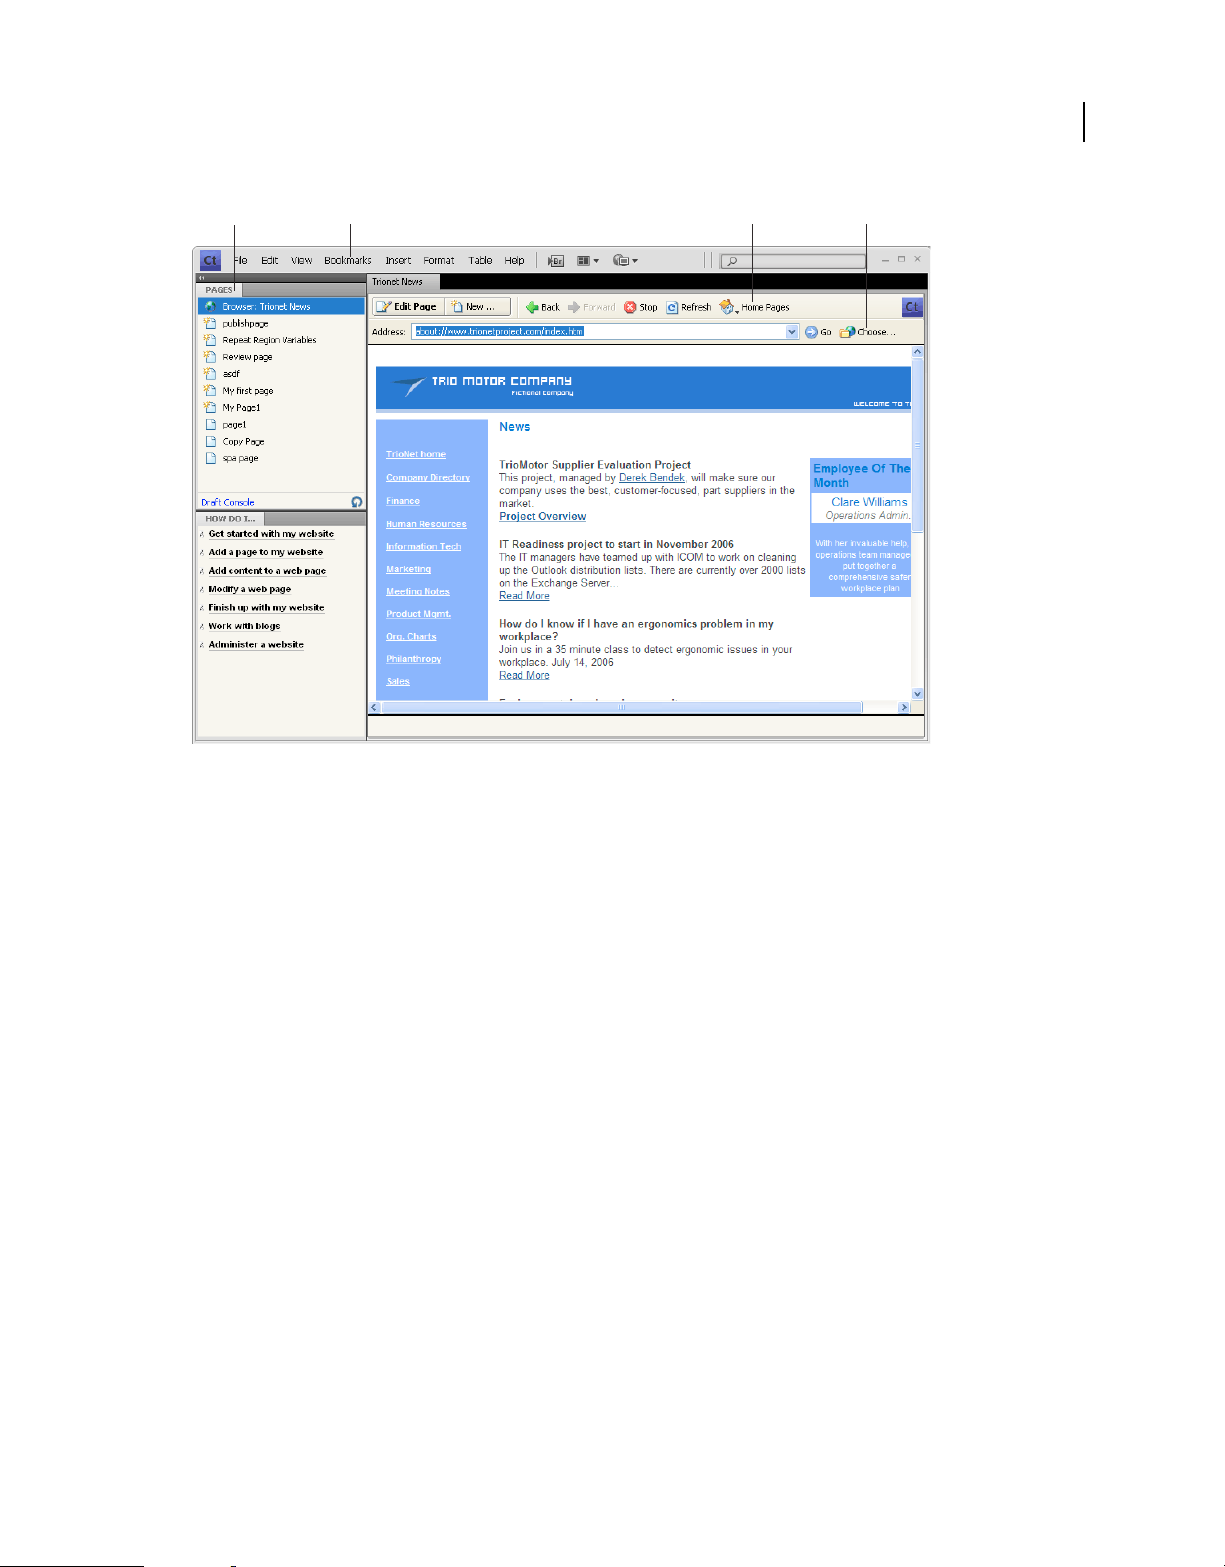
USING CONTRIBUTE CS4
Workspace
27
AB
A. Current drafts B. Bookmarks C. Home pages D. Pages that aren’t linked
C
D
View drafts and new pages or blog entries
The Pages panel displays the titles of drafts you are currently editing. You can also access drafts from the File menu.
❖ Do one of the following:
• Click the title of the draft in the Pages panel in the sidebar.
• Select File > Drafts, and then select a draft from the pop-up menu.
See also
“View home pages for your websites and blogs” on page 27
“View recently published web pages and blog entries” on page 28
“View blog entries” on page 28
“View pages and files that you can’t browse” on page 28
View home pages for your websites and blogs
You can use the toolbar to view the home pages for all your websites and blogs to which you are connected. The View
menu also gives you access to these pages and blog entries.
❖ Do one of the following:
• Click the Home Pages button in the toolbar, and then select a home page.
• Select View > Home Pages, and then select a home page from the pop-up menu.
Page 35

See also
“View drafts and new pages or blog entries” on page 27
“View recently published web pages and blog entries” on page 28
“View blog entries” on page 28
“View pages and files that you can’t browse” on page 28
View recently published web pages and blog entries
The File menu gives you quick access to web pages and blog entries you’ve recently published.
❖ Select File > Recent Pages and Blog Entries, and then select a page from the pop-up menu.
See also
“View drafts and new pages or blog entries” on page 27
“View home pages for your websites and blogs” on page 27
“View pages and files that you can’t browse” on page 28
USING CONTRIBUTE CS4
Workspace
28
View blog entries
The Entries pop-up menu provides quick access to a blog entry from your blog home page.
1 Browse to your blog home page.
2 From the Entries pop-menu, select the blog entry you want to manage. You can also select a blog entry by using
View > Select Blog Entry > Blog entry title.
The selected blog entry appears in the embedded browser, and the title of the selected blog entry is displayed in the
Entries pop-up menu.
Note: If a blog entry does not have a title, the title of the blog entry appears as <Untitled Blog Entry> in the Entries popup menu.
See also
“View drafts and new pages or blog entries” on page 27
“View home pages for your websites and blogs” on page 27
“View pages and files that you can’t browse” on page 28
“View recently published web pages and blog entries” on page 28
View pages and files that you can’t browse
Contribute gives you access to pages and files that are associated with your website or blog but that you can’t browse
to. Use the Choose button in the toolbar to view pages and files that are saved on a website folder but aren’t linked from
any page on your website or blog.
1 In the Contribute browser or editor, select View > Choose File or Blog Entry or click the Choose button in the
browser toolbar.
The Choose File or Blog Entry dialog box appears.
Page 36

USING CONTRIBUTE CS4
Workspace
2 Select a file or blog entry by doing one of the following:
• If the file is in a folder on the website or blog you are currently browsing, select a file.
• If the file is not in a folder on the current website or blog, use the Look In pop-up menu to navigate to the correct
website or blog folder, and then select a file.
Depending on the type of the file you select, a preview may appear so that you can confirm that you’re selecting the
correct file.
3 Do one of the following:
• Select Entries Only to display pages with blog entries.
• Select Pages to display a special kind of blog entry. Contents of Pages are stored in a database, and are retrieved
using protocols like MetaWeblog and Atom.
4 Click OK.
The web page or file appears in the Contribute web browser.
Note: If you select a file type that the Contribute browser can’t display, you’ll see the File Placeholder page.
See also
“View drafts and new pages or blog entries” on page 27
29
“View home pages for your websites and blogs” on page 27
“View recently published web pages and blog entries” on page 28
“View blog entries” on page 28
Set up access to commonly used pages
Contribute lets you keep a list of bookmarks for pages that you visit frequently. You can add a bookmark for any page—
not just pages in websites or entries in blogs that you’re connected to.
View pages in your bookmarks list
You can select pages in your list of bookmarks to quickly view those pages.
In Windows, Contribute also includes your Internet Explorer bookmarks (up to 2000 bookmarks) in the Other
Bookmarks list under your Contribute bookmarks.
❖ Do one of the following:
• To view a Contribute bookmark, select the Bookmarks menu, and then select a bookmark from the list.
• (Windows only) To view an Internet Explorer bookmark, select Bookmarks > Other Bookmarks, and then select
a bookmark from the list.
See also
“Add bookmarks” on page 30
“Delete bookmarks” on page 30
Page 37

USING CONTRIBUTE CS4
Workspace
Add bookmarks
You can add any web page—not just pages in websites or entries in blogs that you’re connected to—to your bookmarks
list. You can have as many as 1000 bookmarks.
1 Browse to the page you want to add to your bookmarks list.
2 Select Bookmarks > Add Bookmark.
The Add Bookmark dialog box appears.
3 To change the title of the bookmark, enter a new title in the Name text box.
This is the name that appears in your bookmarks list.
4 To add the page to a folder, click an existing folder name or click New Folder to add a folder.
5 Click OK.
Contribute adds the page to your bookmarks list in the Bookmarks menu.
See also
“View pages in your bookmarks list” on page 29
“Delete bookmarks” on page 30
30
Delete bookmarks
You can delete any page from your bookmarks list, or you can delete a bookmarks folder.
1 Select Bookmarks > Delete Bookmark.
The Delete Bookmark dialog box appears.
2 Select the name of the bookmark or the folder you want to delete.
3 Click Delete.
Contribute removes the page from your bookmarks list in the Bookmarks menu.
4 To delete another bookmark or folder, select it, and then click Delete again.
5 Click Close when you finish deleting bookmarks.
See also
“View pages in your bookmarks list” on page 29
“Add bookmarks” on page 30
Set Contribute preferences
You use the Preferences dialog box to set your user preferences for Contribute. You can set preferences for blog
defaults, general editing, file editors, proxy settings, invisible elements, inserting Microsoft Office documents, Adobe®
PDF® documents, the servers to ping when a blog entry is posted, password security, and blog entry tags.
You can also set the time intervals at which Contribute automatically saves the draft. This minimizes the possibility of
losing unsaved changes under unforeseen circumstances.
Page 38
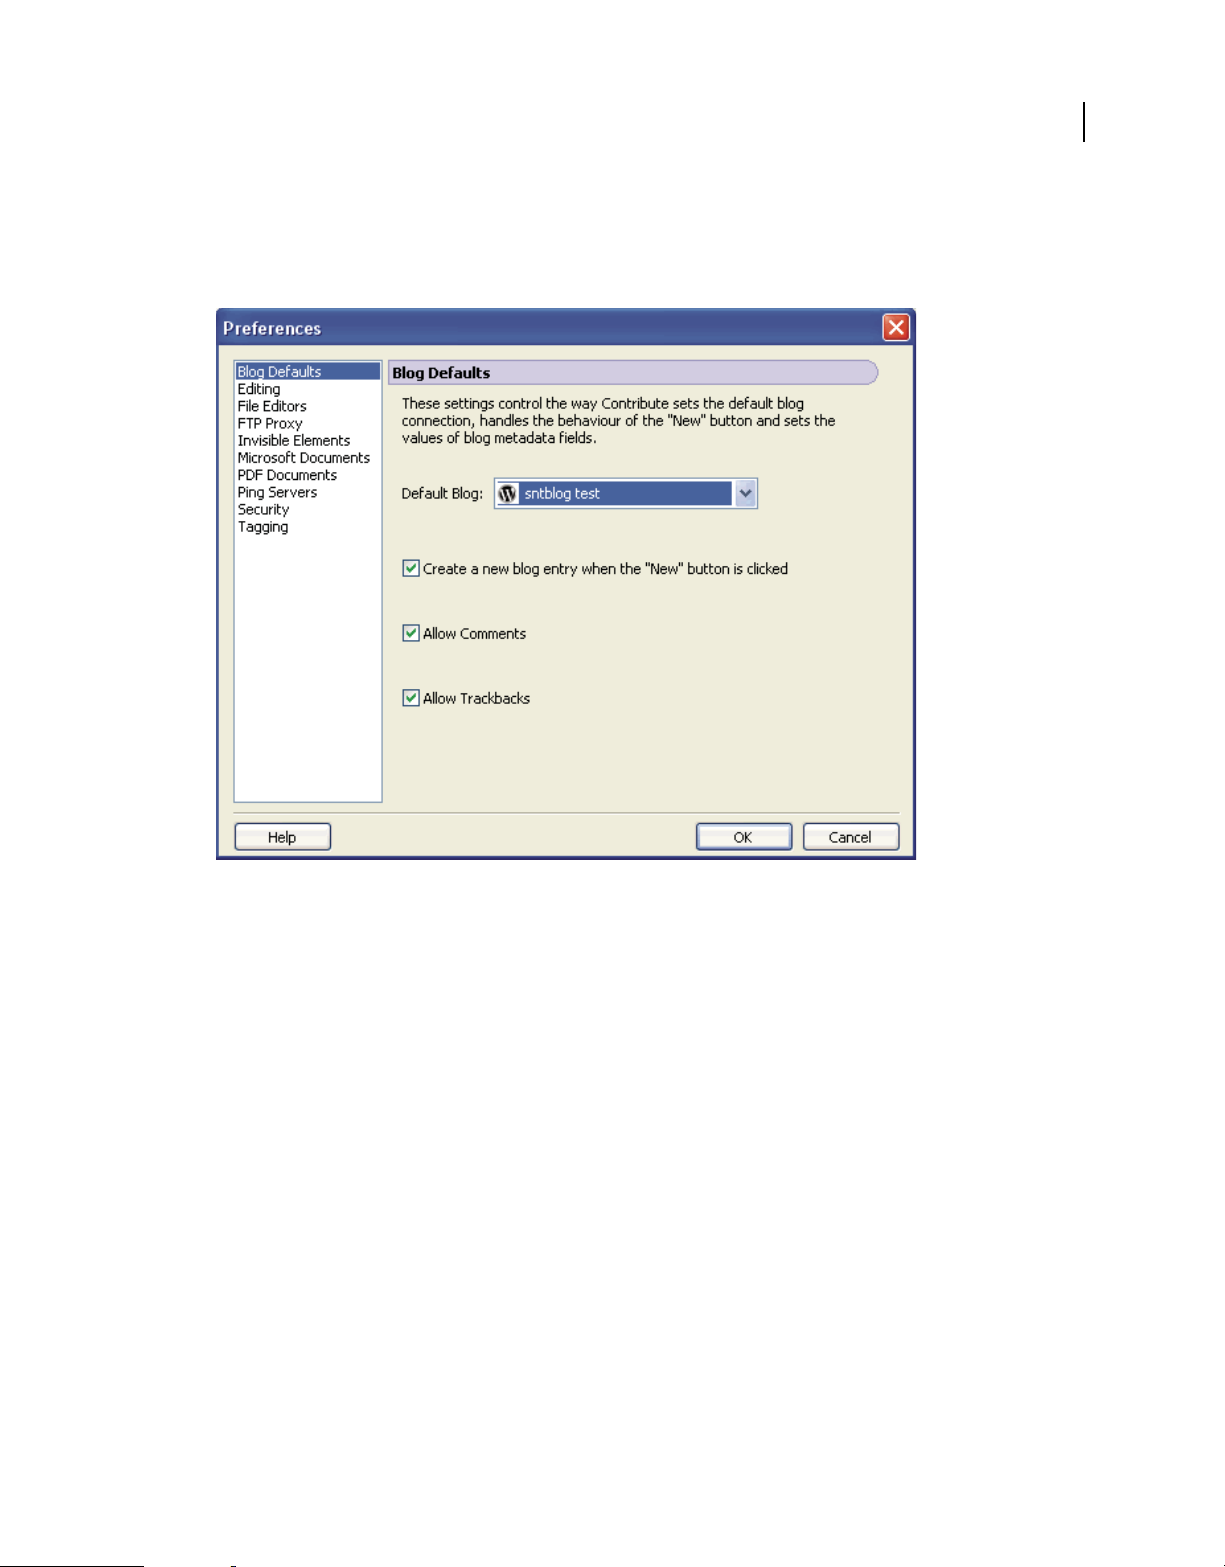
Edit user preferences
1 Select Edit > Preferences (Windows) or Contribute > Preferences (Mac OS).
The Preferences dialog box appears.
USING CONTRIBUTE CS4
Workspace
31
2 Select an option from the list on the left:
• Select Blog Defaults to set options for the following:
• Default blog in which a blog entry is created
• Whether to create a blog entry when you click the New button
• Whether comments and trackbacks are allowed by default for blog entries
For more information, see “Setting blog default preferences” on page 39.
• Select Editing to set general editing options, such as how Contribute handles table editing, or to select a spelling
dictionary (see
at regular time intervals.
“Setting editing preferences” on page 40). You can also set your preference for saving the draft
• Select File Editors to select primary application editors by file type (see “Setting file editor preferences” on
page 40).
• Select FTP Proxy to add or change settings for your FTP proxy server (see “Setting FTP proxy preferences” on
page 41).
• Select Invisible Elements to hide or show invisible elements (see “Setting invisible element preferences” on
page 41).
• (Windows only) Select Microsoft Documents to determine how Contribute handles Office documents (see
“Setting Microsoft Office document preferences (Windows only)” on page 41).
Page 39

USING CONTRIBUTE CS4
Workspace
• Select PDF Documents to configure the way Contribute handles insertion of PDF documents in draft web pages
or blog entries. (See
“Setting PDF document user preferences” on page 42.)
• Select Ping Servers to add or remove the ping server URLs you want Contribute to notify when you post a new
blog entry using Contribute. You can also view a list of the most recent failed ping server log entries, up to a
specified number of entries. (See
“Setting ping server preferences” on page 42.)
• Select Security to set up a Contribute startup password (see “Setting security preferences” on page 43).
• Select Tagging to add and remove tagging servers, determine where Contribute adds tags to blog entries, and to
specify details about the tag repository (see
“Setting tagging preferences” on page 44).
Change or disable startup password
You can change your Contribute startup password as often as you like. Before you can change the startup password,
you must first successfully enter the current Contribute startup password and start Contribute.
If the Require Password At Startup option is selected in the Contribute Preference dialog box, you must enter the
correct password to start Contribute and edit website pages. If you forget or don’t know the Contribute startup
password, you can’t use Contribute to edit pages unless you disable the Contribute startup password requirement.
Before you can change the startup password requirement, you must remove all your existing website connections.
32
Change the Contribute startup password
1 Select Edit > Preferences (Windows) or Contribute > Preferences (Mac OS).
The Preferences dialog box appears.
2 Select Security from the option list on the left.
3 Type the new password, and then type the new password again.
4 Click OK.
Disable a Contribute startup password
1 Select Edit > My Connections (Windows) or Contribute > My Connections (Mac OS).
2 Under Website Name, select a website connection, and then click Remove.
Note: You might have to discard any unpublished drafts before removing the website connections.
3 Repeat step 2 until you remove all website connections.
4 Click Close.
5 Select Edit > Preferences (Windows) or Contribute > Preferences (Mac OS).
6 In the Preferences dialog box, select Security.
7 Deselect the Require Password At Startup option.
8 Click OK.
Page 40

USING CONTRIBUTE CS4
Workspace
Set browser encoding
To specify how a page should appear in the Contribute browser, you can set the browser encoding for that page. You
might need to set encoding if characters aren’t displayed properly in the Contribute browser.
1 In the Contribute browser, right-click (Windows) or Control-click (Mac OS) on the page.
2 Select Encoding, and then select an option from the pop-up menu.
Contribute accessibility features
Accessibility refers to making websites and web products usable by people with visual, auditory, motor, and other
disabilities. Contribute provides features that make it accessible to users with disabilities.
It’s important to make your web pages accessible to all your website visitors.
The U.S. government and other organizations have established accessibility legislation and guidelines. For more
information about two significant initiatives, see the World Wide Web Consortium Web Accessibility Initiative
www.w3.org/wai) and Section 508 of the Federal Rehabilitation Act (www.section508.gov).
(
Also, as you edit your pages, remember that some visitors use screen readers. Contribute helps you make your images
and tables more accessible in the following ways:
33
• You can add text that screen readers recite to describe images on your pages. Your Contribute administrator can
have Contribute prompt you for descriptive text whenever you insert an image. For more information, talk to your
Contribute administrator or see
• You can include table headings to be recited by screen readers. To insert tables with headings, see “Insert tables” on
page 158.
Note: Screen readers do not read boldface headings centered in a row or column.
“Set page-editing and paragraph settings” on page 288.
Use screen readers with Contribute
A screen reader recites text that appears on the computer screen. It also reads nontextual information, such as button
labels or image descriptions.
You can use a screen reader when you edit your web pages. The screen reader starts reading at the upper left corner of
the application.
Contribute supports the following screen readers:
• JAWS® for Windows®, from Freedom Scientific® (www.freedomscientific.com)
• Window-Eyes screen readers, from GW Micro® (www.gwmicro.com)
See also
“Use operating system accessibility features” on page 33
“Use the keyboard to navigate Contribute” on page 34
Use operating system accessibility features
Contribute supports the Windows operating system high-contrast setting. You activate this setting through the
Windows Control Panel.
Page 41

USING CONTRIBUTE CS4
When high contrast is on, Contribute responds as follows:
Workspace
• Dialog boxes and panels use system color settings.
For example, if you set the color to White On Black, all Contribute dialog boxes and panels appear with a white
foreground color and black background.
• The Contribute editor uses the background and text colors you set in Format > Page Properties so that your pages
render colors as a website visitor’s browser renders them.
See also
“Use screen readers with Contribute” on page 33
Use the keyboard to navigate Contribute
While you are editing, you can use the keyboard to navigate the Contribute workspace, dialog boxes, and tables
without a mouse.
You can also use keyboard shortcuts to open some dialog boxes and perform some commands. For a list of shortcuts,
“Windows keyboard shortcuts” on page 307.
see
You can use keyboard shortcuts to navigate the Contribute workspace—that is, to select commands from the menus
and to switch between the Contribute browser and editor. For a complete list of Contribute keyboard shortcuts, see
“Windows keyboard shortcuts” on page 307.
34
All the items in the Pages panel and toolbar are accessible through the menus. To view task information in the How
Do I panel, use Contribute Help (Help > Adobe Contribute Help).
Keyboard shortcut to switch from the Contribute browser to the editor
❖ Do one of the following:
• Press Control+Shift+E (Windows) or Command+Shift+E (Mac OS), to edit the current page.
Note: This has the same effect as clicking the Edit Page button in the toolbar.
• (Windows only) Press Alt+F, press Alt+F again, and then use the arrow keys to select a current draft or new page
from the pop-up menu.
The drafts and new pages listed in the Pages panel appear in this list.
Keyboard shortcut to switch from the Contribute editor to the browser
❖ Press Control+Shift+B (Windows) or Command+Shift+B (Mac OS).
Note: This has the same effect as clicking Browser in the Pages panel.
See also
“Keyboard shortcuts to navigate dialog boxes” on page 34
“Keyboard shortcuts for navigating in tables” on page 35
Keyboard shortcuts to navigate dialog boxes
You can use the keyboard to navigate dialog boxes.
• To move through dialog box options, press Tab.
In Mac OS, pressing Tab moves the insertion point from one text field to the next.
Page 42

USING CONTRIBUTE CS4
Workspace
• To accept a choice and exit the dialog box, press Enter or Return.
• To close the dialog box without making any changes, press Escape or Alt+F4 (Windows).
• (Windows only) To move through choices for an option, use the arrow keys.
For example, if an option has a pop-up menu, move focus to that option, use the Down Arrow key to move through
the choices.
• (Windows only) To move through an option list, press Control+Tab to shift focus to the option list, and then use
the arrow keys to move up or down the list.
To see an example of an option list, select Edit > Preferences.
• (Windows only) To shift to the options for an option in an option list, press Control+Tab.
See also
“Keyboard shortcuts for navigating in tables” on page 35
Keyboard shortcuts for navigating in tables
After you select a table, you can use the keyboard to navigate through it.
1 In the Contribute editor, do one of the following to select the table:
• If the insertion point is to the left of the cell, press Shift+Right Arrow.
• If the insertion point is to the right of the cell, press Shift+Left Arrow.
2 Press the Down Arrow key to position the insertion point in the first cell.
3 Use the arrow keys or press Tab to move to other cells as necessary.
Pressing Tab in the rightmost cell of a row adds another row to the table.
35
4 To select a cell, press Control+A (Windows) or Command+A (Mac OS) while the insertion point is in the cell.
5 To exit the table, use the Select Table Cell command (Control+A) or Command+A (Mac OS); then press the Up,
Left, or Right Arrow key.
Reference
This section provides information about the dialog boxes introduced in this chapter.
Completing the Go To Web Address dialog box
Use the Go To Web Address dialog box to find a specific web page, if you know the page’s web address.
1 Enter an address in the Web Address (URL) text box.
2 Click OK.
Using the Choose <Image/Library Item/SWF Content> dialog box
Use the Choose Image, Choose Library Item, or Choose SWF Content dialog box to select one or all images, library
items, or SWF content in a folder, to include as Shared Assets.
Page 43

USING CONTRIBUTE CS4
Workspace
Select an image in the Choose Image dialog box
1 Select an image from the required folder.
2 (Optional) Click the Select All Files In Folder button, and click OK.
If you select a single file, a preview appears so that you can confirm that you’re selecting the correct entry.
3 Click OK in the message box that appears.
The Shared Asset Properties dialog box appears with the Web address of the image file.
4 The title of the image file appears in the Name field. You can modify the title.
5 Specify a relevant value in the ALT Text field. ALT text describes the image for people with disabilities or for people
whose browsers are set to only display text.
6 Click OK. The selected image file appears in the Shared Assets list.
Note: You can select one or more shared assets in the list and click Edit or Remove.
To select a SWF file in the Choose SWF Content dialog box:
1 Select a SWF movie from the required folder.
2 (Optional) Click the Select All Files In Folder button, and click OK.
If you select a single file, the SWF icon appears in the Preview area.
36
3 Click OK in the message box that appears.
The Shared Asset Properties dialog box appears.
4 The title of the SWF movie file appears in the Name field. You can modify the title.
The Web address of the SWF movie appears below the Name field.
5 Click OK. The selected SWF movie file appears in the Shared assets list.
Select a Library Item in the Choose Library Item dialog box
1 Select a Dreamweaver library item (.lbi file) from the required folder.
2 (Optional) Click the Select All Files In Folder button, and click OK.
If you select a single file, the Dreamweaver icon appears in the Preview area.
3 Click OK in the message box that appears.
The Shared Asset Properties dialog box appears.
4 The title of the Library file appears in the Name field. You can modify the title.
5 Determine the Editing behavior by selecting the Lock Item On Page Check box.
The Web address of the Library file appears below the Name field.
6 Click OK. The selected Library file appears in the Shared Assets list.
Note: If you select multiple files in a folder, the files names are listed in the Shared Asset Properties dialog box. You can
select a file, and click the Name column or the ALT Text column to modify the title or the ALT Text value of the file.
Page 44

USING CONTRIBUTE CS4
Workspace
Using the Choose File or Blog Entry dialog box
This dialog box is displayed when, from the View menu, you select the Choose File or Blog Entry option. You can view,
edit, or delete specific entries in your blog using the Choose File or Blog Entry dialog box.
1 Select an entry by doing one of the following:
• If the entry is in a folder on the blog you are currently browsing, select an entry.
• If the entry is not in a folder on the current blog, use the Look In pop-up menu to navigate to the correct blog
folder, and then select an entry.
Click the Up One Level icon if necessary.
A preview might appear so that you can confirm that you’re selecting the correct entry.
2 Do one of the following:
• Select Entries Only to display pages with blog entries.
• Select Pages to display a special kind of blog entry. Contents of Pages are stored in a database, and are retrieved
using protocols like MetaWeblog and Atom.
3 Choose from the following options:
• Click the View button to see the selected entry in the Contribute browser.
• Click the Edit button to open the selected entry as a draft in the Contribute editor.
• Click the Delete button to remove the selected entry from your blog.
4 If you clicked Delete, click Yes in the confirmation dialog box, and then click Close to close the Choose File or Blog
Entry dialog box.
37
Completing the Choose File or Blog Entry dialog box
While editing a web page or blog entry, you can use the Choose File or Blog Entry dialog box to find web pages, blog
entries, PDFs, and other files in the websites and blogs you’re connected to.
1 Select an item by doing one of the following:
• If the item is in a folder on the website or blog you are currently browsing, make a selection.
• If the item is not in a folder on the current website or blog, use the Look In pop-up menu to navigate to the
correct folder, and then make a selection.
Depending on what you select, a preview might appear so that you can confirm that you’re making the correct
selection.
2 Do one of the following:
• Select Entries Only to display pages with blog entries.
• Select Pages to display a special kind of blog entry. Contents of Pages are stored in a database, and are retrieved
using protocols like MetaWeblog and Atom.
3 Click the folder icons as necessary:
• Up One Level moves the selection up one level in the folder structure.
• New Folder lets you add a folder.
• Delete Folder removes the selected folder.
Note: You can delete folders only if they are empty.
Page 45

USING CONTRIBUTE CS4
Workspace
4 Click OK.
The file is opened in the right pane.
Completing the New Folder dialog box
The purpose of the New Folder dialog box is to add a new folder to your website or to your list of bookmarks.
1 Enter a name for the folder.
2 Click OK.
Completing the Add Bookmark dialog box
The purpose of the Add Bookmark dialog box is to add a page to your list of bookmarks.
1 To change the name of the bookmark, enter a new name in the Name text box.
This is the name that appears in your bookmarks list.
2 To add the page to a folder, click an existing folder name or click New Folder to add a folder.
3 Click OK.
Contribute adds the page to your bookmarks list in the Bookmarks menu.
38
See also
“Add bookmarks” on page 30
Completing the Delete Bookmark dialog box
The purpose of the Delete Bookmark dialog box is to remove a page or folder from your list of bookmarks.
1 Select the name of the bookmark or the folder you want to delete.
2 Click Delete.
Contribute removes the page from your bookmarks list in the Bookmarks menu.
3 To delete another bookmark or folder, select it, and then click Delete again.
4 Click Close when you finish deleting bookmarks.
See also
“Delete bookmarks” on page 30
Page 46

USING CONTRIBUTE CS4
Workspace
Setting blog default preferences
Use the Blog Defaults option of the Preferences dialog box to set blog default options. You can select the default blog
server in which Contribute creates a blog entry, whether clicking the New button creates a new blog entry, and whether
comments and trackbacks are allowed by default for blog entries.
1 Select the options you want to set:
• Select the blog in which you want Contribute to create a blog entry from the Default Blog pop-up menu.
Contribute creates a blog entry in the blog you select when you click the New Entry button as well as when you
post to the blog from a Microsoft Office document or from a browser such as Internet Explorer (Windows) or
Firefox. Contribute also creates a blog entry in this blog if you select the Create a new blog entry when the “New”
button is clicked preference option, which is described in this section. Finally, Contribute creates a blog entry in
this blog when you quote information from a website or blog entry you are currently viewing.
For more information on creating a blog entry from a quoted selection, see “Create a blog entry based on a
quoted selection” on page 83.
All blogs to which you have a Contribute connection are listed. When a user doesn’t specify a blog in which to
create a blog, the first blog is listed in the pop-up menu by default.
• Select or clear Create A New Blog Entry when the “New” button is clicked.
When this option is enabled, the name of the New button changes to New Entry. Contribute creates a new blog
entry in the blog you selected from the Default Blog pop-up menu, which is described in this section.
39
If you don’t enable this option, clicking the New button opens the New Web Page Or Blog Entry dialog box.
• Select or deselect Allow Comments.
When this option is enabled, Contribute allows the blog server to accept comments for blog entries.
This option is enabled by default when you create a blog entry. You can disable it before posting the blog entry.
Some blogs do not support comments. For more information, see your blog documentation.
In the Contribute browser, you can select Format > Blog Metadata > Allow Comment or click the Allow
Comments button in the toolbar to allow comments. For more information about allowing comments, see
“Allow comments for blog entries” on page 91. The Allow Comments button is highlighted when selected and
dimmed when it is not selected.
• Select or deselect Allow Trackbacks.
When this option is enabled, Contribute notifies the blog server to allow other users to link to a blog entry using
its trackback URL. A trackback URL is associated with the posted blog entry, which can be used to track other
posts that refer to the entry. Other blog authors use the trackback URL when they add a reference to the blog
entry. The blog server maintains a list of links to blogs that reference a blog entry’s trackback URL. Users can
click the links to go to these blogs.
In the Contribute browser, you can select Format > Blog Metadata > Allow Trackback or click the Allow
Trackback button in the toolbar to enable trackbacks. The Allow Trackback button is highlighted when selected
and dimmed when it is not selected.
To insert a trackback URL, select Insert > Trackback URL or click the Insert Trackback button on the Contribute
toolbar, and then paste the trackback URL of the original post to be tracked.
Some blogs do not support the trackback feature or require you to set a preference to allow it. For more
information, see your blog documentation.
2 Click OK.
Page 47

USING CONTRIBUTE CS4
See also
“Set Contribute preferences” on page 30
Setting editing preferences
Use the Editing option of the Preferences dialog box to set editing options.
1 Select the options you want to set:
• Select or deselect Enable screen reader support.
When this option is enabled, Contribute disables offscreen rendering of pages so that a screen reader can be used.
• Select a dictionary from the Spelling dictionary pop-up menu.
• To automatically save files at regular intervals, select Save Contents In The Background, and enter a value for
the time interval.
2 Click OK.
See also
“Set Contribute preferences” on page 30
40
Workspace
Setting file editor preferences
Use the File Editors option of the Preferences dialog box to select or change your primary editing applications for each
type of file you edit. When you need to edit web page content, such as an image, in an external application, Contribute
starts that application.
Note: Before you set file editor preferences, make sure to close the application you want to set as a file editor.
Change the editor for a file type
1 Select a file type in the left pane.
Associated editors appear in the right pane. If the application you want to select is in the pane, skip to step 5.
2 Click the Plus (+) button above the right pane.
The Select External Editor dialog box appears.
3 Navigate to the application you want to add, and click Open.
The application name appears in the right pane.
Note: You can associate an editor with the Web Page Source type, but if the Contribute administrator has not enabled
source editing for your website, you cannot start an external application to edit the source.
4 Select the application you want Contribute to start for the selected file type, and then click the Make Primary
button.
The word Primary appears beside the application name.
5 Click OK.
Add a file type and associate an editor
1 Click the Plus (+) button above the left pane, and then type the file type.
2 Click the Plus (+) button above the right pane.
The Select External Editor dialog box appears.
Page 48

USING CONTRIBUTE CS4
3 Navigate to the application you want to associate with the new file type, and click Open.
The application name appears in the right pane.
4 Click OK.
Delete a file type or associated editor
1 Select a file type in the left pane or an application in the right pane.
2 Click the Minus (-) button above the pane.
The file type or application name disappears from the pane.
Note: You cannot delete the Web Page Source type.
3 Click OK.
See also
“Set Contribute preferences” on page 30
Setting FTP proxy preferences
Use the FTP Proxy option of the Preferences dialog box to enter or change your FTP proxy host and port.
41
Workspace
1 In the FTP proxy host text box, enter the name of the firewall host.
2 In the FTP proxy port text box, enter the network port number through which FTP access is enabled.
3 Click OK.
See also
“Set Contribute preferences” on page 30
Setting invisible element preferences
Use the Invisible Element option of the Preferences dialog box to turn invisible elements, such as section anchors, on
or off.
Note: For more information about section anchors, see “Link to a specific place in a page” on page 186.
1 Select or deselect the Show section anchors when editing a page check box.
2 Click OK.
See also
“Set Contribute preferences” on page 30
Setting Microsoft Office document preferences (Windows only)
Use the Microsoft Documents option in the Preferences dialog box to select a preference for inserting Microsoft
documents.
1 Select an option to specify the default action that Contribute performs when you insert a Microsoft document in a
draft:
Insert The Contents Of The Document Into The Current Draft Copies the content of the selected document into the
draft.
Page 49

USING CONTRIBUTE CS4
Workspace
Create A Link To The Document Inserts a link to the selected document.
Convert To PDF And Create A Link To The PDF Converts the selected document into a PDF and inserts a link to the
PDF document.
Convert To PDF And Embed The PDF As Object Converts the selected document into a PDF and embeds the PDF
document as an object.
Ask Whenever I Insert A Microsoft Office Document Into Contribute Lets you select how you want to insert the
Office document.
2 Click OK.
See also
“Set Contribute preferences” on page 30
Setting PDF document user preferences
As a Contribute user, you can use the PDF Documents option in the Preferences dialog box to select a preference for
inserting PDF documents in draft web pages or blog entries.
1 Select an option to specify the default action that Contribute performs when you insert a PDF document in a draft:
Create A Link To PDF Document Inserts a link to the selected document.
42
Insert PDF As An Embedded Object Inserts the PDF file into the draft as an object.
Ask Whenever I Insert A PDF Document Into Contribute Lets you select how you want to insert the PDF document.
2 Click OK.
Note: You can insert the PDF as an embedded object only if the Administrator has granted the Allow PDF Embedding
permission for the relevant website or blog connection.
See also
“Set Contribute preferences” on page 30
Setting ping server preferences
Use the Ping Server option of the Preferences dialog box to add and remove ping server URLs to notify when a blog
entry is posted, to view a list of pings to the ping servers, and to enter the maximum number of failed pings to store for
the listed ping servers.
Add the URL of a ping server to notify when a blog entry is posted
1 Click the Plus (+) button above the Ping Servers pane.
2 In the Ping Servers pane, enter the URL for the server (for example, http://rpc.technorati.com/rpc/ping, or
http://ping.blo.gs), and press Tab.
If the URL is invalid, an error message appears. You can click OK to add the invalid URL and correct it later.
3 (Optional) Repeat step 2 to add additional ping server URLs.
4 Click OK.
Delete a ping server
1 In the Ping Servers pane, select the desired ping server URL.
Page 50

USING CONTRIBUTE CS4
Workspace
2 Click the Minus (-) button above the Ping Servers pane.
3 Click OK.
View a log of failed ping server entries
1 Click the View Log button.
The Failed Ping Servers Log dialog box opens, listing the ping server URLs to which a ping update request failed.
As many as 100 entries are listed, depending on the maximum number of entries you specify in the Maximum
Number Of Log Entries field in the Ping Server pane. If there are more than 100 entries, the oldest entry is deleted.
2 (Optional) Click the Clear Log button to clear the log.
3 Click OK.
Determine the maximum number of log entries to list in the Failed Ping Servers log
1 In the Maximum Number Of Log Entries field, enter the maximum number of entries to display when you click the
View Log button that opens the Failed Ping Servers Log dialog box.
If the number of entries in the Failed Ping Servers Log dialog box exceeds the number you specify, the oldest entries
are deleted so that the most recent number of entries are displayed. You can specify as many as 100 log entries (the
default setting).
43
2 Click OK.
See also
“Set Contribute preferences” on page 30
Setting security preferences
Use the Security option of the Preferences dialog box to use a stronger encryption method when storing website
connection information on your computer.
If you require this password at startup, you can prevent other people with access to your computer from making
changes to your Contribute websites.
1 Select Encrypt Connection Information For All Websites and blog sites to let Contribute encrypt connection
information, such as user name and password.
2 Type a password in the Password text box.
Contribute uses this password to encrypt information. It restricts access at startup if an incorrect password is
entered.
3 In the Confirm Password text box, type the password again.
Note: If the passwords do not match, you see an error message asking you to retype and confirm the password.
4 (Optional) Select Require Password At Startup to enter the password each time you start Contribute.
When you require a startup password, anyone using Contribute on your computer must provide the correct
password in order to edit, add, or delete pages in your websites.
Note: Be sure to keep your password information secure and do not lose it. If you lose your password, you must remove
all of your Contribute website connections before you can use Contribute to make changes in your websites.
5 Click OK.
Page 51

USING CONTRIBUTE CS4
Workspace
See also
“Set Contribute preferences” on page 30
“Change or disable startup password” on page 32
Setting tagging preferences
Use the Tagging option of the Preferences dialog box to specify how Contribute will use tags with blog entries you
create or edit. You can specify where tags appear in your blog entries, enter a tag prefix to use with tags, add and remove
tag repositories, and specify a default tag repository.
When you specify a tag repository to use for your blog entries, users can search this repository for blog entries that use
one or more tags. The user can view any blog entry you created that uses a tag that they entered in their search.
For more information about tagging, see “Add tags to a blog entry” on page 89.
Determine where tags appear and enter a tag prefix
1 Select whether tags appear at the top or bottom of blog entries from the Default Tag Placement pop-up menu.
2 If you would like to use a specific tag prefix, enter a tag prefix in the Tag Prefix field.
3 Click OK.
44
Enter a new tag repository
1 Click the Plus (+) button above the Tag Repositories pane.
2 In the Tag Repositories pane, enter the URL for the repository you want to add, and press Tab.
If the URL is invalid, an error message appears. You can click OK to add the invalid URL and correct it later.
3 (Optional) Repeat step 2 to add other tag repository URLs.
4 Click OK.
Specify a default tag repository
1 In the Tag Repositories pane, select the repository you want to set as the default.
The first repository listed is specified as the default, but you can select a different repository.
2 Click the Make Default button.
3 Click OK.
Delete a tag repository
1 In the Tag Repositories pane, select the tag repository you want to delete.
2 Click the Minus (-) button above the Tag Repositories pane.
3 Click OK.
See also
“Set Contribute preferences” on page 30
Page 52

USING CONTRIBUTE CS4
Workspace
Using the Failed Ping Servers Log dialog box
The Failed Ping Servers Log dialog box lists the ping server URLs to which a ping update request failed. As many as
100 entries are listed, depending on the maximum number of entries you specify in the Maximum Number Of Log
Entries field in the Ping Server pane of the Preferences dialog box. If there are more than 100 entries, the oldest entry
is deleted.
1 (Optional) Click the Clear Log button to clear the log.
2 Click OK.
See also
“Setting ping server preferences” on page 42
45
Page 53

Chapter 4: Working with existing web pages and blog entries
Adobe® Contribute® lets you edit existing web pages and content on your website and to edit existing blog entries and
content on your blogs. You can cancel your edits or cancel a new web page or blog entry. You can delete blog entries
and, with permission, you can delete web pages and other files on your website. You can also export a page to an HTML
file. For information about creating pages, see
Web pages with a workflow other than Author > Publish must be approved/reviewed before you can publish it. When
you publish the web page draft, Contribute updates the existing web page with your edits. You publish drafts of blog
entries in the same way, with the exception of sending a draft of a blog entry to other users.
You can now experience the benefits of Contribute in browsers such as Microsoft Internet Explorer and Mozilla
Firefox. Using the Contribute toolbar in these browsers, you can add and edit web pages, publish web pages to your
website, or publish to a blog directly from the browsers.
“Create or copy a page on your website” on page 76.
46
Overview of working with blogs and web pages
You can use Contribute to edit existing blog entries on your blog and existing pages on your website, including web
pages based on templates.
Note: You cannot edit web pages created with in-context editor (ICE) in Contribute.
The draft review process
The review process for a draft web page depends on the workflow assigned to its template. Administrators enforce
workflows to web pages by assigning predefined workflows in Contribute templates. When you create a web page using
a template, it is assigned the workflow associated with that template. Contribute assigns a default workflow to the
following:
• Templates that are not assigned a workflow
• Starter web pages
• Web pages created without using a template
If your web page is created in an application other than Dreamweaver®, it is assigned the workflow of its linked page
in Contribute.
The strict enforcement of workflows in Contribute help maintain a disciplined author-centric approach to the
authoring and publishing process. In previous versions of Contribute, a reviewer could send the page to another
reviewer without the web page coming back to the author.
The four workflows available in Contribute are:
Author > Publish Authors can directly publish a web page after creating it if they have publish permissions.
Author > Review > Publish The author must get the web page reviewed before publishing it.
Author > Approve > Publish The author must get the web page approved before publishing it.
Author > Review > Approve > Publish The author must get the web page reviewed and approved before publishing it.
Page 54

Working with existing web pages and blog entries
USING CONTRIBUTE CS4
For all workflows other than Author > Publish, the web page must be reviewed/approved before it is published.
When users receive a web page, the toolbar displays buttons for actions that the users can perform and to which they
have permissions. Actions are similarly enabled or disabled in the menu bar (File > Actions.)
For example, a webpage test.htm is associated to a template that has the Author > Review > Publish workflow assigned
to it. When authors complete adding content to the page, they can only send it for review. The Publish button does not
appear in the toolbar until the web page comes back from the reviewer. Similarly, the toolbar of the reviewer has
buttons for only those actions available to the reviewer. When the reviewer completes reviewing the web page, it can
only be sent back to the author for further action.
Workflows are defined in XML files, and decide the course of the web page from its authoring stage to the time it gets
published. It is possible to create your own workflow by customizing an existing XML file. However, Contribute checks
only for syntax errors in such XML files.
The XML files for workflows are protected on the server, and users cannot download and edit these files.
Note: Workflows cannot be assigned to blog pages.
You can send a draft for edit, review, or approval to anyone who has connected to the website. Contribute stores user
names when users connect to the website. You can send the draft to multiple reviewers at the same time. However,
only one reviewer can review the draft at a given time. When you send a draft for review or approval, you transfer
“ownership” of that draft. You cannot proceed to the next stage in the workflow until the draft comes back from all the
people to which it has been sent.
47
All the users, to whom the web page draft has been sent, must approve the draft. If even one user rejects the draft, it is
removed from the Pages panel of all the users to which it has been sent. The draft is then returned to the author.
When you receive a draft for review or approval, it appears in your Pages panel in Contribute. You might also receive
an e-mail message from the sender to alert you that you have a draft to review or approve. When you complete editing,
reviewing, or approving the draft, the draft is returned to the author.
The following table lists the actions that are available in Contribute during the life cycle of the web page. Only those
actions are available to users for which they have permissions, and which can be performed at that stage of the web
page life cycle.
Action Description
Publish Publishes the web page. All intermediate drafts are deleted and all inbox messages are
Send Uploads the files to a temporary location in the site and sends messages to the
Send for Edit Sends the page for editing.
Send for Approval Sends the page for approval. The approver cannot edit or review the draft.
Send for Review Sends the page for review. The reviewer cannot edit the web page; only comment on it.
Send for Publish Sends the page for publishing if the author does not have permissions to publish.
removed.
recipients. The task for a draft sent to multiple recipients is closed only when all the
recipients perform one of the actions assigned to them, or when one of the actions like
publish, or delete terminates the workflow. The options available for this action are
listed in the subsequent rows.
Edit Draft Opens the draft for editing.
Edit Done Closes the edit session. The web page moves to the next step in the workflow.
Delete Draft Deletes the draft in the WIP (work in progress) state and closes the workflow.
Page 55

Action Description
Delete Page Deletes the page from the website.
Discard Draft Clears any changes made to the draft.
Working with existing web pages and blog entries
USING CONTRIBUTE CS4
48
Undo Send Returns the draft to the person who sent it and deletes it from the inbox of the
Return Returns the draft to the sender if the web page has been unaltered.
Review Opens the web page for review.
Review Done Closes the review session.
Reject Rejects the draft. Even if one of the reviewers rejects the draft, the draft is deleted from
recipients.
the inbox of all the other reviewers. The draft is returned to the author.
Web pages continue to use the initial workflow of a template till they are published. Any changes made to the workflow
during the draft cycle are reflected only when the web page re-enters the cycle.
You can select the option to publish a web page along with its dependent files and linked files if they are in the same
workflow. The location of linked/dependent files that have a different workflow is finalized on the site, but they are not
published.
All dependent files of the published file are published along with the published page. Shared dependent files are also
published. However, dependent files exclusive to the linked file are published with the linked file.
For example, consider the following case:
• Page1.htm is based on the template template1.dwt with the workflow Author > Publish.
• Page2.htm is based on the template tempate2.dwt with the workflow Author > Review > Publish.
• Page1.htm is associated with the dependent files (assets) wav1.mp3 and video1.mpeg.
• Page2.htm is associated with the wav1.mp3, and video2.mpeg files as its dependent files (assets).
When Page1.htm is published, the dependent files wav1.mp3, and video1.mpeg are also published. The location of
Page2.htm is finalized on the site, but it is not published until the workflow of Page2 is complete. The dependent file
video2.mpeg is published only when Page2.htm gets published.
The status and information of a page at any stage of the lifecycle is available on the status bar, the draft history, and the
Draft Console.
Users connecting to a website administered using a previous version of Contribute cannot use the workflow feature
until the site is upgraded. Users with previous versions of Contribute cannot assign a workflow to their templates.
When they send their pages for review to users of Contribute CS4, the reviewers can use only those features that were
available in the previous release.
Users of previous versions of Contribute can receive pages created in Contribute CS4 only after they upgrade. For
Contribute CS4 pages that have been sent to users with previous versions, the author can undo the send, and retrieve
the file.
The e-mail review process
The Contribute e-mail review process uses your default e-mail application to create a message containing a web
address where reviewers can see a temporary copy of your draft. Contribute automatically creates the temporary copy
on the same server where you publish your website. The recipient clicks the web address (URL) link in the e-mail
message to view your draft.
Page 56
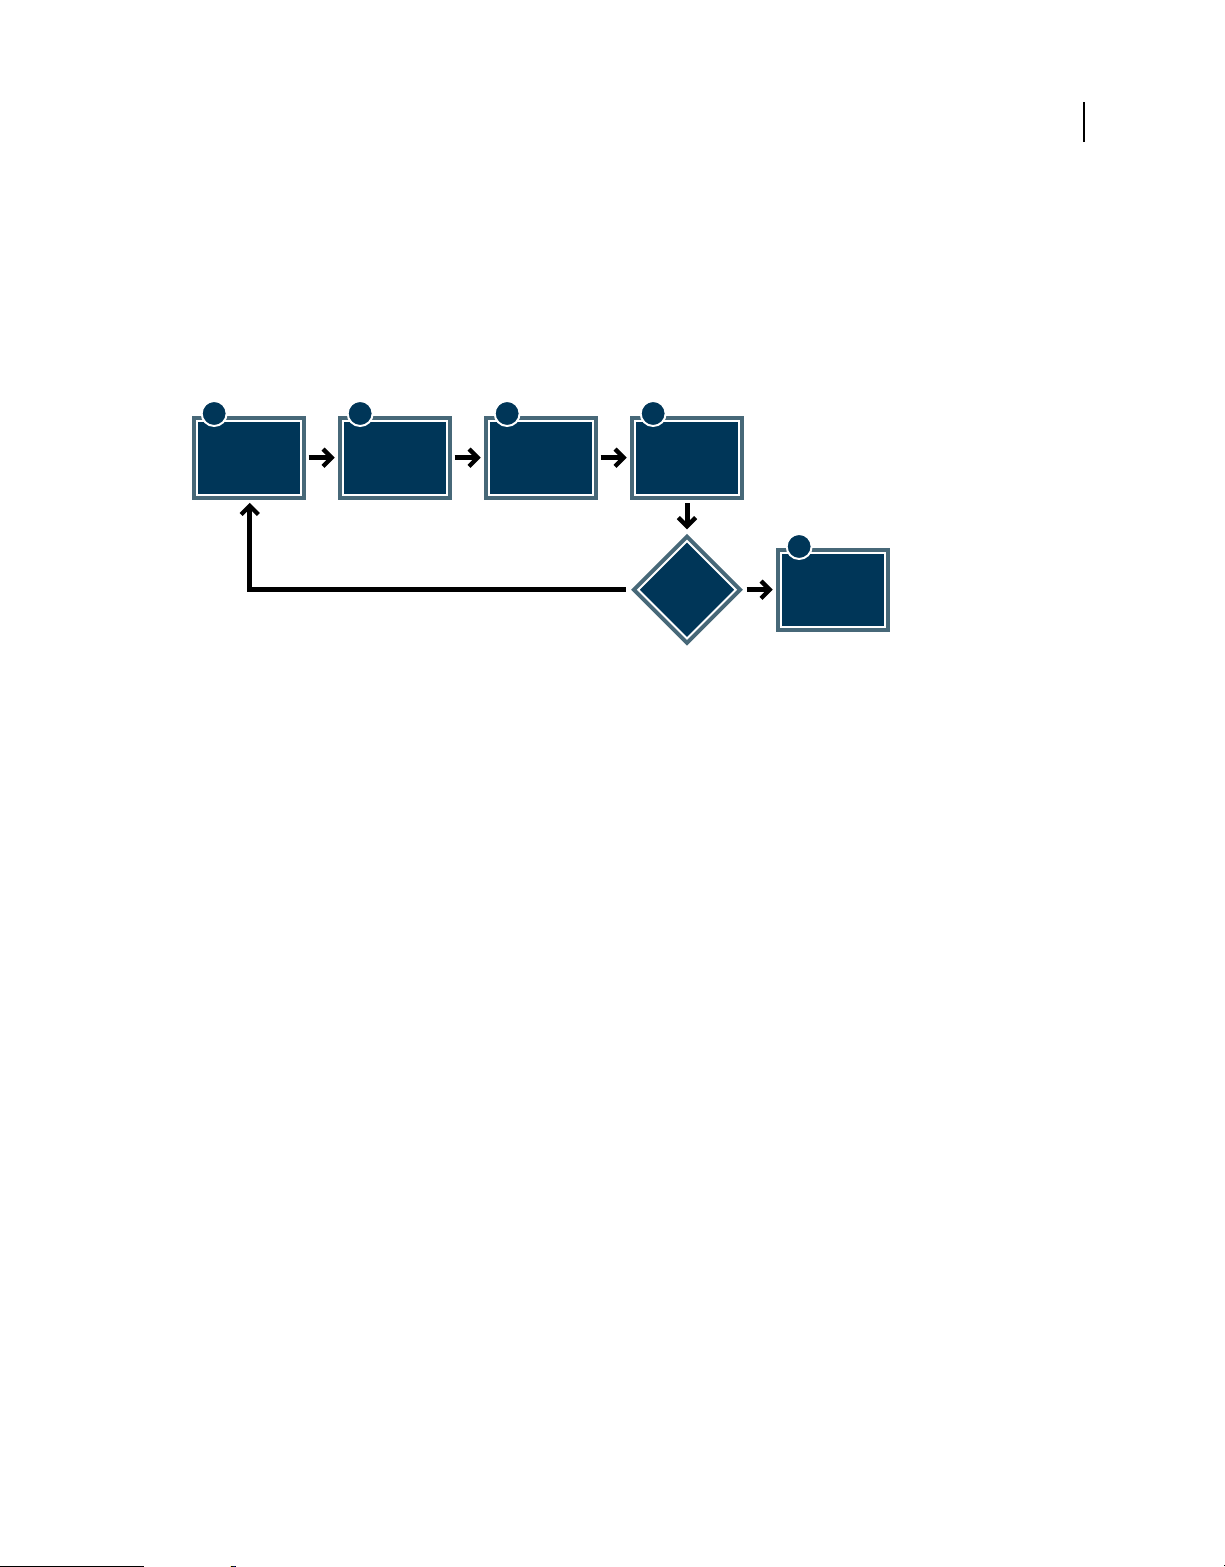
Working with existing web pages and blog entries
USING CONTRIBUTE CS4
When you send an e-mail review request, Contribute displays a message under the toolbar to alert you that you sent
the draft for review; the message includes the date you sent the review request. You can then save the draft for later,
until you get feedback from your reviewer, or you can continue editing the draft.
After reviewing your draft, the reviewer can send you feedback by e-mail. The reviewer cannot edit the review draft.
You can make changes to your draft based on the reviewer’s feedback, and then publish the draft or request another
review. When the draft is canceled or published, Contribute removes the temporary copy of the draft that it placed on
the server for the reviewer.
1 2 3 4
You request an
e-mail review.
E-mail review process
Reviewer clicks
link in e-mail to
view the draft.
Reviewer sends
you e-mail
with feedback.
You make edits
to draft
as necessary.
Finished?
YesNo
5
You are ready
to publish!
49
About templates
A Dreamweaver template contains a preset page layout and includes elements such as text and images. A template
gives you a starting point for new web pages and blogs. Using a template can ensure that the pages on your website or
blog have a consistent look.
Templates are also associated to workflows. Web pages created using a template will follow the workflow assigned to
it. For more information about workflows, see
For example, on a company’s internal website, the company employee template might contain basic elements and
provide sections for employee information. Suppose the template has the company logo and address, and blank
sections for the employee’s name, department, phone number, and picture. Any new employee page based on the
company employee template inherits the same page layout.
In a template, the designer creates regions to control which elements of a template-based page you can edit. There are
editable regions in a template, which you can edit, and locked regions, which you can’t edit. In the employee template
example, the company logo and address might be in a locked region. The employee information sections would be
editable regions.
“The draft review process” on page 46.
Page 57
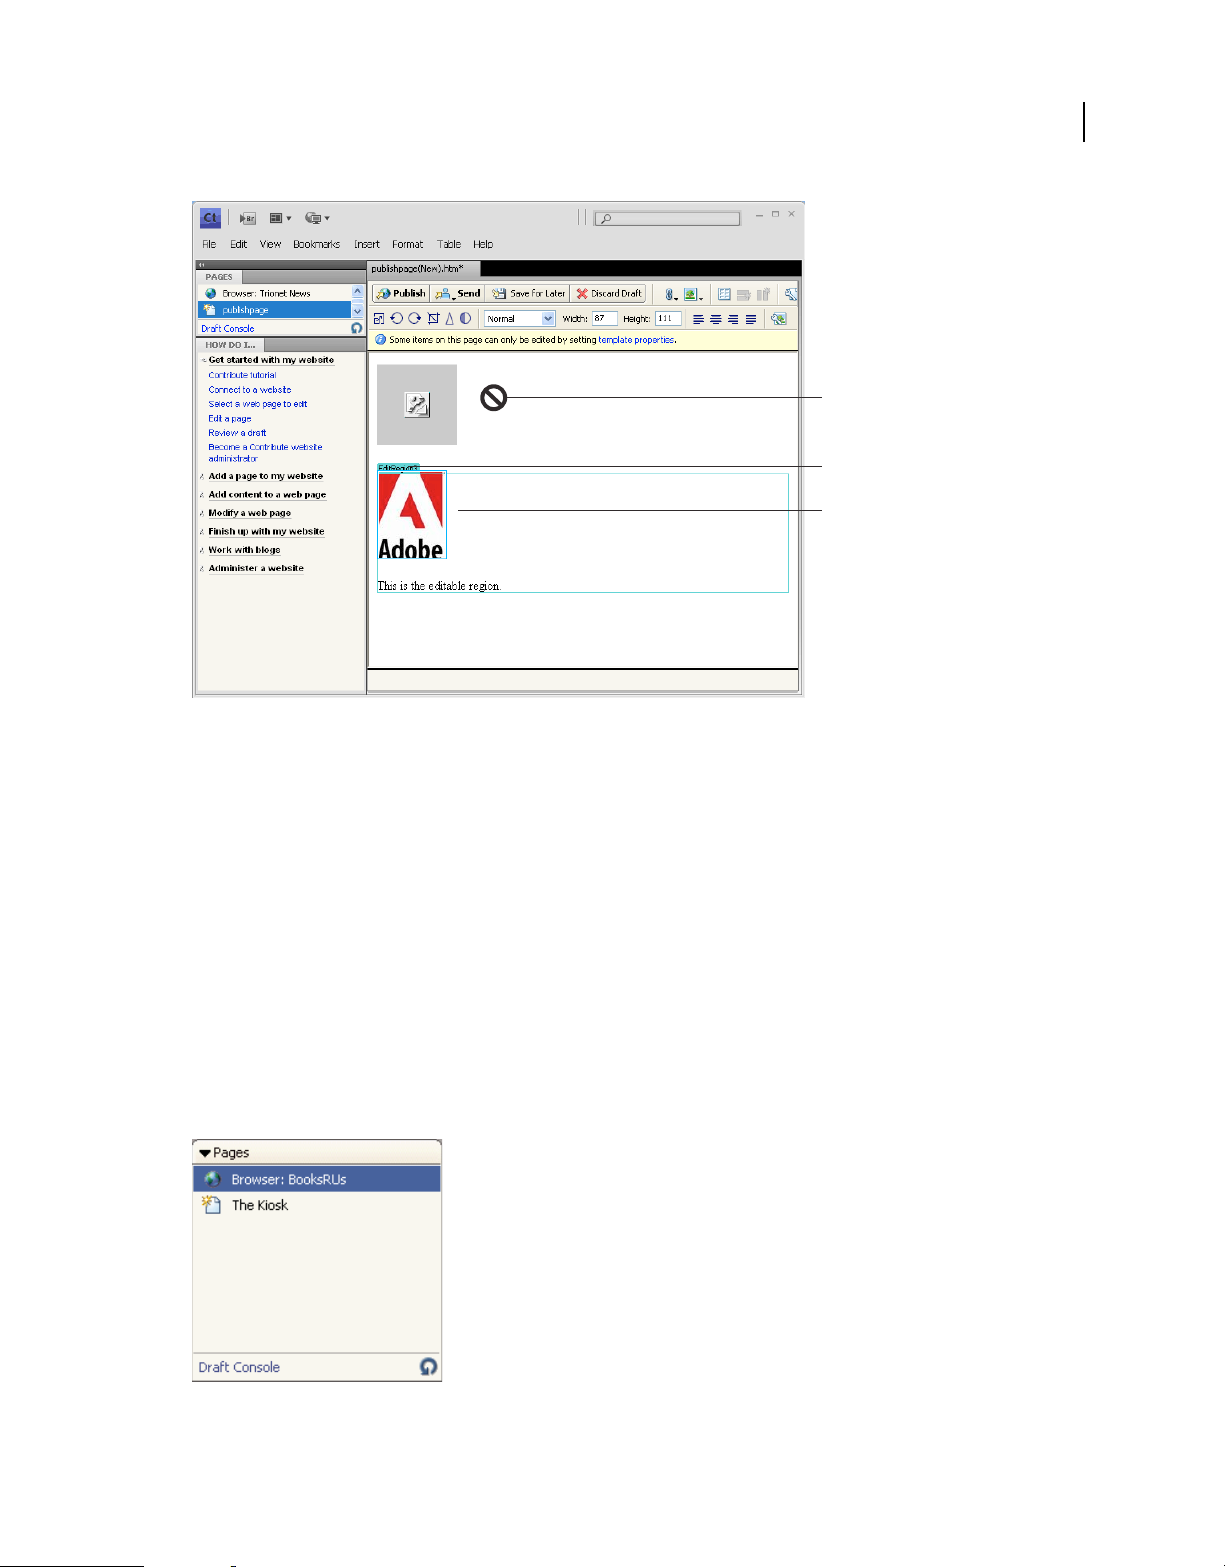
Working with existing web pages and blog entries
USING CONTRIBUTE CS4
A
B
C
50
A. Locked region B. Template tab C. Editable region
See also
“Edit a template-based web page” on page 62
Edit existing web pages and blog entries
You can edit web pages on websites and blog entries on blogs that you’re connected to and have permission to edit (see
“Connect to a blog” on page 6). You cannot edit a web page or blog entry if it is locked—that is, if someone else is
currently editing it. When you browse to a web page or blog entry, the message area under the toolbar indicates
whether you can edit it.
Contribute supports editing content in dynamic sites that use the Atom and MetaWeblog blog protocols.
While you edit a web page or blog entry, Contribute saves it as a draft, and the draft title appears in the Pages panel in
the sidebar.
The Pages panel
Page 58

Working with existing web pages and blog entries
For more information, see “Edit a web page” on page 51. For information about working with drafts, see “Save drafts”
on page 55.
Note: To edit a Microsoft document that you’ve linked to on your website, see “Edit web pages in an external application”
on page 67.
There might be restrictions on which parts of a web page draft you can edit. Your template designer can create a
template with locked regions, or your Contribute administrator can set up editing constraints that restrict editing to
text only.
Note: If you do not have permission to edit a page or part of a page that you need to edit, talk to your Contribute
administrator or see
You can also use Contribute plug-ins to edit web pages and blog entries from your browser, such as Internet Explorer
and Mozilla Firefox. For more information, see
“Managing users and roles” on page 280.
“Edit a web page or blog from your browser” on page 52.
USING CONTRIBUTE CS4
Edit a web page
After you’ve connected to a website, you can easily browse to and edit pages on that website.
1 Browse to the page to edit (see “Browse to web pages and blog entries” on page 26).
2 Do one of the following:
• Click the Edit Page button in the toolbar.
• Select File > Actions > Edit Page.
The page appears in the Contribute editor as a draft, and the draft title appears in the Pages panel.
51
See also
“Edit existing web pages and blog entries” on page 50
“Save drafts” on page 55
Edit a blog
You can make changes to a blog entry in two ways. You can edit an entry directly in Contribute. Alternatively, if you
have an entry in a browser window, you can click the Edit In Contribute button to start Contribute, where you can edit
the entry. For more information, see
Note: If the Edit Page or Edit Entry button is not visible in the toolbar in the Contribute application, you aren't connected
to the blog server hosting the blog. Click the Create Connection button in the toolbar to create a connection to the blog
server.
1 Browse to your blog home page.
2 From the Entries pop-up menu, select the blog entry you want to manage, or select View > Select Blog Entry > blog
entry title and choose the relevant blog entry to edit. Alternatively, select View > Choose File or Blog Entry, and in
the Choose File or Blog Entry dialog box, click the Edit button.
The selected blog entry appears in the embedded browser, and the title of the selected blog entry is displayed in the
Entries pop-up menu.
3 Click the Edit Entry button or select File > Actions > Edit Entry.
The blog entry opens as a draft in Contribute. You can make your changes to the content as needed, and publish
the entry.
“Edit a web page or blog from your browser” on page 52.
Page 59

Working with existing web pages and blog entries
USING CONTRIBUTE CS4
Note: You can link this blog entry to a blank blog entry and publish the entries. For more information, see “Link to a
new blank blog entry” on page 179.
See also
“Edit existing web pages and blog entries” on page 50
“Save drafts” on page 55
“Manage blog entries” on page 84
Edit a web page stored on your computer
You can use Contribute to edit pages that aren’t on a website you’ve connected to; you can open an HTML page saved
on your computer and make your edits. The experience is similar to using Notepad or TextEdit, but it has the ease of
use and functionality of Contribute.
For example, suppose you receive an HTML page in e-mail that you need to edit for a coworker. Even if the page isn’t
associated with a website you’ve connected to, you can save the page to your computer, open and edit the page in
Contribute, and return it to your coworker.
Note: Do not create a connection to your local drive. If you do, Contribute treats files saved on your computer as files on
a website, and the Direct Edit feature does not work properly.
52
1 In the Contribute browser or editor, select File > Open.
The Open dialog box appears.
Note: You cannot use this feature to open and edit TXT files saved on your computer.
2 Navigate to and select the file you want to edit, and then click Open.
The page opens as a draft in the Contribute editor; the toolbar contains Save and Close buttons instead of Publish
and Discard Draft buttons.
Note: Administrator preferences are not applied because this page is not part of a website. To enforce preferences for
pages that are edited this way, see the Contribute Support Center at
http://www.adobe.com/support/contribute/.
See also
“Save drafts” on page 55
Edit a web page or blog from your browser
You can use Contribute plug-ins to open your web pages and blog entries for editing in Contribute directly from your
web browser. You can also directly edit a web page or blog entry within the web browser without opening Contribute.
The web page will follow the workflow assigned to its template after the editing is complete.
Unlike the Contribute application, the in-browser editor opens in the edit mode only. Tasks like administering the
website, creating a connection, and setting preferences cannot be performed in the in-browser editor. The in-browser
editor honors site connection settings, permissions, and workflow settings in Contribute. The web pages follow the
workflow assigned to their templates in Contribute.
You cannot connect to a web site using the Internet browser. Connect to your website or blog in Contribute before you
edit a web page or blog entry in your browser. See
connection” on page 233. You are prompted to connect to the page if you haven’t done so already.
“Create a website connection” on page 231 and “Create a blog server
Page 60

Working with existing web pages and blog entries
USING CONTRIBUTE CS4
When you choose to edit the web page or blog entry in the web browser, Contribute launches the in-browser editor
(IBE). The in-browser editor is the editor in Contribute that runs within the web browser. You can only edit published
pages in the in-browser editor. You cannot create new web pages or blogs using the IBE.
The in-browser editor has three areas: toolbar area, edit area, and status area. The edit area and status area look the
same as in the Contribute application.
The toolbar in the in-browser editor is different from the one in Contribute in the following ways.
The IBE toolbar:
• Displays only those actions that can be performed in the in-browser editor and are available to the user.
• Does not have a menu bar. Some of the actions available only in the menu bar in Contribute have been moved as
new icons to the toolbar.
• Does not have buttons for some of the tasks in Contribute that are not commonly used.
You can use the same keyboard shortcuts that you use in Contribute while working in the in-browser editor. You can
drag and drop images into the in-browser editor during editing, like in Contribute.
When you open a page for editing in the browser, the URL changes to the one set by the in-browser editor. The original
URL is displayed after you perform an action on the page.
Note: If you close the in-browser editor or the tab containing it, the web page draft is available in the pages panel of
Contribute.
53
Web pages must be sent for review, edit, or approval before they are published. When you complete editing a page,
and choose the appropriate send action, you are prompted to select the reviewers, or approvers. The draft sent to the
reviewers appears in the pages panel of their application. This step onwards, the draft follows the same pattern as it
would if it had been edited in Contribute. Collaborative authoring is possible only if the draft has been set for editing
in Contribute.
You can edit only one instance of a web page in the in-browser editor at a time. An error message is displayed if you
try to open the same page in another instance for editing. Similarly, a web page open for editing is locked and
unavailable to other users for editing.
Close all linked files open in Contribute or the in-browser editor before you publish a web page. Close a web page if it
has a dependent file that is shared with the file being published.
Any of the following actions performed on the web browser closes the in-browser editor after asking you for
confirmation. Contribute saves the web page before closing it.
• Closing the tab containing the in-browser editor
• Closing the browser
• Using the Back and Forward buttons to move to another web page in the in-browser editor window
Note: Clicking the Stop or Refresh button does not impact the in-browser editor.
This feature is available on the following browser versions and operating systems:
• Internet Explorer versions 6.0 and later on Windows Vista (SP 1) and Windows XP (SP 2)
• Mozilla Firefox versions 1.5 and later on Windows Vista (SP 1) and Windows XP (SP 2)
• Mozilla Firefox versions 1.5 and later on Mac OS X® (10.3.9) and Mac OS X (10.4.x).
Install the browser plug-ins in Windows
The Internet Explorer browser plug-in is automatically installed when you install Contribute on your computer.
Page 61

Working with existing web pages and blog entries
USING CONTRIBUTE CS4
When you launch Contribute for the first time on a Windows computer, you will be prompted to install the Firefox
Extension plug-in. If you click Cancel, you can install this component from the following path:
[Contribute install path]/SupportFiles/FirefoxExtension/FirefoxExtensionSetup
After Contribute is successfully installed on your computer, the Edit and Post To Blog plug-ins appear as buttons in a
separate toolbar in the browser window. The Edit menu has two options:
Edit Opens the web page for editing within the browser.
Edit in Contribute Opens the web page for editing in Contribute.
Note: If you cannot see the toolbars, select View > Toolbars > Contribute Toolbar in your web browser.
The browser plug-in for editing a page
Install the browser plug-ins on Mac OS
When you launch Contribute for the first time in Mac OS, you will be prompted to install the Firefox Extension plug-in.
54
When you launch Contribute for the first time on a Windows computer, you will be prompted to install the Firefox
Extension plug-in. If you click Cancel, you can install this component from the following path:
[Contribute install path]/FFExtnForContributeCS4.app
After Contribute is successfully installed on your computer, the Edit and Post To Blog plug-ins appear as buttons in a
separate toolbar in the browser window.
Note:
• You can remove the Contribute browser plug-ins for Mozilla Firefox in Mac OS only by using the Firefox Extension
Manager.
• You cannot repair the Contribute application in Mac OS; reinstall the application.
You must have a connection to your website or blog before you edit a web page or blog entry in the internet browser.
“Create a website connection” on page 231 and “Create a blog server connection” on page 233.
See
If you see the Create Connection button when the page or entry opens, then you do not have a connection to the
website or blog you were browsing and you cannot edit the page. See
“Create a website connection” on page 231 for
information on connecting to a web page.
Edit a web page or blog entry in Contribute from your browser
1 Open or navigate to the web page, blog, or individual blog entry in your browser.
2 Select Edit > Edit In Contribute.
3 If you browsed to a blog home page, then select a blog entry to edit in the Entries pop-up menu. The web page or
blog entry opens as a draft in the Contribute editor. You can now edit this page or blog entry.
4 For web pages with a workflow other than Author > Publish, you are prompted to send the page for review or
approval. Select the reviewers from the dialog box, and click OK.
When the reviewers connect to the site in Contribute, the web page is displayed in their Contribute panel.
Page 62

Working with existing web pages and blog entries
USING CONTRIBUTE CS4
Edit a web page or blog entry in your favorite browser
1 Open or navigate to the web page, blog, or individual blog entry in your browser.
Note: You must have a connection to your website or blog before you edit a web page or blog entry in your browser.
“Create a website connection” on page 231, and “Create a blog server connection” on page 233.
See
2 Click Edit in the browser’s toolbar.
3 If you browsed to a blog home page, then select a blog entry to edit in the Entries pop-up menu. The web page or
blog entry opens as a draft in the web browser. You can now edit this page or entry.
4 For web pages with a workflow other than Author > Publish, you are prompted to send the page for review or
approval. Select the reviewers from the dialog box and click OK.
When the reviewers connect to the site in Contribute, the web page is displayed in the Pages panel.
After the required action is performed on the page, the in-browser editor closes, and the web page is refreshed in the
browser.
If the web page is not editable, an error message is displayed within the in-browser editor, and the page is restored to
its original URL. However, if an error message is displayed after the in-browser editor is loaded, click the Close button
to return to the original page.
55
Undo mistakes
In Contribute, as in most applications, you can undo individual mistakes as you make them. You can also redo an edit
if you decide that you don’t want to undo it.
Note: In Contribute, you can also discard changes, after you publish your draft, by reverting to a previously published
version of a page. For more information, see
“Roll back to a previous version of a page” on page 211.
Undo an edit
❖ Select Edit > Undo.
Redo an edit
❖ Select Edit > Redo.
Save drafts
Save a draft while you work
Contribute automatically saves a copy of your draft when you switch to the browser, switch to another draft, publish
the draft, or exit Contribute. You can use the Preferences dialog box to set time intervals for automatically saving the
draft. This will minimize the possibility of losing unsaved changes under adverse circumstances.
When you edit a page or blog entry (see “Edit existing web pages and blog entries” on page 50), Contribute
automatically saves the page or blog entry as a draft, and the draft title appears in the Pages panel in the sidebar.
Page 63

Working with existing web pages and blog entries
Note: This option is only available for drafts saved on your computer, not for drafts that are associated with a website or blog.
USING CONTRIBUTE CS4
Save a draft and continue working
1 Select File > Save.
2 Click Save in the toolbar.
Note: When you save a new page draft for the first time, you do not give it a filename until you publish it. For more
information, see
“Publish a new page to your website” on page 205.
Automatically save a draft at regular time intervals
1 Select Edit > Preferences
2 Select Editing from the options in the left panel.
3 In the Save Contents In the Background Field, set a value in minutes at which you want to automatically save the
drafts.
Save a draft for later use
Contribute saves your draft whenever you leave it and keeps the draft in the Pages panel until you publish (see
“Publishing web pages and blog entries” on page 203), cancel (see “Discard a draft, new page, or new blog entry” on
page 70), or send for review (see “The draft review process” on page 46).
56
1 Do one of the following to close your draft:
• Click Browser in the Pages panel to switch to the browser.
• Select View > Browser to switch to the browser.
• Click the Save For Later button in the toolbar to close the draft and switch to the browser.
• Click another draft title in the Pages panel to edit that page.
• Close Contribute.
2 If you closed Contribute, restart the application.
3 Click the draft title in the Pages panel to return to the draft you were previously editing.
The draft appears in the Contribute editor for you to continue editing.
Send web page drafts and files for review
For workflows other than Author > Publish, send the document for review or approval before you can publish the web
page. The Publish button is enabled only after the workflow is honored. If your role doesn’t allow you to publish
directly to the website, you can send the draft to someone who can publish it. For more information on workflows, see
“The draft review process” on page 46.
You can use the e-mail review process to post web page drafts for review. For more information on using the e-mail
review process, see
“The e-mail review process” on page 48.
The review process lets you get feedback and collaborate with others on a web page draft or file. Reviewers can add
comments to the draft or return the draft without reviewing it. The administrator assigns the workflow defining the
review process for a template. For web pages without templates, and for templates without a workflow, Contribute
assigns a default workflow.
Page 64
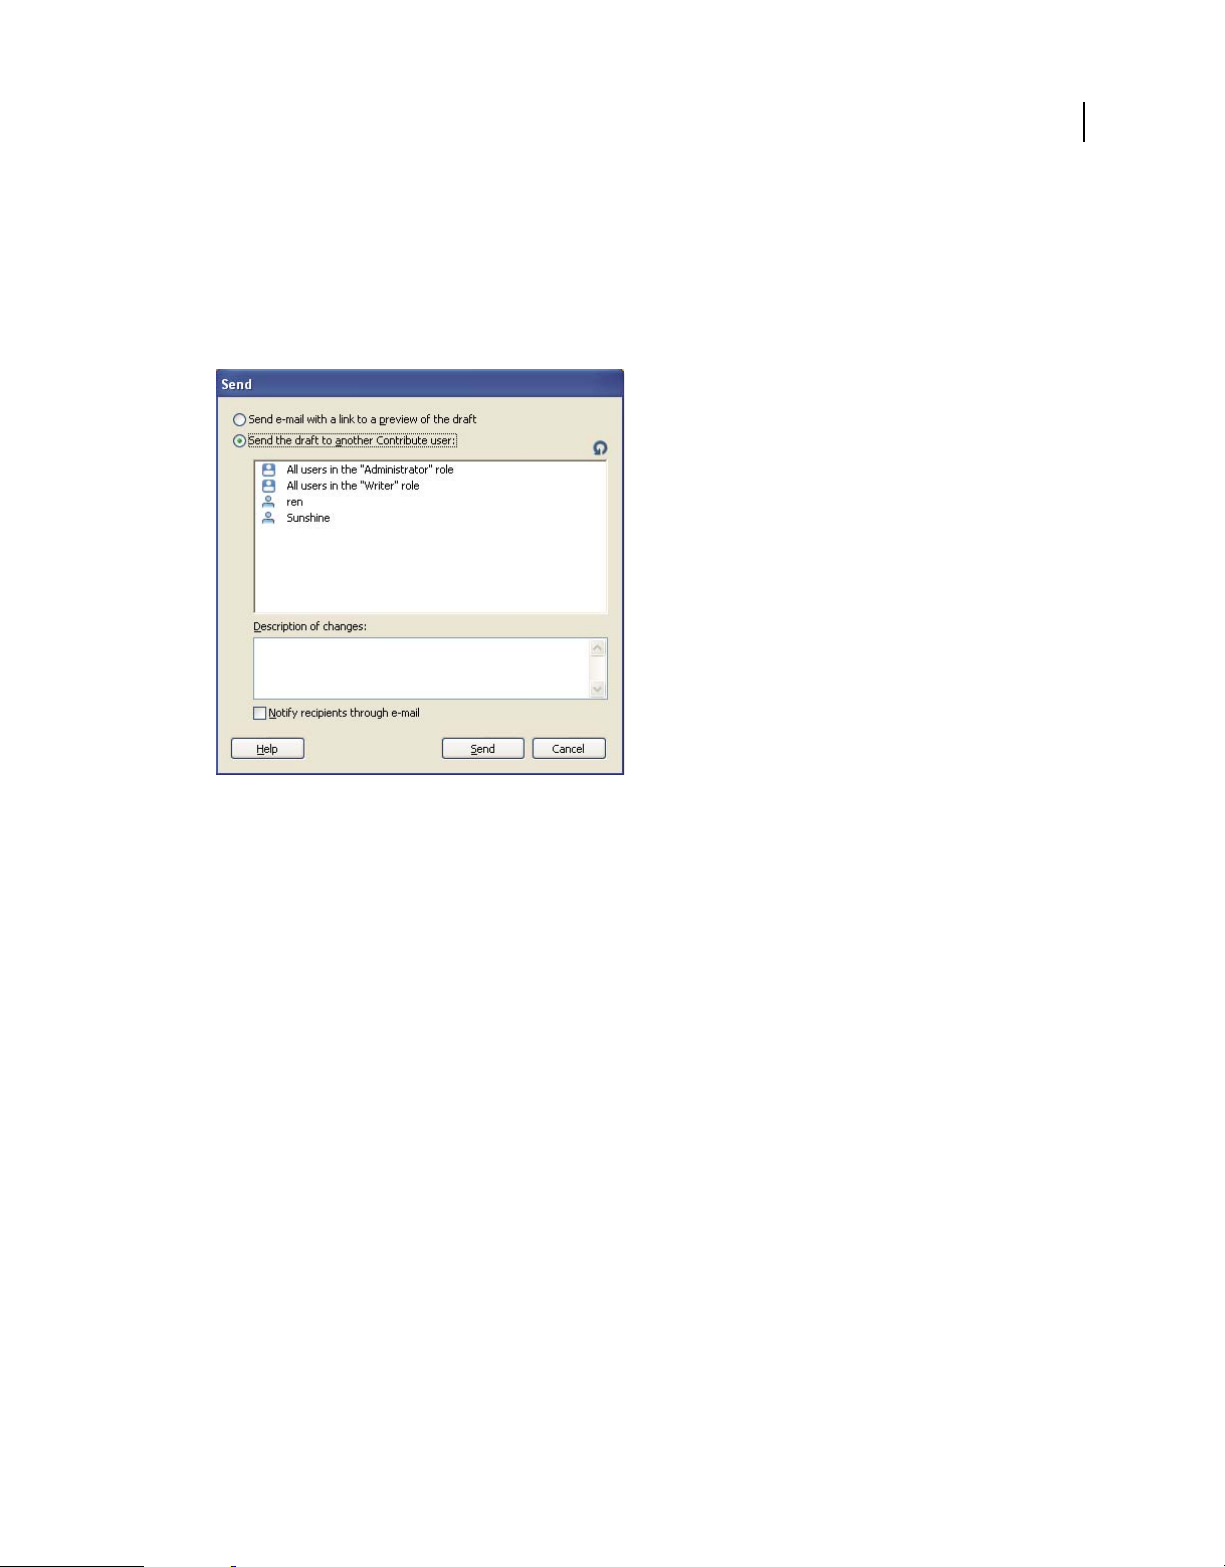
Working with existing web pages and blog entries
USING CONTRIBUTE CS4
Note: The draft review process only applies to web page drafts. It does not apply to any kind of blog entry.
Send a web page draft for review
1 Select Send > Send For Review in the toolbar, or select File > Actions > Send > Send for Review.
The Send dialog box appears.
57
2 Select the Send The Draft To Another Contribute User option, and then complete the dialog box. You can send the
draft to any user who has connected to this website.
For more information, see “Completing the Send For Review dialog box” on page 73.
For information about options in the dialog box, click the Help button.
3 Click Send.
4 If the Send New Page dialog box appears, you can change the draft’s filename, or click Choose Folder to select the
folder from where you want to publish the file. You can also change the expiry date for the new page than the one
specified by the administrator. Then click Send.
Note: The current folder location appears in the web address under the filename.
5 If the Send Linked New Files dialog box appears, you can click the names of the unpublished linked pages, and then
change the filenames and folder location. Then click Send All.
Send a web page draft for review by e-mail
You can make the web page draft available for others to review—even if they don’t have Contribute.
Note: If the page to be reviewed is in a frameset, the web address is for the single page that you edited, not the entire
frameset.
For more information about the e-mail review process, see “The e-mail review process” on page 48. If you are assigned
a role that cannot publish, you cannot use the e-mail review process. In that case, use the draft review process (see “The
draft review process” on page 46).
Page 65

Working with existing web pages and blog entries
USING CONTRIBUTE CS4
Note: The draft review process only applies to web page drafts. It is not applicable to blog entry drafts.
1 In your draft, select Send > Send for Review, or select File > Actions > Send> Send For Review.
The Send dialog box appears.
2 Select the Send e-mail With A Link To A Preview Of The Draft option, and then click Send.
3 If the Send New Page dialog box appears, you can change the draft’s filename or click Choose Folder to save this
draft in another location. You can also change the expiry date for the new page than the one specified by the
administrator. Then click Send or Next.
Note: The current folder location appears in the web address (URL) under the filename.
4 If the Send Linked New Files dialog box appears, select each unpublished linked page to change the filename and
folder location as necessary. Then click Send All.
Contribute creates a new e-mail message in your default e-mail application.
In Mac OS, Contribute works with the following default e-mail applications: Apple Mail®, Eudora®, and Entourage®.
Note: If Contribute does not find a default e-mail application or cannot start your e-mail application, you can create
the e-mail message by clicking the Click Here link in the message area under the toolbar. Copy the web address (URL)
for the draft that appears in the browser window and paste the address in an e-mail message to send to reviewers.
5 Enter the reviewer’s name and a message, and then send the e-mail message.
In Contribute, you can work on another draft or switch to the Contribute browser until you receive feedback from
the reviewer. When you receive feedback from the reviewer, click the draft title in the Pages panel to return to the
draft and update it.
58
Note: When you delete or publish the draft, Contribute removes the temporary copy of the draft that it placed on the
server for the reviewer.
Send a file for review
You can send a file that is on your computer to another person to review or publish for you. You cannot select HTML
files or dynamic file types, such as JSP. If you select an invalid file type, Contribute warns that you cannot select this
file and provides a complete list of invalid file types.
You can also publish a file directly from your computer, depending on the role the Contribute administrator assigned
you. For more information, see “Publish a file from your computer to your website” on page 208.
1 Select File > Send File From My Computer. The Select File dialog box appears.
2 Select the file you want to add to the website, and then click Select. If you have connections to more than one
website, the Select Website dialog box appears.
3 If the Select Website dialog box appears, select the website where you want to add the draft for the file for review,
and then click OK.
The website list includes any website you are connected to. The reviewer you want to send the file to must also be
connected to the website you select.
The Send For Review dialog box appears.
4 Select the name of the person you want to review the file you are sending from your computer, enter comments for
the reviewer, and then click Send.
The Send New Page dialog box appears.
5 Do the following:
Page 66

Working with existing web pages and blog entries
USING CONTRIBUTE CS4
Note: The current folder location appears in the web address under the filename.
a Change the filename, or click the Choose Folder button to save this draft in another location
b (Optional) Change the expiry date.
See also
“Publish a file from your computer to your website” on page 208
Track web page drafts
After you send a web page draft for review, you can track it to see what the reviewer does with the draft.
Note: The draft edit/review process only applies to web page drafts. It is not applicable to blog entry drafts.
1 Click the Draft Console link in the Pages panel.
Note: The Draft Console is not available if you don’t have a website connection that has an administrator assigned.
The Draft Console displays links to all the drafts you have sent and all the drafts you’re editing or reviewing. Each
sent draft also has status information.
Contribute removes published and deleted drafts from the Draft Console every 30 days. If you would like to
manually remove outdated drafts, press Control+Shift while selecting View > Refresh Drafts.
59
2 If you would like to view a draft, select the draft title.
The draft appears in Contribute; you can click the Draft Console link to return to the Draft Console.
3 To update your view at any time, do one of the following:
• Click the Refresh Drafts icon at the bottom of the Pages panel.
• Click the Refresh button in the Draft Console.
• Select View > Refresh Drafts.
4 When you finish viewing the Draft Console or the draft you selected, select the browser or another draft in the Pages
panel.
Retrieve sent drafts
1 Click the Draft Console link in the Pages panel. The draft console appears.
If you have just sent the draft and are still viewing it in the Contribute window, you can click the Undo Send button
and skip the rest of this procedure.
2 Select a draft in the Sent Drafts section. Contribute displays the draft.
3 Click Undo Send in the toolbar.
The draft disappears from the reviewer’s Pages panel and appears in your Pages panel.
Page 67

Working with existing web pages and blog entries
USING CONTRIBUTE CS4
Access new review drafts
Adobe Contribute is configured to check for new review drafts and to synchronize them with the available drafts for
connected websites and blogs in the background. The next time you edit an existing review draft, Contribute
automatically checks for new review drafts, downloads them, and displays them in the Pages panel along with a
notification in the status bar indicating that there are new review drafts for review. Alternatively, you can manually
check for new drafts by clicking the Refresh icon. The new draft sent for review is listed in the Drafts To Review area
in the Draft Console page. As a result, the process of starting Contribute is not delayed.
1 Click the Draft Console link in the Pages panel.
Note: The Draft Console will not be available if you do not have a website connection that has an administrator
assigned to it.
The Draft Console displays links to all the drafts you have sent, and all the drafts you are editing or approving. Every
dispatched draft has status information.
Note: Contribute removes published and deleted drafts from the Draft Console every 30 days. If you want to manually
remove outdated drafts, press Control+Shift while selecting View > Refresh Drafts.
2 If you want to view a draft, select the draft title.
The draft appears in Contribute; you can click the Draft Console link to return to the Draft Console.
60
3 To update your view at any time, do one of the following:
• Click the Refresh Drafts icon in the Draft console panel.
• Select View > Refresh Drafts.
If there are new review drafts, Contribute downloads them, and displays them in the Pages panel, along with a
notification in the status bar indicating that there are new review drafts for review.
While you are editing a draft, if Contribute delivers an updated version of an earlier review, you can delete the
earlier draft. This delete operation does not force Contribute to check for new review drafts, and therefore,
improves the performance of Contribute.
Edit web page drafts
When someone sends you a web page draft for editing, the draft appears in your Pages panel in Contribute. You can
manually refresh the Pages panel to check for drafts to edit.
Note: The draft edit process only applies to web page drafts. It is not applicable to blog entry drafts.
1 Select a draft in the Pages panel to edit.
The draft appears in the Contribute window for you to edit; the draft status pane at the bottom of the window
contains information about the draft.
Note: If the draft status pane is not expanded, click the expander arrow at the bottom right of the Contribute window
to display the pane.
2 Do one of the following:
• Click the Edit Draft button in the toolbar to change the draft.
The draft appears in the Contribute editor. After you finish editing, you can do one of the following:
Page 68

Working with existing web pages and blog entries
USING CONTRIBUTE CS4
• Click Save For Later to save the changes you made to the draft.
• Click Actions > Edit Done. In the Edit Done dialog box, enter any comments for the author. When you click
OK, the draft is sent back to the author with the comments.
• Click Delete Draft if you want to discard your changes to the draft. Deleting a draft does not remove the draft
from the review process.
Note: You can delete drafts only if the administrator has provided you with the required permissions.
Review web page drafts
When someone sends you a web page draft for your review, the draft appears in your Pages panel in Contribute. You
can review the document by selecting the content you want to comment on, and adding your comments. However,
you cannot edit the document, as it is in a read-only state.
Only one reviewer can edit the draft at a given time. Other reviewers can review the draft only after the reviewer
completes reviewing the draft.
You can do the following when reviewing a web page:
• Make your comments public or private: Only the author and the reviewer providing the comment can view
comments marked as private. All the reviewers in the review cycle can view comments marked as Public.
• Use the various options in the Review menu to filter comments.
• Select the color for the highlighted text to which you are adding a comment.
• Select a color for the comment dialog that pops up when you select text on the web page.
• Manually refresh the Pages panel to check for drafts pending review.
• View all the public comments that reviewers have added to the draft.
Note: The draft review process only applies to web page drafts. It does not apply to any blog entry drafts.
61
1 Select a draft in the Pages panel to review.
The draft appears in the Contribute window for you to review; the draft status pane at the bottom of the window
contains information about the draft.
Note: If the draft status pane is not expanded, click the expander arrow at the lower right of the Contribute window
to display the pane.
2 Click the Review button in the toolbar.
3 Select the text to which you want to add a comment. The comment pop-up menu appears.
4 After you add a comment, do the following:
• Click Add Comment to add the comment.
• Click Public or Private to mark the comment as Public or Private.
• If you do not want to add the comment, click Delete Comment to remove the added comment from the draft.
5 Click Review Done to send the draft with the comments to the author.
Page 69

Working with existing web pages and blog entries
USING CONTRIBUTE CS4
View and filter comments for a web page draft you are reviewing
1 Select Review > Show, and use one of the following options to filter the comments on the page:
Show Comments List Displays all the comments as a list at the bottom of the page.
Hide All Comments Hides all the comments in the document.
Show All Comments Displays all the comments on the page.
Show By Reviewers Sorts the comments by reviewers. If you have not selected a reviewer using this option,
comments from all reviewers are displayed.
Show By Type Select an option to display public comments, private comments, or both. The option to display
private comments is available only to the author of the document.
Open All Comment Pop-Ups Opens all the comment pop-up menus.
Minimize All Comment Pop-Ups Minimizes all comment pop-up menus. The content in the comment is displayed
when the user moves the mouse over the minimized dialog.
2 To move through the comments list, use the Previous Comment and Next Comment options in the Review menu.
Note: Some comments might not appear at their intended position in the page. Navigate to the end of the page to locate them.
62
Work with template-based web pages
A Dreamweaver template is a special type of web page that contains a preset page layout and includes elements such
as text and images. In Contribute, you can create a web page or a blog entry based on a template. You can also edit a
template-based page for a website or a blog, edit the template properties of the page for a website, and customize
templates for blogs.
Note: If you have a lot of templates on your website, Contribute can take longer to start. For faster startup, consider not
connecting to specific websites and blog connections or disabling your websites and blog connections when you start
Contribute. For more information, see
See also
“About templates” on page 49
“Create a web page based on a template” on page 80
Edit a template-based web page
A page based on a Dreamweaver template (a template-based page) has editable regions, where you can add or edit
content, and locked regions, where you cannot add or edit content.
Note: If you try to edit a locked region in a document based on a template, the pointer changes to indicate that you can’t
click in that region.
When you view a template-based page, you see outlines around the editable regions. The editable regions each have a
tab at the upper left giving the name of that content area. The tabs show you where you can add or update content on
the page.
“Enable a website or blog server connection” on page 261.
For example, a product template-based page might have a Title region, for the product title, and a Description region,
for a product description. You add content to the appropriate sections.
Page 70
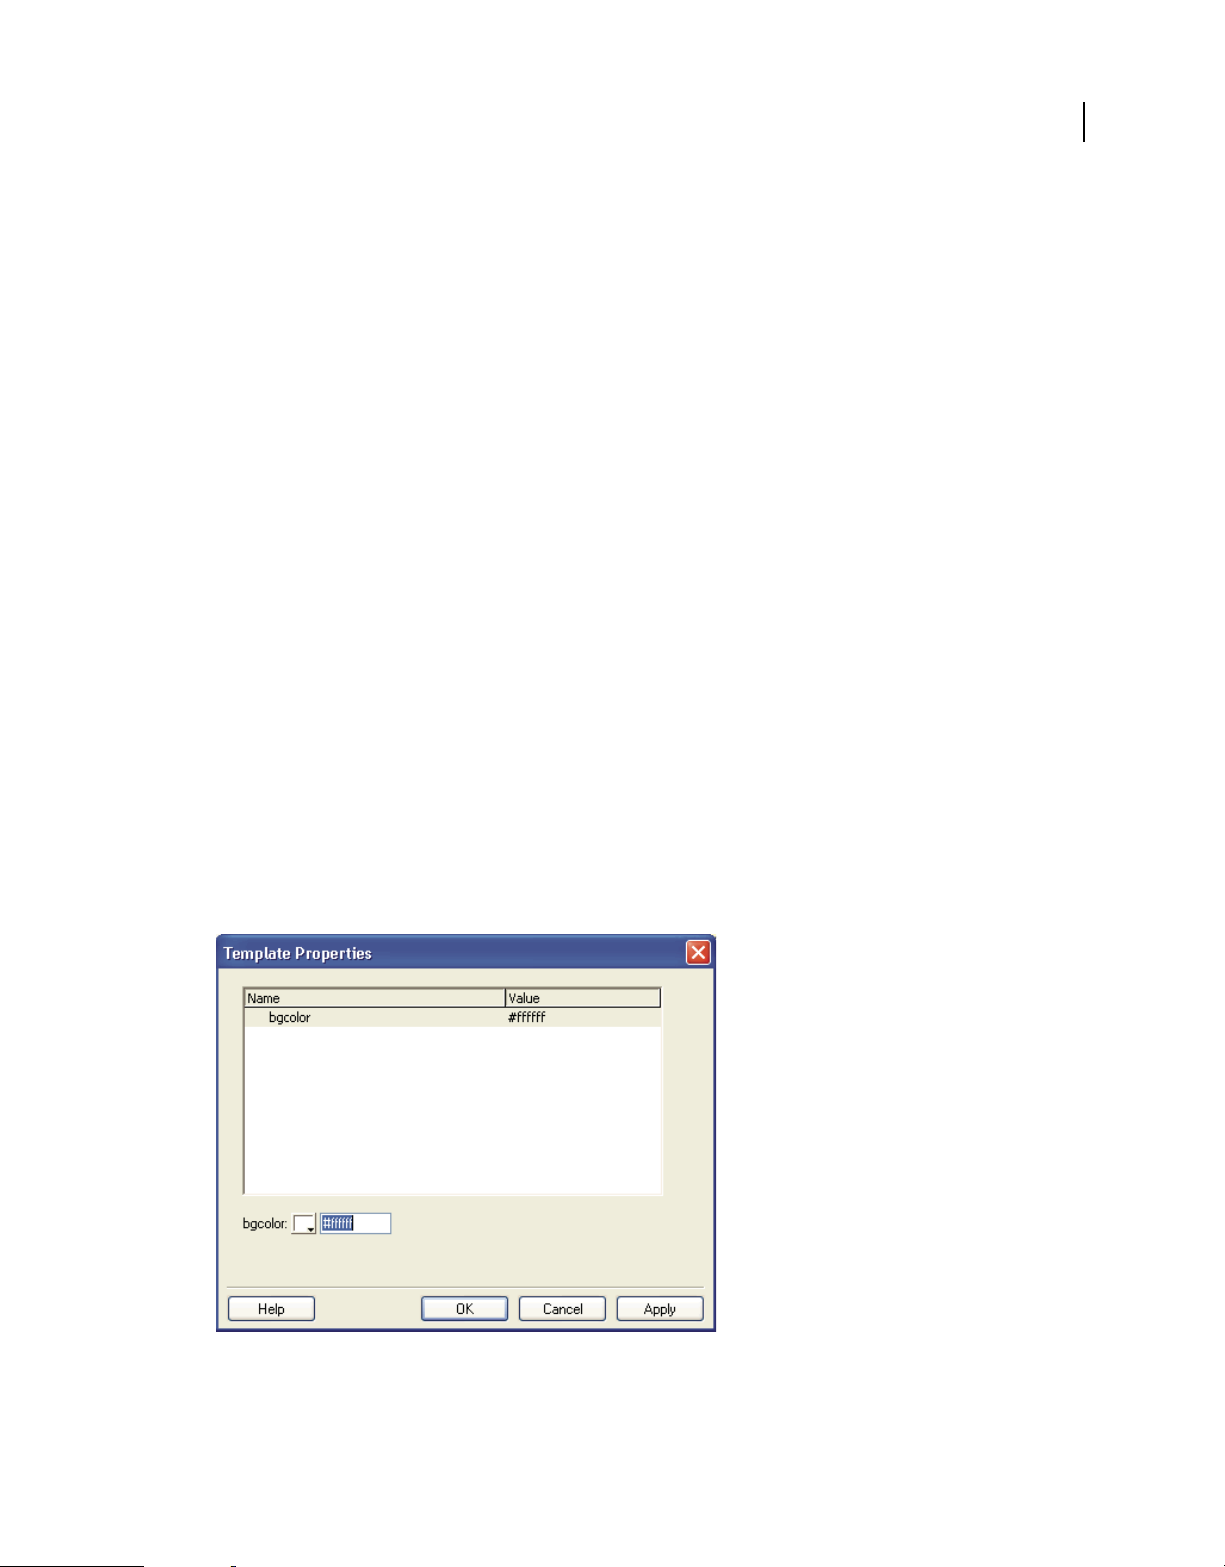
Working with existing web pages and blog entries
USING CONTRIBUTE CS4
You can edit the editable regions of a template-based page as you would edit any other web page.
1 Browse to the template-based page you want to edit.
2 Do one of the following:
• Click the Edit Page button in the toolbar.
• Select File > Actions > Edit Page.
The web page opens as a draft in the Contribute editor. You can make edits in the editable regions.
See also
“About templates” on page 49
“Customize template files for blogs” on page 64
“Refresh templates” on page 65
Set template properties for a web page
You can change template properties and customize templates when you work in web pages or blogs in Contribute. You
can change template properties such as background color on a web page. You can customize blog templates by adding
extra fields in the Dreamweaver template file, which is created automatically after you start working in a blog in
Contribute.
63
The Dreamweaver template designer might make it possible for you to show or hide parts of the page. You control this
content in the Template Properties dialog box. Pages based on a template might have editable attributes, such as
background color, that you can edit in Template Properties.
1 Browse to a template-based page; then click the Edit Page button in the toolbar.
2 Select Format > Template Properties.
The Template Properties dialog box opens.
3 In the Name list, select a property.
Contribute updates the bottom of the dialog box to show the label of the selected property and its assigned value.
Page 71

Working with existing web pages and blog entries
USING CONTRIBUTE CS4
4 In the field to the right of the property label, edit the value to modify the property.
5 Click Apply to apply changes without closing the dialog box, or click OK to apply changes and close the dialog box.
See also
“About templates” on page 49
Customize template files for blogs
Whenever you create a connection to a blog in Contribute, a Dreamweaver template (DWT) file is automatically
generated. You can customize DWT files to include additional fields in your blog if your blog publishing service
supports extra fields. You can use these additional fields to add extra information to your blogs.
Note: Not all blog publishing services support extra fields.
You can enter any additional fields in the form of XML tags in the Dreamweaver template file. After you add these tags,
the additional fields appear the next time you create a blog entry. For more information on creating blog entries, see
“Create a blog entry for your blog” on page 81.
Note: This process is helpful to customize your Dreamweaver template file. Familiarity with XML tags is helpful to
publish your blog entries to a blog publishing service such as Movable Type.
64
You can also publish this customized blog entry to another blog if the other blog server supports extra fields; otherwise
the additional fields are invisible in the blog. After you change the blog entry back to the original blog, all the additional
fields become visible. For more information on specifying target blogs, see
“Select the blog for the blog entry” on
page 88.
1 Open the DefaultTemplate.dwt file in any text editor:
• In Windows, the DefaultTemplate.dwt file is located at: C:\Documents and Settings\[user name]\Local
Settings\Application Data\Adobe\Contribute CS4\Sites\Sitex\Templates.
Note: If you cannot see the Local Settings folder, open Windows Explorer and select Tools > Folder Options > View.
In Hidden Files And Folders, select Show Hidden Files And Folders.
• In Mac OS, the DefaultTemplate.dwt is located at: /[Mac OS HD]/Application Support/Adobe/Contribute
CS4/Sites/Sitex/Templates
2 Enter the XML tags for the fields you want. Following is an example for adding the Extended Content, Excerpt, and
Keyword tags:
<<begintranslate>> <!-- TemplateBeginEditable name="mt_text_more" --> <<endtranslate>><!-TemplateEndEditable -->
<<begintranslate>> <!-- TemplateBeginEditable name="mt_excerpt" --> <<endtranslate>><!-TemplateEndEditable -->
<<begintranslate>> <!-- TemplateBeginEditable name="mt_keywords" --> <<endtranslate>><!-TemplateEndEditable -->
Always add the tags after the following lines:
<div class="entry-content">
<<begintranslate>> <!-- TemplateBeginEditable name="adobe_main_content" -->
<<endtranslate>><!-- TemplateEndEditable --></div>
3 Save and close the file.
The additional fields appear the next time you create a blog. For more information, see “Create a blog entry for your
blog” on page 81.
Page 72

Working with existing web pages and blog entries
USING CONTRIBUTE CS4
See also
“About templates” on page 49
Refresh templates
If you have several templates on your website, Contribute can take longer to start. For faster startup, you can configure
Adobe Contribute to start up without downloading templates from the server to your client computer. You can
download updated templates whenever it is required, or when Contribute displays a message indicating that a selected
template is not synchronized with the template available on the server.
1 In the Contribute browser, click New in the toolbar, or select File > New.
The New Web Page Or Blog Entry dialog box opens.
2 In the Create New Web Page or Blog Entry For pane, select and expand the website or blog connection in which
you want to create the new page or blog entry, if it is not already expanded.
3 Below the Preview pane, view information about the template associated with the selected website. If Contribute
indicates that the template is out of date, click Refresh Templates, and select one of the following options from the
pop-up menu:
For All Websites Updates templates for all websites and blogs globally.
65
For Selected Website/Blog Updates templates for the selected website or blog only.
For Selected Template Updates the selected template only.
The template is refreshed.
4 Click OK.
While creating a new page, if you select a template that does not match the template on the server, Contribute
prompts you to confirm whether you want to create the page based on the old template. If you click Yes, the new
page is created based on the old template. However, if you click No, the selected template is updated, and then the
page is created.
Note: If a template is not available, the For Selected Template option is disabled.
See also
“About templates” on page 49
Work offline
Contribute gives you the freedom to edit web pages and blog entries without a network connection. Using the Work
Offline feature of Contribute, you can work on an airplane, at home, or anywhere.
While you are working offline, you can edit drafts, but you cannot use the Contribute browser. Contribute remains
offline—even if you establish a network connection—until you switch to working online.
❖ Do one of the following:
• If Contribute is running and has a network connection, select File > Work Offline (Windows) or Contribute >
Work Offline (Mac OS).
Page 73

Working with existing web pages and blog entries
USING CONTRIBUTE CS4
• If Contribute is not running, start Contribute without a network connection; select Work Offline in the
Connection Failure dialog box, and then click OK.
The Contribute browser displays the Working Offline page. Click a draft title in the Pages panel to start editing.
Switch between working online and working offline
If you start Contribute offline without a server connection, or switch to working offline during an online Contribute
session, you can switch to working online whenever you establish a server connection.
Note: Contribute does not reestablish the connection to your web server. You must connect to the server before you switch
to working online in Contribute.
Switch from working online to working offline
❖ Select File > Work Offline (Windows) or Contribute > Work Offline (Mac OS).
Switching to working offline does not disconnect your network connection.
Switch from working offline to working online
1 Restore your network connection, if necessary.
2 Do one of the following:
• Select File > Work Offline (Windows) or Contribute > Work Offline (Mac OS).
The check mark next to this menu option disappears.
66
• Click the Work Online button in the toolbar.
Work offline in the Contribute editor
When you’re working offline, the Contribute editor displays information about what you can do offline. You cannot
browse to other web pages, websites, blog entries, or blogs when you are offline.
You can edit current drafts in the Pages panel or create web pages and blog entries while you’re offline. Some
Contribute editor functions are not available when you’re offline. For example, you can’t publish web pages or blog
entries until you are online again.
Before you work offline, be sure to click Edit Page to create drafts for any web pages or blog entries you want to edit
offline. You cannot access home pages or recently published web pages or blog entries while you are offline.
Edit a draft while working offline
❖ Click a draft title in the Pages panel of the sidebar.
The draft opens in the Contribute editor.
Create a web page or blog entry while working offline
❖ Select File > New. The New Web Page Or Blog Entry dialog box opens. You can create a blank web page or blog
entry.
The new web page or blog entry opens as a draft in the Contribute editor, and its title appears in the Pages panel.
Delete a new web page or blog entry while working offline
1 Open any new web page or blog entry that you created while working offline.
Page 74

Working with existing web pages and blog entries
USING CONTRIBUTE CS4
Note: You can delete only those web pages and blog entries that you created while working offline. You cannot cancel
changes to a draft while working offline.
2 Click the Discard Draft button in the toolbar or select File > Actions > Discard Draft.
Contribute discards the new web page or blog entry from the Pages panel and opens the Contribute Working
Offline page.
See also
“Switch between working online and working offline” on page 66
Edit web pages in an external application
To edit images, Microsoft Word documents, Adobe Fireworks™ content, or files of other types on your website, edit
the content in the application in which it was created. You can open the appropriate application from Contribute to
edit the file.
Note: Use Contribute to edit the file in an external application; changes you make to the local, original source file do not
appear on your website.
67
Before you can use Contribute to start an external application editor, you may need to associate an editor with the type
of the file you intend to edit (see
common file types.
Before you can use Contribute to start an external application editor, you may need to associate an editor with the type
of the file you intend to edit. Contribute has preassigned editors for common file types.
1 To find the content you want to edit, do one of the following:
“Setting file editor preferences” on page 40). Contribute has preassigned editors for
• Browse to the page or file that contains the content you want to edit, and then click Edit Page.
• Click the Choose button in the toolbar, navigate to the file you want to edit, and then click OK.
Note: If the Contribute browser cannot display the page or file you’ve selected, you’ll see the File Placeholder page.
• If you browsed to a page and opened it as a draft, right-click (Windows) or Control-click (Mac OS) the element
you want to edit, and then select Edit In External Application.
Contribute displays the External Application Editing page and starts an external editing application.
Note: To change your default editor, see “Setting file editor preferences” on page 40.
2 If you are editing an image in Fireworks, click No in the Find Source dialog box to indicate that you do not want to
edit the source file for this image; you want to edit the image for your website only.
3 In the external application, make changes as necessary; then save your changes and close the application.
Note: If you are editing in Fireworks, click the Done button in the editing window.
4 In Contribute, click one of the action buttons in the toolbar.
Click the Launch link on the External Application Editing page to open the content in the external editor again, to
make additional changes.
Page 75

Working with existing web pages and blog entries
USING CONTRIBUTE CS4
Edit web page source in an external application
You can edit web page source in an external application to make quick modifications or to do testing, such as link
checking or accessibility testing. Contribute opens the source in an external editing application.
Note: If your Contribute administrator has not enabled source editing, you cannot edit the source in an external
application. For information, talk to your Contribute administrator.
Important: Editing web page source in an external application is very different than the editing experience in Contribute.
If you are unsure about editing the source directly, talk to your Contribute administrator.
1 In the Contribute browser or editor, view the page you want to edit the source for.
2 Select File > Actions > Edit Page Source In External Application.
Contribute displays the External Application Editing page and starts an external editing application.
Note: To change your default editor associated with Web Page Source, see “Setting file editor preferences” on page 40.
3 In the external application, make changes as necessary, and then save your changes and close the file or application.
Important: Be careful when you edit web page source—you can easily alter style and formatting and get unexpected
results. If you are unsure about editing the source directly, talk to your Contribute administrator.
68
4 In Contribute, do one of the following:
• Click the Edit In Contribute link on the External Application Editing page to reload the draft in Contribute.
This option lets you see your changes and resume editing.
Note: If Contribute warns you that you must save and close the file in the external application, click OK.
• Click the Launch link on the External Application Editing page to reopen the content in the external editor.
This option lets you make additional changes, and provides a convenient way to switch back and forth between
Contribute and the external editing application.
• Click the Publish button in the toolbar to publish your changes to the website.
• Click the Send For Review button to send the draft to another user to review your changes.
• Click the Discard Draft button if you want to discard the changes after editing in an external application.
This options discards all changes you’ve made in Contribute or in the external application since you started
editing this draft.
See also
“Edit web pages in an external application” on page 67
Configure blog server settings
Blogging systems support a variety of features that enhance blogging experience. Client applications, like Contribute,
can access only those features to which the blog system provides access. Because not all blog systems support all the
features, Contribute provides you a common set of features, which it can access from different blog systems. The
following features are currently supported in Contribute.
• Inserting images
• Inserting audio
Page 76

Working with existing web pages and blog entries
USING CONTRIBUTE CS4
• Inserting video
• Commenting features
• Categories
• Trackback features
• Pages
• Parent pages
• Page order
When you access a blog page, only those features supported by the blog server are enabled on the interface. However,
you can choose to enable a feature that the blog server doesn’t support. This override works only if the server starts to
support the feature before the blog is published. From the list of features supported by Contribute, you can personalize
only three features — Images, Audio, and Video.
For example, if the server does not support embedding images, you can enable the option using the blog interface. The
embedded image is published on the server only if the server starts providing this support before the page is published.
You can also choose to disable features supported by the server. These settings are applied only on your computer, and
do not affect settings on the server.
The configured settings for different blog systems are stored in the registry.
69
Note: The applied settings work only on your local computer, and you must reconfigure them when you edit blogs from
a different computer.
1 Select Edit > My Connections.
2 In the My Connections dialog box, select the blog server that you want to configure. Click Configure. The
Configure Blog Server dialog box appears.
The features supported by the server appear selected next to the corresponding options. The features supported by
the server that cannot be customized appear in the field below the options.
3 To enable a feature that is not supported, check the option. The corresponding button and menu item for that
feature are enabled in the interface.
4 To revert to the default server options, and to check the current status of the features supported by the blog server,
click Update Support.
Configure blog settings
1 Select Edit > Configure Blogs, and select the blog that you want to configure. Alternatively, in the My Connections
dialog box, select the blog site and click Configure.
2 In the Configure Blog dialog box, select Styles And Fonts in the left panel.
a Select the method by which Contribute users can (or cannot) apply styles to text from the Style support pop-up
menu. The style options are as follows:
Don’t Allow Users To Create Styles Prohibits users from creating styles. Users cannot modify any text and style
formatting options.
HTML Tags Lets you determine whether users can create HTML styles, and to what degree they can modify and
apply styles on the website.
Document-level CSS Lets you determine whether users can create CSS styles in the document, and to what
degree they can apply CSS styles from existing CSS style sheets.
Page 77

Working with existing web pages and blog entries
USING CONTRIBUTE CS4
b Change the Styles options as necessary. If the Allow Users To Apply Styles option is selected, users can apply
heading and paragraph styles using the Contribute editor toolbar or menu commands. If this option is
deselected, the user cannot apply new paragraph styles.
Include HTML heading styles (<h1>, ...) in the Style menu Specifies that the standard HTML Paragraph,
Heading1, Heading2, Heading 3, Heading 4, Heading 5, and Heading 6 tags are available in the Style menu.
Include CSS styles in the Style menu Specifies that CSS styles appear in the Style menu.
Allow users to apply fonts and sizes (displays the Font and Size menu) Activates the Font and Style menus in
the Contribute editor toolbar. This lets users select the fonts and font sizes to use on the page. If this option is
not selected, Contribute uses the font styles and sizes defined in the page’s HTML source code.
Allow users to apply bold, italic, underline, strikethrough, and fixed width styles Activates the bold, italic,
underline, strikethrough, and fixed width style options in the Formatting menu and lets the user apply these
options to text.
Allow users to apply font color and background color Activates the Text Color and Highlight Color options in
the Formatting menu and lets the user apply these options to text.
3 Select New Images in the left panel. Use the options in the New Images panel to customize your settings.
For each blog site, the blog-specific settings are stored in a separate BlogHub.CSI file.
70
Discard a draft, new page, or new blog entry
When you are editing a draft of an existing web page or blog entry, you can decide to discard all changes and retain the
currently published version of the web page or blog entry. When you are editing a new web page or blog entry that you
created, you can discard it.
Also, depending on your role, you might be able to delete pages that are published on your website. For more
information, see
“Delete a web page or file” on page 71.
Discard changes to a draft of a published web page or blog entry
❖ In your draft, click the Discard Draft button in the toolbar.
The published version of the web page or blog entry appears in the Contribute browser, without any edits.
Discard a new web page or blog entry
❖ In the new page draft, click the Discard Draft button in the toolbar.
Contribute discards the new web page or blog entry.
Delete a web page or blog entry
You can permanently delete pages and entries from your website or blog.
If you want to delete a draft, and not remove the existing page or entry from your website or blog, see “Discard a draft,
new page, or new blog entry” on page 70.
Page 78

Working with existing web pages and blog entries
USING CONTRIBUTE CS4
Delete a web page or file
Depending on your role, you might be able to delete pages from your website. If you can delete pages, you can delete
files of any type on your website, including image files.
Note: If you do not have permission to delete a page that you need to delete, talk to your Contribute administrator or see
“Set folder and file access settings” on page 286.
You do not need special permission to delete a new page that you created and haven’t published yet. For more
information, see
1 Do one of the following to find the page or file:
• Browse to the page or file you want to delete.
• Click the Choose button in the toolbar; then select a file and click OK.
Note: If Contribute cannot display the page or file you browse to, you’ll see the File Placeholder page. You can still
delete the page or file, even though you can’t view it.
2 Select File > Actions > Delete Page.
Note: This menu item is disabled if you do not have permission to delete pages on your website.
3 Click Yes to confirm that you want to delete the file.
Contribute deletes the page and displays the last page you viewed in the browser.
“Discard a draft, new page, or new blog entry” on page 70.
71
See also
“Discard a draft, new page, or new blog entry” on page 70
Delete a blog entry
You can delete existing entries from your blog.
If you want to delete a draft, see “Discard a draft, new page, or new blog entry” on page 70.
1 In the Contribute browser, browse to the blog home page that contains the entry you want to delete.
2 From the Entries pop-up menu, select the blog entry you want to delete, or select View > Select Blog Entry and
choose the relevant blog entry.
3 When the blog entry is displayed in the embedded browser, click the Delete Entry button, or select File > Actions
> Delete Entry.
Note: You can also delete a blog entry by selecting the Choose File or Blog Entry option from the View menu. In the
dialog box that appears, select the required blog entry, and click the Delete button.
4 In the confirmation dialog box, click Yes to confirm that you want to delete the entry.
Contribute deletes the entry from your blog, and displays your blog home page.
Note: The list of blog entries in the Entries pop-up menu is updated after a blog entry is deleted.
Refresh the Entries list
You can update the list of blog entries in your home page by refreshing the list, manually.
❖ Click the Refresh Blog Entry List button to refresh the list of blog entries displayed in the Entries pop-up menu,
or select View > Refresh Blog Entry List.
The blog entries listed in the Entries pop-up menu are updated.
Page 79

Working with existing web pages and blog entries
USING CONTRIBUTE CS4
Export a web page or blog entry (Windows only)
Contribute lets you export a web page or blog entry from Contribute to an external HTML file. You can save the file
anywhere on your computer or network.
If you export a new web page with images—that is, a page you haven’t published yet—you’ll see the images in your
exported web page. If you edit an existing web page—a previously published page—you might not see all the images
on your exported page. This is because the new web page references local versions of the images, and the existing page
references images that are saved on your website.
1 Browse to the web page or blog entry to export.
2 Do one of the following:
• If you are exporting a web page, click the Edit Page button in the toolbar.
• If you are exporting a blog entry, click the Edit Entry button in the toolbar.
3 Select File > Export.
The Export dialog box appears.
4 Select a location to save the exported file.
5 Enter a filename.
6 Click Save.
The exported file appears in the folder you selected.
72
Print a web page or blog entry
You can browse to a web page or blog entry and print it, or you can print a web page or blog entry you are editing to
check your changes.
Preview a page
1 Do one of the following:
• Select File > Print Preview (Windows).
• Select File > Print, and then click the Preview button (Mac OS).
The web page or blog entry appears in a browser window.
2 To print the page or blog entry, click Print or OK.
3 Click Close to close the preview when you finish viewing it.
To preview a web page or blog entry in a browser, see “Preview a page in your default browser” on page 207.
Print a page
1 Select File > Print.
Note: (Windows only) In the Contribute browser, you can also right-click, and then select Print.
2 Click Print or OK.
Page 80

Working with existing web pages and blog entries
USING CONTRIBUTE CS4
Your default printer prints the page.
See also
“Edit web page source in an external application” on page 68
Add Google search
You can add a Google™ search field to your web page, so that your website visitors can search the entire web or just
your website.
Insert a Google search field
1 In your draft, place the insertion point where you’d like the search field to appear.
2 Select Insert > Google Search Field.
The Insert Google Search Field dialog box appears.
3 Set the options on each screen, and then click Next (Windows), or click Continue (Mac).
For information about any of the options in a screen, click the Help button.
73
4 Review the summary, and then click Done, or click Finish (Mac).
The Google search field appears on your draft.
Change Google search field properties
1 In your draft, select the Google search field.
2 Select Format > Google Search Field Properties.
The Google Search Field Properties dialog box appears.
3 Click any tab at the top of the dialog box, and then change options as necessary.
For information about any of the options in the tab, click the Help button.
4 When you finish, click OK.
Reference
This section provides information about the dialog boxes introduced in this chapter.
Completing the Send For Review dialog box
Use the Send For Review dialog box to send a draft you’re editing, or a file from your computer, to someone for review.
1 Select one of the following options:
Note: These options are available if you are sending a draft for review. If you are sending a file for review, skip this step.
Send E-mail with a link to a preview of the draft Uses the email review process. This option opens a message in
your default email application. Contribute automatically adds a link to the preview of the draft, and you can select
reviewers, and add a message.
Page 81

Working with existing web pages and blog entries
USING CONTRIBUTE CS4
This review method is useful if you want to keep working on the draft while someone reviews it. Working on the
draft does not affect the temporary draft posted for review. This review method is also useful for reviewers who do
not have Contribute. For more information, see
Send The Draft To Another Contribute User Uses the e-mail review process. This option opens a message in your
“The draft review process” on page 46.
default e-mail application. Contribute automatically adds a link to a preview of the draft, and you select the
reviewers and add a message.
This option sends the draft you are working on to the users you select.
This review method is useful if you need another user to review, edit, or publish a draft for you. You cannot
continue working on the draft after you send it for review. For more information, see
“The e-mail review process”
on page 48.
2 Select the options for the review as follows:
• If you selected the Send Draft To Another Contribute User option, select the name of the person you want to
review the draft, and then enter comments for the reviewer.
The Users list shows all users who have connected to this website. You can Control-click (Windows) or
Command-click (Mac OS) to select multiple users.
In the Comments section, you might want to tell the reviewer what has changed in the draft or maybe give the
reviewer instructions about what to do with the draft after the review.
74
• If you selected the Send Draft To Another Contribute User option, select Notify Recipients Through e-mail if
you want to send an e-mail message to the reviewer.
This option automatically launches your default e-mail application so that you can send an e-mail message to
reviewers alerting them to check Contribute for a draft to review.
3 Click Send.
For workflows other than Author > Publish, you have to send the document for review or approval before you can
publish the web page. The Publish button is enabled only after the workflow is honored. If your role doesn’t allow you
to publish directly to the website, you can send the draft to someone who can publish it. For more information on
workflows, see
“The draft review process” on page 46.
Using the Draft History dialog box
Use the Draft History dialog box to view the history associated with the draft you received for review.
Note: The Draft History dialog box enables you to only view the description of changes. You can add a description of
changes when you send the draft for review (see
Select a Sender’s Name The comments entered by the sender are displayed in the Description Of Changes section.
The action performed and Date columns Describe the action performed by the user, and the date of the action.
Recipients The names of users to which the document was sent.
See also
“Edit web page drafts” on page 60
“The draft review process” on page 46).
Page 82

Working with existing web pages and blog entries
USING CONTRIBUTE CS4
Completing the Template Properties dialog box
Use the Template Properties dialog box to show or hide content in a template-based page.
1 In the Name list, select a property.
Contribute updates the bottom of the dialog box to show the label of the selected property and its assigned value.
2 In the field to the right of the property label, edit the value to modify the property.
3 Click Apply to apply changes without closing the dialog box, or click OK to apply changes and close the dialog box.
See also
“Set template properties for a web page” on page 63
Completing the Select Website Folder dialog box
Use the Select Website Folder dialog box to select the local folder that contains the website for the page you’re opening.
This enables Contribute to locate any dependent files used by the page.
❖ Select the folder that contains the website for the page you’re opening, and then click OK.
75
Completing the Send New Page dialog box
Use the Send New Page dialog box to change the filename of the draft you are sending for review, before you send it.
1 In the Filename field, change the filename of the draft you are sending for review.
2 Click Choose Folder to select the folder from where you want to publish the file.
3 Select an expiry date for the page from the Page Expires On pop-up menu.
4 The selected folder location appears in the web address under the filename.
5 Click Send.
Page 83

Chapter 5: Adding pages, blog entries, and documents
With Adobe® Contribute® , you can add pages to your website. You can create a blank web page, a copy of a web page, a
copy of a sample web page, or a web page based on a template. In addition to creating web pages, you can add existing
content from Microsoft Office documents, such as Word or Excel files, to your website, and add video files to a web page.
You can also use Contribute to create a stand-alone page that is not associated with one of your websites by saving the
new page to your computer.
With Contribute, you can create and post blog entries to your blog. You can also create a blank blog entry, create a blog
entry by quoting a selection from a web page you are viewing, or create a blog entry from existing information you
select in your browser or in Microsoft Office documents, such as Word or Excel files. Contribute also supports a special
kind of blog entry called Pages, which are supported by some blog sites.
Create or copy a page on your website
76
You can create or copy any of the following types of pages on your website:
• Copy of current page
• Blank web page
• Starter web page
• Template
Note: If your Contribute administrator has restricted the types of new pages you can create, you won’t see all of these
options when you create or copy a page. For more information, talk to your Contribute administrator or see
settings for new web pages” on page 291.
See also
“Create a stand-alone web page” on page 81
“Specify
Copy a page on your website
You can create a copy of the page you are currently viewing on your website. You must be viewing the page in the
Contribute browser.
You cannot create a copy of a page that is a draft in the Contribute workspace. Also, you cannot copy a page from one
website to another website. You cannot create a copy of a page that contains frames.
Remember to add a link to the page before you publish; otherwise, website visitors cannot navigate to the page.
Page 84
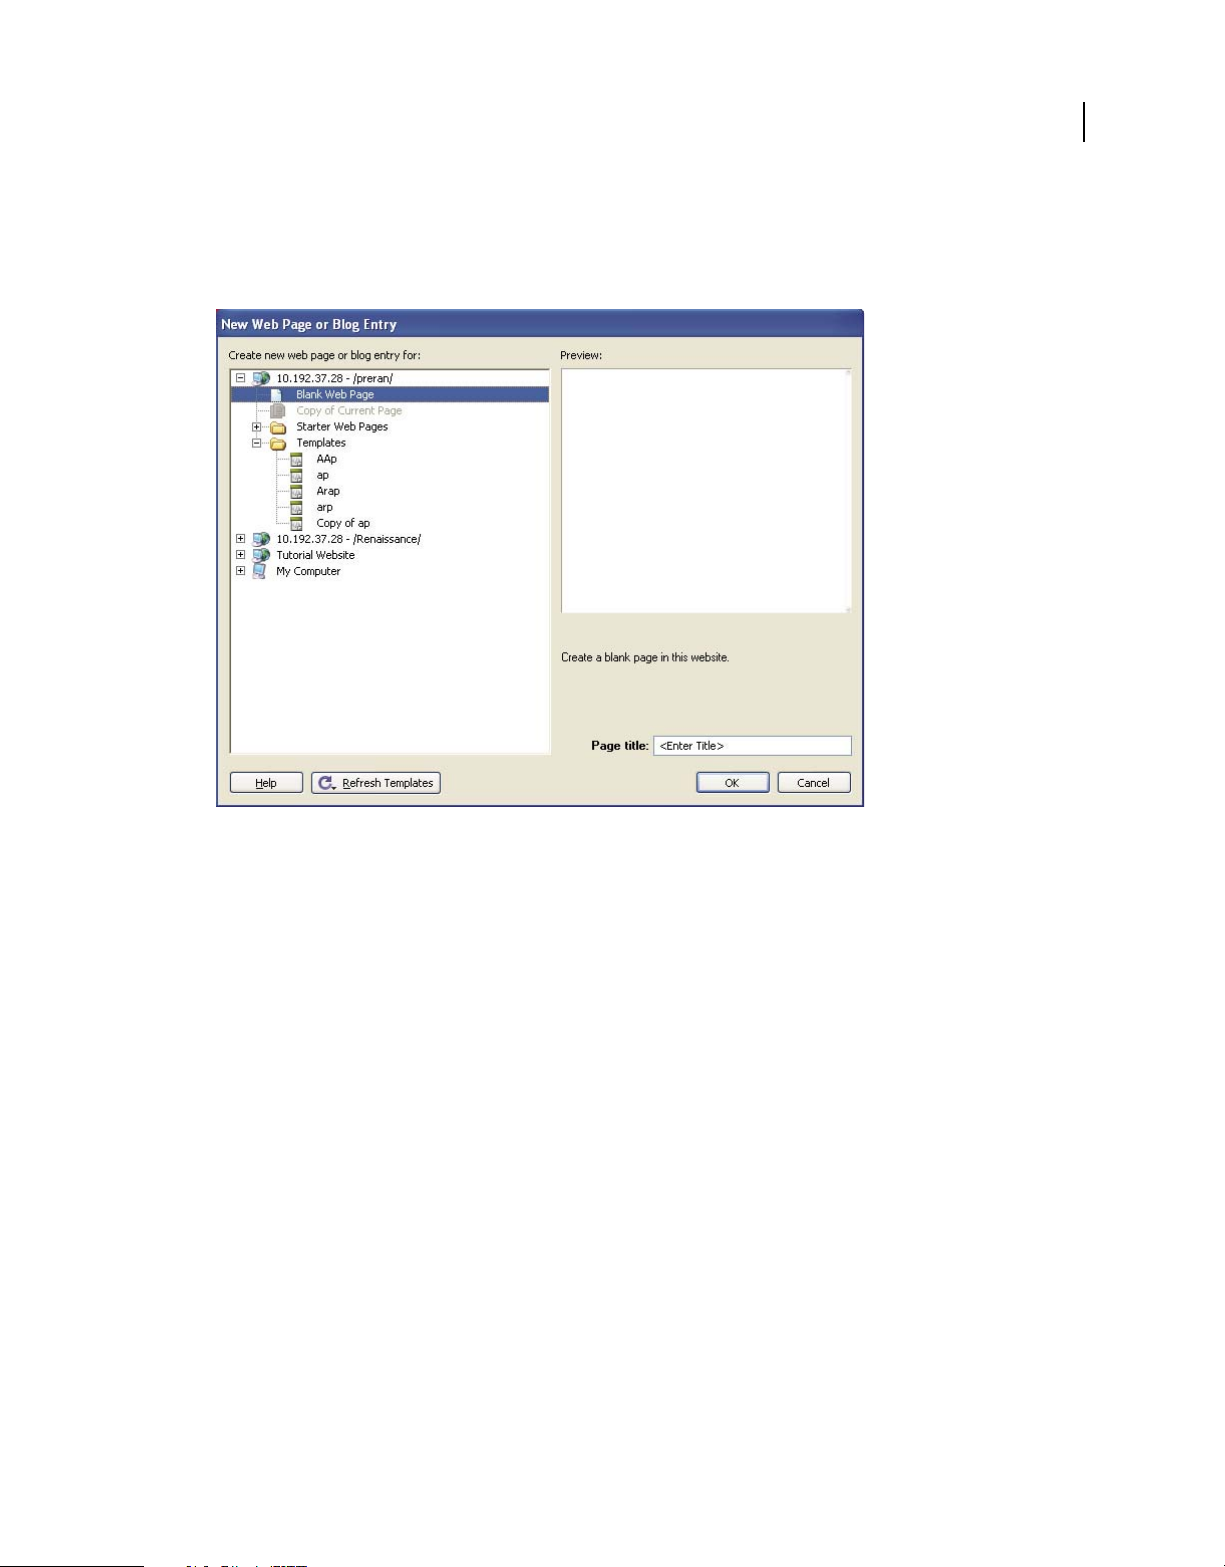
Adding pages, blog entries, and documents
USING CONTRIBUTE CS4
For web pages, the copied page has the same workflow that is assigned to the page from which it has been created.
1 Navigate to the page you want to copy, and click the New button in the toolbar or select File > New.
The New Web Page Or Blog Entry dialog box appears.
77
2 In the Create New Web Page Or Blog Entry For pane, select Copy Of Current Page.
Note: If you cannot select this option, you are viewing a page in your browser that you cannot copy. If you do not see
this option, your Contribute administrator has restricted the types of new pages that you can create. For more
information, talk to your Contribute administrator or see
“Specify settings for new web pages” on page 291.
A preview of the page appears in the Preview pane on the right side of the dialog box.
3 Enter a page title in the Page Title text box.
This title appears in the browser title bar when a website visitor views the page; it does not appear on the page itself.
4 Click OK.
The new page opens as a draft in Contribute. Be sure to add a link to your new page before you publish it (see
“Create text and image links” on page 177).
Note: Contribute creates the new page in the same folder as the page you copied. You can change the folder location
when you publish the new page.
Create a blank web page
You can create a blank web page to add to your website. Remember to add a link to the page before you publish;
otherwise, website visitors cannot navigate to the page.
Blank web pages are assigned the default workflow Author > Publish.
Page 85

Adding pages, blog entries, and documents
USING CONTRIBUTE CS4
Note: It’s a good idea to create the new page and a link to that page at the same time. To do that, see “Link to a new page”
on page 178.
1 In the Contribute browser, click the New button in the toolbar, or select File > New.
The New Web Page Or Blog Entry dialog box opens.
2 In the Create New Web Page Or Blog Entry for pane, expand the website in which you want to create the new page,
if it is not already expanded, and select Blank Web Page.
Note: If you don’t see this option, your Contribute administrator has restricted the types of new pages that you can
create. For more information, talk to your Contribute administrator or see
“Specify settings for new web pages” on
page 291.
3 Enter a page title in the Page title text box.
This title appears in the browser title bar when a website visitor views the page; it does not appear on the page itself.
4 Select a template that you want to assign to the web page. The page workflow assigned to the template is displayed
below the Preview panel.
5 Click OK.
The new page opens as a draft in Contribute. Be sure to add a link to your new page before you publish it (see
“Create text and image links” on page 177).
78
Contribute creates the new page in the same folder as the page you were viewing when you created the page (unless
you selected another website in step 2). You can change the folder location when you publish the new page.
See also
“Set page properties for a web page” on page 85
“Add keywords and a description for a web page” on page 87
Copy a starter web page
Contribute comes with built-in starter web pages that you can copy and use on your website. Use any of these pages as
a starting point for your web page.
Starter web pages are assigned the default workflow Author > Publish.
Remember to add a link to the page before you publish it; otherwise, website visitors cannot navigate to the page.
Note: It’s a good idea to create the new page and a link to that page at the same time. To do that, see “Link to a new page”
on page 178.
1 In the Contribute browser, click the New button in the toolbar, or select File > New.
The New Web Page or Blog Entry dialog box opens.
2 In the Create new web page or blog entry for pane, do the following:
a Expand the website in which you want to create the new page, if it is not already expanded.
b Expand the Starter Web Pages folder, and then select a starter web page.
Note: If you don’t see the Starter Web Pages folder, your Contribute administrator has restricted the types of new
pages that you can create. For more information, talk to your Contribute administrator or see
new web pages” on page 291.
“Specify settings for
A preview of the page you select appears in the Preview pane on the right side of the dialog box.
Page 86

Adding pages, blog entries, and documents
USING CONTRIBUTE CS4
3 Enter a page title in the Page title text box.
This title appears in the browser title bar when a website visitor views the page; it does not appear on the page itself.
4 Click OK.
The new page opens as a draft in Contribute. For information about editing the starter web page, see “Edit a starter
web page” on page 79. Also, be sure to add a link to your new page before you publish it (see “Create text and image
links” on page 177).
Note: Contribute creates the new page in the same folder as the page you were viewing when you created the page
(unless you selected another website in step 2). You can change the folder location when you publish the new page.
Edit a starter web page
The Contribute starter web pages were created by a professional design firm. You can copy any of the sample pages
and use them in your website. You can use any of the pages as a starting point to create your own page, or replace the
existing content with your information.
After you create a page based on a starter web page, you can modify the page. This page is not a template, in which
some parts can be modified but other parts are restricted. The page is a starting point for your web page; you can
change it as needed.
79
Note: The hypertext links on the page do not work automatically; you must edit each link on the page so that it refers to
a page in your website.
The following are guidelines for working with text, images, and links on the starter pages. These are tips to help you
get started; there are many ways to modify the starter web pages to make them your own.
Modify text in a draft based on a starter page
1 To replace existing text, select any text on the draft and type over it.
When you replace existing text, Contribute retains the formatting established by the design of the starter web page.
You can apply formatting to any text to override the design.
2 To add text to draft, copy text from the draft or from another source (such as Microsoft Word), place the insertion
point on the page or select text you want to replace, and then select Edit > Paste Text Only.
Note: To delete the date object from your page, you must deselect Protect Scripts And Forms in the administration
settings. For more information, talk to your Contribute administrator or see
“Set page-editing and paragraph settings”
on page 288.
For more information about working with text, see “Working with text” on page 113.
Replace an image or graphic element in a draft based on a starter page
❖ Select the image, press Delete, and then drag a new image to the draft.
Most images and graphics on the starter web pages have dimensions on them. When you replace an image, try to
use an image that’s close in size to the one you’re replacing, so that you retain the page design.
Note: If you see a yellow shield icon, it’s probably a placeholder for the current date. When you publish the page, the
current date appears.
For more information about working with images, see “Working with images and graphic elements” on page 131.
Page 87

Adding pages, blog entries, and documents
USING CONTRIBUTE CS4
Enable links in a draft based on a starter page
❖ Do one or more of the following:
• To replace existing link text, select a link, and then type your link text.
Note: Not all links on the starter web pages look like typical links, with blue, underlined text. Links might not be
underlined and might have a different design treatment applied to them. When you click an intended link on a
draft based on a starter page, the status bar at the bottom of the Contribute editor indicates that it is a link.
• To make a link work, select a link, click the Link button in the toolbar, and then select Browse To Web Page.
Click the Browse or Choose button in the Insert Link dialog box to find and select a page, and then click OK to
close the Insert Link dialog box.
You must make the links work, or delete the ones you don’t want.
You can also link to a new web page, such as another starter web page, and modify the new starter web page
later. For more information, see “Link to a new page” on page 178.
• To add a link to a vertical navigation bar, select the row that contains the last link in the series, and then select
Edit > Copy. With the row still selected, click the Insert Row Below button in the toolbar. Select the new row,
and then select Edit > Paste.
For more information about working with links, see “Working with links” on page 177.
80
See also
“Copy a starter web page” on page 78
Create a web page based on a template
You can create a web page based on a template, which can help you maintain a consistent look across your website. In
Contribute, there are two types of templates:
• A template created in Dreamweaver® (see Dreamweaver Help > Using Dreamweaver). A Dreamweaver template is
a template that a designer creates for you with editable and locked regions.
• A page that your Contribute administrator designated as a template. Your Contribute administrator can designate
any page on your website as a template.
You can create a copy of either type of template to use as a starting point for your new page. Dreamweaver templates
have editable and locked regions (see
absent from templates created by the administrator. In addition, templates created by the administrator are assigned
a workflow. Contribute assigns a default workflow to templates without a workflow. For more information, see
draft review process” on page 46.
You can create a blog entry based on a template if your blog publishing service generates Dreamweaver templates for
your blog. To know more about creating blog entries, see
Remember to add a link to the new page before you publish it; otherwise, website visitors cannot navigate to the page.
Note: It’s a good idea to create the new page and a link to that page at the same time for websites and blog entries. For
more information, see
“Link to a new page” on page 178 and “Link to a new blank blog entry” on page 179.
“Work with template-based web pages” on page 62). Such regions could be
“The
“Create a blog entry for your blog” on page 81.
1 In the Contribute browser, click the New button in the toolbar, or select File > New.
The New Web Page Or Blog Entry dialog box opens.
2 In the Create New Web Page Or Blog Entry For pane, do the following:
a Expand the website in which you want to create the new page.
Page 88

Adding pages, blog entries, and documents
b Expand the Templates folder, and then select a template.
Note: If you don’t see the Templates folder, your Contribute administrator has restricted the types of new pages
that you can create. For more information, talk to your Contribute administrator or see
web pages” on page 291.
A preview of the page you select appears in the Preview pane on the right side of the dialog box.
3 Enter a page title in the Page Title text box.
This title appears in the browser title bar when a website visitor views the page; it does not appear on the page itself.
4 Click OK.
The new page opens as a draft in Contribute. Be sure to add a link to your new page before you publish it (see
“Create text and image links” on page 177).
Note: Contribute creates the new page in the same folder as the page you were viewing when you created the page
(unless you selected another website in step 2). You can change the folder location when you publish the new page.
USING CONTRIBUTE CS4
“Specify settings for new
Create a stand-alone web page
81
You can use Contribute to create pages that aren’t on a website you’ve connected to. You can save the page on your
computer or network.
1 In the Contribute browser, click the New button in the toolbar, or select File > New.
The New Web Page or Blog Entry dialog box appears.
2 In the Create New Web Page Or Blog Entry For pane, expand My Computer (Windows) or This Mac (Mac OS),
and then select Blank Web Page.
Note: Please select the option under My Computer (Windows) or This Mac (Mac OS) and not under a website that
you are connected to.
3 Enter a title for the new page.
4 Click OK, and then click OK again at the prompt.
The Save As dialog box appears.
5 Browse to the location where you want to save the file, and click Save.
The new page opens as a draft in the Contribute editor.
See also
“Create or copy a page on your website” on page 76
Create a blog entry for your blog
You can create the following types of blog entries:
• Blank blog entry
• Blank page
• Blog entry based on a auoted selection from a web page
Page 89

Adding pages, blog entries, and documents
USING CONTRIBUTE CS4
Create a blank blog entry
You can create a blank blog entry to add to your blog. A blank blog entry is a blank page that might have the template
(page layout and elements such as text and images) of your blog template, depending on whether your blog publishing
service generates Dreamweaver templates for your blog. For example, if you create a blank blog entry for your blog
hosted by TypePad, the blank blog entry has the page layout and elements of the blog template.
When you connect to a blog server, Contribute checks if the server supports the following properties:
• Categories
• Comments
• Trackbacks
• Media objects
• Images
If any property is not supported by the server, the corresponding option is disabled in Contribute.
You can add new information in a blank blog entry.
1 In the Contribute browser, click the New button in the toolbar, or select File > New.
The New Web Page Or Blog Entry dialog box opens.
82
2 Select the desired blog, and choose the Blank Blog Entry option.
3 Enter a title for the blog entry in the Blog Entry Title text box.
4 Click OK.
The new blog entry opens as a draft in Contribute.
5 (Optional) Add a tag using the Tags field.
6 In the Date area, click the Set Date Time icon and set the date and time when you want your blog entry draft to be
published.
7 (Optional) Select one or more categories from the Categories list.
8 Click the Allow Trackbacks icon to maintain a list of other blogs that are linked to your blog entry.
9 Click the Allow Comments icon to allow users to enter comments about your blog entry.
Note: Before publishing the blog entry, select File > Preview In Browser to view the blog entry in a web browser and
test all the links in the entry.
10 Enter content for the blog entry and publish it.
Note: You can link a blank blog entry to another blank blog entry and publish the entries. For more information, see
“Link to a new blank blog entry” on page 179.
Create a blank Page
Contribute supports a special blog entry called Pages supported by some blog sites. Contents of Pages are stored in a
database, and are retrieved using protocols like MetaWeblog and Atom.
Pages, spelled with a capital P, contain information that does not change drastically over a period of time. Information
contained in the Pages is displayed permanently on the blog. Pages can be organized in a hierarchical fashion into
pages and subpages with a parent-child relationship between them.
Note: You cannot use this feature when working with blog sites that do not support Pages.
Page 90

Adding pages, blog entries, and documents
USING CONTRIBUTE CS4
For example, Pages could contain information about the author, copyright information, legal matter, or description of
the blog. Sub pages for the author could contain information related to the author, like hobbies, professional interests,
and personal likes and dislikes.
Note: If the word Pages appears after a period, the reference could be either to Pages or normal web pages depending on
the context.
Pages can use templates and each Page can use a different template. However, Contribute CS4 supports only the default
template of the blog site and assigns it to all the Pages.
Note: You cannot assign categories or tags to Pages.
1 Connect to the blog in which you want to create the new blank blog Page.
2 In the Contribute browser, click the New button in the toolbar, or select File > New.
The New Web Page Or Blog Entry dialog box opens.
3 Select the desired blog, and choose the Blank Page option.
Note: This option is not available for blog sites that do not support Pages.
4 Enter a title for the blog Page in the Blog Page Title box.
5 Click OK.
The new blog Page opens as a draft in Contribute.
83
6 In the Date area, click the Set Date Time icon and set the date and time when you want to publish your blog entry
draft.
7 Select an option from the Parent Page pop-up menu to set a parent page for the Page.
8 Enter a number to set a page order for the Page. This order can change based on the relative page order of child
pages.
9 Click the Allow Trackbacks icon to maintain a list of other blogs that are linked to your blog entry.
Note: Before publishing the blog entry, select File> Preview In Browser to view the blog entry in a web browser. Test
all the links in the entry.
10 Enter the content for the blog entry and publish it.
Note: You can link a blank blog entry to another blank blog entry and publish the entries. For more information, see
“Link to a new blank blog entry” on page 179.
See also
“Create a blog entry based on a quoted selection” on page 83
“Set date and time for a blog entry” on page 84
Create a blog entry based on a quoted selection
You can create a new blog entry from information you select in a web page in the Contribute browser. Such a selection
is called a quote.
Page 91

Adding pages, blog entries, and documents
You can also create a blog entry from a quoted selection in an external browser, such as Microsoft Internet Explorer
“Post content to a blog from a browser” on page 215) or from Microsoft Office applications such as Word, Excel,
(see
and Outlook (see “Post content to a blog from Microsoft Office applications (Windows only)” on page 215). You can
then publish the entry to your blog.
1 In the Contribute browser, browse to the web page you want to quote a selection from.
2 Make a selection in the web page.
3 Do one of the following:
USING CONTRIBUTE CS4
• If you have a connection to the website you are viewing, click the New button in the toolbar.
• If you don’t have a connection to the website you are viewing, select File > New.
The New Web Page Or Blog Entry dialog box appears.
4 Expand the folder for the blog where you want to publish the new entry.
5 Select Quote From Current Page.
Note: This option is not available if you are using a browser other than the Contribute browser.
6 Enter the title for the blog entry in the Blog Entry Title field.
7 Click OK.
84
See also
“Create a blank blog entry” on page 82
Manage blog entries
Adobe Contribute has simplified the task of managing blog entries. You can quickly access a blog entry from your
blog's home page by selecting the entry title from the Entries pop-up menu. This list displays all blog entries in the blog
to which you are connected in reverse chronological order. When you select a blog entry from the Entries pop-up
menu, the selected blog entry is loaded in the embedded browser.
You can make changes to a blog entry in the following ways:
• You can edit a blog entry directly in Contribute. For more information, see “Edit a blog” on page 51.
• If you have a blog home page or an individual entry in a browser window, you can click the Edit In Contribute
button to start Contribute and edit. For more information, see
page 52.
Note: You must have a connection to the website or blog before you can edit a web page or blog entry in your browser.
See also
“Undo mistakes” on page 55
“Save a draft for later use” on page 56
“Set date and time for a blog entry” on page 84
“Edit a web page or blog from your browser” on
Set date and time for a blog entry
You can set the date and time when you want to schedule the publishing of your blog entry draft.
Page 92

Adding pages, blog entries, and documents
USING CONTRIBUTE CS4
If you select an earlier date, and publish the blog entry, it is published immediately with the date you specified. If you
select a future date and publish the blog entry, the blog entry will be published on the specified date at the specified
time only if your blog server supports the date control API. Alternatively, the blog entry is published immediately with
the future date you specified.
Note: The publishing date and time settings are honored by compatible blog servers only.
Set parent Page and page order for a blog Page
You can edit a blank blog Page to set its parent page and page order in blog sites that support this feature. Any page
other than the page itself and its child pages are listed in the menu. For new blank blog Pages, all the pages are listed.
For Pages in the same hierarchal level, you can set the order in which they appear in the list. For example, let us
consider two parent pages: My Hobbies with an order of 1 and About Me with an order of 2 that are listed under a Page
called Personal Info. If you want About Me to be displayed before My Hobbies, change the Page Order for About Me
to 1 and that for My Hobbies to 2. The final ordering, however, is determined based on the relative page order among
Pages under the same Parent.
View and delete blog Pages
You can view blog Pages using the Choose File Or Blog Entry dialog box (View > Choose File or Blog Entry.) Click the
Pages button to view the Pages in the blog. To delete a Page, browse to it using Contribute, and click Delete Blog Entry.
85
See also
“Create a blank blog entry” on page 82
“Manage blog entries” on page 84
Set page properties for a web page
For each web page, you can specify layout and formatting properties, including the default font family and font size,
background color, margins, link styles, and many other aspects of page design.
Note: You can set page properties for web pages only. You can’t set them for blog entries.
The page properties you select apply only to the current web page. If a page uses an external CSS style sheet, Contribute
does not make changes to the external style sheet, because those changes affect all other pages that use that style sheet.
Page 93

Adding pages, blog entries, and documents
USING CONTRIBUTE CS4
Note: If you are editing a draft based on a template, or if you are restricted to text-only editing by your Contribute
administrator, you might be able to change the page title only. For more information, contact your Contribute
administrator or see
1 In your draft, click the Page Properties button in the toolbar, or select Format > Page Properties.
“Set page-editing and paragraph settings” on page 288.
The Page Properties dialog box appears.
86
2 Select categories from the list on the left and make changes as necessary.
By default, Contribute uses CSS to assign page properties. If your Contribute administrator set the preference to
use HTML tags instead of CSS, you see only the Title/Encoding and Appearance categories on the left side of the
dialog box. For more information about this setting, contact your Contribute administrator or see
“Set style and
font settings” on page 289.
Note: If you cannot select the Links or Headings categories, your Contribute administrator has set options to prevent
you from changing those page properties. Likewise, if you can only change page margins in the Appearance category,
the administrator has restricted access to the other properties in that category. For more information, talk to your
Contribute administrator or see
“Set style and font settings” on page 289.
For information about options in any of the categories, see the following sections:
• “Setting the HTML Appearance Page Properties options” on page 108 or “Setting the CSS Appearance Page
Properties options” on page 108
• “Setting the CSS Links Page Properties options” on page 109
• “Setting the CSS Headings Page Properties options” on page 109
• “Setting the Title/Encoding Page Properties options” on page 107
For information about options in any of the categories, click the Help button.
3 Click Apply to see changes without closing the dialog box or click OK to apply changes and close the dialog box.
See also
“Add keywords and a description for a web page” on page 87
Page 94
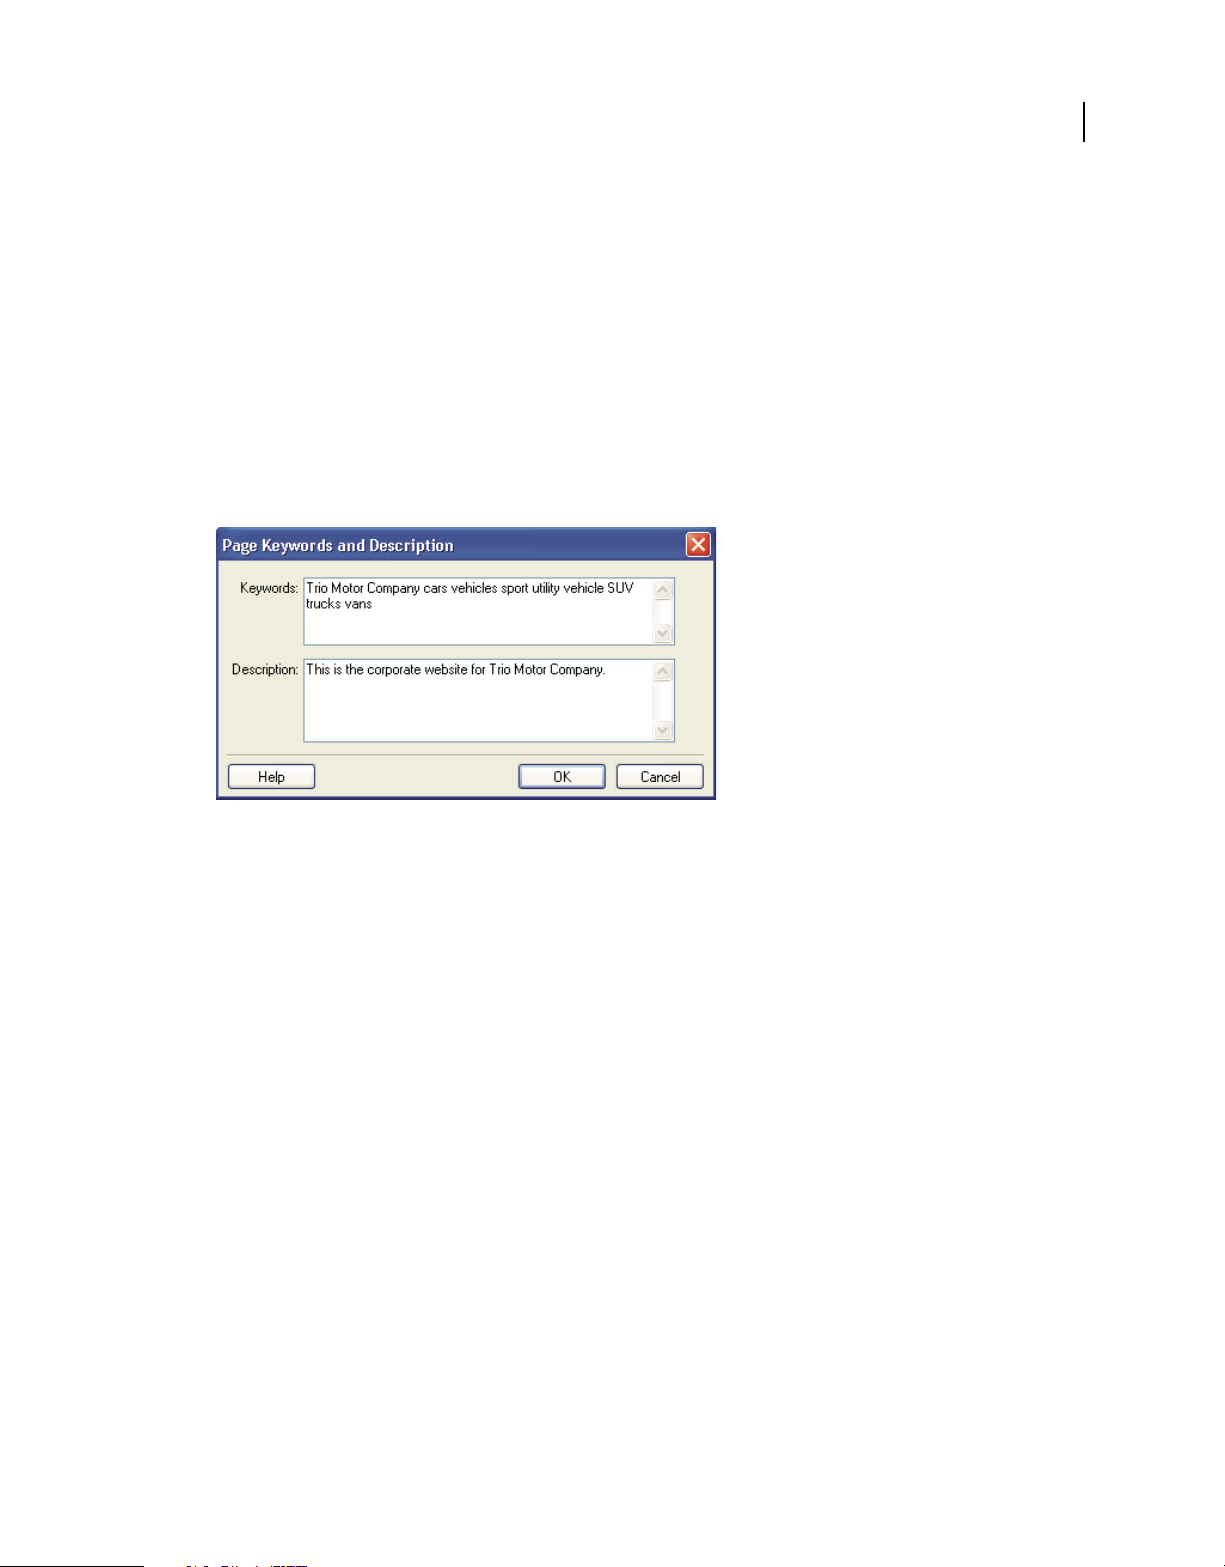
Adding pages, blog entries, and documents
USING CONTRIBUTE CS4
Add keywords and a description for a web page
You can associate keywords and a description with your web page. Visitors who type one of your keywords in a search
engine can find your page.
Note: You can add keywords and descriptions for web pages only. You can’t add them for blog entries.
1 Browse to the page you want to add keywords and a description for, and then click the Edit Page button in the
toolbar.
A draft opens in the Contribute editor.
2 Select Format > Keywords And Description.
The Page Keywords And Description dialog box appears.
87
3 Enter or change keywords in the Keywords pane.
Separate each keyword with a single space (for example, meeting minutes planning committee holiday party).
4 Enter or change the page description in the Description pane.
5 Click OK.
See also
“Set page properties for a web page” on page 85
Set preferences for blog entries
You can set other preferences for blog entries. In the Preferences dialog box, you can perform the following tasks:
• Set options for the default blog to connect to, whether to create a blog entry when you click the New Page button,
whether comments are allowed for blog entries, and whether to allow other users to link to a blog entry using its
trackback URLs (see
Note: Some blog hosts do not support comments, or require you to set a preference to allow comments. Review your
blog host’s documentation for more information.
For more information about adding trackback URLs to blog entries, see “Add trackback URLs to a blog entry” on
page 91. For more information about adding tags to blog entries, see “Add tags to a blog entry” on page 89.
• Specify the ping server URLs you want Contribute to notify when you post a blog entry.
“Set Contribute preferences” on page 30).
Page 95

Adding pages, blog entries, and documents
USING CONTRIBUTE CS4
• View a list of failed pings to the ping servers.
See also
“Set Contribute preferences” on page 30
Enter metadata for a blog entry
When you’re creating or editing a blog entry, you can enter additional information about the entry using the blog
metadata features. You can do the following tasks for blog entries:
• Select the blog to post the blog entry to
• Enter or change the title
• Add tags
• Assign categories
• Add trackback URLs
• Specify whether to allow comments
The primary blog metadata features—the blog to post the entry to, the blog entry title, and the tags to add to the
blog entry—are available from the main blog entry toolbar in the Contribute browser. Secondary blog metadata
features—categories, whether to allow trackback URLs, and whether to allow comments—are available when you
click the Show/Hide Secondary Metadata button
Options from the View menu.
on the blog entry toolbar, next to the Tags field or select More
88
In addition to the blog entry toolbars, you can also enter metadata features for a blog entry from the Format > Blog
Metadata menu.
Select the blog for the blog entry
You can select the blog where you want to post a blog entry you’re creating or editing. You can post a blog entry to any
blog to which you’ve created a Contribute connection.
1 Create or edit the blog entry you want to post.
Note: For information about creating a blog entry, see “Create a blog entry for your blog” on page 81. For information
about editing a blog entry, see “Manage blog entries” on page 84.
2 Do one of the following:
• Select the blog where you want to post from the Blog pop-up menu in the toolbar.
• Select Format > Blog Metadata > Blogs, and then select the blog you want to post to from the pop-up menu.
Note: A warning appears if you’re posting an existing blog entry that you’re editing to a target blog other than the
original blog. If you post the edited blog entry to a different blog, some blog metadata associated with the blog entry
may be removed, and links to other blog entry drafts in the original blog are removed.
3 (Optional) Click OK to close the warning dialog box.
The blog entry is posted to the target blog.
When you post an existing edited blog entry to a new blog, any links from the blog entry to blog entry drafts in the
original blog are broken. You must resolve the broken links in the blog entry you moved and in the drafts to which
it linked.
Page 96

Adding pages, blog entries, and documents
USING CONTRIBUTE CS4
Note: For more information on linking to a blog entry, see “Link to a new page” on page 178. For more information
on publishing a blog entry, see “Post content to a blog” on page 214.
Enter or change a blog entry’s title
You can enter or change the title for a blog entry. You can enter a title for a blog entry when you create it, or change it
after you save the blog entry as a draft or post it to your blog.
Enter the title for a new blog entry
❖ Enter the title in the Blog entry title field in the New Web Page Or Blog Entry dialog box when you create the entry.
Enter or change the title for an existing blog entry or blog entry draft
❖ Do one of the following:
• Enter the title in the Title field in the toolbar.
• Select Format > Blog Metadata > Title, and enter the title in the Title field in the toolbar.
Add tags to a blog entry
You can use tags to enter one or more brief descriptions for your blog entries. Other users can search for blog entries
that use those tags. For example, for a blog entry about the most strikeouts in a major league baseball game, you could
enter tags such as “baseball,” “strikeouts,” “strikeout records,” and so on. The following tag repositories are provided
for you:
89
• www.technorati.com/tag
• http://blogs.icerocket.com/search?q=
When the user enters a tag in the tag field for a blog entry, Contribute creates a tag link. After the user publishes the
entry and clicks the tag link, a list appears in the embedded browser showing all the blog entries indexed by the tag
repository using the same tag.
When you create or edit a blog entry in the Pages panel, you can enter as many tags as you want for the entry, separated
by commas.
Note: You can set preferences to determine where tags appear with your blog entries, the tag prefix to appear before tags
in a blog entry, and more. For more information on entering tags, see
1 In the Pages panel, select the desired blog entry.
2 Do one of the following:
“Set Contribute preferences” on page 30.
• Click the Tags field in the toolbar to place the pointer in it.
• Select Format > Blog Metadata > Tags to place the pointer in the Tags field in the toolbar.
3 In the Tags field, enter one or more tags for the blog entry.
You can enter as many tags as you want for an entry. Use commas to separate tags.
Depending on the preferences you set for the Tagging option in the Preferences dialog box, Contribute adds the tags
to the top or bottom of the blog entry, preceded by the specified tag prefix.
After you add the tags for the blog entry, you can edit it, publish it, or save it as a draft.
Note: You can clear tags from a blog entry by deleting them from the Tags field, or, if you are editing the blog entry, by
deleting the tag in the entry. After you publish the updated blog entry, the tag no longer appears with the blog entry on
the blog.
Page 97

Adding pages, blog entries, and documents
USING CONTRIBUTE CS4
See also
“Set Contribute preferences” on page 30
Assign categories to a blog entry
You can assign categories to blog entries to group similar blog entries together. For example, you can categorize blog
entries related to current affairs or sports.
You can assign more than one category to a blog entry. You can change or remove a selected category at any time.
Support for categories varies among blog hosts. Some blog hosts provide predefined categories, others let you create
your own categories, and some don’t support categories. For more information, review your blog host’s
documentation.
1 In the Pages panel, select the desired blog entry.
2 Do one of the following:
• Select the desired category from the Categories pop-up menu in the toolbar.
A check mark appears next to the selected category.
• Select Format > Blog Metadata > Categories, and then select the desired category from the pop-up menu.
A check mark appears next to the selected category.
90
Note: You can assign multiple categories to a blog entry.
Assign a different category to a blog entry
1 If necessary, select the desired blog entry in the Pages panel.
2 Do one of the following:
• Select the new category from the Categories pop-up menu in the toolbar.
A check mark appears next to the specified category.
• Select Format > Blog Metadata > Categories, and then select the new category from the pop-up menu.
A check mark appears next to the specified category.
Remove a category from a blog entry
1 If necessary, in the Pages panel, select the desired blog entry in the Pages panel.
2 Do one of the following:
• Deselect the categories from the Categories pop-up menu in the toolbar.
• Select Format > Blog Metadata > Categories, and then deselect all selected Categories from the pop-up menu.
Refresh the list of available categories
Some blog hosts let you add, edit, or delete the categories you can assign to blog entries. After you make changes to the
available categories at your blog host, you can refresh the list of available categories in Contribute to reflect the changes.
Note: You can make changes only to the available categories at your blog host. You can’t make changes to the categories
in Contribute.
1 Select the desired blog in the Pages panel.
2 Click the Refresh button on the blog metadata toolbar.
Page 98

Adding pages, blog entries, and documents
The revised categories appear in the Categories pop-up menu in the toolbar. They also appear when you select
Format > Blog Metadata > Categories. Blog entries using a newly created, edited, or deleted category are updated.
USING CONTRIBUTE CS4
See also
“Create a blog entry for your blog” on page 81
Add trackback URLs to a blog entry
When you create a blog entry, you can add one or more trackback URLs to it. You use trackback URLs to maintain a
list of other blogs that are linked to your blog entry. To link to one of your blog entries, other blog authors add that
blog entry’s trackback URLs to their blog entry. Your blog maintains a record of these linked blog entries for each of
your blog entries. You can click these links to view the linked entries. You can also prevent other users from adding
your blog’s trackback URL to their blog entries by disabling the Allow Trackback option.
Note: You set a preference to determine whether trackback is enabled for blog entries. Some blogs don’t support the
trackback feature or require you to set a preference to allow it. For more information, see your blog documentation. For
more information on enabling trackback URLs for blog entries, see
1 Select the desired blog entry in the Pages panel.
Note: Contribute does not validate the URLs you enter in the Trackbacks dialog box or the Trackback URL(s) field. If
you enter an invalid URL, or want to change the trackback URL later, you can edit the blog entry and add a new
trackback URL. However, you cannot edit or delete the trackback URLs you originally entered.
“Set Contribute preferences” on page 30.
91
2 Do one of the following:
• Click the Trackbacks button in the toolbar.
• Select Format > Blog Metadata > Allow Trackbacks.
3 Enter the trackback URL for the blog entry in the Trackback URL(s) field, and then click OK.
Contribute adds the URLs to the blog entry, and the Trackbacks field appears at the bottom of the Contribute
workspace. You can add, edit, or delete trackback URLs in this field. These modifications are also reflected in the
Trackbacks dialog box.
Note: Some blogs do not support the trackback feature or require you to set a preference to allow it. For more
information, see your blog documentation.
After you add a trackback URL to the blog entry, you can edit, publish, or save it as a draft.
Note: You can add only one trackback URL per line in the Trackbacks dialog box and the Trackback URL(s) field in
the Contribute workspace.
See also
“Set Contribute preferences” on page 30
Allow comments for blog entries
You can use the Blog Defaults option of the Preferences dialog box to specify whether Contribute allows the blog server
to accept comments for your blog entries. If you enable comments, users can enter comments about your blog entries.
You can also allow or disallow comments for individual blog entries.
Page 99

Adding pages, blog entries, and documents
Note: You set a preference to determine whether comments are enabled for blog entries. For more information about
allowing comments for blog entries, see
require you to set a preference to allow it. For more information, see your blog documentation.
1 Browse to a blog entry.
2 Click the Edit Entry button in the toolbar, or select File > Actions > Edit Entry.
3 Do one of the following:
“Set Contribute preferences” on page 30. Some blogs don’t support comments or
USING CONTRIBUTE CS4
• Select or deselect Format > Blog Metadata > Allow Comments to allow or disallow comments for the blog entry.
• Click the Allow Comments button in the toolbar to allow or disallow comments.
4 After you allow or disallow comments for the blog entry, you can edit, post, or save it as a draft.
When you post the blog entry to your blog, a Comments link lets anyone reading the entry post a comment.
About converting documents to PDFs (Windows only)
You can use Contribute to convert Microsoft Office documents, such as Word documents, PowerPoint presentations,
and Excel spreadsheets, to PDF documents, and insert these documents in Adobe Contribute web pages or blog entry
drafts. The process of inserting a Microsoft Office document as a PDF involves conversion of the document to an
Adobe PDF file before it is inserted.
92
The PDF files are uploaded to a folder based on relevant Administrator settings.
See also
“Set Contribute preferences” on page 30
Insert Office documents as PDFs in Contribute pages (Windows only)
You can use Contribute to convert Microsoft Office documents, such as Word documents, PowerPoint presentations,
and Excel spreadsheets, to PDF documents, and insert these documents in Adobe Contribute web pages or blog entry
drafts. The process of inserting a Microsoft Office document as a PDF involves conversion of the document to a PDF
before it is inserted.
Note: If you are inserting a Microsoft Word document or Microsoft PowerPoint presentation, and want to specify the area
of the document to convert, convert the document while working in Word or PowerPoint, and then insert it in your page
in Contribute.
1 In the draft, place the insertion point where you want the PDF document to appear.
2 Select Insert > Document As PDF.
The Open dialog box appears with a list of PDF Convertible Documents.
3 Select an Office document, and then click Open.
Page 100
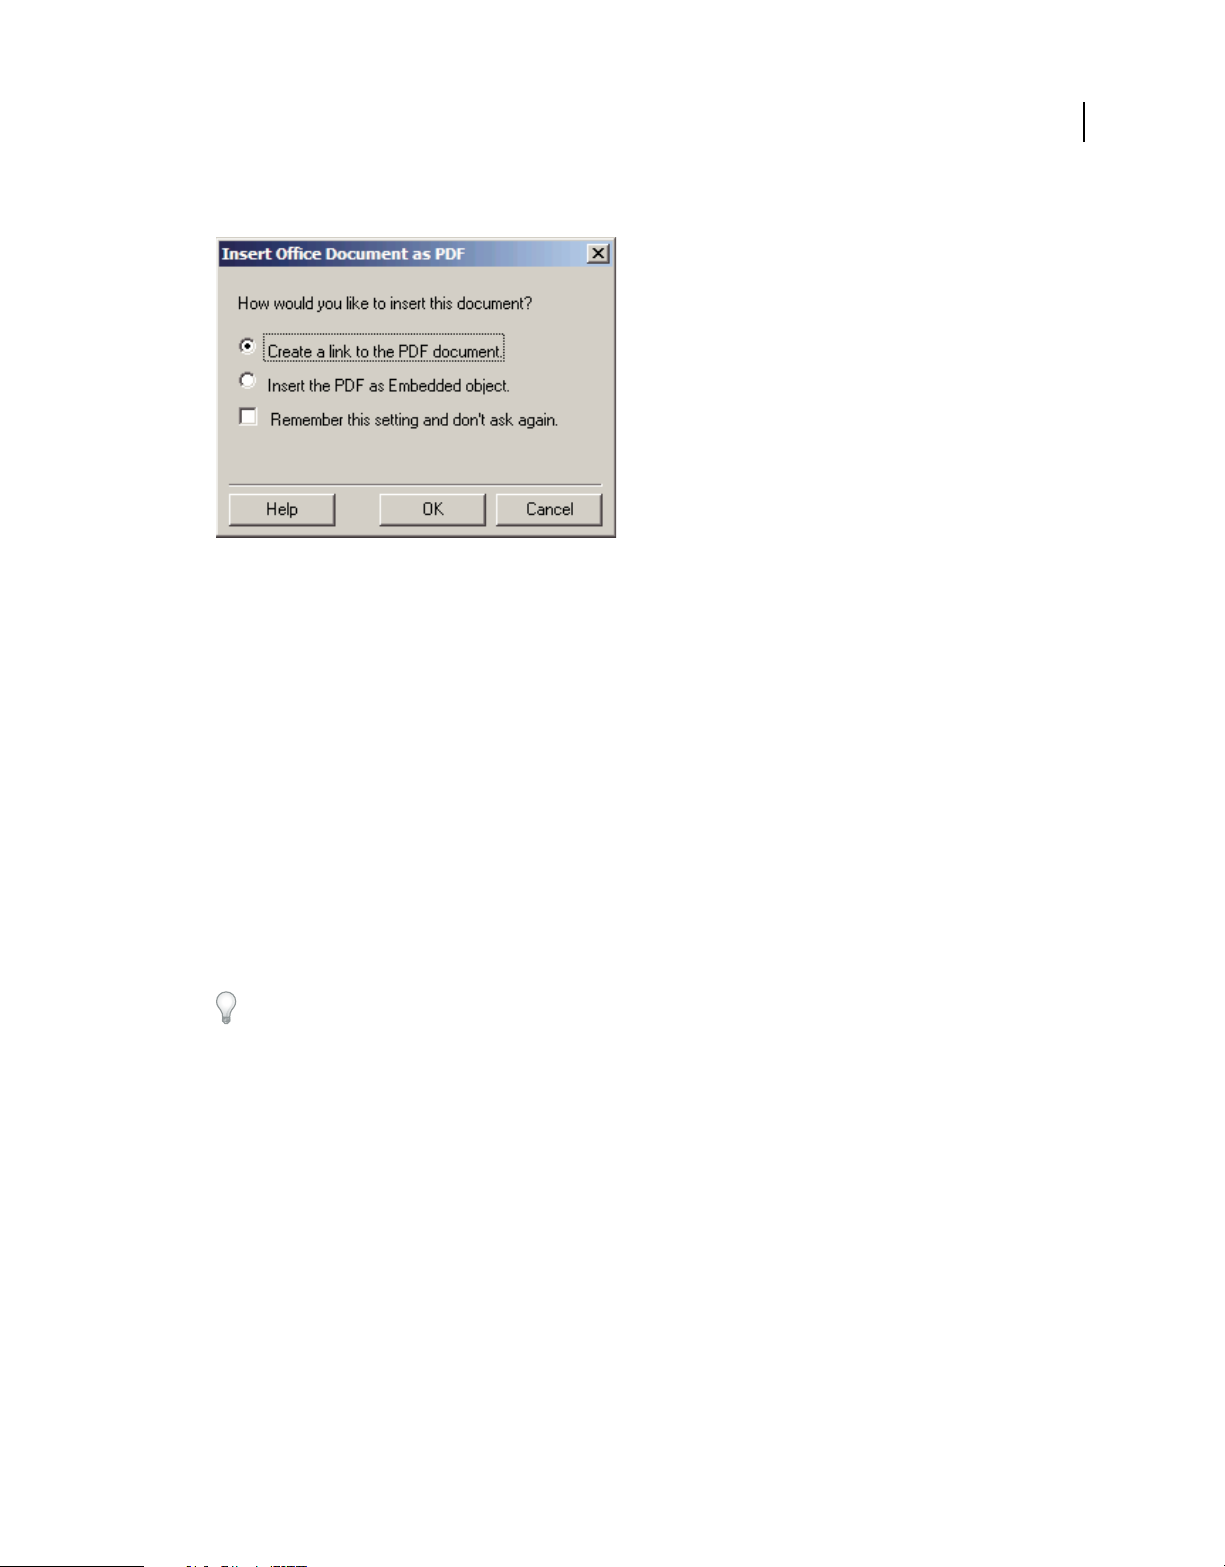
Adding pages, blog entries, and documents
USING CONTRIBUTE CS4
The Insert Office Document As PDF dialog box appears.
4 Select one of the following options:
Create A Link To The PDF Document Converts the document to a PDF, and inserts a link to the selected document.
Insert The PDF As Embedded Object Converts the document to a PDF, and embeds the PDF document as an object.
Note: The Insert the PDF as Embedded Object option is disabled if your website administrator has prevented
embedding of PDFs.
93
5 Select the Remember This Setting And Don't Ask Again check box, if desired.
For more information about settings defined in the Preferences dialog box, see “Setting Microsoft Office document
preferences (Windows only)” on page 41.
6 Click OK.
Contribute converts the document to a PDF document and inserts it as a link or an embedded object into your draft.
Create and insert a PDF document by dragging
1 In the draft, place the insertion point where you want the PDF document to appear.
Reduce the size of the Contribute window so that you can also see the application that contains the file you plan
to drag.
2 Open Windows Explorer.
3 Drag the document to convert, to the insertion point.
The Insert Microsoft Office Document dialog box appears.
4 Select Convert To PDF and create a link to the PDF or Convert To PDF and embed the PDF as Object, and then
click OK.
Contribute converts the document to a PDF document and inserts it into your draft.
Delete a PDF document from a draft
1 In the draft, highlight the PDF document to select it.
2 Press the Delete key.
 Loading...