How it Works
Log In / Sign Up
Buy Points
How it Works
FAQ
Contact Us
Questions and Suggestions
Users
Lynx
Loading...
L
L42R3LP
3
L42R3NG
4
L42TR
L42TRF
L42TRFLP
4
L42TRFNG
2
L42TRLP
4
L42TRNG
3
L500
3
L5000NG
L500ADALP
2
L500ADANG
2
L500ADARLP
2
L500ADARNG
3
L500CART
2
L500FLP
4
L500FNG
4
L500FRLP
5
L500FRNG
3
L500LP
6
L500PS
L500PSF
L500PSFLP
5
L500PSFNG
L500PSFR
L500PSFRLP
5
L500PSFRNG
L500PSLP
6
L500PSNG
4
L500PSR
2
L500PSRLP
6
L500PSRNG
L500REF
6
L500RLP
5
L500RNG
L54
2
L54 (2005)
L54 (2006)
L54-2007
L54-2008
L54 (2010)
L5430
L54-30 (2005)
L5430F
L5430FR2B
2
L5430R2B
L54F
L54FR
2
L54PS
L54PSFR
4
l54Psfr-1
3
L54psfr-1-2007
L54psfr-1-2008
L54PSFR-2
L54PSFR2NG
7
L54PSR
3
l54Psr-1
3
L54psr-1-2007
L54psr-1-2008
L54psr-1-2010
L54PSR-2
L54PSR2NG
2
L54R
L54TR
L54TRF
L54TRFLP
4
L54TRFNG
3
L54TRLP
4
L54TRNG
3
L600
L6000LP
L600ADALP
2
L600ADANG
2
L600ADARLP
2
L600ADARNG
L600CART
L600FLP
4
L600FNG
2
L600FRLP
4
L600FRNG
3
L600LP
3
L600PS
L600PSF
L600PSFLP
5
L600PSFR
L600PSFRLP
5
L600PSFRNG
2
L600PSLP
5
L600PSR
L600PSRLP
2
L600PSRXX
4
L600RLP
4
L600RNG
3
L7000NG
L700CART
L700FLP
4
L700FNG
3
L700FRLP
5
L700LP
6
L700NG
3
Loading...
Loading...
Nothing found
l54Psfr-1
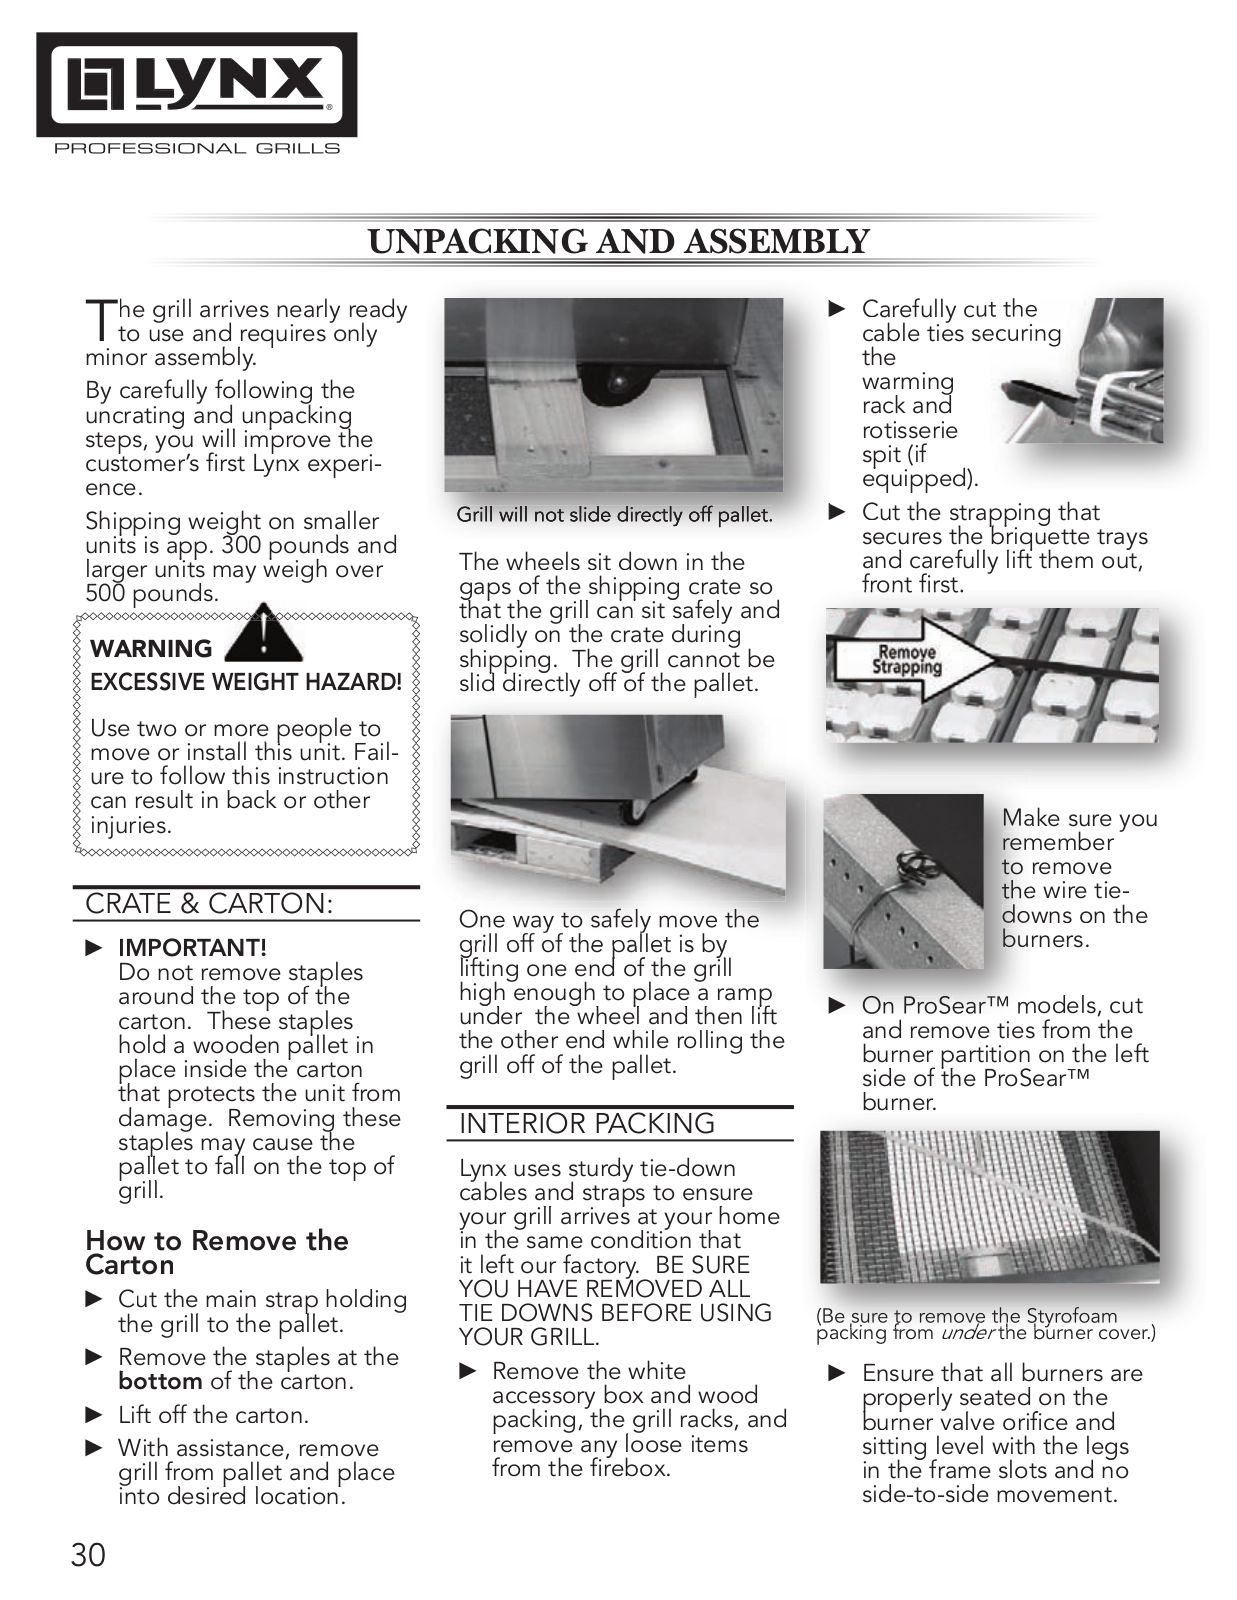
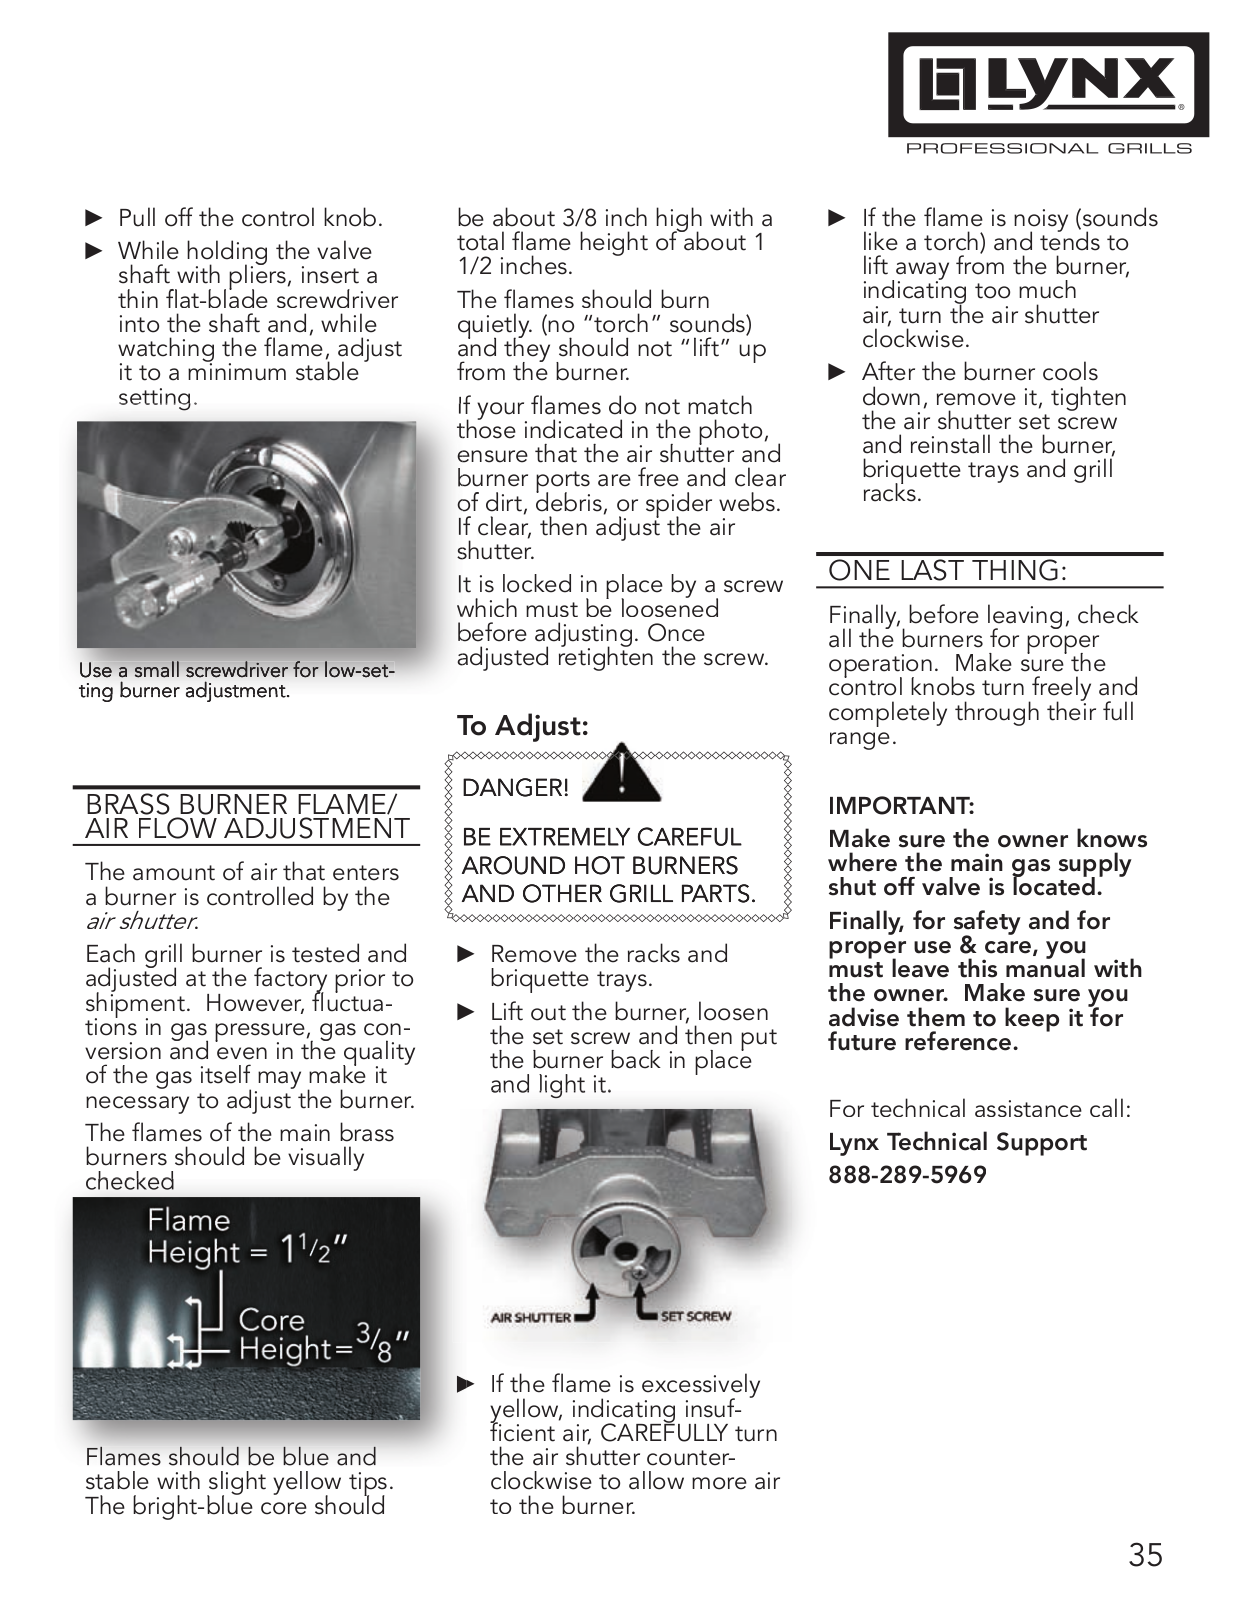
Care & Use/installation Manual
48 pgs
6.32 Mb
0
Use & Installation Manual
48 pgs
20.77 Mb
0
User Manual
48 pgs
6.46 Mb
0
Table of contents
Loading...
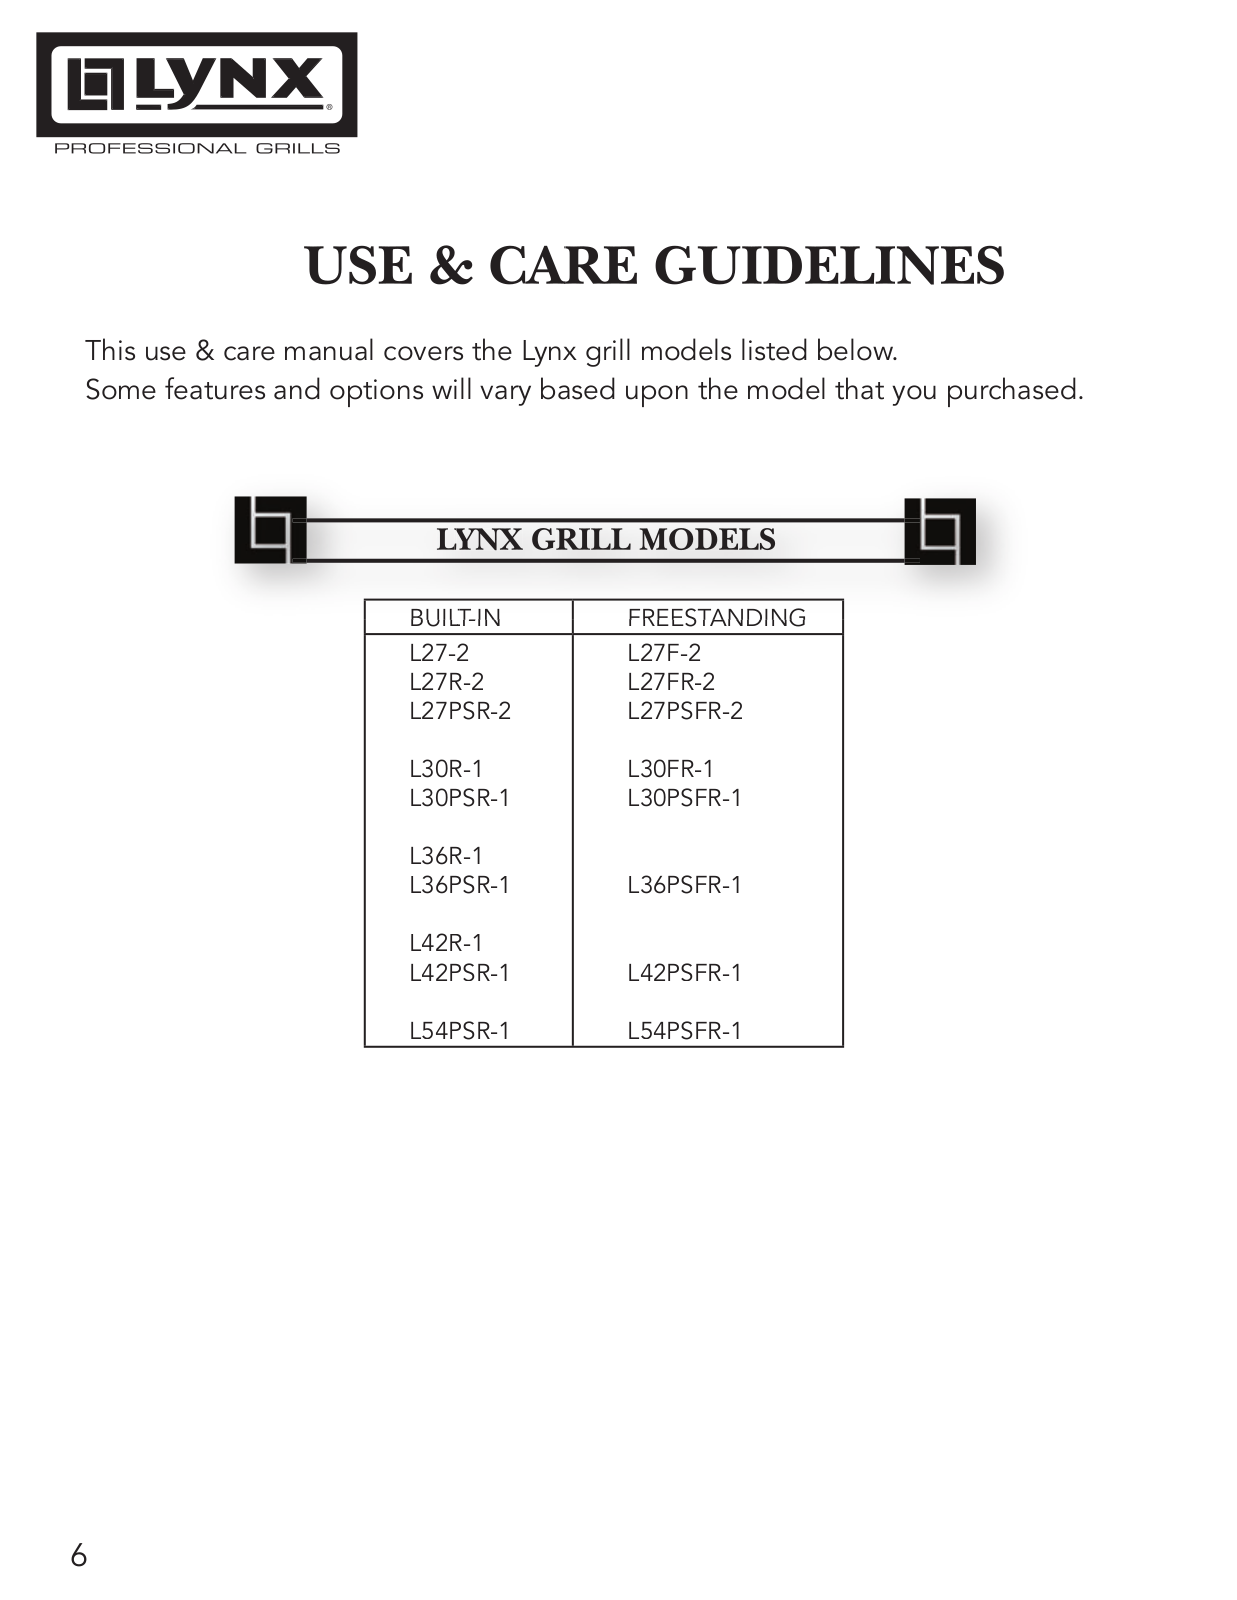
Lynx L54PSFR-1, L30PSFR-1, L30PSR-1, L54PSR-1, L42R-1 User Manual
...
Lynx L54PSFR-1, L30PSFR-1, L30PSR-1, L54PSR-1, L42R-1, L42PSR-1, L36R-1, L42PSFR-1, L36PSFR-1, L27PSR-2, L27-2, L27FR-2, L27F-2, L27R-2, L27PSFR-2, L30R-1, L36PSR-1 User Manual
Download
Specifications and Main Features
Frequently Asked Questions
User Manual
Download
Loading...
+
hidden pages
Unhide
You need points to download manuals.
1 point = 1 manual.
You can buy points or you can get point for every manual you upload.
Buy points
Upload your manuals