

Page 1

Page 2
PROFESSJOJ'-JAL GRILLS
A MESSAGE TO OUR CUSTOMERS...
ou've just joined the world of Lynx
cooks ... a discriminating collection of
amateur and professional chefs that take
outdoor cooking to a new level.
Your grill has been designed and built
with meticulous attention to detail and it
offers some unique and powerful
features. You can achieve maximum
performance and enjoyment of these
features only by carefully reading the Use
& Care manual ... before your first cook-out.
iiiix
It includes important safety tips, great hints for better
griJl!ng and some delectable recipes for you to try.
You JJwant to keep it handy for easy reference.
Also, we enjoy hearing from our customers. We like to
hear about your successes but also about any
difficulties you are having. Please feel free to contact
us with any questions or problems, or just to share ........
a new redp.e You never know, your redpe could
end up in our next printing of this manual! Please
include the model number of your grill in your
correspondence.
With the proper use and care this product wiJJ
provide years of trouble-free service.
Should your Lynx grill change ownership, please
make sure that the new owner receives this manual.
Thanks again for your purchase. Enjoy!
Page 3
PROFESSIONAL GRILLS PROFESSIONAL GRILLS
READ THIS MANUAL CAREFULLY and completely before using your grill to reduce the risk of:
1) Fire
2) Burn hazard, personal injury or property damage
3) Ruined steaks or other unpleasant cooking experiences
4) Unapproved installation or servicing.
THIS PRODUCT IS DESIGNED FOR OUTDOOR USE ONLY. Improper installation, adjustment,
alteration, service or maintenance can cause property damage, injury or death.
Read this manual thoroughly before installation, use, or servicing of this product.
OOOO_.>OOOOOOOOOO<>OOOOOOOOO/OOOOOOOOOOOC>
DANGER
IF YOU SMELL GAS:
1) Shut off all gas supply lines to the grill.
2) Extinguish any open flames.
3) Carefully open lid. Remember, it may be
extremely hot!
4) If odor continues, keep everyone away
from the grill and immediately call your
gas supplier or your fire department.
WARNING
1) DONOTstoreorusegasolineorother
flammablevaporsandliquidsinthe
vicinityofthisoranyotherappliance.
2) AnLPcylindernotconnectedforuse
shallnotbestoredinthevicinityofthis
oranyotherappliance.
c_o_.>OooOOOOO_ooOOoo_oOOOo<>OooOOOOO_ooOo_
DANGER
S'IL Y A UNE ODEUR DE GAZ:
1) Coupez I'admission de gaz de I'appariel.
2) Eteindre toute flamme hue.
3) Ouvrir le couvercle.
4) Si I'odeur persiste, _loignez-vous de
I'appareil et appelez imm_diatement
le fournisseur de gaz ou le service
d'incendie.
WARNING
1) Ne pas entreposer ni utiliser de I'essence
nid autres vap,eurs ou liquides inflam-
mables clans le voisinage de I'appareil,
ni de tout autre appaAn LP cylinder not
connected for use shall not be stored in
the vicnity of this or any other appliance.
2) Une bouteille de propane qui n est pas
raccord@e en vue de son utiJisation, ne
dolt pas _tre entrepos@e dans le voisin-
age de cet appareiJ ou de tout autre
appareil.
O_C_OOOOO_OOOOOOO_ ..... OOOOOOO_
WARNING! CALIFORNIA PROPOSITION 65
1) The burning of gas cooking fuel generates some bymproducts which are on the list of sub-
stances which are known by the State of California to cause cancer or reproductive harm.
2) California law requires businesses to warn customers of potential exposure to such substanc-
es. To minimize exposure to the substances, always operate this unit accordin 9 to the use
and care instructions found in this manual. Be certain to provide adequate ventilation when
cooking.
3) California Proposition 65 lists "Silica, crystalline" which is used in one of the components of
the IR burner, as an agent known to the state of California to cause cancer.
3
Page 4
PROFESSIONAL GRILLS
WARNING
1) Never use dented, rusty or damaged propane cylinders. NEVER store additional or empty
propane cylinders in the grill cabinet or in the vicinity of this or any other appliance. Do not
store propane cylinders indoors or on their sides.
2) Children should NEVER BE LEFT ALONE or unattended in an area where a grill is located.
Place your grill well away from areas where children play. Do not store items that may interest
children in or around the grill, in the cart, or in the masonry enclosure.
3) NEVER move the grill when hot. When in use, portions of the grill are hot enough to cause
severe burns.
4) Always maintain the required clearances from combustibles as detailed. The grill is designed
for outdoor use only. NEVER use in a garage, building, shed, breezeway, or other enclosed
area. Do not use this grill under any overhead combustible construction.
5) Gas grills are not designed or certified for and are not to be installed in or on recreational
vehicles, portable trailers, boats or any other moving installation.
6) ALWAYS have an ABC Fire Extinguisher accessible -- never attempt to extinguish a grease
fire with water or other liquids.
7} STORING YOUR GRILL:Store your grill in a well-ventilated area. If stored indoors, detach
and leave LP. cylinder outdoors in a well-ventilated area away from heat and away from
where children may tamper with it
8) Keep any electrica/supply cord and the fuel supply hose away from any heated surfaces.
Electrical cords should be placed away from walkways to avoid tripping hazard.
9) Do not repair or replace any part of the grill unless specifically recommended in this manual.
Other service should be performed by a qualified technician.
10) If the grill is installed by a professional installer or technician, be sure that he/she shows you
where your gas supply shut-off is located. All gas lines must have a shut-off that is readily and
easily accessible. If you smell gas, check for gas leaks immediately. Check only with a soap
and water solution. (See iNDEX: Leak Testing for further details.) Never check for gas leaks with an
open flame.
11) Inspect the LP gas supply hose prior to each use of the grill. If there is evidence of excessive
abrasion or wear, or the hose is cut, it must be replaced before using the grill
12) Never remove the grounding prong from the plug or use this product with an ungrounded,
2-prong adapter.
13) This manual must remain with the product owner for future reference.
This product complies with ANSI standard Z21.58-2007/CSA 1.6-2007 and has been tested and
approved by Intertek.
To obtain replacement parts or service contact:
Lynx Professional Grills
5895 Rickenbacker
Commerce, CA 90040
888-879-2322
4
Page 5
PROFESSIONAL GRILLS
TABLE OF CONTENTS
A Message to our Customers; ...,.;. .................................................................................... 2
USE &
" ..... .:............................................................................................ 12
U,s_r_g"7 he f roSear BUrr_er........................................................................................... 13
O_irzg The Rotisserie Burrzer ........................................................................................... 14
&Sir_gThe Smoker Box ................................................................................................... 15
Cleaning Your I,ynx Grill ................................................................................................. 16
_oubleshooting Your I,ynx Grill ................................................................................... 19
Poter_ti(d Problems ......................................................................................................... 19
How 7b Obtair_ Service From Lyr_x .................................................................................. 22
The Lyr_x Story ............................................................................................................. 22
Warranty .......................................................................................................................... 23
INSTALLATION GUIDELINES ...................................................... 25
Bef'ore You Start ............................................................................................................... 27
[/shipmer_t arrives (t(_maged .......................................................................................... 27
Unpacking and Assembly ................................................................................................ 30
Electrical Connections ..................................................................................................... 31
Gas Connections ................................................................................................ _:...... , ,°,:32
Wiring Schematics ................................................................. :'-"u'; .........
L27 Non-Rotisserie Grill
L27 & L30 rotisserie Grill ..................................................
L36 & L42 rotisserie Grill ..................................................
L54 rotisserie Grill ............................................................
2010 Lynx Professional Grills Exploded Parts View ...............
2010 Lynx Professional Grills Parts list ..................................
5
Page 6
PROFESSIONAL GRILLS
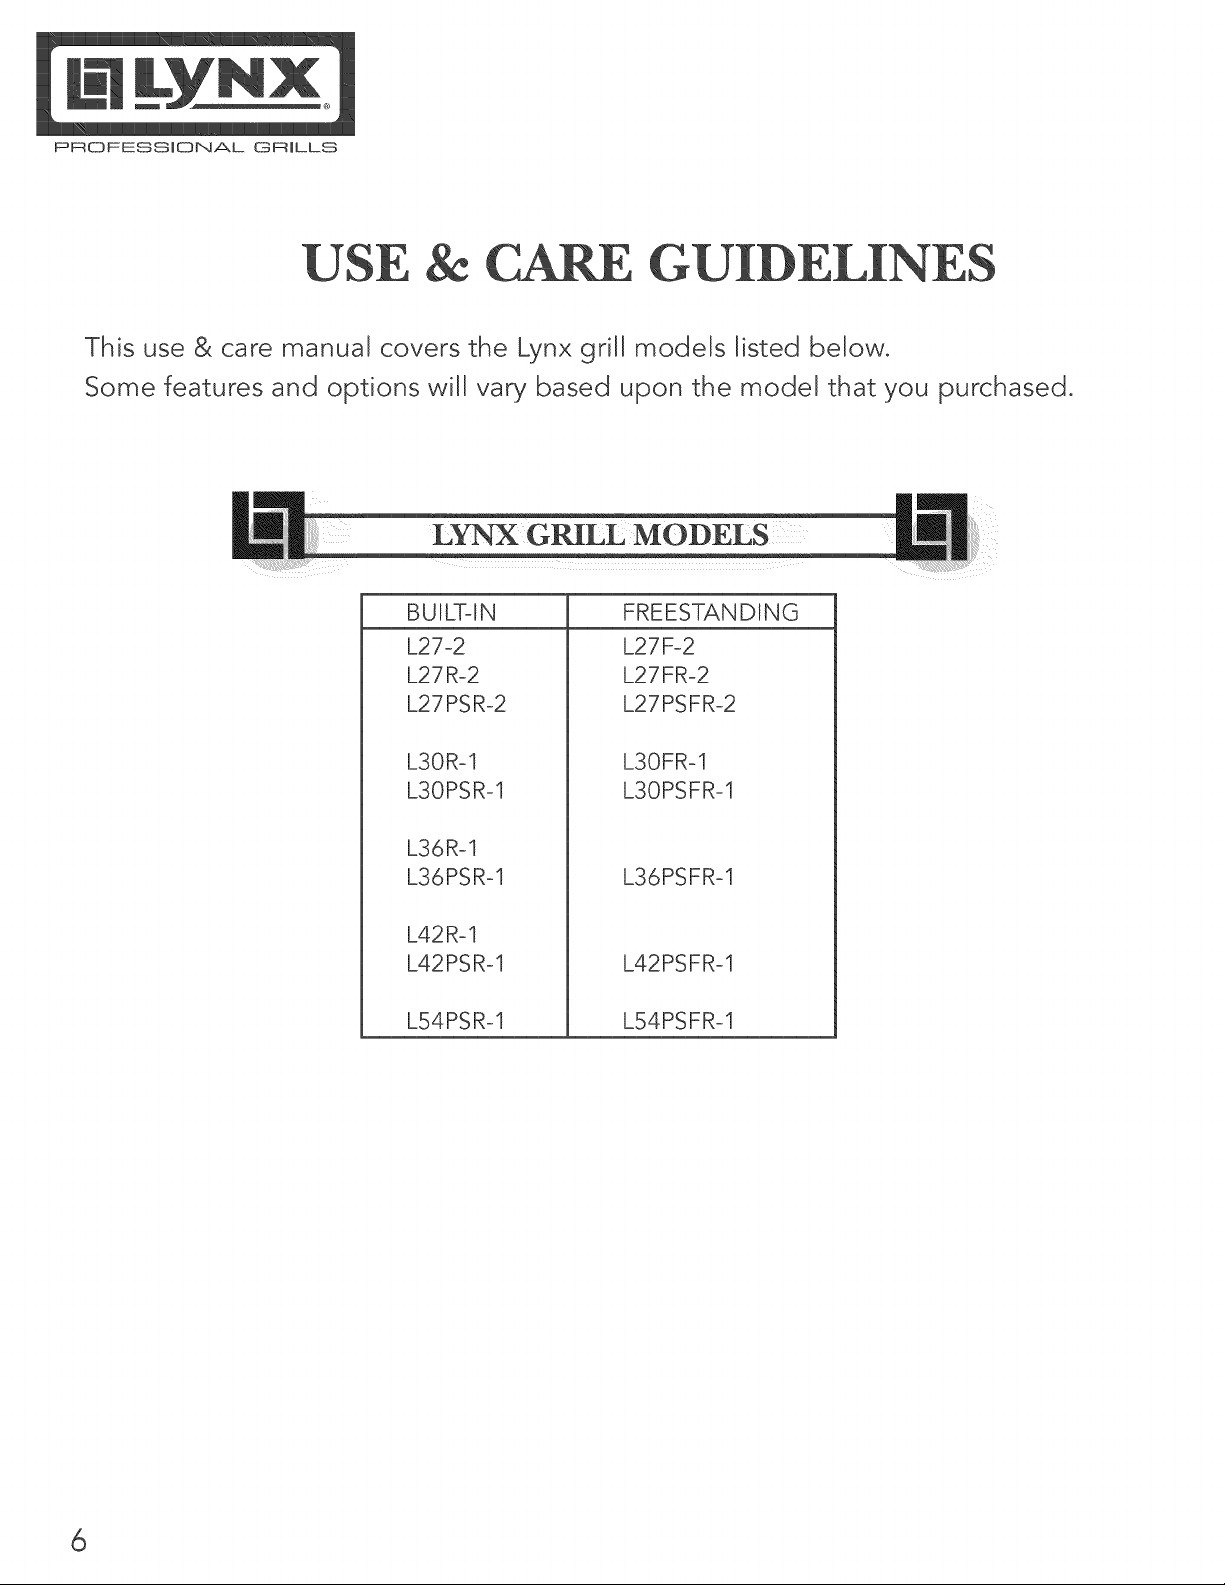
This use & care manual covers the Lynx gd[[ models listed below.
Some features and options wi[[ vary based upon the mode[ that you purchased.
LY__L MOE_ELS
BUILT-IN
L27-2
L27 R-2
L27 PS R-2
L3OR-I
L3OPSR-1
L36R-1
L36PSR-1
L42R-1
L42PSR-1
L54PSR-1
FREESTANDING
L27 F-2
L27 FR-2
L27PSFR-2
L3OFR-I
L3OPSFR-I
L36PSFR-1
L42PSFR-1
L54PSFR-1
6
Page 7
PROFESSHONAL GRHLLS
IMPORTANT SAFETY PRECAUTIONS
PLEASE REVIEW THESE iMPORTANT SAFETY PRECAUTIONS
BEFORE YOU USE YOUR GRmLL
1) NEVER LEAVE THE GRmLL UNATTENDED WHmLE COOKING.
2) Ensure all tie-down wires have been removed from the burners.
3) Always use caution when operating the grill in a windy area. (See UNDEX: "Grilling in Windy Condi-
tions" for further details.)
4) Avoid wearing loose-fitting garments or long sleeves while grilling. They could ignite.
5) Never touch the grill racks, hood or immediate surrounding metal surfaces with your bare hands
while grilling.
6) Use an insulated glove or mitt when opening and operating the grill. Always open the grill lid
slowly to allow heat and smoke to escape before fully opening.
7) The grill hood must be fully opened while lighting the grill. Releasing fuel into a closed grill
before lighting wiJJnot make it light sooner or more efficiently. It will only risk explosion and
personal injury or death. Never Jean over hot grill surface or look directly into the grill when at-
tempting to light.
8) Do not heat unopened food containers as pressure build-up will cause the container to ex-
plode.
9) Do not use aluminum foil to line grill racks or drip pans. This wiJl alter the airflow or trap exces-
sive heat in the control area and can melt knobs and ignition modules. Such damage is specifi-
cally excluded from your warranty.
10) Never use charcoal or any other solid fuel in the grill.
11) Cooking excessively fatty meats and oils wiJJcause flare ups. Internal fires or damage caused by
them or by the grill being left unattended while cooking are not covered under the terms and
conditions of our warranty.
12) Never grill without the drip pan in place. Always ensure the drip pan is pushed all the way to
the back of the grill. Hot grease can leak downward and produce a fire or explosion.
13) Grease is extremely flammable. Let hot grease cool down before attempting to handle or dis-
pose of it. The drip tray should be cleaned of grease on a regular basis.
14) Do not use the grill unless a leak check has been performed on aJJgas connections. (SeeUNDEX:
"Leak Test Procedure" for further details.)
15) Never operate the grill while under the influence of alcohol or drugs.
16) Do not Jean on side shelves and never place a load weighing more than 25 pounds on a side
shelf.
17) If any burner does not light or goes out during operation, turn off aJJgas control knobs, open
the hood and wait five (5) minutes before attempting to redight.
Page 8
PROFESSIONAL GRILLS
18) Portable LP cylinders: Always shut off the main valve on the LP cylinder after each use.
19) Spiders and insects like to nest in the burners, venturis, valves and orifices of a grill, disrupting
the gas flow. This very dangerous condition can cause a fire behind the control panel, damag-
ing the grill and risking personal injury. If your grill has been unused for a long time, !,nspect
and dean the burners, venturis, valves and orifices. (See UNDEX: Cleaning the Brass Burner for further
details.)
o RI I[N GIN NDY COND IT][ O N S
\v ,° ...........
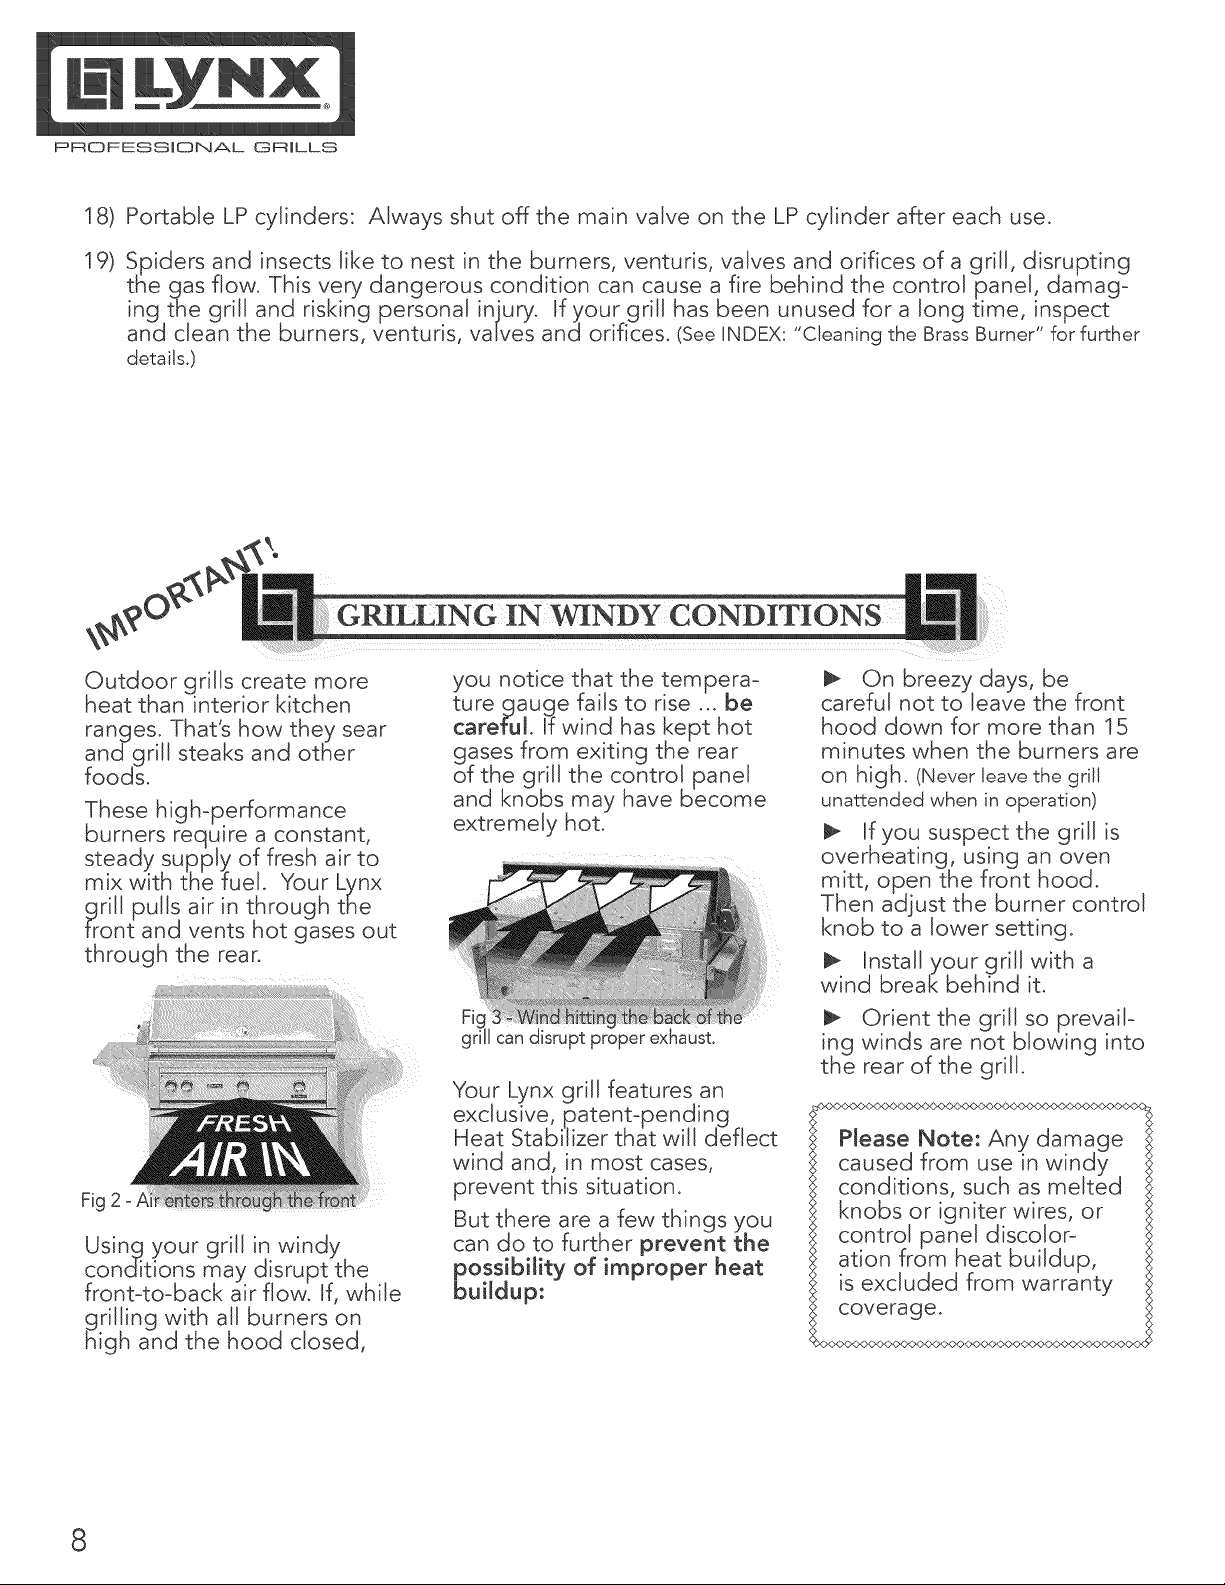
Outdoor grills create more
heat than interior kitchen
ranges. That's how they sear
andgrill steaks and other
foods.
These high-performance
burners require a constant,
steady supply of fresh air to
mix with the fuel. Your Lynx
9rill pulls air in through the
tront and vents hot gases out
through the rear.
Using. your grill in windy
conditions may disrupt the
front-to-back air flow. If, while
rilling with all burners on
igh and the hood closed,
you notice that the tempera-
ture gauge fails to rise ... be
careful. If wind has kept hot
gases from exiting the rear
of the grill the control panel
and knobs may have become
extremely hot.
Fi
can disrupt proper exhaust.
g
Your Lynx grill features an
exclusive, patent-pending
Heat Stabilizer that will deflect
wind and, in most cases,
prevent this situation.
But there are a few things you
can do to further prevent the
possibility of improper heat
buildup:
I_ On breezy days, be
careful not to leave the front
hood clown for more than 15
minutes when the burners are
on high. (Never leave the grill
unattended when in operation)
I_ If you suspect the grill is
overheating, using an oven
mitt, open the front hood.
Then adjust the burner control
knob to a lower setting.
Install your grill with a
wind break behind it.
1_ Orient the grill so prevail-
ing winds are not blowing into
the rear of the grill.
Please Note: Any damage
caused from use in windy
conditions, such as melted
knobs or igniter wires, or
control panel discolor-
ation from heat buildup,
is excluded from warranty
coverage.
<_>OO_JOOO<)OO<>OOO_O<>OOO_O<>OOO_X)OOOOO<'X>OO
8
Page 9
USING YOUR GRILL
PROFESSIONAL GRILLS
rilling requires high heat
for searing and low, con-
trolled heat for slow cooking.
Thinner cuts of food are often
cooked at a "HI" heat setting
with the lid open.
On the other hand, large,
thick pieces of meat or
poultry are often first seared
at the k/gk setting and then
grilled at a/owersett/'ng ...
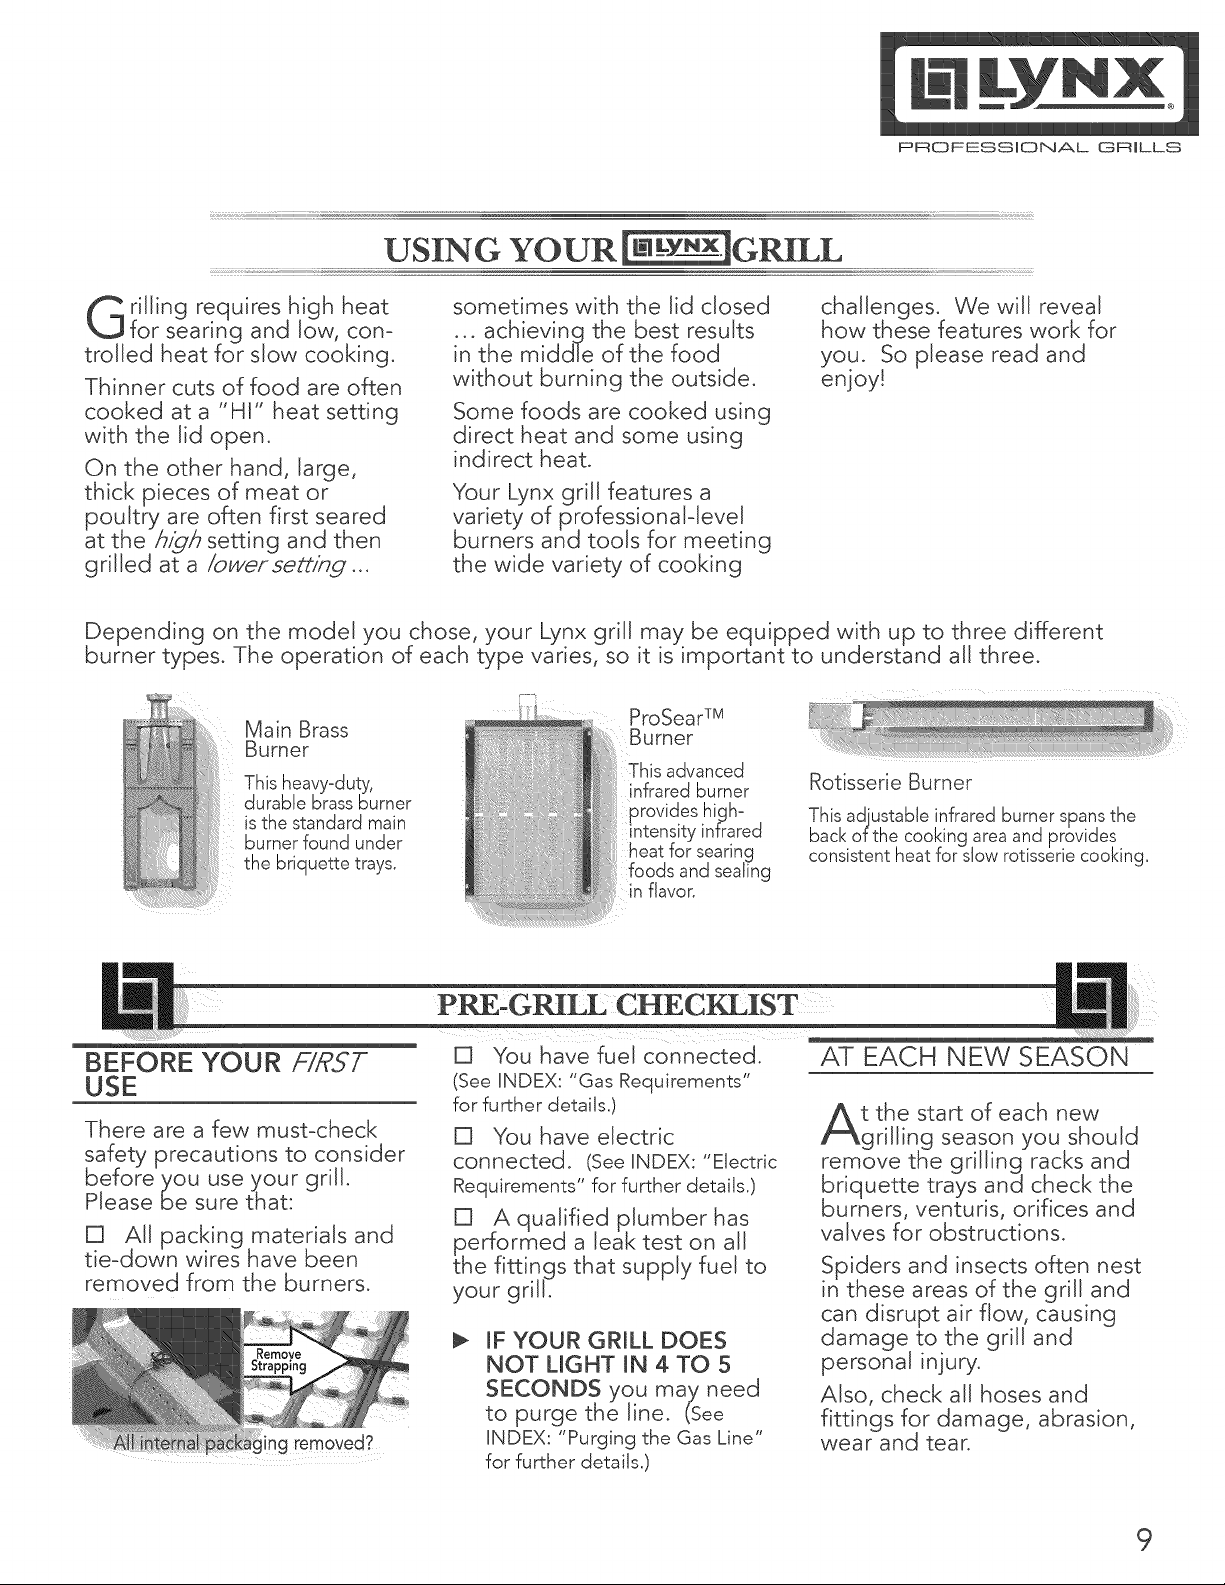
Depending on the model you chose, your Lynx grill may be equipped with up to three different
burner types. The operation of each type varies, so it is important to understand all three.
Main Brass Burner
B urn e r
This heavy-duty, infrared burner
durable brass burner
is the standard main }ity infrared
burner found under
the briquette trays, foods and sealing
sometimes with the lid closed
... achieving the best results
in the middle of the food
without burning the outside.
Some foods are cooked using
direct heat and some using
indirect heat.
Your Lynx grill features a
variety of professional-level
burners and tools for meeting
the wide variety of cooking
ProSear TM
This advanced
)rovides high-
searing
in flavor.
challenges. We wiJJ reveal
how these features work for
you. So please read and
enjoy!
Rotisserie Burner
This adjustable infrared burner spans the
back of the cooking area and provides
consistent heat for slow rotisserie cooking,
BEFORE YOUR FIRST
USE
There are a few must-check
safety precautions to consider
before you use your grill.
Please be sure that:
[] All packing materials and
tie-down wires have been
removed from the burners.
]mg removed?
PRE,GR I CHECKL'IST
[] You have fuel connected.
(See INDEX: "Gas Requirements"
for further details.)
[] You have electric
connected. (See iNDEX: "Electric
Requirements" for further details.)
[] Aqualified plumber has
performed a leak test on all
the fittings that supply fuel to
your grill.
IF YOUR GRILL DOES
NOT LIGHT IN 4 TO 5
SECONDS you may need
to purge the line. (See
iNDEX: "Purging the Gas Line"
for further details.)
AT EACH NEW SEASON
t the start of each new
grilling season you should
remove the grilling racks and
briquette trays and check the
burners, venturis, orifices and
valves for obstructions.
Spiders and insects often nest
in these areas of the grill and
can disrupt air flow, causing
damage to the grill and
personal injury.
Also, check all hoses and
fittings for damage, abrasion,
wear and tear.
9
Page 10
PROFESSIONAL GRILLS
BEFORE EA 04
USE
Before any use, always make
sure that:
[] ... you do not smell gas
before you light the grill. If
you do smell gas, shut every-
thing off and have a qualified
plumber check for leaks.
[] ...YOU NEVER LEAVE THE
GRILL UNATTENDED WHILE
COOKING.
[] ... the cooking area is free
and clear of any combustibles,
besides your food, that might
ignite.
[] ... the control knobs turn
freely.
[] ... if you are using a
portable propane cylinder, it is
securely connected and leak
tested. (See INDEX: "Cylinder
Retention Instructions" for details.)
[] ... you know where the
main gas supply shut-off is
located
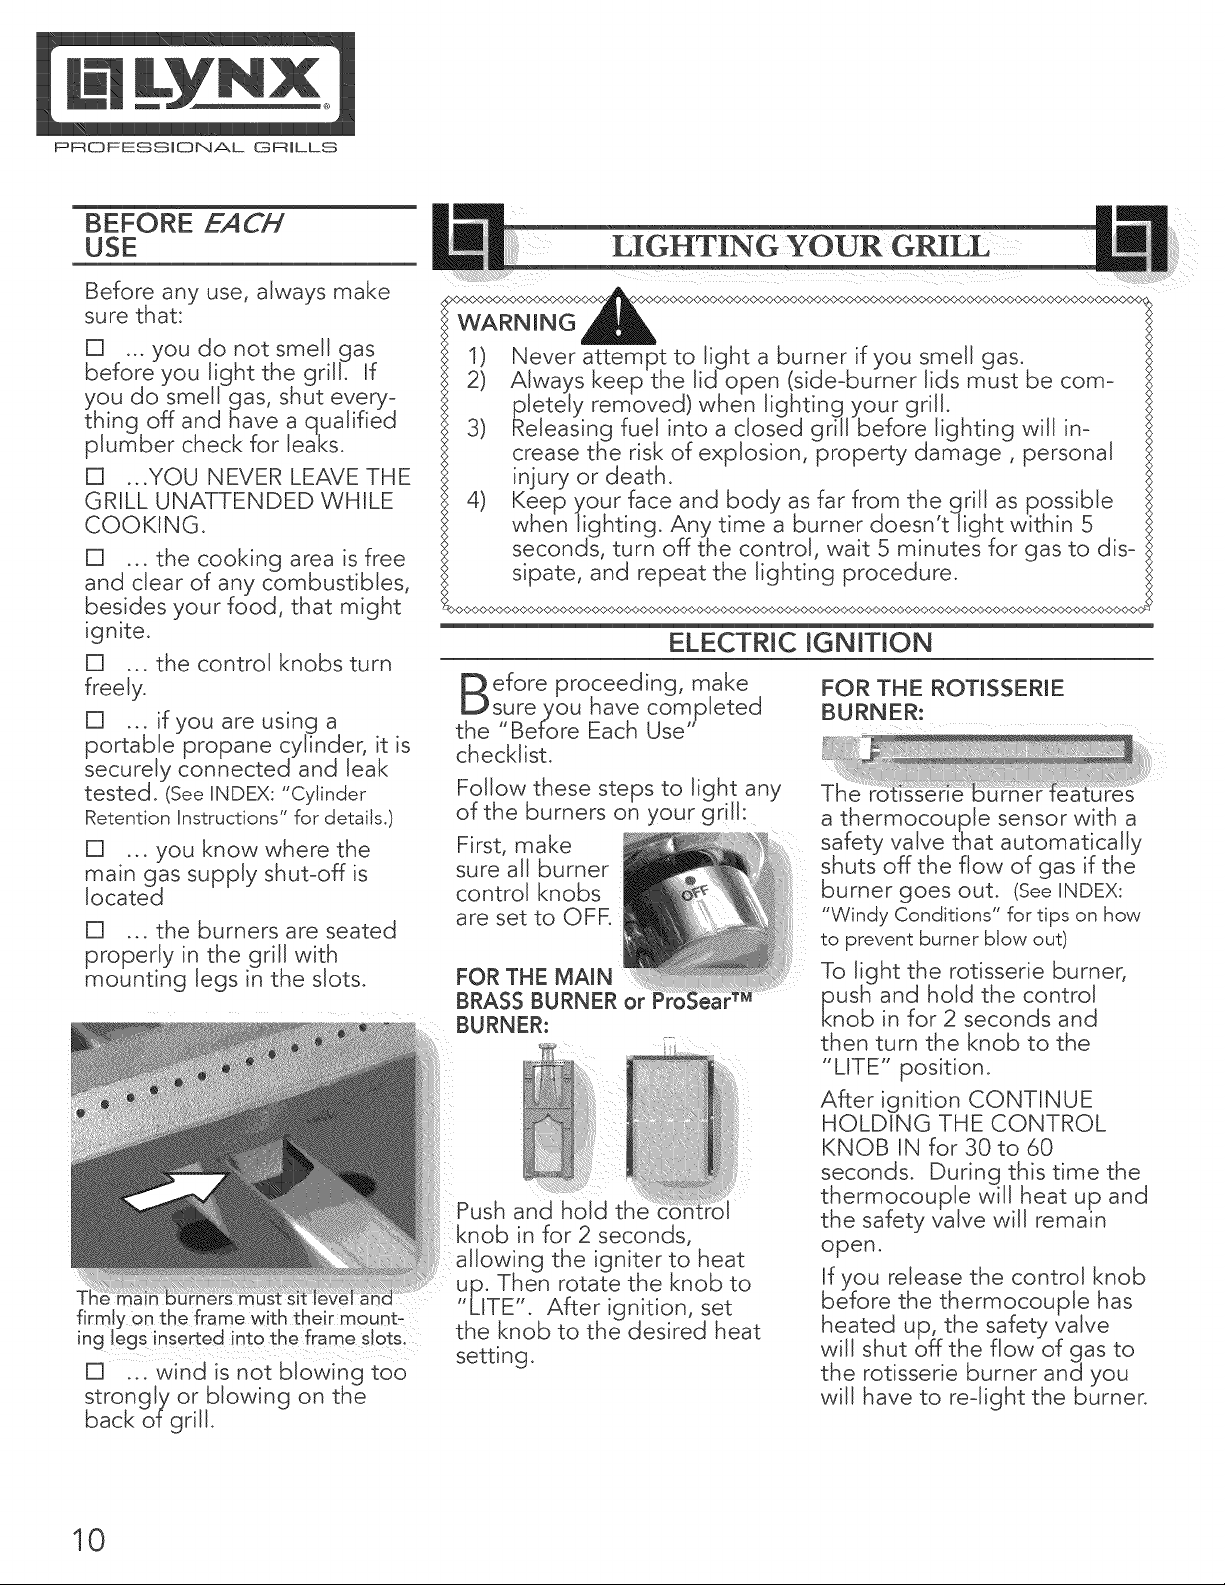
[] ... the burners are seated
properly in the grill with
mounting legs in the slots.
firmly on the frame with their mount:
in9 !egs inserte d into the frame slots.
[]
strongly or blowing on the
back of grill.
WARNING
1) Never attempt to light a burner if you smell gas.
2) Always keep the lid open (side-burner lids must be com-
pletely removed) when lighting your grill.
3) Releasing fuel into a closed grill before lighting will in-
crease the risk of explosion, property damage, personal
injury or death.
4) Keep your face and body as far from the grill as possible
when lighting. Any time a burner ctoesn t light within 5
seconds, turn off the control, wait 5 minutes for gas to dis-
sipate, and repeat the lighting procedure.
ELECTRIC IGNITION
efore proceeding, make
sureyou have completed
the Before Each Use"
checklist.
Follow these steps to light any
of the burners on your grill:
First, make
sure all burner
control knobs
are set to OFR
Push and hold
in for 2 seconds,
allowing the igniter to heat
up. Then rotate the knob to
"LITE". After ignition, set
the knob to the desired heat
setting.
FOR THE ROTISSERIE
BURNER:
a thermocouple sensor with a
safety valve that automatically
shuts off the flow of gas if the
burner goes out. (See INDEX:
"Windy Conditions" for tips on how
to prevent burner blow out)
To light the rotisserie burner,
push and hold the control
knob in for 2 seconds and
then turn the knob to the
"LITE" position.
After ignition CONTINUE
HOLDING THE CONTROL
KNOB IN for 30 to 60
seconds. During this time the
thermocouple will heat up and
the safety valve will remain
open.
If you release the control knob
before the thermocouple has
heated up, the safety valve
will shut off the flow of gas to
the rotisserie burner and you
will have to re-light the burner.
:ures
10
Page 11
PROFESSIONAL GRILLS
WARNING: PROPANE
Extremely cold temperatures
may cause your ProSear TM
burner to light/hs/b/e the
burner instead of out-
s/de. Once lit, if you hear a
'whooshing' sound, imme-
diately turn the burner knob
off to extinguish the flame
and then immediately re-
light the burner.
MANUAL LIGHTING
f a burner doesn't light after
several attempts, it can be
match lit using the lighting rod
stored in the drip tray.
Match-lighting your grill is
done in one of three ways,
depending upon which
burners are being lit.
First, make sure you've
returned all of the control
knobs to the OFF position
and have allowed 5 minutes
for any accumulated gas to
dissipate before attempting to
match light a burner.
Using the lighting rod, place a
lit match infront of the manual
lighting tube for the burner
you wish to light. (See photo)
Push and turn the correspond-
ing burner control knob to
"LITE". If the burner doesn't
light within 5 seconds turn the
knob off and wait 5 minutes
before attempting to light it
again. Once [it, gas will stop
flowing through the manual
lighting tube.
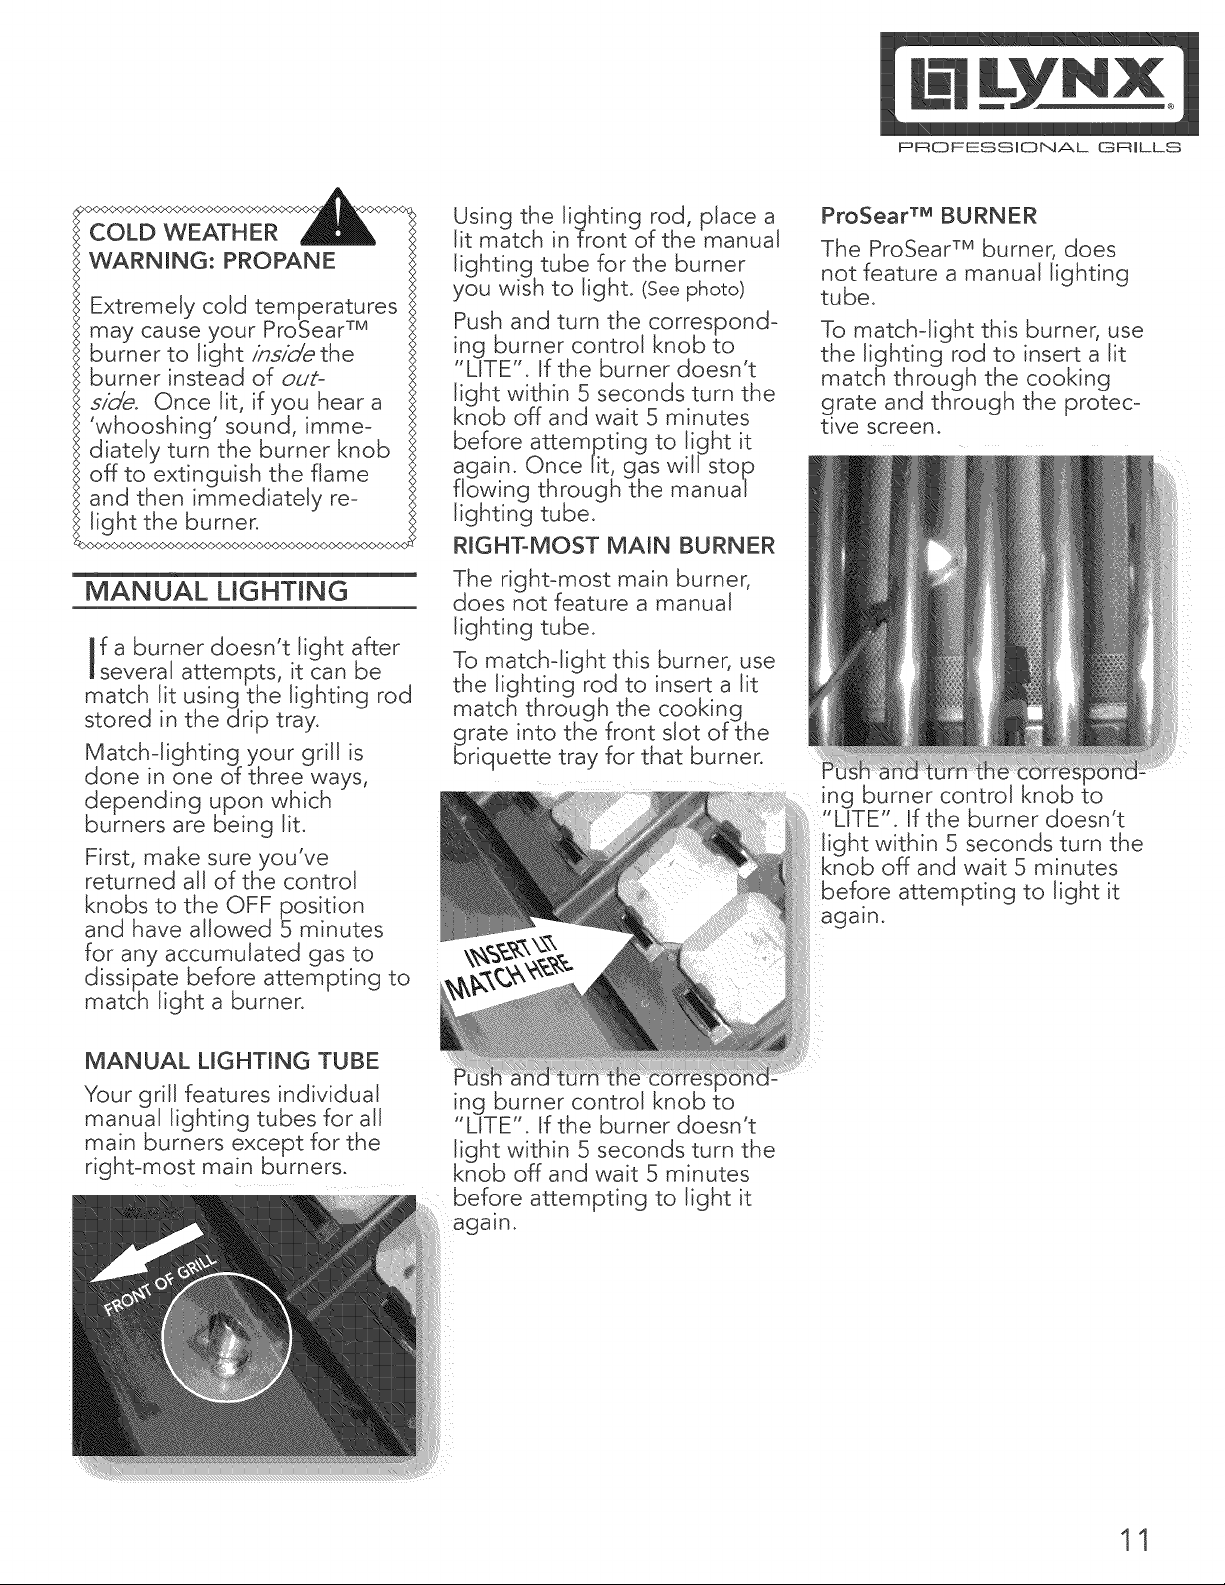
RIGHT-MOST MAIN BURNER
The right-most main burner,
does not feature a manual
lighting tube.
To match-light this burner, use
the lighting rod to insert a lit
match through the cooking
grate into the front slot of the
briquette tray for that burner.
ProSear TM BURNER
The ProSear TM burner, does
not feature a manual lighting
tube.
To match-light this burner, use
the lighting rod to insert a lit
match through the cooking
grate and through the protec-
tive screen.
ing burner control knob to
"LITE". If the burner doesn't
ht within 5 seconds turn the
off and wait 5 minutes
before attempting to light it
again.
MANUAL LIGHTING TUBE
Your grill features individual
manual lighting tubes for all
main burners except for the
right-most main burners.
ing burner control knob to
"LITE". If the burner doesn't
light within 5 seconds turn the
knob off and wait 5 minutes
before attempting to light it
11
Page 12
PROFESSIONAL GRILLS
re-heating your grill every
time you use it is extremely
important. Pre-heating allows
the briquettes to properly
heat up, providing more even
and more consistent cooking
resu Its.
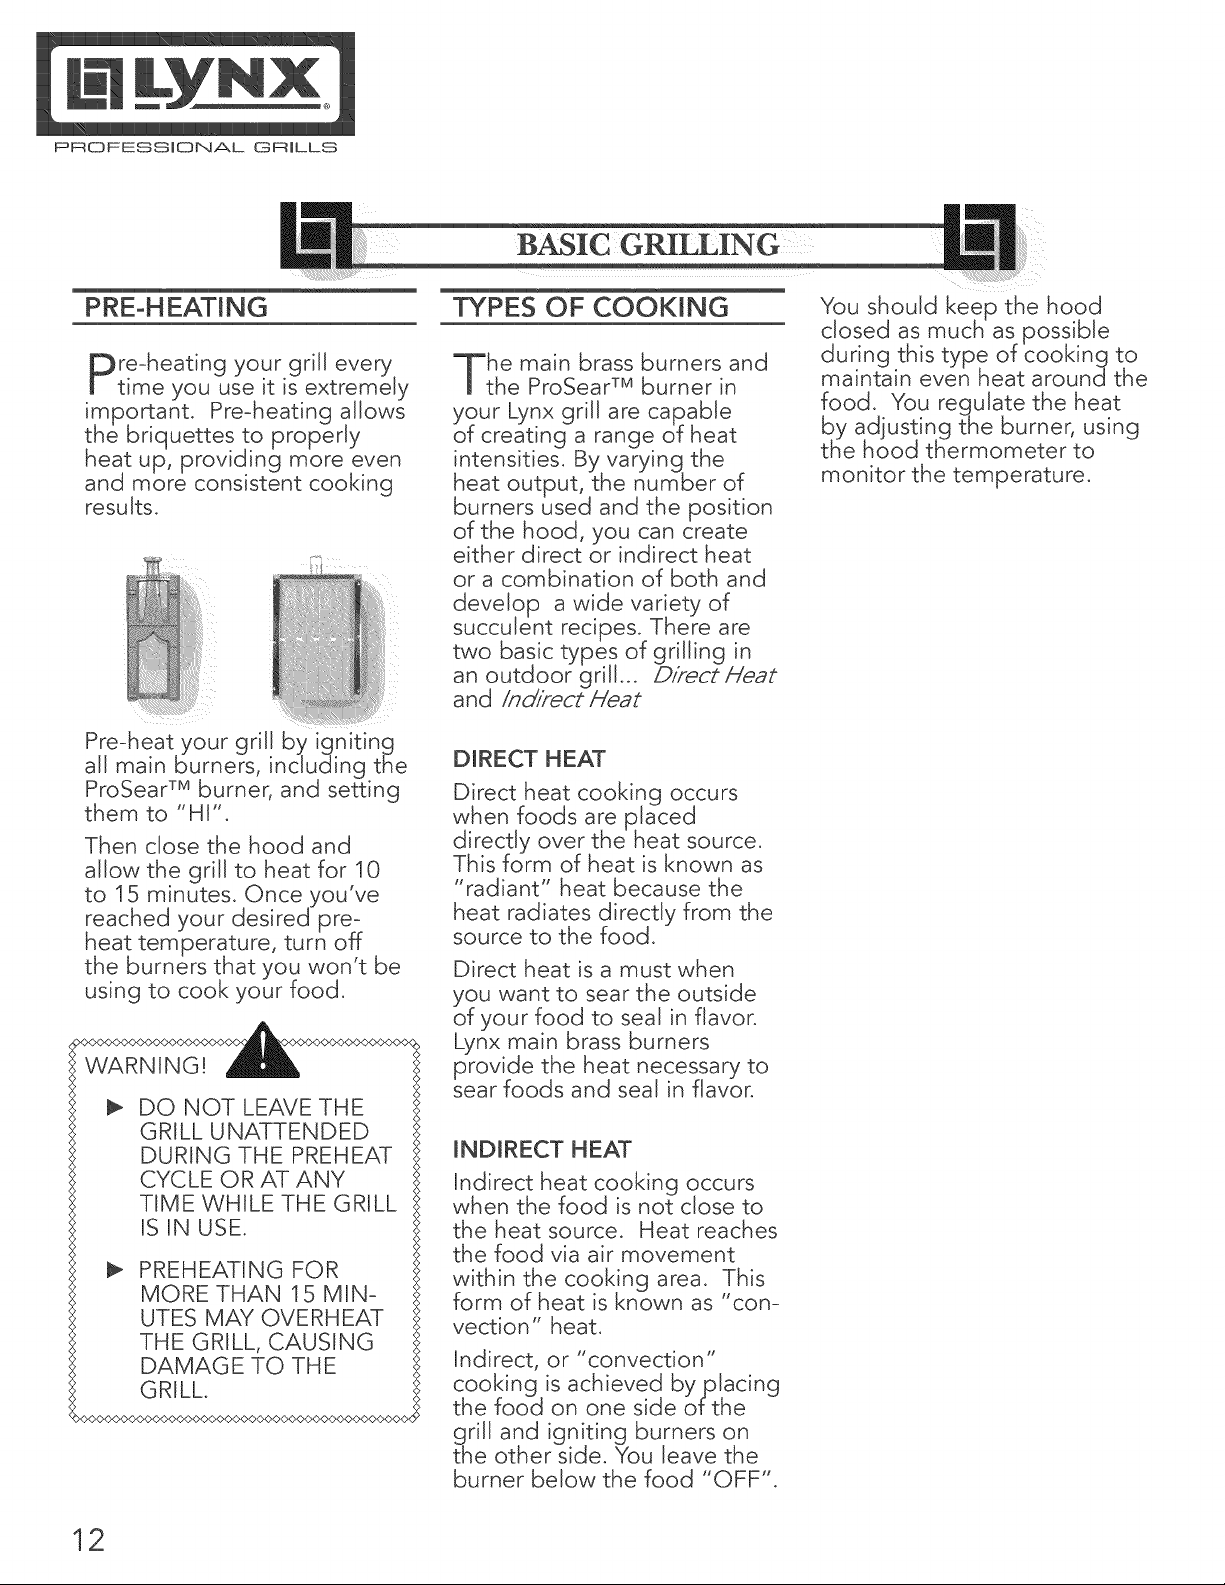
Pre-heat your grill by igniting
all main burners, including the
ProSear TM burner, and setting
them to "HI".
Then close the hood and
allow the grill to heat for 10
to 15 minutes. Once you've
reached your desired pre-
heat temperature, turn off
the burners that you won t be
using to cook your food.
WARNING!
DO NOT LEAVE THE
GRILL UNATTENDED
DURING THE PREHEAT
CYCLE OR AT ANY
TIME WHILE THE GRILL
IS IN USE.
PREHEATING FOR
MORE THAN 15 MIN-
UTES MAY OVERHEAT
THE GRILL, CAUSING
DAMAGE TO THE
GRILL.
>O_O#
TYPES OF COOKING
he main brass burners and
the ProSear TM burner in
your Lynx grill are capable
of creating a range of heat
intensities. By varying the
heat output, the number of
burners used and the position
of the hood, you can create
either direct or indirect heat
or a combination of both and
develop a wide variety of
succulent recipes. There are
two basic types of grilling in
an outdoor grill... D_?ectHeat
and/nc//?ect Heat
DIRECT HEAT
Direct heat cooking occurs
when foods are placed
directly over the heat source.
This form of heat is known as
"radiant" heat because the
heat radiates directly from the
source to the food.
Direct heat is a must when
you want to sear the outside
of your food to seal in flavor.
Lynx main brass burners
provide the heat necessary to
sear foods and seal in flavor.
INDIRECT HEAT
Indirect heat cooking occurs
when the food is not close to
the heat source. Heat reaches
the food via air movement
within the cooking area. This
form of heat is known as "con-
vection" heat.
Indirect, or "convection"
cooking is achieved byplacing
the food on one side of the
grill and igniting burners on
the other side. You leave the
burner below the food "OFF".
You should keep the hood
closed as much as possible
during this type of cooking to
maintain even heat around the
food. You regulate the heat
by adjusting the burner, using
the hood thermometer to
monitor the temperature.
12
Page 13
7 USING PROSEAR BURNER
PROFESSIONAL GRILLS
_rofessional
resta urant
:hefs have
,s relied
of heat
red
heat ... to create a higher
searing temperature than
what standard burners can
achieve. So Lynx provides the
ProSear TM infrared burner.
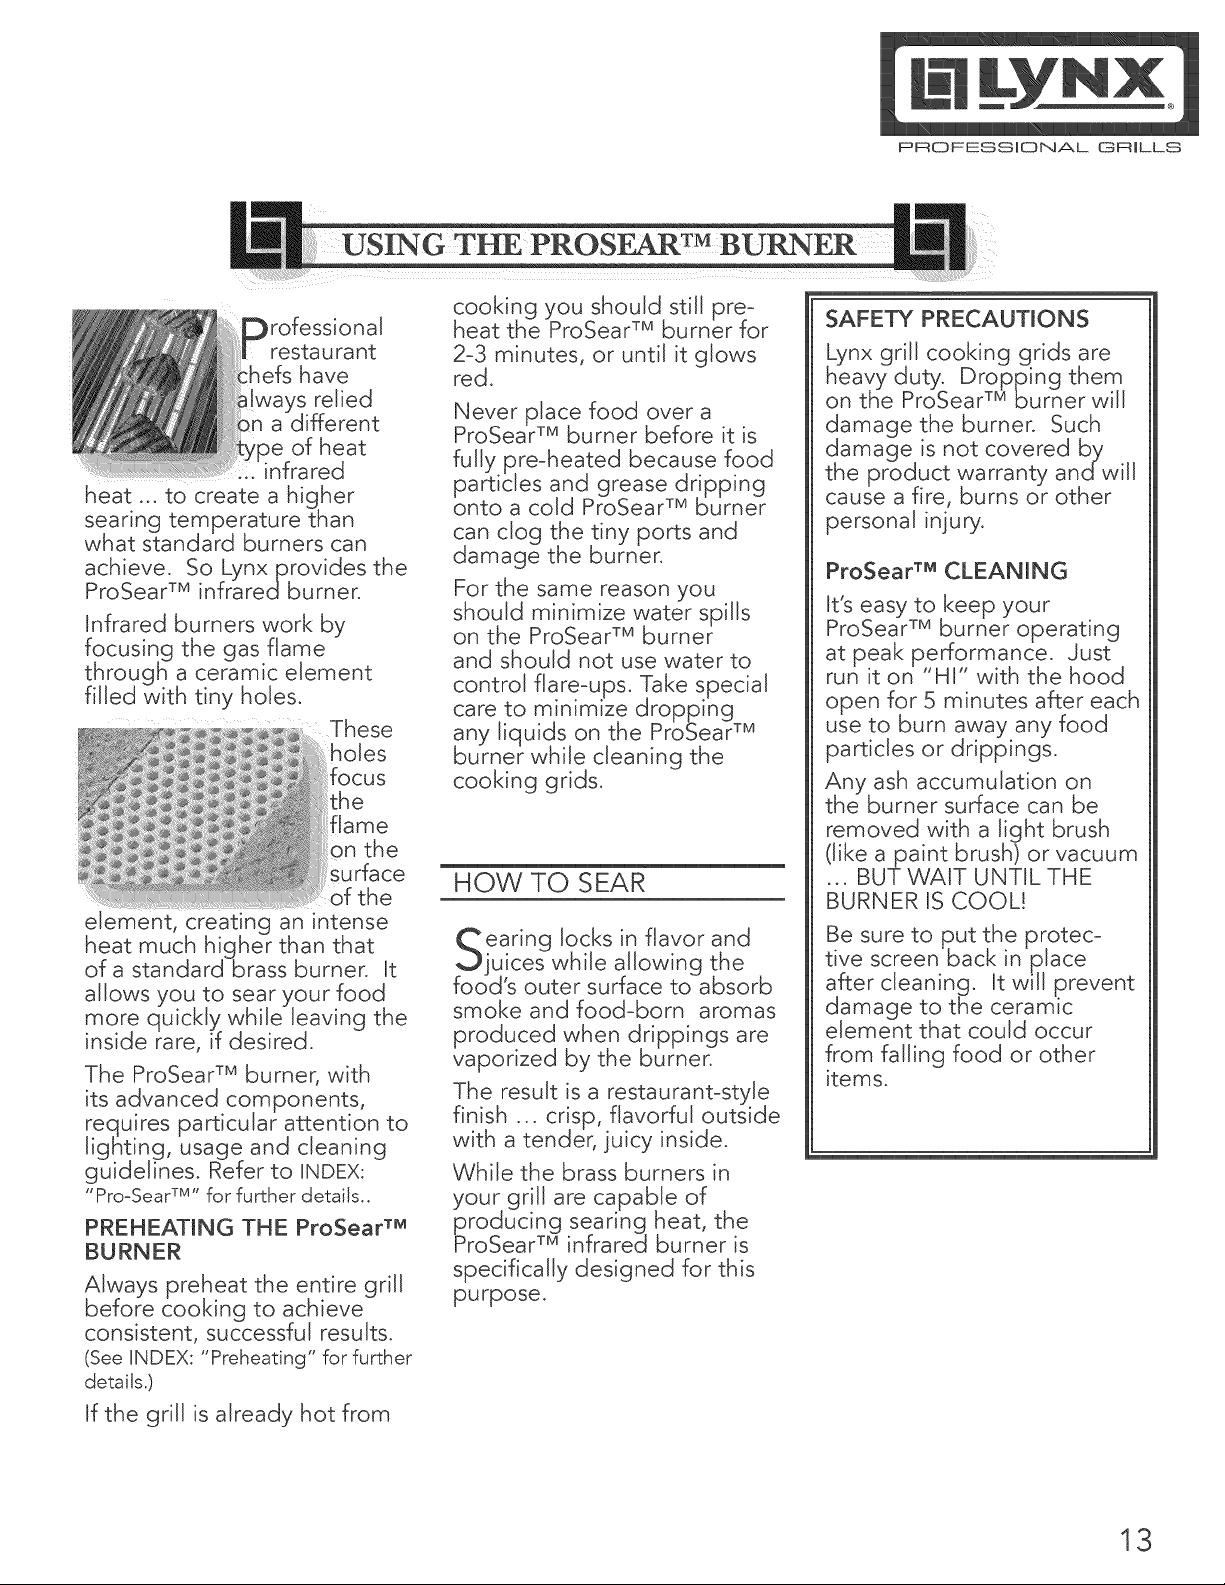
Infrared burners work by
focusing the gas flame
through a ceramic element
filled with tiny holes.
These
holes
focus
the
flame
on the
surface
of the
element, creating an intense
heat much higher than that
of a standard brass burner. It
allows you to sear your food
more quickly while leaving the
inside rare, if desired.
The ProSear TM burner, with
its advanced components,
requires particular attention to
lighting, usage and cleaning
guidelines. Refer to UNDEX:
"Pro-Sear TM''for further details..
PREHEATING THE ProSear TM
BURNER
Always preheat the entire grill
before cooking to achieve
consistent, successful results.
(See UNDEX: "Preheating" for further
details.)
If the grill is already hot from
cooking you should still pre-
heat the ProSear TM burner for
2-3 minutes, or until it glows
red.
Never place food over a
ProSear TM burner before it is
fully pre-heated because food
particles and grease dripping
onto a cold ProSear TM burner
can clog the tiny ports and
damage the burner.
For the same reason you
should minimize watereSpills
on the ProSear TM burn
and should not use water to
control flare-ups. Take special
care to minimize dropping
any liquids on the ProSear TM
burner while cleaning the
cooking grids.
HOW TO SEAR
earing locks in flavor and
ju!ces while allowing the
food s outer surface to absorb
smoke and food-born aromas
produced when drippings are
vaporized by the burner.
The result is a restaurant-style
finish ... crisp, flavorful outside
with a tender, juicy inside.
While the brass burners in
your grill are capable of
producing searing heat, the
ProSear TM infrared burner is
specifically designed for this
purpose.
SAFETY PRECAUTIONS
nx grill cooking grids are
eavy duty'. Dropping them
on the ProSear TM burner will
damage the burner. Such
damage is not covered by
the product warranty and will
cause a fire, burns or other
personal injury.
ProSear TM CLEANING
It's easy to keep your
ProSear TM burner operating
at peak performance. Just
run it on "HI" with the hood
open for 5 minutes after each
use to burn away any food
particles or drippings.
Any ash accumulation on
the burner surface can be
removed with a light brush
(like a paint brush) or vacuum
... BUT WAIT UNTIL THE
BURNER IS COOL!
Be sure to put the protec i
tive screen back in place
after cleaning. It will prevent
damage to the ceramic
element that could occur
from falling food or other
items.
13
Page 14
PROFESSIONAL GRILLS
J_ i!i!ii!i!i!i_i'_!i'__
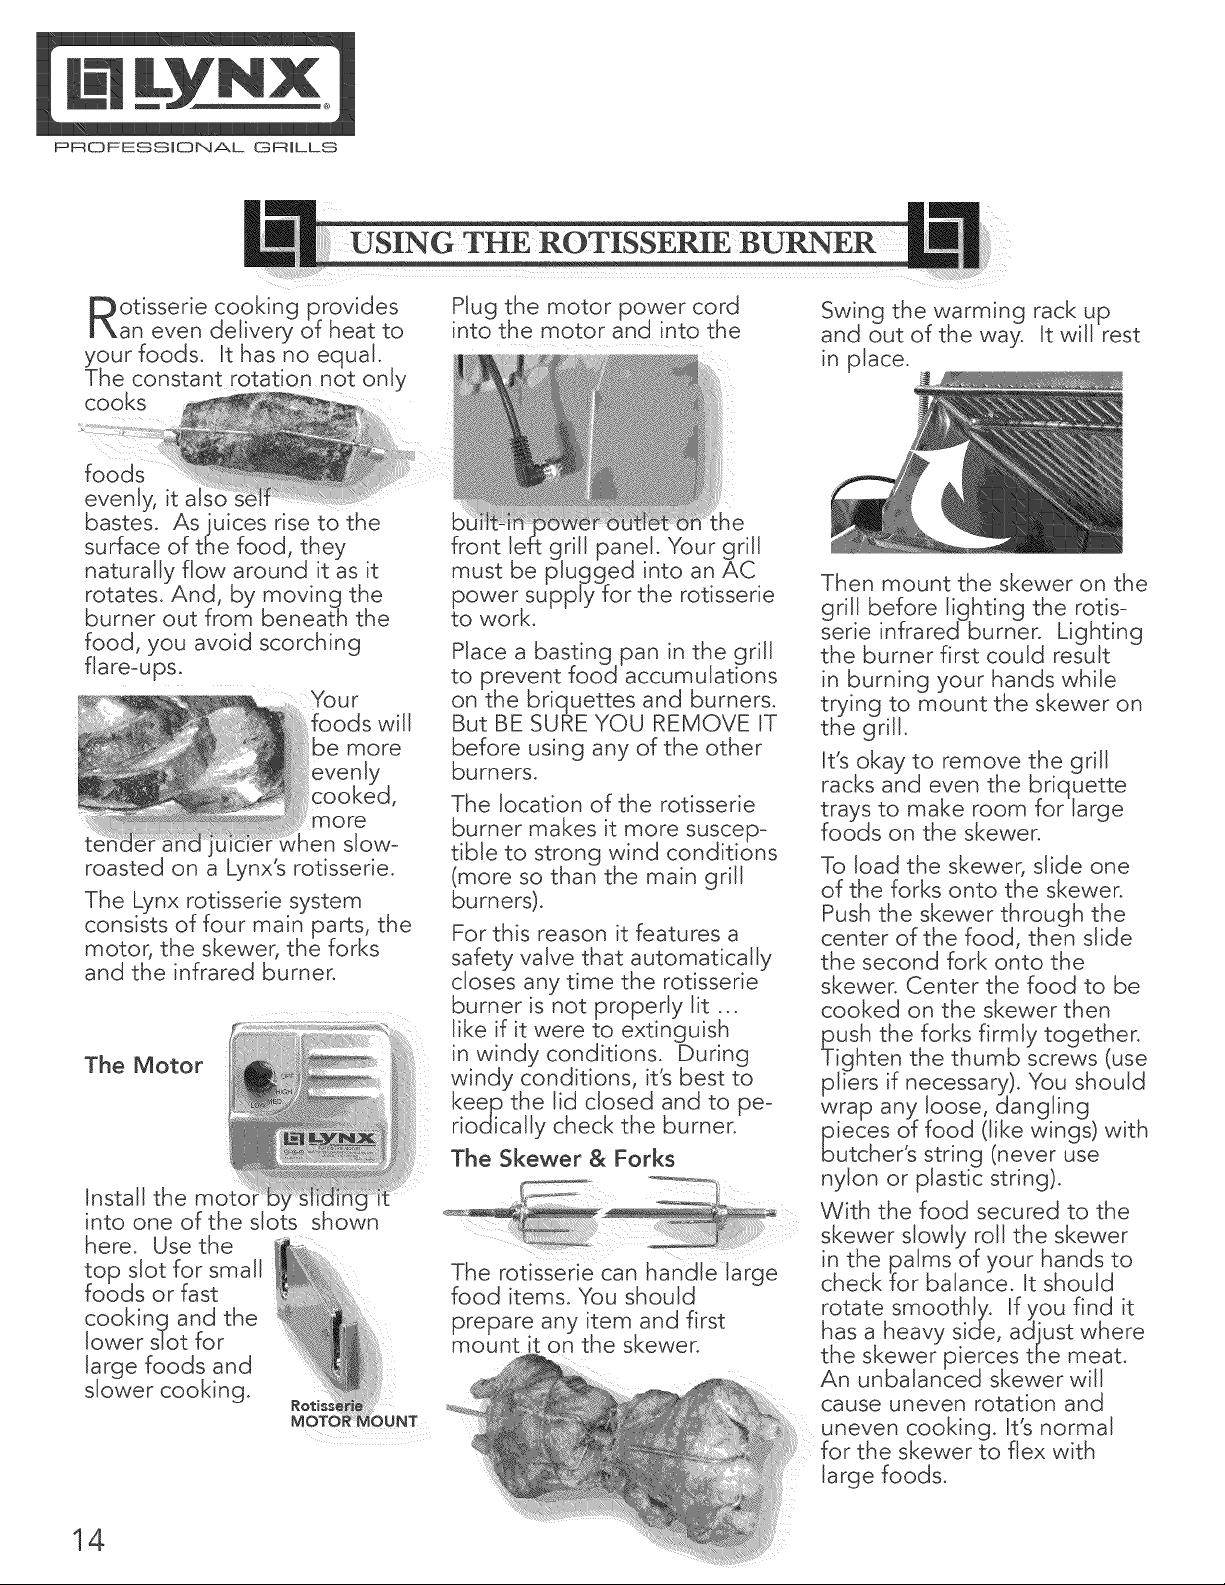
otisserie cooking provides
an even delivery of heat to
your foods. It has no equal.
The constant rotation not only
cooks
USING THE ROTISSEPdE _RNER
foods
evenly, it al._
bastes. As juices rise to the
surface of the food, they
naturally flow around it as it
rotates. And, by moving the
burner out from beneath the
food, you avoid scorching
flare-ups.
Vo u r
will
l: more
juicier vv slow-
roasted on a Lynx's rotisserie.
The Lynx rotisserie system
consists of four main parts, the
motor, the skewer, the forks
and the infrared burner.
The Motor
Install the moto
into one of the slo]
here. Use the
top slot for small
foods or fast
cooking and the
lower slot for
large foods and
slower cooking.
it
]OWn
Plug the motor power cord
into the motor and into the
front lel Your grill
must be ed into an AC
power supp rotisserie
to work.
Place a basting pan in the grill
to prevent food accumulations
on the briquettes and burners.
But BE SURE YOU REMOVE IT
before using any of the other
burners.
The location of the rotisserie
burner makes it more suscep-
tible to strong wind conditions
(more so than the main grill
burners).
For this reason it features a
safety valve that automatically
closes any time the rotisserie
burner is not properly lit ...
like if it were to extinguish
in windy conditions; During
windy conditions, its best to
keep the lid closed and to pe-
riodically check the burner.
The Skewer & Forks
The rotisserie can handle large
food items. You should
prepare any item and first
mount it on the skewer.
Swing the warming rack up
and out of the way. It will rest
in place.
Then mount the skewer on the
grill before lighting the rotis-
serie infrared burner. Lighting
the burner first could result
in burning your hands while
trying to mount the skewer on
the grill.
It's okay to remove the grill
racks and even the briquette
trays to make room for large
foods on the skewer.
To load the skewer, slide one
of the forks onto the skewer.
Push the skewer through the
center of the food, then slide
the second fork onto the
skewer. Center the food to be
cooked on the skewer then
push the forks firmly together.
Tighten the thumb screws (use
pliers if You should
wrap any loose, gling
pieces of food (like wings) with
butchers string (never use
nylon or plastic string).
With the food secured to the
skewer slowly roll the skewer
in the palms of your hands to
check for balance. It should
rotate smoothly. If you find it
has a heavy side, adiust where
the skewer pierces the meat.
An unbalanced skewer will
cause uneven rotation and
uneven cooking. It's normal
for the skewer to flex with
large foods.
14
Page 15
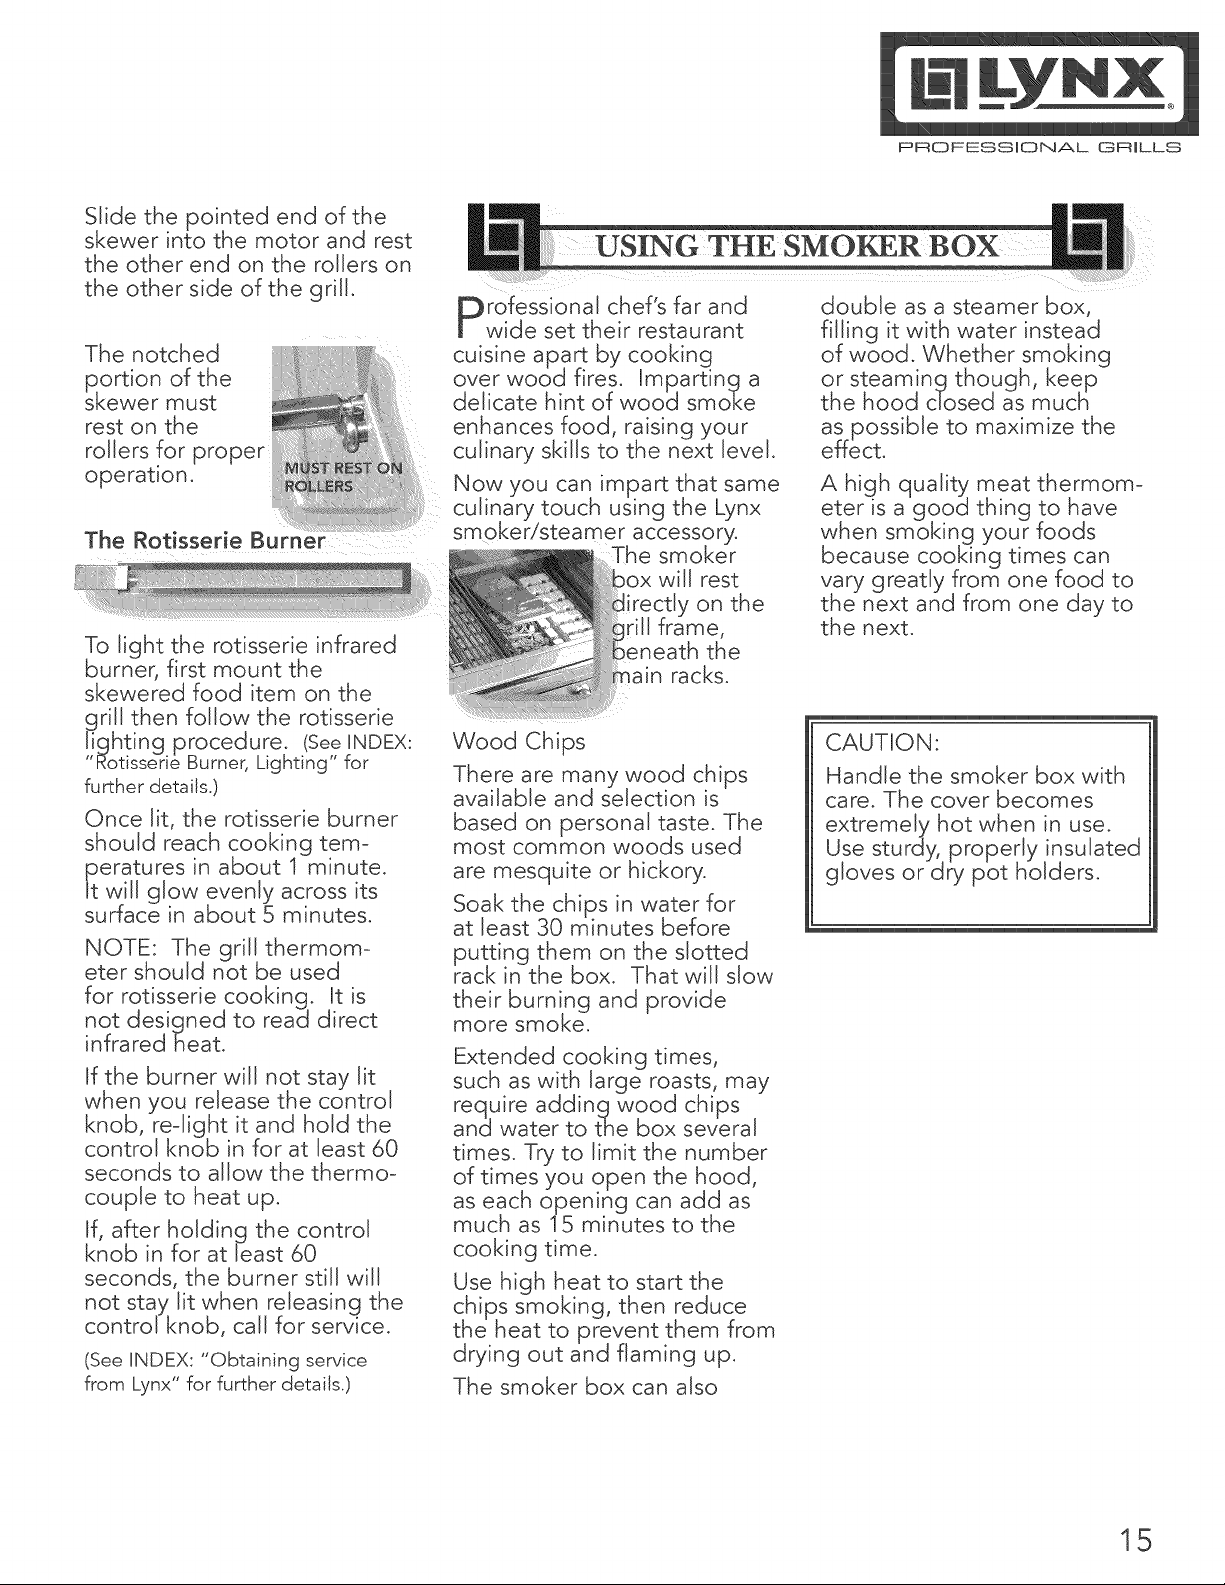
Slide the pointed end of the
skewer into the motor and rest
the other end on the rollers on
the other side of the grill.
The notched
portion of the
skewer must
rest on the
rollers for proper
operation.
The Rotisserie Burner
To light the rotisserie infrared
burner, first mount the
skewered food item on the
jgrill then follow the rotisserie
!ghting procedure. (See UNDEX:
Rotisserie Burner, Lighting for
further details.)
Once lit, the rotisserie burner
should reach cooking tem-
peratures in about 1 minute.
it will glow evenly across its
surface in about 5 minutes.
NOTE: The grill thermom-
eter should not be used
for rotisserie cooking. It is
not designed to read direct
infrared heat.
if the burner wiJJ not stay lit
when you release the control
knob, re-light it and hold the
control knob in for at least 60
seconds to allow the thermo-
couple to heat up.
If, after holding the control
knob in for at least 60
seconds, the burner still will
not stay lit when releasing the
control knob, caJJ for service.
(See UNDEX: "Obtaining service
from Lynx" for further details.)
rofessional chef's far and
wide set their restaurant
cuisine apart by cooking
over wood fires, imparting a
delicate hint of wood smoke
enhances food, raising your
culinary skills to the next level.
Now you can impart that same
culinary touch using the Lynx
smoker/steamer accessory.
The smoker
will rest
:Jy on the
teneath the
in racks,
Wood Chips
There are many wood chips
available and selection is
based on personal taste. The
most common woods used
are mesquite or hickory,
Soak the chips in water for
at least 30 minutes before
putting them on the slotted
rack in the box, That wiJJ slow
their burning and provide
more smoke,
Extended cooking times,
such as with large roasts, may
require adding wood chips
and water to the box several
times. Try to limit the number
of times you open the hood,
as each opening can add as
much as 15 minutes to the
cooking time.
Use high heat to start the
chips smoking, then reduce
the heat to prevent them from
drying out and flaming up.
The smoker box can also
PROFESSmONAL GRmLLS
double as a steamer box,
filling it with water instead
of wood. Whether smoking
or steaming though, keep
the hood closed as much
as possible to maximize the
effect.
A high quality meat thermom-
eter is a good thing to have
when smoking your foods
because cooking times can
vary greatly from one food to
the next and from one day to
the next.
CAUTION:
Handle the smoker box with
care. The cover becomes
extremely hot when in use.
Use sturdy, properly" insulated
gloves or dry pot holders.
15
Page 16
PROFESSIONAL GRILLS
CLEANING YOUR GRILL
STAINLESS STEEL
nx products are known for
their attractive appearance.
We achieve this by selecting
only the finest grades of
stainless steel and applying
exacting workmanship.
In order to maintain this at-
tractive appearance over the
life of the grill it is important
to take the following steps:
After each use wiAe clown
the exterior of the grill to
remove grease and splatters.
Be sure to follow the
cleaning instructions for
keeping the grates and
burners clean and ready for
use.
Use a commercially
available Stainless Steel
cleaner to dean and polish
the exterior surfaces.
Doing these things on a
regular basis minimizes the
amount of effort required.
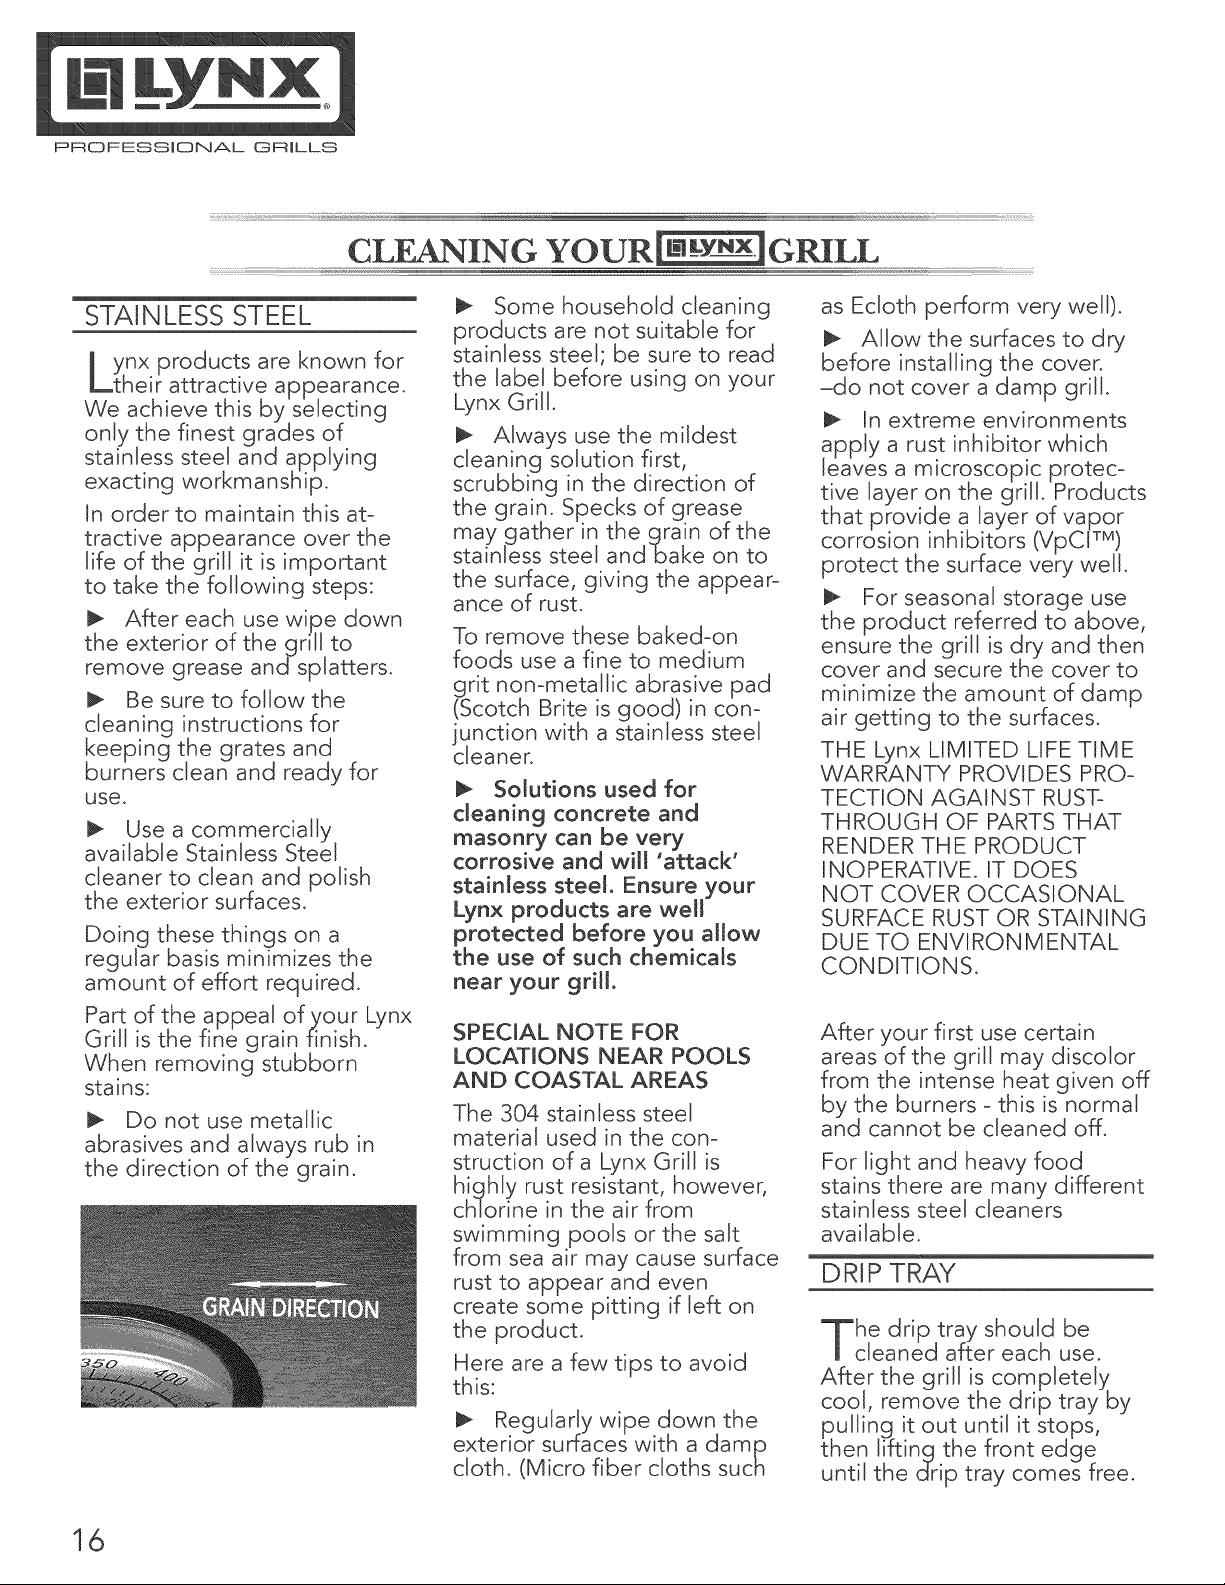
Part of the appeal ofyour Lynx
Grill is the fine grain finish.
When removing stubborn
stains:
Do not use metallic
abrasives and always rub in
the direction of the grain.
Some household cleaning
products are not suitable for
stainless steel; be sure to read
the label before using on your
Lynx Grill.
Always use the miJdest
cleaning solution first,
scrubbing in the direction of
the grain. Specks of grease
may gather in the grain of the
stainless steel andbake on to
the surface, giving the appear-
ance of rust.
To remove these baked-on
foods use a fine to medium
grit non-metallic abrasive pad
(Scotch Brite is good) in con-
junction with a stainless steel
cleaner.
Solutions used for
cleaning concrete and
masonry can be
corrosive and will
stainless steeJo Ensure your
Lynx products are well
protected before you allow
the use of such chemicals
near your griJh
SPECIAL NOTE FOR
LOCATIONS NEAR POOLS
AND COASTAL AREAS
The 304 stainless steel
material used in the con-
struction of a Lynx Grill is
highly rust resistant, however,
chlorine in the air from
swimming pools or the salt
from sea air may cause surface
rust to appear and even
create some pitting if left on
the product.
Here are a few tips to avoid
this:
Regularly wipe down the
exterior surfaces with a damp
cloth. (Micro fiber cloths such
as Ecioth perform very well).
Allow the surfaces to dry
before installing the cover.
-do not cover a damp grill.
In extreme environments
apply a rust inhibitor which
leaves a microscopic protec-
tive layer on the grill. Products
that provide a layer of vapor
corrosion inhibitors (VpCI TM)
protect the surface very well.
For seasonal storage use
the product referred to above,
ensure the grill is dry and then
cover and secure the cover to
minimize the amount of damp
air getting to the surfaces.
THE Lynx LIMITED LIFE TIME
WARRANTY PROVIDES PRO-
TECTION AGAINST RUST-
THROUGH OF PARTS THAT
RENDER THE PRODUCT
INOPERATIVE. IT DOES
NOT COVER OCCASIONAL
SURFACE RUST OR STAINING
DUE TO ENVIRONMENTAL
CONDITIONS.
After your first use certain
areas of the grill may discolor
from the intense heat given off
by the burners - this is normal
and cannot be cleaned off.
For light and heavy food
stains there are many different
stainless steel cleaners
available.
DRIP TRAY
he drip tray should be
cleaned after each use.
After the grill is completely
cool, remove the drip tray by
pulling it out until it stops,
then lifting the front edge
until the drip tray comes free.
16
Page 17

PROFESSIONAL GRILLS
Clean it with hot soapy water
or an oven-style cleaning
product and re-install.
Also, check the tray after rain.
If you ve left the grill
uncovered, you may need to
remove the drip tray drain
plug to drain the water from
the tray'. The drain plugcan
be removed with a flat-head
screwdriver.
WARNIN6 _
DO NOT ALLOW EXCESS
GREASE OR LIQUIDS TO
ACCUMULATE IN THE DRIP
TRAY AS THIS MAY CREATE
A FIRE HAZARD.
NEVER USE GRILL WITHOUT
DRIP TRAY PROPERLY IN-
STALLED
Remove the racks and then
the briquette trays by lifting
the front edge and pulling
them towardyou.
Flip the trays
.... and put
them back in
over the
Light
:he burners
_nd set them
"HI" for 5
: 10 minutes
to burn the briquettes clean.
Any remaining food items can
be brushed off using a soft
brush.
Be sure the trays have com-
pletely cooled before reinstall-
ing them.
Replacement briquette trays
can be ordered from Lynx or
from your dealer.
MAIN BRASS BURNERS
the front.
4) Angle the burner sideways
and lift it out.
Be careful not to change the
air shutter position.
To Clean the Brass Burner:
To maximize grill perfor-
mance, clean the exterior of
the burner with a wire brush.
Remove stubborn scale with a
metal scraper.
Clear any clogged ports with a
straightened paper clip. Never
use a wooden toothpick as
it may break off and clog the
port.
Shake out any debris through
the air shutter.
Use a flashlight to inspect the
burner inlet to ensure it is not
blocked. If obstructions can
be seen, clean it with a paper
clip or a pipe cleaner.
GRILLING RACKS
he easiest way to clean
the grill racks is to do so
immediately after turning off
the burners, while they are
still hot. Wearing a long BBQ
mitt to protect your hand
from steam, dip a brass bristle
brush in hot water and scrub
the grill rack. Dip the brush
frequently because the steam
helps remove baked-on foods.
CERAMIC BRIQUETTES
he ceramic briquettes
normally burn off any accu-
mulated food drippings. But
you may occasionally experi-
ence larger spills that don t
burn off under normal use.
When this happens, let the
grill cool completely.
ake sure the grill is com-
cool before pro-
Ensure that the gas supply is
off and all control knobs are in
the "OFF" position.
To Remove Brass Burners:
1) Remove the grill racks and
briquette trays.
2) Lift the burner up until the
legs exit the frame.
3) Then pull to the rear of
the grill so the burner head
comes off the brass orifice at
PROPER PLACEMENT OF
EACH BURNER IS CRITICAL.
AFTER CLEANING THEY
MUST BE CENTERED ON
THE BRASS ORIFICE, REST-
ING LEVEL WITHOUT ANY
ROCKING.
FAILURE TO MEET THESE
CONDITIONS MAY CAUSE
A VERY DANGEROUS CON-
DITION THAT CAN CAUSE
PERSONAL INJURY AND
PROPERTY DAMAGE.
v .....
17
Page 18

PnOFESS ONAL GRiLlS
PROSEARTM BURNER
t's easy to keep your
ProSear TM burner operating
at peak performance. Just run
it on "HI" with the hood open
for 5 minutes after each use to
burn away any food particles
or drippings.
Any ash accumulation on
the burner surface can be
removed with a light brush or
vacuum ... BUT WAIT UNTIL
THE BURNER IS COOL!
Every 3 to 6 months, remove
the burner (its held in place
by a set-screw) and inspect
the venturi (inlet) and orifice
to ensure that they're free of
obstructions.
Food debris on the inside
of the burner can be gently
shaken out. Do not touch the
ceramic surface.
Clean any obstructions with
a straight piece of metal coat
hanger, pipe cleaner or paper
clip.
When re-installing the
ProSear TM burner, be sure to
correctly position the burner
and the protective screen.
18
Page 19

PROFESSmONAL GRmLLS
TROUBLESHOOTING YOUR_GRILL
BEFORE YOU CA LL:
Please check a few things before you call for service:
Is there fuel supplied to the grill?
Is the main shut-off valve open?
Are you using correct type of fuel? (LP or Natural Gas) (See INDEX: "Gas Requirements" for further
details.)
Is your propane cylinder empty? Have you recently refilled the propane cylinder? If so, is the
connection tight?
Have you opened the valve on the propane cylinder?
Is the grill plugged in to a live electric circuit?
If you've checked the above items, review the trouble-shooting list below before calling for Lynx for
service.
GRILL WON'T LIGHT
Your Lynx grill uses an electric
ignition system that does not
spark. The igniters should
glow constantly when a
control knob is pushed in.
First, confirm that the grill is
getting electricity by turning
on the lights.
CHECK THE IGNITERS
[] Ensure that all burner
controls are set to OFR
[] Remove the racks and
briquette trays.
[] Watch an igniter as you
push in and hold the
corresponding control
knob. You will need either
a small mirror or shiny
metal object to see the
igniter under its cover.
(Be sure you push in the
correct control knob and
keep the knob in the
"OFF" position)
[] Check the remaining ,
igniters. If igniters don t
glow, proceed with trou-
bleshooting or match-
light the burner.
CHECK THE BURNERS
If the igniters are working
check to see if gas is
reaching the burners by" at-
tempting to match light a
burner.
BE CAREFUL! IF THE
BURNER FALLS TO IGNITE,
WAIT 5 MINUTES BEFORE
ATTEMPTING TO IGNITE
OTHER BURNERS! (See
INDEX: "Match Lighting" for
further details.)
If match lighting doesn't
work, re-check fuel connec i
tions for leaks and ensure
the supply is of the correct
type and is of adequate
pressure. (See INDEX: "Leak Test"
for further details.)
If the burner will light with a
match, then the igniter may
not be functioning correctly.
Call for service.
If the burner will not match
light, and you know you are
getting gas, wait for any
gas to dissipate and remove
the burner and check it for
blockages. (See INDEX: "Clean
the Brass Burner" for further details.)
YELLOW FLAME OR GAS
SMELL WHILE COOKING
IF YOU SMELL GAS WHILE
THE GRILL IS OPERATING,
IMMEDIATELY TURN OFF ALL
BURNERS AND SHUT OFF
THE MAIN FUEL SUPPLY.
PERFORM A LEAK TEST
(See INDEX: "Leak Test" for
further details.)
CHECK FOR BLOCKAGES
(See INDEX: "Clean the Brass
Burner" for further details.)
19
Page 20

PROFESSIONAL GRILLS
A yellow flame on the main
burners indicates a lack of air.
But, if the air around the grill
is dusty or if heavy grease is
present, some orange tips on
the burner flame are normal.
ADJUST THE AIR SHUTTER
To adjust for insufficient air,
adiust the air shutter. (See ,
iNDEX: Air Shutter Adjustment for
further details.)
LOW OR INSUFFICIENT
NO PART OF THE GRILL
SHOULD EVER BE LINED
WITH ALUMINUM FOIL.
Doing so will interfere with
airflow and can cause a low
heat condition.
Ensure that you've preheated
the main burners for at
least 10 to 15 minutes with
the hood closed and the
ProSear TM burner for 3
minutes.
Proper levelin 9 during instal-
lation is critical. A grill that is
out of level will cause erratic
burner combustion and inef-
ficient, uneven heating. A
carpenters spirit level should
be used to level the grill both
front-to-back and side-to-side.
If the low heat problem
persists:
CHECK THE GAS SUPPLY
LINE SIZING REQUIRE-
MENTS.)
CHECK THE GAS SUPPLY
LINE FOR KINKS OR
DAMAGE.
REPLACE any damaged
supply lines.
CHECK THE REGULATOR
Make sure that the regulator
& hose assembly is the one
designed for and supplied
with your Lynx 9rill and that
20
it is correctly set up for the
type of fuel you are using.
(See iNDEX: "Regulator Conver-
sion" for further details.)
The hose and regulator
provided by Lynx must be
used if your grill is set-up for
an LP Gas Cylinder.
Check that there is no
physical pressure being
applied to the regulator
attached to the back of the
grill. The regulator contains
a flexible diaphragm and
should not be allowed to
touch the grill body or its
surroundings.
CHECK FOR OBSTRUC i
TIONS
Ensure that the burners and
drip tray are clean and free
from obstructions.
LP (Propane) units:
IS THE CYLINDER
ALMOST EMPTY?
Almost-emAty cylinders may
not have sufficient pressure
to run the burners at high
heat.
HAVE THE LINE
PRESSURE CHECKED BY
A QUALIFIED TECHNll
ClAN (See iNDEX: "Gas
Requirements" for further
details.)
FLOW LIMITING DEVICE
Improper lighting proce-
dures may have activated
the LP cylinders flow control
device, reducing the heat
output.
To reset the flow control:
[] Shut off all burner
controls and close the LP
cylinder valve.
[] Wait 30 seconds and,
very slowly, reopen the
cylinder valve.
[] Wait a few seconds and
reJite a burner,
Bulk LP Cylinder Users
Bulk LP cylinder lines must
be properly regulated,
Ensure that you are using
a 4/11 appliance regulator
supplied by Lynx and
converted to LPgas. Also
ensure that you do not have
more than one regulator in
line.
Natural Gas units:
SUPPLY LINE
Ensure thatthe supply" line is
at least 3/4 inside diameter
or 1" outside diameter.
CHECK LINE PRESSURE
Natural gas pressure should
be at least 7" W.C. and 4"
W.C. pressure under full load
(with all burners on.)
CHECK BURNERS FOR
BLOCKAGES
CHECK FLAME CHAR-
ACTERISTICS. (See iNDEX:
"Flame, Correct Size" )
CLEAN OR ADJUST AIR
SHUTTER (See iNDEX: "Air
Shutter Adjustment."
WIND HITTING GRILL
Wind hitting the grill while in
use, especially winds blowing
into or across the hood gap
from behind, can cause poor
performance and in some
cases can cause the control
panel to get dangerously hot.
Steady or
g. sty
winos can
prevent
the normal
exhaust of
hot gases.
Locate ,our
grill ng
winds grilling in
windy conditions.
Page 21
PROFESSIONAL GRILLS
BURNER EXTINGUISHES
LOCATION
First determine if the problem
is being caused by location.
If the grill is subject to high
winds, reposition it to provide
some protection.
CHECK THE FLAME
Check the gas supply and
flame characteristics. (See
INDEX: "Flame, Correct Size")
BURNERS SEATED
Check to ensure that the
burners are correctly posi-
tioned in the gri!l. (See iNDEX:
"Burner Placement for further
details.)
Correctly-installed burners
should be seated firmly and
level with no side-to-side
movement.
BURNER EXTINGUISHES
ONLY WHEN SET TO
"LOW"
The valves on the grill feature
an adjustable low setting.
Fluctuations in gas pressure,
gas conversion and even in
the quality of the gas itself
may affect burner perform
mance at the LOW setting.
It could be either too high or
tOO lOW. (See iNDEX: "Burner
Adjustment" for further details.)
ROTISSERIE WON'T
LIGHT
Follow the same procedure as
described for the grill burners
to diagnose problems with the
rotisserie burner.
BE CAREFUL! The rotisserie
burner flame may be hard to
see in bright sunny conditions.
ROTISSERIE LIGHTS
BUT GOES OUT AS
SOON AS CONTROL IS
RELEASED
CHECK
THERMOCOUPLE
The control knob must be
held in for 30 to 60 seconds
after ignition for the rotis-
serie burner to stay lit. (See
iNDEX: "Lighting the rotisserie"
for further details.)
If the burner will not stay" lit
when you release the control
knob, re-light it and hold the
control knob in for at least
60 seconds to allow the ther-
mocouple to heat up.
If, after holding the control
knob in for at least 60
seconds, the burner still will
not stay lit when releasing
the control knob, call for
service.
(See INDEX: "Obtaining service
from Lynx" for further details.)
LIGHTS WON'T LIGHT
CHECK POWER
Ensure that the grill is
connected to a live AC
power source and check for
rotisserie motor operation.
RESET TRANSFORMER
Disconnect power from the
grill and wait 5 minutes for
the transformer to cool clown
and reset. Then reconnect
power. If, after resetting the
transformer and replacing
bulbs, you still do not have
power, call for service.
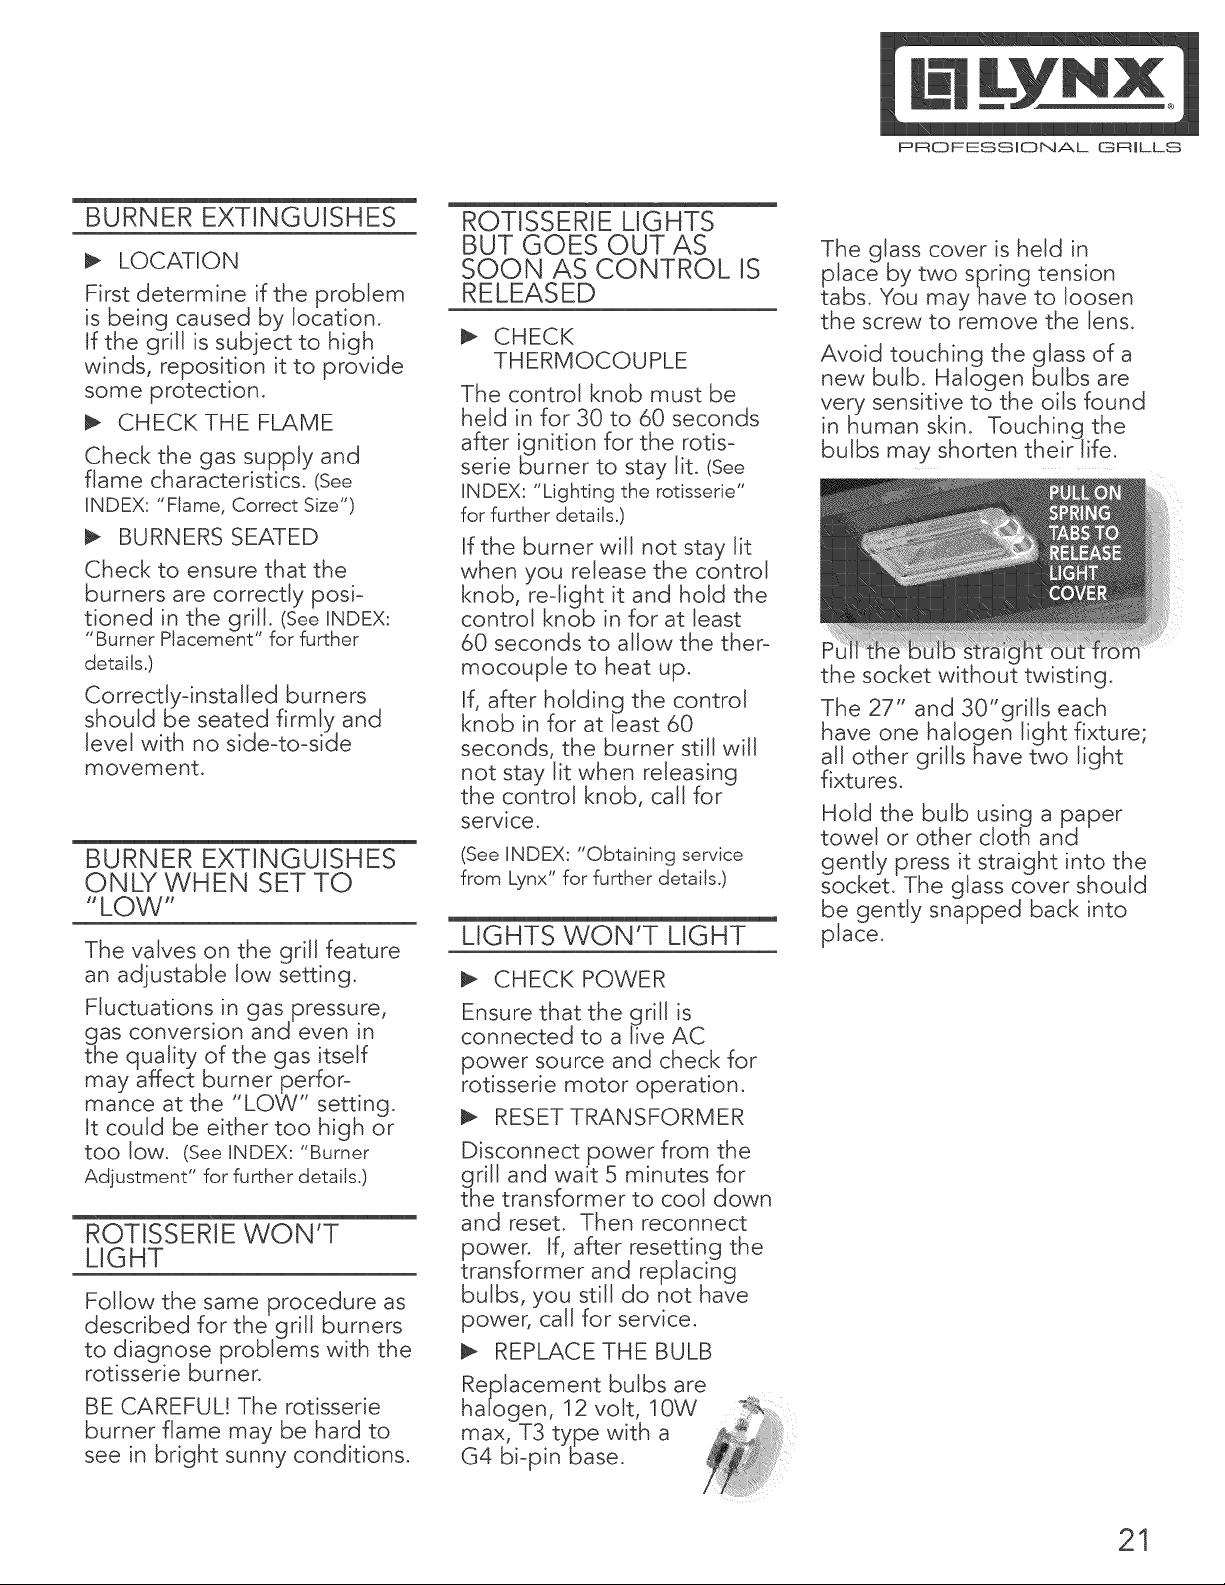
REPLACE THE BULB
Replacement bulbs are
halogen, 12 volt, 10W
max, T3 type with a
G4 bi-pin base.
The glass cover is held in
place by two spring tension
tabs. You may have to loosen
the screw to remove the lens.
Avoid touching the glass of a
new bulb. Halogen bulbs are
very sensitive to the oils found
in human skin. Touching the
bulbs may shorten their life.
the socket without twisting.
The 27" and 30"grills each
have one halogen light fixture;
all other grills have two light
fixtu res.
Hold the bulb using a paper
towel or other cloth and
gently press it straight into the
socket. The glass cover should
be gently snapped back into
place.
21
Page 22

PROFESSIONAL GRILLS
Before calling for service,
lease make sure you have
tPhe following information:
[] Model number
[] Date of purchase
[] Proof of purchase by the
original owner
[] Serial number.
The serial number can be
located on the rating plate
which is located either on the
underside of the drip tray, on
the heat shield behind the
front panel, or on the inside
left cabinet wall (for most free-
standing grills).
L-YNx PnOFE:SSIONAL
For warranty service, contact
the Lynx Customer Service
Department for an authorized
service agent near you at:
(888) Buy-Lynx
(888-289-5969).
www.LynxG rills.corn
iiii
Your satisfaction is of the
utmost importance to us. If a
problem cannot be resolved
to your satisfaction, please
write, fax or emaiJ us:
Lynx Professional Grills
5895 Rickenbacker
Commerce, CA 90040
Service: (888) Buy-Lynx (888-
289-5969)
Tel: (323) 838-1770
Fax: (323) 838-1778
www.lynxgrills.com
Contact Lynx for replacement
parts. Parts are shipped RO.B.
Commerce, CA.
LYNX BEGAN WITH A VISION.
smaJJ group of manufactur-
ing engineers with over a
century of collective experi-
ence had a dream.
They dared to take
their extensive com-
mercial manufac-
turing know-how
and create a line of
outdoor cooking
products that otter
commercial elegance
and performance ....,_
to the consumer ,_
market.
Lynx has taken the
ua lity, workman-
ip, service and
innovation of the
commercial market
THE LYNX STORY
and incorporated it into the
Lynx Professional Grills line
of consumer and commercial
products. The combination
of creative design, superior
materials and
.qevates Lynx
roducts to a
of their
)wn.
original
are
ised every day
restaurants,
_otels and
parks
the USA:
LYNX SATISFIED CUS-
TOMERS
TGI Fridays • Applebee's
e Houston s ® Red Lobster ®
Hard Rock Car6 ®WoJfgang
Puck's ® Cheesecake Factory
P
e Red Robin ® Planet
Hollywood ® Hilton ® Hyatt
® Four Seasons Marriott Le
Meridian • Sheraton ® Conrad
International BeJJagio ® New
York New York • MGM Grand
® Treasure Island e Mirage ®
Paris ® Venetian ® Excalibur
® Mandalay Bay ® Riviera ®
Desert Inn ® Hard Rock Hotel
® Disney World
Page 23

PROFESSIONAL GRILLS
J° Limited Lifetime Warranty.
The stainless steel body housings, the solid brass grill burners and the ProSear TM burners are warranted to be free from
defects in material and workmanship when subjected to normal domestic use and service for the lifetime of the original
purchaser. This warranty excludes surface corrosion, scratches, and discoloration which may occur during regular use.
This warranty is limited to the replacement of the defective parts, with the owner paying all other cost including labor.
*Does not include the rotisserie infra-red burner.
II. Limited Five-Year Warranty,
The structural integrity of the interior grill parts, exterior, and drip pans are warranted to be free from defects in
material and workmanship, when subjected to normal domestic use and service, for a period of five years from the date
of purchase. This warranty is limited to the replacement of the defective parts, with the owner paying all other cost
including labor.
JJJ. Limited One-Year Warranty.
All other grill components are warranted to be free from defects in material and workmanship for a period of one year
from the original date of purchase. Lynx will replace or repair parts found to be defective at no cost to the original
purchaser.
IV. Limitations & Exclusions
1) Warranty applies only to the original purchaser and may not be transferred.
2) Warranty is in lieu of all other warranties, expressed or implied and all other obligations or liabilities related to the
sale or use of its grill products.
3) Warranty shall not apply and Lynx is not responsible for damage resulting from misuse, abuse, alteration of or
tampering with the appliance, accident, hostile environment, flare-up fires, improper installation, or installation not in
accordance with the instructions contained in this manual, or the local codes.
4) Lynx shall not be liable for incidental, consequential, specW or contingent damages resulting from its breach of this
written warranty or any implied warranty.
5) Some states do not allow limitations on how long an implied warranty lasts, or the exclusions of or limitations on
consequential damages. This warranty gives you specific legal rights and you may have other rights which vary from
state to state.
6) No one has the authority to add to or vary Lynx's warranty, or to create for Lynx any other obligation or liability in
connection with the sale or use of its products.
7) Limited to the replacement of defective parts with the owner paying all other costs including labor.
V. What is not covered.
Lynx shall not be responsible for and shall not pay for the following:
1) UnstaHation or start-up, damages or problems caused by improper installation or use;
2) Service by an unauthorized service provider;
3) Damage or repair due to service by an unauthorized service provider or use of unauthorized parts;
4) Units installed in common areas or non-residential applications such as day<are centers, bed and breakfast centers,
churches, nursing homes, restaurants, hotels, schools, etc.;
5) To correct normal adjustments or settings, due to improper installation, commissioning or local gas supply proper-
ties;
6) Shipping and handling costs, export duties, installation, removal, or rednstaHation cost;
7) Display medals are generally sold "as is." Ufyou have purchased a display modal, please be advised that it is sold
"as is" and that it is subject to the following warranty exclusions: any exterior or cosmetic damage is non warrant-
able; any missing components will be replaced at consumers expense; major handling damage to manifold, valve and
ignition system will be serviced at consumer's expense; all other warranty's (standard warranty) will remain in effect.
8) The cost of a service call to diagnose trouble. (See UNDEX: "Obtaining Service from Lynx" for further details.)
23
Page 24

PROFESSmONAL GRmLLS
24
Page 25

PROFESSIO[NAL GRILLS
INSTALLATION GUIDELINES ...................................................... 25
Be[ore You Start ............................................................................................................... 27
g shiprr_er_t ar'riv,_,s dg_rr_g_g_d.......................................................................................... 27
Unpacking and Assembly ................................................................................................ 30
Electrical Connections ..................................................................................................... 31
Gas Connections .............................................................................................................. 32
Final Checks .................................................................................................................... 34
Side Burner/I,PSGE Hookup ......................................................................................... 36
Wiring Schematics ........................................................................................................... 37
L27 Non-Rotisserie Grill ............................................................................................. 37
L27 & L30 rotisserie Grill ............................................................................................ 38
L36 & L42 rotisserie Grill ............................................................................................ 39
L54 rotisserie Grill ...................................................................................................... 40
2010 Lynx Professional Grills Exploded Parts View ......................................................... 41
2010 Lynx Professional Grills Parts list ............................................................................ 42
25
Page 26

PROFESSIONAL GRILLS
WARNING
1) Always maintain the required clearances from combustible construction as detailed. The
grill is designed for outdoor use only. NEVER use in a garage, building, shed, breezeway or
other enclosed area. This grill shall not be used under any overhead combustible construc-
tion.
2) Gas grills are not design certified for and are not to be installed in or on recreational ve-
hicles, portable trailers, boats or armyother movinginstallation
3) Keep any electrical supply cord and the fuel supply hose away from any heated surfaces.
Electrical cords should be placed away from walkways to avoid tripping hazard.
4) Do not repair or replace any part of the grill unless specifically recommended in this manual.
Other service should be performed by a qualified technician.
5) All gas lines must have a shut-off that is readily and easily accessible. Be sure the owner
knows where the shut-off is located. If you smell gas, check for gas leaks immediately. Check
only with a soap and water solution. Never check for gas leaks with an open flame. (See UN-
DEX: "Leak Testing" for further details.)
1) The outdoor cooking gas appliance and its individual shutoff valve must be disconnected
I_ rom the gas supply piping system during any pressure testing of that system at test pres-
sures in excess of 0.5 psi (3.5 kPa).
2) The outdoor cooking gas appliance must be isolated from the gas supply piping system by
closing its individual manual shutoff valve during any pressure testing of the gas supply pip-
ing system at test pressures equal to or less than 1/2 psi (3.5 kPa).
STATE OF MASSACHUSETTS
1) Massachusetts requires all gas be installed using a plumber or gas fitter carrying the appro-
priate Massachusetts license
2) All permanently-installed natural gas or propane installations require a "T" handle type
manual gas valve be installed in the gas supply line to this appliance.
3) This does not apply to portable propane installations using a 20 pound cylinder.
26
Page 27

PROFESSIONAL GRILLS
BEFORE YOU START
l_! IF SHIPMENT ARRIVES DAMAGED !_1
VISIBLE LOSS OR DAMAGE:
Be certain any visible damage to the carton is noted on freight bill or express receipt and signed
by the person making delivery.
FILE CLAIM FOR DAMAGES IMMEDIATELY, regardless of extent of damage.
CONCEALED LOSS OR DAMAGE:
If damage is unnoticed until the grill is unpacked, notify the transportation company or carrier im-
mediately and file a "concealed damage" claim with them. This should be done within (15) days
of the date delivery is made to you. Be sure to hold on to the container for inspection. We cannot
assume responsibility for damage or Joss incurred in transit. (See UNDEX: Obtaining Service from Lynx for
further details.)
WARNING
Never install this product into a combustible enclosure without an insulated jacket. Doing so
could result in fire, property damage and personal injury.
Never locate the grill under a roof or overhang, in a building, garage, shed or other such
enclosed area.
Never locate the grill under combustible construction.
Installation must conform with local codes or, in the absence of local codes, with either the
National Fuel Gas Code, ANSI Z223.1/NFPA 54, Natural Gas and propane Installation Code,
CSA B149.1, or Propane Storage and Handling Code, B149.2,
Cx>O<YJOOO/, _<_>OOO<X
IMPORTANT NOTES:
Where's the Wind?
When selecting a suitable
location, consider important
factors such as exposure
to the wind and foot-traffic
patterns.
If you have a freestanding
grill, position it so the prevail-
ing wind blows into the front
control panel (at your back
when grilling), supporting the
proper front-to-rear airflow.
Built-in grills located in areas
with prevailingwinds should
be protectedby a wind
barrier.
Winds hitting the backof the
grill directly may cause
problems, as well as wind
blowing along the hOOC!ga9.
Be po
How long is your run?
Keep all gas supply lines as
short as possible because
gas lines lose pressure over
distance and with each elbow
and tee that is added. This
drop in pressure affects grill
perTormance. (See INDEX:
"Gas Supply Line Runs" for further
details.)
Are you "on-the-level"?
Proper leveling during instal-
lation is critical. A grill that is
out of level will cause erratic
burner combustion and inef-
ficient, uneven heating. A
carpenters spirit level should
be used to level the grill both
front-to-back and side-to-side.
If the floor is uneven or has
a decided slope, re-leveling
may be required each time
you move a freestanding unit.
BUILTItN INSTALLATIONS:
The Lynx Built-In Grill is
designed for easy installation
into masonry enclosures.
27
Page 28

PROFESSIONAL GRILLS
NOTE:
Lynx buiitdn grills are intended
either for installation in a
buiJtdn enclosure constructed
of non-combustible materials
or for an installation in a built
in enclosure constructed of
combustible material when
installed with a Lynx insulating
jacket (LIJ).
For non-combustible applica-
tions, the grill drops into the
opening shown in the cutout
detail drawing (See UNDEX: Gas
Requirements") and hangs from
its counter-top trim. A deck is
not required to support it from
the bottom.
When using the insulated
jacket in a combustible
enclosure, the jacket must be
supported from the bottom by
a ledge on each side or a fuji
deckbeneath the jacket.
(See UNDEX: "Gas Requirements")
Pay spedaJ attention to the
rovisions shown for gas line
ook-up.
The enclosure should have
ventilation holes to prevent
gas build-up in the event of
a leak. The deck ledges and
counter should be fiat and
level. (refer to ANSI Z21.58
Enclosures For Self Contained
LP-Gas Supply Systems or
local codes for additional
information)
CLEARANCE TO COM-
BUSTIBLE MATERIALS:
Minimum clearance from the
sides and back of the grill to
adjacent combustible con-
struction below the top of
unit are 12 from the sides
and back.
D6gagement minimal entre
Jes _arois Jat@aJes et J'ard@re
de I'appariel et la construc-
tion combustible au-dessous
du panneau sup6rieur de
J'appareiJ (30 cm _ partir des
patois Jat@raJes et 30 cm
partir de J'arri_re).
Minimum clearance from
sides and back of unit to
adjacent combustible con-
struction extending above the
unit is 18 from the sides and
back.
D@gagement horizontal
minimal entre Jes patois
Jat@raJes et J'ard@re de
J'apparieJ et Ja construction
verticaJe combustible au-
dessus de J'appareil (45.7 cm
partir des patois Jat@rales et
45.7 cm _ partir de J'arri@re).
Do not use this appliance
under overhead combustible
surfaces,
Ne pas utiJiser cet appareil
sous une surface combus-
tible.
A minimum of 6" of clearance
is needed on the left side of
the grill above the counter
top tot the motor and skewer,
If the grill is to be iolaced into
a combustible enclosure, an
approved insulated jacket
is necessary and is available
only from your Lynx dealer,
Lynx insulated jackets have
been designed and tested
specifically for your Grill.
REAR HOOD CLEARANCE:
A 3 inch clearance is required behind the grill to allow the front
hood to open.
The grill exhausts combustion products and cooking greases to
the back. Never locate the grill where this exhaust will be difficult
to dean.
(3" min)
This grill requires that a 120
volt, 60 hertz, 15 amp GFI
certified outlet be installed by
a qualified electrician.
28
O O
Page 29

PROFESSIONAL GRILLS
CUT-OUT DIMENSIONS FOR BUILT-IN GRILLS
2" round or square holes
for manifold connection
(rearor bottom access)
_CocktailPro should have an
open bottom for plumbing
and drain access.
29"
Grill
1 1/8"-
mm.
CocktailPro*
Doors
Access
36 3/8"
min.
Warming Drawer/
Convenience Center
Note: Insulated jacket required for all grills installed
into a combustible enclosure. See detail below.
1/8" min. for model LUDE
3 1/2" min. for model LUDXL
2 1/2" min. for model LDR
Counter top Notch Detail
5
19"
\3 1/4" min.
Specifications are subject to change without notice.
Model A B C D E F 6 14
L27 26 22 10 7/8
L30 29 24 1/2 107/8
L36 35 22 101/8
L42 41 24 1/2 107/8
L54 53 24 1/2 107/8
I _ countertop I
_- [o overhang[___
9/16" for Grills
1/2" for Complementary Products
Model
LU27
LU30
LIJ36
LU42
LIJ54
a b ¢ d e f
33 S 24 4 I/2 3 11 5/8
36 5 261/2 41/2 3 115/8
42 5 24 4 I/2 3 11 5/8
48 S 261/2 41/2 3 115/8
60 5 261/2 41/2 3 115/8
b
Model A B C D E F G H
A . DQO
LDR21-1 19 1/4
LDR27-1 25 1/4
LDR30-1 28 1/4
LDR36-2 34 1/4
LDR42-1 40 1/4
LSB1 12 1/8 24 1/2 105/8
LSB2 12 1/8 24 1/2 105/8
LSB2PC 24 1/4 24 1/2 105/8
LPSGE 12 1/8 24 1/2 105/8
LPB 19 22 10 5/8
LUDE 24 12 1/8 19 1/4
LUDXL 24 1/4 17 1/4 18 9/16
L30WD 20 1/2 28 1/2 10
L42CC 24 1/2 40 I/4 19 3/8
• _ j •
CS3O 22 3/4 10 5/8
29
Page 30

PROFESSIONAL GRILLS
UNPACKING AND ASSEMBLY
he grill arrives nearly ready
to use and requires only
minor assembly.
By carefully following the
uncrating and unpacking
steps, you will improve the
customer's first Lynx experi-
ence.
Shipping weight on smaller
units is app. 300 pounds and
larger units may weigh over
500 pounds.
EXCESSIVE WEIGHT HAZARD!
Use two or more people to
move or install thls unit. Fail-
ure to follow this instruction
can result in back or other
injuries.
CRATE & CARTON:
IM PO RTA NT!
Do not remove staples
around the top of the
carton. These staples
hold a wooden pallet in
place inside the carton
that protects the unit from
damage. Removing these
staples may cause the
pallet to fall on the top of
grill.
How to Remove the
Carton
Cut the main strap holding
the grill to the pallet.
Remove the staples at the
bottom of the carton.
Lift off the carton.
With assistance, remove
grill from pallet and place
into desired location.
The wheels sit down in the
gaps of the shipping crate so
that the grill can sit safely and
solidly on the crate during
shipping. The grill cannot be
sliddirectly off of the pallet.
high enough to place a ramp_
under the wheel and then lift
the other end while rolling the
grill off of the pallet.
INTERIOR PACKING
Lynx uses sturdy tie-down
cables and straps to ensure
your grill arrives at your home
in the same condition that
it left our factory. BE SURE
YOU HAVE REMOVED ALL
TIE DOWNS BEFORE USING
YOUR GRILL.
Remove the white
accessory box and wood
packing, the grill racks, and
remove any loose items
from the firebox.
Carefully cut the
cable ties g
the
warming
rack and
rotisserie
spit (if
equipped).
Cut the strapping that
secures the briquette trays
and carefully lift them out,
front first.
Make sure you
remember
to remove
_he wire tie-
downs on the
bu rne rs.
It_ On ProSear TM models, cut
and remove ties from the
burner partition on the left
side of the ProSear TM
burner.
(Be sure to remove t
pack ng from u:_d'erthe cover,)
Ensure that all burners are
roperly seated on the
urner valve orifice and
sitting level with the legs
in the frame slots and no
side-to-side movement.
30
Page 31

PROFESSIONAL GRILLS
ELECTRICAL CONNECTIONS
WARNING - ELECTRICAL GROUNDING
Product installation must meet local electric codes or, in the absence of local codes, the latest
edition of the National Electrical Code ANSl/NFPA No. 70 or the Canadian Electrical Code
CGA 1.6b2005.
Use only a Ground Fault Interrupter (GFI) protected circuit with this outdoor cookin 9 gas ap-
pliance.
IMPORTANT: When connecting your rotisserie motor, first connect the motor to the grill and
then plug the grill into the outlet.
This grill is equipped with a three prong (grounding) electric plug for your protection against
shock hazard andmust be plugged directly into a properly grounded three prong outlet.
NEVER cut or remove the grounding prong from this plug.
Use only extension cords with a 3 prong grounding plug, rated for the power of the equip-
ment, and approved for outdoor use with a W-A" marking.
To protect against electric shock, do not immerse any part of the power cord, an extension
cord or any plugs in water or other liquid.
Unplug the product from the outlet when not in use and before cleaning. Allow it to cool
before putting on or taking off parts.
Do not let the cord hang over the edge of a table or touch hot surfaces.
Do not use an outdoor cooking gas appliance for purposes other than intended.
Do not operate any outdoor cooking gas appliance with a damaged cord, plug, or after the
appl!ance malfunctions or has been damaged in any manner. Contact the manufacturer for
repair.
CONNECTION TO AC
Installation requires an
outdoor 120VAC 15A GFI
(Ground Fault Interrupter)
electrical outlet adjacent to
the grill.
The GFI outlet features an
internal breaker that reduces
shock hazard. This type of
outlet should be installed by
a qualified electrician either
inside the island enclosure
for built-in units, or near the
location where a free-standing
unit will be used.
For built-in grills, the supplied
12V transformer is connected
to the grill during installation.
If the electrical system fails to
operate, a connection may"
have come loose in shipping
or the GFI may have tripped,
requiring a reset. See the
Troubleshooting section for
more details.
31
Page 32

PROFESSIONAL GRILLS
GAS CONNECTIONS
WARNiN6
NEVER CONNECT A GAS LINE DIRECTLY TO THE GRILL. A PRESSURE REGULATOR MUST BE
INSTALLED ON ALL GAS EQUIPMENT. ALL LOCAL CODES REQUIRE IT AND LYNX SUPPLIES THE (}
CORRECT REGULATOR WiTH YOUR GRILL. REMOVING OR FAILING TO INSTALL THE PRESSURE
REGULATOR CAN RESULT IN FIRE AND SERIOUS PERSONAL INJURY AND WiLL VOID THE WAR-
RANTY.
he grill is factory set to use
either propane (LP) or
natural gas (NAT). It is critical
that the gas you use matches
that which the grill was set up
fon You can verify that by
checking the ratingRbte.
The
model and gas type, This
one is underneath the drip tray,
The rating plate is located in
one or more of the following
places:
Attached to the underside
of the drip tray
On the heat shield behind
the front panel
On the inside left cabinet
wall
Ensure that the gas supplied
meets with the minimum
pressure requirements. Do not
operate the grill on any gas
other than that for which the
grill has been set.
Fuel WC WC Min
Max Under
inlet Full Load
Nat Gas 7 in 4 in
LP 14 in 11 in
VVater Column Requirements
Both the regulator and the
manifold orifices have been
tuned for the type of gas
specified on the rating plate.
Converting to a different type
of gas requires a conversion
kit, available from Lynx or
from your dealer and must be
installed by a qualified techni-
oan.
All installation and all instal-
lation parts must conform to
local codes with the National
Electrical Code, ANSI/NFPA
70-1990 and the National
Fuel Gas Code, ANSI Z223.1/
NFPA 54 in the U.S and CGA-
B149.1/.2 in Canada.
Canadian installations must
conform to CGA-B149.1/.2
naturalgas/propane installa-
tion code. (Canada)
NATURAL GAS
Lynx recommends that
only qualified profession-
aJs perform the required
plumbing on this product.
To ensure satisfactory per-
formance, the gas supply
line must be sized to ac-
commodate the total BTU
re uirements of all the as-
fireqd equipment that wi_ be
connected to that line.
In no case should pipe less
than 3/4" inside diameter or
1" outside diameter ever be
used to connect this product.
Calculate the total BTU
output of all equipment
and refer to "INDEX: Gas
Supply Line Runs" for
allowable run distances
for ¾ inch pipe. Failure
to meet these minimum
re uirements ma reduce
peqformance of t_e grill
and any other appliances
running on that supply line.
Always keep supply line
runs as short as possible.
(See INDEX: "BTU Output" for
specific model ouputs)
A gas shut-off valve must
be installed in an easily
accessible location by a
qualified plumber.
O
O
47
32
Page 33

PROFESSIONAL GRILLS
Keep any threading
compound off of the first
two pipe threads to avoid
having any small pieces of
compound break loose and
clog a burner valve or
orifice. Do not put sealant
on any male end of flare
fittings.
Keep
last two
threads
clean
For
built-in instal
ommended that any flexible
pipe used be kept as short
as possible. (See iNDEX: "Gas
Connections" for typical permanent
hook up.)
For ,freestanc//;'79' units using
natural gas, Lynx strongly
recommends using a quick
disconnect kit.
Permanently plumbed LP con-
nections, such as those in line
with a bulk cylinder, require
a 4/11 regulator. (Lynx P/N
30781)
If you are using a 4/11
MaxitroJ regulator, ensure that
it is set for the correct fuel by
adding or removing the cap
gasket as shown below.
Gasket
Never connect an Unregulated
gas line to the grill.
LP Cylinder
Requirements
The LP cylinder must be con-
structed and marked in accor-
dance with the specifications
for LP gas cylinders of the U.S.
Department of Transportation
(DOT) and designed for use
with a Type 1 system only
Cylinders must be secured
using the provided cylinder
retention system to avoid
movement.
uick Disconnect (it, part
#LQD, is available from your dealer.
LP GAS
Grills set up for LP gas come
equipped with an LP hose/
regulator assembly for con-
nection to a standard 20 lb. LP
cylinder. (Type 1). All fittings
necessary to attach the
assembly to the griJ are
included.
Do not change the
regulator/hose assembly
or use any other assembly
than the one supplied with
your Lynx grill°
Do not attempt to use a
5LPmA equipped regulator/
hose assembly with a
standard 5t0 POL cylinder/
valve assembly°
Do not store a spare LPmgas
cylinder under or near this
appliance
Never fill the cylinder
beyond 80 percent full
if the information above is
not followed exactly, a fire
causing death or serious
injury may occur.
device.
Never use a cylinder with a
damaged valve.
A dented or rusty LP cylinder
may be hazardous andshouid
be avoided. If in doubt, have
it checked by your LP supplier.
Always check for leaks after
every LP cylinder change.
(See iNDEX: "Leak Test" for further
details.)
Always shut off the LP-gas
supply at the cylinder when
the grill is not in use.
Cylinders must be stored
outdoors in a well-venti-
lated area out of the reach of
children. If your grill is stored
indoors, the LP cylinder must
be stored outside.
LP cylinder with type 1 valve
con nection
33
Page 34

PROFESSIONAL GRILLS
LP Connections
Make sure the LP cylinder
valve is fully closed. It is
possible for the valve to be
open without releasing gas
but, as soon as you start con-
necting the regulator, gas will
leak from the connection.
Insert the regulator inlet into
the cylinder valve and turn the
black coupler clockwise until
the coupler is hand tight. Do
not over-tighten this connec i
tion.
To disconnect the coupler, first
make sure the main cylinder
valve is turned off. Grasp
the coupler and turn counter
clockwise. The inlet will then
disengage.
Always Jeak4est the connec-
tion after refilling or exchang-
ing LP cylinders. (See UNDEX:
"Leak Test" for further details.)
GAS LiNE PURGING
You should purge the gas line
of air before attempting to
light the grill.
Make sure all grill controls
are in the "OFF" position.
Slowly turn on the main
gas supply.
Push in the rotisserie knob
and confirm that the igniter
is glowing. It is furthest
from the fuel source and
will completely purge the
lines. It will take several
seconds for the burner to
light.
Hold the knob ON for
about 20 seconds to allow
the air in the system to
purge and the burner to
light
Wait at least 5 minutes
after shutting off the
control before attempting
to light the burners.
FINAL CHECKS
LEAK TESTING
DANGER!
To prevent fire or explosion
hazard, DO NOT smoke or
allow any potential source
of ignition (sparks, electri-
cal arcing, etc)in the area
while performing a leak
test. Leak tests should be
conducted outdoors only.
Never conduct a leak test
using fire or flame.
Leak Test Procedure:
Create a soapy solution
of 1 part soap and 3 parts
water
Confirm that all control
knobs are in the off
position.
Turn on the fuel supply. For
natural gas, turn the valve
handle 1/4 turn to align
with the gas flow.
For LR, turn the cylinder
valve knob counter
clockwise one full rotation.
Apply the soap solution
generously by paint brush
or squirt bottle on all con-
nections and fittings.
If bubbles appear to
"grow" on any of the con-
nections, you have a gas
leak. IMMEDIATELY turn off
the gas supply.
Fixing a Gas Leak
Shut off the gas supply
Turn aJJgrill controls to the
"ON" position to purge
the grill of any gas build-
up, then turn the controls
back OFF.
Wash off the soapy solution
with cold water and dry.
Tighten the loose joint, or
replace the faulty part with
manufacturer-recommend-
ed replacement parts.
DO NOT attempt to repair
the L.R cylinder valve if it is
damaged. The only way to
safely resolve a damaged
cylinder is to REPLACE IT.
Repeat the leak test to
ensure that no leaks are
present.
LOW HEAT BURNER AD-
JUSTMENT
FOR MAIN BRASS BURN-
ERS, PROSEAR TM AND SIDE
DO NOT ADJUST THE RO-
TISSERIE BURNER,
he main brass burners and
side burners on your Lynx
grill feature an adjustable low
setting.
Fluctuations in gas pressure,
gas conversion and even in
the quality of the gas itself
may affect burner perfor-
mance at the "LOW" setting.
It could be either too high or
too low.
To adjust the burner low
setting:
Make sure the grill is cool.
Remove racks and
briquette trays so that you
can see the flames while
adjusting the burners.
Light the burner and set
it to "LOW". (all the way
counter- clockwise).
34
Page 35

PROFESSIONAL GRILLS
Pull off the control knob.
While holding the valve
shaft with pliers, insert a
thin flat-blade screwdriver
into the shaft and, while
watching the flame, adjust
it to a minimum stable
setting.
ting burner adjustment.
be about 3/8 inch high with a
total flame height of about 1
1/2 inches.
The flames should burn
quietly. (no "torch" sounds)
and theyshouJd not Jilt up
from the burner.
If your flames do not match
those indicated in the photo,
ensure that the air shutter and
burner ports are free and clear
of dirt, debris, or spider webs.
If clear, then adjust the air
shutter.
It is locked in place by a screw
which must be loosened
before adjusting. Once
adjusted retighten the screw.
To Adjust:
If the flame is noisy (sounds
like a torch) and tends to
Jilt away from the burner,
indicating too much
air, turn the air shutter
clockwise.
After the burner cools
down, remove it, tighten
the air shutter set screw
and reinstall the burner,
briquette trays and grill
racks.
ONE LAST THING:
Finally, before leaving, check
all the burners for proper
operation. Make sure the
control knobs turn freely and
completely through their fuji
range.
BRASS BURNER FLAME/
AiR FLOW ADJUSTMENT
The amount of air that enters
a burner is controlled by the
alp s/Torte/:
Each grill burner is tested and
adjusted at the factory prior to
shipment. However, fluctua-
tions in gas pressure, gas con-
version and even in the quality
of the gas itself may make it
necessary to adjust the burner.
The flames of the main brass
burners should be visually
checked
Flames should be blue and
stable with slight yellow tips.
The bright-blue core should
Remove the racks and
briquette trays.
Lift out the burner, loosen
the set screw and then put
the burner back in place
and light it.
If the flame is excessively
/ellow, indicating insuf-
icient air, CAREFULLY turn
the air shutter counter-
clockwise to allow more air
to the burner.
Make sure the owner knows
where the main gas supply
shut off valve is Iocatedo
Finally, for safety and for
proper use & care, you
must leave this manual with
the owner. Make sure you
advise them to keep it for
future reference°
For technical assistance call:
Lynx Technical Support
888-289-5969
35
Page 36

PROFESSIONAL GRILLS
SIDE BURNER/LPSGE HOOKUP
BUILT-IN INSTALLATION
Shut off the gas supply at
the main valve.
Disconnect all plumbing
(if already attached) from
the grill and the gas supply
va [ve.
Remove all the fittings from
the grill manifold.
Install the side burner into
the counter top cutout.
Connect the gas supply to
the grill and side burner as
shown in the two diagrams
on this page.
Turn the gas supply on and
leak test all connections.
(See INDEX: "Leak Test" for
further details.)
Natural Gas
U Pipe Work
_ Regula!or ........
;p
B 1/2"Close Nipple
_ 1/2"Tee
h _ 1/2" Union (Coupler)
BBQ Manifold
-_-- -- _ 1/2"MIP Fitting
17/----_]_ 1/2" O.D. Stainless
_ Street Elbow
/_ Ste0,F,exibleHo e
11 \ l_.... II /SideB ..... I!_ / .... g
! Grill Extender
Valve 1/2"Min Reducer
=u N.G.Outlet Shuf-Off Requires 3/4 - 1/2
Inter Connecting
...... _TOPi
iFlox
/ "" , REARVIEW
1/2"Close Nipple
1/2" Male-Female
Side Burner or
CART INSTALLATION
Shut off the gas supply at
the main valve.
Disconnect all plumbing
(if already attached) from
the grill and the gas supply
va [ve.
Remove all the fittings from
the grill manifold.
Install the side burner onto
the cart according to the
directions supplied with
the cart mounting kit.
Connect the gas supply
to the grill and the side
burner as shown in the
diagrams on this page for
your gas type.
Turn the gas supply on and
leak test all connections.
(See INDEX: "Leak Test" for
further details.)
LP Gas
Use regulator here for
hard-plumbed L.R hook-up
BBQManifotd _/1/2" Male-Female
!- ] A_/-- 1/2" MIP Fitting
r Z r
1/2") Union (Coupler)
ur_ //Street Elbow
teel ,ex,b,e.ose
I_ 1/2" Male-Female
/ _r111BBxtrennec_elr
I -_----] Street Elbow
__ High pressureflexible
hose & regulator existing
on grill
I/2"FIP x 3/8"MIP Flare
Elbow OE1/2" FIP or 1/2"
FIP x 3/8"MIP Flare
g
1/2"Close Nipple
l/2"Tee
1/2"Close Nipple
36
Page 37

WIRING SCHEMATICS
HALOGEN
UGHTS
Male pins @ LEAD WiTH r_lN
• _ " m !il j , , Q DF_AD H_AD (NO PIN_
PROFESSIONAL GRILLS
...................................... BLACK
............................. RED
ORANGE
............................................................GREEN
WHITE
BACK OF THE GRILL
FRONT OF THE GRILL
4X Molex FemaEe
Male pins
4X Molex Male
Female pins
| I
I i
I m
m m _
I | 1 2X Mo_ex Male
I_ l _ Female Pins
I
J
|
_ _t Male pins Varis o_' %% "*_'
i
m
l
I
I
I I
I
2x Mo[ex Female Green * i
Molex Female
Male pins
-=.. :::,2: ..............
Mo_ex Male
Female Pins
Light
LED
!
Igniter
L_4FT RIGHT
BURNER BURNER
Hot
Sudace
Igniter
L
Light
Switch
Rotisserie
Jack
L27 NON-ROTISSERIE GRILL
37
Page 38

PROFESSmONAL GRmLLS
4X Molex Male .,_1_
Female pins
i; /
Light
J Switch
-_MoJex Femab
MaJe pirss
Rotisserie
Female Pins
,Jack
MaJe pins
ROTISSERIE LEFT RIGHT
BURNER BURNER BURNER
L27 & L30 ROTISSERIE GRILL
4_
Page 39

Rotisserie
Igniter
A
®
hAlOGEN
LIGt-_TS
4X Molex Mab
Femab pins
PROFESSIONAL GRILLS
B
BACK OF _HE GRIll m J
I m
m i!
m I E
I
I
I
I
I
4X Molex Female
Male pins
li _ " Molex Femab _ I
_ Male pins Vadstol
('_ _EAD WiTH PiN
Q DAD LEAD ( NO P_F_)
Molex Male
Light Light
LED LED
BURNER BURNER
SEAR
Female pins
Rotisserie
L36 & L42 ROTISSERIE GRILL
Jack
Page 40

PROFESSIONAL GRILLS
HALOGEN
LIGHTS
Rolisselie
Igniter
£
4X Molex Male
Female pins
B
4X Molex Femab
Male pins
BACK OF _INE GRI L I_ U
...... _ _" _ _ _ _ Light
FRONT O
THE GRILL
4X Mo[ex Female
i m
a I i Molex Male
I
1_ _ Hot Hot Hot Not
I_ I_ Igniter Ignite_ Igniter Igniter
_ ROTISSERI EF} ONTR RIGH'_ SAR ROTISSERI
Male
_ BURNER BURNER BURNER BURNER BURNER BURNER
Q LEADWIT4 P_N
DAD LEAD ( NO PIN)
Female Pins
ED
Light Light Light
lED _ LED _ lED
Light
lED
Surface Surface Surface Surface
40
L54 ROTISSERIE GRILL
Page 41

PROFESSIONAL GRILLS
2010 LYNX PROFESSIONAL GRILLS EXPLODED PARTSVIEW
NUT
F/S SCREWI
B/I SCREW I
HOOD
_ _ EXTENSION SPRING
_53_ TRANSFDRNER BRIQUETTE TRAY
RDTISERIE CORD
GAS CDLLECTDR BOX
GAS COLLECTOR BOX(
MANIFOLD PIPE ASS'Y{4._
IRFLEXTUBIN_@_
IR BURNER VALVE,_9_-
BULLNDSE ASS'Yi3 _ .......
FRONT PANEL (35_ -.
BEZEL AND SCREW_3@_3_ \
STAINLESS RDTIS KNOB
STAINLESS BURNER KNOB(
STAINLESS BURNER KNOB,
s
....... / \
LED HARNESS ASSY _ Y
BRIQUETTES (
QTY 35 PER BOX
(i BOX PER BURNER)
PRD SEAR BURNER
H BURNER {BRASS)!
GAS DEFLECTOR
PLAIN ELECTRDDE
BURNER VALVE
RDTISERIE JACK+
ILIGHT SWITCH
HARNESS
\
HATCH HOLDER /
DRAIN PLUG_78}
_76}HEAT SHIELD
_ FIREBOX ASS'Y
(NOT FIELD REPLACABLE)
ROLLER BEARING KIT AND ALL CONNECTING WIRES
@DRI,_AN
J DRIP PAN__
_WARHING SHELF
GRATE
HOOD LIGHT HDDD STOP
'\ _I)RDLLER BEARING
)IR PANEL ASSY
}IR BURNER FRAHE
)IR RDTIS BURNER
AC_SCREW TO ATTACH IR BURNER
WDDDCHIP TRAY
IR IGNITER BRACKET
IR IGNITER COVER
REGULATOR 4/11
'_,8_ FIREBOX PARTITIDN
RDTIS ORIFICE
TO 8O0O FT ELEVATION)
_3_COHPLETE ELECTRODE KIT
- INCLUDES HOT SURFACE IGNITERS
SNOKER BOX
SPACER
iSCREW
.....KIT RDTISSERIE
11/2/09
41
Page 42

42
ITEM GRILL SIZE PART NO,
i L27 80322
L30 80309
L36 80310
L42 80311
L54 80318
8 ALL 90132
3 ALL 88877
4 L27 32555
L30 32109
L36 32110
L42 32111
L54 32118
5 L87 17012
L30 30018
L36 17020
L48 30018
L48 30019
L54 30018
L54 30019
6 ALL 28018
7 ALL 33058
7A ALL 33893
L54 33108
72 ALL 14018
8 ALL 31795
9 L87 32551
L30 32156
L36 32441
L48 32448
L54 38159
i0 L27 8838O
L27 80381
L30 80869
L36 80270
L42 80271
L54 80878
ii ALL 28854
12 87,30 80446
36,42,54 80447
13 ALL 31979
14 L27 80318
87 NON IR 80319
L38 80873
L36 80274
L42 80275
L54 80276
14A L27 32988
30,36,54 38989
L48 38990
142 L27 32991
30,36,54 32992
L48 32993
14C ALL 38644
15 L27 10067
L30 32484
L38 32245
L42 32485
L54 32486
16 87,30,54 10159
36,42 10158
17 ALL 33059
L54 33860
18 L3O 33135
27_36,42,54 33136
19 ALL 88781
ALL 13053
20 30,48,54 32743
L36 33056
21 ALL 90128
22 ALL 32468
83 ALL 32469
24 L27A36 PRENGK
L27,L36 PRELPK
30A2,54 PRONGK
30,42,54 PROLPK
L87A36 13013
L27,L36 13019
30,42,54 30329
30,42,54 30328
PROSEAR 13015
PROSEAR 13020
30,36,54 13016
30,36,54 13021
L27 _ 13016
L27 _ 13021
L42 _ 30470
L48 _ 31342
25 ALL 90129
26 30,42,54 90073
87,36 90074
27 L27 32548
L3O 18050
L36 31494
L42 18051
L54 31324
28 ALL 33130
29 27 NON IR 80434
27,30 80435
36,42 80436
L54 80437
30 ALL 90137
30A ALL 90139
3i ALL 90136
32 ALL i0001
33 ALL 31929
34 ALL 33148
11/2/09
DESCRIPTION
FRONT HOOD ASSY, 27 _
FRONT HOOD ASSY, 30"
FRONT HOOD ASSY, 36"
FRONT HO00 ASSY, 48"
FRONT HOOD ASSY, 54"
MOTOR MOUNTING BRACKET KIT, ALL PRO
MOTOR ASSY, HEAVY DUTY 3 SPEED
WARMING SHELF, PRO 27*
WARMING SHELF, PRO 30 _
WARMING SHELF, PRO 36"
WARMING SHELF, PRO 42"
WARMING SHELF, PRO 54"
(2) GRATES 12" x 18"
(2) GRATES 13 1/2 X 21"
(2) GRATES 16 1/8" X 18 1/8"
(2) GRATES 13 i/2" X 21"
(1) GRATE 12" X 21" (CENTER)
(2) GRATES 13 1/2" X 21"
(2) GRATES 12" X 21"
IR THERMOGOUPLE
IR ELECTRODE. HOT SURFACE (SEE ALSO #73:
GAS COLLECTOR BOX, IR ROTIB,
GAS COLLECTOR BOX, IR ROTIS R/H 54 _
SCREW, #6 38 X i/4 PH PAN HB
IR CRASS ELBOW, 7/16 20 MALE THREAD
LIGHT PANEL/REAR HOOD LINER, 27" 2008
LIGHT PANEL/REAR HOOD LINER. 30" 2007
LIGHT PANEL FOR BUAL LIGHTS, 36" 2008
LIGHT PANEL FOR DUAL LIGHTS, 42" 2008
LIGHT PANEL FOR BUAL LIGHTS, 54" 2007
REAR HOB[] ASSY, PRO 27" 2008
REAR HOOD ABSY, PRO 27 _ NON IR 2008
REAR HOOD ASSY, PRO 30" 8007/8008
REAR HOOD ASSY, PRO 36 _ 2807/2008
REAR HOOD ASSY, PRO 42 _ 2007/2008
REAR HOOD ASSY, PRO 54" 2007/2008
HOOD SPACER, ALL PRO SERIES
HOOD LIGHT ASS'Y, SINGLE W/IOW BULB. 2010
HOOD LIGHT ASS'Y, DUAL W/IOW CULC, 2010
BULB_ REPLACENENT_ lOW HALOGEN
IR PANEL ASBY. PRO 27 _ 2010 (INCLUDED BURNER)
REAR FINISHING PANEL, NON IR. PRO 27" 8008
IR PANEL ASSY, 30 _ 8010 (INCLUDES BURNER)
IR PANEL ASSY, 36" 2010 (INCLUDES BURNER)
IR PANEL ASSY, 42 _ 2010 (INCLUDES CURNER)
IR PANEL ASSY, 54 _ 2018 <INCLUDES CURNER)
IR ROTIS CURNER ONLY (SHALL 16 IN)
IR ROTIS BURNER ONLY (MEDIUM 21 IN)
IR ROTIS CURNER ONLY (LARGE 28 IN>
IR BURNER FRAME ONLY (SMALL 16 IN)
IR BURNER FRAME ONLY (MEDIUM 21 IN,)
IR CURNER FRAME ONLY (LARGE 88 IN,>
BURNER HANGER, PRO 30 _ 2010
BURNER HANGER, PRO 36" 2010
BURNER HANGER, PRO 42" 2010
BURNER HANGER, PRO 54" 2010
WOOBCHIP TRAY (27", 38 _, 540
W00BCHIP TRAY (36% 420
IR IGNITER BRACKET, PRO 8018
IR IGNITER BRACKET. RIGHT, 54 _ 2810
IR IGNITER COVER, PRO 30 _ 2010
IR IGNITER COVER 2010 (27% 36% 42% 540
REGULATOR 4/11 N/G ONLY
REGULATOR W/3O" HOSE DOUBLE STAGE LP
FIREBOX PARTITION, 30",42',54 _ 2008
FIREBOX PARTITION, PRO 36 _ 2010
ROLLER BEARING KIT ROTISSERIE (2 PARTS EA)
HOOD STOP, PRO 2808
SCREW/HOOD STOP #8 32 X in RH TRUSS HB
COMPLETE ORIFICE FIELD KIT LP TO NG
COMPLETE ORIFICE FIELD KIT N6 TO LP
COMPLETE ORIFICE FIELD KIT LP TO NG
COMPLETE ORIFICE FELB KIT NO TO LP
ORIFICE.BURNER. NG (#41 SHORT)
ORIFICE,BURNER, LP (#53 SHORT)
ORIFICE,BURNER. NG (#41 LONG)
ORIFICE,BURNER, LP (#53 LONG)
ORIFICE,BURNER, NG (#44 SHORT)
ORIPICE,BURNER_ LP (#54 SHORT)
ORIFICE, IR ROTIS, NG (#50 SHORT)
ORIFICE, IR ROTIS. LP (#57 SHORT)
ORIFICE, IR ROTIS. NG (#50 SHORT)
ORIFICE, IR ROTIS, LP (#57 SHORT)
ORIFICE, IR ROTIS. NG (#48 SHORT)
ORIFICE, IR ROTI8_ LP (#56 SHORT)
ROLLER BEARING KIT DRIP PAN (2 PARTS EA)
SMOKER BOX ASSY 30 _, 42% 54"
SMOKER BOX ASSY, 27% 36*
DRIP PAN, PRO 27 _ 2008
DRIP PAN, 30 _
DRIP PAN, 36 _
DRIP PAN, 42 _
DRIP PAN, 54 _
TRANSFORMER MOUNTING BRKT B/I S F/S
LED HARNESS ASSY, 27 _ NON IR, 2010
LED HARNESS ASSY, 874R/30% 8010
LED HARNESS ASSY, 36"/48 _, 2010
LED HARNESS ASSY, 54 _, 2010
KNOB, BURNER, STAINLESS
KNOB KIT, STAINLESB (3 BURNER+I ROTIS)
KNOB, ROTIS, STAINLESS
BEZEL
BEZEL SCREW, #6 38 X i/8 PH PAN
LIGHT SWITCH + HARNESS, BLUE LIGHTED 2010
ITEM GRILL SIZE PART NO
35 L27 32546
L27 32547
L30 31670
L36 31682
L42 31687
L54 31691
36 ALL 33058
37 PS MODELS 33098
38 L27 80317
L30 80261
L36 80263
L42 80265
L54 88868
39 ALL 31772
40 L27 P/S 33131
L30 P/S 33131
L36 P/S 33132
L42 P/S 33133
L54 33134
41 ALL 31794
48 ALL 32846
43 L27 80251
L27 80252
L2/ 80253
L27 80254
L27 80429
L27 80488
L30 80211
L30 80212
L30 80213
L3O 80214
L36 80227
L36 80228
L36 80229
L36 80230
L42 80801
L42 80202
L42 80203
L48 80204
L54 80220
L54 80221
44 ALL 33051
45 30,42,54 30485
27,36 11012
46 PS MODELS 33000
PS MODELS 32915
47 30,42,54 80015
30,42,54 90071
42,54 80033
42,54 98072
27,36 80232
27,36 90070
48 ALL 90053
49 ALL 30417
50 ALL 14018
5i ALL 80440
52 ALL 80438
L87 NON IR 80439
53 ALL 33100
54 ALL 31170
55 L27 32557
L30 32522
L36 32523
L48 32524
L54 32525
56 30,42,54 31874
27,36 31780
57 ALL 31738
58 ALL 31736
59 ALL 31200
60 ALL 14013
ALL 14009
ALL 14026
61 L27 32556
L30 32128
L36 32129
L42 32130
L54 32131
62 ALL 31563
63 ALL 33033
64 ALL 32133
65 ALL 32194
66 ALL 14014
67 ALL 14084
68 ALL 14030
69 ALL 31031
70 ALL 31013
71 ALL 31649
72 ALL 32477
73 L27 NON IR 90146
27,30 90147
36,42 9O148
L54 90149
74 ALL 32190
75 ALL 32939
76 L27 38596
L27 33861
L30 31669
L30 31813
L36 31815
L36 31816
L42 31698
L42 31817
L54 32275
77 ALL 14823
78 ALL 90151
DESCRIPTION
FRONT PANEL, PRO 27 _ 2008
FRONT PANEL, NON IR, PRO 27 _ 2008
FRONT PANEL_ 30 _
FRONT PANEL, 36"
FRONT PANEL, 42 _
FRONT PANEL, 54 _
GAS COLLECTOR BOX, H CURNER
GAS COLLECTOR BOX, PROSEAR CURNER
BULLNOSE ASS'Y, PRO 27 _ 2008
BULLNOSE ASS'Y_ 30_, 8007
BULLNOSE ASS'Y, 86% 2807
BULLNOSE ASS'Y, 42_ 2007
BULLNOSE ASS'Y, 54_, 2007
IR BURNER VALVE W/ MICROBWITCH
GAS DEFLECTOR, 27_/38 _ PROSEAR. 2OlO
GAS DEFLECTOR, 27"/30" PROSEAR. 2OlO
GAS DEFLECTOR, 36" PROSEAR, 2810
GAS DEFLECTOR, 42" PROSEAR, 2810
GAS BEFLECTOR_ PRO 54 _ 2010 (PROSEAR)
FLEX HOSE, 9 MM X 38" W/ 7/16 FITTING!
MAIN BURNER VALVE W/ MICROSWITCH
MANIFOLD ASS'Y W/VALVES, 27 _ LP
MANIFOLD ASS'Y W/VALVES, 27 _ LP NON IR
MANIFOLB ASS'Y W/VALVES, 27" NG
MANIFOLB ASS'Y W/VALVES, 27 _ NG NON IR
MANIFOLB ABS'Y W/VALVEB, 27 _ LP PROBEAR
MANIFOLB ASS'Y W/VALVES, 87" NG PROSEAR
MANIFOLB ASS'Y W/VALVES, 30 _ LP PROSEAR
MANIFOLB ASS'Y W/VALVES, 30" LP
MANIFOLB ABS'Y W/VALVES, 30 _ NG PROBEAR
MANIFOLD ASS'Y W/VALVES, 30" N8
MANIFOLB ASS'Y W/VALVES, 38" LP PROSEAR
MANIFOLB ASS'Y W/VALVES, 36 _ LP
MANIFOLD ASS'Y W/VALVES, 36 _ NG PROSEAR
MANIFOLD ASS'Y W/VALVES, 36 _ NG
MANIFOLD ASS'Y W/VALVES, 48 _ LP PROSEAR
MANIFOLD ASS'Y W/VALVES, 48 _ LP
MANIFOLD ASS'Y W/VALVES, 42 _ NG PROSEAR
MANIFOLD ASS'Y W/VALVES, 48 _ NG
MANIFOLD ASS'Y W/VALVES, 54 _ LP PROSEAR
MANIFOLD ASS'Y W/VALVES, 54 _ NG PROSEAR
ELECTRODE, MAIN BURNER, HOT SURFACE (SEE #731
H BURNER (BRASS)
H BURNER (BRASS)
PROSEAR BURNER, 30_, 42_, 54% 2009
PROSEAR BURNER, SHORT, 27_/36" 2010
BRIQUETTE TRAY, 30% 42% 54 _
OMPLETE TRAY W/ BRIQUETTES 8, CLIPS
BRIQUETTE TRAY, NARROW, 42_,54 _
:OMPLETE TRAY W/ BRIQUETTES ,% CLIPS
BRIQUETTE TRAY, 27'% 36"
COMPLETE TRAY W/ BRIQUETTES S CLIPS
BRIQUETTES, 35 PER BOX
IR ACCESS COVER
SCREW, 1/4 20 X 3/8 PH TRUSS HB, S/S
ROTISERIE JACK + INTERNAL HARNESS_ 2010
MAIN POWER HARNESS, 2010 (271R, 30, 36, 42, 54
MAIN POWER HARNESS, 27 _ NON IR, 2010
TRANSFORMER, 5 AMP, PRO 2010
ROTISERIE EXTERNAL CORD
HOOD HANDLE, 27% 2008
HOOD HANDLE, 30% 2008
HOOD HANDLE, 36% 2008
HOOD HANDLE, 42", 2008
HOOD HANDLE, 54% 2008
EXTENSION SPRING, 3@', 42% 54"
EXTENSION SPRING, 27% 36"
INSULATING BUSHING, HOOD HANDLE
END CAP FOR HOOD HANDLE
HOB]) THERMOMETER
PIVOT SCREW, i/4 20 X 1_ HEX !}RIVE
PIVOT SCREW NUT, HEX, 1/4 20 S/S
PIVOT WASHER, SPLIT LOCK, i/4 S/S
SPIT ROD, PRO 2T' 2008
SPIT ROD, 3@' 2007
SPIT ROD, 36 _ 2007
SPIT ROD, 42 _ 2007
SPIT ROD, 54 _ 2007
SPIT FORK, HEAVY DUTY, ALL SIZES
FRONT RETAINING BKT, WARMING RACK 2011
REAR RETAINING BRACKET, WARMING RACK
LEFT RETAINING BRACKET, WARMING RACK
SCREW #8 32 x 8/8 PH TRUSS HEAD S/S
LOCK NUT, #8 32. S/S
BOLT, HEX HEAD, I/4 20 X i/2% S/S
ALTERNATE LIGHTING BEVIEE, MATCH HOLDER
SCREW, #8 X i/2 PH TRUSS HB TYPE 'A'
SCREW, $$8 32 X 5/8 PH, PAN HI, S/S
HOOD BUMPER, ,580 DIA
COMPLETE ELECTRODE KIT, 27" NON IR,2OI(
COMPLETE ELECTRODE KIT. B7qR/3O% 2810
COMPLETE ELECTRODE KIT, 36"/48% 8010
COMPLETE ELECTRODE KIT, 54" 2OlO
SCREW, #10 32 X i i/4 PH FLAT HB S/S
ROTIS SPACER
HEAT SHIELD, PRO 87"
HEAT SHIELD, PRBSEAR 27 _
HEAT BHIELB, PRO 30"
HEAT BHIELB, PRBBEAR 30"
HEAT SHIELD, PRO 36"
HEAT SHIELD, PROSEAR 36"
HEAT SHIELD, PRO 42"
HEAT SHIELD, PROSEAR 42"
HEAT SHIELD, PROSEAR 54 _
NUT, COMBINATION (FOR HEAT SHIELD/
BRAIN PLUG AND SEAL KIT. DRIP PAN
Page 43

PROFESSIONAL GRILLS
MODEL-SPECIFIC BTU OUTPUTS
H BURNER ROTISSERIE PROSEAR TOTAL INPUT
2 @ 25,000 Btu 50,000 BtuiHr
2 @ 25,000 Btu 1 @ 14,000 64,000 BtuiHr
L27PS(F)R-2 1 @ 25,000 Btu 1 @ 14,000 1 @ 23,000 62,000 BtuiHr
L30R(F)-I 2 @ 25,000 1 @ 14,000 64,000 Btu/Hr
L30PS(F)R-I I @ 25,000 I @ 14,000 I @ 23,000 62,000 BtuiHr
L36R-1 3 @ 25,000 1 @ 14,000 89,000 BtuiHr
L36PS(F)R-1 2 @ 25,000 1 @ 14,000 1 @ 23,000 87,000 BtuiHr
L42R-1 3 @ 25,000 1 @ 16,000 91,000 BtuiHr
L42PS(F)R-1 2 @ 25,000 1 @ 16,000 1 @ 23,000 89,000 BtuiHr
L54PS(F)R-1 3 @ 25,000 2 @ 14,000 1 @ 23,000 126,000 BtuiHr
MAXIMUM RUNS FOR ALL
APPLIANCES ON SUPPLY LINE
Run Length Max BTU for all Ap-
3/4" Pipe pliances on line
(in feet)
10 360,000
20 245,000
30 198,000
40 169,000
50 150,000
60 135.000
70 123,000
80 115,000
43
Page 44

PROFESSIONAL GRILLS
INDEX
A
Air Flame/Flow Adjustment ...... 34
Adjustment ............................... 34
Air Shutter Adjustment ............. 34
B
BTU Outputs, Model Specific... 42
Burner Adjustment, Low ........... 33
Burner Adjustment, Main ......... 34
Burner Placement ..................... 17
C
Clean the Brass Burner ............. 17
Contacting LYNX ...................... 22
Cut-out Dim., Built-in Grills ...... 28
E
Exploded Parts View .................
4O
G P
Gas Connections ...................... 31
Gas Line Purging ...................... 33
Gas Requirements .................... 31
Gas Supply Line Runs ............... 32
Grilling in Windy Conditions ...... 8
Leak Test Procedure ................. 33
Lighting, Manual ....................... 11
Lighting Your Grill ..................... 10
Liting the Rotisserie Burner ...... 10
Low Heat burner adjustment .... 33
M
Manual Lighting ........................ 11
Match Lighting ......................... 11
Maximum Runs for all appliances on
supply line ...................... 42
Maxitrol Regulator .................... 31
Parts List ................................... 41
Parts View, Exploded ................ 40
Pre-Heating ProSear Burner ..... 13
Pre-Heating the Grill ................. 12
Purging the Gas Line ................ 33
R
Regulator Conversion ...............
S
Schematic, L27 & L30 ............... 37
Schematic, L27 Non-Rotisserie. 36
Schematic, L36 & L42 ............... 38
Schematic, L54 ......................... 39
Schematics ................................ 36
Service, contacting Lynx ........... 22
T
31
F
Flame, Correct Size ..................
34
O
Obtaining Service From LYNX.. 22
Technical Support .....................
W
Windy Conditions, Grilling in .....
22
44
Page 45

NOTES
PBOFESSmONAL GRmLLS
45
Page 46

PROFESSIONAL GRILLS
NOTES
46
Page 47

47
Page 48

 Loading...