

Page 1
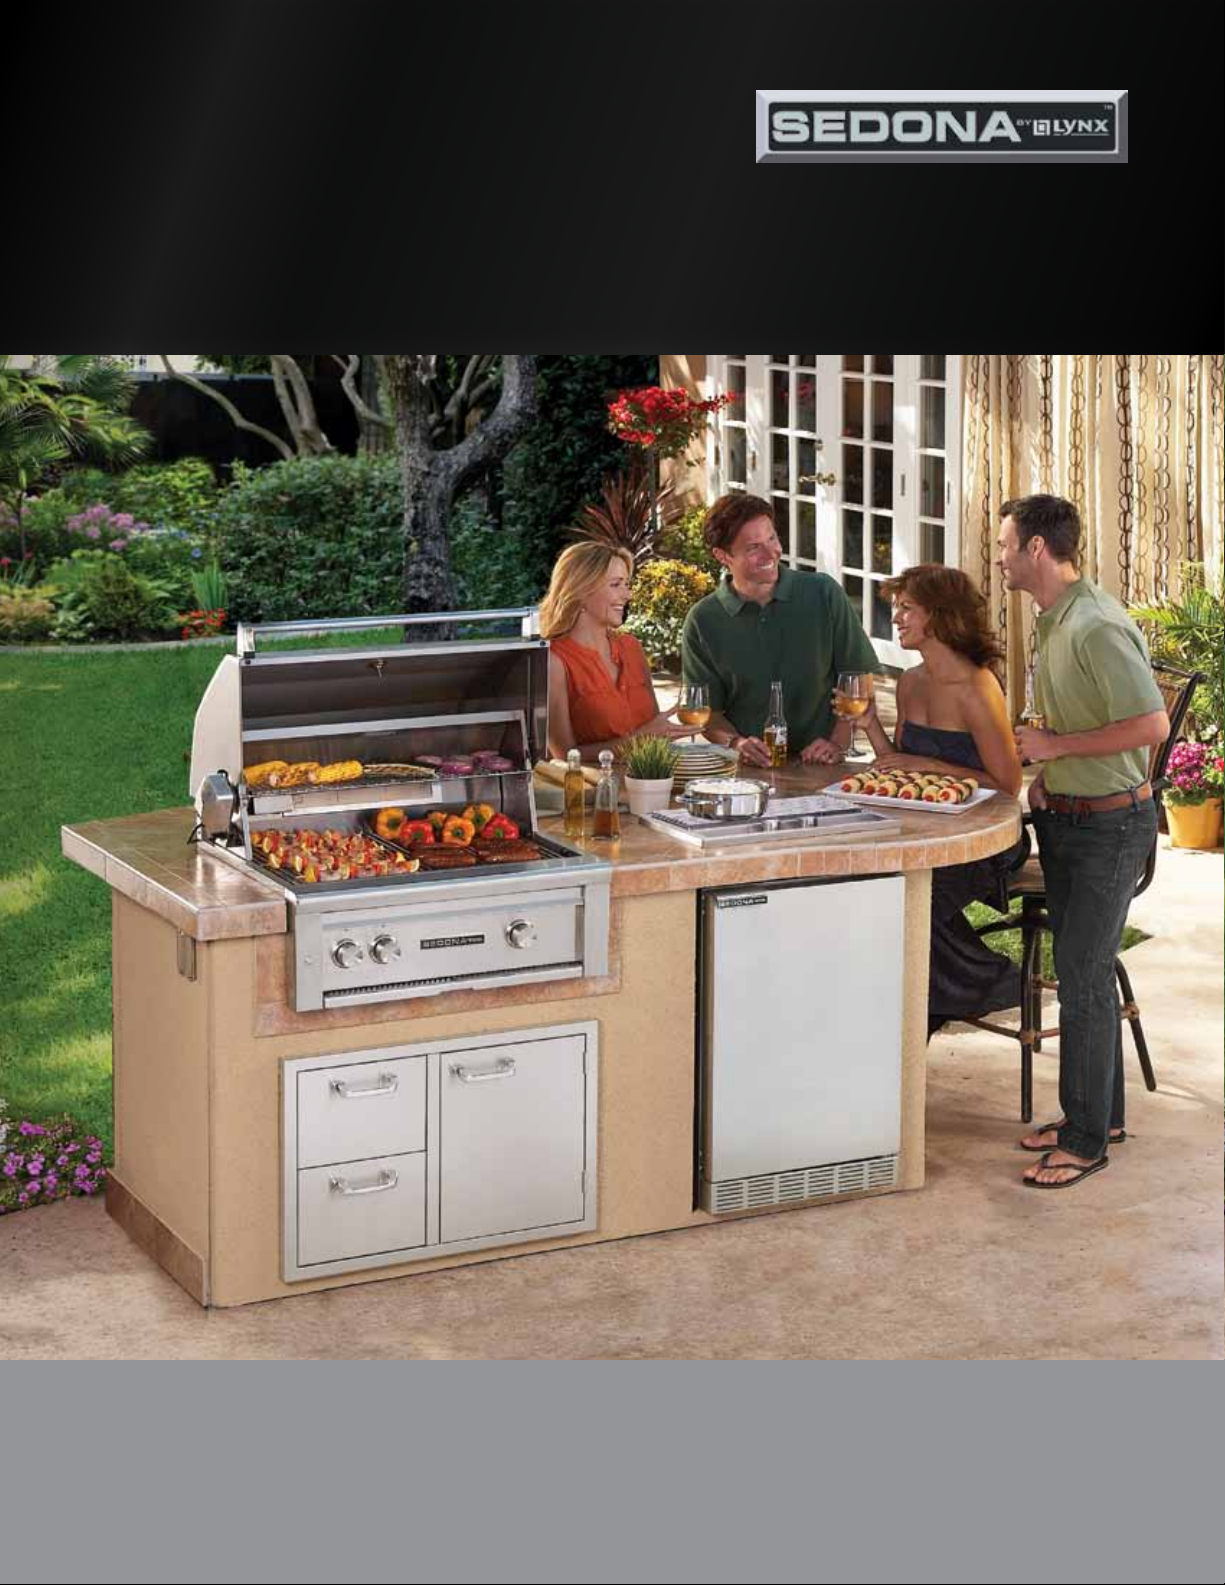
MoM FrIEnDLY. DAD rEADY.
™
sEDonA IsLAnD AssEMbLY
InstructIons
Page 2
SEDONA ISLAND ASSEMBLY INSTRUCTIONS
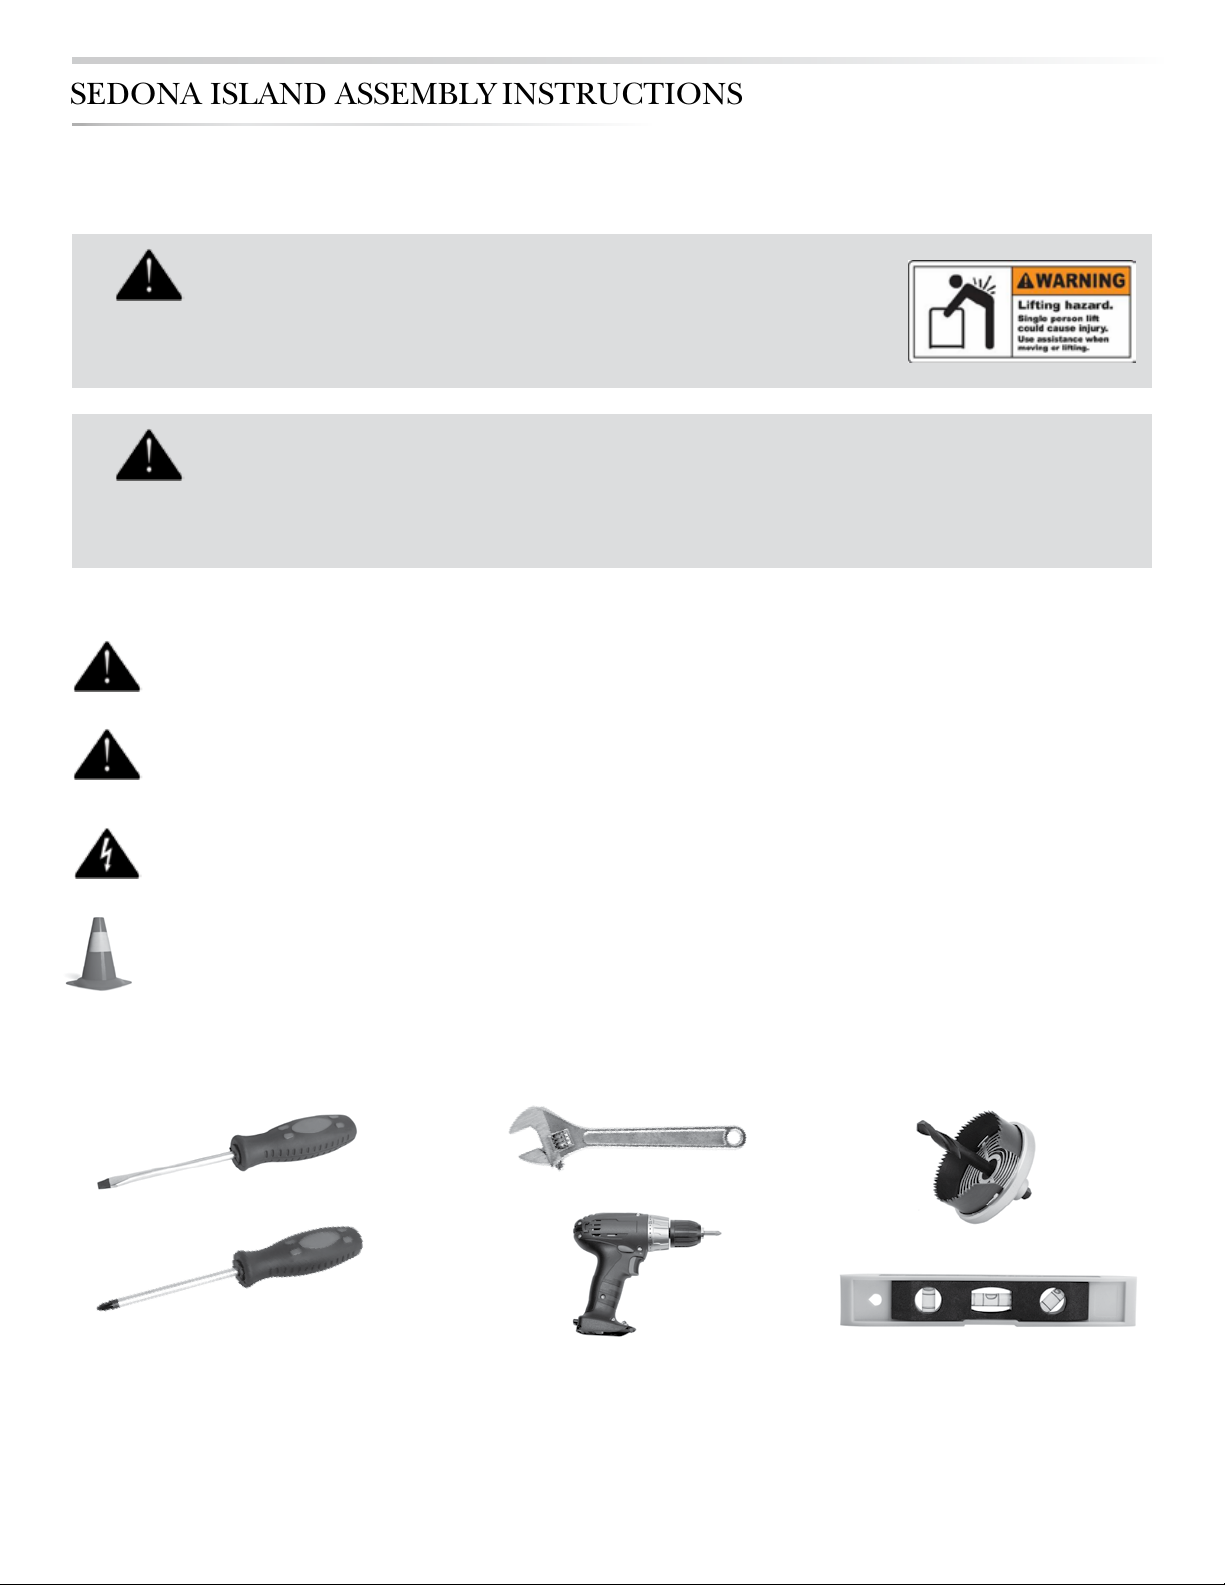
IMPORTANT SAFEGUARDS
WARNING
Two to three people are needed to set up the island. Failure to do so may result in injury.
WARNING
Do not store or use gasoline or other ammable liquids or vapors in the vicinity of this or any other appliance.
To reduce the risk of re, electrical shock or personal injury follow the instruction contained in this guide carefully.
Do not omit any steps.
Never attempt to lift the island by the counter top as serious damage may occur.
To prevent electrical shock use only a three pronged power estension cord, do not remove the grounding prong,
do not use an adapter. Use an extension cord rated for outdoor service such as SJTW.
Plan your island location prior to beginning any set up. The island must be installed and leveled in its final
location. Moving the island once complete is not advised as damage will occur.
RECOMMENDED TOOLS:
A Level, a Philips and a Slotted Head screwdriver, and an Adjustable Wrench. An Electric drill with a Philips head
tting is useful for uncrating the panels. A hole drill is needed of you would like to provide an alternate extension
cord or drainage port.
2
SEDONA ISlAND ASSEmbly INStructIONS
|
PART NO. 34269 REV B. 5/13
Page 3
Congratulations on your purchase of the SEDONA by LYNXtm island package cooking center. The fully featured premium
SEDONA ISLAND ASSEMBLY INSTRUCTIONS
outdoor kitchen can be created in no time at all. The Mom Friendly, Dad Readytm cooking products are designed with the
family in mind. The grills are crafted by Lynx Grill Specialists at our factory in Southern California. Each Sedona Grill displays
the meticulous t and nish and high-quality material that have made Lynx products favorites of grilling enthusiasts.
WARNING
Before you begin the island installation you need to plan ahead. Some things to consider:
POWER SUPPLY:
Where will the power enter your island?
A 1-1/2 hole is provided in the base panel for an extension cord to pass. If another location is desired you will have to drill
a hole into the side or back panels. The extension cord should be brought into the enclosure before the base is leveled
and the side panels assembled.
Can the base be positioned over an existing 110 VAC electrical outlet so an extension cord will not be needed?
Should a qualied electrical technician be provided for this work? It is recommended.
ISLAND ORIENTATION:
From what direction are the prevailing winds coming?
It is important for proper operation that winds do not blow directly on the rear of the grill.
Consider positioning the island to take advantage of natural wind breaks.
LEVELING THE ISLAND:
Can the grill be leveled properly in its final location?
The base has adjustable legs that must be used to level the island before the panels and top are installed.
Is the island installed on solid ground or pavers so the adjustable feet will not sink in over time?
If the island is not leveled correctly the panels will be misaligned and cannot be corrected once assembly is complete.
Once assembly is completed the island cannot be moved.
ASSEMBLING THE ISLAND:
Do you have an assistant or two to help in the assembly?
You will need assistance holding panels in place while assembling, and for installing the counter top.
The top panel is heavy and we don’t want anyone hurt while assembling the island.
INSTALLING THE APPLIANCES:
The side burner is equipped with 2 drainage tubes. These must be replaced with the 2 longer tubes found in the “Open
Me First Box” in order for the drains to reach the hole in the base panel.
Plan for the drain position. Can the tubes be positioned to drain properly?
The grill and side burners need proper connections to the gas supply.
Do you need a qualified technician to assemble and leak test the gas connections? It is recommended.
The refrigerator should be leveled during installation and allowed to sit at rest for at least 2 hours before plugging it in.
If you have any questions or comments please contact Lynx Customer Care:
Lynx Professional Grills
5859 Rickenbacker Rd.
Commerce, CA 90040
Lynx Customer Care 888.289.5969
SEDONA ISlAND ASSEmbly INStructIONS
3
|
Page 4
SEDONA ISLAND ASSEMBLY INSTRUCTIONS
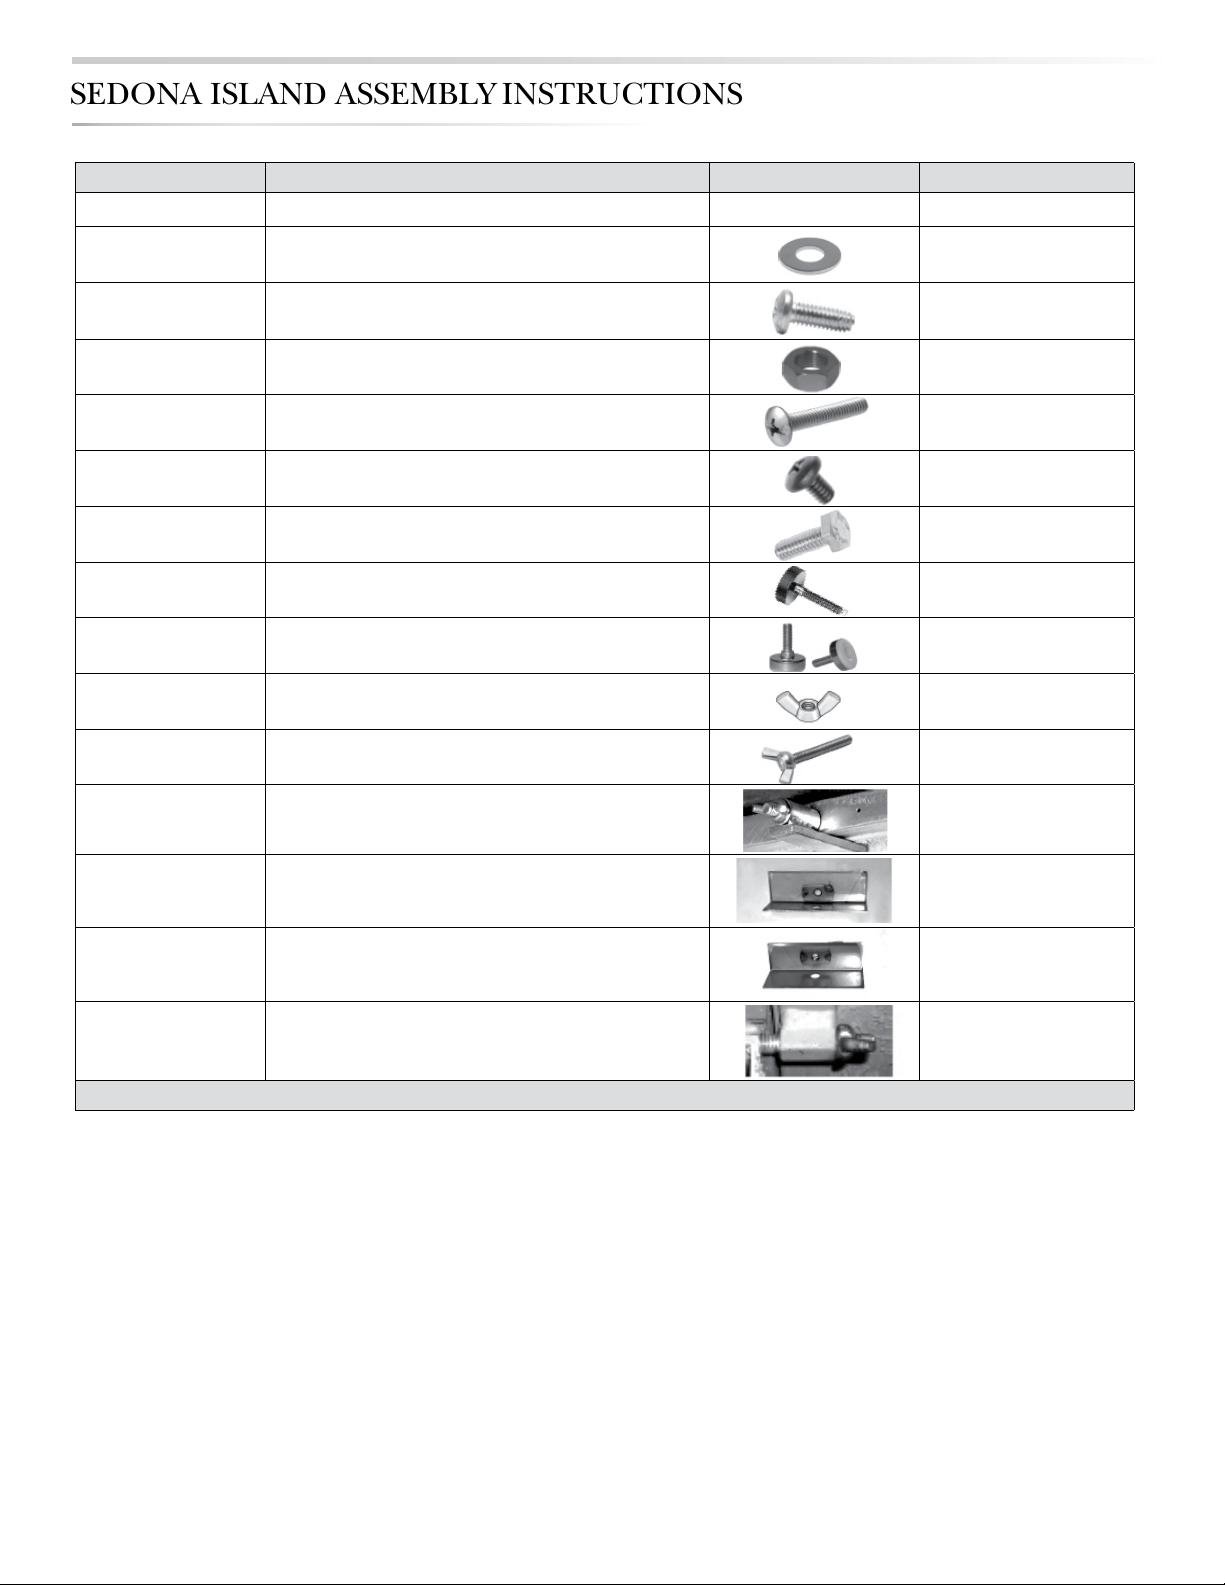
PART NUMBER DESCRIPTION PHOTO SPECIFICATIONS
1
(14044)
2
(14014)
3
(14009)
4
(32730)
5
(14012)
6
(14030)
7
(34264)
8
(34396)
9
(34395)
10
(34397)
11
(34333)
TANK RETAINING WASHER
TRANSFORMER /BATTERY MOUNTING SCREWS
SIDE BURNER MOUNTING HEX NUT
SIDE BURNER MOUNTING SCREW
ACCESS DOOR FRAME MOUNTING SCREWS
HEX BOLT
TANK RETAINER FINGER SCREW
ADJUSTABLE FEET
WING NUT
WING BOLT
COUNTER TOP MOUNTING CLAMP
1/4 X 11/16
2 EA.
8-32 X 3/8 TRUSS
4 EA.
1/4-20 SS
2 EA
1/4-20 X 1-1/4 PH
2 EA.
1/4-20 X 3/8 PH
4 EA.
1/4-20 x 1/2, 2 Ea.
1/4-20 x 1-1/2
2 EA.
6 EA.
3/8-16
10 EA.
3/8-16 x 2
4 EA.
2 EA.
12
(80758)
13
(80759)
14
(34332)
ACCESS DOOR FRAME MOUNTING BRACKET
(Note weld nut location)
SIDE BURNER MOUNTING BRACKET
(Note weld nut location)
SIDE BURNER MOUNTING BRACKET
4 EA.
2 EA.
4 EA.
4
SEDONA ISlAND ASSEmbly INStructIONS
|
Page 5
SEDONA ISLAND ASSEMBLY INSTRUCTIONS
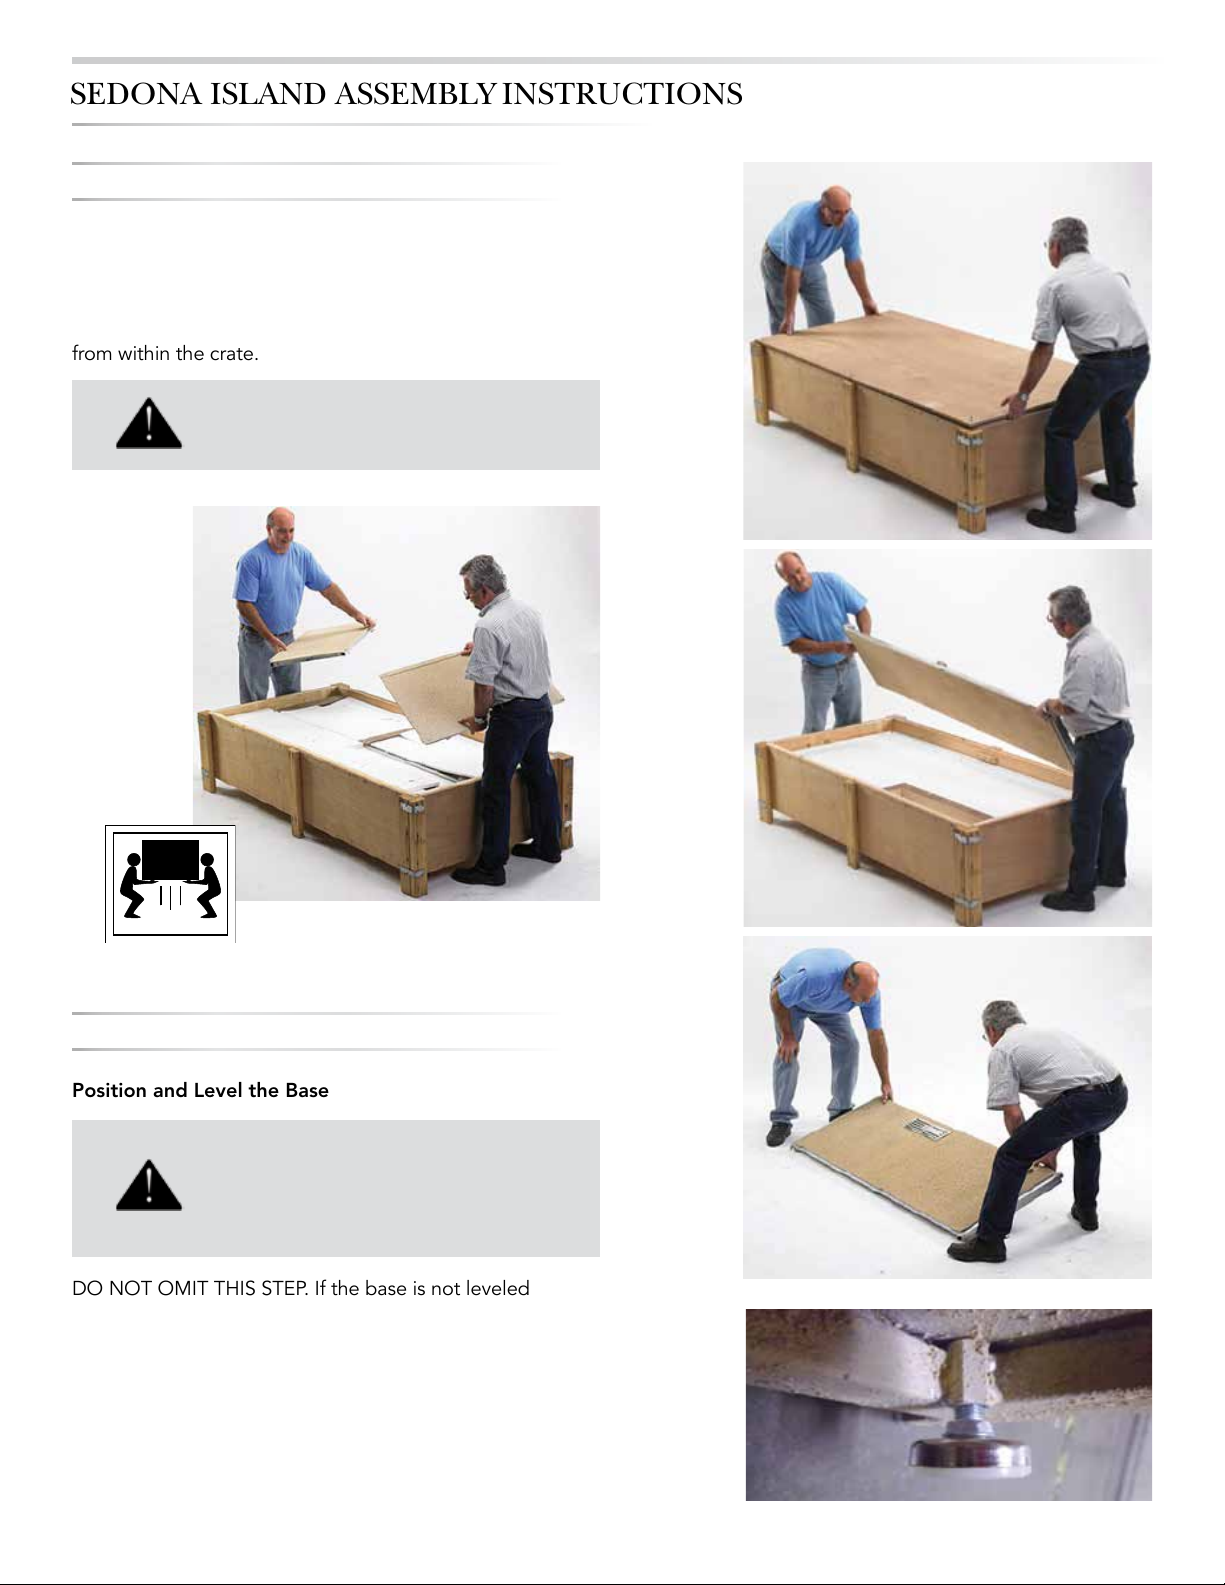
Step 1
Unpacking the Crate
Using a manual or power Philips head screwdriver, remove
all of the screws used to secure the top cover of the crate.
Remove the island bottom, rear, front and two side panels
from within the crate.
We recommend 2 to 3 people perform
setup operations.
TEAM
LIFT
FOR YOUR SAFETY
Step 2
Position and Level the Base
Place the island base on a level surface
in it’s nal location and proceed to level
it in all directions. The bottom panel has
adjustable feet for this purpose.
DO NOT OMIT THIS STEP. If the base is not leveled
correctly the island will be misaligned. The base cannot be
leveled and the island cannot be moved once the assembly
is nished. If you need to reposition the island you will have
to disassemble it and start again.
Island Base
Leveling Feet
SEDONA ISlAND ASSEmbly INStructIONS
5
|
Page 6
SEDONA ISLAND ASSEMBLY INSTRUCTIONS
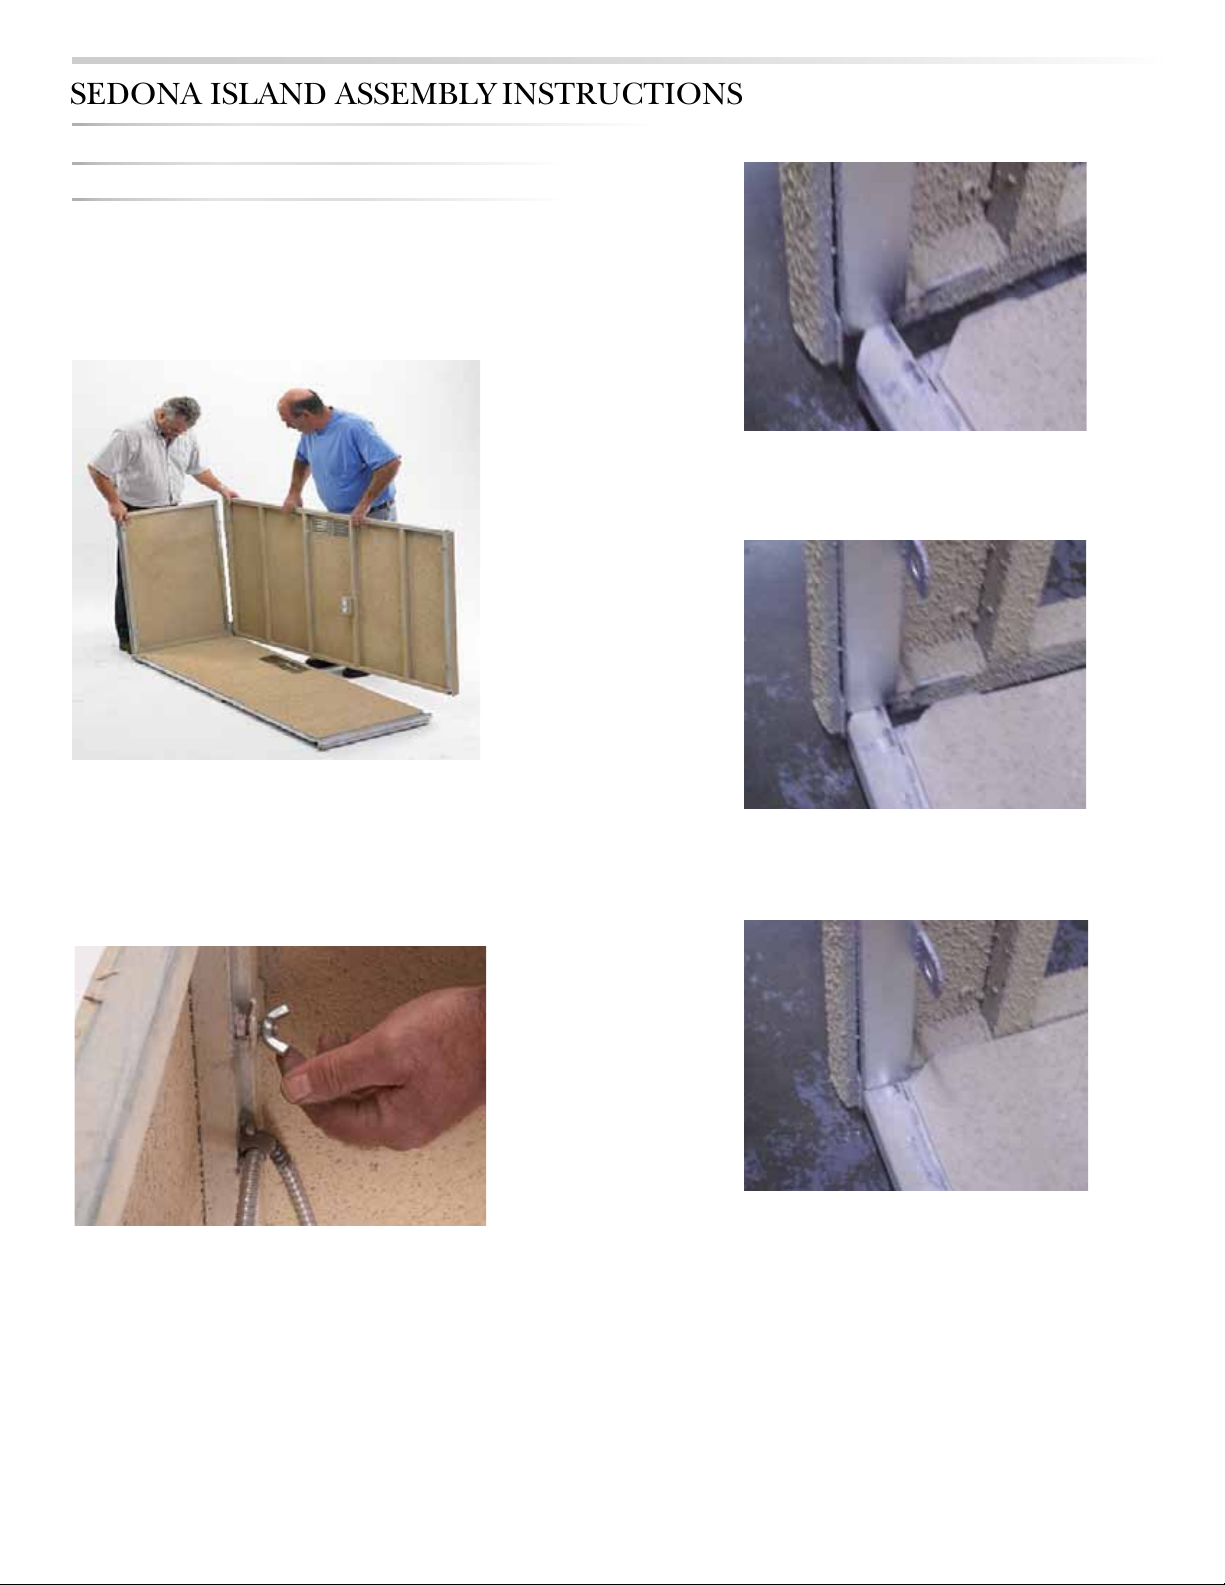
Step 3
Assembling the Rear & Side Panels
Assemble the rear panel to the bottom panel by placing
the corners of the back panel on top of the bottom panel
corners and push them rmly together.
STEP 3A Insert Back Panel Onto Base
While one person holds the rear panel in place, attach a
side panel to the rear panel loosely using the 2 wing-nuts
(Part No. 9), turned in about 4 full turns. This will allow the
panel to stay loose enough to align the rest of the panels
and hardware.
STEP 3B Align
STEP 3C Press
6
SEDONA ISlAND ASSEmbly INStructIONS
|
Page 7

SEDONA ISLAND ASSEMBLY INSTRUCTIONS
Step 4
Assemble the Front Panel
With one person holding the rear and side panel in place,
assemble the front panel to the bottom by placing the
front panel corners on top of the bottom panel corners and
pushing them rmly together
Tilt the front edge of the side panel away from the bottom
panel to allow the front panel mounting brackets to pass by
threaded mounting screws on the side panel. Push the side
panel into position and attach to the front panel loosely
with 2 wing nuts (Part No. 9).
Push the remaining side panel into position and attach it
to the front and rear panel loosely with 4 wing nuts (Part
No. 9). Clamp both side panels to the front and rear panels
using 4 wing bolts (Part No. 10) and clamps (Part No. 14).
After tightening the clamps go back and tighten the 8 wing
nuts (Part No. 9) to secure the side panels to the front and
back panels.
SEDONA ISlAND ASSEmbly INStructIONS
7
|
Page 8

SEDONA ISLAND ASSEMBLY INSTRUCTIONS
Step 5
Overview of the Island’s Electrical System
Now that the island wall assembly is complete, familiarize yourself with the location of the electrical outlets. The
electric outlets come pre-wired from the factory. The photo below shows the position of the 110 VAC GFCI outlet on
the left rear wall, the back panel center outlet for the refrigerator and grill power supply, and the combination USB
charging station and 110 VAC power outlet on the right.
To prevent electrical shock use only a three pronged power cord, do not remove the grounding prong,
do not use an adapter. Use a UL approved extension cord rated for outdoor service such as SJTW.
Before installing the grill and accessories attach your extension cord into the GFI outlet. Do not plug
the extension cord into a power source until you have completed the equipment installation.
The island wiring diagram is shown below. If you have any questions please contact LYNX customer
care or consult a professional electrician.
8
SEDONA ISlAND ASSEmbly INStructIONS
|
Page 9

SEDONA ISLAND ASSEMBLY INSTRUCTIONS
Step 6
Mounting the Transformer
Locate the 4 transformer mounting screws (Part No. 2) and
the transformer/battery bracket. The transformers are found
in the packaging inside the grill and side burner packaging.
Mount the transformer on the rear panel support frame
near the rear panel outlet using the pre-drilled holes
provided. Install the side burner battery bracket (not shown)
below the transformer in the same manner (see page 13).
Step 7
Installing the Drawers and Door Storage System
These must be installed before setting the
counter top in place to allow access to
the storage system door frame mounting
bracket fasteners
To simplify the installation, start by removing the drawers
and door. To remove the drawers, nd the black lever on
each side glide rail. One lever pushes up and the other one
down to release the drawer from the glides.
The access door simply lifts off of the hinge pins.
Place the storage system frame in the cutout and secure it
with 4 access door frame mounting brackets (Part No. 12
shown below, note the weld nut location), and 4 access
door frame mounting screws (Part No. 5). There are 2 on
each side.
Step 8
Install the Countertop
With the help of an assistant or two, place the counter
top in place jiggle it a little until the walls slip into place,
and then secure the top with 2 wing nuts (Part No. 9) and
clamps (Part No. 11) located under the counter top, at the
front and rear.
LEVER:
PART NO. 12
SEDONA ISlAND ASSEmbly INStructIONS
9
|
Page 10

SEDONA ISLAND ASSEMBLY INSTRUCTIONS
Step 9
Install the Side Burner
We recommend a qualied, trained gas service technician
perform all pipe tting and gas leak test procedures prior to
installing the refrigerator. Once installed there will be limited
access to the gas piping. Before installing the side burner,
familiarize yourself with the illustration on the next page.
Wrap the side burner manifold threads with Teon tape,
see Fig. 1 on page 11. Remove the 1/2” FIP tting from
the exible hose and install it on the side burner manifold.
Attach the stainless steel exible hose to the 1/2” FIP tting
at the end of the side burner manifold.
Clear plastic replacement extension tubes are provided
in the Open Me First box to drain spills and drain water
from the side burner. Set the side burner in place in the
counter top cutout. Be sure to keep the side burner wiring
accessible to attach to the grill once it is installed. Route the
tubes through the holes in the rear center of the island base
for drainage out of the island.
On the bottom of the side burner locate the center Philips
head screw on each side of the burner base. Remove the
screw and install the side burner mounting bracket with it
(Part No. 13, note weld nut position) ange up, as shown to
the right. Screw the side burner mounting screw (Part No. 4)
into the weld nut, and install the side burner mounting hexnut (Part No. 3) on the screw. Tighten the screw up to the
side burner bracket frame to secure the side burner in place.
Use the hex nut to lock the screw into position.
Step 10
Install the Grill
Locate and remove the plug from the 1/2” Tee tting in the
grill manifold to facilitate the side burner connection (see
the drawing on the next page).
With the help of an assistant set the grill in place. Make
sure to align the grill evenly and be sure it is fully supported
on the mounting anges. Before sliding the grill back
completely, reach behind the grill and attach the electrical
wiring from the side burner using the attached Molex
connectors (See page 13).
10
SEDONA ISlAND ASSEmbly INStructIONS
|
Page 11

SEDONA ISLAND ASSEMBLY INSTRUCTIONS
Step 11
Making the Connections
We recommend a qualied, trained gas service technician perform all pipe tting procedures and conduct a gas leak test
prior to installing the refrigerator. Once installed there will be limited access to the gas piping.
Working from the refrigerator cutout, nd the stainless steel exible hose from the side burner. Remove the 1/2” tting
from the exible hose and wrap the tting with Teon tape. Install the tting into the Tee tting on the grill manifold, then
connect the exible gas hose to the tting. Tighten all ttings to ensure they are gas tight. Use a leak detection liquid on
each threaded joint and check for gas leaks. See the following page for an alternate leak test method.
Do not check for leaks with an open ame.
Do not use sealant on any are ttings.
SEDONA ISlAND ASSEmbly INStructIONS
11
|
Page 12

SEDONA ISLAND ASSEMBLY INSTRUCTIONS
Step 12
Installing the LP Tank
The LP Tank retention device can be secured to the door
frame with two bolts (Part No. 6) and washers (Part No. 1).
The LP tank is rested in the retainer and the nger screws
(Part No. 7) are tightened at the base of the tank securing
it into position.
Connect the hose and regulator to the LP cylinder. Make
sure all of the burner knobs are in the OFF position.
Step 13
Leak Test All Fittings
Make a solution of 1 part liquid dish soap and 3 parts water
being careful not to shake the solution.
Open the LP Cylinder and using a brush or spray
bottle, apply the solution to all ttings at the stainless
steel connector, the Tee tting, the regulator and hose
connections. Wait a moment and check for the formation
of bubbles. Bubbles will indicate a gas leak that must be
repaired before continuing.
WARNING
DO NOT CHECK FOR LEAKS
WITH AN OPEN FLAME!
Step 14
Install the Refrigerator
Install the refrigerator and level it according to the
refrigerator instructions. Route the power cord to the outlet
in the rear panel, but do not plug it in. You must wait 2-3
hours before plugging it into the outlet on the rear inside
panel of the island.
12
SEDONA ISlAND ASSEmbly INStructIONS
|
Page 13

SEDONA ISLAND ASSEMBLY INSTRUCTIONS
See Step 9
Make the electrical connections as shown below, then plug the transformer into the electrical outlet on the rear panel.
SEDONA ISlAND ASSEmbly INStructIONS
13
|
Page 14

Sedona By Lynx ISLand Package LImIted Warranty
I. Limited Warranty – Grill, Side-Burner, Doors, Drawers,
and Refrigerator
For the warranty on the individual stainless steel island components, please see the warranties in their product Care &
Use Manuals.
IV. What is not covered: Lynx shall not be responsible for
and shall not pay for the following:
1. Installation or start-up, damages or problems caused by
improper installation or use;
II. Limited One Year Warranty – Island Frame, Housing
and Counter-top
The base, sides and counter-top of the island are warranted
to be free from defects in material and workmanship, when
subjected to normal domestic use and service, for a period of
one (1) year from the original date of delivery. This warranty is
limited to the repair or replacement of the defective parts.
III. Limitations & Exclusions
1. This Warranty shall apply to products purchased and
located in the United States and Canada. Products must
be purchased in the country where service is requested.
2. Warranty applies only to the original purchaser and may
not be transferred.
3. Warranty is in lieu of all other warranties expressed or
implied and all other obligations or liabilities related to
the sale or use of its grill products.
4. Warranty shall not apply and Lynx is not responsible for
damage resulting from misuse, abuse, alteration of or
tampering with the appliance, accident, hostile environment, are-up res, improper installation, or installation
not in accordance with the instructions contained in this
manual, or the local codes.
5. Lynx shall not be liable for incidental, consequential,
special or contingent damages resulting from its breach
of this written warranty or any implied warranty.
2. Service by an unauthorized service provider;
3. Damage or repair due to service by an unauthorized
service provider or use of unauthorized parts;
4. Warranty does not apply to products installed in any
commercial or non-residential application. Examples
of excluded applications include, but are not limited to
day care centers, schools, bed and breakfast centers,
churches, private clubs, re stations, club houses, common areas in multi-family dwellings, restaurants, hotels,
nursing homes, food service locations and institutional
food service locations.
5. To correct normal adjustments or settings, due to improper installation, commissioning or local gas supply
properties;
6. Shipping and handling costs, export duties, installation,
removal, or re-installation cost.
7. Display models are generally sold “as is.” If you have
purchased a display model, please be advised that it is
sold “as is” and that it is subject to the following warranty exclusions: any exterior or cosmetic damage is
nonwarrantable; any missing components will be replaced at consumers expense; major handling damage
to manifold, valve and ignition system will be serviced at
consumer’s expense; all other warranty’s (standard warranty) will remain in effect.
8. The cost of a service call to diagnose trouble.
6. Some states do not allow limitations on how long an im-
plied warranty lasts, or the exclusions of or limitations on
consequential damages. This warranty gives you specic
legal rights and you may have other rights which vary
from state to state.
7. No one has the authority to add to or vary Lynx’s warranty, or to create for Lynx any other obligation or liability
in connection with the sale or use of its products.
8. Limited to the replacement of defective parts with the
owner paying all other costs including labor.
14
SEDONA ISlAND ASSEmbly INStructIONS
|
Page 15

SEDONA ISLANDS REpLAcEmENt pARtS LIStS
L16 0 0 G
PART NO. QTY. DESCRIPTION
34312 1 Top Panel, L1600 Sedona Island, Gray
34297 1 Front Panel, L2600/L1600 Sedona Island, Gray
34320 1 Side Panel, Left, L1600/L1500 Sedona Island, Gray
34321 1 Side Panel, Right, L1600/L1500 Sedona Island, Gray
34324 1 Back Panel, L1600 Sedona Island, Gray
34310 1 Bottom Panel, L2600/L2500/L1600 Sedona Island, Gray
34332 4 Mounting Clamp, Side Panel, Sedona Islands
34333 2 Mounting Clamp, Counter Top, Sedona Islands
80763 1 Touch-Up Kit, L1600/L1500, Gray
90216 1 Sedona Island Hardware Kit
L16 0 0 S
PART NO. QTY. DESCRIPTION
34314 1 Top Panel, L1600 Sedona Island, Sandalwood
34299 1 Front Panel, L2600/L1600 Sedona Island, Sandalwood
34322 1 Side Panel, Left, L1600/L1500 Sedona Island, Sandalwood
34323 1 Side Panel, Right, L1600/L1500 Sedona Island, Sandalwood
34325 1 Back Panel, L1600 Sedona Island, Sandalwood
34311 1 Bottom Panel, L2600/L2500/L1600 Sedona Island, Sandalwood
34332 4 Mounting Clamp, Side Panel, Sedona Islands
34333 2 Mounting Clamp, Counter Top, Sedona Islands
80764 1 Touch-Up Kit, L1600/L1500, Sandalwood
90216 1 Sedona Island Hardware Kit
L15 0 0 G
PART NO. QTY. DESCRIPTION
34316 1 Top Panel, L1500 Sedona Island, Gray
34317 1 Front Panel, L1500 Sedona Island, Gray
34320 1 Side Panel, Left, L1600/L1500 Sedona Island, Gray
34321 1 Side Panel, Right, L1600/L1500 Sedona Island, Gray
34328 1 Back Panel, L1500 Sedona Island, Gray
34330 1 Bottom Panel, L1500 Sedona Island, Gray
34332 4 Mounting Clamp, Side Panel, Sedona Islands
34333 2 Mounting Clamp, Counter Top, Sedona Islands
80763 1 Touch-Up Kit, L1600/L1500, Gray
90216 1 Sedona Island Hardware Kit
L1500S
PART NO. QTY. DESCRIPTION
34318 1 Top Panel, L1500 Sedona Island, Sandalwood
34319 1 Front Panel, L1500 Sedona Island, Sandalwood
34322 1 Side Panel, Left, L1600/L1500 Sedona Island, Sandalwood
34323 1 Side Panel, Right, L1600/L1500 Sedona Island, Sandalwood
34329 1 Back Panel, L1500 Sedona Island, Sandalwood
34331 1 Bottom Panel, L1500 Sedona Island, Sandalwood
34332 4 Mounting Clamp, Side Panel, Sedona Islands
34333 2 Mounting Clamp, Counter Top, Sedona Islands
80764 1 Touch-Up Kit, L1600/L1500, Sandalwood
90216 1 Sedona Island Hardware Kit
SEDONA ISlAND ASSEmbly INStructIONS
15
|
Page 16

SEDONA ISLANDS REpLAcEmENt pARtS LIStS
L2600G
PART NO. QTY. DESCRIPTION
34296 1 Top Panel, L2600 Sedona Island, Gray
34297 1 Front Panel, L2600/L1600 Sedona Island, Gray
34304 1 Side Panel, Left, L2600/L2500 Sedona Island, Gray
34305 1 Side Panel, Right, L2600/L2500 Sedona Island, Gray
34308 1 Back Panel, L2600/L2500 Sedona Island, Gray
34310 1 Bottom Panel, L2600/L2500/L1600 Sedona Island, Gray
34332 4 Mounting Clamp, Side Panel, Sedona Islands
34333 2 Mounting Clamp, Counter Top, Sedona Islands
80761 1 Touch-Up Kit, L2600/L2500, Gray
90216 1 Sedona Island Hardware Kit
L2600S
PART NO. QTY. DESCRIPTION
34298 1 Top Panel, L2600 Sedona Island, Sandalwood
34299 1 Front Panel, L2600/L1600 Sedona Island, Sandalwood
34306 1 Side Panel, Left, L2600/L2500 Sedona Island, Sandalwood
34307 1 Side Panel, Right, L2600/L2500 Sedona Island, Sandalwood
34309 1 Back Panel, L2600/L2500 Sedona Island, Sandalwood
34311 1 Bottom Panel, L2600/L2500/L1600 Sedona Island, Sandalwood
34332 4 Mounting Clamp, Side Panel, Sedona Islands
34333 2 Mounting Clamp, Counter Top, Sedona Islands
80762 1 Touch-Up Kit, L2600/L2500, Sandalwood
90216 1 Sedona Island Hardware Kit
L2500G
PART NO. QTY. DESCRIPTION
34300 1 Top Panel, L2500 Sedona Island, Gray
34301 1 Front Panel, L2500 Sedona Island, Gray
34304 1 Side Panel, Left, L2600/L2500 Sedona Island, Gray
34305 1 Side Panel, Right, L2600/L2500 Sedona Island, Gray
34308 1 Back Panel, L2600/L2500 Sedona Island, Gray
34310 1 Bottom Panel, L2600/L2500/L1600 Sedona Island, Gray
34332 4 Mounting Clamp, Side Panel, Sedona Islands
34333 2 Mounting Clamp, Counter Top, Sedona Islands
80761 1 Touch-Up Kit, L2600/L2500, Gray
90216 1 Sedona Island Hardware Kit
L2500S
PART NO. QTY. DESCRIPTION
34302 1 Top Panel, L2500 Sedona Island, Sandalwood
34303 1 Front Panel, L2500 Sedona Island, Sandalwood
34306 1 Side Panel, Left, L2600/L2500 Sedona Island, Sandalwood
34307 1 Side Panel, Right, L2600/L2500 Sedona Island, Sandalwood
34309 1 Back Panel, L2600/L2500 Sedona Island, Sandalwood
34311 1 Bottom Panel, L2600/L2500/L1600 Sedona Island, Sandalwood
34332 4 Mounting Clamp, Side Panel, Sedona Islands
34333 2 Mounting Clamp, Counter Top, Sedona Islands
80762 1 Touch-Up Kit, L2600/L2500, Sandalwood
90216 1 Sedona Island Hardware Kit
16
SEDONA ISlAND ASSEmbly INStructIONS
|
Page 17

notes
SEDONA ISlAND ASSEmbly INStructIONS
17
|
Page 18

18
notes
SEDONA ISlAND ASSEmbly INStructIONS
|
Page 19

Page 20

Lynx Professional Grills
5895 Rickenbacker Rd.
Commerce, CA 90040
Service: (888) Buy-Lynx (888-289-5969)
Fax: (323) 838-1778
www.Lynxgrills.com
 Loading...