

Page 1
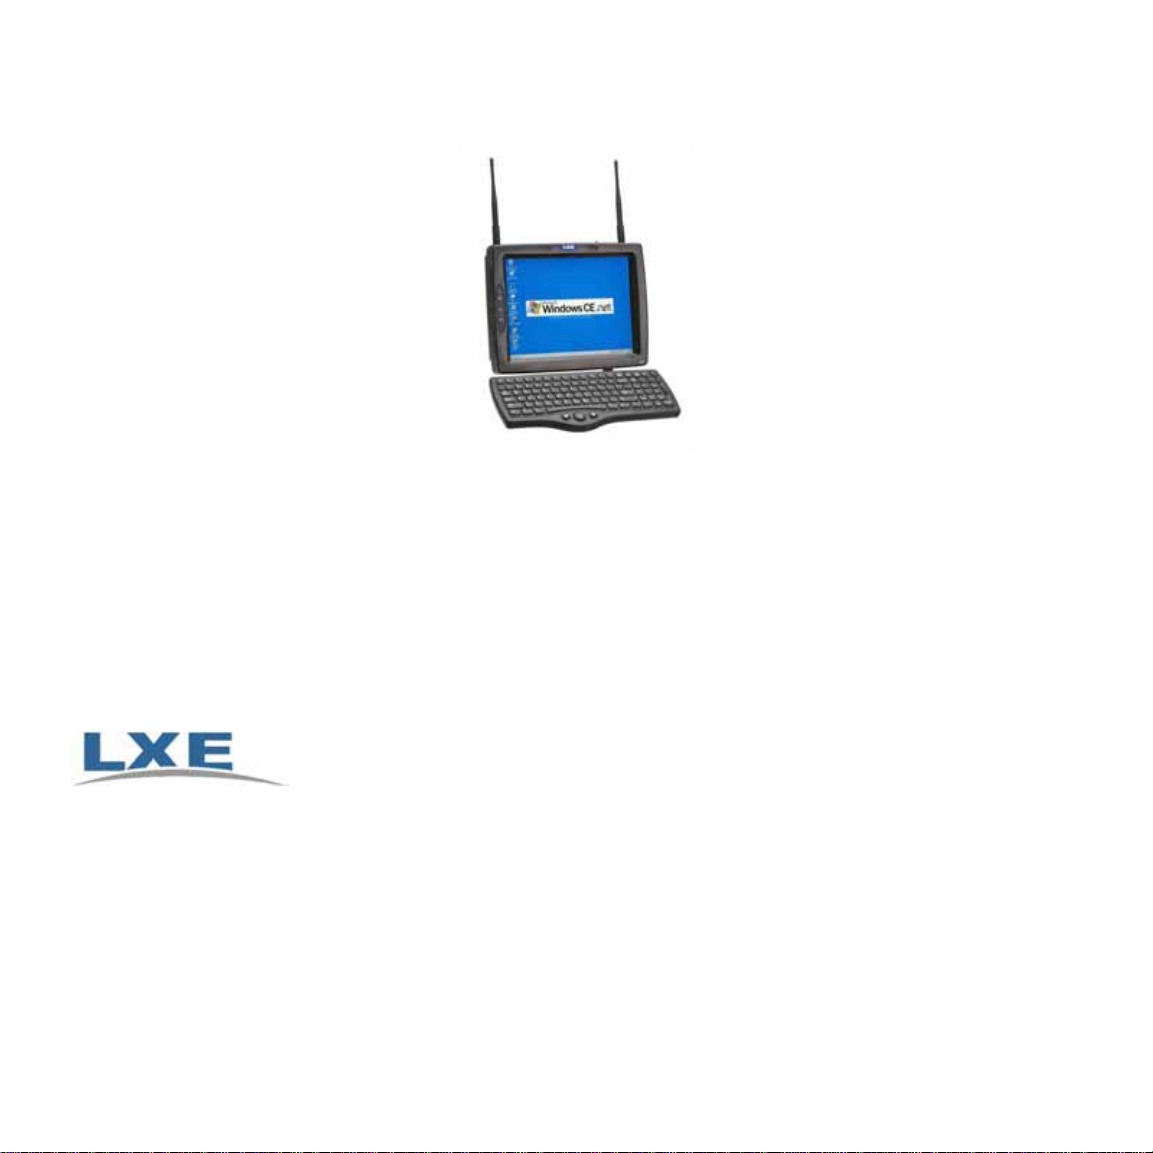
VX7 User’s Guide
Declarations of Conformity for the Wireless Transceivers and VX7 equipment, all graphics and
informational tables are in the full version of the VX7 User’s Guide on the LXE Manuals CD and
on the LXE ServicePass Website. This user guide is designed for delivery on a LXE mobile
device screen.
The reader is strongly encouraged to read Appendix B, “Regulatory Notices and
Safety Information”. Important safety cautions, warnings and regulatory
information is contained in Appendix B in the full version of the VX7 User Guide.
Copyright © 2006 by LXE Inc.
All Rights Reserved
E-EB-VX7UG-E
Page 2

LANGUAGE: ENGLISH
Notices
LXE Inc. reserves the right to make improvements or changes in the products described in this manual at any
time without notice. While reasonable efforts have been made in the preparation of this document to assure its
accuracy, LXE assumes no liability resulting from any errors or omissions in this document, or from the use of the
information contained herein. Further, LXE Incorporated, reserves the right to revise this publication and to make
changes to it from time to time without any obligation to notify any person or organization of such revision or
changes.
Copyright Notice:
This manual is copyrighted. All rights are reserved. This document may not, in whole or in part, be copied,
photocopied, reproduced, translated or reduced to any electronic medium or machine-readable form without prior
consent, in writing, from LXE Inc.
Copyright © 2006 by LXE Inc. An EMS Technologies Company.
125 Technology Parkway, Norcross, GA 30092 U.S.A. (770) 447-4224
Trademarks:
LXE® and Spire® are registered trademarks of LXE Inc. RFTerm® is a registered trademark of EMS
Technologies, Norcross, GA. Microsoft®, Windows and the Windows logo are registered trademarks of Microsoft
Java
Corporation in the United States and/or other countries.
® and Java-based trademarks and logos are
trademarks or registered trademarks of Sun Microsystems, Inc. in the U.S. or other countries, and are used under
license. Intel® and Intel XScale are trademarks or registered trademarks of Intel Corporation or its subsidiaries
in the United States and other countries. RAM® and RAM Mount™ are both trademarks of National Products
Inc., 1205 S. Orr Street, Seattle, WA 98108. The Cisco® Square Bridge logo is a trademark of Cisco Systems,
Inc.; Aironet, Cisco and Cisco Systems are registered trademarks of Cisco Systems, Inc. and/or its affiliates in the
United States and certain other countries. Summit Data Communications, Inc. Summit Data Communications,
the Summit logo, and “The Pinnacle of Performance” are trademarks of Summit Data Communications, Inc. All
rights reserved. Symbol®, the Symbol logo and Spectrum24 are registered trademarks of Symbol Technologies,
Inc.
All other brand or product names are trademarks or registered trademarks of their respective companies or
organizations. When this manual is in PDF format: “Acrobat ® Reader Copyright © 1987-2006 Adobe Systems
Incorporated. All rights reserved. Adobe, the Adobe logo, Acrobat, and the Acrobat logo are trademarks of Adobe
Systems Incorporated.” applies.
Revision Notice
Notices – Updated copyrights and trademarks.
Accessories – Updated Accessories listing and included ROHS classifications.
Input Panel (Virtual Keyboard) – Revised section.
Page 3

Table of Contents
The VX7 Vehicle Mount Computer........................................................................................................ 7
Introduction.............................................................................................................................................7
Environmental Specifications..................................................................................................................8
Quick Start...............................................................................................................................................9
The Full-Screen Display...........................................................................................................................10
VX7 Control Panel...................................................................................................................................10
Microsoft Windows CE .NET Control Panel ................................................................................................ 10
PCMCIA, ATA and SD Slots......................................................................................................................10
AppLock and the VX7.............................................................................................................................. 11
Single Application AppLock................................................................................................................... 11
Multi-Application AppLock.................................................................................................................... 11
Touch.............................................................................................................................................11
Hotkey............................................................................................................................................11
The Keyboards....................................................................................................................................... 12
The 95-key QWERTY Keyboard with Pointing Device..............................................................................12
Key Maps........................................................................................................................................12
NumLock and the VX7 ......................................................................................................................13
CapsLock and the VX7......................................................................................................................13
Scroll Lock and the VX7 .................................................................................................................... 13
Keyboard Backlight ..........................................................................................................................13
Pointing device................................................................................................................................14
The 60-key QWERTY Keyboard ............................................................................................................ 14
IBM 3270 Keypad Overlay.................................................................................................................14
IBM 5250 Keypad Overlay.................................................................................................................14
Key Maps........................................................................................................................................14
Unused Key Functions......................................................................................................................14
NumLock and the VX7...................................................................................................................... 15
Keyboard Backlight ..........................................................................................................................15
Keyboard LEDs................................................................................................................................ 15
CAPS LED........................................................................................................................................15
Secondary Keys LED......................................................................................................................... 16
Control Keys....................................................................................................................................16
General Windows CE .NET Keyboard Shortcuts......................................................................................17
PS/2 Keyboard/Mouse .........................................................................................................................17
USB Keyboard/Mouse..........................................................................................................................18
Input Panel (Virtual Keyboard)............................................................................................................. 18
Enabling the Input Panel ..................................................................................................................19
Page 4

Power Supply......................................................................................................................................... 19
Uninterruptible Power Supply Battery Pack............................................................................................19
Backup Battery ...................................................................................................................................20
Getting Help .......................................................................................................................................... 20
Manuals and Accessories......................................................................................................................... 20
Manuals .............................................................................................................................................20
Accessories......................................................................................................................................... 21
Installation ......................................................................................................................................... 24
Install Mounting Brackets........................................................................................................................ 24
RAM Mount System.............................................................................................................................25
Components.................................................................................................................................... 25
Torque Measurements...................................................................................................................... 26
Procedure .......................................................................................................................................26
Step 1 – Mount Vehicle RAM Mount Bracket........................................................................................26
Step 1b – Mount Vehicle RAM Clamp Mount........................................................................................27
Step 2 – Attach RAM Mount Ball to the VX7........................................................................................27
Step 3 – Assemble Optional Keyboard Brackets................................................................................... 28
Step 4 – Attach VX7 and Bracket Assembly to RAM Mount................................................................... 28
U-Bracket Mount System ..................................................................................................................... 29
Components.................................................................................................................................... 29
Torque Measurements...................................................................................................................... 30
Procedure .......................................................................................................................................31
Step 1 - Mount Bottom Mounting Bracket To Vehicle...........................................................................31
Step 2 – Attach Rear Bracket VX7...................................................................................................... 31
Step 3 – Attach VX7 Assembly To Bottom Mounting Bracket. ............................................................... 31
Step 4 – Assemble Optional Keyboard Brackets................................................................................... 32
Step 5 – Complete Assembly.............................................................................................................32
Install Stylus Tether and Sleeve............................................................................................................33
Install/Remove Touchscreen Protective Film.......................................................................................... 33
Remote LXE Keyboard Bracket Assembly............................................................................................... 34
Remote Keyboard Mounting Dimensions ............................................................................................ 34
UPS Battery Pack Remote Mount.......................................................................................................... 35
Connect Keyboard..................................................................................................................................35
LXE Keyboard ..................................................................................................................................... 35
PS/2 Keyboard and Mouse ................................................................................................................... 36
Connect Antenna....................................................................................................................................36
External Antenna ................................................................................................................................ 36
Remote Vehicle Mount Antenna............................................................................................................36
Internal Antenna................................................................................................................................. 37
Connect Serial Barcode Scanner .............................................................................................................. 37
Page 5

Connect Serial Printer or PC .................................................................................................................... 38
Ethernet and USB Ports...........................................................................................................................39
USB Mouse......................................................................................................................................... 39
Connect External Headset....................................................................................................................... 40
Connect Power Cable and Optional UPS Battery Pack.................................................................................40
External Power Supply, Optional..............................................................................................................41
Vehicle 12-80VDC Power Connection........................................................................................................ 42
Power Adapter Cable .............................................................................................................................. 46
Fuse Replacement for the VX7................................................................................................................. 47
Operation............................................................................................................................................ 48
Powering On/Off ....................................................................................................................................48
Keyboard Backlight................................................................................................................................. 49
95 Key Keyboard.................................................................................................................................49
60 Key Keyboard.................................................................................................................................49
PS/2 and USB Keyboards..................................................................................................................... 49
Display and Touchscreen ........................................................................................................................ 50
Adjusting Screen Display......................................................................................................................50
Cleaning the Display............................................................................................................................51
Disabling the Touchscreen................................................................................................................... 51
Disabling the Touchscreen Heater ........................................................................................................ 51
Calibrating the Touchscreen................................................................................................................. 51
Touchscreen Protective Film................................................................................................................. 51
Touchscreen and Mouse...................................................................................................................... 52
Adjust Speaker Volume........................................................................................................................... 53
Microsoft Windows CE .NET Event Sounds.............................................................................................53
Power Management................................................................................................................................53
Laser Barcode Scanner Warnings............................................................................................................. 54
Enter Data.............................................................................................................................................54
Keyboard Entry...................................................................................................................................55
Touchscreen Entry ..............................................................................................................................55
Right Click.......................................................................................................................................56
Scanner Entry.....................................................................................................................................56
Aiming the Barcode Scanner............................................................................................................. 56
Distance from Label ......................................................................................................................... 56
Successful Scan...............................................................................................................................57
Unsuccessful Scan ........................................................................................................................... 57
Appendix A Key Maps ........................................................................................................................ 58
95-key Keypad with Pointing Device.........................................................................................................58
Key Map 101-Key Equivalencies............................................................................................................ 58
Page 6

60-key Standard Keypad.........................................................................................................................58
Key Map 101-Key Equivalencies............................................................................................................ 58
Safety Statements..................................................................................................................................63
Page 7

The VX7 Vehicle Mount Computer
Introduction
The VX7 Vehicle Mount Computer (VMC) is a rugged, vehicle-mounted, Microsoft® Windows®
CE .NET equipped computer. The VX7 is capable of wireless data communications from a
fork-lift truck or any properly configured vehicle. The unit uses a 2.4 GHz radio for wireless
data communications.
The VX7 is a tablet-style computer and features a SVGA color TFT display. The touch-screen
display supports graphic features and Microsoft Windows CE .NET icons that the Windows CE
.NET operating system supports. An illuminated keyboard is available to facilitate use in dimly
lit areas.
The VX7 provides the power and functionality of a desktop computer in a vehicle mounted
unit, with a wide range of options:
•
400MHz Intel® PXA255 CPU
•
64 or 128MB of DRAM
•
Wireless LAN radios with internal, single external or dual external antenna options
•
Ethernet port
•
USB Host and Client ports
•
Choice of screen display brightness based on ambient light in daily use
•
Available touch screen protective film
•
Available Uninterruptible Power Supply (UPS) Battery Pack
•
Available RAM MountTM options
•
Extended temperature version includes touchscreen heater
•
Support for voice applications such as LXE’s TalkManager.
Note: The “VX7 Reference Guide” contains VX7 technical information and advanced
functions.
Page 8

Environmental Specifications
Feature Specification
Operating Temperature
Standard version -4°F to 122°F (-20°C to 50°C) [non-condensing]
Extended Temperature version -22º to 122º F (-30ºC to 50ºC [condensing]
Storage Temperature
Standard version -22°F to 140°F (-30°C to 60°C) [non-condensing]
Extended Temperature version -22°F to 140°F (-30°C to 60°C) [condensing]
Water, Sand Dust IP66 per IEC60529
Operating Humidity
Standard version Up to 90% non-condensing at 104°F (40°C)
Extended Temperature version 100%
Vibration Based on MIL Std 810F
ESD 15 kV
Page 9

Quick Start
This section’s instructions are based on the assumption that your new system is preconfigured and requires only accessory installation (e.g. antenna, external keyboard and/or
barcode scanner) and a power source.
Use this guide as you would any other source book -- reading portions to learn about the VX7,
and then referring to it when you need more information about a particular subject. This guide
takes you through installation and operation of the LXE VX7.
In general, the sequence of events is:
1. Install Vehicle Mounting Bracket on vehicle and secure VX7 in Mounting Bracket
Assembly (see “Installation”, later in this manual).
2. Connect power cable to the VX7. The power cable can also be connected to a UPS
battery pack, which is then connected to the VX7.
3. Connect accessories to VX7, e.g. scanner, antenna, etc.
4. Secure all cables to the VX7 with the Strain Relief Cable Clamps.
5. Turn the VX7 on.
6. When instructed, calibrate the touchscreen.
7. The screen may appear white while applications and drivers are loading. When
complete, set Date and Time (see the “VX7 Reference Guide”).
8. Configure radio (see the VX7 Reference Guide”).
9. Warmboot to ensure all registry settings are saved.
Device is ready for use.
The VX7 and its keyboard should be mounted in an area in the vehicle where it:
•
Does not obstruct the vehicle driver’s vision or safe vehicle operation.
•
Can be easily accessed by anyone seated in the driver’s seat.
If your VX7 has AppLock installed, please contact your system administrator for setup and
processing information.
AppLock is configured by an administrator to limit general users to only certain programs.
Page 10

Note: When the internal antenna option is ordered, the internal antenna is mounted on the
inside of the Access Panel Cover.
Note: COM1 is configured with Pin 9 +5V. COM3 is labeled “COM2/3” and is configured with
Pin 9 RI. Please see the VX7 Reference Guide for details.
The Full-Screen Display
The VX7 Display is a TFT color unit capable of supporting SVGA graphics modes. The
resolution is 800 x 600 pixels.
VX7 Control Panel
The VX7 control panel contains the status LED, power button and display brightness
adjustment buttons. Please refer to the “Operation” section, later in this manual, for details
on the VX7 Control Panel.
Microsoft Windows CE .NET Control Panel
The Microsoft Windows CE .NET Control Panel provides standard Windows CE .NET options for
configuring the VX7, such as:
•
Sound volume
•
Display configuration
Please consult your System Administrator or refer to commercially available Microsoft Windows
CE .NET user guides or the on-line Help application for these standard Windows CE .NET
configuration options.
PCMCIA, ATA and SD Slots
The VX7 has two PCMCIA slots. These slots are intended for use with Type I or II cards, such
as LXE’s 2.4GHz radios. These slots are hot swappable per PCMCIA specifications.
The Compact Flash (CF) slot contains the Compact Flash ATA hard drive. This drive contains
Page 11

the Operating System and the Documents and Settings. The VX7 does not operate without
this card installed. The CF card is not hot swappable.
One Secure Digital (SD) slot is provided for SD memory cards. The SD card is hot swappable.
Please see the “VX7 Reference Guide” for more details on the PCMCIA, CF and SD slots.
AppLock and the VX7
AppLock may be installed and running on the mobile device. AppLock restricts access to
programs and the Windows CE .NET Control Panel. Please contact your system administrator
for details.
Single Application AppLock
Single application AppLock restricts a user to one application. The user is unable to exit the
application (or if the application exits, it immediately restarts).
Multi-Application AppLock
The appearance of taskbar icons are different on various mobile device platforms and may
differ from the example shown below. This example is shown only to aid in describing how the
user can switch between applications using a stylus. If RFTerm and Microsoft Word were the
two applications locked, and the user tapped the taskbar icon to place the popup menu on
screen, a switching menu showing both application icons is displayed on the screen.
Touch
Tap the taskbar icon to place the popup menu on screen. Tap one of the application icons in
the popup menu. The selected application is brought to the foreground while the other
application continues to run in the background. Stylus taps affect the application running in
the foreground only. Alternatively you can use the Tab, BackTab and/or cursor keys to move
the on-screen cursor. Then press the Enter key to activate the highlighted choice.
Hotkey
If the mobile device uses LXE’s Dual AppLock to allow the user to switch between two
applications, the default Activation key is Ctrl+Spc. The key sequence switches the focus
Page 12

between one application and another. Data entry affects the application running in the
foreground only. Note that the system administrator may have assigned a different key
sequence to use when switching applications.
Note: The hotkey method can still be used if the touchscreen on the VX7 is disabled.
The Keyboards
The following keyboard options are available for the VX7:
•
LXE 95-key QWERTY keyboard with integrated pointing device – a customized rugged
keyboard connected to the VX7 via a watertight connector.
•
LXE 60-key QWERTY keyboard – a customized rugged keyboard connected to the VX7 via
a watertight connector
•
A standard PS/2 keyboard via an adapter cable attached to the “Keyboard/MOUSE” port on
the VX7. The adapter cable also provides a connector for a PS/2 mouse.
•
A USB keyboard via a dongle cable attached to the “Ethernet/USB” connector is available
on certain VX7’s. Your system administrator can determine if your VX7 supports a USB
keyboard..
•
A software keyboard, or virtual keyboard, can be displayed on the touch screen. The
virtual keyboard can be used in place of, or in addition to, a physical keyboard.
For more details on each keyboard type, please refer to the appropriate section later in this
chapter.
The 95-key QWERTY Keyboard with Pointing Device
Designed for ease of use with the Windows CE .NET operating system, the 95-key keyboard
with pointing device connects via a cable to the keyboard port on the VX7. Additional
Windows keys (the Windows logo key and the Application key) and an integrated pointing
device are provided for use with Windows CE .NET operating system.
Note: The 2nd key function is available on the 60-key keyboard only.
Key Maps
The 95-key keyboard supports all 104 keyboard functions (101 keyboard standard plus
Page 13

Windows keys) and includes an integrated pointing device and left and right mouse buttons.
However, because the keyboard only has 95 keys, all functions are not visible (or printed on
the keyboard). Therefore the VX7 keyboard supports what is called hidden keys -- keys that
are accessible but not visible on the keyboard.
The hidden keys supported by the VX7 are listed in Appendix A, “Key Maps”.
NumLock and the VX7
For the 95-key keyboard, the NumLock key and the numeric keys are backlit green when
NumLock is off. When NumLock is on, the backlight for the NumLock key and the numeric
keys are amber.
The default value for NumLock is On.
The warmboot behavior of NumLock can be configured. Please refer to the “VX7 Reference
Guide” for more information.
CapsLock and the VX7
For the 95-key keyboard, the CapsLock key is backlit green when CapsLock is off. When
CapsLock is on, the backlight for the CapsLock key is amber.
The default value for CapsLock is On.
The warmboot behavior of CapsLock can be configured. Please refer to the “VX7 Reference
Guide” for more information.
Scroll Lock and the VX7
For the 95-key keyboard, the Scroll Lock key is backlit green when Scroll Lock is off. When
Scroll Lock is on, the backlight for the Scroll Lock key is amber.
The default values for CapsLock and Scroll Lock are Off.
Keyboard Backlight
The 95-key keyboard backlights each key with an LED. The keyboard backlight is manually
controlled using the “backlight” key in the upper right hand corner of the keyboard. Pressing
the backlight key cycles the keyboard backlight through the levels of backlight intensity:
•
Off
Page 14

•
Maximum intensity
•
Medium intensity
•
Low intensity.
Pointing device
The mouse pointer may not always be visible. Please see “Touchscreen and Mouse” later in
this manual for more details.
The 60-key QWERTY Keyboard
The 60-key keyboard has 101 keyboard functions, including a numeric keyboard pad. Please
refer to Appendix A, “Key Maps”, for keypress combinations.
IBM 3270 Keypad Overlay
The 60-key keypad is available with an IBM 3270 overlay designed to allow the user to enter
terminal emulator commands when running LXE’s RFTerm™ program.
IBM 5250 Keypad Overlay
The 60-key keypad is available with an IBM 5250 overlay designed to allow the user to enter
terminal emulator commands when running LXE’s RFTerm™ program.
Key Maps
The 60-key keyboard supports all 101 keyboard functions. However, because the keyboard
only has 60 keys, all functions are not visible (or printed on the keyboard). Therefore the VX7
keyboard supports what is called hidden keys -- keys that are accessible but not visible on the
keyboard.
The hidden keys supported by the VX7 are listed in Appendix A, “Key Maps”.
Unused Key Functions
There are several key functions on the 60-key keyboard that are not used on the VX7. These
include:
•
<2nd> <F3> – The Resume/Suspend function is not used, as the VX7 does not support
Page 15

these power management modes.
•
<2nd> <F4> and <2nd> <F5> – The Display Brightness functions are not used as the
display brightness is adjusted by the buttons on the VX7 control panel.
•
<2nd> <F6> and <2nd> <F7> – The Contrast functions are not used as the contrast is
not adjustable on the TFT display on the VX7.
•
<2nd> <F8> and <2nd> <F9> – The Volume control keys are not used as volume is
adjusted via the Microsoft Windows CE .NET Control Panel.
•
<2nd> <F10> – Please see “Keyboard Backlight” later in this section for details on
toggling the keyboard backlight.
NumLock and the VX7
The 60-key keyboard does not have a NumLock indicator or key. NumLock can be toggled
On or Off using the <2nd> <SHIFT> <F10> keypress sequence.
The default value for NumLock is On.
The warmboot behavior of NumLock can be configured. Please refer to the “VX7 Reference
Guide” for more information.
Keyboard Backlight
The LXE keyboard keys are backlit with LEDs. The backlight is manually controlled using the
<2nd> + <CTRL> + <F10> keypress sequence.
Keyboard LEDs
The VX7 keyboard has two (2) LED indicators.
CAPS LED
This LED indicates the state of the keyboard CapsLock mode. If CapsLock is enabled this LED
is illuminated green. When CapsLock is off, the LED is dark.
Press <2nd> then <F1> to toggle CapsLock On and Off.
The default value of CapsLock is “Off”. For information on configuring the behavior of
CapsLock after a reboot, please refer to the “VX7 Reference Guide”.
Page 16

Secondary Keys LED
The keyboard is equipped with several secondary keys. These keys are identified by the
superscripted text found on the keyboard keys. The secondary keys are accessible by using
two (2) keystrokes: the <2nd> key followed by the superscripted key.
Once the <2nd> state is enabled (by pressing the <2nd> key) the Secondary Mode LED is
illuminated and the <2nd> state is enabled until another key is pressed. The <2nd> key is
toggled on with a <2nd> keypress and then immediately off with another <2nd> keypress.
For example:
Press <2nd> and <F1> to turn CapsLock on and off.
Press <2nd> and <↑> to initiate the PgUp command.
Press <2nd> and <Q> to type the “!” key.
Press <2nd> and <BkSp> to enter the Insert (Ins) mode.
Control Keys
The keyboard has several control keys, some of which are not used on the VX7.
Note: The 2nd functions of the <F4> and <F5>keys are not used as the display brightness is
adjusted via the buttons on the control panel.
The 2nd functions of the <F6>, and <F7> keys are not used as the VX7 has TFT LCD
screen with no provision for contrast adjustments.
The 2nd functions of the <F8> and <F9> keys are not used as the sound volume on the
VX7 is controlled with the Volume and Sounds icon in the Microsoft Windows CE .NE
Control Panel.
The <F10> key is used to toggle the backlight as part of the keypress sequence <2nd> +
<CTRL> + <F10>. This key sequence immediately toggles the status of the keyboard
backlight. Pressing <2nd> + <F10> has no effect on the keyboard backlight.
Page 17
General Windows CE .NET Keyboard Shortcuts
Use the keyboard shortcuts in the chart below to navigate with any VX7 keyboard. These are
standard keyboard shortcuts for Windows CE .NET applications.
Press these keys … To …
CTRL + C Copy
CTRL + X Cut
CTRL + V Paste
CTRL + Z Undo
DELETE Delete
SHIFT with any of the arrow
keys
CTRL+A Select all.
ALT+ESC Cycle through items in the order they were opened.
CTRL+ESC Display the Start menu.
ALT+Underlined letter in a
menu name
Underlined letter in a
command name on an open
menu
ESC Cancel the current task.
Select more than one item in a window or on the desktop, or select
text within a document.
Display the corresponding menu.
Carry out the corresponding command.
The touchscreen provides equivalent functionality to a mouse:
•
A touch on the touchscreen is equivalent to a left mouse click.
•
Many items can be moved by the “drag and drop” method, touching the desired item,
moving the stylus across the screen and releasing the stylus in the desired location.
•
A double stylus tap is equivalent to a double click.
•
A touch and hold is equivalent to a right mouse click.
PS/2 Keyboard/Mouse
A standard PS/2 keyboard and mouse can be attached to the VX7 using the appropriate
Page 18

dongle cable. The dongle cable attaches to the VX7 and provides two PS/2 connectors, one
labeled “Keyboard” and one labeled “Mouse”. Please refer to documentation provided with
the PS/2 keyboard and mouse for more information on their operation.
Note: The PS/2 keyboard and mouse cannot be hot swapped. Power down the VX7 before
connecting or disconnecting these PS/2 devices.
The mouse pointer may not always be visible. Please see “Touchscreen and Mouse” later in
this manual for more details.
USB Keyboard/Mouse
A standard USB keyboard and/or mouse can be attached to the VX7 using the appropriate
dongle cable. The dongle cable attaches to the VX7 and provides a USB connector. Please
refer to documentation provided with the USB keyboard and mouse for more information on
their operation.
The mouse pointer may not always be visible. Please see “Touchscreen and Mouse” later in
this manual for more details.
Input Panel (Virtual Keyboard)
The Input Panel may be enabled via the Input Panel icon in the Windows CE .NET Control
Panel. The Input Panel can be displayed as a large or small keyboard.
Virtual keyboards display the actual character a keypress results in. For example, pressing the
<Shift> key on the virtual keyboard toggles the characters displayed on the keys between
upper and lower case. The <123> key toggles the keys displayed between alphabetic and
numeric characters. The <áü> key toggles the keys between standard and international
symbols. The <Shift> and <áü> keys can be used in combination for capitalized international
characters.
Note: When the virtual keyboard is displayed, the physical keyboard is still active, if attached.
Therefore it is possible to input data from both keyboards.
Page 19

Enabling the Input Panel
The Input Panel is disabled by default. To enable the Input Panel, select Start | Settings |
Control Panel |Input Panel icon. Make sure the “Allow applications to change the input
panel state” checkbox is checked and warmboot the VX7.
Power Supply
Vehicle power input for the VX7 is 12V to 80V DC and is accepted without the need to perform
any manual adjustments within the VX7. See the section titled “Installation”, sub-section titled
“Vehicle 12-80V DC Direct Connection”. An optional Uninterruptible Power Supply (UPS)
battery pack is available for the vehicle power supply connection.
If 12V to 80V DC power is not available – for example, in an office environment – an optional
external Input Power Supply can be used to convert AC wall power to an appropriate DC level.
See the section titled “Installation”, sub-section titled “External Power Supply”.
Power input is fused for protection and the fuse is externally accessible. See section titled
“Installation”, sub-section titled “Fuse Replacement for the VX7”.
Uninterruptible Power Supply Battery Pack
An optional Uninterruptible Power Supply (UPS) battery pack is designed to provide power to
the VX7 for short periods of time when vehicle power is unavailable (such as when vehicle
batteries are swapped). Fully charged, the UPS battery powers the VX7 for a minimum of 15
minutes at 25º C (77º F) ambient temperature.
The Power Status LED on the VX7 indicates the UPS battery status:
Green – Running on 12V – 80V power input
Solid Yellow – Running on UPS battery, battery is not low on power
Flashing Yellow – Running on UPS battery, battery is critically low.
Page 20

Backup Battery
The internal 190 mAh Lithium backup (coin cell) battery provides power to maintain date and
time when the VX7 is not powered from an external source.
Caution
•
Danger of explosion if battery is incorrectly replaced.
•
Replace only with the same type or equivalent type recommended by the manufacturer.
•
Dispose of used batteries according to the manufacturer’s instructions.
Getting Help
All LXE manuals are now available on one CD and they can also be viewed / downloaded from the
LXE ServicePass website on the ServicePass / Documentation page. Contact your LXE
representative to obtain the LXE Manuals CD or logon information for the ServicePass web
pages.
You can also get help from LXE by calling the telephone numbers listed on the LXE Manuals
CD, in the file titled “Contacting LXE”. This information is also available on the LXE website.
Explanations of terms and acronyms used in this guide are located in the file titled “Glossary”
on the LXE Manuals CD.
Manuals and Accessories
Manuals
The following manuals are available on the LXE Manuals CD:
•
VX7 Reference Guide
•
Contacting LXE
•
LXE Technical Glossary
Page 21
Accessories
The table below lists the available VX7 accessories.
•
Where two parts numbers are listed for a given part, the part number ending in “-R” is the
RoHS compliant version.
•
When only one part number is listed, the part is RoHS compliant unless otherwise noted.
VX7 Brackets
Bracket, U Style, VX6 VX7 9000A021UBRACKET-R
Bracket, U Style w/ Integrated Keyboard Mount, VX7 9000A025UBRKTWKBDMNT-R
Kit, VXX U-Bracket to VX6 VX7 Adapter 9000A022BRKTADPTKIT-R
Kit, VXX U-Bracket to VX7 Adapter w/ Keyboard Mount 9000A026BRKTADPKBDMN-R
Bracket, RAM Mount VX6 VX7 9000A023BRKTRAMMOUNT-R
Bracket, Combo RAM VMT Mount w/ Keyboard Mount, VX7 9000A027BRKTRAMWKBMN-R
Bracket, VXX RAM ball on plate 9000A028RAMPLATEBALL-R
Bracket, RAM keyboard mounting plate 9000A029RAMKBDPLATE-R
Bracket, RAM keyboard arm 9000A030RAMKBDARM-R
Bracket, RAM Squeeze Mount, VX6 VX7 9000A031BRKTRAMSQZMT-R
Bracket, Combo RAM Squeeze Mount w/Keyboard Mount 9000A032BRKTRAMSQKBMT-R
Keyboard Brackets
Bracket, Remote, Keyboard, LXE
Bracket, Remote, Mouse Keyboard
Keyboards
Keyboard, LXE Standard, D9, ANSI/PC Overlay, QWERTY
Keyboard, LXE Standard, D9, IBM 5250 Overlay, QWERTY
Keyboard, LXE Standard, D9, IBM 3270 Overlay, QWERTY
Keyboard, Rugged PC Style w/Mouse, PS2 D9
Data Cables
Cable, Combo D15 to USB and Ethernet Adapter 1 Ft 9000A071CBLD15USBETH
9000A012BRKTRMTLXE
9000A201BRKTRMTLXE-R
9000A018BRKTMKBDRMT
9000A018BRKTMKBDRMT-R
9000A157KBDSTDD9ANSI
9000A157KBDSTDD9ANSI-R
9000A158KBDSTDD95250
9000A158KBDSTDD95250-R
9000A159KBDSTDD93270
9000A159KBDSTDD93270-R
9000A160MOUSEKBDD9
9000A160MOUSEKBDD9-R
Page 22
Cable, Combo D15 to USB-H, USB-C and Ethernet Adapter 9000A075CBLUSBHCETH
Cable, Keyboard/Mouse Dual PS2 Adapter 1 Ft 9000A072CBLD9DUALPS2
Cable, Printer/PC, D9 to D25
Cable, PC, D9 to D9 9000A054CBL6D9D9
Power Cables
Cable, Input Power, 12 FT, VX5 VX6 VX7 9000A037CBLPWR12FT-R
Adapter Cable, VX1 VX2 VX4 Power Cable to VX5 VX6 VX7 9000A077CBLPWRADPTR
Power Supplies
Power Supply, External, AC, W/US Power Cord VX5 VX6 VX7 9000A318PSACUS-R
Power Supply, External, AC, No Power Cord VX5 VX6 VX7 9000A318PSACWW-R
UPS Battery and Cables
Battery, UPS Lead Acid, VX5 VX6 VX7 9000A378UPSBATTPACK-R
Cable, UPS Battery, Remote Mount Extender, 6 Ft 9000A074CBLUPSEXTNDR
Antenna and Antenna Mount Kits
Replacement antenna, 2.4GHz 153180-0001
Remote Mount Antenna Assembly Kit, 8 Ft Cable
Remote Mount Antenna Assembly Kit, 6 Ft Cable 9000A278ANTREMOTE6-R
Right Angle Remote Mount Antenna Assembly Kit, 6 Ft Cable 9000A280ANTREMOTE6RT
Right Angle Remote Mount Antenna Assembly Kit, 15 Ft Cable 9000A281ANTREMOT15RT
Miscellaneous
Stylus, with Tethers and Sleeves, 5 Pack 9000A510STYLUS
Protective Film, 12 in Display, 10 Pack, VX5 VX7 9000A511PROTFILM12IN
Voice Recognition Accessories
Headset coiled adapter cable, with quick disconnect connector to a 2.5
mm audio jack. A headset (see below) is required
Headset, Single Band HX1A501SINGHEADSET
Headset, Dual Band HX1A502DUALHEADSET
Headset, Behind the Ear, Dual Ear HX1A503BTHHEADSET
Foam, Replacement Block, Headset HX1A504HSBLOCKFOAM
Yoke, Replacement for Dual Band Headset HX1A505DUALYOKE
Yoke, Replacement for Single Band Headset HX1A506SINGLEYOKE
9000A053CBL6D9D25
not
(above part is
9000A279ANTREMOTE8
9000A279ANTREMOTE8-R
9000A076CBLHEADSET1
RoHS compliant)
Page 23
Replacement Microphone Foam, Wind Screen, 10 pack HX1A508WINDSREEN10
Replacement Microphone Foam, Wind Screen, 50 pack HX1A509WINDSREEN50
Replacement Headset Foam, Ear Cover, 10 pack HX1A510FOAMEAR10
Replacement Headset Foam, Ear Cover, 50 pack HX1A511FOAMEAR
Scanners
Scanner, Powerscan, SR, 8’ Cbl, WW
Scanner, Powerscan, SR, 12’ Cbl, US
Scanner, Powerscan, SR, Low Temp, 8’ Cbl
Scanner, Powerscan, SR, Low Temp, 12’ Cbl
Scanner, Powerscan, LR, 8’ Cbl, WW
Scanner, Powerscan, LR, 12’ Cbl, US
Scanner, Powerscan, LR, Low Temp, 8’ Cbl
Scanner, Powerscan, LR, Low Temp, 12’ Cbl
Scanner, Powerscan, XLR, 8’ Cbl, WW
Scanner, Powerscan, XLR, 12’ Cbl, US
Scanner, Powerscan, XLR, Low Temp, 8’ Cbl
Scanner, Powerscan, XLR, Low Temp, 12’ Cbl
Scanner, LS3408 Fuzzy Logic SR, D9 Interface Cable, 8ft
Scanner, LS3408 Extended Range, D9 Interface Cable, 8ft
8300A326SCNRPWRSR8DA9F
8300A326SCNRPWRSR8DA9F-R
8300A327SCNRPWRSR12DA9F
not
(above part is
8300A332SCNRS8D9FLT
(above part is
8300A333SCNRS12D9FLT
(above part is
8310A326SCNRPWRLR8DA9F
8310A326SCNRPWRLR8DA9F-R
8310A327SCNRPWRLR12DA9F
8310A327SCNRPWRLR12DA9F-R
8310A332SCNRL8D9FLT
(above part is
8310A333SCNRL12D9FLT
(above part is
8320A326SCNRPWRXLR8DA9F
8320A326SCNRPWRXLR8DA9F-R
8320A327SCNRPWRXLR12DA9F
(above part is
8320A332SCNRX8D9FLT
(above part is
8320A333SCNRX12D9FLT
(above part is
8510A326SCNRFZYDA9F
8510A326SCNRFZYDA9F-R
8520A326SCNRERDA9F
8520A326SCNRERDA9F-R
RoHS compliant)
not
RoHS compliant)
not
RoHS compliant)
not
RoHS compliant)
not
RoHS compliant)
not
RoHS compliant)
not
RoHS compliant)
not
RoHS compliant)
Page 24

Install Mounting Brackets
Installation
Caution:
This device is intended to transmit RF energy. For protection against RF exposure to humans
and in accordance with FCC rules and Industry Canada rules, this transmitter should be
installed such that a minimum separation distance of at least 20 cm (7.8 in.) is maintained
between the antenna and the general population. This device is not to be co-located with
other transmitters.
Equipment Needed:
50 inch pounds (5.64±.56 N/m).
Note: Torquing tool is not supplied by LXE. Bolts, washers, and wrench needed when
attaching the bottom mounting bracket to the vehicle are not supplied by LXE.
Several types of mounting systems are provided for the VX7:
RAM mount system:
•
Available RAM ball base or RAM clamp mount
•
Optional integrated keyboard bracket
U-Bracket system:
•
Optional integrated keyboard mounting bracket
•
Provision for integrated UPS battery mount
Phillips No. 1 screwdriver and a Torque wrench capable of measuring to
•
Available without U-Bracket for vehicles previously equipped with an LXE vehicle mounted
computer
Remote mount for keyboard
Remote mount for UPS battery pack
Before installation begins, verify you have the applicable vehicle mounting bracket assembly
components necessary for your mount type, as shown in the following figures.
Page 25

RAM Mount System
Components
RAM Mounting Assembly
The RAM mounting assembly consists of the following parts:
1. VXX RAM ball bracket
2. RAM arm, size D
3. RAM ball base
- or -
RAM clamp mount
RAM Clamp Mount includes:
Upper Clamp Piece with Ball
Lower Clamp Piece
Bolts (2 each)
Nylon locking nuts (2 each)
4. Hardware (not shown):
Bolts, 1/4-20x5/8 (4 each)
Washers, 1/4 locking (4 each)
Washers, 1/4 flat (4 each)
RAM wrench
RAM Integrated Keyboard Mount
The optional RAM integrated keyboard mount consists of the following parts:
1 Keyboard mounting plate.
2 RAM arm, size C
3 Keyboard mounting bracket
Page 26

4. Hardware (not shown):
Screws, 8-32x5/8 (4 each) for use with the 95 key keyboard
Screws, 10-32x5/8 (4 each) for use with the 60 key keyboard
Bolts, 1/4-20x5/8 (3 each)
Washers, 1/4 locking (3 each)
Washers, 1/4 flat (3 each)
Torque Measurements
You will need a torquing tool capable of torquing to 50 inch pounds (5.64±.56 N/m).
Torque all screws and bolts according to the following table:
For these screws and bolts… Torque to
1/4 bolts 50.0±5 in/lb (5.64±.56 N/m)
Procedure
Step 1 – Mount Vehicle RAM Mount Bracket
1. Determine the position for mounting the RAM ball base. Be sure to position the RAM bracket
to allow access to the switches and ports on the bottom of the VX7.
2. Attach the RAM ball base to the vehicle mounting surface using four 1/4 bolts (or equivalent)
fasteners.
Note:.......1/4 Bolts not included.
IMPORTANT: Mount to the most rigid surface available.
Page 27

Step 1b – Mount Vehicle RAM Clamp Mount
Note: If you are using the RAM ball base, complete Step 1a and skip Step 1b.
1. Determine the position for mounting the RAM clamp mount. The clamp mount can be used on
a beam (such as on a fork lift truck) up to 2.5” (63.5 mm) wide and approximately 2” (50.8
mm) thick. The clamp may be attached to a thicker beam by substituting longer bolts (not
included). Be sure to position the RAM clamp mount to allow access to the switches and ports
on the bottom of the VX5.
2. Position the upper clamp piece with ball (A) on the beam. Place the bolts (B) through the
holes in the upper clamp piece.
3. Position the lower clamp piece (C) below the beam. Align the bolts with the holes in the lower
clamp piece.
4. Place the nylon locking nuts (D) on the bolts and tighten the bolts.
Step 2 – Attach RAM Mount Ball to the VX7
1. Turn the VX7 off before attaching the RAM mount ball.
2. Place the VX7 face down on a stable surface.
3. Position the RAM ball bracket on the rear of the VX7, aligning the curved edge on the RAM
mount bracket with the curved edge on the VX7. Attach with four 1/4-20x5/8 bolts, using
one flat washer and one locking washer per bolt. Place the locking washer on the bolt before
the flat washer.
Caution
Failure to use one ¼ flat washer and one ¼ locking washer per bolt can result in damage to
the backplate of the VX7 computer.
Page 28

Step 3 – Assemble Optional Keyboard Brackets
1. If using the optional integrated keyboard mount, attach the keyboard mounting bracket to the
RAM mounting bracket with three 1/4-20x5/8 bolts, using one flat washer and one locking
washer per bolt. Place the locking washer on the bolt before the flat washer.
2. If using the optional integrated keyboard mount, attach the keyboard to keyboard mounting
plate, using the appropriate screws:
•
For the 95 key keyboard, use four 8-32x5/8 screws
•
For the 60 key keyboard, use four 10-32x5/8 screws
Note Excess keyboard cable length can be looped around the hooks on the bottom
of the keyboard mounting plate.
Step 4 – Attach VX7 and Bracket Assembly to RAM Mount
1. If the optional integrated keyboard bracket is not used, slip the RAM arm over the ball on the
vehicle RAM ball bracket. Insert the ball of the RAM mount bracket into the RAM arm. Adjust
the VX7 to the desired position and tighten the knob on the RAM arm using the supplied RAM
wrench.
2. If using the optional integrated keyboard bracket, there are two arms included. Slip the
larger RAM arm over the ball on the vehicle RAM mount bracket. Insert the ball of the RAM
mount bracket into the RAM arm. Adjust the VX7 to the desired position and tighten the knob
on the RAM arm using the supplied RAM wrench.
Slip the smaller arm over the RAM ball on the keyboard mounting bracket. Insert the RAM
ball on the keyboard mounting plate into the RAM arm. Adjust the keyboard to the desired
position and tighten the knob on the RAM arm using the supplied RAM wrench.
Note Excess keyboard cable length can be looped around the hooks on the bottom
of the keyboard mounting plate.
Make sure there is a minimum 1” (25.4 mm) clearance between the VX7 and
the keyboard.
Page 29

U-Bracket Mount System
Components
Bottom Mounting Bracket
This bracket is mounted to the vehicle. The VX7 can be mounted to the bottom mounting bracket
with or without an integrated keyboard mounting bracket. Additionally, the UPS battery pack may
be mounted to the bottom mounting bracket.
If the optional UPS battery pack is to be mounted to the bottom bracket, use the following parts
included with the UPS battery pack (not shown):
1” long aluminum spacer w/through hole (2 each)
1/4 flat washer (2 each)
1/4 locking washer (2 each)
screw, pan head, 1/4-20x2 (2 each)
Back Bracket without Keyboard Mount
1. Rear Bracket
2. Hardware (not shown):
1/4 flat washer (8 each)
1/4 locking washer (8 each)
1/4 flat washer (8 each)
Back Bracket with Keyboard Mount
1. Rear Bracket
2. Adjustment knob (2 each)
3. Keyboard Mounting Plate
4. Hardware (not shown):
1/4 flat washer (8 each)
1/4 locking washer (8 each)
1/4 flat washer (8 each)
Screws, 8-32x5/8 (4 each) for use with the 95 key keyboard
Screws, 10-32x5/8 (4 each) for use with the 60 key keyboard
Page 30

Torque Measurements
You will need a torquing tool capable of torquing to 50 inch pounds (5.64±.56 N/m).
Torque all screws and bolts according to the following table:
For these screws and bolts… Torque to
#6 screws 8.0±.5 in/lb (0.9±.05 N/m)
#8 screws 16.0±1 in/lb (1.8±.11 N/m)
1/4 bolts 50.0±5 in/lb (5.64±.56 N/m)
Page 31

Procedure
Step 1 - Mount Bottom Mounting Bracket To Vehicle.
1. Position the bracket to allow access to the switches and ports on the bottom of the VX7.
2. Attach the bottom mounting bracket to the vehicle mounting surface using a minimum of four
1/4 bolts (or equivalent) fasteners.
Note:1/4 Bolts and washers not included. It is recommended to use lock washers and flat
washers on the fasteners.
IMPORTANT: Mount to the most rigid surface available.
After the bottom bracket has been attached to a rigid surface, you are ready to assemble the
VX7 bracket configuration.
Step 2 – Attach Rear Bracket VX7
1. Turn the VX7 off before attaching the rear bracket.
2. Place the VX7 face down on a stable surface.
Align the rear bracket with the holes on the back of the VX7. Attach with four 1/4-
3.
20x5/8 bolts, using one flat washer and one locking washer per bolt. Place the
locking washer on the bolt before the flat washer.
Step 3 – Attach VX7 Assembly To Bottom Mounting Bracket.
1. Place lock washer first, then flat washer on 1/4-20x5/8 bolt. Next insert mounting bolts
through the curved apertures in the bottom mounting bracket and into the screw holes on the
side of the back mounting bracket.
2. Loosely tighten each bolt as it is inserted.
Important: Do not torque bolts until all bolts are in place and viewing angle is
adjusted.
3. Loosen the hex bolts on both sides to adjust the viewing angle of the mounted VX7.
4. Torque the hex bolts to 50±5 in/lb (5.64±.56 N/m).
Note: Test the torque on the bolts frequently during operation and re-tighten if
necessary to 50±5 in/lb (5.64±.56 N/m).
Page 32

Step 4 – Assemble Optional Keyboard Brackets
1. Fasten the keyboard to the keyboard mounting plate. Use four 8-32x5/8 screws to attach the
95-key keyboard. Use four 10-32x5/8 screws to attach the 60-key keyboard.
Note Excess keyboard cable length can be looped around the hooks on the bottom
of the keyboard mounting plate.
2. Attach the keyboard mounting plate to the side mount brackets using the two adjusting
knobs.
3. Adjust the angle of the keyboard by loosening the two adjusting knobs, adjusting the
keyboard angle and then tightening the adjusting knobs,
Step 5 – Complete Assembly
1. If using a UPS battery pack, the battery pack can be mounted to the bottom mounting
bracket. Place a locking washer and then a flat washer on a 1/4-20x2 bolt. Thread the bolt
through the UPS Battery Pack, then through the 1” aluminum spacer and into the mounting
bracket.
2. Connect all cables to the VX7. Secure the cables with the strain relief cable clamps, ensuring a
slack loop remains between the cable clamp and the accessory connector.
3. The vehicle mounted bracket and the VX7 are now ready to use.
Page 33

Install Stylus Tether and Sleeve
The LXE stylus kit includes the stylus, tether and sleeves. The tether allows the stylus to be
mounted to the VX7 and the sleeve provides storage for the stylus when not in use.
How To Install Stylus Tether and Sleeves
Locate the tether holes on the top of the VX7. (see below):
Select the mounting hole most convenient for the particular VX7 installation.
Slide the clip end of the stylus tether into the tether mounting hole.
Determine a convenient location for the stylus sleeve. Apply the adhesive baked Velcro® loop
strip to the VX7 or mounting bracket. Attach the Velcro® hook strip on the elastic stylus
sleeve to the loop strip.
Install/Remove Touchscreen Protective Film
LXE offers a replaceable touchscreen protective film to protect the touchscreen when the VX7
is used in an abrasive environment.
How To Install Touchscreen Protective Film
Make sure both the touchscreen and protective film are clean and dry before installation.
Please review “Cleaning the Display”, later in this guide, for instructions on suitable cleaning
agents.
Center the protective film over the touchscreen. The antiglare side must be facing outward.
Do not cut or trim the protective film.
The protective film is approximately 1/10” (2.54cm) larger than the touchscreen at the centers
of the edged (indicated by the arrows in the figure above).
Slide the protective film so that one of the edges of the film can be slid between the
touchscreen and display housing when the protective film is re-centered on the touchscreen.
Repeat for the other three edges, ensuring the protective film is centered over the
touchscreen when finished.
How to Remove Touchscreen Protective Film
Page 34

To remove the protective film, slide the protective film in one direction until the edge clears.
Lift up on the edge of the film so it does not slide between the touchscreen and display
housing when slid back. Repeat until all edges are free and remove the protective film.
Remote LXE Keyboard Bracket Assembly
Equipment Needed: Phillips screwdriver, torque wrench.
1. Place the keyboard face down on a flat, stable surface.
2. Position the bracket on the keyboard base, aligning the four screw holes in the keyboard
with the four mounting holes in the bracket flanges. When positioned correctly, the bracket
should overlap at the top of the keyboard.
3. Attach the keyboard to the bracket with four screws (included). Tighten to 9 +/- 1 in/lb (1.02
N/m).
4. Attach the keyboard-bracket assembly to the vehicle’s mounting surface using four 1/4 bolts,
lock washers and flat washers or equivalent.
Note: Bolts, washers, and wrench needed when attaching the bracket to the vehicle are not
supplied by LXE.
IMPORTANT: Mount to the most rigid surface available.
Remote Keyboard Mounting Dimensions
The overall space required for the keyboards are:
•
LXE 95-key keyboard: 5.75” (146.05mm) x 13.40” (340.40mm)
•
LXE 60-key keyboard: 4.40” (111.50mm) x 11.90” (302.00mm)
Page 35

UPS Battery Pack Remote Mount
The optional UPS battery pack must be mounted remotely when using the RAM mount system
or a U-bracket designed for a previous model LXE computer. The remote mount can also be
used with the VX7 U-bracket assembly if it is not convenient to mount the UPS battery pack to
the U-bracket.
A six foot extension cable is available to connect the UPS battery pack to the VX7.
1. Position the UPS battery pack to allow cables to reach the vehicle battery and the VX7.
2. Attach the UPS battery pack to the vehicle mounting surface using two 1/4 bolts, lock
washers and flat washers (or equivalent) fasteners.
Note:1/4 Bolts and washers not included.
IMPORTANT: Mount to the most rigid surface available.
Connect Keyboard
LXE Keyboard
The VX7 has an external 9-pin connector for the keyboard. All LXE keyboards are connected in
a similar fashion. The keyboard is attached to the connector labeled “KEYBOARD”. The
keyboard receives power from the VX7.
1. Turn the VX7 off before attaching the keyboard cable.
2. Insert the keyboard cable into the VX7 keyboard connector.
3. Once the pins are firmly seated, tighten (turning clockwise) the thumbscrews.
4. Secure the cable with a strain relief cable clamp.
5. Turn the VX7 on.
Page 36

PS/2 Keyboard and Mouse
By using the optional dongle cable, a standard PS/2 keyboard and mouse may be attached to
the VX7.
1. Turn the VX7 off before attaching the keyboard dongle cable.
2. Insert the 9-pin connector end of the dongle cable into the VX7 keyboard connector.
3. Once the pins are firmly seated, tighten (turning clockwise) the thumbscrews.
4. Secure the cable with a strain relief cable clamp.
5. Attach a PS/2 keyboard and/or PS/2 mouse to the appropriately labeled PS/2 connector
on the dongle cable.
6. Turn the VX7 on.
Note: The PS/2 keyboard and mouse cannot be hot swapped. The VX7 must be turned off to
connect or disconnect PS/2 devices.
Connect Antenna
Several antenna options are available for the VX7. Options include single or dual external
antennas, remote vehicle mount antennas and an internal antenna.
External Antenna
Note: VX7’s are equipped with a radio and require an antenna. Some VX7’s may be equipped
with a dual antenna option. For these VX7’s, an external antenna must be connected to
each antenna connector.
Place the antenna over the antenna connector. Push down and twist clockwise until the
antenna is secured. Repeat for second antenna connector, if present.
Adjust the antenna angle to improve RF communications with the computer network.
Note: Substitution of antennas is not permitted unless authorized by LXE. Use of unauthorized
antennas will void the FCC emissions certification of the VX7.
Remote Vehicle Mount Antenna
The external antenna (or antennas) can be remotely mounted on the vehicle. Please refer to
Page 37

the “Vehicle Remote Mount Antenna Installation Sheet” for details.
Internal Antenna
If the internal antenna option is ordered, an antenna is mounted on the inside of the user
access panel cover.
The internal antenna assembly has two antenna cables. Attach the antenna cables to the
radio card. When this process is complete, reattach the access cover screws using a torque
wrench capable of measuring to 9±1 inch pounds force (1.016±.11 N m). The screws must be
fastened to 9 inch pounds each. The screws require a Phillips size 1 driver head.
Connect Serial Barcode Scanner
Refer to the documentation received with the barcode scanner for complete instructions. Read
all warnings and caution labels.
Before using the scanner, read section titled “Operation”, sub- section titled “Laser Barcode
Scanner Warnings”.
Pin 9 of COM1 is configured to provide +5V. To change Pin 9 of the port, please refer to
Chapter 4, “System Configuration” in the “VX7 Reference Guide”.
The scanner cable is attached to the connector labeled “COM1/SCANNER”. The scanner
receives power from the VX7.
The cable requires a nine-pin D-shell female connector for the VX7.
Note: Use of a shielded cable is required to maintain FCC and CISPR22 emissions
compliance.
1. Power off the VX7 before connecting the scanner cable to the VX7.
2. Seat the connector firmly over the pins and turn the thumbscrews in a clockwise direction. Do
not overtighten.
3. Use a strain relief clamp to secure the cable.
4. Press the power button to power up the VX7.
When you have finished using the scanner, remove it from the VX7 and store the scanner in a
Page 38

closed container or bag.
Refer to the documentation received with the barcode scanner for complete instructions.
Connect Serial Printer or PC
Refer to the documentation received with the printer or PC for complete instructions.
Pin 9 of COM3 (labeled “COM2/3”) is configured to provide RI. To change Pin 9 the port,
please refer to Chapter 4, “System Configuration” in the “VX7 Reference Guide”.
The printer or PC cable requires a nine-pin D-shell female connector for the VX7.
The printer or PC cable is attached to the connector labeled “COM2/3”.
Note: Use of a shielded cable is required to maintain FCC and CISPR22 emissions
compliance.
1. Power off the VX7 before connecting the cable to the VX7.
2. Seat the connector firmly over the pins and turn the thumbscrews in a clockwise direction. Do
not overtighten.
3. Use a strain relief clamp to secure the cable.
4. Press the power button to power up the VX7.
Page 39

Ethernet and USB Ports
An Ethernet port and different types of external USB ports are available via a dongle cable
attached to the port labeled “ETHERNET/USB”, located on the bottom of the VX7. Please refer
to th illustrations below for the different USB connectors available via dongle cable.
1. Power off the VX7 before connecting the D15 connector to the VX7.
3. Insert the D15 end of the Ethernet/USB dongle cable into the VX7 USB connector. Seat the
connector firmly over the pins and turn the thumbscrews in a clockwise direction. Do not
over tighten.
3. Use a strain relief clamp to secure the cable.
Note: The VX7 may be powered On any time after the D15 connector has been
secured to the VX7.
4. Plug the desired device, such as a USB mouse or floppy drive, into the end of the dongle
cable with the USB port. Refer to the documentation for your USB device for more details on
installation. USB devices may be installed, removed or swapped without turning off the VX7.
5. Insert the network cable and ensure it is firmly seated in the connector jack.
6. To remove the Ethernet cable, press the release tab on the cable end.
USB Mouse
The USB port may be used to connect a USB mouse to the VX7, however the mouse pointer
may not always be visible. Please see “Touchscreen and Mouse” later in this manual for more
details.
Page 40

Connect External Headset
The VX7 provides an external headset connection via an audio jack connector labeled “Audio”.
The audio jack accepts a headset with a 2.5mm plug, such as a mono headset with
microphone or a stereo headset. Please refer to the VX7 Reference Guide for information on
configuring the audio port for a mono headset with microphone or a stereo headset.
1. Insert the speaker or headphone plug into the audio connector; making sure the plug is
firmly seated in the audio jack.
2. Replace the plug when the speaker or headset is removed from the audio jack.
3. Use a strain relief clamp to secure the cable.
Connect Power Cable and Optional UPS Battery Pack
1. Turn the VX7 off before attaching the power plug.
2. Connect the power cable to vehicle power (See the following section titled “Vehicle 12-80VDC
Direct Connection”.)
- or -
to an AC adapter. (See the following section titled “External Power Supply”.).
3. Several possibilities are available for routing the vehicle power to the VX7. See the following
section titled “Vehicle 12-80VDC Direct Connection” for details.
4. All plugs and receptacles are keyed and care must be used when connecting the cables.
Tighten the nut of the plugs clockwise until tight.
Secure the cable with the strain relief cable clamps.
5. Turn the VX7 on.
Page 41

External Power Supply, Optional
The LXE-approved AC Power Adapter is only intended for use in a 25ºC (77ºF) maximum
ambient temperature environment.
In North America, this unit is intended for use with a UL Listed ITE power supply
with output rated 12 – 80 VDC, minimum 75W. Outside North America, this unit is
intended for use with an IEC certified ITE power supply with output rated 12 – 80
VDC, minimum 75W.
The external power supply may be connected to either a 120V, 60Hz supply or, outside North
America, to a 230V, 50Hz supply, using the appropriate detachable cordset. In all cases,
connect to a properly grounded source of supply provided with maximum 15 Amp overcurrent
protection (10 Amp for 230V circuits).
How To: Connect External Power Supply
1. Turn the VX7 off.
2. Connect the detachable cordset provided by LXE (US only, all others must provide their own
cable) to the external power supply (IEC 320 connector).
3. Plug cordset into appropriate, grounded, electrical supply receptacle (AC mains).
4. Connect the watertight connector end to the VX7’s Power Connector by aligning the connector
pins to the power connector; push down on the watertight connector and twist it to fasten
securely.
5. Turn the VX7 on.
Page 42

Vehicle 12-80VDC Power Connection
Caution:
For proper and safe installation, the input power cable must be connected to a fused circuit on the
vehicle. This fused circuit requires a 10 Amp maximum time delay (slow blow) high interrupting rating
fuse. If the supply connection is made directly to the battery, the fuse should be installed in the positive
lead within 5 inches of the battery positive (+) terminal.
Caution:
For installation by trained service personnel only.
Warning:
Risk of ignition or explosion. Explosive gas mixture may be vented from battery. Work only in well
ventilated area. Avoid creating arcs and sparks at battery terminals.
Note: Please see “Power Adapter Cable” later in this section for information on adapting a
VX1, VX2 or VX4 DC power supply to the VX7.
Note: Correct electrical polarity is required for safe and proper installation. Connecting the
cable to the VX7 with the polarity reversed will cause the VX7’s fuse to be blown. See
the following figure titled “Vehicle Connection Wiring Color Codes” for additional wire
color-coding specifics.
How To: Connect Vehicle 12-80VDC Connection
1. The VX7 must be turned off and the power cable must be UNPLUGGED from the VX7.
2. While observing the fuse requirements specified above, connect the power cable as close as
possible to the actual battery terminals of the vehicle. When available, always connect to
unswitched terminals in vehicle fuse panel, after providing proper fusing.
ATTENTION:For uninterrupted power, electrical supply connections should not be
made at any point after the ignition switch of the vehicle.
Page 43

3. Route the power cable the shortest way possible. The cable is rated for a maximum
temperature of 105°C (221°F). When routing this cable it should be protected from physical
damage and from surfaces that might exceed this temperature.
Do not expose the cable to chemicals or oil that may cause the wiring insulation to deteriorate.
Note:If the vehicle is equipped with a panel containing Silicon Controller Rectifiers (SCR’s),
avoid routing the power cable in close proximity to these devices.
Always route the cable so that it does not interfere with safe operation and maintenance of the
vehicle.
Use proper electrical and mechanical fastening means for terminating the cable.
Properly sized “crimp” type electrical terminals are an accepted method of termination.
Please select electrical connectors sized for use with 18AWG (1mm2) conductors.
Wiring color codes for LXE supplied DC input power cabling:
Vehicle Supply Wire Color
+12 - 80VDC (DC +) White
Return (DC -) Black
Vehicle Chassis GND Green
Vehicle Connection Wiring Color Codes
4. Provide mechanical support for the cable by securing it to the vehicle structure at
approximately one foot intervals, taking care not to over tighten and pinch conductors or
penetrate outer cable jacket.
5. Refer to the following sections to complete the power connection to the VX7.
Page 44

How To: Connect VX7 without a UPS Battery Pack
1. Connect the power cable to the vehicle’s electrical system as described in “Connect Vehicle
12-80VDC Connection”.
2. Connect the power cable to the VX7 by aligning the water-tight connector pins to the power
connector on the bottom of the VX7; push down on the water-tight connector and twist it to
fasten securely.
3. Turn the VX7 on.
How To: Connect VX7 to a Integrated Mount UPS Battery Pack
1. Connect the power cable to the vehicle’s electrical system as described in “Connect Vehicle
12-80VDC Connection”.
2. Connect the power cable to the UPS battery pack by aligning the water-tight connector pins
to the input connector (labeled “From Vehicle”); push down on the water-tight connector and
twist it to fasten securely.
3. Connect the output cable (labeled “To Computer”) from the UPS battery pack to the power
connector on the bottom of the VX7 by aligning the water-tight connector to the power
connector; push down on the water-tight connector and twist it to fasten securely.
4. Turn the VX7 on.
Page 45

How To: Connect VX7 to a Remotely Mounted UPS Battery Pack
1. Connect the power cable to the vehicle’s electrical system as described in “Connect Vehicle
12-80VDC Connection”.
2. Connect the power cable to the UPS battery pack by aligning the water-tight connector pins
to the input connector (labeled “From Vehicle”); push down on the water-tight connector and
twist it to fasten securely.
3. Connect the output cable (labeled “To Computer”) from the UPS battery pack to the extension
cable by aligning the water-tight connector to the input end of the extension cable; push
down on the water-tight connector and twist it to fasten securely.
4. Route the extension cable the shortest way possible. The cable is rated for a maximum
temperature of 105°C (221°F). When routing this cable it should be protected from physical
damage and from surfaces that might exceed this temperature.
Do not expose the cable to chemicals or oil that may cause the wiring insulation to
deteriorate. Always route the cable so that it does not interfere with safe operation and
maintenance of the vehicle.
Note:If the vehicle is equipped with a panel containing Silicon Controller Rectifiers (SCR’s),
avoid routing the power cable in close proximity to these devices.
5. Provide mechanical support for the cable by securing it to the vehicle structure at
approximately one foot intervals, taking care not to over tighten and pinch conductors or
penetrate outer cable jacket.
6. Connect the output end of the extension cable to the power connector on the bottom of the
VX7 by aligning the water-tight connector to the power connector; push down on the watertight connector and twist it to fasten securely.
7. Turn the VX7 on.
Page 46

Power Adapter Cable
LXE offers an adapter cable (part no. 9000A077CBLPWRADPTR) to adapt certain VX1, VX2 or
VX4 DC power supplies to the VX7. Please read and follow all cautions below to determine if
your present power supply can be used with the VX7.
Caution:
This document assumes the VX1/2/4 DC power cable, if applicable, is already properly
connected to your vehicle. If this is not the case, please refer to the “VX1 User’s Guide”, “VX2
User’s Guide” or “VX4 User’s Guide” for direct vehicle connection details.
Caution:
For use only with VX1/2/4 DC power cables with yellow colored cable containing 18AWG wires.
Do not use this cable with VX1/2/4 DC power cables with gray colored cable containing
22AWG wires. These power cables must be replaced with a VX5/6/7 power cable.
Caution:
When a DC power cable that is eight feet or longer is in a 12V application, there may be an
excessive voltage drop over the longer cable. If this occurs, a new power cable is required.
Caution:
Do not use this adapter with AC power supplies originally designed for the 1380, 1390, VX1,
VX2 or VX4. These power supplies do not have sufficient power for the VX7.
Note: For more information on the 12-80V DC direct, UPS battery pack and extension cable
connections please refer to the appropriate section earlier in this manual.
How To Connect Power Adapter Cable
1. The VX7 must be turned off and the power cable must be UNPLUGGED from the VX7.
2. Attach the smaller end of the Power Adapter Cable to the VX1/2/4 power cable by aligning
the water-tight connector pins to the power cable connector. Push down on the water-tight
connector and twist it to fasten securely.
3. Connect the larger end of the Power Cable directly to the computer or to a UPS battery pack,
as desired. Please refer to the appropriate section earlier in this manual for UPS battery pack
connection details.
Page 47

Fuse Replacement for the VX7
The VX7 uses a 100V, 10A time delay (slow blow), high current interrupting rating fuse that is
externally accessible and user replaceable. Should it need replacement, replace with same
size, rating and type of fuse – Littlefuse 0234010 or Optifuse MSC-10A (5x20mm).
1. Turn the VX7 off and disconnect the power cable from the VX7.
Caution:
2. While holding the VX7 over a level surface, push the fuse cover in and twist it one quarter
turn counterclockwise. A flat head screwdriver may be used to twist the fuse cover.
3. Remove the fuse.
4. Discard the fuse and place a new fuse in the holder.
5. Push the fuse in and twist it clockwise one quarter turn.
6. Reconnect the power cable to the VX7.
Fuse has voltage on it even when power is off. Always disconnect
input power before changing fuse.
Page 48

Operation
Powering On/Off
Connect the VX7 to a power source, either AC or Vehicle.
The power (on/off) button is located on the front of the VX7. The switch is sealed by a rubber
membrane. The Status LED on the LXE VX7 is illuminated when the power is on:
•
Green – VX7 is operating from vehicle or AC
•
Solid Yellow – VX7 is operating from the UPS
•
Flashing Yellow – VX7 is operating from the UPS, but UPS battery is critically low.
Press the power button to start the VX7. You are now ready to use the computer.
Enter data using the keyboard, touchscreen or a Serial Barcode Scanner.
Note: Always turn the computer off prior to connecting or disconnecting any power source.
The VX7 is designed for an orderly shutdown when using the power button. An orderly
shutdown first closes any open programs, and then shuts down the Windows CE .NET
operating system. DO NOT remove power from the VX7 without shutting down the VX7.
The VX7 shutdown may be initiated in any of the following ways:
•
Momentarily pressing and releasing the power button (less than 5 seconds) performs an
orderly shutdown.
•
Pressing and holding the power button for more than five seconds forces a shutdown. Any
open programs and the Windows CE .NET operating system are shut down before power
off. Use this option to shut down the VX7 when the operating system is not responding.
For more information on the Windows CE .NET shutdown process, please refer to the
Windows CE .NET help function or commercially available help guides.
Page 49

Keyboard Backlight
LXE keyboards feature LEDs that illuminate the individual keys.
95 Key Keyboard
The backlight is manually controlled using the “backlight” key in the upper right hand corner
of the keyboard. Pressing the backlight key cycles the backlight through the levels of
backlight intensity:
•
Off
•
Maximum intensity
•
Medium intensity
•
Low intensity.
60 Key Keyboard
The keyboard backlight may be toggled manually by pressing <2nd> + <CTRL> + <F10>.
This key sequence immediately changes the state of the keyboard backlight as follows:
•
Turns the backlight Off if it is currently On.
•
Turns the backlight On if it is currently Off.
PS/2 and USB Keyboards
Standard PS/2 and USB keyboards generally do not feature keyboard backlighting.
Page 50

Display and Touchscreen
The VX7 Display is a thin-film transistor display capable of supporting SVGA graphics modes.
Display size is 800 x 600 pixels. The display covering is designed to resist stains. The touch
screen allows signature capture and touch input.
The touch screen is a Resistive Panel with a scratch resistant finish that can detect touches by
a stylus, and translate them into computer commands. In effect, it simulates a computer
mouse. Only Delrin or plastic styluses should be used.
Note: Always use the point of the stylus for tapping or making strokes on the display. Never
use an actual pen, pencil or sharp object to write on the touch screen.
An extra or replacement stylus may be ordered from LXE. See the “Accessories” section for the
stylus part number.
Adjusting Screen Display
Some VX7’s provide the option to adjust the screen resolution. Please refer to the “VX7
Reference Guide” for more details.
The color TFT display is an active source of light. The VX7 display brightness can be adjusted
via the brightness control keys located on the VX7 control panel. Pressing the brightness up
button increases the display brightness incrementally until maximum brightness is achieved.
Likewise, pressing the brightness down button decreases the display brightness until minimum
brightness is achieved. Because there are 64 incremental levels of brightness intensity, a
single press of either brightness adjustment button may not be noticeable. The up or down
button can be pressed and held to accelerate brightness adjustment.
Note: The 2nd functions <F4>, <F5>, <F6>, and <F7> keys on the 60-key LXE keyboard have
no function on the VX7.
There are no provisions for adjusting the contrast of the display. The display remains on
unless Microsoft Windows CE .NET power management is configured to turn the display off
after a certain period of inactivity.
Page 51

Cleaning the Display
Keep fingers and rough or sharp objects away from the display. If the glass becomes soiled or
smudged, clean only with a standard household cleaner such as Windex® without vinegar or
use Isopropyl Alcohol. Do not use paper towels or harsh-chemical-based cleaning fluids since
they may result in damage to the glass surface. Use a clean, damp, lint-free cloth. Do not
scrub optical surfaces. If possible, clean only those areas which are soiled. Lint/particulates
can be removed with clean, filtered canned air.
Disabling the Touchscreen
The touchscreen can be disabled, if desired. For more information, please refer to “Disabling
the Touchscreen” in the “VX7 Reference Guide”.
Disabling the Touchscreen Heater
The touchscreen heater included on extended temperature VX7 models can be disabled on
certain VX7’s, if desired. For more information, please refer to “Disabling the Touchscreen” in
the “VX7 Reference Guide”.
Calibrating the Touchscreen
Although the touch screen is installed and calibrated at the factory, users may make
adjustments to it. To calibrate the touchscreen, select Start|Settings and double tap the
Stylus icon.
The calibration utility displays a cross on the screen. Touch the center of the cross with the
stylus and hold for a few seconds. Release and repeat with the next cross. After all locations
have been touched, either press <Enter> or click the Calibration button.
Touchscreen Protective Film
LXE offers a replaceable touchscreen protective film to protect the touchscreen when the VX7
is used in an abrasive environment. Installation and removal instructions can be found earlier
in this guide.
Page 52

Touchscreen and Mouse
Please refer to the “VX7 Reference Guide” for information on identifying your VX7.
Platform 1 VX7’s
Because the touchscreen also functions as a mouse, the pointer for on the 95-key keyboard, a
USB mouse or a PS/2 mouse may not always be visible on the screen. The mouse pointer
reappears when the 95-key keyboard pointer or external mouse is moved or clicked. Please
see “USB Mouse” earlier in this manual for more details.
•
When a USB mouse is first attached to the VX7, the mouse pointer may not be visible.
However, moving or clicking the mouse causes the pointer to appear.
•
When the USB mouse is unplugged, the pointer may remain visible until the touchscreen is
tapped.
•
If the touchscreen is used for input, the mouse pointer may disappear. However, moving
or clicking the mouse or pointing device on the 95-key keyboard causes the pointer to
reappear.
Platform 2 VX7’s
The mouse pointer is not visible unless a mouse (P/S2 or USB mouse or 95-key keyboard with
pointing device) is attached.
If a mouse of any kind is attached, the mouse pointer is displayed on screen.
Page 53

Adjust Speaker Volume
Microsoft Windows CE .NET provides volume adjustment by clicking the “Volume and Sounds”
icon in the Windows CE .NET Control Panel. The volume control adjusts the built in speaker’s
volume.
Note: The <F8> and <F9> keys on the 60-key LXE keyboard have no function as Windows
CE .NET controls the sound volume.
Microsoft Windows CE .NET Event Sounds
The VX7 includes a customized sound scheme. The customized WAV files are preferable to
the standard Microsoft Windows CE .NET sounds when using the internal speakers.
Power Management
All Power Management is handled through the Microsoft Windows CE .NET Control Panel.
Since the VX7 is externally powered, the only power management configuration is for the
display and the display backlight. Both the display and the display backlight are turned off at
the same time. The time interval can be configured using Start | Settings | Control Panel
| Display | Backlight tab.
When enabled, the display and backlight are turned off when the timer expires. The timer is
reset by the following primary events:
•
Keypress, or
•
Mouse movement, or
•
Touchscreen touch
For more information on configuring Microsoft Windows CE .NET Power Management, please
refer to the VX7 Reference Guide.
Page 54

Laser Barcode Scanner Warnings
•
Do not look into the laser’s lens.
•
Do not stare directly into the laser beam.
•
Do not remove the laser caution labels from the scanner.
•
Do not connect the laser barcode module to any other device.
Caution:
Please read the caution labels.
Avoid exposure. Laser light is emitted from the scanner’s aperture.
Use of controls, adjustments or performance of procedures other than those specified herein
may result in hazardous radiation exposure.
The scanner uses laser light. The following labels are representations of caution and
warning labels placed on laser scanners.
Do not pour, spray, or spill any liquid on the scanner. The Barcode Scanner contains the
circuitry, scanning motor and laser. Handle with appropriate care.
Enter Data
You can enter data into the VX7 through several different methods:
•
The tethered scanner connected to the COM1 serial port provides barcode data entry
•
The serial ports are used to input/output data
•
The keyboards provide manual entry
•
The touchscreen also provides manual entry
•
If a voice application is present, the VX7 accepts vocal data.
Page 55

Keyboard Entry
Refer to Appendix A “Key Maps” for specific keypresses.
The keyboard is used to manually input data that is not collected otherwise. Almost any
function that a full sized computer keyboard can provide is duplicated on the LXE keyboard
but it may take a few more keystrokes to accomplish a keyed task.
Almost every key has two or three different functions. The primary alpha or numeric character
is printed on the key.
For example, when the <2nd> key is selected pressing the desired second-function key
produces the <2nd> character i.e. <2nd> + F1 toggles the CAPS Lock function. The specific
<2nd> character is printed above the corresponding key.
Please refer to Appendix A “Key Maps” for instruction on the specific keypresses to access all
PC-compatible keyboard functions.
Touchscreen Entry
Note: This section is directed to the VX7 user. The assumption is that the unit has been
configured and the touch panel calibrated by the System Administrator prior to releasing
the VX7 for use.
Note: Always use the point of the stylus for tapping or making strokes on the display. Never
use an actual pen, pencil or sharp object to write on the touch screen.
The touchscreen input performs the same function as the mouse that is used to point to and
click elements on a desk top computer. The stylus is used in the same manner as a mouse –
single tap or double tap to select menu options, drag the stylus across text to select, hold the
stylus down to activate slider bars, etcetera. Holding the stylus down for ½ second performs
the right mouse click function.
When using a stylus, hold the stylus as if it were a pen or pencil. Touch an element on the
screen with the tip of the stylus then remove the stylus from the screen. The touch screen
responds to an actuation force (touch) of up to 4 oz. of pressure.
The touch screen can be used in conjunction with the keyboard and an input/output device
connected to one of the VX7’s serial ports.
•
Touch the stylus to the field of the data entry form to receive the next data feed.
Page 56

•
The cursor begins to flash in the field.
•
The unit is ready to accept data from either the keyboard or a device connected to a serial
port.
Right Click
A right click can be simulated on the touch screen. To perform a right click, touch the touch
screen with the stylus and hold it in the same location for a short time.
Scanner Entry
The following section is directed toward a generic tethered scanner connected to the COM1
serial port on the VX7.
Aiming the Barcode Scanner
Aim the scanner
away
from you, direct it at the barcode and press the trigger to scan.
The Scan On LED (or equivalent) turns red to indicate the scanner is on.
Adjust the aim so that the thin, red laser beam covers the entire length of the barcode.
Some scanners use a laser aiming beam which then spreads into a wide beam when the
scanner’s Aiming Beam Timer expires. Place the aiming beam in the center of the barcode and
hold the scanner steady until the beam spreads and the barcode is decoded. Beeps may be
heard as the barcode is decoded. Refer to the barcode scanner user’s guide for information on
the Aiming Beam Timer and beep sequences, and the TE reference guide for host generated
beep sequences.
The scan beam must cross every bar and space on the barcode.
Distance from Label
Large barcodes can be scanned at the maximum distance. Hold the scanner closer to small
barcodes (or with bars that are very close together).
Note: Do not position the scanner exactly perpendicular to the barcode being scanned. In this
position, light can bounce back into the scanner’s exit window, and possibly prevent a
successful decode.
Page 57

Successful Scan
When the scan is successful, the scanner’s good scan indicator illuminates, the scan on
indicator is off, and the currently running application may produce a distinctive audible tone.
Unsuccessful Scan
When the scan is unsuccessful, the scan on indicator remains illuminated and the currently
running application may produce distinctive audible tones. Check the following:
•
Is the scanner programmed for the barcode being read?
•
Check the barcode for marks or physical damage e.g. ripped label, missing section, etc.
•
Try scanning test symbols of the same code type at different distances and angles.
Page 58
Appendix A Key Maps
95-key Keypad with Pointing Device
The key map table that follows lists the commands used for the VX7. Note that since the VX7
uses a Microsoft Windows CE .NET operating system, no DOS Terminal Emulation keypress
sequences are provided.
Key Map 101-Key Equivalencies
There are ten hidden keys on the 95-key keyboard. Each of these hidden keys is accessed by
pressing the <Fn> key plus another key.
To get this key Press These Keys and Then
Insert Fn + 0 on the number pad
Home Fn + 7 on the number pad
Page Up Fn + 9 on the number pad
Delete Fn + . on the number pad
End Fn + 1 on the number pad
Page Down Fn + 3 on the number pad
Up Arrow Fn + 8 on the number pad
Left Arrow Fn + 4 on the number pad
Down Arrow Fn + 2 on the number pad
Right Arrow Fn + 6 on the number pad
Note: The 2nd key function is available on the 60-key keyboard only.
60-key Standard Keypad
The key map table that follows lists the commands used for the VX7. Note that since the VX7
uses a Microsoft Windows CE .NET operating system, no DOS Terminal Emulation keypress
sequences are provided.
Key Map 101-Key Equivalencies
When using a sequence of keys that includes the <2nd> key, press the <2nd> key first then
the rest of the key sequence.
Page 59
Note: This keyboard does not have a NumLock indicator. NumLock is enabled by default.
The warmboot behavior of NumLock can be configured. Please refer to Chapter 4,
“System Configuration” in the VX7 Reference Guide. When NumLock is off, only the
numeric 0 through 9 and DOT keys are affected. All other keymaps are unchanged.
When the VX7 boots, the default condition of Caps (or CapsLock) is Off. The Caps (or
CapsLock) condition can be set toggled with a <2nd>+<F1> key sequence. The CAPS
LED on the keyboard is illuminated when CapsLock is On.
To get this key
Keyboard Backlight x x F10
Suspend/Resume x F3
2nd 2
Shift Shift
Alt Alt
Ctrl Ctrl
Esc Esc
Space Sp
Enter Enter
Enter (numeric) x Enter
CapsLock (Toggle) x F1
Back Space Ins/BkSp
Tab Tab
BackTab x Tab
Ctrl-Break 1
Pause x x F3
Up Arrow Up Arrow
Down Arrow Down Arrow
Right Arrow Right Arrow
Left Arrow Left Arrow
Insert x Ins/BkSp
Delete (numeric) x DEL
Home x Left Arrow
End x Right Arrow
Page Up x Up Arrow
Page Down x Down Arrow
Right Shift x x F7
Right Alt x x F8
Right Ctrl x x F9
ScrollLock x x F4
Press These Keys and Then
nd
Shift Ctrl Alt CapsLock
2
x x F2
Press this key
nd
1
Press <Ctrl> then <2nd> then <F2> to produce Ctrl-Break.
Page 60

To get this key
Press These Keys and Then
nd
Shift Ctrl Alt CapsLock
2
Press this key
NumLock x x F10
F1 F1
F2 F2
F3 F3
F4 F4
F5 F5
F6 F6
F7 F7
F8 F8
F9 F9
F10 F10
F11 x x F1
F12 x x F2
a A
b B
c C
d D
e E
f F
g G
h H
i I
j J
k K
l L
m M
n N
o O
p P
q Q
r R
s S
t T
u U
v V
w W
x X
y Y
z Z
A x A
B x B
C x C
Page 61

To get this key
Press These Keys and Then
nd
Shift Ctrl Alt CapsLock
2
Press this key
D x D
E x E
F x F
G x G
H x H
I x I
J x J
K x K
L x L
M x M
N x N
O x O
P x P
Q x Q
R x R
S x S
T x T
U x U
V x V
W x W
X x X
Y x Y
Z x Z
1 (alpha) x x 1
2 (alpha) x x 2
3 (alpha) x x 3
4 (alpha) x x 4
5 (alpha) x x 5
6 (alpha) x x 6
7 (alpha) x x 7
8 (alpha) x x 8
9 (alpha) x x 9
0 (alpha) x x 0
DOT (alpha) x K
1 (numeric) 1
2 (numeric) 2
3 (numeric) 3
4 (numeric) 4
5 (numeric) 5
6 (numeric) 6
7 (numeric) 7
8 (numeric) 8
Page 62

To get this key
9 (numeric) 9
0 (numeric) 0
DOT (numeric) DOT
< x 0
[ x 1
] x 2
> x 3
= x 4
{ x 5
} x 6
/ (numeric) x x 7
/ (alpha) x 7
- (numeric) x x 8
- (alpha) x 8
+ (numeric) x x 9
+ (alpha) x 9
* (numeric) x I
* (alpha) x x I
: (colon) x D
; (semicolon) x F
? x L
` x N
_ (underscore) x M
, (comma) x J
‘ (apostrophe) x H
~ (tilde) x B
\ x S
| x A
“ x G
! x Q
@ x W
# x E
$ x R
% x T
^ x Y
& x U
( x O
) x P
Press These Keys and Then
nd
Shift Ctrl Alt CapsLock
2
Press this key
Page 63
Important: This symbol is placed on the product to remind users
to dispose of Waste Electrical and Electronic Equipment (WEEE)
appropriately, per Directive 2002-96-EC. In most areas, this product
can be recycled, reclaimed and re-used when properly discarded.
Do not discard labeled units with trash. For information about
proper disposal, contact LXE through your local sales
representative, or visit www.lxe.com.
Safety Statements
RF Safety Notice:
Caution:
This device is intended to transmit RF energy. For protection against RF exposure to humans and
in accordance with FCC rules and Industry Canada rules, this transmitter should be installed such
that a minimum separation distance of at least 20 cm (7.8 in.) is maintained between the antenna
and the general population. This device is not to be co-located with other transmitters.
Lithium Battery Safety Statement:
Lithium battery inside. Danger of explosion if battery is incorrectly replaced. Replace only with
same or equivalent type recommended by battery manufacturer (US).
AC Power Supply Safety Statement – VX6 Output Rated 12 – 80 VDC, Minimum
75W
Optional A/C Power Supply:
Outside North America, this unit is intended for use with an IEC certified ITE power supply
with output rated as stated at the top of this page. (US)
Vehicle Power Supply Connection Safety Statement:
Vehicle Power Supply Connection:
If the supply connection is made directly to the battery, a 10A slow-blow fuse should be
installed in the positive lead within 5 inches (12.7 cm.) of the battery positive (+) terminal.
(US)
 Loading...